11 Golden Rules For Watering A Cactus

Cacti are often associated with the stark landscapes of deserts, but they’re versatile plants that can be found in a variety of climates, including tropical rainforests. Their ability to thrive in arid conditions is attributed to their extensive root systems, which can draw water from a large surrounding area, allowing them to endure even during dry spells.

Proper watering is crucial to maintaining a healthy cactus, whether it’s situated in a natural habitat or cultivated at home. The task involves more than just the amount and frequency of water; understanding the specific needs of your cactus is essential. There are several key guidelines that should be taken into consideration to ensure that your cactus can flourish.

Key Takeaways

  • Cacti can survive in diverse environments, from deserts to rainforests, due to their adaptive mechanisms.
  • Proper watering techniques are vital for cactus health and depend on several factors.
  • Thorough knowledge of your specific cactus species can aid in optimal care and prevent over or underwatering.

1. Understanding Cactus Watering Frequency

Watering cacti is more than just a routine—it is a critical aspect that determines the health and vibrancy of your plant. It’s important to water based on the plant’s specific needs which can change with its environment and state of growth.

  • Growing Season: From March to September, cacti are in their active growth phase and require more frequent hydration, typically once a week. This consistent watering helps prevent dehydration. Fertilization should coincide with this watering schedule.
  • Dormancy Period: In the dormant months, reduce watering significantly. Check the soil’s moisture by touching it; if it’s entirely dry, it’s time to water, but if there’s still moisture, wait longer.
  • Checking Soil Dryness: Before another round of watering, the topsoil must be completely dry. For accurate measurement, use a soil moisture gauge. Alternatively, a simple method is to insert a stick into the soil—if it emerges without soil sticking, the cactus needs water.

When a cactus does not receive enough water, it may appear washed out and limp, with a lighter coloration. Conversely, receiving too much water can cause the plant to swell beyond its normal size, which may eventually lead to root decay.

Careful observation of these signs and the appropriate adjustment of the watering method is key to a healthy cactus. Whether it’s an occasional deep watering or a more regular weekly schedule, the goal is to cater to the plant’s needs without overdoing it.

2. Assessing Water Needs Based on Cactus Dimensions

  • Young Cacti: High growth rate necessitates more frequent watering.
  • Mature Cacti: Despite a lower surface area to volume ratio leading to reduced evaporation, watering is still necessary.
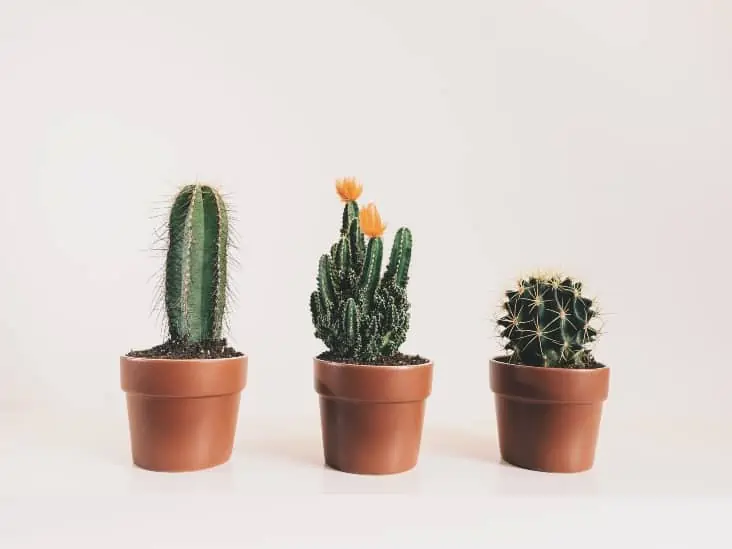
Three cactus plants on a pot.
Small younger cactus will often need more water since their growth rate is high.

3. Soil’s Role in Cactus Hydration Requirements

Soil Composition and Water Retention

The soil mix used for cacti is paramount in regulating how much water the plants hold onto. Ideal cactus soil should possess a fine balance between moisture retention and the ability to let excess water escape swiftly through the pot’s drainage holes. A soil that drains well keeps roots from standing in water, reducing the risk of rot.

  • Sandy Soil: Increases drainage and prevents water-logged roots.
  • Pebbles or Grains: Enhance soil structure and aeration.
  • Organic Material: Provides essential nutrients and retains moisture efficiently, permitting brisk drying as well.
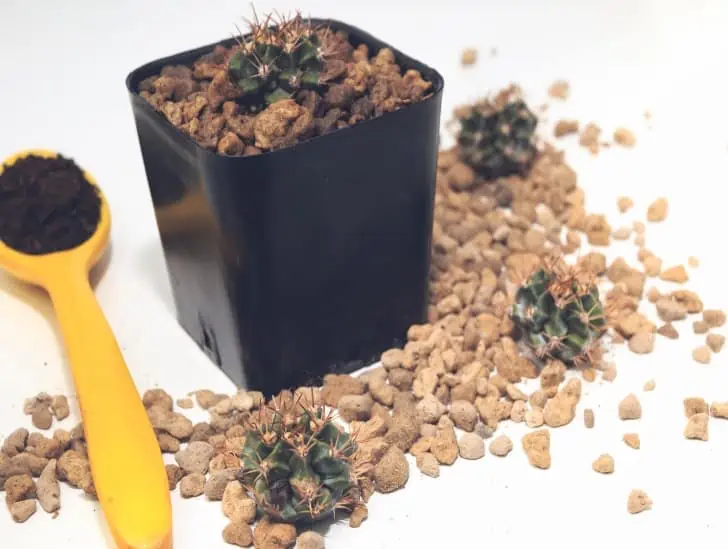
Cactus soil and equipment for planting.
You can make your own potting mix to ensure once you water, it drains effectively.

Customizing Your Potting Mix

Making a custom potting mix can be more cost-efficient and ensures optimal drainage tailored to your cactus type:

  • Desert Cacti Blend:
    • Mix equal parts sandpumiceperlite, or vermiculite with pre-prepared potting mix.
    • Aim for a quick-drying, light mix that does not retain excessive water.
  • Tropical Cacti Blend:
    • Integrate one part coarse builder’s sand with two parts potting mix base of ground fir bark mixed with peat moss or coconut coir.
    • This blend should retain slightly more moisture to cater to tropical species’ needs.

Note: Whether sandy or pebbly, it’s crucial that your soil type is porous enough to facilitate quick water passage while hitting the right mark of moisture delivery to the cactus roots.

Assessing Drainage and Moisture Level

Before you plant or repot, testing your soil for proper drainage ensures that your mix meets your cactus’s specific needs. Discard compact and heavy topsoil if present, as it can hinder water flow and air circulation.

  • Moisture Assessment: Using a touch-test or a moisture meter helps gauge if the soil has dried out completely before the next watering.
  • Soil Condition: A homogeneous, lump-free soil signifies a well-blended mixture.

Once your cactus is settled in the correct type of soil prepared as above with all ingredients stirred evenly, water the plant thoroughly to establish a healthy water cycle right from the start.
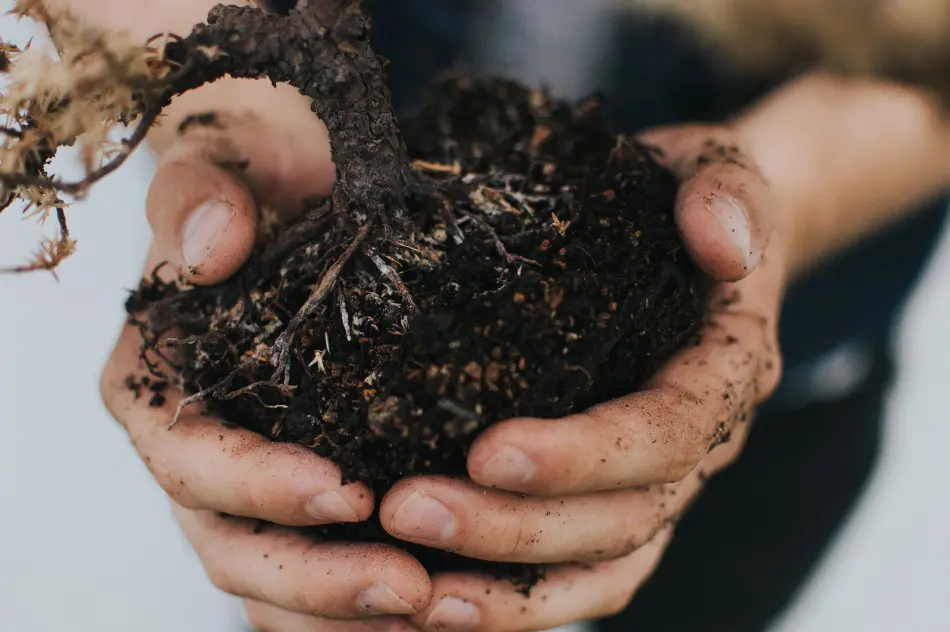
Person holding the plant from the pot.
Soil is a crucial aspect of growing cactus as it determines if it retains or drains the water

4. Seasonal Watering Patterns for Cacti

Chilly Season Care

In the cooler months, cacti enter a rest phase and their growth pauses as temperatures fall. To accommodate this dormancy, watering should be reduced, with a good rule of thumb being moistening the soil once every four weeks.

Reawakening Period Nourishment

With the arrival of milder weather, cacti begin to emerge from their dormant state. The increase in natural precipitation serves as a cue for watering needs, which generally translates to hydrating cacti once per week to support their renewed growth.

Heatwave Hydration

The rise in heat during summer leads to faster soil drying. Cacti in this season may need water more frequently—up to two or three times per week, depending on the specific climate and soil dryness. It’s essential to check the soil manually to determine when water is necessary.

Autumn Adjustments

When autumn temperatures stay above 40 degrees Fahrenheit, a weekly watering is a good practice to maintain. Consistent soil moisture helps cacti adapt to the changing conditions as they prepare for cooler months ahead.

5. Choosing the Right Containers for Your Cacti

Container Material and Watering Frequency

Different materials used for cacti containers can affect how quickly the soil dries and how often you need to water these resilient plants. It is crucial to understand the properties of each container type to ensure the health of your cacti.

Cactus plant on the container.
The container will determine the amount of water

Clay Containers

Clay containers are excellent for promoting soil aeration due to their porous nature. Unglazed options tend to wick away moisture, which can be beneficial for cacti that thrive in dry conditions. However, you must regularly monitor soil moisture levels, as these pots can dry out more rapidly than others, requiring more frequent watering. These containers offer a steady temperature for the plant but can be more expensive and may crack in cold weather.

Earth-colored Pots

Characterized by their natural clay construction, these pots are similar to ceramic but typically unglazed. Their porosity allows for quick drainage and breathability for the roots, requiring more attentive watering schedules to prevent the soil from drying out too fast. They are lightweight and reasonably priced but should be protected from freezing temperatures to prevent cracking.

Monkey tail cactus in a clay pot.
The clay absorbs moisture from the potting soil, especially if the cactus prefers dry soils.

Synthetic Pots

Lightweight and versatile in design, synthetic pots, made from materials like plastic, are widespread in plant cultivation. They can retain moisture longer due to their non-porous nature, which means less frequent watering is necessary. Nonetheless, additional care is needed to ensure the soil does not remain overly wet, which could harm cactus roots.

Woven Containers

These containers are crafted from a mix of resin and fibers, offering the look of traditional pots with the added benefit of durability and resistance to weather conditions. Those designed specifically for cactus care usually come with built-in drainage holes. If using fiberglass containers, be cautious with watering, and do so only when the soil has dried out completely.

Metal Pots

Offering a sleek and durable option, metal pots can be used for cacti with proper care. They are not typically designed with drainage in mind, so watering should be minimized and carefully controlled to avoid root issues. In warm environments, metal can conduct heat excessively, potentially causing harm, so consider placement carefully.
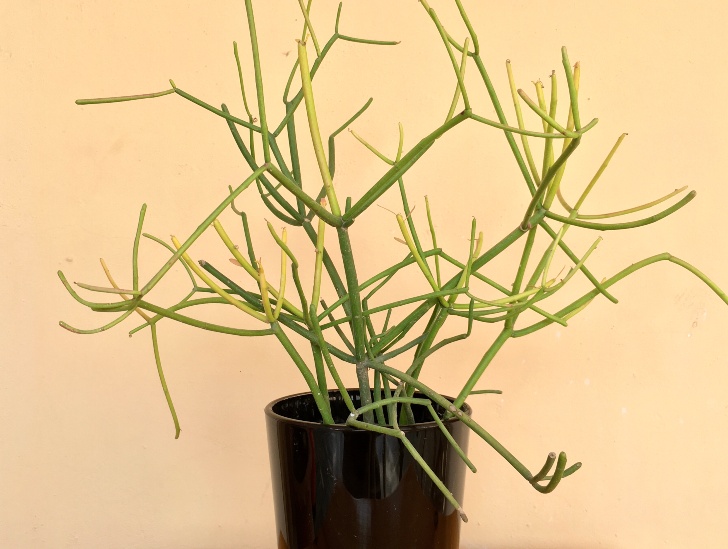
Pencil cactus in a black plastic pot.
They are light and can be crafted to look like terracotta or ceramic pots.

Wooden Planters

Natural and rustic, wooden plant containers provide an attractive and sturdy option. They retain moisture and can be slower to dry out. To prevent potential root rot, cacti in wooden containers should be watered less frequently. A plastic liner can be beneficial to protect both the wood and the cactus’s roots from moisture damage.

In all cases, ensure that your chosen container has proper drainage, which is vital for cactus health. If drainage is lacking, consider using bottom watering techniques or a saucer of water to allow the plant to absorb moisture from the bottom up. Implement good drainage practices, be it through the use of containers with drainage holes or by manually controlling the watering amount to create an ideal growing environment for your cacti.
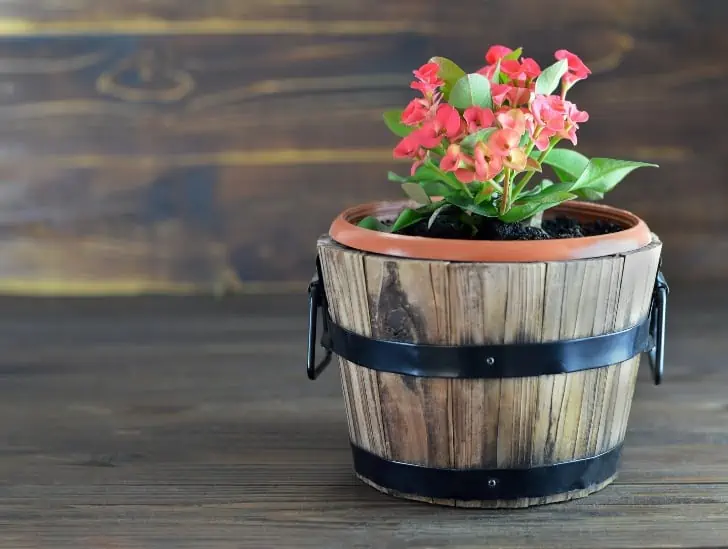
A plant in a wood pot container.
These types of containers hold moisture in and are slow to dry out completely.

6. Watering Considerations for Cacti Based on Location

Watering Techniques for Cacti Inside Homes

To properly maintain indoor cacti, understanding their water retention in leaves and stems is key. These plants are prone to root rot if overwatered, and can shrivel up when not receiving enough water. During the active growth period, water should be applied until excess flows out of the pot’s drainage holes — this is critical to removing any build-up of salts in the soil.

  • Frequency: In the growing months, watering roughly every 10 to 14 days is appropriate.
  • Dormancy: Check for soil dryness and offer water only every three to four weeks in their dormant phase.
  • Seasonal heating: Consider a humidity tray or a humidifier to rebalance moisture levels when indoor heating is in use, mitigating the dry conditions that heaters create.

Observation is a reliable guide; if the cactus appears lackluster, it may need an increased watering schedule. Aim to provide less water rather than more to avoid complications from overwatering.
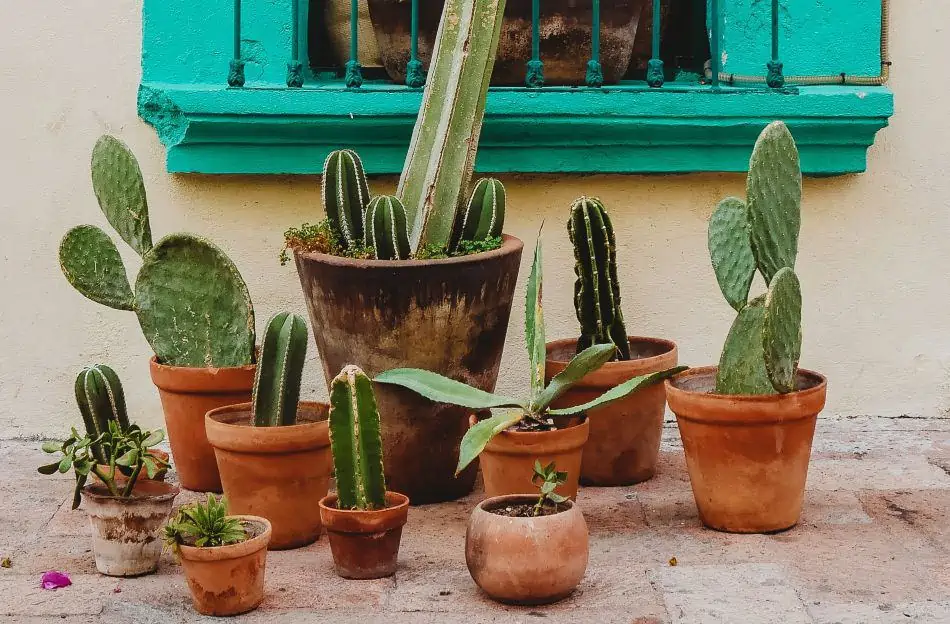
Cactus plants outside on clay pot.
Outdoor cacti Vs Indoor cacti

Optimizing Watering Practices for Outdoor Cacti

Cacti grown outdoors experience a different environment from their indoor counterparts, demanding an adjusted watering strategy. Moisture levels in the soil should guide your watering decisions.

  • Moisture Checking: Utilizing a moisture meter can prevent both over- and underwatering. Insert the probe carefully into the soil, taking care not to harm the roots, and consult the meter to judge when watering is needed.
  • Growth Season Watering: Increase watering frequency to once every 7 to 10 days, ensuring full soil saturation until water drains freely from container holes.
  • Dormant Season: Similar to indoor cacti, limit watering to once every three to four weeks. You’ll eventually recognize the plant’s needs by its appearance and behavior.

The best time for watering outdoor cacti is in the morning, allowing the plant to hydrate adequately before the hotter part of the day, which helps prevent potential heat stress and sunburn. This consistent schedule will help in maintaining a robust and thriving cactus.

Remember, both indoor and outdoor cacti are sensitive to their environments, and successful watering largely depends on observing and responding to the plant’s conditions. Whether dealing with the controlled climate indoors or the variable elements outside, adjust your watering practices to align with the needs of your cacti.

 7. Optimal Water Types for Cacti Care

Considerations for Softened Water

Utilizing water that has undergone mineral removal processes, commonly involving sodium or potassium, one must exercise caution. If this treated water carries high sodium levels, it can accumulate within the soil, potentially leading to dehydration and nutrient uptake issues in cacti.

Impact of Hard Water on Cacti

Hard water, characterized by its higher content of calcium and magnesium, is known to leave residue on cacti and in the soil. Over time, this can be harmful to the plants. To mitigate the negative impact, repotting every one to four years might be necessary, as this can remove the accumulated minerals.

Benefits of Harvested Rainwater

Rainwater is fundamentally optimal for cacti irrigation, due to its balanced mineral content. Being a seasonal resource, collecting rainwater when possible for subsequent use is a valuable practice. Additionally, blending tap water with stored rainwater can temporarily lower the concentration of salts in the soil, though periodic repotting is still advised to ultimately reduce salt accumulation.

For cleansing mineral deposits from a cacti, a mild solution can be created by combining a tablespoon of vinegar with distilled water or rainwater. Using a cotton ball dipped in this mixture, one can gently clean any mineral stains present on both the cactus and its container.
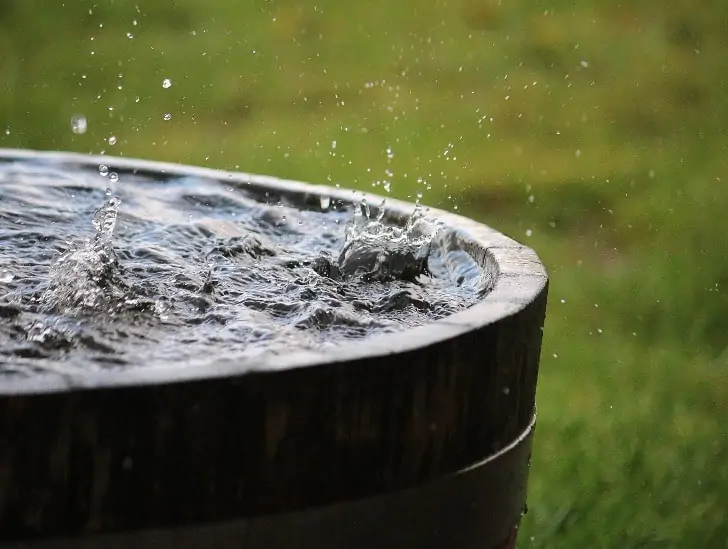
A water in a water container.
Since rainwater is not available year-round, you can store the water for later use.

8. Understanding Cactus Species and Their Water Needs

Cacti exhibit diverse water requirements, largely influenced by their native habitats. Species originating from rainforest regions—such as the Christmas cactus—thrive with more frequent watering and retain moisture well. In contrast, desert cacti, like the Prickly Pearflourish with less water and demand fast-draining containers to prevent root rot and promote healthy growth.

Appropriate Watering Patterns Based on Habitat:

  • Desert Varieties:
  • Rainforest Varieties:
    • Can tolerate more moisture
    • Pots that retain some water
    • Regular watering to echo humid environments

Understanding the species of cactus one owns is critical; it allows for a more targeted care approach, ensuring the plant not only survives but thrives in its new environment.

TOp view of cactus plants in different containers.
The idea is to know the specific species so that you can water it accordingly

9. Selecting the Appropriate Pot Size

When it comes to repotting your cactus, the choice of pot size plays a crucial role in the plant’s well-being. A well-sized pot ensures proper drainage, preventing excess water from causing root rot—a common issue in oversized containers. Here are key considerations:

  • Small Pots: Suitable for keeping the soil from staying wet too long. Typically, such pots may require watering weekly, but always check the soil’s dryness first.
  • Larger Pots: These retain moisture longer, extending the time between watering sessions to 4-6 weeks. Be cautious, as prolonged wet soil can harm the roots.
  • Optimal Pot Size: Upon repotting, choose a pot that’s roughly 10% wider than the cactus’ width to accommodate growth without excess space.

Remember, a cactus thrives when its roots are neither too dry nor too wet. Thus, finding the balance through the right pot size is essential.

10. Considerations for Cactus Lighting

Sun Exposure and Watering Frequency:

  • Direct Sunlight: Increases soil drying, leading to more frequent watering needs.
  • Indoor Placement:
    • South-facing windows: Cacti demand regular watering due to increased light.
    • North-facing windows: Cacti require less frequent watering due to reduced light.

11. Identifying Watering Issues in Cactus Plants

Signs of Underwatering in Cactus

A dehydrated cactus presents distinct visual cues that it’s not receiving enough water. These indicators include:

  • A lighter coloration, indicating water depletion.
  • Shriveling of the cactus body as water reserves become utilized.
  • The plant’s surface feeling brittle or bone-dry upon touch.
  • Observable drooping or collapse of the structure.
  • Noticeable decrease in pot weight due to moisture loss.

Correcting underwatering is straightforward. Proper hydration can restore the plant’s vigor within several days.

Recognition and Implications of Overwatering

Overwatering poses a serious threat to cactus well-being, often leading to decay and fungal infections. The hints of excess moisture are:

  • Swollen, discolored areas trending toward brown or black.
  • Softening of tissue, particularly at the base, signaling rot.
  • A mushy appearance and texture, contrasting the typical firmness of a healthy cactus.

The root system suffers significantly during overwatering, becoming vulnerable to rot, hindering its ability to nourish the plant.

Addressing Root Rot

If root rot is suspected due to the above symptoms, a root inspection is vital. Healthy roots appear white, while infected ones are darkened. Salvaging a partially affected cactus involves:

  • Excising the decayed roots with sterilized shears.
  • Replanting in fresh soil to encourage recovery.

Sanitize all tools post-use to forestall spreading the disease.

Watering Techniques for Cacti

Tailor the watering method to the specific needs of your cactus species. Some well-established methods include:

  • Saturation watering, allowing excess water to drain freely.
  • Bottom watering by placing the plant in a saucer until the soil is moist halfway up.
  • Drip watering with a hose for gradual soil hydration.

Understanding the cactus variety and its environmental adaptations informs the appropriate watering regime and method.

Small cactus plants in a small pot.
When your cactus show signs of underwatering, water it thoroughly. It should bounce back to healthy leaves and stems in a few days

Essential Insights on Cactus Hydration

Spring and Summer Care: During these growth-centric seasons, cacti require adequate hydration, which promotes cell growth, flowering, and fruit development.

  • Observation is Key: Owners should observe their cacti to learn specific hydration needs.
  • Replicating Natural Habitat: Aim to emulate the plant’s natural environment for optimal growth.

Note: When buying a cactus, gather information about its native conditions to better recreate its preferred habitat at home.
What Temperature Is Too Cold For Cactus Plant?

Cacti, often associated with arid deserts and relentless sun, are more versatile than commonly thought. With over 2,000 species in their family, these hardy succulents have adapted to a variety of climates, from mountainous regions to tropical zones. Not all cacti are fragile in the face of cold; in fact, some can endure subzero conditions. The green flowered hedgehog is a prime example, capable of withstanding temperatures down to an impressive -20°F.

At the core of a cactus’s ability to endure colder weather are ingenious adaptations that prevent water inside its tissues from freezing. This article will explore these survival strategies, examine the risks cold weather poses to cacti, and discuss methods to help these resilient plants recover if they experience excessive cold.

Key Takeaways

  • Cacti can survive in various climates and a select number can tolerate extreme cold down to -20°F.
  • Cacti adapt to colder temperatures by reducing water content to avoid tissue damage from freezing.
  • Protective measures can be taken to help cacti recover from cold exposure.

What Is the Lowest Temperature for a Cactus Plant?

Cacti exhibit varying degrees of cold tolerance based on species-specific adaptations. The hedgehog cactus (Echinocereus viridiflorus), recognized for its resilience, can endure freezing climates, sustaining itself in temperatures plummeting to -20°F. This petite yet robust plant reaches heights no more than eight inches and spreads to about three inches in width.

The aptly named fishhook barrel cactus weathers low temperatures down to -5°F. It stands out with its hook-like spines and can attain a height of six feet and a girth spanning three feet.

In contrast, the horse crippler cactus (Echinocactus texensis), admired for its striking purple blooms, can withstand zero-degree Fahrenheit weather. Its growth is relatively modest, with a height and diameter peaking at eight and twelve inches, respectively.

Another species, the Santa Rita prickly pear (Opuntia Santa-Rita), can survive in temperatures as chilly as 12°F. It features distinct, spined paddles reaching approximately a foot high and half a foot wide.

Despite these examples, it’s important to acknowledge that cacti from regions with milder winters may suffer damage under intense cold stress. To ensure the well-being of cacti in colder climates, understanding their temperature requirements and providing appropriate care during lower temperature periods is crucial. Generally, cacti are not adapted to sustain a significant drop in night temperatures and may need protection or a suitable microclimate to thrive.

Table: Cold Tolerance Ranges of Select Cactus Species

Cactus SpeciesMinimum Temperature Tolerance
Hedgehog Cactus-20°F
Fishhook Barrel Cactus-5°F
Horse Crippler Cactus0°F
Santa Rita Prickly Pear12°F

It’s essential to conduct research on individual cacti species and their specific tolerances to ensure successful cultivation in various temperature zones.

Cacti Survival Strategies During Winter Dormancy

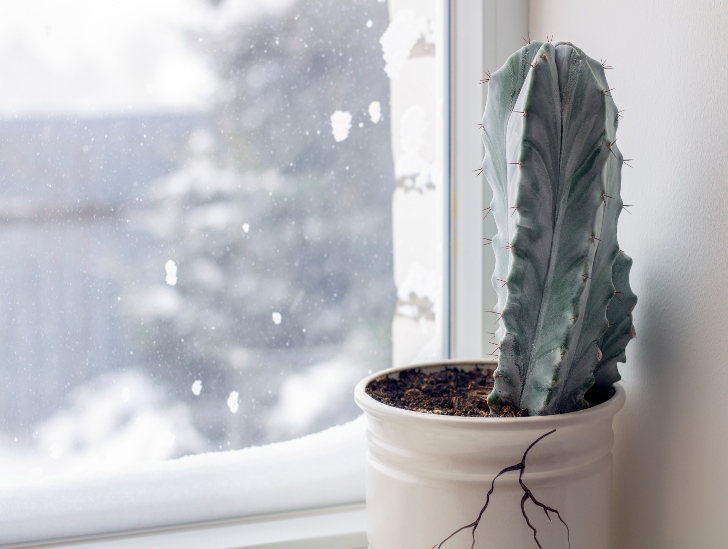
Cactus near the window.
During the cold months, stop watering and fertilizing your plants.

Cacti, by nature, are masters of enduring scorching heat and arid conditions, chiefly due to their ability to hoard moisture within their stems and spines. When temperatures plummet, these desert inhabitants enter a dormant state to safeguard the liquid within their cells from solidifying. Their metabolism slows, curtailing the need for substantial water and nutrients.

In this phase of dormancy, which aligns with the winter months:

  • Watering: It should be minimized or ceased to allow the cactus to dehydrate slightly, reducing the risk of its tissues freezing.
  • Sunlight: While in hibernation, the necessity for sunlight diminishes. Nevertheless, the Echinocereus, or hedgehog cactus, alongside other cold-hardy varieties, can subsist in areas that receive full sun.
  • Growth: This halts to converse energy.

As the days grow shorter and the chill of winter sets in, cacti naturally prepare for the colder season. Alternatively, by providing an artificial summer-like environment indoors, with ample light and sustenance, these hardy plants can be tricked into continuing their growth. Despite this possibility:

  • Reproduction: Their natural reproductive cycle, signaled by the changing seasons, could be disrupted, potentially causing them to forfeit flowering.

When winter comes, it’s best to let cacti rest, offering just enough moisture to maintain their survival, as they gear up to emerge from their dormant state when the warmer weather returns.

Impact of Cold Temperatures on Cacti

When cacti are exposed to temperatures below their tolerance level, they are prone to a condition commonly referred to as frost damage. Here’s what happens and how to manage it:

  • Cellular Damage: The liquid within the cactus cells can freeze, leading to an expansion that may rupture the cell walls. This can result in discoloration, shrinkage, and misshapen appearance of the cactus.
  • Symptoms of Frostbite: Cacti may exhibit darkened or softened sections on their stems, indicative of frostbite.
  • Revival Techniques:
    • Relocation: Move the cactus to a warmer environment immediately, which could include placing it indoors or on a warming mat.
    • Hydration: Provide ample water to help rehydrate damaged cells and encourage recovery.
    • Additional Lighting: Supply additional light, either natural or artificial from a source like a grow light, to facilitate photosynthesis and energy production for healing.

In regions with colder climates, such as Alaska or generally cold areas, cacti are more susceptible to such conditions. Ensuring protective measures and rapid response to cold exposure can help mitigate the effects of low temperatures on these resilient succulents.

Indicators of Excessive Cold in Cacti

When a cactus experiences low temperatures beyond what it can withstand, its health visibly deteriorates. These are the telltale signs of a cold-stressed cactus:

  • Shift in Color: A pale complexion indicates distress.
  • Soft Texture: A cactus should feel firm; if it’s spongy, it may be too cold.
  • Stunted Growth: Slowed or halted growth signals possible temperature issues.
  • Spots on Surface: Dark areas may be a sign of cold damage.
  • Leaf Appearance: Reduced blooms or wrinkling leaves suggest adverse conditions.
  • Plant Structure: Limpness or drooping of the cactus can result from inadequate warmth.

If any of these conditions are observed, relocating the cactus to a warmer environment and ensuring proper hydration is crucial for recovery.

Can Ice/Snow Kill Cacti Plants?

Froozen plant.
Ice storms and freezing rain are not good conditions for your outdoor cacti plants

In regions where ice storms are common, cacti can be at high risk. Ice and snow can be harmful to these plants, often leading to damage or even death. Here are key factors to consider for protecting cacti in frosty weather:

  • Insulation: When freezing temperatures threaten, ensure cacti are insulated. Covering them with plastic helps mitigate ice accumulation.
  • Drainage: Cacti prefer well-draining soil to prevent water from pooling around the roots. Adding components like coarse sand or compost to the ground can enhance drainage and provide better conditions during snowy seasons.
  • Hardy Varieties: Some cacti are cold-hardy and can withstand chilly conditions, but even they are vulnerable to freezing rain. If cold weather is frequent in your area, consider hardy species that can endure lower temperatures.

It’s worth noting that despite the resilience of certain cacti to snow and sub-zero conditions, the prolonged presence of ice from freezing rain can cause significant harm. Careful gardening and preventive measures are crucial for their survival.

Remember, the desert origins of cacti do not prepare them for ice encasement. If you’re cultivating these plants in areas prone to such weather, proactive steps are essential.

Identifying Cold and Frost Stress in Cacti

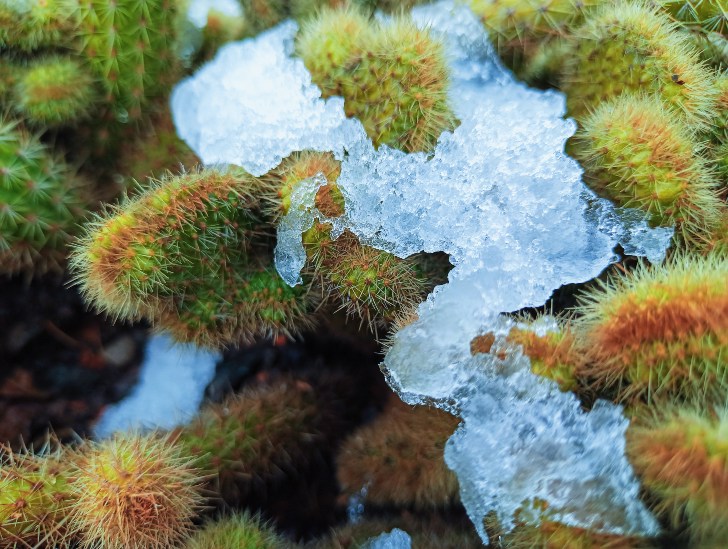
Snow on the cactus.
A common sign that your cactus plant has been damaged by cold is the presence of a softened tissue.

When a cactus succumbs to the chill of its environment, the damage is often not visible immediately; in some cases, it can take a couple of days before the symptoms of cellular destruction appear. Cacti affected by cold may exhibit soft spots on their otherwise rigid structure. These soft areas typically begin as pale or whitish patches which, over time, darken to black as the tissue decays.

Indicators of Cold Damage in Cactus Plants:

  • Softened Tissue: An initial sign of cold distress in cacti; starts white and darkens.
  • Discoloration: Blackened areas indicate serious cell damage and decay.
  • Delayed Appearance: Damage might not be evident for up to 48 hours post-exposure.

Cylindropuntia species, also known as cholla, Opuntia humifusa, known as the eastern prickly pear, and Opuntia santa-rita, are examples of more cold-hardy cacti that can endure colder conditions better than others. The notable Christmas cactus, despite its festive name, can also be susceptible to more extreme cold, assuming it does not receive adequate protection.

Cold Resistance Traits in Cacti:

  • Spines: Serve as a defense against chilly winds.
  • Areoles: Specialized structures from which spines grow can help prevent frost from settling.
  • Moisture Retention: Cacti with lower internal moisture may be less prone to frost damage due to fewer ice crystals forming within the tissues.
  • Opuntia Family: Includes variants like the prickly pear, which have adapted to survive cooler temperatures.

In extreme cases, the affected parts of cacti may detach as a result of weakening from the cold. It’s imperative to recognize these signs promptly to prevent further decay and potential loss of the plant.

Restoring a Cactus after Frost Exposure

In areas where temperatures plummet, a cactus can experience significant stress due to the water within its tissues freezing and expanding. Such conditions can impair the plant’s stem cells and possibly cause rot once the ice melts and leaves behind softened, misshapen stems. However, with careful attention, a frozen cactus can be brought back to health.

When handling a cactus that has encountered frost, patience is crucial. The tissues may soften, but immediate trimming should be avoided as the plant might self-recover. Discoloration towards purple or white may occur, but if blackening of the tips is observed, this indicates rot, which necessitates pruning.

The optimal time for pruning a frost-damaged cactus is on a clear day after the last frost has passed. This ensures that the plant isn’t subjected to additional stress from ongoing cold weather. Here are the steps to properly trim the plant:

  • Inspect the cactus: Look for any blackened areas which suggest rot.
  • Prune damaged sections: Remove softened or black parts of the cactus until only healthy tissue remains. This may involve trimming the tips or removing the entire top section if it’s compromised.
  • Sanitize tools: Clean the cutting tools between each snip to prevent the spread of decay.

Cacti, being resilient, will typically respond well to pruning, and new growth is expected within a few months. Though this growth may differ in appearance from the original, it signifies a successful recovery from cold damage. To ensure the best chance of revival, keep the following in mind:

  • Careful observation is needed to determine the plant’s healing process.
  • Avoid premature pruning to allow for potential self-healing.
  • Prune only when necessary, removing all signs of rot to stop it from spreading.

Restored correctly, even a severely cold-damaged cactus can resume healthy growth, with its vitality and structure intact.

Cactus freshly picked from the ground,
Your pruning can revive the plant, and in a few months, new growth will sprout in all pruned areas

Protecting Your Cactus from the Chill

To safeguard cacti against cold conditions, gardeners can employ several methods:

  • Relocation: Transfer potted cacti to a warmer indoor space, such as a house or greenhouse, when forecasts predict freezing temperatures.
  • Insulation: Apply a layer of burlap or frost cloths over outdoor cacti to act as a barrier against the cold; securing the edges ensures no heat escapes.
  • Hydration: Adequately water your cacti prior to the cold setting in; this allows them to store water which provides internal insulation.
  • Acclimation: Gradually introduce your cacti to cooler temperatures to help them adjust to lower thermostats without shock.
  • Lighting: For indoor cacti, consider using a grow light to provide supplemental warmth and light that mimics their natural environment.
  • Air Flow: Ensure there is sufficient air circulation around covered cacti to prevent moisture accumulation, which can lead to freezing damage.

Using these tactics, such as providing a shelter with a frost cloth or adding warmth with heat lamps, can assist in preserving the health of your cacti during colder months.

Essential Insights on Cactus Cold Tolerance

Cactus species exhibit diverse cold tolerance levels. Certain types endure exceptionally low temperatures down to -20°F, while others sustain damage at or below 32°F. To foster cacti effectively, it’s crucial to comprehend and cater to the specific thermal preferences of your chosen species.

Cold-Resistant Cacti:

  • Possess adaptive abilities for survival in frigid conditions
  • Require safeguards against extreme elements like ice and freezing rain

Key Considerations:

  • Specific cacti vary in their cold weather resilience
  • Protective measures are vital for their well-being in hostile climates

Blooming Cycles of Different Cactus Species: An Overview of Seasonal Patterns

Cacti are a diverse group of plants that often captivate with their striking forms and resilience in arid environments. Among their most intriguing characteristics is their blooming cycle, which varies widely across different species. Some cacti boast flowers that open only for a single night, offering a rare and enchanting spectacle, such as the night-blooming cereus. Others celebrate the seasons with a more enduring display, with blooming periods that align with environmental cues of spring, summer, or even winter.

Understanding the blooming cycles of these hardy plants is not only of interest to the avid gardener but also to those who appreciate the complexity of desert ecology. Each species follows a unique schedule of flowering, often driven by specific climate conditions and survival strategies. The blooming of cacti is a remarkable process that involves phases of initiation, bud formation, and flowering, resulting in the production of fruits. As such, the care for these plants during their blooming period is vital, and common issues may arise that require troubleshooting to ensure that these spectacular displays can be enjoyed year after year.

Key Takeaways

  • Cacti exhibit a wide range of blooming cycles and patterns, unique to each species.
  • The blooming process is influenced by seasonal changes and environmental factors.
  • Proper care during blooming can enhance flower production and address common growth issues.

Defining Cactus Characteristics

In exploring the remarkable world of cacti, it’s essential to examine both their unique structural features and their biological processes, which enable them to thrive in some of the harshest environments on Earth.

Anatomical Features

Cactus plants are distinguished by their spines, which are actually modified leaves designed to reduce water loss and provide protection. Beneath the spines lie the areoles, specialized structures unique to cacti from which both spines and flowers grow. The skin of cacti often has a waxy coating, aiding in water retention, and can vary in texture from smooth to woody. Many species also exhibit tubercles—small, rounded projections that can help shade the plant body.

Physiological Processes

Cacti have evolved to perform photosynthesis differently than other plants, using a process called Crassulacean Acid Metabolism (CAM) which allows them to conserve water by opening their stomata at night. During these times, they absorb carbon dioxide and store it until daylight permits photosynthesis.

Cacti as Succulents

As succulents, cacti are adept at storing water in their fleshy tissues, enabling survival through extended dry periods. This succulent property is particularly important in their native dry conditions, especially in regions like Mexico and South America.

Taxonomy of Cacti

The Cactaceae family comprises around 139 genera and nearly 2,000 species. The family is exclusively native to the Americas, with its center of biodiversity in regions like Brazil and Argentina.

Cactus Habitats

Although commonly associated with desert regions, cactus habitats can range from arid plains to tropical rainforests. They are often found in shallow and well-draining soils, where moisture is scarce and the sunlight is abundant.

Adaptations to Environments

Cacti have a variety of adaptations to their environments, from thickened stems for water storage to the presence of spines for defense against herbivores. These features are essential for survival in environments with intense heat and limited rainfall.

Lifecycle and Maturity

From the seedling stage to maturity, cacti undergo a significant transformation, ultimately becoming flowering plants. The time it takes for cacti to reach maturity and begin blooming can vary widely among species, some taking several years to produce their first flowers.

Indoor Versus Outdoor Cacti

Indoor cactus plants are popular houseplants that often live in containers, requiring careful management of water, soil, and light conditions to mimic their natural habitats. While outdoor cacti are typically more resilient and can handle greater variances in environmental conditions.

Seasonal Aspects of Cacti

The unique blooming cycles and adaptations of cacti are intrinsically linked to the seasons, with specific periods of growth and dormancy dictating their life processes.

Winter Period

During winter, cacti species like Schlumbergera, commonly known as Christmas cactus, and Thanksgiving cactus, experience a period of dormancy. In this time, they require cooler temperatures to induce blooming. The winter season is crucial for these cacti as they set buds and bloom as daylight decreases. It’s typically important for these plants to be in temperatures around 12-15°C (55-59°F) to initiate flowering.

Summer Adaptations

In contrast, many cacti, such as Opuntia and Echinocereus, thrive in the summer heat, displaying remarkable adaptations like thickened stems to retain water and spines to provide shade. During summer, cacti manage their resources and may enter a state of slowed growth to conserve energy, awaiting the optimal conditions for blooming.

Blooming Timelines

The blooming timeline of cacti is not uniform across species; while Opuntia species may flower from late spring to early summer, others may have different patterns. Echinocereus species, for instance, may have a maturity-dependent flowering sequence which can be specific to late spring. This bloom generally heralds a period of active growth and reproduction, which for many cacti, requires increased temperature and light exposure.

Reproduction and Propagation

Cacti propagate through both seeds and vegetative means such as offsets. Flowering plants may exhibit different styles of blooms, which facilitate cross-pollination, an important aspect of seed formation. In the propagation of species like the Christmas cactus, cuttings from offsets can be taken and rooted in a suitable substrate to create new plants, thereby continuing the cycle of life through the seasons.

Diverse Cactus Species

The world of cacti presents a stunning array of forms, from towering columnar species to petite globular types. Each possesses unique adaptations that enable them to flourish in a variety of environments, with an impressive range in size, shape, and flowering habits.

Columnar Species

Columnar cacti, such as the iconic Saguaro (Carnegiea gigantea), are distinguished by their lofty, tree-like structures. These towering giants are native to the deserts of North America and can live for over 150 years. Columnar species typically grow vertically and may develop several arms as they age.

Globular Varieties

Contrasting the vertical reach of columnar cacti are the globular varieties. Species like Rebutia and Echinocactus, commonly known as the barrel cactus, boast a spherical or short cylindrical shape. Rebutia are small, often producing vibrant flowers, while Echinocactus can grow to substantial sizes and are characterized by their prominent ribs and numerous spines.

Epiphytic Types

Unlike their desert-dwelling cousins, epiphytic cacti, such as Epiphyllum or orchid cactus, grow on other plants or structures. They are adapted to more humid conditions found in tropical and subtropical environments. These cacti have leaf-like stems and produce large, showy flowers, distinguishing them from other cacti.

Unique Epidermal Features

Cacti exhibit a collection of unique epidermal characteristics that help them conserve water and protect from harsh sunlight. For instance, Mammillaria elongata has elongated tubercles covered in spines, while Ferocactus species are known for their stout, curved spines that arise from prominent ridges on their spherical bodies. These features are not just for defense or water storage; they also help in the reproductive process by aiding in the dispersal of seeds.

Popular Cacti and Their Blooming Patterns

The variety among cactus plants is astounding, each species possessing its distinct blooming cycles. Here is a snapshot of the blooming patterns across different types of popular cacti.

Holiday Favorites

Easter Cactus (Hatiora gaertneri): This cactus is named for its bloom season, which typically coincides with the Easter holiday. The flowers, usually pink or red, dangle gracefully from the stems. More about this can be found in Understanding The Timing Of Cactus Flower Blooms: A Guide For Gardeners.

Christmas Cactus (Schlumbergera bridgesii): As indicated by its name, it blooms near the Christmas season. The flowers come in various shades, adding a festive touch to any setting.

Desert Dwellers

Golden Barrel Cactus (Echinocactus grusonii): This round, ribbed cactus typically flowers in the hottest months, with yellow blooms circling its crown.

Prickly Pear (Opuntia microdasys): Recognizable for its broad, flat pads, these produce yellow, red, or purple flowers in late spring to early summer.

Cacti with Notable Flowers

Moon Cactus (Grafted Cacti): Often vibrant in color, these cacti are actually grafted onto another species, with the top part rarely blooming. However, the rootstock may produce modest flowers depending on its species.

Rat Tail Cactus (Aporocactus flagelliformis): Known for its long, trailing stems, this cactus displays vibrant pink to red flowers during spring.

Common Houseplant Cacti

Fairy Castle Cactus (Acanthocereus tetragonus): Resembling the spires of a castle, this cactus can take years to bloom and often does so only when fully mature, producing white or yellow flowers.

Peanut Cactus (Echinopsis chamaecereus): Displaying orange-red blooms, this cactus flowers in late spring and often requires ample sunlight.

Parodia: A genus with various species, these cacti typically flower in summer, offering a display of yellow, red, or orange blooms atop their ball-shaped bodies.

Caring for Blooming Cacti

Proper care of blooming cacti involves understanding their specific watering, light, temperature, soil, and maintenance needs. These factors are crucial for the plant’s health and vibrancy during its blooming cycle.

Watering Needs

Blooming cacti require a delicate balance of watering. During active growth and bloom periods, they should be watered more frequently but always allow the soil to dry out completely between waterings. Overwatering can lead to root rot, which is detrimental to the plant’s health. The Thanksgiving cactus thrives in typical household conditions without too much fuss over watering.

Light and Temperature

Cacti in bloom perform best in conditions that mimic their natural habitats. They prefer bright indirect light and should be kept at a temperature that’s consistent – generally between 65-75°F (18-24°C). During the blooming phase, some cacti species such as the Christmas cactus, demand cooler nighttime temperatures and longer periods of darkness to trigger and sustain their flowers.

Soil and Nutrient Requirements

The right soil mix is crucial for the health and growth of blooming cacti. They require a well-draining soil medium, often a mix of potting soil and sand or perlite. Nutrient needs can be met with a balanced, low-nitrogen fertilizer applied during the growing season but should be reduced or halted during dormancy.

Pruning and Maintenance

Pruning helps maintain the shape of the cactus and encourages branching where flowers are more likely to develop. Using sterile tools, one should prune dead or overgrown branches after the blooming cycle. Furthermore, check for pests that can impact the cactus’s health, and clean the spines and areoles gently to prevent dust buildup, which can inhibit growth.

Troubleshooting Common Issues

In cultivating cacti, gardeners may encounter issues affecting the health and flowering of these resilient plants. This section provides strategies for addressing common problems related to pests, environmental stress, blooming, and plant care in containers.

Pest and Disease Management

One encounters problems with pests such as spider mites, scale insects, and mealybugs, which can hinder growth and blooming in cacti. Disease management is critical; signs of stress, like black or brown spots and mushy stems, may indicate overwatering and fungal infections. For pest infestations, one can apply insecticidal soaps or neem oil treatments, ensuring to follow application guidelines to avoid plant harm.

Dealing with Environmental Stress

Cacti thrive under specific conditions, and when those are not met, they suffer from environmental stress. Ensuring that a cactus receives sufficient sunlight (at least six hours a day) and is watered correctly, allowing the soil to dry out completely between watering sessions, are essential steps. In dry conditions, one must balance humidity levels without overhydrating.

Encouraging Bloom

Cacti may not bloom or show signs of flowering due to several factors. They require a period of dormancy, with cooler temperatures and less frequent watering, to promote blooming cycles. It is also beneficial to fertilize them with a specialized cactus fertilizer, which can provide the necessary nutrients for flowering.

Repotting and Transplanting

Cacti often outgrow their containers or require fresh soil to rejuvenate their root systems. When repotting and transplanting, use a well-draining cactus mix and size up the container if the plant has expanded beyond its current pot. Handle the process delicately to avoid root damage, which may stall growth and blooming.

Conclusion

The blooming cycles of cacti are intricately linked to their environmental adaptations and specific species characteristics. They display a remarkable diversity in their flowering habits, with some species flowering annually, while others may do so less frequently. The key factors influencing these cycles include temperature, light, water availability, and the cactus’s maturity.

  • Annual bloomers: Some cacti species bloom each year at predictable times, typically when conditions are most favorable for pollination and seed dispersal.
  • Less frequent bloomers: Other species flower sporadically, and their blooms may be a rare delight, sometimes triggered by specific environmental cues.

It’s essential to recognize that not all cacti follow the same patterns, and these can vary widely:

  • Day Bloomers: Many cacti flowers open with the sunlight and close at dusk.
  • Night Bloomers: Some species, like those from the genus Epiphyllum, unfurl their blossoms at night, relying on nocturnal pollinators.

Gardeners should tailor their care for cacti according to the specific species’ needs to foster a successful blooming cycle. They must ensure optimal growing conditions, which can be a delicate balance in cultivation, mimicking the cactus’s native habitat as closely as possible. It is in this careful mimicry that the spectacular and sometimes elusive cactus flowers can be coaxed to reveal their beauty. To deepen understanding, examining guides on the timing of cactus flower blooms and cacti’s life cycle can be particularly informative.

Cactus Care 101: How to Safely Repot Your Spiky Plant

Cacti are popular houseplants known for their unique appearance and low-maintenance requirements. However, like all plants, cacti eventually outgrow their pots and require repotting to maintain their health and vigor. Repotting a cactus plant can be tricky since it requires special care and attention.

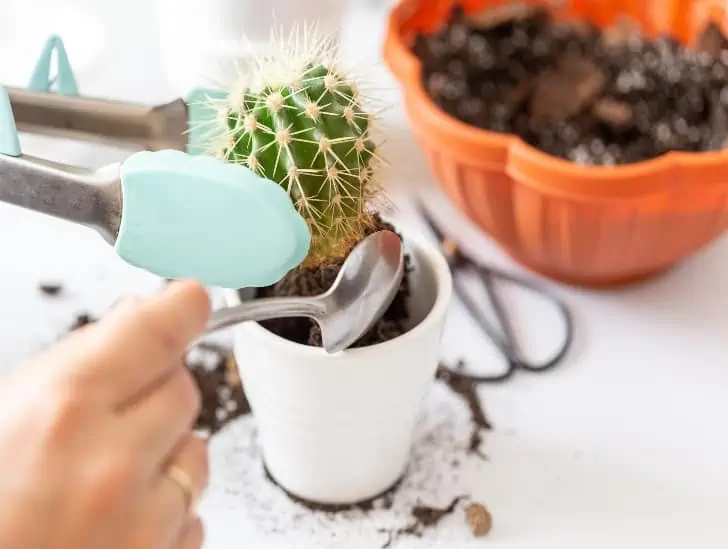
So, how do you safely repot your spiky plant? Repotting a cactus involves gently removing the plant from its current pot and loosening any compacted soil around the roots. After this, rinse off the roots and replant in a fresh, well-draining potting mix. Using gloves or tongs when handling the cactus is essential since it has sharp spines that can cause injury if not handled properly. Ensure the pot you choose is a manageable size. The new pot should be about 1-2 inches larger than the current one. After repotting, Water your cactus, and place it where it can get plenty of light.

Do you want to learn more about repotting a cactus plant safely? Keep reading to find out everything you need to know.

When Do You Need to Repot a Cactus?

Cacti are generally slow-growing plants that have adapted to thrive in harsh desert environments. They store water in their stems, which allows them to survive prolonged periods of drought.

The growth rate of a cactus varies depending on its species. Still, most indoor cacti experience active growth during spring and summer, followed by fall and winter dormancy.

A cactus may outgrow its pot for several reasons, such as an increase in size, depleted nutrients in the soil, or poor drainage. Signs that your cactus may need repotting include:

  • Roots protruding from the drainage holes indicate that the cactus has outgrown its current container and requires more growing space.
  • Yellowing or wilting leaves: A lack of nutrients in the soil can cause the cactus to appear unhealthy, signaling the need for repotting.
  • Stunted growth or failure to flower: This could be a sign that the cactus is root-bound and unable to take up enough water and nutrients to support its growth.

Consider repotting your cactus every two or three years. Repotting more frequently than necessary can harm the plant since it can cause stress and shock.

A person repotting cactus.
The growth rate of a cactus varies depending on its species.

The best time to repot your cactus is during its active growth phase in the spring or early summer. This allows the plant to recover quickly from the stress of repotting and establish itself in the new container before the dormancy period kicks in.

Tools Needed for Repotting a Cactus

Having the right tools to repot your cactus safely is recommended. The tools we discuss below play a crucial role in ensuring that the repotting process is smooth and safe for you.

1. Pot/Container

A suitable pot or container is crucial for repotting a cactus plant. Some critical factors to consider when choosing your container include size, material, drainage, and aesthetics.

Typically, you want the new pot slightly larger than the previous one to allow for the cactus plant’s growth. A general rule is to select a container about 1-2 inches larger than the current pot.

A pencil cactus in a pot.
You want the new pot slightly larger than the previous one to allow for the cactus plant’s growth.

Go for a pot made of a breathable material that allows excess moisture to evaporate. Terracotta or clay pots are popular choices for cacti due to their porous nature.

You must also ensure that the container has plenty of drainage holes at the bottom to prevent waterlogging, which can be detrimental to cacti.

And don’t forget to consider the pot’s appearance and how it complements the overall style of your cactus plant collection or home décor.

2. Potting Mix

The right potting mix is essential to provide a well-draining and nutrient-rich environment for your cactus plant.

Most cacti species require a well-draining soil mix to prevent unnecessary water retention that can lead to root rot.

Look for potting mixes designed for cacti or succulents, which usually contain perlite, pumice, or coarse sand to improve drainage.

Avoid potting mixes with high levels of organic matter or fertilizers since they can cause severe root rot that can lead to the untimely death of your plant. A good potting mix will have a balanced pH level suitable for cacti plants.

A sterilized potting mix is also recommended to minimize the risk of introducing pests or diseases to your cactus plant.

Luckily, you can always make your potting mix by combining regular potting soil with sand, perlite, or pumice in a 1:1 ratio.

3. Protective Gloves

Protective gloves are essential when handling cactus plants to prevent injury from the plant’s sharp spines.

Choose gloves made of thick, durable material that can withstand the cactus spines. Leather or thick rubber gloves are often suitable options.

A kid wearing a gardening gloves.
Consider gloves with a secure wrist closure to prevent spines from entering.

Ensure the gloves fit your hands well and provide enough flexibility to handle the delicate cactus without compromising your grip. Consider gloves with a secure wrist closure to prevent spines from entering.

Also, look for gloves designed to be puncture-resistant to protect your hands from cactus spines.

Repotting a Cactus: Step-by-Step Guide

Now that you have gathered all the necessary tools, it’s time to start.

Step 1: Gently remove the cactus from its pot

The first step is to remove your cactus from its current pot carefully. Wearing protective gloves, turn the pot upside down and gently tap or squeeze the sides of the container until the plant slides out.

You can also upend the container and let gravity help you with the job. The plant should slide out of the container without much hassle.

Feel free to ask for help from your friend if you are stranded. However, you must remind them to wear protective gloves or use a cotton towel while touching the cactus.

If you want to repot a relatively tall cactus that is impossible to remove from the current container, consider cutting the current container using an angle grinder or rotary saw.

Gently tap the roots of the cactus plant after cutting the container to get rid of any old potting mix left.

Step 2: Carefully remove the soil and inspect the roots

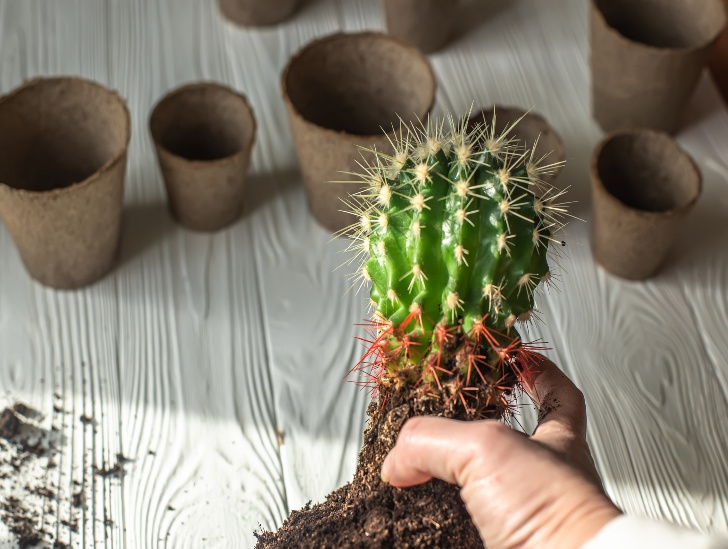
Once removed, inspect the root system of your cactus to check for any signs of disease or damage. Trim off brown, mushy, or discolored roots using sharp and sterilized shears.

A cactus on hand.
Inspect the root system of your cactus to check for any signs of disease or damage.

Remove as much of the old potting mix from the roots as possible. You can use a soft brush or damp cloth to help with this process.

Step 3: Place the cactus in its new container

Now it’s time to place your cactus in its new container. Add some fresh potting mix into the bottom of the container and carefully place the cactus in it.

Fill the sides of the container with more potting mix and gently press down around the base of the plant to hold it firmly in place.

Then, give your cactus a good drink of water until it trickles out from the drainage holes at the bottom.

Step 4: Place your cactus in its new home

Your newly potted cactus is ready to be placed in its permanent home.

Place it in an area with bright, indirect light and avoid exposure to direct sunlight, which can quickly damage the delicate plant.

Also, ensure the environment has enough humidity for the cactus to thrive.

Tips for Successful Repotting

Below are some tips to help you get the most out of your cactus repotting process:

  1. Water the cactus a few days before repotting: This will help the roots slide out of the old pot more easily.
  2. Handle the cactus carefully: Use thick gloves or wrap the cactus in a towel to protect your hands from spines.
  3. Gently remove the cactus from its old pot: Loosen the soil around the edges and gently lift the plant, not damaging the roots.
  4. Inspect the roots for any signs of rot or disease: Trim away any damaged or unhealthy roots with clean pruning shears.
  5. Place the cactus in the new pot with fresh soil: Position the cactus in the center of the pot and fill it in with the soil mixture, ensuring that the base of the stem is slightly above the soil line.
  6. Wait a few days before watering: This allows damaged roots to heal and reduces the risk of root rot.

Common Mistakes to Avoid

Some of the common mistakes you need to avoid when repotting your cactus include:

A golden barrel cactus on hand being repot.
Always wear thick, puncture-proof gloves to protect your hands from cactus spines.
  • Using a pot that is too small or too large for the cactus: A pot that’s too small will restrict the plant’s root system, while one that’s too large can encourage waterlogging.
  • Using poor-quality soil mix: Choose a well-draining soil designed explicitly for cacti or succulents.
  • Not using protective gloves: Always wear thick, puncture-proof gloves to protect your hands from cactus spines.
  • Not pruning unhealthy roots: Trim away brown, mushy, or discolored roots before repotting.
  • Placing the cactus in direct sunlight: Cacti prefer bright, indirect light and require protection from direct sunlight to prevent sunburn.

Summary

Repotting a cactus plant is an essential task for the health and well-being of your beloved plant.

The process might seem daunting, but with the right tools and plenty of care, you can ensure that your cactus thrives in its new home.
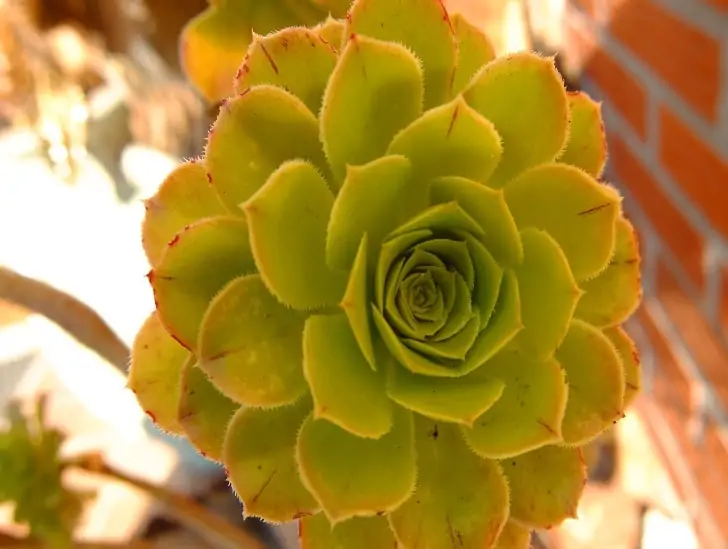
Remember to choose the right pot size, use a sterile potting mix, wear protective gloves, and monitor your cactus for any signs of disease or damage.

Keep Your Open Terrarium Healthy: A Beginner’s Guide

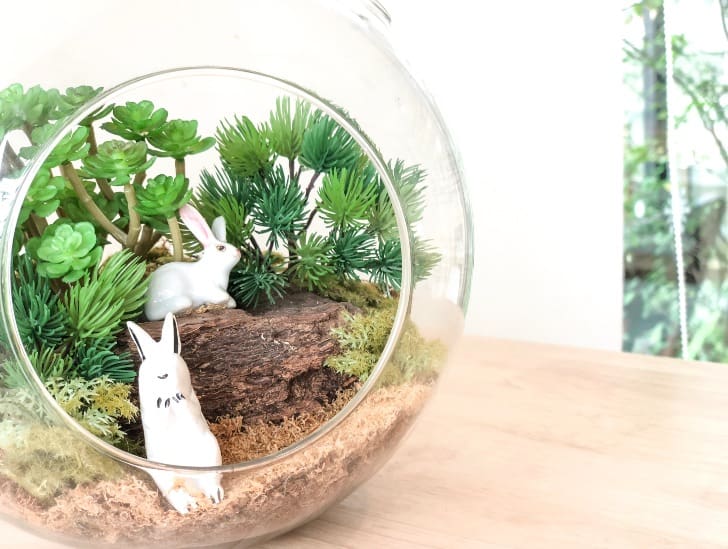
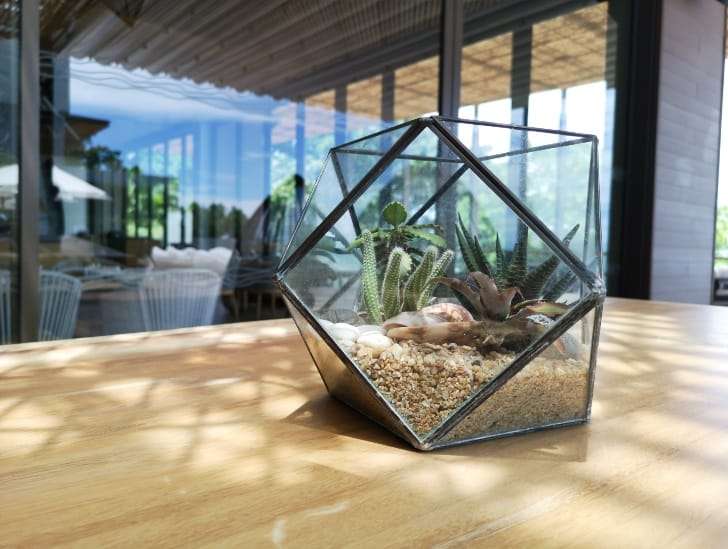
A close round terrarium with succulent.

Open terrariums are pretty trendy, and it is for a good reason. They are relatively easy to create and add beauty to our indoor spaces. Besides, they come in many forms and are more functional than closed terrariums. However, their unique care requirements must be fulfilled for them to thrive. If you treat your open terrarium casually, you will cause irreversible damage to your plants. Take time to understand your plant requirements and stick to a regular care routine to ensure your open terrarium remains healthy and beautiful.

So, what are some of the general care requirements for an open terrarium? Open terrariums usually require careful watering and close monitoring of the moisture level. Excessive moisture can lead to root rot and other diseases. On the other hand, too little moisture can cause the plants to wilt and die. Routine maintenance includes debris removal, pruning, pest treatment, fertilization, keeping the glass and interior clean, and provision of adequate lighting. However, everything starts with choosing the right plants for your open terrarium.

This blog post outlines the general tips for caring for open terrariums. Read on to find out everything you need to know.

What Is an Open Terrarium?

Before we dive deep into discussing the routine maintenance tasks for an open terrarium, it is good to provide a general overview of an open terrarium.

The term “terrarium” is generally used to refer to a closed container of moisture-loving plants. However, not all moisture-loving plants thrive in closed containers. When the plants are put in an open container, it creates an open terrarium.

Open terrariums are carefully designed to provide sufficient airflow, light, and enough moisture for the plants.

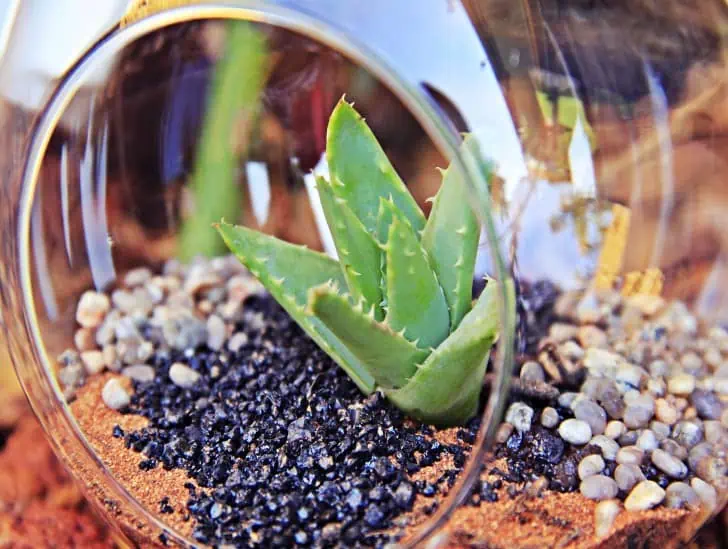
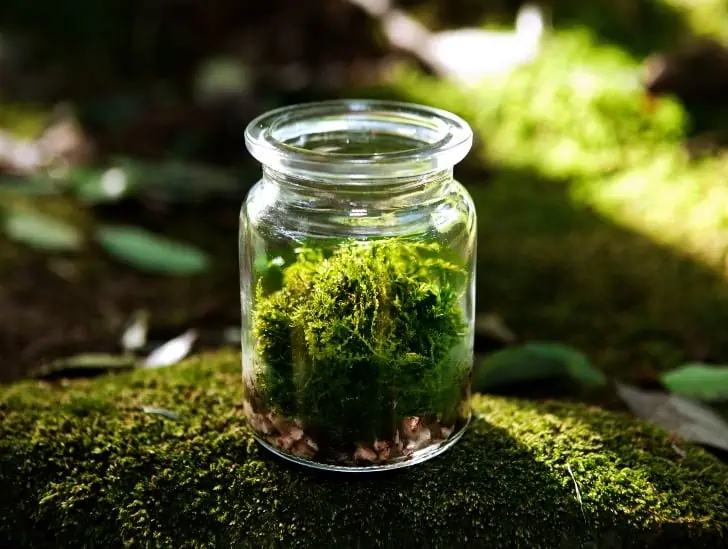
Small plant at an open terrarium.
These terrariums are great for anyone who desires a natural green space indoors.

Open terrariums are often designed to maximize drainage, which is vital for water-loving plants. The containers may be glass bowls or jars with open tops that allow light and air to enter.

These terrariums are great for anyone who desires a natural green space indoors but needs more time for extensive maintenance of the plants. Open terrariums are meant explicitly for plants that don’t need much humidity to thrive.

They are an excellent way for people to get started with terrariums since they don’t have to deal with many factors that can easily take down a terrarium.

Open terrariums are more versatile in home decor and have given rise to geometric and air plant terrariums.

Taking Care of an Open Terrarium

Now that you understand what a terrarium is better let’s look at the general tips for taking care of these terrariums.

1. Everything Starts with Selecting the Right Plants

Choosing the right plant type is very important for any open terrarium. Consider light availability, humidity, soil requirements, and water needs.

For instance, succulents and cacti don’t require much moisture and are perfect for open terrariums since they can tolerate the drier air in these setups.

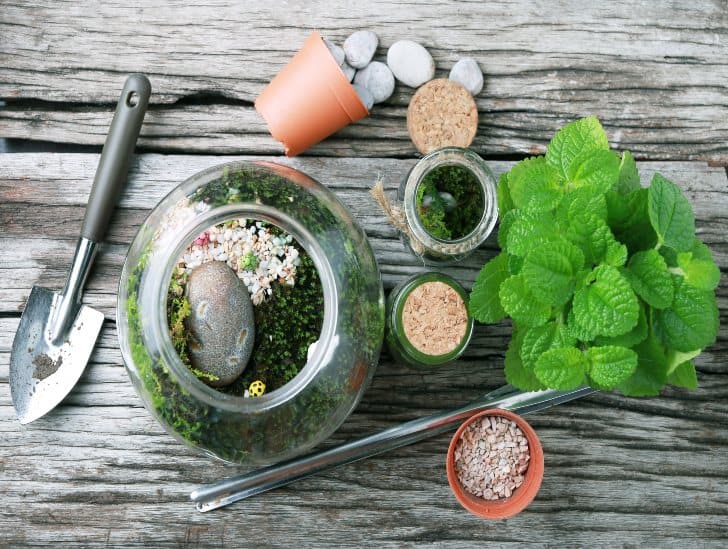
Tools for an open terrarium.
Choosing the right plant type is very important for any open terrarium.

On the other hand, tropical plants may need to do better since they need high humidity levels to thrive.

Be sure to research your preferred plants beforehand to determine their needs and if they will thrive in your terrarium’s environment.

2. Terrarium Positioning (Lighting)

One of the most important things you must do to protect your open terrarium is always to have it in the right spot. In this case, the right place is part of your room that receives the right amount of light at the right time.

The plants in your terrarium depend on the light provided for photosynthesis. Failure to provide adequate lighting can lead to slow growth and unhealthy plants.

However, it would be best if you were careful not to expose your terrarium to excessive direct sunlight since it can cause irreversible sunburn.

The sweet spot is what we refer to as the bright/indirect light. In this case, you are trying to mimic the idea of dappled light in a typical rainforest where only a few filtered sun rays shine through to the bottom of the forest where most of these plants grow.

Generally, a well-lit south or east-facing window sill or a brightly lit room is all it takes to keep your open terrarium happy and healthy.

Feel free to use artificial grow lights as supplementary lights if you cannot find a perfect spot for your open terrarium in your home.
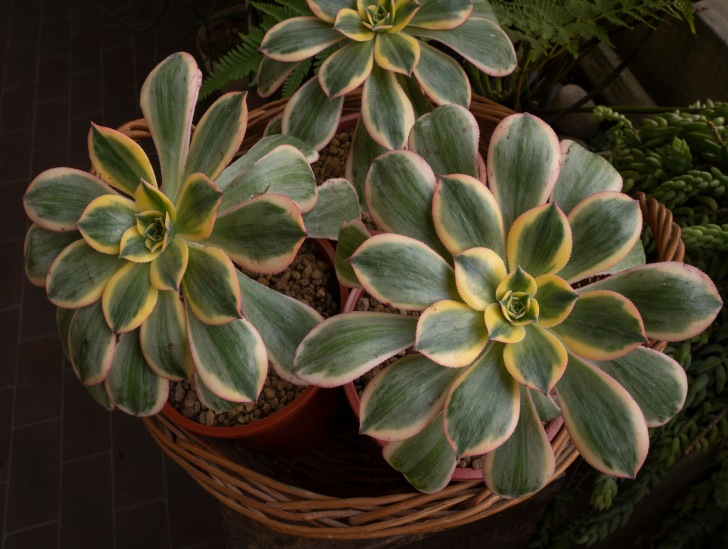
3. Monitor the Moisture Level Carefully

One of the benefits of open terrariums is that they allow excess moisture to evaporate quickly, reducing the risk of root rot and other diseases.

However, this also means you must carefully monitor the moisture levels in your open terrarium.

This can be done by feeling the soil with your fingers or inspecting the leaves of your plants to see if they are dry or wet.

Generally, you should ensure the soil is moist but not soggy. If it feels too damp, reduce the watering frequency until it starts drying out again.

Open terrariums also need occasional misting. You can spray the plants with a gentle water spray to keep them hydrated.

Be sure to use clean, distilled water for your terrarium since tap water can contain chlorine or other chemicals that may be harmful to your plants.

4. Be Careful with Watering

Since open terrariums don’t have a natural water cycle, you must ensure everything is balanced.

Typically, the watering requirements and methods will vary greatly depending on the type of plants you have in your terrarium.

If your terrarium is dominated by succulents, cacti, and other plants that thrive in arid conditions, consider watering them every two or three weeks.

A person watering the plant in the terrarium.
Always do a finger test on the soil or check for signs of wilting before deciding whether or not to water your terrarium.

On the other hand, tropical plants need to be watered more regularly.

When in doubt, always do a finger test on the soil or check for signs of wilting before deciding whether or not to water your terrarium. Overwatering can cause root rot and other health problems in your plants.

5. Regularly Clean Your Terrarium’s Glass Container

Most open terrariums are made of a glass container to allow as much light as possible to get through to the plants. Unfortunately, glass containers are susceptible to dirt and may need regular cleaning.

First, remove the plants and soil from the glass container to clean your terrarium.

Then use a soft cloth or a paper towel to gently scrub away any dirt or dust on the surface of the glass. Rinse it with distilled water and let it dry before re-planting your terrarium.

6. Pruning

Open terrariums containing vines and other houseplants tend to outgrow the glass container quickly.

To prevent this, you should consider pruning your plants regularly to keep them from taking over the terrarium and crowding out other plants.

A open terrarium outdoor exposed to sunlight.
The best time to prune is late winter or early spring.

Trim back any dead leaves or branches with sharp scissors or garden shears. Also, make sure not to prune too much since it can stunt the growth of your plants.

However, be easy with pruning. Some intentional spillover can look good; you don’t have to trim it. Use logic to figure out what to prune and leave for decoration.

The best time to prune is late winter or early spring. This will allow your terrarium to get a head start on the growing season with healthy, strong plants.

7. Pests and Diseases

Open terrariums are naturally susceptible to pests, bugs, and infestations since they are open to the environment. Gnats and mealybugs are some of the most common pests that attack open terrariums.

To prevent these pests from taking over your terrarium, inspect your terrarium regularly and look out for any signs of infection or infestation.

If you spot one, isolate the affected plant immediately and carefully remove all infected leaves and debris.

If the problem persists, consider spraying some pesticide on the affected plants. Use an organic pest control product to avoid causing harm to your plants or introducing toxins into your terrarium.

8. Remove Mold as Soon as You Spot It

If you notice signs of some fluffy, white substance on one of your plant’s leaves, know it is mold, and you must act quickly to save your terrarium.

While it is normal for mold to develop in closed terrariums due to condensation, it is an unwelcome sight in open terrariums.

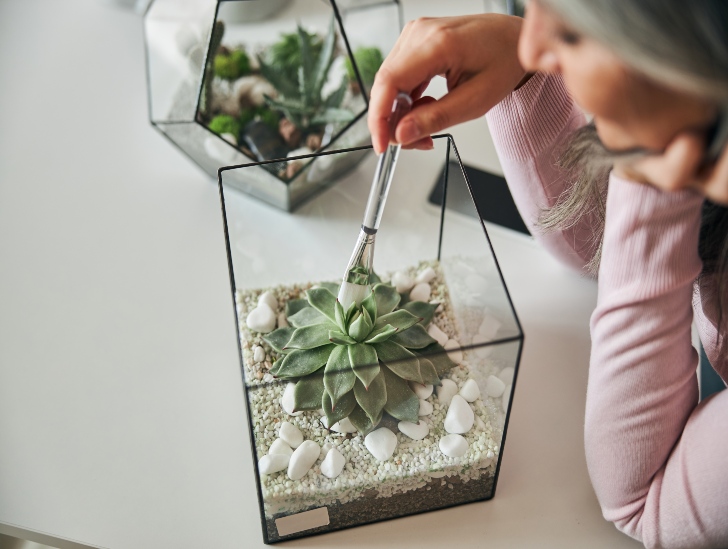
A woman brushing the plant in the terrarium.
Try to keep the humidity levels low in your terrarium.

To remove the mold, first, use a damp cloth or paper towel to wipe away any visible growth gently.

If that doesn’t work, spray some diluted rubbing alcohol on the affected area and let it sit for 15 minutes before wiping it off with a dry cloth.

As a preventative measure, try to keep the humidity levels low in your terrarium and avoid any unnecessary water splashes when watering your plants. If you do that, mold will not grow in your open terrarium.

Final Thoughts

Open terrariums can be an exciting way to bring a bit of nature into your home. However, it is crucial to understand the basics of open terrarium care before starting one.
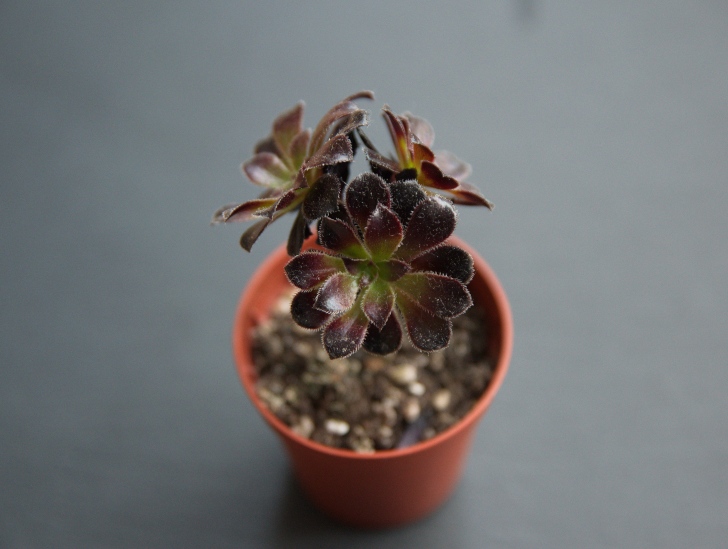
Be sure to take the time to research and learn about the needs of each plant in your terrarium before you begin so that you can give them the best care possible.

With proper maintenance and attention, your terrarium will add joy and beauty to your home for many years.

How Much Direct Sunlight Does An Air Plant Need?

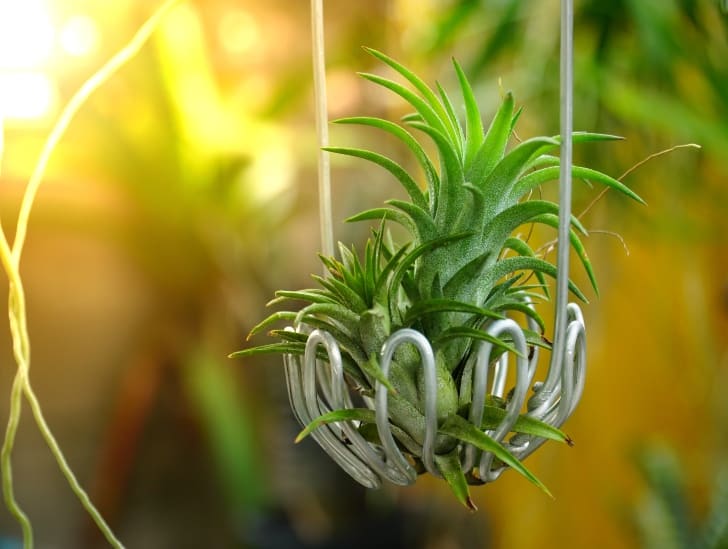
A air plant exposed to sunlight.

Air plants, also called tillandsia, prefer a bright but indirect, filtered light. They are a part of the Bromeliaceae or Bromeliad species and have been labeled Epiphytes, as they do not need soil to grow. They thrive well in warmer subtropical climates, which gives you an idea of the best sunlight conditions.

 A little direct light may be beneficial and bring out more color in your plants. Too much sunlight will deplete the moisture in your plants and make them burn and eventually die if they are left in the sun for too long. A great deal of natural light encourages flowering. If kept in low light conditions, they may survive, but they will not grow very fast or flower.

Key Factors That Influence How Much Light Your Air Plant Requires

Three primary factors affect the amount of light your air plant can handle.

Species

Xeric species are desert air plants that can resist much more sunlight. They generally have short silver hairs covering their leaves, protecting them against direct sunlight. Xeric species are the ideal option if you prefer a place that receives direct sun.

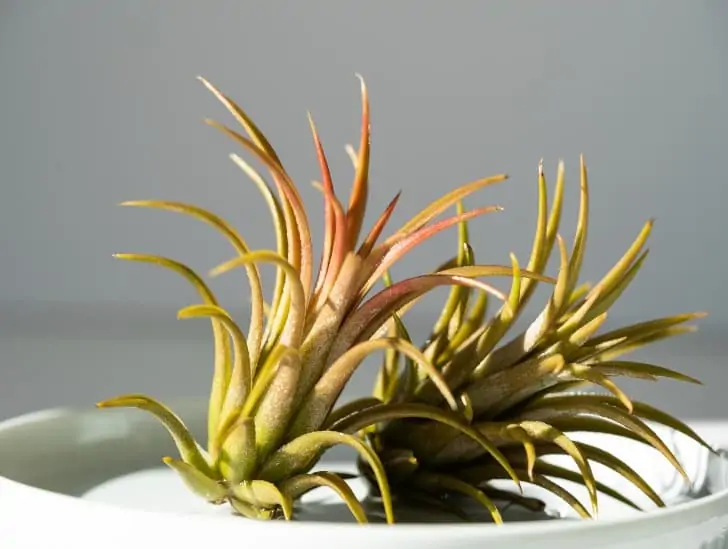
Airplant hanging.
They grow better under filtered light.

● Mesic forest air plants, however, receive only the sunlight that has been filtered through a tropical canopy. As a result, mesic-air plants tend to have smooth, broad leaves that trap as much sunlight as possible. As a result, they grow better under filtered light.

Humidity

Humidity in your environment may also dictate how much natural light air plants can manage. If your air plants live in a damper environment, they will be able to withstand a little more sunlight since they will not dry out so quickly.

When temperatures are warmer and conditions drier, your air plants are more prone to sunburn. However, if temperatures or moderate humidity are high and your air plants stay well-watered, they will be far more resistant to direct sunlight.

If you put your air plant where it will receive a lot of light, you should plan for misting more frequently – twice a week or even a day. A sunny bathroom is an excellent choice for an air plant because the humidity of your shower will take care of most plant misting for you.

Season

When determining how much light your air plant can absorb, keep seasonal changes in mind. Beware of direct sunlight and intense summer sun, magnified by windows, terrarium glass, etc. Move your air plant terrarium to a different window or farther from a light source in the summertime months.

A glass hexagonal terrarium.
Move your air plant terrarium to a different window or farther from a light source in the summertime months.

In the growing season (April to October), plants in the air thrive under sunlight but can be burned if exposed to strong direct sunlight. However, they are happy under more direct sunlight for the rest of the year.

Outdoor Sunlight Requirements

Keep your plants away from direct sunlight. Remember, in nature, many species of air plants like to grow up in the sheltered canopy and shaded trees. However, they will do their best if you can place them in a bright place away from the sun’s rays.

Please make sure they are in an area that the sun will not directly strike for more than an hour a day or where they are entirely shaded from the direct sunlight. Beneath a tree or on your porch or Lanai should work just fine.

Air plant on outdoor.
They will do their best if you can place them in a bright place away from the sun’s rays.

Some Tillandsia may take more sun than others according to the species of the plant and its environment. If your plant has more slender, wispier leaves, it probably won’t do too well in full sun. Thicker and fuller leaves may better retain moisture so that this kind of air plant may better tolerate some direct sunlight for parts of the day.

If you live in a state of the south or desert areas where the sun is extreme, you need to be very careful with the exposure of your air plants to direct sunlight. Be especially careful in the regions that lack moisture, like the desert, because your plants will damage and wither from direct sunlight even faster.

Tillandsias love spending the summer outside, but make sure you put them in place with filtered sunlight. Direct sunlight in the hot summer months can “fry” them. And be sure to bring the plants indoors before the first autumn frost.

Indoor Light Requirements

Air plants are small in size, making them perfect options to decorate small spaces and apartments. If you keep them inside, we recommend keeping them next to the windows. However, windows must be shaded, either from a tree or any other type of protection against the direct sun.

Filtered light, or perhaps only the mild morning sun, is perfect for your indoor air plants because they are inclined to get a little “fried” in direct sunlight. Pay particular attention when planting in a terrarium, as light amplification may burn your plants.

As air plants benefit from indirect sunlight, their ideal location is to receive many hours of soft morning light and bright light throughout the day. A window facing eastward is acceptable. If you place them at the south or west window, be sure to maintain a certain distance to avoid direct exposure to the sun for their optimal growth. For example, putting one to three feet from a window facing east or west or one or two feet from an artificial light source.

A Airplant in glass terrarium.
Windows must be shaded, either from a tree or any other type of protection against the direct sun.

Rooms with windows facing north also work well, as long as the plant is located near the window, and the window is not blocked by trees or a complex of neighboring apartments. Western daylight tends to arrive late in the day and can be very hot and intense. If you keep them appropriately watered, they can tolerate warm, more direct sunlight and more prolonged exposure. Avoid poorly illuminated areas.

Exceptions

Air plants have silvery or whitish reflections, some of which are more visible on the underside of the leaf. The radiance is very visible; on others, not that much. The silver luster or fuzz is known as trichomes.

The silver appearance of any Tillandsia is due to the high density of trichomes, which means that it is adaptable to dry conditions and can reflect sunlight. Conversely, plants that look greener (mesic tillandsias) have fewer trichomes, are adapted to shade, and require more frequent watering.

The air plants of the silver-leaf variety can withstand more direct sunlight. These air plants usually have thicker and fuller leaves. Some Tillandsia xeric species like Xerographica can survive well in direct sunlight for short periods due to trichomes.

Trichomes offer a flurried look at an air plant’s surface, making it absorb nutrients and water more effectively. It also makes it possible for the air plant to manage direct sunlight better. Another variety that is also capable of withstanding periods of full sun is the Orthophytum. They take full sunshine and do not require a lot of water.

The trichomes serve as sunscreens protecting the leaves from the sun’s rays. More trichomes mean that the plant will be able to withstand more sun. So give the silver-colored plants as much light as you can.

It is important to remember that they will not tolerate the full summer sun, but the winter sun is fine. Also, remember that you may need to water more frequently when exposed to direct sunlight.

Artificial Light for Air Plants

Although air plants can withstand short periods of darkness, they require good lighting to produce their best. Placing your plant in an office or basement where it will get no natural sunlight is possible. Nevertheless, there are some specific rules to follow to ensure the success of your air plant.

Grow lights can provide extra light to air plants – or as the sole light source. Fluorescent or full-spectrum LEDs are the perfect artificial light for air plants, specialized for growing plants.

Standard filament lamps do not emit the quality of light required for photosynthesis.

Position your Tillandsia not more than 3 feet from the light source. If artificial light is their primary source of light, plan to keep it on for approximately 12 hours per day to provide adequate light. You can use an automatic timer to have them receive the proper amount.

Signs of Excessive Sunlight

Signs of sunburn include:

  • Brown spots,
  • Dried patches occur inside the growth.
  • The unhealthy splotchy appearance of the outer leaves 
Dying airplant
Air plants do not grow well in full sunlight.

Once you notice these signs, remove the plant right away from its current location. Next, carefully pull out the outer leaves that are completely damaged. If they do not detach easily, use a pair of scissors to cut the damaged areas. Finally, give the plant a good soak before finding it a new place, better off away from the sun.

Bottom Line

Air plants do not grow well in full sunlight, but they require a few hours of bright and indirect sunlight per day. The quantity of the sun also depends on the type of air plant and the climatic condition. In addition, you can use artificial lamps to grow them. If you keep them appropriately watered, they may take more direct sun for a more extended time.

Adenium Plant (Desert Rose) – Does It Require Direct Sunlight?

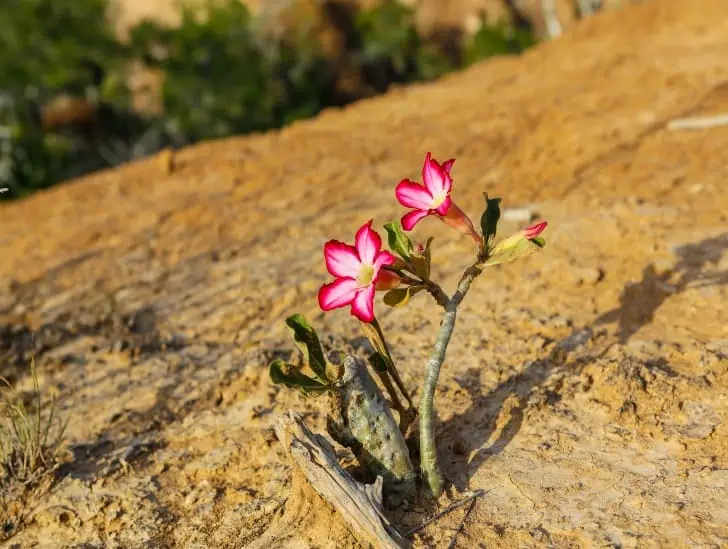
Adenium plant, also known as the desert rose, is a perennial succulent plant native to parts of Africa and Arabia. The plant has thick, fleshy roots and a stem with beautiful flowers. It is a popular houseplant and can also be found in arid, desert-like climates. Caring for the plant is relatively easy, but one question that is often asked is whether the succulent needs direct sunlight.

So, does the adenium plant need direct sunlight? The answer to this question is yes and no. Adenium plants appreciate bright light, but they cannot tolerate direct, scorching sunlight. If you live in an area with scorching summers, it is best to grow your plant under a shade cloth or in a spot that only receives morning sun.

This blog post discusses everything you need to know about growing an adenium plant, including the amount of sunlight it needs. We also provide tips on how to care for your plant so that it thrives.

Adenium Plant General Light Requirements

In general, adenium plants need at least 4 hours of sunlight per day. They can tolerate up to 6-8 hours of sunlight, but anything more than that will start to damage the plant. If you live in an area with hot summers, it is best to provide some afternoon shade for your plant.

Adenium plant exposed to sunlight.
It is a popular houseplant and can also be found in arid, desert-like climates.

The amount of sunlight your plant receives will also affect the blooming pattern. Adeniums that receive more sunlight will bloom more often than those that don’t.

When growing the succulent indoors, it is best to place it near a south-facing window. This will ensure that your plant receives enough light. If you don’t have a south-facing window, you can supplement the light with artificial grow lights.

How to Know If Your Adenium Is Getting Enough Light

There are a few ways to tell if your plant is getting enough light. The first is by looking at the leaves. Healthy leaves should have a deep green color. If the leaves are pale or yellow, this is a sign that the plant is not getting enough light.

The second way to tell if your adenium is getting enough light is by looking at the stem. The stem should be thick and fleshy. If the stem is thin and spindly, this is a sign that the plant is not getting enough light.

Adenium Socotranum plant outdoors.
Adeniums that receive enough light will produce more flowers.

The third way to tell if your adenium is getting enough light is by looking at the flowers. Adeniums that receive enough light will produce more flowers. If the plant is not receiving enough light, the flowers will be smaller and fewer in number.

How Do You Know Your Adenium Isn’t Receiving Enough Sunlight?

Adenium needs at least four hours of sunlight to do well. If it isn’t receiving that much sunlight, the leaves will turn pale or yellow. The stem will also be thin and spindly. The plant may also produce fewer flowers.

The other obvious sign that your plant isn’t receiving sufficient light is etiolation. When a plant doesn’t receive enough light, it will start to stretch out and become leggy. The internodes (the space between the leaves) will also become longer.

If your plant is etiolated, you can cut back the stem to promote new growth. Be sure to place the plant in a spot that receives more light. You may also need to supplement the natural light with artificial grow lights.

Can Adenium Receive Too Much Sunlight?

The simple answer is yes. Like other succulents, adenium can sunburn if exposed to direct, scorching sunlight. The leaves will turn red or brown, and the plant will start to wilt. If the sunburn is severe, the leaves will eventually fall off.

Desert rose in a pot indoors.
Be sure to place the plant in a spot that receives bright light but not direct sunlight.

To avoid sunburn, it is best to provide some afternoon shade for your plant. This is especially important during the summer months when the sun is at its strongest.

You can also move your plant indoors during the hottest part of the day. If you do this, be sure to place the plant in a spot that receives bright light but not direct sunlight.

How Do You Treat Sunburn on Adenium Plant?

If your adenium plant has already suffered sunburn, you need to act swiftly to avoid further damage. If the sunburn isn’t severe, you don’t have to worry because it will eventually heal on its own.
To help the healing process, you can provide some afternoon shade for your plant. You can also move the plant indoors or place it in a spot that receives indirect sunlight.

If the sunburn is severe, you need to take measures to prevent further damage. The first thing you need to do is provide some afternoon shade for your plant. You can also move the plant indoors or place it in a spot that receives indirect sunlight.

Next, you need to water the plant more frequently. This will help prevent the leaves from drying out and falling off.

Finally, you need to apply a succulent fertilizer to help the plant recover. Be sure to follow the directions on the fertilizer label.

With proper care, your plant will eventually recover from sunburn. However, it is essential to note that the leaves will never return to their original color. If that is an issue for you, consider pruning the damaged leaves.

Can Adenium Grow Under Shade?

Adenium can grow under shade, but it will not do as well as it would in full sun. The plant will be leggy, and the leaves will be pale green. The flowers will also be smaller and fewer in number.

Positioning your plant under shade may also lead to other problems such as powdery mildew and root rot.

It is best to provide adenium with at least four hours of sunlight. If that is not possible, you can supplement the light with artificial grow lights.

Can Young Adenium Plants Survive Direct Sunlight?

Caring for young adenium plants requires a bit more care and attention. This is because they are more susceptible to sunburn and other problems.

To avoid sunburn, it is best to position young adenium plants under partial shade. This is especially important during the summer months when the sun is at its strongest.

Desert rose stem flower.
To avoid sunburn, it is best to position young adenium plants under partial shade.

You can also move your plant indoors during the hottest part of the day. If you do this, be sure to place the young plants in a spot that receives bright light but not direct sunlight.

With proper care, your young adenium plant will eventually become acclimated to the sun and can be moved into a full sun position.

Can Adenium Grow in Artificial Light?

Adenium can grow in artificial light, but it will not do as well as it would in full sun. The plant will be leggy, and the leaves will be slightly pale. The flowers will also be smaller and fewer in number.

To grow adenium under artificial light, you need to pay close attention to the intensity of the artificial bulbs you use. Generally, you need bulbs that produce at least 10,000 lux. Leave the lights turned on for at least eight hours a day.

It is important to note that adenium will not flower under artificial light. If you want your plant to flower, you need to provide your plant with some exposure to natural sunlight.

You also need to be careful not to overdo it with artificial light. It is best to use a combination of fluorescent and incandescent light bulbs. This will help prevent the leaves from getting too hot.

How Often Should You Water Adenium?

Adenium plants are drought tolerant and can survive long periods without water. However, they will not thrive unless they are given a good soaking every few weeks.

You may need to water your plant once a week during the summer months. This will depend on the weather conditions and the type of soil you are using.

If you are growing adenium in a pot, you will need to water it more frequently. This is because the roots are confined, and the soil dries out more quickly.

Watering adenium plant.
You can also allow the plant to go through a period of dormancy in the winter months.

You can reduce the watering schedule to once every two weeks during the winter months. Be sure to check the plant before watering to ensure the soil is dry.

Overwatering is one of the most common problems with adenium plants. If you water too often, the roots will rot, and the plant will die.

To avoid this problem, make sure the soil is dry before watering. You can also allow the plant to go through a period of dormancy in the winter months. This will help prevent root rot.

Conclusion

Although adenium plants can tolerate a certain amount of direct sunlight, it is essential to be aware of the plant’s general light requirements and how to provide them.

If you are unsure whether your adenium is receiving enough light, there are several ways to tell. Sunburn on an adenium plant is not common, but can happen if the plant receives too much sun.

Adenium plants can also grow under shade, although they will not flower as prolifically. Young adenium plants should not be exposed to direct sunlight for extended periods until they have become stronger and more tolerant.

Aeonium Succulents: Do They Need Direct Sunlight?

A green pink aeonium exposed to sunlight.

Aeonium is a succulent genus consisting of approximately 35 different species of plants that belong to the Crassulaceae family, which also features the beautiful Echeveria plants. The succulent is native to parts of Morocco, Madeira, and the Canary Islands. Thanks to their magnificent floral display, they are also common houseplants in many homes. While growing aeonium at home is pretty easy, most gardeners are split on the issue of the right light requirements for the succulent. Does it require exposure to direct sunlight, or can it survive in partial shade? Let us find out.

So, does aeonium need direct sunlight? The simple answer is no. While this plant does well in spots that receive plenty of bright, direct sunlight, it can still tolerate partial shade without any problems. Typically, the succulent requires exposure to at least six hours of full sun a day to develop its beautiful leaf colors. If you live in an area that doesn’t receive plenty of sunlight, consider supplementing your plant’s light requirements with artificial grow lights. However, you need to be careful with exposing aeonium to full sunlight because it is susceptible to sunburn.

Do you want to learn more about aeonium and whether you can expose your plant to direct sunlight? Read on to find out everything you need to know.

Aeonium Light Requirements

Before we dive deep into discussing whether aeonium can withstand direct sunlight or not, it’s first essential to understand the plant’s general light requirements.

Generally, aeonium does best when it receives bright, indirect light. This means they should be placed in a spot where they will get several hours of sunlight each day, but where the light is not too harsh – typically six hours of sunlight.

Aeonium exposed to sunlight.
Aeonium are one of the common houseplants in many homes.

This can be tricky to achieve indoors, so if you’re not sure whether your plant is receiving enough light, try moving it to different spots within your house and monitor the reaction.

Find a spot on a south-facing or east-facing windowsill and position your plant there. Be sure to rotate it frequently to facilitate even growth of the plant.

If you start to notice your plant’s leaves turning yellow or brown, then it is a clear sign that your aeonium is not getting enough light and should be moved to a sunnier spot.

Can Aeonium Withstand Direct Sunlight?

Now that we know a bit about aeonium light requirements, let’s discuss whether they can withstand direct sunlight or not.

The answer is: it depends.

Some aeoniums can withstand direct sunlight without any issues, while others may start to wilt or burn if they are exposed to too much sun.

If you are unsure whether your aeonium can handle direct sunlight, it’s best to err on the side of caution and keep it in a spot where it will receive only indirect light.

However, when your plant is overexposed to direct sunlight, it may suffer extensive sunburn that can be pretty challenging to reverse. We cover more about aeonium sunburn below:

Can Aeonium Suffer Sunburn?

The simple answer is yes. If you set your plant in a spot that constantly receives prolonged hours of direct sunlight, your plant may develop sunburn over time.

It can be disheartening to discover that your precious aeonium has developed sunburn, but whether the plant survives or dies will depend on how quickly you act after the discovery.

While serious sunburn can put your aeonium’s life at risk, minor sunburn can be dealt with before things get out of hand.

Aeonium plant.
Sunburned aeoniums develop a series of discolored patches on their leaves.

However, before you decide what to do with your sunburned aeonium plant, it is critical to recognize the signs of sunburn in your plants.

Typically, sunburned aeoniums develop a series of discolored patches on their leaves. These patches can be black, brown, or yellow, depending on the severity of the sunburn.

If only part of the succulent was overexposed to the direct sunlight, the patches might only show on the parts exposed to the sunlight. Typically, the more severe the sunburn, the darker the discoloration.

The discolored patches on the leaves of your aeonium plant may also have a different texture than the healthy parts of your succulent. If your plant’s leaves typically have a smooth surface, you may notice that the sunburned patches feel slightly rough.

Minor sunburns may cause little to no change in texture, but a severe burn will definitely make your plant’s leaves feel rough and scarred.

How Can I Avoid Sunburn on My Aeonium without Depriving It of Enough Light?

The best way to avoid sunburn on your aeonium plant is to adhere to its light requirements. Generally, the succulent can thrive in direct sunlight and adapt to different light intensities.

During spring and summer, you need to be careful with introducing your plant to direct sunlight after the cold winter months. Instead of taking your aeonium directly from a relatively dark spot to direct sunlight, make the process gradual.

Aeonium plant in a pot indoors.
You need to consider a few environmental factors when exposing your aeonium to direct sunlight.

Start by exposing it to the morning sunlight for a couple of hours and gradually increase the number of hours overtime.

Keep switching the plant between partial shade and full sun until it fully adapts. If moving the plant is not an option for you, consider covering it with a shade cloth. Gradual introduction to direct sunlight will eliminate the risk of it being shocked and sunburned.

You also need to consider a few environmental factors when exposing your aeonium to direct sunlight. Remember that direct sunlight can dry your succulent out pretty fast, putting it at a higher risk of sunburn.

The water loss caused by the relatively high temperatures makes your plant more fragile and susceptible to sunburn. Aeoniums planted in pots are slightly more likely to dry out than those planted in the ground.

This is because aeoniums planted in-ground benefit from the naturally cooler temperatures underground. Growing pots tend to heat up quickly, especially in direct sunlight, which increases the evaporation rate.

To keep your aeonium from drying out quickly, water it regularly to maintain cool temperatures. But you need to be careful not to waterlog your succulent because it can lead to serious root rot issues.

Frequent watering allows the succulent to soak up as much water as possible without worrying about the water that will evaporate before filling up its reserves.

Can Aeonium Recover from Sunburn?

The best way to deal with sunburn on your aeonium is to prevent it. If you don’t take good care of your plant, allowing it to develop sunburn, recovery will largely depend on how severe the damage is.

If the sunburn is light and hasn’t affected a large part of your plant, quick intervention can stop it from spreading and becoming worse. The only thing you need to do is move your plant to partial shade and water it frequently.

However, if the sunburn is more extensive, recovery may take a while. In such a case, you need to move your plant to partial shade and keep a close eye on it.

Aeonium black rose in a pot.
Aeoniums planted in pots are slightly more likely to dry out than those planted in the ground.

Sometimes, you may be forced to treat sunburn to save your plant. Treating involves moving the aeonium to a relatively shady area and regularly spraying it with cool water to keep it hydrated.

If you notice signs of drooping leaves or wilting, be sure to add some mulch around the base of your plant to help it in retaining moisture.

If the sunburn hasn’t caused wilting or drooping of leaves, feel free to bring your aeonium back into the sunlight as long as you keep it under partial shade.

Can Aeonium Receive Too Little Sunlight?

Naturally, aeonium is a sun-loving succulent and will start to show signs of distress if it doesn’t receive enough sunlight.

If your aeonium isn’t receiving enough sunlight, you’ll start to see signs of unhealthy growth.

The most common sign of too little light is etiolation. The process of etiolation forces your plant to stretch out in the direction of light. The stretching will make it grow tall and become leggy.

red aeonium succulent in a pot.
It is very rare when growing these succulents outdoors because there is light in all directions.

If you notice signs of etiolation in your plant, the best thing to do is move your plant into a sunnier spot. Typically, when etiolation is happening, your plant is getting stressed out from trying so hard to find a source of light.

However, it is good to mention that etiolation will only happen when growing the succulent indoors. It is very rare when growing these succulents outdoors because there is light in all directions.  

Etiolation will only happen outdoors if you have grown the plant under full shade, which is not recommended.

So, before you pick a spot in your backyard garden for this succulent, make sure there are no tall plants or other obstacles around that can stop it from receiving plenty of direct sunlight.

Summary

Aeonium can tolerate a fair amount of direct sunlight, but it’s essential to be careful not to over-expose it. If you’re ever unsure about how much sun your aeonium is receiving, err on the side of caution and give it a little less light rather than too much. With a little bit of care, your aeonium will thrive under the right conditions!

Crown of Thorns — Do They Need Full Sunlight?

Crown of thorns, also known as Christ thorn or Christ plant, is a flowering succulent native to parts of Madagascar. It is part of the spurge family that features different species of succulents. Generally, these plants are low maintenance, easily adaptable, and thrive in indoor and outdoor environments. While it is relatively easy to care for a crown of thorns plant, one of the most common questions beginners ask is; does the plant need direct sunlight to survive? Let us find out.

So, does the crown of thorns need direct sunlight? The simple answer is no. While the crown of thorns is a sun-loving plant, it doesn’t require constant exposure to direct sunlight for it to survive. Typically, the succulent only requires six hours of direct sunlight daily to thrive and flower profusely. Indoor crown of thorns can still thrive under artificial light as long as the intensity is right. Failure to provide your plant with sufficient light may hinder flowering and cause etiolation. When your plant starts to produce elongated, soft new growth, it could be a sign that it is not receiving plenty of light.

This blog post discusses everything you need to know about the crown of thorns and direct sunlight. Read on to learn more.

Crown of Thorns General Light Requirements

Generally, a crown of thorns plant requires as much bright, indirect sunlight as you can provide. The better the light exposure, the more flowers you will get during the flowering season.

Red crown of thorns.
These plants are low maintenance, easily adaptable, and thrive in indoor and outdoor environments.

However, your crown of thorns will still thrive and bloom profusely as long as it gets at least five hours of bright, indirect light every day. For outdoor plants, it is recommended to place them in a spot that receives a few hours of direct sunlight every day.

For indoor plants, consider positioning them on a south-facing or west-facing spot for the best results. Avoid placing the plant in direct sunlight because the intense heat can damage your plant’s leaves.

Crown of Thorns General Temperature Requirements

The ideal temperature range for a crown of thorns plant is between 60°F and 90°F (15°C – 32°C). The plant can tolerate higher temperatures as long as there is enough moisture in the air. However, prolonged exposure to temperatures above 100°F (38°C) can damage your plant’s leaves.

During the winter months, the plant will enter a dormancy period. It is normal for the plant to shed some leaves during this time. The plant can survive temperatures as low as 50°F (10°C), but prolonged exposure to cold temperatures can damage your plant.

When caring for a crown of thorns plant, it is important to keep an eye on the temperature since extreme temperatures can damage your plant and hinder its growth.

Can Crown of Thorns Receive Too Much Sunlight?

While this succulent is sun-loving and can easily soak up intense amounts of sunlight, there are times when the intensity is too much for them. If your crown of thorns is constantly exposed to scorching, direct sunlight, you could end up with a sunburned plant.

When your succulent is sunburned, it cannot carry out photosynthesis more effectively. The primary goal should be to give your plant the correct amount of sunlight exposure. As mentioned above, this succulent tends to thrive in temperatures between 60oF and 90oF.

Crown of thorns exposed to sunlight,
Like other succulents, the crown of thorns becomes stressed when exposed to too much sunlight.

However, too much intense sunlight can harm even the hardiest succulents. The ultraviolet sun rays and the intense heat can cause your plant’s leaves to burn. Furthermore, when the sunlight is too intense, a lot of heat is generated, leading to increased evaporation, making the crown of thorns more susceptible to sunburn.

Like other succulents, the crown of thorns becomes stressed when exposed to too much sunlight. When this happens, the succulent’s first response is to generate pigments that help it adapt to too much direct sunlight.

But the pigments may not be sufficient to protect your plant over a long time. Increased exposure to direct sunlight will eventually cause harm to your crown of thorns.

A sunburned crown of thorns will generally have yellow patches on its leaves. In some cases, these patches will be brown or black, depending on how severe the sunburn is. Besides the discoloration, you can also feel a relatively rough texture compared to the usually smooth leaf surface.

A relatively light case of sunburn on your crown of thorns may be depicted with a brown or whitish discoloration, while severe burns appear as dark spots. Indoor or shaded crown of thorns is more susceptible to sunburn and, in most cases, has a slim chance of survival.

How Can You Prevent Sunburn?

If your crown of thorns is already displaying signs of sunburn, you need to respond promptly to prevent further damage.

If you are caring for an outdoor crown of thorn plants, the best thing is to move it to a location with shade. You should also water it frequently to prevent it from becoming too dry.

Water your plant early in the morning or late evening when the weather is relatively chilly. Watering your crown of thorns in the afternoon when the weather is too hot will fry the root exacerbating the sunburn issue.

Crown of thorns in a pot.
Generally, moisture in the growing container tends to evaporate faster hence the need for frequent watering.

Additionally, watering your succulents when the weather is too hot only increases the likelihood of the water evaporating before your plant can actually absorb it.

If you can’t locate a spot outdoors with enough shade to protect your succulent from direct sunlight, consider using shade cloth or net to provide it with shade and filter out the ultraviolet rays.

For indoor plants, consider moving them away from the window that receives too much sunlight. If you don’t want to move the plant, make sure you cover the window.

If you are growing your crown of thorns indoors in a growing container, it may require frequent watering than its outdoor counterpart. Generally, moisture in the growing container tends to evaporate faster hence the need for frequent watering.

Can a Sunburned Crown of Thorns Be Saved?

A sunburned crown of thorns can be saved, but it will take time for the plant to heal and recover.

The first step is to identify the severity of the sunburn. If the leaves are merely discolored or have slight brown patches, your plant has a good chance of surviving.

Sunburned crown of thorns.
If you want to restore the original color of the plant, you may be forced to prune the sunburned sections

However, if the leaves are blackened or have big brown patches, the chances of survival are relatively slim.

If you notice your plant is sunburned, immediately move it to a shaded area and water it frequently. Avoid using fertilizers during this time as they may cause further stress to your plant.

Give your plant some time to rest and heal in a shaded area before moving it back to a relatively sunny spot.

You need to keep in mind that the sunburn and brown marks on your crown of thorns plant cannot heal even if you manage to save it. So, if you want to restore the original color of the plant, you may be forced to prune the sunburned sections and wait for new growth.

How Can I Protect My Crown of Thorns from Full Summer Sun?

One of the easiest methods you can use to protect your crown of thorns from damage caused by extreme summer sun is shade cloth.

The primary purpose of shade cloth is to protect your succulent from direct sunlight while allowing just enough sunlight to pass through it.

Furthermore, the cloth prevents the buildup of excessive heat in plant tissues that could lead to the whitish or brown discoloration from the ultra-violet radiation.

Crown of thorns in a wooden pot.
The primary purpose of shade cloth is to protect your succulent from direct sunlight.

While it is crucial to gradually expose your crown of thorns to light, you need to be careful with how you do it and the amount of light you expose your plant to.

Can a Crown of Thorns Survive Under Artificial Light?

The simple answer is yes, a crown of thorns can survive under artificial light, but it will not thrive as it would under natural sunlight.

Crown of thorns plants are native to Madagascar and other parts of Africa, where they grow under relatively harsh sun. So, they are used to strong sunlight and heat.

When grown indoors, the plant doesn’t receive the same amount of sunlight it would in its natural habitat. As a result, it doesn’t grow as well.

That being said, if you want to grow your crown of thorns indoors, you need to provide it with bright artificial light. The best option is to use fluorescent bulbs that emit full-spectrum light.

Make sure the intensity of the artificial light is not too strong as it could damage the plant. Also, keep the light source at a distance of about 12 inches from the plant.

You should also rotate your plant every couple of days so that all sides of the plant receive an equal amount of light.

Conclusion

The crown of thorns is a beautiful and popular succulent that does well indoors and outdoors. However, like other succulents, it’s susceptible to sunburn, especially when exposed to too much direct sunlight.

To prevent your plant from sunburn, make sure you provide it with enough shade, especially during the hot summer days.

If your plant is already sunburned, immediately move it to a shaded area and water it frequently. With proper care, your plant will eventually recover.

Hens and Chicks: Does It Need Direct Sunlight?

A sempervivum on rocks and exposed to sunlight.

The hens and chicks plant is probably the cutest succulent out there. Native to Southern Europe and northern Africa, the petite plant is loved by gardeners worldwide for its gorgeous texture, easygoing nature, and varied shapes. It is a darling to many people. What is even more interesting is the fact that it is relatively easy to care for the succulent whether you are growing it indoors or outdoors. However, one question that always comes up is; does the hens and chicks plant need direct sunlight? We shall find out the truth in a moment.

So, does the hen and chicks plant require direct sunlight? The answer is yes and no. Generally, the hens and chicks plant thrives in full sun, but it can still do well in partial sun. The need for lighting mostly depends on the variety and species of the plant you have and its natural habitat. Ideally, you should always strive to provide your sempervivum with at least four hours of direct sunlight. Overexposure to sunlight can lead to severe sunburn, which is a big problem to deal with in the long run.

Do you have a hens and chicks plant at home but wondering whether or not you should expose it to full sun? You have come to the right place. Read on to find out everything you need to know.  

The Hens and Chicks Plant General Light Requirements

The hens and chicks plant is generally a sun-loving succulent. It does best when exposed to full sun but can still tolerate partial sun. However, the amount of sunlight your plant gets will depend on the variety you have and its natural habitat.

For example, varieties that are native to shady areas will not do well when exposed to direct sunlight for long periods.

Hens and chicks exposed to sunlight,
It does best when exposed to full sun but can still tolerate partial sun.

The best way to know how much light is ideal for your hens and chicks plant is to observe it closely. If the leaves start to turn yellow or brown, it is an indication that the plant is getting too much sun.

On the other hand, if the leaves are pale green, it means that the succulent is not getting enough lighting.

In general, you should aim to provide your plant with at least four hours of sunlight every day. If you are growing the plant indoors, place it near a sunny window. If you are growing it outdoors, choose a spot that gets plenty of sunlight in the morning and partial shade in the afternoon.

Hens and Chicks Sun or Shade?

To understand whether you need to grow your succulent in full sun or partial shade, you need to figure out what these terms mean.

Typically, when a plant grows in a spot where there is no shade and receives between 10-12 hours of direct sunlight every day, it is referred to as full sun. The number of sunshine hours may reduce drastically in winter.

For a hens and chicks plant, at least eight hours of direct sunlight can still be considered full sun.

Half shade or partial sun is achieved when your succulents receive no more than six hours of direct sunlight every day. It means that the plant could be exposed to plenty of morning sunlight but shaded from the scorching afternoon sun. Or they only get sunlight in the early hours of the morning and late hours of the evening.

Hens and chicks plant exposed to morning sunlight,
Choose a spot that gets plenty of sunlight in the morning and partial shade in the afternoon.

The case when this succulent doesn’t receive any form of direct sunlight is referred to as full shade. This term can also be used when the sempervivum grows under a tree and is only exposed to scattered sunlight.

Typically, you want to keep your hens and chicks plant under partial sun conditions, cutting the maximum number of hours your plant is exposed to direct sunlight to six a day. This way, your plant can still thrive while avoiding sunburn issues.

Can a Hens and Chicks Plant Receive Too Little Light

Like any other plant, a hens and chicks plant can also receive too little light. When this happens, the leaves of your succulents will start to turn pale green. The problem is not lethal in most cases, and your plant will survive as long as you provide it with enough exposure to light.

However, if the lighting conditions do not improve, your plant will eventually start to stretch out and become leggy. This condition is also referred to as etiolation.

When this happens, the stem of your plant will become thin and elongated, while the leaves will grow further apart from each other. Your plant will also produce fewer offsets.

Ideally, you want to avoid this problem by providing your plant with enough lighting. If you notice that your plant is starting to stretch out, move it to a spot where it can receive more light.

You can also try to increase the number of hours your plant is exposed to sunlight every day. If this is not possible, you can supplement the natural light by using artificial grow lights.

The Hens and Chicks Plant and Sunburn

Generally, the hens and chicks plant enjoy a lot of sunlight. As mentioned earlier, it requires up to six hours of direct sunlight every day to stay healthy.

This is especially true for the sempervivum because it has vibrant, bright colors that will only show if it receives sufficient exposure to sunlight. When the plant gets exposed to enough sunlight, it becomes “happily stressed” and displays its most beautiful color variations.

However, the succulent is still prone to sunburn. Typically, the hens and chicks plant thrives in temperatures between 60oF and 90oF. If it is exposed to extremely hot sun rays, it may develop irreversible sunburn on its leaves.

Sempervivum plant exposed to sunlight.
When the plant gets exposed to enough sunlight, it becomes “happily stressed” and displays its most beautiful color variations.

Fortunately, this succulent is relatively easy to grow because it displays signs of unhappiness and stress pretty quickly. When the plant is stressed due to excessive exposure to sunlight, it will start to develop discolored patches on its leaves.

The patches will be white, brown, or dark red at the early stages of sunburn, depending on the type of sempervivum you have. If you notice early signs of sunburn but do nothing about it, it transitions into a full-blown problem.

Severe sunburn on your hens and chicks plant will mostly show up as black patches on the edges of the leaves that slowly spread towards the center.

If nothing is done, the leaf will eventually dry out. Indoor sempervivum plants tend to turn golden brown or yellow when they are burning from too much direct sunlight.

How Does Sunburn Affect Hens and Chicks Plant?

Leaves that are severely sunburned will eventually die and fall off the plant. If this happens, your succulent may not be able to produce offsets or flowers.

In some cases, the entire plant may die if exposed to too much sunlight for an extended period.

If you notice that your hens and chicks plant is sunburned, act quickly to save your plant. The first thing you want to do is move it to a spot where it can receive indirect sunlight or artificial light.

Sempervivum plant with water droplets.
Another way to prevent sunburn is to water your plant more frequently.

You also want to make sure that the succulent is not placed in an area where it will be exposed to hot afternoon sun rays.

Once you have moved your plant to a safer location, check the leaves for any sign of damage. The leaves will eventually heal and produce new offsets if the sunburn is not too severe. However, if the damage is too severe, the leaves will fall off, and your plant may not recover.

How to Prevent Sunburn on a Hens and Chicks Plant

In order to prevent sunburn, it is important to acclimate your plant before exposing it to direct sunlight. This process can take weeks or even months, depending on the type of succulent you have.

The best way to acclimate your hens and chicks plant is to place it in an area where it can receive indirect sunlight for a few hours every day. Gradually increase the amount of time the plant is exposed to sunlight until it can tolerate six hours of direct sunlight per day.

Closeup image of sempervivum plant.
You can also prevent sunburn by using a light-colored pot.

You also want to make sure that the succulent is not placed in an area where it will be exposed to hot afternoon sun rays. If possible, try to find a spot where it can receive morning or evening sun.

You can also prevent sunburn by using a light-colored pot. A white or light-colored pot will reflect some of the sunlight and prevent the plant from getting too much direct light.

Alternatively, use a pot with a built-in sunshade to protect your succulent from the harsh afternoon sun.

Another way to prevent sunburn is to water your plant more frequently. This will help keep the leaves from drying out and prevent them from getting damaged by the sun.

Conclusion

While the hens and chicks plant does need some direct sunlight, it can also tolerate a fair amount of shade.

If you want to make sure your plant is getting enough light, try positioning it in an area where it will receive morning sun and afternoon shade.

You can also prevent sunburn on your plant by using sunscreen or light-colored planting pot. Thanks for following along with our series on the hens and chicks plant!