Want to Make Your Own Succulent Wreath? Here’s How!

Close-up image of a succulent wreath.

Succulents have taken the world by storm, and for a good reason – their unique shapes, vibrant colors, and low-maintenance nature make them an ideal choice for indoor and outdoor decor. If you’re looking for a fun and creative way to display your favorite succulent varieties, why not create a beautiful succulent wreath?

So, how can you create your own succulent wreath? Everything starts with selecting the right plants and materials for the project. Choose the perfect succulent species and varieties to create a beautiful color palette. Gather basic materials like wire or twine, scissors, pruning shears, and heavy-duty glue for the project. Start by cutting off pieces of wire or twine to make the base of your wreath, then shape it into a circle. Secure the ends with glue and let it dry for at least 24 hours. Place succulents on the outer edges of the hoop in a pattern that appeals to you, making sure to use glue to secure them firmly. Once your design is complete, water your succulents as needed and hang up the finished wreath for all to admire.

This blog post outlines a step-by-step guide to making a beautiful succulent wreath. Read on to find out everything you need to know.

What Is a Succulent Wreath?

Before diving into succulent wreaths, let’s briefly explore succulent plants. Succulents are diverse plants known for their thick, fleshy leaves or stems that store water. They come in various shapes, sizes, and colors, making them perfect candidates for wreath-making.

A succulent wreath is a living, circular arrangement created from different succulent plants. Instead of traditional foliage or flowers, these wreaths feature many succulent cuttings rooted or secured to a base, such as moss or a wire frame.

A christmas succulent wreath.
These plants are known for their resilience and ability to store water, making them low-maintenance plants.

The result is a lush and vibrant display that can be hung on doors and walls or used as a centerpiece.

Succulent wreaths come in different shapes, colors, and textures, allowing you to create visually striking wreaths that stand out.

These plants are known for their resilience and ability to store water, making them low-maintenance plants. Once established, succulent wreaths require minimal care.

With proper care, succulent wreaths can remain vibrant and attractive for months or years, providing lasting beauty to your space.

How Do I Make My Own Succulent Wreath?

Now that you know what a succulent wreath is, it’s time to discover how to make your own. Here are the steps you’ll need to take:

Step 1: Pick the Right Plants

Everything starts with picking the right plant species for your succulent wreath. Your succulent species will largely depend on your taste and the space you’re putting it in.

Succulents come in various colors, shapes, and sizes, giving you enough room for different looks. Once you’ve chosen the species for your wreath, it’s time to pick out individual plants.

For instance, if you’re making a wreath for an outdoor space, pick hardy and drought-tolerant varieties such as Sempervivum, Echeveria, or Sedum.

A kid with 3 succulent on hand.
Once you’ve chosen the species for your wreath, it’s time to pick out individual plants.

If you want to create a succulent wreath indoors, soft-leaved varieties such as Haworthia or Crassula are ideal.

Step 2: Gather Materials

You’ll also need to gather the materials necessary for creating a succulent wreath. Commonly used materials include wire, twine, scissors, pruning shears, and heavy-duty glue.

It’s also a good idea to have additional supplies, such as soil, wood chips or bark, and rocks for decoration.

The good thing is that most of these items can be found in hardware stores. Alternatively, you can find succulent frames and other supplies online from specialty stores or craft shops.

Step 3: Assemble the Base

Once you’ve gathered all the materials and plants, it’s time to construct the wreath base. Start by cutting off pieces of wire or twine and shaping them into a circle.

Secure the ends with glue and let it dry for at least 24 hours before moving on to the next step.

A succulent materials.
This will help give the wreath its shape and texture, resulting in a more attractive display.

The best way to ensure your wreath is secure and well-shaped is to use a spool of wire or twine and wrap it around the base in a spiral pattern. This will help give the wreath its shape and texture, resulting in a more attractive display.

Step 4: Take Stem Cuttings

Once you have finished assembling the base, start taking stem cuttings of the succulent plants you’ve chosen.

This is done by removing two to three inches of the stem from each plant, then letting them dry and callus for several days before planting them in the wreath.

Consider taking the cuttings for at least two days before creating the wreath. Ensure the cuttings are about two inches long, and remove the lower leaves from the cuttings. The same way you would do if you were propagating them in new pots.

Step 5: Assemble Your Wreath

Now that your stem cuttings are ready, it’s time to assemble the succulent wreath.

Place the succulents in a pattern around the outer edges of the hoop, leaving space for other decorations. Secure each one with glue and ensure no gaps exist between them.

Take time to lay out the cuttings in a unique arrangement you wish to see. Aim for density and balance.

A person who assembles the succulent wreath.
Take time to lay out the cuttings in a unique arrangement you wish to see.

You can add extra decorations like stones, wood chips or bark, and small figurines to give the wreath more personality.

Step 7: Secure the Plants with Pins

Sometimes, glue isn’t enough to hold the stem cuttings in place. To ensure everything is secure and tightly held together, use pins or small nails to fasten them to the base. This will help prevent accidental falls and keep your succulent wreath looking great for longer.

Step 8: Water Your Succulent Wreath

Once you have assembled your succulent wreath, it’s time to water it. Succulents need very little water – a few drops every few weeks is usually enough. Never over-water succulents since they can lead to root rot and other issues.

In fact, you should treat your succulent wreath like newly propagated succulents. The best way to water them is by dipping the cut ends of each stem in lukewarm, slightly salted water for a few seconds.

This helps prevent bacteria from forming and ensures you get the most out of your succulent wreath.

Step 9: Hang Up Your Succulent Wreath

The last step is to hang up your wreath for all to admire. Get creative with where and how you display your creation – the possibilities are endless! Have fun and enjoy your beautiful succulent wreath.

A succulent wreath hanging.
The last step is to hang up your wreath for all to admire.

How Long Does It Take to Make a Succulent Wreath?

Depending on the size and complexity of your succulent wreath, it can take anywhere from half an hour to several hours.

If you are new to making wreaths, it is best to start with a smaller design and then move on to bigger and more complicated arrangements once you get better at it.

You may also consider gathering all the materials and plants ahead of time to save yourself some time. Once you have the materials and plants at hand, the actual process of making a succulent wreath should take an hour or two.

Do I Need Professional Tools to Make a Succulent Wreath?

No, you don’t need professional tools to make a succulent wreath. All you need is some wire, twine, scissors, pruning shears, and heavy-duty glue.

You can also use pins or small nails for extra support if needed. A good pair of garden gloves are also recommended for safety.

Be bold and ask for help from a professional gardener if you encounter any issues.

You can also talk to your friends or family members who have experience making succulent wreaths for help and advice. With the proper guidance, you’ll be able to make a unique succulent wreath with ease!

Can I Put My Succulent Wreath Outdoors?

Yes, you can put your succulent wreath outdoors if it is in a sheltered spot and gets enough indirect sunlight.

Consider choosing hardy and drought-tolerant species such as Sempervivum, Echeveria, or Sedum for outdoor use.

You should also monitor the weather conditions and bring the wreath indoors if it’s too cold or wet.

What Kind of Maintenance Does a Succulent Wreath Need?

A succulent wreath doesn’t need much maintenance, but it’s essential to water and monitor it regularly.

Generally, you should water the wreath every few weeks with just a few drops – never over-water since this can rot the roots of the plants.

You may also want to remove dead or dying leaves from the wreath to ensure it looks neat. Furthermore, you should rotate the wreath every few months so that all sides get equal sunlight.

This will help prevent your plants from becoming lopsided and keep them looking their best. With proper care and maintenance, a succulent wreath can last for years.

Final Thoughts

Making your succulent wreath is a creative and enjoyable process everyone can try. You only need suitable materials, plants, and tools, and you’ll have a beautiful piece of living art in no time.

With minimal care and maintenance, your succulent wreath will remain vibrant and attractive for months or years.

What Are the Hottest Succulent Landscaping Trends Right Now?

A small succulent selection.

Succulents have taken the world of landscaping by storm, and it’s not hard to see why. Their beautiful shapes, vibrant colors, and low-maintenance requirements make them a sought-after addition to any outdoor space. Modern gardeners always seek unique landscaping ideas, eye-catching color schemes, and innovative ways to incorporate succulents into their outdoor spaces. If you want to refresh your garden or create a stunning landscape that stands out, you’ve come to the right place.

So, what are some of the hottest succulent landscaping trends right now? One of the most popular trends is to create succulent gardens. This type of garden typically features various succulents, such as aloe, agave, and sedum, planted close together in beds or containers. Gardeners add more rocks to their gardens to create an artistic and whimsical look. They also grow succulents in hanging baskets suspended from walls or tree branches, adding a unique element to their outdoor spaces. Some are even designing living walls with succulents as the main feature. This creative way of displaying plants turns any wall into a vibrant green gallery filled with texture and color.

In this blog post, we’ll explore the hottest succulent landscaping trends currently making waves in the gardening world and inspire you to create your succulent paradise.

So, buckle up and prepare to be inspired as we explore the most exciting succulent landscaping trends that will transform your garden into a breathtaking oasis.

Trend #1: More Rocks as Plants in Gardens

This is one of the hottest succulent landscaping trends that has gained immense popularity recently. It involves incorporating rocks as a prominent feature in garden designs, mimicking the appearance of plants or serving as a backdrop for succulents.

This trend combines the beauty and texture of succulent plants with the natural and aesthetic appeal of rocks.

The trend has gained popularity due to its unique and visually striking appearance. It offers low-maintenance landscaping since rocks require less care than traditional plants.

Succulents are known for their ability to thrive in arid conditions, making them suitable for rock gardens.

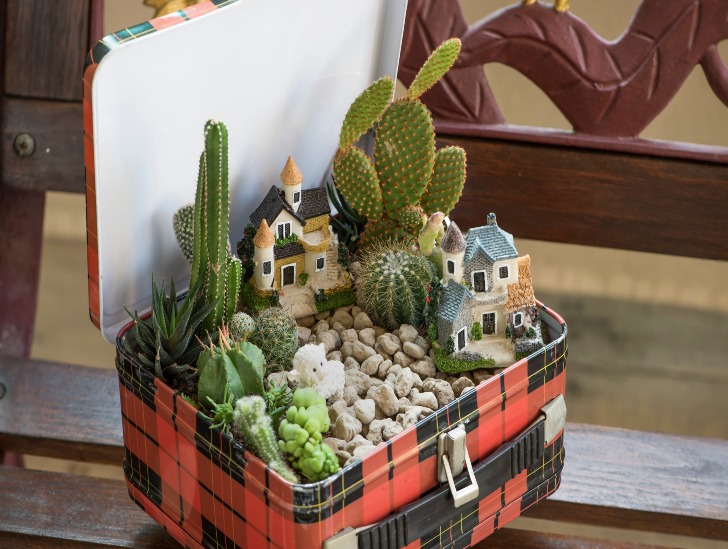
A succulent box arrangement.
This trend combines the beauty and texture of succulent plants with the natural and aesthetic appeal of rocks.

The combination of rocks and succulents creates a harmonious and natural-looking landscape, often with a contemporary or Zen-inspired aesthetic.

To implement this trend, you must start by selecting an area where you want to create a rock garden. This can be a small section or an entire garden bed.

Clear the area of any existing plants or debris, level the ground, and choose a variety of rocks in different sizes, shapes, and colors to add visual interest and texture to the garden.

Arrange the rocks strategically, creating clusters or focal points within the garden. Now select a diverse range of succulent plants that are well-suited for your climate and the conditions of the rock garden. Some popular choices include echeverias, sedums, and aeoniums.

Plant the succulents in the gaps between the rocks, ensuring they have enough space to grow and thrive.

Consider adding additional elements such as gravel, sand, or mulch to enhance the overall look of the rock garden.

Trend #2: Vertical Succulent Gardens

Vertical succulent gardens are a great way to heighten outdoor spaces and maximize small areas with limited ground space. This trend is prevalent in urban settings where balcony gardening is becoming increasingly popular.

Homeowners are creating vibrant vertical walls of succulents, which offer an attractive and unique display.

Select the suitable container or wall structure type for your succulent plants to create a thriving vertical garden.

A basic frame can be constructed from wood or metal to support the planters where the succulents will grow. Select lightweight planters that are easy to install and hang.

Consider the amount of light your plants will get when choosing succulents for this type of garden. Be sure to select a variety of species with different shapes, sizes, and colors for maximum impact.

Once you have selected your plants and container, it’s time to assemble them on the wall. Start by arranging the planters in a pattern you like, then securely attach them to the wall.

Fill each planter with soil, carefully place the succulents in their new homes, and water them regularly. You can add decorative elements such as rocks or driftwood for an extra visual impact.

A succulent wall art.
Once you have selected your plants and container, it’s time to assemble them on the wall.

In addition to being visually stunning, vertical succulent gardens are a great way to take advantage of limited space and create an eye-catching display in any outdoor area.

Trend #3: Display Succulents in Rustic Containers

Another popular trend is to display succulents in rustic containers. This gardening style combines plants’ natural beauty with the charm and unique character of vintage or antique furniture pieces.

The key to this trend is finding attractive containers to enhance succulent displays. Containers can be made from various materials, such as wood, metal, ceramic, and terracotta.

Look for vintage or antique furniture pieces at flea markets, garage sales, or online stores to find unique containers you can repurpose.

Once you have selected your containers, fill them with soil and arrange the succulents in an attractive pattern.

A airplant in a wood.
Containers can be made from various materials, such as wood, metal, ceramic, and terracotta.

To add texture and interest, you can add natural elements such as stones, shells, organic mulch, or driftwood.

This trend is perfect for those who want to create a unique display of succulents with a rustic and vintage feel. It’s also great for adding a touch of character to any outdoor space.

Trend #4: Create a Wellness Moment with Aloe Vera

This is a concept that focuses on utilizing aloe vera plants to enhance well-being and promote a sense of tranquility. Aloe vera is a succulent plant known for its medicinal properties and numerous health benefits.

Incorporating aloe vera into your daily routine can create a soothing and rejuvenating experience.

Cultivating an indoor aloe vera garden can bring the soothing presence of nature into your home. Select a sunny spot near a window where your aloe vera plant can receive ample sunlight.

Aloe vera plants are relatively low-maintenance and can thrive in well-draining soil. Plant your aloe vera in a suitable pot or container and ensure proper drainage.

By nurturing and caring for your aloe vera, you can create a peaceful green corner that adds beauty to your living space.

Furthermore, you can use fresh aloe vera gel in various ways to benefit your health. The gel has numerous applications, such as in skin care regimens or orally boosting immunity and digestion.

Creating a wellness moment with aloe vera is a great way to take advantage of this versatile plant’s benefits while enjoying its natural beauty.

Trend #5: Growing Edible Succulents

Did you know that some succulents are edible? Growing edible succulents is an excellent way to take advantage of these plants’ many benefits while adding a touch of flavor to your meals.

Edible succulent varieties include sempervivums, Sedum rubrotinctum, and Opuntia ficus-indica. These hardy plants are easy to grow in well-drained soil and require little maintenance.

You can make your edible succulent garden outdoors or on a sunny windowsill.

A group of sempervivum exposed to sunlight.
These hardy plants are easy to grow in well-drained soil and require little maintenance.

Select a variety of succulents that will add flavor and texture to your meals, such as sempervivums for salads, Sedum rubrotinctum for adding to soups, or Opuntia ficus-indica for a unique topping on tacos.

To take your edible succulent garden to the next level, consider adding culinary herbs and other vegetables to create an outdoor kitchen sanctuary.

This is a great way to enjoy fresh produce while adding beauty and interest to any outdoor space.

Trend #6: Combining Succulents with Cacti for Color and Texture

Most cacti plants make ideal bedfellows with succulents due to their similar needs and preferences for dry, arid climates. Cacti come in different shapes, sizes, and colors that can add visual interest to your succulent garden.

Combining cacti with succulents creates an eye-catching display with unique textures and vibrant hues. Select a variety of cacti species and look for interesting shapes, such as barrel, ball, or columnar.

Arrange the plants in a pleasing pattern that will draw attention to your creation. Add decorative elements such as driftwood, rocks, and shells to add texture and interest.

This trend is perfect for creating an attractive succulent garden that will impress and delight. The combination of cacti and succulents will bring life to any outdoor space.

Trend #7: Go Bold with Blue Agave

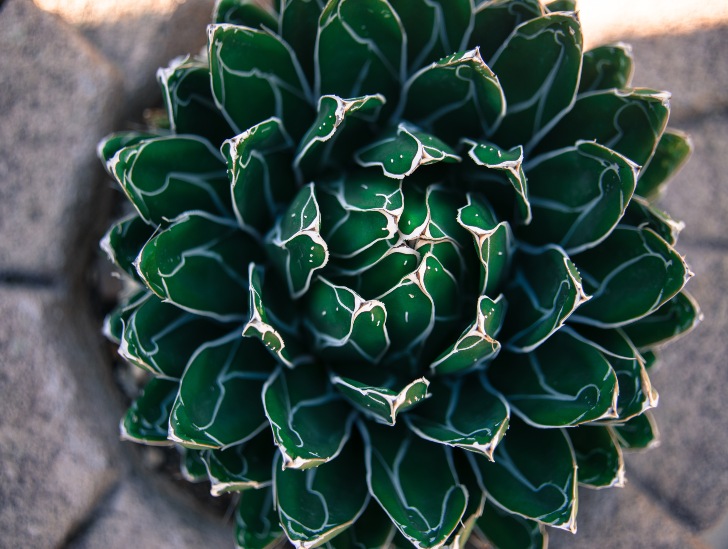
Blue agave is a bold and beautiful succulent that can add a dramatic statement to any outdoor space. This type of agave is native to Mexico, and it has thick, spiky leaves that feature stunning shades of blue-green with white stripes.

A queen victoria agave plant.
This type of agave is native to Mexico, and it has thick, spiky leaves.

Blue agave plants are easy to care for and require minimal maintenance. They thrive in full sun exposure and do best in well-draining soil kept slightly dry.

For an added touch of drama, consider planting blue agave in a symmetrical pattern and adding decorative elements such as rocks or shells to complete the look.

Final Thoughts

These are just some of the hottest trends in modern succulent landscaping. Whether you opt for a rock garden or living wall, these trendy ideas will help transform your outdoor space into a vibrant oasis. So, get inspired and get growing.

How to Wire Bonsai: A Beginner’s Guide

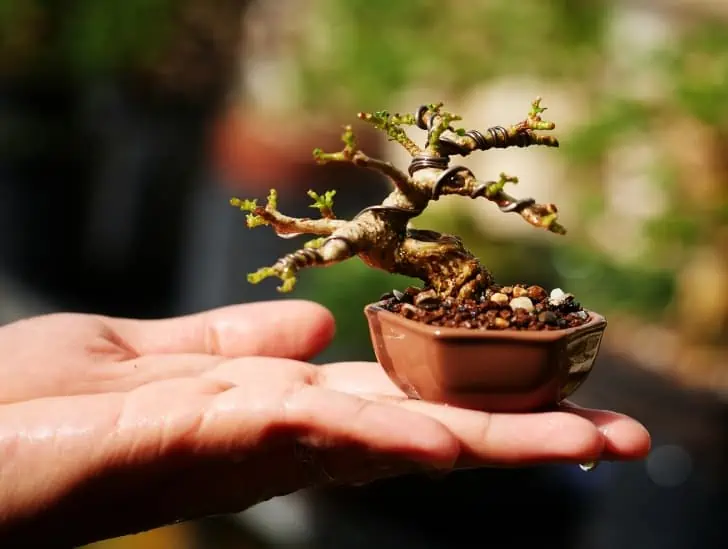
A small wired bonsai on hand.

Wiring is a fundamental technique for training and shaping a bonsai tree’s growth. It involves bending the trunk and branches into the desired shape by winding wire around them. While beginners might find wiring intimidating, if mastered, it is a satisfying skill that can turn your bonsai into a beautiful piece of art.

So, how do you wire a bonsai tree? The first thing to do is locate pairs of similar-sized branches you will wire. Next, wind the wire firmly around the branch, starting from where it joins the trunk. You will wind the wire around the trunk until you reach the chosen branch pairs and then continue wiring to the end of that branch. Lastly, you will bend into the desired shape. You can now repeat this process for the other selected branch pairs.

Whether you are a skilled bonsai lover or just getting started, this blog post will discuss everything you need to know about wiring bonsai. Read on to learn.

How To Prepare Your Bonsai Tree for Wiring

Before getting into the details of how to wire bonsai, it’s essential to familiarize yourself with how to prepare your tree for wiring.

There are several steps for prepping bonsai for wiring, including removing unwanted leaves and branches, pruning opposing branches, and removing crotch growth.

The first step in preparing your bonsai for wiring is cutting the leaves off every branch’s first half inch. This enables the wire to grasp the branch securely and keeps the wire from falling or hurting the branch.

Use a pair of pruning shears to carefully cut away the leaves and branches, not harming the surviving branch.

Next, trim the branch’s crotch growth if there is any. The buds or tiny branches that sprout at the joint of two branches are called crotch growth.

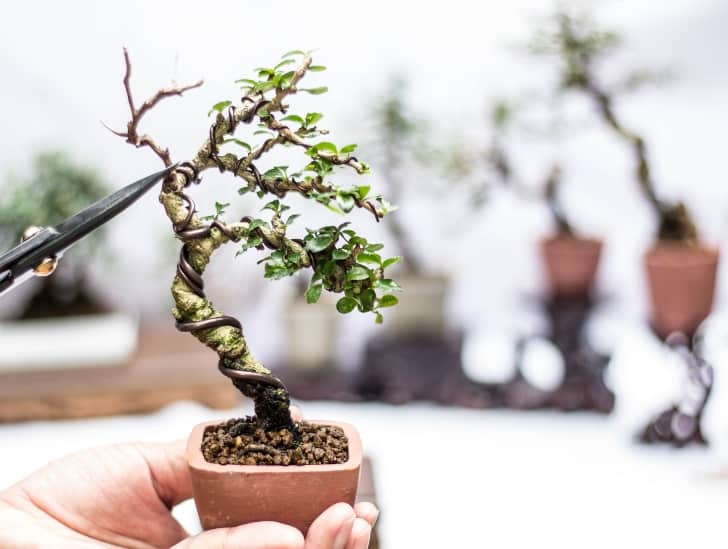
A bonsai tree wrapped in a wire.
It’s essential to familiarize yourself with how to prepare your tree for wiring.

These growths could make weak spots in the branch and mess with wiring. Clearing crotch growth helps achieve sturdier and more stable branches that are easier to wire.

Lastly, cut any opposing branches to avoid structural issues with the branch. Opposing branches are those that develop on a branch directly crosswise from one another.

As the tree grows, such branches may lead to structural issues like an inverse taper. You can prevent these problems by carefully pruning out one of the opposing branches, keeping the other one intact.

It’s crucial to ensure your bonsai is healthy and watered well before wiring it. A malnourished or dehydrated tree might not withstand the wiring process and is more at risk of damage.

So, before designing your bonsai, ensure it gets enough water and grows well.

Step-By-Step Guide to Wiring Your Bonsai Tree

Now that you have finished preparing your bonsai for wiring, it is time to wire it. Here is a step-by-step guide on how to wire a bonsai.

Step 1: Locate pairs of same-sized branches

The first thing  you need to do is to locate pairs of branches of similar size that are growing next to each other. You will wire these branches together to get the desired form and shape.

Wiring branches in pairs helps to secure the wire to the bonsai, thus holding the branches firmly in place.

A hand pointing at the wires at the bonsai tree.
You will wire these branches together to get the desired form and shape.

Selecting branches of comparable sizes helps you to choose the correct wire gauge that suits both branches. This ensures it is thick enough to secure both branches but not so thick that it could break them in the process.

Step 2: Apply 3 bends of wire to the first branch

Wind the wire firmly around the branch, starting from where the branch joins the trunk. You should wind the wire thrice at a 50–60 degree angle.

Ensure the wire is level with the branch as you wind it and be careful not to disturb or damage the surrounding leaves.

Once the wire has been wound three times, it should be sturdy enough to be twisted in the opposite direction towards the pair branch.

Step 3: Wire along the length of the paired branch

Wind the wire around the trunk until it reaches your chosen pair of branches, then proceed to the branch’s apex.

Always keep your turns at a 50–60 degree angle to prevent hurting the surrounding foliage. With this angle, the wire can bend as required while retaining the turn.

Step 4: Finish wiring the first branch

You can now finish wiring the branch you started with to the end.

Step 5: Bend the branch into the desired position

Applying little pressure, bend the branch gently into a natural curve. Make sure you retain the leaves on the outside of the curve and prune any that appear inside of the bends.

With the branch, try to imitate how a tree grows naturally by giving it a natural movement. If you are working on younger bonsai, allow the branch some flexibility since the bends will look more natural as the tree and the branches grow.

A copper wire at the bonsai.
Don’t be alarmed if you hear a slight snap or pop in a branch.

Overbending or forcing the branch into place can damage it or its bark. So, take your time and be gentle on the branch, making little modifications until you attain the desired shape.

Don’t be alarmed if you hear a slight snap or pop in a branch. This usually comes from the branch’s outer layer, which almost always heals if less than 50% of its diameter is broken. 

If a branch does break, leave it alone and use a wound sealant to fasten the healing process. 

Step 6: Repeat

Repeat the same procedure for the other branches, wiring them in pairs to maintain the tree’s symmetry and balance.

Take your time on each pair, ensuring the branches are well-positioned, the wire is tight, and the leaves are properly aligned to give your bonsai a natural look.

How to Remove Bonsai Wire

You must be as cautious when removing bonsai wire as you were when fixing it since you may cause as much damage either way. There are two methods used to remove bonsai wire;

The first is to unravel it. However, this can be dangerous since the branch may bend and break if you don’t support the rear end of the wire as you unravel the front.

You can use this technique, but you must be extra careful to learn how to do it right.

The second way to remove bonsai wire is by cutting it off using specialized cutters. These wire cutters have a rounded snout to prevent cutting the branch or trunk during wire removal. 

The safest and easiest way to remove wires is to cut them off in sections at each rotation point. Some people unwind wire so they can straighten it out and reuse it.

However, this is not advisable since once a wire is used, it becomes weak and cannot hold equally well.

Besides, making it perfectly straight again is impossible, so if you reuse it, its tiny knots may cling to the bark and bruise or damage your bonsai.

Common Mistakes Made When Wiring Bonsai

Using incorrect wire thickness

You may damage your bonsai if you use a wire that is either too thick or too thin. If the wire is excessively thick, it may cut into the bark and injure the tree, leaving unattractive scars.

Similarly, if the wire is thick enough, it won’t provide the support the branches need, so they may not bend properly.

A hand wiring a bonsai.
You may damage your bonsai if you use a wire that is either too thick or too thin.

The rule of thumb is to use a wire about a third of the diameter of the trunk or branch you are wiring.

Wiring part of the bonsai

Beginners frequently make the mistake of wiring half of a bonsai and leaving the other half for later. If you forget to wire the second half, your bonsai may prioritize the unwired branches over the wired ones.

This is especially true for junipers, and it might lead to the wired part dying because bonsai prioritizes the development of the unwired branches.

Leaving the wire on for too long

If the wire is left on the branch too long, it can cut into the bark and cause permanent scarring or injure the tree.

Therefore, you need to remove it as soon as your bonsai takes on the desired shape. This can take anywhere between a few weeks to months, depending on the type and size of the tree.

A tiny wire bite is okay in species with rough bark, but severe scarring might harm the branch’s structure.

Wiring in the wrong season

Wiring your bonsai at the wrong time could damage it. The best time to wire a tree is during its active growing season, generally from early spring through late summer.

A bonsai indoor.
Wiring your bonsai at the wrong time could damage it.

Wiring during the dormancy period may result in the death of the branches since the tree has a lower capacity to repair any damage.

Final Thoughts

Wiring is essential for achieving and maintaining your bonsai’s desired form and shape. With suitable wire, perfect timing, and proper preparation, wiring can help you attain the ideal look and improve the health of your bonsai.

You can encourage your tree’s growth and health while enhancing its natural beauty by following the above guide and avoiding common mistakes.

With enough practice and patience, you may master the skill of bonsai wiring and create stunning bonsai you will admire for years.

Pumice or Perlite: The Ultimate Guide for Succulent Lovers

A pumice on a cactus pot.

Most succulent lovers know that their beloved plants hate excess moisture. Too much moisture can lead to root rot and other serious problems. That’s why it’s so important that you choose the right soil for your plants. Two of the best choices for succulent soil amendment options are pumice or perlite. Both are inorganic and have neutral pH values critical in reducing soil density. They don’t decompose and can easily turn poor soil into excellent succulent soil.

But which one is the better choice for your succulents? Well, the truth is that both pumice and perlite are good options. It all depends on what you need from them and what kind of succulents you have. Pumice is a lightweight volcanic rock that has tiny air pockets throughout its structure. These air pockets help create an environment that drains well while providing the necessary moisture for your succulents to thrive. Perlite is a siliceous volcanic glass that has been heated and expanded, forming tiny air pockets throughout the material. These pockets make perlite so effective at aeration and drainage in the soil. The difference between the two is that pumice is denser than perlite, making it better for succulents that need more moisture in their soil.

This blog post covers everything you need to know about perlite and pumice so you can decide which is best for your succulents. So, let’s get started!

Pumice

Pumice, a volcanic rock with excellent horticultural properties, has emerged as a favored soil amendment option for succulent enthusiasts.

Pumice is a lightweight, porous volcanic rock formed when lava rapidly cools down after being ejected from a volcano. It mainly comprises highly vesicular volcanic glass and various minerals such as feldspar and quartz.

Due to its unique structure, pumice exhibits exceptional drainage and aeration properties, making it an ideal soil amendment option for succulents.

A closeup image of a pumice.
It is commonly extracted through open-pit mining or collected from volcanic deposits.

Pumice is primarily sourced from volcanic regions around the world, including areas with active and dormant volcanoes. It is commonly extracted through open-pit mining or collected from volcanic deposits.

Once mined, the pumice is crushed into various particle sizes suitable for horticultural use.

What Are the Advantages of Pumice?

Below are some of the advantages of pumice over perlite:

  • Excellent Drainage: Pumice’s porous nature allows water to flow freely through the soil, preventing excess moisture retention and reducing the risk of root rot, a common problem in succulents.
  • Enhanced Aeration: The air-filled pores in pumice facilitate the exchange of oxygen and carbon dioxide in the soil, promoting healthy root growth and preventing root suffocation.
  • pH Neutral: Pumice is pH-neutral, which helps maintain a balanced pH level in the soil, preventing alkalinity or acidity imbalances that could harm succulents.
  • Lightweight: Pumice’s lightweight nature makes it easier to handle and work with, especially when potting or repotting succulents.
  • Longevity: Pumice is highly durable and does not break down easily, providing long-term benefits to succulent plants.

Potential Drawbacks of Pumice

Pumice also has some potential drawbacks that should be kept in mind.

  • Cost: Pumice is typically more expensive than perlite, making it a more costly soil amendment option. However, it’s longevity and beneficial properties often outweigh the initial cost.
  • Availability: The availability of pumice may vary depending on your region, so it may not always be easy to find.
  • Limited Water Retention: Pumice’s excellent drainage properties can be a disadvantage in areas with extremely dry climates or for succulents that require higher moisture levels. Gardeners must monitor watering carefully to avoid underwatering.
  • Particle Size: Pumice usually comes in different particle sizes, making it difficult to find the right size for your succulents.

Considerations for Succulent Gardeners

There are some important factors to consider when deciding whether pumice or perlite is the right soil amendment option for you. Here are the most important considerations for pumice.

Panda plant in a soil.
There are some important factors to consider when deciding whether pumice or perlite.
  • Particle Size: It is important to select pumice with appropriate particle size for succulent cultivation. Finer grades (3-6 mm) are suitable for smaller containers and seedlings, while coarser grades (6-10 mm) are better suited for larger containers and more established plants.
  • Watering Frequency: Since pumice has excellent drainage, it may necessitate adjustments to watering practices. Succulents potted with pumice may require less frequent watering than traditional soil mixes.
  • Nutrient Availability: While pumice does not provide significant nutrients to plants, it allows for better nutrient uptake by preventing waterlogging and improving root health. Succulent gardeners should supplement with appropriate fertilizers to ensure optimal plant growth.

Perlite

Perlite, also known as sponge rock, is a mineral made from volcanic glass. It usually contains about 70% silicon oxide and other minerals such as sodium, iron, aluminum, and potassium.

Typically, the unique combination of these minerals can be recognized by their colors which are either dark grey or black.

Before the raw perlite can become usable, it is processed in a kiln and then allowed to cool before it is crushed.

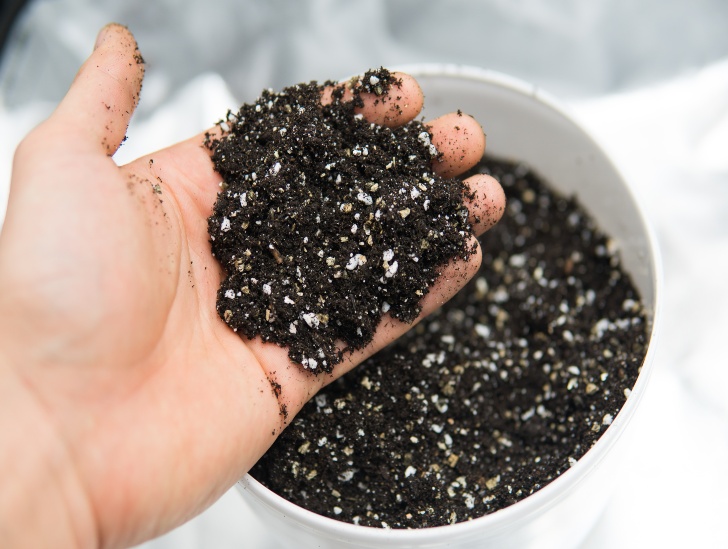
A soil with perlite.
It is known as sponge rock, is a mineral made from volcanic glass.

When the raw perlite is heated, it expands and becomes porous, which gives succulents great drainage properties.

The final product is a porous white ball. In fact, the easiest way to recognize perlite is by its white colour.

There are three different sizes of perlite; coarse, medium, and fine. Whatever you choose mostly depends on your needs. Some gardeners even prefer a blend of all three sizes for their succulent soil.

Perlite is predominantly used in hydroponics and as a succulent mix because it improves drainage and aeration. The main downside of perlite is that it creates perlite dust that can be unhealthy for your respiratory system.

Advantages of Perlite

Some of the key advantages of perlite include:

Fertilizer on the soil mix.
Perlite particles have insulating properties that help protect succulent roots from extreme temperature fluctuations
  • Optimal Drainage: Perlite’s porous nature promotes excellent drainage, preventing waterlogging and reducing the risk of root rot in succulent plants. It allows excess water to flow freely through the soil, maintaining optimal moisture levels for healthy root development.
  • Enhanced Aeration: The air pockets in perlite facilitate oxygen exchange within the soil, promoting robust root growth and preventing suffocation of succulent roots.
  • Lightweight: Perlite’s lightweight nature makes it easy to handle, blend with other soil components, and amend existing soil mixes. It provides structural stability to potted succulents and aids in root establishment.
  • pH Neutral: Perlite is pH neutral, which contributes to a balanced soil pH for succulent plants and is essential for optimal nutrient uptake.
  • Insulation Properties: Perlite particles have insulating properties that help protect succulent roots from extreme temperature fluctuations in both hot and cold climates.

Potential Drawbacks of Perlite

Like pumice, there are also some potential drawbacks to using perlite in succulent soil mixes.

  • Dust: Perlite creates a lot of dust when it is handled or mixed with other soil components. This dust can be harmful to your respiratory system if inhaled and should be avoided at all costs.
  • Limited Water Retention: Perlite’s excellent drainage capabilities may require succulent gardeners to water more frequently, particularly in arid environments or when cultivating succulents that require slightly higher moisture levels. Careful monitoring of soil moisture is crucial to prevent underwatering.
  • Cost: Depending on the quality being purchased, perlite can be a more expensive soil amendment option compared to pumice. However, its beneficial properties may make it worth the additional cost.
  • Availability: The availability of perlite may depend on the region you are in.

Considerations for Succulent Gardeners

Some of the key considerations you need to keep in mind if you decide to choose perlite include:

  • Particle Size: Perlite is available in different grades, from fine to coarse. Finer grades are suitable for smaller containers or seedlings, while coarser grades are preferable for larger containers and more established plants. Choose a particle size that allows proper water flow and root aeration without compacting the soil.
  • Nutrient Availability: While perlite does not provide significant nutrients to plants, it improves nutrient availability by preventing water saturation and facilitating proper root function. Supplementing with suitable fertilizers is essential to meet the nutritional needs of your plants.

Pumice vs Perlite: Which One Is Right for My Succulents?

The answer to this question depends on the particular needs of your succulent plants. Factors such as climate, container size, and watering frequency should all be taken into account when selecting the right soil amendment option.

A sack of soil and a bonsai without a pot.
Regardless of what you choose, remember to supplement with appropriate fertilizers.

Generally, pumice and perlite offer excellent drainage and aeration properties for succulent cultivation, so it is ultimately up to the gardener to decide which is best for their plants.

Researching and testing both pumice and perlite in different scenarios can help you determine which soil amendment works best for your succulent garden.

Ultimately, the goal is to create a well-balanced succulent soil mix that allows your plants to thrive. Regardless of what you choose, remember to supplement with appropriate fertilizers and monitor moisture levels closely for optimal growth.

Final Thoughts

Pumice and perlite are both excellent soil amendments for succulent cultivation.

While pumice is more neutral in its texture and provides better water retention, perlite offers superior drainage and aeration properties as well as insulation against temperature extremes.

Ultimately, the decision on which soil amendment option to choose will depend on the particular needs of your succulents and the environment they are grown in.

Careful research and testing should help you make the best decision for your succulent garden.

How to Perfectly Prune Rosemary: A Step-by-Step Guide

A person cutting a rosemary.

Rosemary is one of the best Mediterranean perennial herbs with powerful antioxidants, fragrances, and beauty. The herb is mainly used for flavoring vegetables, meat, cocktails, and bread. Rosemary is drought-resistant and only requires little maintenance to thrive. However, the herb is known to become too big and bushy if not pruned. Therefore, it is always important to prune your Rosemary at least twice a year. This ensures that your herb maintains a good shape and remains attractive. Pruning also prevents woodiness, encourages new growth, and maintains airflow, critical in preventing diseases.

So, how do you prune a Rosemary? The first step in pruning is to identify the new growth and old woody stems. Start by getting rid of dead or diseased branches and cutting them off at the base. Next, cut off the old woody stems at their base and remove any spindly branches or shoots. Use sharp, sterilized cutting tools for this. Now shape your rosemary plant. You can do this by trimming the new growth to create a cone shape with an open center. Finally, trim off any stems or branches growing over the top of your rosemary plant to ensure even growth.

This blog post outlines a step-by-step guide on how to prune a rosemary perfectly. Read on to find out everything you need to know.

When Is the Best Time to Prune Rosemary?

Rosemary should be pruned once or twice a year. This will ensure the herb continues to thrive and look attractive. The best time to prune your Rosemary is in late Spring and early summer after its flowers begin to fade.

Pruning during these times will encourage new growth, prevent diseases, and shape your plant into a more attractive form.

The timing is also crucial because it gives new growth enough time to harden and adjust to the new environment before autumn frost.

Optionally, you can prune your Rosemary in early fall, approximately six weeks before the expected frost date.

A second pruning of the Rosemary is only needed if your herb grows exceptionally quickly or if you need to reduce the size of your herb further.

Pruning a rosemary.
This will ensure the herb continues to thrive and look attractive.

Rosemary plants that have become leggy or overgrown must be pruned gradually, cutting back about one-third of the herb every three or four months during the active growing season.

Outdoor Rosemary typically thrives in USDA zones 7-11. Therefore, the best time to prune your herb is between March and May. Indoor Rosemary can be pruned any time during Spring or early summer.

What Are the Benefits of Pruning Rosemary?

A fresh haircut for your herb comes with a wide range of health and aesthetic benefits you will love. Here are some of the key benefits of pruning Rosemary:

1. New growth

Rosemary can only grow new shoots and leaves on fresh, green stems. Cutting off the tips is critical in encouraging the existing stems to branch out and form new stems rather than turn woody. The result is usually a bushier and more beautiful plant.

2. Disease Prevention

Pruning encourages airflow around your rosemary plant. This is critical in preventing diseases such as powdery mildew and other fungal infections.

A rosemary in a pot with a hand spraying water.
It carries away moisture that accumulates overnight, which may cause diseases to spread easily.

When the air circulates around the leaves, it carries away moisture that accumulates overnight, which may cause diseases to spread easily.

3. Shape Your Plant

When you want control over how tall or wide your herb should be, pruning is the answer. Cut off any stems or branches growing over the top of your Rosemary plant to help it maintain an even shape.

4. Prevent Woodiness

Perhaps, the biggest enemy of Rosemary is woodiness. This is when the stems become too hard and no longer grow new leaves or shoots.

A rosemary in a white pot.
This is when the stems become too hard and no longer grow new leaves or shoots.

Pruning your Rosemary regularly can help prevent woodiness by encouraging new growth and maintaining airflow around the plant.

5. Root Establishment

Pruning Rosemary also encourages it to funnel more energy into the root section. This is critical in the early stages of growth and the weeks leading up to the winter season.

Pruning Rosemary: Step-by-Step Guide

Now that you know when to prune and why it’s essential, here is a step-by-step guide on how to prune your Rosemary:

Tools Needed

You will need the following tools to prune your Rosemary herb. Ensure you have all of them before you get started:

  • Pruning Shears: Choose a pair of sharp pruning shears with bypass blades. These will provide clean cuts without damaging the branches.
  • Gloves: Wear a pair of gardening gloves to protect your hands from the sharp thorns and rough branches of the herb.
  • Disinfectant: It’s important to disinfect your pruning tools before and after pruning to prevent the spread of diseases. You can use rubbing alcohol or a solution of one part bleach to nine parts water.

Steps to Prune Rosemary

Follow the steps outlined below to prune your Rosemary herb:

Step 1: Timing Choose the right time to prune your Rosemary

The best time is in early Spring, just before the plant starts actively growing. Avoid pruning during extremely cold or hot weather since it can stress the plant.

Step 2: Assessment

Examine the plant and identify the branches that need pruning. Look for dead, diseased, or damaged branches and any branches that are overcrowded or crossing each other.

Step 3: Sterilize Your Tools

Before you begin pruning, disinfect your pruning shears using the disinfectant solution mentioned earlier. This step helps prevent the transmission of any potential diseases from one plant to another.

Step 4: Remove Dead or Damaged Branches

Start by removing any dead or damaged branches. Make clean cuts as close to the base of the plant as possible. This will encourage new growth and maintain the overall health of the rosemary plant.

Step 5: Thin Out Overcrowded Branches

Identify branches that are growing too close together or crossing each other. These branches can prevent air circulation and increase the risk of disease. Choose the weakest branches for removal and cut them back to the base of the plant.

A gardener trimming a rosemary plant.
Identify branches that are growing too close together or crossing each other.

Step 6: Shaping

Decide on the desired shape for your rosemary plant. If you prefer a more compact shape, prune the outermost tips of the branches. If you want a bushier appearance, cut back the longer branches to promote branching and denser growth.

Step 7: Prune with Precision

Make your cuts at a 45-degree angle above a leaf node or bud. This angle allows water to run off and prevents moisture accumulation, reducing the risk of fungal infections. Avoid cutting too close to the main stem, which can cause damage.

Step 8: Step Back and Assess

Periodically step back and assess your pruning progress. This will help you maintain a balanced and aesthetically pleasing shape. Make any additional cuts as needed to achieve your desired result.

Step 9: Clean Up

Once you’ve finished pruning, remove all the pruned branches and debris from around the rosemary plant. This helps prevent the buildup of pests and diseases.

Step 10: Water and Fertilize

After pruning, give your Rosemary plant deep watering. This helps reduce stress and encourages new growth. You can also apply a balanced organic fertilizer to promote healthy development.

A person watering a rosemary in a pot,
Give your Rosemary plant deep watering.

FAQs About Pruning Rosemary

In this section, we address some of the common questions gardeners have about pruning Rosemary.

Can you overprune Rosemary?

Yes, it is possible to overprune your herb. To avoid killing or stunting your rosemary bush, never prune more than one-third of its growth at one time.

Cutting too far into the woody parts of the herb can cause irreversible damage. You should only prune the shrub down to a few inches.

How do you trim Rosemary to encourage growth?

To keep your rosemary plant healthy and growing, prune off the top few inches of each branch. This will encourage branching and prevent woodiness. Also, ensure adequate sunlight, water, and fertilizer for optimal growth.

Can you cut Rosemary in the winter?

Yes, you can prune your Rosemary during the winter months. However, avoid pruning when temperatures drop below freezing because it can damage the plant. Wait until the weather warms up before you start trimming your herb.

Does Rosemary regrow after cutting?

Yes. Your plant will automatically regrow after pruning, provided you do it correctly. To ensure healthy regrowth, use sharp pruning shears and sterilize them before and after each use. Also, don’t remove more than one-third of the growth at a time.

How do I prune Rosemary for bushier growth?

If you are looking for a bushier, more dense growth, prune the longer branches back to promote branching.

You can also pinch off the tips of new shoots to encourage lateral branching and flowering. This will prevent your Rosemary from getting too leggy and promote a fuller appearance.

Can I propagate the Rosemary cuttings from pruning?

Yes, it is possible to propagate Rosemary cuttings from pruning. To do so, take 4-inch stem cuttings with at least two sets of leaves.

Dip them in a rooting hormone and plant them in well-draining soil. Keep the soil moist and provide indirect light. Within five weeks, you should see new growth from the cuttings.

Final Thoughts

Pruning your Rosemary is an essential step in encouraging growth and preventing diseases. It also helps shape your plant, prevent woodiness, and increase root establishment.

Regular pruning will ensure that your Rosemary continues to thrive for years. Be sure to use sterilized cutting tools when pruning and follow the above steps to ensure perfect pruning.

Why Is My Bear Paw Succulent Turning Yellow?

A bear claw plant.

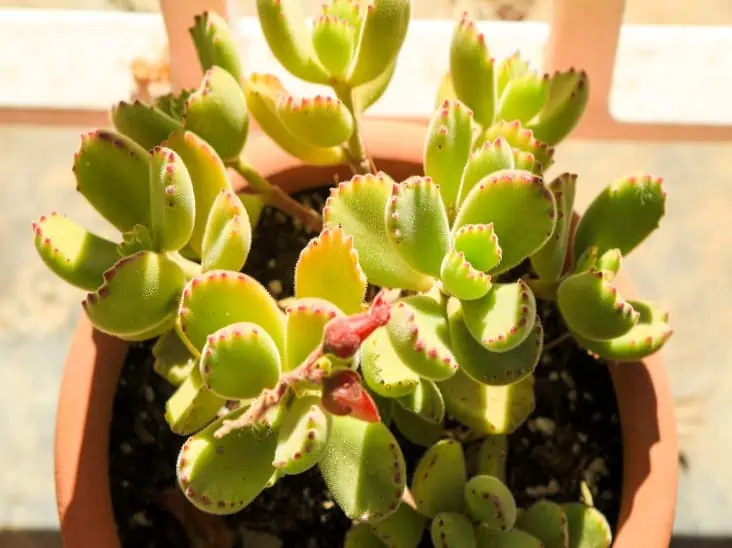
Bear paw is a small, beautiful succulent that looks like a bear’s paw. That’s where the succulent got its name. Bear paw has plump, fuzzy green leaves with reddish tips on the ends that appeal to the naked eye. Though low-maintenance, your succulent may start turning yellow. You may want to know why this is happening to care better and maintain your plant.

So, why is my Bear paw succulent turning yellow? Bear paw generally turns yellow when underwatered or overwatered. But other reasons could contribute to yellowing, such as poor soil, lack of light, and fungal infection. Growing bear paw in the wrong pot, without proper drainage, can also cause it to turn yellow. Pests, common among succulents, can make your bear paw turn yellow. Also, yellowing can occur naturally as the old leaves fall off to make way for new ones. You must take immediate action to prevent your succulent from dying.

This post will discuss in detail the common reasons bear paws turn yellow. Read on to learn more.

Quick Facts About Bear Paw

Before getting into the details of why bear paws turn yellow, it is crucial to look at basic facts about this succulent plant.

Cotyledon tomentosa, also known as bear paw, is one of the cutest members of the succulent family. It is native to South Africa, specifically the Eastern Cape and Western Cape provinces.

Bear paw has unique thick, oval-shaped green fuzzy leaves with noticeable dark red serrated edges that resemble a bear’s paw.

With these leaves and velvety coating, this little succulent does a great job creating a beautiful contrast and peculiar texture to any indoor space.

Bear paw thrives in a low, shrub-like environment and can grow up to 30 cm tall. During spring, it often produces big orange bell-shaped flowers.

A close-up bear claw image.
It is crucial to look at basic facts about this succulent plant.

While Bear paw is low maintenance, its leaves are rather delicate. Therefore, it is essential to know how to take care of them.

8 Reasons for Bear Paw Turning Yellow

Bear paw is the easiest succulent to grow. The succulent requires proper care to grow healthy and attractive.

There are several things that your succulent may be lacking, causing it harm. Here are a few reasons why bear paw turns yellow.

1. Overwatering

Bear paw thrives with a relatively small amount of water. In fact, it can go for several weeks without water, and it will be just fine.

The plant leaves start turning yellow when you overwater it or even water when the soil is not completely dry.

Bear paw does not enjoy being soaked in water for extended periods, like any other succulent. Keeping the soil soggy will only affect it and cause irreversible root rot.

A bear claw watered and exposed to sunlight.
Bear paw thrives with a relatively small amount of water.

Yellowing leaves are the first sign that you have overwatered your succulent. When you notice this, consider adjusting your watering schedule immediately. 

How to fix

Water your bear paw only when the soil is completely dry. The soak-and-dry method is the best, given that the succulent doesn’t like sitting in water for too long.

Use a spray bottle or place your bear paw in a saucer full of warm water for an hour every few weeks. The key is to ensure excess moisture drains out after the hour or as soon as possible.

2. Underwatering

Bear paw’s leaves typically turn yellow when it is underwatered. Dry, yellow paws (leaves) indicate you are underwatering the succulent.

You might face this problem if you are among those who only water their succulents once a month or infrequently. Plant leaves might become pale and wilt.

How to fix

To remedy underwatering, ensure to water your succulent soon after the soil dries up. This will help you fully understand the plant’s requirements and prevent the potential of stressing the plant out.

3. Inadequate light

Bear paw succulent thrives in bright light, and they become healthy and appealing when exposed to adequate sunlight throughout the day.

The succulent requires at least six hours of sunlight per day and needs to be frequently rotated so that it does not burn in one part only.

When you notice an unusual growth pattern, such as yellowing leaves, thinning, or stretching out to a particular direction, this is a sign that your succulent is not getting sufficient light.

A bear claw plant exposed to sunlight.
Ensure your bear paw only gets partial sun, as direct sunlight exposure might stress the plant.

Generally, succulents are slow-growing plants; thus, their sudden growth would be unhealthy.

How to fix

Place the bear paw at a place where it can receive plenty of direct light all day long. The best location to place it is near a window where it will enjoy adequate sunlight and fresh air throughout the day.

But remember, exposure to too much sunlight can also cause its leaves to turn yellow and fall off. To avoid this, ensure your bear paw only gets partial sun, as direct sunlight exposure might stress the plant.

Also, turn your plant frequently to protect the leaves from burning.

4. Pest infestation

Pest infestation is the worst nightmare for most succulents. Mealybugs are the most common pests that attack bear paw succulents.

Aphids can also attack the succulent and secret a sticky substance called honeydew which can attract ants. These pests are contagious and can swiftly spread among all other succulents.

When infested by pests, bear paws often turn yellow as their nutrient supply decreases. These pests consume the plant, slowly devouring it from the inside out.

How to fix

Early detection is the most crucial factor here. Isolate the plant immediately after you see these tiny bugs.

Spray insecticides on the succulent until the pests are gone. Insecticidal soap or neem oil can help eliminate aphids and mealybugs.

5. Poor soil

For bear paw succulents, good soil is like having a good home to live in. The plant may experience extensive problems such as irreversible root rot when planted in poor soil. A good example of poor soil is one with poor drainage capabilities.

Besides, poor soil lacks vital minerals that plants need to thrive. Such soil will cause the bear pa to have soggy leaves and turn yellow.

How to fix

You must use well-draining soil for your succulent. Such soil drains water faster, flushing out all excess water from the plant. Well-draining soil also contains all the nutrients the succulent needs to thrive.

A bear claw plant in a pot.
The plant may experience extensive problems such as irreversible root rot when planted in poor soil.

6. Growing in the wrong pot

Generally, succulents should be grown in a pot with proper drainage. When you plant a bear paw in a pot with no drainage holes, there will be no way to drain the excess water. It means that the excess water will sit at the bottom of the pot, dampening the soil, thus causing root rot.

How to fix

When choosing a pot, consider the size of your bear paw now and how much it will likely grow. Ensure the pot has enough holes at the base that will allow excess water to drain out.

You then need to fill this pot with well-draining soil. Combining these two can prevent overwatering and help keep the soil dry, thus preventing yellowing and promoting healthy growth.

7. Fungal infection

Bear paws will turn yellow when they contract fungal diseases like powdery mildew and root rot. Usually, this might happen when the succulent is under stress.  The stress can be a result of overwatering, overfeeding, or underwatering.

Poor soil and overwatering are the leading causes of fungal infection. In fact, bear paw is quite susceptible to fungal infections and diseases.

How to fix

If your bear paw has a fungal infection, remove the affected leaves or branches to prevent it from spreading.

Applying fungicides to the affected area can also help. Ensure the fungicide you use is organic because chemical ones can harm the plant. 

Also, as we already mentioned, you must use good quality, well-draining soil and avoid overwatering your succulent.

8. Natural process

Lastly, your bear paw turning yellow could be a natural process. This may also occur naturally as the old leaves fall off to make way for new ones.

Bear claw plant exposed to sunlight.
Your bear paw turning yellow could be a natural process.

Succulents frequently lose their old leaves when the seasons change by becoming yellow and dry.

Should You Remove the Yellow Succulent Leaves?

You can pull the leaves out if they are yellow and soggy. These leaves prevent the soil below them from drying and hinder the plant from breathing.

But you must be careful when removing the leaves to avoid harming the succulent. Instead of pulling, just cut them.

Also, use a sterilized cutting tool to prevent further damage to your bear paw. When succulents develop yellow leaves, you should determine why and act appropriately.

Final Thoughts

A bear paw makes a lovely stand-alone succulent in pots and can make a great eye-catcher when paired with your other succulent collections. 

However, bear paw succulents can turn yellow for all the above reasons, so they need extra care to thrive and grow healthy continually.

The most important thing is to act fast and identify the reason for yellowing to save the succulent from dying. You will be sure your succulent is healing when the leaves return to their original color.

How to Care for Your Pleiospilos nelii Royal Flush Plant

A split rock exposed to sunlight and flowering.

Are you a true succulent gardener? If so, you should consider adding the Split Rock variety to your outdoor garden or indoor succulent collection. The Split Rock is a versatile succulent that can serve as a decorative centerpiece for your home or ground cover. Split Rock only grows a few inches high and has two to four stone-like leaves divided by a cleft in the middle.

But how do you care for Pleiospilos Nelii Royal Flush Plant? In its natural environment, Split Rock usually grows in dry, desert climates. You must try to mimic these conditions if growing it at home. Use a good soil mix and always keep the soil almost dry. The succulent should be watered sparingly. Split Rock also loves the sun, so ensure to place it in a south-facing window, and during Summer, bring them outdoors to enjoy filtered light. The succulent feeds on its older leaves, so fertilization is unnecessary.

Read this guide for everything you need about growing and caring for Pleiospilos nelii.

Pleiospilos nelii Royal Flush Plant: Quick Overview

Before discussing how to care for your Pleiospilos nelii Royal Flush Plant, it is essential to know what this succulent is.

Pleiospilos Nelii’ Royal Flush’ is a distinctive blooming succulent native to South Africa. It is a mesemb (leaf succulent that thrives in hot, dry climates) and a member of the Aizoaceae family.

Split Rock typically grows up to a few inches high. It has two to four purple or gray-green leaves, which assume a curved shape.

The leaves look like stones and are divided by a crack or cleft, hence why this succulent goes by the name Cleft Stone, Living Rock Plant, or Mimicry Plant.

Split Rock is generally nontoxic to humans or animals, which makes it great for your indoor or outdoor garden if you are a pet lover.

A split rock on the ground.
It is a mesemb and a member of the Aizoaceae family.

However, experts classify mesembs as the most difficult succulents to maintain, meaning caring for your Split Rock could be tricky. This ad will end in 11

How to Care for Pleiospilos nelii Royal Flush Plant

Caring for Split Rock is more complex than other succulents. You must closely monitor its adaptability and follow its growth habits in your environment. Here’s what to do to help your Split Rock thrive:

1. Watering

Split Rock is drought tolerant. The succulent can go for a long time without water, which makes it the perfect plant for anyone with a full-time job.

Watering should be done during the growing season, usually between Spring and early Fall. You wait until the soil is completely dry and deep soak it.

Your watering schedule should be drastically decreased to once every few weeks in the winter when temperatures drop.

Remember that too much watering might lead to Split Rock cracking and finally rotting. So, before you water again, be careful to inspect the soil and the sturdiness of the leaves.

If the leaves are still green, but the ground feels nearly dry, your succulent doesn’t need watering.

Also, remember that a healthy Split Rock will only have two pairs of leaves at any particular time. When your succulent begins to grow more than four leaves or even shows a tiny crack on its skin, you are overwatering it.

Avoid watering your succulent for a week or so when you notice these signs.

2. Light requirements

Split Rock requires partial shade to full sun to thrive. That means you should expose it to maximum light if growing it indoors, particularly in Winter when the cold may compromise the succulent’s health.

Split rock exposed to sunlight.
Split Rock requires partial shade to full sun to thrive.

Placing it in a south-facing window will help meet this requirement. If your house doesn’t have a south-facing window or another location where the succulent can get adequate light, consider buying and installing artificial grow lights to complement natural light.

You could also plant Split Rock in your outdoor garden to get maximum light but protect it from the harsh afternoon sun and rain.

3. Humidity and temperature

The Split Rock thrives in indoor environments that are less humid. It is susceptible to extreme changes in humidity levels, so ensure you provide proper aeration or misting that is easy to regulate if you live in a high-humidity region.

The other thing you need to keep in mind is that this succulent is not cold-tolerant. You might be forced to take some measures to promote survival outdoors, but eventually, you must move it indoors to ensure it survives the winter.

The ideal temperature for this succulent is 18-25 degrees Fahrenheit, but it can survive in slightly cooler temperatures if cared for well.

But if temperatures drop below one degree Fahrenheit, you have to move it indoors, and that’s the reason it is advisable to grow your Split Rock in a pot.

4. Soil and pot size

Consider mixing regular soil with some pumice to promote healthy growth for your Split Rock. Doing this improves the drainage and aeration of the soil mix.

It also provides the mineral, rocky mix that Split Rock prefers. Better drainage also makes the soil dry out faster, which helps prevent root rot.

A split rock exposed to sunlight.
Split Rock has an elongated tap root, so you may want to ensure the pot is at least 4″ deep.

The best soil for your Split Rock succulent is a combination of cactus mix and pumice. If mixing the soil yourself, aim for a 25/75 ratio of cactus mix to pumice.

Split Rock has an elongated tap root, so you may want to ensure the pot is at least 4″ deep. Proper drainage is key, so ensure the pot has a hole at the base.

Don’t add a layer of rocks at the base of the pot. This won’t help with drainage and will only raise the water table, which may cause root rot.

5. Propagating

Split Rock may be propagated from seeds or by division. Since these succulents rarely produce offsets, gardeners usually propagate from seeds.

Collect Split Rock seeds from flower pods during Summer to propagate this succulent through seeds.

Soak the freshly collected seeds in water for a day, then plant them in moist sandy soil for better results.

The soil should be kept slightly moist during the germination stage. You must be patient when propagating Split Rock from seeds because they take longer to sprout.

To propagate through division, get a sharp, sterilized knife to cut out a cluster of the succulents during the Spring season before new leaves shoot. 

Allow the newly cut succulent to callus for some days, then transplant it in well-draining soil.

6. Repotting

Split Rock is a slow grower, so you should only repot it every three to five years. To repot, choose a new pot that is about 4 inches deep with holes in the bottom.

That should allow proper drainage for your succulent and give its roots enough room to spread out. You can also grow your Split Rock directly on the ground in your garden.

But you must ensure the soil and drainage conditions are ideal to prevent root rot caused by poor drainage and freezing.

Additionally, adding rocks at the top of your succulent soil would make Split Rock feel more homely. Ensure the soil covers at least one-third of the stem, exposing two-thirds.

Lithops in a pot.
Adding rocks at the top of your succulent soil would make Split Rock feel more homely.

After successfully transplanting your Split Rock, avoid watering it for up to a week to help its roots grow and acclimate to the new soil.

You can water after a week if necessary. Avoid disturbing or repotting your Split Rock during its dormant phase.

Only repot when the succulent starts its flowering cycle, which typically begins in the early Spring.

7. Fertilization

Most succulents thrive even without being fertilized regularly. Fertilizing is especially unnecessary for Split Rock since it absorbs nutrients from its old leaves, and new ones start growing to replace them.

You must be careful with the type of fertilizer you choose if you choose to fertilize your Split Rock. Go for a fertilizer with low nitrogen and high phosphorus and potassium levels.

That’s because nitrogen-rich fertilizers lower the absorption rate of potassium, which activates about 60 enzymes responsible for root growth.

Nitrogen also exposes the succulent to dreadful diseases. The ideal fertilizer should have a balanced calcium, magnesium, zinc, sulfur, and iron ratio.

Alternatively, you can use organic fertilizers since they don’t leave chemical residue in the soil. Orchid bark would be a great organic matter.

The bark decomposes slowly, giving excellent organic material without making the soil cakey. 

8. Grooming and maintenance

Split rock will mostly take care of itself. So, you don’t have to worry too much about grooming and pruning. However, you can remove the old leaves if you notice that your succulent has not fully absorbed them. You should only do this if they can come off with ease.

Lithops in windowsill.
You can remove the old leaves if you notice that your succulent has not fully absorbed them.

Don’t pull the leaves if they are firmly attached to the succulent. Allow them to shed on their own to avoid damaging or harming the succulent.

Bottom Line

Caring for Split Rock is easier than it sounds if you are patient and careful. These succulents only require close monitoring of temperature and water requirements to thrive. If you follow the above tips, you will be on your way to having a quality ornamental plant in your garden.

Succulent Hunting: Where to Find Rare and Exotic Varieties for Your Collection

A topsy debbie.

If you are convinced that you have had enough collection of succulents, you need to pause and think again. The succulent family has so many species for collection. In fact, some people have turned succulent hunting into a perfect hobby. Succulent hunting involves searching for rare and unusual varieties of these unique plants in their natural habitat or plant stores.

So, where can one find rare and exotic succulent varieties for their collection? First, you need to list some of the best rare succulent species you want to go after. The list may include succulents such as the baseball plant, disco cactus subterraneo-proliferans, plover eggs plant, and crinkle leaf plant. Once you have your list, it is time to step out and start hunting for these precious plants. Some of the best places to buy rare succulents include Mountain Crest Gardens, Harddy, Succulents Box, Succulent Market, and The Succulent Source. You can also find them in online plant forums, rare plant shows, botanical gardens, and specialty nurseries.

This article will provide an overview of how and where to go on a successful succulent hunt. Read on to find out everything you need to know.

What Is Rare/ Exotic Succulent?

A rare succulent is a succulent plant that is uncommon and difficult to find in homes or its natural habitat. Several factors contribute to the rarity of succulents:

1. Limited Distribution

Some succulents have a restricted natural distribution, meaning they are found only in specific regions or habitats.

These plants may be endemic to a particular area or found in isolated pockets, making them naturally scarce.

A zebra plant.
Some succulents have a restricted natural distribution.

Limited distribution can be due to specific climatic requirements or habitat destruction.

2. Slow Growth and Low Propagation

Certain succulents have slow growth rates, making them rare to find on the market.

Additionally, these plants may be challenging to propagate, requiring specialized techniques such as grafting, offsets, or leaf cuttings.

The combination of slow growth and low propagation rates contributes to their rarity.

3. A rarity in the Wild

Succulents that are rare in their natural habitats due to habitat loss, over-collection, or environmental changes also become scarce in homes.

These plants may face threats like deforestation, urbanization, or climate change, reducing their overall population and making them rare in their native and cultivated settings.

4. Unique Characteristics

Some succulents are considered rare due to their unique characteristics. This could include unusual growth patterns, distinct leaf shapes or colors, or the presence of rare genetic mutations.

These distinctive traits make them highly sought after by collectors and enthusiasts, increasing their rarity and value.

5. Limited Availability

Certain rare succulents may be available only through specialized nurseries, botanical gardens, or dedicated collectors.

These plants may have limited commercial production or be part of conservation efforts, making them harder for the general public to find. Limited availability contributes to their rarity and exclusivity.

PS: It’s worth noting that the concept of rarity can be subjective and may vary depending on factors such as geographical location, availability, and popularity among collectors. What is considered rare in one region or community may be more common in another.

What Are Some of the Best Rare Succulents?

Before you start hunting for these succulents, you need to know what you are looking for and what makes them rare or exotic.

We have compiled a list of some of the best rare succulents to provide a good starting point.

1. Baseball Plant

The “baseball plant” is a common name for Euphorbia obesa, a succulent species native to the arid regions of South Africa.

The baseball plant gets its name from its spherical shape, which resembles a baseball or a bowling ball.

A Euphorbia obesa.
A succulent species native to the arid regions of South Africa.

It has a compact, globular body that can reach a diameter of around 4 to 5 inches (10 to 12 cm). This shape is relatively uncommon among succulents and contributes to its visual appeal.

The succulent has a slow growth rate, adding to its rarity. It can take several years for the plant to reach its mature size, with each new growth ring appearing as a distinctive vertical ridge on the surface of the plant.

The baseball plant has a pale green to bluish-green hue, accentuated by patterns of vertical ribs and grooves on its surface.

These ribs give it an exciting and attractive texture, adding to its appeal as a rare succulent. The coloration and patterning vary among individuals, making each plant unique.

2. Plover Eggs Plant

The Plover Eggs Plant, scientifically known as Adromischus cooperi, is a rare succulent native to South Africa. It derives its common name from the appearance of its leaves, which resemble tiny plover eggs.

 Adromischus cooperi in a pot.
It derives its common name from the appearance of its leaves, which resemble tiny plover eggs.

The succulent features small, rounded leaves that are pale green to grayish-green. The leaves have distinctive spots or markings resembling the speckled pattern on bird eggs.

The Plover Eggs Plant is highly valued for its unique leaf texture and pattern.

3. Graptoveria ‘Topsy Debbie’

‘Topsy Debbie’ is a rare succulent hybrid resulting from a cross between two genera, Graptopetalum and Echeveria.

This unique plant showcases a compact rosette shape with thick, fleshy leaves. The leaves exhibit captivating coloration, ranging from pale blue to lavender, with hints of pink or purple along the edges.

‘Topsy Debbie’ is highly sought after for its attractive appearance and ability to form dense clusters. Its rarity is due to limited propagation and availability, making it a prized addition to succulent collections.

4. Giant Quiver Tree

The Giant Quiver Tree, scientifically known as Aloidendron pillansii, is a rare succulent tree native to Southern Africa. It is distinguished by its massive size, reaching up to 30 feet (9 meters).

The tree derives its name from the traditional use of its hollowed branches by indigenous people to store quivers for their arrows.

A  Aloidendron pillansii.
It is distinguished by its massive size, reaching up to 30 feet (9 meters).

The Giant Quiver Tree has a thick, succulent trunk covered in rough, cork-like bark, and it produces thick, sword-shaped leaves that are bluish-gray or green.

5. Echeveria gibbiflora ‘Barbillion’

This rare succulent, also known as the Barbillion Echeveria, is a unique variety of Echeveria gibbiflora.

It stands out due to its large, rosette-shaped structure and stunning coloration. The plant forms multiple thick, fleshy leaves that can grow up to 12 inches (30 cm) long, creating an eye-catching display.

‘Barbillion’ is characterized by its vibrant hues, ranging from deep purples to rich reds and greens.

6. Crinkle Leaf Plant

The Crinkle Leaf Plant, also known as Kalanchoe thyrsiflora, is a rare succulent found in the arid regions of South Africa.

It grows in high-altitude areas between 6,000 and 13,000 feet (1,800 to 4,000 meters) above sea level. This plant features large rosettes of thick, crinkled leaves with an interesting, furrowed texture and a grayish-green hue.

A Kalanchoe thyrsiflora.
A rare succulent found in the arid regions of South Africa.

Due to overcollection and deforestation, the Crinkle Leaf Plant is one of the rarest succulents in its habitat. It’s highly valued for its unique appearance and has become a prized addition to collections worldwide.

Where Can I Find These Rare Succulents?

Now that you know some of the best rare succulents, you may be wondering where to find them. Here are some places to check out:

1. Specialty Succulent Nurseries

Specialty nurseries specializing in rare and exotic succulents are a great place to look for unique plants.

They typically offer the widest selection of unusual varieties, many of which are difficult to find elsewhere.

Some nurseries even offer online ordering, making it easy to get your hands on these rare plants.

2. Online Plant Markets and Communities

Numerous online platforms, such as eBay or Etsy, specialize in selling rare succulents. These marketplaces often feature a wide selection of unique varieties from around the world.

Moreover, there are numerous online communities dedicated to succulents where you can find experienced collectors with valuable knowledge and tips.

Joining these groups is a great way to stay up-to-date on the latest rare varieties available for sale or trade.

3. Plant Shows

Did you know that there are plant shows specifically for rare succulents? These events feature vendors selling a variety of unusual and one-of-a-kind plants.

It’s the perfect place to meet like-minded collectors and find and purchase some truly unique plants.

The only challenge you may face is that these shows are often held in specific locations and tend to be intermittent, so you’ll need to research events near you in advance.

4. Friends and Family

Another great source of rare succulents is your friends and family. Ask around to see if anyone you know has a unique plant they may be willing to share or sell.

Often, the most unique plants can be found in personal collections rather than nurseries or markets.

Consider organizing a plant exchange with colleagues or your local gardening club to meet fellow succulent enthusiasts and get access to rare specimens.

5. Botanical Gardens

Many botanical gardens around the world use their space to grow and preserve rare and endangered plants, including succulents.

Visiting these gardens is a great way to get the chance to see an impressive variety of rare species in person.

Summary

Rare succulents are highly sought after due to their unique appearance and limited availability. This makes them great additions to collections and can add a touch of exotic beauty to your home or garden.

These plants can be found in specialty succulent nurseries, online markets, and communities, plant shows, friends and family collections, and botanical gardens.

With a bit of searching, you’ll surely find the perfect rare succulent for your home or garden!

Cactus Care 101: How to Safely Repot Your Spiky Plant

Cacti are popular houseplants known for their unique appearance and low-maintenance requirements. However, like all plants, cacti eventually outgrow their pots and require repotting to maintain their health and vigor. Repotting a cactus plant can be tricky since it requires special care and attention.

So, how do you safely repot your spiky plant? Repotting a cactus involves gently removing the plant from its current pot and loosening any compacted soil around the roots. After this, rinse off the roots and replant in a fresh, well-draining potting mix. Using gloves or tongs when handling the cactus is essential since it has sharp spines that can cause injury if not handled properly. Ensure the pot you choose is a manageable size. The new pot should be about 1-2 inches larger than the current one. After repotting, Water your cactus, and place it where it can get plenty of light.

Do you want to learn more about repotting a cactus plant safely? Keep reading to find out everything you need to know.

When Do You Need to Repot a Cactus?

Cacti are generally slow-growing plants that have adapted to thrive in harsh desert environments. They store water in their stems, which allows them to survive prolonged periods of drought.

The growth rate of a cactus varies depending on its species. Still, most indoor cacti experience active growth during spring and summer, followed by fall and winter dormancy.

A cactus may outgrow its pot for several reasons, such as an increase in size, depleted nutrients in the soil, or poor drainage. Signs that your cactus may need repotting include:

  • Roots protruding from the drainage holes indicate that the cactus has outgrown its current container and requires more growing space.
  • Yellowing or wilting leaves: A lack of nutrients in the soil can cause the cactus to appear unhealthy, signaling the need for repotting.
  • Stunted growth or failure to flower: This could be a sign that the cactus is root-bound and unable to take up enough water and nutrients to support its growth.

Consider repotting your cactus every two or three years. Repotting more frequently than necessary can harm the plant since it can cause stress and shock.

A person repotting cactus.
The growth rate of a cactus varies depending on its species.

The best time to repot your cactus is during its active growth phase in the spring or early summer. This allows the plant to recover quickly from the stress of repotting and establish itself in the new container before the dormancy period kicks in.

Tools Needed for Repotting a Cactus

Having the right tools to repot your cactus safely is recommended. The tools we discuss below play a crucial role in ensuring that the repotting process is smooth and safe for you.

1. Pot/Container

A suitable pot or container is crucial for repotting a cactus plant. Some critical factors to consider when choosing your container include size, material, drainage, and aesthetics.

Typically, you want the new pot slightly larger than the previous one to allow for the cactus plant’s growth. A general rule is to select a container about 1-2 inches larger than the current pot.

A pencil cactus in a pot.
You want the new pot slightly larger than the previous one to allow for the cactus plant’s growth.

Go for a pot made of a breathable material that allows excess moisture to evaporate. Terracotta or clay pots are popular choices for cacti due to their porous nature.

You must also ensure that the container has plenty of drainage holes at the bottom to prevent waterlogging, which can be detrimental to cacti.

And don’t forget to consider the pot’s appearance and how it complements the overall style of your cactus plant collection or home décor.

2. Potting Mix

The right potting mix is essential to provide a well-draining and nutrient-rich environment for your cactus plant.

Most cacti species require a well-draining soil mix to prevent unnecessary water retention that can lead to root rot.

Look for potting mixes designed for cacti or succulents, which usually contain perlite, pumice, or coarse sand to improve drainage.

Avoid potting mixes with high levels of organic matter or fertilizers since they can cause severe root rot that can lead to the untimely death of your plant. A good potting mix will have a balanced pH level suitable for cacti plants.

A sterilized potting mix is also recommended to minimize the risk of introducing pests or diseases to your cactus plant.

Luckily, you can always make your potting mix by combining regular potting soil with sand, perlite, or pumice in a 1:1 ratio.

3. Protective Gloves

Protective gloves are essential when handling cactus plants to prevent injury from the plant’s sharp spines.

Choose gloves made of thick, durable material that can withstand the cactus spines. Leather or thick rubber gloves are often suitable options.

A kid wearing a gardening gloves.
Consider gloves with a secure wrist closure to prevent spines from entering.

Ensure the gloves fit your hands well and provide enough flexibility to handle the delicate cactus without compromising your grip. Consider gloves with a secure wrist closure to prevent spines from entering.

Also, look for gloves designed to be puncture-resistant to protect your hands from cactus spines.

Repotting a Cactus: Step-by-Step Guide

Now that you have gathered all the necessary tools, it’s time to start.

Step 1: Gently remove the cactus from its pot

The first step is to remove your cactus from its current pot carefully. Wearing protective gloves, turn the pot upside down and gently tap or squeeze the sides of the container until the plant slides out.

You can also upend the container and let gravity help you with the job. The plant should slide out of the container without much hassle.

Feel free to ask for help from your friend if you are stranded. However, you must remind them to wear protective gloves or use a cotton towel while touching the cactus.

If you want to repot a relatively tall cactus that is impossible to remove from the current container, consider cutting the current container using an angle grinder or rotary saw.

Gently tap the roots of the cactus plant after cutting the container to get rid of any old potting mix left.

Step 2: Carefully remove the soil and inspect the roots

Once removed, inspect the root system of your cactus to check for any signs of disease or damage. Trim off brown, mushy, or discolored roots using sharp and sterilized shears.
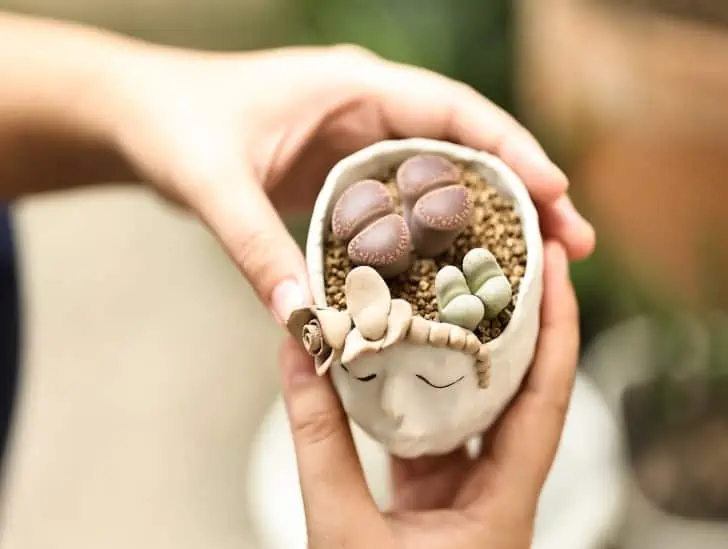
A cactus on hand.
Inspect the root system of your cactus to check for any signs of disease or damage.

Remove as much of the old potting mix from the roots as possible. You can use a soft brush or damp cloth to help with this process.

Step 3: Place the cactus in its new container

Now it’s time to place your cactus in its new container. Add some fresh potting mix into the bottom of the container and carefully place the cactus in it.

Fill the sides of the container with more potting mix and gently press down around the base of the plant to hold it firmly in place.

Then, give your cactus a good drink of water until it trickles out from the drainage holes at the bottom.

Step 4: Place your cactus in its new home

Your newly potted cactus is ready to be placed in its permanent home.

Place it in an area with bright, indirect light and avoid exposure to direct sunlight, which can quickly damage the delicate plant.

Also, ensure the environment has enough humidity for the cactus to thrive.

Tips for Successful Repotting

Below are some tips to help you get the most out of your cactus repotting process:

  1. Water the cactus a few days before repotting: This will help the roots slide out of the old pot more easily.
  2. Handle the cactus carefully: Use thick gloves or wrap the cactus in a towel to protect your hands from spines.
  3. Gently remove the cactus from its old pot: Loosen the soil around the edges and gently lift the plant, not damaging the roots.
  4. Inspect the roots for any signs of rot or disease: Trim away any damaged or unhealthy roots with clean pruning shears.
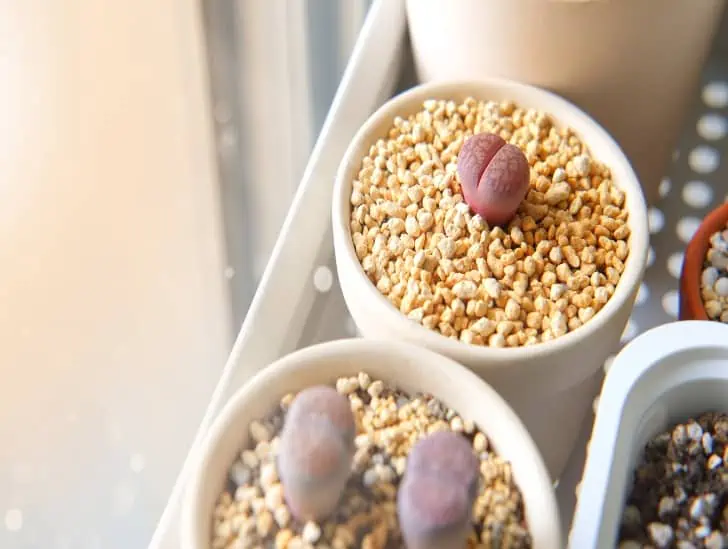
  5. Place the cactus in the new pot with fresh soil: Position the cactus in the center of the pot and fill it in with the soil mixture, ensuring that the base of the stem is slightly above the soil line.
  6. Wait a few days before watering: This allows damaged roots to heal and reduces the risk of root rot.

Common Mistakes to Avoid

Some of the common mistakes you need to avoid when repotting your cactus include:

A golden barrel cactus on hand being repot.
Always wear thick, puncture-proof gloves to protect your hands from cactus spines.
  • Using a pot that is too small or too large for the cactus: A pot that’s too small will restrict the plant’s root system, while one that’s too large can encourage waterlogging.
  • Using poor-quality soil mix: Choose a well-draining soil designed explicitly for cacti or succulents.
  • Not using protective gloves: Always wear thick, puncture-proof gloves to protect your hands from cactus spines.
  • Not pruning unhealthy roots: Trim away brown, mushy, or discolored roots before repotting.
  • Placing the cactus in direct sunlight: Cacti prefer bright, indirect light and require protection from direct sunlight to prevent sunburn.

Summary

Repotting a cactus plant is an essential task for the health and well-being of your beloved plant.

The process might seem daunting, but with the right tools and plenty of care, you can ensure that your cactus thrives in its new home.

Remember to choose the right pot size, use a sterile potting mix, wear protective gloves, and monitor your cactus for any signs of disease or damage.

How to Grow and Care for Melocactus Azureus: A Comprehensive Guide

A closeup image of a Turks' Cap Cactus.

Melocactus Azureus, commonly referred to as the Turks’ Cap cactus, is a species of cacti native to South America. The cactus belongs to the genus Melocactus which consists of 40 different species. The Azureus species is usually dark green, oval and features nine to ten sharp ribs lined with spines. The cactus can reach up to seven inches tall and 5.5 inches wide. The Melocactus Azureus remains one of the most popular cacti choices for indoor or outdoor gardening since it requires little care and maintenance to thrive.

So, how do you care for and grow your Melocactus Azureus? Melocactus Azureus prefers bright, indirect sunlight. Place the cacti in an area where they can receive plenty of light but avoid direct exposure to the sun. The cactus requires frequent watering to thrive. Water it once every two or three days but ensure the soil is completely dry before watering. Melocactus Azureus requires relatively warm temperatures to stay healthy. Anything above 70 degrees Fahrenheit will do. Also, consider feeding it during the active growing season and repot every two or three years.

This blog post discusses everything you need to know about the Melocactus Azureus and how to care for it. Read on to learn more.

Melocactus Azureus: A Quick Overview

Melocactus Azureus, also known as the Turk’s Cap Cactus, is a globose species of cacti native to the tropical climate of Brazil. It has a striking frosty blue epidermis and can reach up to 50 cm tall.

The plant has several ribs with areoles that contain white to brown spines. It is winter-dormant and requires full sun for optimal growth.
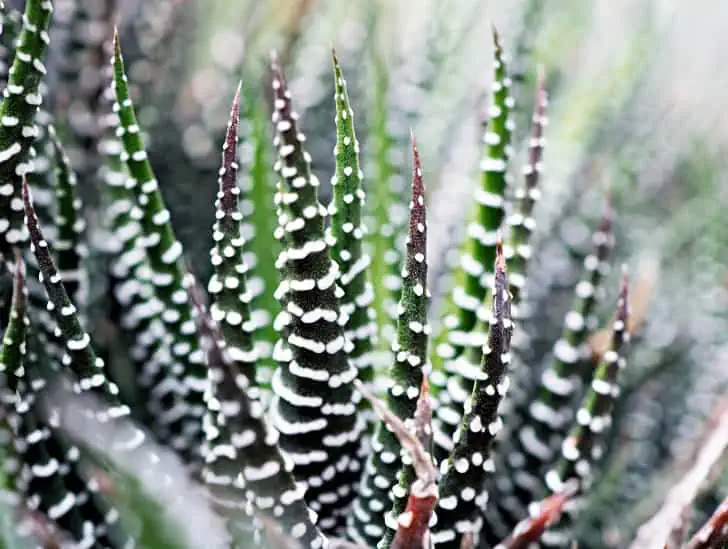
It grows at a relatively medium speed and can take a couple of years to reach full maturity. The cactus flowers in late spring and summer producing pink to white flowers. When pollinated, these flowers transform into pepper-shaped fruits.

Turks' Cap Cactus in a pot.
It has a striking frosty blue epidermis and can reach up to 50 cm tall.

Although Melocactus Azureus has spines, they are not sharp and can be handled without protective gear.

This cacti species is a must-have for every succulent lover due to its unique appearance and low maintenance requirements.

How To Grow and Care for a Melocactus Azureus

Now that you have a basic understanding of the Melocactus Azureus, let’s look at how to care for and grow this striking cactus.

1. Selecting Your Plant

Everything starts with selecting the right plant for your garden. When selecting your Melocactus Azureus, look for one with evenly distributed spines free from visible damage or pests.

Also, make sure that the plant is firm and has a healthy appearance.

You must remember that the Melocactus Azureus is a slow-growing species, so you don’t need to be in a rush when selecting one. Take your time and pick a healthy plant that has the potential to grow for years in your garden.

2. Water Requirements

Unlike other cacti species, Melocactus azureus loves regular watering for it to stay healthy. This is perhaps because the species is native to the tropical climate of Brazil, which receives plenty of rainfall throughout the year.

Therefore, consider watering your cactus once every two or three days. However, you must check the soil before watering. Water only when the soil feels dry to avoid causing root rot.

Watering a pencil cactus.
You must check the soil before watering.

Using your finger or a wooden stick is the easiest way to check the soil. Stick it into the soil, and if you feel moisture, wait for the soil to dry before watering.

Cut back on your watering frequency during winter because the plant is winter-dormant and requires less water during this season. During this time, you can afford to water your plant once every week.

You should also pay close attention to the watering method you use. For Melocactus Azureus, the ideal method is bottom watering. This ensures that the water reaches all parts of the cacti and prevents root rot.

3. Light Requirements

Melocactus Azureus prefers bright but indirect sunlight. You should place your cactus in an area where it can get plenty of sun without any direct exposure to the burning rays of the sun. Too much direct sunlight can cause burns on the plant.

If you live in an area where the sun is too intense, you should place your cactus in a location that gets filtered sunlight. This will provide it with enough light and keep it from getting damaged.

However, this is only possible if you grow it outdoors. So, how can you achieve the same conditions for an indoor Melocactus azureus?

For an indoor cactus, find a spot in your house that receives plenty of direct sunlight for most time of the day.

turks' cap cactus exposed to sunlight.
You should place your cactus in a location that gets filtered sunlight.

It can be a south or east-facing windowsill or balcony. The primary objective is to ensure that the plant is getting enough light.

Consider supplementing natural light with fluorescent lights for an extra boost. This will allow your cacti to receive the required amount of sunlight, even during winter when there are reduced daylight hours.

But you must be careful with the type of lights you use. Too much artificial light can also damage your cacti, so find a balance between natural and artificial lighting. Ideally, you should use lamps that emit full spectrum wavelength.

4. Temperature and Humidity

Closely related to the aspect of light is temperature and humidity. These two factors also play an essential role in the growth of your Melocactus Azureus.

The ideal temperature for this species is anywhere between 70 to 80 degrees Fahrenheit during the day and 60 degrees Fahrenheit at night. Anything higher or lower can be detrimental to its growth.

Regarding humidity, the ideal relative humidity for Melocactus Azureus is around 40 to 50%.

It means that it should not get too dry or too humid. Maintaining the right humidity level can be challenging, especially if you are growing your cacti indoors.

To increase the humidity levels in your home, try misting or using a small humidifier. This will keep the air moist and help your cactus absorb more water from the soil.

5. Soil Requirements

This cactus thrives in well-draining soils. The ideal soil should have a high proportion of organic matter along with some sand, gravel, and clay. You can also use a commercial cacti potting mix for the same purpose.

Once you have found the suitable soil, loosen it up so air and water can move freely through it. This will ensure that your Melocactus Azureus gets the right amount of moisture and nutrients.

A turks' cap cactus top view.
The ideal soil should have a high proportion of organic matter along with some sand, gravel, and clay.

Avoid growing cactus in regular garden soil because it doesn’t facilitate the fast draining of water.

You can easily make an appropriate soil mix for your cactus by combining three parts potting soil, one part sand, and one part perlite or vermiculite.

6. Fertilizing Requirements

The Melocactus Azureus does not require frequent fertilizing for it to thrive. You can feed your cactus once a year with a general-purpose or cacti fertilizer at half-strength. You can easily find the right fertilizer at your local plant store.

Ensure you dilute the fertilizer with clean water to suit your cactus. Keeping it at full strength could prove too strong for your cactus and might do more harm than good.

Consider fertilizing your cactus in spring or summer to aid growth. You don’t need to feed your plant during winter because it is usually dormant at this time.

Avoid over-fertilizing because it can cause the cactus to become unhealthy and weak.

7. Potting and Repotting

The Melocactus Azureus should be planted in a pot slightly bigger than its root ball size. This will allow it to spread and grow freely.

With time, the cactus will outgrow its current pot hence the need for repotting. Ideally, you should repot your Melocactus azureus every two or three years. When repotting, use the same soil mix as you did for planting or replace it with a fresh one if need be.

Avoid using regular garden soil because this species prefers well-draining soils. Also, avoid disturbing the roots too much during repotting because they are prone to rotting if left exposed for an extended period.

Turks Cap cactuses in a pot.
When repotting, use the same soil mix as you did for planting or replace it with a fresh one if need be.

The new pot must be slightly larger than the previous one to accommodate further growth. You can also use a bigger pot if you want your cactus to look fuller and more impressive.

8. Pruning

Lastly, you should keep an eye on the size of your Melocactus Azureus. The cacti can grow quite large hence the need for regular pruning and trimming.

To maintain a healthy look, remove any dead leaves or parts that look weak or diseased. This will help reduce losses in case of a disease outbreak and make your cactus look neater.

Be sure to use sharp and clean pruning shears when pruning your cactus. This will help keep the wounds small and prevent infection from setting in.

Summary

Taking care of a Melocactus Azureus requires you to provide it with the right growing conditions for optimal development.

That includes the right soil, humidity level, and fertilizing schedule, among other considerations.

With proper care and attention, your cactus can continue to thrive for many years. So, make sure you stick to the guidelines provided here for a healthy plant!