Grafted Cactus: The Ultimate Guide

Human beings have long liked to tinker with nature to see the results. As such, crossbreeding of plants is quite common. This practice has resulted in the emergence of plant varieties that are hardier than their original versions, offering better yield or more ornamental value. Grafting happens when a piece of one plant is grown onto another plant. While grafted cactus is a direct result of human intervention, there is more to it than meets the eye.

So, what is grafted cacti? Simply put, grafted cacti is a combination of two different cacti species on one plant. To be grafted, both plants need to be cut, and then the pieces are joined together with a special grafting technique. It means that the stem of one cactus is grafted onto the rootstock (base) of another. The result is a single plant with two separate parts – one on top and the other at the bottom. The top part is known as the scion, while the bottom is known as the rootstock.

This blog post discusses everything you need to know about grafted cactus, from how it’s done to why this technique is so popular. So, let us get started.

Grafted Cactus: An In-depth Analysis

Perhaps, the grafting technique for cacti plants is started in the wilderness and only aided by human beings.

What do we mean? Well, in their natural habitat, some cacti species produce pups that get detached from the mother plant after some time.

When the mutant pup separates itself from the mother plant, it has no choice but to die since it cannot photosynthesize.

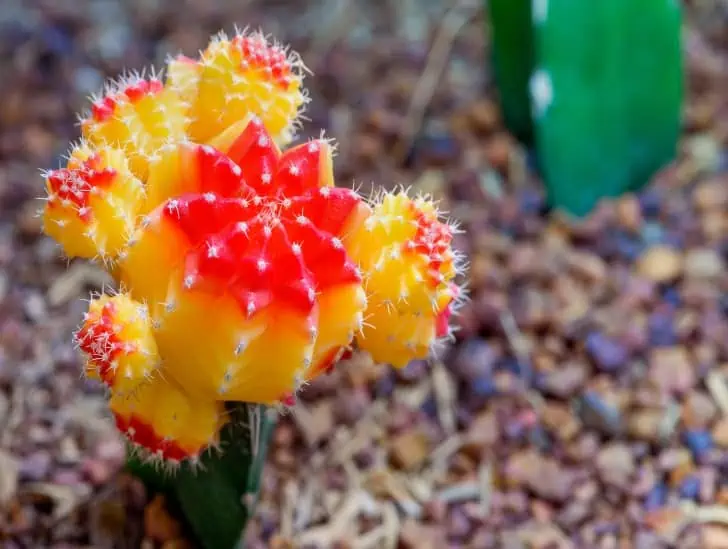
A yellow crest grafted cactus in a pot.
This process gives rise to a new plant with features from two different plants.

The primary reason it can’t photosynthesize is that it lacks chlorophyll, which is critical in photosynthesis.

For the mutant pup to survive, it must have other means of getting water and nutrients. That is where the grafting technique comes into play.

The pup is grafted onto an existing cacti plant to get nutrients from its “host” via the roots. The mutant pup then grows slightly faster than normal since it has access to more resources. This process gives rise to a new plant with features from two different plants.

However, the grafting process in a home environment is a little more complicated. It requires you to have the right tools and techniques, as well as a high level of expertise.

You must also understand the compatibility of the two cacti species to ensure a successful graft. If you plan on trying this technique, make sure you research thoroughly before attempting it.

Grafting Cacti Plants: Why Do It?

Cacti plants are grafted for many reasons. You can choose to graft your plants to produce a different cacti species mechanically.

The process produces a faster-growing, more robust species with enhanced ornamental value.

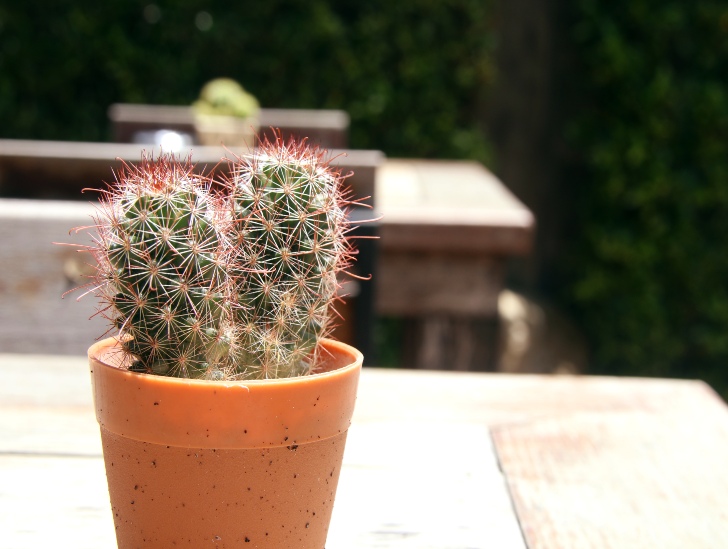
A small colorful cactus.
You can also graft cacti plants to create a unique shape or size that you otherwise wouldn’t get from regular cultivation.

You can also graft cacti plants to create a unique shape or size that you otherwise wouldn’t get from regular cultivation.

Grafting helps protect the mutant pup from the environment since it can draw nutrients from its host’s roots.

The process also helps the new plant to resist pests and diseases better since it is a combination of two different cacti species.

Grafting is relatively common in fruiting cacti species since it increases the overall growth rate and maturity of an existing cactus plant for earlier fruition.

Typically, the scion inherits the characteristics of its mother plant, while the rootstock now turns into the base of the new plant.

A moon cactus garfting.
Grafting is relatively common in fruiting cacti species.

The union is usually at the vascular cambium, where the scars of the rootstock and the scion are carefully sealed together to aid healing and joining.

Once the wounds have healed completely, no special grafted cactus care is needed. All you have to do is take care of it like you would do for any other cacti plant.

What Are the Common Rootstocks for Cactus Grafting?

As mentioned earlier, you need to fully understand the compatibility of the two cacti species before you attempt grafting.

Generally, you can use any species as a rootstock. However, many experienced gardeners prefer using any of the following cacti species as rootstocks:

1. Dragon Fruit

The dragon fruit is a green cactus plant that makes an excellent rootstock for grafted succulents because it is more resilient and adaptive to sudden environmental changes like temperature and humidity. The dragon cactus produces a fruit referred to as the dragon fruit or pitaya.

A grafted dragon fruit.
You can also graft cacti plants to create a unique shape or size that you otherwise wouldn’t get from regular cultivation.

2. Barbary Fig

The Barbary fig is a firmly rooted species that readily take in the tissue for scions it is grafted onto. It thrives well in hot climates, making it an excellent rootstock for such conditions.

3. Peruvian Torch Cactus

The Peruvian torch cactus is a columnar cactus species that grows well in most types of soil. It is often used as a rootstock for other succulent and desert plants because it can tolerate extreme conditions like drought, frost, and intense heat.

It can reach up to 30 feet high with the right growing conditions. The cactus also produces an edible fruit commonly used in South American Cuisine.

4. Golden Torch Cactus

The golden torch cactus grows between 3-6 feet tall and is a desert-type cactus. It can tolerate extreme temperatures from both hot and cold climates and requires minimal maintenance, making it an ideal rootstock for grafted cacti plants.

5. Blue Myrtle Cactus

The blue myrtle cactus is a Mexican plant with a columnar shape and dark blue-green color. It is often used as a rootstock for grafting due to its ability to tolerate extreme temperatures and soil types. This cactus also produces an edible fruit that is sweet and juicy.

Though these cacti species are excellent for grafting, it is also essential to research thoroughly and understand the compatibility of the other cacti species involved.

Grafting Cacti Plants: The Process

The process of cacti grafting is a bit labor-intensive, but once you understand the steps and the materials required, it becomes easier. Here are some tips to keep in mind when grafting your plants:

  • Choose healthy scion and rootstock plants that have similar or compatible sizes. Check for signs of disease or infection before you start the grafting process.
  • Use a sharp blade or scalpel to make a flat cut at the top of the rootstock and then create a slit down its side about 1/4 inch deep.
  • Place the scion onto the rootstock and be sure the vascular cambium layers are touching.
  • Secure the scion with a rubber band or any other material to hold it in place while it heals.
  • Water the grafted plant regularly, but do not overwater or underwater it.
  • After a few weeks, the scion should have successfully taken over the rootstock. To ensure this, inspect the top of the scion and ensure it has started growing new roots and shoots.
  • Once the scion is securely joined to the rootstock, you can start taking care of your cactus as usual.

Tips for Grafted Cactus Care

Grafting is a delicate process and requires special care to ensure successful results. Here are some tips on how to properly care for your grafted cactus:

  • Get the temperature right – Cacti prefer warm temperatures between 18-25 degrees Celsius, with slightly higher temperatures during summer and slightly lower temperatures during winter.
  • Water appropriately – Grafted cacti need regular watering but should be allowed to dry out before their next watering session.
  • Monitor for pests and diseases – Keep a close eye out for signs of infection or any kind of damage caused by environmental changes or pests.
  • Provide enough light – Grafted cacti need plenty of sunlight, so make sure to give them at least six hours of direct light each day for optimal growth.

Moon Cactus and Why It is the Most Ideal Cactus to Graft

The Moon Cactus, or Gymnocalycium mihanovichii, is a type of cactus that was first discovered in the 19th century.

It is native to South America and has been cultivated as an ornamental plant. The Moon Cactus has a unique shape and vibrant colors, which make it stand out among other cacti species.

A grafted cactus.
The cactus usually needs to be grafted onto a compatible rootstock to survive and thrive.

Perhaps, one of the standout features of the moon cactus is its colorful appearance. Unfortunately, this cactus lacks chlorophyll needed to help it manufacture its own food. Therefore, the cactus usually needs to be grafted onto a compatible rootstock to survive and thrive.

It is also a popular choice for grafting due to its ability to tolerate extreme temperatures and drought conditions.

Overall, the Moon Cactus makes for an ideal scion because of its bright colors and resilience to extreme weather conditions.

That is why it has become popular for grafting among gardeners looking for an ornamental cactus.

Summary

Grafting cacti is an effective method for propagating and cloning your favorite plants.

The process involves selecting compatible rootstock and scion plants, joining them together in the right way, and giving them proper care they need to thrive.

With a bit of patience and dedication, you can easily graft your own collection of cacti plants. Good luck!
Crassula Moon Glow: Everything You Need to Know for a Healthy Plant

The Crassula Moonglow succulent is one of the most exciting succulents since it doesn’t have a specific native origin. The plant is an amazing hybrid product of modern nurseries, having been created by two different succulent species, namely the Crassula perfoliata falcata and the Crassula deceptor arta. The small, upright succulent is a popular indoor plant known for its attractive appearance and relatively low maintenance requirements. It has thick, fleshy leaves and produces delicate pink flowers that can add a touch of elegance to your home garden or indoor spaces.

So, what do you need to know about the Crassula Moonglow succulent? The Crassula Moonglow belongs to the family Crassulaceae, known for its gray, hairy, and thick leaves. The leaves are usually stacked in opposing ranks along a beautiful stem. The succulent prefers a warm, sunny climate with a well-draining potting mix. Since it is one of the most drought-tolerant succulents, you don’t have to worry about frequent watering. In fact, you are only allowed to water it when the soil is completely dry. Given the right care, Crassula Moonglow will produce beautiful pink flowers in spring and winter. The plant can reach up to eight inches tall when grown indoors.

This blog post discusses everything you need to know about the beautiful Crassula Moonglow. Read on to learn more.

Crassula Moonglow: Scientific Classification

The succulent belongs to the family Crassulaceae, known for its gray, hairy, and thick leaves. The scientific name of the plant is simply Crassula Moonglow.

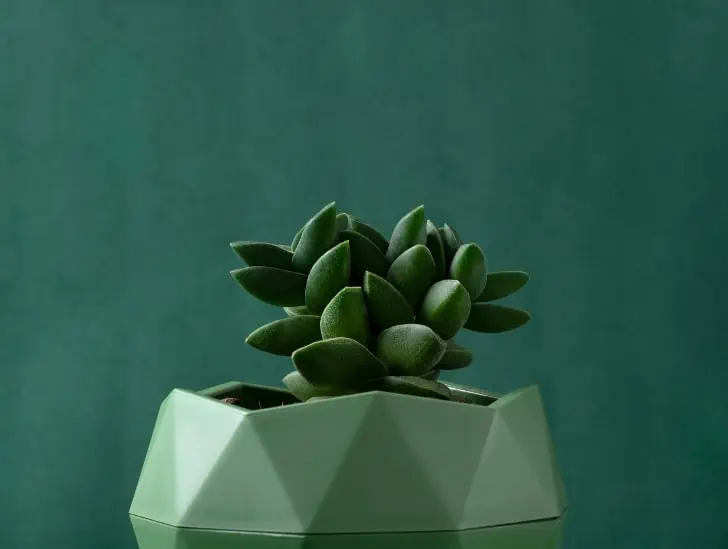
A crassula moonglow in a green pot.
The succulent belongs to the genus Crassula.

It belongs to the subfamily Crassuloideae which includes more than 1,400 species. Crassula contains over 200 succulent plants, mainly native to southern Africa.

The succulent belongs to the genus Crassula, known for its small-sized, shrubby, or herbaceous plants with woody stems.

Crassula Moonglow: Description and Appearance

The Crassula Moonglow is a beautiful indoor succulent with gray leaves tightly packed in overlapping ranks. The leaves are usually thick and fleshy with light pink to yellowish orange flowers.

When grown indoors, the plant can reach up to eight inches tall, but it can grow much taller when planted outside in warmer climates. It usually creates a compact cluster of columns that are pretty interesting to look at.

Besides being thick and fleshy, its leaves are also covered with fine velvet and its branches are covered in a soft coating of fine hairs.

The Crassula Moonglow is a hybrid succulent not related to any specific species of Crassula. It was bred by a nursery in Germany and is now widely available worldwide.

The succulent thrives in USDA hardiness zones 10a to 11b, meaning it can survive in temperatures of between 30 and 50 Degrees Fahrenheit.

Crassula Moonglow: Origin

As mentioned earlier, the succulent doesn’t have a native origin.

However, it is believed that the earliest Crassula crossings were introduced by the famous Johnson Cactus Gardens in late 1958. This was when the first cross-breeding of Crassula Perfoliata and Crassula deceptor happened.

The first crossing was simply an experiment to establish whether it was possible to create a hybrid with unique features.

Although the experiment was successful, it was not until the late 1970s that Werner Schwab officially launched the Crassula Moonglow in Germany.

The succulent has gained massive popularity since then and is now widely available in nurseries and online stores worldwide.

Crassula Moonglow: Forms and Hybrids

One of the most popular forms of Crassula Moonglow is the “Ivory Tower,” known for its white flowers that bloom in late winter. It has thick, rounded leaves and is quite resistant to drought and pests.

There are also other forms of the succulent such as Crassula “Dragon’s Breath,” which produces vibrant red flowers; Crassula “Flowering Time” with burgundy-red flowers; and Crassula “Fairy Queen” with white star-shaped flowers.

Moreover, there are many hybrids of the succulent available on the market, such as Crassula Rubicunda x deceptor and Crassula deceptor x ‘Pink Diamond.’

Crassula Moonglow: Growth Rate

This succulent is a relatively slow-growing plant that matures slowly over time. It usually takes about one to two years for it to reach maximum height.

Although it doesn’t require extra fertilizer to grow faster, it can benefit from a light application of balanced nutrients once every few months.

Crassula moonglow in a cloth.
This succulent is a relatively slow-growing plant that matures slowly over time.

Patience is key when growing the succulent, and you must always take good care of it to ensure it stays healthy and continues to grow.

Crassula Moonglow: Care and Maintenance

The Crassula Moonglow is an easy-care succulent that requires minimal attention from its owners. Typically, it prefers warm, sunny climates with a well-draining potting mix and moderate watering.

Since this succulent is drought resistant, it doesn’t need frequent watering, but it should be watered when the soil is completely dry.

It should be pruned regularly to keep it manageable and attractive. Pruning will also help promote healthy growth of the plant. Consider applying a diluted liquid fertilizer once a month during the growing season for better results.

A crassula perfoliata in a pot.
Start by gently removing the plant from its current pot and knocking away the old soil from its roots.

Since the succulent is a relatively slow grower, it doesn’t need frequent repotting. Ideally, you should repot your Crassula Moonglow once every two or three years or whenever it outgrows its current pot.

Ensure the potting mix is completely dry before repotting. Start by gently removing the plant from its current pot and knocking away the old soil from its roots.

Proceed to remove any rotten or dead roots before you transfer it to a new pot and fill the pot with fresh soil. Consider treating any cuts with a fungicide to prevent fungal infections.

Finally, water your plant lightly and place it in a sunny spot where it can receive plenty of sunlight. Your next watering session should occur when the potting mix is completely dry.

Crassula Moonglow: Propagation

This succulent can be propagated through stem cuttings or leaf cuttings. Stem cuttings should be taken from mature stems about 5 cm in length and inserted into a well-draining potting mix.

Leaf cuttings can be taken by plucking off healthy leaves with their petioles (leaf stalks) intact and inserting them in containers filled with moist potting mix. Ensure the leaves are not touching each other to avoid rot.

Your cuttings should be placed in an area where they can receive indirect sunlight and kept slightly moist until they start rooting and producing new growth. This process may take up to a few weeks or even months, so patience is necessary.

Once your cuttings have rooted, feel free to transplant them into individual pots and care for them as per the instructions above.

You can also propagate it through division. Division involves carefully separating the offsets (baby succulents) from the parent plant and replanting them in different containers.

This method is best done during spring or summer when the baby plants are well-established and easier to remove. Use clean, sharp scissors to avoid damaging the baby plants as you separate them from their parent.

Crassula Moonglow: Growth Problems

The two most common issues you will encounter when cultivating this amazing succulent are fungal diseases and mealybugs.

Fungal diseases can be prevented by ensuring the potting mix is well-draining and avoiding overwatering. If you notice any wilting leaves or powdery patches, treat them with a fungicide immediately.

Mealybugs can be easily identified as tiny, white pests covered in a cotton-like material. If you notice any mealybugs, treat them with neem oil or insecticidal soap and transfer your plant to a different location.

Overwatering may also lead to root rot. Common signs of root rot include wilting leaves, yellowing foliage, and mushy stems.

If you notice these signs remove the affected parts and repot your Crassula Moonglow in a well-draining potting mix.

You can prevent future root rot by improving the drainage of your potting mix and reducing watering frequency.

Crassula Moonglow: Uses

This succulent is one of the most popular houseplants in the world due to its attractive foliage and easy care.

Its showy leaves make it an ideal choice for adding color to your living spaces, while its low maintenance requirements mean it can be enjoyed by both beginners and experienced gardeners.

A crassula plant hanging and exposed to sunlight.
You can also use it as a hanging plant to create a unique look in your home.

It is an excellent choice for rock gardens as it can tolerate drought conditions very well. You can also use it as a hanging plant to create a unique look in your home.

Furthermore, the succulent can be used for ornamental purposes and even be incorporated into certain dishes.

Its leaves are edible and have an acidic flavor similar to lemon or lime, making them great for adding zest to salads or garnishing dishes.

Crassula Moonglow: Toxicity

This succulent is non-toxic and can be safely cultivated in households with children or pets. It poses no threat to humans or animals and is resistant to fungal infections.

crassula in a pot with a cat.
It poses no threat to humans or animals and is resistant to fungal infections.

However, it is always good to err on the side of caution and keep it away from your pets because it can cause mild skin irritation if ingested.

Final Words

The Crassula Moonglow is a beautiful, easy-care succulent that can make a great addition to your indoor garden.

It has interesting features and comes in many forms and hybrids. With proper care, it will thrive indoors for many years.

How to Ship Succulents: 6 Essential Things You Need to Know

Succulents for delivery in an egg tray.

The truth is that shipping succulents from one point to another are a challenging task to accomplish. Many things can go wrong with the shipment leading to catastrophic damage. The potting soil may become loose, stems may break, and the succulent may die due to poor shipping conditions. Things are even more delicate with highly sensitive succulents such as cacti. Therefore, there are some things you need to keep in mind if you want to ship your succulent safely.

So, what are the six most crucial things you need to know about shipping succulents? The first and most important thing to know is that everything depends on your chosen shipping material. Be sure the box is sturdy and well-insulated. From there, package your succulent appropriately and make sure that your succulent is protected from shock. Pay attention to temperature while remembering that most succulents do not like extreme heat or cold. The other thing to keep in mind is moisture. Ensure the shipping box remains free from moisture throughout transit. And use plenty of paddings, such as newspaper or bubble wrap, when packing your succulent to prevent unnecessary bumps or jolts that could damage the succulent during transit.

This blog post discusses everything you need to know about shipping succulents and the necessary precautions. Read on to learn more.

1. Shipping Material

The most important thing to know when shipping succulents is the type of material you will use. Choosing the wrong box can damage your succulent while in transit.

Consider using a sturdy, well-insulated cardboard box for shipping. Ensure it is big enough for your succulent, and consider using bubble wrap or packing peanuts to keep it in place and protect it from bumps or jolts.

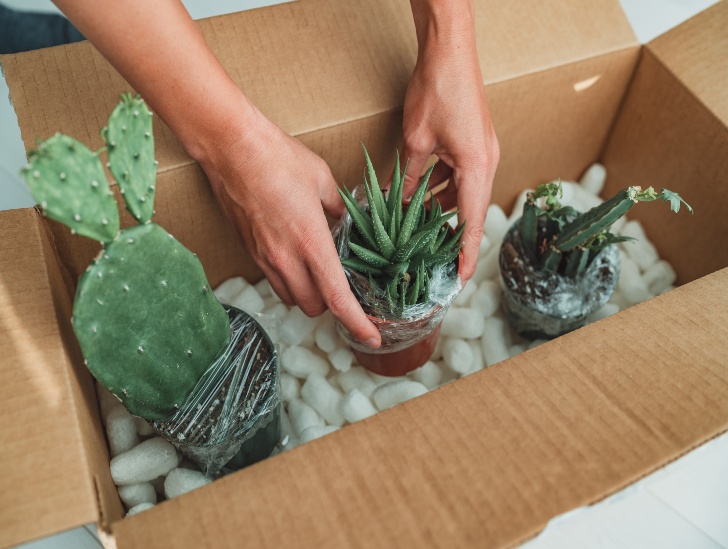
Succulent plants being prepapred to be shipped.
Consider using a sturdy, well-insulated cardboard box for shipping.

One of the best options is corrugated plant shipping boxes explicitly designed for packing plants. The good thing is that most succulents can be shipped without the pot. This cuts the shipping costs and makes it easier to pack your plants.

Feel free to use a partitioned corrugated box if shipping many plants to the same address. The partitions can be diagonal, horizontal, or vertical, depending on the type of succulents you are shipping.

You can get custom shipping boxes made for your succulents that are shipped regularly.

If you are an individual or small business and getting boxes made for you seems expensive, consider assembling the boxes yourself. All you need to do is find regular boxes, add partitions, and you are good to go.

2. Preparing the Plants for Shipping Is Key

Most succulents are best shipped bare roots. All you need to do is pull them out of the container or earth and carefully shake off the massive chunks of soil.

But don’t wipe off all the soil to avoid damaging the root systems. The roots still need some moisture and microbes while in transit.

Carefully wrap the roots with a moist paper towel (feel free to use several). Alternatively, spray the roots with some water and wrap them in plastic.

Consider wrapping the top of the succulent to avoid potential breakage.

A blank tablet and plants in a box.
Most succulents are best shipped bare roots.

For cacti and other sensitive succulents, make sure they have not been watered recently before pulling them out. A partially dry potting mix is the best option for shipping them.

For plants that are already flowering, consider cutting off the flowers before shipping. Target a clean angle cut to avoid damaging the plant.

Once you have cut off the flowers, put the plant in a jar of water for about three hours to absorb enough water to last the entire trip.

Now tie the plants in one bunch and wrap the bottom end with relatively wet paper towels and seal it. This way, your succulent can travel for long distances without withering.

3. Temperature Control

Most succulents are temperature-sensitive, so temperature control is critical when shipping them. The ideal range for most succulents is between 16°C (60°F) and 21°C (70°F). It is also essential to maintain a steady temperature throughout transit.

Consider using cold/heat packs to keep the temperatures regulated when shipping your succulents. You can get them in most stores or make them yourself.

To make your cold pack, fill a resealable plastic bag with frozen vegetables and seal it tightly before putting it in the box.

To make a heat pack, fill a resealable plastic bag with warm but not hot water and seal it before adding it to your box.

4. Moisture Control

Besides temperature control, moisture control is also crucial. Too much moisture or not enough moisture can damage the succulents in transit.

To control the humidity level in your box, get some silica gel packets and put them into the box before you add the plants. The silica gel will absorb any excess moisture, thus keeping your succulent safe during transit.

Once you have packed the plants, put your plant box in a larger box to help insulate it from temperature and moisture changes.

Ensure you fill gaps with packing peanuts or similar material for extra insulation. This way, your succulents can make it through their long journey safely.

5. Take Note of Shipping Rules and Regulations

Although shipping live plants over long distances in most parts of the world don’t require special equipment, there may be laws and limitations you need to know before you start the process.

These laws and regulations are applicable when shipping plants locally and internationally.

For instance, most succulents can be shipped to the United States as long as mailing them is not prohibited by the United States Department of Agriculture (USDA). Check the USDA database to read the guidelines for mailing plants in each state.

Succulents beside the box.
Use recognized couriers such as UPS, FedEx, and USPS to ship succulents.

The guidelines usually differ from state to state based on the impact of the mailed plants on local vegetation.

It is also essential to take note of the rules and regulations when shipping plants internationally. Countries have different restrictions, so it’s best to contact your local post office or customs service for more information.

For instance, you must obtain a phytosanitary certificate before shipping succulents internationally from the United States.

The destination country’s Department of Agriculture or Horticulture issued the certificate. It attests that succulents are free from pests and diseases.

Also, it is crucial to make sure you properly label your package. Most countries recommend labeling packages with a basic description of the contents (i.e., live plants) and an indication of their value. This helps ensure your package arrives safely and on time.

For courier services, you will need fast shipping since plants are perishable. A tracking number is also essential so you always know your package’s location. Use recognized couriers such as UPS, FedEx, and USPS to ship succulents.

6. Label Your Succulents Appropriately

You will need a standard shipping label containing the basic information about your shipment, the sender’s address, the recipient’s address, and the courier code.

It is critical to use handling labels to communicate the content of your package with the handlers. Ensure your handling label is prominently visible and states “Live Plants” to prevent delays or accidental mishandling.

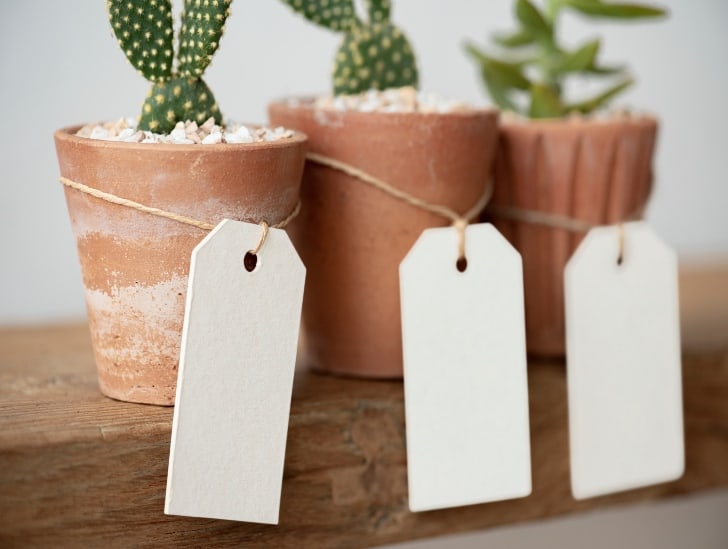
Succulents with label tags.
It is critical to use handling labels to communicate the content of your package with the handlers.

It is also essential to ensure you include care instructions for the recipient. These instructions should outline how best to take care of their succulents after they arrive. This gives the recipient an idea of what to do once they receive their plants.

Can I Ship Succulent Cuttings?

Besides potted succulents, you can also ship succulent cuttings. Make sure you water the succulent before taking the cuttings. Carefully wrap these cuttings in a newspaper or soft tissue paper.

Alternatively, use egg cartons and cover them with soft tissue before you close the carton. Place the carton in a cardboard box and label it appropriately.

From there, shipping the cuttings is similar to shipping a potted succulent. This means you still need to fill the box with packing peanuts and wrap it in plastic before you mail it.

How Long Can Succulents Survive Shipping?

Since most succulents are sturdy, they can survive shipping for one or two weeks if you wrap them properly. However, it is essential to note that the shipping time may vary depending on the distance, weather conditions, and type of succulent.

How Can I Recover Succulents from a Long Shipping Time?

Once you order succulents and pay, how long the shipping time takes is out of your control. So, knowing how to recover succulents from an extended shipping time is crucial.

plant in a box.
Unpack the plants carefully and cut away any dead leaves.

The first step is to inspect the package for any sign of damage or leakage. If there is visible damage, contact the sender immediately for re-shipment.

Next, unpack the plants carefully and cut away any dead leaves. Once you are done, transfer the succulents to a new pot with fresh soil. Provide adequate light and water to help them recover quickly and start growing again.

Final Word

Shipping succulents can be challenging, but you can quickly learn with practice. As long as you follow the laws and regulations, properly label your shipments, wrap them in appropriate packaging materials, and provide proper care instructions, you can easily send succulents worldwide.

Why Do Bonsai Trees Drop Leaves and Can They Regrow?

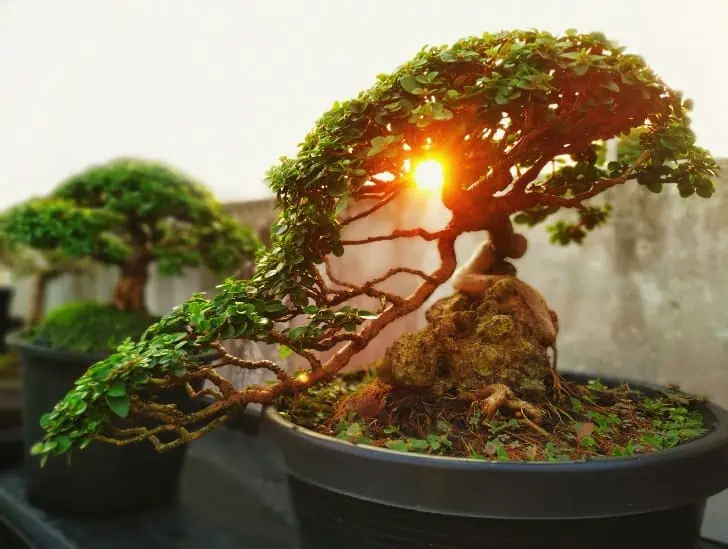
A bonsai outdoors sunset.

Bonsai trees are popular among those who enjoy the art of gardening and are an excellent way to bring a piece of nature into your home. Unfortunately, bonsai trees can suffer from different plant-related issues like any other plant. One of the common issues you may encounter when growing bonsai trees is leaf shedding or dropping. In most cases, the primary cause of bonsai dropping or shedding leaves is due to mistakes in routine care. But the good thing is that bonsai-dropping leaves can be reduced or avoided.

So, why are my bonsai dropping leaves, and will they grow back? The main reason for bonsai trees dropping leaves is poor care. Improper care habits such as insufficient light, overwatering, underwatering, pest infestation, lack of proper drainage, and overfertilization can lead to bonsai shedding or dropping leaves. However, bonsai-dropping leaves can also occur naturally as part of the preparatory steps that the plant takes as it enters the dormancy period. Dropping of leaves is relatively common on some deciduous bonsai trees. These trees naturally shed leaves in winter or fall to help them store as much water as possible for use when they slide into dormancy.

This blog post discusses everything you need to know about bonsai-dropping leaves and whether they will grow back. Read on to learn more.

Care Specifications for Indoor and Outdoor Bonsai

It is crucial to understand care specifications for indoor and outdoor bonsai since leaf dropping mostly involves improper care.

Most bonsai trees love temperate climates. Traditionally, these trees are grown outdoors in a sunny but sheltered position, requiring proper light, water, and feeding to thrive.

If you want to keep your bonsai indoors, choosing the right species that can tolerate indoor conditions is essential.

For outdoor bonsai trees, they must be placed where they get at least 4-6 hours of direct sunlight daily.

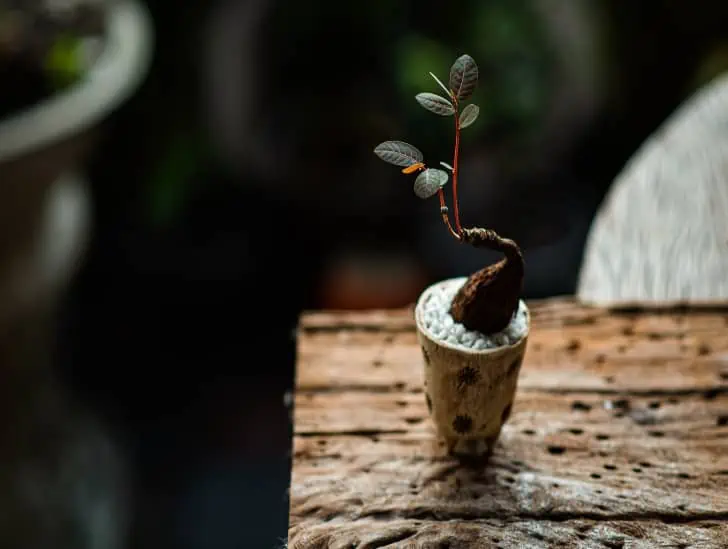
A litlle caudex bonsai.
Always check the soil to ensure it is not too dry or soggy before watering.

These trees need to be watered regularly, especially during the active growing season, but you must allow the soil to dry out completely between watering sessions.

Feeding your bonsai with a balanced fertilizer once or twice a month from spring to summer is also essential.

Consider watering them at least once a week, but always check the soil to ensure it is not too dry or soggy before watering.

Why Are My Bonsai Dropping Leaves?

Once you have identified if your bonsai is suited for outdoor or indoor environments, you can easily figure out why it is dropping leaves and take appropriate measures to stop further damage to your plant.

Below are some of the most common reasons bonsai trees drop leaves:

Reason #1: Insufficient Light

One of the primary reasons indoor bonsai trees drop leaves is insufficient light. It is no surprise that these plants love a lot of sunlight. Therefore, for most indoor bonsai trees, the limited amount of light received is not enough for growth.

Although insufficient light will not kill your indoor bonsai trees, it may delay their growth leading to leaf shedding or dropping. If you prune your tree, the leaves and branches may stop growing altogether.

Consider positioning your bonsai tree on a windowsill that receives plenty of direct sunlight for optimal growth. The best spot should be a south-facing or east-facing windowsill.

Bonsai tree in the windowsill exposed to sunlight.
The best spot should be a south-facing or east-facing windowsill.

However, you must remember that many outdoor bonsai tree species cannot withstand extreme temperatures.

Excessive light can make their nodes and internodes grow too large, leading to leaf dropping. Always ensure your outdoor bonsai tree receives adequate shade during the warmer months.

Reason #2: Overwatering or Underwatering

Another common reason for bonsai trees dropping leaves is overwatering or underwatering. Too much water can cause root rot and lead to leaf shedding, whereas too little water will result in dehydration, causing the leaves to dry and eventually drop off.

To avoid this issue, you must understand your bonsai tree’s water requirements and adjust its watering cycle accordingly.

Always check the soil before watering to ensure it is not too wet or dry and provide only sufficient water necessary for growth.

Also, don’t forget to consider the bonsai tree species to determine the amount of water and frequency of watering.

Reason #3: Improper Drainage

Being small in size, bonsai trees are typically grown in relatively small pots. Both outdoor and indoor bonsai trees need specialized care compared to other houseplants.

Trees grown in relatively smaller pots tend to have limited space for nutrients and water uptake.

The best way to determine if your bonsai suffers from poor drainage issues is to be keen during watering.

If you notice that the water drains out too quickly or doesn’t drain at all, your bonsai tree could be rootbound.

A person watering a bonsai.
The best way to determine if your bonsai suffers from poor drainage issues is to be keen during watering.

Being root-bound means that the root system of your plant has been disrupted. Therefore, the plant’s roots cannot absorb water and other nutrients effectively.

Rootbound bonsai trees are more susceptible to drying up quickly or may retain extra moisture leading to overwatering issues.

Such plants are more prone to show signs of plant stress, such as dropping leaves out of season and yellowing leaves.

Reason #4: Underfeeding or Overfeeding

Fertilizer is crucial for the overall health of your bonsai trees. In fact, it is highly recommended to feed your bonsai tree with a balanced fertilizer every month from spring to summer.

However, too much feeding can be detrimental to its growth since it may cause a nutrient burn or leaf drop due to an overdose of minerals and other nutrients.

On the other hand, underfeeding will result in slow growth, yellowing of leaves, and eventual leaf shedding.

To avoid this issue, always check the label of your fertilizer to ensure you’re applying the right amount and type of fertilizer for your bonsai tree.

Ideally, you want the fertilizer to contain Nitrogen, phosphorous, and potassium. Most bonsai trees will also do best with organic fertilizer.

Reason #5: Pests and Diseases

Your bonsai trees may also shed leaves due to certain pests and diseases. Common pests such as aphids, scale insects, mites, or mealybugs can damage the leaves and cause them to fall off.

Similarly, if your bonsai trees are infected with a disease like powdery mildew or verticillium wilt, they will likely start shedding leaves in large quantities.

You may have to use an insecticidal soap or oil solution directly onto the leaves and branches to get rid of the pests. For diseases, you will need to consult with a plant specialist for appropriate treatments.

Reason #6: Relocation

Bonsai trees need a lot of light to thrive, as mentioned earlier. The energy gained from light helps with the process of photosynthesis.

These plants also consume energy through metabolism. Typically, the rate of metabolism is high at relatively high temperatures.

A sudden change of location may change the supply of light that the tree is used to. This is especially true for indoor bonsai trees.

A bonsai being prepared to repot.
The sudden change in environment may pose a significant problem for indoor bonsai trees.

When these plants are transferred from bright greenhouses into the normal environment (relatively darker apartments), they suffer from shock.

The sudden change in environment may pose a significant problem for indoor bonsai trees. The high energy consumption due to increased metabolism plus low energy production is a bad combination you want to avoid.

So, how does bonsai solve this problem? They drop leaves to adjust to the new environment. The only way you can help your bonsai tree in such situations is by positioning it in a brightly lit spot.

This will help your plant to adjust gradually to its new surroundings.

Reason #7: Recent Repotting

Have you recently repotted your bonsai tree? If yes, this is likely the cause of leaf shedding on your tree.

When repotting a bonsai tree, root pruning is compulsory. This may lead your tree to start losing leaves as a way of adjusting to its new status.

Repotting is generally stressful for bonsai, especially the highly sensitive ones such as ficus. Consider repotting your plant in early spring or summer when it is just coming out of the dormancy period.

A bonsai on hand.
When repotting a bonsai tree, root pruning is compulsory.

Once you have repotted your bonsai, maintain temperatures around 50 degrees Fahrenheit. This will help the plant adjust to its new environment comfortably.

Also, consider keeping your repotted bonsai in a relatively shaded area for two to three weeks and water it moderately to minimize stress levels. Don’t apply fertilizer for the first three or four weeks after repotting.

Will Bonsai Dropping Leaves Grow Back?

So, will your bonsai tree grow back the leaves it has dropped? Generally, most healthy and disease-free bonsai trees can regrow their foliage within a few months.

In most cases, bonsai trees will regrow their foliage once the issue has been addressed.

So, if you notice leaf shedding in your bonsai trees, check for any underlying problems and take the necessary steps to fix them as soon as possible.

This will help ensure that your bonsai tree remains healthy and grows back its lush green foliage.

Summary

In conclusion, there are many reasons why your bonsai may be dropping leaves, and all of those reasons can typically be remedied.

However, the time it takes for new leaves to grow back depends heavily on the cause, location, climate, and age of the bonsai tree.

With proper care protocol in place, you can expect leaf regrowth.

Moss Terrarium Lighting 101: How Much Light Needed?

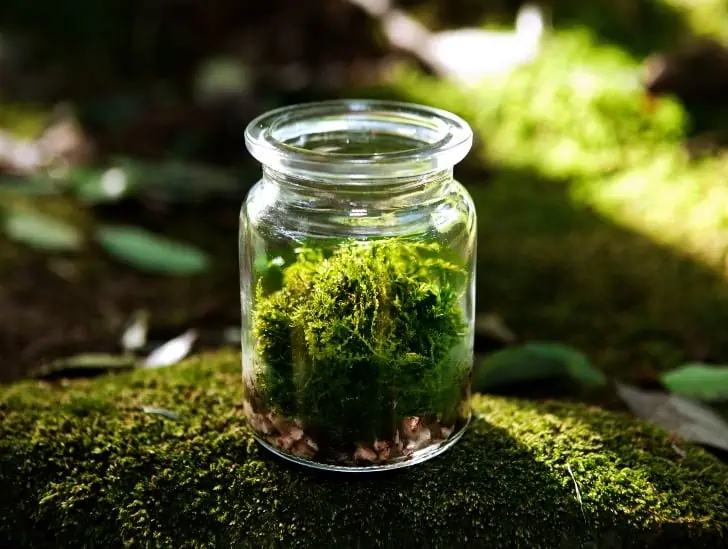
A cylindrical closed terrarium.

Moss is one of the plants that doesn’t get much attention among succulent lovers. But it is a good plant that can be an excellent addition to your terrarium. In fact, it plays a critical role in regulating the amount of moisture in the soil while preventing algae from taking over. It also protects plants with delicate roots. However, you must be careful with how much light your moss terrarium receives.

So, how much light does a moss terrarium need? Moss does not require a lot of light to thrive. Generally, moss will tolerate a wide range of lighting levels, from low light to bright indirect sunlight. The amount of light that you provide for your moss should depend on the species you choose and the environment in which it is growing. Be sure to provide your moss with moderate indirect natural sunlight for at least four to six hours per day. If you don’t have access to natural sunlight, use artificial lighting such as LED or fluorescent bulbs placed close to the terrarium.

This blog post discusses everything you need to know about how much light your moss terrarium needs. Read on to learn more.

What Is a Moss Terrarium?

A moss terrarium, also known as a “mossaria” or “mossarium“, is designed to grow moss and other plants in an enclosed environment.

In fact, the term “Mossarium” translates to a “container of moss” in English. Mossaria, on the other hand, is used to describe multiple moss plant terrariums.

Moss terrariums can provide you with the perfect microclimate for growing various small plants, including bromeliads, ferns, and even tiny orchids. They make incredible decorations too.

Making a moss terrarium is relatively easy. Compared to other succulents, moss is a relatively easy plant to maintain.

A terrarium
They make incredible decorations too.

The key layers of this plant are pretty easy to obtain but critical to the longevity and success of your moss terrarium.

Proper drainage is one of the most important things you need to remember when creating a moss terrarium.

The drainage layer usually consists of sand, gravel, or charcoal and ensures the soil is not waterlogged. It also prevents the moss from rotting due to excess moisture.

Making sure your moss terrarium is properly lit is just as important. The light level should neither be too harsh nor too dim. We shall cover more on lighting in our next sections.

The substrate is the bottom layer of your terrarium. It provides a medium for plant roots to anchor onto and helps keep moisture in place. This layer can be made up of soil, moss, or even sand.

The last two layers are top dressing and decoration. Top dressing can include gravel, tiny stones, shells, or glass chips.

Decorations are crucial for creating a visually beautiful terrarium. They can be anything from tiny figurines to plastic ornaments, but it is essential to ensure they don’t block sunlight.

What Are the Different Types of Moss Terrariums?

There are three different types of moss terrariums. A moss terrarium can be fully aquatic, the traditional terrain setup, or a hybrid of both.

The traditional terrain setup is the most common type of moss terrarium. This style has a drainage layer, substrate, and top-dressing layers. The plants are grown in the soil, watered from above, or misted with water.

The fully aquatic setup is just like it sounds; it’s a completely submerged environment that only requires minimal misting to keep moisture levels high.

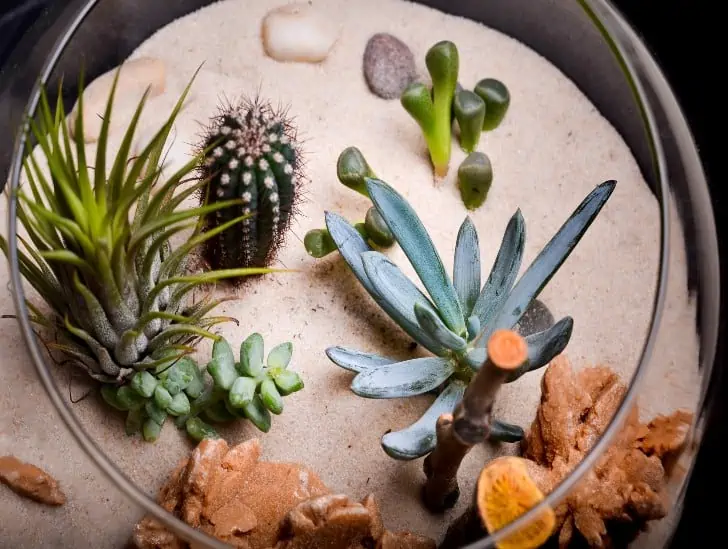
A round sand terrarium.
The moss you need will mostly depend on the type of terrarium you have chosen.

The critical components of this type of setup are a substrate, gravel, and aquatic plants such as Java moss or Hairgrass.

The hybrid setup is a combination of the terrain and aquatic style. This type of terrarium uses both water-filled containers and soil to create the perfect environment for growing moss.

You can use either artificial lighting or natural light for this setup. The moss you need will mostly depend on the type of terrarium you have chosen.

How Much Light Does a Moss Terrarium Need

Now that we have covered all the essential layers of a moss terrarium, let us shift focus and discuss the lighting requirements in detail.

To thrive, moss plants require bright, indirect sunlight and temperatures between 65-80 degrees Fahrenheit.

You must avoid exposing moss to direct sunlight since it can burn the delicate leaves of moss plants. Make sure your moss terrarium is located away from any direct light sources.

Some moss plant species will thrive in relatively shaded and low-light areas, but the key to success remains to provide your moss with bright, filtered light. This allows your plant to photosynthesize without any issues.

You should also ensure the spot isn’t too dry or windy to avoid drying out your moss. Although moss plants love moisture and warmth, they require proper airflow to thrive.

If your moss is an enclosed terrarium, consider positioning it on a windowsill or shelf that receives plenty of bright, indirect light away from air conditioning devices or radiators.

A open terrarium outdoor exposed to sunlight.
You should also ensure the spot isn’t too dry or windy to avoid drying out your moss.

Open the lid occasionally for air exchange. You should even consider taking your terrarium outdoors once a week for a full day of proper air exchange.

But don’t put it under direct light. The primary purpose of taking the terrarium outdoors is for proper ventilation.

Always aim for mid-range lighting since too much or too little light may cause your moss to wither. Don’t be afraid to place your terrarium moss on a windowsill that receives plenty of indirect sunlight.

What Type of Light Does a Moss Terrarium Need?

Your moss terrarium will primarily benefit from natural bright light from the sun. If you don’t have direct access to natural sunlight, you could consider using artificial lighting such as LED grow lights or fluorescent bulbs tailored for plants.

LEDs and fluorescent lamps with higher Kelvin ratings (5000-6500K) will be most beneficial for your moss terrarium.

Generally, the higher the Kelvin rating, the more intense the light and heat. If you are using artificial lighting, ensure that you have it set on a timer so it is not overused.

It’s also essential to take into consideration how much light your moss terrarium needs. The amount of light required depends on what kind of moss you are growing. However, most mosses need between four to six hours of light daily.

Direct vs. Indirect Light: What Is the Difference

We have consistently said that your moss terrarium will only thrive when exposed to bright, indirect sunlight. So, what exactly is the difference between direct and indirect light?

Direct light refers to when a source of light (e.g., the sun) is shining straight onto an object without any obstruction or diffusion.

On the other hand, indirect light refers to when a light source shines on an object but is blocked or diffused in some way, such as through a curtain.

Moss plants do not have the capability to tolerate direct sun exposure and will burn if they are exposed to it for too long.

Therefore, they should always be placed in an area that receives indirect light or has some kind of barrier between them and direct sunlight.

What Are the Temperature Requirements for a Moss Terrarium?

The aspect of light is closely related to the temperature needed for optimal moss growth. The ideal temperature range for most moss terrariums is between 65-80 degrees Fahrenheit.

Moss plants are very sensitive, and any drastic changes in temperature can cause them harm or death.

A african violet plant in a terrarium.
The aspect of light is closely related to the temperature needed for optimal moss growth.

If you do not have a way of regulating the temperature of your enclosure, consider keeping it away from heat sources such as radiators, fireplaces, and windowsills that receive direct sunlight.

You may need to mist your terrarium more often to prevent dehydration in warmer environments. Placing ice cubes in the terrarium can also help lower the temperature and ensure it stays consistent over time.

What Is the Ideal Humidity Level for a Moss Terrarium?

Moss plants thrive in humid environments, which is why terrariums with moss plants are typically kept closed. The ideal humidity level for most moss terrariums is between 70-90%.

Humidity levels can be increased by regularly misting the terrarium or placing a shallow water bowl inside the terrarium.

Check on your terrarium often since too much humidity can lead to fungal growth and other problems.

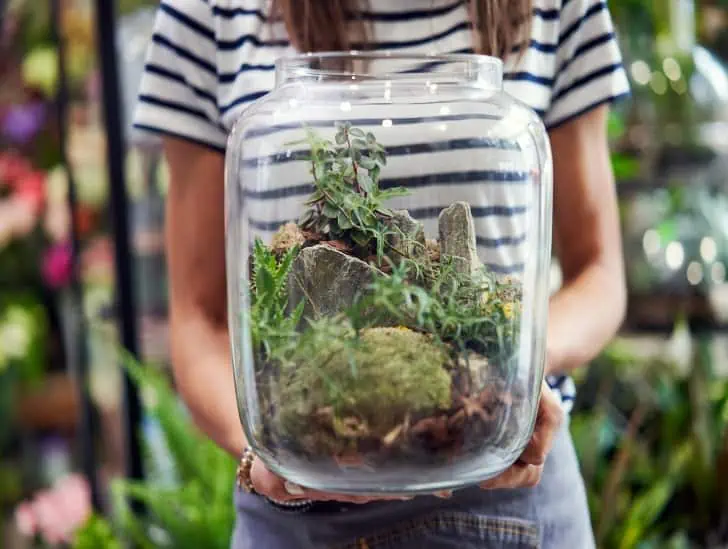
A person holding a terrarium.
Humidity levels can be increased by regularly misting the terrarium.

One of the best ways of controlling the humidity level of your terrarium is by keeping an eye on the temperature.

Keeping temperatures in the range of 70-80 degrees Fahrenheit can help maintain high humidity levels without creating moisture buildup inside the enclosure.

Summary

Moss terrariums are a great way to add life and color to your home décor. You must provide them with proper lighting and a favorable environment for them to thrive.

The image layer should be made up of sand, soil, and moss plants. The ideal environment for a moss terrarium is one with bright, indirect light away from air conditioning devices or radiators.

Artificial lighting, such as LED grow lights or fluorescent bulbs, can also be used in place of natural sunlight.

Your terrarium moss will thrive and add beauty to your home with the right conditions!

Why Your Terrarium is Growing Mushrooms – Here’s Why

A person holding a terrarium.

Creating an open or closed terrarium remains one of the best ways of decorating your indoors. Terrariums usually need little care and maintenance to stay healthy and look good. A common feature of many terrariums is mushrooms growing inside them. However, the big question is; where do the mushrooms come from, and what can you do about it? Do you let them stay and be part of your terrarium, or eliminate them? We shall find out shortly.

So, why do mushrooms appear in a terrarium? Mushrooms often appear in terrariums since they thrive in moist and humid environments. This makes them very suitable to live in the mini-world you have created for your plants. The spores of mushroom fungi can be found almost everywhere, including in the soil and on plants. As soon as you open your terrarium, the spores will float around and settle on surfaces or be distributed by air currents, thus making their way into your terrarium. They can also come from organic material, such as dead leaves or wood, which may have been used to decorate your terrarium.

This blog post discusses everything you need to know about mushrooms appearing in your terrarium. Read on to learn more.

Why Do Mushrooms Appear in a Terrarium?

The truth is that you neither planted mushrooms in your terrarium nor did you envision having them there. So, where did they come from if you did not plant them?

To answer this question, you must first understand the environment in a terrarium. Terrariums are often moist and humid; an ideal condition for mushrooms to grow.

Since spores of mushroom fungi can be found almost everywhere, including in soil and on plants, they will find their way into your terrarium when you open them.

Ajar converted to a closed terrarium.
The mushrooms will feed off them and grow without any extra effort from you.

The spores float around and settle on surfaces or be distributed by air currents, thus making their way into your terrarium.

They can also come from organic material, such as dead leaves or wood, which may have been used to decorate the terrarium.

Once the spores get favorable conditions, they automatically start to grow. With time, they create a dense nutrient transport network in your terrarium.

You have to remember that mushrooms usually feed on decaying matter. As more leaves fall from your terrarium plants and decompose within the terrarium’s environment, the mushrooms will feed off them and grow without any extra effort from you.

Mushroom mycelium can be beneficial if it wraps around the roots of your terrarium plants since it provides your plant with water and essential minerals while taking sugar from it.

Should I Get Rid of the Mushrooms?

Most people believe that mushrooms absorb nutrients from soil affecting the growth of their terrarium plants. However, that is not the case. Instead, mushrooms tend to add more nutrients to your terrarium soil.

They freely share nutrients with your terrarium plants and are not harmful. In fact, mushrooms pose no safety concern to you or your terrarium plants.

On the contrary, they can be highly beneficial to your plants since they are natural decomposers. Being decomposers means that their lifecycle is different from other plants.

A person holding a terrarium.
The topmost part of the mushroom is the only productive part of the fungi.

When they decompose, they increase the level of nutrients in your terrarium soil, making your plants healthier and stronger.

Their presence in your terrarium can play a crucial role in breaking down unwanted waste by recycling the materials into valuable nutrients.

The topmost part of the mushroom is the only productive part of the fungi. Below the surface, you can see a root-like structure known as mycelium.

The mushroom mycelium can quickly spread throughout the potting mix, causing it to appear as if there are many mushrooms growing.

The top part of the mushroom only appears once the reproductive cycle is over. Therefore, getting rid of them is unnecessary; you can consider them a part of your terrarium setup.

However, some mushroom species may harm your health if you consume them. You should not allow them to grow in your terrarium.

This brings us to the next question; what can I do about mushrooms if I don’t want them in my terrarium? Let us find out.

What Can I Do About Mushrooms If I Don’t Want Them in My Terrarium?

We have already mentioned that mushrooms growing in your terrarium should not be a cause of concern since they are harmless to your plants. However, you should remember that some mushroom species are toxic and must be avoided at all costs.

So, to play safe, you should consider removing them as soon as possible. You can get rid of the mushrooms from your terrarium in two ways; pull them out manually or increase the temperature and light levels.

A cylindrical closed terrarium.
You should remember that some mushroom species are toxic and must be avoided at all costs.

The easiest way to get rid of mushrooms is to pull them out manually with the help of a stick or tweezers.

Be sure to wear gloves while doing so, as some mushroom types have toxins on their spore surfaces that can cause skin irritation and allergies in some people.

Another way to eliminate mushrooms from your terrarium is by increasing the temperature or light levels. This will make the environment unfavorable for mushrooms, and they won’t be able to survive.

However, we must mention that the sight of mushrooms growing in your terrarium is a clear sign of a relatively healthy ecosystem, and you should be happy about it.

The growth of mushrooms is quite normal in moss terrariums. These plants like to grow in low-light and humid environments, which are ideal for mushroom growth.

Therefore, if you have moss terrariums in your home, it is likely that mushrooms will start to appear over time.

Although they may not be the most attractive sight, they add a lot of nutrition to the soil without taking away anything from it.

Some people assume that the best way of dealing with mushroom growth in such a situation is overwatering the terrarium.

Unfortunately, the results can be catastrophic. You must avoid overwatering your terrarium since it can lead to root rot, and your plants could die.

Can I Create a Mushroom Terrarium?

Yes, you can create a mushroom terrarium using the same principles as moss terrariums. The key is building a closed environment with enough humidity and moisture for the mushrooms to thrive.

To do this, you must use soil/peat moss mixtures with adequate drainage and provide an indirect light source. You can also add compost and mulch to the mix depending on your specific requirements.

You then need to create a suitable environment for the mushrooms to grow by adjusting the humidity, temperature, and light levels.

Once the environment is suitable, you can add a few mushrooms from your local store or even gather them from your outdoor environment.

As a result, you should be able to grow edible mushrooms in your home without any hassles.

How Else Can I Use Mushrooms in My Terrariums?

Mushrooms can also be used as decorations in your terrarium. They look pretty attractive and are a great way to add a bit of color or texture to your terrariums.

You can use them for educational purposes, such as teaching your kids about fungi and the environment, or use them to add a bit of life to your terrarium without taking up much space.

What Is the Average Lifespan of Mushrooms?

The lifespan of mushrooms depends upon the species and their environment. Generally, most mushrooms have a short lifespan ranging from a few days to weeks, depending on their growing environment.

A garden terrarium with mushroom.
The lifespan of mushrooms depends upon the species and their environment.

However, some varieties can live for several months and even reach up to 2 years with favorable conditions. The average mushroom typically lasts about 2-4 weeks before drying up and decaying away.

To ensure your terrarium mushrooms live longer, consider keeping their environment as ideal as possible. This means providing enough moisture, light, and temperature while avoiding drastic environmental changes.

Are Mushrooms Plants?

You may be wondering if mushrooms are plants since they usually grow in soil and behave like conventional plants.

But the answer is no: mushrooms are not plants; they belong to the fungi kingdom and have features that separate them from true plants.

Mushrooms do not contain chlorophyll and thus cannot produce their own food like true plants. They obtain nutrients from decaying organic material present in the terrarium environment.

They also have a relatively short lifespan and reproduce using spores rather than seeds. Some of the common mushroom species that can be found in terrariums include morels, shiitake, and oyster mushrooms.

Final Word

Mushrooms appearing in your terrarium are perfectly normal and should not be a cause for concern.

They come from spores that have likely been present in the soil or organic material used to decorate the terrarium and can be beneficial to the environment.

If you want to add mushrooms to your terrarium, create a suitable environment and introduce a few spores or mushroom pieces from the local store.

With proper care, you can easily grow edible mushrooms in your plant terrarium without much hassle.

Lady Finger Cactus: The Ultimate Care and Maintenance Guide

A lady finger cactus flowering.

The Lady Finger Cactus, also known as Gold Lace Lady Finger Cactus, is a relatively petite cactus native to Mexico. The cactus gets its name from its long and slender finger-like stems. With its delicate silhouette and beautiful golden spines, the Lady Finger Cactus adds an exotic charm to any home décor. However, you must take special care of your Lady Finger Cactus to ensure that it stays healthy and blooms.

So, how do you take care of a lady finger cactus? Typically, this cactus enjoys a slightly bright, sunny position on a south-facing windowsill. This is because it requires up to six hours of direct sunlight to thrive. Keep the temperature above 20 degrees Fahrenheit and be careful how often you water. Lady Finger Cactus likes dry, well-draining soil and should be watered once every two weeks. Too much water can cause root rot and other issues. Only water it when the soil is completely dry. You must also ensure that the potting mix in which you cultivate the Ladyfinger cactus is well-draining.

This blog post discusses how to care for a Ladyfinger Cactus in detail. Read on to find out everything you need to know.

Ladyfinger Cactus: An Overview

Before we dive into the details of caring for a Ladyfinger Cactus, let’s take a quick look at its background and most essential characteristics.

The Ladyfinger Cactus is native to central Mexico and grows in clusters of finger-like stems. This cactus has slender, bright green stems decorated with stunning golden spines.

The stems grow up to 15 inches in height. It produces fragrant white flowers between April and August.

Lady finger cactus in a brown pot.
This cactus has slender, bright green stems decorated with stunning golden spines.

In its natural habitat, this cactus can grow up to 6 feet tall, but it usually maxes out at around 15 inches when cultivated indoors.

Although rare, there are a few cultivars of this cactus that a determined cactus lover can find. The two most common cultivars are the Mammillaria elongata, commonly referred to as the monstrous ladyfinger cactus, and the Mammillaria elongata copper king cactus.

Ladyfinger Cactus Care Tips

Ladyfinger cacti are relatively easy to care for as long as you keep a few key points in mind. Here is what you need to know:

Light

As mentioned earlier, this cactus thrives in bright, direct light even when grown indoors. A south-facing windowsill with plenty of direct sunlight is the ideal spot to position your ladyfinger cactus indoors.

You can still position it on a west or east-facing windowsill if you don’t have a south-facing one.

Lady finger cactus exposed to sunlight.
This cactus thrives in bright, direct light even when grown indoors.

One of the most important things you need to remember is that a ladyfinger cactus won’t survive in low-light environments.

Therefore, consider installing artificial grow lights if your indoor environment doesn’t provide your cactus with enough light. These lights are quite easy to manage and will provide your cactus with enough light even in the dimmest apartment.

When grown outdoors, consider providing your ladyfinger cactus with access to full sun. However, be careful with how you introduce the succulent to increased light levels after winter to avoid sunburn.

Although this cactus loves a lot of direct sunlight, too much of it can permanently damage the plant.

Therefore, instead of sticking your ladyfinger cactus outside for a full day right away, start by introducing it to direct sunlight for a few hours in the morning.

Gradually increase the amount of direct light as the days go by until your cactus is used to full sun conditions.

Watering

The Ladyfinger cactus requires low levels of water to thrive. You should only water your cactus once every two weeks when the soil is completely dry.

Too much watering can lead to root rot, a fungal condition that affects succulents grown in damp environments.

To avoid this, ensure the potting mix you use to grow your Ladyfinger cactus is well-draining. Always stick your finger into the soil to check if it is still moist before watering. If it feels moist, wait for a couple of days to pass before checking again.

The watering method you use will also make a big difference. Consider watering the soil directly rather than misting or spraying the leaves since it can cause fungal diseases.

Alternatively, use the bottom-watering method, which involves placing the pot in a container of water and allowing the soil to absorb moisture from below.

This watering method ensures that your cactus is evenly watered without trapping too much moisture within the potting mix.

A water can beside the cactus.
Consider watering the soil directly rather than misting or spraying the leaves since it can cause fungal diseases.

The best time to water your ladyfinger cactus is in the morning since it allows the spines to dry off, reducing the chances of fungal diseases caused by excess moisture.

Avoid watering your cactus in the afternoon when the evaporation rate is high because your plant may not have enough time to absorb enough water before it evaporates. If you cannot water in the morning, consider watering in the evening.

Temperature & Humidity

Ladyfinger cacti thrive in hot and dry conditions. This cactus can survive temperatures of up to 90°F (32°C) but does best when the temperature is kept between 70-80°F (21-27°C).

Avoid exposing your Ladyfinger cactus to cold temperatures since it can cause the spines to drop off.

Humidity is not very important when growing a Ladyfinger cactus since it thrives in dry environments.

However, ensure you don’t expose your cactus to too much humidity because it can cause fungal diseases and other problems.

Soil

Like other cacti species, ladyfinger prefers well-draining soil. Remember, any form of excess moisture in the soil will eventually lead to root rot.

Therefore, you must do everything possible to ensure your ladyfinger cactus only sits in potting mix that allows excess water to drain away as fast as possible.

Avoid potting mix with huge amounts of water-retaining components such as peat moss, coconut coir, and clay.

Lady finger cactus planted.
If you purchase commercial soil, go for one explicitly labeled for use with succulents or cacti plants.

Your soil should only contain small amounts of these ingredients and large amounts of soil amendments such as coarse sand, perlite, and pumice.

If you purchase commercial soil, go for one explicitly labeled for use with succulents or cacti plants. This type of soil is specially manufactured to ensure it provides cacti plants with the best-growing medium.

If you cannot find a cactus mix readily available in your local garden center, consider making one yourself using the ingredients mentioned above.

Growing Container

Once you have picked the correct type of soil, you must also choose the right container for your cactus.

No matter how well-draining your potting mix may be, a container that does not have enough drainage holes will only cause your cactus to suffer.

Look for pots with several small drainage holes at the bottom and ensure they are large enough to allow excess water to escape easily.

You can use any type of pot you like, be it plastic, terracotta, or ceramic, but remember, the larger the pot, the more soil your cactus will have to absorb moisture.

Finally, pick a shallow and wide pot because ladyfinger cacti do not require too much depth.

Fertilizer

Give your Ladyfinger cactus a balanced liquid fertilizer every month or two during the active growing season. Be careful with the type of fertilizer you use since it can easily burn your cactus.

Always dilute the fertilizer to half its recommended strength before applying it to avoid nutrient toxicity and root damage.

Avoid fertilizing during winter when the plant is dormant to lower the chances of burning your cactus.

Pruning

A ladyfinger cactus does not require frequent pruning since it does not grow too tall and does not become too bushy.

However, you may want to occasionally trim off any dead or diseased stems and spines as they appear. This will help keep the cactus healthy and looking good always.

When pruning, make sure you wear gardening gloves and protective eyeglasses to avoid being hurt by the spines.

Propagation

The easiest way to propagate ladyfinger cacti is using stem cuttings. To do this, use a sharp knife or garden scissors to remove a healthy stem from the main plant.

Allow the cutting to sit for a few days to allow the wound to heal before planting it in well-draining soil.

Keep the cutting away from direct sunlight since it can cause sunburns and wait until you see new growth before watering.

Repotting

Your ladyfinger cactus requires re-potting every two or so years. This will help keep the soil fresh and give your cactus more space to grow.

When re-potting, make sure you use a pot slightly larger than the current one but don’t over-pot your cactus since this can cause root rot.

Lady finger cactus in a black pot.
When re-potting, make sure you use a pot slightly larger than the current one .

If you are re-potting into the same pot, make sure to replace some of the old soil with a fresh cactus mix.

Apply a modest amount of top dressing, such as gravel or sand, to improve drainage and enhance your plant’s beauty.

Summary

Growing a ladyfinger cactus is relatively easy, provided you understand its needs and take the necessary steps to meet them. Make sure you have the right type of soil, container, and fertilizer before planting your cactus.

Also, don’t forget to occasionally prune off dead stems and spines as they appear. Follow the tips mentioned above, and your cactus will give you plenty of years of enjoyment.

Panda Plant Care: Tips and Tricks for Keeping Your Plant Happy

Native to Madagascar, the Panda plant is a member of the Kalanchoe genus. It is one of the most-loved succulents across the world. The panda plant is known for its interesting pattern and relatively soft feel. In fact, its botanical name translates to “covered with fine hairs” in English. Like many succulents, the panda plant is less fussy and can thrive even with neglect. A mature plant can be up to two feet tall.

So, how do you take care of a panda plant? Well, like other succulents, this plant doesn’t love being overwatered. Too much water can cause irreversible root rot due to the relatively large size of its leaves that store water for many days. You should only water it when the soil is completely dry. The plant requires at least six hours of bright sunlight daily, although it can withstand partial shade. If you are looking to fertilize your panda plant, do so sparingly since overfertilizing can cause root rot and other issues. Feed your panda plant with a liquid fertilizer during the active growing season. Ensure the temperature doesn’t fall below 65 degrees Fahrenheit and only repot once every two or three years.

This article discusses everything you need to know about caring for a panda plant. Read on to learn more.

Panda Plant: General Overview

The panda plant is a perennial succulent that grows in Madagascar. Its leaves are grey-green with brown edges and are usually covered in silver hairs. These hairs are called trichomes. Its botanical name is kalanchoe tomentasa.

Panda plant top view image.
The panda plant is highly tolerant of dry air and doesn’t require frequent watering to thrive.

Decorative year-round, this succulent makes a beautiful addition to every succulent garden. It makes a perfect houseplant for heated properties even though it rarely flowers indoors.

Like other succulents, the panda plant is highly tolerant of dry air and doesn’t require frequent watering to thrive. Just give it plenty of direct sunlight, and it will remain healthy for many years.

The two main panda plant varieties are the velvet-leaf panda (Kalanchoe tomentosa) and the felt-leaf panda (Kalanchoe beharensis).

Panda Plant Care Guide

Now that you know a bit about the panda plant, let’s talk about how to take care of it properly.

Watering

This succulent is drought-tolerant and doesn’t need too much water to thrive. You should wait until the soil is completely dry before watering it. The amount of water required will depend on the time of year and the temperature.

During the summer, it will need to be watered more often than in winter. Generally, you should water your panda plant once every two weeks because the evaporation rate is relatively high.

But make sure you check the soil before watering. To do this, insert your finger at least one inch into the soil.

If it’s still moist, wait for a few days before you check again. You can also use a moisture meter to accurately measure the moisture content in the soil.

During winter, cut down the watering to once a month. Since the days are shorter and cooler, your panda plant will need less water and sunlight to thrive.

Keep in mind that excessive watering will lead to root rot. Catching root rot in a panda plant may be difficult since it usually takes many months for the rot to appear on the leaves.

However, some early signs of root rot are yellow or discolored leaves, wilting or drooping stems, and an unpleasant smell.

Light

The panda plant needs plenty of bright light for optimal growth, but it can also tolerate partial shade. It does best when placed in a south-facing window with direct sunlight for at least six hours daily.

An east-facing or west-facing windowsill can still serve the purpose if you don’t have a south-facing windowsill in your house.

Panda plant exposed to light.
The panda plant needs plenty of bright light for optimal growth, but it can also tolerate partial shade.

Closely monitor the amount of light your plant gets and adjust accordingly since too much or too little sunlight can cause problems.

If your home doesn’t get enough natural light, use artificial grow lights to provide your panda plant with the right amount of light it needs. Keep the lights on for at least 12 hours during summer and 8 hours in winter.

Temperature and Humidity

The panda plant prefers relatively warm temperatures and high humidity levels. The ideal temperature range for this succulent is between 65 to 75 degrees Fahrenheit (18-24°C).

If you live in a cold climate, it’s best to keep your panda plant indoors during winter. Ensure the room temperature doesn’t fall below 60 degrees Fahrenheit (15°C).

Panda plant in a black pot.
The panda plant prefers relatively warm temperatures and high humidity levels.

Be careful with introducing it to sunlight after winter. If you place it in direct sunlight straight away, the leaves will sunburn due to a sudden increase in temperature.

The best way to do it is to gradually increase the amount of sunlight your panda plant gets. Start by placing it near a window where it will get bright indirect light for a few days, then move it closer to the window until you can place it in direct sunlight.

Humidity levels should ideally range between 40 to 50 percent. Feel free to use a humidifier to achieve this or mist your plant regularly with lukewarm water.

Fertilizer and Soil

Like other succulents, the panda plant needs soil that has excellent drainage properties. Use a potting mix specifically designed for succulents or make your own mixture with equal parts of topsoil, perlite, and coarse sand.

Your panda plant needs fertilizing once or twice a year. Consider usingan organic fertilizer with balanced nitrogen, phosphorus, and potassium levels, or get a liquid houseplant fertilizer designed for succulents. Just dilute it to half its recommended strength before use.

Panda plant on soil.
Use a potting mix specifically designed for succulents or make your own mixture with equal parts of topsoil, perlite, and coarse sand.

Be careful with the amount of fertilizer you use since too much fertilizer can burn the plant’s roots.

Propagation

Panda plants can be propagated by stem cuttings and leaf cuttings. Simply take a few healthy stems or leaves off the main plant and place them in moist soil. Ensure the soil is well-drained; otherwise, root rot may occur.

Keep the newly planted cuttings in a warm, bright spot, and soil moist but not saturated. You should see roots appearing on the stem or leaves within a few weeks.

Once you see new growth on the stem or leaves, you can start watering it normally.

Repotting

The panda plant is a relatively slow grower and can survive in the same pot for up to three years.

When it’s time to repot your plant, use a slightly larger pot than the current one. Ensure the new pot has plenty of drainage holes at the bottom and use well-draining succulent soil for optimal growth.

Panda plant on pots.
Ensure the new pot has plenty of drainage holes at the bottom.

The size ratio of the new pot to the old one should be about 1.5 times larger for optimal growth. For instance, if the old pot had a diameter of four inches, the new one should have six inches.

You can repot your panda plant any time, but spring is the best time since it’s the start of its growing season.

Gently remove the root ball from its pot and gently break up the soil around the roots to loosen them up. Then, place the root ball in the new pot and fill it with succulent soil.

Pruning

Panda plants don’t need much pruning, but water can help keep the plant healthy. Prune away any dead, yellow, or damaged leaves with a pair of scissors sterilized with alcohol.

Consider pruning the stem to create fuller and bushier growth. Simply snip off new shoots at the stem’s base, and the plant will start to branch out.

You can also take stem cuttings for propagation, as mentioned above. Use sharp scissors or pruners and sterilize them with alcohol before each use to prevent the spread of disease.

Spacing

The panda plant loves considerable space around it to thrive and grow. Ensure there is at least eight inches of space between other plants and the panda plant to ensure good airflow.

If panda plants dominate your garden, consider leaving a space of 2-3 feet between the plants for better results.

Pests & Diseases

The panda plant is relatively resistant to pests and diseases. But watch out for mealybugs, spider mites, and scale insects which can attack your plant if it’s not taken care of.

You may also experience root rot due to overwatering or poor drainage. To prevent this, ensure you water your plant only when the soil has dried out and use a well-draining soil mix.

If you notice any pests or diseases, take the necessary action to eliminate them immediately. Use insecticidal soap or remove the affected parts of your plant.

Summary

The panda plant is a stunning succulent with unique fuzzy leaves, making it stand out from other houseplants. If you give it the right care and attention, you can enjoy this lovely plant for many years.

It’s an easy-care plant that requires bright indirect light, well-draining soil, regular watering, and occasional fertilizing. To encourage bushier growth, you can prune healthy stems or take stem cuttings for propagation.

Repotting your panda plant once in two or three years is also necessary to ensure optimal growth. With the right care, you’ll soon have plenty of healthy, beautiful panda plants!

Is Your Succulent Turning Purple? Causes and How to Save It

The world is a beautiful place. Every living thing under the sun has certain emotions and feelings. The only difference is in how they express them. Succulents are no different; they, too, can express emotions through the colors of their leaves and stems. When you notice your succulent turning purple, you should know that it is saying something to you. But what could it be? We are here to help decode the message.

So, why is my succulent turning purple? Succulent leaves and stems may turn purple due to insufficient sunlight, poor soil drainage, exposure to extremely cold temperatures, underwatering, overwatering, and nutrient deficiency. The change of color may also occur due to natural stress response when the succulent is moved to a new environment.

This article discusses critical causes of succulent color change and provides solutions for each cause. Read on to find out everything you need to know.

Why Do Succulents Change Colors?

Succulents generally change colors when they are undergoing some form of stress. During this time, they produce pigments such as anthocyanin, which turns them purple or blue, and carotenoids, which turn them yellow or red.

Anthocyanin plays a critical role in protecting the plant from temperature stresses and also protects it against overexposure to the sun’s ultraviolet rays.

Cactus on 3 different colors.
If it is not common for your succulent type to change colors, you must evaluate the environmental conditions around it and look for a cause.

Carotenoids, on the other hand, protect from drought and heat stress.

If you notice your succulent changing colors, you need to research more about it and see if it is common because some succulents tend to change colors naturally.

For instance, it is common for the leaves of the hens and chick plants to turn purple on the edges. Sometimes, it is not something you should get worried over.

But if it is not common for your succulent type to change colors, you must evaluate the environmental conditions around it and look for a cause. Be sure to act quickly before the problem worsens.

Why Is My Succulent Turning Purple?

Now that you know why succulents change colors, it is time to look at the leading causes of purple coloration in succulents. They include:

1. Too Much Heat or Light

While most succulents love direct or indirect sunlight exposure, they can also get burnt like any other plant. One of the main signs of sunburn in succulents is discoloration, corking, yellowing, or whitening. The succulent may turn purple if the sunburn is severe.

If you notice your succulent turning to purple and positioned in a spot that receives too much direct sunlight, move it elsewhere. Failure to act quickly will get your plant cells damaged and die.

A kalanchoe exposed to sunlight.
One of the main signs of sunburn in succulents is discoloration, corking, yellowing, or whitening.

You can tell that your succulent has suffered sunburn if it develops discoloration on the sun-facing side.

With time its leaves will start turning red, purple, or blue. Keep in mind that heat and light stress are serious issues that must be addressed promptly. Any further neglect may lead to the sudden death of the succulent.

Various succulent species have different lighting and temperature requirements. However, most of them prefer lots of bright, indirect light. Some even require partial shade to thrive.

Generally, six hours of light a day during the active growth season is good enough. If you live in an area that doesn’t receive too much sunlight, consider investing in a grow light for your succulents. This will help them get the adequate amount of sunlight that they need.

2. Poor Soil Drainage

If your succulent is turning purple, it may be because it doesn’t have enough drainage in its soil or potting mix. Succulents cannot survive when their roots are regularly exposed to too much water or when their soil retains lots of moisture.

For this reason, ensure that your pot has proper drainage holes and that the potting mix is highly porous. Consider adding some gravel for additional drainage.

A kid watering the plant carefully.
Succulents cannot survive when their roots are regularly exposed to too much water or when their soil retains lots of moisture.

It is also advisable to let your succulent dry out completely between watering and to water it deeply but infrequently.

3. Nutrient Deficiency

Succulents may also turn purple due to a lack of essential nutrients such as Nitrogen, phosphorus, and other micronutrients.

The most common signs of nutrient deficiency in succulents include yellowing or fading foliage, weakened growth, and color changes.

It is important to note that plants grown in containers require regular fertilization to stay healthy. However, be sure to follow the instructions provided by the fertilizer manufacturer. Too much fertilizer can damage your succulent.

4. Your Succulent Is Naturally Changing Its Color

Although most succulents are green, some have hints of red or purple that they develop as they grow.

For instance, it is common for succulents such as Kalanchoe, Crassula, and Sedum species to turn purple or reddish as they grow.

This usually happens when the succulent is exposed to direct sunlight and is most likely not a cause for concern. Therefore, look at clear photos of your succulent online to see if the color change is normal.

5. Underwatering

Most succulents turn purple or red when they dry out from underwatering. Their leaves and stems become stressed due to lack of water, causing them to change color.

If you notice your succulent turning purple and it has been some time since you last watered it, this is most likely the cause. Be sure to water it right away to help bring it back to its normal vibrant color.

A woman sparying water at the cactus in a pot.
Although you shouldn’t water your succulents regularly in winter, some watering is still required.

Other signs of an underwatered succulent include shriveling, dry soil, and curling leaves. Your succulent leaves may lose their plumpness if the issue is addressed sluggishly.

Although you shouldn’t water your succulents regularly in winter, some watering is still required. This is especially true if you keep your succulent indoors where the temperature is relatively warm.

Water your succulents at least once a month to keep them hydrated. Don’t let the soil dry up since it may cause damage to your plant’s roots.

Start watering your succulents regularly from early spring to late autumn. Your watering schedule should be determined by the amount of light and heat your succulents receive.

6. Overwatering

Another common reason why succulents turn purple is that they are overwatered. As previously mentioned, this can happen if the pot doesn’t have enough drainage holes or retains moisture for too long.

If your succulent is turning purple due to overwatering, you will notice other symptoms, such as rotting roots, soft and mushy stems, discoloration, and wilting leaves.

To avoid overwatering your succulent, it is essential to check the soil’s moisture content before watering. Use your finger or a small tool to test the soil’s dryness near the root area. If it feels moist, don’t water it and wait till next time.

If you are sure your succulent is overwatered, try to remove it from the pot and gently remove as much soil as possible. Then, lay it on a paper towel or newspaper before replanting it in a fresh potting mix.

7. Sudden Changes in Temperature or Lighting

Avoid suddenly changing your succulents’ environment, as this could damage or even kill them. In fact, most succulent species don’t like sudden changes in temperature and light.

If they experience a sudden change in temperature or lighting, they may start changing their color. If you notice your succulent turning purple, it might be because of a change in its environment.

It is important to keep the temperature and lighting conditions consistent to avoid sudden changes. This will also help ensure that your succulent doesn’t experience any traumatic events which can cause them to turn purple or even die.

A houseplant in the windowsill.
Most succulent species don’t like sudden changes in temperature and light.

If you want to change your succulents’ environment, do it gradually. Start by increasing the temperature or light exposure in small increments until your succulent gets used to it.

This will ensure that it doesn’t experience too much stress, which can lead to color changes.

8. Issues with the Root System and Root Rot

If your succulent is turning purple or black, it may be caused by a problem with the root system. This can be anything from root rot to nutrient deficiency.

Root rot is often caused by overwatering or poor drainage. It is a significant problem that should not be ignored since it can cause permanent damage to your succulent’s roots. If left untreated, your succulent may die.

If you suspect root rot, inspect your succulent’s roots and check if they are soft and mushy or have a black or brown color. If that is the case, take immediate action to save your plant.

You can remove the damaged parts of the root system and repot it in fresh soil. Make sure to provide proper drainage and water your succulent sparingly.

Summary

If your succulent is turning purple, it could be due to too much heat or light, poor drainage, nutrient deficiency, natural color change, underwatering, overwatering, sudden changes in temperature or lighting, or issues with the root system. Root rot is a common issue that can cause succulents to turn purple.

Hopefully, this article has helped you understand why your succulent is turning purple and given you some tips on fixing the problem. Keep enjoying your succulent plants!

Want a Thriving Zebra Plant? Here’s How to Take Care of It

Aphelandra squarrosa, commonly referred to as the zebra plant, is a tropical plant native to parts of Brazil. This plant is known for its dark green foliage and contrasting veins that resemble the patterns of a zebra. Given the right conditions, it can grow up to six feet tall outdoors and two feet indoors. Even though the zebra plant has a reputation for being one of the hardest-to-please houseplants, it is still among the best to have. It just needs a little bit of your attention to thrive.

So, how do you take care of a zebra plant? This plant generally thrives in bright, indirect light but can tolerate a few hours of direct morning sunlight. Only water your zebra plant when more than 25% of the topsoil is completely dry. Water thoroughly and empty the saucer of any excess water to avoid causing root rot. The plant prefers a relatively high humidity of between 60-70%. Its leaves tend to turn brown if the humidity is too low. Fertilize your plant during its active growing season using a good quality liquid fertilizer diluted to half strength every two weeks.

This blog post discusses everything you need to know about taking care of a zebra plant. Read on to learn more.

Zebra Plant: Key Characteristics

The zebra plant is a member of the Acanthaceae family and is native to Brazil. It has ovate-oblong leaves, usually dark green with contrasting veins, forming a distinctive zebra pattern.

The plant’s flowers, which bloom in spring or summer, can be yellow, orange, or red and measure around two inches in width.

Zebra plant on a white pot.
The zebra plant has a reputation for being one of the hardest-to-please houseplants.

Although this plant can easily attain a height of six feet in its natural habitat, most gardeners usually treat it with a growth suppressant limiting its height to just two feet.

Some of the common types of zebra plant include Dania, which has the typical white-veined and dark green leaves, apollo, which features white stripes than Dania and red apollo, which adds a gold mix to its stems and leaves. Some of its leaves may be stained red on the underside.

Zebra Plant Care: Important Tips

To take good care of your zebra plant, it is essential to know what kind of conditions this tropical plant needs. Here are a few tips for taking care of your zebra plant:

Light

This plant prefers bright, indirect light. However, it can tolerate a few hours of direct morning sunlight.

During summer, position your zebra plant in a location that receives plenty of indirect sunlight to encourage budding, which happens in autumn.

The zebra plant requires average night temperatures of about 65-70 degrees Fahrenheit and light levels of between 650-700 footcandles. These conditions must be maintained for at least 12 weeks consecutively for the flowers to form.

One of the best ways to ensure your zebra plant receives plenty of sunlight is to place it on a south-facing windowsill with a transparent sheer curtain between it and the windowpane to help diffuse the glare.

Zebra plant exposed to sunlight.
It can tolerate a few hours of direct morning sunlight.

If you don’t have a south-facing window, consider positioning it on an east-facing windowsill, where it receives plenty of direct sunlight during the morning hours.

The mild rays of the morning sunlight are usually considered a direct equivalent to bright, indirect light.

Reduce the amount of light exposure during winter as the plant slides into dormancy. During this time, your zebra plant will be okay with around 450-500 footcandles of light every day.

Just make sure you don’t leave it in total darkness since it can be catastrophic in the long run.

Watering

The zebra plant prefers to be kept relatively moist but not waterlogged. You should only water it when more than 25% of the topsoil feels dry.

Water thoroughly, ensuring water sips in from the base and not from the leaves. This plays a critical role in preventing leaf spot disease caused by too much moisture on the leaves.

And remember to empty any excess water that has collected in the saucer to avoid causing root rot.

The best time to water your zebra plant is in the morning. This gives your plant enough time for the leaves to dry before evening.

The evaporation rate is also low in the morning, which ensures your plant has enough time to absorb the water before it evaporates.

Avoid watering in the afternoon by all means. If you cannot water in the morning, consider watering in the evening.

Furthermore, avoid watering your zebra plant with cold water since it can shock its root system. The water you use should be at room temperature or slightly warmer.

Fertilizer

Feed your zebra plant every month during spring and summer using a balanced houseplant fertilizer at half-strength dilution. During fall and winter, fertilize it sparingly.

To encourage more flowering, consider supplementing your fertilizer with a 10-20-10 general-purpose plant food every month. Be sure to follow package instructions for the best results.

Consider using liquid fertilizer since it is highly convenient. You will basically be killing two birds with one stone; watering and fertilizing simultaneously. It is also a precaution since it is challenging to use fertilizer sticks and control the dosage.

In some cases, using fertilizer sticks or spikes may lead to overfertilizing your zebra plant, which can cause severe damage to the root system. Adding fertilizer to water helps you make it dilute or stronger to your liking.

Humidity

This plant prefers a relatively high humidity of between 60-70%. Its leaves tend to turn brown if the humidity is too low.

Zebra plant in a pot outdoors.
This plant prefers a relatively high humidity of between 60-70%.

You can increase the humidity around your zebra plant by misting its leaves or placing it in a humidity tray filled with pebbles and water. Make sure the water doesn’t touch the base of your plant.

You can also purchase a humidifier to create an optimal environment for your zebra plant and other houseplants. This is especially helpful if you live in a dry climate or use central heating during winter.

Pruning

Pruning your zebra plant is not only important for its aesthetic appeal, but it also helps preserve its natural shape and encourages new growth.

Zebra plant in a pot with a pruner beside.
Pruning your zebra plant is not only important for its aesthetic appeal.

Prune your zebra plant by pinching back spent blooms and trimming off yellow or brown foliage with scissors. Ensure you use sharp scissors to avoid tearing the leaves.

Be sure to discard the cut stems and leaves in the trash as they can harbor bacteria and pests which can spread to your healthy plants.

Repotting

Your zebra plant should be repotted every two years or when you observe overcrowding in its pot. The best time for this is during spring since it coincides with the end of dormancy and the beginning of the growing season.

When choosing a pot for your zebra plant, make sure it is one size larger than its current pot. This will give it adequate space to grow and thrive.

Also, ensure it has several drainage holes to allow excess water escape quickly and prevent root rot.

Use fresh potting soil and a mixture of perlite or sand for optimal drainage. Avoid watering your plant for a few days after repotting since it is already in wet soil.

Finally, consider moving your zebra plant outdoors during summer months to ensure it gets adequate sunlight and fresh air.

Bring it back indoors when temperatures start to drop. This will boost your plant’s energy and encourage growth and flowering.

Pests and Diseases

Unfortunately, zebra plant is highly prone to pests and diseases. Common pests include aphids, mealybugs, scale insects, whiteflies, spider mites and fungus gnats. The most common diseases include root rot and powdery mildew.

To deal with these problems, always inspect your plant before purchasing it to ensure there are no pests or signs of disease.

Also, practice proper hygiene and always discard dead leaves, roots or stems from your plants.

Keep an eye out for signs of pest infestation, such as yellowed leaves, sticky deposits on foliage or black spots on petioles.

Treat pests with insecticidal soap, neem oil or horticultural oils and treat diseases with a fungicide to keep your plant healthy.

Propagation

Zebra plants can be propagated by either stem cuttings or division.

For stem cuttings, take a few cuttings of about 3 inches in length from your zebra plant and remove any leaves from the lower portion.

Zebra plant in a white pot.
Place the container in a warm and humid environment.

Dip them into rooting hormone and insert them into a moist potting mix that contains perlite or sand for better drainage. Place the container in a warm and humid environment.

For division, gently dig up your plant and separate the crown from its roots. Plant each section in its own pot filled with fresh potting mix.

Water well and keep them in a bright place but away from direct sunlight until they are established.

Summary

The zebra plant is a truly unique and beautiful addition to any houseplant collection. With its distinctive foliage, bright colors and relatively low maintenance needs, you don’t have to be an expert gardener to get the most out of this amazing plant.

The key to taking care of a zebra plant is providing it with moderate light, water, and humidity, complemented with occasional fertilization.

The more you pay close attention to the environmental factors and keep an eye on possible pests or diseases, the more healthy your zebra plant will be.