Tricks for Making Rosemary Bloom: A Step-by-Step Guide

Rosemary is one of the most popular herbs in the world. The herb is evergreen and has beautiful needle-shaped leaves. It produces white or blue flowers that can be used for decoration and culinary purposes. Indeed, various factors affect rosemary flowering. Failure to provide the right conditions can lead to a lack of blooms. Fortunately, there are many things you can do to make your rosemary bloom.

So, how do you make a rosemary bloom? The rosemary plant thrives both indoors and outdoors. Typically, it requires well-draining soil, a temperature above 30 degrees Fahrenheit, infrequent watering, moderate humidity, and full sunlight to bloom. Strive to use a balanced fertilizer too. It is best to prune the plant in early spring when the winter weather begins to fade away, and temperatures start to rise. The pruning will help promote new growth and encourage more blooms.

This blog post discusses everything you need to know about how to make rosemary bloom. Read on to learn more.

Why Is My Rosemary Flowering?

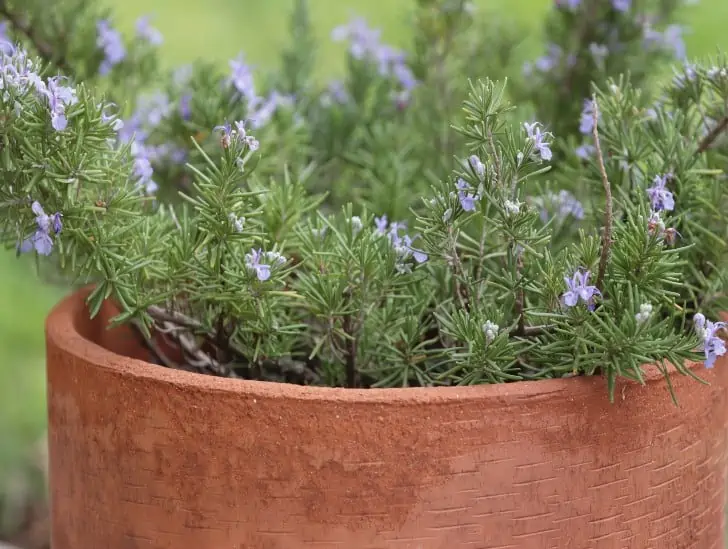
A rosemary plant completes its reproductive cycle by flowering. The flowers get pollinated to form fruits. A relatively warm, dry climate with lots of direct sunshine plays a crucial role in promoting the rosemary’s natural and internal flowering cycle.

The flowers come in varying colors depending on the rosemary species you have in your garden. The flowers range from white to pink.

The Majorca Pink species produces pink flowers, while the Golden Rain species produces dark blue flowers.

Rosemary plants flowering.
A rosemary plant completes its reproductive cycle by flowering.

Among the different rosemary species, the most common species grown in outdoor and outdoor gardens include Square Sea Rosemary, Benden Blue Rosemary, Prostrate Rosemary, and Sissinghurst Rosemary.

When Does the Rosemary Flower?

The blooming time for a rosemary plant usually depends on the environmental conditions and the herb’s internal clock. The herb mostly has two flowering seasons.

The first flowering season is spring, while the second is fall.

The spring flowering period mainly occurs from April to May, while the fall flowering period occurs from August to October.

Why Is My Rosemary Not Flowering?

A wide range of factors may interfere with a rosemary’s flowering cycle. Here are some of the most common reasons why your rosemary is not flowering:

1. Too Much Nitrogen Fertilizer in the Soil

Rosemary mainly thrives in nutrient-poor sandy soils in its natural habitat. It often grows on hillsides and by the coastal parts of South Europe. The herb has adapted explicitly to thriving in sandy soils low in nutrients, well-draining, and highly porous.

Therefore, rosemary is not a heavy feeder. If the herb is planted in nutrient-rich soil, the nutrients promote foliage growth at the expense of flowers.
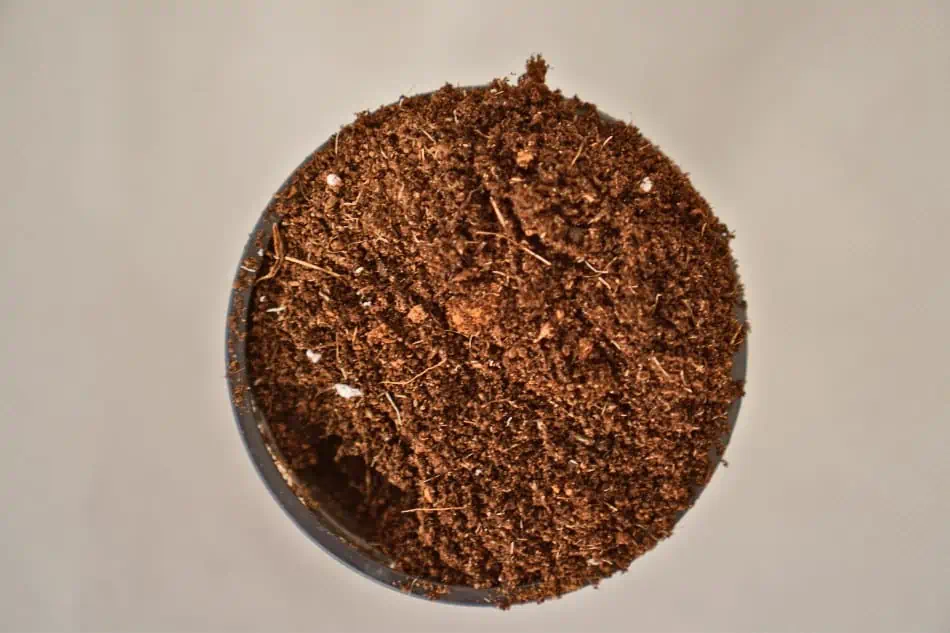
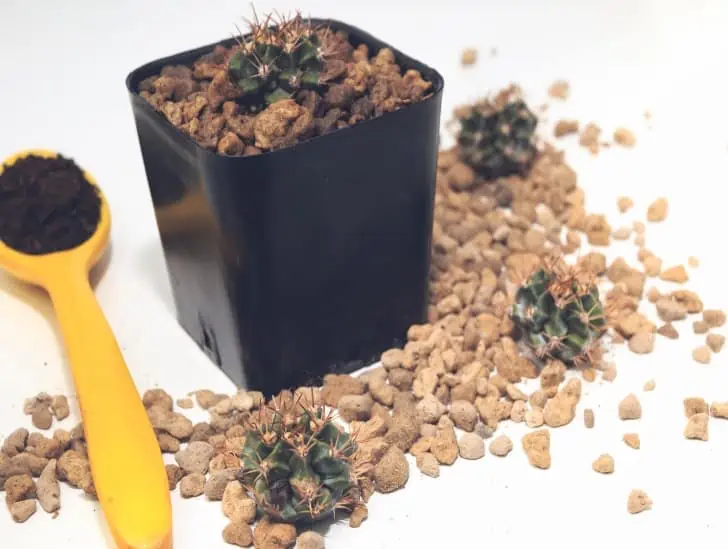
A cactus oil in a pot.
If the herb is planted in nutrient-rich soil, the nutrients promote foliage growth at the expense of flowers.

To encourage blooming, it is essential to replicate the plant’s natural habitat by using well-draining, sandy soil.

Additionally, do not overfertilize the rosemary with nitrogen-rich fertilizers, as this encourages excessive growth of foliage at the expense of flowers.

If you have already applied fertilizer to your rosemary, don’t add any more fertilizer. Neglect the plant for some time so that it uses the fertilizer in the soil.

Add more sand to your soil and top it up with perlite and grit. As long as you don’t add more fertilizer to the soil, the rosemary will recover successfully and increase the chances of it flowering next season.

Consider adding approximately 20% sand or grit to about 80% compost to your planting pot to improve drainage. The compost feeds the herb with nutrients, while the sand helps to create well-drained soil.

2. Inadequate Sunlight

The rosemary requires a minimum of six hours of direct sunlight per day. If your rosemary is not getting enough exposure to sunlight, it will not be able to flower properly. Consider shifting the pot to a spot where it can get more direct sunlight.

If your rosemary is planted in a shady area, the shade will be detrimental to your herb’s health and won’t grow well or flower.

Rosemary in a pot.
It needs plenty of direct bright light to survive.

The herb may not survive for too long in the shade. We recommend replanting the rosemary in a sunny spot with good airflow to reduce the risk of fungal disease.

Remember that while rosemary may survive in relatively cool climates with northerly latitudes, it still needs plenty of direct bright light to survive.

If growing it indoors, consider using grow lights to give the plant enough light.

3. Incorrect Pruning

Another possible reason your rosemary is not flowering may be incorrect pruning. Rosemary should be trimmed lightly and sometimes heavily for shaping purposes, but never too often or excessively.

The herb requires proper maintenance and trimming throughout the year, especially during its flowering season. Trim off the spent flower heads to promote new blooms.

However, we recommend not pruning your rosemary before or shortly after winter to allow it to build up on reserves for the next flowering cycle in spring.

4. Dry Soil

Rosemary is not a drought-tolerant plant. It needs regular irrigation during summer, but avoid over-watering or waterlogging as this can cause root rot. The roots must also be able to breathe in air from time to time.

The plant should be watered when the top layer of soil is dry. We recommend using a moisture meter to help you gauge when to water your rosemary.

Avoid placing your rosemary under direct sunlight immediately after watering, as this will scorch the leaves. Instead, wait until the water on the leaves has evaporated before exposing your rosemary to direct sunlight.

Watering a rosemary.
Avoid placing your rosemary under direct sunlight immediately after watering, as this will scorch the leaves.

Finally, mulching the soil will help retain moisture and reduce evaporation during hot summer days.

For this purpose, consider adding organic matter such as straw, compost, or bark chips around your rosemary’s pot. This will help keep the soil moist and cool throughout summer.

5. Diseases and Pest Infestation

If your rosemary plant is weak, it will not bloom. Pests and diseases affect the number of leaves, the blooming cycle, and the overall health of the rosemary.

Some common pests and diseases to watch out for are aphids, spider mites, root rot, and powdery mildew.

If your rosemary shows any signs of pests or diseases, such as wilting leaves or discoloration, you must take immediate action before the plant weakens further.

You can use insecticidal soap or neem oil to eliminate pests and fungicides for diseases.

6. Overcrowding

Rosemary plants need sufficient space to grow and the leaves to receive adequate airflow. Overcrowding them will cause the plant to become weak and not flower properly.

Typically, have a distance of 19-25 inches between rosemary plants. Otherwise, water won’t evaporate from the bottom part of the rosemary plant, and sunlight won’t reach the herb’s leaves.

Rosemary in a white pot.
Overcrowding them will cause the plant to become weak and not flower properly.

If you notice that your rosemary is overcrowded, it’s best to divide and replant into different pots or bigger ones. This will give the herb enough space to flourish and increase its chances of flowering.

Tips for Making Rosemary Bloom

Making rosemary bloom requires providing optimal environmental conditions and promoting healthy growth. Here are some tips that could help you succeed:

  • Choose a sunny spot in your garden, or pick the right spot indoors to place your rosemary plant.
  • Give it enough water and space while ensuring drainage is adequate.
  • If you are growing it indoors, consider using grow lights.
  • Trim off spent flowers during its flowering season to promote new blooms.
  • Avoid pruning your rosemary before winter or shortly after.
  • Mulch the soil to help retain moisture and reduce evaporation.
  • Be on the lookout for pests and diseases affecting its health and chances of flowering.
  • Provide adequate space between rosemary plants to allow for good airflow.

What Can You Do with Rosemary Flowers?

The main parts of the rosemary herb are roots, stems, leaves, and flowers. Leaves are mainly used as an ingredient in cooking and as a traditional medicine.

Rosemary flowers are also edible and have many uses in food, beverages, and beauty products. You can make oil or tea from dried rosemary flowers or fresh petals for various purposes. For example:

  • Use them to decorate cakes and desserts.
  • Garnish your cocktails and drinks

Rosemary flowers are used in beauty products to make soaps, lotions, creams, perfumes, and other cosmetics. They add a pleasant scent to the product and bring many skin-care benefits.

The oil extracted from rosemary flowers has soothing and relieving effects for arthritis and cramps. Carefully apply the oil on aching muscles and joints before you go to bed for better results.

Summary

If your rosemary is not blooming, it could be due to one of several factors, including too much nitrogen in the soil, lack of sunlight, incorrect pruning, dry soil, diseases, or pests.

By following the tips we’ve provided above, you can encourage your rosemary to bloom beautifully.

And once it starts flowering, you can do plenty of things with the colorful flowers.

From using them as a garnish to adding them to vases around the house, enjoying beautiful blooms from your rosemary bush is quite rewarding.

How to Stop Birds from Eating Succulents?

Do you have a beautiful collection of succulents, but you constantly find some bitten, eaten, and badly damaged? If so, you could be dealing with more than bugs and pests. Birds may be eyeing your succulents as an easy and tasty snack. Fortunately, there are several ways to prevent birds from getting close enough to take a bite out of your beautiful succulents.

So, how can you stop birds from eating your succulents? One way to keep birds away from your succulents is by using deterrents. Netting or bird spikes can be used to create barriers that the birds cannot cross. Another way to protect your succulents is by using repellents. Repellents such as bird-repellent gel, liquid, or granules can help discourage birds from coming close to the succulents. You can also use motion-activated devices to frighten birds away. Water sprays and ultrasonic devices are effective for deterring birds from eating your plants.

This blog post discusses everything you need to know about protecting your succulents from birds. We review the best methods for deterring birds and other tips and tricks for keeping them away from your plants.

Read on to learn more.

Why Do Birds Eat Succulents?

Birds often target succulents because they like the nutritious juice in the leaves and stems. The juice contains much-needed vitamins and minerals, which the birds need for energy.

Furthermore, the bright colors of some succulent varieties attract birds in search of food.

Keep in mind that the diet of most birds doesn’t include succulents, but they will go for the juice if other food sources are scarce.

A bird eating a plant while flying.
The sugary leaves and stems serve as an excellent dessert for them.

Some succulents, such as echeverias and aloes, contain highly delicious and nutritious water. During times of scarcity, birds flock to succulents for a drink.

Other succulents, such as agaves, are a delicious treat that many birds cannot resist. The sugary leaves and stems serve as an excellent dessert for them.

When the birds are done with all the pecking, your succulent plants will be left with several wounds that may eventually lead to death if you are not careful.

How to Know If Birds Are Eating Your Succulents

To find out if birds are having a field day with your succulents, you should start by looking at the soil around your pot. Do you see signs of birds’ poop around the pot? If yes, then you are probably dealing with a bird problem.

Another way to tell if birds have been having a snack is to look at the leaves and stems of your succulents. Bite marks on the leaves or stems indicate that birds have tasted your succulent.

Since most birds taste succulent leaves, you will likely notice small holes in your succulent leaves. The holes will be smaller for birds.

So, if you notice bigger chunks of holes in the leaves, you may be dealing with bigger animals, not birds.

A  remain of cactus fruit caused by the bird.
Some bird species will leave behind the entire leaf or stem after feasting on them.

Keep in mind that even cats and dogs eat succulents. Squirrels and other rodents may also find their way to your garden and feed on your succulents.

Some bird species, such as hummingbirds, will leave behind the entire leaf or stem after feasting on them.

In this case, you will notice that the leaves and stems are gone, with just a tiny stub remaining where they were connected to the main stem.

If you find any of these signs around your succulents, you must act immediately before more damage is done.

How to Protect Succulents from Birds

You can take several actions to protect your succulents from hungry birds. Here are some of the most effective ones:

1. Netting

One of the most effective ways to stop birds from accessing your succulent collection is using netting or bird spikes. You can use the netting to create a physical barrier that the birds cannot cross.

You can purchase bird netting made of fine mesh so birds cannot go through it quickly. Consider placing the net over the top of your succulents to keep birds away.

The good thing is that you can easily set up the bird netting to surround your garden without touching your succulents.

A plant protected by a net.
You can use the netting to create a physical barrier that the birds cannot cross.

Find a way to build a simple framework around your succulents so you can easily drape the netting over them. This plays a critical role in ensuring the net doesn’t hinder the growth of your succulents in any way.

Using fence posts, tall stakes, or bamboo poles, you can make the netting framework. Take time to set up an excellent framework to protect your garden effectively.

2. Hang Reflective Tape Near the Garden Area

Did you know that a good reflective tape can scare away birds? Consider hanging some reflective tape near the garden to protect your succulents from birds.

The shiny surface of the reflective tape will scare away any bird that tries to access your garden. This is an effective way to keep birds at bay without hurting them or making your garden unattractive.

You can also hang wind chimes near your succulents if birds try to access your garden. The sound of the wind chime will scare away the birds and keep them from eating succulents.

3. Use Chicken Wire Over the Ground

Chicken wire pinned to the ground can protect newly sown succulent seeds or tubers. The wire stops birds, including your chickens, from scratching the soil where you have the seeds or tubers.

As your succulents grow and become bigger, you can carefully lift the wire on stakes or bend it around hoops.

The primary target is to ensure that the chicken wire doesn’t take away the beauty of your garden. You can also use fabric, burlap, or compostable mulch to cover newly sown succulent seeds.

A plant protected by a chicken wire.
The wire stops birds, including your chickens, from scratching the soil where you have the seeds or tubers.

These materials will help control weeds while providing an effective barrier against birds. Some gardeners also use mothballs around the area where they have succulents.

The mothball smell keeps the birds away without hurting anything else!

4. Use Predator Decoys

Predator decoys can be a good way of scaring birds from your succulent garden. Luckily, there are many different types of predators that birds fear. One of the best predator decoys is the owl.

Carefully position owl decoys near your succulents or fence posts to scare birds away. Use multiple owl decoys if you have a relatively large garden.

However, there is one thing you need to keep in mind when using this method. Birds aren’t stupid; they will soon realize that an owl decoy left in one place for several days or weeks will not harm them.

Therefore, it is essential to rotate the decoys and change their locations occasionally. This will help scare away the birds effectively while keeping your succulent garden safe.

5. Use a Bird Repellent Spray

Bird repellent spray is something that many gardeners think of first when trying to keep birds away from their gardens.

This spray contains chemicals that make the surface of your succulents unpalatable and inedible for birds. You can apply this spray on your plants or any area around the garden you want to protect.

However, it is essential to note that most bird-repellent sprays may have an unpleasant smell, and their effectiveness can be reduced over time. Therefore, you should consider reapplying the spray periodically for maximum results.

6. Feed the Birds, So They Lose Interest in Your Succulents

The primary reason birds eat succulents is that they are hungry, and their food sources are dry.

So, if you can provide them with an alternative food source, they will immediately lose interest in your succulents.

You can feed the birds around your garden area or hang bird feeders at a distance. This will help keep them away from your succulent garden without causing any harm.

You can also consider setting up water baths around your succulents. Once the birds have had enough food from the feeders, they will likely drink from the water baths and leave your succulents alone.

To make things easier, avoid putting mixed seeds in your bird feeders. Instead, have one seed type in each feeder. This way, birds can easily choose what they want to eat, and your succulents will remain safe.

7. Use Natural Predators to Keep Birds Away from Your Succulent Garden

Your cat or dog can effectively keep birds away from your succulent garden. Besides cats and dogs, you can use natural predators such as hawks and owls to scare birds away.

You can also introduce a few chickens around your succulents, as they will scare away other birds from visiting your plants.

A dog looking at the succulent.
Your cat or dog can effectively keep birds away from your succulent garden.

However, it is essential to note that chickens can also eat succulents, so keep them away from your garden.

Finally, remember to clean up regularly and eliminate bird droppings that may attract more birds.

Conclusion

Protecting your succulents from birds is essential if you want them to thrive. Several ways to keep birds away from your succulents include deterrents, repellents, and motion-activated devices.

With a little extra effort, you can enjoy the beauty of your succulents without worrying about birds damaging your plants.

Good luck!

Trailing Succulents: A Guide to 7 Must-Have Varieties

Did you know that there are over 10,000 succulent species in the world? This provides you with a variety of options for your garden or home. One popular succulent group is the trailing succulents. These succulents are becoming popular since they can fit in different spaces and look beautiful. But for starters, it can be challenging to identify which trailing succulents types may work best for you. Fortunately, we are here to help you.

So, what are some of the best trailing succulents? Trailing succulents come in different shapes, colors, and sizes. Some of the most common ones include the monkey’s tail, the string of pearls, the rat tail cactus, the string of bananas, and the climbing aloes. Others include the string of nickels, the string of hearts, the string of buttons, and the starfish cactus.

This blog post discusses seven of the most popular trailing succulents, their features, and how to care for them. Read on to find out everything you need to know.

What Are Trailing Succulents

The term “trailing succulents” refers to a group of plants that grow in a trailing or cascading pattern. This is because they have stems that hang down and cascade over the sides of planters, hanging baskets, and other vessels.

Trailing succulents come in many shapes, sizes, and colors, allowing you to choose something that best fits your space. They can be used in various ways, including small hanging baskets, ground covers, or window boxes.

You can also use these succulents to cover large areas like walls and fences. The best part is that they are easy to care for, making them perfect for busy gardeners who don’t have much time to devote to their plants.

Different Types of Trailing Succulents

Now that you know what trailing succulents are, let’s discuss the types available. The seven most popular trailing succulents are:

1. String of Pearls

The string of pearls is one of the most popular trailing succulents. Native to parts of South Africa, this plant has become a common houseplant thanks to its beauty and versatility.

The succulent looks beautiful anywhere you stick it and can be used to add a unique dimension to your overall plant arrangement. The succulent will grab everyone’s attention, from little teacups to hanging baskets.

String of pearl hangging near the window exposed to sunbeam.
This plant is a common houseplant thanks to its beauty and versatility.

Its stem can grow up to three feet long, with a large portion hanging. When cut, the stem automatically splits into two or more parts and keeps growing. Its stems are lined beautifully with small, round, pea-like leave.
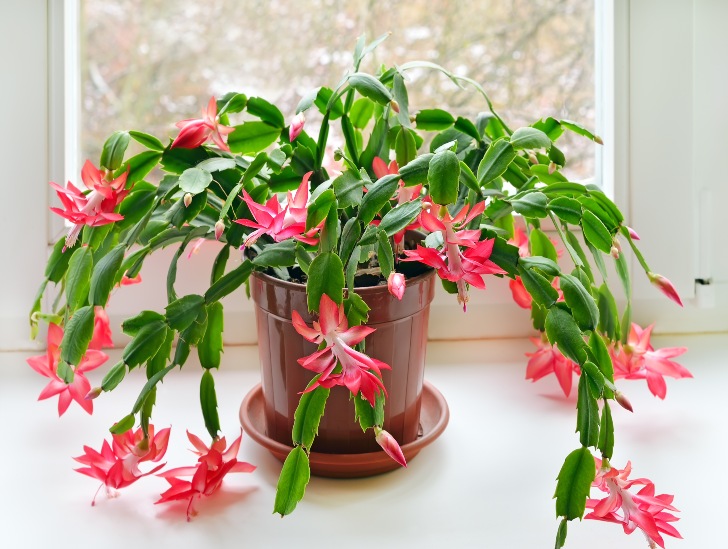
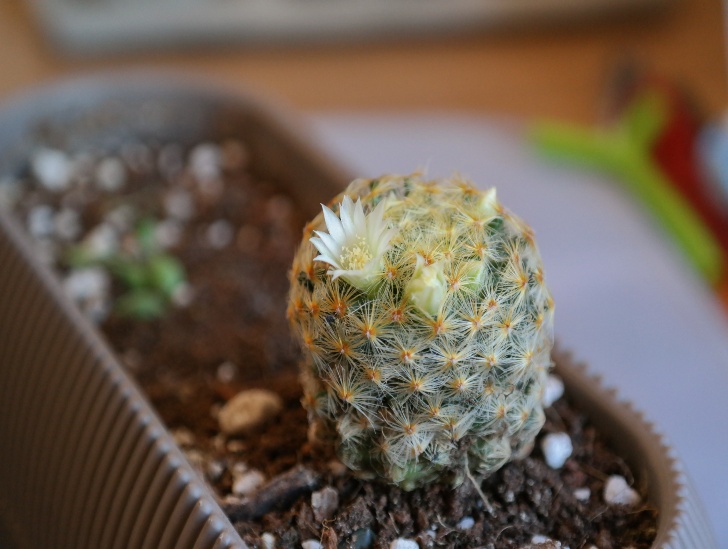
The string of pearls is less fussy, and caring for it is less tedious once you figure out what it needs to thrive.

Typically, the succulent requires a well-draining potting mix and less watering. However, young plants require frequent watering to establish stable roots. Only water your string of pearls when the soil is completely dry. consider

The succulent requires bright, indirect sunlight to thrive. Therefore, it is crucial to protect it from the intense afternoon soon. In fact, the string of pearls thrives in a partially shaded area.

For fertilization, use a soluble fertilizer once a month in the spring and summer.

When mature, this succulent produces white flowers with a sweet, vanilla scent. The flowers appear in late spring or early summer and last for a few days before disappearing.

2. Monkey’s Tail

The monkey’s tail is another popular trailing succulent that has become quite common with gardeners. It is native to Mexico, where it can be found growing on rocky hillsides or cliffs.

The succulent has long, thin stems that hang and trail down, much like a monkey’s tail. Its leaves are small, oval-shaped, and light green in color.

The monkey’s tail is relatively easy to care for, requiring well-draining soil and regular watering. The succulent needs bright filtered sunlight to thrive, so it should be placed near a window or other area with plenty of light.

It should be watered when the soil is dry and fertilized in the spring and summer. It also requires protection from strong winds and sudden temperature changes, so avoid placing it outdoors if possible.

The succulent produces small yellow flowers in the late spring or early summer, giving it a unique look and adding a nice pop of color to your plant arrangement.

The monkey’s tail can be used in various ways, from ground cover to hanging baskets or window boxes. When used in the latter two, ensure the stems are secured so they don’t fall as the succulent grows.

3. String of Nickels

The String of Nickels is another great trailing succulent. The succulent has green, bluish-gray leaves that are primarily flat and round, giving them the appearance of nickels (coins) hanging on a piece of string.

They are native to the tropical rainforest of Central and South America and are natural epiphytes. The term “epiphyte” refers to a group of plants that mainly grow on tree trunks, rocks, or other plants.

The String of Nickels looks excellent in living wreaths, hanging baskets, or wall art cascading down on the sides of the planter.

String of nickel hanging.
This produces white flowers in spring or early summer.

As with most succulents, the string of nickels requires well-draining soil and regular watering when the soil is dry.

They need plenty of light to thrive, so place them near a window or other area where they can get bright filtered sunlight. During the spring and summer months, fertilize with a soluble fertilizer once a month.

The String of Nickels produces white flowers in spring or early summer, adding an extra touch to your plant arrangement.

4. String of Hearts

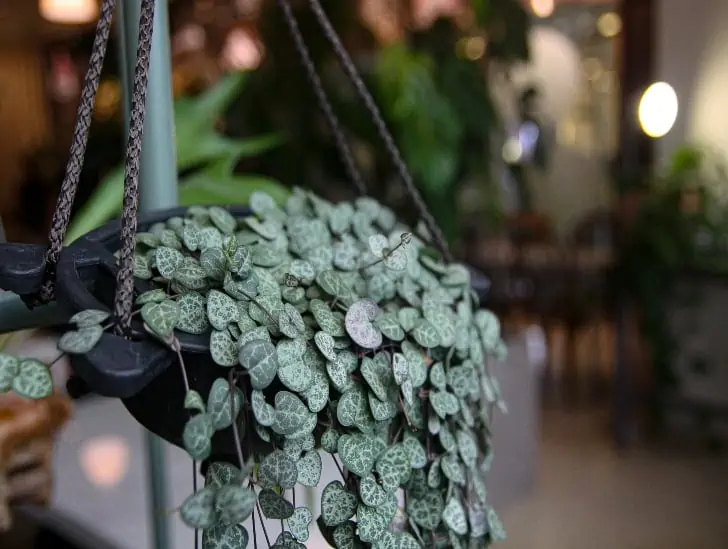
The String of Hearts is a beautiful succulent with heart-shaped leaves. Native to parts of South Africa, the String of Hearts has vines that can trail endlessly, reaching up to seven feet long.

The leaves of this succulent are usually dark or pale green, depending on their exposure to sunlight. They also have ivory-colored veins, giving them the appearance of hearts.

The String of Hearts requires well-draining soil and regular watering when the soil is dry. It needs bright indirect sunlight to thrive, so keep it near a window or other area with plenty of light. Fertilize in the spring and summer with a soluble fertilizer once a month.

String of hearts outdoors exposed to sunlight.
The String of Hearts has vines that can trail endlessly, reaching up to seven feet long.

The String of Hearts produces purple flowers in spring, adding an extra pop of color and life to your plant arrangement.

When growing this succulent, ensure that you support its long vines, as they can become heavy when mature. Secure them at regular intervals to keep them from drooping down.

5. Wax Plant

Also known as Hoya, the wax plant is native to Australia, East Asia, and Southern India. This succulent is known for its heart-shaped leaves and vine-like qualities. But remember that not all Hoyas are succulents.

These plants are popular houseplants but also do well outdoors. Most of them require bright but filtered sunlight to thrive. Also, protect your wax plant from the intense afternoon sun.

Wax plants are typically grown in hanging baskets and require more watering than other succulents to thrive.

You should also provide it with a well-draining potting mix and only water when it is dry. Consider watering it more during the active growth season and less often during winter.

Fertilize the wax plants twice a month in the spring and summer with a soluble fertilizer.

The succulent produces clusters of waxy, star-shaped white flowers that are very fragrant and attractive. This adds an extra level of interest to your plant arrangement.

6. Burro’s Tail

Native to parts of Mexico, the Sedum Burrito (Burro’s Tail) is a beautiful and easy-to-care-for trailing succulent. It has fat, teardrop-shaped leaves that are bright blue-green and grow on long stems or tails.

This succulent does not require much maintenance and is generally relatively easy to look after.

Sedum buritto hanging.
This succulent also makes a great addition to hanging baskets as it has an excellent trailing habit.

Place it near a window with plenty of bright, indirect sunlight and water it when the soil is dry. Fertilize twice a month in the spring and summer with a soluble fertilizer.

The Burro’s Tail produces small, white-pink star-shaped flowers during spring, adding extra beauty to your plant arrangement. This succulent also makes a great addition to hanging baskets as it has an excellent trailing habit.

7. Rat Tail Cactus

The rat tail cactus derives its name from its long, thin stems reminiscent of a rat’s tail. Native to Central and South America, this cactus prefers bright indirect sunlight and fast-draining soil.

Water the rat tail cactus when the soil is dry but avoids overwatering as this can lead to root rot. Fertilize with a soluble fertilizer twice a month during the spring and summer.

Flowering rat tail cactus.
The rat tail cactus derives its name from its long, thin stems reminiscent of a rat’s tail.

The rat tail cactus produces white-pink flowers at its tips in summer, adding extra beauty to your plant arrangement.

This cactus is known for its ability to tolerate full sun and very low temperatures, making it an excellent choice for outdoor succulents.

Summary

Trailing succulents are perfect for filling in empty spaces in your garden or for cascading down from a hanging planter.

They come in various shapes and sizes, so you can find one to fit your needs.

Although they’re relatively easy to care for, it’s essential to know which type of plant you have so that you can give it the proper amount of sunlight and water.

What Is the Best Time to Repot a Cactus?

A person repotting cactus.

Cacti remain one of the best houseplants to have around. They come in various shapes, colors, and sizes. These succulents remain a perfect choice for beginners and experts alike. While these plants are generally low maintenance, they need to be repotted every once in a while. Knowing when the best time is for your cactus to be repotted can help it stay healthy and strong.

So, what is the best time to repot a cactus? The best time to repot your cactus plant is during the active growing season when it is healthy. The growing season follows the dormancy period, which is usually in springtime. When the weather starts to warm up, and your plant starts shooting out new growth, it’s time to repot. Make sure you use a well-draining container and soil for your cactus to ensure that it can thrive. It is essential to wait until the root system has filled the pot before repotting, as this can cause shock to the plant.

This blog post discusses everything you need to know about repotting a cactus plant. Read on to learn more.

Why Should I Repot My Cactus Plant and How Often Should I Repot?

It is crucial to repot your cacti plants for the same reason you need to repot your other plants: It provides them with more room to grow bigger and healthier by replenishing the nutrients in the soil.

A pot with cactus fell.
If the plant is becoming root bound or has been more than three years since its last repotting.

On average, consider repotting your cactus plant every two to four years. If the plant is becoming root bound or has been more than three years since its last repotting, it is time for a new pot. This will ensure that your cactus has enough room to expand and grow.

When Should I Repot My Cactus?

Typically, the best time to repot your cactus plant is at the end of the dormancy period. This will play a critical role in minimizing stress on your cactus.

However, you must remember that the dormancy period is different for different cacti species.

While most cacti species go into dormancy during the cold winter months (between November and February), others slide into dormancy during the hot summer months (between May and August).

It is essential to know when your cactus species will go dormant so that you can plan accordingly. That way, you avoid repotting it too sooner or later.

What Should I Do Before Repotting?

There are a few things that you should do before repotting your cactus. First, inspect your plant’s roots to ensure they are healthy. If you notice any signs of rot or disease, wait before repotting.

Next, sterilize the pot you will use for repotting by washing it with a 1:4 bleach and water solution. This will help prevent any diseases from spreading to your new cactus.

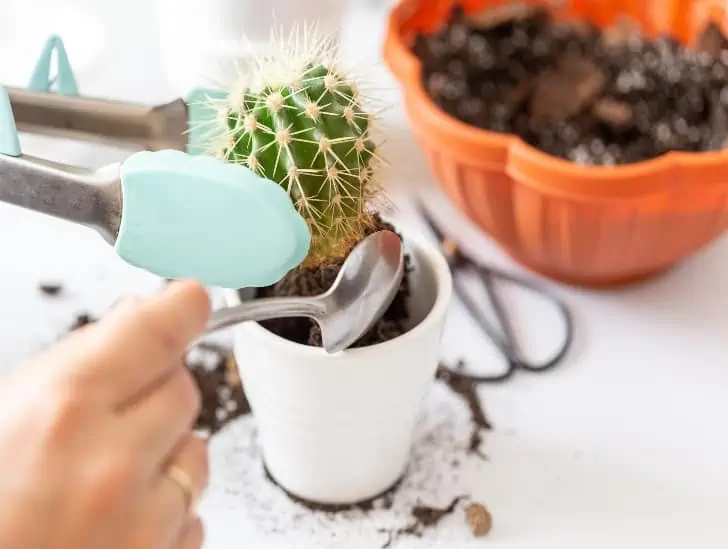
Cactus soil ane equipments.
There are a few things that you should do before repotting your cactus.

Finally, choose an appropriate soil mix for your cactus. Cacti require well-draining soil and a pot with good drainage. A combination of equal parts sphagnum peat moss, perlite, and coarse sand is popular for cactus soil.

After preparing the pot, you can move on to repotting your cactus.

What Do I Need to Repot a Cactus Plant?

You will need a few things to repot your cactus plant. These include:

  • Repotting pot with adequate drainage
  • Potting mix specific for cacti
  • A spoon or trowel
  • A pair of gloves to protect your hands
  • A sharp knife (if needed)
  • Pruning shears (optional)

Once you have all of your supplies, you can get started.

How Do I Repot a Cactus Plant?

Follow the steps outlined below to repot your cactus properly:

Step 1: Pull the Cactus Out of Its Current Pot

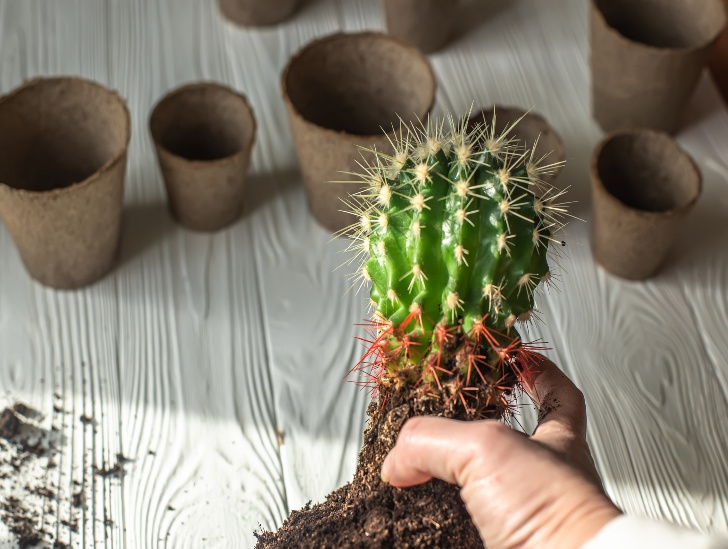
Start by carefully lifting the cactus from its current pot. Gently shake off any excess soil, then inspect the roots to ensure they are healthy and not root-bound.

A cactus on hand.
Start by carefully lifting the cactus from its current pot.

Be careful not to damage the roots or stems of your cactus when pulling it out of its pot.

Step 2: Prune Your Cactus (Optional)

Using a pair of pruning shears, cut back any dead leaves, shoots, and even damaged areas in the plant. This will help promote healthy new growth in your cactus.

Step 3: Soak the Roots in Water

If you find any signs of root rot or disease, soak your cactus’s roots in lukewarm water to help get rid of any pests or diseases.

Step 4: Place Your Cactus into Its New Pot

Once you have finished inspecting the roots, place your cactus into its new pot and fill it with a well-drained soil mix specifically for cacti.

Gently pack the soil around the plant’s base, making sure that there are no air pockets.

Step 5: Water Your Plant

Once you have repotted your cactus, water it lightly. Be sure not to overwater, as this can cause root rot and other issues.

Once you have repotted your cactus, it is essential to monitor its growth for the first few weeks as it adjusts to its new home.

A woman watering the cactus.
Once you have repotted your cactus, water it lightly.

You may need to adjust your watering schedule if you notice any signs of stress, such as wilting or discoloration.

How Big Should the New Pot Be?

Repotting means moving your cactus from the current pot to a bigger one.

When selecting a new pot for your cactus, make sure it is at least two inches larger in diameter and one inch taller than the current pot. This ensures enough space for your plant’s root system to continue growing.

For instance, if your current pot is six inches in diameter, then you should select a new pot that is eight inches in diameter.

Also, pay close attention to the material used for the new pot. Clay pots are better at allowing air to flow around the roots, while plastic pots retain more moisture and can cause root rot if not monitored properly.

Remember to add a few drainage holes in the bottom of your new pot if you feel like it needs more holes. This ensures that excess water can drain away from the roots quickly and keep them healthy.

Remember that your chosen pot can also impact your cactus’ growth rate. A bigger pot will allow for more root and stem growth, while a smaller pot will limit it.

Should I Mulch Repotted Cactus?

Mulching mainly serves two purposes: It helps keep moisture around the plant’s roots and protects your cactus from extreme temperatures.

If you live in an area with high temperatures, adding a light layer of mulch around your newly repotted cactus will help it adjust to its new environment.

A thin layer of organic material, such as pine needles or organic bark, can help protect the roots from extreme heat and help retain moisture.

Apply only a little mulch around your cactus, sometimes leading to root rot. Keep it light and remember to remove any excessive mulch during heavy rainfall.

Should I Fertilize a Newly Repotted Cactus?

Cacti are naturally slow-growing plants that don’t need too much fertilizer to thrive. However, if you feel that your cactus is growing slowly or needs a boost of nutrients, fertilizing it can help.

Try using a low-strength liquid fertilizer every couple of weeks during the active growing season (spring and summer).

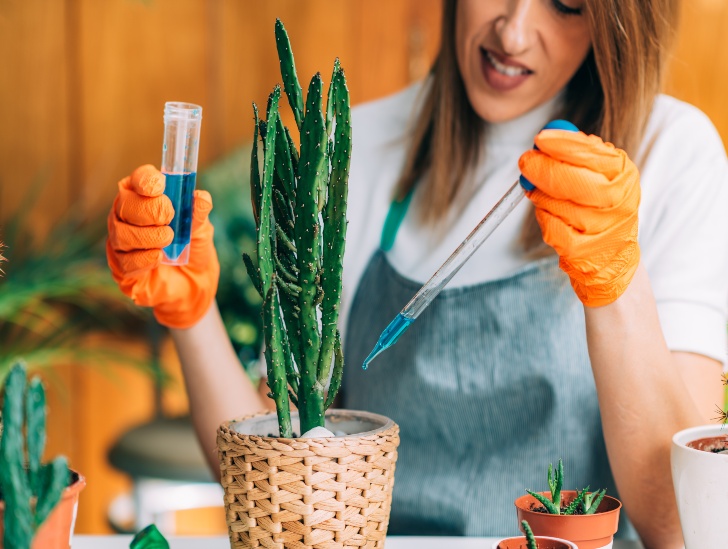
A woman applying fertilizer on the cactus.
If you feel that your cactus is growing slowly or needs a boost of nutrients, fertilizing it can help.

Avoid fertilizing any cactus during the dormant season (autumn and winter), as this can cause damage to the plant.

What Should I Do If My Newly Repotted Cactus Isn’t Thriving?

If your newly repotted cactus isn’t thriving, it could be due to several factors.

Start by checking the soil in its new pot. Ensure it is well-draining and light enough for the plant’s roots to breathe. If you think the soil isn’t ideal, you may need to repot your cactus again.

Also, ensure that the new pot you selected is large enough for your cactus and has adequate drainage holes at the bottom. If it does not, then this could be causing problems with water accumulation around the roots.

It is also essential to check your watering schedule. Overwatering can lead to root rot and other issues in cacti, so if you’ve been giving your plant too much water, then this could be causing the problem.

Finally, ensure that your cactus’s environment suits its growth needs. Cacti plants do not do well in hot and humid environments, so if this is the case for you, you may need to move your plant somewhere cooler.

If none of these things is helping, then it is best to consult a professional before trying anything else. A professional can diagnose any underlying issues with your cactus and advise reviving it.

Summary

Now that you know all there is to know about repotting cacti, it is time to get out there and do it!

Be sure to follow the steps outlined above, and remember to give your plant enough water after placing it in its new pot.

With a little effort, your cactus will take well to its new home and continue to thrive for many years.

Buddha’s Temple Plant: To Sun or Not to Sun?

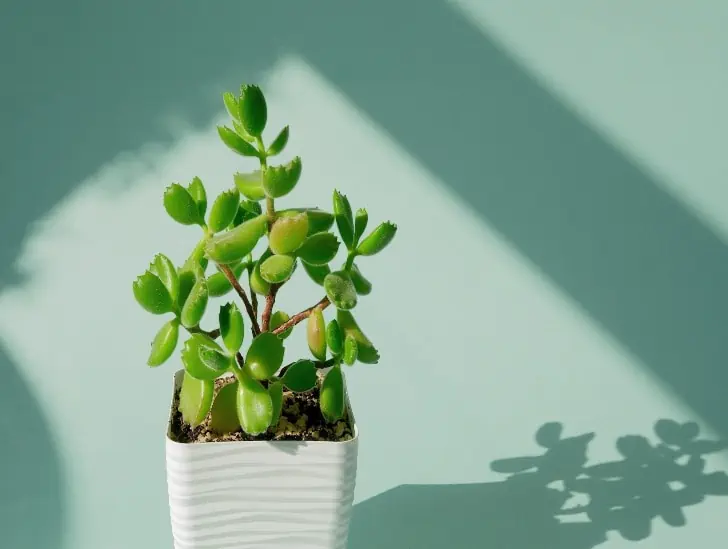
The Buddha’s temple plant, also known as Crassula ovata, is a succulent native to the dry regions of South Africa. It is a popular plant to grow indoors since it is relatively easy to care for and can thrive in different environments. But does this plant is whether it needs direct sunlight to prosper?

According to the National Gardening Association, the Buddha’s temple plant does not need direct sunlight to thrive. This succulent can tolerate quite low light conditions, making it an ideal plant for growing indoors. However, the National Gardening Association does recommend giving your Buddha’s temple plant some indirect sunlight if possible. If you can place your plant near a window where it will receive some bright light for part of the day, that would be ideal.

This blog post discusses everything you need to know about Buddha’s temple lighting requirements. Read on to learn more!

Buddha’s Temple: General Light Requirements

Before we dive into the specifics of Buddha’s temple lighting requirements, let’s briefly review how to care for your Buddha’s temple and plant’s general light needs and. As we mentioned above, the Buddha’s temple plant is native to the dry regions of South Africa. This succulent grows in shady areas beneath trees or shrubs in its natural habitat.

As a result, caring for Buddha’s temple plant is very easy. The plant is adapted to thrive in low light conditions. In fact, this plant can tolerate quite low light levels without suffering any ill effects. However, the Buddha’s temple plant will grow best if given some bright, indirect sunlight daily.

Buddha temple topview.
This succulent grows in shady areas beneath trees or shrubs in its natural habitat.

If you are growing your Buddha’s temple plant indoors, the best place to put it would be near a window. This is where it will receive some bright, indirect sunlight for part of the day.

If you cannot provide your plant with natural sunlight, you can also grow it under artificial light.

What Is Direct Sunlight?

You may be wondering what exactly direct sunlight is and why it is not good for the Buddha’s temple plant.

Direct sunlight is the type of light that comes from the sun on a clear day. This light is intense and can harm many plants, including succulents.

When exposed to direct sunlight, the Buddha’s temple plant leaves will turn red or brown. The plant may also start to produce fewer flowers. In extreme cases, exposure to direct sunlight can cause the leaves of the plant to shrivel up and fall off.

A succulent exposed to morning sunlight.
It is best to grow your Buddha’s temple plant in a spot that receives some shade during the day.

If you live in a climate where the sun is very intense, it is best to grow your Buddha’s temple plant in a spot that receives some shade during the day.

Alternatively, you can grow your plant under artificial grow lights emitting gentler light.

What Is Indirect Sunlight?

On the other side of the spectrum, we have indirect sunlight. Unlike direct sunlight, indirect sunlight is the type of light that comes from the sun on a cloudy day.

This light is not as intense as direct sunlight, but it is still bright enough to provide some benefits to plants.

When exposed to indirect sunlight, the Buddha’s temple plant leaves will turn a greenish-yellow color. The plant may also produce more flowers than it would in low-light conditions. In general, indirect sunlight is ideal for most succulents, including the Buddha’s temple plant.

If the sun is very intense where you live, you might not want to expose your plant so much as cause it damage.

Consider moving your Buddha’s temple to a spot that gets some indirect sunlight to protect it from the intense heat.

You can also consider using artificial grow lights instead, so the plant doesn’t get excess sunlight than it needs.

Artificial Light vs. Natural Light for Buddha’s

If you cannot provide your Buddha’s temple plant with any natural sunlight, you can also grow it under artificial grow lights.

Artificial grow lights are designed to mimic natural light and can be a great way to provide your plant with the light it needs to thrive.

You can choose from a few different types of artificial grow lights, but we recommend using LED grow lights. LED grow lights are energy efficient and emit light similar to natural sunlight.

Buddhas temple offspring.
You will also need to provide your plant with some darkness for a few hours each day.

It’s important to ensure that the lights are not too close to the plant when using artificial grow lights. If the lights are too close, they can actually end up causing more harm than good.

You should generally keep the lights about 12 inches away from the plant. You will also need to provide your plant with some darkness for a few hours each day, so we recommend using a timer to turn the lights off at night.

What Is the Best Light for Buddha’s Temple Plant?

The best light for Buddha’s temple plant is bright, indirect sunlight. The primary goal is to ensure that your succulent receives some light daily, but it is also important to avoid exposing it to direct sunlight.

If you live in a climate where the sun is very intense, consider growing your Buddha’s temple plant in a spot that receives some shade during the day. Alternatively, you can grow your plant under artificial grow lights emitting gentler light.

Buddhas Temple plant
The primary goal is to ensure that your succulent receives some light daily.

Prolonged exposure to direct sunlight can lead to the leaves of the plant turning red or brown. This can also result in the plant producing fewer flowers, and in extreme cases, the leaves may shrivel up and fall off.

Can a Buddha’s Plant Receive Too Little Sunlight?

While this succulent thrives in relatively low light, it can also suffer if it does not receive enough sunlight.

If your plant does not receive enough light, the leaves will stretch out and become leggy. The cactus can die without sunlight so ensure it gets some light however little.

If this happens, you can try moving your plant to a spot that receives more light. You can also try using artificial grow lights to give your plant the light it needs to thrive.

In general, we recommend providing your Buddha’s temple plant with at least 4 hours of indirect sunlight each day. If you are using artificial grow lights, we recommend keeping the lights on for 12-14 hours each day.

Buddha’s Temple: Lighting Requirements for Flowering

Does Buddha’s temple plant need special lighting to flower? While this plant can flower in low light conditions, it typically produces more flowers if it receives at least 4-6 hours of sunlight each day.

Buddha's temple flowers.
It typically produces more flowers if it receives at least 4-6 hours of sunlight each day.

If you are growing your Buddha’s temple plant indoors, you can try placing it near a sunny window where it will receive direct sunlight daily. Alternatively, you can grow your plant under artificial grow lights emitting more intense light.

Buddha’s Temple: Lighting Requirements for Fruiting

The Buddha’s temple plant is not known for producing fruit, but it can produce small, green fruits in the right conditions. The plant will need at least 6 hours of sunlight each day to produce fruit.

Remember that the plant will only produce fruit if it is healthy and well-cared for. Provide it with the appropriate amount of water and fertilizer and protect it from pests and diseases.

Failure to do so may result in the plant failing to produce fruit, even if it receives the appropriate amount of light.

Can the Buddha’s Temple Survive Winter?

While the Buddha’s temple plant is typically a summer-flowering plant, it can survive winter in some cases. If you live in an area with mild winters, you can leave your plant outdoors year-round.

However, if you live in an area with cold winters, you must bring your plant indoors or grow it under artificial grow lights.

When bringing your plant indoors for the winter, make sure to place it in a bright spot near a sunny window. You may also need to provide additional artificial light if the natural light is not sufficient.

You should also be careful with how you move the plant back to its outdoor spot after winter. Make sure to acclimate the plant gradually to the outdoors to avoid shocking it and causing damage.

Start by moving it to a spot that receives indirect sunlight for a few hours daily. Then, over the course of a week or two, you can slowly increase the amount of time it spends outdoors until it is back to its regular schedule.

Summary

Buddha’s temple plant is a beautiful and low-maintenance succulent perfect for growing indoors. The plant doesn’t need direct sunlight to thrive, but it needs some light to grow.

If you are growing Buddha’s temple plant indoors, place it in an area where it will get indirect light and keep the room warm and humid.

You can also consider using artificial grow light to provide some good lighting for your precious plant.

With proper care, your Buddha’s temple plant will thrive and bring some natural beauty into your home. You will be sure to see your plant thrive, and possibly bloom.

Bear’s Claw Plant: Sunlight Preferences and How to Provide Them

Bear claw plant exposed to sunlight.

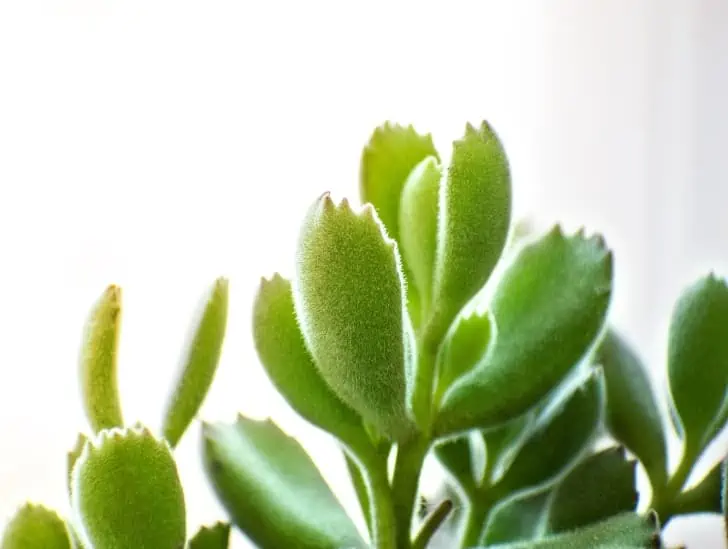
The bear’s claw plant, also known as the Aloe barbadensis, is a succulent native to parts of South Africa. It gets its name from its long, curved leaves resembling a bear’s claws. The plant is drought-resistant and can tolerate long periods without water. But how much sunlight does it need to thrive?

The bear’s claw plant needs full sun to partial shade in cooler climates. In warmer climates, it prefers full sun but can also tolerate partial shade. If you live in an area with scorching summers, it’s best to give the plant some afternoon shade to protect it from the heat. However, you must remember that too much direct sunlight can scorch this plant’s leaves. Therefore, if you live in an area with very strong sunlight, consider placing your bear’s claw plant in a spot with partial sun.

This post discusses everything you need to know about the bear’s claw plant light requirements.

Bear’s Claw Plant: General Light Requirements

Before we dive into the specifics of how much sunlight the bear’s claw plant needs, let’s talk about its general light requirements.

This plant is a succulent, meaning it stores plenty of water in its stem and leaves. Succulents come from arid climates and are used to high levels of sunlight. In fact, most succulents need at least six hours of direct sunlight each day to thrive.

The bear’s claw plant is no exception. It needs plenty of sunlight to grow and stay healthy. However, it’s important to remember that too much direct sunlight can damage the plant. If the leaves are exposed to too much sun, they can become sunburned and turn brown or yellow.

A bear claw flowering and exposed to sunlight.
It needs plenty of sunlight to grow and stay healthy.

Therefore, finding a balance is essential when choosing a spot for your plant. A location that gets plenty of sunlight but isn’t too hot or sunny is ideal.

If you’re unsure whether a particular spot will be too hot for the plant, it’s always best to err on the side of caution and choose a location that gets partial sun instead of full sun.

Bear’s Claw Plant: Minimum Light Requirements

Bear’s Claw plant generally needs at least six hours of direct sunlight each day. However, it can tolerate less sunlight if it’s in a cool climate. The plant will do fine in full sun to partial shade in cooler climates.

The most important thing is to make sure the plant gets enough light. If it doesn’t get enough light, the plant will become etiolated. It means the stem and leaves will stretch out and become thin. The plant will also produce fewer flowers.

A bear claw freshly watered and esxposed to sunlight.
The plant will do fine in full sun to partial shade in cooler climates.

To avoid this, make sure to give your plant plenty of sunlight. If you live in an area that doesn’t receive plenty of natural sunlight, consider using grow lights to give your plant the light it needs.

Bear’s Claw Plant: Maximum Light Requirements

Too much direct sunlight can damage the bear’s claw plant. If the leaves are exposed to too much sun, they can become sunburned and turn brown or yellow.

The plant generally prefers full sun but can also tolerate partial shade. If you live in an area with extremely hot summers, it’s best to give the plant some afternoon shade to protect it from the heat.

If you’re unsure whether a particular spot will be too hot for the plant, it’s always best to err on the side of caution and choose a location that gets partial sun instead of full sun.

What Are the Signs Your Bear’s Claw Plant Is Receiving Too Little Light?

How can you tell if your Bear’s Claw plant is receiving too little sunlight?

If your plant gets too little light, it will become etiolated. The stem and leaves will start to stretch out and become thin.

Etiolation is even more likely to occur if the plant isn’t getting enough sunlight and the temperature is relatively low.

A young bear plant.
Moving your plant to a spot with more sunlight is important.

Other signs that your plant isn’t getting enough light include:

  • The plant produces fewer flowers
  • The leaves are pale or yellow
  • The plant grows more slowly than usual

If you notice any of these signs, moving your plant to a spot with more sunlight is important.

If you are growing your bear’s claw plant indoors, shift it to a south-facing window. If you are growing it outdoors, move it to a spot with full sun.

What Are the Signs Your Bear’s Claw Plant Is Receiving Too Much Light?

Like too little light, too much sunlight can also damage the plant. If the leaves are exposed to too much sun, they can become sunburned and turn brown or yellow.

Avoid giving your plant more than six hours of direct sunlight each day. If you live in an area with extremely hot summers, it’s best to provide the plant with some afternoon shade to protect it from the heat.

You can provide shade by planting taller plants around your bear’s claw plant or using a sun umbrella or screen.

Other signs that your plant is getting too much sunlight include leaves turning brown or yellow, wilting, and faded or bleached flowers.

If you notice any of these signs, it’s important to move your succulent to a location that gets less sunlight.

If you are growing your bear’s claw plant indoors, shift it to a north-facing window. If you are growing it outdoors, move it to a spot that receives partial sun or shade.

What Are the Ideal Temperature Conditions for the Bear’s Claw Plant?

Good temperature for your plants is also important for their growth. In general, the bear’s claw plant prefers warm temperatures. It can tolerate temperatures as low as 50 degrees Fahrenheit but prefers temperatures between 60 and 85 degrees Fahrenheit.

If the temperature is too low, the plant will not grow as quickly and may even stop growing altogether. The leaves can become sunburned if the temperature is too high.

To keep your plant healthy, keep the temperature in the ideal range. If you live in a warm climate, this should not be a problem. However, if you live in a cold climate, you may need to take steps to protect your plant from the cold weather.

A bear plant exposed to sunlight.
The plant will not grow as quickly and may even stop growing altogether.

One way to do this is to grow your plant in a pot so that you can move it indoors when the temperature drops. Another way to protect your plant is to use a frost blanket or tarp to cover it when cold weather is forecast.

Can a Bear’s Claw Plant Survive Winter?

Since this plant is adapted to surviving in relatively hot and dry areas, you may be wondering if it can survive winter.

The answer is yes, but only if the temperature stays high enough. If the temperature falls below 50 degrees Fahrenheit, the plant may die.

During winter, the succulent slides into a state of dormancy. This means that it stops growing and doesn’t need as much water.

If you live in an area with cold winters, it’s best to grow your plant in a pot so that you can move it indoors when the temperature drops. Another way to care for your plant during winter is to use a frost blanket or tarp to cover it when cold weather is forecast.

Taking these steps will help your plant survive the winter and start growing again in the spring.

How Often Should I Water a Bear’s Claw Plant When It Is Receiving Direct Sunlight?

In general, you should water your plant once a week. However, this may vary depending on the temperature and humidity levels where you live.

Your plant will need more water if you live in a hot and dry climate. Likewise, your plant will need less water if you live in a cool and wet climate.

During the winter, when the plant is dormant, you can reduce the watering frequency to once every two weeks.

A bear claw plant exposed to direct sunlight.
Your plant will need more water if you live in a hot and dry climate.

To water your plant, give it a good soaking until water runs out of the drainage holes in the bottom of the pot. Then, let the soil dry out completely before watering again.

Over-watering is one of the most common problems people have with succulents. If you water your plant too often, the roots will start to rot. This can lead to fungal diseases that can kill your plant.

It’s much better to underwater your plant than to overwater it. If you are unsure whether or not your succulent needs water, it is good to err on the side of caution and wait a few days before watering again.

Bottom Line

The bear’s claw plant does not need direct sunlight to survive. In fact, too much direct sunlight can actually damage this plant.

If you want your bear’s claw plant to thrive, place it in a spot that gets partial or filtered sun and water it only when the soil is completely dry.

Watch out for signs of too much or too little light so you can save your plant before it becomes too late.

With just a little bit of basic care, your bear’s claw plant will thrive for years to come!

Cholla Cactus 101: A Look at 8 Different Species

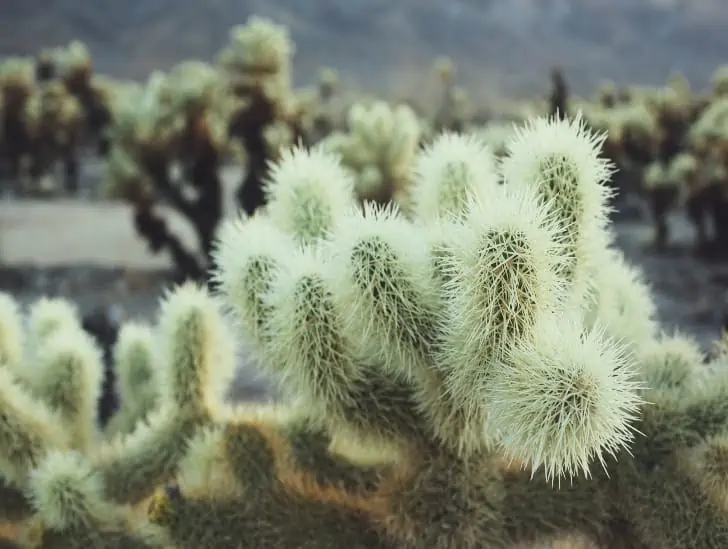
Native to parts of North America and West Indies, the cholla cactus (Cylindropuntia sp.) is a member of the Opuntiaceae family. Most cholla cacti are densely covered in sharp, barbed needles called glochids. These glochids detach easily from the plant and can become lodged in the skin, causing irritation. Chollas are sometimes referred to as “jumping cacti” because the glochids can detach and become embedded in unsuspecting passersby.

There are more than 20 species of cholla cactus, including barrel cactus (Ferocactus cylindraceus), buckhorn cholla (Cylindropuntia acanthocarpa), chain-fruit cholla (Cylindropuntia fulgida), and Christmas cholla (Cylindropuntia leptocaulis). Others include pencil cholla (Cylindropuntia kleiniae), staghorn cholla (Cylindropuntia versicolor), and teddy bear cholla (Cylindropuntia bigelovii).

While all cholla cacti share some common characteristics, there are also some notable differences between the various species. This blog post will explore some of those differences and briefly overview each type of cholla cactus.

Cholla Cactus: An Overview

Before we dive into the different types of cholla cacti, let’s first take a look at some of the plant’s key characteristics. As we mentioned, chollas are members of the Opuntiaceae family and are native to North America and the West Indies.

Most species grow in arid or semi-arid environments, such as deserts and dry grasslands. They typically have a cylindrical shape and can range in height from a few inches to several feet. Many chollas are covered in sharp, barbed needles called glochids.

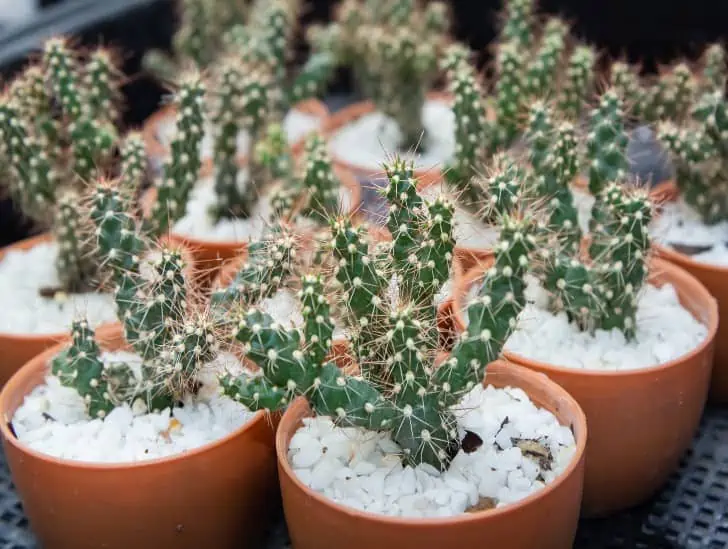
A cholla cactus in a pot.
Most species grow in arid or semi-arid environments, such as deserts and dry grasslands.

These glochids detach easily from the plant and can become lodged in the skin, causing irritation. This characteristic of Chollas have given them the name “jumping cacti”.

Different Types of Cholla Cactus

There are different types of Cholla cactus you’re likely to come across. They include:

1. Barrel Cactus (Ferocactus cylindraceus)

As its name suggests, the barrel cactus is shaped like a barrel. It is native to the southwestern United States and northwestern Mexico.

Barrel cacti can grow up to 6 feet tall and 3 feet wide. They are typically green in color, but some barrel cacti can also be yellow, red, or orange.

Barrel cacti have spines that are up to 2 inches long. The flowers of the barrel cactus are usually red, orange, or yellow.

One of the most notable differences between the barrel cactus and other types of cholla cactus is that they don’t have glochids. Instead, it has long, sharp spines that can cause serious injury if they come in direct contact with human skin.

In its natural habitat, the barrel cactus typically grows in desert climates. It is a slow-growing cactus that can live for hundreds of years.

2. Buckhorn Cholla (Cylindropuntia acanthocarpa)

Buckhorn cholla is native to the southwestern United States and northwestern Mexico. It gets its name from its fruit, which is shaped like a buck’s horn.

Buckhorn cholla typically grows to be between 3 and 5 feet tall. It has green stems that are covered in sharp spines. The flowers of buckhorn cholla are usually yellow, orange, or red.

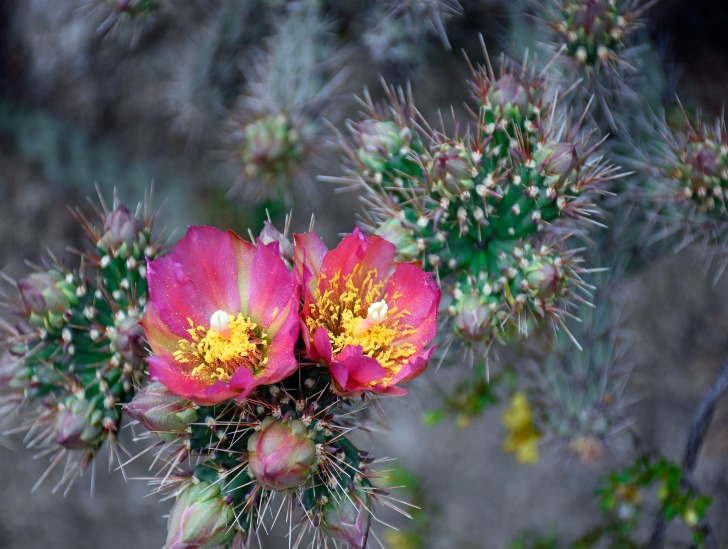
A Buckhorn Cholla flowering.
It gets its name from its fruit, which is shaped like a buck’s horn.

Like barrel cactus, buckhorn cholla does not have glochids. Instead, it has long, sharp spines that can cause serious injury if they come in direct contact with your skin.

The Buckhorn cholla does well as an outdoor decorative plant in desert climates. It is a slow-growing cactus that can live for up to 50 years.

3. Jumping Cholla

The jumping cholla is a tree-like cactus native to the deserts of Arizona, California, and Mexico. It gets its name from the fact that its barbed spines can easily detach from the plant and become embedded in the skin of passing animals or humans.

Jumping cholla typically grows to be between 6 and 10 feet tall. It has green stems that are covered in sharp spines. The flowers of the jumping cholla are usually white, pink, or purple.

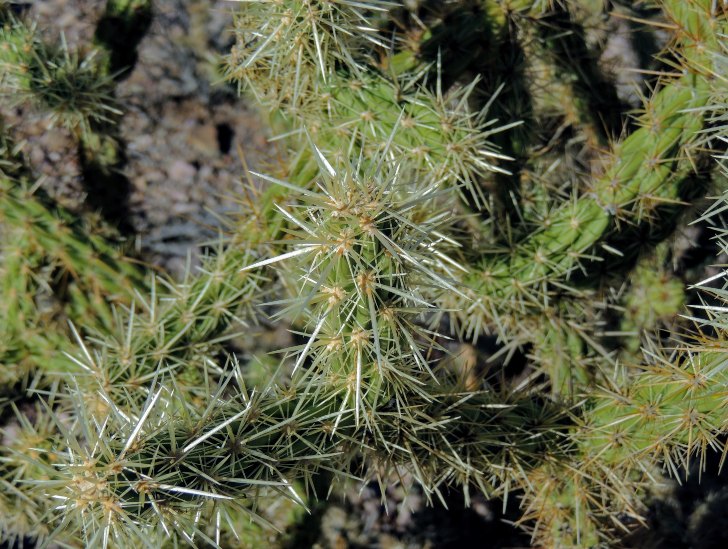
Close up image of a Cholla cactus.
It is also used for erosion control in desert areas.

Like other types of cholla cactus, jumping cholla does not have glochids. Instead, it has long, sharp spines that can cause serious injury if they come in direct contact with your skin.

The jumping cholla is not typically used as an ornamental plant due to its dangerous spines. However, it is sometimes used for erosion control in desert areas.

4. Cane Cholla

Native to Oklahoma, Arizona, and parts of Texas, the cane cholla is also known as a “walking stick” cactus because of its long, thin stems. It can grow up to 20 feet tall in the wild but is often much smaller when grown in a pot.

Cane cholla has green stems that are covered in sharp spines. The flowers of cane cholla are usually white, pink, or purple.

The cane cholla is not typically used as an ornamental plant due to its dangerous spines. However, it is sometimes used for erosion control in desert areas.

Besides animal dispersal, this cactus also spreads by breaking off at joints when it is brushed against. The broken segment of the cactus then sticks to animal fur or human clothing and is carried to a new location where it can take root and grow.

Some people have the cane cholla in their home gardens as an ornamental plant. However, this cactus is not recommended for home gardens because of its potential to spread and become invasive.

5. Christmas Cholla Cactus

Aptly named, the Christmas cholla cactus usually produces beautiful red berries around the holiday season. It is a small cactus that grows only about 2 feet tall.

The Christmas cholla cactus has green stems that are covered in sharp spines. The flowers of the Christmas cholla cactus are usually white, pink, or purple.

This type of cholla cactus thrives in both deserts and grasslands, making it a familiar sight in many home gardens. The Christmas cholla rapidly grows to colonize an area, making it somewhat of a nuisance if not kept in check.

Despite its menacing appearance, the Christmas cholla is actually a relatively harmless plant. However, the sharp spines can cause skin irritation if they come into contact with bare flesh. Handling this plant cautiously and wearing gloves when working around it is important.

Pruning the Christmas cactus is relatively easy and can be done with a sharp pair of shears or a pruning knife. Simply cut away any stems that are getting too long or out of control.

If you have pets or small children, keeping them away from the Christmas cholla cactus is important, as the spines can cause pain if they come into contact with skin.

6. Claret Cup (Echinocereus triglochidiatus)

The claret cup cactus is native to the southwestern United States and northwestern Mexico. It gets its name from the deep red color of its flowers, which bloom in early spring.

The claret cup cactus is a small plant that grows only about 2 feet tall. It has green stems that are covered in sharp spines. The flowers of the claret cup cactus are deep red and bloom in early spring.

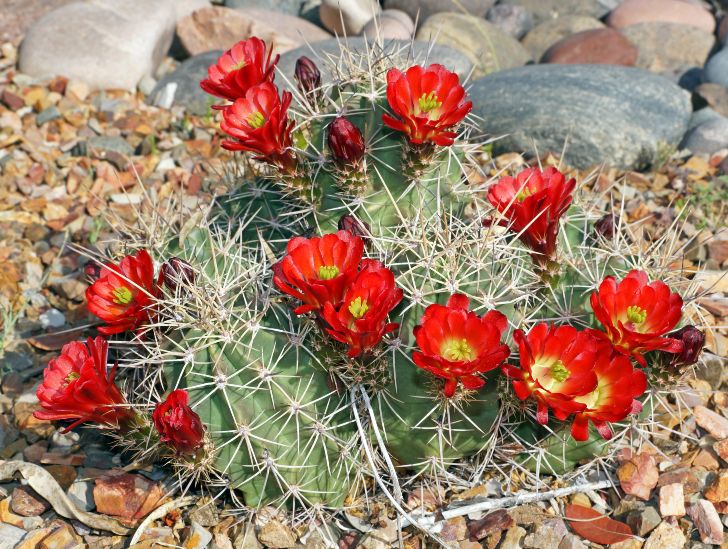
Claret Cup flowering.
It gets its name from the deep red color of its flowers, which bloom in early spring.

It is one of the most popular cacti for gardens and landscaping because of its showy flowers and lack of water requirements. The claret cup cactus is easy to grow and care for and relatively resistant to pests and diseases.

Typically, it only requires watering about once a week and can even tolerate some drought conditions. It prefers full sun but can also grow in partial shade. It is important to plant the claret cup cactus in well-draining soil to avoid root rot.

The claret cup cactus is a beautiful plant that is easy to care for and makes a great addition to any garden or landscape.

7. Diamond Cholla

The diamond cholla is a type of cactus native to the deserts of Arizona and California. It is a member of the family Cactaceae, which includes all cacti. The diamond cholla gets its name from its diamond-shaped leaves.

Diamond Cholla can grow up to 12 feet tall and 6 feet wide. It has many small, sharp spines on its stems and leaves. The diamond cholla blooms in the spring and summer months. Its flowers are white or pink.

The fruit of this cactus is edible. So, if you’re wondering whether you can eat raw cactus, this is the answer. Diamond has a sweet taste and is often used in jams and jellies.

The diamond cholla is also a popular plant for landscaping. It is drought-tolerant and does not require much water to grow.

8. Staghorn Cholla

The staghorn cholla usually exhibits branching habits and is commonly seen in the deserts of Arizona and California. It gets its name from its antler-like branches, which are covered in sharp spines.

Cholla cactus bearing fruits.
It gets its name from its antler-like branches, which are covered in sharp spines.

The staghorn cholla typically grows to be about 2-3 feet tall. Its branches are green or blue-green and are covered in sharp spines. The flowers of this cactus are typically yellow or white.

The staghorn cholla is a popular plant for landscaping because it is easy to care for and does not require much water. It is also drought-tolerant. This cactus can be propagated from stem cuttings.

Summary

As you can see, there are many different types of cholla cacti. Each has its own unique appearance and characteristics. While they all fall under the cholla cactus family, each one is different. Be sure to do your research before you go out and purchase a cholla cactus!

Spine-Free Cactus: A List of Thornless Options for Your Garden

What comes to your mind when you think of cacti? Well, many people view cacti as prickly plants with sharp spines. But did you know that not all cacti have spines? In fact, there are more than 1,500 species of cacti, and only a small percentage of them are armed with spines.

So, what are some of the common types of cacti that don’t have spines?

The most common spineless cactus is the Christmas cactus (Schlumbergera truncata). This tropical plant is native to Brazil and features segmented stems with colorful flowers. Another popular type of spineless cactus is the Easter cactus (Rhipsalidopsis gaertneri), which is closely related to the Christmas cactus. Other notable spineless cacti include the orchid cactus (Epiphyllum), queen of the night (Peniocereus greggii), and old man cactus (Cephalocereus senilis).

Read on to learn ten types of cacti that don’t have spines and their other characteristics.

1. Christmas cactus (Schlumbergera truncata)

Christmas cactus is the most popular type of spineless cactus. This tropical plant is native to Brazil and features segmented stems with colorful flowers. The plant gets its common name from the fact that it blooms around Christmas time.

Christmas cactus is relatively easy to care for and makes a great houseplant. When growing indoors, place the plant in a bright spot but out of direct sunlight.

A christmas cactus flowering near the window.
This tropical plant is native to Brazil and features segmented stems with colorful flowers.

The best time to water Christmas cactus is when the soil is dry to the touch. Christmas cactus is also relatively tolerant of drought and can go long periods without water.

Once the plant blooms, it will likely start to drop its flowers. This is normal and doesn’t mean that the plant is dying. To encourage more blooms, give the plant a cool period (50-60° F) for about four weeks in the fall.

2. Easter cactus (Rhipsalidopsis gaertneri)

The Easter cactus is another popular type of spineless cactus. This succulent is closely related to the Christmas cactus and shares many of the same features. The Easter cactus is native to Brazil and gets its common name from the fact that it blooms around Easter time.

The Easter cactus is relatively easy to care for. When growing indoors, place the plant in a bright spot but out of direct sunlight. Water the plant when the soil is dry to the touch. Easter cactus is also relatively tolerant of drought and can go long periods without water.

To encourage blooming, give the plant a cool period (50-60° F) for about four weeks in the fall. However, you need to be careful with Easter cactus as it is susceptible to root rot. Be sure to plant the succulent in well-draining soil and avoid overwatering.

You also need to be careful with the amount of fertilizer you give Easter cactus. Too much fertilizer can damage the plant’s roots and prevent it from blooming.

3. Mammillaria lasiacantha

Mammillaria lasiacantha is another type of non-spiny cactus native to parts of Mexico. It gets its name from the long, white hairs that cover its body. These hairs help protect the plant from the hot desert sun.

Mammillaria lasiacantha has a spherical body and grows about 6 inches (15 cm) tall. The flowers of this cactus are white or pink, and they bloom in the spring.

Mammillaria lasiacantha flowering.
It gets its name from the long, white hairs that cover its body.

This cactus is easy to care for and makes a great houseplant. Place it in a bright spot but out of direct sunlight. Allow the soil to dry out completely between watering sessions. Water it less often during winter.

Mammillaria lasiacantha is not susceptible to many pests or diseases, but mealybugs can be a problem. The best way to protect your plant from mealybugs is to keep an eye out for them and treat them with insecticidal soap or neem oil as soon as you spot them.

4. Orchid cactus (Epiphyllum)

The orchid cactus is a type of spineless cactus that is native to Central and South America. This plant gets its common name from its showy flowers resembling orchids. Orchid cacti are also sometimes called epiphyllum cacti.

Orchid cacti are relatively easy to care for, making them perfect for planting indoors. They can thrive both indoors and outdoors. When growing indoors, place the plant in a bright spot but out of direct sunlight.

Consider placing it on a south-facing window or near an east-facing window. Water the plant when the soil is dry to the touch.

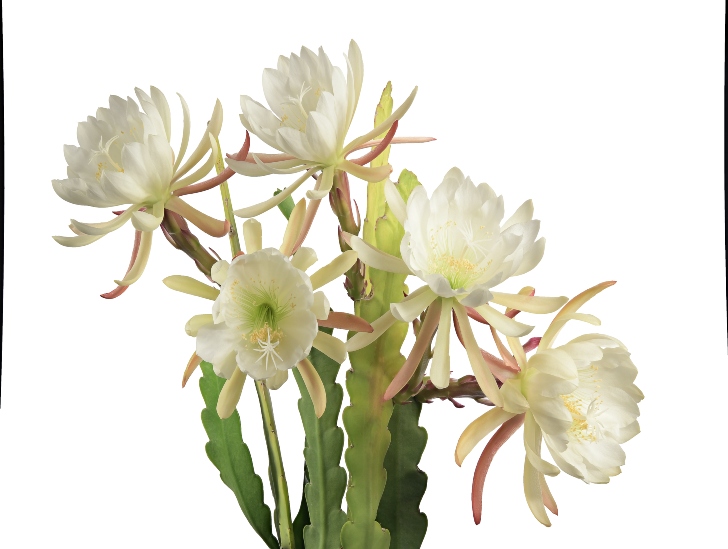
Ochid Cactus flowering.
This plant gets its common name from its showy flowers resembling orchids.

To encourage blooming, give the plant a cool period (50-60° F) for about four weeks in the fall. This will ensure the plant has enough time to rest and store energy for blooming. Its flowers are typically white or pink and bloom in the spring or summer.

5. Rhipsalis baccifera

This cactus is native to Brazil and is one of the most popular spine-less cacti. It’s easily recognizable by its long, thin stems that can grow up to 3 feet (1 meter) long. The stems are greenish-brown and covered in tiny, white hairs.

Rhipsalis baccifera flowers are small and white and bloom in the late spring or early summer.

This cactus is easy to care for, making it a great houseplant. Place it in a bright spot but out of direct sunlight. Allow the soil to dry out completely between watering sessions.

One of the ways to care for cacti during the winter months is water even less frequently. In fact, this cactus can survive the entire winter without water.

Rhipsalis baccifera is not susceptible to many pests or diseases, but mealybugs can be a problem. These pests suck the sap from the plant and can cause it to become stunted or even die. If you see mealybugs on your plant, treat them with insecticidal soap or neem oil.

6. Queen of the night (Peniocereus greggii)

The queen of the night is a type of spineless cactus that is native to Mexico and the southwestern United States. This plant gets its common name from its large, showy flowers that bloom at night.

The queen of the night cactus is relatively easy to care for and makes great houseplants. When growing indoors, place the plant in a bright spot but out of direct sunlight. Water the plant when the soil is completely dry.

The queen of the night cactus is well adapted to surviving in relatively dry areas and can go long periods without water.

Queen of the night flowering.
The queen of the night cactus is relatively easy to care for and makes great houseplants.

The queen of the night cactus typically blooms in late spring or early summer. The flowers are short-lived, only lasting one night. However, the plant will produce new flowers nightly for several weeks.

After the flowering period, the plant will go into a dormancy period and should be watered less frequently. Allow the soil to dry out completely between watering during this time.

Also, the plant may shed some of its older leaves during the dormancy period. This is normal and should not be cause for concern.

The queen of the night is not susceptible to many pests or diseases. However, mealybugs can be a problem. These pests suck the sap from the plant and can cause it to become stunted or even die. If you see mealybugs on your plant, treat them with an insecticidal soap or neem oil.

7. Pachycereus pringlei

Pachycereus pringlei, commonly known as the Cardon cactus, is a type of spineless cactus native to Mexico. It is the tallest cactus in the world and can grow up to 65 feet (20 meters) tall.

The cardon cactus has a large, columnar trunk, and it is covered in spines. The flowers of the cardon cactus are white or pink, and they bloom in the spring. The fruit of the cardon cactus is edible, and it tastes like a cross between a pineapple and a pear.

The cardon cactus is mainly found in the Sonoran Desert, California. It is also known as the elephant cactus or the candelabra cactus.

A Cardon Cactus in the desert.
the Cardon cactus is a type of spineless cactus native to Mexico.

This succulent is a slow-growing plant that can live for hundreds of years. It is drought-tolerant and does not need much water to survive.

The cardon cactus is an important food source for desert animals, and the Native Americans used the cactus for food, shelter, and medicine.

If you are looking for a unique and interesting plant to add to your collection, the cardon cactus is a great choice. It is a beautiful plant that is sure to make a statement in your home or garden.

8. Peyote

Peyote is an odd-looking but cute cactus native to Mexico and the southwestern United States. It has a green, spherical body with small, pink flowers. It gets its name from the fact that it is often used as a natural psychedelic drug.

Peyote grows in arid desert regions, and it is a slow-growing cactus. It can take up to 12 years for a peyote plant to mature. The plant is small and only grows about 6 inches (15 cm) tall.

Peyote has been used by Native Americans for centuries, both as a food source and as a medicine. It was also used in religious ceremonies and as a way to induce hallucinations. Peyote is still used today for these same purposes.

If you are interested in growing peyote, it is essential to know that the plant is federally protected in the United States. It is illegal to grow or possess peyote without a permit. In Mexico, peyote is not regulated, and it is legal to grow and use the plant.

Summary

While some cacti have spines or thorns, several do not. If you are interested in adding a cactus to your garden, but are unsure if it will have prickles, consult this list for some ideas.

All of the cacti on this list can be found at local nurseries, so you can get started on your collection today!

The Best Tips and Tricks for Hanging Succulents

Succulents hanging.

Hanging succulents are your go-to plants if you’re looking for a unique way to spruce up your garden. Not only are they beautiful and low maintenance, but they can also be used in many ways to create stunning displays. Let’s take a closer look at why hanging succulents make a great addition to any garden.

What do I need to know about hanging succulents? Hanging succulents are also known as trailing succulents. They differ from other succulents because they have longer stems and tendrils supporting the growing plant. Over time, these stems will get longer, and an entire display of hanging succulents can be created.

Some common hanging succulents include the string of hearts, the string of beads, Christmas cactus, strings of bananas, and mother-in-law’s tongue. Most are hardy plants that can be grown just about anywhere as long as they have plenty of indirect sunlight and well-draining soil. They don’t require much water or maintenance, so they’re ideal for those who want a beautiful garden without all the fuss.

This blog post discusses everything you need to know about hanging succulents. We’ll look at the different types of hanging succulents, how to care for them, and where you can find them. We’ll also touch on the benefits of having hanging succulents in your garden.

What Is a Hanging Succulent?

Before we dive deep into hanging succulents, let us talk about what they are.

As mentioned earlier, hanging succulents are also known as trailing succulents. They produce long stems and tendrils that hang down, making them perfect for creating a hanging display in your garden or home. These plants come in various colors and shapes, so you can mix and match them to create a beautiful display.

Hanging succulents are easy to care for and require little maintenance, making them ideal for those who don’t want to spend hours tending to their garden. They need plenty of indirect sunlight and well-draining soil to thrive, so ensure you provide these basic needs for your succulents.

String of pearls exposed to sunlight.
These plants come in various colors and shapes, so you can mix and match them to create a beautiful display.

Some people refer to them as trailing succulents because they tend to cascade down the sides of containers, creating an elegant display.

In their natural habitat, these plants mostly grow in bright light and rocky terrain, so they can quickly adapt to various garden styles.

Common Types of Hanging Succulents

Here is a list of some of the common types of hanging succulents:

1. String of Hearts

The string of hearts is native to parts of South Africa and is one of the most popular trailing succulents. The leaves are heart-shaped and come in shades ranging from green to purple.

String of hearts hangging.
The string of hearts blooms small, white flowers during spring.

This plant is a fast grower and can reach up to three feet in length. It thrives in bright, indirect light and must be watered regularly. The string of hearts blooms small, white flowers during spring.

2. String of Beads

Also known as the Senecio rowleyanus, this is a popular trailing succulent with round leaves that look like beads.

It can reach up to three feet in length and comes in shades of green and white. This plant does best in bright, indirect light and must regularly be watered.

String of beads hangging outdoors.
It is essential to water the plant more frequently and feed it during this time.

The string of beads usually blooms in the spring and summer, producing small yellow flowers. It is essential to water the plant more frequently and feed it during this time. Consider pruning it after the flowering season is finished to keep it tidy.

3. Christmas Cactus

The Christmas cactus is a beautiful succulent that produces colorful blooms during winter. It’s native to Central and South America and can reach up to four feet in length over time.

The Christmas cactus is one of the most popular trailing succulents because of its festive look. It has pointed leaves in green and pink shades, making it perfect for adding a pop of color to any garden.

Christmas cactus hangging
The Christmas cactus is one of the most popular trailing succulents because of its festive look.

The succulent likes bright indirect light and needs to be watered regularly to thrive.

4. Burro’s Tail

Burro’s tail is an all-favorite hanging succulent that is a true showstopper thanks to its lush foliage. It has thick, cylindrical leaves that hang down in bunches and can reach up to two feet in length over time.

The succulent is native to Mexico and prefers bright, indirect light and plenty of water during summer.

During the winter months, it should only be watered sparingly. The burro’s tail may produce small white flowers in the spring and summer.

However, this plant isn’t a massive bloomer. So, don’t be frustrated if yours doesn’t produce many flowers.

5. String of Dolphins

The string of dolphins is also known as the Senecio peregrinus, one of the most exciting trailing succulents. This plant has dark green leaves resembling dolphins and can reach up to three feet long.

The string of dolphins prefers bright, indirect light and must be watered regularly during summer. During winter, it should only be watered sparingly.

This succulent is an excellent choice for those who want to add texture and interest to their garden with a unique hanging plant. Plus, it’s low maintenance and doesn’t require much care!

That’s why they can make a wonderful addition to any outdoor space or balcony, creating a stunning display that will last for years.

How Do I Care for Hanging Succulents?

Hanging succulents are low-maintenance plants that don’t require much care. If you provide them with plenty of indirect sunlight, regular watering during the summer months, and occasional pruning to keep them tidy, they should thrive in your garden.

It’s also essential to give them a well-draining soil mix so their roots don’t become waterlogged.

You can use a potting mix specifically made for cacti and succulents to do this. This will help to ensure that your trailing succulents get all the nutrients they need to stay healthy and happy.

Most of them can survive without feeding, but it doesn’t hurt to feed your succulents every few months with a balanced fertilizer during their growing season. Use a liquid or slow-release fertilizer for best results.

Check on them regularly and trim any dead or dying leaves. This will help keep the plant healthy and looking good. Consider pruning your trailing succulent after the blooming season to keep it neat.

Finally, consider repotting your succulents every couple of years with fresh soil and a bigger pot if necessary. This will help ensure that your plants have plenty of room to grow and stay healthy.

The best way to know when it’s time to repot is to check the roots. If you notice that the roots are filling up the pot, it’s time to repot. This is also a great time to divide your succulents and create more plants!

How to Choose the Best Hanging Succulents for Your Garden

When selecting the best hanging succulents for your garden, you should consider a few things.

First, look at the plant’s size and ensure it’s suitable for where you plan to hang it. For example, if you want to hang a large trailing succulent in a small space, you may need to look for a smaller variety.

A string of Dolphin hangging,
Do research the particular type of succulent you are interested in and ensure it will thrive in your area.

You should also consider the amount of light your hanging succulents will receive. Most prefer bright, indirect light, but some can tolerate full sun.

Finally, make sure you choose one suitable for your climate and conditions. Do research the particular type of succulent you are interested in and ensure it will thrive in your area.

Some do well in dry, desert climates, while others prefer humid environments. Therefore, you must provide your preferred trailing succulent with the right conditions for it to thrive.

Where Can I Buy Hanging Succulents?

Hanging succulents can be found in many places. You can purchase them at nurseries, garden centers, home improvement stores, and even online.

It’s essential to ensure that you buy your succulent from a reputable source to know it is healthy and will thrive in your garden.

When shopping online, check the seller’s reviews and ensure they have a good reputation. This will help ensure that you get a healthy plant that will be easy to care for.

If you are not experienced in identifying healthy succulents, it is advisable to purchase them from a local nursery to get expert advice on which varieties are best suited to your climate and conditions.

Conclusion

Hanging succulents are a great way to bring life and color to any outdoor living space. These unique plants have become increasingly popular in recent years due to their incredible beauty and low maintenance needs, from the string of beads to the Burro’s tail.

These succulents require bright, indirect light and regular watering during the summer months. During winter, they should only be watered sparingly.

Be sure to give them plenty of space in well-draining soil and provide them with occasional fertilization. Remember to prune any dead or dying leaves!

With a bit of care, your hanging succulents will thrive and bring beauty to your garden for many years.

Caudex Plants: A Touch of the Tropics in Your Home

If you are a gardener, chances are you are always looking for new and exciting plants to add to your collection. You might have heard of a caudex plant, but you don’t know what it is or how to care for it. Caudex plants are a fascinating group of succulents with an intriguing and unique appearance. They are relatively low-maintenance and can bring an exciting look to your garden.

So, what is a Caudex plant? Caudex plants are members of the plant family Crassulaceae, which includes some other well-known succulents such as the jade plant and hens & chicks plant. Caudex plants have a thick, woody stem (called a caudex) that gives them their unique appearance. Their leaves are usually small and can be found in shades of green and purple. Most of them are native to the Mediterranean, so they thrive in warm climates with plenty of sun exposure and well-draining soil.

This blog post discusses everything you need to know about caudex plants, including their care requirements and tips for propagating them. We will also discuss the different types of caudex plants and how to choose the right one for your garden.

Read on to learn more!

Caudex Plant: General Overview

As mentioned earlier, caudex plants are members of the plant family Crassulaceae. Many of these plants have thick, woody stems that give them their unique look— think of a cactus with its thick stem!

Caudex plants range in size from small succulents to larger shrubs or trees. They can be found in various colors, including green, purple, and yellow.

Most are native to the Mediterranean, thriving in warm climates with plenty of sun exposure and well-draining soil.

While they may not be as easy to care for as some other types of succulents, such as jade plants or aloe vera, they can still make a great addition to your garden if you are willing to put in the effort.

Caudex plants usually require regular watering and total exposure to the sun when grown at home. They can also benefit from occasional fertilizing, especially during the growing season.

You may need to protect your plant during the coldest months of the year if you live in a region with colder winters.

Why Grow Caudex Plants at Home?

Caudex plants are an excellent choice for gardeners looking to add some unique, eye-catching plants to their collection. Their attractive shape and vibrant colors can make them stand out in any garden or landscape.

These plants are also relatively low-maintenance and don’t require much care. They are also drought-tolerant and can survive long periods without water.

Finally, caudex plants are widely available in nurseries and garden centers, so it’s easy to find one that fits your needs and preferences.

Common Types of Caudex Plants

There are many different types of caudex plants, and each one has its unique characteristics. Some of the most popular varieties include:

1. Crassula perfoliata

This caudex plant is native to South Africa and has a unique shape. It has thick stems, and bright green leaves that form an attractive rosette pattern.

Crassula perfoliata in a pot.
This caudex plant is native to South Africa and has a unique shape.

This caudex plant can be grown in containers or gardens and is relatively easy to care for. All it needs is full sun and occasional watering.

2. Euphorbia Obesa

Euphorbia Obesa plant has an unusual shape that resembles a bowling pin or a sea shell.

It is native to parts of South Africa and can tolerate hot climates, though it does need protection from frost in colder regions. This plant requires full sun, well-draining soil, and occasional watering to thrive.

3. Desert Rose

Few succulents can match the beauty of a Desert Rose. This caudex plant has bright green leaves and beautiful pink flowers that bloom throughout the year.

It is native to parts of Africa, Madagascar, and other regions. The desert rose requires full sun and well-draining soil to grow correctly.

A desert rose flowers.
This caudex plant has bright green leaves and beautiful pink flowers that bloom throughout the year.

It is often deciduous in winter. Therefore, it is crucial to bring the plant indoors if the temperatures drop below 50 degrees Fahrenheit.

4. Elephant’s Foot

The elephant’s foot is perhaps the most common type of caudex plant. It is native to parts of Africa and has thick stems and glossy green leaves.

The succulent gets its name because it looks like an elephant’s foot. This caudex plant is best suited for growing in containers and requires full sun, well-draining soil, and occasional watering to thrive.

5. Madagascar Palm

The Madagascar palm is another typical caudex plant. It has thick stems and bright green leaves that can reach up to twelve feet in height.

The plant is more tolerant to cold temperatures than other varieties and can be grown outdoors in temperate climates.

However, it will need protection from frost during the winter months. Feel free to expose it to full sun, as it can tolerate much more light than other caudex plants.

6. Buddha Belly Plant

The buddha belly is also known as the grout plant and is native to parts of Africa and Arabia. It has thick stems and large, round leaves that resemble a Buddha’s belly. This plant is easy to care for and can tolerate various soil types.

Buddha elephant plant in a pot.
It has thick stems and large, round leaves that resemble a Buddha’s belly.

It does require plenty of sunlight to grow properly. However, you must protect it from frost during the winter months. It does not require much care and can survive long periods without water.

Caring for Caudex Plants

Caring for caudex plants is relatively simple as long as you meet their basic needs. They require full sun and well-draining soil to prevent root rot.

Water your caudex plant about once a week or when the soil is dry. Fertilize with a balanced fertilizer once every two months to promote healthy growth.

Pruning is not necessary, but if you do prune, be sure to use sterilized tools to prevent the spread of infection.

Another essential aspect of routine care is to ensure your caudex plant has enough space for its roots to expand freely. Since most are slow-growing plants, they can stay in the same pot for about three to five years.

If you need to repot it, use a container one size up from its current home. For instance, if the plant is in a four-inch pot, use a five or six-inch pot when repotting. This will give its roots enough room to grow and maintain healthy growth.

Troubleshooting Caudex Plants for Trouble

These succulents are usually prone to rotting and weak/unseasonal growth. In fact, rotting is the main complication of caudex plants. The most common signs of rot are yellowing leaves, softening stems, and rotting roots.

If you notice any of these signs on your caudex plant, acting quickly and removing the affected parts is crucial. Be sure to check the soil drainage and make sure that the plant is not overwatered.

Additionally, ensure the container has enough drainage holes and is in an area that receives plenty of sunlight. With these simple steps, you can help your caudex plant stay healthy and thrive.

How to Propagate Caudex Plants

Propagating caudex plants is relatively easy. The easiest way to propagate them is by using stem cuttings, leaf cuttings, or division. Stem cuttings can be taken from the ends of the stems and placed in a sterile medium.

Leaf cuttings can also be taken and placed on a sterile medium, where they can form new roots that will eventually develop into new plants.

However, division is the most reliable way of propagating caudex plants. To do this, you must carefully remove the plant from its container and gently separate it into two or more sections.

A small desert rose.
The easiest way to propagate them is by using stem cuttings, leaf cuttings, or division.

You can then replant the sections in separate containers with well-draining soil and provide the necessary care.

If you are ambitious, you can also try propagating them through seed germination. Most caudex plants are slow growers, so it will take some time for the seeds to germinate.

On average, it takes around two to three months for caudex seeds to germinate and sprout. Once the seeds have sprouted, transfer them to individual containers and provide proper care.

How to Choose the Right Caudex Plant for Your Garden

When looking for a caudex plant to add to your garden, choosing one that fits your climate and space is vital. Consider the amount of sunlight, soil type, and temperature range when selecting a plant.

You should also consider how much maintenance you are willing to do—some caudex plants require regular pruning or repotting. In contrast, others need minimal attention to thrive.

Euphorbia Obesa in a pot.
You should consider how much maintenance you are willing to do—some caudex plants require regular pruning or repotting.

When you find the right plant for your garden, provide it with ample sunlight and water and watch as it grows into a beautiful succulent centerpiece.

Summary

Caudex plants are an exciting and easy-to-care-for addition to any garden. These unique plants come in many shapes, sizes, and colors, making them perfect for adding interest and variety to your landscape.

If you’re looking for a low-maintenance plant that can tolerate extended periods of drought, then a caudex plant might be the right option!