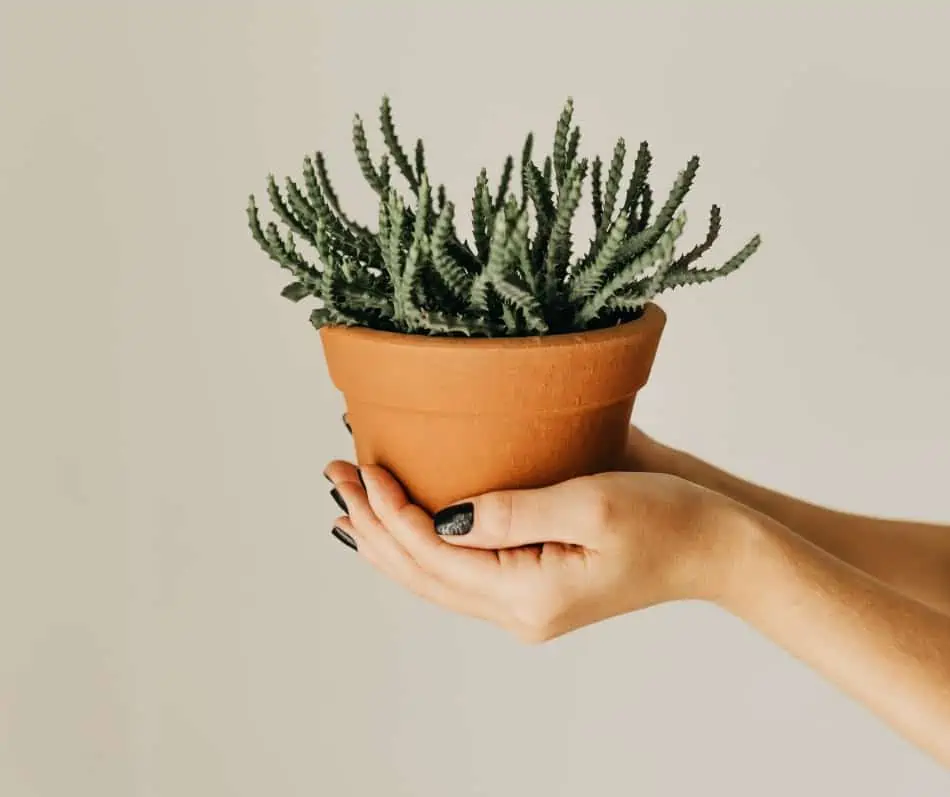
12 Cactus Garden Ideas To Spice Up Any Backyard

Does your backyard look plain and uninspiring? It may be time you did something about it. If you live in an arid or semi-arid region and wondering what can work for your backyard, we have good news; a cactus garden will do justice to your backyard. A cactus garden works best for those who may not have enough time to keep monitoring the progress of the plants. This said, however, creating a cactus garden can be easier said than done.  You may need more than just the desire and availability of the cactus plants. This is especially so when it comes to practical cactus garden ideas that will work best based on the design, size and overall outlook of your backyard.

So, what are the top cactus garden ideas that can spice up your backyard? Let’s face it; there are hundreds of ideas that you can go for when it comes to your backyard. However, the ultimate choice will boil down to your personality, size and shape of your backyard, climatic conditions of your region and the ultimate goal or purpose of your backyard garden.  Whether you are looking to do a mound, patch or colorful cactus garden get your design right. You may also see the need to do a blend of both succulents and cactus, adds some rocks for the borders or include a mix of both large and small cactus varieties.

This article will be looking at the various cactus garden ideas for your backyard. It will focus more on how you can achieve that ideal design that will speak boldly about your personality and creativity. This will also include details about each additional item for the garden and their importance.

1. Succulent cactus blend

A blend of cactus and other succulents on your backyard will create a sight to behold. For this idea, find succulents that can complement your small cactus plants on the garden. Preferably, these should be flowering succulents to help give your backyard that delightful look.

Add succulent cactus blend to your cactus garden, ideally those that produce gorgeous flowers.

2. A patch of cactus plants

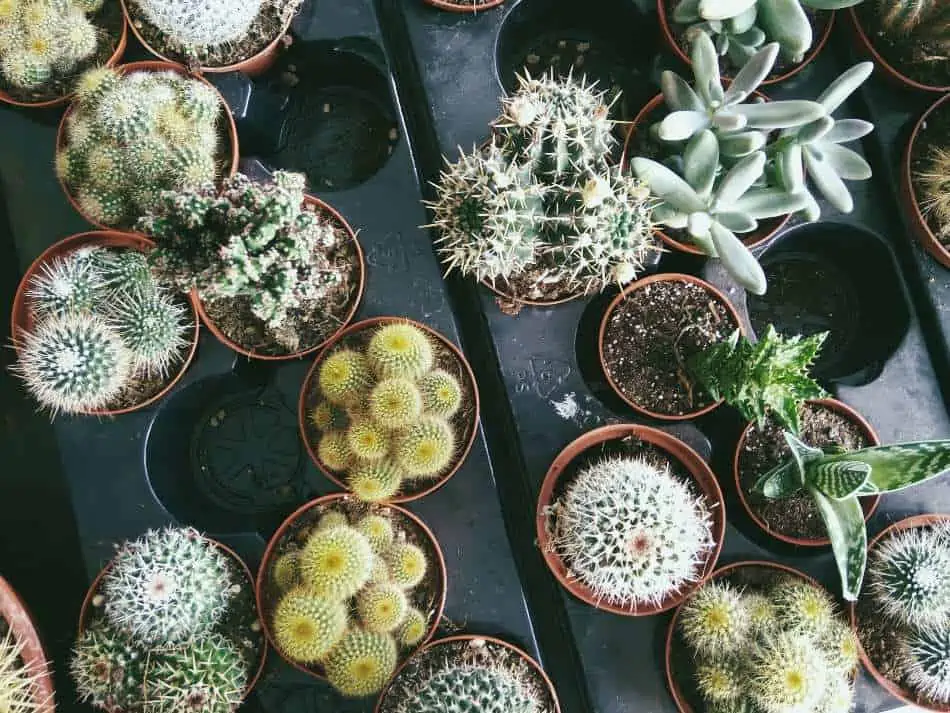
Go for small, rounded cactus varieties and plant them in neat rows. Patches that stretch into the distance give your garden that desert look while maintaining the exotic appearance that your backyard needs.  You can complement these with some all cactus species by the sides.

3. Red garden cactus

For this idea, create a perfect symmetry using a number of cactus plants with varying shades. You will be surprised by the red shale that will surround the plants once they are fully matured. There are no specific cactus species for this design, but the idea is to find a perfect blend that will complement the overall look of your garden.

4. The aloe effect

Your backyard cactus garden cannot be complete without some aloe effect. Here, you can find one or multiple short cactus varieties for your garden.  You will then break up the monotony using some huge aloe-type plant. This can come in as the centerpiece of the garden. It will overshadow the cactus plants, thus creating an intriguing sight.
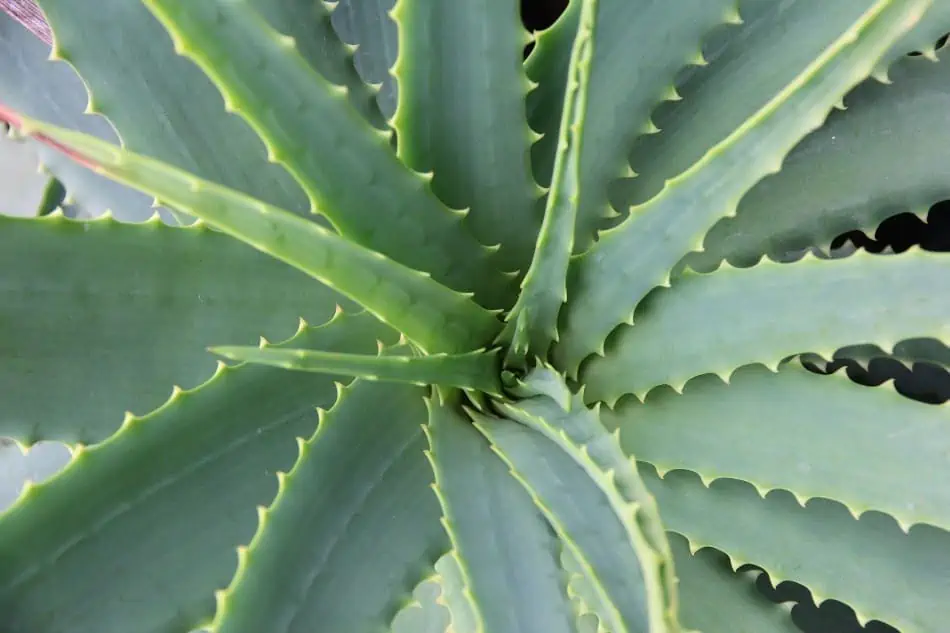
Aloe-type cacti can act as a focal point of your backyard cactus garden.

5. Arizona Garden

Arizona is known for its sandstone and tan coloration. Why not apply this effect on your backyard cactus garden? Here, you can create a rock garden by planting some cactus species adapted for the Rocky Mountains. This will create an inviting view, whether you are at the garden or by the window.

6. Go for the high heavens

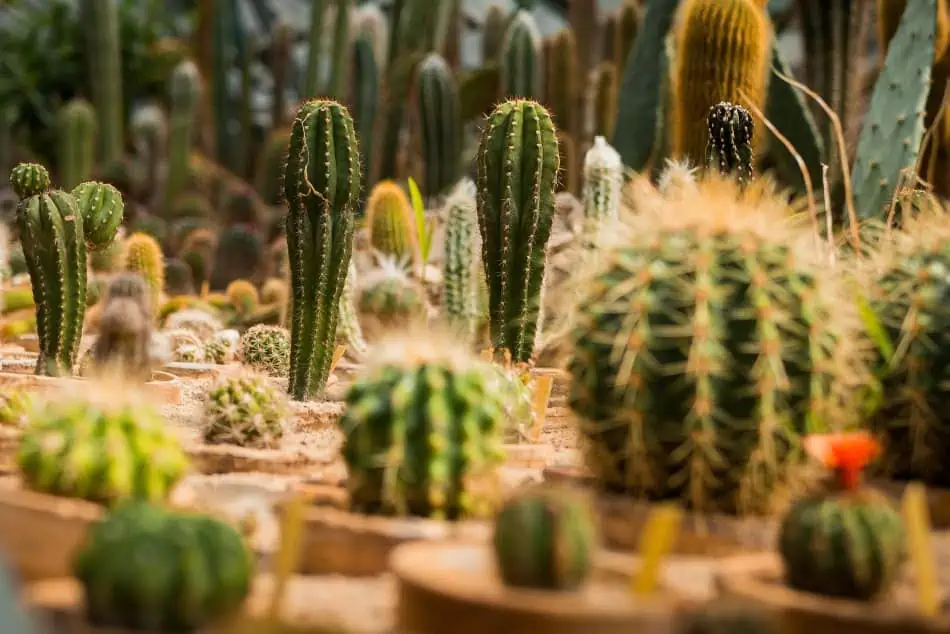
If you have a bigger backyard, why not opt for the taller cactus varieties? Species like the giant saguaro can easily come in to give your backyard that towering, yet charming atmosphere. The contrast created between the green look against your wall’s color can be a sight to behold. You can then complement these tall species with some ‘grounded’ species for form a perfect ground cover for your garden.

7. The spiny look

Cacti are synonymous with spines. While this can be one of the most detested features by cactus handlers, you can make some lemonade out of this lemon. Find a variety of the spiny cactus that produces long spines. Usually, these spines come in different colors depending on the species in question. The glowing red, purple, black and brown spines jutting from these cacti create an angelic view that will certainly catch your attention. This works best for your backyard since the area may not be frequented by children and curious pets.
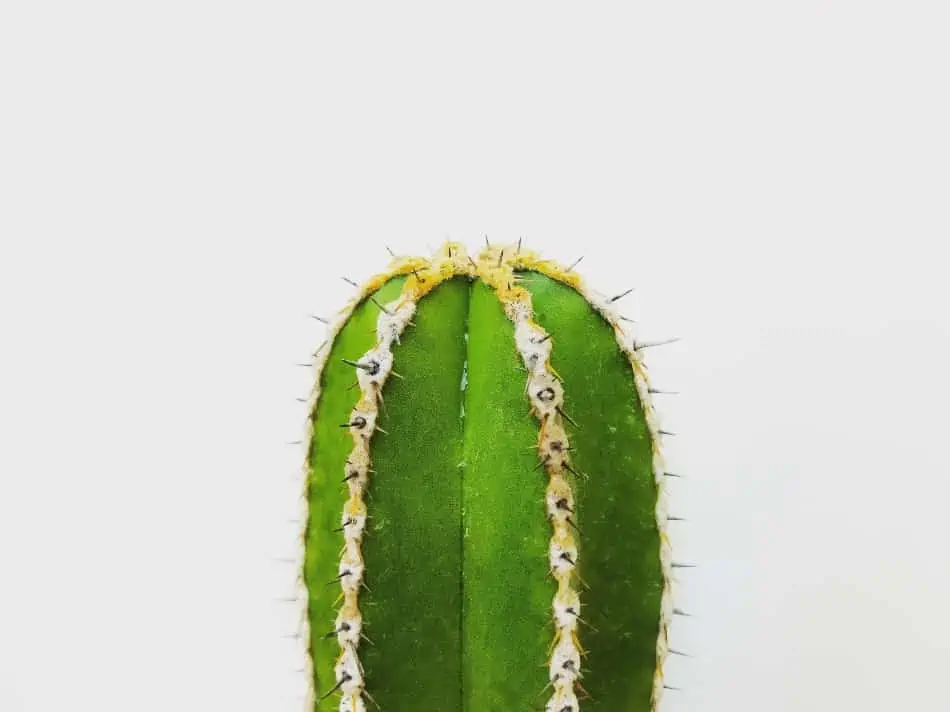
Add some spiny cactus species to your backyard garden and ensure the area is not visited by the kids or pets.

8. Rocky colors

Choose a cactus species of your liking and plant them in solitude, each spread out. You will then find small stones with different pastel colors and spread them just at the base of each plant. The color contrasts from the stones create an ideal carpet look for your garden. This will most likely work better by using cactus species that do not spread out too much when mature. Let your creativity kick in when designing this rocky outlook.

9. Potted and ground mix

If you do not have much space in your backyard, consider creating a garden with potted plants. This is especially so for the edges and borders of your garden. Plant some short cactus types on the ground in the middle of the garden. You can then create a fence-like border at the edges using potted plants. If you can find different colored plants for the potted plants, the better.

10. Recycled art garden

There is something wild about cactuses that make them ideal for rugged spaces. Your backyard may include other structures, tools and sometimes stalled machines. Why not improve this outlook by filling it up with some vibrant green life? One may opt for potted cactus types or larger cactus types like the Saguaro or barrel cactus. You will be surprised how your small urban yard will look spacious after all.

11. Lawn alternative

If you live in an arid area, you want to save water as much as possible. While using gravel as the ground cover is an option, you can make this look better by planting some grass cover. You can then add in some sparse plantings of your preferred cactus plant. This will create a water-wise meadow that anyone would be happy to look at.

12. Prickly pear galore

Prickly pear is one of the most popular cactus types for outdoor gardens. If you are looking to experience some edible delight at your backyard, then creating a prickly pear garden is your best bet. Once matured, you can enjoy its tasty fruits that can also be made into jelly. Its pads can also be added to tacos, salads and egg dishes once the spines are fully cleaned off. The fact that the prickly pear grows in clusters makes it ideal to create that forest feel for your backyard garden.
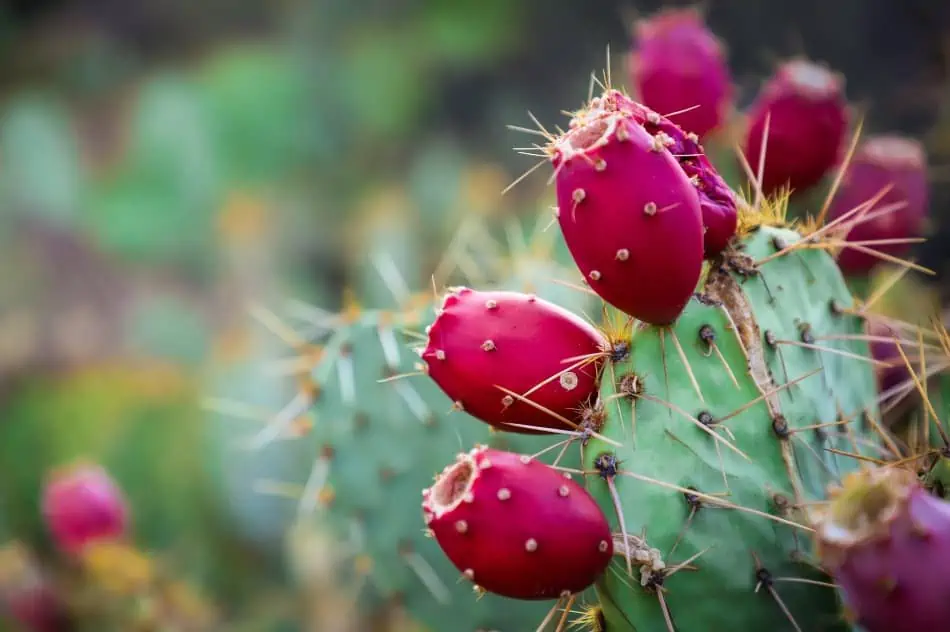
By adding prickly pear cactus to your garden, you will have some edible cactus fruits right in your backyard.

Considerations when creating a backyard garden

Even with the above ideas, you may fail at your bid to create that perfect backyard garden if you do not take some basic cactus care rules into consideration. The following tips will come in handy in this process:

Soil drainage and access to light

Too much or stagnant water can be detrimental to your cacti. Before delving into the planting process, ensure that your backyard has a good drainage. You may consider adding some soil on one end to make a slanting bed. Your soil should also contain enough sand as this is ideal in terms of drainage for your soil.

Depending on the type of cactus you hope to plant on your backyard, ensure that access to sunlight is possible, at least for a couple of hours every day. Remember, there are multiple cactus varieties available and you may need to seek advice from your local arborist regarding the growing conditions for your cactus.

Focus on the centers and edges

For a perfect backyard garden design, ensure that you choose an attractive border. Usually, your borders will stand out with rounded rocks, small colored stones or cement blocks. You may also see the need to place some large rocks as a centerpiece for your garden. Alternatively, using some huge cacti species like the barrel cactus or giant saguaro will do the trick.

Size of your backyard

The size of your backyard will determine the type, size and number of cacti you can use to create your garden. Some designs are meant to make your backyard look spacious despite its small outlook. You do not want to stuff your space too much and end up with a messy backyard.

Your backyard says a lot about your personality, and you do not want to gamble with its design. A cacti garden can be your ultimate savior if you understand how to do it right. Use the various types of cacti to create a perfect blend or size, texture, shades and color for your garden. These can help punctuate your space into a sight to behold.

How To Grow A Peanut Cactus

The peanut cactus (Echinopsis chamaecereus) blossoms on the rocky Argentinian mountains, their native grounds, all year round. This species is a great choice for indoor gardening, cherished for their fuzzy, peanut-shaped stems and scarlet-orange spring and summer flowers. They are easy to care for, and their otherworldly appearance is priceless and worth any hassle. Like any other cactus, you can easily get impressive results with minimal effort.

What does it take to grow a peanut cactus? To sprout quickly, grow your peanut cactus from the parent’s stems. Harvest a young stem from the cactus stump at the tail-end of fall. Nip the fingers from the plant’s base and regrow the budding shoot in commercial cactus soil mix or a homemade potting mix of sand, peat moss, and loam in the ratio 2:1:1. Each cutting is to be planted in its pot protected from direct sunlight. Give them just the right amount of water and watch the bloom. For better results, enrich their soils with fertilizer, two-three times a year.

This article will expound in depth all the factors that go into successful propagation and care of the peanut cactus. It will delve peanut cactus’s basic traits, best conditions for growth, its varieties and hybrids, aesthetic uses, illuminate tips for cactus propagation, transplanting, watering and grooming. This will include pests and diseases that affect this species. It will also point at special care tactics that suit the plant’s seasonal needs.

Characteristics of the peanut cactus

  • They grow as a clump of stems that mimic human fingers. New stems are usually erect and plump while old ones turn woody and brown. The stems have shallow ribs coupled with six to nine ridges covered in small white bristly spines. They are a low-growing species that grow to about 15 cm tall and 30 cm wide.
  • They grow relatively fast compared to other cacti species. The numerous offsets will easily crowd a pot sooner than other cactus plants can.
  • They flower in early summer and late spring, producing oversized brightly-colored red and orange flowers – 3 inches long and 2 inches wide.
  • Its flowers are funnel-shaped with hairy floral tubes. Depending on the variety, they can either be nocturnal or diurnal. These blooming characteristics make it a desirable choice for cactus gardening.
  • They produce hairy globular fruits with mushy insides. Within the fruit are seeds that can be used to propagate the peanut cactus.
  • They are spiny and wind in a spiral manner. The spines are, however, soft and do not penetrate the skin. This makes them ideal for indoor landscaping for homes with curious kids and notorious pets.
  • They succumb easily to flooding and over-watering.
  • They do not tolerate extremely cold winters.
  • They require full to partial sunlight to get by, especially in summer. Peanut cactus requires at least 6-8 hours of sunlight a day for its survival. This cactus may, however, require some shading, particularly during spring. Under poor lighting, the stems can grow long and thin. It would be best if you aimed to strike a perfect balance for light exposure and shade to prevent scorching the stems or undernourishment.
  • The species goes through a dormancy period where they shrivel up abit and acquires a slight reddish tinge on their stems. The dormancy antecedes the flowering season. During this period which the green creeps back the stems as watering continues in spring.

Propagating peanut cactus

As much as they are flowering desert plants, peanut cacti are easily propagated using stem cuttings or offshoots from the mother plant.

Although you can grow a peanut cactus from seeds, growing the plant by propagating its offsets is a much quicker way.

Here is a step-by-step guide on its propagation:

  • Hold up the spiny offsets using tweezers and cut the stem right from the base. The offsets are easy to detach from the mother plant since they are weakly attached naturally.
  • Dip the snipped part in a growth hormone and cure using an antiseptic solution before planting it into potting mix. An antiseptic solution like cinnamon helps to keep fungal and bacterial activity at bay.
  • Before planting, allow the slit part to form a callous. The callous is a sheath that protects the plant from pathogens.
  • The cultivars are then grown in a potting mix. You may opt to purchase your cactus mix online or make your own soil mix at home.
  • Within a few weeks, your cuttings should develop roots and grow into a healthy cactus with the right care.

Peanut cactus can still be propagated using seeds. However, this is not recommended because the plant will grow at a snail’s pace when propagated compared to cuttings. Cuttings are far along the germination process, unlike seeds that have only just begun. The beauty is that it can form many offsets all at once, many times in its lifetime.

Fertilization

Applying fertilizer to a peanut cactus will cause tremendous growth spurts. However, dosing up the plant with fertilizer, all at once, is not preferred.  They would rather take it in small amounts- keeping them nourished all year long. While applying fertilizer once a year is acceptable, doing it at least twice is the regarded even better. Too much of anything can be harmful, and this also applies for plants. Excessive application of fertilizer can scorch the cactus. A good gardener would probably make a fertilizer feeding chart for better management of the fertilization schedule.

You should fertilize your peanut cactus 1-2 times a year.

Growth options and conditions

Peanut cactus can be grown as a houseplant or outdoor cactus, dictated by the area’s climate. It thrives in zones 10 through 12 of plant hardiness. These zones ranges between 30˚F to well over 45˚F in temperature. This species is known to grow outdoors in regions like California, Florida, Nevada, and Arizona. Despite this, this hardy, versatile species can grow anywhere in the world. You can grow it indoors, provided it does not miss out on adequate sunlight.

If you have decided to grow a peanut cactus indoors, make sure the plant gets enough sunlight.

Watering the peanut cactus

Peanut cacti, like other cactus species, require watering in moderation. The species is adapted to seasonal deluges or no water for days. The soak and dry method is ideal; water is added whenever the soil appears or feels dry. To test this, stick your finger in the mound of soil. Water the cactus if at least one inch of the soil feels dry.

 Water the plant from the sides rather than directly pouring water from the top. Overhead watering is wasteful and, if done in the heat of the day, can cause increasingly high rates of evaporation. Watering below ensures that the water seeps down the soil into the roots. They are best watered at dusk or dawn.This way, they get to utilize the moisture rather than losing it through evaporation.

Under-watered cacti tend to fall over thanks to the little water in their stems. Water plays a critical role in the turgidity and support of stems. Without water, its cells are flaccid, and this may cause them to droop over. It would help if you struck a fine balance in your watering regime to avoid deprivation or overabundance.

Transplanting

Repot your peat cactus every three years using damp soil with excellent drainage. Repotting is a crucial and less recurrent step that happens in the life of every potted cactus. This should be done with care to keep the roots from breakage and injury.

Cacti roots may run out of breathing space, and hence, repotting gives it room for growth. Once a peanut cactus matures, it produces a dozen offshoots and stems. This bunch of stems can be reduced to cuttings that you can pot separately to grow into mature peanut cacti.

Repotting your peanut cactus will give the plant some extra space to grow and protect it from various diseases.

Transplanting is a great hack for disease prevention. Murky and poorly-drained soils harm your cactus’ roots. This can result from overwatering or using poorly-drained soils for cactus potting. To spot an ailing cactus, be on the lookout for wilting.

A sickly peanut cactus improves drastically when potted in fresh soil. Frequently changing the soil can help kick disease to the curb.

The other reason for transplantation would be increased nutrition. In about two years, the cactus plant sitting in the same pot has chugged down any growth nutrients and the soil slowly loses its fertility. New, freshly prepared soil mix is a natural way to replenish long-lost nutrients and boost the plant’s overall health. Commercial fertilizers can still be used, but fresh home-made soil mix comes with purely natural elements that help the cacti thrive till the next repotting.

Fortunately, the peanut cactus does not require any pruning. No tipping, topping, head-tracking, or plant mutilation is unnecessary. Trimming columnar cactus might be tricky and is done when part of the plant experiences damage.

Uses of the peanut cactus

Indoor landscaping

The miniature plant displays a beautiful array of bright crimson-orange, unscented flowers during spring and summer that is such a beauty to behold. They do well when grown on hanging baskets or pots placed to flatter your window sill or office desk.

A peanut cactus can be an ideal addition to your indoor cactus garden.

Peanut cactus can be grown together in the same pot with other flowering cactus perennials sporting different shades of color. This contrast will help create a most desirable floral display. Pair the peanut cactus crimson-orange flowers with yellow flowers from ball cactus or the star cactus’ white flowers, and watch your cactus garden transform.

Outdoor landscaping

This cactus variety is an ideal species for xeriscaping. Grow your peanut cactus in a rock garden. This is a popular xeriscaping trend that you must try. Peanut cactus will get you there and fulfill your gardening fantasies. A flowering cactus is a great way to complement a regular garden. As a rule of thumb, fill up spaces and vacuums. In a garden, this can best be done using succulents like the peanut cactus.

Peanut Cactus Varieties

This plant has been immensely hybridized with other diverse species considered a subset of the same genus. Crossbreeding in cacti is advantageous as it helps introduce new desired traits such as drought tolerance that improve survival. It helps enhance already present desirable traits as well purge and dilute the least desirable qualities.

One of the peanut cactus varieties that came about as a result of crossbreeding is the yellow stemmed peanut cactus (Echinopsis chamaecereus var. lutea).This variety lacks chlorophyll and cannot survive under direct sunlight. It has been grafted with a green stemmed species (Hylocereusundatus) to enhance its chances of survival.

Peanut cactus has been extensively hybridized with members of Echinopsis species, yielding hybrids with larger showy flowers with red, orange, and magenta hues. Duotone blooms of pink and yellow and pink and red colors resulted from hybridization, creating a colorful species. The hybrids are erect and have wider stems. Other clones such asx Chamaelobivia f. cristata have fuzzy stems that resemble caterpillars.

Pests and diseases

Bug infestations

Peanut cactus is highly susceptible to cactus spider mites but can be infested with weevils, mealy bugs, whitefly and scale. Spider mites sap the plant’s juices. They manifest as small yellow or white patches that appear on the stems. To shoo them away, spray the stems with water. You can also use a miticide to mitigate infestation effectively.

For biological control, Phytoseuiluspersimilis is a potent natural predator that helps abate pest infestation. Other bug infestations can be controlled using insecticidal soaps and contact or systemic insecticides.

Black stem and root rot

This is a fungal infection caused by overwatering. The rot creeps from the plant’s base and eventually leads to poor growth, discoloration and eventually, death. Root rot is a deadly manifestation because it occurs in the roots, where you may not easily notice until it is too late. The damage caused with extensive progression may be irreparable.

Prevent your peanut cactus from overwatering to protect the plant from root rot.

Dealing with the stem and root rot

  • Use thick gloves or a newspaper, remove the cactus from the pot.
  • Observe the condition of the root and the stem. Healthy cactus roots are white in color while infected roots appear black or brown. Salvage the rest of the healthy white roots by cutting away the black-brown rotten roots.Discard the plant if all its roots are rotten.
  • Leave the cactus to dry until callouses form on the cut regions.
  • Repot the cactus using fresh cactus potting soil.

To avoid this in the future, watering sparingly will help minimize the rot.

Signs of nutrient deficiency in peanut cactus

Nutrient deficiency diagnosis for the peanut cactus can be easily done from it physical traits. For instance, stems falling over the place can be suggestive of undernourishment. Nutrient deficiency is easily overlooked since its manifestations may either resemble a pest invasion or seem like an accident. The main culprits behind stems dropping down are nutrient depletion in the soil and inadequate exposure to sunlight.

Inadequate nutrients in the soil – In some cases, cactus roots become too weak to support the plant’s frame thanks to malnutrition. To salvage this, a balanced fertilizer is highly recommended, with phosphorus in higher abundance than nitrogen in a 5-10-5 solution.

Insufficient sunlight – Cactus stems tend to droop with inadequate sunlight. Stems begging for sunlight will grow gravitating towards a window or any source of natural light.By nature, plants are phototropic – survival instinct that enables them to reach sunlight. This growth inclination towards the direction of sunlight is referred to as phototropism. With easily detachable stems like the peanut cactus, it is only a matter of time before the stem falls over. So, the next time you notice fallen stems, try and understand why it happened. It is, however, no cause for alarm; you can easily rectify the problem. All you have to do is place the pot under the light that the plant yearns.

Special treatment during winter

The peanut cactus requires that extra care during winter since they cannot tolerate these extremely cold conditions. When night temperatures drop to just about the freezing point, consider taking the plant back to the house.

Place it in a cool place for the rest of the months to come. During this season, you may not need to water the plant as it would be in its dormant stage. Make sure the cactus pot has a drainage hole to pass out the excess water.

Towards the end of winter, bring the plant to a warmer spot. This gradual change of temperature prevents the plant from experiencing heat shock – a major cause of distress in plants that can detrimentally affect its growth. Heat shock manifests as wilting.

Consider taking your peanut plant indoors in winter to protect the plant from freezing temperature.

Before the start of bloom, transplant your peanut cactus to its final home, where it will remain for the rest of the blooming season. Remember, repotting in the flowering season will sabotage the process.

For the peanut cactus, you have to work a little harder to achieve the desired floral display for the season to come. Optimizing growth conditions will likely lengthen the blooming period and yield a spectacular floral bloom. Increase watering as spring approaches. Add liquid fertilizer when watering the cacti. Liquid fertilizers are easier for plants to utilize since they are readily absorbed. Flowering lasts one to two weeks. Once the flowers start to wither, move the plant near a sunny window or outside altogether. Ensure the plant gets access to full sun after flowering.

The peanut cactus is a great cactus option for a gardening experience. They are an easy-to-grow succulent with close-to-nothing requirements that grow fast and bloom in spectacular, showy flowers you can brag about. If it isn’t for the bristly segmented pickles sprouting from the ground as a clump, the flowers that crown the plant’s apex are worth the gardening experience. It will also add to your botanical genius growing this rare and exotic species.

How To Grow A Jumping Cactus

The Sonoran desert can be beautiful to look at when cacti bloom. However, do not be deceived, some cacti species can be nasty when you get closer. One of these is the Jumping Cholla cactus. The cactus gets its name from its habit of ‘jumping’ from its parent plant to the ground or onto the skin of any animal that passes by. This is a unique adaptation that helps the cactus procreate and multiply in different locations.  Once the spine is ripe, it easily detaches from the main plant and will begin rooting once it hits the ground. The jumping cholla cactus is one of the largest cacti in the desert, rivaling the likes of the giant saguaro.

So, how do you grow the jumping cholla? Considering its natural ability to detach from the parent plant onto the ground, growing a jumping cholla should not be much of a problem. The cactus can be propagated from its stem, seeds or offsets.  It grows best under direct sunlight and the soil should be dry and well draining to avoid root rot. Once the plant is mature enough it grows some little sharp spines. Avoid pricks and injuries to the skin when handling it by wearing thick gloves. The Jumping Cholla works well when grown together due to their unique growth pattern.

Facts about the Jumping Cholla

  • The jumping cholla can live for decades in their natural habitat and even longer when grown at home.
  • Unlike most other cacti, they thrive best under direct sunlight. Since they do not need much water, they are tolerant to neglect and can be idea for those who travel frequently.
  • A mature jumping cholla will easily attach to anything that comes close. When it gets in contact with the skin, it is not toxic but can cause a painful irritation. As such, consider keeping them away from reach of children or any curious pets.
  • They are excellent complements to other indoor succulents like yucca, aloe and agave.
  • The jumping Cholla can grow to a height of up to 15 feet.
  • Their blooming season comes between April and June. Its star-shaped flowers come in warm colors like red, pink, orange and yellow-green.
  • The jumping cholla produces some green fruits after the flowering season. The fruits would hang down from the branches. These spineless fruits also have fertile fruits that can be used to propagate the cactus.

Types of Jumping Cholla

The jumping cholla is a general name usually used interchangeably in reference to the Cylindropuntia fulgida (Chain fruit cholla) and the Cylindropuntia bigelovii (Teddy bear Cholla). Both varieties feature joints that detach from the main plant and hold on to anything in the vicinity.

Cylindropuntia fulgida (Chain fruit cholla)

This jumping cactus stands out with its cylindrical jointed stems. These stems usually stand about 8 to 10 feet tall. The light green stems feature some knotty ridges. This variety blooms magenta purple flowers that grow to about 1.5 inches wide. The chain fruit cactus gets its name from the growth pattern of its fruits. Its produces its fruits persistently and its aerosols will keep churning out even more fruits, thus forming a chain of fruits.

Chain-fruit cholla cactus features stems that are 8-10 feet tall.

Cylindropuntia bigelovii (Teddy bear Cholla)

The Teddy bear Cholla features some jointed stems, 2 to 10 inches long. This stem would usually be hidden in a dense array of spines, 7 to 10 inches long. Its branches are not truly cylindrical thanks to the raised areas, hereby called tubercles.

This Jumping Cholla variety features some greenish yellow flowers about 1.5 inches wide. The flowering season is then followed by some deciduous, fleshy fruits.

Teddy bear cholla cactus comprises joint stems that are 2-10 inches long.

Propagating Jumping Cholla cactus

Jumping Cholla cactus is an easy growing plant as long as propagation is done right. You can easily propagate this cactus, either by seeds or by its cuttings.  However, while propagating by seed can be a sure way to get a pure species; this may not be the best method if you are looking to get quick results. Seeds take time to germinate, and when they do, their growth is slow.

Propagation though cutting is a popular method for the cholla cactus.  This can be done easily using is stem offshoots. These stem offshoots grow some weak points where you can easily pluck out and grow in a separate pot.

The Cholla cactus is a sensitive plant, and you do not want to gamble during propagation. Some of the notable factor to take into consideration before propagation is the temperatures, and the season. Ensure that the temperatures are at least 60°F (16°C). These are ideal temperatures that will allow successful rooting.

When taking your cuttings, always ensure that you get the specimen from healthy plants that represent the best of that species. Avoid taking cuttings with dents, blemishes, bruises or those generally looking shriveled or diseased. A healthy cutting will translate into a healthy plant that may not need much attention once it matures. All you will need to do in such case is to water once in a while and keep watch on pests and bugs.

Here is a step-by-step guide on how to propagate a Jumping Cholla:

  • Remove your chosen stem offshoot from the parent plant using a sharp and disinfected knife. Alternatively, you can simply snap it off from the joint using your hands. Always use thick gloves when handling that Cholla cactus to avoid pricks from its spines.
  • For cuts, always ensure that you cut of your offshoot in a slanted manner. This is important in helping protect the parent plant from water collecting at the cut area.
  • Dip the base of your cutting in sulphur or other common rooting compounds to improve the chances of rooting.
  • Let the cutting dry off for a few days until the base is callused. This is an important step to help avoid cases of the cutting rotting once it is planted. It is also important in helping protect you cactus from common soil-borne diseases.
  • Once the cutting is callused, get some good soil mix. You can make this at home or purchase the commercial versions. A good soil mix should contain at least 50 percent peat or compost and 50 percent pumice or perlite.
  • Get an ideal container and fill it with your soil mix. Your container should be well draining with drainage holes that help drain excess water.
  • Place your soil deep enough into the soil to avoid it tipping over. Ideally, the cutting should be covered at least 3 inches into the soil.
  • Apply some little water sparingly if the soil is too dry
  • Position your container in a bright location. This could be by the window or balcony where sunlight can easily reach.

With the right propagation, you should notice some signs of rooting within a few weeks.  A growing tip will be a good sign that roots are already developed and that the plant can now tap nutrients from the soil.

Watering the Jumping cholla cactus

The Jumping Cholla cactus may be a desert plant, but this does not mean that it needs no water. Just like any other plant, the cholla cactus needs water for better nutrient uptake and healthy growth. The only difference in this case is that it does not need much water as it can tolerate longer periods of drought. Based on this, watering should be done in moderation. Overwatering your Jumping Cholla cactus can lead to root rot, and you do not want to go this route. It is better to under-water than over-water the cactus as the latter can be detrimental to its survival.

Although Jumping Cholla is a desert cactus, you still need to offer the plant enough water to grow healthy.

For a Jumping Cholla, watering should be done regularly for the first few months as the plant gets used to the new environment. Once it settles in, watering can be done less often. During your watering regime, always ensure that the top one inch of the soil feels dry before you water it. The frequency of watering can, however, be determined by the weather conditions of the region. For instance, hotter regions may need more frequent watering compared to colder areas thanks to the high percentage of water loss through evaporation.

Light requirements

Just like any other cacti, light is an important element for the Jumping Cholla. This is especially so during the first stages of its life. As such, you may see the need to place it in an area where it can tap maximum sunlight. Such locations may include a south or southeast facing window, a conservatory or even a greenhouse in case of an outdoor garden. However, in cases where access to natural light is a challenge, you can opt for artificial sources of light in the name of grow lights.  These can replace the need for sunlight and you can purchase from any electronics store.

Jumping Cholla cactus requires 10-14 hours of light, especially during the first stage of life.

Access to light for at least 10 to 14 hours a day is recommended to the jumping cholla. This light comes in handy to help trigger chemical reactions for the plant to produce energy and food. However, since the cactus also needs to make its own food through the CAM photosynthesis, it also needs some dark periods for better development.

Fertilization 

The jumping cholla cactus may be adapted to thrive in the barren lands with little nutrients, but this does to mean it does not need some fertilizer when grown at home.  Feed your jumping cholla with a balanced granular fertilizer on a regular basis. In this case, you care better off with fertilizer specifically made for cacti and other succulents. However, you can also use water-soluble, low nitrogen fertilizer on the plant. This will help maintain a consistent flow of nutrients to the plant without compromising on the plant’s survival.

You should fertilize your Jumping Cholla cactus with a balanced granular ferilizer regularly.

Having said this, it is also important to note that too much of the fertilizer can be detrimental to the health and growth of the Jumping Cholla. Too much fertilizer can cause the plant to become weak and eventually droop over. The best fertilizer in this case would be an NPK fertilizer with a ratio of 5-10-10 or better still 10-10-10 but diluted to ¼ of its strength.

The best time to fertilize your cactus would be during your watering regime.  Here, you will dissolve one tablespoon of your soluble fertilizer in one gallon of water.

Repotting the Jumping Cholla cactus

With the right care, your Jumping Cholla will grow fast, and within no time, you will see the need to repot. Repotting is necessary for two main reasons:

  • To help get the plant some fresh, fertile soil free from diseases and pests
  • To help avoid too much crowding of the root once the container becomes too small

These two factors are aimed at ensuring your cactus remains healthy and strong all trough its lifetime. When repotting, consider the type of container to use. For hot areas, you are better using a plastic container as this helps maintain soil moisture for much longer. On the other hand, taller varieties of the cholla cactus may need clay pots as these absorb excess water thus saving the plant from root rot occasioned by over-watering.

Repotting your Jumping Cholla cactus will give the plant some fresh and fertile soil along with extra room to grow.

When repotting the jumping cholla cactus, ensure you brush off excess soil from previous container before repotting in the fresh soil. For outdoor gardens, however, you do not need to do any repotting.  All you need to do is keep monitoring through proper watering and fertilization. Once the plant achieves enough offshoots, it will be time to propagate into new plants.

Pests and diseases

The jumping cholla may be resistant to many pests and diseases but it is mostly susceptible to cochineal scale insects. You will easily notice them thanks to their sticky white appearance. These insects eat up the plant by sucking its sap, thus causing some white and brown patches. For outdoor gardens, you can easily do away with these insects by spraying it with a garden hose. For indoor gardens, however, you may see the need to use a mixture of water and alcohol. Apply these on the plant’s stem focusing on the affected areas.  Within a few days, the insects will be no more.

Another notable pest for the jumping Cholla is the cactus longhorn beetle. These are usually about one inch long and adults are shiny black with distinctive white patches on their antennae. They attack the cactus by burrowing into the stems and laying their eggs. This leads to some black rusty deposits on the stem. In extreme cases, the larvae can attack the roots causing the plant to droop over and die.

The longhorn beetle can be easily eradicated by handpicking from the stem. In cases where the population is high, chemical control can be applied.

Common diseases that can affect the jumping cholla include root rot and stem rot. This is mostly caused by poor watering by either over-watering or under-watering.

Is a Jumping Cholla cactus edible?

The Jumping cholla has edible fruits and buds. However, considering the natural appearance of the cactus, it is adapted to protect itself from predators. As such, you may need to work harder before getting something edible from the plant.

The jumping cholla produces fruits that are edible all year round. These can be eaten, either raw or boiled. In case you want to eat them raw, you can only eat the insides. However, boiling it will mean that you can eat the fruit as a whole. Usually, the larger fruit varieties are better-tasting compared to the smaller ones.

Cholla buds bloom in late April or early May. These buds are highly nutritious, low in calories and high in calcium and iron.

Whether you are harvesting its buds or fruits, it is important to note that jumping Cholla has glochids that can be dangerous to the skin. These, almost invisible spinelets can easily prick into your skin. As such, it is advisable that you brush off any traces before picking or cooking.

Jumping Cholla cactus produces fruits that you can eat either raw or cooked.

Whether you are looking to plant it for aesthetical reasons or for food, the cholla cactus is an interesting plant. As much I may be used as an indoor plant, it is best suited for an outdoor garden. This is all thanks to its ‘jumping’ tendency that can be uncomfortable around children and curious pets. When growing indoors, ensure you prune or cut off excess offshoots to prevent the plant from overgrowing. This should be the perfect opportunity to propagate and get even more plants in your garden.  This is a pretty awesome plant that can thrive even in the harshest of conditions. Just ensure they experience the right warmth, regular watering, full sunlight and pest free conditions. With the right care, these cacti can produce bright flowers that can help bring pomp and color to both your outdoor and indoor landscapes.

Are Succulents Poisonous to Dogs? Everything You Need To Know

Disclaimer: The author is not a medical doctor or veterinarian. The information presented is purely to share our experience and for entertainment purposes. As always, check with a doctor and/or veterinarian before making any health or nutrition decisions and consult with a doctor and/or veterinarian regarding any question or problem that you have. The author and blog disclaim liability for any damage, mishap, or injury that may occur from engaging in any activities or ideas from this site.

Whether you are a dog owner who loves succulents, or you are a succulent extraordinaire who loves dogs, one day you will ask yourself if succulents are poisonous to dogs?

Some types of succulents are poisonous to dogs and if ingested, they may cause vomiting, diarrhea, seizures, and in rare cases, death. If you know the difference between the toxic and non-toxic plants, you can easily enjoy their therapeutic benefits, while keeping your four-legged friends safe.

Keep reading to learn more about succulents, which ones are toxic to dogs, and what you should keep in mind if you have a dog and a succulent in your house.

Succulents Poisonous to Dogs

Succulents are low maintenance plants that are an attractive home décor option. They are also believed to purify the air, improve humidity, and increase oxygen levels in the house. But sometimes accidents can quickly ruin what they were meant to do. 

So, first things first, let us talk about the plants that can harm your dog, what they look like and what signs of poisoning you should watch for.

PlantScientific NameDescriptionSymptoms
AloeAloe VeraShort-stemmed with thick, greenish, fleshy leavesVomiting, lethargy, diarrhea, red urine
String of PearlsSenecio RowleyanusPea like leavesDrooling, diarrhea, vomiting, and lethargy, skin irritation, and dermatitis
Jade PlantCrassula OvataSmooth, shiny, thick, and fleshy leavesIncoordination, vomiting, lethargy, and even depression
Snake Plant Sansevieria TrifasciataSwordlike leaves with vibrant yellow edgesVomiting, nausea, and diarrhea
SpurgeEuphorbia spp.Leaf bracts of yellow, red, purpleVomiting and irritation of the mouth and the stomach
KalanchoesKalanchoe blossfeldianaBlooming in pink, red, yellowAbdominal pain, lethargy, salivation increase, diarrhea, vomiting, irregular heartbeats, severe weakness, labored breathing, death
Sago PalmCycas RevolutaPalm tree like leavesVomiting, thirst, and liver failure
Pencil CactusEuphorbia TirucalliTall with thick white sapVomiting
Panda PlantPhilodendron BipennfoliumFuzzy, mossy leavesDifficult swallowing, mouth irritation, and vomiting
Kalanchoe DelagoensisMother of MillionsCreeping tendrils that brunch together on a single stemDiarrhea, abnormal heart rhythm, vomiting, death
Silver Jade PlantCrassula ArborescensSilvery green leaves with red edgesVomiting and nausea
Kalanchoe DaigremontianaMother of ThousandsBig green leaves ending with baby plantlets on the edgesVomiting, collapse, diarrhea, abnormal heart rate, tremors, and seizures

For more information visit ASPCA Animal Poison Control Center and Pet Poison Helpline for a database of toxic and non-toxic plants.

Things to Know About Succulents and Dogs

Sometimes (unfortunately), things go backwards. Your dog would eat a succulent, and you may not even know that he did, let alone its name. It could be a plant that your dog triumphantly ate on a walk, or your spouse decided to water your aloe plant and left it in your dog’s reach. Let us talk about these unexpected scenarios and how you can be prepared for them. 

Why would your dog eat succulents anyway?

Dogs will be dogs. They would eat succulents for the same reason they would roll in the mud or eat:

  • A box of pudding
  • A $100 bill
  • An umbrella 
  • Another dog’s poop.
Dogs are attracted to various succulents due to their physical appearance, smell, and taste.

However, it is not uncommon that dogs would be attracted to succulents because of their smell, taste, and texture. Often, they would have an upset stomach, and to get rid of the discomfort, your fido friends would eat plants to induce a bowel movement or throw up. Sometimes dogs are deficient in certain nutrients and look for uncommon (in people’s view) foods to supply those.

Toxic and Non-Toxic Succulents

Now that you know that some succulents are toxic, you may decide that you do not want them at home if they are jeopardizing the health and life of your dog. If you are still looking for a natural succulent in your home, but don’t want to worry that it can hurt your dog, here are some beautiful options that will still brighten your home and purify the air without the toxicity.

To replace your Aloe Vera, that is harmful to dogs, when ingested, choose another succulent with long spiky triangular leaves like Haworthia. The look is similar, but the latter would not hurt your dog.

Ha
Haworthia is a succulent that looks like Aloe Vera, but it is not harmful for dogs.

If you want to replace String of Pearls, which is toxic to dogs, try Burro’s Tail. It has lush green leaves that are just a little bigger than the pea-looking leaves of String of Pearls.

If you like colorful succulents like Kalanchoe, substitute them for a vivid Sempervivum Red Lion. 

Signs of Succulent Poisoning in Dogs

If your dog swallowed one of the succulents on the toxic list, you should watch for the following signs:

  • Vomiting
  • Diarrhea 
  • Weakness 
  • Labored breathing
  • Lethargy
  • Tremors
  • Seizures

If your dog eats a succulent and gets sick, keep these tips in mind:

  • Take your pet away from the plant
  • Check if your pet is breathing normally 
  • Take a sample of the succulent
  • Take notes of symptoms in your dog to report to the vet 
  • Do NOT try to feed your dog
  • Do NOT induce vomiting without talking to your veterinarian or Pet Poison Helpline 
  • Call for Help

You are a new pet owner, or you just have never encountered a situation like this? Here are a few suggestions for who to call:

  • Your Vet.  Your vet is prepared to give you advice on plant poisoning. She will also know your dog’s health history and will take that into consideration to prescribe the best plan to action. If you end up at the vet’s office, keep in mind that your dog’s adventurous taste may cost you between a few hundred and a few thousand dollars.
  • The American Society for the Prevention of Cruelty to Animals (ASPCA). You can contact the Poison Control Center at 888-426-4435 and describe the symptoms of your dog. ASPCA may be able to give you some tips on how to help your dog recover faster from plant poisoning.
  • Animal Poison Control Center. Call the Center at 855 764-7661. You may want to write the phone number and put it on the fridge, so you have it handy in case the unexpected happens.

Can My Dog Die if She Eats a Succulent?

Most often, poisonous plants cause reactions ranging from mild nausea to tiredness. If your dog eats a large quantity of a toxic succulent, this may lead to death, but that would be extremely rare. The chances are your dog will be fine in a couple hours. 

In rare cases, intesting large amounts of succulents might lead to fatal results in dogs.

Tips for Pet Owners who are Succulent Lovers 

Good news is that you do not need to give up your succulent or your dog because you have heard that these two may not be compatible. You can still have both if you stay informed.

Here are a few tips that would help you enjoy your plants, and keep your dog safe:

Know What Plant You Have

If you already have a succulent, but you do not know what it is, do some research. You can go to a nearby nursery and ask the staff or check out the garden literature in the nearest library, ask a neighbor who loves plants, or simply search the topic on the Internet. Be resourceful and proactive to gather as much information as possible. You will learn something new, that can help you take better care of both your household plants and your pets. 

As a dog owner, you should get detailed information about the toxicity of your succulents to protect your beloved pet.

Know What Plant You Buy

When you are buying a succulent, ask the shop assistant if it is poisonous to dogs. Most nurseries and flower shops would have that information handy and will gladly provide it to you. They want happy and returning customers after all.

Keep Toxic Plants Away from Dogs

 You want your plants in visible places, so you can enjoy them and take advantage of their health benefits. Most likely your dog will inhabit the same room where you have the plants. Try putting the succulents in higher and inaccessible for your pets places to prevent them from eating them.

Communicate with Others in the House that Succulents Poise Risks to Dogs 

Talk to your family about the harm of succulents to dogs and set rules on who and how to take care of the plants to minimize your dog’s exposure to them.

Summary

Taking care of your succulent and dog is not rocket science. You do not need to choose one or the other. Be informed, use common sense, and the chance of getting your dog poisoned will be minimal. If you are not willing to take the risk of harming your dog with a poisonous plant at home, investigate buying some artificial plants that look like succulents, and that should do the trick.

Are Succulent Plants Poisonous To Cats?

Disclaimer: The author is not a medical doctor or veterinarian. The information presented is purely to share our experience and for entertainment purposes. As always, check with a doctor and/or veterinarian before making any health or nutrition decisions and consult with a doctor and/or veterinarian regarding any question or problem that you have. The author and blog disclaim liability for any damage, mishap, or injury that may occur from engaging in any activities or ideas from this site.

Succulents are popular, low-maintenance houseplants that add greenery to any space.  Consuming too much of any plant is not recommended for cats, there are certain succulent plants that are more toxic than others.  Cat owners must know exactly what kind of succulents they have in their home.  

There are succulent plants that can cause severe upset to a cat’s gastrointestinal tract.  Some succulents may cause minor sickness, while others pose a host of serious issues for cats.  With many different types of succulents, you need to know if your succulents are toxic or non-toxic to your cat.

Some succulent plants are non-toxic to cats.  But with so many different types of succulents, which ones are poisonous to cats?  Read on to learn about popular succulents that are harmful to your cats and how to keep cats away from houseplants.  

Poisonous Succulent Plants to Keep Away from Cats

The list of poisonous plants is constantly increasing.  Below is a list of some popular succulent plants that are harmful to cats.  

Plant NameSymptoms
Aloe VeraVomiting, diarrhea, lethargy; saponins are toxic tremors, poor appetite, abdominal pain
KalanchoeAbnormal heart rhythm, vomiting, diarrhea
EuphorbiaSkin and eye irritation, gastrointestinal upset
JadeIncoordination, gastrointestinal upset

These are just a few succulent plants that are poisonous to your cat.  Know what kind of succulent you have and if its type is harmful to cats.  

Common Symptoms Cats May Display

There are certain symptoms that are commonly displayed in cats.  For example, the famous aloe vera succulent has saponin components that cause diarrhea, vomiting and makes them lethargic.  A stomach problem would be a sure sign your cat has consumed a harmful plant.  

Another symptom to look for would be irritation on their skin.   Watch for a change in their behavior, like constant scratching and licking.  If there are rashes, any visible discoloration in their skin would be a cause for concern. 

Keep Your Succulent Plants and Your Cat Safe

Your cat is naturally curious and may want to explore your succulent plants.  They may want to chew at the leaves or dig in the soil.  Make sure to check with your veterinarian during your cat’s check-up visits.  They may be allergic to certain types of succulents in your home.  

Since cats are naturally curious about the environment, they might chew succulents or dig the soil.

What To Do If Your Cat Ingests a Poisonous Succulent?

Cats are inquisitive and independent animals.  A pretty, succulent plant can be tempting for cats, and it is normal behavior for them to want to play or eat them.   While not all succulent plants are poisonous, cats still shouldn’t consume these.  

If your cat does ingest a poisonous succulent, you should contact your local veterinarian.  It is better to contact them as soon as you believe your cat has ingested one of these succulents.  If you are told to bring your cat to the veterinarian, it helps to also bring a piece of the plant and know the plant’s name for reference. 

If your cat ingests a poisonous succulent, contact the local vet right away.

A complete list of poisonous succulents and other plants can be found on ASPCA Animal Poison Control Center’s website. Taking your pet to the local veterinarian or contacting them first is the best thing you can do for your feline friend to ensure they receive proper care.

Non-Poisonous Succulent Plants to Cats

Succulent plants are popular due to their beauty and low maintenance. Luckily, some beautiful succulents are non-poisonous to cats.  Listed below are a few succulent plants that are cat-friendly and safe to have in your home.  

Zebra Haworthia is among the non-poisonous succulents to cats.

These plant options are easy to maintain, which is one of the reasons succulents are so popular.  Plants like opuntia succulents are prickly, which can be a natural deterrent for cats to stay away.  Cats may be tempted to play with these plants, but you won’t have to worry about it being fatal.  

Keeping Your Cat Away from Succulent Plants

Even if your succulents are non-poisonous to your cat, you may not want them to play with your plants.  There are ways to keep cats out of your plants but not compromise having your favorite succulents in your home.

Even if your succulents are not poisonous to cats, you should still keep your cat away from them to protect the plants.

Use a Safe Spray as Repellent 

While training your cat is a good option, making your plant undesirable to your cat can work as well.  Cats are not big fans of citrus.  They do not like the taste or smell, so spray your succulent with water and squeeze juice from:  

  • Lime
  • Lemon 
  • Orange

Another natural repellent is to mix your water with lavender or garlic to help deter them from nibbling on your succulent plants.  In addition to homemade repellents, many store brands can be used as a deterrent for cats.  Keeping them away from these succulent plants means your cat is staying safe.

Cover the Soil So Your Cat Can’t Dig

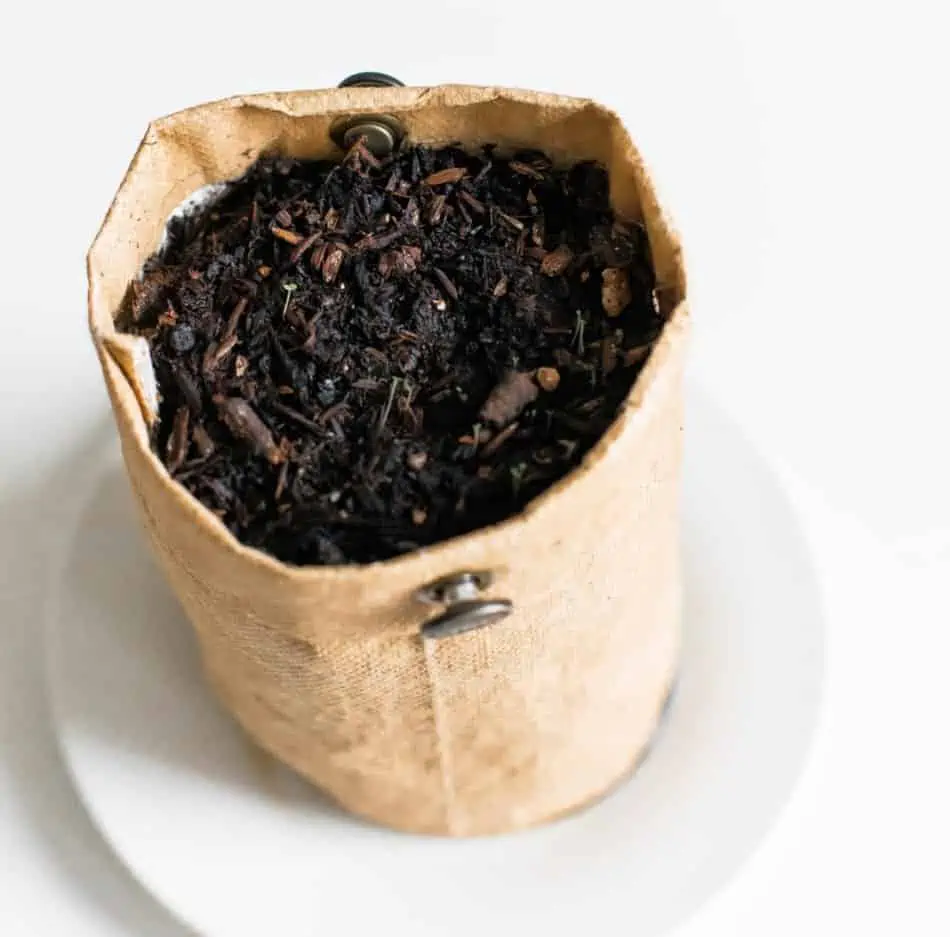
If you have a plant that has soil exposed, consider covering the soil with a breathable surface.  Using a breathable fabric, like burlap, and cover soil.  Spray with a natural citrus repellent. 

Place Succulent Plants Out of Your Cat’s Reach

As a cat owner, you may have to do some rearranging to your space to best accommodate your cat.  While cats tend to be excellent leapers, find out of reach places around your home to place those succulent plants.  

  • Hanging Plants – Decorate your home with hanging plants that will still give a touch of greenery but stays out of your cat’s reach.
  • Plant Terrariums – Display your succulents in a small or large terrarium.  Whatever the style, it will keep your succulents covered and inaccessible to your feline.
  • Wall Planters – Have beautiful succulent plants high out of reach of your cat to avoid any harm.  Your home will be well-decorated.  Most importantly, your cat will be safe from consuming any poisonous plants.
  • Wall Pallets – These are a unique display for your succulents that can be placed high up on your wall, inaccessible to your cat.

These different options should all be placed out of reach from your cat.  Hang your succulent plants high enough that your cat cannot reach them.  For the terrariums, make sure they are displayed in a location where your cat cannot knock them over.   

Make Sure Your Cat Litter is Well-Maintained

In addition to using repellents and ensuring you have non-poisonous succulent plants in your home, there are other factors that can help keep your cat away from your plants.  Start with maintaining a clean litter box.  Cats are known as clean pets and for this many cat owners appreciate owning one.  If the litter isn’t well-maintained, they may dig in the potting soil as if it was their new litter box.  

Have Litter Boxes Accessible for Your Cat

Make sure you not only have a clean litter box but a litter for as many cats as you may own.  To keep your cat from digging in plants, ensure they have easy access to litter boxes.  If you have 1 cat, then you should have 2 litters.  For however many cats you may have, make sure there is 1 more litter box for use.

Give Your Cat Their Own Plant

There are cat-friendly grass planters and other types of plants that are made just for cats.  A grass planter is a perfect distraction and will have your cat playing hours.  There are DIY planters, just make sure the type of plant is cat friendly.  Cat grass or an inside cat garden can provide hours of fun for your cat.   

There are some popular plant toys for cats:

  • Catnip
  • Scratching post
  • Cat tree

Making your home safe for your cat is important.  Providing a safe plant for your cat will distract them from getting into your favorite succulents.  

8 Unusual Types Of Succulents To Brighten Your Home

The popularity of succulent plants is a thrill that won’t lose steam any time soon. What with amateurs jumping on the bandwagon to try their hand in gardening? However, if your knowledge of succulents is limited, you will be surprised to note a rare group of succulents, some with unusual features. These don’t mature quite easily and may fail to grow roots or even propagate. In contrast to the popular indoor and outdoor plants like Burro’s Tail, Flaming Katy, Aeonium, and Agave that can thrive on neglect, some of the uncommon succulents require a little attention to thrive.

So what are the unusual types of succulents? There about sixty family plants that can be categorized as succulents. Unusual succulents are termed to thanks to their uniqueness in growth, size, shape and maturity.  The term rare succulents came about not because they are unavailable but because they were difficult to grow, propagate or even produce roots at a certain point. Some of the uncommon types of succulents include the following:

1.Pig’s Ear Plant( Cotyledon orbiculata)

2. Plover Eggs

3. Aeonium haworthii ‘kiwi’

4. Graptoveria ‘Topsy Debbie’

5. Pebbled Tiger Jaws

6. Mexican Hens and Chicks

7. Baseball plant

8. Kalanchoe rhombopilosa

This article will take a look at each of these unusual types of succulents. It will also consider their characteristics, origins, and ideal conditions for growth.

1. Pig’s Ears Plant( Cotyledon orbiculata)

This plant, also called round-leafed navel-wort, is native to the Arabian Peninsula and South Africa. The name Pig’s Ears came about because its fleshy grey-green leaves resemble a swine’s ear. The plant can grow up to 4.3 feet or 1.3 meters in height. Its small and bell-shaped leaves are coated with a whitish substance that helps the succulent to reflect sunlight and conserve moisture. Depending on the variety, this succulent can have either orange-red or, in rare varieties, yellow leaves.

Pig’s Ears plant is a succulent with bell-shaped leaves that can grow up to 4.3 feet in height.

To care for Pig’s Ear, plant it in a dry space, whether indoors or in the garden. You can also put it on hanging baskets, pots, window baskets, and any suitable container. Even though it can do well in partial shades, a sunny location that mimics its natural habitat is ideal. Before watering your plant, ensure the soil is well-draining. Rotting is a common problem, not to mention that snails and slugs make the plant their favorite playground. If possible, use a snail trap or a slug bait to get rid of them.

2. Plover Eggs Plant

This succulent with pudgy silvery-green leaves dotted with purplish speckles is native to South Africa. Its scientific name is Adromischus cooperi from the family Crassulaceae, but the name Plover Egg Plant is used because the leaves have a mottled appearance. You can see the copper marks on the leaves against the green leaves. When mature, it stands at 4 inches or 10 centimeters tall, with delicate, sky-facing flowers on a slender stem. The  Plover Eggs Plant is known to be a slow-growing succulent.

The propagation of this succulent is possible either by seeds, leaves, or cuttings. If the species drops off its leaves, you can simply place it against the side of the container, and it will grow into a new plant. However, you can also cut the leaves using a camping knife. For planting purposes, fill the container with gritty sand before adding humus. The sand ensures that the water will drain. Every month, feed it with a cactus fertilizer for optimum growth.

3. Aeonium haworthii ‘kiwi’

This plant is also known as Kiwi Verde, Aeonium Kiwi, or simply Kiwi. Its origin is a mystery, and people believe it could be a hybrid of Aeonium haworthii from the Canary Islands. With yellow and green variegated and spoon-shaped leaves, this succulent is surely a beauty to look at when fully grown. The edges have a tinge of rose-red. Under the right conditions, it can grow to as high as 2 feet.

Aeonium Kiwi is a succulent with yellow and green spoon-shaped leaves that feature rose-red edges.

To grow it successfully, water it under excessively dry conditions only in well-drained soil, preferably every two to three weeks. The kiwi Verde can be propagated, but for you to achieve that, make sure you do so from healthy leaves only. Use a sharp knife or scissors to do so and let it callous for five days, if not a week, before planting.

4. Graptoveria ‘Topsy Debbie’

Another unique succulent is a hybrid of Topsy turvy and Debbie, all from the Crassulaceae family. The plant is also known as Lilac spoons because of its color. It has thick, spoon-shaped leaves in seamless rosettes. When mature, this plant can grow up to 15 centimeters tall and produces flowers in Spring.

If you plant it in a container, mix sand, grit, topsoil. Add humus for optimum growth. Besides, it needs the full sun, so when you plant it indoors, ensure you move it with the sun.  Shrivelled leaves or a finger that goes several inches into the soil means you need to water.

5. Pebbled Tiger Jaws

This succulent, native to South Africa, was named so because of its intimidating, fang-shaped leaves. It has also been named Shark jaws and Faucaria tuberculosis. Interestingly,  the Pebbled Tiger Jaws is quite harmless and soft to the touch despite the spikes. It is no wonder that the Royal Horticultural Society awarded it the Award of Garden Merit based on its performance in the United Kingdom.

The Pebbled Tiger Jaws is a succulent with triangle-shaped leaves that features yellow blooms when the weather is cool.

The Pebbled tiger jaws has fleshy leaves that are triangular and produce bright yellow flowers during cooler months. When fully grown, it stands to a height of 15 centimeters, or 6 inches tall.

6. Mexican Hens and Chicks

The fact that this succulent is native to Mexico has seen it attract such names as the Mexican gem, the Mexican snowball, and White Mexican rose. The term hens and chicks is used thanks to the mother plant that produces numerous tiny baby offsets that surround its base. It is a perennial evergreen succulent belonging to the genus echeveria and Crassulaceae family.

Mexican Hens and Chicks is an evergreen succulent with pale green and fleshy leaves.

Mexican Hens and Chicks grows up to 4 inches or 10 centimeters tall when mature. Its leaves are pale green and fleshy.  It has long pink stalks and flowers. The flowers with yellow tips appear during Spring and winter. To propagate the plant, you can use either the offsets, leaves, or stem cuttings. These are cut carefully using a sharp razor blade.

7. Baseball plant

If you were wondering about its name, the Baseball plant, also known as Euphorbia obesa, has a shape that resembles a ball. It grows wildly in arid regions in the Cape Province of South Africa.  The succulent has become popular as a houseplant since its discovery in the 1800s, for they have thanks to their unique shape and low maintenance requirements.

The Baseball plant can have a diameter of  6 to 15 centimeters. Its diameter usually depends on age.   When the green succulent is exposed to direct sunlight, either red or purple areas are visible.

You can grow the Baseball plant alone or choose to grow it together with other succulents. When doing so, avoid moving the plant because it easily gets stressed, leading to poor health. It is unnecessary to use fertilizer, but cactus food will be ideal when tempted to use it. Use it only once at the onset of growth.

8.  Kalanchoe Rhombopilosa

This darling of collectors is also named Pies of Heaven because the leaves have an almost triangular shape, just like a pie. It is native to Itampolo in southwest Madagascar. When fully grown, this succulent can stand to a height of 10 to 30 centimeters on its silvery stem.

The grey-green leaves are mottled and pinched at the edges. The Kalanchoe usually peaks during Spring and Autumn. However, they are dormant during summer. It is during Spring that the succulent is ideal for propagation. The flowers are usually small and greenish-yellow with red lines. As an ideal container succulent, the Pie requires more water during winter.

These unusual types of succulents are a great addition to any garden or home as they add both personality and distinction. Taking care of these succulents is a good way of expanding your knowledge on them as a whole as they are both fascinating and diverse. Getting an unusual succulent and caring it to maturity is a source of pride for any succulent enthusiast. While there are tens of other succulents with unique characteristics, these top the list, and it also helps that they can be grown indoors.

15 Types Of Succulents That Are Easy To Care

When it comes to succulents, you always know they’re the easiest to plant and care for. These plants can survive pretty well anywhere. They’re used to enduring harsh climatic conditions with little to no moisture. These are the types of plants you plant in your house, water once in a while, and let them fend for themselves.

However, not all succulents are easy to care for and can survive neglect. Others require very strict watering, while others need them to fertilize often. If you’re looking for specific succulents that will give you a very easy time caring, you have to pick carefully. You need succulents that won’t be demanding in terms of watering, sunlight, or fertilizer. You also need those that can resist pests, rot, and won’t die easily.

Finding the kinds of cactus that will give you an easy time is not hard. Take a look at this list of 15 succulents that are pretty easy to care for.

1.  Paddle Plant

Also known as Kalanchoe tetraphylla, the paddle plant makes it our top list of the easiest succulents to grow. The plant doesn’t give you a hard time keeping in your indoor garden because it will call for very little attention. You only have to water it when you notice that the soil on top is dry. It needs bright light but doesn’t expose it to direct or hot sunlight if you want to maintain its red edges.

2.  Aloe Vera

You can never go wrong with the Aloe Vera plant either in your indoor or outdoor garden. It’s a great plant to start with if you’re a beginner gardener because you don’t need a manual full of instructions to care for it. Make sure the soil dries out between watering for your aloe vera to grow healthy. Ensure it receives direct sunlight for a couple of hours every day. You can only re-pot it once you notice the roots pushing out of the pot.

Since aloe vera does not require too much care, it is an excellent succulent for beginners.

3.  Agave

Agave is a quick-growing succulent that adorns your garden with beautiful blooms in their season. You don’t want to break your back, caring for it to reward you with beauty. It’s another one which will give you the easiest time to care for. The agave plant has its smaller varieties suitable for indoor growing with bright light next to the window.

4.  Jade Plant

Jade plant is a very popular succulent in indoor gardens, all thanks to its easy-to-care nature.  The plant is available in different varieties, which all do well with very little care. Whether you buy the tiny baby plant or go for the mature ones, be assured that they’ll thrive in your garden. 

Just make sure they receive good drainage soil with lots of sunlight. Have the soil dry completely between watering but give it plenty of water when you decide to do so. It needs good soaking during watering and not just a few sips.

5.  Dasylirion

This is another attractive succulent plant that requires very little input from your side to adorn your garden. This plant resembles palm, and many people don’t even realize they’re succulents, but they are.  They’ll give your garden their southwestern look with their green, blue-green, or greying leaves. The leaves are small and sharp, and they have somehow woody stems.

If you love this stunning appearance, make sure this succulent receives some water to grow. But you’re assured that they can still do well in desert gardens thanks to their drought-tolerant nature. Plant them in containers if you want them to adorn your garden with their attractiveness.

6.  String of Pearls

If you thought those plants that hang on baskets are complicated to grow, then you’re wrong. Try a string of pearls and enjoy the beauty of hanging plants without straining yourself. You have to give your precious plant bright light and enjoy that direct afternoon sun. You should also go slowly on watering because it doesn’t need a lot of it. Water string of pearls moderately in warm climates and bright light and enjoy the beauty.

You can easily grow a healthy String of Pearls if you give the succulent plenty of sunlight.

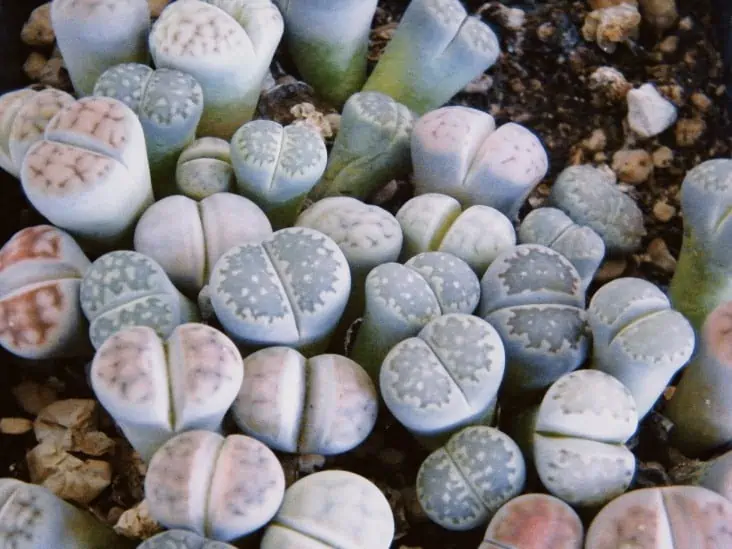
7.  Lithops

Lithops look like stones, and someone won’t even notice they’re plants until they bloom. These plants are one of the easiest succulents to use in adorning your indoor garden. They provide you with lots of colors and designs. If you want these plants to bloom, give them enough sunlight. They need well-drained soil with little watering. They grow dormant in winter, and you should refrain from watering during this period.

Lithops are stone-like succulents that can bloom if you give them enough sunlight.

8.  Haworthia

This is a great succulent that produces a clear gel similar to that of aloe vera. Haworthia adorns your garden with plenty of colors ranging from brown to green. They also come in various types and sizes to choose from. Haworthia will do well in your garden if you give them good shade and mild winter climates. The plant is easy to maintain and resistant to pests. Don’t expose them to too much moisture, as this can cause rot and end up killing your precious plant.

Although Haworthia is resistant to pests, moisture can cause root rot and kill the plant.

9.  Burro’s Tail

This plant is also known as Sedum Donkey’s Tail, thanks to its fleshy and cute appearance. It’s a perfect plant to grow in hanging baskets. The plant has a unique ability to survive in any soil type. It’s resistant to pests and many diseases. It’s a friendly succulent to grow even in households with pets because it’s non-toxic. Grow Burro’s Tail either indoors or outdoors, and you’ll love it.

10. Snake Plant

If the term snake doesn’t scare you, then the snake plant should be one of the plants to grow in your garden. Gardeners love this succulent for its easy care and beauty. The plant adorns your garden with its glossy, long, and flat leaves, which have a dark green color. Apart from the beauty, the snake plant is also known to provide your garden with some good air purification. Be careful with this plant where there are pets because the leaves can be toxic.

11. Echeveria

The beautiful succulent is one of the most popular plants in gardens thanks to their easy care. The plant grows beautiful rosettes which come in a variety of colors and pastels. You don’t need to give your Echeveria too much water because this will only cause them to rot. Plant them in a container with good drainage soil. Water if you notice that the soil has completely dried out.

12. Tiger Jaws

Tiger jaws got their name from their leaves that form what looks like tiger jaws with pointy teeth. The appearance makes a great part of this plant’s beauty. It’s one of the easiest succulents that you can introduce to your garden. Make sure you grow this plant near the window area where it can benefit from the direct sunlight. 

At least four hours of direct sun is enough to make this amazing plant adorn your garden with stunning yellow flowers. Grow it in a container with good drainage holes and only water when the soil is completely dried out.

13. Hens-and-Chicks

This is another low care succulent species that grow in spirals or rosettes. The plants have pointed leaves that are green in color and marked with red, blue, or purple colors. The plants come in two main varieties; the Echeveria Elegans and sempervivum tectorum. Both varieties grow pretty well either indoors or outdoors and require little maintenance.

14. Golden Barrel Cactus

You cannot mention low-maintenance succulents and leave cactus species out. In this case, the golden barrel cactus is a perfect representation of the cactus succulent varieties that are easy to grow and care for. The ‘mother-in-law’s cushion’ is a drought-tolerant plant that is beginner gardener friendly.

Grow this plant indoors but don’t forget to ensure it receives enough sunlight.  Water it when you notice the soil drying out. The plant is also one of the fastest-growing cactus varieties that you should re-pot while still young. Well, it won’t take over your home by growing into a giant barrel because its growth rate slows down as it ages.

15. Pincushion Cactus

Still, on cactus, the pincushion is another succulent cactus type that can give you a very easy time to grow and care for. The pretty-looking cactus got its name from its sharp needles that can prickly your skin if you don’t handle them well. It’s not a very family friendly-plant because of the spikes. Keep it away from homes with children and pets.

If you give your pincushion lots of sunlight, the rest of the care will be very easy. Water only when the soil is dry. Give it a period of no watering during the cold months, so it goes into the dormancy stage. If you follow these simple care tips, the pincushion cactus will indeed reward you with beautiful blooms.

Summary

If you’re beginning your gardening journey and don’t know much about succulents, these low-key plants are the ones to start with. The plants are very easy to grow and care for and will easily jumpstart your journey to becoming an excellent gardener. Ensure you learn the care needs for these plants and enjoy the beauty they add to your garden.

How To Care For Lithops – Tips For Growing Living Stones

The world is full of beautiful, marvelous animals and plants with remarkable survival adaptations. Lithops are plants that remind us all about the wonders of nature. This amazing plant camouflages itself to look like colored stones. Because of this, Lithops are known as “living stones.”

The Lithops’ fascinating nature has made it a popular house plant. Thankfully these small, beautiful plants are easy to take care of with a few guiding tips. These beautiful, stone-like plants require only a few things to keep in mind for them to live a long and healthy life. Read on to learn more on how to grow and take care of Lithops. 

Growing and Caring Tips for Lithops

Once you have your Lithops settled in your home, you will want to ensure they live long and healthy lives. Since Lithops live natively in areas outside of southern Africa, proper care instructions are different from other native plants. 

Below are the necessary steps for providing Lithops with the care they need to thrive:

  • Choosing the correct container material
  • Choosing the correct container size
  • Making the appropriate soil mix
  • Watering sufficiently
  • Providing enough sunlight
  • Monitoring temperature 
  • Minimizing fertilizer 
  • Trying specific composting
  • Checking the soil’s pH levels before planting 

Learning proper care is important, and following the guidelines below will help your Lithops live strong, healthy lives. 

Choose the Correct Container and Size

Determining your container is the first step to properly taking care of your Lithops. The container should be large enough for the plant to grow and live in for its entire life.

  • A container at least 10% larger than the plant will give them plenty of room. 
  • A pot too large or deep will run the risk of retaining too much water. Lithops require very dry conditions, so this could destroy your plant.
  • Too much space will make the succulent appear awkward for its big surroundings. 
To grow Lithops, select a container that is 10% larger than the plant itself.

If you are making an arrangement of succulents, make sure all of the plants in the arrangement come from a similar climate. Also, give them plenty of room to grow and live together. Transition the plants quickly from their holding trays or temporary homes to the one container as quickly and carefully as possible. 

Determine the Correct Pot for Your Lithops

Picking the correct type of pot for your Lithops to live in can help ensure a healthy and long life for your plant. The material the pot is made of should mimic the environment the Lithops is native to, which is well-drained and breathable. 

When choosing a pot, the most important thing is the drainage hole. The pot must have a way to move water out of the pot to keep the soil from becoming overly wet, which can quickly rot and kill your Lithops. If you fall in love with a particular pot that does not have a drainage hole, look into making your own drainage hole. 

Ceramic and terracotta pots are two of the best pot material options for Lithops.

The best pot materials for Lithops are below.

  • Ceramic
  • Terracotta 

Ceramic or terracotta pots are great options for your Lithops because they are breathable and drain well. A variety of ceramic pots, glazed or unglazed, are readily available at most gardening stores. 

Ceramic pots absorb sunlight to warm the plants during the day and cool off well at night. However, ceramic pots can absorb so much heat from sunlight that they can burn plants. Be sure to keep an eye on how much sun your Lithops are getting so it does not overheat. 

Pot Materials to Avoid

Below are some pot materials that will not work very well for Lithops.

  • Metal: Metal can rust over time, which can hurt the plant’s health.
  • Wood: Wood containers are unique and stay cool at night and warm during the day, but can also retain water, so be aware of wet soil or rotting. 
  • Glas: Glass is a beautiful option to display Lithops, but glass pots are breakable and lack drainage. Glass is also not breathable. 
  • Certain plastic pots

Plastic can be a good option since it is lightweight and durable if you choose your pot carefully. Plastic is not as breathable as ceramic or terracotta, but if you have a drainage hole, it should allow water to properly work its way through the soil. 

Choose the Correct Soil Mix

As discussed earlier, Lithops need an easily drainable environment to thrive. Lithops are native to soil conditions that are hot, dry, and airy, so the best way to take care of your Lithops is to prepare soil that mimics these conditions. 

Make sure the soil for your Lithops is rocky and sandy for the plants to grow healthy.

Lithops like rocky, sandy soil, typical of southern Africa. Pre-mixed succulent soil products mixed with small pebbles are the easiest way to get started. These are available at most local nurseries, especially if you live in hotter, drier climates, where succulents grow well outside. Some pre-mixed succulent potting soil, also good for Lithops include: 

  • Superfly Bonsai Succulent Mix
  • Hoffman Organic Cactus Succulent Soil
  • Succulent Cult Soil Mix

You can also make your own soil. To make good potting soil for Lithops, mix together standard potting soil with a ground-up rocky material such as ground or fine sand, shale, pebbles, ceramic, or grit. Perlite is also a good choice. 

Lithops grow in soil that is not nutritious, so avoid soils with an abundance of added nutrients, fertilizer, or even organic materials. These types of soils can be loaded with nutritional components and take longer to dry out. Honestly, Lithops do not need a lot of soil for healthy living since Lithops grow in rocky areas with little nutrient soil. 

Water Lithops Appropriately

Two critical factors in caring for Lithops are fast-draining soil and good air movement. Soil should not dry out completely, especially for more than three days. Doing so can cause the root hairs to die off, and the plant will not be able to take in any more water. 

Water intake for Lithops varies by the season. The overall watering conventions by season are as follows:

  • Make sure your Lithop is watered sparingly. Do not over water, or keep the soil bone dry.  
  • Water more often in the spring and fall.
  • Water sparingly in summer and winter.
Never overwater your Lithops and ensure that the soil is not bone dry.

In the winter, it is okay to cut back watering, as the Lithop will drink moisture from the old leaves. During the winter, to keep root hairs alive, water less often. If you bring your Lithops in for the winter to live under indoor lights, taper down your watering and monitor the drainage. 

In springtime, increase watering for new leaves to take over while the old leaves begin to dry out. Growing will stop during the hotter months of summer, and you can taper off watering, but remember not to let the soil dry out. Pick up watering again in late summer or fall. 

Ensure the Correct Amount of Sunlight 

Lithops require full sunlight. When Lithops get at least five or more hours of direct sunlight, the colors of the plant begin to really show off. 

However, this does not mean that Lithops need direct heat. Excessive heat will burn your Lithops plant, so monitor the temperature and move the Lithops inside if the temperature is too hot for too long. 

Make sure your Lithops get plenty of sunlight, especially if you are growing them indoors.

If you are displaying your Lithops inside, or if you live in an area with less daylight, there are ways you can compensate for giving your plants the sunlight they need

  • Rotate the plant regularly, so the entire plant receives sunlight. This will help the plant not strain for sunlight and help develop its stunning colors all around the plant.
  • Provide the plant with artificial light to make up for the lack of natural sunlight. 

Because Lithops are native to a warm, dry climate, this direct sunlight is necessary for the plants to survive and thrive. 

Provide the Right Temperature

Lithops love warm, dry weather. You can leave Lithop plants outside throughout the year if you live in an area where the temperature does not drop lower than 40 to 50 degrees Fahrenheit. 

  • These plants thrive in warmer temperatures but not overly hot areas. Too much heat can burn and kill the plant.
  • Carefully monitor the outside temperature, and move your Lithops to the shade if the temperature reaches over 90 degrees Fahrenheit.
  • Also, consider monitoring your Lithops more if you live in an area that experiences quick changes in temperatures.

Many areas can receive snow in late spring or a spike in heat in the middle of winter. If you live in these types of climates, closely monitor the plants and change their living areas to keep up with the climate. 

Do Not Use Conventional Fertilizer

The nutrients found in most fertilizers are not suitable for Lithops since their native soils contain little nutrients. Most potting soils already contain some type of organic materials, so if you use regular potting soil, be sure to mix in more permeable components. These can include:

  • Pumice
  • Sand
  • Grit
Manure tea is an excellent fertilizer for Lithops since it can remove harmful pathogens.

If you feel like you need or want to add fertilizer for extra care, you may consider a milder conditioner such as manure tea. Manure tea is an organic fertilizer composed of livestock manure. The manure is cured to remove potentially harmful pathogens and then placed in teabags. 

Manure tea is like drinking tea for plants. The tea is steeped in water for a few days and used as your watering solution for the Lithops. 

Use Compost Materials Sparingly

If you are planting Lithop seeds, it is okay to add compost to the top layer of soil. Just be sure to keep in mind that compost is not necessary for healthy Lithop growth.

  • Top the soil with rocks to simulate the Lithop native living conditions. The compost nutrients will eventually seep through the pot to feed your Lithop plant. 
  • Compost should not hurt the plant in small amounts, but large amounts of compost could provide too many nutrients and keep the soil from drying.

As with fertilizer, there are ways to utilize compost. You have to be sure you are using this resource in a way that your Lithops will still thrive.

Maintain Proper pH Levels

Most gardeners test the pH level of the soil and see this as an important step before planting. The level of pH indicates the acidity level of the soil. A pH level of 7 is a neutral level, and most plants do well in a range between 5 and ½ to 7. Most succulents, including Lithops, prefer a more acidic soil around a pH level of 6. 

Lithops prefer growing in a sightly acidic soil with a pH of around 6.

If you want to test the pH level of your potting soil before planting, you can purchase test strips at your local nursery. If the soil needs more acidity, add a water solution made of one tablespoon of white vinegar to every five gallons of water. A high level of alkaline is not healthy for your Lithop, so it is helpful to know the pH level of your soil. 

There are different kinds of pH testers to choose from:

  • Electronic meters
  • pH test strips
  • Chemical colored dyes that can help you monitor the pH level after it rains if your Lithops plant lives outside.

Rainfall or fertilizers in the potting mix can increase soil acidity, so you will want to check your soil’s pH periodically to ensure it is in the safe zone for your Lithops.

Lithops Are Not High Maintenance

Besides monitoring the soil moisture, if a Lithop is doing well in its living conditions, you can, for the most part, leave it alone. Required maintenance is low and includes the following tasks. 

  • Routinely checking the Lithops soil for the appropriate moisture level
  • Periodically checking pH
  • Rotating the plant for sufficient sunlight 
Lithops are low-maintenance plants that require proper watering, slightly acidic pH, and sufficient sunlight.

You will notice the shedding and growing of their new leaves seasonally. This is the plant’s natural process. Pruning is not needed. To make the Lithop plant look better, you can gently remove the thin shedding layer of the dead leaf. Waiting until this part falls off naturally works well too.

Most Lithops varieties are not prone to disease since they grow in dry sandy soil that does not invite fungus development. Lithops are vulnerable to damage or rotting if they are overwatered. Monitoring the soil’s moisture level and making sure the plant is well-drained is key to keeping them disease-free. 

Special Instructions for Lithops Living Outside

If you live in a warm, dry climate and decide it is suitable for Lithops to live outside, monitor the plant’s temperature, sunlight, and rain levels. 

  • A Lithops plant should not be left in temperatures cooler than 40 degrees or hotter than 90 degrees Fahrenheit for long periods of time. 
  • Your plant should receive steady sunlight each day. When the days shorten, the minimum sun exposure should be four to five hours. Rotate the plant regularly for even sun exposure if needed. 
  • Monitor the rain levels. Too much rain can easily leave a Lithop to rot or change the acidity level of the soil. 

Even though warm, dry climates mimic the Lithops natural environment, the plant still requires monitoring.

Tips for Caring for Lithops Indoors

Lithops that live indoors are easy to maintain. All you need to remember is to keep your plant watered regularly, ensure the plant is well-drained, and your plant receives plenty of sunlight exposure. Ignoring the Lithops occasionally may be okay for a short time, but you will want to check in on your plant from time to time. 

  • Keep your Lithop watered in small amounts regularly, but do not over-water the plant. Soil should be well-drained but not overly dry. 
  • Rotate your Lithop plant regularly if it does not receive sun exposure equally over the plant.
  • Lithops are not poisonous, so even though pets and children will probably not find the plant attractive to eat, it will be okay if an accident occurs. 

Just like with outdoor Lithops, your indoor Lithops will need direct sunlight, so be sure to keep indoor Lithops in a window that receives plenty of sun.

Steps to Take If Your Lithop Is Not Looking Well

If signals appear that your Lithops is not feeling well, more than likely, it has been overwatered. Retaining too much water is the number one reason a Lithop does not survive. Too much water causes the Lithop to rot quickly. If you move the plant, carefully remove the plant and soil and quickly transition it to a new pot.  

It is normal each year for the Lithop leaves to die and make room for new leaf growth. Lithops are typically weak plants with frail roots. If you move your sick Lithop to a new pot, make sure to do it quickly and with care. 

Lithops are generally considered weak plants, but with the right conditions and correct care, they can live long and healthy lives. Some other common issues with Lithops include:

  • Wrinkling of the leaves, which indicates they need more water. Watering the plant will quickly fix this problem. 
  • If you notice your Lithops is twisting upwards instead of lying flat, it probably indicates the plant is struggling for sunlight. Simply move the plant to an area that receives more sunlight. 
  • If there is an accident that causes scrapes to the leaves, the scrape scars can not be removed. The Lithops will eventually grow new leaves during its growing season to replace the scarred leaves.  

If you have several types of succulents in one pot, it is possible that one of the plants gets sick, but the others are healthy. Here, you will need to carefully separate them. Sometimes, the plants’ roots get entangled. If this happens, it is very difficult and dangerous for your plant to untangle them. You may be stuck with a dying arrangement. 

Protect Lithops from Insects and Pests

Thankfully, Lithops are not very attractive to most insects and pests because they do not offer a lot of nutrition. The most common insect that bothers Lithops is the spider mite. 

Spider mites tend to live inside the middle section between the leaves or hide behind old leaves. Spider mites leave white spots on the plant’s surface. An all-natural pesticide, if applied in a small mist, usually fixes the issue. 

Another good characteristic of Lithops is that they provide little nutritional value for most insects, so they generally will not be looking to attack your Lithops. If they become infested, here is a list of the other common pests that may be causing you issues. 

  • Thrips: These pests leave dark scars on new leaves. A mild insecticidal soap should kill most thrips. 
  • Scale insects/Mealybugs: Remove these by scraping them off the leaves with a gentle hand tool.
  • Aphids: Insecticidal soap should remove aphids. 
  • Snails and slugs: Attract snails and slugs away from Lithops with snail bait or other moving, more appealing plants close by.
  • Root-knot nematodes: These pests are microscopic and live near the plant’s roots. As long as your soil is mainly dry and drained well, these pests should not last. 
  • Mice: The leaves of the Lithops sometimes attract mice. To keep mice from eating the leaves, you can lightly cover the Lithops with breathable mesh or metal caging or use mouse traps. 

Infestations are rare and usually do not last long. When they do occur, they can be easily handled with natural pesticides, insecticides, and traps.

Divide Lithops to Grow More

You can divide your Lithops to grow more. However, you will need to wait a few years until you have grown clusters.

  • Once you have clusters, delicately remove the Lithops from the pot and cut through the roots.
  • Each division should have a root you can reliably replant.
  • Plant each in its own pot, leaving room for the root to take hold. 
To grow more Lithops, consider delicately removing a division from the cluster.

If you decide to replant your Lithops to grow clusters, or you just need a larger space, remove and replant the Lithops quickly and carefully. Go back and follow the initial steps, such as choosing the right container and size. 

Once planted, place rocks and gravel on the soil surface to mimic the plant’s native living conditions. If you choose to divide Lithops, it is a good idea to keep replanting to no more than once every three to four years. 

Prepare for Lithops to Live Long Lives

Even though Lithops are generally weak plants, they can live up to 40 or 50 years. If their living conditions are set correctly, and they are tended to frequently, Lithops should live long lives.

Several years after planting, Lithops begin to create two pairs of leaves, which then develop into clusters. These clusters can be cut to plant new Lithops, as stated above.

Lithops Blooming Patterns

Most Lithops bloom in late fall or early winter, but some varieties bloom in spring or early summer. 

  • In a Lithops older than three years, you will typically see one flower that looks like a daisy growing from the inside of the two.
  • When this happens, watch the flower bloom in the morning for sunlight and pollination, and close up at night. 
Some Lithops bloom in late fall or early winter while others produce flowers in spring or early summer.

Lithops go dormant in the winter and summer. The leaves begin to die, and new leaves form. You will know the plant is growing again when the new leaves begin to appear from the middle section between the old leaves.  

After the new leaves emerge, the old leaves begin to die and wither. Once the leaves are very thin, they will fall off, or you can carefully remove them to keep them looking fresh and beautiful. 

Choose from Many Common Lithop Varieties

If you live in a warmer climate, local nurseries should have plenty of Lithops plants for you to purchase. If you live in cooler areas where product selection is slim, there are plenty of online websites that sell and ship Lithops. 

Though the Lithop is only a recently popular plant, there are still over 37 species of Lithops and about 145 varieties to choose from. It is not helpful to list in detail all of the varieties, but below are several types usually found at local nurseries:

  • Lithops aucampiae
  • Lithops dorotheae
  • Lithops hookeri
  • Lithops karasmontana, “Karas Mountains Living Stone”
  • Lithops lesliei, “Lesliei Living Stone”
  • Lithops ruschiorum
  • Lithops viridis, “Green-Rock Plant”

Unfortunately, there are reports of fake Lithop seeds sold online. The product pictures have vividly colored Lithop plants, indicating they are enhanced photos. Be sure to check for reliable sellers with positive reviews who are available by phone to talk through the specific conditions and colors of the plants and seeds you intend to purchase. 

Plant Seeds or Buy Fully-Grown Lithops

If you want a quick home décor option, young, already growing Lithops are available and will immediately give you a stunning live plant for your home. If you are up for creating your own arrangement, seeds take longer to grow, but you will have the satisfaction of seeing them grow from the ground up. 

  • The best time to plant is in fall or spring.
  • Your seeds will need sunlight, water, and time to grow.
  • It takes around twelve to eighteen months for seeds to germinate.
  • Be careful when opening the seed packets because the seeds are very small and look like dust.

If plants are more your style, the main things you need to consider when purchasing Lithops are the dimensions of the arrangement you are interested in and your personal preference on appearance. Talk to the nursery staff about the specific condition of the particular plant before you buy it. 

If you choose to buy Lithops online, most websites will show the particular plant or arrangement, so you know the general appearance before purchasing. Contact the seller directly to learn more about how old the plants are, their specific condition, and shipping time and conditions. Make sure you are purchasing from a reputable seller. 

How To Care For Succulent Plants Indoors And Outdoors?

Succulents are both exotic and eye-catching. They have become popular in offices, rocky gardens, and homes for a good reason. You may have heard the myth that to grow them, one needs a green thumb. Perhaps that is true, but then it depends on how you interpret it. If you have been gifted a succulent and worry about caring for it or have seen neighbors nicely display theirs on the windowsill and want to own one, it may be time to learn how to grow and care for the same. With succulents, recreating their wild habitat in your garden or house is the first step. For one, they are drought-smart and thus almost super easy to look after as long as you get the basic requirements for each plant right.

So how do you care for succulent plants indoors and outdoors? Succulents are drought resistant and you may not need to do much to keep them alive. As long as they have been properly propagated, watered sparingly and given the right amounts of NPK fertilizer, you should be good to go. Succulents thrive in a good mix of well, draining soil and needs moderate lighting and fairly warm temperatures.

The article will look at the various factors that come in handy when caring for succulents indoors and outdoors. It will look at the importance of each of these factors and how best to achieve success while at it.

1. Light needs

You may wonder whether succulents do better indoors or outdoors. Since their natural habitat is out in the open, they will do well outdoors in full light. However, they can also thrive indoors as long as they can access sunlight for a couple of hours a day. That said, hardy succulents can thrive in just about any climate, as long as you repot them at the right time. Succulents have an antifreeze mechanism that makes them go dormant as soon as temperatures plunge. Some succulents known to tolerate the full sun include Cacti, Agave, Jade Plant, and Aeoniums.

If you repot your succulents at the right time, they can grow healthy in literally every climate.

When growing succulents indoors, go for those that tolerate low-light. The Snake plant, Ponytail, Mistletoe cactus, and Aloe vera are examples of such succulents. Nevertheless, indoor succulents can be placed outdoors whenever the weather permits, while outdoor ones can be shielded from the full sun to avoid direct contact with sunlight.

2. Temperature

You may be tempted to assume that because succulents grow in the hot wild, all of them tolerate extreme heat during the summer. Nothing could be further from the truth. Admittedly, a succulent like the cactus grows in the desert, but that isn’t the case with all succulents. Most succulents prefer temperatures of between 60 to 90 degrees Fahrenheit; anything more and both leaves and roots get damaged permanently. Some of the succulents that tolerate extreme heat include Whale’s tongue agave, Black rose, Pachyphytum fittkaui, and Blue Senecio.

Temperatures below 60 and above 90 degrees Fahrenheit can damage the succulent roots.

Sometimes, when the weather plummets to below zero, very few succulents will survive. Among the few hardy succulent that can survive such extremes include Thompson’s yucca, Parry’s agave, Hardy serum, and Hardy opuntia. As such, growing them in moveable pots is the wisest thing to do.

3. Propagation

When it comes to succulents, propagation is an easier and inexpensive way of acquiring new plants from what you already have. The fact that you can grow a new plant from a parent plant is the greatest feeling for a gardener.

You can propagate and grow new succulents by rooting their leaves, stems, offsets, or seeds.

Depending on the species, succulents can be propagated by leaf, stem, offset cuttings and seeds.  Propagating by leaf or offset cutting is the most popular as it takes only about two weeks to root. The longest method to propagate is using seeds as it can take between 3 weeks to 12 months for the plant to germinate, depending on the succulent species.

Rooting in soil vs rooting in water

Whereas propagating via a soil medium is the easiest way to encourage rooting, this method can sometimes lead to pathogens and fungus attacking the cuttings, which eventually causes the succulent to rot. To avoid this, you may consider using water as a rooting medium. Some gardeners find it problematic rooting their succulents using the soil and would rather opt to use water. However, not all succulents take to rooting in water. Some common succulents that easily root in water include Jades, Sempervivums, and Echeverias.

Water rooting steps

1. Cut a stem or a leaf and allow it to callus

2. Place the stem or leaf in distilled, purified or plain tap water

Let the end of the leaf or stem touch the water or be just above the water.

3. Place it outside in a bright area but out of direct sunlight.

4. Once rooted, remove the cuttings and let them dry before planting in the soil.

4. Watering

Unless you have been living under a rock, you must have heard the saying that too much of anything is poisonous. Unfortunately, this saying appears to be ignored by many beginner gardeners. For whatever reason, you may forget that these plants are native to dry areas and thus have a love-hate relationship with water. Too much or too little of the same can be detrimental to the growth and overall health of the plant. So, how frequently should you water my indoor and outdoor succulent plants?

To answer that question, we need to take a keen interest in how succulents use water. For the stems, leaves, and roots to grow and to bloom, succulents will use water. However, their tissues, leaves, and stems have water storage capacities for their survival. So, whenever we talk of watering succulents, the rule of thumb has always been; ‘less is more’. Generally, it would help if you watered a succulent only when about one inch of the soil feels dry.

You should only water your succulents when the top of the soil feels dry.

We can talk of sticking to a watering schedule, but considering the different factors, including species, light and temperature needs, it’s not practical to have a one-size-fits-all watering timetable.

Talking of watering, how will you determine whether you are overwatering or underwatering your indoor or outdoor succulents? Most succulent gardeners get overwhelmed when striking a balance between an underwatered and an overwatered succulent. Let’s take a look at the telltale signs:

Overwatered succulent

An overwatered succulent will appear as follows:

a.         The leaves will be soft, mushy, and squishy when touched.

b.         The color of the leaves will appear lighter than normal, almost translucent.

c.         Leaves fall off easily and may appear blackish from the center of the plant.

To rescue an overwatered succulent is easy. First, gently remove it from the container or soil. You can then take away excess soil from the roots and remove any dead or rotten roots and leaves. Air it outside to dry but away from direct sunlight for up to 3 days. Finally, you can either plant it in a new container or move it to a new location in the garden.

Underwatered succulent

Succulents generally thrive on neglect, but some species cannot withstand an extreme water shortage in the roots. Underwatering may happen either because you are neglectful or have a busy schedule. An underwatered succulent plant will appear as follows:

1.         The growth will be too slow for a succulent.

2.         The leaves lose their firmness and become brownish with dry edges.

3.         Dry leaves will be seen from the bottom of the plant, going up.

4.         The leaves may wilt off and eventually dry up

An underwatered plant, however, is not a lost cause. To save it, you use water generously. Assuming it has been starved of water for a long time, pour water on the base of the plant until you notice some come out of the drainage holes. Otherwise, if the condition is not that dire, you may rejuvenate the underwatered succulent by misting or spraying the foliage with water. The plant should recover away from direct wind or sunshine.

5. Fertilizing

Just because succulents are hardy plants growing out in the wild doesn’t mean that they don’t need fertilizing. Succulents need fertilizer for better, faster growth. Fertilizer also comes in handy to help the plant bloom and produce brighter, larger flowers at the right season.

Among the most favored fertilizers by succulent growers are manure tea, fish emulsion, and balanced fertilizers. You may use it depending on the succulent species for industrial fertilizers, but there is a word of caution. These need to have the right balance of NPK where phosphorous is higher than nitrogen. Usually, you will need to dilute the fertilizer in half before use. After all, you don’t want to burn your beautiful succulents while trying to boost them.

Here are some widely used fertilizers for your indoor and outdoor succulents.

Manure tea, fish emulsion, and balanced fertilizers are among the best options for succulents.

Authentic Haven Brand Manure Tea

This is a cup of tea made specifically for your plants, so don’t be tempted to take a sip. It comes balanced from the factory. Insert the teabag in 1 to 5 gallons of water depending on your succulent species and let it stay for 24 hours. It will turn brownish. Once you are done steeping, pour the brownish water in a container and generously water your plant.

What if you don’t want to purchase a commercial teabag? Well, making your own is as simple as it can get.

How to make manure tea at home

For this purpose, use manure from a goat, cow or poultry but not a carnivore as their stool contains harmful pathogens.

1.         Fill a bucket two-thirds way up

2.         Add your manure so that it fills the bucket

3.         Stir it twice in that day and let it sit there for forty-eight hours

4.         Once the solid has settled, pour the, now brownish, liquid into a different bucket.

Make sure you dilute it to the color of weak tea before applying it to your succulents.

GrowBetter Organic Cactus and Succulent Fertilizer

The beauty of this fertilizer is that it’s odorless. What’s more, quite a number of succulents can benefit from its use. Notably, Yucca, Saguaros, Aloe, and Dragon fruit are just a few of such succulents. This slow-release fertilizer will leave your succulents well-nourished for up to two months per every application. It leaves the roots healthy and is ideal for both indoor and outdoor succulents. They have been hailed for making the leaves fuller and leading to large, bright blooms

Dr Earth Premium Gold Pure & Natural Fertilizer

If your succulents have ever had the problem with leaves turning pale or yellow, it means they lack nitrogen. This fertilizer has balanced amounts of potassium, phosphorus, and nitrogen that will solve the problem. The potassium will help keep diseases at bay, while the phosphorus will give your plant healthy roots and help flowers bloom.

One teaspoon of this fertilizer mixed with a gallon of water is all that you need.

Miracle-Gro Succulent Plant Food

This succulent fertilizer comes in liquid form, so it’s easier to seep into the soil and get absorbed by the roots. It can be used with popular succulents, all cacti, Jade, and Aloe. You can either apply it to the soil directly or mix it with water every fortnight.

Organic worms

Worms eat dead leaves, roots, and grass and, thereafter, release castings. The castings are full of phosphorus, nitrogen, potassium, and calcium that help boost your succulents’ overall health. If that isn’t enough, they improve soil structure which helps in water infiltration. With that in mind, how do you attract worms into your garden?

Once you leave your garden undisturbed, with compost manure and enough mulch around your succulents, worms will find a haven. You may then pick a few worms and place them in your planters for them to naturally fertilize the soil.

6. Containers or Planters

When planting succulent at home, containers and planters come in handy. These decorative containers in different shapes, colors, and sizes add to the overall ambience of your garden and home. In gardening, containers are pots and planters, terms that are used interchangeably. When it comes to containers, they can go anywhere, whether it is a flight of stairs, window sills, or even walkways. That said, how do you choose the correct planter?

When selecting a container for your succulents, pay attention to drainage holes, its design, and the material it is made of.

A good planter should be of good drainage, design, and material. Let’s consider each in detail.

1.      Drainage

A pot without proper drainage will cause water clogging and eventually lead to the rotting of succulent roots. As such, a container with holes at the bottom is highly recommended. So, no matter how beautiful a container looks, if it doesn’t have perforations, your succulent will be as good as dead on arrival.

2.      Design

The design matters a lot to you as much as it does to the succulent in your pot. For one, an attractive container adds to the decor of your home and garden. Notably, different designs are fit for different succulents based on their size and growth pattern.  While spillers, for example, would do well on hanging planters, low-growing succulents won’t look good in tall pots but rather in short ones. On the same note, Aloe, which grows upright, fits perfectly in a tall container.

3.      Material

Go for pots with breathable material when growing succulents. These will allow for much-needed aeration of your plants. The much-praised ceramic and terracotta-made pots are a few examples. If you are neglectful, busy or travel a lot, using plastic materials is recommended because the water doesn’t easily evaporate from the container. Still, on the material, consider its weight. Will you be able to move them on a whim when need be? For example, when the weather has suddenly changed, and you want to protect your plants from the elements; you should be in a position to relocate your succulent much easily.

7. Soil

Soil is a vital component in the growth of a succulent and any plant for that matter. It is paramount as all succulents will eventually end up in the soil. So, how does it affect the growth of your succulent, and how can you ensure you get it right for your indoor and outdoor succulents to thrive?

Whether you are planting your succulents indoors or outdoors, make sure the soil is well draining.

As a gardener, you probably use conventional potting soil for your plants. This is readily available, and you might be tempted to use it when planting succulents. The problem here is that the conventional potting soil is made to hold water; a feat that can be detrimental to the survival of your succulent.

In this regard, you need good draining soil whether you are planting your succulent in a garden or container. So, what constitutes a good soil mix? Most gardeners prefer coarse sand placed on top of the potting soil. While this can help drain water, the soil is meant to do more than just draining water. They need to support the plant physically, hold moisture and nutrients.

To achieve that, you may consider making your succulent soil mix at home.

How to prepare the right succulent potting soil

You will need garden soil, coarse sand, and perlite. The perlite is meant to aerate the soil and also helps in drainage, just like the coarse sand.

To achieve the desired results, mix the sand, soil, and perlite in the ratio of 3:3:1, which translates to 3 cups of sand, 3 cups of soil, and 1 cup of perlite. With that mixture, you need not worry about your succulents rotting because of poorly drained soils.

From the above, it is clear that succulents need care even with the fact that in their natural habitat, they flourish on neglect. However, caring for succulent plants doesn’t mean spending lots of cash, you may consider using the simple, home-grown strategies to reduce the costs involved drastically. It may be a challenge the first time, but once you get the drift, it becomes a walk in the park henceforth. Give your succulents the right care, and you will reap strong, healthy and brighter plants, both in your outdoor garden and indoors.

How To Care For String Of Pearl Plant?

As people look to add more green into their lives, succulents and cacti are often a popular choice. These low maintenance plants are the perfect choice for beginners and experts alike. The string of pearls plant is a succulent that’s getting increasing attention due to its striking appearance and easy care requirements.

The string of pearls plant is fairly easy to care for. Its basic requirements include needing at least six hours of sun, water once per week, and the correct soil mixture to encourage drainage. Other requirements include a warm environment, mid-level humidity, and a hanging container.

It’s also a common choice because it can be housed indoors or outdoors, is easily propagated, and doesn’t have may pest problems. Let’s go over all of the information you’ll need to know before growing your own string of pearls.

String of Pearls Plant: Basic Care

The string of pearls plant (Curio rowleyanus, formerly Senecio rowleyanus) is one of the easier succulents to care for. Here’s a basic rundown of the care requirements:

SunlightAt least six hours; avoid direct sunlight/ full exposure
Temperature72 degrees Fahrenheit/ ~22 degrees Celsius
WaterSoak thoroughly once per week; let dry completely between waterings
HumidityPreferably around 40% – 50%
SoilSucculent-specific potting mix; must include sand, pumice, or perlite
ContainerAny type, hanging preferred; drainage strongly recommended
The String of Pearls produces small white or cream flowers in summer.

When properly taken care of, your string of pearls should look like small peas attached to trailing vines. It should be a lush green color and, during the summer, bloom small, white or cream flowers that may be brush-like in appearance.

Below, we’ll go into more detail about each requirement and what you’ll need to do to care for your plant.

Sunlight and Temperature Requirements

Like most succulents and cacti, the string of pearls appreciates ample light. For optimum growth, you’ll need to ensure your plant receives at least six full hours of light.

Keep in mind, the string of pearls prefers partial shade or indirect light. You can acclimate your plant to full exposure or direct sun, but doing so prematurely can scorch its stems and leaves.

This means that you can’t keep it inside for most of the year and just sit it out on your porch when it’s warm. If you want to transition it outside during the spring and summer, start by placing it in a shaded area and gradually expose it to direct light.

To grow a healthy String of Pearls, you should give the plant at least 6 hours of full sun daily.

If you’re worried that your string of pearls isn’t getting enough light, considering supplementing it with an artificial grow light. These are available online and in some retail stores and nurseries. Alternatively, you can just buy plant grow bulbs and screw them into a lamp you already have around the house.

Full spectrum LED lights are preferable, since these last longer and will not put off heat that could potentially harm a person or plant. Some models also offer automatic timers and Red-Green-Blue color level adjustments so that you can better control your plant’s growth.

You can also invest in a fluorescent light. But while these may be more powerful and effective initially (depending on the wattage), they’ll grow weaker over time and will need to be replaced more often than LEDs.

Depending on your needs, there is a wide variety of lights and bulbs available in varying wattage levels and sizes. There are also lights and bulbs for every budget, whether you’re looking to spend under $20 or want to shell out for a more professional setup.

Proper Temperature Requirements for String of Pearls

Besides the light itself, you’ll also need to keep an eye on the temperature. String of pearls prefers warm climates that are at least 72 degrees Fahrenheit (roughly 22 degrees Celsius).

This isn’t a problem indoors during the colder months (when you have the heat on) or outdoors during the warmer months (depending on the climate where you live). But when you have the A/C blasting inside or the temperatures start dipping outdoors, your succulent can suffer.

Since the String of Pearls prefers warmer environment, avoid placing the plant in areas that are too cold.
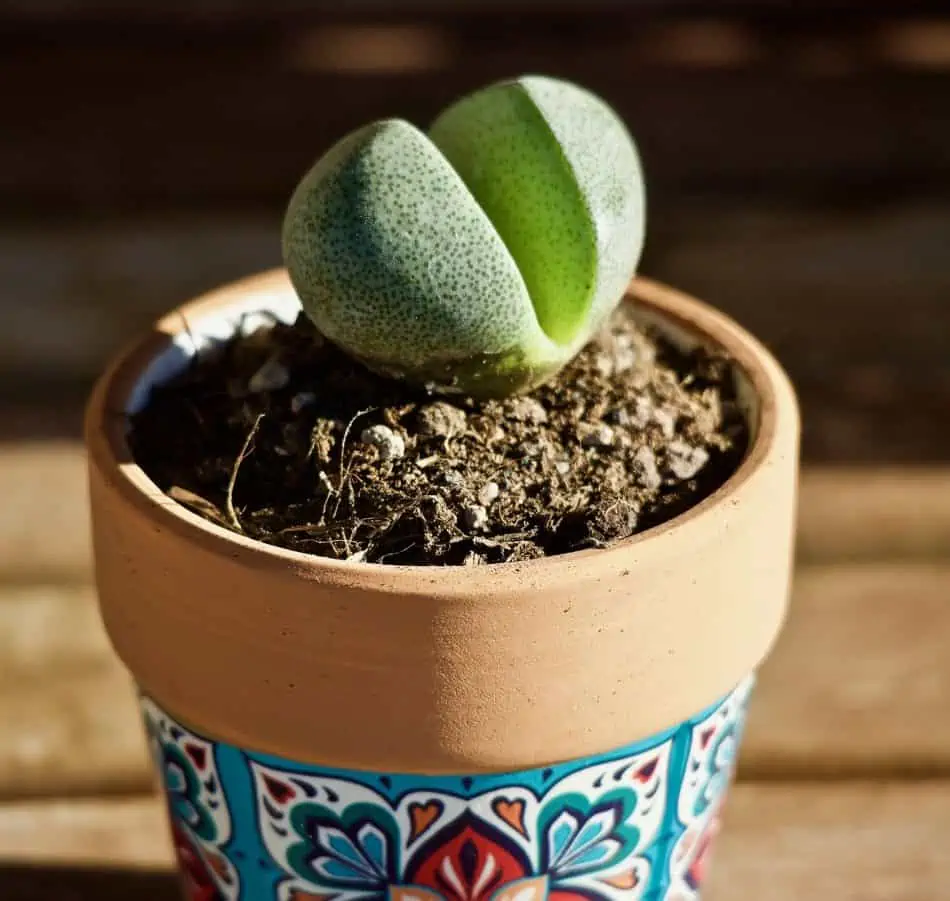
Make sure you’re housing your string of pearls in a mild, warmer area that won’t be affected by sudden or often temperature changes. Add a heating element near your plant, if necessary. 

Alternatively, if you can control the temperature of one room or area outside (such as a greenhouse), keep it around 70 degrees Fahrenheit year-round.

If you house your plant inside, avoid placing it in drafty areas where it may be inadvertently affected by cool air.

Watering and Humidity Requirements

While succulents are renown for needing almost no water, the string of pearls plant takes this one step farther. Its round leaves (i.e., its ‘pearls’) reduce exposure to sun and result in slower evaporation, making it particularly drought tolerant even for a succulent.

As a result, you should be careful not to overwater this plant. If you give it too much water at once or water it too often, it won’t be able to thrive. Similarly, not providing drainage and forcing the roots to sit in waterlogged soil for extended periods of time will cause it to die.

It is recommended to water your String of Pearls once a week.

The best initial schedule is to thoroughly soak your string of pearls once per week. Wait until you see water coming from the drainage holes or, if your container has no drainage, water it until the first two inches of soil are soaked.

Then, before you water it one week later, check to see if the topsoil is dry. If it’s still damp, wait another week; if it’s completely dry, water it again according to the same method.

This will help you gauge how often you need to water your plant and how much water to give it each time.

Despite their arid origins, string of pearls also appreciate humidity. Typically, the average humidity in a home is fine. But if you have a dehumidifier in your home or live in a dry region, try to keep at least 40% humidity levels around your succulent.

You can increase humidity levels by placing a dish of water near the plant, grouping plants and succulents together, and misting around the plant (but not directly on or near the roots).

Soil, Potting, and Fertilization Requirements

String of pearl plants have fairly straightforward requirements when it comes to soil, potting, and fertilization. Though you have some wiggle room, here are the ideal conditions for your succulent:

  • Soil – A succulent-specific mix with regular potting mix and sand, pumice, or perlite
  • Potting – A hanging container with ample drainage; fill completely with soil
  • Fertilization – Light feedings during spring and summer

String pearl plants and succulents need soil that promotes aeration and drainage. This means that regular potting soil (and soil from your backyard) are a no-go.

Choose the right pot, soil mix, and fertilizer for your String of Pearls to ensure that the plant grows healthy.

Look for cactus and succulent-specific potting soil. This will have sand, pumice, or perlite mixed in. Alternatively, you can buy regular potting soil and manually mix at least one of these ingredients in.

When it comes to potting, containers with drainage are always preferable. Succulents need water, but they don’t like sitting in soaking wet soil. Without drainage, the excess water can’t escape and may cause root rot or mold.
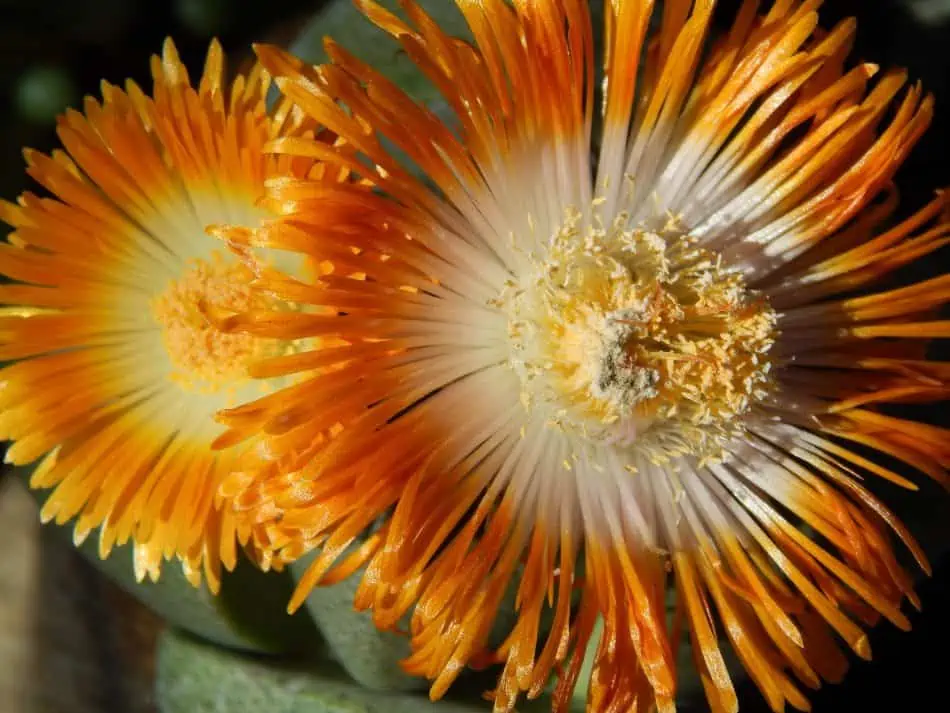
Any pot with a drainage hole will work, but terra cotta pots are particularly great for beginners.

To prevent soil from washing away, you can add a layer of mesh between the drainage holes and the potting mix.

If you don’t have a container with drainage, be sure to watch how much you water your string of pearl plant. Test the top two inches of the soil to make sure they’re dry before watering again.

A common misconception is that you can add a layer of rocks or pebbles to the bottom of your container to trap excess water. This isn’t true; the soil will hold the water and continue to waterlog the roots instead of draining into the rock layer.

Instead of adding rocks, mix activated charcoal into the bottom inch of your potting soil. This will absorb any overflow.

It’s also better if your container offers the string of pearls room to grow. The nature of this plant means that vertical space is more important than shelf space or horizontal room. Hanging containers are a great way to make sure your string of pearls is able to stretch and trail comfortably.

Generally, succulents don’t need much fertilizer, and string pearl plants aren’t an exception. But to encourage growth, you can lightly fertilize during the spring and summer seasons.

Be careful not to overfertilize. Besides attracting pests like mealybugs, this can cause your succulent to grow too fast and become weak.

Outdoor vs. Indoor: Which Is Best for String of Pearls?

String of pearl plants can be kept indoors or outdoors. It’s native to southwest Africa and so can obviously grow outside, but has also been kept with great success as a houseplant. It can therefore be kept inside or outside (or a mixture of both).

However, there are advantages and disadvantages to both settings. These mainly revolve around the succulent’s care requirements, such as the light, temperature, and watering schedule.

Although the String of Pearls can grow both indoors and outdoors, there are some pros and cons you should consider.

Here’s a quick rundown of the pros and cons of keeping string of pearls inside versus outside:

Indoor SpacesOutdoor Spaces
ProsTemperature controlled
Can track waterings
Easier to protect from pests
Easier to meet light requirements
Easier to meet temperature/ heat requirements (dependent on climate)
Benefit from pollinators
ConsHarder to meet light requirements
Harder to meet temperature/ heat requirements (dependent on climate)
Reduced chance for pollination
Subject to weather conditions
Potential for overwatering due to rain
Harder to protect from pests

Your home is a controlled space; you can control how much light your string of pearls receives, the temperature of the room it’s housed in, and how often and how much water it receives. Even if you don’t have many windows or don’t receive much natural sunlight, you can buy artificial lights help your plant thrive.

But many succulents appreciate the natural light and warm temperatures of the outdoors, though it can be harder to control how much water they get unless the plants are housed in a covered area. These ideal conditions, coupled with the presence of pollinators, also mean your string of pearls is more likely to bloom. 

Here are some other considerations to keep in mind when deciding whether to keep your string of pearls inside or outside:

  • Sun Exposure – Do you have a space where the plant will receive indirect sun or partial shade for at least six hours?
  • Room To Grow – Do you have a space where the plant’s stems will have room to grow and trail?
  • Protection – Do you have a space where the plant will be protected, such as from pets, children, wildlife, inclement weather, etc.?
  • Cold Weather – Do you have a space where the plant will be safe from cold temperatures, such as from winter weather or strong A/C flow?

You don’t necessarily have to have a yard to keep your succulents outside; a balcony, patio, and wide window ledge are just three examples of other options that still provide you with outside access.

But the deciding factor should always be what works best for you. If you don’t have access to an outdoor space, then keeping your succulent inside is the better option. Conversely, if you don’t get much light inside but have a nice outdoor space, then keeping your succulent outside is preferable.

Whether you keep your string of pearls indoors or out, remember to keep it out of reach of children and pets. When consumed, this succulent can be toxic— it’s better to be safe than sorry, so hanging planters or containers are strongly recommended.

How To Propagate String Of Pearls

String of pearls naturally grow one of two ways: vertically and horizontally. Vertically, you’ll see growth as the stems of your succulent grow and create longer trails.

But string of pearls is naturally a creeper, which is how it grows horizontally as well. Its stems spread across the ground and send out shoots, which create ground cover and a more expansive root system. Once established, these shoots create their own stems and tendrils, which produce more leaves and shoots, and so on and so forth.

If you provide a wide enough container or plant your succulent directly in the ground, you may see this natural growth when the string of pearls is established enough.

But if you want to directly propagate it yourself, there’s a different method:

  • Cut – Cut off roughly two inches from one of the trailing stems. The stem should be green and have no visible damage (such as withered or brown areas). Cut between the leaves (‘pearls’).
  • Plant – Plant in a container with good drainage filled with a succulent-specific potting mix. Insert part of the cutting into the soil (after removing the leaves) or coil the cutting and lay it on top of the soil, pressing it gently to establish contact.
  • Water – Moisten the soil during the initial planting and mist it every 3 – 4 days after that. Monitor the ends of the cutting to make sure you’re not underwatering (which will cause shriveling) or overwatering (which will cause brown spots and rot).
  • Rest – It can take weeks or even months for a cutting to take root and start growing in earnest. During this time, keep your cutting in a bright, warm place. Make sure it doesn’t receive too much direct light.  

Only propagate during spring or summer when your string of pearls is strong and healthy and make sure your tool is sharp— using a dull instrument can damage both the cutting and the parent plant.

Cut, plant, water, and rest your String of Pearls to properly propagate the plant.

Before your string of pearls will spread naturally or thrive enough for you to manually propagate it, it will first need to become established.

Following the care requirements laid out in this article is a great start. The right soil and container will provide a strong foundation for growth, while receiving the correct amount of sun and water (and fertilizer during the warm months) will encourage growth.

You can also help your succulent grow through regular pruning. Though this may seem contradictory (cutting parts off seems like the opposite of growth), pruning actually creates a healthier plant. It prevents the string of pearls from diverting resources, such as water, to areas that are already dying off.

Take a pair of sharp scissors or shears and trim dying pieces. Stems and leaves that are brown, shriveled, or simply not growing should all be removed promptly.

Common Care Issues with String of Pearls Plants

If your string of pearl plant isn’t doing so well, don’t be discouraged! Many people find that succulents are pickier in terms of care than they originally thought. But with a few simple fixes, your string plant will bounce back in no time.

Choosing the wrong container size is one of the most common mistakes people make when caring for the String of Pearls.

Here are some common care issues that owners should look out for if they have a string of pearls plant: 

  • Gnats and Pests – These are more common for indoor plants, but can affect all succulents. To get rid of these, treat with an anti-pest spray or 70% isopropyl alcohol solution. Going forward, make sure not to overwater or overfertilize.
  • Container Size – A container that’s too large will hold water and cause the succulent’s roots to rot. Because string of pearls have narrow, delicate stems, they are especially prone to this issue.
  • Planting Depth – String of pearls have shallow root systems that spread out rather than down. Planting your succulent more than an inch into the soil will prevent aeration and cause it to hold too much water (which causes fungal growth and rot, respectively).
  • Overwatering – This plant stores water in its leaves (‘pearls’) instead of stems. So if you overwater it, the pearls will literally swell and burst. If they have a shriveled and mushy appearance, cut back on the water.

If you’re lucky, you’ll never have any of these issues. But if one does appear, it’s nothing to worry about. You can easily solve the issue by trying out the solutions above.

General Care Tips for Succulents and Cacti

For the most part, succulents and cacti are some of the easiest plants to keep (that’s what makes them so popular, after all). But like any other living thing, they do have some basic care requirements that need to be met.

Just like other succulents, the String of Pearls requires plenty of light, proper watering regime, and regular cleaning.

If you’re still struggling with your string of pearls plant, here are some tips and tricks that might help you revive it:

  • Provide Plenty of Light… – It might seem like a no brainer, but succulents need lots of light. And even when we think they’re getting that, they might not be. String of pearls need at least six full hours of sunlight.
  • But Not Too Much Light – Even though your string of pearls needs light, be careful about the type of light you provide. Directly sunlight or full sun exposure can scorch them and be more harmful than helpful. May sure to provide at least partial shade.
  • Rotate At Least Weekly – You should also rotate your plant at least once per week to make sure it’s getting even light all around. If your string of pearls is only growing on one side, that’s a sign it’s not getting enough sunlight.
  • Adjust Water Per Season – Adjust how often and how much you water your plant according to the season. Water more during the spring and summer, but less during the fall and winter. And, of course, wait for the soil to dry between waterings.
  • Adjust Water For Pots – If your string of pearls is potted in a container with drainage, soak the soil until you see water emerge. But if there’s no drainage, water the soil less. Don’t ever mist your plant instead of watering; this causes weak roots and mold.
  • Clean Leaves and Stems – Plants housed indoors will inevitably gather dust, just like plants outside may pick up pollen. Make sure to regularly and gently clean your string of pearls with a damp cloth or soft-bristle brush, such as a makeup brush or paintbrush.

Just like air plants, succulents are often misrepresented as needing next to no care— a sort of ‘buy them and forget about them’ type of plant. But in reality, they have some basic requirements that will need to be met before they can really thrive.

Varieties of String Succulents

Though string of pearl plants are one of the most popular string succulents, they’re by no means the only variety available. String plants share the same basic features, but can vary in appearance and care requirements depending on which type you have.

If your string of pearl plant doesn’t look like what we’ve described, check out these other varieties to see if you have a different string succulent. Alternatively, keep reading if you’re interested in other string varieties in addition to your string of pearls.

Here are five other popular string succulents:

  • String of Buttons/ Necklace Vine (Crassula perforata) – This string plant grows vertically and features triangular, grey-green leaves with red edging. During the spring, it blooms star-shaped white or pale yellow flowers.
  • String of Bananas/ String of Fishhooks (Curio radicans) – Like the string of pearls, this plant grows vines. But instead of peas, it features glossy, banana-shaped leaves. During late winter or early spring, it blooms white flowers that smell like cinnamon.
  • String of Hearts/ Rosary Vine (Ceropegia linearis/ woodii) – The trailing stems of this plant feature small, heart-shaped leaves that are either dark green or light green/ grey, depending on how much light it gets. Flowers appear in late summer or early fall.
  • String of Tears (Curio citriformis) – This slow-growing succulent features trailing but erect stems with tear-drop shaped leaves. Leaves are green with transparent stripes and flowers are a cream or yellow color that appear in late summer or winter.
  • String of Turtles (Peperomia prostrata) – Also slow-growing, this plant has hanging stems with delicate, rounded leaves. Leaves are dark green or purple with white veining, resembling that of a turtle shell. Flowers are small and cream-colored.

These string succulents are all beautiful statements plants that are comparatively easy to grow and propagate. Whether you’re building a vertical garden or designing a hanging display, any one (or more) of these varieties would made a wonderful choice.

String of buttons, string of bananas, and string of hearts are all hardy and make great choices for any beginners or recovering black thumbs.

Growing A Healthy (And Happy) String of Pearls Plant

As succulents and cacti grow more popular for both beginner gardeners and advanced growers alike, the string of pearls plant has received an increasing amount of attention— and for good reason.

String of pearls are hardy, easy to grow, and aesthetically striking. As long as they receive roughly six hours of light per day and are watered once per week (or as needed), they’ll thrive. 

The String of Pearls can grow perfectly healthy if you properly plant and take care of the plant.

Planting them in the correct container, keeping them in a warm place, and maintaining humidity levels will also ensure your succulent thrives. They’re also versatile in terms of where you can keep them and aren’t prone to pest issues.

Whether you’re looking to gift a burgeoning gardener with a new plant or want to add some green to your own living space, the string of pearls plant is a succulent that fits in every home.