Ultimate Guide: How to Care for Santa Rita Cactus

A beautiful garden might not seem like an attainable goal; most plants go through the dormancy period in winter, and less growth happens during this time. However, nearly all indoor plants bloom for a few months before fading; with proper care, your plant will thrive for a few years.

The Santa Rita Cactus, commonly known as the Purple Prickly Pear, is an exception. This attractive succulent has colorful fleshy pads which turn to a deep purple in winter and soft blue-gray in warm temperatures. During the spring, large yellow flowers appear. 

Native to Mexico, this hardy plant has over 40 varieties and can attain heights of 8 feet. The slow-growing edible succulents have flat-shaped pads with spines. Most people like them because of their edibility and ornamental nature. 

In this article, we will learn more about growing and taking care of the Santa Rita Cactus. So let’s get right into it.

Growing

A desert succulent like the prickly pear can not tolerate constant moisture. Therefore, we recommend planting in containers that can meet the drainage needs of the plant. Make sure that your container, preferably a pot, has enough drainage holes at the base.

Fill your pot with a well-draining soil mix for your succulent and move it to a warm location. The bottom-most layer should be gravel for better drainage. Start by planting seeds, push them slightly inside the ground, and place them near a sunny window or under grow lights.

Propagating is much faster than sowing seeds. Transfer the prickly pears into bigger pots if the cactus gets rootbound. If you are planting to transplant the plant, wait until the cold climate is over to avoid the danger of frost and rain.

You can also purchase young plants at your local nursery and transplant them to a sunny spot with well-draining soil. Though the best time to transplant is in spring, you can transfer your plant at any time if you reside in dry areas such as Southern California.

Propagation

You can propagate your Santa Rita Cactus plant from either seeds or pads. We suggest growing from the pads as this is relatively easier and faster. Cut a couple of pads from the parent plant during warmer climates. 

Place the cut-off pads in a cool area and wait for about 1-2 weeks for the cuts to heal perfectly before planting. Then, push the cuttings about an inch dip in your container, just sufficient to hold the plant uprightly, and expect rooting within a few weeks. Do not water until you see signs of growth.

If you choose to propagate by seeds, scoop some seeds from an open ripe fruit and rinse them. Give the seeds time to dry completely and sprinkle them in a pot of moist, well-draining soil. Cover the seeds thinly with dirt or sand. Finally, cover your jar in a translucent paper wrap and position it in a sunny spot. Germination can take a few weeks to months.

Requirements for Growing your Santa Rita Cactus

Proper care of your prickly pear starts with knowing the best conditions necessary for your plant to thrive. 

Water

Prickly pears are drought tolerant and only need occasional watering. This plant, like most succulents, stores water in its jointed stems called pads. Water only when the surface appears dry. Throughout spring and summer, we recommend it once or twice weekly.

In colder periods like fall and winter, you can water your prickly pear one to two times a month. When you are watering your plant, moisten it, don’t soak it. Underwatering can cause the pads to appear wrinkled and thinner; water thoroughly if you notice these signs. On the other hand, too much water can reduce the purple pad color.

Light

A place with enough light is necessary for the prickly pear cactus to thrive. The Santa Rita Cactus is a tropical plant that thrives well when exposed to warmth. Therefore, place your plant where it can get at least six hours of direct sunlight. We recommend a west or south-facing window.

A blooming Prickly pear cactus flower.
A place with enough light is necessary for the prickly pear cactus to thrive.

Soil

Santa Rita Cactus can take poor soil conditions as long as the drainage is good. However, the plant prefers light, well-drained gravelly or sandy soil. You can get a ready-made potting mix or come up with your own. 
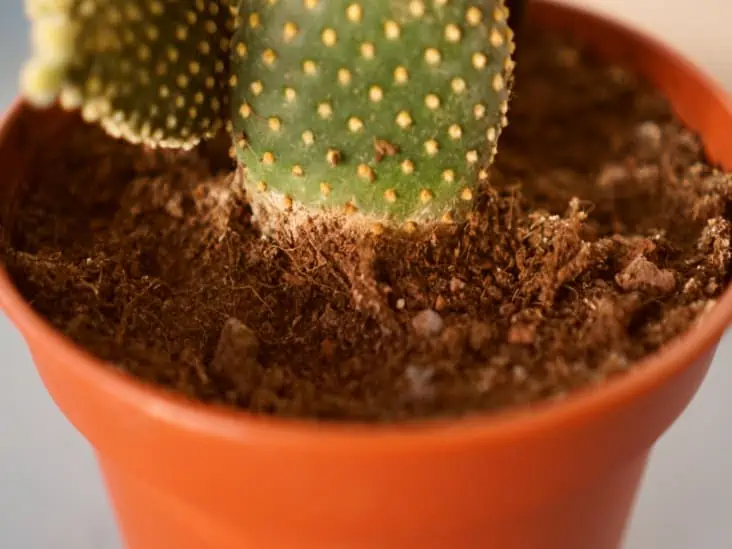
A pot with a soil and a plant.
It prefers light, well-drained gravelly or sandy soil.

To make the potting medium, mix equal parts of compost, soil, and sand or perlite. Avoid clay-rich dirt because it can lead to stagnation. You can always mix the clay with sand or peat moss for better soil structure if you have no other options. 

Temperature & Humidity

Santa Rita Cactus does well in hot and dry desert summers but can also take cold temperatures. Mild winters, hot summers, and low humidity are the ideal conditions for this succulent. 

Indoor temperatures and humidity levels are generally acceptable for prickly pear. However, the plant does not tolerate high humidity even if the temperature is optimal. Avoid artificial sources like air conditioners because they can lead to excessive temperature fluctuations.

How to Take Care of Your Prickly Pear

Taking care of your Santa Rita Cactus is more than just providing the right conditions. Though the plant is low maintenance, you have to put in some work for the best results.

Feeding

Santa Rita Cactus does not need fertilizers, but nutrients get used up faster in containers, and you might have to feed your plant. For young plants, apply fertilizers that contain equal amounts of nitrogen, phosphorus, and potash during the growing season and follow product instructions. 

High nitrogen fertilizers lead to larger pads, while low nitrogen fertilizers contribute to increased flowers and fruits. Never feed your plant in winter as there is no growth.

Pruning

Pruning is not necessary but can help to keep your plant in size and propagation. The best time to prune is during spring or late summer while the pads are still young. They get woodier as they mature and might be hard to prune later on. 

Remove the poorly formed pads that appear damaged and those that brush against each other. First, moisten the cactus to stop the micro spines from detaching from the pads. The fine spines, also known as glochids, can cause skin irritation and respiratory issues. 

To remove the pads, hold them with a pair of tongs and snap them off at the base using a sharp kitchen knife or shears dipped in rubbing alcohol. Start with light cuts and take out the small pads between the trunks first, then move on to the top parts.

Repotting 

Consider repotting your plant once the roots outgrow the pot or if the plant seems unstable in its container. The ideal time to repot is in spring. Before you repot, ensure that the soil is dry. Then, grab its base, and knock away the oil soil.

Move it to a slightly bigger pot and feel with a well-draining succulent mix. Avoid watering your plant right away; give the roots time to recombine. To figure out if your plant requires repotting, monitor the growth rate. If the plant is growing slowly, then it’s time to report it.

Fruit Thinning

Fruit thinning involves removing extra fruits and flowers for lower production and improved quality. Thinning should be done two weeks before the formation of the fruits. When you thin your plant, leave about ten fruits on each stalk.

Removing extra fruits and flowers for lower production and improved quality.

Harvesting

Prickly pears can be eaten raw or used to make juices. There are also claims of the pads being effective in the treatment of diabetes and high cholesterol. However, before harvesting the fruits, take precautions, such as wearing gloves for protection against the spines.

Go for young pads because mature pads have sharp spines and are more fibrous in texture. Hold the pad and use your other hand to cut the pad from the plant with one hand.

Santa Rita Cactus fruit
Monitor the growth rate, to figure out if your plant requires repotting.

To harvest the fruits, use thick gloves or tongs. Then, twist each fruit off to remove it. Ripe fruits are orange, red, or purple, while younger fruits are green.

Santa Rita Cactus Problems

Pests and Diseases

Santa Rita prickly pears are generally disease-free but can become infested with mealybugs or scale. Scales appear like cotton coatings on the pads, while mealybugs are white. They both suck sap from the pads. To remove the pests, use a strong stream of pressurized water. 

For more severe infestations, prune a few pads from the center of the cluster during summer when the insects are most active or use insecticidal soap. 

Sunburn

Sunburn occurs when you transfer an indoor plant to the open landscape for direct sun exposure. For example, sunburned prickly bears turn yellow. You can reduce the risk of sunburn, placing cheesecloth over new plants. 

Overwatering

Overwatering leads to root rot and scab. You can tell that your plant is getting too much water if the stems have a rust color. Do not water your Santa Rita cactus plant if the soil is still damp; wait for it to dry out completely.
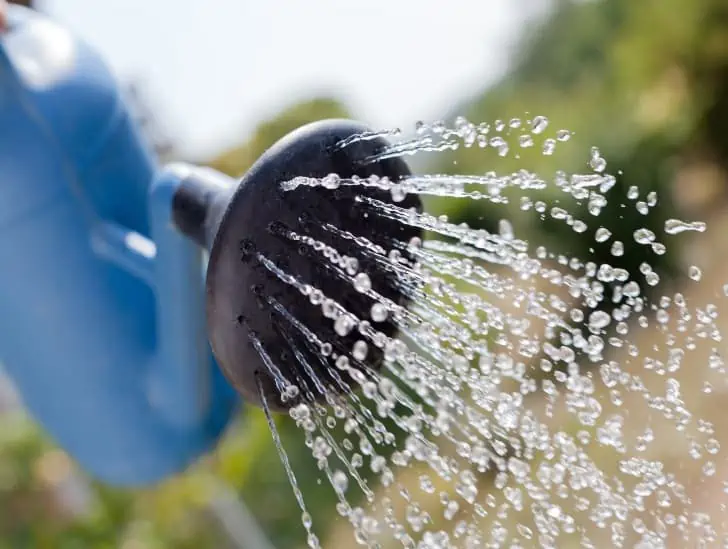
Do not water your Santa Rita cactus plant if the soil is still damp; wait for it to dry out completely.

Infections

The commonly known infections include phyllosticta pad spots and charcoal spots. Phyllosticta pad spot is characterized by black lesions on the pads, while charcoal appears as a ring of raised dots. First, destroy the plant to prevent the spread of infections.

No doubt, the prickly pear is a worthy addition to your indoor plant collection if you are looking for low maintenance, ornamental and edible plants that bring out that pop of color in your home.

Ultimate Guide: How to Care for a Panda Plant

The Panda plant is a wild succulent native to Madagascar. The succulent is characterized by velvety red-rimmed leaves that have unique patterns and a woody stem. Easy on the eyes and touch, the panda plant has earned the nickname Fuzzy Kalanchoe because of its fuzzy hairs. The hairs help to reduce moisture loss and keep pests at bay. The panda plant can grow to massive heights of up to 32 inches in the wild, while indoor growth is limited to about half the size.

This gorgeous plant has quickly become a favorite to many because it is beautiful and vibrant. The plant is also straightforward to care for. There are many varieties to choose from though the Chocolate Soldier is highly popular. Panda plants are a great addition to your indoor plant collection because they offer many benefits such as detoxifying the air, medicinal purposes, and beauty benefits. An excellent choice for beginners, the fuzzy kalanchoe does very well indoors and requires very little maintenance. So let’s get right into it.

Finding the right container

The first step to making sure your plant blooms is to use a container that prevents sitting water. The best container is a pot made out of porous materials as it can quickly dry. However, you can also use plastic or ceramic materials, but you must be careful not to overwater your plant. Drainage is critical; make sure that whichever pot you choose has drainage holes at the base.

Soil

Regular gardening soil is not a good option for panda plants as it can retain too much water. Remember, succulents do not need that much water, especially standing water. Instead, your plant will require a mix rich in minerals, organic water, and air. You can develop a sandy potting mix of 60% loam/potting soil, 25%sand, and 15%perlite. The mixture should be well-draining. Add rocks at the base of the pot for good drainage.

How often should you water your panda plant?

The best part about the fuzzy kalanchoe is the ability to retain water for weeks. So if you are forgetful or have a busy schedule, you are in luck. Panda plants only require watering anywhere from one to three weeks, depending on the humidity levels in your home.

Check your soil’s dryness to confirm whether your plants need watering or not. Place a toothpick or wooden spatula into the soil if it seems dry, then it’s time to water your plant. To ensure that your plant gets enough water, continue watering until it seeps through the drainage holes.

Avoid the water getting in contact with the leaves.

Water the plant from the tips, but avoid the water getting in contact with the leaves. The leaves are susceptible to humidity and can rot when in contact with water. In case the water touches the leaves, quickly soak it up with a tissue. You can also water the plants from the bottom with a base tray; add small amounts until the soil surface no longer absorbs the water. Overwatering can lead to root rot; make sure to drain any excess water.

How much light does a panda plant require

Panda plants enjoy bright and direct sunlight. Though they can tolerate high temperatures, they can’t survive excess heat. Place your plant in the north, south, or west-facing window sills in the morning and move it to areas with less light in the afternoon. All that is required is a few hours of direct sunlight and plenty of indirect light. If your panda lives outside, do not overexpose it to direct sunlight; leave it out for a few hours and move your plant into the shade.

Temperature

Indoor panda plants do well in an average temperature of 15-23°C. Though resilient plants can withstand most climates, they cannot withstand excessively hot or cold temperatures. We recommend humidifiers in dry climates, and you can also water your plant more frequently or place it in a humid corner. If the levels of humidity increase, avoid watering or put it on a dry spot in your home. Move the plant outside during the warmer months but get it inside quickly when cold temperatures kick in or when it gets excessively hot.

Panda plant having indirect sunlight.
Move the plant outside during the warmer months.

How do you trim/prune a panda plant?

If you prefer your plant dense and short, you can prune your panda plant regularly to maintain its shape. You will need scissors or pruning shears. Cut the leaves at the base to allow for new leaves to grow. It all comes down to how you prefer your fuzzy kalanchoe, whether neat and dense or wild and natural. 

Flowering

Flowers rarely bloom in indoor panda plants. There are exceptions where tiny tubular white flowers bloom at the tips of the branches. If the plant is placed outdoors, you will spot flowers once fully mature. The yellowish-red flowers are bell-shaped with a furry texture.

A close up image of a panda plant.
Flowers rarely bloom in indoor panda plants.

Feeding

Generally, panda plants do not require fertilizers to thrive. If you want to add fertilizer, make sure to use diluted liquid fertilizer once a month in spring and summer. Do not use fertilizers during the winter as there is minimal growth, which may damage the roots. Only use succulent fertilizers designed explicitly for cactus and other succulents.

Repotting your panda plant

The Fuzzy Kalanchoe is a slow grower and only requires repotting once every two years. For a mature plant, you can report after three years. Move your plant to a slightly larger pot. To repot your plant, hold it at the base, overturn the pot gently, and smoothly remove the plant. To make repotting easier, you can water the plant first. Move your plant to the new pot, bury the roots and leave a little stem above the surface. Water your plant after a week.

Propagation

Propagation at home is the most economical way to get multiple panda plants. The best time to propagate your plant is during the spring or summer months, as the climate is optimal for your plant to thrive. You will need sharp scissors. Snap off a few leaves; make sure that you don’t snap off too many as this will negatively affect your plant. Make sure no leaf part is left on the stem for successful propagation. Also, do not snap off a single leaf because it may not sustain root growth. 

A young panda plant in a pot.
Make sure no leaf part is left on the stem for successful propagation.

Dry the leaves for about 5-7 days until completely dry and place them in a container. Make sure the cuttings are placed in well-draining soil, such as the perlite mix or sandy soil. Water the plant frequently and move it to an area with indirect sunlight. The leaves develop their first roots after about 3-6 weeks. Move the plant to a pot with standard succulent soil when tiny green leaves start growing and prune them when they begin to grow for a fuller appearance.

Panda plant problems

Root & Leaf Rot

Commonly caused by overwatering and is characterized by mushy yellow leaves and black, soggy roots. If you notice these signs, you can remove the damaged leaves or repot your plant and water it less frequently. Remember, you only have to water your plant if the soil is arid; you can use a toothpick to confirm this.

Pests

Though indoor plants are less susceptible to pests, they can still experience them. The pests include mealybugs and scale insects. Mealybugs hide at the joints of stems and leaves, while scale insects appear like tiny black dots. Inspect your plants frequently to deal with the bugs before it’s too late. If the bugs are few, you can remove them with a pin. On the other hand, for severe infestations, use predators that feed on the bugs, such as ladybugs, or rub 70%isopropyl alcohol on the mealybugs. For the scale insects, you can use insecticides.

A panda plant.
Inspect your plants frequently to deal with the bugs before it’s too late.

Ominous Signs to look out for 

Dried up Leaves

If your panda plant leaves are continuously drying, especially at the base, you might want to check on the amount of water your plants are getting. Dried leaves are a sign of underwatering. So water your plants more frequently and remove any dead leaves.

Yellow Mushy Leaves

As earlier mentioned, this is a sign of too much water. Before adding water, check on the soil moisture content; if damp, avoid watering. Allow the water to dry out before the next watering session.

Black Spots

Black spots can either scale insects or extreme overwatering. If decreasing the amount of water you are giving the plant does not work, use insecticides.

The white substance on Leaves

This white substance could indicate mealybugs. The bugs can be hard to deal with if not detected early. You can rub alcohol on the plants or use an insecticide.

Bottom Line

To sum it all up, if you would like to have a healthy and thriving panda plant, you need to make sure the soil is well-draining, maintain optimum temperatures, provide just enough water, adequate lighting, and be on the lookout for pests. It doesn’t get any easier than this.

Ultimate Guide: How to Care for Mother of Thousands

Tiny little plantlets growing along the edges of plant leaves might sound unreal. Now, imagine the plantlets dropping from the main plant and taking root wherever they land. That is how the mother of thousands plant got its name; the plant gives rise to many others.

Some consider this invasive plant a weed. To contain it, we recommend planting it in a container.

Surprisingly, this attractive succulent is easy to care of and not as problematic as many think, since it’s considered a weed. Also known as Devil’s backbone, Alligator Plant, and Mexican Hat Plant; the Mother of Thousands native to Madagascar grows from only one stem. 

This attractive houseplant is characterized by pointed and narrow blue-green leaves; the plant can grow up to 35 inches tall. This guide will center on what you should know on Mother of Thousands needs to get you started.

Light Requirements

Mother of Thousands thrives in hot and bright conditions. Adjust the amount of light your plant is exposed to depending on the season. During the hotter months, from early June to late September, avoid placing the plant in direct sunlight because this may lead to sunburn of the delicate leaves. 

Do not place your plant near west or south-facing windows because of excess heat; consider finding another location. Ensure your plant gets enough light from fall to early spring by placing it in direct sunlight in the colder months.

We recommend an east-facing window if you want your Mother of Thousands to thrive. Direct sun, especially in the morning, is ideal for this plant. Avoid placing your plant near North facing windows as the plant will not get enough hours of sunshine in this direction. You can also keep your plant outside or put it in a south-facing window.

How can you tell if your plant is receiving enough light? First, take a look at the leaves; if they are vivid green with a beautiful red outline, they are happy; however, if the plant appears spindly and tall with sparsely spaced leaves, you might want to increase the amount of light your plant is getting. Your plants may also become leggy when they don’t get adequate sunlight.

The Recommended Temperature

The best temperature for your Mother of Thousands plant is 75.2 Fahrenheit. Always keep your plant away from direct heat sources as this can make it dry up fast, in addition to damaging the leaves. Temperatures below four °C may cause the plant to die.

Plant receiving an indirect sun light.
Always keep your plant away from direct heat sources as this can make it dry up fast

Which Container should you use For Your Plant?

The roots of this Alligator plant require plenty of air circulation since they are delicate. We suggest using a pot that has holes at the bottom for easy drainage of excess water. To improve drainage, add pebbles or small stones at the base of the bank.

Put your pot in a tray for extra water to drain out. Empty the tray immediately the water begins to collect. The Mother of Thousands plant does not do well in damp conditions. Stagnant water may lead to root rot and plant damage. If you don’t want your plant to grow too tall, use a small pot.

Avoid planting your Mother of Thousands plant with other plants in the same pot because the plantlets will take over, making any other plant unable to thrive.

The best Soil For Mother Of Thousands

The Alligator Plant thrives well in sandy, well-draining soil. Try out a potting mix specifically designed for cacti. If you cannot get a sandy potting mix, you can make your own by adding a little coarse sand to standard potting soil. You can add the following to improve the soil drainage:

  • Perlite- When added to potting soil, it keeps it light and loose 
  • Vermiculite- helps to retain moisture in the soil
  • Pumice- Helps with soil aeration
Propagation of a Mother of thousands plant.
Try out a potting mix specifically designed for cacti.

You can also try pumice, perlite, and sand mix. Do not use soil that has a blend of loam, humus, and peat moss, as these can retain moisture in the pot.

Watering Guide

Properly water your Mother of Thousands plant all year round. Confirm that the soil is dried at least two inches before the next watering session—use room temperature water because extreme temperatures may shock the roots. When watering, make sure no water gets to the leaves because this can cause leaf rot. You can reduce the watering frequency in winter but do not allow the plant to dry out. Overwatering can lead to leaf malformation.

Pruning

Prune your Mother of Thousands plant when it starts to get curly and weedy. Nip the top of your plant right above a big leaf. This action will cause the plant to commence the growth of leaves further down the stem. The plant automatically sheds off any dead leaves, but you can go ahead and remove dead and damaged leaves for new growth.

The Propagation process

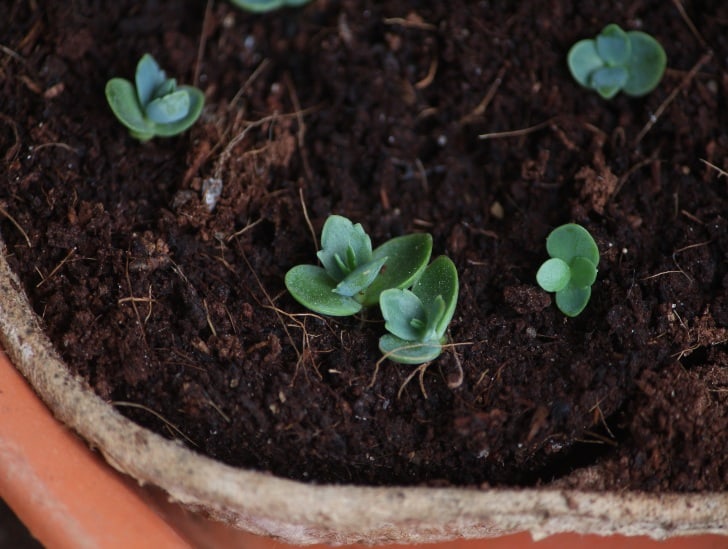
The plantlets make it extremely easy to propagate the Mother of Thousands plant. Pick a few plantlets from any leaf and place them in a moist place, preferably a plastic bag. Next, take a small pot and add cacti soil. 

Place the plantlets on the soil and space them out half an inch apart. Mist the earth and plantlets to ensure they get moist without being saturated. Cover your pot with plastic wrap. Move the bank to a place with lots of sunshine and keep the plantlets and soil moist without overwatering. 

A mother of thousands plants in a pot.
Transfer the plants to their pots when they are big enough, be careful not to mess with the root network.

When the plantlets start to grow, keep adjusting the plastic wrap to avoid crushing the plants. Remove the plastic wrap when the plants are around an inch tall. Maintain the sunny conditions as the plants continue to grow. Transfer the plants to their pots when they are big enough, be careful not to mess with the root network.

Repotting

The best time to repot is your Mother of Thousands is when it outgrows its original pot. You can tell it’s time to repot by observing the roots. Pot Bound roots come out of the drainage holes at the base of the pot.

 If your plants start drying out faster despite cool temperatures, this could also indicate that you should relocate your plant to a bigger pot. The slow growth of stems and leaves is also a strong indicator. The best time to transfer your plant is during spring, when warm temperatures stimulate growth. 

When choosing a new point, go for a size larger; we recommend about 2 inches more. Your fresh pot should have drainage holes. Fill the unique pot with cacti soil or your mix; about a third full. Place your plant on the soil and spread your fingers around the stem. Flip the bank gently and loosen the roots. Move the plant smoothly out of the pot. 

Trim roots that appear mushy and rotted. Put your plant in the middle of the pot; the roots should be just an inch below the top of your pot. Add a few inches of soil, about 2-3, and compact the soil. Do not overfill the pot with soil. Water your plant slowly, ensuring that you let any excess water drain out.

Humidity Level Requirements

Mother of Thousands can tolerate different humidity levels. However, average room humidity is best suited. This is why the plant can survive and thrive in different humidity levels.

Flowering

The Mexican Hat Plant rarely blooms indoors. However, in the right conditions, it will produce pink tubular flowers hanging above the central stalk. Only mature plants bloom; once they flower, the plant dies, giving a chance to the plantlets to start sprouting. The blooming season runs from late fall to early winter.

A cactus flower
Once they flower, the plant dies, giving a chance to the plantlets to start sprouting.

Fertilizer

The best time to fertilize your Mother of Thousands plant is anytime between March and September. We suggest it once every three months. You don’t have to feed your plant throughout the fall and winter because there is little or no growth taking place. Use a liquid fertilizer with half strength.

Pests and Diseases

The main pests that target the Mother of Thousands plant include Aphids, Scale Insects, and Mealybugs. Examine your plants frequently for any signs of infestation. If you notice any pests, apply insecticidal soap to hose down the pests. Apply more than once for severe infestations.

Common Problems Mother of Plants Encounter

  • Root Rot – Occurs if plants sit in moist soil for long. If the roots are seriously infected, pick the plantlets and transfer them to fresh and well-draining soil.
  • Leaf Curling– Caused by overwatering or lack of enough sunlight. Reduce the amount of water and move your plant to a sunny location to deal with this problem.
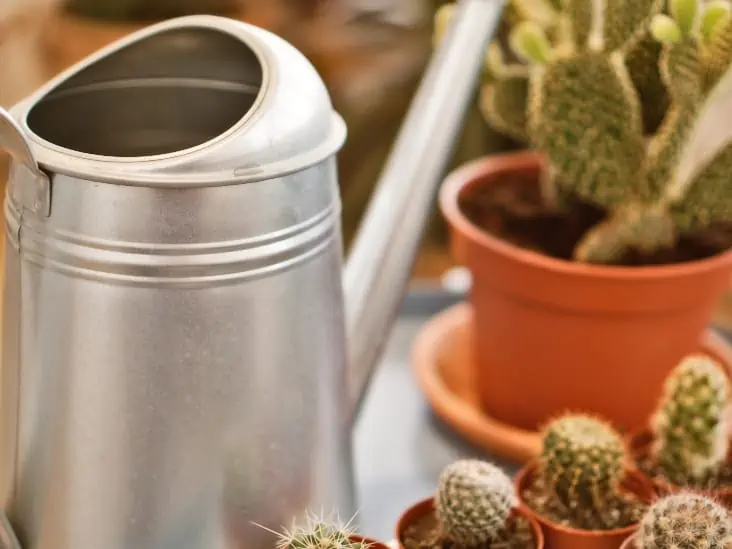
A water container.
Reduce the amount of water and move your plant to a sunny location to deal with this problem.

The Devil’sDevil’s backbone is poisonous. The leaves, stems, and plantlets are toxic and can be lethal to children and pets. Place the plant where children are unable to reach it, preferably high windowsills. Signs of poisoning include diarrhea, vomiting, and abnormal heartbeat. Consult a doctor or Veterinarian immediately if your child or pet ingests any part of the plant.

Bottom Line

What are you waiting for? Grow this marvelous plant in It’s evident that the mother of thousands can thrive in different humidity levels. Furthermore, it is easy to maintain all year round.

Ultimate Guide: How to get your Ice Plant to Flower

Are you looking for an indoor plant that can brighten up your space with bright daisy-like flowers and is low maintenance? Ice Plants can be a great addition to your indoor plant collection. With yellow, purple, or pink blooms, these pretty plants flower throughout the summer. Like most succulents, they thrive in arid conditions and require minimal care. 

The ice plant derives its name from the ice crystal-like dots on the leaves, which give it a shimmery appearance. This hardy plant is primarily kept for ornamental value but has a history of medicinal and culinary use in its native South Africa.

You can eat the leaves either in raw form or slightly cook them. The leaves can also be used to garnish, and the plant is consumed whole as a cereal. This pretty plant has been used to manage cardiovascular problems, tuberculosis, and minor skin conditions.

The Ice Plant has over ten cultivars; a few are listed below:

  • Cooper’s Hardy Ice Plant- Most popular; Dark green, shiny leaves; bright pink to purple blooms
  • Ice Plant Kelaidis- Leaves resemble jelly beans; yellow centered salmon to pink blooms
  • White Wonder- Large white flowers

If you want your Ice Plant to bloom, you will have to make sure the conditions are just right. Read on to figure out how to make the most of this beautiful plant and get things blooming.

How to Plant Ice Plant

There are many beautiful cultivars to choose from, and it might take you a while to settle on one. As a newbie, you can begin with one type. If you are a more experienced gardener, you can go for two or more. We suggest choosing a plant based on your environmental conditions because temperature and humidity are important factors to consider.

Ice Plants are easy to grow; you can sow your Ice Plant seeds early in the spring. Alternatively, buy small plugs from nurseries available in groundcover flats. We recommend using cactus mix if used in potted arrangements.

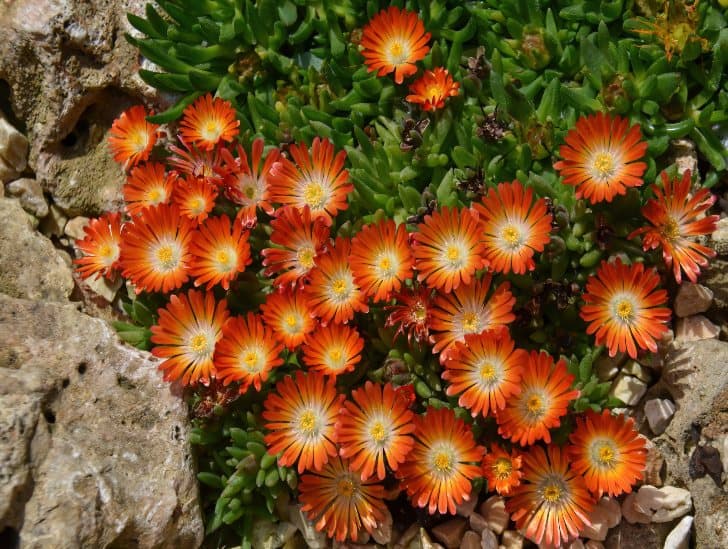
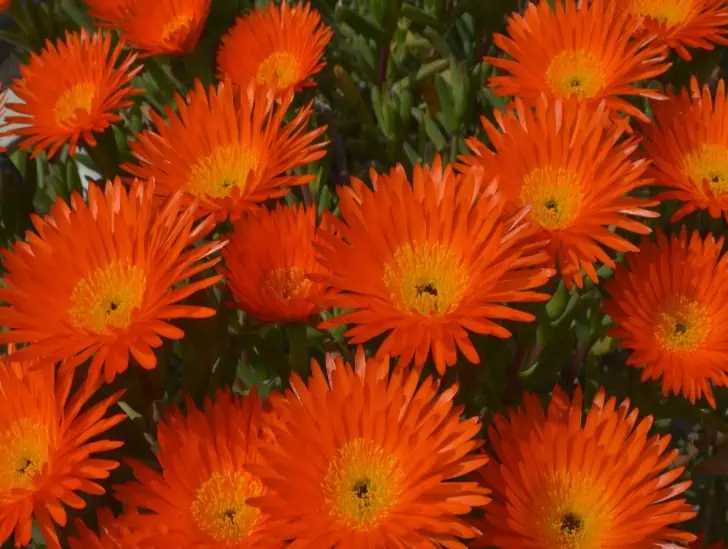
Orange Ice plant flower.
It can brighten up your space with bright daisy-like flowers and is low maintenance

If you go the seed way, use a small container to sow your seeds. Press the seeds lightly into the soil, do not cover entirely because the seeds will require light for germination. Make sure that the container is kept moist for about 15-20 days until germination. 

Transfer your container to a sunny indoor spot or use artificial plant light sources. Alternate darkness with light at a ratio of 2:1 as plants also require darkness to grow. The taller your plants grow, the more distance between the fluorescent lights and the plant.

The Best Conditions for Your Ice Plant to Bloom

Water

The water needs of an Ice Plant will differ with seasons. In very hot periods, we suggest watering your plant every week. If the conditions are warm, you can do it once in two weeks. During the colder seasons, the plants require little to no water. Before the winter, make sure that your plant is dried out to avoid too much moisture. Drain excess water, do not let your Ice Plant sit in water.

Light

Full sun is necessary for your Ice Plants to flower bountifully. We suggest at least six hours of direct sun exposure. They can still grow in partial shade but do best in Plants that do not get enough sun, tend to be weak and leggy.

Ice plant receiving a direct sun light.
Full sun is necessary for your Ice Plants to flower bountifully.

Soil

The Ice Plant thrives in dry soil that has excellent drainage. If the soil is dense like clay, your plant will not grow. The best soil is sandy or gravelly soil with minimal or no nutrients. Place your Ice plant in a container with a well-draining medium.

Temperature & Humidity

Ice Plants do well in dry climatic conditions; they die if subjected to temperatures below 2 degrees Celsius. The ideal temperature range for your indoor ice plant is 10-21 degrees Celsius. Too much moisture can lead to root rot and fungal problems. 

Humidifiers do not work on Ice Plants; avoid placing your plant in rooms with high humidity. For your plant to bloom as you would like, make sure the conditions are dry and within the recommended range.

Flower on the vase.
Avoid placing your plant in rooms with high humidity.

Fertilizer

Ice plants do not require feeding but use either composed or flower-made slow-release fertilizers if you must use fertilizers. Soil nutrients are depleted more quickly in containers than in garden soil. If your indoor plants do not get adequate feeding, they will experience weak growth and lack of blooms.

However, there is an exception; too much nitrogen can negatively affect flower production. If you are using fertilizer and your flowers are not blooming, we suggest you stop using it.

Pruning

Ice plants don’t need much pruning, but a little trimming can lead to more vibrant flowers. The most appropriate time to prune is right after flowering. To start, trim down the plant using pruning shears, and cut it down to a height that will do away with the dead flowers. The ideal time to eliminate old foliage is before new growth, late winter or early spring.

A purple ice plant flower.
A little trimming can lead to more vibrant flowers.

What Can I do for my Ice Plant to Flower?

Ice plants flower differently depending on the species. To get your plants to bloom, you can follow these helpful tips: 

Deadheading

Remove the wilted and faded flowers. If you want your flowers to bloom repeatedly, we recommend removing the old, dying flowers through a process called deadheading. If you leave the dead flowers on the plant, they end up seeding, and the plant stops producing flowers. Dead flowers also attract pests and diseases.

Once you remove the spent flowers, the plant will strengthen itself instead of concentrating the energy on producing seeds. In some plants, all you have to remove are the spent buds. To remove the spent parts, use either your fingers or a pair of garden pruners. Deadheading using your fingers can be referred to as pinching. 

You can remove the parts either once or a couple of times during the growing season. For flowers that form on their stems, you can remove the entire flowering system and cut it off at the bottom of the plant. 

Fertilizing

To keep your plants blooming, feed them consistently throughout the growing season. Use half-strength liquid fertilizer. The best flowering fertilizer is one that has more phosphorus as opposed to nitrogen. Phosphorus promotes flower growth. We recommend using a bloom-boosting fertilizer that will increase phosphorus.

Nitrogen, on the other hand, can get your plant growing but not blooming. If you notice excess growth with no blooming, stop the fertilizing and soak the plant in water to wash off the excess nitrogen. Alternatively, you can try mixing time-based fertilizer into the soil at the start of the growing season.

More Sun

Ice Plants bloom best in direct sunlight. We suggest exposing your plant to several hours of daylight daily for brilliant flowers.

Pay Attention to the Roots

Roots are a fundamental part of your plant because they help in the absorption of water and nutrients. Therefore, if you want abundant blooms, take good care of your roots. When transplanting or digging around the plant, do not cut or damage the roots. Instead, we recommend keeping your plants slightly root-bound for prolific bloom; this action enables the plant to focus more on blooming and less on root development.

A close up image of a flower of ice plant.
Ice Plants bloom best in direct sunlight.

Moderate Watering

Too much watering can cause a lack of flowers. On the other hand, a lack of adequate water can lead to the dropping of flower buds. Avoid both extremes and water your ice plant moderately throughout the flowering season for the ultimate bloom.

Why Are My Ice Plants not Flowering?

Generally, ice plants fail to flower because of the reasons listed below:

  • Pruning Mistakes– The best time to prune your ice plant is after flowering. If you prune at an inappropriate time and do it incorrectly, you can expect a significant reduction in your flowers.
  • Nutrient Inconsistency As earlier mentioned in this article, phosphorus is necessary for the flowering of your ice plant. Therefore, too little phosphorus or too much nitrogen can cause your plants not to flower.
  • Age factor- An ice plant can take up to two to three years to mature fully. So if your plant is young, the chances of blooming are slim.
  • Environmental Issues Environmental factors like light and temperature affect blooming, as we have seen. For example, low temperatures kill flower buds leading to zero flowers. Inadequate light can also be the reason your ice plant is not flowering.

There is no doubt that the ice plant is one of the most colorful indoor succulents. However, getting your ice plant to bloom is not an impossible task. For brilliant flowers, familiarize yourself with the factors that inhibit flowering and provide the right conditions for your ice plant to thrive.

FAQs

  1. Do ice plants do well in pots?

The ice plant is excellent for your outdoor garden because of its drought tolerance, but it can also bloom indoors as long as you place it strategically facing a sunny south window.

2. When should I expect my Ice Plant to bloom?

Ice Plants begin blooming in the spring and can go on for a few weeks. Some species can bloom a second time later on in the summer.

Ultimate Guide: How to Care for Ice Plant

If you are looking for one of the most vibrant succulents to fill your garden or indoor spaces, then you should try Ice plants. Native to South Africa, these heat-loving succulents tend to draw much attention in the landscape thanks to their attractive daisy-like flowers that come in shades of yellow, cream, pink, red, or purple, depending on the plant’s variety. Furthermore, Ice plants are relatively hardy and can survive on some degree of neglect.

So, how do you care for an Ice plant? Since the plant isn’t fussy, you don’t have to do much to keep it happy. Give your Ice plant full sun for at least six hours per day. Like other flowering plants, Ice plants won’t bloom well in shaded areas. Plant it in a growing pot slightly wider than the root ball and water it only when the potting mix is completely dry. Be careful with your watering because it doesn’t like to stay in moist soil. The plant prefers sandy and well-draining potting mix.

In this guide, we discuss everything you need to know about caring for your Ice plant. Read on to learn how to keep your plant healthy and happy.

A Quick Overview of the Ice Plant

The name “Ice plant” is an umbrella term that refers to several plant species. These plant species are mostly grown in urban gardens and spread quite rapidly under the right growing conditions. Sometimes, it can spread so rapidly, invading unwanted spaces.

The plant has more than ten cultivars, all of which are unique and gorgeous in their own way. The most prominent one is the Cooper that produces unique purplish-pink blooms. This succulent can grow year-round depending on the temperature and climate.

Light is essential to its growth which means growing it indoors can be challenging if you don’t have an indoor spot that receives plenty of direct sunlight. The most common pests that attack Ice Plants are Mealybugs and Aphids.

A Purple Ice plant.
These heat-loving succulents tend to draw much attention in the landscape thanks to their attractive daisy-like flowers.

These pests usually feed on the plant, causing severe damage. You can treat light infestations by spraying the affected areas with water. However, for heavy infestation, consider replacing the entire plant instead of chemical treatment.

Despite their name, Ice plants are highly sensitive to cold and prefer hot temperatures with minimal humidity. High levels of humidity can cause the stem and roots of the plant to rot.

How Do You Take Care of Ice Plants?

Now that you have a clear overview of these plants, let us figure out the specific tasks you need to accomplish to make your plant happy and healthy.

1. Site and Potting Mix

These plants usually require exposure to direct sunlight to thrive. Failure to provide them with a sufficient amount of sunlight, the blooms won’t open. So, if you are growing them indoors, you need to find a spot that receives plenty of bright, direct sunlight for at least six hours a day.

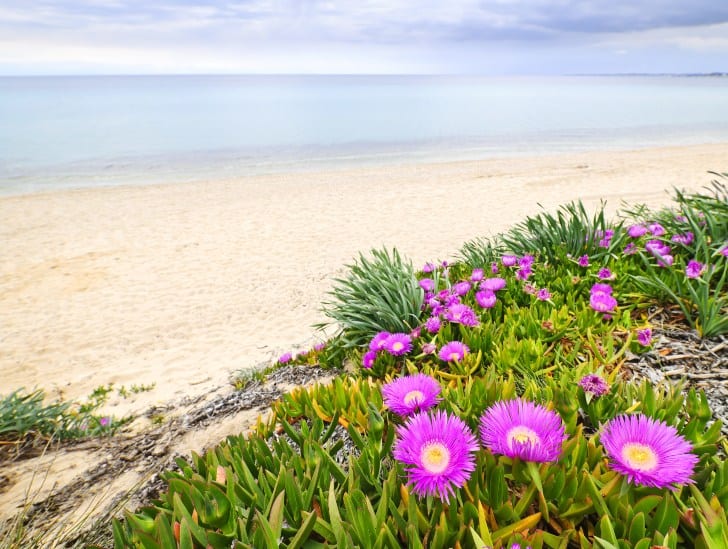
Ice plant along the sea shore.
These plants usually require exposure to direct sunlight to thrive.

That means a west-facing window will be the perfect spot for your indoor Ice Plants. If you are growing them outdoors in your plant or flower garden, find a suitable location that receives sunlight throughout the day. Avoid shaded spots or those that only receive partial sunlight.

For potting mix, ensure you use light, well-drained soil that doesn’t hold water for too long. If you are using growing pots, make sure the potting soil used is of high quality and combined with a sufficient amount of pellets or coarse sand to provide adequate drainage.

Space outdoor Ice plants at least 13 to 20 inches apart to allow sufficient room for growth. Plants grown indoors should be as far apart as possible.

2. Watering

Ice Plants are drought-tolerant succulents and only require minimal watering to thrive. Before you come up with your watering schedule, assess the amount of rainfall your area receives and consider watering your outdoor plants only once or twice per month if your area receives plenty of rain.

A gardener holding a water can.
You should water more frequently if you live in a relatively dry area that only receives sporadic rainfall.

However, you should water more frequently if you live in a relatively dry area that only receives sporadic rainfall.

Cease any watering as fall approaches and allow your ground-grown Ice plants to dry out. This will help protect them when the hard frost hits during the cold winter months. If you don’t give your plant sufficient time to prepare to enter into winter dormancy, it may succumb to winter temperatures.

3. Temperature and Humidity

Ice Plants are well adapted to surviving in relatively warm temperatures where winter front isn’t a significant danger. If you live in an area where winter temperatures drop below 36oF, you should consider growing your Ice Plants indoors to prevent cold damage.

Typically, your plant will do well in temperatures that range between 50oF and 75oF. Some of the varieties can comfortably withstand higher temperatures. An Ice plant will only tolerate lower temperatures for a short period.

Always check the hardiness range of any Ice plant you wish to grow as a perennial to avoid surprises. If you live in a snowy region, consider winter mulching your Ice plants to prevent damage.

4. Fertilizer

Ice plants will survive with minimal fertilization. You will be surprised to learn that these plants are prolific bloomers and will still produce beautiful flowers even if you fail to fertilize them at all.

Upon planting, it is highly recommended you mix a small portion of well-decomposed compost with your regular soil and add some slow-release organic fertilizer before you plant it into the ground.

However, if you are growing your plants in growing pots, you may be required to feed them regularly. Use half-strength fertilizer to feed your Ice Plant during the spring and summer months.

Never feed the plant during fall since it needs to wither a little bit to protect itself from the harsh winter ahead. Weak growth or lack of flowering can be signs that you need to feed your Ice plant.

5. Propagating Ice Plants

One of the most amazing things about these plants is that they propagate easily, especially when exposed to large amounts of direct sunlight. If you want to multiply your Ice plant, you can do so via cuttings, division, or seedlings.

The easiest way to propagate Ice plants is through seedlings. Simply take your Ice plant seed and bed it in a rich composite potting mix with good drainage.

An Ice plant leaf.
These plants is that they propagate easily, especially when exposed to large amounts of direct sunlight.

You don’t even need to cover it. Only press it slightly against the potting mix so that it doesn’t get blown away by wind.  From there, water it lightly and expose it to lots of direct sunlight so that it begins germinating.

Ice plant cuttings work almost the same way as other succulent cuttings. Select a healthy cutting and allow it to heal slightly before you replant it. You can propagate Ice plants from cuttings any time of the year, but we highly recommend against doing it during winter.

The best time to propagate from cuttings would be during summer or spring, when the plant is actively growing. Let your plant rest easy during winter.

Furthermore, you can also propagate by the division method. This is the best propagation method if you intend to plant your ice plant in growing pots. To propagate by division, take out the main plant and slowly split the roots until they form two separate plants.

Repot each of the plants in separate pots and make sure you are using a well-draining potting mix.  Water slightly and allow them to sit in a spot where they can receive plenty of direct sunlight throughout the day.

6. Pruning

Since Ice plants are heavy bloomers, you need to prune them regularly to ensure they don’t invade other spaces.

As your plant starts to awaken in mid-spring and prepare for blooming, inspect it for any winter-damaged or dried-up foliage. If you spot any winter-damaged or dried-up foliage, prune them from the plant.

7. Special Care

Ice plants grown indoors need repotting at least once every year. Consider repotting it in early spring, before new growth starts to sprout. Since Ice plants enter dormancy during winter, it is always good to report before the growing season ends.

A plants being transferred.
Consider repotting it in early spring, before new growth starts to sprout.

Your outdoor Ice plants will benefit greatly from regular mulching, especially if you live in an area where winter temperatures drop to below 50oF.

Consider applying a two to four-inch layer of mulch to the soil layer surrounding your plant and remove the mulch when temperatures start to rise in spring and summer.

8. Pests and Diseases

Mealybugs and aphids can be a nuisance to ice plants. To prevent infestation, observe your plant regularly and take appropriate measures as soon as you spot the pests.

You can also use insecticidal soap or spray neem oil on the affected area for treatment. If your plants are exposed to cold temperatures for too long, they could be susceptible to rot and frost damage.

If you notice wilting or discoloration of the leaves, cut down on the watering and check if your plants are exposed to wet soil for too long.

Ensure you also give them ample space for growth and provide sufficient light for healthy growth.

Common Ice Plant Problems

When grown in proper conditions, the Ice plant is generally non-problematic. The succulent will thrive with minimal care. However, a non-conducive environment can result in a wide range of growth issues. Some of the common Ice plant problems include:

1. Yellow leaves

Yellow leaves on an ice plant is a common sign of overwatering. This plant is highly sensitive to excess water and will die if you don’t take prompt action to correct the problem.

Allow the potting mix to dry completely between watering sessions. Never water your ice plant without checking for the level of soil dryness. Only water when you are fully convinced that the soil is dry.

Also, ensure that the potting mix drains well to avoid this problem. Soggy soil can also lead to yellow leaves and irreversible root rot.

2. Leggy stems

Ice plant is a trailing succulent and tends to grow tall and lanky with age if not provided with enough sunlight. If your ice plant is growing leggy, it might be because it isn’t receiving enough light.

Upon noticing this problem, move your Ice plant closer to a south or east-facing window to take advantage of the natural sunlight or consider investing in artificial grow lights. Regular pruning will also help to keep your ice plant bushy and encourage new growth.

3. Failure to produce flowers

If your ice plant fails to produce flowers, it is likely due to several reasons. Poor soil quality, lack of fertilizer, and inadequate sunlight can all cause this issue.

Ensure you use a nutrient-rich potting mix for your plant and feed them regularly with half-strength fertilizer during spring and summer.

Also, ensure your ice plant receives at least six hours of direct sunlight daily. Invest in artificial grow lights with the correct spectrum and intensity if you are growing ice plants indoors.

Summary

Ice Plants can grow everywhere and at any time of the year as long as you provide them with adequate sunlight, water, and the right soil. These plants are relatively easy to acquire, care for, and propagate.

In fact, you don’t need to be an expert to take care of Ice Plants, but you really need to be mindful of their needs. While they can thrive anywhere, take time to identify the perfect spot in your house or garden that receives plenty of sunlight to achieve better results.

With proper care, your plant will reward your effort with fast growth and beautiful blossoms that can cover the entire of your interior patio garden or backyard plant garden.

How to Propagate Echeveria?

One of the most significant advantages of growing succulents is that it is typically easy to propagate them. It means that you can easily maintain and multiply your succulent collection with little effort. Echeverias are no different since they produce offsets at the base, making it easy to multiply these lovely rosette-forming succulents. If you have been looking for ways of propagating your Echeveria plant, then you are in the right place.

So, how can you propagate Echeveria? Generally, you can propagate your Echeveria in four different ways: leaf cuttings, stem cuttings, separating offsets, and germinating seeds. Separation of offsets is probably the quickest and easiest way to propagate your Echeveria, but it can only be done when the mother plant has produced healthy pups. Propagation by leaf and stem cutting is also relatively easy but requires patience and a little bit more attention. To propagate through seed germination, you must, first of all, collect mature seeds from flowers or purchase them.

In this guide, we discuss everything you need to know about propagating Echeveria. So, let us get started right away.

The Benefits of Propagating Your Echeveria Plant

One of the top reasons you should consider propagating your Echeveria plant is that it increases your collection of these lovely succulents. It also helps you see new and interesting forms of the same species.

Besides, propagating this plant makes it available to your loved ones and friends who might not be able to buy it at a local nursery.

Since propagating Echeverias is easy, you can start it even as a beginner and see new plantlets in your collection without spending any money.

What Tools Will You Need to Propagate Echeveria?

The tools you need will largely depend on the propagation method you choose. If you plan to propagate your Echeveria through stem cuttings, then all you need is a sharp cutting tool, while propagating it through leaf-cuttings requires a slightly different set of tools.

A Echeveria plant.
Echeveria is one the most easiest plant to propagate.

Tools Needed for Propagation via Leaf Cuttings

If you want to propagate your Echeveria through leaf cuttings, then you need the following tools:

  • Rubbing Alcohol
  • A clean cutting tool, i.e., razor blade or sharp knife
  • A rooting hormone powder

Although gloves are not mandatory when propagating your Echeverias with leaf cuttings, most professionals wear them to avoid contact with the plant tissue.

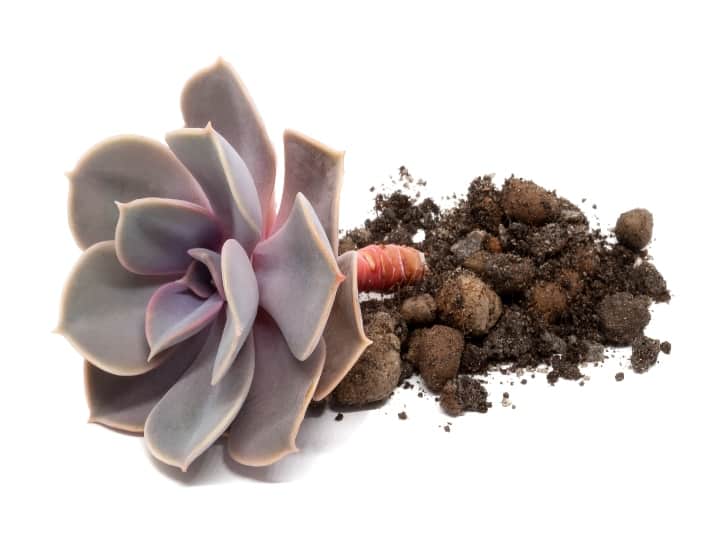
The cuttings, soil, and tools for propagation.
Things Needed for Propagation

Additionally, you will also need a growing medium to place the cuttings so that you can start to grow them almost immediately after cutting the leaves from the mother plant.

Tools Needed for Propagation via Stem Cuttings

If want to propagate Echeveria by stem cuttings, you will need the following tools.

  • A sharp-edged cutting tool.
  • A growth or rooting hormone.

What Is Rooting Hormone and Why Do You Need It?

Rooting hormone powder is a special chemical that helps plants heal better and grow faster after being cut. It takes care of the wounds so that plants can grow normally. It also helps stimulate rooting during propagation by stem cuttings and leaf cuttings.

After making a fresh cut, it is better to immediately dip the tips of the stem in the powdered hormone before planting. This will help your plant root faster and more effectively because Echeveria can take a lot of time before it fully roots.

Propagating Echeveria through Offsets

If you have an adult Echeveria plant at home, there is no need to purchase a new one since you can propagate it easily through offsets.

 An offset is a small plant that grows from the side of an adult plant. It is usually in the shape of a disk, which has developed on one side of the mother plant.

Offsets are also known as pups or babies, and you can propagate them by separating them from the parent plant. When propagating your Echeveria via offsets, you need to be extra careful while cutting them off to avoid any damage.

Steps to Propagate Echeverias through Offsets

1. Start by cleaning your main plant thoroughly with water and rubbing alcohol.

2. Make a clean cut on the offset you want to propagate at least 1-inch below the base of its stem.

3. Use your fingers to gently pull the offset away from the mother plant.

4. Remove all but two leaves on top of the offset before planting it in a 1-inch deep pot with a fresh potting mix. You can either grow it indoors or outdoors once it roots.

Propagating Through Stem Cuttings

One of the quickest and easiest ways to propagate Echeveria is by taking stem cuttings. For this method, you will need a sharp-edged cutting tool like a razor blade or knife to take the required cuttings from the mother plant with a clean and quick precision.

Steps to Propagate Echeveria through Stem Cuttings

1. Choose a stem with a plump node from the mother plant. The node is the area where leaves come out of the stem, and it takes time to form new roots when these nodes are cut.

An Echeveria stem.
Choose a stem with a plump node from the mother plant.

2. Make a clean cut at least 1/4-inch above the second leaf from the top (opposite side of the stem from the node).

3. Remove any leaves from the lower half of the cutting.

4. Dip the fresh cut in rooting hormone before planting it in a small pot filled with growth medium so that it can quickly heal and start to grow new roots. You may also cover it with a plastic bag until you see new growth.

5. When you see new growth, remove the plastic bag and keep the plant in a sunny location with plenty of water until it roots completely.

Propagating Through Leaf Cuttings

To propagate Echeveria through leaf cuttings, all you need are leaves from the mother plant. You will need at least three leaves to make a new plant.

Steps to Propagate Echeveria through Leaf Cuttings

1. Gently tear off the lower half of the leaf you intend to use for propagation.

2. Make a fresh cut or nick on one of its sides about 1/4-inch above the leaf’s base.

A leaf cuttings.
You can propagate your Echeveria in four different methods, one of it is the Leaf Cuttings.

3. Place the leaf cuttings in a small pot filled with growth medium and cover it tightly with plastic to keep out any light.

4. Keep removing any dead or decaying leaves from your plant as they are not likely to root and will only hamper the growth of new plants.

5. You also need to check the plastic covering every day and spray water on it to help your leaf cuttings develop new roots.

6. When you see new growth, remove the plastic and keep your plant in a sunny location until it rots completely.

Propagation through Seed Germination

Lastly, you can also propagate Echeveria through seed germination. This method is highly effective because the young plants are not affected by viruses or fungal infections.

Steps to Propagate Echeveria through Seed Germination

  1. The first thing you need to do is ensure you have mature and well dried Echeveria seeds that will germinate without any problem.
  2. Next, clean the propagation pan thoroughly to ensure they do not infect your seeds with bacteria and fungus.
  3. Fill the propagation tray with enough potting mix to accommodate your seeds.
  4. Sow the seeds on top of the soil, cover it lightly with soil, and spray some water on the soil so that your seeds are moistened all through. You can also keep them moist by covering them with transparent plastic sheets except for an opening where you will use to water them.
  5. The seeds usually germinate and begin to grow in a few weeks or months, depending on the climate and conditions you provide. Once your young Echeveria plants have grown to about 2 inches high, remove their plastic cover and transplant them into small pots filled with growth medium before they outgrow the tray.

Taking Care of a Newly Propagated Echeveria Plant

Newly propagated Echeveria doesn’t require as much attention as its mother plant because it has fewer pests and diseases problems. However, you should still water them regularly, especially if the potting mix is dry and not moist enough.

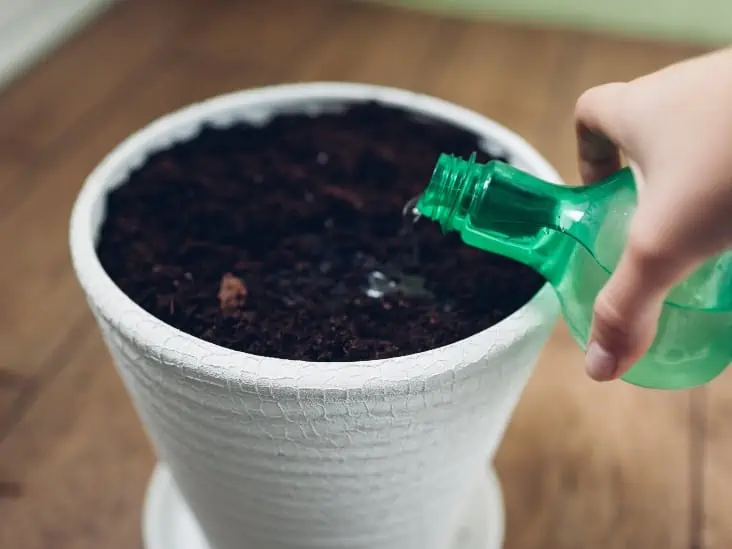
A freshly watered plant
you should still water them regularly, especially if the potting mix is dry and not moist enough.

You may also use slow-release fertilizers to help your newly propagated Echeveria grow faster and healthier. You can also check young plants for any signs of pests or disease outbreaks to prevent them from infecting other plants.

You must cover young plants with plastic sheets if there are no leaves on their stems because they are vulnerable to harsh weather conditions until they grow new leaves.

When this happens, take off the plastic and keep your plant in a sunny location for faster growth and flowering.

When Is the Best Time to Propagate Echeveria?

Spring is the best time to propagate Echeveria, typically from late March to early May. During this period, Echeveria plants experience their most active growth phase.

The combination of longer daylight hours and moderate temperatures creates optimal conditions for successful propagation.

Springtime offers a naturally conducive environment because the weather becomes milder, providing the ideal temperature range for propagation.

It is also important to note that soil tends to dry out at a moderate pace during spring, allowing for optimal moisture control. Before propagating, ensure you have a well-draining potting mix to avoid root rot.

It is essential to avoid propagating Echeveria during winter or summer because winter frost or scorching summer heat can negatively impact your success rate.

How Hard Is It to Propagate Echeveria?

Propagating Echeveria succulents can be rewarding and relatively easy, although the success rate can depend on various factors. Understanding these factors is crucial for increasing your chances of successful propagation.

One crucial factor is the health of the parent plant. Choose a mature Echeveria plant that is healthy, free from diseases or pests, and exhibiting robust growth. A healthy parent plant increases the likelihood of producing viable offsets or leaf cuttings.

Timing plays a significant role. The best time to propagate Echeveria is during the active growing season, typically in spring.

This is when the plants are naturally more receptive to propagation and have higher metabolic activity, increasing the chances of successful root development.

Proper moisture control is also vital during the propagation process. Overwatering can lead to root rot and hinder the development of new roots. Allow the soil to dry out between watering sessions and avoid waterlogging.

It’s best to water Echeveria plants thoroughly but infrequently, ensuring the soil is completely dry before the next watering.

Ultimately, successful Echeveria propagation requires patience and time. It can take several weeks or even months for offsets or leaf cuttings to establish roots and develop into independent plants.

Therefore, it is essential to provide consistent care and refrain from disturbing the newly propagated plants during this critical establishment phase.

Final Thought

You can propagate your Echeveria plant with leaf, stem, or offset cuttings. The process of propagating via leaves is the easiest and most popular method for beginners to try, and it doesn’t require any special tools.

Propagation through offsets will take a little longer, but you’ll get more plants in return if they’re placed in an area where they will thrive. For those who want instant gratification, propagation through stem cuttings may be right for you!

We hope that you’ve found these tips helpful, and we encourage you to share them with family, friends, or fellow gardeners too!

How To Propagate Desert Rose?

Desert Rose is a favorite houseplant if you are looking for a low-attention plant for your garden or decorating your patio. This plant grows in arid locations like rocky outcrops or dry riverbeds, but they adapt well in tropical and sub-tropic environments.

Desert Rose has a short stem that forks into two at ground level, each branch bearing multiple leaves arranged spirally up its length.

When it reaches its blooming period, it produces flowers with shades of white or yellowish-white with a red spot on the lower lip; your home brightens up during this period. 

How can I plant a Desert Rose?

You can propagate Desert Rose from cuttings or seeds. You can purchase Desert Rose seeds at specialty nurseries or online; however, make sure you’re getting a fresh seed. The fresher the seed, the greater your chances of getting a strong, healthy plant. 

The resulting plant will typically lack a thick and fascinating root system above ground when propagating Desert Rose from a cutting. The caudex forms from a seed and is easily noticeable when it grows.

The main benefit of starting with a cutting is that you can perform all sorts of creative things, such as grafting cuttings with one flower color to plants with another. You may also join many distinct cuttings together to make an attractive arrangement.

Starting Desert Rose From Cuttings

Step 1: Make your cuttings

Identify a healthy mother plant to make your cuttings from. Ensure you have clean, sterilized gardening tools to create a cutting.

Cut healthy branches at least six inches which is ideal for rooting, and lay them on a paper towel or newspaper in a dry place away from sunlight. Allow the cuttings to dry before planting for at least 48 hours.

Step 2: Prepare Potting Mix

After two days, prepare a container or pot with a gravelly, well-drained potting mix. Alternatively, you may use a commercial mix designed for succulents and cacti or one made up of equal parts of potting soil, peat moss, coco coir, sand, and gravel.

Remember to line the pot’s bottom with a layer of coarse gravel for better drainage.

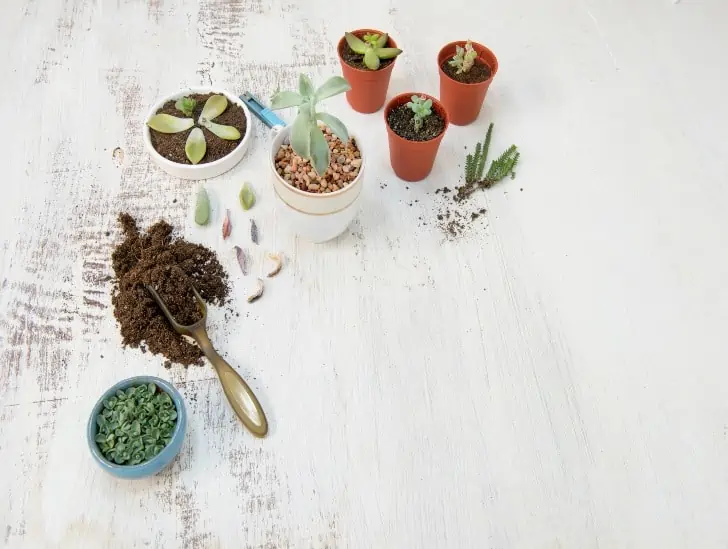
A soil, plant and tools for gardening.
You may use a commercially mixed potting mix or gather all materials needed such as soil, moss, coco coir, sand, and gravel.

Step 3: Plant The Cuttings

Sprinkle the cut end with rooting powder to enhance rooting and poke it into the potting mix about two inches deep. Soak the planting mix thoroughly with a spray bottle and let it drain. Mist every few days to keep the soil wet but avoid getting it soggy. 

Desert Rose dislikes it when the soil is soggy; if you allow its soil to become overly damp, the roots will rot.

Proceed to place the container in a warm, bright indirect light and still setting indoors or outside and monitor it closely. 

If you’re growing it indoors and start growing leaves, turn it every day or two to ensure it gets equal light. It will bend toward the sun if you don’t do this.

How to Propagate Desert Rose from Seeds

To plant Desert Rose seeds, prepare your growing medium of 50% coco coir or peat moss and 50% perlite or sand. Place the mix in a tray or shallow pot, and ensure after planting the seeds, you place the pot in bright indirect light.

Another thing, you may provide a warming pad to create the perfect temperature for seed germination of between 80 to 85°F. Here is a quick fix to plant your seeds:

Step 1: Plant The Seeds

Place an equal amount of seeds in each container. Evenly sprinkle the seeds across the surface of the medium and just barely cover them with the planting mix.

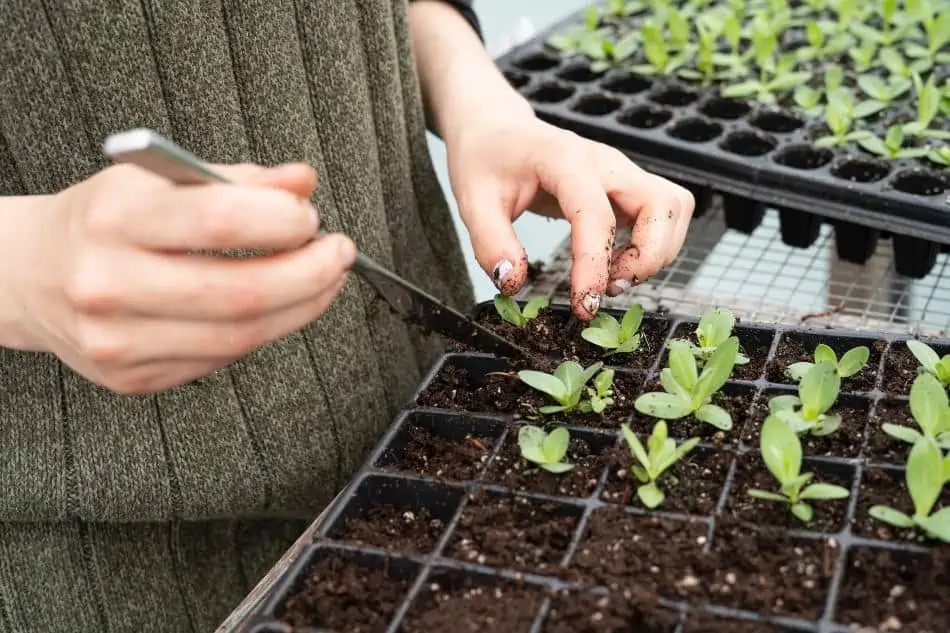
A seedling tray.
When putting the seeds in a container, make sure to evenly spread them out and cover them with potting mix.

Saturate the growth medium uniformly with water using a spray bottle. Repeat this procedure on alternate days until the seeds sprout.

Step 2: Care for The Seedlings

Once the seeds start sprouting in approximately three to seven days, continue to mist them once or twice a week to keep them moist without overwatering.

Seedlings should be large enough to be transplanted into individual containers in around a month.

When the plant sprouts new leaves, it’s time to move it to a sunnier location. Grown Desert Rose plants enjoy bright direct sunlight.

You can plant Desert Rose plants directly in the ground outdoors, but since they are not cold tolerant, growing them in containers for easy moving indoors during winter is preferable.

Winter makes the leaves droop and might kill the plant when exposed to cold for long.

How Can I make Desert Rose Grow Faster?

For your Desert Rose to grow faster, ensure you provide enough or sufficient of these conditions:

  • Sunlight
  • Water
  • Fertilizer
  • Keep away pests and diseases
  • Pruning

Your Desert Rose will grow to bloom if you get all these conditions correct and provide the right care. The blooms last long depending on your environment and are attractive to hummingbirds and pollinators like bees and butterflies.

How Often Should You Water Desert Rose? 

The Desert Rose likes a warm, rainy season but cut back on watering at the onset of winter. Always check on the soil; once the soil is dry, water moderately for at least twice a week. Water it moderately in warm conditions and sparingly during winter.

Don’t let your soil get soaked in water as it can kill your plant.

Soak the soil, but never let it become wet. Wet soil will make the roots rot, killing your plant. You can plant your plant on an inclined landscape to encourage water drainage if grown outdoors.

Outdoor grown Desert Rose grow and become drought tolerant, making them need little watering once they mature. Water deeply during severe drought with a slow drip for some time during the coolest times of the day. 

How Much Sunlight Does Desert Rose need?

The Desert Rose plant loves sunlight, and it will bloom to its full potential with direct, intense sunshine with temperatures between 70°F up to 100°F.

They may also flourish in the morning or afternoon sun, but they do not flower as frequently. These plants become lanky and weak-stemmed when kept under shade.

A young desert rose.
They require intense sunshine to reach its full potential.

Too much sun may also affect them, especially the midday sun, which may cause a burning effect on its leaves. When the weather changes and temperatures fall to 55°F or below, it will go into a dormant phase. Prune the plant and bring it inside or provide a good shade with warm conditions.

Add Some Nutrients for the Plant Growth

You can give your plant a light feeding of water-soluble liquid fertilizer or slow-release fertilizer every few weeks during the growing season. You may use Epsom Salt to give lusher and greener foliage for a start. 

Give your Desert Rose a diluted feeding once every two weeks in the spring as the plant gets up from its winter dormancy.

Reduce the frequency to once a month during the summer. As winter approaches, stop feeding the plant and let it wind down for dormancy.

If you bring your Desert Rose indoors for the winter, give it one moderate feed in mid-winter; however, this is not required because the plant will be in a state of semi-dormancy.

Which Pest and Problems Affect Desert Rose?

The most prevalent problem with Desert Rose is root rot. Over-watering is critical to note, as these plants have thick roots that retain water. These plants do not require or want to be in the water for long; therefore, you are causing harm rather than good by overwatering them.

Remember to water cautiously and ensure that your plant’s drainage system is functioning correctly.

Pests that may harm Desert Rose plants include:

  • Mealybugs
  • Aphids
  • Spider mites

You can treat these pests using neem oil insecticides. For other pests such as caterpillars, handpick them from your plant. Always wear gloves when picking them, and later treat the plant using Bacillus thuringiensis (Bt) as soon as possible.

The caterpillars can devour and reduce your Desert Rose plants to a stem very fast. Once they have defoliated your plant and you treated the plant, don’t despair. The plant will spring back new leaves.

Is Pruning Necessary for Desert Rose?

Because these plants can grow to be quite huge, frequent pruning and under-potting are required to keep them in check.

Constant pruning will keep your plant vigorous, fresh and well-groomed.

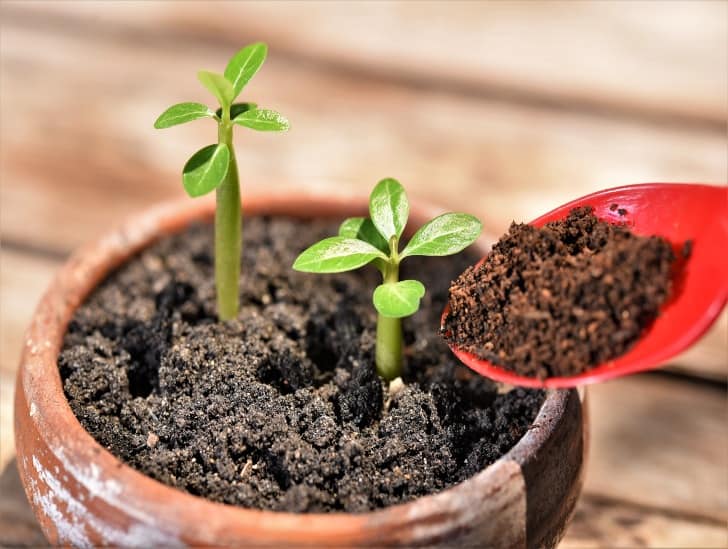
A young plant in a pot having fertilizer.
Pruning can make your desert roses become fresh and well-groomed.

During the growing season, trim or cut back undesirable growth. Trim back excessive development before bringing the plant inside for winter to make the dormancy period more effective. Furthermore, it will be simple to maintain a smaller, more compact plant indoors throughout the winter months.

Prune your Desert Rose before placing the plant outside come spring. Remove any dead or damaged leaves and vegetation to allow low competition for nutrients. Reduce straggly branches to improve the form of the plant. These limbs may be used as cuttings to grow new plants.

Bottom Line

Now you know all you need to do to make your Desert Rose grow faster. One cutting of this beautiful plant is enough to provide you with enough for your garden. 

Furthermore, you can graft it with several plants like oleander and have it style your home when it blooms with unique flowers.

All these wonderful things make Desert Rose become part of the family. As you care for and enjoy this fascinating plant throughout the seasons and years, you’ll come to think of it as a valued friend.

Ultimate Guide: How to Care for Crown of Thorns Plant

The Crown of Thorns Plant, popularly known as the Christ Plant, is one of the most liked ornamental indoor succulent plants. Native to Madagascar, this bushy and slow-growing plant flourishes above 55°F, the average temperature for most homes. These fascinating plant flowers almost all year round. The Christ Plant is a highly sought-after indoor plant because it is super easy to care for, and all that is required is adequate light and water.

The woody stem serves as an adequate water reservoir. The sharp thorns, bright green leaves, and the bright leaf-like structures below the flower make this unique plant stand out in your home. We recommend wearing gloves when handling the plant because it is poisonous, and the sap can be toxic not only to you but also to your pets. However, the crown of the thorns plant can last for a long time with proper care. Read on to learn how to take good care of your crown of thorns plant.

How much sun do crown of thorns need?

This indoor plant is a sucker for bright light. We suggest placing your plant in indirect light because direct sunlight can damage your leaves. Choose the most illuminated spot in your home for this ornamental, preferably near a sunny window for at least 3 to 4 hours of direct sun. After a week, give your potted plant a quarter turn for even growth.

If your plant can not get enough light in your house, take it outside for the required amount of sunlight. Remember, your plant cannot bloom without enough light. During winter, the light levels are low, and you can move the plant to a cooler spot with sunlight or supplement using artificial sources. 

How often should you Water your crown of thorns plant?

The Crown of Thorns plant might be the plant for you if you have a busy lifestyle as it thrives on neglect. You can water your plant less frequently because it stores water in its thick stems and prefers slightly dry soil. The Christ Plant has different watering needs depending on the season. Your plant will require very little water during winter, but during late spring and early fall, you should water your Crown of Thorns plant when the soil is halfway dried out. 

A crown of thorns plant that has just been watered.
It stores water in its thick stems and prefers slightly dry soil.

To confirm whether your plant needs water, use your finger. In the winter, the soil should dry to a depth of 2 to 3 inches before watering. An inch’s depth of dry soil should get you watering your plant during spring and late fall. Fill the pot until flooded, wait for the excess water to drain, and empty the saucer below the pot. You can also spray your crown thorns with a weak saline solution as the plant thrives in the seaside. Allow the soil to dry because excess moisture can lead to root rot. If the leaves turn yellow, reduce the watering.

Humidity & Temperature Tolerance

Succulent plants store water, so average to low humidity is enough; the crown of thorns plant is no exception. The plant does well in warm temperatures starting from 55° F. Do not worry about taking your plant outdoors during the summer as it can withstand temperatures of up to 90°F/32°C.

A plant  having indirect sun light.
The plant does well in warm temperatures starting from 55° F.

Your plant leaves will start falling off, and your plant might have difficulty flowering if the temperature is lower than required. The plant thrives in low humidity and high temperatures.

Pruning

Fast-growing or bushier Crown of Thorns will benefit from pruning and trimming. The preferred time to prune and shape your plant is right after blooming. Preferably during autumn and in time for spring when new growths start showing. A few branches appear at every pruned branch leading to a bushier and fuller plant. 

Before pruning, sterilize your shears or scissors to avoid passing on diseases from one plant to another. Then, cut the stem tip at its point of origin to stop stubby and unattractive branches. 

Remove the aged leaves and stems and get rid of them for good. The main reason for trimming is to keep your plant in shape. If the branches lean towards a direction you would not want, trim them. 

Cutting a branch of a plant.
Sterilize your shears or scissors to avoid passing on diseases from one plant to another

Remember to wear gloves as the poisonous white milky sap can irritate the skin, eyes, and mouth. We recommend cutting back your crown of thorns when your children and pets are not around because even small ingested amounts can irritate the mouth and cause stomach upsets. In addition, the sticky sap can stain your clothes, so wear old clothing when pruning.

Pests & Diseases

Infestation is not significant for this tough plant because a crown of thorns is very pest-resistant. Problematic pests include Scale, Mealybugs, and Aphids. Be observant and look out for these harmful organisms around the growing tips because pests are drawn to new growth. 

If the pests are a few, manually scrape them off by using a pump-up water sprayer. Another good option you could try is to wipe the foliage with diluted soap or dishwashing liquid using a cotton ball or swab. Running water is an equally good option. 

Alternatively, swab with cotton dubbed in alcohol or get rid of the infected part altogether. Pests multiply quickly and may infect your other house plants, so make sure you treat any infestation straight away.

Flowering

A Crown of Thorns Plant produces colorful bracts in the early spring and through late summer. Under the right set of conditions, the crown of thorns can produce flowers all year. The flowers are in clusters of red and yellow and shades of pink, salmon, red, and bicolor. 

The flower buds are located in the leaf axils of each leaf. If you want your plant to bloom all year round, choose a sunny location, use good potting soil, water as needed and use a fertilizer high in phosphorus content during the flowering stage.

Soil & Fertilizer

Crown of Thorns requires stable soil as they tend to grow top-heavy. Layer with gravel at the bottom for excellent drainage. Avoid light-weight mixes, instead use a potting mix amended with sandy, quick-draining soil. 

The mix should be two-thirds cactus or succulent soil mix and third perlite or coarse sand. Well-drained soil will prevent root rot. However, poor drainage can also lead to a sudden decline in leaves.

A top view of a plant, shovel and a soil.
It requires stable soil as they tend to grow top-heavy.

The plant requires little nourishment. Therefore, we recommend adding the fertilizer as a solution containing 150-275 ppm fertilizer at the planting stage. You can also add slow-release fertilizer. Never feed your Crown of Thorns plant with fertilizers containing boron, as your plant can react sensitively to the micronutrient.

For regular feeding, dilute the water-soluble fertilizer to half the recommended strength and feed every month. The plant food should be low in nitrogen and high in phosphorus. Do not add fertilizer in winter when the flowering period is over. Too much fertilizer can lead to leaf tip burning because of excess salt build-up in the soil.

Repotting

The Crown of Thorns plant only requires repotting every 2-3 years because it is a slow grower. Shift your plant to a larger pot with a drainage hole to avoid a mushy medium and root rot. We recommend just a few inches larger, nothing bigger. 

You can replace a few top inches of the potting mix with a fresh mix for larger plants. If you prune the extra stems and only water your plant as required, you might not need to report your plant after a short time.

Repot your mature plant that no longer fits in its container to keep it in good health. We suggest doing this during summer because this is the time when the plant is at its hardiest. How do you report your plant?

  • Gently remove the Crown of Thorns plant from its current container. 
  • Loosen the soil
  • Prune old and dead roots
  • Make ready an inch thick of sandy well-draining pot mix
  • Place the plant slightly lower than its initial placement 
  • Fill spaces with the rest of the mix
  • Relocate your pot to a sunny window with at least 3 hours of direct sunlight.

Propagation

Propagating your Crown of Thorns Plant from stem cuttings is relatively easy. First, take cuttings from the younger branches in the spring and early summer. You can use any sharp blade, such as a simple razor, to cut at the point where the branch meets the trunk.

Immediately after cutting, dip the end of the stem tip cutting in warm water and spray the original plant with cold water on the trimmed areas to avoid the sap from oozing out. Dry your cuttings on a paper towel for a few days. Then, immerse the hardened ends of the cuttings in a rooting hormone product and poke them into the moist soil.

A top view of a red Crown of thorn plants.
Immerse the hardened ends of the cuttings in a rooting hormone product and poke them into the moist soil.

Move the pot to a warm location with bright and indirect light for some time. Do not water the plant for a few weeks. Your cutting should develop roots after about six weeks. If you tug gently on the cutting and there is some resistance, the roots have already formed. Begin watering lightly after about a month when new signs of growth appear.

Crown of thorns problems & How to Avoid them

No Flowering

Lack of blooming is a common issue with indoor plant growers. Give your plant at least a year if it is still young. You might want to check on the amount of light your plant is getting if your plant is not flowering. Do not place your plants in a dark room. Lack of nutrients is another factor. Apply fertilizer with a high phosphorus content to encourage flowering.

Yellow Leaves

The most probable reason for your plant leaves turning yellow is too much watering. Reduce the amount of water, especially in the winter. Overwatering will cause the roots to rot; when their function is impaired, the entire plant will lack the required nutrients leading to signs of dying, such as yellow leaves. Once you notice yellowing, stop adding water and place the pot under sunlight for faster evapotranspiration.

Toxicity to Pets

The crown plant is mildly toxic to pets. If your pets ingest the milky sap, they will exhibit symptoms such as stomach upsets and mouth irritation. Consult your Vet immediately in case of ingestion. 

Indoor planting is not as complicated and time-consuming as it appears. Instead, try out a low-maintenance plant that can fit perfectly into your schedule, like the Crown of Thorns Plant.

How to Propagate Air Plant?

Air plants, also known as Tillandsias, are drought-resistant plants that are relatively easy to grow and make remarkable house plants. With just a single air plant, you can easily multiply your collection. The most important thing you need to do is know when your air plant is ready to be propagated and act swiftly before it becomes too late. The plant doesn’t need soil to root because it gets its essential nutrients from air and water.

So, how do you propagate air plants? The easiest way to propagate air plants is through pups. You will need to carefully peel back the plant’s leaves or cut them off to access the pups at the base. Ensure you feel the area where your plant connects with the roots system to feel the pups before you start cutting the leaves. Once you have the pups, you can root them in water or soil. You can also propagate air plants by germinating seeds or rooting stem cuttings.

In this blog post, we discuss everything you need to know about propagating an air plant. Read on to learn more.

Propagating Air Plant Using an Offset/Pup

The truth is that there are several ways of propagating air plants, but dividing pups is perhaps the easiest, most effective, and most common propagation technique.

It is highly recommended that you conduct the process of pup separation during the morning or early afternoon hours.

The entire process of separating pups from the mother plant is relatively easy and doesn’t consume a lot of time. All you need is a sharp knife or razor blade, some kind of light, and an excellent place to grow the pups.

Feel the base of the mother plant to ensure there are pups. Pull the leaves up and carefully cut the pup away from the mother plant right at the base. Be careful to avoid damaging the pup or error on cutting more from the mother plant than what is necessary.

Cutting pups from the mother plant is an easy process that almost anyone can perform with ease. Sometimes, the positioning of the pups can allow you to easily snap it off without using a cutting object.

Once you have removed the offset, feel free to grow them just like you would with a full-sized air plant. It is that simple. You can decide to root the pups in potting mix or water.

The most important thing you need to do is keep the pup fully hydrated by placing it in a bowl of water.

An air plant in a pot without soil.
You need to keep the pup fully hydrated by placing it in a bowl of water.

Some people prefer mounting the offset on a growing board using crafting wire and setting it in a relatively bright spot indoors. If you don’t have a good spot indoors, feel free to position your pup outdoors in a relatively shaded area.

However, if you are propagating your air plant during winter, ensure you keep your newly separated offsets indoors so that they don’t suffer frost damage.

When Do Air Plants Start Producing Pups

Air plants will generally start producing offsets after their first blooming cycle. Sometimes, it can take them up to six months to start producing pups. Some varieties take much longer to bloom before they start producing offsets.

Patience is a virtue you will need when it comes to propagating air plants. These succulents tend to do things in their own sweet time, and there is nothing you can do about it other than wait.

The pups serve as a beginning of an entirely new and independent air plant that will eventually mature, bloom, and start producing its own set of pups.

Air plant in a small jar with water.
Plant pups normally grow after the first blooming cycle of an air plant. Sometimes, it can be up to six months.

It is highly recommended you let the pups grow to at least one-third or half of the mother plant size before you cut them off and propagate them separately.

In the wild, the pups usually remain attached to the mother plant until it dies. Once the mother plant dies, the pups develop into a new beautiful plant. Therefore, removing the offsets isn’t necessary if you want to let them grow out naturally.

How Many Pups Does an Air Plant Produce?

The number of pups an air plant produces depends on the plant’s species. However, the typical Tillandsia species usually produce between two to eight pups.

Even the time the offsets are produced will depend on your plant’s species.  Some air plant species start producing pups before their flowering cycle starts, while others will take much longer after blooming before they begin to produce pups.

What Can You Do to Encourage Pup Growth?

Normally, your air plant should start producing pups after the blooming cycle without any problems. The time it takes before your plant starts to bloom may vary, but the fact is that it will bloom at some point and produce pups.

However, some air plant varieties, such as the xerographica, are relatively slow to bloom and produce offsets. Your air plant requires exposure to sufficient light, airflow, and water to flower and produce healthy pups.

image of xerographica plant
This is an example of a xerographica plant

The exact amount of light intensity and exposure your plant will require to produce pups will depend on its variety. You can also use plant fertilizer specially formulated for air plants to encourage blooming and subsequent pup production.

But you must keep in mind that fertilizer has to be used in moderation and doesn’t replace proper care and growing conditions.

What Happens If I Don’t Separate the Offsets?

In the natural habitat, the pups are usually attached to the mother plant until it dies. You can also take the same route if you don’t want to separate the pups and cultivate them into new plants.

There is no harm in failing to separate the pups, and it only gives you a large ball of plants which is relatively rare.

So, if you want something unique for your garden or indoor plant collection, just leave the pups attached to the mother plant and see what will happen.

How can You Make Your Air Plant Flower?

So far, you already understand that flowering is the recipe for pup production. So, if you can get your air plant to flower sooner, you can be sure of pup production.

As long as your plant is healthy and you take good care of it, flowering shouldn’t be a problem. But there are still a few things you can do to accelerate the process.

The most critical thing you need to do is ensure your air plant is getting enough sunlight. Position it on a north-facing window or in a good spot where it gets partial shade. If you notice that isn’t helping much, consider transferring your plant into a brighter spot.

A seedling planted.
To make your air plant flower faster, you need to provide enough sunlight to accelerate the process

Water your plant regularly using a combined method to ensure it is absorbing enough water needed for growth and flowering. Consider soaking your air plant in water for at least 30 minutes per week if you stay in a humid area.

Water it more often if you notice it is drying out quickly, especially during the hot summer months.

Lastly, fertilize your air plant at least once a month during the active growing season. Fertilization will promote faster growth and keep your plant well-fed for healthy blooming. Just ensure you use an air plant-specific fertilizer or bromeliad fertilizer.

Propagation through Germinating Seeds

You can also propagate air plants through seed germination, although it takes a lot of time to achieve desired results.

Collect seeds from your existing flower plant after the flowering season. Soak the seeds in a bowl of water for between three and four weeks until they start to swell and grow in size. That is an indication that they are starting to germinate.

You don’t need to cover the seeds nor expose them to direct sunlight while they are soaked. If your plant doesn’t produce seeds during the flowering season, consider purchasing the seeds from your local nursery.

seed germination process
One way to also help your air plant propagate is through seed germination

Once your seeds have swollen and started showing signs of germination, get them out of the water and place them on a piece of cheesecloth in indirect sunlight. Ensure you spread the cheesecloth in an area that receives plenty of indirect sunlight, such as your patio or porch.

Spritz the seeds with water at least once every week. If the seeds aren’t getting enough water, they will slowly start to wither and curl.

You can also nourish the germinated seedlings with half-strength essential liquid fertilizer. Ensure the liquid fertilizer you use is specially designed for air plants. Use a spray bottle to fertilize the seedlings.

Once the seedlings have grown to about one or two inches, transfer them to their own containers and start taking care of them. Avoid overwatering them, and keep in mind that these succulents grow slowly. Sometimes, it may take up to nine months for the plants to reach their full size.

Can You Propagate Air Plants Through Cuttings?

While it is indeed possible to propagate air plants through cuttings, there’s a catch. These plants can only be propagated through offset cuttings since they cannot regenerate from leaves or stems, rendering these types of cuttings unsuccessful for propagation purposes.

Propagation through offset cuttings follows the same steps described above for normal propagation through offsets.

Gently remove the offset from the parent plant using clean scissors or pruning shears and allow it to cure or dry for a day or two to eliminate potential rot issues.

Once the offset has cured, plant it in a suitable growing medium or mount it onto a desired surface to spur growth.

After planting, ensure that the new offset receives appropriate care. This includes providing sufficient air circulation, indirect light, and occasional misting or soaking to maintain the required moisture levels.

Taking Care of Newly Propagated Air Plants

Congratulations on successfully propagating your air plants. However, that was only the first step in ensuring that you multiply your plant collection successfully.

The next part involves taking care of the newly propagated plants so that they grow into mature air plants.

Place your newly propagated air plants in a location with bright, indirect light. Avoid direct sunlight because it can lead to irreversible sunburn.

An east or west-facing window is usually ideal. If you’re unsure about light levels, opt for more shade rather than excessive light.

Since air plants thrive on good air circulation, ensure there is adequate airflow around newly propagated plants.

Consider placing them in an area with good ventilation, such as a balcony. This helps prevent moisture buildup and reduces the risk of stem rot.

Mist your air plants 1-2 times a week or gently soak them once a month. Use a spray bottle to mist the plants thoroughly.

For soaking, submerge the plants in room temperature water for about 20-30 minutes, then allow them to dry completely upside down to prevent water from pooling at the base.

Lastly, consider feeding your newly propagated air plants with a diluted, balanced, water-soluble fertilizer once a month during the active growing season (spring to early fall).

However, you should avoid fertilizing the plants during the dormant winter months.

Final Thoughts

That is it about air plant propagation, and we hope you have learned how to grow your plant collection. The most important thing is to ensure that you are taking good care of your younger air plants and watering them only when necessary. It is now time for you to go out there and start propagating your air plant to increase your collection.

Ultimate Guided: How To Care For Crassula Ovata?

The Crassula Ovata, also known as the jade plant, is a small succulent that grows up to 3 feet tall and 2 feet wide. You don’t need luck in caring for the jade plant; they just require a little work and attention to keep them alive and attractive. 

A Crassula Ovata that is well taken care of is more attractive, especially if you place it in the garden or inside your home in a beautiful container. Let’s dive into how to grow, care and finally identify various types of crassula plants.

Planting Crassula Ovata

Are you looking to plant Crassula Ovata for the first time? Well, here are some things to note to ensure a healthy jade plant.

Choose a wide and sturdy pot with a moderate depth since jade plants may grow top-heavy and fall over.

Use soil that drains appropriately; excessive dampness might cause soft leaves and fungal diseases like root rot. However, if you want to grow succulents in a plastic pot, ensure it has adequate drainage. A 2:1 ratio of potting mix to perlite is ideal. Alternatively, use pre-made cacti or succulent planting mix.

Watering a jade plant too soon may lead to root rot. It’s critical to wait at least one week before watering after planting, allowing the roots to settle and heal from any damage.

ProTip: Keep the jade plant root-bound in a small container and restrict water to encourage it to blossom. In the winter, cooler temperatures promote bloom.

Growing Jade Plant From Stem or Leaf

Crassula Ovata is very easy to grow from a stem or its leaf. When grown outside and a leaf falls, the chances a new plant will grow from it are high.

A pot of plant.
Jade plants may grow top-heavy and fall over

Here is how you can grow a jade plant from leaf or stem:

  1. Take a stem cutting or remove a leaf from a well-established plant. A good stem cut should be 2–3 inches long and have at least two pairs of leaves.

    Allow a stem cutting or leaf to sit in a warm location for several days, about four days. The cut area will form a callus, helping to prevent rot and promote rooting.
  2. Get your pot and a good-draining potting mix. Ensure the soil is not wet but slightly moist to prevent leaf or stem cutting rot.
  3. Take the leaf and set it on top of the soil. Cover the cut end with some soil. Make sure you don’t apply too much soil to it. For stem cutting, place it upright in the soil. If it does not stand by itself, prop it up with a few rocks or toothpicks.
  4. Set the pot in a warm, bright location with indirect light. Don’t water it.
  5. After a few days, the leaf or cutting will start to develop roots. You can give the plant a slight poke or tug a week after to see if it has rooted itself in place. Suppose it hasn’t; wait a little longer before testing it gently every two days.
  6. When the plant appears to be firmly rooted, water it thoroughly and gently. You may use a turkey baster to apply a fine water spray without disturbing the roots too much.

    Ensure that the top layer of soil is not only wet, as you want to promote the new jade plant roots to grow downward for water rather than up toward the surface.
  7. Allow the soil to dry between waterings and keep the plant out of direct sunshine until at least eight weeks.

How to Care Crassula Ovata

Now let’s learn about how you can care for your jade plant and pass it down through generations. Some of the common factors to consider are light, type of soil, and watering.

Read on as we discuss each and every factor in detail.

Light

Jade plants require at least 6 hours of direct sunshine per day. Young plants should be exposed to bright, indirect sunlight; adult jade plants can withstand more direct sun exposure.

A plant near the window.
Young plants should be exposed to bright, indirect sunlight.

If jade plants are grown in low-light conditions, they may become leggy and top-heavy. This condition makes them vulnerable to damage if they fall over or can no longer support their own branches!

Water

It’s critical to water jade plants correctly! The most common problem that people have with their jades is improper watering

  • In the spring and summer: When the plant grows, it will need more water than at other times of the year. Wait until the soil has dried out before watering it again. This ensures the soil is sufficiently wet throughout—not just at the surface. Because of this, you may end up watering it once a week or once a month—it all depends on how quickly its soil dries out.
  • In the fall and winter: The plant may pause or experience slow growth during this period; it may go dormant. At this time, it will require less water. Water it less frequently than in the summer and spring. Fully grown jade plants might require watering only once or twice during this period.
A plant being watered.
When watering, try to avoid splashing water on the leaves, as this might cause them to decay in a humid atmosphere.

When watering, try to avoid splashing water on the leaves, as this might cause them to decay in a humid atmosphere.

Water that contains too much salt can burn or kill jade plants. If your tap water isn’t ideal, use filtered or distilled water instead.

If the plant’s leaves begin to fall, become shriveled, or develop brown spots, it is an indication that it requires more water. Alternatively, if the plant is receiving too much water, the leaves may get squishy and waterlogged.

Soil

Crassula plants thrive in sandy, rocky blends created especially for succulents, and they require well-draining soil. They prefer neutral to slightly acidic soil, but even highly high pH levels seldom harm the plant. The roots of Crassula plants can rot easily in boggy, wet soils because of their sensitivity.

A plant preparation.
It thrive in sandy, rocky blends created especially for succulents, and they require well-draining soil.

Temperature

Jade plants thrive at room temperature 65° to 75°F, but they like it a bit cooler at night and during the winter down to 55°F.

Keep in mind that jade is not frost tolerant, so if you keep it outside during the summer, bring it inside as soon as temperatures drop below 50°F in late fall.

When caring for Jade plants during winter, move jade plants away from chilly windows and out of drafty rooms. Jade plants’ leaves may fall as a result of cold temperatures.

Maintain Shape

Pruning is quite bearable, and you should do it in the early spring. Start by cutting off any deformed or sick branches. Then imagine the look you want for your tree and go until you’re 1/3 of the way through its development, taking thin, clean cuts just above a branching point or node. 

When you cut back a node, two new branches will grow from that point, so cut where you want to see more fullness.

Add Some Fertilizer

Jade plants don’t need high levels of nutrients, so feed them sparingly. A diluted combination of a regular liquid houseplant fertilizer or a fertilizer designed for succulents and cacti should suffice. Also, make sure you read how to apply the fertilizer on the package.

Repotting

In a tiny pot, jade plants don’t mind being root-bound. Keeping them root bound will make a Crassula Ovata smaller and easier to handle.

Repot young jade succulents every 2 to 3 years to stimulate growth if they have overgrown the current pot. For older jade plants, 4 to 5 years repotting is okay or as needed for overly grown jade plants.

A plant being transferred.
Repot young jade succulents every 2 to 3 years to stimulate growth.

The ideal time to transplant is in the early spring, just as the growing season begins. Wait a week or two after repotting before watering the plant. 

Diseases and Pests

Although pests and diseases may vary between species, most Crassula plants are plagued by aphids, spider mites, mealybugs, and other typical insect pests—mainly when cultivated indoors. 

Pest problems are best addressed with non-chemical techniques that may not kill the plant, such as neem oil or other horticultural oils.

Looking for Different Types of Crassula Plants?

Jade plants come in a variety of hues, shapes, and sizes. Many different types of jade plants are available, ranging from the common green-leafed jade to several variegated types. Here are some interesting crassula plants you might plant:

  • Crassula pellucida variegata: This plant’s leaves are heart-shaped and variegated in pink, greens, and ivory white.
  • Crassula erosula ‘Campfire’: In winter, the distinctive red-leaved variety of this plant has lime leaves that grow long and branched. It’s a clumping plant that grows to be about 4 to 8 inches tall and 2 feet broad when mature.
  • Crassula ‘Morgan’s beauty’: The pretty pink late spring flowers of this half-hybrid cultivar are dusted in white. It reaches a height of about 4 inches.
  • Crassula perforata: The common name for this plant, also known as the stacked Crassula, comes from its unique leaves around its central stem.

Final Thoughts

Overall, Crassula is a great plant to have in your garden or home! It adds a unique texture and color to any environment. They’re also an excellent choice for a low-maintenance, drought-tolerant plant. 

In addition to their resilience and low maintenance, they’re ideal for both novices and experts alike since they are easy to grow from leaf or start from cuttings.