Nepenthes Plants: Top 5 Tips for Properly Watering

A close-up bear claw image.

Nepenthes is one of the best indoor plants for a gardener. However, a significant number of people who try their hand at cultivating nepenthes end up with a dead plant because they simply don’t know how to care for it. The truth is that nepenthes is a relatively fussy plant, and any slight mistake with watering can be costly. Watering a pitcher plant appropriately means finding the perfect balance between overwatering and underwatering.

So, what are the golden rules for watering nepenthes? Pitcher plants must be watered regularly to keep the potting mix moist. Water your plant as soon as the tray is empty and until the potting mix is completely moist. Use rainwater or distilled water and avoid tap water as much as possible. Bottom watering is highly recommended because your plant gets a chance to absorb as much moisture as possible. Always wait until your potting mix is completely dry before you water your nepenthes to avoid root rot issues.

Taking care of a nepenthes plant can be tricky, especially for beginners. One simple mistake can make you feel like you are a plant killer. But you don’t have to fear anything because we will show you the best way to maintain the moisture requirements for your plant.

Read on to find out everything you need to know about watering pitcher plants.

1. Know When to Water

A general rule of thumb that most gardeners use is to wait until the potting mix is completely dry before watering the pitcher plant. While this is an acceptable approach, you can still use some better ways to figure out when to water your pitcher plant.

Rather than waiting for the potting mix to dry out completely, study your plant over some period and establish a watering schedule to follow.
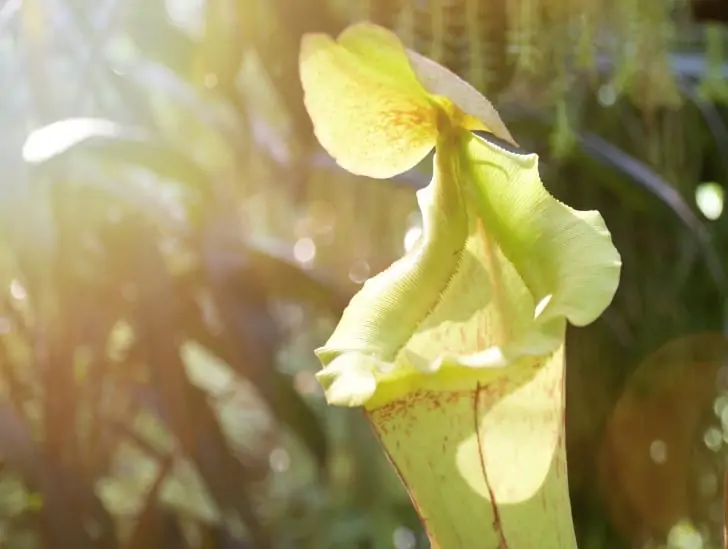
The best option for beginners is to check your plant regularly without fail.

 For instance, if you discover that you mostly water your plant after two days during the dry season, stick to that schedule and maybe water after four or five days during periods of high humidity.

The watering schedule you establish will, of course, vary depending on where you live and the general climatic conditions of the area. The best option for beginners is to check your plant regularly without fail.

Ensure that your plant’s roots are not sitting in excess water that isn’t draining out of the growing pot. Waterlogging a pitcher plant can lead to serious root rot issues that can easily kill it. In simple words, keeping your potting mix moist is crucial but don’t make it soggy or oversaturated.

2. Water the Pitchers

Sometimes, the pitchers themselves may also require watering. When you first bring your nepenthes plant home, take a peek inside the plant’s pitchers. If you notice they are entirely empty, use an eyedropper to refill each of them to about a third way with distilled or reverse osmosis water.

The primary purpose of filling the pitchers with water is to prevent them from becoming dehydrated and dying off as they struggle to fill themselves.

Make a routine to check the level of fluid inside the pitchers regularly. If you notice the fluid level is periodically low or empty, it could be a sign of underwatering or low light.

Nepenthes with a fly.
Be sure to increase the moisture levels inside the pitchers as soon as possible.

A combination of underwatering and low light can be catastrophic. So, be sure to increase the moisture levels inside the pitchers as soon as possible and provide your plant with sufficient exposure to sunlight.

If you live in an area that doesn’t receive plenty of sunlight, consider using artificial grow lights to ensure you are fulfilling your pitcher plant’s light requirements.

3. Know How to Water Your Pitcher Plant

Pitcher plants are native to Madagascar, Australia, and Southeast Asia. These species generally grow in mountain forests or low-lying jungles. So, this tells you that they thrive in humid areas. The mountain-growing pitcher plants prefer relatively cooler temperatures than the jungle-growing species.

Some species grow in dense jungles below elevations of 3,000 feet. They are known as the lowland nepenthes and prefer relatively high heat and constant, steamy humidity to thrive.

Nepenthes near the water.
Mountain-growing pitcher plants prefer relatively cooler temperatures.

So, if you are growing these plants at home, especially indoors, you need to keep in mind that they cannot tolerate dry soil at all. No matter the species you have, be sure to provide it with enough moisture and keep the roots slightly damp all the time. Damp doesn’t mean wet.

So, what is the best way to water your nepenthes to achieve this target? Well, you can use the top-bottom watering technique or the bottom watering method.

In top-bottom watering, you will need to add enough distilled water to an irrigation can and use it to water the plant from the top until excess water starts to drain out of the drainage holes at the bottom of the growing pot.

Make sure the excess water drains off well before you walk away. Avoid using clay pots because they can easily wick water and cause the potting mix to dry out relatively quickly.

The best way to water nepenthes is by using the bottom watering method by placing the growing container in a relatively shallow tray filled with distilled water; a third way the depth of the container. Don’t fill the tray more than a third of its depth.

Take your pitcher plant and immerse it in the tray. Allow it to sit in the tray of water for up to 30 minutes before you remove it. The plant would have absorbed enough water to keep it going for three to five days before you water again.

The highland species that enjoy relatively cooler temperatures can benefit greatly from ice cubes placed on top of the potting mix every night. The ice cube will melt through the night and offer the moisture that the plant loves.

4. Don’t Let the Plant Sit in Water for Too Long

Using the bottom watering method can be tricky because you may be tempted to leave the plant sitting in the water tray for too long, thinking you are helping it.

Unfortunately, pitcher plants don’t like being waterlogged. The more they are waterlogged, the more they develop root rot that can kill your plant in no time. So, you should never let the plant sit in water for more than 30 minutes.

The bottom watering method.
You should never let the plant sit in water for more than 30 minutes.

If you are tempted to let your plant sit in the tray for prolonged times, ensure you empty it first and only live about an inch of water in it. The little water you leave in the tray plays a crucial role in increasing the plant’s humidity.

5. Use the Right Type of Water

When it comes to watering pitcher plants, not all water is the same. Choosing the wrong water type can kill your plant faster than overwatering.

Don’t attempt to water your nepenthes using bottled water or tap water since it can be extremely harmful. These plants are naturally intolerant to nutrients and minerals.

For that reason, they need to be watered with water sources that contain little to no mineral substances. Rainwater, distilled water, or reverse osmosis water are the three best options. These options are highly safe because they don’t have any mineral substances.

If your area receives plenty of rainfall during winter, be sure to collect as much rainwater as possible and store it safely somewhere. When you run out of rainwater, go for distilled water.

Fortunately, distilled water can be found in almost every grocery store, and it is highly affordable. A gallon of it will go for about $1, depending on where you live.
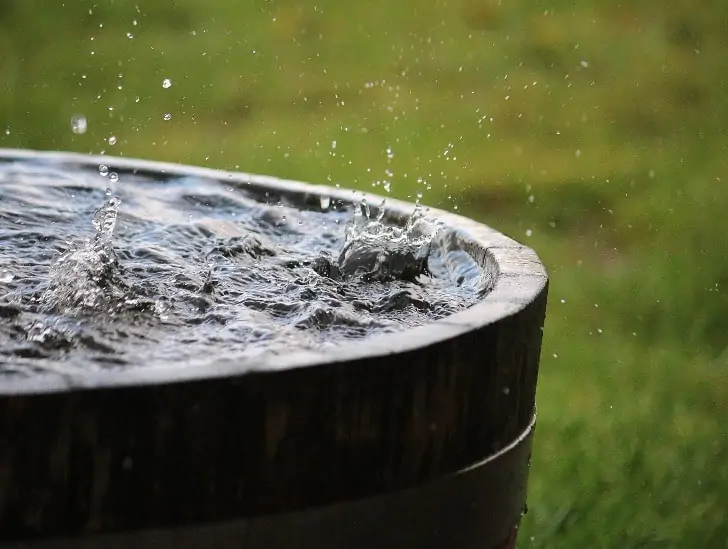
A water.
Choosing the wrong water type can kill your plant faster than overwatering.

Reverse osmosis water is mostly sold in licensed water stores and select pharmacies. However, you need to remember that reverse osmosis water may be slightly more expensive than distilled water.

When buying distilled water, avoid any bottles that contain words such as “contains electrolytes,” “enhanced for flavor,” and “additives added for taste.” These words mean that some chemicals have been added to the water, which is not a good sign.

Why Is Rainwater the Best Option for Watering Nepenthes?

Nepenthes plants generally grow in poor acidic conditions and are highly sensitive to the water they grow in. So, any water containing a relatively high quantity of dissolved salts and minerals such as calcium and magnesium does them no good.

The mineral concentration can build up with time, causing root rot and severe decline in their overall health. The effects are quite dramatic for pitcher plants but slightly slower for other carnivorous plants.

Generally, the type of water you use must contain less than 100ppm (parts per million) of dissolved minerals and salts. Rarely will you have this type of water coming out of your tap, no matter where you live.

You can always check with your local water authority to ascertain the softness of water coming out of your tap. Sticking to rainwater, distilled water, or reverse osmosis water will do you good in the long run.

Summary

Watering nepenthes incorrectly is a catastrophic mistake that many gardeners tend to commit. Even the slightest mistake can affect the general growth of your plant and make you start questioning your gardening skills.

To avoid committing these mistakes, it is good to understand your plant’s moisture requirements to help you maintain a perfect garden. We hope you now know what you need to do in terms of watering to keep your pitcher plant happy!

8 Simple Rules For Watering Your Sempervivum

Sempervivum makes one of the excellent choices for relatively low-maintenance houseplants. The plant is naturally hardy and requires minimal watering to survive. In fact, overwatering a sempervivum plant can be catastrophic. Therefore, you need to understand your plant’s watering needs and try as much as possible to stick on it to have a lush succulent at home.

So, what are some of the golden rules for watering Sempervivum? Since the plant is highly drought-tolerant, you should only consider watering it when the potting mix is completely dry. If the soil still feels moist, there is no need to water it. How much you need depends on a wide range of factors, but you need to try as much as possible to match what the plant gets in its native habitat. Cut down on watering your plant during winter and consider using the bottom watering method to keep your plant hydrated. The best time to water your Sempervivum is early morning or in the evening to allow it to absorb as much water as possible.

Read on to learn more about sempervivum watering rules and how to create a lush succulent planting at home. We cover everything you need to know.

How Often Should I Water my Sempervivum?

Generally, you should water your Sempervivum only when the potting mix is completely dry. Although the soil may still be relatively moist at depth, feel free to water your plant as long as the top one inch of the soil feels dry.

You need to keep in mind that the soil dries at different rates depending on the time of the year. The watering frequency also depends on the presence of drainage holes and the type of soil in use.

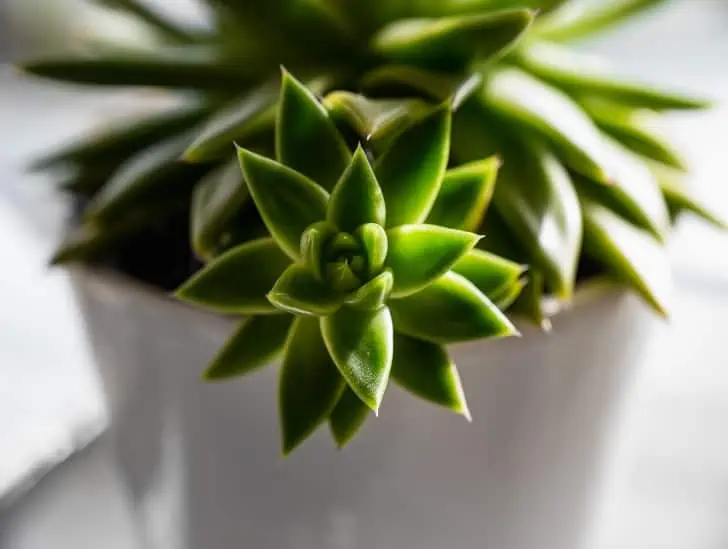
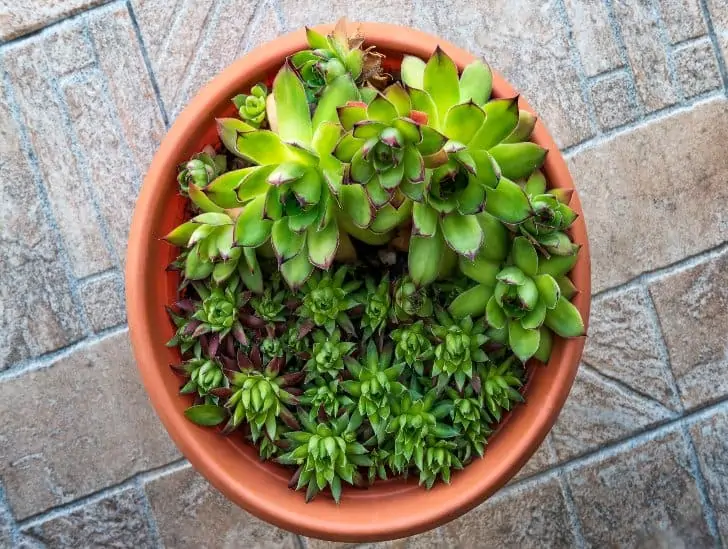
Sempervivum in a bron pot.
Watering it at least once a week is enough to keep it happy.

Consider watering your succulent at least two times a week if it is grown in sandy soil and one time per week if it is grown in clay soil. However, no watering is necessary during winter since the plant enters a state of dormancy and no growth happens.

Water once per week during spring and autumn only if your plant grows in sandy soil. Otherwise, no watering is required during these two seasons as well.

During summer, you may notice that the topsoil of your succulent dries in a day. It doesn’t mean that you need to water it daily. In such a case, the plant will have absorbed enough moisture to survive the heat for three or four days.

Furthermore, the soil layer towards the bottom of the growing pot will still contain enough moisture to keep your plant alive. Keep in mind that if you overwater your plant, you could easily lose it due to root rot issues.

Spring is the time of the year when Sempervivum grows intensively. So, it needs a lot of water during this time. Watering it at least once a week is enough to keep it happy.

You can consider increasing the watering frequency towards the end of spring when the sun is intense, and there is no rain. This will keep your plant active and healthy.

How Much Water Do I Need?

The exact amount of water you need to give your depends on a wide range of factors, but you need to try as much as possible to match what the plant receives in its natural habitat.

Sempervivum mostly grows in the alpine region, where they receive relatively regular rainfall. However, the rain is mostly light showers.

Sempervivum in a pink pot.
A sempervivum plant requires approximately 0.5″ to 1.0″ of water once a week during the dry months of the year.

As a general rule of thumb, a sempervivum plant requires approximately 0.5″ to 1.0″ of water once a week during the dry months of the year. Sometimes, you can go slightly lower or higher than the recommended values depending on the climate of where you live.

What Type of Water Should I Use?

Rainwater is the best option for your Sempervivum. This is because it doesn’t contain any chemicals or salts found in tap water. Rainwater is natural and free from anything that could potentially damage your succulents.

Therefore, it is highly advisable to collect as much rainwater as possible during winter and store it for later use.

If you don’t have access to rainwater, go for reverse osmosis or distilled water. In this case, the water has been treated appropriately to get rid of chemicals that may build up in your potting mix and cause harm to your plant.

A water in a basin.
Rainwater doesn’t contain any chemicals or salts found in tap water.

Distilled water is the cheaper and readily available option. You can purchase distilled water from your local supermarket.

Avoid using tap water at all costs because it contains chlorine, sodium, magnesium, calcium, and fluoride, which may harm your succulent.

If it is the only option you have, let it sit in an open container overnight to allow the mineral elements to evaporate or settle at the bottom of the container before watering your plants with it.

Watering Frequency Depends on the Type of Soil

The kind of potting mix you use to grow your Sempervivum will directly impact the watering schedule. If your succulent is growing in clay soil, you don’t need to water it frequently. This is because clay soil dries slowly.

Clay soil may feel dry at the top, but it usually forms a crust that doesn’t allow the bottom layer of the soil to lose water. Therefore, Sempervivum grown in such soil doesn’t require watering at any time of the year except summer.

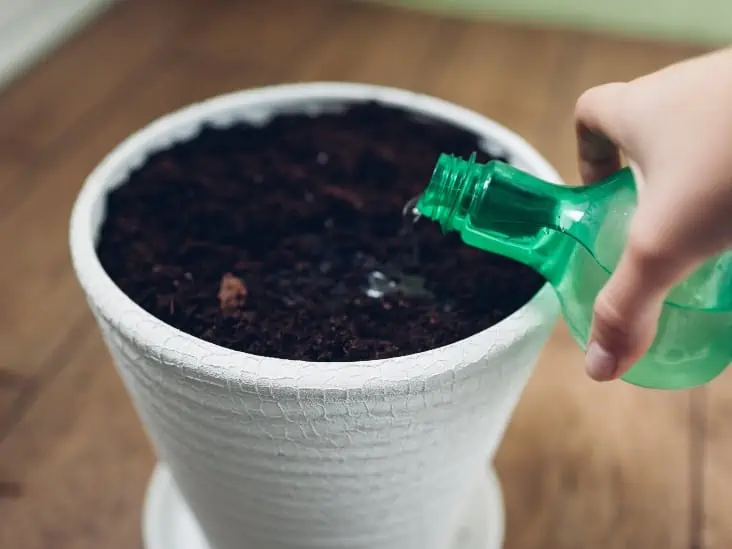
A pot being watered.
Watering frequency depends on the type of soil.

On the other hand, sandy soil loses water relatively quickly, even if there is no drought. So, if your succulent is growing in such soil, it requires frequent watering.

During summer, consider watering your Sempervivum at least twice a week but cut the frequency down to once a week during spring. During winter, your plant will most probably have enough moisture to keep it happy throughout the season.

What Are the Signs of Underwatering?

Even though it is a drought-tolerant plant, it doesn’t mean that Sempervivum can survive for eternity without water. Your plant gets dehydrated when it is not receiving sufficient amounts of water, and it will show you.

Generally, if you see signs of over-drying, such as wrinkled, crispy, or flexible leaves, you should start watering your Sempervivum quite often. Water deeply and frequently to revive your succulent and maintain its health.

It may take a couple of weeks before your plant starts responding. Feel free to water up to three times a week for young plants to encourage faster growth.

Don’t panic if you notice signs of underwatering in your Sempervivum. As long as you increase the watering frequency and ensure all the other conditions are ideal, your plant will be okay. You should only be worried if you start to notice signs of overwatering because that is more dangerous.

Don’t Overwater Your Sempervivum

Overwatering can be quite dangerous to your plant, especially if it is not noticed early. Most often, sempervivum plants suffer from overwatering from excess water during winter, but it can also happen during summer or spring if you are not careful.

When you manually water these plants and do it quite often, it becomes quite dangerous. Some of the common signs of overwatering include yellow and almost transparent leaves. This is a clear indication that your plant has started to rot, and you need to find ways of reviving it.

The plant can also become elongated as it tries to fight off the rot. If you notice signs of rot on your plant, you need to act quickly. Dig it out of the container and transfer it to a relatively dry place.

A plant being overwatered.
Overwatering can be quite dangerous to your plant.

Clean all the potting mix from the plant and carefully remove all the rotten parts of the plant. Place it in a dry place, prepare a fungicide solution and treat it. Let it dry before repotting.

Size of Plant Affects the Amount of Water Consumed

Another important thing that you need to remember is that the size and shape of your Sempervivum will affect its water requirements.

Generally, the large species plants require more water but need to be watered less often since they absorb and retain moisture better than the small varieties. So, water them with plenty of water once a week.

The relatively small and compact sempervivum varieties require less water but frequent watering. These varieties grow slower and don’t retain moisture for too long. Some of the common examples include sempervivum globiferum and sempervivum arachroneidum.

So, if you have a dwarf sempervivum, only feed it with a small amount of water but make sure you do it frequently. Technically, you need to water the small varieties as soon as the topsoil dries.

Best Time to Water Sempervivum

In the summer, it is better to water your outdoor succulents early in the morning so that roots can soak up moisture before the peak heat sets in. This is also the best time to water your Sempervivum during winter.

If you cannot water your plants early in the morning, then do so late in the evening. Don’t winter it during the afternoon because the scorching sun could deny the roots an opportunity to absorb as much water as possible.

Summary

Sempervivum is a highly drought-tolerant plant that can take some neglect. However, you need to be careful with your watering regime because too much or too little water can cause harm to your plants.

Don’t let your plants dry out, and don’t overwater them. We hope you have learned a few tricks on how to keep your Sempervivum happy, and you are ready to go.

All About Sempervivum Care – The “Houseleek”

Also known as the hens and chicks plant, Sempervivum is one of the most common house plants found worldwide. Although the succulent can easily spread and survive in a wide range of environments, it still needs proper care to thrive and remain healthy. Many gardeners love Sempervivum due to its exotic appearance resembling a beautiful rosette that can complement any interior décor, outdoor garden, or succulent terrarium. Other names referring to the succulent include Thor’s beard, Jupiter’s eye, Thunder plant, and Liveforever. 

So, how can you take care of a sempervivum plant at home? Generally, Sempervivum does well when grown outdoors in sandy or gravelly soil. The main soil requirement for this succulent is that it must be well-draining. Since the plant is drought-tolerant, you don’t need to water it daily. Instead, check the soil regularly and ensure it is completely dry before watering. Sempervivum prefers relatively high temperatures of between 65oF and 75oF to thrive. The plant stops growing when temperatures fall too low. For light requirements, make sure you grow your Sempervivum in full sun. The plant requires at least six hours of sunlight every day to thrive. There is no need to fertilize it since it is adapted to growing in poor soils.

If you are still new to Sempervivum and don’t know how to care for the succulent, you have come to the right place. Read on to discover more information on how to take care of the Sempervivum plant.

Sempervivum: Brief Overview

Sempervivum is a genus of stemless succulents native to Europe. The plant hails from family Crassulaceae, also known as Houseleeks. The genus comprises more than 50 different species.

The succulent is common in the Alps and the Carpathians since it prefers relatively rocky places and dry climates, which is why it can survive on roof shingles, walls, or rocks in montane regions.

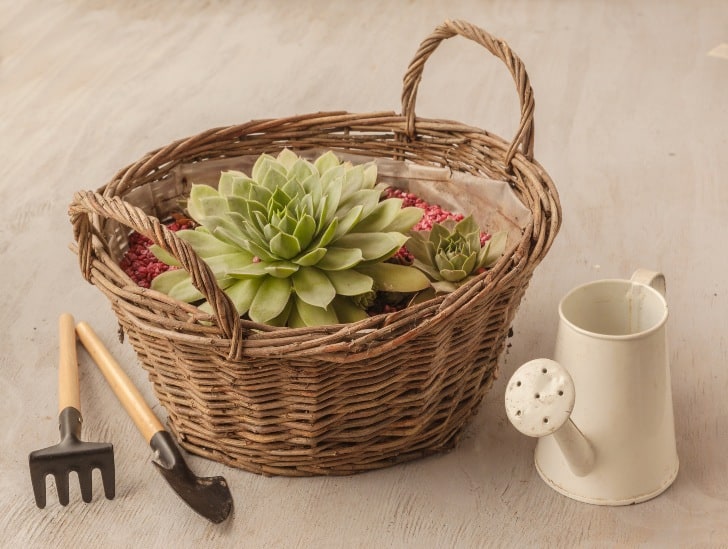
A sempervivum in a wooven basket.
The genus comprises more than 50 different species.

The plant is highly durable and can maintain its green foliage even in the harshest growing conditions. In fact, Sempervivum is a Latin name that means “always living.

The succulent isn’t toxic to dogs and cats. In fact, the American Society for the Prevention of Cruelty to Animals has declared the succulent one of the safest plants to have around pets and horses.

The leaves of Sempervivum are edible and can be juiced or eaten raw. Their texture, taste, and color are similar to cucumbers. The plant also produces fruits that are edible. Some people even eat the succulent’s seeds, stems, and roots, but you need to be careful with the quantity consumed because consuming very large quantities can cause vomiting.

Sempervivum blooms in the summer. Depending on the variety of plant you have, the flowers may be purple, red, or pink. The fruits are produced during flowering but ripen around late August or early September.

The plant’s leaves are evergreen and grow into rosettes. The primary function of the leaves is to store water which gives them a rather chubby appearance. The succulent can grow up to 25 cm tall and 20 cm wide in optimal growing conditions.

How to Care for Sempervivum

Now that you have some knowledge about Sempervivum, let us discuss some of the things you need to do to ensure your plant remains healthy and happy.

Where to Plant Sempervivum

If you live in a relatively cool and bright place, you can plant your Sempervivum on the rooftop. After all, most of these plants come from Europe, where they are traditionally planted on rooftops of cottages and survive without issues.

If you want to have it in your backyard or front yard garden, make sure you pick a relatively rocky spot. You can even have it in cracks and crevices in the walls or between rocks.

The plant will generally do well in a relatively dry area unsuitable for growing other plants. The succulent doesn’t mind poor soils and negligence.

Sempervivum care outdoors and indoors is generally easy because it is hardy and doesn’t mind growing in poor soils. It also tends to do well in relatively shallow planters on a sunny windowsill indoors or outdoor setting.

Soil Requirements

Sempervivum generally does well in shallow and well-drained soils. You can easily make your own potting mix by combining three parts of regular succulent soil with one part of crushed limestone.

Remember that the root system of Sempervivum is relatively tiny. So, it is always good to use shallow pots, shells, or stones with natural depressions or hollows.

You don’t even need to add potting mix when using a stone. Just set your sempervivum plant in the depression and wet the rock regularly from the bottom to provide the succulent with moisture.

In your home or office, ensure you keep your Sempervivum plant in relatively shallow containers with coarse, well-draining potting mix or no potting mix at all.

Watering Requirements

Sempervivum requires little or no watering as long as you maintain good drainage. You can water your plant once per week or whenever the surface of the soil is dry.

A freshly watered sempervivum.
You can water your plant once per week.

Watering should only be done during summer. You don’t need to water the plant during winter.

Light Requirements for Sempervivum

Sempervivum does well in a wide range of sunlight conditions, but generally, it likes to have a few hours of direct sunlight per day.

If you are planning to grow them on a windowsill, make sure the glass doesn’t reflect light into the plant because it can magnify sunlight and burn its leaves.

If you keep them indoors, use a small fan to circulate air around the plant, especially during summer when it produces fruits.

You can also keep your plant outdoors during summer but ensure it gets direct sunlight for only a few hours each day.

Dried leaves indicate low levels of sunlight, whereas wilted or yellowing leaves indicate too much light. You should move the plant away from direct sunlight if you notice these signs.

Temperature Requirements

Sempervivum does well in both hot and cold climates. However, it prefers a slightly warm environment with little or no frost during winter.

This is usually when it produces flowers, so you should ensure the plant has enough sunlight exposure to encourage flowering.

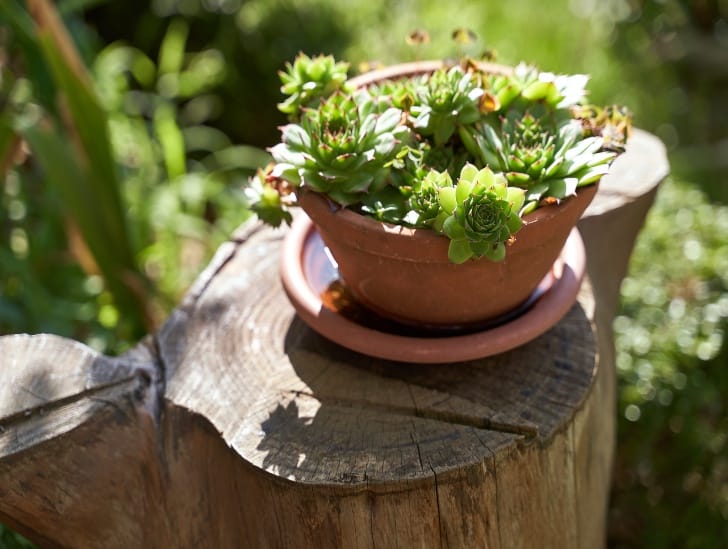
A sempervium in a pot exposed to sunlight.
It prefers a slightly warm environment with little or no frost during winter.

Sempervivum plants can survive temperatures of -31°F, but they die when exposed to sustained cold.

As mentioned, the plants also require little to no watering during winter because there is no growth or flowering. You should stop all watering until new shoots appear in spring.

While Sempervivum does well in the outside conditions, it isn’t suited for places with intense, hot sunlight or windy conditions.

Fertilizing Requirements

Sempervivum doesn’t need fertilizers, and it usually grows in poor soils and rocky surfaces.

However, if you like faster growth and more blooms indoors or outdoors, you can feed the plant with a diluted dose of a balanced fertilizer in early spring.

Sempervivum in a rocky surface.
It usually grows in poor soils and rocky surfaces.

Use a spoonful of fertilizer per plant and mix this with a gallon of water. Soak the entire plant, including its pot, for up to 30 minutes to ensure it absorbs all the nutrients.

Insects and Diseases  

Sempervivum is usually pest-free, but you should keep an eye for aphids or mealybugs. You can use a cotton swab dipped in alcohol to rub the pest off the plant.

You should also remove any dead leaves from your Sempervivum since they can harbor pests and diseases.

As mentioned, if your succulent has wilted or yellowing leaves, make sure it gets enough sunlight.

If your plant suddenly collapses, remove any dead portions immediately to avoid the spread of disease. You can then dust off aphids or give it an insecticide bath if you spot pests eating away parts of your succulent.

Sempervivum Propagation Methods

Sempervivum is usually propagated by division. When you divide the plant, you should separate some of the “baby” offshoots from the mother plant to get more plants.

You will need a sharp knife or garden clippers for this process. It is best to join two cuttings together, so they join at their bases while leaving their stems apart. You then need to place the joining area into a pot with moist, but not wet soil, and cover it until new leaves appear.

Sempervivum in a pot with offshoots.
You should separate some of the “baby” offshoots from the mother plant to get more plants.

You can divide your Sempervivum plant once every 2-3 years to keep it healthy and growing well. If you allow it to grow too big, its center will weaken and collapse.

Once the plant reaches 4-5 inches (10-13 cm) in diameter, you can repot it into a larger pot with well-draining soil to make room for its expanding roots.

Repotting should be done in spring before new shoots appear in summer. Don’t water your Sempervivum for several days after repotting.

Summary

Sempervivum is hardy succulent with thick leaves that spread to form rosettes. It prefers poor, well-draining soils and is usually pest-free.

It is easy to grow since it tolerates indoor settings as well as harsh outdoor conditions. The plant produces offsets which can be divided for propagation every few years.

You should stop watering the plant in winter and allow it to go dormant since it doesn’t need any water during this time.

We hope you have learned a lot about this cute plant and that you can try growing it at home.

Thanks again for visiting our site, and please come back for more articles about succulents and gardening.

How To Take Care Of Your Monkey’s Tail: Ultimate Guide

Monkey tail is one of the most popular cacti species grown in homes worldwide. The monkey tail is a beautiful cactus with long white, soft, and hair-like spines. Its stems are cylindrical and can grow up to three inches in diameter and 8.5 feet long. These plants are relatively easy to grow and require minimal care to thrive, but you have to ensure the growing conditions are right to get the best out of them.

So, how do you care for monkey tail cactus? This cactus generally prefers growing in well-draining and slightly acidic succulent soil. It requires very little water during spring and summer. You don’t need to water it during winter. Overwatering can literally kill your monkey tail. The plant can survive temperatures lower than the freezing point without any issues. In summer, ensure you provide it with at least 10 hours of bright direct sunlight and maintain the relative humidity between 40-50%. Only fertilize your monkey tail cactus once in spring, autumn, and summer using half-strength fertilizer.

Do you want to learn more about how to care for a monkey tail cactus? You came to the right place. Read on to know more about monkey tail cactus care and how you can get the best out of the succulent.

Monkey Tail Cactus – A Brief Overview

The name “monkey tail cactus” is derived from the plant’s long stems covered in relatively soft spines that resemble strands of hair. The cactus grows naturally in crevices of stones and cliffs.

A monkey tail cactus.
It is best grown as a hanging plant.

It has a relatively shallow root system that quickly absorbs water whenever it rains. Its stems are greenish-yellow and are covered with down-facing soft spines resembling white hairs.

A typical monkey tail cactus develops three to five stems that branch at the bottom of the plant. It may grow upright for several feet before the stems start drooping.

When the growing conditions are ideal, the cactus produces magnificent bright, red flowers. They usually bloom after a few days then the flowers develop into fruits.

The origin of this cactus can be traced back to Santa Cruz. Besides its natural habitat, the cactus can also be grown as a houseplant. It is best grown as a hanging plant due to its outstanding drooping stems.

How to Care for Monkey Tail Cactus

Now that you have some background information about this cactus, let us figure out some things you need to do to get the best out of it.

Generally, there are many things you need to keep in mind while caring for a monkey tail cactus. They include feeding, watering, temperature, pests, light, and so on. Here is an in-depth analysis of each.

Soil Requirements

Since the monkey tail cactus absorbs much of its moisture and nutrients from the atmosphere, it doesn’t develop a robust root system. Therefore, it doesn’t require much from the soil other than anchorage that is strong enough to support the weight of its hanging stems.

The cactus will generally thrive in well-draining and slightly acidic soil. It grows best in soil with a pH level ranging from 5.0 to 6.5. When watering your plant, you need to ensure that the pH level of the water in use is good enough to support the long-term needs of the plant.

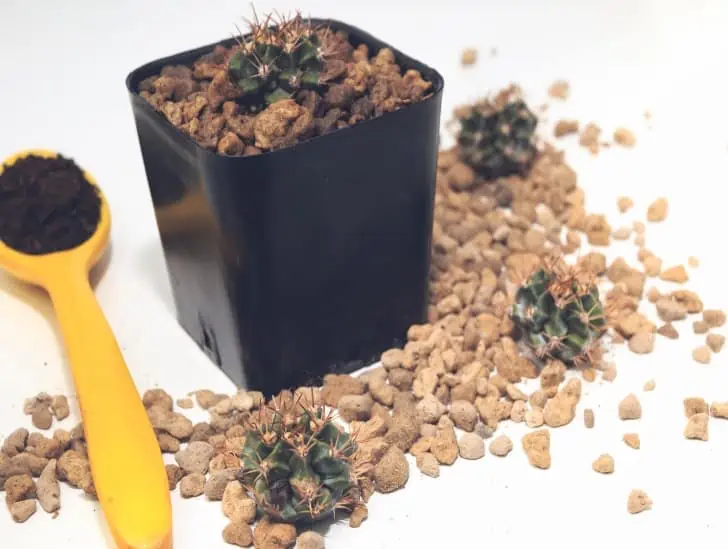
A cactus soil.
A generic cactus soil with good drainage should be ideal for your monkey tail.

Avoid using highly alkaline water since it will slowly alter the soil pH making it an unsustainable growing medium for your plant over time.

It is also vital that the soil drains well between watering sessions. Cacti plants, in general, don’t love being waterlogged. A generic cactus soil with good drainage should be ideal for your monkey tail.

The relatively shallow root system of the plant allows it to quickly absorb any water that falls on the potting mix.

But since the roots are exposed to surface temperatures, you must take appropriate measures to protect them from extreme heat or cold by adding a layer of mulch over the potting soil to serve as an insulator.

Temperature and Humidity Requirements

The monkey tail cactus likes relatively warm temperatures, but it can withstand temperatures as low as -6oC. If you live in an area that experiences such cold temperatures, it is advisable to let your plant spend the winter inside the house.

When the plant is exposed to extremely low temperatures, don’t water it. Remember that all cacti plants survive by storing water in their stems. If the stored water freezes, it can damage the plant cells.

Monkey tail cactus on the soil.
You need to be extra careful with humidity during winter.

Don’t try to make abrupt changes to the growing environment of the monkey tail because the effects can be catastrophic. For instance, moving it from low temperatures to high temperatures or from low light to bright light abruptly can cause systemic shock from which your plant may not recover.

In an indoor setup, ensure you control the humidity levels the plant is exposed to. Generally, the humidity level must be in line with temperature, lighting, and watering levels.

During summer, the succulent will mostly utilize the moisture in the atmosphere to boost its overall growth and development.

You need to be extra careful with humidity during winter because too much humidity combined with too much water can lead to root rot issues.

Watering Requirements

Most succulents don’t need as much water as you think they do, and monkey tail cactus is no different. Sometimes, what you may think is enough ends up being too much, resulting in overwatering.

Generally, you should only water your monkey tail when the potting mix is completely dry. You also need to adapt your watering regimen to fit seasonal changes.

Feel free to water deeply in spring and summer, then allow the soil to dry out completely before watering again.

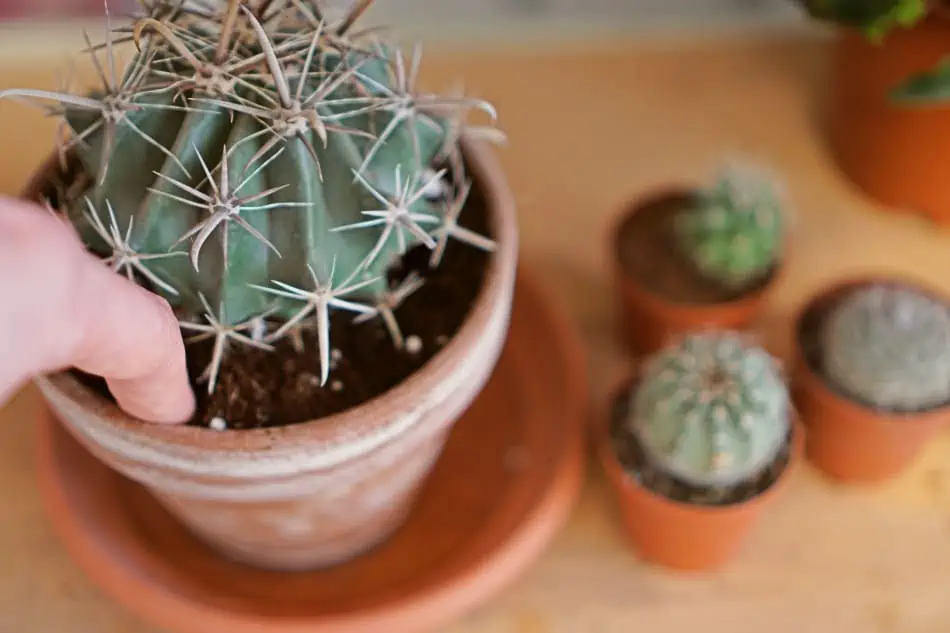
Checking the moisture of the soil for watering.
If you must water, do it sparingly and allow the soil to dry out completely before watering again.

In fall and winter, be sure to reduce the frequency of watering. It is even unlikely that you will need to water your monkey tail cactus during winter. If you must water, do it sparingly and allow the soil to dry out completely before watering again.

You should start to increase the watering frequency in spring to help kick start your plant’s metabolism for the new growing season that is about to start.

Light Requirements

All cacti are sun-loving plants and will do best under direct light conditions. So, if you are growing your monkey tail indoors, make sure you place it on the windowsill of a south-facing window.

Find the sunniest spot in your home, and your monkey tail will appreciate it. Whenever possible, move the plant outdoors during spring and summer so it can enjoy as many hours of direct sunlight as possible.

Generally, the cactus requires between 10 and 14 hours of direct sunlight to survive and thrive. So, finding a sunny spot will do you good.

Since the plant’s growth cycle is primarily determined by light levels, monkey tail cactus tends to slide into a period of dormancy during fall and winter. During this time, no growth happens, and your plant will be okay if it is kept indoors with minimal disturbance.

Fertilization

Just like watering, your monkey tail is not a huge feeder. Feel free to feed it once during spring and once during summer. This is the active growing season, and the fertilizer will provide your plant with the nutrients it requires to grow.

Monkey tail cactus in a huge pot.
Ensure the fertilizer you choose is slow-release to avoid shocking your succulent.

You can use low nitrogen or foliar feed with sufficient phosphorous to stimulate flowering and fruit development.

However, if you want your plant’s stems to be strong, use a potassium-based fertilizer. You can use liquid plant fertilizer with a ratio of 5:10:5. Ensure the fertilizer you choose is slow-release to avoid shocking your succulent.

Potting and Repotting

The monkey tail cactus doesn’t require much depth since it has a relatively shallow root system. Typically, the width of the pot to use will be determined by the number of plants you choose to have in it.

It is recommended that you report your monkey tail cactus every three years to replenish the potting mix. Don’t increase the pot size during repotting unless you intend to increase the number of plants in it.

Ensure the soil is completely dry before repotting. The new pot should also have plenty of drainage holes to avoid saturating the potting mix, leading to root rot issues.

Propagation

Monkey tail cactus is mainly propagated through cuttings and seeds. For cuttings, take a piece off the end of one of the stems, allow it to callous over then plant it in a growing container. You can also use branches or pups instead of taking cuttings.

Mist the soil after potting to stimulate root formation. New roots should start forming after approximately one month.

Seed propagation requires patience because it takes more time and skill. In fact, you need to know how to pollinate the flowers to produce seeds.

Summary

In summary, the monkey tail cactus is one of the most attractive succulents that are easy to grow at home. The plant doesn’t require a lot of attention and maintenance to thrive.

As long as you provide it with the ideal growing conditions, you will always have a happy and healthy plant.

We hope you now understand how to care for the monkey tail cactus, and you are ready to start showing it some love.

How to Make Moss for a Terrarium: Step-by-Step Guide

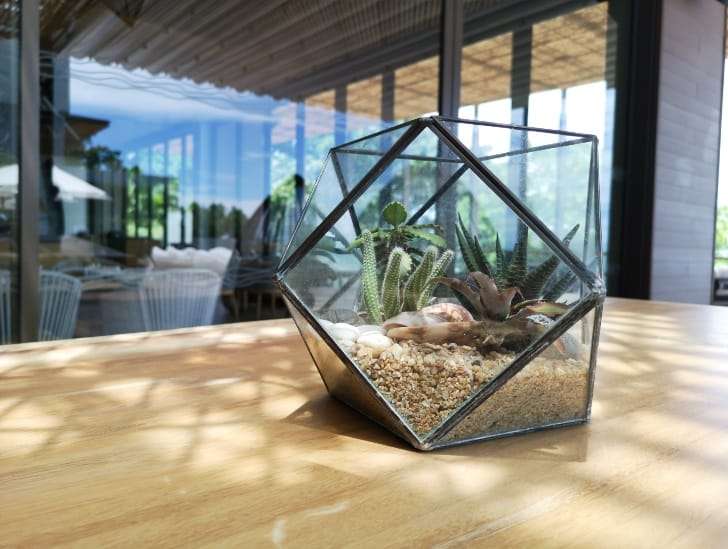
A terrarium

Growing moss involves more than getting your hands in the dirt. Moss is a plant that appears in different species. It is a non-vascular type known as the bryophytes, with no vessels to transport water, appearing as simple grassy mounds. They have no roots or containers to transport water, making them favorable for closed terrariums.

A terrarium is a clear, non-draining container with a small environment. Moss is an ideal ingredient in terrarium making. The two grow together perfectly. All they require is little soil, low light, and dampness. 

But how do you make a perfect mini moss terrarium at home? The solution includes preparing a layer of gravel at the bottom of a container and adding dry moss, and the layer prevents the soil from mixing with the gravel on the bottom. Next, add a few inches of soil on top of the dried moss. First, however, it is essential to differentiate and understand the different types of moss you are using. 

 This article will show you how to make the perfect moss for a terrarium at home.

Why use Moss for Terrarium?

Before picking on any moss, it is necessary to understand the many types of moss species. Most are used as ground covers in almost all types of terrariums. Moss has no roots, presenting two essential benefits you can take advantage of

  1. Moss will not compete for nutrients or water with other plants in your garden
  2. Moss can be placed anywhere in your terrarium

How to Make Moss for a Terrarium

Choose your container-making moss of terrarium begins by choosing a proper container to use. You can select a plastic jar, a glass, or a decorative container that is transparent and see-through. The size of the container depends on your preference of the height and broadness of your terrarium.

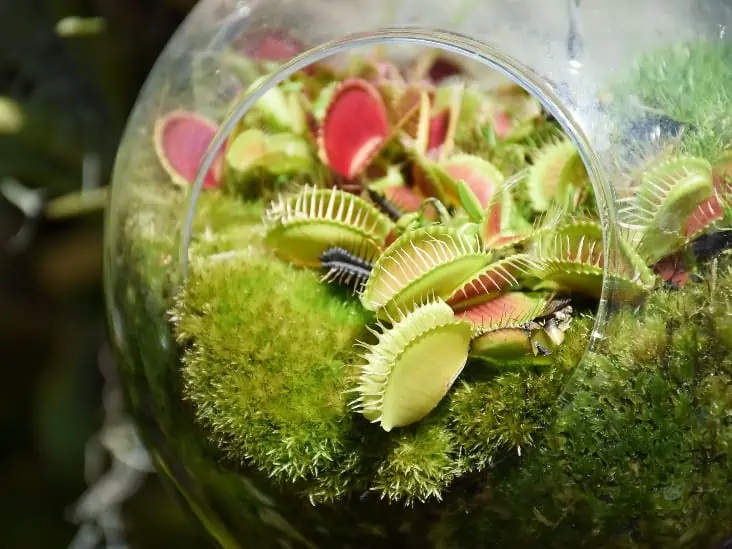
flytrap terrarium
A terrarium is a clear, non-draining container with a small environment.

If you would like your terrarium to house animals, choose a container-sized for the animal species. Large containers can hold more moss and are good masterpieces for tables and desks. The small ones are easier to clean, control humidity and keep clean.

If you plan to house animals in your terrarium, choose a glass container that does not overheat. Plastic containers can overheat, leaking chemicals into the water. Any terrarium used for animals should have a proper lid and ventilation to allow appropriate air circulation.

  1. Add gravels to your terrarium.

Gravels and pebbles make one of the essential parts of the terrarium’s foundation. Graves represent the perfect material to use in creating bottom drainage. They collect the excess water in the container’s soil layer to prevent root rot.

The gravels should be rinsed properly with water. They should be layered 1-2 inches at the bottom of the container. While adding gravels to the container, you could add color and ambiance by layering gravels of different colors. You can also swirl with other substrate choices, as long as they drain quickly.

Gravels on a terrarium.
Gravels represent the perfect material to use in creating bottom drainage.

On top of the graves, add a layer of activated carbons or charcoal to absorb odor and purify excess water. Charcoals absorb harmful elements in the soil and water that can build up inside the terrarium over time, damaging your plant. The process is critical in safeguarding the plant for long periods. 

  1. Choose the type of moss you will use

Firstly, avoid using any wild plants considered illegal or restricted by authorities in your area. Consider buying them from a shop or purchase in an online store. Below are the four most common types of moss that are easy to source, and above all, legal. 

 I. Cushion moss

Cushion moss is a general term for Leucobryum glaucum. This species is green with silver-tinted leaves. When growing, it creates a puffy, pillow shape. The shape makes it a popular choice in the terrarium. In addition, it creates a hillside and shrubberies effect.

  1. Hair cup moss (Polytrichum commune)

 It is also an excellent added feature to a terrarium setup. It works perfectly with large terrariums because of their height. It grows as high as 40cm. Most importantly, the moss creates star-shaped leaves, bringing a good effect when designed appropriately.

  1. Terrestrial moss

With proper airflow, these types of moss will do better in the damp substrate. They can properly grow in any location above the aquatic line. This type of moss can also work well if you add some animals in your terrarium. 

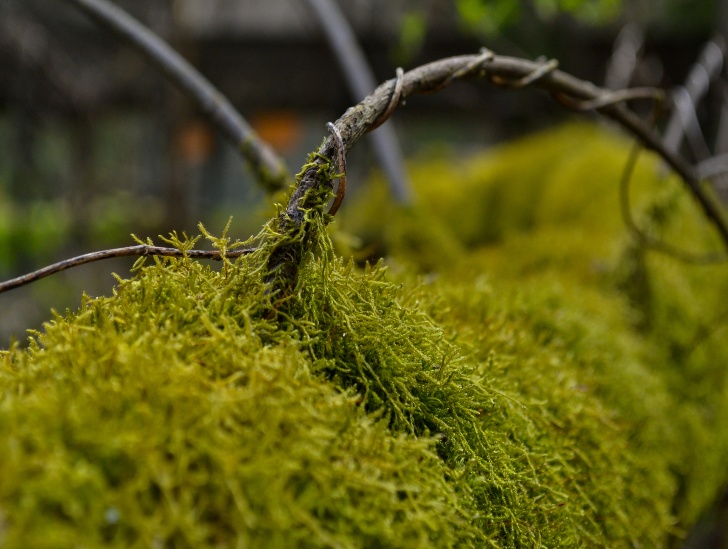
A terrestrial Moss.
They can properly grow in any location above the aquatic line.
  1. Spanish moss

The “old man’s beards,” as they are locally called, create a stringy, long strand and spooky feeling. It works for humid and forestry terrariums because it naturally grows in wet and humid environments. This type of moss will also provide your pet with the necessary comfort and shelter.

  1. Prepare your soil

Coco-coir, peat moss, or house plant soil works with most moss plants. Besides, succulents prefer a well-drained inorganic medium. You can also mix a decent amount of activated carbons into the cactus potting mix. Avoid using a potting soil mix with already-corporate fertilizer as the terrarium plants don’t necessarily require the extra fertilizer.

  1. Choose other decorations

You can check in your local stores or online store for terrarium décor. This item includes shells, rocks, plastic figurines, or other small items that can fit in your terrarium. Small scenes with figures may be good inside a container, but animals should not use moss.

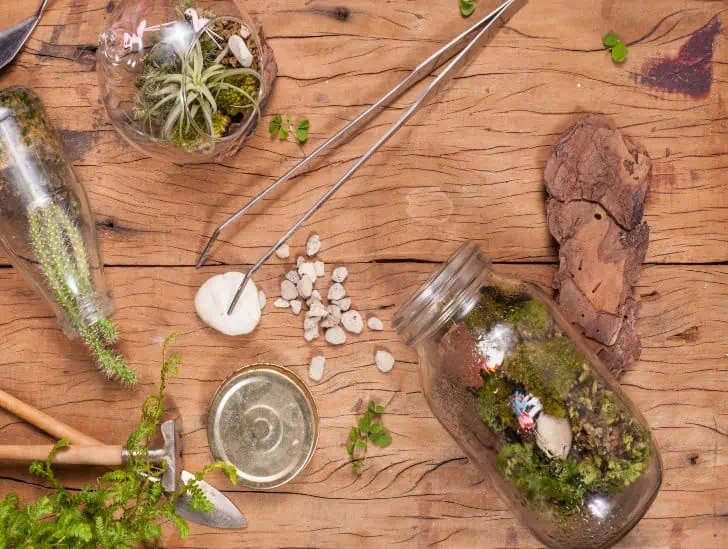
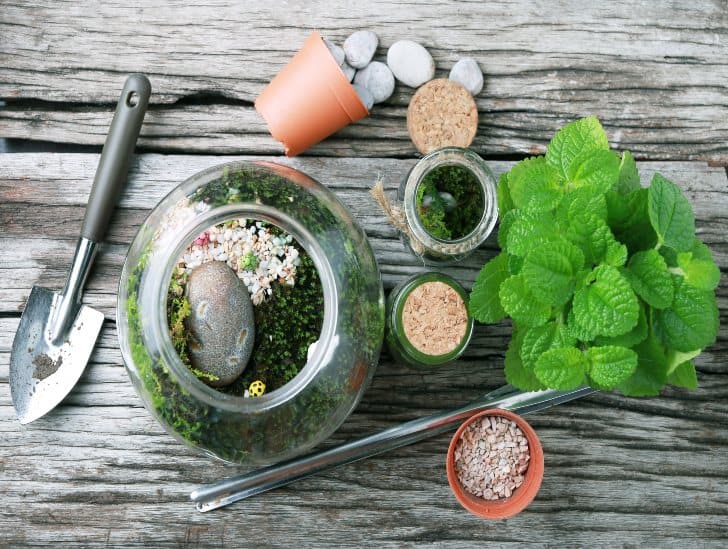
Equipment needs for terrarium.
Small scenes with figures may be good inside a container.

You can also choose tiny plants from your nursery to plant in your terrarium, along with moss. The plant used should be live plants to keep your terrarium moss oriented. These trees may include newly sprouted oak tree saplings, ferns, or colorful weeds like sprouts. The grass may not be appropriate as it becomes invasive in a moist environment.

Making the Terrarium

  1. Add substrate to your container.

In the terrarium container, add the substrate at the bottom of the container to form the base. If gravels are not available, sand, rock granules, or loose potting soil can be used. Ensure they cover a better part of the pot for proper drainage.

  1. Add moss

Moss can be used to cover the entire top of the substrate. It can be spread around and filled in the gaps with other smaller pieces of decorations. When placing the moss, it should not be layered but taped to prevent mold from growing due to lack of proper drainage.

Moss can be placed in different styles. While other colored mosses make beautiful patterns, different types of moss pull your terrarium together. Tape it to the sides or scatter it when using the Spanish moss or other hanging species.

A terraium.
It can be spread around and filled in the gaps with other smaller pieces of decorations.

Adding a stick or a large rock in the middle of the terrarium then hanging the moss is also a perfect idea. When adding moss, avoid packing it too tightly. Also, ensure it does not press up against the walls of the terrarium.

  1. Add some extra décor

To make the terrarium look more sociable and fill in the gaps, you can add some extra decorations. For example, natural-looking rocks can make a great accent with green or brown moss. Others like quartz enhance bright-colored moss.

Using decors made of plastic is not recommended for a terrarium. When kept in the sun for long, plastics may meltdown, affecting the water purity. In addition, plastic décor does not look natural near-real moss or other plants for aesthetic purposes.  

Did you Want to Add some Animals to Your Terrarium?

Well, doing proper research on various animals you would like to keep is essential. Knowing the side effects of these animals and their best habitat is essential. Generally, when choosing animals, some of the most recommended animals are non-aquatic salamanders or small toads. Adding a tiny insect or frog is recommended to enhance a complete ecosystem.

Amphibians may need a small source of water. Some of the good insects you can use include harmless beetles, pillbugs, and snails. The insect will love it more when there is a cap-full of water or light with frequent misting.

 In all the animals you keep, ensure you have the means to provide care, food, and a safe environment for them. Follow the care instructions for each animal after adding them to the terrarium. Ensure you practice proper handling measures, such as washing your hands, before and after touching them or their environment.

Proper Care for a Terrarium

  • Always keep your terrarium wet. Ensure to mist your terrarium once a day with chlorine-free water.
  • Always remember to feed your plants and animals. Animals should be fed with their specific species’ diets while the plants can get some fertilizer. The fertilizer added should be in a very small amount and in liquid form.
  • The terrarium should always be placed in a rightful area. Place it in a room with proper temperatures, and in a place, it does not get direct sunlight.
  • After about nine months, you can always replace the substrate and clean the container. To allow enough air to the moss, remove the container top for two hours every week.

Bottom Line

What next if not to enjoy your terrarium? Remember that moss bouncy and verdant nature gives texture and perfect depth to any design. By reading this article, you can even decide to go a step further to offer your terrarium, different effects of rolling hills, wild grassland, or even dense jungle. With proper care, something captivating is on the make, and your neighbors will be peeping or seeking advice on how to maintain their terrarium as yours!

Sedum (Stonecrop): How Much Sun Does It Need?

A sedum exposed to sunlight.

Sedum, also known as the stonecrop, is a relatively easy-to-grow group of succulents that look great in the summer and autumn. The Genus features approximately 600 different species that look alike. These succulents are known as “stonecrops” because people who have it usually joke that only stones can survive with less care and live longer than sedum. However, you still need to ensure the growing conditions are suitable for your plant to thrive. One of the easiest ways to ensure your sedum thrives is by providing it with the right amount of sunlight. The light shouldn’t be too much or too less.

So, does sedum need direct sunlight? The simple answer is “no.”  While these succulents prefer full sun, they can still survive in partially shaded areas. The plant will generally develop the best colors if it receives at least six hours of sunlight every day. The vigorous low-growing species can still survive with less than six hours of sunlight, but you have to ensure the amount of time the succulent is exposed to sunlight doesn’t drop to below four hours. If you live in an area that doesn’t receive plenty of sunlight, be sure to use artificial lights to fulfill the plant’s light requirements.

This article discusses everything you need to know about sedum plant light requirements. Does it need full sunlight to thrive? How long should be exposed to artificial lights? Read on to learn everything you need to know.

What Are the Best Growing Conditions for Sedum?

Like most succulents, stonecrops prefer full sun to thrive. While these succulents are primarily associated with backyard gardens in relatively hot and dry regions such as the western parts of the United States, sedum can actually thrive in a wide range of soil types and climates.

Good drainage is an essential requirement for the plant to thrive. In fact, this is one of the most popular hardy plants you will come across. The plant is also common on Colorado’s steep, south-facing hillside, where it is blasted by full sun for most parts of the year.

A pink sedum.
The plant spreads pretty quickly, preventing invasive weeds from taking over your garden.

Stonecrops can survive with minimal watering and don’t need to be fed regularly. In fact, you should only consider feeding your plant during the active growth season. The plant spreads pretty quickly, preventing invasive weeds from taking over your garden.

If you want to learn more about sedum plant care and how to grow one at home, ensure you read our ultimate guide on how to care for sedum plants here.

Sedum Plant Light Requirements

Like other succulents, sedum will only thrive when grown in a location where it can receive at least six hours of full sun every day. If you use artificial lights to grow these plants, you should leave them turned on for at least 12 hours a day. In some cases, you may have the lights on for up to 16 hours a day before you turn them off and give the plant eight hours of rest.

While most sedum species love full exposure to sunlight, some species can tolerate partial shade. No species can survive in total shade. If you are growing sedum in an area that experiences relatively long, cold winters, make sure you take your plants out during spring and summer to improve their overwintering capability.

A sedum plant in a pot.
Most sedum species love full exposure to sunlight.

If you are growing these plants indoors, be sure to find a good spot on an east-facing or south-facing windowsill. This way, they can enjoy plenty of direct sunlight. Since the succulent is one of the most undemanding plants, a regular potting mix will do well as long as you don’t leave it to become too dry.

During the dry season, the plant will shade most of its leaves. Don’t worry because this indicates that your plant is receiving the right amount of sunlight required.

The flowers have needle-like structures that come in a wide range of colors, including green, blue, purple, and grey. Butterflies and bees love the leaves too much. Since sedum is a perennial plant, the leaves reappear after the dry season.

Can Sedum Survive in Shade?

The answer to this question is both “yes” and “no.” While most sedum species require exposure to full sunlight to thrive, some low-creeping species will survive partial shade as long as the potting mix is kept relatively moist.

However, no sedum species can survive under the full shade because these plants use sunlight to manufacture food through photosynthesis. When growing sedum under partial shade, you need to ensure all the other growing conditions are spot on.

Plant in a shade.
No sedum species can survive under the full shade.

A combination of partial shade and extremely low temperatures or overwatering is a surefire way of killing the succulent. Even though the plant is generally undemanding and low-maintenance, you cannot afford to over-neglect it for too long.

What Are the Signs of Too Little Sunlight?

So, how can you know that your sedum is receiving too little sunlight? The first and most prominent sign is the flopping over of the plant’s stem.

When sedum isn’t receiving enough sunlight, it grows leggy, and its leaves become soft because it is trying to reach out to the available sunlight. This will cause the plant to overstretch and become weak.

A closeup image of sedum.
This will cause the plant to overstretch and become weak.

When flowering starts and weak stems now have extra weight to support, the plant can no longer stay erect, and it will most likely flop. So, if you notice signs of weak stems in your sedum, the cause could be a lack of enough sunlight.

Fortunately, the remedy is quite simple. Simply transfer your plant to a spot that receives plenty of sunlight, and it will start to grow strong again. However, full recovery may take some time.

What Are the Signs of Too Much Sunlight?

Since they are sun-loving plants, it doesn’t mean that sedum can’t receive too much sunlight. Typically, when the succulent is exposed to too much sunlight, it will start to show stress that can trigger a wide range of symptoms.

Your plant will start shedding leaves to avoid losing too much water through transpiration. This is its most common defense mechanism when exposed to excessive light.

Sedum in a clay pot.
Your plant’s leaves will start to show signs of sunburn damage by getting scarred.

If the leaves don’t fall, most of them will start turning yellow or showing brown patches that are more noticeable on the outside edges of the leaf. The smooth feel of the leaf may also turn into a rough texture.

If you notice these signs and do nothing about it, your plant’s leaves will start to show signs of sunburn damage by getting scarred. Remember that the scarring is permanent, and the only way to get rid of it is by pruning the affected sections.

Therefore, be sure to move your plant to a partial shed as soon as you start to notice signs of excessive exposure to sunlight. When you move your plants from indoors to outdoors, introduce them to full sunlight gradually.

You can start by exposing them to the morning sunlight for a couple of hours, then gradually increase the number of hours until you reach a point where you can throw them in full sun, and they won’t find it hard to survive.

Will Sedum Survive Winter?

Being a sun-loving succulent, you may be wondering if sedum can really survive winter. Well, the truth is that sedum can survive winter if you take care of it the right way.

The succulent is extremely tolerant of cold environments, but you need to ensure you are doing a few things right. First, if you plan to leave your sedum outdoors during winter, ensure you use resin containers.

The reason why we recommend resin is that ceramic containers may break when freezing temperatures hit. You can even protect your plant further by burying the container in the ground.

Another thing you need to be careful with during winter is watering. Keep in mind that you are dealing with a succulent, and these plants generally don’t like too much water.

During winter, sedum enters a period of dormancy and stops growing. Therefore, you need to stop or moderate watering. However, in dry winter, you still need to water your plant sufficiently to keep it alive.

Check the soil regularly to determine if you need to water your plant. Typically, potted sedums need more watering during winter than those grown in-ground.

You should also consider bringing outdoor sedum indoors during winter. This will keep the succulent safe from the freezing temperatures that may destroy it.

However, before you bring your sedum indoors, ensure you prune it to get rid of the elongated stems. If you have a relatively smaller sedum, you can bring it inside without pruning it.

Once they are indoors, provide them with appropriate source light. The best option is to use artificial grow lights that you can purchase online.

Grow lights will play a critical role in keeping your plants healthy throughout the cold season. Be sure to keep the lights on for at least 12 hours a day.

Final Thoughts

Sedum is a tough plant that can survive in many different conditions. Be sure you’re giving it the right amount of light and water, but don’t worry if it’s not getting enough sun–just try to provide some shade for your sedum during the hottest parts of the day.

Make sure they have good drainage, too! If they aren’t thriving, consider moving them outdoors for part of the year, where more sunlight will be available.

Does Sempervivum Bloom? Growing Tips And Answers

The sempervivum is a charming, strange and oddly plant loved by many people for its unique appearance and vibrancy. The succulent is relatively hardy and can survive with minimal care. The plant got its name from a Swedish biologist named Carl Linnaeus, known for the Latin naming of the Sempervivum species. Sempervivum is a Latin name that loosely translates to “always living.” While gardeners know a lot of things about this succulent, one thing that is always confusing is the flowering pattern of the succulent.

So, does sempervivum bloom? The simple answer is “yes.” However, the succulent will only flower once in its lifetime since it is monocarpic, meaning it dies after blooming. Luckily, a sempervivum will grow for many years (at least three) and produce lots of offsets commonly referred to as chicks before flowering. The offsets (chicks) live on when the mother plant dies after blooming. You can temporarily halt the flowering by scooping out the bloom stalks with a sharp, clean knife. This only works if you manage to catch them as soon as the center rosette starts to close and elongate.

This blog post discusses everything you need to know about sempervivum flowers, including what triggers blooms, when you should expect them to appear, how they look, and how you can temporarily halt blooming.

How Do You Know that Sempervivum is About to Bloom?

One day you wake up and notice your sempervivum bulging and looking strange because the center part no longer matches the uniform growth of the plant leaves. What do you do in a such a case?

Well, you don’t have to be worried about anything but simply keep an eye on the bulging part at the center of your plant because it is most likely a flower stalk that will eventually produce beautiful star-shaped blooms.

Some of the common signs that your sempervivum is about to bloom include stretching the main stem, tilted appearance to the rosette, and closing the center leaves.

A sempervivum flower.
The succulent will only flower once in its lifetime.

As the bloom matures, the center part of your plant becomes even taller and longer. Sometimes, the plant can suddenly grow up to two feet tall.

The process is known as the monocarpic process and signals that the flower is about to come out and produce seeds before the plant dies off. No need to worry because the flowering parent plant will have created several smaller offsets that will take its place.

Cutting the stem off once the succulent has already started growing taller won’t help save the plant. So, if you didn’t notice the signs earlier, it only makes sense to enjoy the unique floral show and bid farewell to the mother plant.

But we must mention that sometimes your sempervivum gets taller and leggy when it is not receiving enough light. The elongation is referred to as etiolation, and it helps the plant reach out for sunlight.

Generally, the stem from a light-deprived sempervivum will look weak and bare, while a flower stalk is strong, round and lush with upward-facing flower bud clusters. So, don’t confuse your light-deprived sempervivum for a sign of flowering.

When Does Sempervivum Bloom?

The sempervivum succulent is highly adaptable and resilient, producing flower-like clusters of rosettes. Most beginners tend to confuse the rosettes for flowers.

However, these succulents take some time before they start producing flowers because they are monocarpic. Generally, a well-maintained sempervivum will flower after three to four years.

The flowering mostly happens in late spring or summer when the long warm days and prolonged hours of sunlight provide the plant with ideal flowering conditions.

The flowering process signals the beginning of the end of the plant’s life cycle, but you shouldn’t be worried because the mother plant will have produced plenty of offsets to replace it.

Sempervivum on a rocky garden.
These succulents take some time before they start producing flowers.

Stressed sempervivum plants tend to bloom earlier, but the flowers produced won’t be healthy. In most cases, you will only notice relatively small flowers that will disappear within a short time before the plant dies.

When you notice such a thing with the mother plant, be sure to reevaluate your routine care schedule and identify what you have been doing wrong so that the offsets that replace it don’t suffer the same fate.

What Happens When Sempervivum Blooms?

As long as you take good care of your sempervivum plant, it will produce several offsets every year. So, these succulents don’t have to flower to reproduce new seedlings.

But as we have mentioned throughout this article, the succulent is monocarpic. So, any rosette that does flower and produces seeds will eventually die. That is why the plant isn’t usually grown for its flowers but for its beautiful appearance.

The flowers are relatively small and come in shades of yellow, white, or pink. If you love experimenting and your primary objective is to propagate sempervivum through seed germination, then the flowers are a welcome sight.

A closeup image of simpervivum.
These succulents don’t have to flower to reproduce new seedlings.

However, it is always a cause for worry for many gardeners because it marks the end of a generation and the start of a new one. Dead rosettes also leave gaps in otherwise tidy sempervivum clumps.

In some rare cases, a sempervivum may fail to produce offsets meaning the appearance of the blooms marks the end of a colony/generation.

What Triggers a Sempervivum Plant to Bloom?

Blooming is a highly unpredictable process in the sempervivum life cycle. One year, your plant will be growing normally and showing no signs of flowering, and in another, a whole colony can decide to produce flowers.’

It is relatively hard to know what informs the succulent that the end is near and needs to propagate. Plant experts believe that any form of stress can induce premature flowering in the sempervivum.

Drastic changes in watering, light, temperature, and even humidity can threaten the plant’s survival, thus diverting all of its resources to produce the next generation of seedlings as fast as possible.

However, if you take good care of the sempervivum and avoid exposing it to any form of stress, you can predict when your plant will start flowering. In most cases, these succulents will start flowering when they are three years old.

A sempervivum that blooms because its time has come will generally produce healthy flowers and leave behind healthy offsets to take its position.

Does Fertilizing Sempervivum Trigger Blooming

Feeding your plant won’t necessarily force it into flowering. Generally, flowering in sempervivum takes time.

However, you need to do everything possible to keep your plant healthy so that when it reaches maturity, it can put on a magnificent floral show that you will love.

Part of your sempervivum care routine should include applying diluted natural fertilizer to the succulent once in spring and once in summer for potted plants, and only once in winter for those growing in your outdoor garden.

A common sempervivum species flowering.
The blooms will appear at the right time.

The only ingredient to getting your sempervivum to bloom is patience. As long as you do the right things and remain patient, you will experience great results. The blooms will appear at the right time, and once they are fed, the mother plant will die peacefully.

But it doesn’t mean you will say goodbye to your plant permanently. As long as you take good care of the offsets (chicks) left behind, they will eventually mature and cover the space left by their mother plant.

Sempervivum Flower Care

Just like the rest of the plant, sempervivum flower care doesn’t require you to do anything special. You can leave the plant alone until it finishes blooming. Once it is done with blooming, the stem and base of the center rosette will dry out and die.

Be sure to clip off the stem other than pulling it out of the living cluster of the remaining rosettes to avoid yanking some of the offsets.

Sempervivum on the basket.
The young offsets will grow larger and fill the space left behind by their parent.

Alternatively, let nature take its course and leave the dying stem as proof of the mother plant’s interesting and fantastic life cycle. The stem will remain standing for a couple of months before it breaks off and compost in the pot or garden.

The young offsets will grow larger and fill the space left behind by their parent. The best you can do is enjoy the flowers and the guarantee of everlasting life that the succulent has in its offsets.

Can You Prevent Sempervivum from Blooming?

The idea of sempervivum dying after blooming can give you goosebumps, especially if you have grown fond of your plant. So, can you stop the plant from blooming so that you can spend some more time together?

Well, there are a few things you can do to try and delay the blooming, but there is no guarantee they will work. If you want to delay the blooming a little bit, ensure you clip off the bloom stalk as soon as it appears.

The stem will be tougher if you catch it too late, and the hormones that cause flowering will be already at work. The success of preventing blooming is highest when the bloom stalk is still less than three inches tall.

Final Thought

Sempervivum usually takes years to bloom, but the flowering rosette will die once it blooms. Give your plant proper care for the best floral show.

If you want to prevent blooming from happening, you need to catch the bloom stalk when it is still less than three inches tall and clip it off. We wish you all the best in your effort to keep your sempervivum happy and healthy!

How To Keep Your Golden Barrel Cactus Fresh, Full And Healthy

Although the golden barrel cactus is now quite rare in the wild, it is common in homes and backyard gardens across the United States and other Latin American countries. Its unique spherical appearance and dark green color make a striking ornamental accent for rock gardens and desert landscapes. This succulent can reach up to three feet in diameter and five feet in height with proper care and attention. It can also produce beautiful flowers. The golden barrel cactus offers an attractive, eco-friendly and perfect décor solution for your garden, even if you live in an area that is prone to drought.

So, how can you care for golden barrel cactus? The golden barrel cactus requires at least six hours of direct sunlight to survive and thrive. So, you need to position it on a south-facing windowsill for better results. Provide well-draining potting mix and water it at least once during the growing season (spring and summer). Ensure the soil is completely dry between watering sessions and maintain the growing temperature between 50oF and 70oF. Don’t let your golden barrel cactus sit in temperatures below 40oF during winter.

This blog post discusses everything you need to know about growing the golden barrel cactus and provides you with practical tips that will help you achieve better results. Read on to learn more.

Golden Barrel Cactus: A Quick Overview

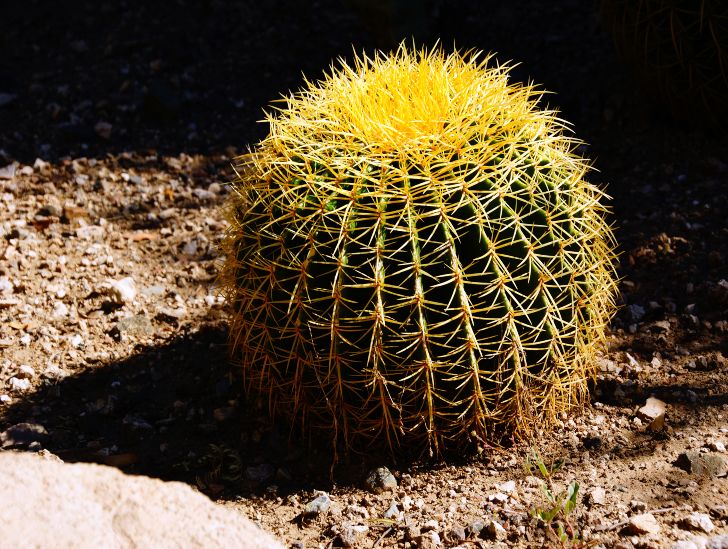
The scientific name of the golden barrel cactus is Echinocactus grusonii. It is also known as the hedgehog cactus, barrel cactus, mother-in-law’s pillow or mother-in-law’s cushion.

The cactus is native to the Chihuahuan desert in Mexico and the surrounding southern states of the USA.

It has a distinctive spiny exterior that is an adaptation to escape from predators. These spines are harmless if they come in contact with your skin, but the branches are quite fragile and easily break off.

Golden barrel cactus can survive for decades under ideal conditions, with some specimens known to have survived for 300 years.

However, it is now an endangered species due to overcollection in the wild and vanishing habitats.

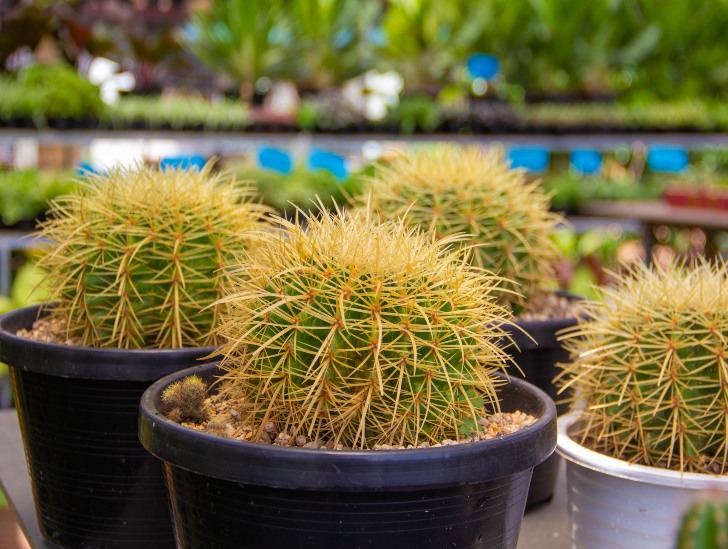
A golden barrel cactus in a bron pot.
The golden barrel cactus is also known as the hedgehog cactus, barrel cactus, mother-in-law’s pillow

Even so, these plants are common houseplants across the United States and other Latin American countries.

Golden Barrel Cactus: How to Care for It?

The golden barrel cactus generally grows best outdoors under certain conditions. However, it is also possible to grow a potted barrel cactus indoors.

Generally, the succulent will do well when you provide it with the right conditions and take care of it.

So, what can you do to ensure your golden barrel cactus is healthy and happy? Let us find out:

1. Soil Requirements

Everything starts with ensuring your barrel cactus is rooted in the right type of potting mix. Being succulent, this plant does well in well-draining soil.

You can add sand or perlite to the mixture to ensure good drainage and aeration. In this way, you won’t have problems with rotting roots.

Your golden barrel cactus needs a potting mix that provides enough nutrients while still draining excess water effectively. Ideally, a standard cactus mix will do the trick. You can also use a loam-based potting mix for success.

2. Pot Size Requirements

Your golden barrel cactus should be planted in a minimum of 16 inches deep and wide container.

But you must ensure that the entire root system is buried in the soil to avoid it drying out quickly due to exposure to air.

Golden barrel cactus in a pot.
Make sure the pot can accommodate its growth without roots getting damaged.

It is important to note that barrel cacti grow slowly. So, if you are growing it in a container, make sure the pot can accommodate its growth without roots getting damaged against the edges of the container.

3. Sunlight Requirements

The golden barrel cactus requires bright sunlight for healthy growth and flowering. To do well, it should receive six hours or more of direct sunlight per day.

If your barrel cactus isn’t getting enough light, it will have yellowish discoloration, and its spines may fall off easily. However, if you provide too much sun exposure, the plant might grow lopsided and expose delicate roots to sunburn.

Keep it on a south-facing window during the growing season, and it will be happy. However, you shouldn’t let it sit on the windowsill if you are experiencing intense sunlight or a heatwave.

Golden Barrel cactus exposed to sunlight.
Excessive heat could scorch your plant and cause unsightly burned patches on sections of the plant.

Excessive heat could scorch your plant and cause unsightly burned patches on sections of the plant. The only way to get rid of sunburned areas is by pruning the sections.

Young golden barrel plants are particularly prone to sunburn. To protect them, ensure you keep them away from direct sunlight until they are relatively mature. Instead of exposing them to direct sunlight, ensure they receive a good amount of indirect sunlight.

4. Watering Requirements

Golden barrel cactus thrives in soils that drain well, so it does best when watered moderately. Allow the top layer of the soil to dry out between watering sessions and keep it away from other plants growing nearby to avoid water competition.

The barrel cactus doesn’t like being waterlogged. Don’t let the roots sit in excess water for too long, as soggy soil can lead to root rot and cause problems with nutrient absorption.

You should water your golden barrel cactus once or twice a week during spring and summer, but reduce the frequency to once per month in winter. This will depend on your conditions and climate, as well as the size of your pot.

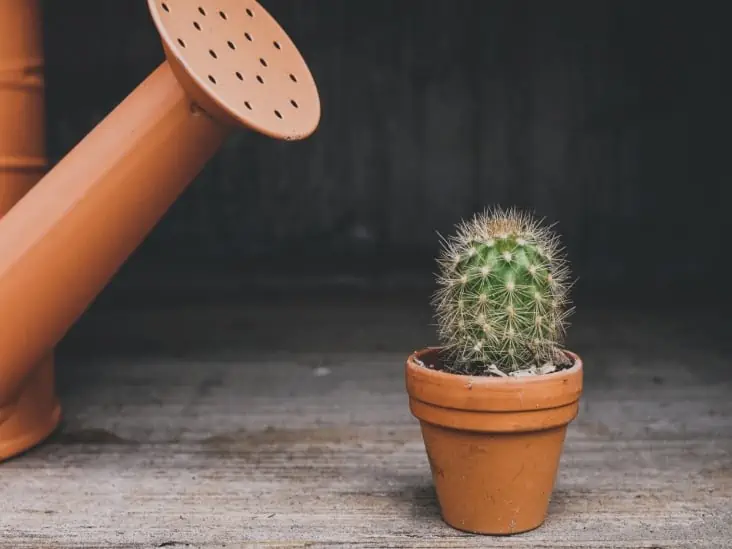
A water can and a cactus.
Allow the top layer of the soil to dry out between watering sessions.

If you can detect even a hint of yellow color at the base of the plant, it is time to water again. The golden barrel cactus thrives if roots are kept slightly moist at all times.

5. Feeding Requirements for Golden Barrel Cactus

The golden barrel cactus doesn’t require much feeding. You can fertilize it with a standard houseplant fertilizer every two to three months during spring and summer, but reduce the frequency to once per month in winter.

Default fertilizer rates should be satisfactory for this plant, so you don’t have to go overboard with the amount of fertilizer you give.

When feeding your golden barrel cactus, don’t fertilize the soil unless roots are exposed. Instead, place fertilizer in a saucer next to the pot. This will ensure enough nutrients reaches the plant’s roots while preventing root rot by keeping excess water away from them.

6. Temperature Requirements

The barrel cactus does well in temperatures between 50-90 degrees Fahrenheit. However, avoid exposing it to temperatures lower than 45 degrees in winter, or your golden barrel cactus may develop leaf drop problems.

If possible, keep your golden barrel cactus above 60 degrees Fahrenheit at all times. Temperatures below this threshold can cause significant stress, leading to a wide range of issues.

When moving your potted barrel cactus outdoors after winter, don’t do it suddenly, as this could shock the plant and cause massive stress.

Instead, gradually acclimatize it by taking it out for a couple of hours in a relatively shaded area before you transition to exposing it to full sunlight.

7. Pests & Diseases for Golden Barrel Cactus

The golden barrel cactus isn’t prone to pests and diseases. However, when infestations do occur, they can cause considerable damage to your plant’s appearance.

If you notice any powdery white substance collecting on the surface of your cactus, it could be mealybugs. Mealybugs are sap-sucking insects that cluster together in colonies on your plant.

Eradicating them requires you to remove infected parts of your plant with care. After removing mealybugs, spray the barrel cactus with insecticidal soap to prevent reinfestation.

If the cactus has dark scars on its skin instead of powdery white substances, it could have scale, which are insects similar to mealybugs. However, unlike mealybugs, scale insects are wingless and do not cluster.

Eradicating them is also more difficult as spraying your cactus with the methods used to remove mealybugs would be useless. Instead, you’ll need to use a strong insecticide.

Aphids are another common pest for golden barrel cactus, especially during summer. While aphids may not cause significant damage to your plants, they can multiply rapidly if left untreated.

Simply wipe them with a wet cotton ball soaked in alcohol to eradicate them. Make sure the infected parts of the plant are dry before you move it back indoors.

8. Propagating Golden Barrel Cactus

You can propagate your golden barrel cactus using its offsets. Just remove them from the main plant using a sharp, clean knife and allow them to dry at room temperature before planting.

A small cactus barrel.
You can propagate your golden barrel cactus using its offsets.

If you want to propagate your golden barrel cactus from seeds, it is best if they are fresh. Otherwise, sow the seeds in pots filled with soil mix and cover them up to around ½ of their depth.

Keep the soil damp and place it in a warm, brightly lit area to ensure the seeds germinate quickly. Once they do, remove all but the strongest seedling from each pot.

Summary

The golden barrel cactus is a very easy plant to grow. While it’s sensitive to significant changes in temperature, it does well if you know what you are doing.

If you do everything right, your golden barrel cactus should reward you with lots of healthy green growth and vibrant flowers.

It gets tall and lean as it grows older. Just make sure to plant it in a large enough pot and avoid positioning it near other plants as it can grow at a rapid pace.

6 Things You Should Know About Watering Your Adenium Plant

The Adenium plant, commonly referred to as the desert rose, is one of the most prolific flowering succulents native to parts of Africa and the Arabian Peninsula. The plant adapts well to many climatic conditions and is mainly cultivated as an indoor houseplant in many homes. While there are many things you need to do to keep an indoor adenium happy and healthy, the most critical aspect of its routine care is watering. Generally, the plant needs to be watered sparingly and only when necessary. Keeping it waterlogged can lead to a wide range of issues, including root rot that can lead to its death.

So, what are some of the golden rules for watering adenium plants? Generally, the watering needs for this succulent largely depend on the time of the year and the climate of the area where you live. To keep your adenium plant happy, keep it moist but not soggy. Check the potting mix regularly and only water when the top two inches of the soil feel dry. In summer, you may want to water it at least once every week but cut it back to once per month in winter. When watering, use the “soak and dry” method and stick to using rainfall or distilled water. Avoid using tap water unless you have no other option.

This blog post discusses some of the essential desert rose watering tips to keep your plant happy and healthy. Read on to learn more!

1. Use Growing Pots with Plenty of Drainage Holes

The #1 adenium watering tip you need to know is this succulent hate being waterlogged. Therefore, the type of container you use will significantly impact your watering regime.

If you are a beginner, we recommend using a growing container with plenty of drainage holes to evade the risk of causing root rot due to waterlogging.

It will also take a lot of time, effort, and experimentation to monitor the water requirements for your plant, depending on the climatic conditions of where you stay. However, once you strike a balance, it becomes relatively easy to keep your plant in great shape and healthy.

An adenium plant being watered.
The type of container you use will significantly impact your watering regime.

If you have already purchased a container without drainage holes, don’t panic because you can easily add drainage holes to any type of container with a diamond tip drill bit.

For glass containers that can’t be drilled, feel free to add a layer of charcoal and pebble to encourage good drainage.

The material of your growing pot is also critical in keeping your adenium plant happy. Generally, growing pots made of porous materials such as ceramic and terracotta allow water to evaporate relatively faster than glass and plastic containers.

Ensure you understand the advantages and disadvantages of different container materials before choosing one for your succulents.

2. Always Check the Potting Mix Before Watering

The truth is that adenium requires slightly more water than other succulent species to thrive. An underwatered adenium will have wrinkled and drooping leaves. But it doesn’t mean that you should water the succulent too often.

A good rule of thumb is to check the top two inches of the potting mix and ensure it feels completely dry before watering. When watering your adenium plant, soak the soil thoroughly and give it some time to dry out before taking your plant back to its usual position.

A person checking the soil of the adenium plant on the pot.
Adenium requires slightly more water than other succulent species to thrive.

Once you have done so, don’t water it again until the potting mix becomes completely dry. Remember that it is always better to underwater your succulents than overwatering them.

For beginners, consider watering your adenium plant once per week during summer and once per month during the cold winter months. Observe your plant’s reaction after every watering session and use the feedback you collect to adjust your watering schedule accordingly.

Learning to tell if your adenium plant is underwatered or overwatered might seem a little bit daunting, but it is doable.

3. Location and Lighting May Influence Watering

Typically, the adenium thrives best in a full sun environment. Exposure to full sunlight has helped the plant to develop survival mechanisms that can influence the watering schedule in a home environment.

When picking a growing location in your home, it is good to choose a spot that receives plenty of bright sunlight throughout the day. This could be east or south-facing windowsill.

If you want to grow the plant in your outdoor garden, be sure to select a spot that is not sheltered by taller plants. While partial shade can offer protection from intense sunlight, the succulent can’t survive in a full shade.

Adenium plant exposed to sunlight.
It is good to choose a spot that receives plenty of bright sunlight throughout the day.

So, if you live in an area that receives plenty of sunlight most parts of the year and you have positioned your plant in a sunny spot, you may be required to water regularly – up to two or three times a week depending on the intensity of sunlight in your area.

This is especially true during the spring and summer seasons when the plant is actively growing. You are even allowed to keep your plant moist but not waterlogged.

During fall and winter, adenium slides into dormancy and stops growing. In most cases, it will also be raining during this time of the year. Therefore, you need to cut back on your watering and give your plant enough time to rest.

Watering it only once per month is enough to keep it happy. In areas that experience extreme weather conditions, the adenium plant may survive the entire winter without the need for watering.

4. Use “Soak and Dry” Watering Method

One of the best ways to water the adenium plant is using the soak and dry” method. This relatively simple technique involves soaking the completely dry potting mix in a water bowl and then allowing it to dry out before watering again.

To avoid causing harm to your succulent, make sure the growing container has plenty of drainage holes to allow the excess water to drain out as quickly as possible.

For indoor adenium plants, it is generally good if water doesn’t get to the top of the leaves. If water sits on the leaves for too long, it can cause rot. Use a small spout watering can or multi-purpose squeeze bottle to accomplish the mission.

However, water sitting on the plant’s leaves isn’t an issue for outdoor plants because there is massive airflow, and the water will dry out pretty quickly.

An air plant on a soak and dry watering method.
The “soak and dry” technique allows your plant to develop a robust and healthy root system.

If possible, just pour water on the soil around the adenium plant until it is completely soaked. You will know that the plant is completely soaked when water starts to drain out of the drainage holes at the bottom of the container.

This watering method works best because desert roses are native to areas where the soil drains pretty quickly after rainfall. The rainfall is also infrequent.

The deep watering technique allows the plant to access plenty of water just as it would in its natural habitat whenever it rains. During the “drought” season, in between the watering sessions, your plant starts to develop new roots in search of more water.

In the end, the “soak and dry” technique allows your plant to develop a robust and healthy root system which enables it to withstand relatively long periods of drought.

Avoid using a spray bottle for watering your plant because it leads to the development of a weak root system that can’t withstand drought.

5. Keep a Record of Your Watering

This one might sound strange, but it is absolutely critical. Keeping a record of your watering schedule is one of the easiest ways of figuring out your plant’s water requirements.

Knowing when you have watered your plant and having notes on how it reacted to the watering will help answer a lot of questions, including whether you are underwatering or overwatering.

Fortunately, there are lots of great ways to keep track of this – you can use pen and pare, notes on your smartphone, a succulent tracker app, or even an excel sheet on your computer.

The primary objective is to record each time you water your adenium and what you observed about the plant a few days later – was everything normal, or did it display some unusual characteristics?

Keeping track of your watering schedule provides you with a comprehensive history for your adenium plant.

It reminds you when it is time to water and even allows you to keep a photo gallery of the different transformations your plant undergoes.

6. Use Rainwater

The best type of water to use for most succulents is rainwater or distilled water. It is not advisable to use tap water because it contains a lot of mineral substances such as calcium or magnesium that can easily build up in the soil or appear on the leaves of your adenium as white spots.

A water in a basin.
Collect plenty of rainwater during the rainy season and store it safely for use.

Be sure to collect plenty of rainwater during the rainy season and store it safely for use throughout the year. If you cannot access rainwater, be sure to visit your local plant store and purchase distilled water.

Summary

That is it about watering your adenium plant and ensuring it remains healthy. As long as you do everything right, your plant will thrive and make you a happy gardener. Remember to be flexible in your approach depending on the climate, soil, and adenium species you have.

At first, you may be forced to deal with a lot of guesswork, but everything becomes pretty easy and straightforward once you understand your plant’s unique water requirements. Have fun growing the adenium plant, and enjoy the process!

Pencil Cactus: Full Sun Or Part Shade?

Pencil cacti are among the most popular succulents for indoor gardening, but they have some special needs that make them different from other common houseplants. For one thing, pencil cacti can grow up to 3 feet tall when given enough room and require at least six hours a day of sun exposure. In addition, these plants should be kept in temperatures between 60 degrees Fahrenheit in the wintertime to 80 degrees during the summer months (or 20-30 degrees Celsius). Apart from watering, the most important aspect of pencil cactus care is light.

So, does pencil cactus need full sun? Yes, pencil cactus does need full sun to be happy. This succulent prefers an area that gets about six hours of direct summer light per day. However, it doesn’t mean that pencil cactus can survive any amount of sunlight. When the sun is too hot, you should provide your plant with a partial shade to avoid sunburns. A sunburned pencil cactus will turn yellow, and it may be difficult to restore its original color without pruning.

This blog post discusses everything you need to know about pencil cacti and exposure to sunlight to help you cultivate healthy and happy plants. Read on to learn more.

How Much Light Do Pencil Cacti Need to Survive?

Generally, pencil cactus prefers to grow under relatively high levels of sunlight. They thrive when exposed to at least six hours of direct sunlight.

If you are growing your pencil cactus indoors, consider positioning it on a south or west-facing window where it can absorb the maximum amount of sunlight.

A pencil cactus exposed to sunlight.
Prolonged exposure to direct sunlight doesn’t affect their watering needs.

To ensure even growth, turn the growing pot once every month so that all sides of the pencil cactus get enough light. During summer, the cactus will grow beautiful yellow foliage that turns into glowing red in the fall and winter.

Prolonged exposure to direct sunlight doesn’t affect their watering needs because they can thrive without water for prolonged periods.

They only require a little bit of water as they are used to growing in dry areas. In fact, many people love growing them as houseplants because they can survive with minimal care.

The most important thing you need to know is that pencil cactus cannot survive under low light conditions. If it runs low on light, the plant will start stretching towards the direction of light, causing a negative impact on its health.

If you live in an area that doesn’t receive plenty of sunlight, you may be forced to install artificial grow lights to keep your pencil cactus happy. If you are using artificial grow lights, ensure you leave them on for at least twelve hours a day.

Can Pencil Cactus Get Sunburned?

While most of us think of the pencil cactus as a highly resistible succulent that only thrives in scorching desert environments, you need to keep in mind that there is a limit to everything.

So, even if you try to mimic the conditions in the plant’s natural habitat, you should know the limits. In fact, some pencil cactus species can only be found in tropical regions that receive plenty of rainfall and don’t experience scorching sunlight.

A sunburned cactus.
It is a case of the plant being overexposed to too much direct sunlight.

Unless you are well-versed in cacti, you may not be aware of the pencil cactus species you have in your home and the climatic conditions it would ordinarily thrive in.

So, can a pencil cactus be sunburned? The simple answer is yes. When you start to notice intense yellowing of your succulent’s epidermis, it is a sign that your cactus isn’t happy with its current growing conditions.

Most probably, it is a case of the plant being overexposed to too much direct sunlight. Remember we mentioned that the plant only needs about six hours of direct sunlight to stay happy. So, if you expose it to more than six hours of direct sunlight, it will start struggling to survive.

Another reason your pencil cactus may be getting sun scorch or sunburn is a sudden change in growth conditions.

Typically, most of these succulents are grown in greenhouses where conditions are kept relatively constant. The amount of light, heat, and moisture remain consistent for a long time.

When you purchase the cactus and bring it home, there is a change in these conditions. When you plant it in a sunny spot, it may experience shock since it isn’t used to direct sunlight or sudden changes in temperature.

The result is a sunburned pencil cactus that will show signs of yellowing first before the rest of the stem starts to turn white and soft, indicating the eventual death of the succulent.

What Does Sunburn Look Like on a Pencil Cactus?

When you overexpose your pencil cactus to direct sunlight, it will start to look a bit sunburned. The edges of the cactus will turn brown or red, and the tips of the spines may start to disappear. If the sunburn is bad enough, the entire plant may die.

Sometimes, the sunburn can be too severe, causing the top layer of the stem to peel off and reveal the layers underneath it. This type of sunburn can sometimes appear white if there are no living cells below anymore.

A sunburned pencil cactus.
If you think your pencil cactus is sunburned, you can try to give it some shade.

The sunburn usually affects all parts of the pencil cactus, including the spines. However, the spines are usually the last thing to die, so they may still be green even if the rest of the cactus is brown or red.

If you think your pencil cactus is sunburned, you can try to give it some shade. You can also water it more often to help it recover.

Can a Pencil Cactus Recover from Sunburn?

A sunburned pencil cactus can successfully recover and start to grow back normally, but it may take some time.

The first thing you need to do is transfer it to a place where it is no longer exposed directly to sunlight. If you are growing it indoors, move it to another room but if you are growing it outdoors, look for ways of providing it with partial shade.

The primary purpose is to protect it from the excessive sunlight that caused the damage. If the cactus has already sustained severe visible burns, don’t try to remove them with a knife because when the plant heals, it may cover the wounds.

Pencil cactus in a black pot.
Be sure to water your pencil cactus because it is dehydrated.

Once you have moved the cactus to a place with relatively bright but indirect light, check the humidity of your potting mix since it may need watering.

To do this, carefully insert a thin wooded stick into the soil and remove it. If you notice that a lot of spoil has adhered to the stick, then you don’t need to water your pencil cactus.

However, if the stick comes out without any soil and feels dry, be sure to water your pencil cactus because it is dehydrated.

How Should You Acclimatize a Pencil Cactus to the Sun?

There comes a time when you have to move your indoor pencil cacti plant outdoors, especially during spring and summer. Unfortunately, if you are not careful with how you do it, the result can be catastrophic.

Moving your indoor pencil cactus outdoors requires a lot of patience. It is highly recommended to start the process in spring or fall when the sun rays are not so intense.

A good way of acclimatizing them is by exposing them to the sun for just one hour in the morning or late afternoon then increasing that time by one hour each week.

Observe your plant keenly for any abnormal reaction. For instance, if you increase the time from one hour to two hours and start to notice signs of sunburn, be sure to slow down.

You can move from one to one and a half while monitoring how the plant reacts to the changes. You are free to experiment, but don’t be in a hurry. Keep in mind that one bad decision can burn your plant to death.

What Can You Do to Prevent Your Pencil Cactus from Getting Sunburned?

Avoid overexposing your pencil cactus to direct and intense sunlight to prevent sunburn. If you live in an area that receives scorching sunlight, be sure to provide your cactus with some form of shade or keep it in a safe spot during midday hours when the sun is at its hottest.

Good air circulation around the plant can also play a critical role in preventing sunburn. Avoid keeping the succulents too close to each other when you group them.

When you water your pencil cactus, do so early in the morning or late evening when it is relatively cooler. This plays a critical role in keeping moisture on the plant and preventing it from drying out too quickly.

Pencil cactus in a white pot.
Feel free to add extra succulent soil to the container to help keep your plant tall and spread out.

You should also avoid sprinkling water directly on your plant’s leaves, as they can get sunburned by this action alone.

Feel free to add extra succulent soil to the container to help keep your plant tall and spread out. This helps it to grow a thick and protective bark.

Final Thoughts

A pencil cactus needs some direct sunlight each day to stay healthy. However, if it gets too much sun, it can get sunburned.

Sunburn on a pencil cactus looks like dried, brown leaves. If you catch the sunburn early enough, you may be able to save your plant.

To prevent your pencil cactus from getting sunburned, gradually increase its exposure to direct sunlight over time.