What Is the Penis Cactus and How to Care for It?

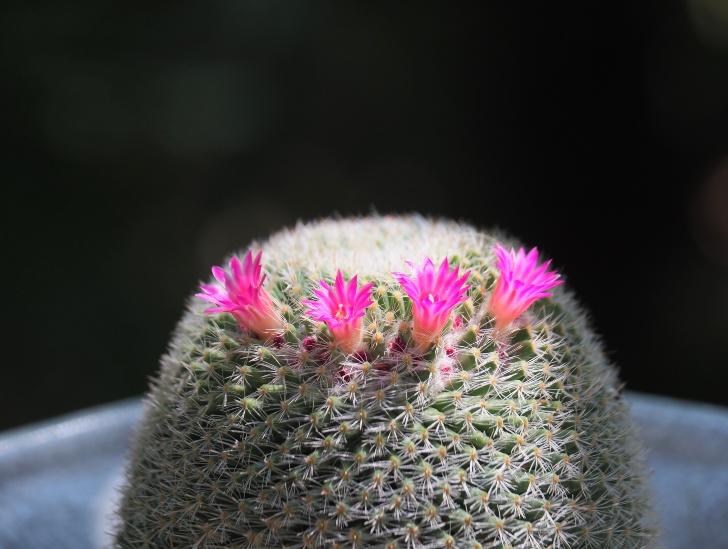
A cactus penis in a pot.

The term “Penis Cactus” is a colloquial name that refers to a specific type of cactus known scientifically as Trichocereus bridgesii. It is also commonly called the “Bolivian Torch” due to its origin in Bolivia and its elongated columnar shape. The nickname is due to the cactus’s appearance, resembling a phallic shape. The cactus grows upright, reaching heights of up to ten feet in its natural habitat. The Bolivian torch cactus features bright yellow spines as long as eight inches. The cactus thrives in relatively warm climates with plenty of sun exposure.

So, how do you take care of a penis cactus? The Bolivian torch cactus prefers full sun exposure making it an ideal option for your outdoor garden. Being a drought-resistant plant, it doesn’t need frequent watering. You should only water it when the potting mix is completely dry. Fertilize your Bolivian torch cactus once a month during the active growing seasons (spring, summer, and fall). Be sure to use a small amount of slow-release fertilizer. The cactus thrives in temperatures between 65 and 85 degrees Fahrenheit. Prune it regularly to prevent it from toppling over if you’re growing it indoors. Watch out for common pests such as aphids and mealybugs, and consider repotting your cactus every two or three years.

This blog post discusses everything you need to know about the Bolivian torch cactus and how to take care of it. Read on to learn more.

Penis Cactus: An Overview

The penis cactus, scientifically known as Trichocereus bridgesii but commonly referred to as the Bolivian torch cactus, is a fascinating and striking member of the cactus family.

Native to the high altitudes of Bolivia, this unique cactus has captured the attention of plant enthusiasts and curious minds alike.

The Bolivian torch cactus boasts an impressive columnar growth habit, often reaching heights of 10 to 20 feet (3 to 6 meters). Its elongated, ribbed stems exhibit a distinctive bluish-green hue adorned with prominent areoles and spines.
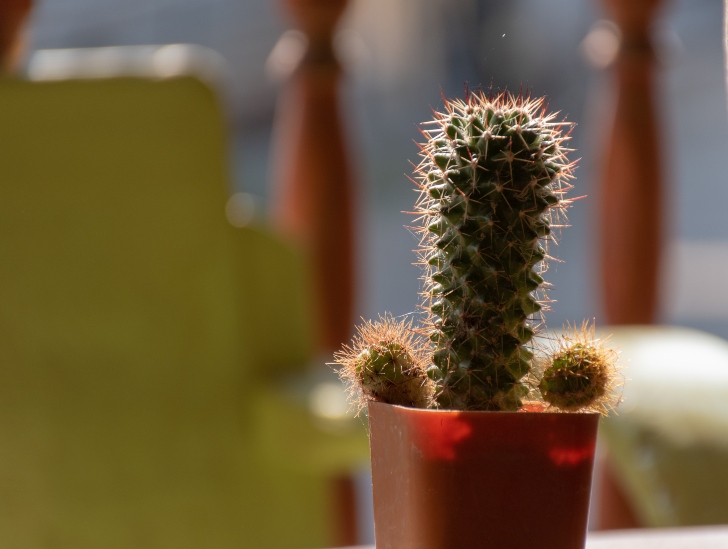
A cactus eccentric shape like penis.
It is a fascinating and striking member of the cactus family.

One of its most notable features is its uncanny resemblance to a phallic shape, earning it the humorous nickname “penis cactus.”

Indigenous to the high-altitude regions of Bolivia, specifically the Andean Mountain ranges, the penis cactus thrives in arid and rocky landscapes. It is a hardy species, adapted to withstand extreme temperatures and water scarcity.

Known for its psychoactive properties, the cactus has played a significant role in religious and healing rituals for centuries.

With increasing interest in the Bolivian torch cactus for ornamental and ceremonial purposes, the species faces potential threats from overharvesting and habitat destruction.

That is why many plant conservationists worldwide have started conservation efforts to protect this unique cactus and its natural habitat, encouraging responsible cultivation and ethical practices.

Taking Care of the Penis Cactus

Now that you know a bit more about the penis cactus, let’s take a look at how to care for it. The tips and tricks highlighted below will help you achieve great success cultivating this cactus at home.

1. Watering

The Bolivian torch cactus is a drought-resistant succulent that doesn’t require frequent watering to thrive. In fact, the cactus has a relatively thick stem to store as much water as possible in its natural habitat.

Therefore, only water the cactus when the potting mix is completely dry. You can check for the dryness level by sticking your finger in the soil up to the first knuckle.

If the soil feels dry, go ahead and water your cactus deeply. Otherwise, give it a couple of days before you check again.

When potted, consider watering the cactus slowly and wait for the water to flow out of the bottom of the growing container. Empty all the excess water from the tray to avoid waterlogging your plant.
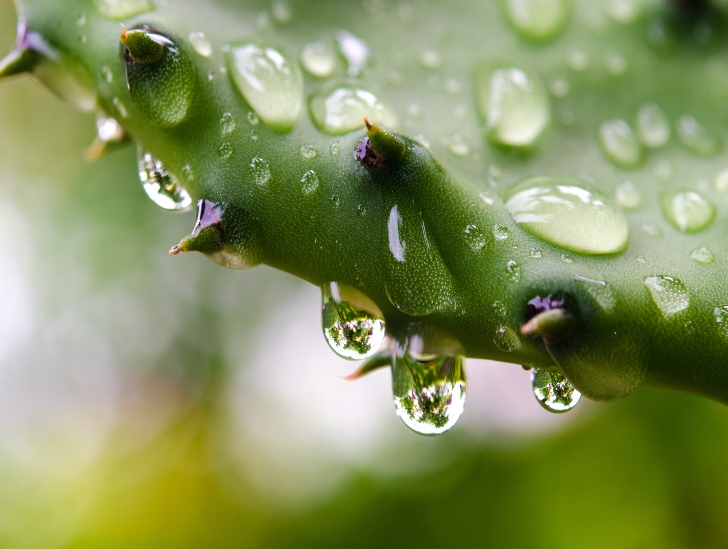
A water droplet in a cactus.
You can check for the dryness level by sticking your finger in the soil up to the first knuckle.

The watering frequency varies significantly with the season. The cactus is actively growing during spring, summer, and fall. Consider watering your cactus once per week to keep the potting mix slightly wet during this time.

Cut back on watering frequency during winter when the plant is dormant. Only water the cactus slightly during this time to keep the soil wet. Consider light watering once a week or every two weeks.

Water your Bolivian cactus with rainwater or distilled water. Avoid tap water since it contains a lot of magnesium, calcium, and other mineral salts that may cause soil compaction. Avoid splashing water on the stem during watering to prevent stem rot issues.

2. Light Requirements

The penis cactus is a sun-loving species and will thrive in bright, direct sunlight. When grown indoors, providing your cactus with the best possible light source is crucial. Typically, the cactus requires at least six hours of direct sunlight every day to thrive.

Choose an ideal spot that receives plenty of direct sunlight most times of the day. A south or east-facing windowsill is a good spot for your cactus.
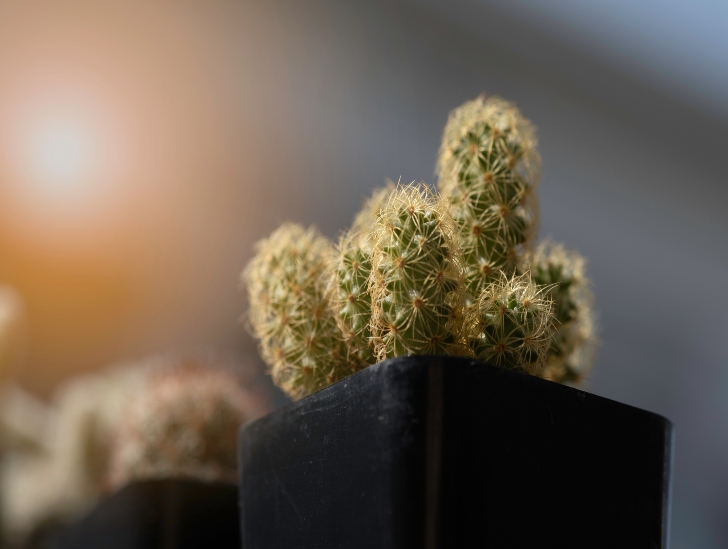
A lady finger cactus exposed to light.
When grown indoors, providing your cactus with the best possible light source is crucial.

Feel free to supplement direct sunlight with artificial grow light if need be. Grow lights are great for providing additional light to your cactus during winter or if you live in an area that receives less sunshine.

Keep in mind that if you grow your penis cactus outdoors, it will require a few weeks of exposure to sunlight before it can tolerate full sun conditions.

Start by exposing your plant to dappled sunlight for several hours daily and gradually increase the exposure time.

3. Temperature and Humidity

The penis cactus enjoys a warm climate. It prefers temperatures between 65 and 85 degrees Fahrenheit, although it can tolerate slightly cooler temperatures if necessary.

Avoid exposing your cactus to temperatures below 40 degrees Fahrenheit for extended periods because it may cause irreversible rot to the plant.

The cactus thrives in dry air conditions, typically found in arid habitats. Low humidity levels will help keep the stems and spines healthy.

Consider increasing the humidity level of your home slightly if it is too dry for the cactus.

A simple way is to place a humidifier near the plant or use a shallow water tray filled with pebbles. Ensure the water level is below the pebbles, so your cactus won’t be sitting in water.

4. Soil Requirements

The penis cactus thrives in relatively fertile, gravel-rich, and highly draining succulent soil. The soil pH should be maintained at around 6-7.5.

You can buy a commercial succulent soil mix or make your own by combining perlite, pumice, vermiculite, potting soil, and sand in equal parts.

You should also add some organic matter, like well-rotted compost, to the soil mix to provide additional nutrition for the cactus.

Some gardeners prefer using a culture soil formula that is about 60% vermiculite, 20% sandy soil, and 20% coconut coir or peat moss for nutrients. Some prefer adding a small amount of organic potting soil to the mix.

A golden barrel cactus on hand being repot.
The soil pH should be maintained at around 6-7.5.

You must remember that the roots of the Bolivian torch cactus are quite sensitive to oxygen deficiency. Therefore, root rot can easily set in if the soil is poorly permeable to water and air.

It is pretty easy to determine the permeability of your soil. Pay attention to how fast the water flows through the potting mix when watering. If it takes too long, amend the soil with more perlite or pumice.

5. Fertilizing

The Bolivian torch cactus doesn’t require frequent fertilization to remain healthy and vigorous. You can provide your cactus with a balanced liquid fertilizer diluted in water three times per year.

During spring and summer, you can replace one of the regular watering sessions with a liquid fertilizer solution. Use half the recommended dose listed on the package to avoid salt buildup in the soil.

Avoid fertilizing your cactus during fall and winter when it is dormant, as this may lead to root burn.

You should also avoid using fertilizer if your penis cactus is in a container that has not been repotted for more than two years.

6. Repotting

With time your cactus will outgrow its pot. At this point, you must repot it into a larger one. This will give the root system enough space to spread and the plant to grow bigger.

Repot your Bolivian torch cactus once every two to three years during spring or early summer. Use a pot slightly bigger than the previous one and fill it with fresh succulent soil.

Water heavily after repotting to help the roots establish in the new container. Reserve fertilizing for the next season when the cactus starts showing signs of active growth.

7. Pests and Diseases

Finally, it is essential to keep an eye on your cactus for any signs of diseases or pests. If left untreated, these can cause severe damage to the plant, so treat them immediately.

Common diseases and pests include root rot, fungal infections, mealybugs, aphids, and spider mites. These can be treated with chemical sprays or organic solutions like neem oil and insecticidal soaps.
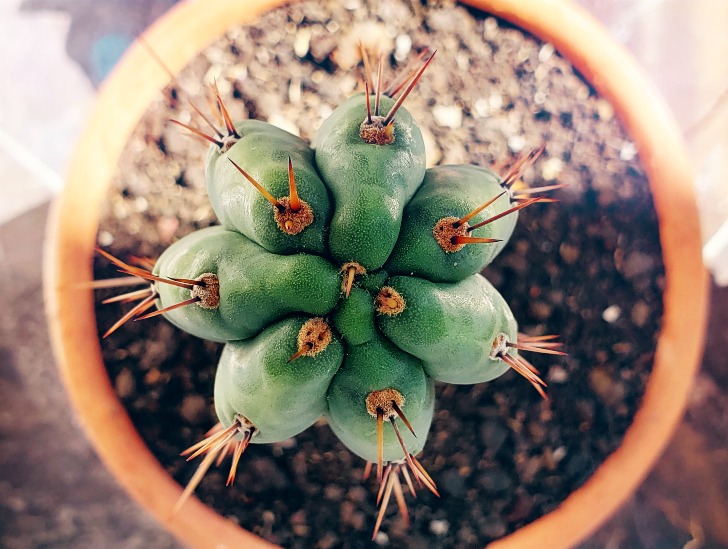
A san pedro cactus top view.
it is essential to keep an eye on your cactus for any signs of diseases or pests.

Be sure to observe the safety instructions listed on the packaging of chemical sprays. When using organic solutions, ensure you use 100% pure essential oils, not diluted ones.

Keep your cactus healthy by wiping off any dusty layers that may accumulate on its spines or stem from time to time. This will keep the plant clean and free from any pests.

Summary

The penis cactus is a beautiful and unique species that is easy to care for as long as you provide it with the right growing conditions.

With proper watering, light, humidity, soil, fertilizing, and pest management techniques, your Bolivian torch cactus can thrive indoors or outdoors for many years.

What Makes Aloe Vera a Must-Have Plant for Your Home Garden?

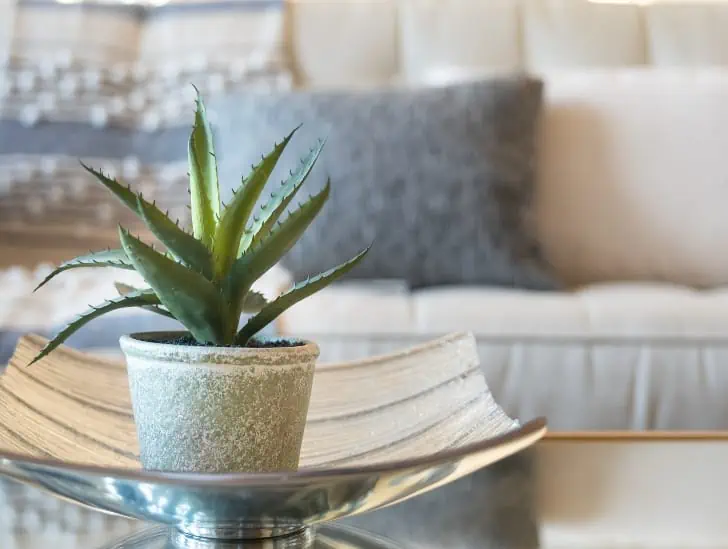
A small aloe vera in a pot.

A home garden creates a haven of natural beauty and tranquility in your backyard. There’s something gratifying about nurturing plants, watching them grow, and reaping the benefits of your hard work. And among the myriad of plant options available, there is one that stands out as a true must-have: Aloe Vera. This succulent is not your ordinary plant. It is a powerhouse of health and wellness benefits that can transform your home garden into a sanctuary of healing and rejuvenation.

So, what makes Aloe Vera a must-have plant for your home garden? Aloe Vera is known for its ability to purify the air by removing toxins like formaldehyde and benzene, making your home environment healthier and more pleasant. The succulent is a game changer when it comes to healing sunburns. Its gel-like substance is known for its cooling properties that provide instant relief from the painful effects of overexposure to the sun. But that’s not all. Aloe Vera is a secret weapon for achieving radiant and healthy-looking skin. The succulent can also help improve your sleep quality. Research suggests that the presence of Aloe Vera in your bedroom can purify the air and promote a more peaceful environment, allowing you to drift off into a restful slumber.

This post delves deeper into the world of Aloe Vera, exploring its history, cultivation, and the many benefits it offers. Read on to learn more.

Aloe Vera: Quick Overview

The Aloe Vera plant has a fascinating history that dates back to Ancient Egyptian times. It is believed that it was used for medicinal purposes, anointing wounds, and treating skin conditions.

The plant then began to spread across the world, with Spanish explorers introducing it to Mexico and other parts of Central America in the early 1500s.

Today, Aloe Vera is cultivated in many countries, including the United States, Jamaica, India, and Africa.

It is believed that it was used for medicinal purposes, anointing wounds, and treating skin conditions.

Aloe plants are incredibly easy to care for. They require little water and can survive in almost any type of climate. The plants thrive in well-draining soil with a slightly acidic pH level and prefer full sunlight.

Once you have the right conditions, all you need to do is water them once or twice a week and watch your Aloe Vera thrive.

What Makes Aloe Vera a Must-Have Plant for Your Home Garden?

Aloe Vera offers many benefits to homeowners, from improving air quality to promoting skin health. Here are some of the most notable advantages of adding this succulent to your home garden:

1. Natural First Aid

One of Aloe Vera’s most prominent advantages is its ability to act as a natural first-aid remedy for various skin issues. Extracted from the plant’s fleshy leaves, Aloe Vera gel contains numerous beneficial compounds that contribute to its healing prowess.

Among these, acemannan, a type of polysaccharide, stands out for its inflammation-reducing and tissue-repairing properties.

When applied to minor cuts or abrasions, the gel’s cooling sensation provides immediate relief, while its antibacterial attributes help prevent infections.

Moreover, Aloe Vera gel creates a protective barrier over the wound, speeding up the healing process and minimizing the risk of scarring.

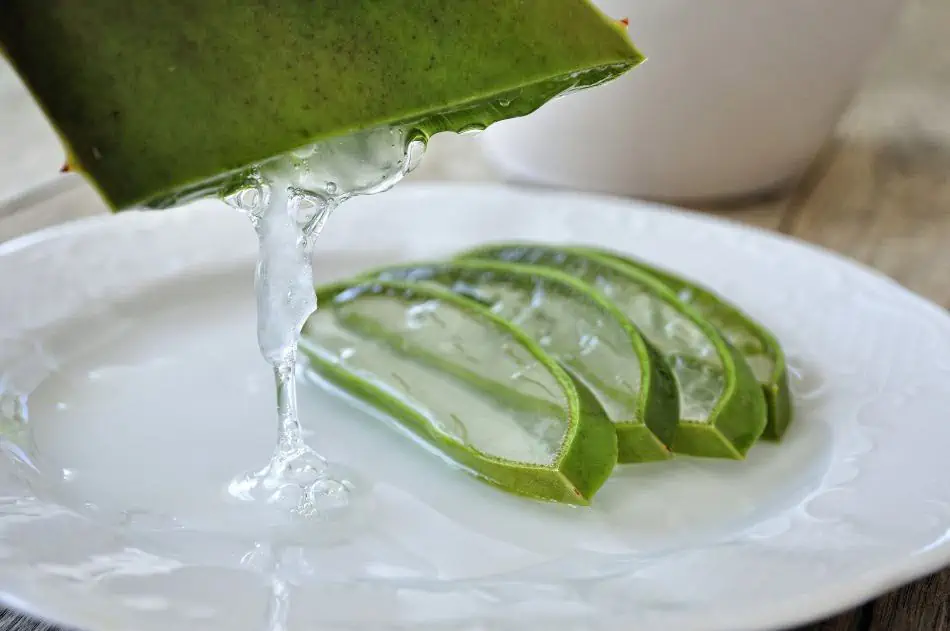
Aloe Vera’s effectiveness as a first aid remedy also extends to burns, including sunburns. Applying the gel to burnt skin forms a soothing layer that alleviates pain, redness, and swelling. Its high water content further aids in rehydrating damaged skin, promoting fast healing.

A aloe vera.
Applying the gel to burnt skin forms a soothing layer that alleviates pain, redness, and swelling.

Beyond burns, Aloe Vera proves useful in managing skin irritations, such as rashes, itching, and allergic reactions. Its gentle and non-irritating nature makes it ideal for providing relief and comfort in these situations.

The gel’s anti-inflammatory properties make it beneficial for managing skin conditions like psoriasis, eczema, and acne.

Its moisturizing effect prevents excessive dryness, flakiness, or oiliness, further contributing to its versatility as a natural remedy.

Compared to over-the-counter ointments or creams containing chemicals and synthetic ingredients, the gel is a safe and natural alternative.

This makes it highly appealing to individuals with sensitive skin or those seeking to reduce their exposure to artificial substances.

2. Air Purification

Aloe Vera is known for its unique ability to purify the air. The plant can remove harmful toxins from the atmosphere, thus protecting your home environment.

Studies have found that Aloe Vera can effectively remove contaminants like formaldehyde, benzene, and carbon monoxide from indoor spaces without any additional filtration or ventilation system.

This makes it a natural solution for improving the air quality in your home, avoiding any potential health risks posed by exposure to chemicals.

Moreover, Aloe Vera’s purifying effect isn’t limited to air; it also affects water. The plant is capable of removing bacteria and chlorine from the tap or drinking water, making it safer for consumption.

The remarkable air-purifying qualities of Aloe Vera make it a valuable asset in any home. Its ability to filter harmful toxins from the atmosphere revolves around its capacity to absorb gases through tiny pores on its leaves.

A aloe vera indoors.
Aloe Vera’s purifying effect isn’t limited to air; it also affects water.

During the process, toxins such as formaldehyde and benzene, commonly found in chemical cleaning products, paints, and more, are absorbed and neutralized. This results in a purer, fresher indoor air quality, contributing to a healthier living environment.

3. Ornamental Value

Besides its practical and medicinal uses, Aloe Vera brings considerable ornamental value to your home garden.

Its distinctive appearance, with succulent, spiky leaves arranged in a rosette formation, makes it an eye-catching addition to any outdoor or indoor space.

The unique architectural structure of Aloe Vera creates an intriguing focal point that effortlessly enhances the overall aesthetics of the garden.

Aloe Vera plants come in different species and cultivars, each offering its own charming attributes. Some varieties showcase vibrant green leaves, while others boast striking patterns and colors like reddish or golden edges.

The visual characteristics add diversity and visual interest to your garden, making it more dynamic and visually appealing.

Furthermore, the succulent’s ability to thrive in different climates and conditions allows it to be creatively incorporated into many garden designs.

Its adaptability makes it suitable for rock gardens, succulent gardens, desert-themed landscapes, and even as a potted plant on balconies or indoors.

As a low-maintenance plant, Aloe Vera is an excellent choice for those looking to beautify their surroundings without the need for extensive care.

A aloe variegata in a pot.
Aloe Vera brings considerable ornamental value to your home garden.

The plant’s ornamental value also extends to its ability to attract pollinators. When aloe plants bloom, they produce striking, tubular flowers ranging from vibrant orange and red to more subdued hues like yellow and white.

The flowers attract bees, butterflies, and hummingbirds, adding an element of wildlife and ecological significance to your garden.

4. Digestive Aid

Aloe Vera has been used as a natural remedy for digestive issues for many years. This is due to its laxative effect that helps to relieve constipation, bloating, and other gastrointestinal problems.
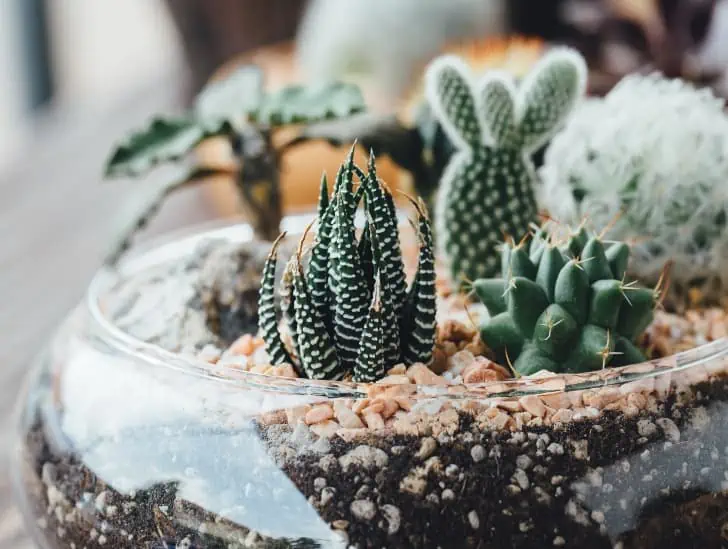
Aloe Vera juice is known to serve this purpose. The juice eliminates waste from the body more quickly than traditional oral medications, further preventing discomfort or cramping.

The gel’s abundance of enzymes and compounds, such as polysaccharides and glycoproteins, contribute to its digestive aid properties.

These substances help to stimulate the body’s natural process for eliminating waste while providing a soothing effect on the gastrointestinal tract.

The succulent can also be used to promote digestive health. Its high nutrient content, including vitamins A, C, E, and B-complex vitamins, helps to strengthen the intestinal walls. This, in turn, boosts the absorption of nutrients and encourages healthy digestion.

Aloe Vera’s digestive properties make it an excellent natural remedy for common digestive issues. Its ability to reduce inflammation while providing a protective coating on the digestive tract can provide much-needed relief while promoting overall gut health.

5. Insect Repellent

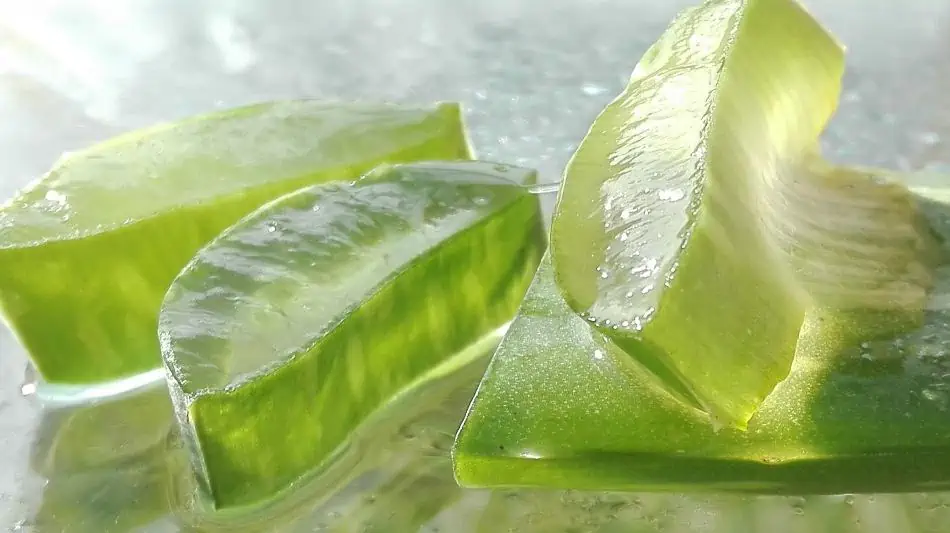
The gel from Aloe Vera leaves can be used as a natural insect repellent. The plant’s compounds, such as aoin and aloe-emodin, are a natural defense against specific bugs like mosquitoes and houseflies.

These substances block the insect’s sense of smell, making it harder for them to detect you as a potential target. Moreover, due to its non-toxic nature, Aloe Vera gel is safe for children and pets.

Aloe vera gel.
The gel from Aloe Vera leaves can be used as a natural insect repellent.

Another way to use Aloe Vera as an insect repellent is by growing the plant in your garden. Its distinctive smell serves as a natural deterrent for many bugs, decreasing their presence and keeping them away.

Besides its insect-repelling properties, Aloe Vera also works as a natural fungicide. Its gel-like consistency helps to protect plants from fungus and other parasites that can infest your garden.

Summary

Aloe Vera is a unique plant with many practical and medicinal uses. Its ability to purify air and water makes it an effective solution for improving indoor air quality and eliminating toxins from drinking water.

Furthermore, its ornamental value gives it the potential to enhance any outdoor or indoor space with its distinctive appearance.

The succulent also brings considerable digestive aid, relieving constipation and other gastrointestinal problems.

All in all, the many benefits of using Aloe Vera make it an invaluable addition to every garden. With its diverse range of uses, Aloe Vera is truly a remarkable plant with limitless potential.

What Makes Parodia Magnifica So Magnificent?

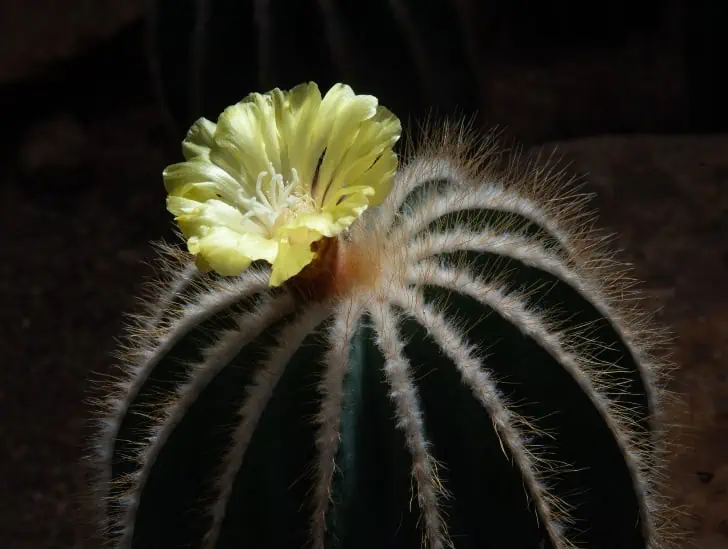
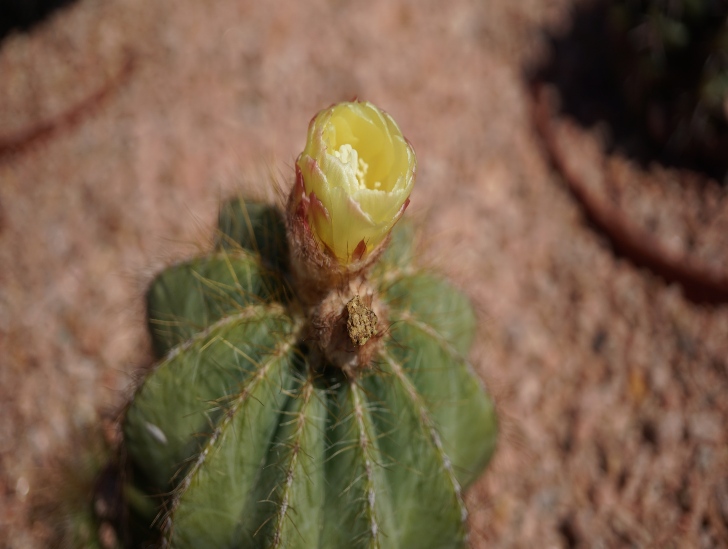
A parodia magnifica closeup image blooming.

Parodia magnifica, also known as the “Magnificent Parodia,” is one of the most unique cactus species in the world. It has a distinct shape and coloring, setting it apart from other types of cacti. Native to the Andes Mountains in South America, this species can be found in various habitats ranging from deserts to grasslands. The Parodia magnifica is loved by cactus enthusiasts due to its unique features and ability to thrive with minimal care.

So, what makes Parodia magnifica so magnificent? The most striking feature of the Parodia magnifica is its spiny body, which consists of thick, white spines that radiate outward from its large central stem. The spines are often curved and densely packed, giving it an almost furry appearance. The spines vary in color, ranging from white to yellow, pink, and even purple. This makes the cactus an attractive option for decorating homes and gardens. The cactus is also known for its unique flowers that vary in shape and color. Some of them are large and brightly colored, while others are small and more muted in color.

This blog post highlights some of the unique characteristics of Parodia magnifica that make it so magnificent. Read on to discover more.

Parodia Magnifica: A Quick Overview

The Parodia magnifica, commonly known as the Magnificent Ball Cactus, is a strikingly beautiful species that captivates the eye with its unique charm and extraordinary appearance.

Native to the South American continent, this cactus belongs to the Cactaceae family and is renowned for its remarkable growth patterns and fascinating adaptations.

The Parodia magnifica is a relatively small cactus with a spherical shape characterized by a plethora of elongated, vibrant green tubercles covering its surface.

A Parodia Magnifica.
The Parodia magnifica is commonly known as the Magnificent Ball Cactus.

These tubercles are adorned with magnificent spines that vary in length and color, ranging from bright yellow to reddish-brown, creating a visually captivating display.

The spines serve as a defense mechanism against herbivores, safeguarding the cactus from potential threats in its natural habitat.

As the cactus matures, it occasionally produces stunning, large, golden-yellow flowers that emerge from the crown of the plant.

The breathtaking blooms are a spectacle to behold and act as a beacon to pollinators, such as bees and butterflies, that play a crucial role in the cactus’ reproductive cycle.

Parodia magnifica usually exhibits a slow but steady growth rate. As it reaches maturity, it can attain a diameter of around 10 to 15 centimeters, making it an excellent choice for enthusiasts of compact cacti collections.

Its relatively diminutive size also allows it to thrive in various settings, including pots, rock gardens, or even as an ornamental houseplant.

Originating from the vast landscapes of South America, the Parodia magnifica finds its natural habitat primarily in regions with arid or semi-arid conditions.

It thrives in well-draining soils and is often nestled between rocky outcrops or gentle slopes.

Its unique ability to endure periods of drought and tolerate high temperatures has enabled it to adapt and flourish in some of the harshest environments on the continent.

One of the most intriguing and captivating aspects of the Magnificent Ball Cactus is its ability to store water in its thickened stem. This adaptation allows the cactus to survive prolonged periods of water scarcity, making it a resilient species in its native habitat.

Additionally, its unique geometric arrangement of tubercles adds to its aesthetic appeal and enhances its water storage capacity by reducing water loss through transpiration.

What Makes Parodia Magnifica So Magnificent?

Now that you understand the Parodia magnifica well, let’s take a closer look at some of the most outstanding features that make it so magnificent.

1. Unique Appearance

Parodia magnifica boasts a truly remarkable and captivating appearance, setting it apart from other cactus species. Its unique morphology and shape are key distinguishing features that set it apart

This cactus stands out among its prickly relatives with a globular or cylindrical body adorned with prominent ribs or tubercles.

Moreover, its size can range from small and compact to larger and more imposing, further adding to its allure.

A parodia magnifica cactus.
Its unique morphology and shape are key distinguishing features that set it apart.

The unique combination of vibrant green tubercles and eye-catching spines creates an unmistakable aesthetic that captivates and charms cactus enthusiasts.

Another standout feature that adds to its unique appearance is its exquisite coloration. The cactus exhibits diverse hues, from vibrant green to serene silver-blue and captivating gray.

Some of its variants may even display hints of reddish tones, making them truly stand out in any collection.

Furthermore, certain variants may display intriguing patterns or variegation, adding an extra layer of visual interest to their appearance.

The cactus also features a unique supination pattern. Each cacti species possesses a specific arrangement and density of spines; in this regard, the Parodia magnifica does not disappoint. Its spines form distinctive patterns that decorate the cactus’s surface, adding to its aesthetic appeal.

Tucked within the spines, Parodia magnifica features small, woolly, or bristly hairs that further accentuate its appearance.

2. Colorful Flowers

The Parodia magnifica produces exquisite, golden-yellow flowers that bloom from the plant’s crown.

The vibrant blooms are a sight to behold and contribute greatly towards making this one of the most beautiful species in its family.

The cactus flowers during spring and summer but may sometimes flower sporadically throughout the year.

The stunning blooms attract pollinators, such as bees and butterflies, which play a crucial role in its reproductive cycle.

A parodia magnifica flowering.
The Parodia magnifica produces exquisite, golden-yellow flowers.

The flowers can reach up to six centimeters across and possess an unmistakable star-like shape with multiple petals radiating from a central stem.

The majestic blossoms are also an essential food source for different insect species and act as an attractive beacon for pollinators.

3. Fruits and Seed Pods

Among the many alluring features of Parodia magnifica, its fruit and seed pods stand out as remarkable components of its life cycle.

These structures, which develop after successful pollination of its flowers, possess distinctive attributes that contribute to the overall magnificence of the plant.

The appearance of the fruit and seed pods is a visual delight. The fruits vary in size, from small, delicate capsules to more substantial, eye-catching globular sizes.

Their colors can be equally captivating, ranging from rich green to warm yellow, depending on the cactus variety.

The texture of the fruit and seed pods is another intriguing aspect. Some Parodia magnifica variants usually have smooth and glossy exteriors, while others exhibit spines, hairs, or tubercles on their surfaces, providing an extra layer of tactile fascination.

Moreover, the development of these fruits and seed pods is an eventful and captivating process. As the flowers fade away, seed pods begin to form and grow in their place.

Observing the transformation from a withering bloom to a developing fruit can be a rewarding experience, demonstrating the life cycle of the cactus in all its natural splendor.

In some cases, the fruits and seed pods might hold surprises within them. The seed pods house remarkably small, numerous, or uniquely patterned seeds reflecting the cactus’s evolution and adaptation to its environment.

The seeds carry the promise of new life and growth, adding a layer of symbolism and significance to the fruiting process.

4. Resilience

As you may have already guessed, one of the most outstanding features of the Parodia magnifica is its resilience.

It has remarkable adaptations that allow it to survive in some of the harshest conditions found in South America.

The cactus can go without water for long periods, with its thick stems acting as effective water reservoirs. Additionally, its spines and woolly hairs serve the purpose of reducing water loss through transpiration.

A parodia magnifica in a pot.
One of the most outstanding features of the Parodia Magnifica is its resilience.

Moreover, it can withstand high temperatures for extended periods while still maintaining a good amount of vigor, often emerging unscathed from relentless heat waves.

These remarkable characteristics make Parodia magnifica one of the most resilient cactus species in its native range, allowing it to thrive under harsh environmental conditions.

5. Season Changes

The other fascinating aspect of Parodia magnifica is its ability to undergo seasonal changes that contribute to its allure throughout the year. This cactus species reveals a dynamic and captivating transformation as the seasons shift.

During the active growing season, typically in spring and summer, the cactus experiences a burst of activity. It may enter a period of vigorous growth, producing new stems, areoles, and spines.

This time of abundance often coincides with the blooming of its magnificent flowers, showcasing a breathtaking display of colors and shapes that will captivate any observer.

As the seasons progress and conditions change, the cactus gracefully adapts to the shifting environment.

With the arrival of autumn, it undergoes subtle changes in coloration, displaying warm hues that reflect the changing landscape around it.

These autumnal shades add to the cactus’ visual appeal and contribute to the overall charm of the garden or collection where it resides.

A ball cactus blooming.
One of the most outstanding features of the Parodia Magnifica is its resilience.

As winter approaches, Parodia magnifica enters a period of rest or dormancy. During this time, its growth rate slows down, conserving energy and resources to withstand harsh conditions.

While it might seem less active, the cactus remains a striking presence with its unique form and textured surface, contributing to the winter aesthetic of the landscape.

Summary

From its unique appearance to its impressive resilience, the Parodia magnifica is a magnificent cactus that stands out among other members of its family. With colorful blooms, captivating fruits and seed pods, and dynamic changes throughout the year, this cactus species will surely bring a unique charm to any garden or collection.

The Ultimate Guide to Propagating Mammillaria Elongata Successfully

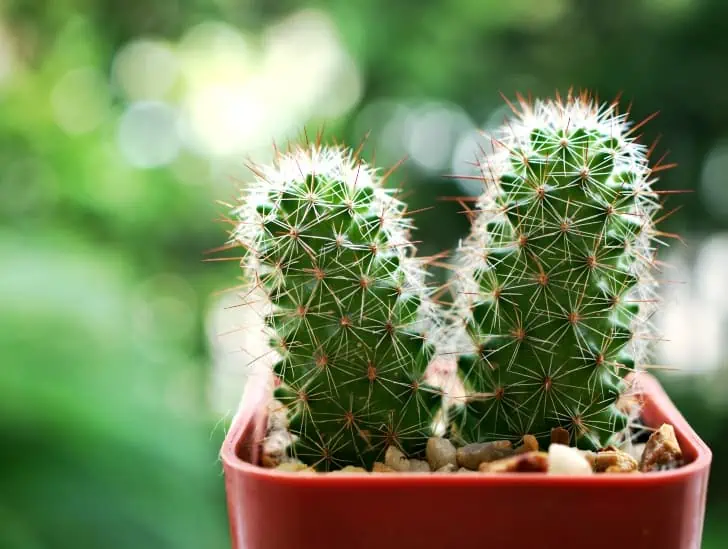
A small lady finger cactus on a pot.

Mammillaria elongata, commonly referred to as ladyfinger cactus, is one of the best cacti species to grow at home. The cactus is native to Mexico and is the prettiest cactus you’ll ever encounter. What makes the ladyfinger cactus popular is its low-maintenance requirements and beautiful looks. Its surface is covered by numerous spines that are harmless. The spines form an eye-catching brown, yellow, or white carpet. However, one of the biggest worries for any cacti enthusiast is how to propagate Mammillaria elongata. Fortunately, propagating the ladyfinger cactus is relatively easy.

So, how do you propagate Mammillaria elongata? The ladyfinger cactus can be propagated through cuttings or seeds. To propagate through cuttings, use a sharp knife to cut the stem of the plant at the base and let the cutting dry. Fill a container with well-draining soil and plant the cut end. Keep the soil moist and wait for the cuttings to form roots. For seed propagation, plant the seeds in a seed-starting mix and water them regularly. The seeds will germinate after a few weeks. Allow the seedlings to reach about two centimeters before you transplant.

This blog post outlines everything you need to know about propagating Mammillaria elongata. Read on to learn more.

Why Should I Propagate Mammillaria Elongata?

Before we get into the nitty-gritty details of propagating Mammillaria elongata, let’s talk about the benefits of propagation. Propagating your cactus helps you create a bigger collection without investing in new plants.

Also, with proper care and attention, you can produce a plant that is as strong and healthy as those store-bought.

The best time to propagate your ladyfinger cactus is in the spring when the plants start thriving, and they can be easily divided into cuttings or grown from seeds.

A lady finger cactus flowering.
Propagating your cactus helps you create a bigger collection without investing in new plants.

The weather should also be warm and dry. So, ensure you have ideal propagation conditions before you get started.

How to Propagate Mammillaria Elongata from Cuttings

Ladyfinger cactus can be propagated through cuttings or seed germination. Each propagation method has its pros and cons. We’ll discuss each process in detail so you can decide which one is best for you.

Propagation Through Cuttings

Propagating ladyfinger cactus through cuttings is an easy and effective way to create new plants from an existing plant. You will need the following materials to propagate ladyfinger cactus through cuttings:

  • Healthy and mature ladyfinger cactus (source plant)
  • Sharp, sterilized pruning shears or a clean knife
  • Well-draining potting mix (cactus mix or a mix of sand, perlite, and peat moss)
  • Small pots or containers with drainage holes
  • Rooting hormone (optional but can enhance success)
  • Plastic wrap or a clear plastic bag
  • Water spray bottle

Step-by-Step Guide to Propagating Ladyfinger Cactus

Follow the steps outlined below to propagate your Mammillaria elongata from cuttings.

Step 1: Prepare the Mother Plant

Ensure that the source ladyfinger cactus plant is healthy and disease-free. It’s best to choose a mature plant with several stems to avoid excessive damage to the parent plant during cutting.

A lady finger cactus exposed to light.
Ensure that the source ladyfinger cactus plant is healthy and disease-free.
Step 2: Select and Prepare the Cutting

Identify a healthy and well-developed stem for cutting. Use sterilized pruning shears or a clean knife to make a clean cut about 1-2 inches above the stem’s base.

The cutting should be approximately 3-4 inches long. Allow the cutting to callus over for a day or two before proceeding to the next step.

Step 3: Potting Mix and Container Preparation

Fill small pots or containers with a well-draining potting mix suitable for cacti. A cactus mix or a blend of sand, perlite, and peat moss in equal parts works well. Ensure the container has drainage holes to prevent waterlogged soil.

Step 4: Rooting Hormone (optional)

Dip the cut end of the cactus cutting in a rooting hormone or gel. While not essential, a rooting hormone can encourage faster root development and increase the success rate.

Step 5: Plant the Cutting

Make a small hole in the potting mix using your finger or a stick. Gently insert the cut end of the ladyfinger cactus cutting into the hole, making sure it stands upright. Lightly press the soil around the cutting to provide stability.

Step 6: Watering

Water the newly planted cutting sparingly, making sure not to overwater. Allow the top inch of the potting mix to dry out between watering sessions to prevent root rot. A water spray bottle can be used to moisten the soil evenly without disturbing the cutting.

Step 7: Provide Indirect Light

Place the potted cutting in a location with bright, indirect sunlight. Avoid placing it in direct sunlight, which can lead to sunburn on the cutting. A windowsill with filtered light or a spot under a shade cloth is ideal.

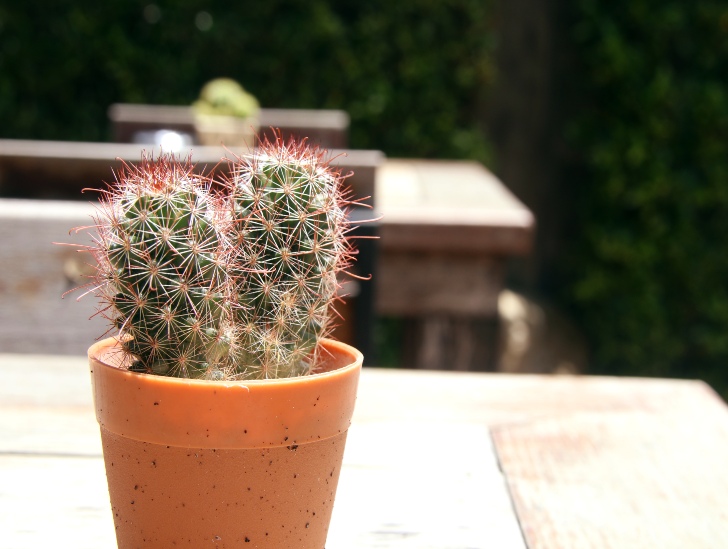
A lady finger cactus in a pot.
Place the potted cutting in a location with bright, indirect sunlight.
Step 8: Encourage Humidity

Cover the cutting with plastic wrap or place it inside a clear plastic bag to create a humid microenvironment. This helps retain moisture and promotes successful rooting. Remove the cover briefly every few days to prevent fungal growth.

Step 9: Monitor and Be Patient

Check the cutting regularly for signs of root development. This process can take several weeks to a couple of months, so be patient. Avoid disturbing the cutting unnecessarily during this period.

Step 10: Transplanting

Once the cutting has developed sufficient roots (visible through the drainage holes or by gently tugging the cutting with resistance), it is ready to be transplanted into a slightly larger container with a regular cactus potting mix. Continue caring for the new plant as you would for a mature ladyfinger cactus.

PS: The best time to take cuttings for propagation is during the growing season, typically in spring or early summer. This is when the cactus is actively growing and has a higher chance of successful root development. Propagation through cuttings also requires patience. It may take some time for the cutting to root and establish itself. Avoid overwatering or disturbing the cutting during this period.

Propagation Through Seed Germination

Propagating ladyfinger cactus (Mammillaria elongata) through seeds is an exciting and rewarding way to grow this unique cactus species.

Unlike propagating through cuttings, seed propagation allows you to witness the complete life cycle of the cactus, from germination to maturity.

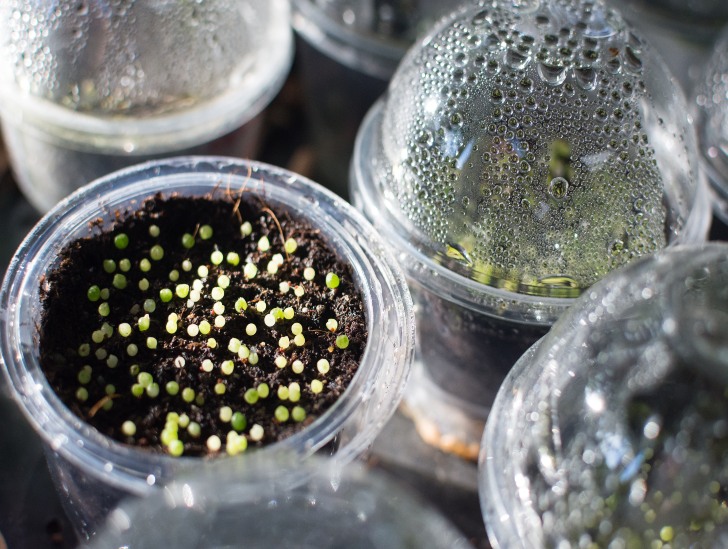
Seedlings on cups.
Propagating ladyfinger cactus (Mammillaria elongata) through seeds is an exciting and rewarding way to grow this unique cactus species.

You will need the following tools to propagate ladyfinger cactus through seed germination:

  • Fresh ladyfinger cactus seeds
  • Well-draining cactus potting mix (or a mix of sand, perlite, and peat moss)
  • Small pots or seed trays with drainage holes
  • Clear plastic wrap or a clear plastic lid (for seed trays)
  • Water spray bottle
  • Bottom heat source (optional but can aid germination)
  • Grow light or a well-lit location with indirect sunlight.

Step-by-Step Guide to Propagating Ladyfinger Cactus Through Seed Germination

Follow the steps outlined below to propagate your Mammillaria elongata through seed germination:

Step 1: Seed Selection and Preparation

Obtain fresh ladyfinger cactus seeds from a reliable source. If you have access to mature ladyfinger cacti, you can harvest the seeds from ripe fruits.

Store-bought seeds are also a good option. Ensure the seeds are fresh and viable for the best germination results.

Step 2: Potting Mix and Container Preparation

Fill small pots or containers with a well-draining cactus potting mix. Alternatively, you can use a combination of sand, perlite, and peat moss in equal parts. Ensure the container has drainage holes to prevent waterlogged soil.

Step 3: Plant the Seeds

Sprinkle fresh ladyfinger cactus seeds over the surface of the soil. Do not cover them with additional soil; they need light to germinate. Gently press down on the soil to ensure good contact between the seed and potting mix.

Step 4: Moisten and Cover

Lightly spray the surface of the soil with water to moisten it. Cover the container or tray with clear plastic wrap or a lid (for seed trays). This helps maintain moisture and humidity, increasing germination success.

Step 5: Provide Bottom Heat (optional)

Placing the container on an electric heat mat under 75-80°F can speed up germination. A warm, well-lit windowsill can also provide bottom heat.

Step 6: Provide Adequate Light

Place the container in a location with bright, indirect light, or use a grow light. Ensure the seedlings receive 12 hours of light daily to ensure healthy growth.

Step 7: Monitor and Water

Monitor the soil moisture regularly, refilling the water spray bottle as needed. Keep the soil moist but not soggy to prevent fungal diseases. Once seedlings emerge, reduce watering gradually until you can see uniform drying of the top layer of soil between sessions.

Step 8: Transplanting

Once your ladyfinger cactus seedlings are 3-4 inches tall, they can be transplanted into individual containers with well-draining cactus potting mix. Continue caring for your plants as you would a mature Mammillaria elongata.

A old lady cactus flowering.
Continue caring for your plants as you would a mature Mammillaria elongata.
Step 9: Continued Care

Continue to provide bright, indirect sunlight and proper watering to the young seedlings. As they grow, you can gradually acclimate them to more direct sunlight.

Summary

Propagating cactus is a fun and rewarding experience. Growing your ladyfinger cactus from seed or cutting provides the satisfaction of watching it grow from start to finish.

Whether you opt for propagation through cuttings or seed germination, give yourself plenty of time and patience to ensure successful results.

With proper care and maintenance, your ladyfinger cactus will thrive and bring you plenty of joy. Good luck!

From Tiny Seeds to Beautiful Air Plants: Your Comprehensive Guide

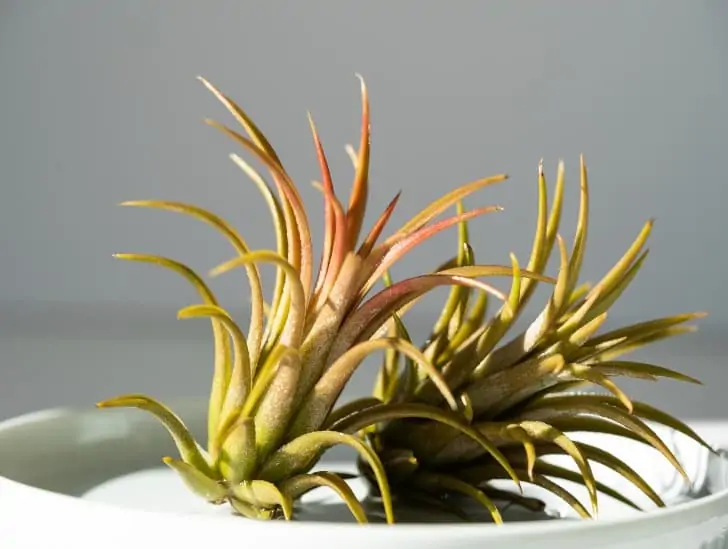
Air plant on a shell.

Air plants, also known as Tillandsias, have become increasingly popular among gardeners for their minimal care requirements and unique appearance. These plants have adapted to growing without soil. In fact, their excellent ability to absorb all the nutrients they need from the air around them makes them an ideal choice for gardeners who may not have a lot of time or space to dedicate to gardening. But the big question is, how can you grow air plants from seeds? Don’t worry because you have come to the right place.

So, how can you grow air plants from tiny seeds to beautiful plants? The first thing you need to do is acquire seeds and prepare the growing medium. You can purchase air plant seeds online or from a local nursery. Ensure the growing medium is well-draining and slightly nutritious. Sow the seeds by sprinkling them on the surface of the growing medium and provide adequate lighting to stimulate germination. Maintain ideal moisture and humidity and be patient. Once the seeds germinate and reach about two centimeters tall, transplant them into small pots.

In this guide, we will explore the basics of air plants propagation by seed and highlight different techniques for caring for them. Read on to find out everything you need to know.

Air Plants: A Quick Overview

Air plant is a common name used to refer to a genus of approximately 650 different species of flowering plants. Most of these plants are native to the United States, Mexico, and parts of the Caribbean.

Unlike most plants that thrive in soil, air plants are adapted to absorbing nutrients and moisture from the air around them through their tiny trichomes and leaves. This adaptation allows them to survive in relatively harsh environments where other plants can’t survive.

Tillandsias are epiphytic and belong to the Bromeliad family. These remarkable plants have adapted to survive and grow in the most extreme conditions, even without soil.

Aair plant exposed to morning sunlight.
Tillandsias are epiphytic and belong to the Bromeliad family.

This makes them extremely popular among gardeners who may not have a lot of space or time to dedicate to gardening.

Growing Air Plants from Seed: Step-by-Step Guide

While many people believe that air plants are propagated through offshoots, seeds are a great way to propagate these plants.

In fact, some air plant species, such as Tillandsia juncea and Tillandsia ionantha, can only be propagated through seed germination.

Air plant seeds are tiny and germinate best when provided with the right amount of light, humidity, and air circulation. The whole process of growing air plants from seeds is fun and highly rewarding.

This section outlines a step-by-step guide on how to grow air plants, from tiny seeds to beautiful plants.

Step 1: Acquire Seeds

The first step to growing air plants from seeds is to acquire good-quality seeds. Air plant seeds are relatively small and can be pretty challenging to handle. Therefore, consider using a small tray or container to hold the seeds during sowing.

You can purchase quality seeds from online stores, garden centers, or a local nursery. Inspect the seeds carefully before purchase to ensure they are healthy and viable.

Agave seed on hand.
The first step to growing air plants from seeds is to acquire good-quality seeds.

You can also ask your friends or family members with mature Tillandsias to save the seeds for you if you don’t have money to spend on purchasing them.

Step 2: Prepare the Growing Medium

The next step is to prepare your growing medium. The ideal growing medium should be well-draining and slightly nutritious.

Generally, a good combination of sand, perlite, peat moss, and potting soil works excellent for air plant seed germination. Ensure the container you use has appropriate drainage holes to allow any excess water to escape.

Step 3: Sow the Seeds

Once you have a suitable growing medium, it is time to sow the air plant seeds.

Gently sprinkle the tiny seeds on top of the growing medium surface and lightly press them down for better contact with the soil. Do not cover them with more soil or bury them.

Step 4: Provide Adequate Lighting

Light is an essential requirement for air plant seed germination. Place the container in a spot where it will receive adequate bright light from natural or artificial lighting.

Exposure to direct sunlight is not recommended since it can damage delicate seeds and seedlings.

Step 5: Maintain Optimal Moisture and Humidity

After sowing the seeds, maintain optimal moisture and humidity to encourage germination. Mist the soil surface regularly with a spray bottle for hydration.

You can also use a pebble tray or humidifier to increase the humidity level around your plants.

Seedlings on cups.
Mist the soil surface regularly with a spray bottle for hydration.

Alternatively, consider covering your seed tray or pot with a clear plastic wrap or humidity dome to maintain the ideal humidity levels required to aid in germination.

Step 6: Patience Is Key

Air plant seeds can take anywhere from a few weeks to a couple of months to germinate. Therefore, patience is key.

Don’t lose hope and think your seeds are dead if you don’t see any germination within a few weeks.

All you need to do is continue providing your seeds with adequate lighting and humidity. Avoid disturbing the seeds because they need the soil to be undisturbed for them to germinate successfully.

Step 7: Transplanting Seedlings

Once the seeds germinate and reach about two centimeters tall, you can transplant them into small pots or trays.

Ensure your containers have adequate drainage holes to allow excess water to escape from the root system as fast as possible.

Top view of different air plants.
Take good care of them, and they will develop into nice plants.

You must also use well-draining potting mix or peat moss to secure the newly transplanted seedlings in their new location. Take good care of them, and they will develop into nice plants.

Step 8: Care for the Seedlings

Once you have transplanted the seedlings to a new location, ensure you take good care of them.

Provide adequate light (bright but indirect), mist them regularly to maintain the required moisture content, and ensure proper air circulation.

With time, the seedlings will develop into mature air plants you can admire and enjoy. You can hang them around your home or garden to enhance the beauty of the space.

How Long Does It Take for Air Plants to Grow from Seed?

It can take about three to four months for air plants to grow from seeds. However, this timeline varies depending on various environmental factors such as sunlight, temperature, and humidity. All these factors affect the growth rate of these plants.

It is essential to ensure that your air plants receive the right conditions for growth. Also, fertilize them regularly to help them reach maturity faster.

Use the right fertilizer type depending on the growing season and follow the instructions provided by your supplier.

Is It Hard to Grow Air Plants from Seed?

Typically, it is not difficult to grow air plants from seed. As long as you provide your seeds with the right growing conditions and take good care of them, they should germinate within a few weeks or months.

However, air plant seed germination can take time and requires patience. You may have to wait several months before the seeds start sprouting and reaching maturity.

Therefore, you need to have enough patience and dedication if you want to grow these plants from seed.

How Do I Take Care of Mature Air Plants?

Light is one of the most critical factors in the health of mature air plants. They thrive in bright, indirect light, making them perfect candidates for indoor spaces with filtered sunlight.

A air plant exposed to sunlight.
For mature air plants, a weekly watering routine is generally sufficient.

Place them near a north or east-facing window to provide sufficient light without exposing them to direct, harsh sunlight.

If grown outdoors, ensure they are placed in a partially shaded area to protect them from the scorching sun.

Proper airflow is essential for the well-being of air plants. Adequate circulation helps prevent excess moisture buildup, reducing the risk of rot and fungal issues.

Indoors, use a fan to keep the air moving gently around the plants. Outdoors, ensure they are not in an area with stagnant air, such as a closed-off corner or nook.

Mature air plants prefer moderate temperatures, typically ranging from 50°F to 90°F (10°C to 32°C). They can tolerate brief temperature fluctuations outside this range but should be protected from prolonged exposure to extreme temperatures.

Avoid placing them near heaters, air conditioners, or drafty windows, as sudden temperature changes can stress the plants.

Watering is also a crucial aspect of air plant care. Unlike traditional plants, air plants do not grow in soil and absorb water and nutrients through their trichomes, small hair-like structures on their leaves.

For mature air plants, a weekly watering routine is generally sufficient. However, factors like climate, humidity, and light conditions can affect watering frequency.

Lastly, mature air plants need occasional fertilization to ensure they receive essential nutrients for healthy growth. Use a balanced fertilizer formulated specifically for epiphytes or air plants.

During the active growing season, typically from spring to early fall, fertilize your air plants once a month at half the recommended strength. Never fertilize immediately after soaking the plant, as it can cause damage.

Summary

Growing air plants from seeds is a rewarding experience that requires patience and dedication.

With the right conditions, you can easily grow air plants from tiny seeds to beautiful plants in no time.

All you need to do is acquire quality seeds, prepare the growing medium, sow the seeds, provide adequate lighting and humidity, and be patient for germination.

The Secret to Healthy Terrariums: Mastering Watering Methods

A close up open terrarium.

Terrariums are critical in adding a natural ecosystem to your living space. However, the stunning ecosystem can easily be destroyed if you don’t know how to water your terrarium. Although the practice of watering a terrarium may seem simple, it is not. Your terrarium can only operate on a fine balance. Too much or too little water can cause severe impacts. For instance, too much water may lead to irreversible rot and mold problems, while too little may cause your plants to wilt and die.

So, what is the secret to maintaining a healthy terrarium? It starts with understanding the right watering methods and using them consistently. The most common terrarium watering methods are spray bottle watering and drainage layer watering methods. The spray bottle method is the easier of the two. You simply use a spray bottle to mist your terrarium, ensuring you do not over-spray and cause water to collect on the plants or in the container. The drainage layer method utilizes several layers of soil, gravel, charcoal, and absorbent material like moss. The soil below the drainage layer should be kept damp but not wet.

This blog post discusses the different terrarium watering methods and how to master them. Read on to learn more.

When Should I Water My Terrarium?

Before discussing the different watering methods, knowing precisely when to water your terrarium for better results is essential. In fact, knowing when to water is like winning half the battle already.

Some people don’t bother about watering their terrariums for months which can be catastrophic in the long run. Fortunately, there are plenty of indicators to look out for that will help you determine the right time to water.

A dry substrate is one of the obvious signs that your terrarium requires watering. Typically, most terrariums house plants that need a lot of moisture to thrive. So, the substrate should never be too dry.

A hangging terrarium with cactus plant.
Knowing precisely when to water your terrarium for better results is essential.

The easiest way to determine the right time to water is by inserting your finger into the soil. If it feels slightly damp, then there is no need to water it. But if the soil feels dry and crumbly, it’s time for a little bit of moisture.

You can also check the condensation levels against your glass to determine if it is time for watering. Typically, an evenly moist substrate will show beads of condensation throughout the soil layer.

Another sign of dehydration is the presence of crispy, yellowing, or wilting leaves. This indicates that the soil is too dry, and you must act promptly to save your terrarium.

How Should I Water My Terrarium?

Now that you know when to water your terrarium, it’s time to learn the different watering methods. Two of the most popular methods are Spray Bottle Method and Drainage Layer Method.

Ajar converted to a closed terrarium.
Two of the most popular methods are Spray Bottle Method and Drainage Layer Method.

Spray Bottle Watering Method

The spray bottle watering method involves using a fine mist to deliver water to the terrarium plants. It simulates the gentle, consistent rainfall many of these plants would receive in their natural habitats.

The fine mist allows the water to disperse evenly, minimizing the risk of overwatering or disturbing the terrarium’s carefully arranged elements.

This method is suitable for open and closed terrariums, making it versatile for many plant species.

The spray bottle watering method is best suited for plants that require moderate humidity and evenly moist soil.

It is particularly useful for tropical plants, mosses, ferns, and other moisture-loving species commonly found in closed terrariums.

If you have an open terrarium with plants that prefer drier conditions, such as cacti and succulents, the spray bottle method may not be the most appropriate choice.

Pros of Using the Spray Bottle Watering Method

Here are some of the pros of using the spray bottle watering method to mist your terrarium:

A person spraying water to a Open Terrarium.
The spray bottle watering method involves using a fine mist to deliver water to the terrarium plants.
  • Precise Watering: The fine mist produced by the spray bottle allows for targeted and controlled watering, preventing overwatering that can lead to root rot and other issues.
  • Moisture Distribution: The method ensures even distribution of water, keeping the soil consistently moist and promoting healthy plant growth.
  • Gentle on Plants: The gentle mist replicates natural rainfall, less likely to disturb the terrarium’s layout or delicate plant structures.
  • Ideal for Closed Terrariums: With their limited airflow, Closed terrariums can benefit significantly from the spray bottle method as it helps maintain the necessary humidity levels.
  • Prevents Soil Compaction: Pouring water directly onto the soil can lead to soil compaction, which hinders proper drainage and root growth. The spray bottle avoids this problem.

Cons of Spray Bottle Watering Method

Below are some of the disadvantages of using the spray bottle method:

  • Time-Consuming: Watering larger terrariums with a spray bottle can be time-consuming compared to other methods like bottom watering.
  • Not Suitable for All Plants: While ideal for certain plant species, the spray bottle method may not provide sufficient water to drought-tolerant plants like succulents.
  • Potential for Uneven Coverage: It requires careful attention to ensure all plants receive adequate moisture, as some may receive more water than others.
  • Prone to Overlooking: The spray bottle method may be easily overlooked or neglected by busy individuals, leading to inadequate watering.

Tips for Effective Spray Bottle Watering

So, what can you do to improve the effectiveness of the spray bottle watering method? Here are some tips for you:

  • Use Filtered Water: Avoid tap water containing chlorine and other chemicals, which can harm delicate terrarium plants. Instead, opt for filtered or distilled water.
  • Maintain Consistency: Regular, consistent watering is critical to a thriving terrarium. Create a schedule that aligns with your plants’ needs and stick to it.
  • Observe Plant Behavior: Monitor your plants closely and adjust your watering routine based on their response. Wilting or yellowing leaves may indicate overwatering or underwatering.

Drainage Layer Watering Method

The drainage layer watering method involves using a layer of porous material at the bottom of the terrarium, such as small rocks, pebbles, or activated charcoal.

This layer acts as a barrier that allows excess water to drain away from the soil, preventing waterlogged conditions that could lead to root rot and other moisture-related issues.

A closed terrarium on a shelf.
This layer acts as a barrier that allows excess water to drain away from the soil.

By facilitating proper drainage, this method ensures that the terrarium’s ecosystem remains in balance and that the plants thrive.

The drainage layer watering method is best suited for open terrariums or containers without a sealed lid, as it allows for better air circulation and faster evaporation.

It is particularly beneficial for terrariums that house succulents, cacti, and other plants that prefer well-draining soil and are susceptible to root rot when overwatered.

In closed terrariums, the moisture trapped within the container makes drainage less critical, and alternative watering methods may be more appropriate.

Pros of Drainage Layer Watering Method

Below are some of the advantages of using the drainage layer watering method to keep your terrarium hydrated:

  • Prevents Waterlogging: The primary advantage of the drainage layer is its ability to prevent water from stagnating in the soil, safeguarding the plants against root rot and fungal issues.
  • Enhanced Aeration: The space created between the soil and the drainage layer allows for improved airflow, promoting healthy root development and reducing the risk of mold and mildew.
  • Low-Maintenance: Once the drainage layer is in place, it provides ongoing benefits with minimal intervention, simplifying the watering process for terrarium owners.
  • Versatility: The drainage layer method is versatile and can be adapted to various terrarium setups, allowing for customization based on the plant’s needs and container size.
  • Watering Efficiency: The drainage layer ensures water reaches the plant roots more efficiently, preventing wastage and keeping the terrarium pristine.

Cons of Drainage Layer Watering Method

Below are some of the disadvantages of this watering method:

  • Requires Precise Layering: Proper installation of the drainage layer is essential. If the layer is too thin or not adequately placed, it may not effectively prevent waterlogging.
  • Limited Moisture Retention: While beneficial for drought-tolerant plants, the drainage layer may reduce the terrarium’s ability to retain moisture, necessitating more frequent watering for moisture-loving species.
  • Overwatering Risk: Although the drainage layer helps prevent water accumulation, excessive watering can still lead to problems, especially if the terrarium lacks appropriate drainage holes.
  • Potential for Soil Movement: If the drainage layer and the soil are not adequately separated, soil particles may sift down into the drainage layer over time, affecting its effectiveness.

Tips for Effective Drainage Layer Watering

What can you do to make drainage layer watering more effective? Below are some tips for you:

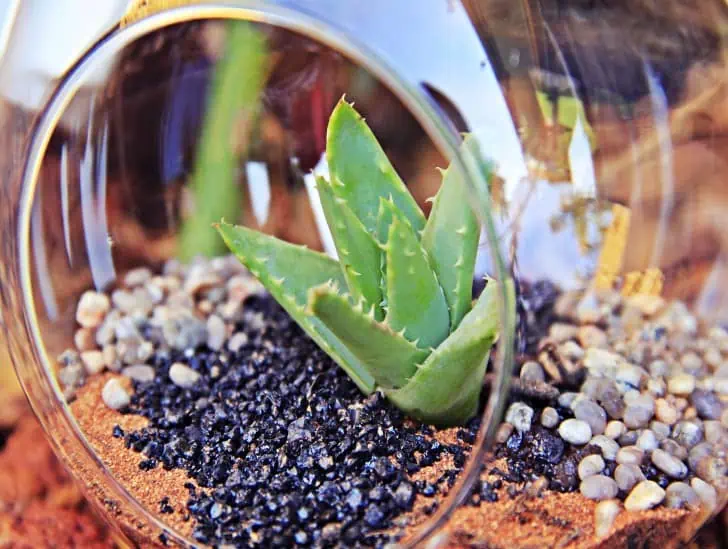
A close round terrarium with succulent.
Regularly check the soil’s moisture content to gauge the appropriate watering frequency.
  • Choose Proper Materials: Select high-quality, clean materials for the drainage layer to ensure optimal results and avoid introducing harmful substances into the terrarium.
  • Monitor Moisture Levels: Regularly check the soil’s moisture content to gauge the appropriate watering frequency for the terrarium’s specific plant species.
  • Proper Separation: Ensure that the drainage layer is separated from the soil by an adequate distance (about 2-3 cm) to prevent soil particles from entering it.

Final Thoughts

The spray bottle and drainage layer methods are two effective ways to water your terrarium.

The spray bottle offers convenience, while the drainage layer reduces waterlogging risks associated with overwatering.

Both techniques have advantages and drawbacks that must be considered when deciding which is best for a particular setup.

With careful observation and regular maintenance, both methods can be used to keep a terrarium healthy and thriving.

Succulent Soil Secrets: What Every Plant Parent Needs to Know

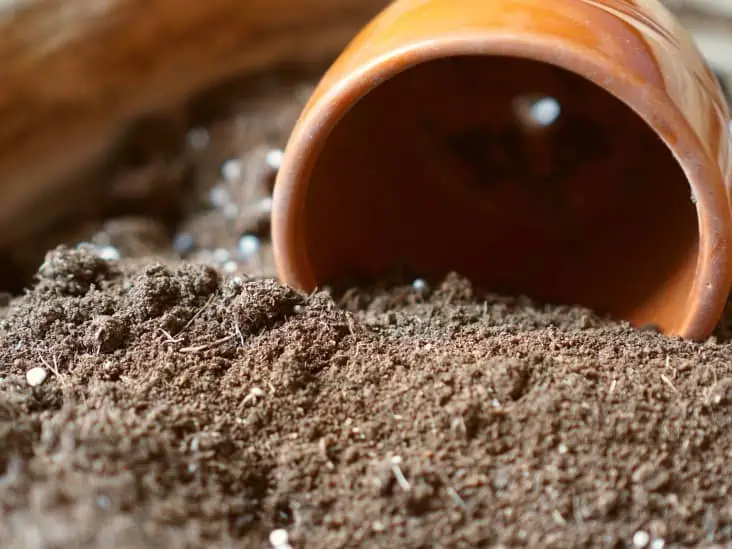
A succulent soil.

A succulent garden can be a source of great pride and accomplishment. Nothing feels good like caring for succulent plants and watching them flourish. And the most exciting part is that succulents are tough and need little maintenance to thrive. However, the biggest secret to landscaping with succulents is to use the right succulent soil. You must create a perfect potting mix for your plants to help them stay happy and healthy. The soil requirements for these plants are unique and may differ from the other plants in your garden.

So, what are the top succulent soil secrets that every parent plant must know? The most important thing you must know is that all succulents need a well-draining potting mix to thrive. Their ability to withstand drought makes them highly susceptible to rot if left in wet soil. The three main components of good succulent soil are sand, regular soil, and pumice or perlite. The ratio of these three ingredients varies depending on the type of succulent that you have. The key succulent soil factors include organic vs. mineral, texture, and porosity. Common succulent soil problems include soil compaction and excessive nutrients.

This blog post highlights some of the top succulent soil secrets every gardener must know. Read on to learn more.

What Is Succulent Soil? A Quick Overview

Before diving into succulent soil’s secrets, let’s quickly review what it is. Succulent soil is a mixture of different ingredients that create an environment conducive to growing succulents.

It usually comprises three main components: sand, regular soil, and pumice or perlite. Sand helps with drainage, while the organic matter provides nutrition and retains moisture. The pumice or perlite improves air circulation and drainage.

The ratio of each component will depend on the type of succulent you’re growing; some prefer more sand, while others need more organic matter. Getting the right mix of ingredients is essential for healthy plants.

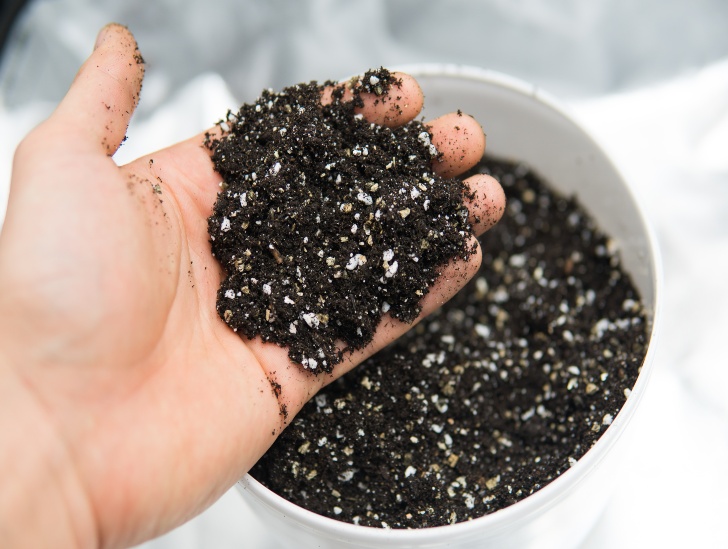
A soil.
Succulent soil is a mixture of different ingredients.

Succulent soil differs from regular soil because it has a looser texture, allowing for better drainage. It also contains fewer nutrients and is more alkaline, essential for succulents to survive.

Understanding the Key Components of Succulent Soil

As highlighted above, the three critical components of succulent soil are coarse sand, potting soil, and perlite/pumice. Below we discuss each of the components in detail:

Coarse Sand

Coarse sand is crucial to every succulent soil mix because it helps improve drainage and soil aeration. It also provides the grainy texture that many succulents love.

Avoid using fine sand in your succulent soil recipe because it won’t enhance drainage. If you cannot find coarse sand, use medium coarse for optimal drainage.

Potting Soil

Even though you will only use a small portion of it, potting soil is still essential to succulent soil since it provides organic matter.

It helps retain moisture and nutrients for succulents, which coarse sand cannot do.

Be sure to choose potting soil that is well-draining for your succulent soil recipe. Feel free to go for standard houseplant mix; you will mix it with coarse sand and perlite.

A sansevieria cutting and a potting soil.
Be sure to choose potting soil that is well-draining for your succulent soil recipe.

Avoid using heavy black gardening soil or houseplant mixes formulated explicitly for water retention.

Perlite/Pumice

Perlite or pumice is vital in succulent soil because it helps to improve drainage and aeration. This component is also essential in providing structure to the succulent soil mix since it has a porous texture.

Pumice is a volcanic rock with high porosity, allowing for better aeration and drainage. It also contains some minerals, which can provide additional nutrition to succulents.

A soil with perlite.
This component is also essential in providing structure to the succulent soil mix.

Perlite is made from expanded glass and is the most commonly used soil amendment for succulent soils. It helps to break up clay-like soils and loosen them up.

Top Succulent Soil Secrets

Now that you understand what succulent soil is all about, here are some important secrets to keep in mind when creating the right mix for your succulents:

Organic vs. Mineral

Every soil type is usually made up of mineral and organic components. Organic components refer to things that were once alive before dying and decomposing.

For instance, tree bark and other plant debris in the soil are considered organic matter. The primary purpose of organic soil components is to provide nutrients and store water.

Minerals refer to the natural inorganic substances found in the soil, such as gravel. The primary purpose of mineral components in the soil is to enhance drainage.

It is crucial to have the correct ratio of organic and mineral components in succulent soil to support plant growth and prevent potential rot.

The right balance of these components allows you to water your succulents profoundly but infrequently.

Typically, the mineral component should range from 40% to 70%, while the organic component should be between 30% to 60%.

The exact ratio will depend on other environmental factors and the succulent species you intend to grow.

Fortunately, there are many organic and mineral soil ingredients to choose from while making succulent soil.

For organic matter, feel free to go for coconut coir, regular potting soil, compost, or even pine bark. For mineral components include volcanic rock, perlite, sand, chicken grit, and fine gravel.

Texture and Porosity

The texture of succulent soil is crucial for drainage. Combining the components in your soil should have a looser texture, allowing water to drain quickly. If the soil feels too dense or compacted, it can lead to root rot and other issues.

Porosity is also an important factor when creating succulent soil. The soil should be porous to allow air circulation; this helps the roots get oxygen when needed.

Fortunately, you can perform a few simple tests at home to establish the texture of your succulent soil.

Fertilizer on the soil mix.
Combining the components in your soil should have a looser texture, allowing water to drain quickly.

A good test is to mix the soil with water and observe how quickly the water drains out. If it takes a long time, your succulent soil might be too compacted and needs more organic matter.

Know Your Succulents

Different types of succulents have different preferences when it comes to soil. Knowing the succulent you plan to grow is essential to create the perfect soil mix for them.

For instance, tropical succulents like Haworthia and Gasteria prefer more organic matter, while cacti such as Echinopsis prefer a looser, sandier texture with less organic matter. Research your succulent type beforehand and adjust the soil mix accordingly.

Common Succulent Soil Problems

Several issues can arise when making succulent soil. The most common problems are soil compaction and too many nutrients in the soil.

Soil Compaction

If you water your succulent and notice that the water drains straight through the growing pot without the potting mix absorbing any of it, you may be dealing with highly compacted soil.

Soil compaction is rare in succulent soil but can still occur because of heavy clay or too much organic matter.

To fix this, amend the soil with more mineral components to loosen it up and allow for better drainage.

However, a more permanent solution would be repotting your succulent with a new potting mix. Ensure the new soil has plenty of coarse sand and perlite/pumice to prevent compaction problems in the future.

Too Many Nutrients

If your succulent is showing signs of nutrient deficiency, such as yellowing leaves, the problem could be due to an imbalance of nutrients in the soil. This is usually caused by too much fertilizer in the soil or using potting mix with too many nutrients.

If this happens, flush your succulent roots with water for about 15 minutes to remove excess nutrients and adjust the pH level if necessary.

Repotting succulents in a fresh potting mix with low nutrient content is also good.

Can I Make My Own Succulent Soil?

Yes, you can make succulent soil at home. All you need to do is mix various organic and mineral components in the right ratio, giving you the perfect mix for growing healthy, happy succulents.

Getting the exact ratio of components that works best for your succulent species may take trial and error, but having the right ingredients is essential.

Tips For Making the Perfect Succulent Soil

Here are some tips to keep in mind while making your succulent soil:

Coconut fiber and soil.
Do your research and know the preferences of each type of succulent.
  • Always use a standard houseplant mix and adjust the texture with coarse sand, perlite/pumice, and other components.
  • Adjust the mineral-to-organic matter ratio depending on the succulent you are growing.
  • Test the soil texture before planting your succulent. If it feels too dense, amend it with organic matter as needed.
  • Do your research and know the preferences of each type of succulent. Their different requirements can help you create the perfect soil mix for them.
  • Keep a close eye on your succulents and look for signs of nutrient deficiency or overly compacted soil.

Final Thoughts

Succulent soil is a mix of mineral and organic components that provide the right balance of drainage and nutrients for succulents.

Depending on the succulent you plan to grow, it needs to be porous and have the right mineral-to-organic matter ratio.

These tips will ensure your succulents get the best soil for a healthy and thriving life.

When Will Your Agave Bloom? Find Out Here!

A agave plant blooming.

It is always a sight to behold when agave starts to bloom because the flowers make your home garden pop with life and vibrant colors. This is because agave flowers are impressively tall and form beautiful clusters. Although many succulents flower often (some do so every spring), you can’t say the same thing about agave. This succulent usually takes several years to produce flowers. Some agave varieties even take decades to reach maturity and flower.

So, when will your agave bloom? Typically, the blooming time of agave largely depends on the species. Some varieties, such as the agave americana, may take many years to produce flowers, but some varieties take between six and eight years to flower. You can use a few factors to determine when your agave will likely bloom. The first factor is the age of your agave. Typically, the older your agave, the more likely it is to bloom. The size of your agave will also determine how soon it might bloom. Keeping your agave in a spacious area with plenty of sunlight will produce flowers sooner than if confined to a smaller area.

This blog post discusses everything you need to know about the agave blooming cycle. Read on to learn more.

Understanding Agave’s Bloom Cycle

Agave plants typically take many years to reach maturity and bloom. This period can vary depending on the species and growing conditions, but it often ranges from 6 to 20 years.

A combination of factors, including age, size, and environmental conditions, triggers the bloom cycle of an agave plant. Once the plant reaches the appropriate stage, it starts preparing for blooming.

The first noticeable sign of agave’s bloom cycle is the emergence of a tall flower stalk, also called an inflorescence.

This stalk grows rapidly and can reach impressive heights, often towering above the plant. The inflorescence serves as a support structure for the blooming process.

As the flower stalk continues to grow, it starts developing buds. These buds gradually mature and transform into beautiful flowers. Agave flowers come in various colors, including yellow, red, and green.

Agave in a pot.
Once the plant reaches the appropriate stage, it starts preparing for blooming.

The flowers are typically tubular or bell-shaped and attract pollinators such as bees, butterflies, and hummingbirds.

The blooming period of agave can last several weeks or even months, depending on the species. During this time, the succulent puts all its energy into producing flowers and attracting pollinators.

Once the Agave plant has finished blooming, it undergoes a remarkable transformation. The flowers eventually wither and fade, leaving clusters of small seed pods. These pods contain seeds that will eventually disperse and produce new agave plants.

After blooming, Agave plants typically enter a stage known as senescence. Senescence is a natural part of the plant’s life cycle, and it refers to the gradual decline and death of the main plant.

However, Agave plants are unique in that they often produce offshoots, called pups, before they die. These pups are genetically identical to the parent plant and serve as a means of propagation.

Understanding agave’s bloom cycle provides insight into these succulent plants’ incredible resilience and reproductive strategies.

From their slow growth and long wait for maturity to the impressive flower stalks and prolific seed production, Agave plants showcase nature’s beauty and adaptability.

When Does Agave Bloom?

Most succulents bloom during spring or summer when warm weather is conducive to growth. Agave plants, however, often bloom during fall or winter when the temperatures start cooling down.

The exact time of flowering can vary depending on a few factors, such as age, size, and environmental conditions.

Generally, agave plants start blooming after they reach six years of age. Some varieties, like the Agave Americana, can take up to two decades to bloom. This is why most people have nicknamed the massive agave plant “the century plant.”

A agave plant with water droplets.
The nectar is expensive because agave flowers usually take too long to bloom.

As mentioned earlier, the succulent usually starts to grow a spike-like stalk when it is almost time to bloom. The primary purpose of the stalk is to provide a place where flowers will form.

Sometimes, you may notice small branches growing from the mother stalk. The primary function of the small branches is to aid in forming flower clusters.

Agave flowers are rich in nectar. That is one of the reasons why agave plants are mainly grown for commercial purposed since the flower’s nectar is used as an excellent substitute for sugar.

The nectar is expensive because agave flowers usually take too long to bloom. The flower’s short lifespan (it usually dies after a few days) makes it difficult to collect and store its nectar for a long period.

What Should You Do When Your Agave Blooms?

When your agave blooms, you should take a few steps to ensure the plant can produce more flowers.

The first step is to allow the flower stalk to mature fully before cutting it off. If you harvest the seeds or pods when they are ripe, you can propagate new plants from them.

After harvesting the seeds, you can plant them in a suitable location and provide the necessary care. This will ensure that your agave continues to bloom again and again.

Also, consider using protective gloves when handling the flower stalk or seed pods since some agave varieties have sharp spines or thorns that can cause skin irritation.

Furthermore, you should avoid using chemical pesticides near agave plants since they can harm pollinators.

How Long Do Agave Blooms Last?

Typically, every blooming branch on your agave has a unique lifespan. Remember that some branches develop faster while others take relatively long to blossom.

In general, the flowers of an agave plant can last anywhere from a few days to several weeks.

A queen victoria agave plant.
Every blooming branch on your agave has a unique lifespan.

However, the entire blooming cycle usually lasts between three and four months. The exact lifespan depends on the species and environmental conditions.

Note that some varieties are more resilient than others regarding blooming cycles. For instance, Agave Americana often blooms much later than other varieties.

Once the flowers begin to wither and decline, it is a sign that the agave is nearing the end of its bloom cycle. The plant will eventually stop producing new buds and start focusing on seed production.

Do Agave Plants Die After Blooming?

Some succulents are monocarpic, meaning they die after blooming. This is not the case with agave plants since most varieties produce offshoots or pups before entering a senescence stage.

These offshoots are genetically identical to the parent plant and ensure the species can continue propagating in its natural environment. These plants flower again when they reach maturity, and the cycle continues.

However, we must mention that some agave varieties may not survive for too long after flowering.

This is because they use massive amounts of energy during the blooming cycle to help the flower branches reach maximum height. This leaves the plant weak and malnourished, which might lead to death.

Do Agave Plants Need to Be Pollinated?

Yes, agave plants require pollination for them to produce seeds. Various insects, such as bees, butterflies, and hummingbirds, typically do this.

These pollinators are attracted to the sweet nectar produced by the agave flowers. As the pollinators feed on the flowers, they transfer pollen from one plant to another, which helps the plants produce seeds.

Agave seed on hand.
Every blooming branch on your agave has a unique lifespan.

However, it is important to note that agave plants can also self-pollinate if there are no other viable pollen sources.

This ensures that their genes are not lost and that the species can continue to propagate in the future.

Can You Stop an Agave from Blooming?

The simple answer is yes. To stop your agave from flowering, you only need to cut the flower stalk as soon as it starts to grow.

Doing this will prevent the plant from producing flowers and going into a blooming cycle.

Remember that cutting off the flower stalk will not harm your agave plant, but it may delay its bloom by several years.
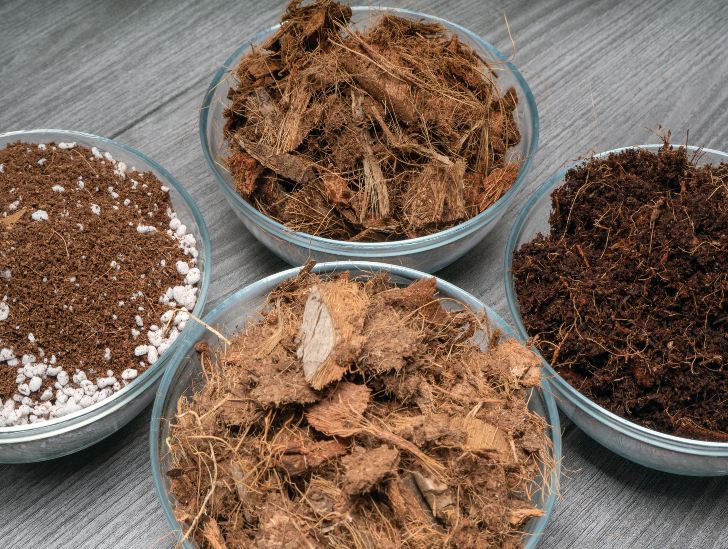
Furthermore, if you foresee any changes in the color of your agave’s leaves or notice that the plant is producing offshoots, it might be a sign that it will bloom soon.

How Long Does an Agave Plant Live?

Typically, the lifespan of an agave plant depends on its species. Some species can live up to 80 years, while others may only survive for a few years.

The environment also plays a key role in determining the plant’s lifespan since it has to offer suitable conditions for its growth and flowering cycle.

In general, cooler temperatures can extend an agave’s life span by several years, while warmer climates may cause it to die prematurely.

A agave cactus.
The lifespan of an agave plant depends on its species.

When it comes to indoor agave plants, their lifespan can be extended by providing a suitable environment and proper care.

For instance, if you provide enough light, water it regularly, and keep it away from extreme temperatures, your agave plant can last several years.

You should also take regular steps to remove pests that might damage the plant or cause death.

Summary

Agave bloom cycles vary depending on the species and conditions, but most of them require a considerable amount of time before they start blooming.

By understanding the factors that influence agave’s blooming cycle, you can help ensure your plant matures and produces beautiful flowers.

Waiting for Air Plant Blooms? Here’s What You Need to Know

A blooming air plant.

Air plants are popular for their relatively low maintenance needs. These plants are easy to care for, but most are slow growers. It usually takes two to five years for most air plants to reach maturity when propagated from seeds. However, the most interesting part of caring for air plants is when they eventually bloom. Air plant blooms are eye-catching, with long sprays of vibrant flowers in varying shapes and colors. The blooms last two to three weeks before wilting away, but they can provide a unique and rewarding experience if you take the time and effort to care for them.
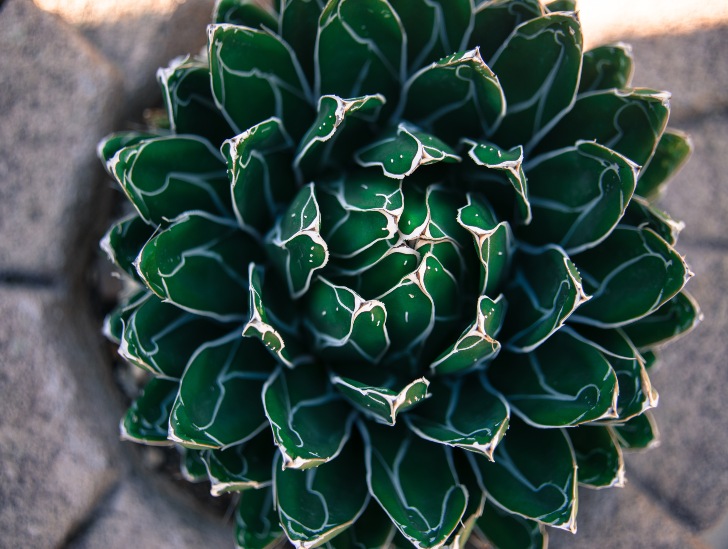
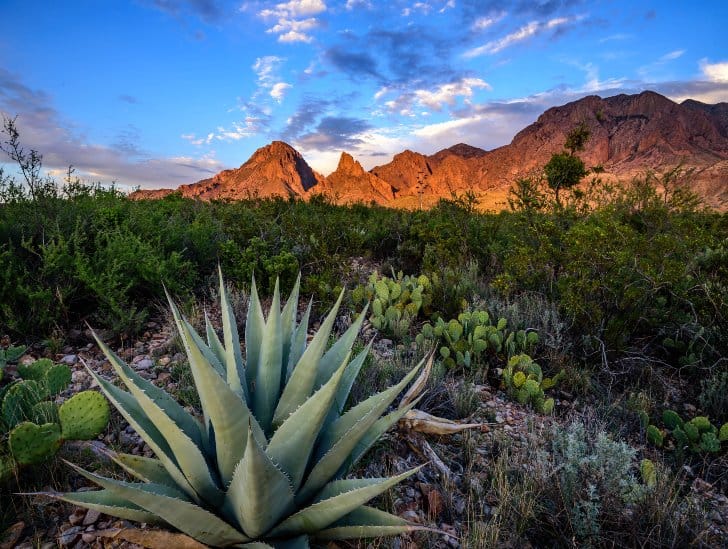
So, are you waiting for your air plants to bloom? Here is what you need to know. The blooming cycle marks the beginning of the reproductive phase for air plants. During this time, air plants produce an inflorescence that develops into beautiful flowers. The blooms have vibrant colors, while others feature relatively light shades. Some air plants, such as the Spanish Moss, produce relatively small flowers that can easily be missed if you don’t look too closely. Depending on the air plant species, the flower colors can vary from purple, green, yellow, pink, and white.

This blog post discusses everything you need about air plants’ blooming cycle. Read on to learn more.

Understanding the Air Plant Bloom Cycle

To understand the air plant bloom cycle, you first need to understand the plant’s general life cycle. Flowering only happens when the air plant is mature and ready to propagate.

The air plant will produce an inflorescence that will eventually develop into a flower. Depending on the species, this process can take two to five years.

Once you see the flowers, they will last for two to three weeks before wilting away. During this period, your air plant is in its reproductive stage and should produce offsets or pups.

Air plant blooming.
The primary purpose of the blooming cycle is to help the plants propagate.

These offsets are duplicates of the mother plant that you can use to propagate more air plants. You can also allow them to grow into mature plants and witness their blooming cycle a few years later.

The blooming cycle may last a few months in some air plants and requires a lot of energy. This is nature’s way of helping air plants attract birds and insects for pollination.

The primary purpose of the blooming cycle is to help the plants propagate.

Therefore, it’s important to let the air plant go through its blooming cycle without trying to pick or remove any of the flowers. Otherwise, you will prevent the plant from reproducing.

Do All Air Plants Bloom?

There are over 600 different types of air plants. So, one of the big questions is, do all air plants flower? The simple answer is yes.

All Tillandsia species bloom, but the flowers vary greatly in shape, size, and color. Some air plants, such as the Spanish Moss, produce relatively small flowers that are hard to spot if you are not keen.

Other species are quite flashy and produce large blooms that are vibrant in color. Some air plants, such as the Tillandsia funckiana, can produce clusters of small flowers that last up to two weeks before wilting away.

A person misting the air plant.
Some air plants, such as the Spanish Moss, produce relatively small flowers that are hard to spot if you are not keen.

Most air plant species have a relatively large bract from which flowers appear. For instance, the Tillandsia cyanea has a pink flowering bract that produces purple flowers.

When Do Air Plants Bloom?

Many factors determine when an air plant will bloom. The blooming cycle largely depends on the environmental conditions where the plant is kept.

The air plant’s season, species, and maturity level also play a crucial role in determining when your air plant will bloom.

The amount of care you provide will determine how soon and prominent your air plant blooms. Like most succulents, air plants bloom in spring and early summer when the days are longer and exposed to sufficient light.

These plants may take much longer to bloom in their natural habitat because of the low light or temperature.

But if you provide them with adequate light, water, and nutrients in a home setting, air plants can bloom much sooner than expected.

The same air plant species that may take five to seven years to bloom in one environment may take up to 20 years to bloom in another environment if the conditions are not right.

How Often Do Air Plants Bloom?

Most air plant species only bloom once in their lifetime. That’s why taking good care of your air plants and providing them with the conditions to reach their flowering phase is important.

The blooming cycle of an air plant may last for a few weeks or a few months, depending on the species and environmental conditions.

After that, you will notice new offsets or pups growing from the mother plant’s base.

Do Air Plants Die After Blooming?

The answer to this question is unclear. Once these plants flower, they produce several baby plants at their base.

The air plants’ life cycle is quite interesting. Air plants are among the most unique plants in the world.

Air plant hanging.
The original mother plant may live for months or years, depending on the species and environmental conditions.

Each blooming plant will only flower once, and other the flowering cycle is over, the plant produces offsets that will eventually grow into mature plants.

So, yes, air plants die after blooming, but the new baby air plants take their place and start a new growth cycle.

The original mother plant may live for months or years, depending on the species and environmental conditions.

What Can You Do with Air Plant Blooms?

Air plant blooms can be used in many ways. You can pick and use the flowers to create beautiful bouquets or floral arrangements.

As mentioned earlier, air plants have a wide range of flower colors which can add dimension to your decorations.

Alternatively, keep the blooms on the mother plant until they dry out and use them in different crafts. Dried blooms are excellent for making wreaths, jewelry, or potpourri.

How Long Do Air Plant Flowers Last?

Depending on the species, most air-plant flowers last from a few days to several weeks. The inflorescence of some air plants may even last up to two months before wilting away.

Caring for Your Air Plant during Bloom

The air plant bloom cycle requires a lot of energy and resources from the plants. Therefore, you must provide your air plants with good care and the necessary conditions during their flowering phase.

Soaking method for air plant
Air plants require moisture to thrive and must be watered frequently during their flowering cycle.

Here are a few tips to help you take care of your air plant during bloom:

  • Provide the right light – Air plants require bright, indirect sunlight or fluorescent lighting for flowering. Ensure you do not expose them to extreme heat, as this can damage the flowers and slow down the growth of the offsets.
  • Water your air plants – Air plants require moisture to thrive and must be watered frequently during their flowering cycle. Depending on the species and environmental conditions, you can water them with rain, distilled, or filtered water once a week or more.
  • Feed your air plant – It is important to feed your air plant regularly during the blooming phase. You can use an air plant fertilizer specifically designed for these plants.

How Can You Make Your Air Plant Bloom?

You must provide your air plants with the right conditions to bloom. The amount of light, water, and humidity the plant receives is critical in encouraging blooming.

Providing the right amount of light to encourage blooming can be tricky. Some air plant species enjoy bright indirect sunlight, while others thrive in bright, direct sunlight.

Understanding the specific species ‘ needs is the key to providing your air plants with the right light. You may also need to adjust the location and the frequency of light exposure to encourage blooming.

A airplant in a wood.
You must provide your air plants with the right conditions to bloom.

Furthermore, you should ensure that your air plants are watered and fed regularly with an air plant fertilizer for optimal growth. These tips will ensure your air plants have all the necessary resources to reach their flowering phase.

To water your air plants, soak them in a water basin for about 20 minutes. Consider using rainwater and avoid leaving it in the water basin longer than necessary because it can cause root rot.

Finally, consider providing your air plants with higher humidity during their flowering cycle to help them open up their blooms and reach their full potential.

You may need to mist the plants a few times per week or even increase the humidity of the environment by using humidifiers or terrariums.

Final Thoughts

Air plants are quite fascinating and rewarding to maintain. The blooming cycle is a special treat you wait years to witness.

The flowers last only two to three weeks, so it’s important to take advantage of this time and let your air plants go through their full reproductive phase without interference.

With adequate care and maintenance, you will witness the bloom cycle of your air plants and enjoy the fascinating show they put on.

Creating the Illusion: DIY Fake Water for Your Terrarium

Candle gel wax on hand.

Have you ever thought of adding a water feature to your terrarium? Most people refrain from using real water because terrariums lack proper drainage. However, there are options for fake water that can give your landscape a realistic look. You can buy fake water products meant for terrariums or do your own. No matter what you choose, fake water will add a lovely and realistic touch to your terrarium.

The question is, how do you make fake water for a terrarium? You can make fake water for your terrarium using candle gel wax, epoxy resin, glue, gelatin, or realistic water products. Colored stones, crystals, or pebbles can also be an alternative to real water. Using these fake water options, you can add water elements like a waterfall or pond that can serve as a lasting part of your terrarium design.

Read this post to learn how to make fake water for a terrarium. The article offers an additional guide on how to achieve water effects, such as ripples and waves.

1. Candle gel wax

Candle gel wax is one of the products you can use to make fake water in your terrarium. Mineral oil is the main ingredient in candle gel wax but is mixed with some resin.

To make fake water with candle gel, take a chunk of wax and melt it in a small pot until it becomes liquid. Allow it to cool to keep bubbles from forming later.

Then, add a bright blue coloring or any other shade of blue to the wax. You may use epoxy resin dye or any acrylic paint as a dye.

Pouring a candle gel wax.
Mineral oil is the main ingredient in candle gel wax but is mixed with some resin.

You can add glitter to the fake water for additional effects. Some dyes come with glitter added to them already. 

Use masking tape to mark off the area of your terrarium where the fake water will sit before filling it. Pour the wax there carefully, then let it dry.

Take off the tape once the candle gel wax has dried. Give it at least 24 hours to settle and dry.

2. Epoxy resin

Epoxy resin is widely used to imitate water in terrariums and mini scenery models. In fact, it is the best material for recreating rivers, ponds, lakes, and ocean features in terrariums.

All you need to make fake water is epoxy and a hardener. The purpose of the hardener is to solidify the epoxy. The general rule is to mix equal parts of epoxy and hardener.

Pour some epoxy into a cup first, then add the hardener. Add more dye as necessary and continue mixing till you achieve the desired shade.

Separate the terrarium using masking tape, then add the epoxy resin. To prevent epoxy from seeping into the soil, you must put a barrier between the soil and epoxy.

You can make a barrier using a piece of plastic (clear or dark) or any other material that won’t melt when in touch with heated epoxy.

Do not pour the entire epoxy resin layer once since it will crack. Instead, pour the epoxy mix on a flat surface.

Pour approximately 6 mm (about 1/4 inch) of epoxy. Then let it cure for about 24 hours before pouring another layer. If you don’t do this, it will crack.

Blow off any bubbles that form to eliminate them – blowing makes them burst. Do not touch resin, as it will stick and form uneven surfaces.

You can add other special effects, such as water flowing from a waterfall if you so want. If you have a hot glue gun or just PVA glue, use it to make a long stick with cuts on the edges.

A epoxy Resin.
Separate the terrarium using masking tape, then add the epoxy resin.

You may attach it to the waterfall feature or something else once it has dried.

Alternatively, cut a long piece of a plastic bottle and make cuts on the edges to simulate flowing water and attach it to the top of the waterfall.

3. Blue decorative stones or crystals

Another technique that doesn’t require complicated liquids is using blue crystals, pebbles, gems, or stones. You can simply simulate the appearance of water by placing many blue stones together.

You can pick either small stones in the form of sand or slightly larger crystals based on the effect you want to achieve.

Making an artificial pond, lake, or sea in a terrarium using tiny crystals is relatively easy. All you need to do is make an outline and add the stones.

You don’t need glue unless you want to attach stones to a waterfall feature or anything similar. E6000 or hot glue are suitable options for this.

Stones or crystals are an excellent option for desert terrariums or terrariums with soil requiring proper drainage. The vibrant blue colors and sparkles make these ornamental stones the best choice.

4. Realistic water product

Realistic water, a product made by Woodland Scenics, is another easy way of making fake water in a terrarium.

The company has other products for creating ripples and waves and deep pour water for deep water effects.

You only need to pour this product over the designated area to create fake water. Don’t pour more than 6mm (or 1/4 inch) per layer.

Let it dry before adding another layer. Ensure it does not come in contact with the soil or other material since it will absorb it.

5. Glue

Wood glue or craft glue can work for this method. However, you might consider using craft glue since it is readily available and cheaper.

Craft glue also becomes clear when dry, so easier to work with when building water features with acrylic paint or colored dyes.

Bottle of glue with paint brush.
You might consider using craft glue since it is readily available and cheaper.

The first step is to prepare your base. Choose where you want the water feature to be in your terrarium.

Use hard surfaces like wood, glass, or plastic to make the water base and ensure it is impenetrable from other parts of the terrarium.

Paint the base from the inside to achieve a natural effect. Use shades of blue to achieve a clean water look and green, brown, or black for a swampy pond water look.

Next, mix glue and water in a ratio of 3:1. The mixture should be enough to make a half inch of your water base. You can add color using dye, food coloring, or acrylic paint.

You can now pour the mixture into the terrarium base. Do not pour more than a half inch in thickness.

Let the glue dry for up to three days. Repeat the process to add more layers, ensuring each layer dries completely before adding the next.

6. Gelatin

Gelatin is one of the products you can use to easily make fake water for your terrarium. Here’s what you need to do:

Boil a cup of water and add a quarter cup of clear gelatin powder. Stir until all gelatin is dissolved.

Pour the mixture into a container you had pre-chilled in the refrigerator. Any shallow container will work.

Let the mixture cool and set for at least four hours. If possible, leave it overnight. Once set, cut the gelatin into small cubes using a sharp knife.

A clear gelatin with rosemary.
Gelatin is one of the products you can use to easily make fake water for your terrarium.

If it looks too cloudy, you can filter the fake water using a cheesecloth or coffee filter. To use, place the cubes of fake water in your terrarium.

They will lay on the bottom and look like real water!

Other Less Preferred Options for Making Fake Water

Apart from epoxy resin, you can also use polyester resin to make fake water. However, polyester resin emits more harmful fumes, so wear a mask.

It also hardens quickly, leaving you with less time to work with it before pouring it into the terrarium (pot time).

A decorative terrarium.
Gelatin is one of the products you can use to easily make fake water for your terrarium.

Polyurethane resin is another product you can use to make fake water. But like polyester resin, its pot time is significantly shorter and emits fumes.

How To Make Waves and Ripples on Fake Water

You can add other attractive effects to your fake water, but wait until the water hardens. There are a few ways to create waves or ripples.

You can achieve this using clear silicone, which you paint with a brush and let dry. This will help you create small waves and ripples. 

Then, you can use medium to heavy gel or glazing media for different water effects. The heavier the gel you choose, the heavier the effects. 

Artists frequently use gel and glazing media to make their paint thicker. Gloss or semi-gloss glazing medium is used for lighter effects, while the medium gel is used for medium effects.

Choose medium glazing options for better visibility. However, you can use any kind to make your preferred water effects.

Final Thoughts

You will realize there are several ways of imitating the water effect in a terrarium, some easier than others.

This article has summarized various simple and affordable options that anyone can use for their terrarium landscape.

Whichever option you choose, be creative and add more detail, like plants, moss, or other decorative natural elements.