How to Easily Propagate Mangaves at Home? Step-by-Step Guide

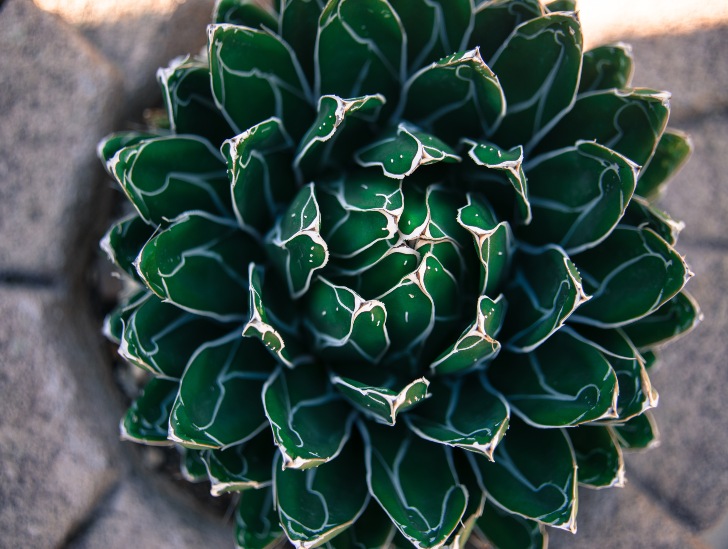
A queen victoria agave plant.

Mangaves, the enchanting botanical fusion of Agave and Manfreda, have taken the succulent world by storm with their striking appearance and remarkable hardiness. These captivating succulents are a perfect blend of Agave’s architectural elegance and Manfreda’s distinctive colors and patterns. But what’s even more fascinating is their propensity for propagation, making it possible for you to multiply your Mangave collection and share their beauty with friends and family.

So, how can you propagate Mangaves at home easily? Mangaves can be propagated through leaf cuttings, offsets (pups), stem cuttings, and seed germination. The most common and easiest propagation method is through offsets or stem cuttings. While seed germination is a bit more challenging, it can also be rewarding. You only need a little patience, and soon, you’ll have your Mangave family flourishing.

Today, we embark on a journey into the world of Mangave propagation, unveiling the secrets to multiplying these unique succulents effortlessly. Read on to find out everything you need to know.

Mangaves: Quick Overview

Mangaves are like nature’s delightful experiments, blending the toughness of Agave with the creativity of Manfreda. These unique succulents have caught the eye of plant lovers around the world.

They come from a mix of two different succulent families. The first part of their name, “Man,” comes from Manfreda, while “gave” comes from Agave.

Manfreda, a relative of Agave, adds exciting colors and patterns to the Mangave family. This hybrid combination is like a succulent superhero, blending the best traits of both plants.

Some Mangaves have rosette shapes, with leaves forming a circle like a beautiful green rose. Others have long, arching leaves that can make them look like elegant, flowing fountains. No matter the pattern, they always look cool.

One thing that makes Mangaves special is their leaves. They can be bold and spiky or soft and wavy, and they often have amazing colors and patterns.

Some Mangaves have spots, stripes, or even splashes of red, making them stand out in the succulent world. Plus, these plants are tough cookies, able to handle hot sun and dry spells like champs.

A variegated agave.
No matter the pattern, they always look cool.

These succulents are highly versatile, meaning you can grow them in your garden or pots. Their spiky or flowing forms can add a touch of drama to your outdoor space. In pots, they look fantastic on a patio or as an indoor houseplant.

If you’re looking for easy-to-care-for plants, Mangaves are a great choice. They don’t need much attention. Just give them lots of sunlight, well-draining soil, and don’t water them too often. They’ll reward you with their unique beauty.

How to Propagate Mangaves at Home

Now that you have a little background on these lovely succulents, let’s dive into how to propagate them at home.

Propagating Through Offsets (Pups)

Offsets are small baby plants that grow around the base of the parent Mangave. These tiny replicas are genetically identical to the parent plant and can easily be separated and replanted to create new individuals.

Propagation of Mangave through offsets is one of the most reliable and straightforward methods.

You’ll need a healthy Mangave plant that has produced offsets (pups) at its base. Use a clean, sharp knife or pruning shears to separate the offset from the parent plant.

However, you need to prepare the offset before making the cut. Carefully remove any surrounding soil to expose its base and root system. Inspect the offset to ensure it is healthy, with no signs of rot, pests, or disease.
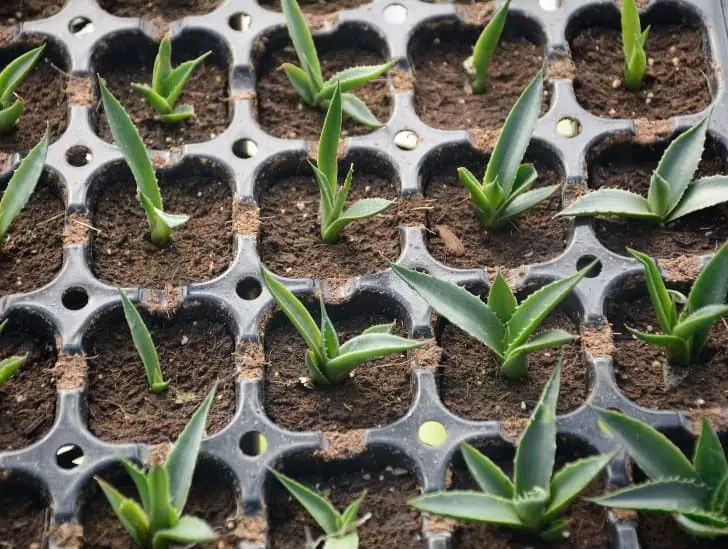
Agave pups.
Use a clean, sharp knife or pruning shears to separate the offset from the parent plant.

Gently and carefully separate the offset from the parent plant. Make the cut close to the base of the offset to minimize damage.

Once separated, place the offset in a dry, shaded area for a day or two to allow the cut end to callus. This step helps prevent rot when planting.

Prepare a pot or container with a well-draining succulent or cactus potting mix for propagation.

After the callusing period, plant the offset in the prepared container. Create a small hole in the potting mix, insert the offset (root end down), and gently pack the soil around it to secure it in place.

While it is not necessary for Mangave offset propagation, you can use rooting hormone to encourage root development if you wish.

Water the newly planted offset lightly, ensuring the soil is evenly moist but not soaked. Overwatering can lead to root rot, so exercise caution.

Timing is crucial for offset propagation. Wait until the offset (pup) has grown large enough to be separated from the parent Mangave plant.

Typically, this occurs when the offset has several roots and a few inches of leaf growth. Do not rush this process because the offset needs to be strong enough to thrive on its own.

Growing from offset is the fastest way to propagate Mangaves, with a high success rate.

Propagating Through Stem Cuttings

Stem cuttings are another easy and fast way of propagating Mangaves. This method works best if you have a leggy or stretched-out Mangave plant with a long stem.

Use a clean, sharp knife or pruning shears to cut off a small stem section. Ensure you have several inches of stem with some leaves at the top.

A agave stem.
Stem cuttings are another easy and fast way of propagating Mangaves.

Leave the cutting in a dry, shaded area for a day or two to callus over before planting. Then, plant the cutting in well-draining soil and water lightly, as you would with offsets.

With proper care and environmental conditions, your Mangave cutting will develop roots and new leaves in a few weeks. Be patient, and you’ll soon have a new Mangave plant.

Propagating Through Leaf Cuttings

Leaf cuttings are an excellent way to propagate Mangaves, especially if you have limited space or want to grow several plants from one. This method may take longer than offsets and stem cuttings, but it’s still worth trying.

Choose a healthy, plump leaf from the parent Mangave plant. Use clean scissors or pruning shears to cut the leaf off at the base, ensuring a clean cut without jagged edges.

Place the cutting in a dry, shaded area to callus for a day or two before planting. Once it is calloused, prepare a pot with well-draining soil and insert the leaf-cutting into it, burying about half of it.

A agave plant with water droplets.
Choose a healthy, plump leaf from the parent Mangave plant.

After a few weeks, you should see new roots forming at the base of the leaf. Once these roots are a few inches long, you can gently transplant the new Mangave plant into its own container or garden bed.

Propagating Through Seed Germination

Propagating Mangave through seed germination is a rewarding but relatively slow method. The success rate can vary due to the hybrid nature of Mangave plants, but it’s a great way to grow unique plants.

Ensure you have a healthy Mangave plant that has produced mature seeds. Collect the seeds when they are fully ripe and ready for propagation.

Once you have collected your seeds, the next thing you need to do is fill the seed tray or small pots with the seed-starting mix, leaving some space at the top. Moisten the mix slightly before sowing the seeds.

Carefully scatter the Mangave seeds evenly over the surface of the seed-starting mix. Do not bury the seeds; they need light to germinate.

Agave seed on hand.
Ensure you have a healthy Mangave plant that has produced mature seeds.

Place the seed tray or pots in a shallow container or tray and cover them with clear plastic wrap or a plastic dome. This creates a mini-greenhouse effect and helps retain moisture.

Place the containers in a warm, brightly lit area without direct sunlight. The seeds should germinate within two to four weeks.

Once the seedlings have developed a few leaves and are strong enough to handle, transplant them into individual pots with well-draining soil. Continue caring for them as you would with mature Mangave plants.

Growing your Mangave plants from seeds is a fantastic way to experiment with new hybrids and create unique plants. However, it can take several years for the plant to reach maturity, so patience is key.

How Do I Care for Newly Propagated Mangave Plants?

When propagating Mangaves, providing them with the right care and environment is essential to ensure success. Here are some tips for caring for newly propagated Mangave plants:

  • Proper Lighting: Like mature Mangave plants, offsets, stem cuttings, leaf cuttings, and seedlings require bright but indirect sunlight. Place them in a location where they can receive at least six hours of sunlight daily.
  • Adequate Watering: Mangaves are drought-tolerant plants, and too much water can lead to root rot. Water newly propagated plants sparingly, only when the soil is dry.
  • Proper Drainage: Ensure the pot or container you use for propagation has proper drainage holes. This will prevent water from accumulating and causing root rot.
  • Suitable Soil: Mangaves thrive in well-draining soil, so use a cactus or succulent potting mix when propagating them. You can also add some sand or perlite to improve drainage.
  • Temperature and Humidity: Mangaves prefer warm temperatures between 65-85°F and low humidity levels. Avoid placing them in rooms with high humidity, such as bathrooms.

Final Thoughts

Propagating Mangave plants is a fun and rewarding process that allows you to create new plants from your existing ones.

Whether you propagate through offsets, stem or leaf cuttings, or seed germination, each method has advantages and challenges.

By following these methods and tips, you can successfully propagate your Mangave plants and expand your collection.

Revolutionize Your Garden with Pumice: Here’s How

A pumice on a cactus pot.

Creating organic soil is vital to growing healthy succulents. To achieve this, it is critical to select the right soil amendment. Pumice is one of the best options available. This lightweight volcanic rock has become increasingly popular among gardeners due to its many benefits. Pumice is formed from volcanic eruptions, producing frothy lava with high gas bubbles. As the lava cools, these bubbles are trapped, resulting in a porous and lightweight stone.

So, how can you revolutionize your garden with pumice? Pumice plays a crucial role in improving the drainage and aeration of soil, which are both essential for succulent growth. Adding pumice to your garden soil also helps with water retention, preventing overwatering and root rot. Its porous nature also allows for better absorption of nutrients by plant roots. Furthermore, pumice is environmentally friendly and sustainable. It is a natural resource that does not harm the earth when mined. It can also be used as a top-dressing option for succulent plants. This helps to reduce soil compaction and aids in preventing weeds from growing. The rough texture of pumice also acts as a natural barrier against pests, making it an excellent choice for organic gardening.

This blog post discusses everything you need to know about pumice and how you can use it to revolutionize your garden. Read on to find out everything you need to know.

What Is Pumice?

Pumice is the result of volcanic activity. When volcanoes erupt, they expel a mix of hot gases and molten lava. As this lava cools rapidly, it traps the expanding gases, creating a frothy, sponge-like structure.

These pockets of trapped gas define the unique characteristics of pumice, such as its lightweight nature and exceptional porosity.

One of pumice’s distinctive features is its lightweight composition. Unlike dense rocks, pumice has a low density, due to its porous structure.

It can float on water; even the largest pumice stones are significantly lighter than other volcanic rocks.

A closeup image of a pumice.
When volcanoes erupt, they expel a mix of hot gases and molten lava.

Pumice stones often appear in shades of white, gray, or even pale green, depending on the mineral content of the volcanic source.

The numerous pores and cavities in pumice are a boon for soil. Pumice’s exceptional porosity allows it to absorb and hold water and nutrients, making it a valuable addition to soil. These tiny pores retain moisture and provide space for oxygen, a vital element for healthy root development.

Pumice has a porous structure, which aids in soil aeration and drainage. When mixed into soil, pumice creates air pockets that allow roots to access oxygen while preventing soil compaction. This promotes root health and overall plant vitality.

Depending on the volcanic source, pumice may contain trace minerals such as potassium, phosphorus, and calcium, which can provide essential nutrients to plants over time. These minerals contribute to the multifaceted benefits of using pumice in soil.

Pumice is an excellent soil conditioner for improving soil structure. It can be incorporated into heavy clay soils to increase drainage and aeration, preventing waterlogged conditions.

Conversely, it can be added to sandy soils to enhance water and nutrient retention. Its ability to balance soil moisture levels makes it a versatile amendment for various soil types.

Using Pumice as a Soil Amendment Option

With its exceptional qualities, pumice can be a game-changer when incorporated as a soil amendment.

Before adding pumice to your soil, choosing the right type of pumice is important. Look for horticultural-grade pumice since it’s been cleaned and screened to remove impurities.

You can typically find pumice at garden centers or online suppliers. Ensure the pumice is dry and free from contaminants.

The ideal ratio of pumice to soil depends on the specific needs of your plants and the existing soil conditions. In general, adding 10-20% pumice to your soil mix can significantly improve aeration and drainage.

You might use a higher percentage for heavy clay soils to enhance drainage, while a lower percentage for sandy soils will help with water retention.

For container gardening, add pumice directly to your potting mix. Blend it thoroughly with the soil, ensuring an even distribution. This will create a well-aerated, fast-draining medium, ideal for container plants.

Fertilizer on the soil mix.
For container gardening, add pumice directly to your potting mix.

Ensure there’s a layer of pumice at the bottom of the pot to prevent soil compaction.

When amending in-ground soil, first determine the type of soil you’re working with. Dig a hole or trench and mix the pumice into the soil you’ve removed.

Add it at the recommended ratio for your specific soil type. Then, place the amended soil back into the hole, creating a pumice-enriched planting area.

Monitoring the moisture levels of your soil regularly is crucial when using pumice. While it enhances drainage, it also improves water retention.

Ensure your plants receive adequate watering, especially during hot and dry periods, to moisten the soil.

After adding pumice as a soil amendment, keep a watchful eye on your plants. Observe their growth, overall health, and response to the amended soil.

Adjust your pumice usage or watering practices as necessary, ensuring your plants receive the right balance of nutrients and moisture.

How To Use Pumice in Your Garden

Pumice is available in different grades and sizes, but the most suitable size for gardening is 1/8″ to 3/8″. It is usually sold in bags, making it easy to handle and apply. Here are some ways you can use pumice in your garden:

  • Add it directly to the potting mix – Mix pumice into your succulent or cactus soil mix for improved drainage and aeration.
  • Use as a top dressing – Spread a layer of pumice on top of your soil to prevent compaction, retain moisture, and deter weeds.
  • Amend garden beds – Mix pumice into your existing garden bed soil for improved drainage and aeration.
  • Use as mulch – Mulching with pumice can help regulate soil temperature and prevent water loss through evaporation.
  • Create a pumice garden bed – For a more extensive succulent or cactus garden, consider creating a raised bed filled with pumice for optimal drainage and moisture control.

What Are the Advantages of Using Pumice as a Soil Amendment Option?

Let us now explore the numerous benefits of incorporating pumice into your soil:

1. Enhanced Aeration

Pumice’s porous structure creates air pockets in the soil, improving aeration. This is crucial for healthy root growth because plant roots require plenty of oxygen to thrive.

2. Improved Drainage

Pumice is exceptional at promoting drainage. When mixed into heavy or clayey soils, it helps excess water to move away from the root zone efficiently.

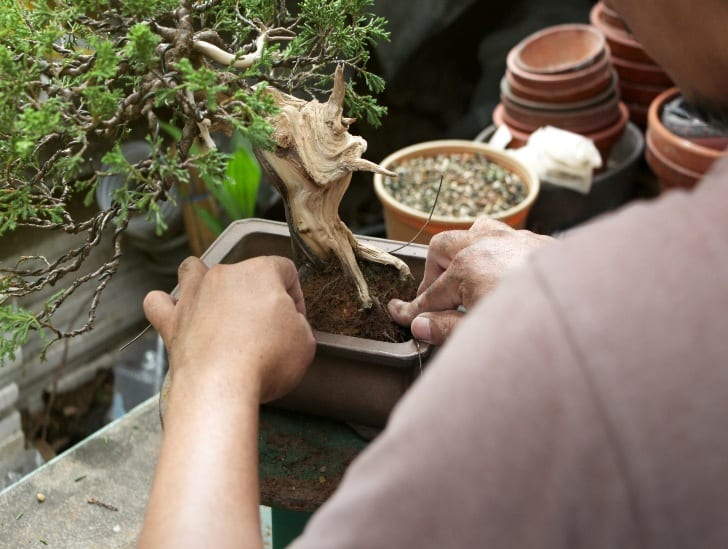
A bonsai plant repotted.
Pumice is exceptional at promoting drainage.

This prevents waterlogged conditions that can lead to root rot and other issues. In sandy soils, pumice aids in retaining moisture, ensuring a consistent water supply for plants.

3. Root Health and Development

Healthy roots are the foundation of healthy plants. Pumice’s ability to enhance aeration and drainage directly contributes to robust root systems. This, in turn, leads to better nutrient uptake and overall plant vitality.

4. Water Retention

While pumice excels at promoting drainage, it also retains moisture. The numerous pores in pumice can hold water, providing a steady supply to plants, even during dry spells. This makes it a versatile option for various soil types and climates.

5. pH Neutral

Pumice is pH neutral, meaning it won’t alter the alkalinity or acidity of your soil. This makes it a versatile choice for many plants, whether they prefer acidic or alkaline growing conditions.

6. Nutrient Retention

Pumice can help your soil retain essential nutrients. As water passes through the pumice-amended soil, it holds onto nutrients, preventing them from leaching away. This is valuable in maintaining healthy nutrient levels for your plants.

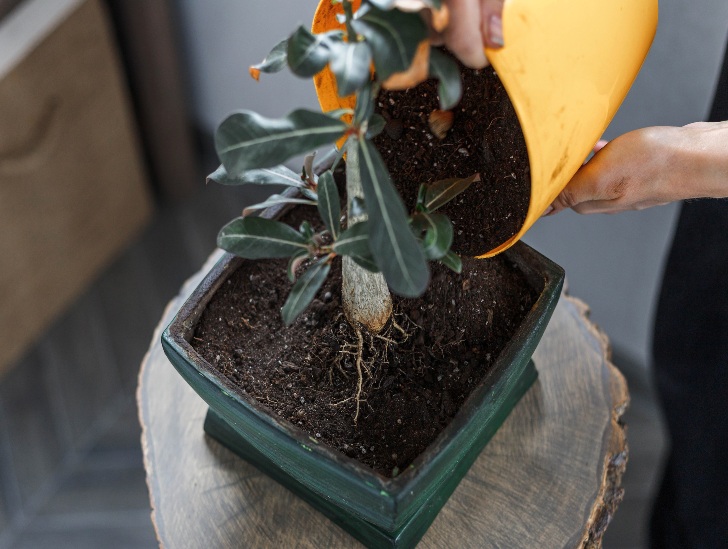
A caudex bonsai in a pot.
Pumice can help your soil retain essential nutrients.

7. Weed Suppression

Using pumice as a top dressing or mulch in your garden can help suppress weeds. Its presence on the soil surface makes it difficult for weed seeds to germinate and establish, reducing the need for manual weeding.

8. Environmental Sustainability

Pumice is a natural and sustainable soil amendment. It is mined from volcanic deposits, and its use minimizes the need for chemical additives or artificial soil conditioners. This aligns with eco-friendly gardening practices and minimizes the environmental impact.

9. Versatility

Pumice is a versatile soil amendment used in various gardening applications. Whether you’re working with container plants, in-ground gardens, or specialty gardens like succulent arrangements, pumice can suit your needs.

What Are the Disadvantages of Using Pumice as a Soil Amendment Option?

While pumice offers a range of benefits as a soil amendment, it’s important to consider potential disadvantages to make an informed decision about its use in your garden.

Horticultural-grade pumice can be relatively expensive, especially if you have a large garden or plan to use it as the primary component of your soil mix. Its cost may be a limiting factor for gardeners on a tight budget.

Pumice is a relatively inert material, meaning it doesn’t provide significant nutrients to plants. While its ability to retain nutrients is advantageous, it doesn’t supply essential elements such as nitrogen, phosphorus, or potassium. This necessitates the addition of fertilizers to ensure plants receive adequate nutrition.

A sack of soil and a bonsai without a pot.
Pumice is a relatively inert material, meaning it doesn’t provide significant nutrients to plants.

For gardeners working with specific plants that require acidic or alkaline soils, pumice’s pH neutrality may be a disadvantage. It won’t contribute to altering the pH of the soil, which may be necessary for certain plant species.

Final Thoughts

Pumice is a versatile and environmentally friendly soil amendment option that can revolutionize your garden.

Its lightweight and porous structure makes it suitable for various gardening applications, including improving drainage, moisture retention, and root health.

While it may have some limitations, its numerous benefits make it a valuable addition to any garden.

Hanging Succulents Made Easy: A Step-by-Step Guide

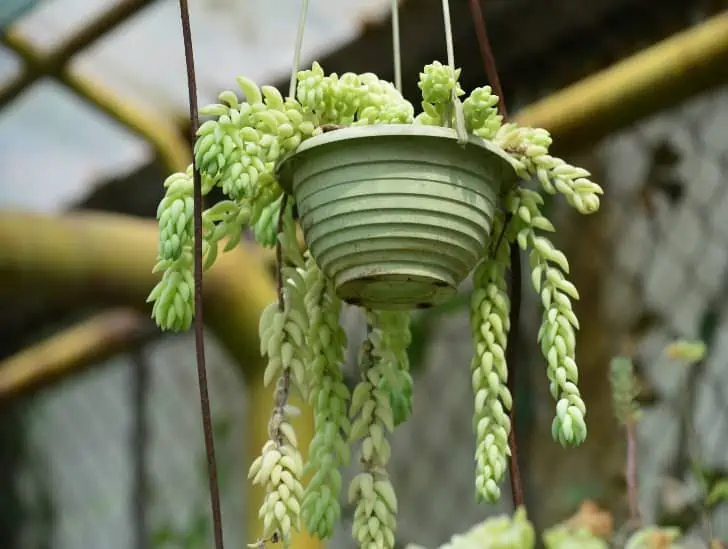
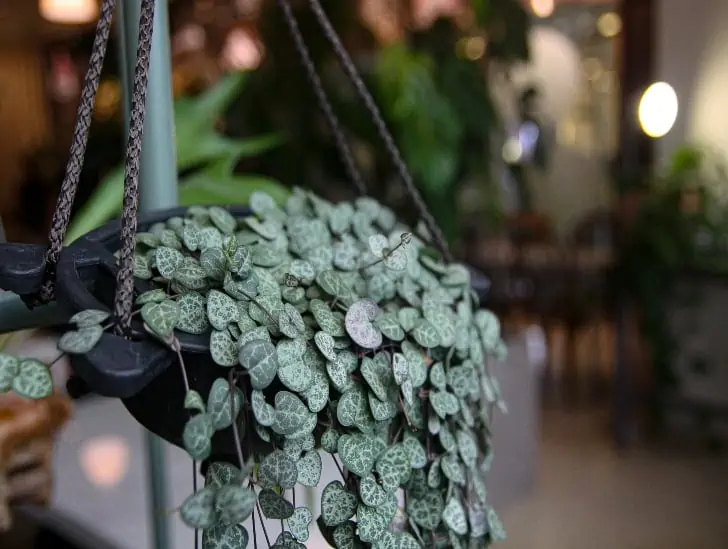
Monkey tail cactus hanging.

There’s an undeniable allure to hanging succulents – a touch of greenery that defies gravity and adds life to any room. Whether you want to add visual interest to a bare corner or create an eye-catching display, hanging succulents are the perfect solution. And best of all, they create a living masterpiece that draws the eye and thrives with minimal fuss. In fact, a garden full of hanging succulents is almost every gardener’s dream – and with this step-by-step guide, it’s easier than you might think.

So, how do you create a garden of hanging succulents? The first thing you need to do is gather the necessary materials. These include a growing container with plenty of drainage holes, a potting mix, a small trowel, gloves, a watering can, and sphagnum moss (optional). Prepare your growing container by filling it with potting mix – use a mix specifically formulated for succulents. You can also add sphagnum moss on top of the potting mix, which will help retain moisture in the soil and create a lush look. Choose your succulents. Look for varieties known for their trailing or cascading growth habit, such as string of pearls, burro’s tail, donkey’s tail, and certain types of echeveria. Prepare the succulents and plant them. Water the succulents appropriately before hanging them.

This post demystifies the seemingly intricate process of creating a perfect hanging succulent garden, breaking it down into easy-to-follow steps. Read on to find out everything you need to know.

Hanging Succulents: The Artful Garden

Few plants have captivated the hearts of gardeners worldwide, quite like hanging succulents. These remarkable botanical wonders have surged in popularity for many reasons.

One of the key reasons for the popularity of hanging succulents lies in their extraordinary resilience. As a group, succulents are renowned for their ability to thrive in arid conditions, thanks to their water-storing capabilities.

When these hardy plants take to the air in hanging arrangements, their inherent strength meets an element of elegance, creating a harmonious juxtaposition.

A donkey tail hanging.
One of the key reasons for the popularity of hanging succulents lies in their extraordinary resilience.

Hanging succulents can endure fluctuations in moisture levels and even periods of neglect, making them a perfect choice for both experienced gardeners and beginners.

These plants have an innate ability to transform any space into a work of art. Their cascading growth habit, combined with an astonishing diversity of shapes, sizes, and colors, allows for endless creativity in garden design.

From the delicate tendrils of String of Pearls (Senecio rowleyanus) to the rosette clusters of Donkey Tail (Sedum morganianum), each hanging succulent variety offers a unique visual delight.

The way hanging succulents drape and flow adds depth and dimension to any setting. Whether suspended in elegant macramé planters, woven into living walls, or allowed to spill from hanging baskets, they introduce an element of enchantment and natural beauty.

The way they interact with light, casting intriguing shadows and highlighting their intricate details, further enhances their aesthetic appeal.

Hanging succulents are exceptionally versatile in terms of design possibilities. They effortlessly adapt to a wide range of containers, from rustic terracotta pots to modern geometric planters.

They can be artfully combined with other succulents, trailing vines, or flowering companions to create captivating arrangements that reflect your personal style.

Moreover, hanging succulents have the magical ability to blur the boundaries between indoor and outdoor spaces.

They thrive equally well in well-lit living rooms, sun-drenched patios, or shaded garden nooks. This versatility allows you to seamlessly integrate these botanical masterpieces into various areas of your home or landscape, enhancing the ambiance and aesthetics of each space.

A Step-by-step Guide to Creating a Perfect Hanging Succulent Garden

Now, let’s dive into how you can create your own stunning hanging succulent garden.

Step 1: Gathering Materials

As mentioned earlier, to create a hanging succulent garden, you will need:

A hanging succulent.
Hanging succulents have the magical ability to blur the boundaries between indoor and outdoor spaces.
  • A growing container with ample drainage holes
  • Potting mix specifically formulated for succulents.
  • Small trowel
  • Gloves
  • Watering can
  • Optional: sphagnum moss to retain moisture in the soil and add a lush look.

Step 2: Preparing the Container

Choose a container that is large enough to accommodate your desired number of succulents. Ensure it has ample drainage holes, as succulents do not do well in waterlogged soil. Fill the container with potting mix, leaving some space at the top to accommodate your plants.

Step 3: Prepare the Succulents

Gently remove the succulent plants from their nursery pots. Be careful not to damage the roots. If the roots are tightly bound, you can loosen them slightly. Consider trimming off any dead or damaged roots.

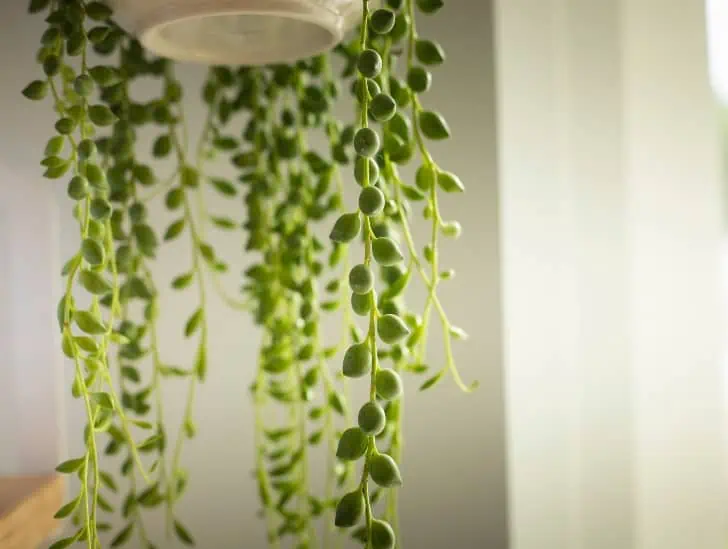
A string of hearts hanging.
Gently remove the succulent plants from their nursery pots.

If you have chosen to use sphagnum moss, wet it before planting the succulents. This will help retain moisture in the soil and create a lush look.

Step 4: Plant the Succulents

Make small holes in the potting mix where you want to place your succulents. Space them evenly, taking into consideration the mature size of each plant.

Insert the succulents into the holes and lightly pack the soil around each plant to secure them in place.

Step 5: Watering

Water the succulents thoroughly but gently until you see water draining from the bottom of the planter. Allow any excess water to drain completely. Be cautious not to overwater because succulents prefer slightly drier conditions.

Step 6: Hang Your Container

Choose an appropriate location for your hanging succulent container. Ensure it receives the right amount of sunlight based on the specific requirements of your succulent varieties.

Typically, bright, indirect light works well for most succulents. You can get creative and hang your container from a tree branch, ceiling hook, or wall bracket.

Step 7: Maintenance

Regularly check the moisture level of the potting mix. Water your succulents when the soil is dry to the touch, which may vary depending on your climate and indoor conditions.

Prune or trim your succulents as needed to maintain the desired shape and size of your hanging arrangement.

A donkey tail hanging.
Regularly check the moisture level of the potting mix.

Fertilize your succulents sparingly, typically during the growing season (spring and summer), using a diluted succulent fertilizer. This step is optional; some gardeners prefer not to fertilize their succulents.

Do Hanging Succulents Need A lot of Water to Thrive?

The simple answer is “no. Like other succulents, hanging succulents prefer the “soak and dry” method to thrive. It means that you should water the succulent thoroughly and allow the potting mix to dry out completely before the next watering session.

However, we must mention that the watering needs of hanging succulents can vary depending on the specific species or variety.

Some hanging succulents, such as the “String of Pearls” (Senecio rowleyanus) and the “String of Bananas” (Senecio radicans), are adapted to more arid conditions and require less water. Others, such as the “Burro’s Tail” (Sedum morganianum), have slightly higher water requirements.

The best way to determine when to water hanging succulents is to observe the soil’s moisture level and the plant itself. Water your succulents when the top inch or two of the potting mix feels dry to the touch.

Do Hanging Succulents Need Direct Sunlight?

As mentioned earlier, most hanging succulents prefer bright, indirect light. However, some varieties can tolerate more intense sunlight, while others may need slightly less light.

It is essential to research the specific needs of your chosen succulent varieties and position them accordingly.

Furthermore, remember that even though succulents are known for their drought tolerance and ability to thrive in bright light, they still need protection from intense midday sun, especially during the summer months.

If you live in a hot and arid climate, consider providing afternoon shade for your hanging succulents to prevent sun damage.

Can Hanging Succulents Thrive Indoors?

Hanging succulents can thrive indoors, as long as they receive adequate sunlight and other essential care requirements.

Indoor locations with bright, indirect light, such as near a sunny window or under artificial grow lights, are ideal for most hanging succulent varieties.

However, keep in mind that indoor environments can be drier than outdoor spaces due to heating and air conditioning systems.

Therefore, you may need to water your hanging succulents more frequently or provide additional humidity through misting or using a humidifier.

Also, consider rotating your hanging succulent container periodically to ensure even sunlight exposure and prevent the plant from growing toward the light source.

Can I Propagate My Hanging Succulents?

Yes, you can propagate your hanging succulents through various methods, such as leaf or stem cuttings and division.

For stem cuttings, simply snip off a healthy stem and remove the lower leaves. Allow the cutting callus over before planting it in moist potting mix. Keep the soil lightly moist until roots form.

A sedum burrito hanging.
For stem cuttings, simply snip off a healthy stem and remove the lower leaves.

For division, gently separate the offshoots or “pups” from the mother plant and plant them in their own containers. Keep the potting mix slightly moist until they form roots.

For leaf cuttings, gently snip off a healthy leaf and place it on top of a moist potting mix. Keep the soil lightly moist until new plants form at the base of the leaf.

Final Thoughts

Hanging succulents are a delightful addition to every garden, bringing a touch of natural beauty and elegance to any space.

Their resilience, versatility, and aesthetic appeal make them an excellent choice for experienced and novice gardeners.

With the right materials and simple steps outlined above, you can create your own stunning hanging succulent garden and enjoy the artful wonders of these unique plants.

Cactus Care 101: How to Protect Your Plants from Winter Burn Damage?

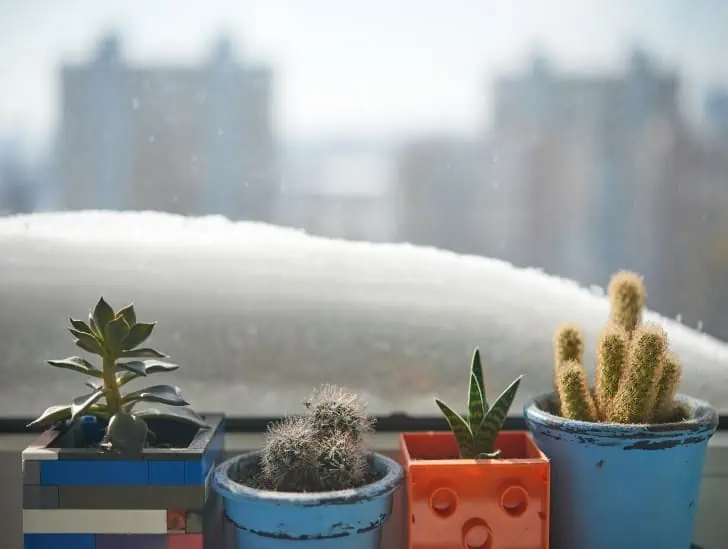
Cactus on windowsill during winter.

Winter brings a serene and often magical transformation to our landscapes as snow blankets the earth. However, for cactus gardeners, the start of winter can be a time of concern. Cacti, with their reputation for thriving in arid desert conditions, may appear ill-equipped to handle the harshness of cold weather. Yet, with the right care and precautions, you can safeguard your cherished plants from the dreaded winter burn damage that can occur during frigid months.

So, how do you protect your cactus plants from winter burn damage? You can help your cactus plants adapt to winter conditions by watering them less frequently, sheltering them, using mulch, moving them indoors, or making a frost blanket.

Read on for more details.

How Does the Cold Damage Plants?

Extreme cold affects plant tissue in two main ways. The first relates to plant biology.

Like any other organism, there’s an ideal temperature for all cellular processes that plants require to thrive. The colder the plants get, the harder it becomes for them to keep up with these processes.

Most plants become dormant at this point, just as deciduous trees do in winter. However, dormancy cannot last forever because plants cannot repair tissue damage or grow in this state.

Freezing is the other risk associated with extremely cold temperatures and is destructive for plants.

Mini succulent in the windowsill furing the winter.
There’s an ideal temperature for all cellular processes that plants require to thrive.

When the temperature drops to the freezing point, water crystalizes into ice. If you have ever left a bottle of water in the freezer, you know that ice expands after crystallizing.

The combination of sharp water crystals and expansion raptures plant cells. That explains why frozen plants become mushy and discolored.

How Cactus Plants Adapt to Freezing Winter Temperatures

Fortunately, not all plants are affected by cold. Cactus is a good example.

Cactus plants adapt in several ways to survive during winter, and regulating water is the reason behind all these adaptations.

Cacti usually go dormant during winter when temperatures tend to drop below freezing point. They reduce their cellular activity and stop growing, which allows them to survive on minimal water.

This is among the best adaptations of most desert plants, but also one that prevents cactus plants from dying when frost covers the ground.

When a plant has less water, it is less likely to crystalize due to freezing.

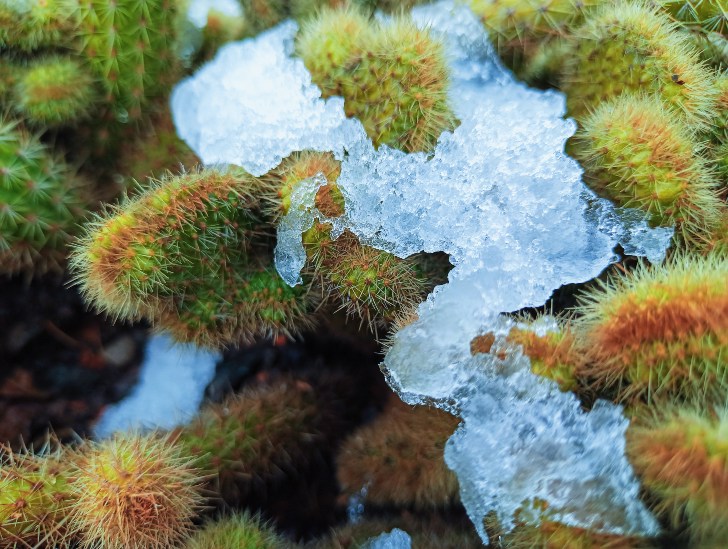
a snow on cactus.
Cactus plants adapt in several ways to survive during winter, and regulating water is the reason behind all these adaptations.

The low water content means other compounds in the plant cells are abnormally concentrated. The high concentration makes them work as a natural antifreeze, thus protecting the cactus.

The cactus could move water into the interstitial spaces between cells if the water level fails to go low enough to trigger this natural antifreeze.

Even if bigger crystals form here, they cannot harm the plant’s cells. Certain proteins found on the cell surface help repel those large crystals.

These adaptations are only partially failsafe, but their impact is impressive. Some cacti species can withstand temperatures below -30°F.

Normally, plants can’t endure such frigid conditions for long, but the hardy cultivars won’t be deterred by one or two freezing nights in the middle of winter from regenerating when the warm weather sets in again.

What Species of Cactus Pants Can Freeze?

Despite having a reputation for thriving in hot climates, some cactus species grow naturally in colder northern regions. Some cactus types are even native to Canada. Here are some of the cold-resilient cacti species:

Prairie hedgehog cactus

These little mounded cacti, native to the Great Plains and American Rockies, are hardy and attractive.

They can withstand any winter conditions but thrive better when covered with snow or mulch during colder months.

Fishhook barrel cactus

This species is unique because it can endure extremely high and low temperatures.

It grows in arid regions of the southern United States and northern Mexico, where daytime and nighttime temperatures vary considerably. Water moderately for optimum growth.

Texas barrel cactus

Texas barrel cactus resembles a bird’s nest made of thorns because protruding spines cover it.

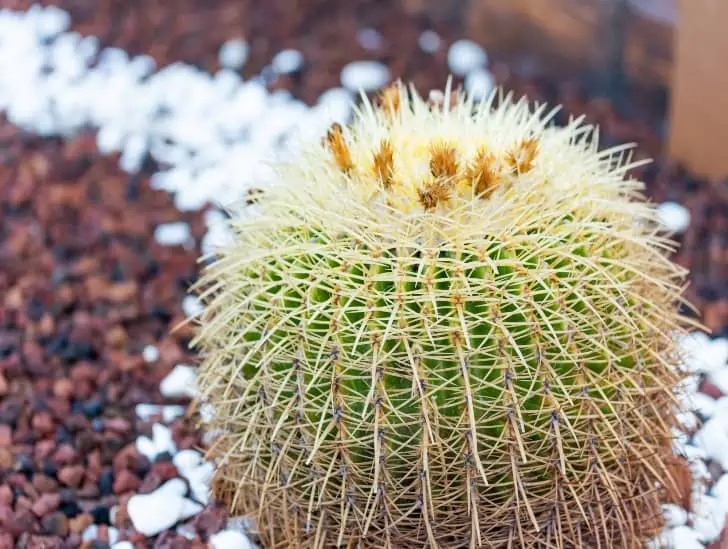
A closeup image of a golden barrel cactus.
Temperatures below 5°F can damage the plant.

It is mostly found in the Chihuahuan Desert and can withstand freezing up to 5°F. Temperatures below this can damage the plant.

Santa Rita prickly pear

Prickly pears come in different cold-hardy species, with the Santa Rita being one of the most common.

When not in the active growing phase or just mildly stressed, its pads turn a spectacular dark purple that adds color to the landscape all year round.

Although it is frost-hardy, Santa Rita can grow up to six feet tall, making it difficult to protect when cold weather approaches. 

Eastern prickly pear

This cactus species is native to the United States and often found in the central and eastern states.

It is widely picked for food, like many other prickly pear cactus plants, since the pads and the fruits are edible.

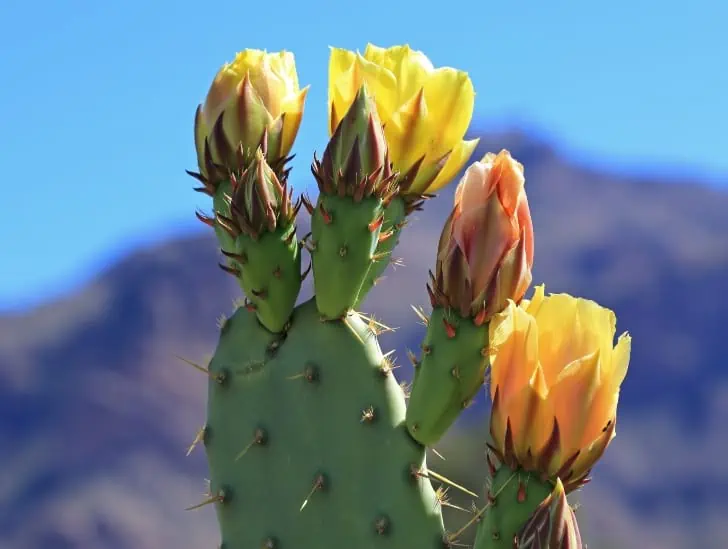
Prickly pear cactus.
This cactus species is native to the United States and often found in the central and eastern states.

However, the eastern prickly pear shrivels as temperatures drop, eventually lying flat on the ground. It comes back to life during spring.

How to Protect Cactus from Winter Burn Damage

Water less frequently

Help your cactus plants gradually adapt to the cold weather as temperatures drop. One way to do this is watering your plants less often, down to once every six weeks for most species.

Reducing watering frequency encourages cacti to enter dormancy, enabling them to survive through winter.

Shelter your cactus from cold air

Avoid waiting until the frost is severe to protect your cactus plants from the cold air. If your plant is small and potted, you can move it to a sheltered location, like behind a wall or away from strong winds. 

Old furniture is another alternative you can use to protect your cactus. You can place a chair over your cactus to help trap some of the heat.

If your cactus is small, you can turn plastic containers upside down over the plant but leave some space for air to enter.

Use mulch or stones

Sometimes, the soil loses its heat faster as the weather cools. Fortunately, you can protect your cactus by covering the ground with materials to help retain the heat.

Some darker stone varieties are excellent for trapping the soil’s heat. Black lava or brown and red rocks can help retain the warmth in the soil, depending on the environment.

You can also use mulch to cover the soil as an alternative to stones. Mulch will keep your cactus comfortable by retaining heat.

Avoid using too much mulch because it might trap moisture and cause your cactus plants to rot since they cannot tolerate excess moisture.

Move your cactus indoors

It could be better to move your cactus indoors if you reside in an extremely cold climate.

But when doing this, be careful not to cause shock to your cactus by changing the temperature, light, or humidity abruptly because this might affect its normal adaptation process.

When moving your cactus indoors, place it in a spot with adequate sunlight or add a cactus-specific grow light to your plant room.

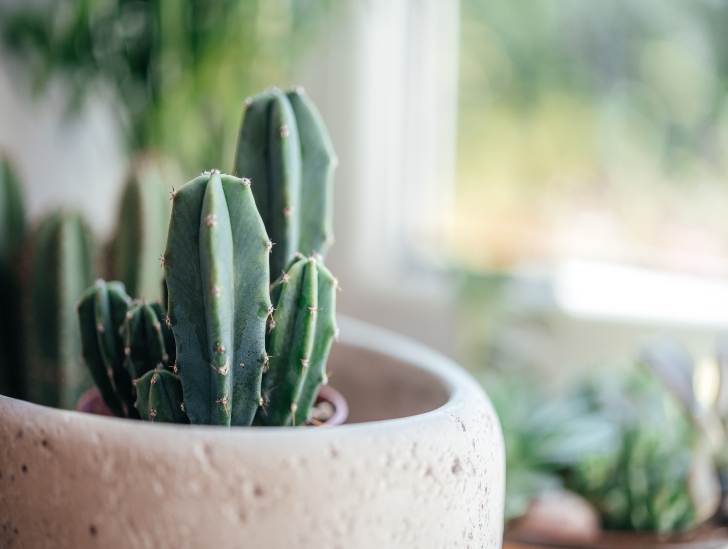
Cactus on windowsill.
Remember to adjust the room’s temperature and humidity to match the outdoor weather conditions.

Also, ensure that no dust or obstructions are on the plant’s surface so that it can absorb enough sunlight.

Remember to adjust the room’s temperature and humidity to match the outdoor weather conditions.

Make a frost blanket

This is a quick and effective technique for protecting your cactus from freezing. You can do this in various ways.

There are high-quality, special frost blankets that retain heat in the air layer surrounding the cactus. You can also use plastic sheets, burlap, and other materials.

A frost cloth, especially white, allows sunlight to pass through, and burlap allows airflow. However, you should leave space for air if using a plastic sheet.

The most important thing is to ensure the blanket does not touch the cactus in any way.

The heat produced this way comes from the layer of trapped air, so if the material touches your plant, it might cause a drop in temperature and create room for frost damage.

Use a sturdy object like a chair to support the blanket and prevent it from shifting. You may need to use several layers of cloth if where you are is extremely cold.

Another option, especially when moving your cactus indoors, is adding artificial light inside the blanket to raise the temperatures further.

How to Revive a Frozen Cactus

Even after doing all this, your cactus may still suffer winter burn damage. Or perhaps your cactus got damaged by the frost because you had no idea how to protect it.

Either way, you can still revive it, so there’s no cause for alarm.

When frost harms your cactus, you notice mushy tissue around the damaged parts. These damaged parts turn white at first. Do nothing at this point and wait for the cactus to repair itself.

The damaged parts will soon turn purple and eventually black. If it turns black, that means the tissue is damaged beyond repair.

At this point, prune the cactus and remove all damaged black areas to prevent further damage.

Summing Up

Cactus plants are highly adaptable to survive extremely hot and cold temperatures. But if you live in areas prone to freezing temperatures, you can protect your cactus plants from winter burn damage by following the simple techniques outlined above.

Want Giant Succulents? Here’s How to Grow Them Like a Pro!

Giant succulent plant exposed to sunlight.

There is something undeniably mesmerizing about giant succulents that command attention and create a botanical spectacle like no other. Their sheer size, striking presence, and unique beauty make them stand out in the world of succulents. If you’ve ever dreamed of nurturing these botanical giants and turning your succulent collection into a living masterpiece, you’ve come to the right place. Welcome to our exclusive guide on growing giant succulents like a seasoned pro.

So, how can you grow giant succulents like a pro? Everything starts with choosing the right species. Some succulent species naturally grow larger than others. Research and select succulent varieties known for their potential to grow large, such as Echeveria, Aeonium, and Agave. Once you have chosen the right species, focus on creating an ideal environment for your giant succulents. The key here is to strike a balance between water, light, and soil quality. Water your succulents sparingly and use a well-draining potting mix. Be sure to provide your giant succulents with enough space to grow and thrive. Additionally, regular pruning can also help your giant succulents reach their full potential.

This blog post highlights the secrets of growing giant succulents like a pro. Read on to find out everything you need to know.

What Is Considered a Giant Succulent?

A “giant succulent” is not an official botanical classification but rather a term used informally to describe succulent plants that are exceptionally large compared to their typical counterparts.

The size of a succulent is relative, and what is considered “giant” may vary depending on the species and context.

You must remember the fact that succulents come in a wide range of shapes, sizes, and forms. While many succulents are small to medium-sized, some certain species or varieties can grow significantly larger than the average.

Several factors influence the size of a succulent, including its genetics, environmental conditions, age, and care.

In some cases, a succulent may be genetically predisposed to grow larger, while others might achieve giant status due to favorable growing conditions and proper care.

A agave plant blooming.
You must remember the fact that succulents come in a wide range of shapes, sizes, and forms.

Therefore, the term “giant succulent” is highly subjective and may vary among individuals and gardening communities.

Generally, a succulent is considered “giant” when it significantly exceeds the typical size of its species or variety. This can manifest in various ways, such as taller stems, larger rosettes, or a more extensive spread.

Gardeners and landscapers often use giant succulents as focal points in their designs due to their striking appearance and size. These larger succulents can add a bold and dramatic element to outdoor spaces.

How Do You Grow Giant Succulents?

Below are some essential tips to help you grow giant succulents like a pro:

Choosing the Right Species

When it comes to growing giant succulents, choosing the right species is crucial. Some succulent varieties are naturally more compact and smaller in size, while others tend to grow larger.

Start by researching various succulent species. There is a wide range of succulents to choose from, each with its unique growth habits, sizes, colors, and shapes.

Consider the climate and conditions in your area when selecting species. Some succulents are better suited for specific climates, such as desert or Mediterranean varieties.

Take time to identify succulents that are naturally larger or have the potential to grow large over time. Examples of large succulent species include Agave americana, Agave titanota, and Aeonium arboreum.

Pay attention to the growth habit of the succulent. Some species grow in rosettes, while others form tree-like structures or sprawling ground covers. Choose a growth habit that appeals to your aesthetic preferences.

Aeonium with white flower.
Pay attention to the growth habit of the succulent.

You should also remember that some succulents are slow growers, taking many years to reach a significant size, while others grow more rapidly. Decide if you’re willing to invest the time and effort required for slow growers.

And most importantly, consider the maintenance requirements of the species you’re interested in. Some succulents are more low-maintenance and forgiving of occasional neglect, while others require more precise care.

Creating the Ideal Environment

Once you have picked the right species, creating an ideal environment for your giant succulents is critical. These plants require specific conditions to thrive and reach their full potential.

The first and most important factor is water. Succulents are known for their ability to store water in their stems and roots. It means they don’t need frequent watering to thrive.

In fact, overwatering is one of the most common causes of succulent death. For giant succulents, it’s essential to water them sparingly and allow the soil to dry out completely between watering sessions.

Using a well-draining potting mix is another crucial aspect of creating an ideal environment for your giant succulents.

Agave in a pot.
Succulents are known for their ability to store water in their stems and roots.

The soil should be able to drain quickly, allowing excess water to escape. You can achieve this by adding materials like perlite, pumice, or coarse sand to your potting mix.

Light is another essential factor for the growth of succulents. Most succulents prefer bright, indirect light.

However, giant succulents may require more direct sunlight due to their larger size and need for energy production. Be sure to place your giant succulents in a location that receives plenty of natural light.

Proper spacing is also crucial for giant succulents. These plants require enough room to spread out their roots and grow comfortably. If grown in containers, be sure to choose pots that are large enough for the plant’s mature size.

Pruning for Optimal Growth

Pruning and trimming are essential practices for maintaining the health and appearance of your succulent plants. This is more important for large succulents.

Pruning and trimming involve the careful removal of dead, damaged, or overgrown plant material to encourage healthy growth and maintain an attractive appearance. Here’s how to effectively prune and trim your succulents.

Be sure to gather the necessary tools before you start the process. Typically, you will need sharp, clean scissors or pruning shears. Ensure your tools are sanitized to prevent the spread of diseases between plants.

Regularly inspect your succulents for dead or yellowing leaves. These can be breeding grounds for pests and diseases and should be removed promptly.

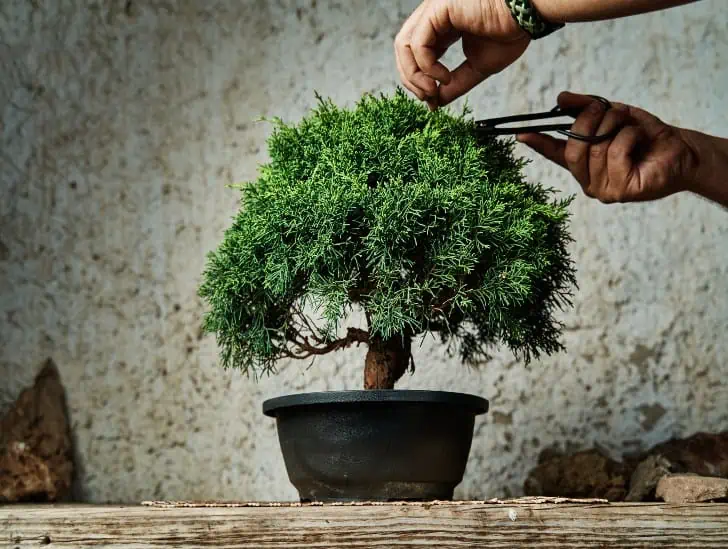
A person pruning a bonsai.
Be sure to gather the necessary tools before you start the process.

Use your scissors or shears to snip off the dead leaves as close to the base of the plant as possible.

You should also keep in mind that giant succulents can become leggy or elongated, especially if they’re not getting enough light.

To maintain a compact and attractive shape, trim back any leggy growth. Cut just above a leaf node (the point where a leaf attaches to the stem). This encourages new growth to emerge from the cut area.

The best time to prune or trim succulents is during their active growing season, typically in spring or early summer. Avoid major pruning during their dormant period since it can stress the plant.

And don’t let the pruned pieces go to waste. Many succulents can be propagated from stem or leaf cuttings. Allow the cut ends to callus for a few days before planting them in well-draining soil to grow new plants.

Make pruning and trimming a part of your regular succulent maintenance routine. This prevents overgrowth, maintains plant health, and ensures your succulents remain visually appealing.

Provide Your Succulents with Enough Space

Giant succulents require adequate space to grow and thrive.

When choosing pots or containers for your plants, be mindful of their mature size and ensure they have enough room to spread out their roots. Overcrowded succulents can quickly become stressed and stop growing.

If you’re growing your succulents in the ground, be sure to space them accordingly as well. This allows for proper root growth and prevents competition for nutrients and space.

Providing enough space allows for better air circulation around the plants, reducing the risk of fungal diseases.

It also makes it easier to access your plants for regular maintenance tasks like pruning and watering.

Monitor for Pests and Diseases

Succulents, like any other plants, can fall victim to a variety of pests. Regular monitoring and early detection are crucial to preventing infestations from damaging your succulents.

Make it a habit to inspect your succulents regularly, both indoors and outdoors. Check the leaves, stems, and soil for any signs of pests or pest damage.

Pay attention to symptoms of pest damage, including yellowing or wilting leaves, deformed growth, brown or discolored spots, and stunted growth. These signs can indicate a pest problem.

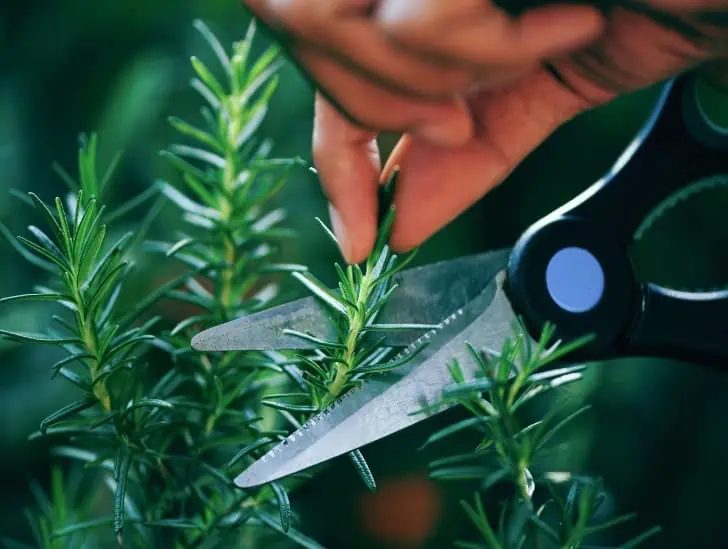
A person pruning a rosemary.
Check the leaves, stems, and soil for any signs of pests or pest damage.

Since many pests prefer to hide on the undersides of leaves, lift the leaves gently and examine them for signs of infestation, such as clusters of insects or white, cottony masses (mealybugs). You can even use a magnifying glass for a closer inspection.

If you detect pests, promptly isolate the affected plant and treat it with an appropriate insecticide.

For larger infestations, consider using natural methods like neem oil or introducing beneficial predatory insects to control the pest population.

In addition to pests, succulents can also suffer from diseases, such as root rot or fungal infections. To prevent these diseases, always use well-draining soil and avoid overwatering.

If you notice any signs of disease, remove the affected parts immediately to prevent spreading.

Summary

Growing giant succulents requires careful consideration of species selection, creating an ideal environment, and regular maintenance practices like pruning and providing enough space.

With proper care, these stunning plants can reach their full potential and add a unique touch to your indoor or outdoor space.

Remember to research the specific needs of your chosen succulent species and adjust as necessary for optimal growth and health.

Unveiling Cactus Secrets: What Makes Spine Diversity So Unique?

Cactus in a pot with pebbles.

Cacti, those iconic desert dwellers, have long fascinated botanists, gardeners, and nature enthusiasts alike. Their ability to thrive in harsh, arid landscapes seems almost mystical, and their strikingly diverse forms and shapes never fail to capture our imaginations. While the hardiness of cacti is well-known, one of their most intriguing features often hides in plain sight – their spines. The incredible diversity of cactus spines is a closely guarded secret. Each spine is not merely a defense mechanism; it’s a testament to the evolutionary ingenuity of these remarkable plants.

So, what makes spine diversity in cacti so unique? Spines have evolved in diverse forms to help cacti plants adapt to their specific environmental challenges, whether it’s to deter herbivores or reduce water loss in arid regions. The shape, size, and arrangement of spines are often key identifiers for plant species, aiding botanists and enthusiasts in classification. Spine diversity also adds unique aesthetics to plants, contributing to their visual appeal and making them popular in horticulture and landscaping.

Today, we will delve deep into the captivating world of cactus spines, uncovering the hidden secrets that make their diversity unique and utterly astonishing. Read on to learn more.

Adaptation to the Environment

The diverse forms of spines found in plants such as cacti and succulents are a result of their remarkable ability to adapt to the specific challenges presented by their environments.

This adaptation is a crucial survival strategy that allows these plants to thrive in some of the harshest and most arid regions.

One of the primary environmental challenges cacti and succulents face is water scarcity. In arid and desert environments, rainfall is infrequent, and water resources are limited.

Spines help these plants conserve precious water by reducing the surface area through which water can be lost.

Unlike broad leaves that would lose water rapidly through transpiration, the reduced surface area of spines minimizes this loss, allowing the plant to store water for extended periods.

A blooming cactus.
One of the primary environmental challenges cacti and succulents face is water scarcity.

Spines also serve as a deterrent to herbivores. In harsh desert environments where food sources are scarce, herbivores may be tempted to feed on succulent plants.

Spines, often sharp and pointed, create a formidable defense mechanism, discouraging animals from grazing on the plant.

This protection ensures the plant’s survival, allowing it to grow and reproduce despite the constant threat of herbivores.

The other core function of spines is temperature fluctuation. The environments where cacti and succulents thrive can experience extreme temperature fluctuations between day and night.

Spines play a role in temperature regulation by providing shade to the plant’s surface during the hottest parts of the day.

This shading effect reduces heat absorption and helps maintain a more stable temperature within the plant’s tissues, protecting it from the damaging effects of extreme heat.

Moreover, spines play a crucial role in reducing wind stress. In open desert landscapes, strong winds can be a significant stress factor for plants.

Spines can help reduce wind stress by breaking up and diffusing the force of the wind as it blows across the plant’s surface. This prevents physical damage to the plant and reduces the risk of uprooting.

Classification and Identification

Cactus spines’ diversity is an intriguing evolutionary feature and a vital tool for botanists in classification and identification.

The shape, size, color, and arrangement of spines can vary greatly between different species of cacti and succulents, making them key identifiers.

For example, the iconic saguaro cactus has long, sharp spines that grow in clusters along its ridges, while the prickly pear cactus has smaller, more numerous spines that cover its surface.

The flowering golden barrel cactus has dense and woolly spines that provide insulation in colder environments, while the cholla cactus has barbed spines that detach easily to disperse seeds.

The precise location of spines on a plant can also be a distinguishing feature.

A cactus plant.
The iconic saguaro cactus has long, sharp spines that grow in clusters along its ridges.

Some species have spines primarily on the stem, while others may have spines on both stems and leaves. The presence or absence of spines on specific plant parts is a critical identifying factor.

Spines can exhibit a wide range of colors, including white, brown, black, and even vibrant hues like red or yellow.

When combined with other identifying features, the color of spines helps botanists and enthusiasts differentiate between species.

Some species feature specialized spines with unique characteristics. These may include flattened, ribbon-like spines, hooked spines, or spines with distinctive patterns or textures. These specialized spines are particularly valuable for pinpointing specific species.

Aesthetic Appeal

The aesthetic appeal of spines is a fascinating aspect of cacti and succulents, contributing significantly to the allure of these plants.

Their diverse forms and striking visual characteristics make them highly prized in horticulture and landscaping.

Spines introduce a unique texture to the overall appearance of cacti and succulents. They break up the monotony of the plant’s surface, creating intricate patterns and visual interest.

Whether short and densely packed or long and gracefully arched, spines add a layer of complexity to the plant’s texture.

Many cacti and succulents, particularly those with columnar or globular growth forms, take on an architectural quality thanks to their spines. These plants resemble living sculptures; the spines contribute to their structural elegance.

A cactus plant.
The iconic saguaro cactus has long, sharp spines that grow in clusters along its ridges.

Moreover, some cacti and succulents undergo fascinating seasonal changes in their spines.

Spines may change color or take on different textures during different times of the year, providing an ever-evolving visual spectacle in the garden.

In landscape design, cacti and succulents with striking spines can serve as focal points, drawing attention and providing visual interest. They create captivating scenes when used as standalone specimens or in group plantings.

The visual intrigue of spined plants makes them appealing subjects for photographers. Their intricate details and the play of light and shadow on their spines offer endless creative opportunities.

Water Storage

Spines have adapted to store water in certain species, enhancing a plant’s survival ability in harsh environments.

These specialized spines have a hollow center that acts as a reservoir for water, which the plant can access during periods of drought.

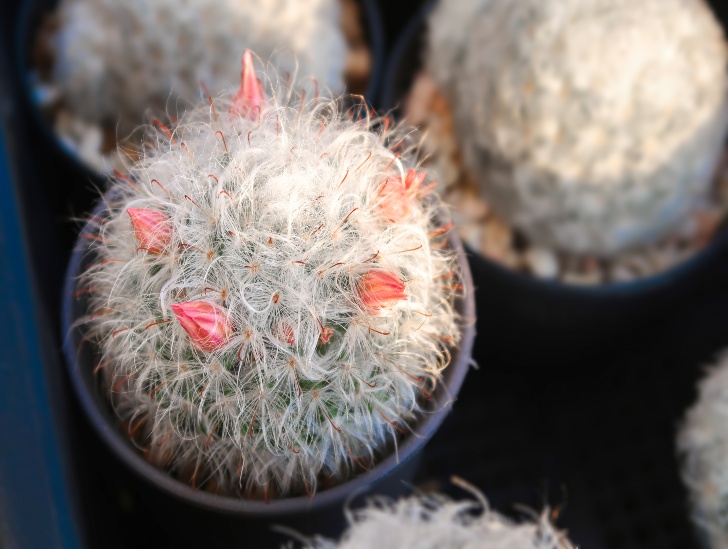
The old man cactus, with its long white spines, is an excellent example of this adaptation. Its dense covering of spines protects it from sun and wind damage while also serving as a water storage system.

Similarly, the golden barrel cactus has a spongy inner tissue that can hold large amounts of water, making it highly resilient during drought.

Old man cactus exposed to sunlight.
The old man cactus, with its long white spines, is an excellent example of this adaptation.

The ability to store water in spines is an essential survival strategy for plants growing in arid regions, where rainfall may be scarce and unpredictable.

It allows them to thrive even in the most challenging conditions and contributes to their remarkable resilience.

Cultural Significance

Spines are often associated with the symbolism of resilience and fortitude. The ability of cacti and succulents to thrive in harsh, arid environments despite limited resources is a powerful metaphor for enduring challenges and adversity in life.

In many cultures, spined plants are revered as symbols of strength and tenacity, inspiring people to overcome difficulties.

Some cultures believe that spines have protective qualities, capable of warding off evil spirits or negative energies.

Spined plants may be planted near homes, entrances, or sacred places to provide a spiritual shield or safeguard against evil forces.

In fact, spined plants have played essential roles in religious and spiritual ceremonies for centuries. They are sometimes used as ritual offerings or symbolic representations of sacred elements.

The presence of spined plants in rituals underscores their spiritual significance and connection to the divine.

In some cultures, these plants are cultivated and displayed for their decorative value. Their unique and exotic appearance makes them popular choices for ornamental landscaping, botanical gardens, and interior décor. Spined plants add a touch of authenticity and cultural diversity to living spaces.

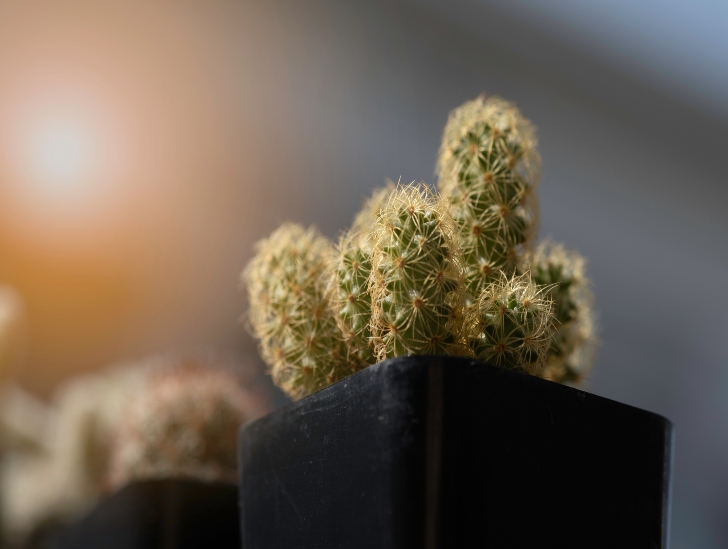
A lady finger cactus exposed to light.
Spined plants have played essential roles in religious and spiritual ceremonies for centuries.

These plants are sometimes featured in cultural celebrations and festivals.

For instance, cacti with vibrant blooms may be incorporated into floral arrangements for special occasions, adding a touch of natural beauty and cultural significance to the event.

Spined plants have also inspired artists, poets, and writers for generations. Their unique forms, textures, and symbolism have been featured in various forms of artistic expression, from paintings and sculptures to literature and music.

Light Reflection

The reflective properties of spines can help plants reduce solar radiation and conserve water. The spines’ color and orientation determine their ability to reflect sunlight, protecting the plant from excessive heat and evaporation.

In some species, spines are arranged in a way that minimizes light absorption while maximizing reflection.
This allows plants to maintain a more temperate microclimate around themselves, shielding them from extreme temperatures.

The reflective properties of spines also contribute to a plant’s energy efficiency.

By reducing the amount of solar radiation they absorb, plants can conserve water and reduce their metabolic rate, allowing them to survive longer periods without rainfall.

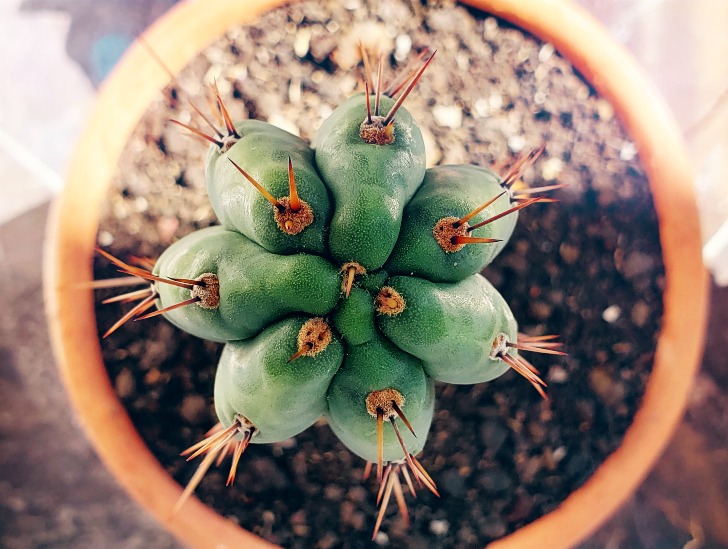
A san pedro cactus top view.
The spines’ color and orientation determine their ability to reflect sunlight, protecting the plant from excessive heat and evaporation.

In addition, spines help protect plants from UV radiation, which can cause damage to cells and disrupt photosynthesis. This is particularly important in high-altitude environments where sunlight intensity is much stronger.

The reflective properties of spines help mitigate the effects of UV radiation, allowing plants to thrive in these challenging conditions.

Summary

Spines are a defining feature of cacti and succulents, serving essential functions in their survival, classification, and aesthetic appeal.

Their diverse forms and functions make them an integral part of these unique plants’ fascinating adaptations to thrive in challenging environments.

So, next time you admire a cactus or succulent’s dazzling display of spines, take a moment to appreciate their complex role in the plant’s growth and resilience.

Top 5 Succulent Varieties for Show-Stopping Large Pots

A agave americana in a pot.

Most succulents are a great addition to every home garden or potted arrangement because of their unique shapes, colors, and low-maintenance care needs. Typically, these plants thrive in small to medium-sized pots because of their relatively slow growth rate. In fact, most succulents are relatively small, making them suitable for small spaces. However, if you want to create a bold and eye-catching display, large pots with different succulent varieties can make a statement in your garden or indoor space. But everything starts with picking the right succulent varieties for the large pots.

So, what are some of the best succulent varieties for show-stopping large pots? The best options include Aloe Vera, Echeveria, Agave Americana, Crassula ovata, Burro’s Tail, and the Sempervivum. Others include Senecio mandraliscae, Aeonium arboreum, Kalanchoe thyrsiflora, and Graptopetalum paraguayense (Ghost Plant).

This blog post will take a closer look at each of these succulent varieties, discussing their unique characteristics and care needs to help you create a stunning large pot display. Read on to learn more.

1. Agave Americana

Agave Americana, commonly known as the Century Plant or American Agave, is a striking succulent that hails from the arid regions of Mexico but has also become naturalized in various parts of the world.

It is a member of the Agave genus, which is part of the Asparagaceae family. Agave Americana is a monocarpic succulent, meaning it typically has a single, grand flowering event at the end of its life cycle, which can take several years or even decades.

One of the standout features of Agave Americana is its impressive rosette shape, which can grow to be quite substantial.

Mature plants can spread several feet and a height of 3 to 6 feet, making them a commanding presence in large pots.

Its leaves are thick, fleshy, and a striking blue-green color. They are lined with sharp, spiky edges, which give the plant a distinctive appearance.

The succulent has an architectural form and unique texture, making it a striking focal point in any succulent arrangement or large pot. The symmetry and shape of the rosette are visually appealing.

Agave in a pot.
It is a member of the Agave genus, which is part of the Asparagaceae family.

Agave Americana is well-suited for container gardening since it requires minimal care. It thrives in well-draining soil and can tolerate drought once established. Its low-maintenance nature makes it ideal for large pots since it can withstand longer periods between watering.

The succulent’s size and striking appearance make it an excellent choice for large pots. It serves as a dramatic focal point in container gardens and can create a bold statement in outdoor landscapes or as a decorative piece indoors.

Its low maintenance requirements make it suitable for those who want an eye-catching succulent without needing constant care and attention.

Because of its adaptability and drought tolerance, it can thrive in large pots without much fuss, making it an excellent addition to xeriscaping projects.

The long lifespan of this succulent means you can enjoy its presence in your large pot for many years before it eventually produces a tall flower spike and then dies, typically leaving behind offsets (pups) that continue the cycle.

2. Aloe Vera

Aloe Vera is widely known for its medicinal properties, thanks to its gel-like substance inside the leaves.

However, it’s also a popular succulent due to its striking appearance and easy-care needs, making it a top choice for large pots.

Aloe Vera is native to the Arabian Peninsula but is grown worldwide. It’s part of the Asphodelaceae family and has over 500 species. The most popular variety for large pots is Aloe Vera Barbadensis Miller, commonly known as “true aloe.”

Aloe Vera typically grows in clusters of rosettes, each producing long, fleshy leaves that can reach several feet long.

Its leaves are thick and dark green, often with a slight blue tint, giving the plant a unique color contrast.

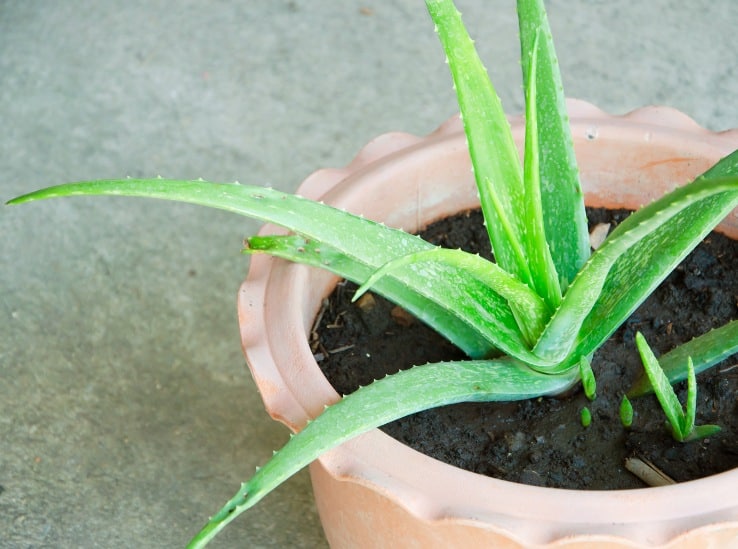
aloe_vera_plant
Aloe Vera is native to the Arabian Peninsula but is grown worldwide.

Aloe Vera stands out from other succulent varieties because its tall flower spike can grow up to 3 feet tall. Its flowers are yellow or orange and add a pop of color to the plant’s overall appearance.

The succulent is relatively low maintenance, requiring a well-draining soil mix and moderate watering (once every week or two). It also thrives in outdoor spaces with partial shade and can tolerate full sun in cooler climates.

One benefit of growing Aloe Vera in large pots is its versatility. You can use the plant’s gel in various skin and hair care products, while its striking appearance adds visual interest to your space.

3. Echeveria

Echeveria is probably one of the most popular succulent genera, thanks to its stunning rosette shape, a wide range of colors and sizes, and ease of propagation.

The succulent is native to Central and South America, particularly Mexico. It belongs to the Crassulaceae family, known for its fleshy-leaved plants.

Echeveria species are characterized by their rosette-like growth habit. The leaves form a tightly packed, symmetrical arrangement around a central point. This rosette shape is visually striking and is a crucial feature of the genus.

These succulents also feature a wide range of leaf shapes, sizes, and colors. Some have thick, spoon-shaped leaves, while others have slender, pointed ones. Leaf colors can range from shades of green to blue, purple, pink, and even variegated patterns.

Many Echeveria species exhibit vibrant leaf colors, especially when exposed to bright sunlight. The leaves can take on red, pink, orange, or purple hues, making them highly decorative.

Outdoor_Echeveria_elegans
These succulents also feature a wide range of leaf shapes, sizes, and colors.

Echeverias are known for their aesthetic beauty. Their rosette form and colorful foliage make them ideal choices for adding a pop of color and texture to large pots and container gardens.

These plants can easily be combined with other succulents, cacti, or ornamental plants in large pots to create visually appealing and harmonious arrangements. Their variety of leaf colors and shapes allows for endless creative possibilities.

Echeverias adapt well to container gardening, thriving in well-draining soil. They can be grown in outdoor gardens, on patios, or as indoor houseplants, making them versatile for large pots.

With proper care, Echeverias can live for many years, and they often produce offsets, ensuring the continuity of their beauty in your large pots.

4. Crassula ovata

Like other succulent varieties, Crassula ovata, also known as Jade Plant or Money Tree, is popular for large pots due to its striking appearance and low maintenance needs. It’s native to South Africa and belongs to the Crassulaceae family.

Jade plants feature thick, fleshy leaves that can be round or oval-shaped and come in shades of green, silver, or variegated patterns. The plant can reach up to 3 feet tall and wide, making it a commanding presence in large pots.

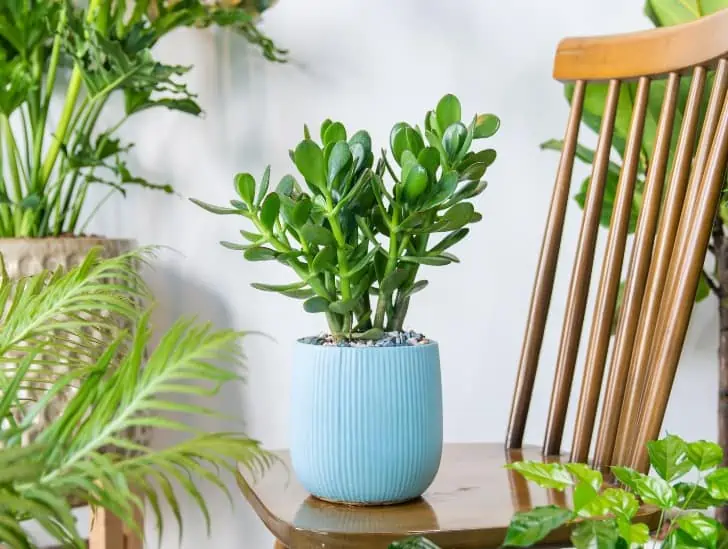
Crassula on a blue pot.
It’s native to South Africa and belongs to the Crassulaceae family.

One unique feature of Jade plants is their thick stem that stores water, allowing them to withstand long periods between watering. This characteristic makes them low maintenance and adds to their hardiness as container plants.

In addition to its aesthetic appeal, Crassula ovata is believed to bring good luck and prosperity, making it a popular choice for large pots in homes and offices.

5. Sempervivum

Sempervivum, commonly known as Hens and Chicks, is another fascinating succulent genus well-suited for large pots and container gardening.

Sempervivum is a genus of succulent plants native to Europe, northern Africa, and western Asia.

The name “Sempervivum” comes from Latin and means “always living” or “evergreen,” reflecting the plant’s hardiness and ability to thrive in various conditions.

These succulents are characterized by their rosette growth habit, where tightly packed leaves form a rosette shape. This rosette can produce offsets, known as “chicks,” which cluster around the main plant, hence the common name “Hens and Chicks.”

Sempervivum species and cultivars come in various colors and leaf shapes. You can find them in shades of green, red, purple, and silver, with some displaying intricate patterns and textures.

The rosette clusters of Sempervivum are visually appealing and can create a charming, textured display in large pots. They work well as standalone specimens or as part of a mixed succulent arrangement.

With a wide range of colors and forms available, you can choose Sempervivum varieties that match your desired color scheme or aesthetic preferences. Their diversity allows for creative and visually striking container gardens.

Sempervivum in a pot.
Sempervivum species and cultivars come in various colors and leaf shapes.

Whether you have a sunny outdoor garden or a shaded patio, Sempervivums can adapt to different conditions, making them versatile choices for large pots in various settings.

Furthermore, these succulents are relatively easy to propagate. All you have to do is separate the offsets and transplant them into new pots. This allows you to expand your collection or share plants with fellow gardeners.

Summary

Succulents come in all shapes, sizes, and colors, making them ideal for large pots and container gardens.

Not only are they visually appealing, but they also require minimal maintenance and can thrive in different environments.

From the tall flower spike of Aloe Vera to the rosette clusters of Echeveria and Sempervivum, each succulent offers unique features that add beauty and interest to any space.

Proper care allows these plants to live for many years, providing endless opportunities for creative and beautiful container gardening. So why not start growing succulents in your large pots today?

Want a Stunning Succulent Centerpiece? Here’s How to Make One

Succulent centerpiece on the teapot.

Succulents are not only charming and low maintenance but also versatile enough to become the star of your next centerpiece. Whether it’s for a wedding, party, or dining table, succulent centerpieces add a touch of natural elegance to any setting. However, proper arrangement and care for succulents are essential to creating a lasting, stunning centerpiece.

So, how can you make a stunning succulent centerpiece? The first step in creating a stunning succulent centerpiece is choosing the right succulents. Once you have the right succulents, plan and gather your materials for the project. They include a shallow container or planter, cactus or succulent potting mix, decorative stones, pebbles, or moss, gardening gloves, and a small trowel or spoon. Prepare your container and gather your succulents. The next thing to do is prepare your container. Make sure that it has proper drainage holes for the succulents to thrive. Plant the succulents and add decorative elements. Water the plants and keep them in a sunny spot.
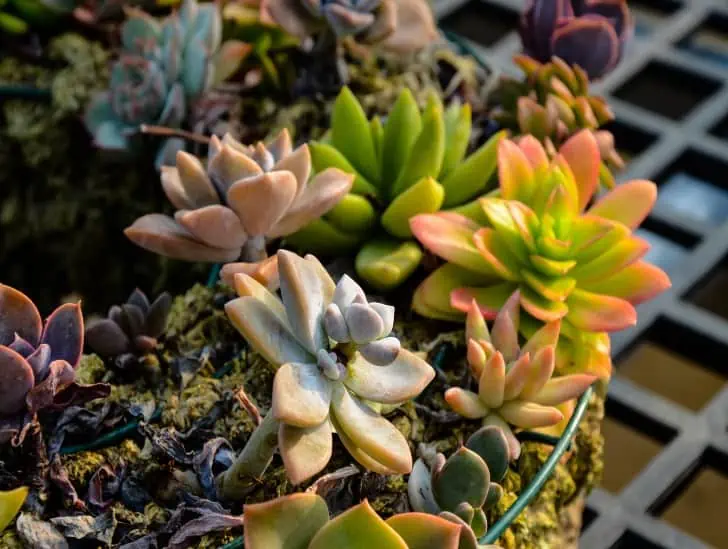
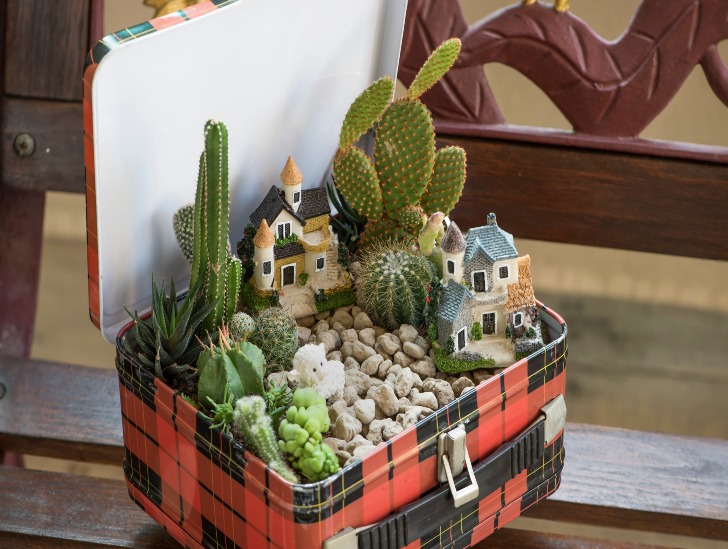
This blog post will guide you through the process of making a stunning succulent centerpiece step by step. Read on to find out everything you need to know.

Why Choose Succulents for Centerpieces?

Before we dive into the steps, let’s explore why succulents make excellent centerpieces:

  • Longevity: Succulents have a longer lifespan than many other cut flowers, ensuring your centerpiece remains beautiful long after the event.
  • Low Maintenance: They require minimal care, making them ideal for busy hosts. With the right conditions, they can thrive for weeks.
  • Versatility: Succulents come in various shapes, sizes, and colors, allowing you to create diverse and visually striking arrangements.
  • Sustainability: Many succulents can be replanted or propagated after the event, reducing waste, and providing lasting memories.

How to Make a Stunning Succulent Centerpiece: Step-by-Step Guide

Now that you know why succulents are an excellent choice for centerpieces, let’s get into the steps of making one:

Step 1: Choosing the Right Succulents

The first step in creating a beautiful succulent centerpiece is choosing the right plants. There are countless varieties of succulents, each with its own unique shape, color, and size.

However, not all succulents are suitable for a centerpiece. It’s best to choose ones that have similar growth habits and care requirements so that they can thrive together in one container.

A succulent arrangement.
The first step in creating a beautiful succulent centerpiece is choosing the right plants.

Some popular succulent choices for centerpieces include echeverias, haworthias, sedums, and aeoniums. They come in different colors, textures, and sizes that can add dimension and interest to your centerpiece.

When choosing succulents, also consider the size of your container. For a small or medium-sized container, it’s best to choose smaller succulents so they don’t overcrowd each other as they grow.

Step 2: Gathering Materials

You will need the following materials to create your succulent centerpiece:

  • A shallow container or planter with proper drainage holes
  • Cactus or succulent potting mix
  • Decorative stones, pebbles, or moss
  • Gardening gloves
  • Small trowel or spoon for planting
  • Watering can or spray bottle
  • Optional: Decorative elements like driftwood, seashells, or fairy lights

Ensure you have gathered all these materials before starting the project. Otherwise, you might have to pause in the middle of the process, which can disrupt your workflow.

Step 3: Preparing Your Container

Once you have selected your succulents, it’s time to prepare the container for planting. Start by selecting a shallow container with proper drainage holes. Succulents do not like to sit in standing water, so ensuring the container can drain excess water properly is crucial.

Next, add a layer of cactus or succulent potting mix to the bottom of the container. This soil type is specifically formulated for succulents and has excellent drainage properties.

Close-up image of a succulent wreath.
Once you have selected your succulents, it’s time to prepare the container for planting.

Be careful with the type of container you choose. Metal or glass containers can become too hot and damage the succulents’ roots, while porous materials like terracotta can absorb water too quickly.

Step 4: Planting and Arranging Your Succulents

It’s now time to get your hands dirty! Put on your gardening gloves and start planting your succulents in the container.

Begin with the larger succulents first, placing them towards the back or center of the container. Then, fill in any empty spaces with smaller succulents. You can also add decorative elements like driftwood or seashells to add interest and texture.

A succulent box arrangement.
Put on your gardening gloves and start planting your succulents in the container.

Leave enough space between each plant for them to grow and breathe. Once all your succulents are planted, use your hands or a small trowel to pack the soil around them gently.

Step 5: Adding Decorative Elements

Add decorative elements like pebbles, stones, or moss on top of the soil to make your centerpiece even more eye-catching. This not only adds texture and visual interest but also helps keep moisture in the soil and prevents it from drying out too quickly.

You can also incorporate fairy lights or other small decorations to add a touch of whimsy and charm to your centerpiece.

Step 6: Watering and Settling

Water your succulents lightly, ensuring the soil is evenly moist but not soggy. You can use a spray bottle for gentle watering. Don’t water the leaves directly because it can cause rot issues.

After watering, set your succulent centerpiece in a sunny spot. Succulents require plenty of sunlight to thrive. So, ensure they get at least 6 hours of direct sunlight daily.

You should also allow your stunning centerpiece arrangement to settle for a day or two before displaying it, giving the succulents time to adjust to the new environment.

Step 7: Caring for Your Succulent Centerpiece

Your succulent centerpiece can last weeks or months with proper care. Here are some tips to keep it looking beautiful:

  • Water your succulents once a week, ensuring the soil is evenly moist but not soggy.
  • Give them enough sunlight. If you notice your succulents starting to stretch towards the light source, it’s a sign they need more sunlight.
  • Avoid placing your centerpiece near air conditioning vents or heaters because temperature fluctuations can harm the succulents.
  • Remove dead or dying leaves to keep your centerpiece fresh and healthy.
  • Replant or propagate any succulents that outgrow the container to avoid overcrowding and promote sustainability.

How Long Does It Take to Make a Succulent Centerpiece?

The time it takes to create a succulent centerpiece will depend on the size and complexity of your arrangement. Small centerpieces can be made in less than an hour, while larger and more intricate ones may take a few hours to complete.

Succulents Terrarium
The time it takes to create a succulent centerpiece will depend on the size and complexity of your arrangement.

The time it takes to complete the project will also depend on your skill set. If you are new to gardening or working with succulents, it may take longer as you get the hang of it. With practice, you can create stunning, succulent centerpieces in no time.

Don’t be afraid to ask for help from more experienced gardeners or seek inspiration from online tutorials and resources.

Where Can I Display My Succulent Centerpiece?

Succulent centerpieces are versatile and can be displayed in different settings. They make great additions to dining tables, coffee tables, and mantelpieces. You can also use them as focal points on entryway tables or outdoor patios.

Choose a spot with enough sunlight for your succulents to thrive. With proper care, your succulent centerpiece can be a beautiful addition to any space for weeks or months.

How Long Do Succulent Centerpieces Last?

The lifespan of your succulent centerpiece depends on various factors, such as the type of succulents used, care and maintenance, and environmental conditions.

Your succulent centerpiece can last several weeks or even months with proper care and attention. The most important thing is to provide your succulents with the right conditions they need to thrive.

Can I Reuse the Succulents from My Centerpiece?

Yes, you can! Once your centerpiece starts to fade, carefully remove the succulents and replant them in a new container with fresh potting mix.

You can also propagate any overgrown or damaged succulents by taking cuttings and rooting them in soil or water.

This allows you to enjoy your succulents for longer and promotes sustainability by reducing waste and promoting plant growth.

So don’t be afraid to experiment with different containers and arrangements, knowing that you can always reuse your succulents in the future.

Do Succulent Centerpieces Require Maintenance?

Succulent centerpieces require minimal maintenance, but you can do a few things to keep them looking good.

Water your succulents once a week, ensuring the soil is evenly moist but not soggy. Give them enough sunlight. If you notice your succulents starting to stretch towards the light source, it’s a sign they need more sunlight.

A sedum succulent.
Water your succulents once a week, ensuring the soil is evenly moist but not soggy.

Remove dead or dying leaves to keep your centerpiece fresh and healthy. You should also replant or propagate any succulents that outgrow the container to avoid overcrowding and promote sustainability.

Final Thoughts

Creating a succulent centerpiece is a fun and rewarding project that can add a touch of nature and beauty to any space.

Remember to choose the right succulents, gather all necessary materials, prepare your container properly, plant and arrange your succulents creatively, add decorative elements, and care for your centerpiece regularly.

With these steps in mind, you can create a stunning succulent centerpiece that will impress and delight you for weeks or even months.

How To Identify Fake Cactus Flowers & Removing Fake Flowers

Fake cactus flower on the pot.

You may stumble on cacti with flowers when you visit a nearby gardening store or plant nursery. At first, you may be stunned at how good the plant looks with a beautiful flower blossom on its top. But you may realize the flowers are not real after a closer look. These are fake flowers that cactus sellers glue on the plant to make it marketable. Unfortunately, buying a cactus and later realizing the flower is fake would leave you feeling cheated.

So, how can you identify fake cactus flowers, and how can you remove them? You identify fake cactus flowers by closely examining the flowers. Look at the placement of the flower, color, and texture, and check for glue binding the flower to the stem. To remove fake flowers from your cacti, you can gently pull them out using your hand, use a hairdryer to blow the glue that binds the flower to the stem, use a knife to scrape off the glue, cut the flower off using scissors, or leave the plant alone till the fake flower falls off on its own.

In this post, we will discuss what fake cactus flowers are, how to identify them, and how to remove fake flowers from your newly bought cactus plants.

What are Fake Cactus Flowers?

The fake flower you see on a cactus is not fake but real. Technically, this flower is an inflorescence from a species of plants called everlastings or strawflowers.

They are called so because when dried, the flowers have a crispy, straw-like texture and remain in good condition for a long time.

This unique texture makes the fake flower easy to identify when touched and comes in different colors.

But the most intriguing thing about a straw flower is that it can respond to humidity levels even when dried.

Small golden barrel cactus.
Technically, this flower is an inflorescence from a species of plants called everlastings or strawflowers.

The flower opens when there is little humidity and closes when there is excessive humidity, imitating real cacti flowers.

Why Do We Have Fake Flowers on Cacti Plants?

Flower growers and sellers often attach flowers of cacti to enhance their appeal. This helps the cacti plants sell faster, getting new homes.

 So, it is your job to inspect each cactus to avoid buying one with a fake flower.

The seller should be truthful if you ask about the flower. But the seller is not to blame if you fail to ask.

Flowers give cactus a vibrant, thrilling appearance that appeals to potential buyers. Knowing whether a cactus flower is real or fake becomes easier as you gain experience.

Do Cacti Plants Flower?

So, you may think that sellers use fake flowers to make cactus look more attractive because these succulents do not flower. Well, this is far from the truth.

Almost all cacti are flowering plants. Some bloom faster than others, depending on the species.

But even though cacti can bloom, making them do so is difficult. You may have to care for the cactus for two to three years; even blooming will depend on the species.

Some species, like Mammillaria, Parodia, and Gymnocalycium, bloom quite fast, while others, such as the prickly pear cactus, take up to four years to flower.

A thelocactus blooming in a pot.
You may have to care for the cactus for two to three years; even blooming will depend on the species.

Another thing is that the lifespan for most cacti flowers is short. Some cactus flowers open for a few days, while others last only for a few hours and then fade away.

So, to keep the flower vibrant for longer, cacti growers came up with the idea of using hot glue to attach flowers to these plants.

They fail to realize that by doing this, they cause damage to the plant. The part of the cactus skin that comes into contact with the hot glue gets burned. This is one of the things you can look out for to identify fake flowers.

How to Identify Fake Cactus Flowers

The best way of handing cacti with fake flowers is to avoid purchasing them. For this, you must inspect the blooms.

Start by looking at the placement of the flower. Cacti sellers often stick the flower on the growth point in the middle of the stem.

However, this is not how real cacti bloom. Real cacti flowers usually emerge on the mature end of the plant.

They can grow directly on the side, sometimes in the middle, but never precisely in the middle part of the plant. So, the flower is fake if it appears precisely at the center.

The color of the flower is another indicator. Cacti with fake flowers are often delivered in trays and are also in trays when exhibited in nurseries.

If you notice blue, purple, or violet flowers in a collection of what looks like flowering cacti, they are fake. Cacti flowers do not have such colors.

A spider cactus blooming.
Cacti with fake flowers are often delivered in trays and are also in trays when exhibited in nurseries.

The same applies to cacti with bright green flowers. Some cacti may have lime-green blooms but not bright green.

Remember to touch the flower. A real cactus flower is silky smooth and gives no resistance when touched. A strawflower feels like paper and can break if you bend it.

You can also look closely to see what binds the flower and the plant together. Real cactus blooms grow on a tubular stem, which can be long or short and is usually prickly.

Some more miniature flowering cacti, like pincushion cacti (Mammillaria), have very short stems but are still visible if you are keen enough.

On the contrary, fake flowers are attached to the cactus plant using hot glue. You may see the whitish glue under the flower if you lift the petals or ray flowers.

You can also delay buying the cactus for at least a week to see how the flowers will look like by then. Real cactus flowers are short-lived. Most of them only survive for less than ten days. Others only last for a day.

However, strawflowers can live up to two years. So, if you notice a cactus is still at the store three weeks later and seemingly blooming well, its flowers are fake.

If the flowering cactus you want has been in the store for some time, its flowers may be dusty – that is if they are fake. Real cactus flowers do not survive long enough to become dusty.

How to Remove Fake Flowers from Cactus

Spreading hot glue on a cactus stem causes permanent damage and kills adjacent cells. So, you want to avoid buying cactus with fake flowers.

But if you already bought your cactus, you can remove the fake flowers carefully without causing further damage. Of course, this will leave a wound, but it may not even be visible.

Here are five ways to remove a fake cactus flower.

1. Remove by Hand

First, avoid yanking the flowers off – they are not bandaids! You might tear off an areole, the skin, or even some cactus flesh.

San dollar cactus blo
So, gently pull the flower out using your hand instead.

This could leave a wound bigger than the hot glue caused. So, gently pull the flower out using your hand instead. Move it back and forth, left and right, and repeat a few times.

The glue will soon come loose.

2. Using a Hairdryer

Hot weather is the best for removing fake cactus flowers because the glue softens and becomes easy to remove.

But if it’s the cold season with barely any sun outside, you can get a hairdryer and blow hot air on the plant.

This will work if the glue is not stuck hard on the plant. But if it’s too adhesive, even a hairdryer won’t break off the flower.

Avoid blowing for too long. Cactus cannot withstand 100 degrees of hot air blown directly, so blowing on the plant for too long could damage the plant cells.

3. Using a Knife

Sometimes, the flower is stuck directly in the cactus spines instead of the stem. If the spines are thick and intertwined, some chunks of glue could remain stuck even after removing the flower.

If this is the case, carefully scrape off the glue using a sharp knife while working your way from the root to the tip of the spine.

Sometimes, you can get all the glue out by gently working on the plant.

4. Use Scissors and Brush

If nothing seems to work because the glue is stuck too hard to the stem, you may need to cut the flowers off altogether. Use scissors to cut them and a brush to clean the spine surface.

Be gentle and careful when cutting the flowers. You may lose some spine, but you will not cause much damage to the plant.

This is worth your effort because it will leave the cactus looking more beautiful without a fake flower on the top.

5. Leave It as It Is

Or you can wait. Cacti are living plants, not stones – they will keep growing.

A golden barrel cactus flowering.
Cacti are living plants, not stones – they will keep growing.

The stem’s shape changes as the cactus grows, and the glue may wear off, so the flower eventually falls off.

Summary

Although cacti bloom naturally, some sellers stick fake flowers to make their plants more appealing to potential buyers.

Being able to differentiate between fake and real flowers is important because fake ones compromise the health of your cactus. Most sellers use hot glue to attach the fake flower, which can damage the plant.

You should remove them by hand, using scissors and a brush, a hairdryer, or a knife so your cactus can thrive.

But it is entirely up to you to decide whether to remove the fake flowers or leave them to fall off on their own.