20 Best Cactus Species For Your Indoors / Outdoors Cactus Garden

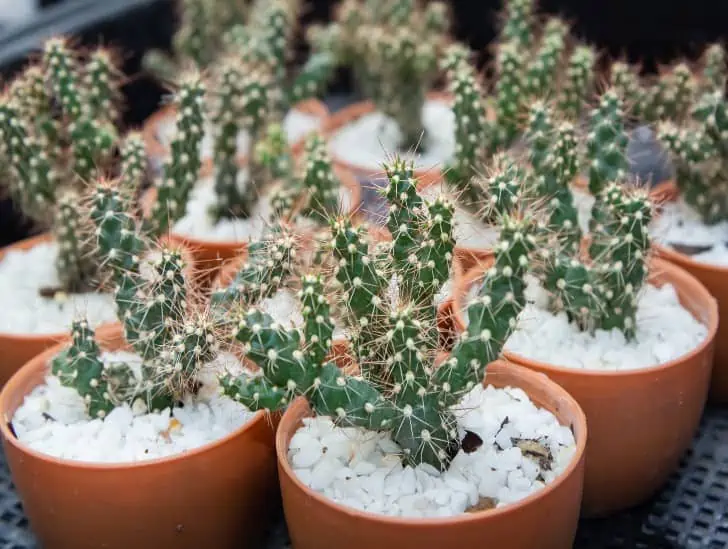
Cacti are one of the extraordinary plants. Most people prefer them and can be grown either indoors or outdoors. With proper care: watering when needed and having the right potting mix, your cactus can last for decades. They require minimal supervision and are ideal for aesthetics. 

As I was researching on cactus species, I wanted to know which species are ideal for indoors and outdoors. I have compiled a list of 20 types of cacti that are ideal for your home. 

Indoor Cactus
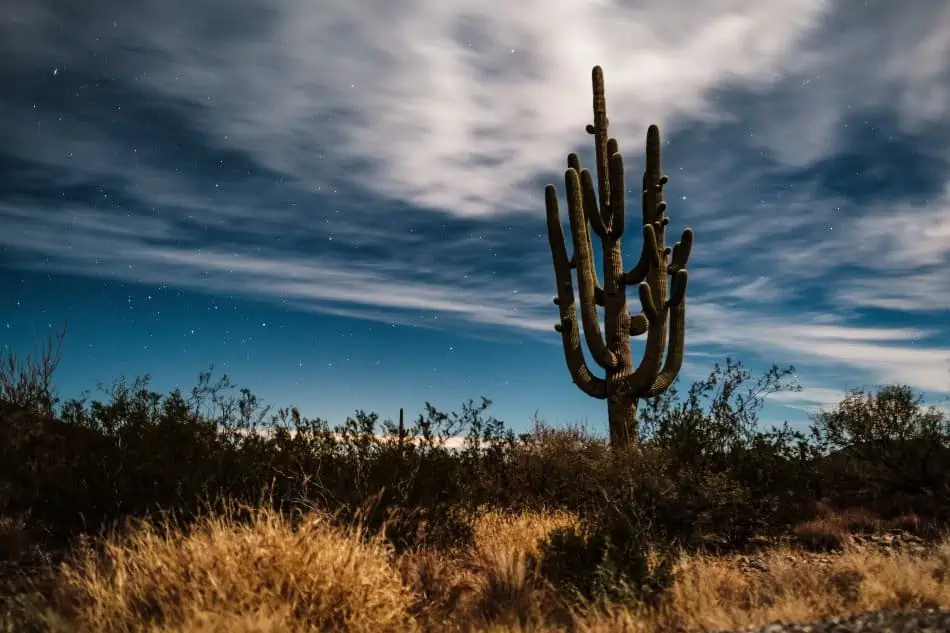
A Saguaro Cactus
Saguaro Cactus

1. Saguaro Cactus

Also known as Carnegiea gigantea, this particular species can grow to over 40ft/12m in height. The Saguaro is native to the Whipple Mountains, the Sonoran Desert in Arizona, Imperial County found in California and the Mexican State of Sonora. 

It has a lengthy lifespan of approximately 150 years. Some may grow their first side arm after about 75-100 years. However, some don’t grow these arms and are referred to as Spear. 

It starts flowering in between April and June. The flowers open after sunset and close mid-afternoon. 

It can take about ten years for the Saguaro to reach 1 inch in height. 

Their fruits are red and are often between 2.4 inches to 3.5 inches. They ripen in June and are edible. 

Saguaros are barrel-shaped and have peripheral stems, which are the “arms.” The plant stores water, and the more it stores, the more it expands and becomes heavy. A foot of the Saguaro can weigh up to 90 pounds. A mature one can even weigh about or over a ton.

Watering cactus is an essential aspect of the plant as proper care needs to be taken for it to grow healthy. Water the Saguaro every 10 to 14 days. However, be sure to check if the soil still has moisture before watering it to avoid root rot.

The oldest Saguaro to live is the ‘Old Granddaddy,’ and it was 300 years old when it died. 

2. Angel Wings
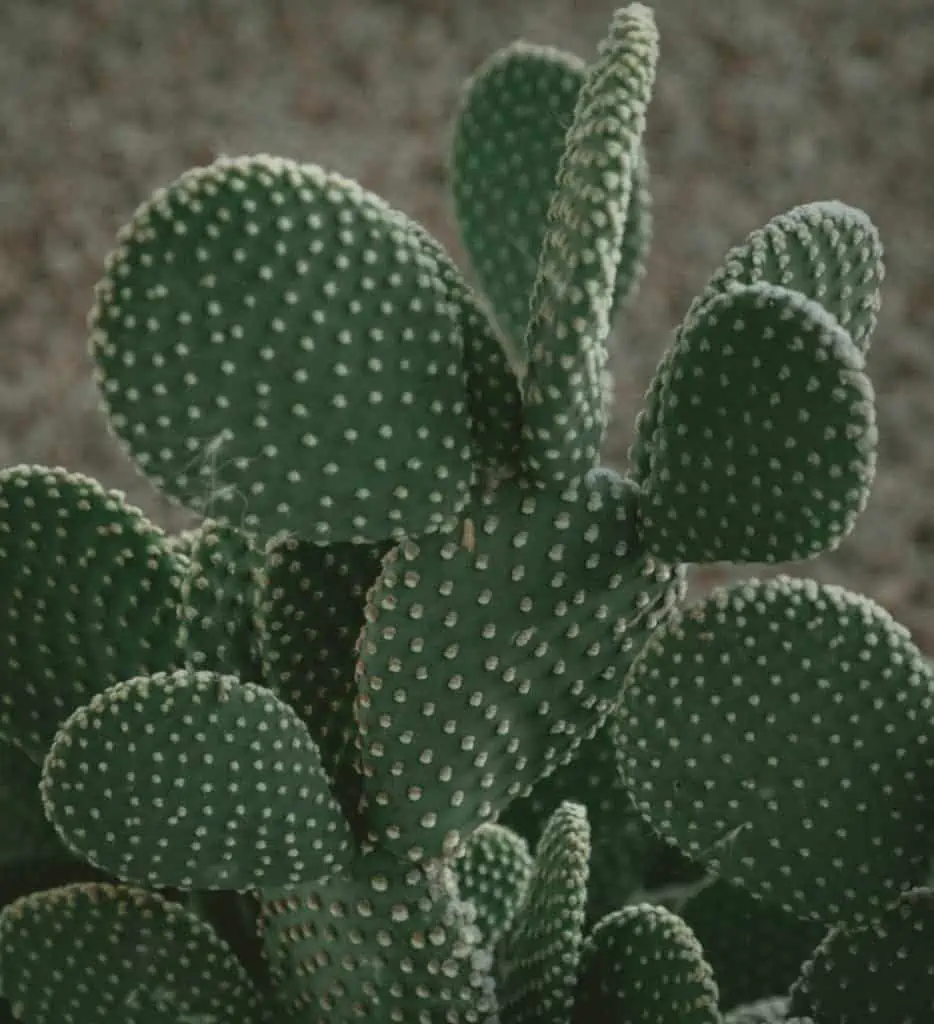
A  Angel Wings.
Angel Wings


Also known as Bunny Ears or its scientific name Opuntia microdasys, the Angel wings cactus is native to northern and central Mexico. It is more of a dense-like shrub that’s usually40-60cm tall. The stems range from 6-15 cm long while 4-12 cm broad. 

Unlike some other cacti, it has no spines but instead, has yellow or white glochids that are 2-3mm and in clutters. The glochids are thinner than the human hairs and detach when touched. Upon touching, they can cause skin irritation. 

The Angel Wings cactus has no central leaves or stems but has individual segments that contain the cactus body. The sections grow in pairs which the new growth resembles bunny ears. 

Budding always begins late spring and produces flowers that are 2 inches. The flowers are yellow but slowly fade to peach once they are fertilized. 

Since this is a desert cactus, regularly water it when in a new pot to from strong roots. Don’t water it during winter. 

Its fruits are safe to eat but should be handled with care, especially when repotting. 

3. Rat Tail Cactus

A  Rat Tail Cactus.
Rat Tail Cactus

The Disocactus flagelliformis or the Aporocactus flagelliformis is native to Mexico. It can be grown indoors, outdoors, or in greenhouses. It is quite a distinctive species whose long trailing stems branch out and are about 1-2 m long and 8-24mm thick. 

The cactus flowers during spring and summer and they are usually red, violet, pink or orange. The flowers are generally 2 inches, which last for a few days. 

Due to its trailing stems, the rat tail cactus is grown in hanging pots. It’s easy to propagate it by cuttings as the stems grow so fast. 

Full light is necessary for this species. Make sure your pot/container is near or on a south or west-facing window. During summer, when the cactus is blooming, ensure the potting soil is moist. However, during winter, water sparingly; when the soil is dry. 

For the temperature, your cactus is just fine at room temperature during summer, spring, and early autumn. However, during winter, keep the cactus in a more relaxed setting. 

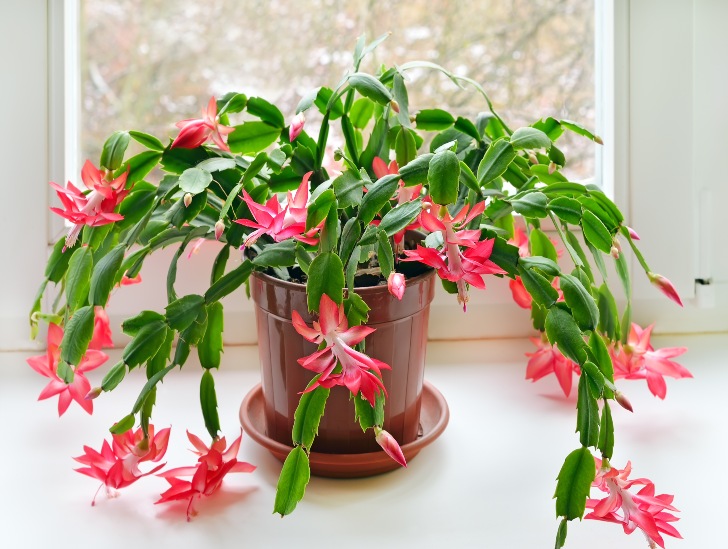
4. Christmas Cactus
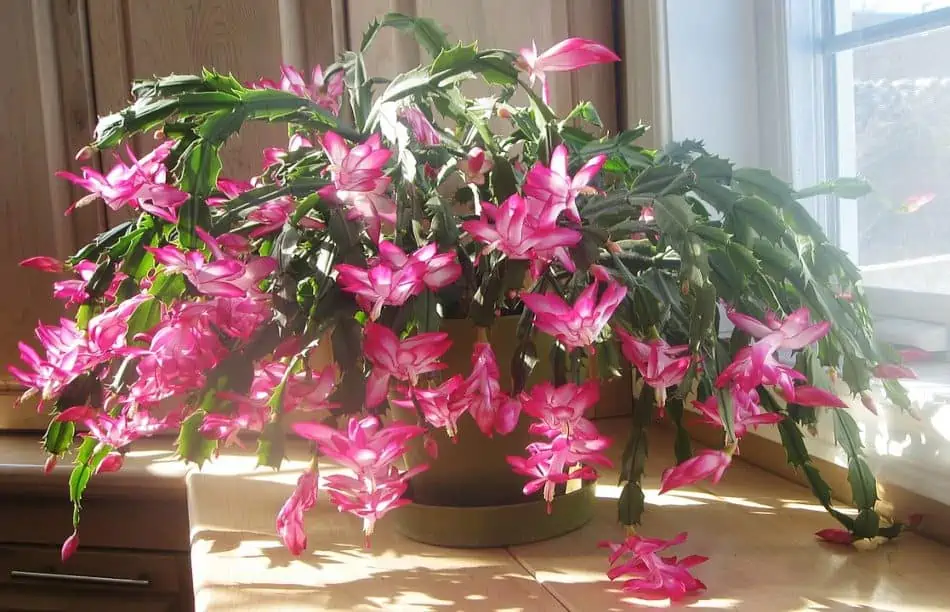
 A Christmas Cactus
Christmas Cactus

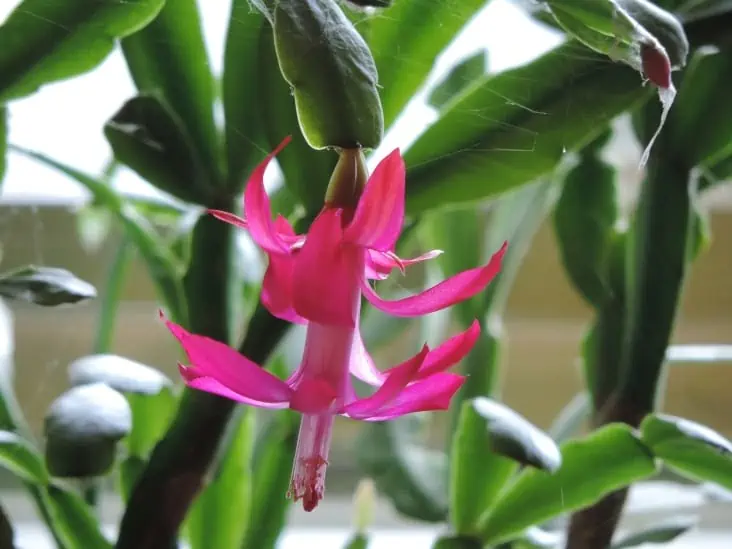
Just as the name suggests, the Christmas Cactus blooms around Christmas. It has hanging branches that are green and flat about 3ft tall. 

The flowers are commonly red, lilac, yellow, pink, and white. They are usually 3 inches long. Native to coastal parts of Brazil, this cactus prefers a humid climate. 

Christmas Cactus is scientifically referred to Schlumbergera. Proper care will help you see the tips of leaves starting to grow. The tips will then begin turning darker until buds appear. Around Christmas time, the buds will then open to beautiful flowers which are perfect for the season. 

They do well in natural light but avoid direct sunlight to encourage blooming. Water them every 3-4 weeks. Only water when the pot is dry on your touch. It requires more water when flowering. 

The type of soil you use should contain leaf matter and debris as this is what they feed on. If you want to propagate, do so 2-3 months after flowering. 

For them to bloom, they’ll need 12-14 hours of complete darkness daily. 

5. Barrel Cactus
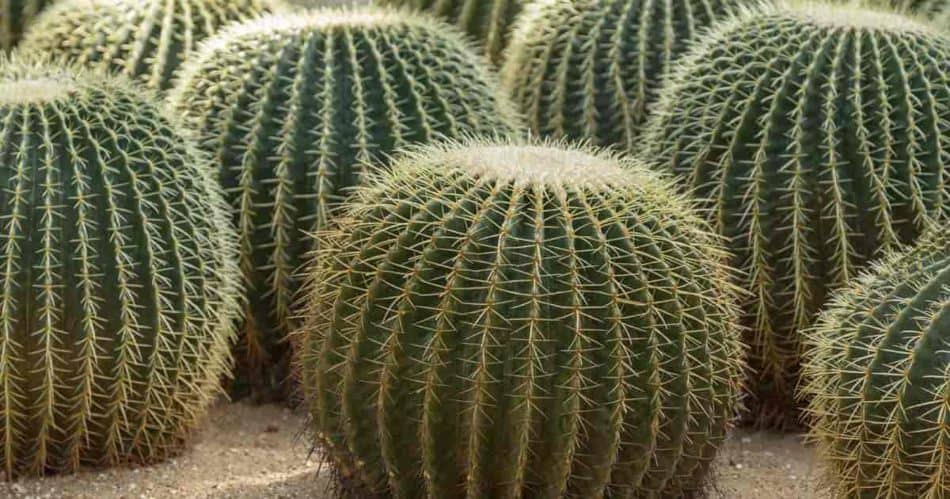
A Barrel Cactus
Barrel Cactus

Barrel cacti are not just one species but various species belonging to two genera, Ferocactus and Echinocactus. They are native to southwestern North America. Some species reach over 1 meter in height at maturity. Others have been known to reach 3 meters in some areas. They are 30cm wide. 

They have a lifespan of an average of 100 years. Naturally, barrel cactus live in extreme heat and direct sun, and it’s only natural to try and mimic the same conditions indoors. 

Barrel cacti are muffin-shaped and often pop out over the edges of their pots. You can easily distinguish it because of its elongated fruits and wavy ribs.

The flowers that bloom in April tend to be yellow, orange or purple and are up to 8cm across. The spines can go up to 10cm long. They grow in a circular shape on top of the cactus when it is quite old. 

For barrel cactus to bloom, they need full sunlight during spring and summer. Direct sunlight can make them become stunted and sunburned and fail to thrive, which is why they are perfect indoors because you can control the amount of light they are getting. 

Due to adapting to arid conditions, their water requirements are not high, and you can even get away with watering every 2-3 months. Unlike other types of cacti, the barrel ones are hard to check for water because their shape almost covers the whole pot and it’s easy to get pricked. 

What kills most barrel cacti is overwatering. Only water when you think it’s essential to avoid root rot.

Place your cactus on a south-facing window, and it does best without humidity. You can also add some cactus fertilizer during the growing season.  Propagation is by seed. 

6. Old Lady Cactus

A Old Lady Cactus.
Old Lady Cactus

Old Lady Cactus, commonly known as Mammillaria hahniana, is a powder puff species which grows in arid areas. It is native to central Mexico. It is capable of growing 10inches/25cm by 20inches/50cm broad. The width being 12cm. White spines usually cover it. 

The Old Lady Cactus is quite popular. As much as it is found in arid areas, it makes a perfect indoor plant as well. You just need to place it in a sunny place in the brightest spot in the room and avoid overwatering it. A south-facing window is perfect. 

It blooms in spring and summer producing red or purple flowers with them being about 0.6 inches/15mm in diameter. It needs 4-6 hours daily for it to thrive. 

Make sure when choosing a cactus soil, you get a porous one, one that drains quickly to avoid the roots sitting in water for an extended period. Make sure you add perlite into the mix. You can use potassium fertilizer once during summer. 

Only water when the soil is almost dry. It could be weekly or biweekly depending on its requirements. Avoid watering during winter unless the plant needs it.  

If you want to propagate, use the offsets that often form clusters on the base of the main plant. Remove the offset and let it dry in a few days so that it forms a callous. Once it forms, you can plant it in a new pot. 

7. Bishop’s Cap
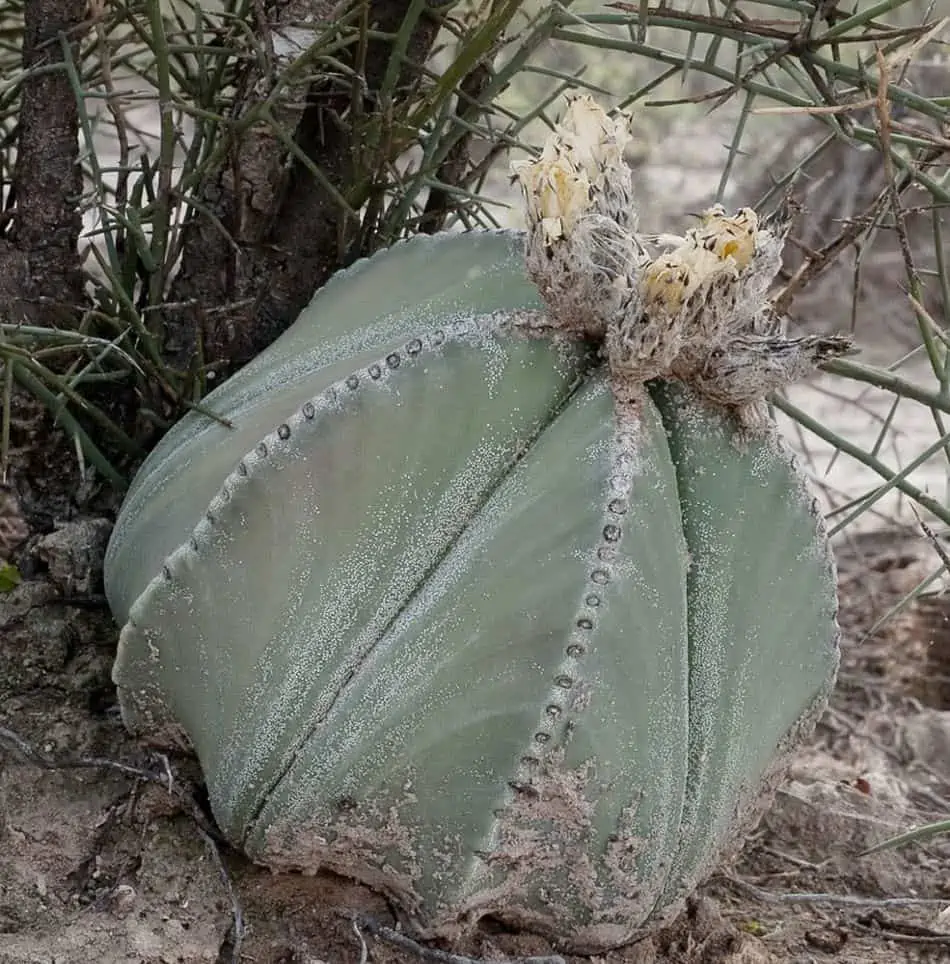
A Bishop’s Cap.
Bishop’s Cap

Also known as bishop’s hat or bishop’s miter cactus, this particular species is native to the highlands of northeastern and central Mexico.

Its scientific name is  Astrophytum myriostigma.  The word astrophytum is Greek meaning star plant. Physically, it has about three to seven vertical ribs which define its star-like shape when young. As it matures, the ribs may increase in number and become more cylindrical. 

The bishop’s cap grows to about 70-100cm tall with a 10-20cm diameter.  The flower which is usually daisy-like appears on top of the cactus. It is typically a maximum of 2inches in diameter.

The cactus blooms in early spring. It produces one or more flowers and is usually creamy yellow with a red or orange base. It can take up to six years to flower. Each of its flowers blooms after every two days. 

For the young plants, the bishop’s cap can’t take intense light, which is why it is perfect indoors. Never place them under the full sun. 

These types of cacti don’t require a lot of water. Only water frequently during summer and avoid watering at all during winter. 

8. Moon Cactus

A  Moon Cactus
Moon Cactus

The moon cactus has a scientific name, Gymnocalycium mihanovichii. The species is native to Paraguay and Argentina. They are found in South America as well. 

Moon cacti are also referred to as Ruby Ball, Red Hibotan, Hibotan cacti or Red Hibotan. What makes them stand out is their red, pink, orange, or yellow colors. The colors are usually ball-shaped, making them look like balls with thorns that sit on another green-colored cactus. It’s more of a two-in-one kind of plant. 

This particular species comes in numerous varieties. What’s frequently found is the mutant of cultivated ones where the colors are only viable if they are grafted because they don’t assimilate because of lack of chlorophyll. In most nurseries, it’s grafted onto another green cactus that has chlorophyll. The plants reach both a heigh and a diameter of 3-5cm while the flowers are 4-5cm wide. 

This type of cactus does not require a lot of water. Only water it when the soil feels dry. Don’t water during winter unless it’s a young moon cactus but even on these occasions, water minimally. 

For sunlight, they thrive best in bright but avoid direct sunlight. It; s great for beginners as it is a low maintenance cactus.

Outdoor Cactus

1. Prickly Pear Cactus
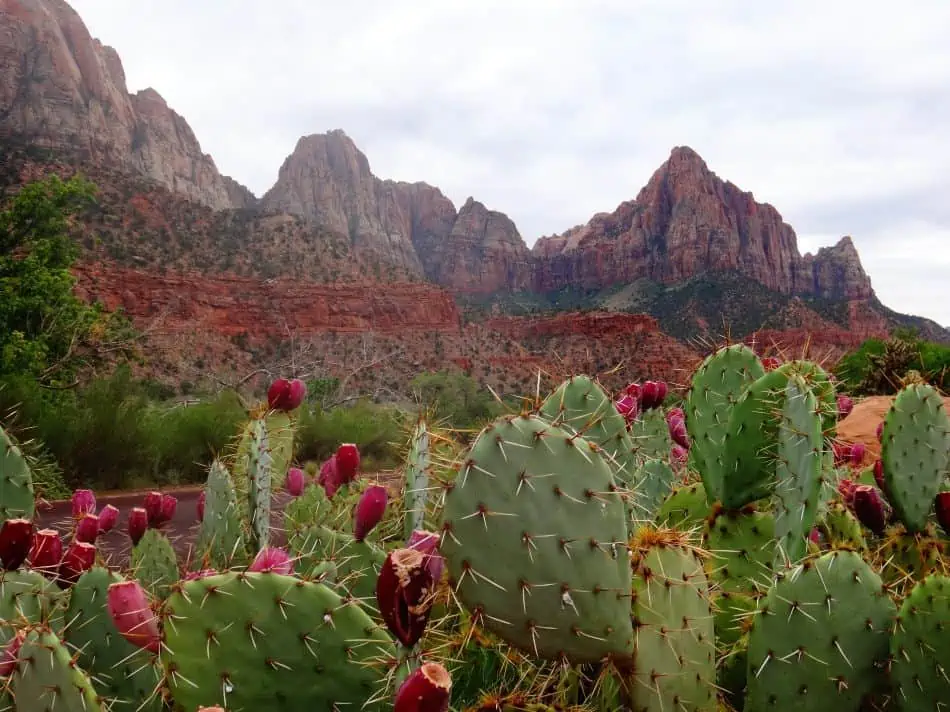
A  Prickly Pear Cactus
Prickly Pear Cactus

The Prickly Pear Cactus is also known as Opuntia. The prickly pears (fruits) are referred to as Tuna, and the pads are Nopals. 

The cactus can grow to a height of about 5-7m, which is equivalent to 16-23ft with spines of 2.5cm. Some are spineless as well. 

Opuntia is only native to the Americas. They are available in various parts of the world and are in abundance in Mexico (central and western areas & West Indies), United States (in drought-prone Western and The south-central regions) and Canada (southern and western) among other areas. 

The Tuna is a typical delicacy in Mexico. The fruits come in various colors: red, yellow-orange, wine-red, or green and can be eaten raw depending on how ripe they are. The pads are also edible; they require thorough cleaning before incorporating them into your meals. The nopales are used in numerous Mexican dishes such as eggs and salads.  

When it comes to propagating, you only need the stem segment. Make sure you plant in spring or summer for better results. 

When caring for your cactus, it doesn’t need pruning. Make sure to get the right potting mix with porous soil that drains quickly to avoid water resting in for long. For newly propagated pads, don’t water for the first month. After that, you can water every 2-4 weeks. 

Growth may be slow after propagating and may take 3-4 years before it produces many flowers. 

As mentioned, the pads are edible — harvest about ⅓ of the pads to keep your plant healthy. The pads are best cut in the mid-morning since the acid content is usually low. 

Place the Opuntia where light is maximum as it requires ample sunlight. For hotter climates, have a partial shade for them to avoid scorching. If you plant them outside in garden soil, no fertilizer is needed. 

These cacti bloom mid-spring all the way to mid-summer. 

2. Jumping Cholla Cactus

A  Jumping Cholla Cactus.
Jumping Cholla Cactus

Also known as the hanging cholla, it is native to the South Western United States and Sonora. Scientifically known as Cylindropuntia fulgida grows at elevations of 300 to 1,000m. The jumping cholla is tree-like grow to heights of  4m/13ft.Their wart-like projections on their stems measure between 6-9mm. Their flowers range from pink, white and lavender and are about an inch wide. 

The name, ‘Jumping Cholla’ comes from the ease at which the stems will detach upon the slightest touch. Their sharp spines will attach themselves to animals and people where they get dispersed.  Upon dispersing, when people remove them and throw them on the ground, they easily root there. 

Chollas do well in slightly acidic soil with an approximate pH of 6. The best potting mix to use for these cacti is one with grit and sand. Just like other cacti that have spines, be cautious when repotting as they may end up sticking on you. Get a pair of leather gloves and a newspaper to ensure you have no contact with them. 

They need as much light as possible and do well in greenhouses where there’s partial shade. Always check the soil for moisture before watering. If it’s moist, wait till it dries to avoid overwatering. 

3. Old Man Cactus
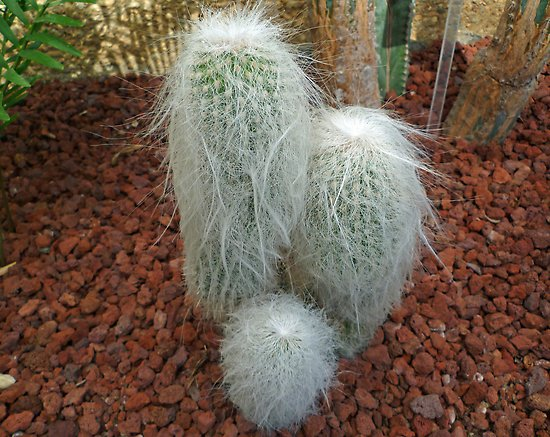
A Old Man Cactus.

Image from Red Bubble

As hilarious as the name sounds, you may think it doesn’t exist, but the truth is, this cactus does exist. The cactus s native to Hidalgo and Guanajuato in eastern Mexico. 

Otherwise known as Cephalocereus senilis it is a columnar species that has clusters of stems that grow between 5-15m tall. What’s striking about this species is the shaggy coat of some long and white hairs that resemble unkempt hair of an older man, hence the name. 

It usually takes a long time before flowering, which can take place anywhere between 10-20 years. The flowers are generally yellow, red or white and bloom at night. They bloom in spring.

It grows well in Mediterranean climates, and it loves well-draining soil hence the need to have a good mixture. 

The best way to grow it is from seeds as it may be hard to get its cuttings. Old man cactus is slow-growing and may take about a three-month germination period, which is why purchasing a grown away could be an easier option. 

This species loves bright light and heat and needs a lot of special care. Allow the soil to dry before watering the plant thoroughly.

4.  Organ Pipe Cactus
A  Organ Pipe Cactus.
Organ Pipe Cactus

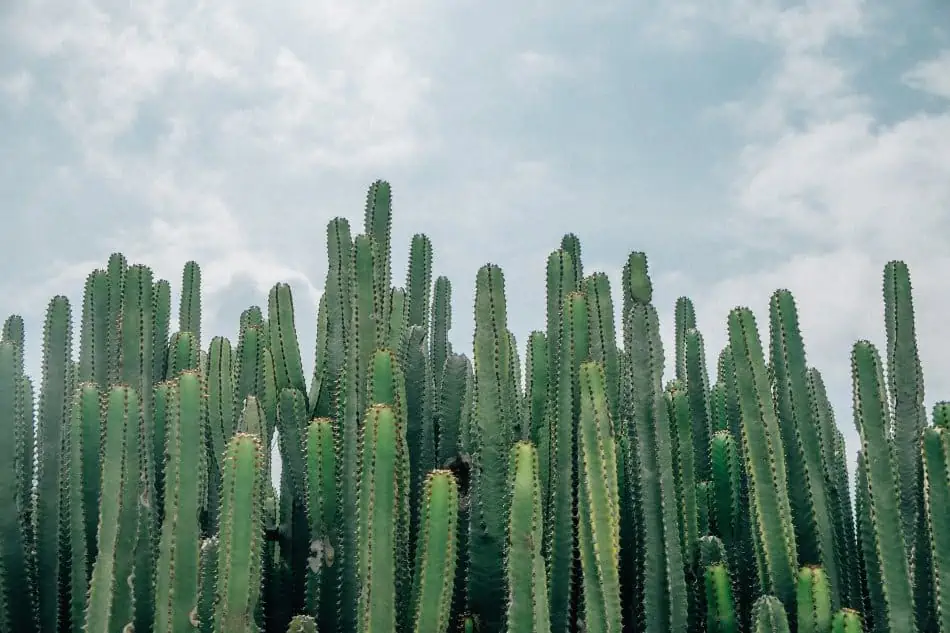
Also known as Pitaya, this particular species is native to the United States and Mexico. They are mostly found in rocky deserts. 

Scientifically known as Stenocereus thurberi, has several stems that grow from one short trunk and rising vertically. The stems are usually 15cm/6inches thick with an average height of  4.9m/16ft while others reach between 23and 26ft. 

Older plants have funnel-shaped flowers that open at night and close during the day. They are usually white and are 8cm for the older plants. The flowers grow around April, May, and June. 

What’s interesting is that they bear fruits as big as a tennis ball with people claiming it tastes better than a watermelon. 

Grow the cactus in gritty,well-drained soils. In the case you are growing them in a container, you can mix one part perlite, one part sand, and one part potting soil. Since it is found in the hot sunny areas, ensure it accesses full sunlight. 

In early spring, water it regularly but look out for indications of overwatering. 

The organ pipe has an estimated lifespan of 150 years. 

5. Peanut Cactus

A  Peanut Cactus .
Peanut Cactus

A peanut cactus can both be grown indoors or outside. Scientifically known as Echinopsis chamaecereus, this cactus is native to Argentina. 

It has long stems that are about 1cm/0.4inches wide and orange flowers that are about 4cm/6inches wide. The flowers appear in late spring. They can grow up to 15cm/6inches tall. 

This particular cactus is quite popular in gardens of hot areas and have a high growth rate. Some of these areas are Arizona, Texas, and California. 

Peanut cacti are susceptible to rot, and they need to be watered only when the top inches of the soil are extremely dry. You can use a stick and dip it into the soil, if some remnants of wet soil stick to it then don’t water the plant. 

Also, give it as much sunlight as possible as it prefers hot temperatures. 

6. Silver Torch Cactus 

A  Silver Torch Cactus.
Silver Torch Cactus, Image by Wikimedia

The Silver Torch Cactus which is also referred to as snow pole and wooly torch, is native to the mountain regions in Argentina and Bolivia. With a height of 3m/9.8ft, they have grey/green columns that are quite erect and slender with only 6cm/2.5inches across. 

Its scientific name is Cleistocactus strausii. The perfect soil is a highly-draining one. It requires strong sunlight but not high temperatures. Full sunlight is needed several hours a day for it to bloom. Surprisingly, it can withstand a frost of -10 °C. 

Naturally, it needs plenty of water during summer and none at all during the winter. Some of the older plants produce deep red and burgundy flowers in summer.  

7. Kingcup Cactus
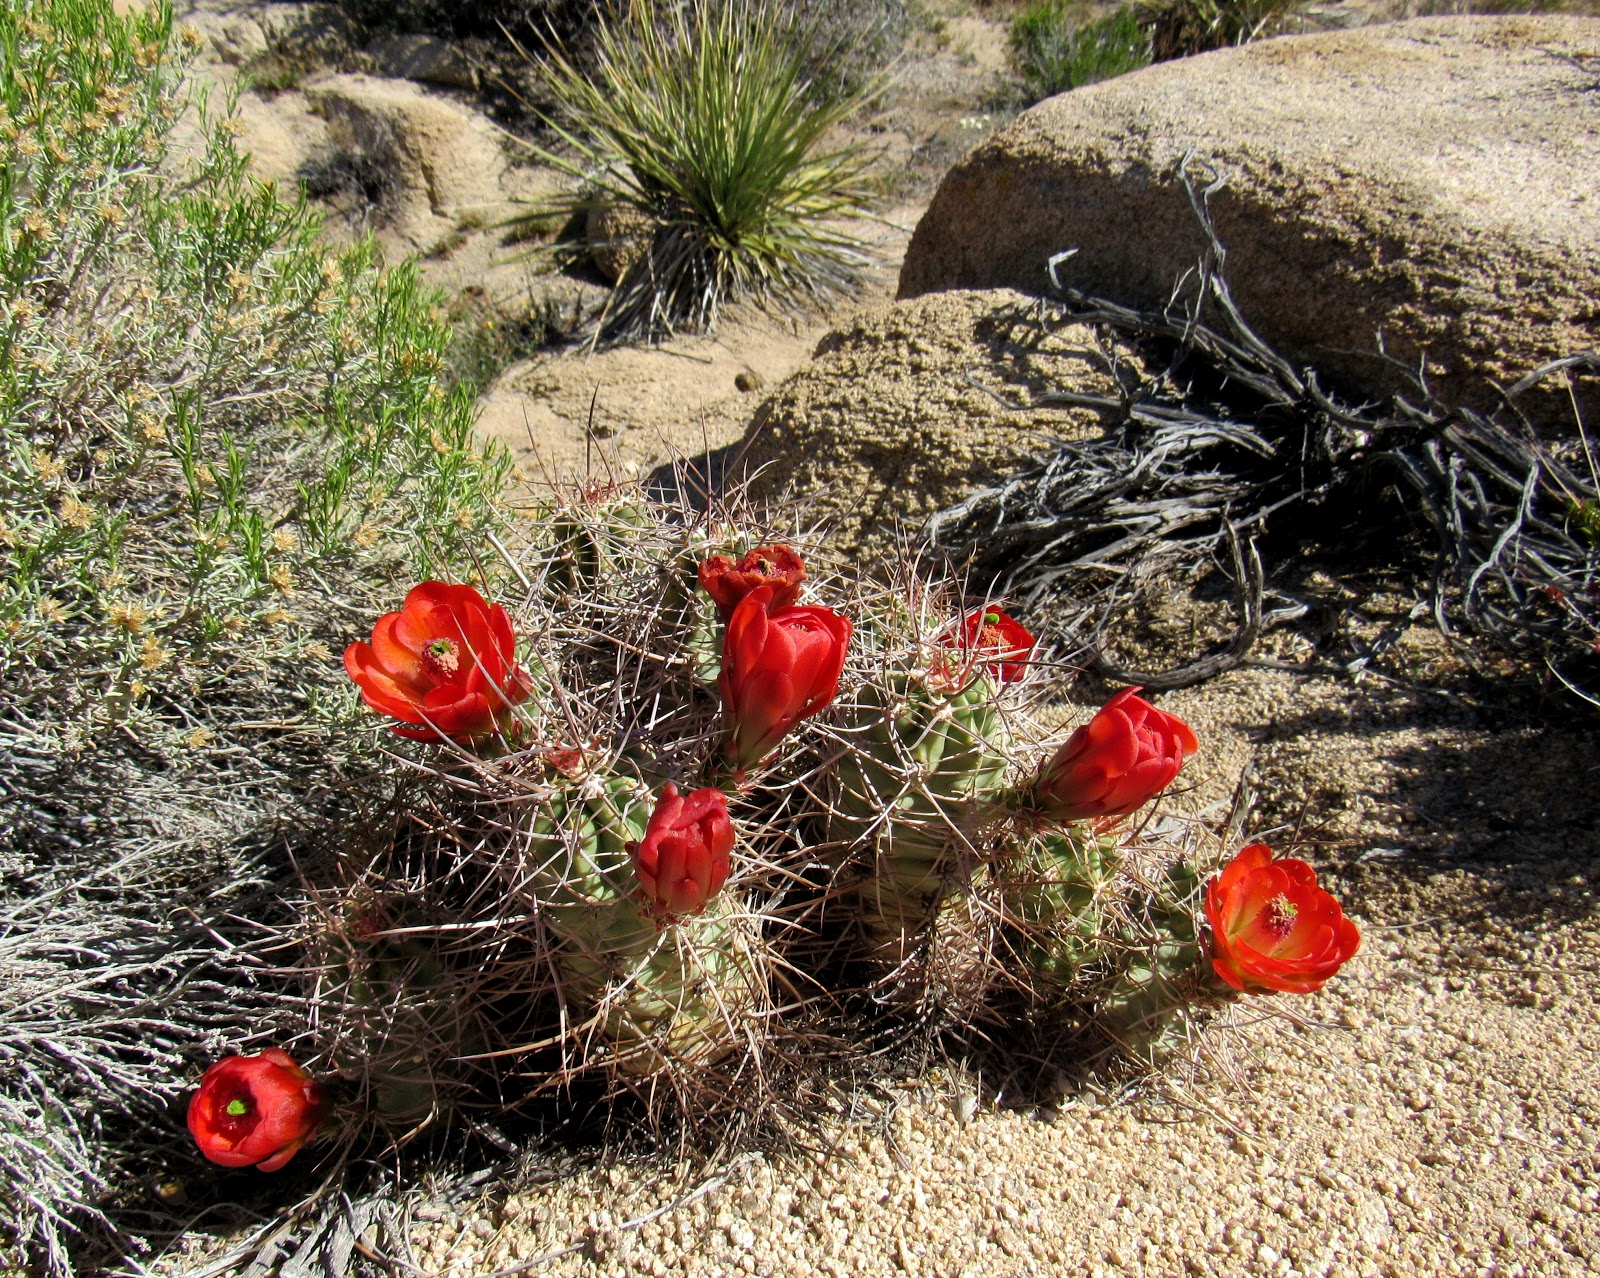
A kingcup cactus.
Kingcup Cactus, Image by Natural History

Kingcup cactus is a species of the hedgehog cactus. Scientifically referred to Echinocereus triglochidiatus, it is native to northern Mexico and the southwestern United States. 

Some other commonly referred names are claret cup or Mojave mound cactus.

One distinct feature is that it forms a bulbous pile of hundreds of cylindrical stems. It is somehow wooly. 

The flowers, which are usually orange-red or scarlet red bloom up to 8-9cm wide in late spring. They prefer a little bit of moisture, some partial sunlight and porous soil that drain water quickly. 

8. Barbados Gooseberry
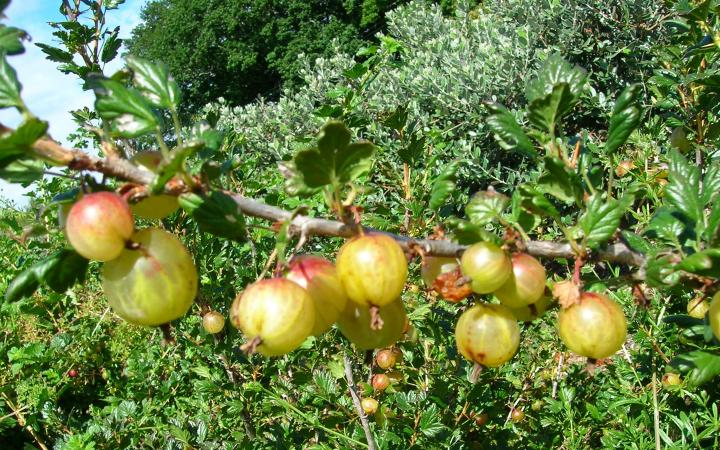
A barbados Gooseberry.
Barbados Gooseberry, Image by Waimea Nurseries

Some of its common names are blade-apple cactus, Barbados gooseberry, rose cactus, leaf cactus, and lemon vine. Scientifically, it is known as Pereskia aculeata. 

The cactus is native to tropical America. Its leaves and fruits are both edible as they contain iron, protein, among other nutrients. Unlike other cacti, this particular species has a vine that grows up to 10m/33ft tall. The stems are 2-3cm thick. 

Flowers of the Barbados gooseberry are either pink, white or cream with them being 2.5-5cm/0.98-1.97inches.  They are mostly outdoor plants because of their shrubby growth. Their preference is dry areas, and you don’t need to repot them regularly. 

When it comes to watering them, you need to be careful not to overwater. They’d rather be underwatered than excess water because the chances of rotting are higher. 

9. Queen of the Night Cactus

A queen of the night cactus.
Queen of the Night Cactus, Image by Tanqueverderanch

The Queen of the Night Cactus-Epiphyllum oxypetalum-is also referred to as Dutchman’s pipe cactus. 

Native to Southern Mexico and some areas of South America, it is a fast-growing plant that flowers late spring all through to summer. The stems are of two types; we have the primary stems that grow to be 6m long while the secondary stems are flat and grow 30cm x 10-12cm. 

They only bloom at night and wilt just before dawn. Flowers are usually white and have a sweet scent and are 30cm long by 17cm wide. Their fruits are purple-red. 

Make sure you feed them the morning sun but avoid the afternoon sun because their leaves can quickly get scorched. If possible, keep them under a shade. They prefer mild winters but hate overwatering.

10. Mexican Fence Post Cactus
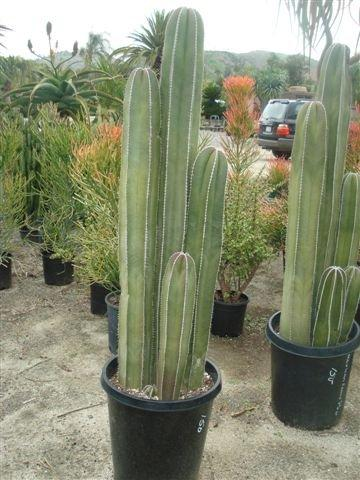
A mexican Fence post.
Mexican Fence Post Cactus, Image by Palms4u

The Pachycereus marginatus is a slow-growing plant with a height of between 3.7m/12ft and 6.1m/20ft. The stems are 9-10cm/3-4inches in diameter. 

As it matures up, it grows numerous ‘arms.’ The name comes from the fact that in several Mexican homes, it’s used as a fence. 

The plant blooms in spring and produces red and yellow fruits with black seeds. You can plant it against the wall of your house. Mexican fence post cactus requires full sunlight with partial shade and porous soil. 

Water occasionally during the hot, dry months. 

11. Totem Pole Cactus

A Totem pole cactus.
Totem Pole Cactus, Image by Gardenista

The Pachycereus schottii f. Monstrosus is a smooth-skinned plant with no visible spines. It is a columnar cactus that grows 3.6m/12ft tall. It has small bumps that give the plant an overall look of a carved image. 

The plant is a night bloomer that produces light pink flowers that open in the evening and close by mid-morning. They produce red fruits that are egg-shaped and are edible. 

These plants are low maintenance and can practically grow even when left uncared for. They love a partial shade as opposed to direct sunlight. Ensure they are under a shade but shield it from extremely cold temperatures. You can even keep them inside during winter. 

Only water them on need-basis. 

12. Blue Candle Cactus
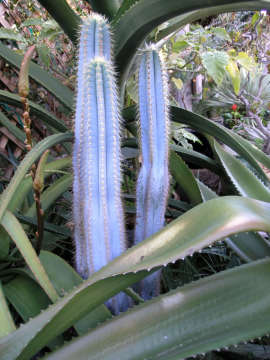
A blue candle cactus.
Blue Candle Cactus, Image by Plant Standaz

Also named whortleberry cactus and bilberry cactus, it is a large shrubby cactus that grows 4-5m in height. The stems have a diameter ranging 6-10cm. 

The flowers have a diameter of 2-2.5cm and are usually creamy white. The fruits are dark purple and are edible. This particular species is quite popular in Mexico for consumption. 

Don’t expose them to temperatures below 25°F as they may die. They are low-maintenance and always allow the soil to dry out before watering them. 

Its scientific name is Myrtillocactus geometrizans.

All the above species are all great. Some are low maintenance, while others require a bit of attention. Before choosing what you want, make sure you go through this list to ensure you make an informed decision. 
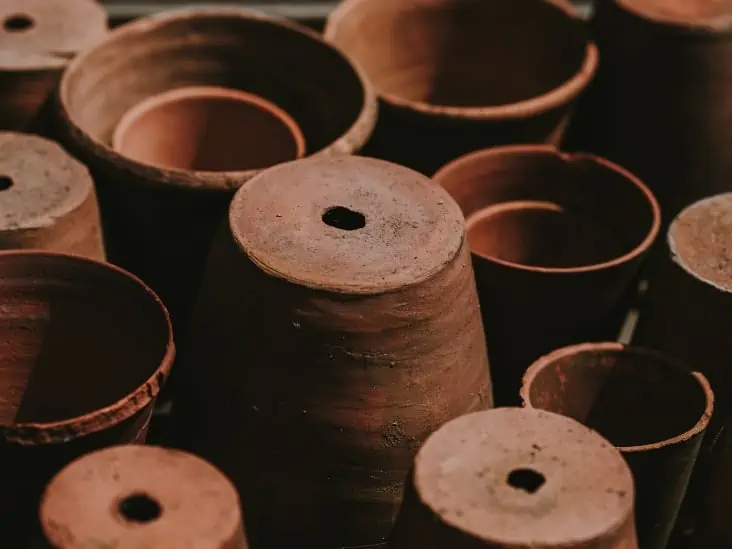
How To Choose The Right Pot For Your Cactus

My passion for cactus has driven me to watch hundreds of Youtube videos on how to take care of them. I’ve read multiple blogs, research journals, books, and any material online and in the libraries, I can find about the cactus.

But before I tell you all the details I uncovered in my research, I realized something significant that many cactus lovers forget before buying the pots. Here are some of the things you should think about before heading out to find the right pot for your cactus.

Questions to Answer Before Your Buy The Pots

  • Are you looking for pots for indoor or outdoor plants?
  • Where exactly do you plan to place the cactus?
  • If you’re looking for pots for your indoor cacti, what colors will complement your home decor?
  • Would you want a masterpiece pot that makes a statement or would you prefer all the pots to be of the same color?
  • If you’re repotting your cactus, what is the size of the current pots?

Here is a detailed report on my research to help you make the right decision when choosing the right pot for your cactus.

What Factors  Should You Consider When Choosing A Pot For Your Cactus?

Drainage

The cactus plant is biologically adapted to survive for an extended period without water.  These adaptations also work against it when you water it so much and too frequently. Therefore, when choosing a pot, ensure that it has drainage holes to drain excess water. If it doesn’t have them, ensure that you drill the holes before using it to plant your cactus.

Cactus with hole.
When choosing a pot, ensure that it has drainage holes to drain excess water.

Material

This is usually the first thought in the minds of many cactus lovers. There are many options to consider when looking for the right material. However, there is no good or bad material. It all depends on your preferences. Here are the materials available and some of the facts you should know about each:

1. Clay (Terra Cotta)

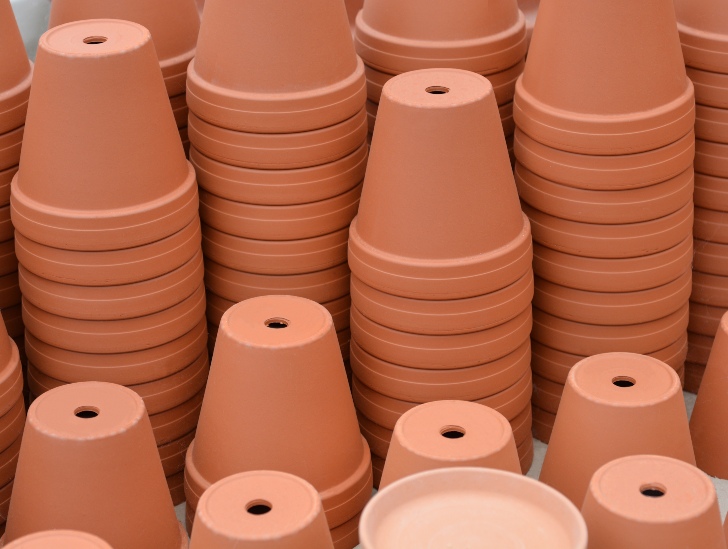
The clay pots are some of the most popular mostly because they drain quickly. Their porous nature creates a conducive environment for the cactus. Also, because they absorb water, it’s pretty easy to estimate the moisture level in the soil. This is because, when the clay pots soak up the water, they turn dark. Finally, these clay pots are affordable as compared to other planters. And, it’s easy to find them in a uniform color for consistency in your home decor.

On the flip side, the clay pots are highly delicate: they immediately shatter if they fall or hit on a rock-solid. Also, due to their high drainage rate, the water can dry out very fast in summer.  Therefore, when you transplant a cactus into a clay pot, pay close attention to it to prevent it from drying out. And, the clay pots are susceptible to breaking in winter.

Note, clay pots might be a challenge when repotting because sometimes the cactus roots might penetrate the clay pot walls. This challenge doesn’t happen with any other kind of pot. However, clay is perfect for people who live in humid areas and do not have an issue with space (they take up a lot of space) and don’t need to move the cactus.

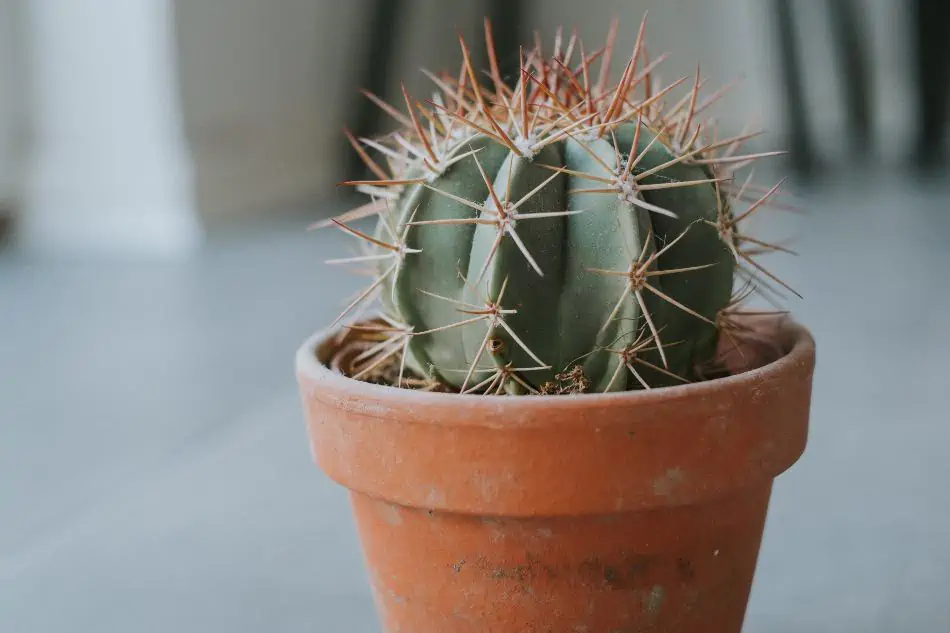
A cactus in a clay pot.
The clay pots are some of the most popular mostly because they drain quickly

2. Wood

Wood is perfect for outdoor cactus. It’s resistant to cold temperature and can hold water for a relatively long period. This makes it ideal for outdoor cactus. All in all, wood is a beautiful material. It can transform the home decor. And, it’s easy to get beautifully crafted wood containers for your cactus.

The major problem with the wood planter is the fact that they’re prone to rotting. This can affect the health of the cacti. Therefore, to prevent this, line the inside of the planter with a plastic bag.

Doing this also compromises the drainage capability of the wood planter. Therefore, ensure that you poke a few holes in the plastic lining to facilitate drainage.

3. Plastic

Plastic pots are some of the most convenient planters you can use. It’s because they’re cheap, readily available and you can easily reuse them. They’re available in all sizes, shapes, and colors.

Plastic pots came into popularity as a better alternative to clay pots due to their functionality. Unlike the clay pots that turn color due to salt build-up after evaporation, indoor plastic pots remain to look beautiful for a long time. 

On the contrary, these plastic containers are inferior in drainage and as such need to be well-drained to avoid soaking up the cactus in water. They’re also not ideal for outdoor use since they’re brittle and can be destroyed by constant exposure to sunlight.

Cactus in a black plastic pot.
Unlike the clay pots that turn color due to salt build-up after evaporation.

If you’re looking for a planter that will add color and design into your home decor, but you’re operating on a budget, you should consider plastic material planters. With technology, plastic planters can now be painted to look like rocks and also manipulated into different shapes. 

4. Ceramic

If you’re looking for a planter that will add elegance to your home decor, a ceramic pot is the right choice for you. They come in different shapes, sizes, and colors, making them ideal as indoor planters.

However, these beautiful ceramic pots can be quite heavy, making them not ideal for bigger cactus that require bigger sized planters. 

There are two types of ceramic pots:

  • Unglazed ceramic
  • Glazed ceramic

Unglazed ceramic pots are porous and most suitable for cactus since they are permeable to water and air. This allows for the healthy growth of the plant.

Glazed ceramic pots are not porous. This makes them very poor in drainage and therefore, the only ideal for the cactus that doesn’t mind a lot of moisture.

If you’re looking for beautiful planters to use for small-sized cactus, you should consider this material. But, be ready to pay extra for the beauty than you would for other materials.

5. Fibreglass

Fiberglass planters come in different colors, shapes, and sizes. They’re mostly moulded and colored to look like clay or wood planters. Due to their lightweight, they’re ideal for planting cactus that will be continuously moved. Additionally, the material is very durable and can withstand changes in temperature, thereby keeping your cactus healthy.

However, these nicely shaped planters have zero drainage. Therefore, to prevent root rot, you’d have to drill holes on them. Since they’re recommended for indoor planting due to their aesthetic nature, you might consider planting your cactus in a plastic container that has holes and fitting the planter into the bigger fibreglass container.

6. Metal

Metal planters can be very aesthetic since they come in different shapes, colors, and sizes. This makes them an excellent additive to your interior design. Metal is very durable and as such can be reused to plant cactus for many years. Copper and brass make some of the most trendy pots due to their attractive nature.

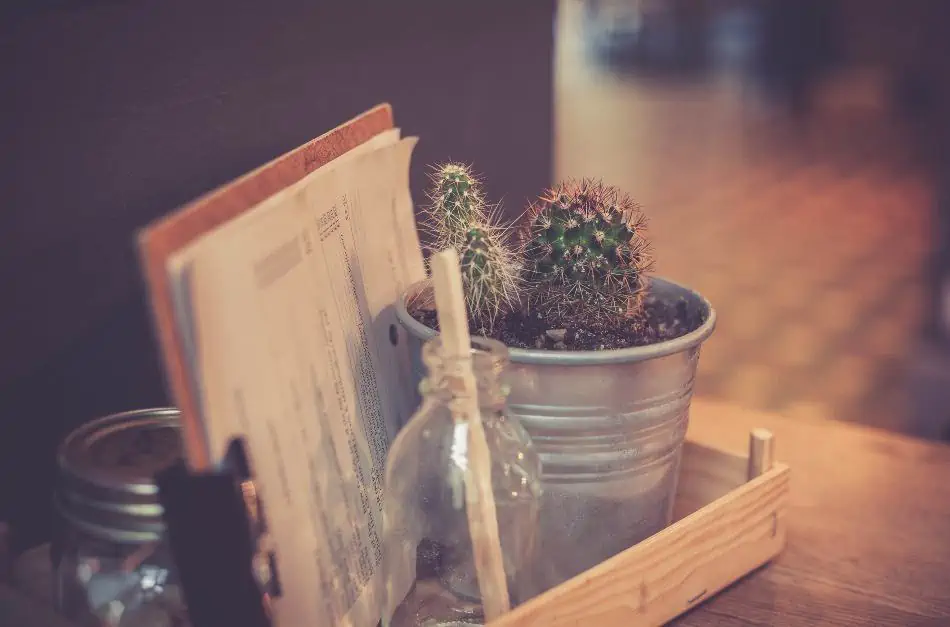
A cactus in a metal pot.
Metal planters can be very aesthetic since they come in different shapes, colors, and sizes. This makes them an excellent additive to your interior design

However, metals such as iron are susceptible to rust. Rusting can be prevented by applying a rust-resistant sealant once every year. Additionally, metal is heavy and therefore not ideal for cacti that you plan to keep on moving.

Lastly, metal, being a good conductor of heat, can get very hot during summer. It might end up burning the cacti. Also, during the cold season, the extremely low temperatures might affect the plant. Also, if the metal container doesn’t come with holes, it might not be ideal for your cactus due to poor drainage.

7. Concrete and Cast-Stone

First, these planters are ideal for outdoor settings. They can withstand various weather conditions, thereby keeping your cactus healthy. Since they can be moulded into different shapes, they add aesthetic value to your landscape.

Concrete is porous and allows water and air to move in and out freely. This quality makes the concrete pots ideal for cactus since it prevents root rot. However, concrete produces lime which lowers the water pH. This can interfere with the health of your cactus. To prevent this, simply water it frequently to drain the excess lime.

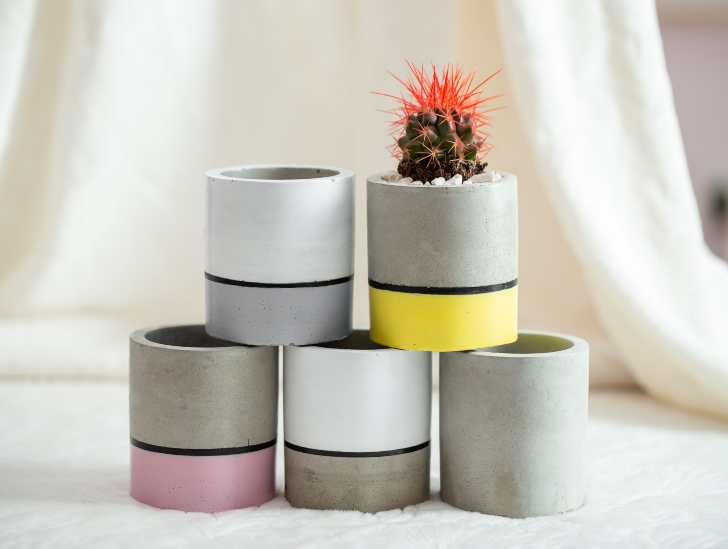
A red needle cactus plant in a cancrete pot.
They can withstand various weather conditions, thereby keeping your cactus healthy.

8. Stone

Stone pots are ideal indoor planters. They come in different shapes and sizes, making them physically appealing. 

Note, there are two types of stone pots: natural stone which has been carved into a planter and limestone mixed with fibreglass.  To note the difference, lift each pot and note the difference in the weight. Natural stone planters are very heavy.

Naturally, the stone pots are durable but, if you drop the natural stone pot, it’s likely to break. The fibreglass and limestone pots are more durable but with less drainage capacity.

Color

Color is a huge determinant, especially when choosing an indoor planter. Ideally, you’d want a planter with a color that compliments your home decor.

However, if you’re buying a pot for an outdoor cactus, the color might not be a big priority.  All in all, if you’re purchasing several pots for many cacti, you might consider purchasing a uniform color to consistency or mix and match the shade for a splash of beauty and fun personality.

How to choose the right pot with the right size

Does the size of the pot matter?

Yes, it does. When getting a succulent, you will note that they’re referred to in specific measurements.  A 4″ cactus doesn’t apply to the length of the cactus. Instead, it refers to the diameter of the pots that are appropriate for the plant.

The general fact to know when choosing the right size of the planter is that the size of the pot should allow for the natural growth of the plant as if it were its natural habitat. Cactus plants usually don’t require big pots. However, if you choose a tiny pot, it will constrict the roots leaving no room for the soil. On the other hand, if you choose a vast container, you will- most likely over water the plant. Therefore, it’s incredibly essential to choose just the right size for the cacti. 

The Best Size

The ideal pot size should have a ¼ of an inch between the main body of the cactus and the end of the rim of the pot.

The depth

The depth of the pot is also very significant since if you choose the wrong depth, it might interfere with the growth of the cactus. The depth is dependent on the type of succulent you’re planting.  The depth of the pot should be proportionate to the natural growing process of your cactus. If your cactus grows tall and tends to have deep roots, get a deep pot to accommodate the deep roots. If the cactus has shallow roots, you can easily use a small pot with minimal depth.

Note, the depth factor is one of the primary reasons why you need to repot. Usually, when the plant is young, it will have a minimal root system and as such, will require a small pot to avoid overwatering. After a few years, you will need to repot it as it grows to accommodate the growing roots and to prevent the roots from getting bound in the small pot.  The one sure way to check whether you need to repot is top check the drainage holes at the bottom of the pot. If there are protruding roots, it’s time to repot to a bigger sized pot.

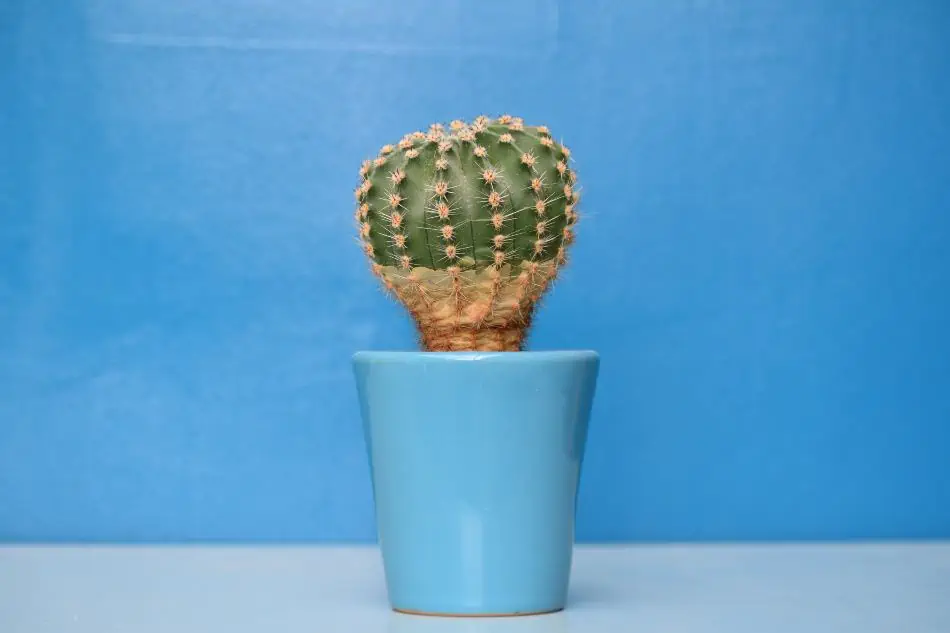
A cactus in a blue pot.
The depth of the pot is also very significant since if you choose the wrong depth, it might interfere with the growth of the cactus

Width

There are quite several cactus species that have shallow roots which grow horizontally. Such types of cacti will not thrive in deep pots. Therefore, always know as much as possible about the species of cactus you’re buying or growing.

If you plant such a species in a slender and deep pot, you will start to notice the roots showing on the sides of the container. Once this happens, it’s time to repot the cactus into a wider pot.

Another tip to help you select the right width for your cactus is the width of the plant. Check the width of the cactus and choose a pot that is only 10% wider than the plant.  Therefore, if a plant is 4 inches wide, select a pot that is only 4.5 inches wide. 

Is it possible to grow several types of cactus in a single pot?

Yes, it is. However, when choosing the pot, you need to know the growth characteristics of each plant. As much as most cactus grow at a languid speed, some do grow relatively fast. If you pot these species together with the ones that grow slowly, you might need to repot them soon.

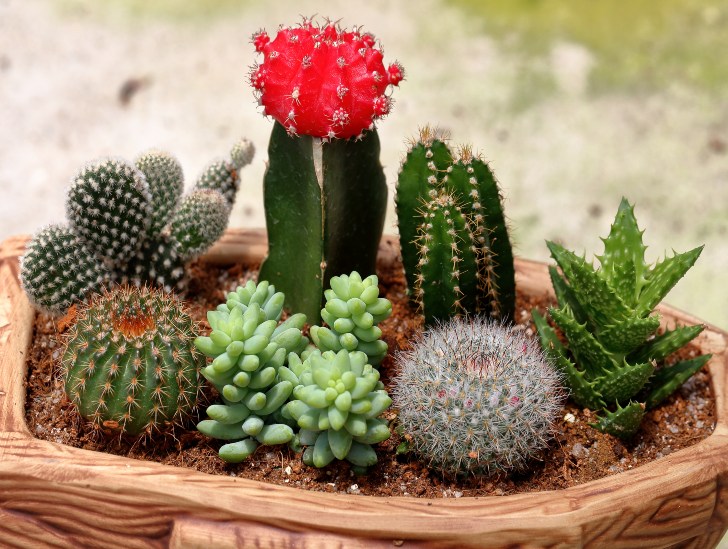
Different species of cactus in one pot.
Ensure they’re not crowded in the pot by giving them a large bowl.

Therefore, when choosing a pot to plant different types of cactus, select the species that have similar characteristics. Also, ensure they’re not crowded in the pot by giving them a large bowl.  Note, when you have several cacti in one pot, you’ll need to be very observant. Ensure the pot size, as well as other conditions of the soil, aren’t favouring certain species while straining the others.

How to Choose the Right Pot When Repotting

As the cactus grows in size, you will need to transfer it to a bigger pot. It helps to facilitate it’s growth and also prevent its roots from getting rootbound. Note, do not be tempted to take shortcuts and repot it using a pot which is double the size of the initial size.

Repotting a cactus is like buying new clothes for your child as it grows. Usually, you buy clothes that fit. If you buy your child’s clothes that are way too big to avoid buying more clothes, later on, they will look awful dressed in oversized clothes.

However, for the cactus, it will not look ‘overpotted,.’ Instead, it will run the risk of root rot by being overwatered. Therefore, if you are transferring a cactus from a 4 inches pot, repot it using a 6 inches pot.

Pro-tip

For your indoor cactus, you’d want a pot that looks stylish. If you’re not getting ceramic pots-which to have poor drainage, it might be hard to get elegant containers. Therefore, instead, get a plastic pot and decorate them using beautifully designed cloths. Alternatively, you can make your own ‘DIY’ pots for small cactus that look elegant and the perfect fit. This is an excellent option for the people who love to get their hands dirty and are quite artistic.

Indoor cactus pot.
You can make your own ‘DIY’ pots for small cactus that look elegant and the perfect fit.

Bottom Line

Remember, do not over pot the cactus. Meaning, do not plant a cactus in a large pot. This will most likely lead to root rot. If your cactus has a dense stem structure but a minimal root network, plant it in a small pot, but to increase the support, place the small pot in a bigger container. Fill the space between the two pots with gravel. It will give your top-heavy cactus enough base support without running the risk of root rot due to overwatering.

How To Grow Cactus From Seed

The time a cactus takes to grow from seed depends on the species and the climate. Cactus seedlings are quite sensitive, and they continuously need protection from direct sunlight. If possible, keep them indoors then introduce them to the outdoors slowly. 

How long does a seed take to germinate?

The seed germination time depends mostly on the species and where you are growing your cactus. When you choose to grow your cactus indoors, they are more likely to germinate fast. Indoors are a more controlled environment, and seed germination can take between three months and several months. 

On the other hands, if you decide to grow your seeds outside, they take years to germinate. Here, cacti will have to wait for the ideal moisture and temperature for them to grow unlike indoors where you have the option of placing them in a light shade windowsill. 

Cactus seedlings need proper care and protection. They need sun protection for the first few years until they are about 3 inches long. Placing them indoors or in a shaded place is the best way to help in seed germination. 

Cactus seedling cups,
Cactus seedlings are quite sensitive, and they continuously need protection from direct sunlight.

When they are about 1 inch long, you can start introducing them to the sun. Go increasing the light intensity and keep them off if they start scorching. If after some time you comfortably leave them on the windowsill consistently, then it may be time to take them outdoors. 

Why Grow Seeds?

You may be wondering why opt for cactus seeds instead of propagating from cuttings? Here are a few reasons:

Seeds are an inexpensive option because they may end up costing a few cents. You can even collect them from your other cactus plants or get them from a friend. 

It is easier to get different species that may not be available as plants.

With seeds, you can easily give away as gifts to friends.

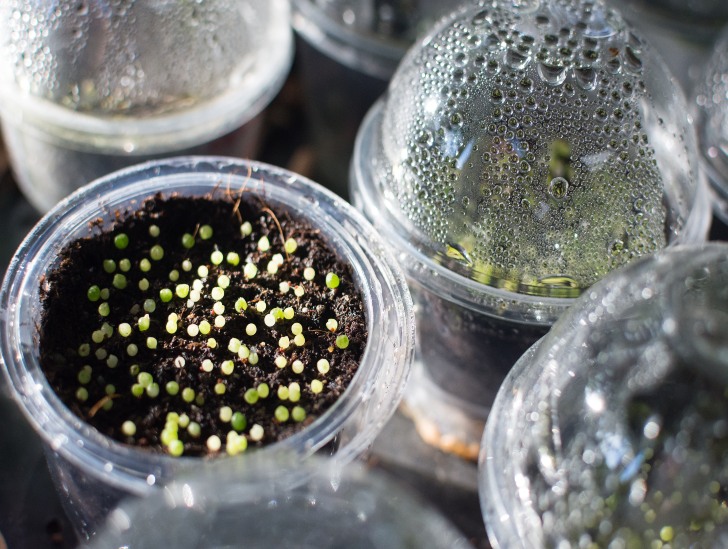
When you notice cactus seedlings starting to develop, you can gradually begin to remove the transparent cover that covers them. However, when to remove is quite essential, and it will depend on the species. The best way to ascertain when to remove is when the seedlings start developing spines. 

When removing the cover, don’t just remove it wholly, start by cutting sections of it to introduce the plant to the change. Cacti the size of a marble, which are usually about six months are okay for planting in pots. 

A closeup image of cactus.
With seeds, you get to see the whole life cycle of the cactus from the very beginning

The Steps To Growing Cactus From Seed

1. Acquiring the seeds

The first step to planting cactus seeds is purchasing them. Most garden supply stores will have the seeds, and you also have the option of buying online. The good thing about buying online is you can select your preferred species through a simple click on your laptop and delivery is done to your doorstep. Some stores will even sell the seeds in packets of different species. 

The other option would be to pick your own seeds from already blooming cactus in case you grow them. The seed pods are usually some brightly-coloured off-shoots that bear flowers. Once the flowers fall off, what is left is the pod. 

Sowing your seeds in late winter or early spring is the best time because it will give the seedlings ample time to grow during summer. 

2. Harvesting from the pods

As mentioned, if you decide to harvest the seeds yourself, then you need to remove the pods. It is recommended to remove the pods when they are still damp but not wet. The seeds are usually inside the pod. 

A closeup image of cactus seeds.
If you decide to harvest the seeds yourself, then you need to remove the pods.

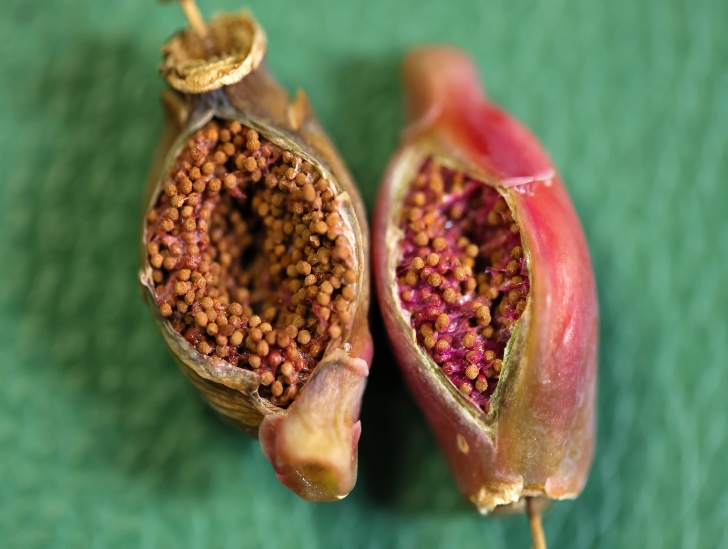
Once you remove all mature pods from your cactus, you need to remove the seeds. Using a knife, slice the pods and scrape off the seeds. Note, seed color varies from different species. Some are usually black or have some reddish dots. They also vary in size; some are extremely small. 

3. The soil you plant the seeds in is significant

One thing about cactus seedlings is that they are intolerant to poorly draining soil. You need to protect your seedlings from common cactus problems such as bacteria and molds, which means the soil needs to be sterilized. 

To sterilize the soil, you can bake or microwave the soil mix. 

Sterilizing soil

There are various ways you can sterilize your soil before using it to plant the seedlings.

  • Using steam

You can steam the soil using a pressure cooker. Pour in a few cups of water into the pressure cooker and place shallow pans of soil (not more than 4 inches deep) over the rack top. For each pan, cover it with foil paper and then close the lid. Steam for about 30 minutes.

In case you don’t have a pressure cooker, pour an inch of water into a sterilizing container and place soil-filled pans (usually covered with foil) on a rack on the water. Cover the container and steam for about 30 minutes. 

A gravel with soil.
One thing about cactus seedlings is that they are intolerant to poorly draining soil

For both methods, after steaming, allow the soil to cool while wrapped with foil until you are ready to use. 

  • Using a microwave

If you decide to use a microwave, fill microwave-safe containers with moist soil and covered with a lid. Don’t use foil here. Ensure there are ventilation holes on the lids to prevent pressure buildup.

Heat your soil for 90 seconds. Leave the soil to cool by covering the ventilation holes with tape.

The other option would be putting two pounds of moist soil into a polypropylene bag. Place the soil in the microwave with the top left part open to allow ventilation. Heat the soil for about 2minutes 30 seconds full power. Once you are done, close the bag and allow it to cool. 

  • Using an oven

For the oven, you need a container that’s specific for oven use. Put soil about 4 inches deep into the container and cover it with foil. Using a thermometer, place it at the centre and heat at 180F for about 30 minutes. 

Once the time lapses, allow the soil to cool and remove the foil only when you are ready to use the soil. 

When coming up with a soil mixture for your cactus seedlings, you need to find the right proportions for your seedlings to germinate. You will need 

  • Pumice or granite stone
  • Cactus soil
  • Vermiculite
  • Perlite

First, the base of the soil mixture should be pumice stone and the cactus soil. Start by removing any chunks in the cactus soil because they may potentially be a breeding place for bacteria as well as not drain water well. 

Once you sift the cactus soil, mix with the pumice or granite stone. In case you don’t find pumice stone, you can use limestone screenings, which is also a cheaper option. Make sure the pumice is more by about 10% than the cactus soil. 

Pour the mixture where you intend to plant the seeds and avoid packing it in, let it stay as natural-looking as it can. Since seedlings are quite small, using a 2-inch pot is sufficient. You can even use existing materials to act as pots for the seeds. 

In the case that you are reusing pots, make sure you clean them thoroughly to prevent potential pests from killing the seedlings even before they germinate. To clean them, you can use bleach water and rinse thoroughly. 

What these seeds need is a high-drainage soil. Make sure you moisten the soil but make sure the water drains completely. 

Spread your cactus seeds on top of the soil, don’t force them into the soil. You can then cover them with a thin layer of either sand or cactus soil. The reason for not burying them deep in the soil is because they only have small amounts of stored energy which may not reach deep into the soil before running out. 

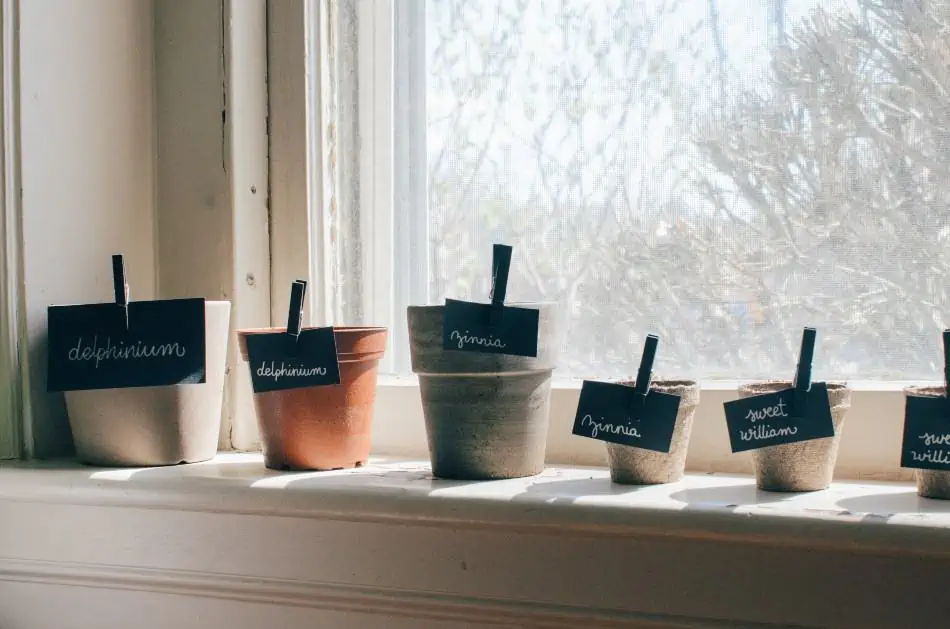
Make sure to label your containers once you spread the seedlings. It is crucial especially if you plant species by species in different containers are they are great so that you can take specialized care on each species. You don’t want to have difficulties when growing them because some species are too similar to each other and you may confuse one for the other. 

4. Exposing the seeds to the sun

After soil moistening and covering the seeds with sand, you need to cover them in a transparent lid or plastic wrap. Place your seeds in a strategic location, preferably indoors, where they have access to the right amount of sun. Consider placing them on a sunny windowsill. 

Don’t place them outside because they don’t like intense sunlight. The purpose of the transparent lid retains moisture and helps the cacti sprout as well as allowing light to reach the plant. 

Monitor your seedlings carefully. If they start turning purple or becoming red, the chances are that they are getting sunburned. Reduce the amount of light access. 

During the initial stages, as much as the seeds need sun, they need the heat more. Warm areas of the house like the kitchen are ideal. However, you can also purchase a heating mat that you place under the seed containers is a way to boost germination. 

Heat and light are essential as the cactus grows to avoid retaliation where the plant grows thinner and soft such that it breaks when touched.  

Plants with label exposed to sunlight.
Place your seeds in a strategic location, preferably indoors, where they have access to the right amount of sun

In most cases, cacti need a temperature of between 70F and 90F for germination. 

5. What to do when germination starts

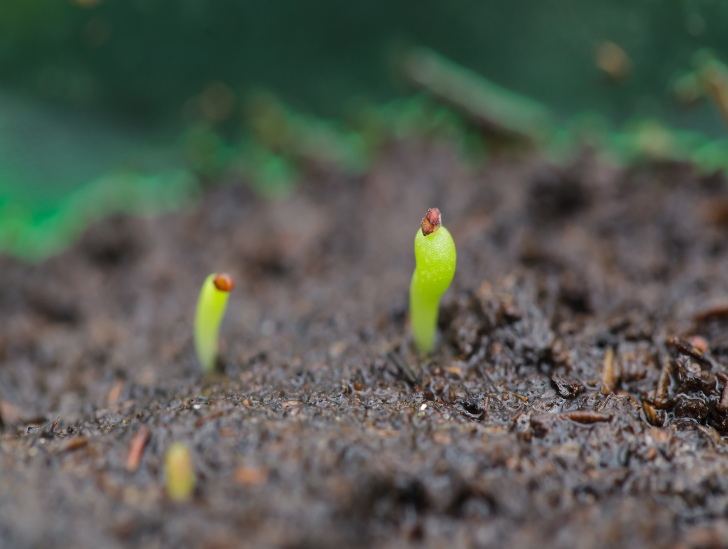
Like earlier mentioned, cacti grow slowly, and you need the patience to see them through the whole process. After planting and having the right light and temperature, you should see your seedlings start germinating. It could take a month or more before they do. 

Tiny spines start forming at this stage. This is your cue to let the plant breathe away from the plastic wrap or transparent lid. However, do it gradually, leave the top open for a few hours during the day and then go increasing the hours. 

Keep doing this until you establish that the cactus doesn’t need the wrap. 

Keep in mind that when you uncover the cactus, water evaporates much faster, which will need you to have a watering schedule to avoid the plant dying. 

A cactus growing from seeds.
Some species don’t have spines, so an indication of growth is when the seedlings sprout.

Fresh or distilled water is ideal for preventing the growth of bacteria and algae. If you feel your tap water tastes like chlorine, don’t use it on your cacti. Since the roots are quite tender, using water with chlorine will burn them. This could end up in killing the cactus. 

Even as the seedlings sprout and seem to be doing well, the truth is, below the ground, the roots are still at a tender position and can’t adequately absorb enough nutrients. Keep the seedlings in the plastic wrap until they overgrow.  The high humidity is what facilitates nutrient and water absorption in the roots until they are strong enough. 

Some species don’t have spines, so an indication of growth is when the seedlings sprout. Make sure you don’t leave any water on the soil. Keep checking for signs of overwatering. No standing water should be in the container. You can dip your finger into the soil to feel how dry or wet it is. 

When germination occurs, keep the same timetable you had when you started watering them. Be on the lookout of certain signs such as seedlings thinning, which could be a cause of poor light. The algae may be top of the soil, which could be a cause of overwatering. A fungus infected cacti will start having black spots. 

6. Repotting

When the seeds are overgrown, it is now time to repot. Choose your potting container wisely as you need one that drains quickly. You need one with drainage holes so that during watering, the excess water drains to avoid root rot

Terracotta and unglazed ceramic pots are some great examples of good drainage pots. However, other types of containers can also work, but the key is getting one that drains water quickly and doesn’t leave the soil clogged with water.

Even as you get the ideal container, how much you water the cactus also contributes to whether your plant rots or not. 

Naturally, as cactus grow slowly, they may take even a year to reach the size of a marble. At this point, you need to repot to give it room to thrive well. Get the right pot size because getting small-sized one prevents the plant’s proper growth. 

Once you remove the cactus from its previous plastic wrap, using the same formula you used for its last soil, make a new mixture. After making it, place the plant in the container then pour in the soil mixture. 

Water the mixture after 3-4 days and make sure you don’t use any plastic wrap or lid to cover the plant. 

Plants on a pot.
Terracotta and unglazed ceramic pots are some great examples of good drainage pots

7. Recovery time after repotting

Once you repot, allowing the plant to take in the new changes helps it avoid any problems. Repotting can be stressful to plants, and they need recovery time. If you previously placed it near a place with ample sunlight, try keeping it in the shade for a few days until it recovers. You can then re-introduce it to the sunlight slowly until it can fully take on the heat. 

Unlike other potted plants, cacti have low water requirements. They are succulents, and they often store water to use when the soil dries up. A general rule of the thumb is to wait until the soil dries before watering the plant again. 

Cholla cactus in a pot.
Use a cactus fertilizer to help in the growth process.

Once your plant grows, you can even water monthly. During winter is when their water requirements are low for most species. At this time, only water when the plant needs it. You’d rather have an underwatered plant than an overwatered one because it is easier to deal with insufficient water than excess. 

During the growing months, use a cactus fertilizer to help in the growth process. Cacti generally need a lower amount of fertilizer than the rest of the plants. 

The above process should help you grow your cactus seamlessly from seed. If you want to experience the joys of watching it grow from the seeds all the way up, you can do this effortlessly. 

Related Questions

How do you ensure your cactus germinate faster? Usually, cactus have slow growth and may end up taking years to grow. However, you can help them germinate more quickly. Soak them in warm water for about 30 minutes as this will loosen up the seed coat and activate germination.

How does a cactus produce seeds? For a cactus to produce seeds, its flowers have to undergo pollination. Pollen has to be transferred from one plant to another by insects or birds. Once pollination takes place, fruits develop that contain the seeds. One cactus plant has the potential of producing a million seeds. 

Cactus Care: Growing Healthy Cactus Outdoors

Growing cacti in your outdoor space can be a great way to give the external area of your home a unique look. These plants produce beautiful blooms during the spring and summer and have plenty of options that you can explore. 

The cactus flowers come in vivid and attractive colors that are guaranteed to be a conversation starter. In addition, cactus comes in a variety of shapes and sizes, giving you plenty of options to choose from.

Wondering how you can create intriguing landscaping designs using cactus for your outdoors? Here are some simple cactus landscaping ideas;

  • Scattering cacti amongst small shrubs or perennials
  • Using prickly bear or blueberry cactus as a specimen plant
  • Creating a desert-inspired theme by scattering stone and gravel where your cacti grow
  • Using tall cacti species to create a wall around your home

Cacti don’t require your care around the clock. Therefore, if you’re a frequent traveller or have a tight work schedule hence little time for plant care, this plant is an excellent choice for you. 

These plants also do not require intensive care, but surprisingly, they can outlive most plants, so long as you know how to care for them.

Although cacti plants require minimal care, it’s crucial to know what to do to, keep your plants healthy. Providing the right care for your cactus will ensure that they don’t die off, prompting you to restart the planting process once again. 

Before we look at how best to take care of our cactus, it’s critical to note that cactus falls into two broad categories. The two categories are;

  • Desert cactus
  • Forest cactus

Both types of cactus have a unique set of needs. Knowing how to differentiate between the two will help you know the type of care they need. Desert cactus has spines and can withstand direct sunlight for hours. 

Forest cacti, on the other hand, are natives of forests and jungles. These plants do not have spines, and are not as hardy, as desert cactus.

Besides knowing what type of cactus you want to grow, you also ought to consider where to plant your cactus. You might either prefer to pot your plants or plant them on the ground, depending on the look you’re going for.

It’s also important to consider whether you’d like to grow your plant from scratch or would just prefer to buy a potted seedling. Sourcing for a seedling that’s already growing might be easier than growing your plant from a seed. However, the latter might give you a first-hand experience on how to care for your plant from start to finish. 

If you buy a cactus from your local plant store, all you’ll need to do is dig a hole to plant your cactus. If you want to grow your cactus form a seed, you’ll need to get your seeds by cutting them out from the pod. 

Growing desert cactus

Desert cactus is a hardy and will survive all year round, in your outdoors, even during winter. Don’t let some varieties of the cacti like the prickly bear fool you when they flop to the ground during winter. The plant will surprise you by jumping back to life in spring and summer. 

A cholla cactus bearing fruits.
Desert cactus has spines and can withstand direct sunlight for hours. 

Watering needs

Do not kill your desert plants with kindness by overwatering. Cactus is a succulent that stores water in its stems, making the plant to look plump. 

Too much water might be misleading at first because it may make the lump appear plump and healthy. However, your cacti roots will suffer from overwatering. 

Only water your plants when the top part of your soil begins to feel dry. One way to check your soil is to put at least two inches of your fingers in the soil. If the soil feels dry, then you need to water your plant.

You can also lift your potted plant to check if it needs watering. If it feels light, then your plant needs watering. To use this method, you’ll need to check the weight of your plant after fully watering it, then do the same after a week or two, to notice the difference. 

Another way you check your soil is to use a moisture measuring device. The device will accurately measure your soil’s watering needs letting you know if it’s too dry or still too wet.

Choose the right container

Container choice may not sound like a big deal when growing cacti, but it can hugely affect your plant’s health. As opposed to using plastic containers which retain plenty of moisture, consider using the following materials;

  • Terracotta
  • Clay
  • Concrete

The above materials wick away any excess moisture, allowing your plants to thrive. If you don’t have access to the above materials, ensure that your pot has plenty of drainage holes.

As a rule of thumb, ensure that water completely runs through the holes every time you water. It may seem like your plant will remain with no water but your soil mix will ensure that there’s still some water left for your plant to absorb. 

If you can’t afford to buy pots at the moment, planting your cacti on your ground will do. Growing your plants on the ground is also suitable if you want to use the plants as a fence.

The best way to plant cacti on the ground is to plant it on a raised bed, rather than level ground. Planting the plants on a bed will help with drainage, especially if it happens to rain for a few days in a row. 

Else, grow your plants in containers if you live in an area that receives lots of rain throughout the year.

The obvious advantage of using containers is that you’ll be able to move your plants to a dry area to save them from overwatering during the rainy season. We’ll cover the dangers of overwatering, under the “watering needs section” below.

Cactus plants outside in the pot.
The above materials wick away any excess moisture, allowing your plants to thrive.

Soil type

Proper drainage is an important part of growing your plant. Soils that hold water for long can contribute to root rot. You might not have the right soil type to suit cactus growth in your area, but you can create it right in your garden.

Bear in mind that good cactus-growing soil should have a mix of both organic and non-organic material. Non-organic materials help with drainage while the organic materials help provide nutrients for your plants.

Cactus soil and requirements.
Soils that hold water for long can contribute to root rot.

You’ll need the following non-organic ingredients to help create holes in your soil, for it to drain properly;

  • Coarse sand
  • Turface
  • Pumice
  • Perlite

The following organic ingredients provide the perfect nutrient-rich soil and retain moisture to grow healthy cactus;

  • Coconut coir/shredded coconut
  • Bark
  • Peat moss

Organic cactus soils are available for you if you don’t have the time to experiment with different soil compositions. These soils are available in many shops that sell cacti. 

Lighting

Desert cactus loves light. Therefore, place your plant in an area with lots of sunshine. Focus on getting at least a minimum of 6 hours and a maximum of 8 hours of sunshine for your cactus daily. 

The beauty about growing cacti outdoors is that you don’t need to place them on your windowpane for sunlight. Window panes tend to amplify the strength of light which might end up burning your cactus. 

Move your plants to a shady area once the sun becomes too hot. 

Too much sunlight might discolor your plant. 

Temperatures

Desert cactus has adapted to dry climate, hence can do well in most dry areas. A temperature of about 75 degrees Fahrenheit will do.

When temperatures dip, such as during winter, avoid watering your plants too much as there’s already enough humidity in the air. 

Growing forest cactus

Soil requirements

Forest cactus survives best in humid areas. Therefore, choose soil that retains a little bit of moisture compared to that of desert cactus soil mix. 

The following soil proportions will work best for your forest cactus;

  • One part of sponge rock/perlite
  • Three parts of potting soil
  • One and a half tablespoons of orchid bark

Watering needs

Forest cactus loves water. Unlike desert cactus which require you to only water them when the soil is completely dry don’t wait for the soil to become too dry.

However, you should be careful not to overwater your plants because the results will be a cactus with rotting roots. Always check the soil and ensure that it’s moist but never wet.

Small cactus in a pot with a water container beside.
Be careful not to overwater your plants because the results will be a cactus with rotting roots.

 Another important thing to note about watering is to water your plants according to the season. During winter, water your plants once every two weeks. During summer and spring, water your plants every few days.  

If you’re growing your plant from a cutting rather than buying a young cactus plant ensure that you don’t water the cutting. Only water the cutting once it starts to root, otherwise it will rot.

Lighting requirements

Forest cactus love filtered lighting. To ensure that your plants get the right amount of lighting, it’s best to grow them in hanging containers. 

If your plants are growing under a tree, put up a shade made of lath or cloth. The materials will filter out the light to prevent sunburns, and promote blooming.  

Do not make the mistake of moving your cacti indoors during winter, then putting them directly under the sun when summer returns. Your plants require time to adjust. Start by placing them under a shade, and then slowly start exposing them to sunshine using an incremental approach.

Initially, place the plant under direct sunlight for about an hour, then moving it to shade, the first few days. Proceed to place it under the sun for two hours the next few days and so on. 

Cactus plant exposed to sunlight.
The general idea here is to avoid shocking your plant with extreme heat as this might eventually kill the plant

Temperatures

If you live in a tropical area, you won’t need to worry too much about temperature requirements for your cactus. This plant is a native of tropical areas where temperatures remain the same all year round.

 If temperatures in your area dip below 10 degrees centigrade move your plants to a warmer area. Your house could be an ideal location until temperatures return to normal. 

Alternatively, construct a shed that you can move your plants over the winter. A shed will ensure that you don’t bring plant bugs to your home. 

Fertilizing needs

Forest cactus gets a lot of nutrients from rotting leaves in the forest. Visit your local plant shop, and buy cactus fertilizer. Use this fertilizer every time you water your plants to promote absorption by the roots. 

You can also try using cow compost. Be careful to use only properly composted manure. Stay away from compost that smells as this is an indicator that it’s not ready for use. 

Container choice

Forest cacti require containers that can seal in the moisture for a longer period. A good choice for material for your container here is plastic. However, ensure that your container has proper drainage to keep the soil moist, but not waterlogged. 

A cholla cactus in a pot.
A good choice for material for your container here is plastic.

Common problems that you may encounter when growing outdoor cactus and how to fix them

Overwatering issues

The easiest way to kill your cacti is to overwater them. Here are the dangers of overwatering your plants. 

  • Your plants won’t be able to properly absorb nutrients because water will constantly drain the nutrients down the soil.
  • Your soil will have excess moisture promoting root rot
  • Your plant will attract plenty of garden pests looking to quench their thirst

The following signs will help you know that you’re overwatering your plants;

  • At first, the plants may appear plump, and then start wilting
  • Soft squishy stems
  • Yellowing of the plant
  • Formation of bumps and blisters that leave permanent marks

Like with indoor plants ensure that you only water your cacti when the top two inches of your soil is dry.

Rotting roots

Remove the plant from the soil, and scrap off the rot with a blunt object. Ensure that you change the soil before replanting as the old soil will contain some of the fungi or bacterium that caused the roots to rot. 

A person holding a cactus freshly picked from the ground.
Always check the soil and ensure that it’s moist but never wet.

Breakage or scarring from hail

Protect your plants with a cardboard box whenever there’s hail in your area. If you have potted plants, it’s easier to move them to a sheltered place until the climate regulates to normal. 

Stunted growth

Every plant needs re-potting every few years, as it grows in size. As your plant continues to grow, it requires more room for expansion and a smaller container will limit growth. 

Another reason to repot your plants is due to nutrient deficiency. Every time you water your cacti, the water washes out the nutrients.

Repot your plants annually or every two years. The time frame is usually when the plants show significant growth. 

How to re-pot your plants

  • Gently pull out your cactus from the soil. The good news here is that cactus has shallow roots; hence you won’t need to yank it out of the soil, which can cause damage.
  • To prevent further damage, cover your plant with a newspaper before pulling it out
  • Pull out your plant from the part of the stem closest to the soil to prevent injury from spines
  • Gently hit the root ball against a hard surface such as a wall to remove excess soil, and also, to make it easier for you to inspect the roots
  • If the roots show any signs of rotting scrap off the rotting parts before re-planting  
  • Ensure that you change the soil, and mix it according to your plant’s nutrient and soil requirements. 

Broken stems

Broken stems can attract pathogens and if left unchecked can kill a whole cactus plant. If your stems are showing signs of disease, cut them off right from the point of infection using shears. Ensure that you don’t leave any infected parts out. 

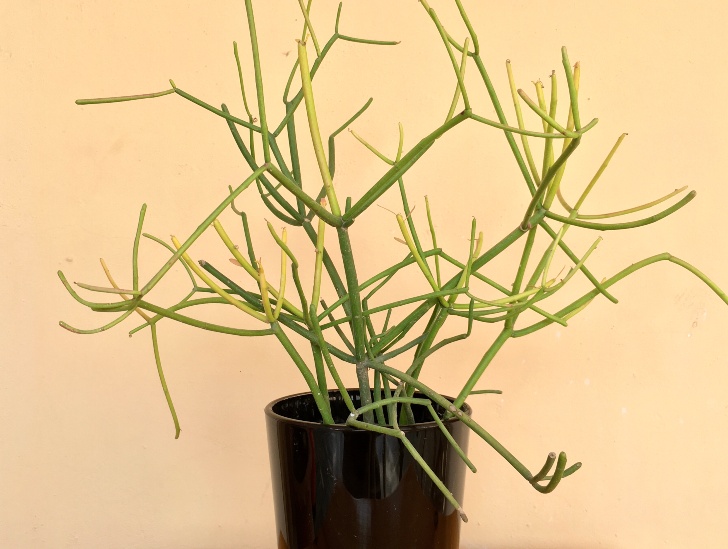
A pencil cactus in a white pot.
Broken stems can attract pathogens and if left unchecked can kill a whole cactus plant.

Make sure that you disinfect your equipment right after, to discourage the spread of disease. 

Dealing with bugs and other critters

Snails, scale insects, mealybugs and spider mites love cactus. While it’s easy to pull off snails some insects like scales insects and spiders require a little more work.

Here’s how to identify the different critters. 

Mealybugs have a cottony, white and waxy appearance and are usually in clusters. These insects like to attach themselves in hidden joints and the underside of leaves.

Spiders

The first sign of a spider infestation is the appearance of spider webs all over your plant. 

Scale insects

Scale insects are also cottony but have dome-shaped shells. You can find these insects on the stems of your cactus plants

Bug removal

  • Dip a cotton bud in alcohol then use it to remove the insects. Alternatively, make an alcohol-water solution in the ratio of 1:3. Spray the solution all over your plant.  
  • Buy insecticidal soap spray from your local plant shop. Use the spray sparingly as too much might damage your cactus
  • Use imidacloprid, acephate, pyrethrins and neem insecticides for bugs that may be difficult to spot or control. 
  • Remember to separate your infected plants from the healthy ones to prevent the bugs from spreading. 

In conclusion

Cactus plants can help you transform your outdoors into a beautiful and attractive space. Both forest and desert cactus can thrive outdoors if you’re keen on their lighting, soil temperature, and watering requirements. 

Caring For Cactus In Winter

Most cactus are usually dormant during winter and active during summer. However, some are active during winter. Christmas cactus and Thanksgiving cactus bloom in winter. We know how unfriendly winter can be, and your cactus needs to be taken care of with caution. I sought to find answers on how you can care for your cactus in winter, and I made some pretty exciting discoveries.

Bringing Your Cactus Indoors in Winter

If your cactus has been outdoors during spring and summer, you need to bring it indoors in cooler weathers. This way, your plant will gradually transition without having a ‘shock.’ 

  1. Move your cactus to a shade outdoors, which receives about one or two fewer hours of direct sunlight daily for 1-2 weeks. Do this just before winter when the temperatures are expected to be below 65F at night. 
  2. Move the plant again to a place that receives one of two fewer hours of sunlight as compared to the previous place. 
  3. The idea of moving the cactus gradually is so that it gets used to the temperatures for it to avoid the ‘shock.’ Take the cactus indoors and find a sunny spot. A south-facing window would be perfect. Try keeping the cactus warmer in temperatures of 65-90F. All this is in preparation of winter dormancy.
  4. Make sure you don’t fertilize the plant during winter because it is dormant. 
Cactus in a pot near the window.
You need to bring it indoors in cooler weathers.

To encourage your cactus to go dormant, you need to reduce your feeding schedule to make it less. Don’t water frequently but rather do it possibly once a month. 

Caring for your Cactus Indoors in Winter

1. Place your cactus strategically 

As mentioned, it is advisable to bring your cactus indoors to avoid the harsh winter conditions. Some people opt for different types of grow lights to provide ample light for the plant. However, unless your home is extremely dark, it may not be necessary to purchase these lights. 

Place your plants strategically at a place where they will receive the most light as possible. The light should be sufficient enough to keep your cactus colorful for the few cold months. If you have more than one cactus plant, keep rotating them so that they all get enough light. 

If you are in the northern areas that experience some harsh winters, don’t place your cacti too close to the window. The cold coming in maybe too harsh to them and they may end up not doing very well.  

2. Grouping your plants

If you are a massive cactus lover, you may probably have a collection of different species. As mentioned earlier, some species are active during winter. The idea is, initially, if you started growing the cacti from seed, you should have probably labelled them. Even when you propagate using cuttings, labelling is essential as this helps you know the particular needs for the plant. 

Know each of the plant’s water and light requirements. Cactus are quite sensitive to overwatering, and you need to water just the right amount. You don’t want your roots rotting slowly and the cactus eventually dying. 

Group them in sections of those active and dormant during winter and their different light requirements. That helps reduce the possibility of making mistakes during their feeding time. If you are not quite sure about the schedules, there’s a lot of research online that has been done on different species. This would be resourceful. 

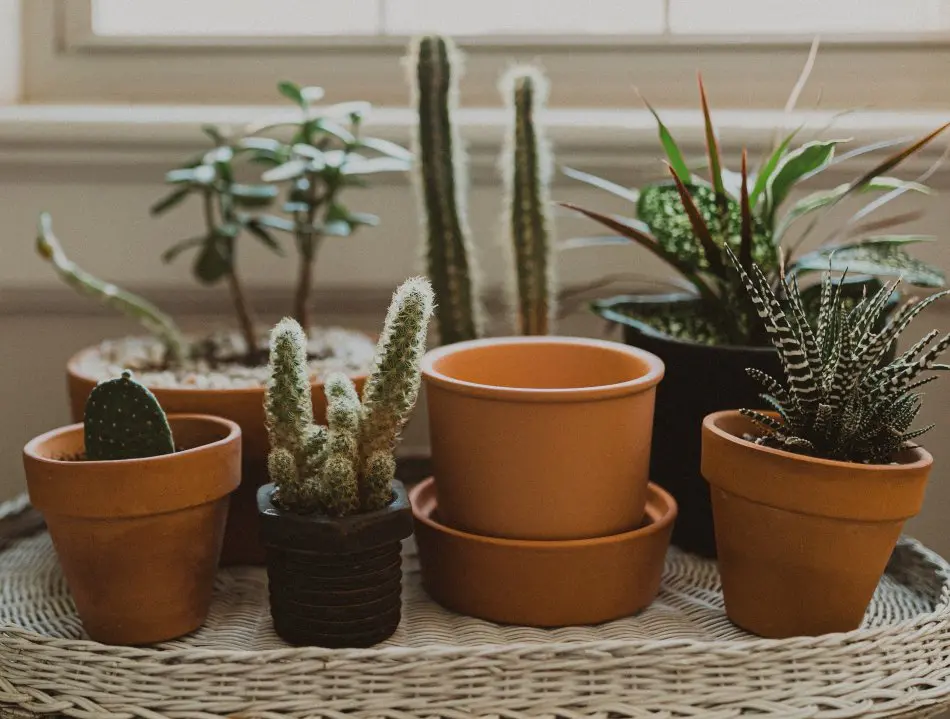
Different kind of cactus on one place.
If your cactus has been outdoors during spring and summer, you need to bring it indoors in cooler weathers

3. No feeding and less watering

As cacti are more prone to rotting as compared to other succulents, proper care needs to be taken to avoid such incidences. Some common signs of root rot are black or colored dots on cacti skin, discolored scabs, sunken spots, and you may even see some oozing of the cactus. 

You need to take into consideration what happens below the soil which you can’t easily see. Cacti depend on the root hairs to provide nutrients. If they start rotting, that means nutrients are not readily available, which drives the cactus to the above signs of root rot. These plants can take some underwatering for some time, but overwatering is pretty bad for them.

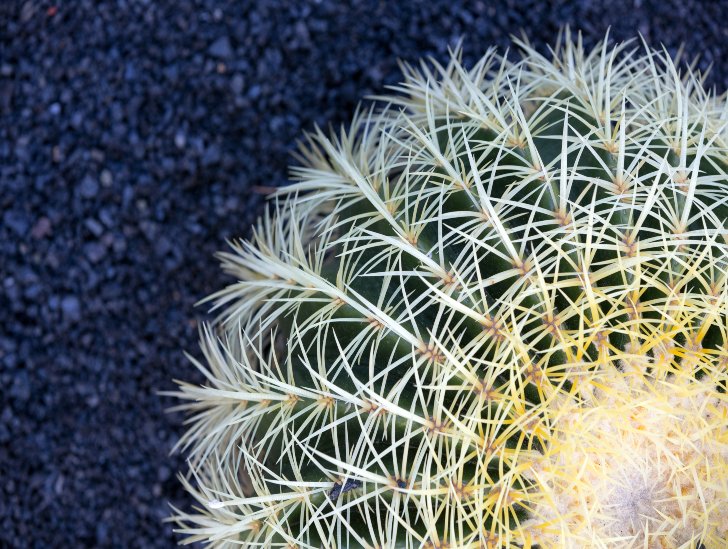
Topview of a golden barrel cactus.
Keep the water levels low and only water when they really need it.

Keep in mind that you should keep the roots happy when watering. This means just enough water to prevent them from drying. Since most species won’t flower in winter, that means the growth rate will be pretty low. Therefore, they just need enough water for survival. 

Also, avoid feeding them. Don’t use any fertilizer at this point as they may end up becoming weak. Keep the water levels low and only water when they really need it. You can use a wooden stick to poke the soil until the lowest point before watering to see if the soil is still wet. Only water when the stick has no soil remains to stick on it. 

The issue of watering is quite sensitive. If you adhere to the above, you might find that your plant only needs water once a month or even longer. Be careful not to underwater such that the soil starts to pull away from the sides of the container. The roots may end up desiccating and collapsing.

The pot you use is a huge determinant of the plant rots. Get a suitable container, preferably terracotta pots that have drainage holes. The importance of these holes is to ensure that any excess water is drained away to avoid water sitting in the soil for long. 

You probably are aware that even the soil you use is a major determining factor how your plant thrives. There are readily available cactus soil mixtures which you can purchase in local garden stores. You can also order online, and they can be delivered to you. Make sure the mix you go with has some coarse sand and vermiculite. The soil mixture and the pot work hand in hand to ensure your cactus doesn’t die of root rot.  

4. Choose your cactus wisely

Purchasing cactus should not be complicated. However, make sure you choose the best species, one that works for your environment. Some cacti species are more tolerant to the freezing temperatures of winter compared to others. 

A Mammillaria Bocasana Cactus flowering.
Make sure you choose the best species, one that works for your environment.

Consider choosing a cactus that will survive through winter. At times, you may need to cover your plants to retain air and moisture to prevent ice from destroying the stems and trunks. 

Some types of cold-hardy cactus

  • The Claret cup cactus

This particular species is from the Echinocereus group. They can withstand temperatures of -20 degrees Fahrenheit/28 degrees celsius. If they are indoors, they can even withstand lower than that. 

  • Mammillaria Bocasana 

This type of cactus belongs to the Mammillaria group that are usually ball-like. Once they mature, they can form rolling mounds of tiny bits of cactus. They can withstand temperatures as low as -20F. 

  • Opuntia

Opuntia is also another group of cacti that’s cold-hardy. Prickly Pear is the most common type in this family. Not only is it among the fast-growing cacti, but it is also drought-tolerant, which means it doesn’t need frequent watering. They grow to an approximate height of 12 inches. 

  • Pediocactus 

One of the popular types of this family is the Mountain spiny star. They are ball-like, and they have a high resistance to cold. They also have the potential of growing up to 12 inches high.

  • Escobaria

Lee’s dwarf snowball, plain’s pincushion, and beehive cactus are some of the popular types in this category. They are very tiny but produce big flowers. 

5. Insect management

Homes will tend to be dry during winter. This is because there are all kinds of heating systems to keep the house warm from the heaters to the furnaces. Insects such as mealybugs love warm places and are most likely to attack your cactus

A mealybug.
Insects such as mealybugs love warm places and are most likely to attack your cactus

It is natural for you cactus to be insect-infested. What you do to manage them is what matters.

Mealybugs

They are usually ⅓ or ⅕ inch long and resemble cotton as they appear waxy. Mealybugs are usually in a cluster and move slowly. They are mostly found on cactus leaves and other hidden parts of the plant. 

We also have root mealybugs that suck the root juices and live in the soil. When they suck these juices, root rot is almost nearly inevitable, and they end up causing bacterial infections.

Fungus gnats

They are usually ⅛ or 1/16 inch and look like black flies that can easily be confused with mosquitoes. Mostly, they hover around the soil surface. What’s interesting is that the adult flies can’t harm the cactus, but the larva is pretty dangerous. The larva lives in the soil and consumes both the roots and organic matter, which are meant to provide nutrients to the plant. 

Fungus gnats are more likely to affect cactus seedlings as compared to fully grown cacti, and they may end up killing the young seedlings. 

Spider mites

The first sign that spider mites infest a cactus is the webbing. You will also notice brown spots on younger plants on the epidermis. In terms of size, they are about 1/50 inch. If you try tapping the affected area, they look like dust. They suck the plant’s juices.

Scale

Scale insects, just like mealybugs, are cotton-like and they attache themselves to leaves and stems but can be scraped off.

Try and control these insects so that they don’t destroy your cactus. Get a safe remedy. First, to avoid the attacks, you need to grow your cactus in the right conditions. Make sure if it’s winter you ensure they are getting just the right amount of heat and light. 

For spider mites and mealybugs, you can wash them off. Cover the soil you’ve planted your cactus in to avoid it being washed away and pour a lumpsum amount of water on the plant. The insects should be washed away. 

Consider spraying the plant with a dilute alcohol solution of 1:3 with the ratio being alcohol to water. 

Prevention is better than managing the insects when they have already attacked your cactus. Hygiene should be a priority when growing these plants. Always be on the lookout for dead leaves and discard them as they are a hot breeding ground for pests. Keep your plant in the recommended conditions such as the right sunlight and watering them only when they require the water.  

Caring for Christmas Cactus in Winter

Like previously mentioned, unlike most cacti species that are dormant in winter, the Christmas cactus is active at this particular season. 

The Christmas cactus prefers bright but indirect sunlight. If you decide to grow them indoors, protect them from the southern and western sun exposure. They do well in warm temperatures of 70-80F. 

During winter, try to keep your Christmas cactus in the evening at temperatures of 60-65 °C. It is more likely to form buds in temperatures between 50-55 °C. 

Christmas cactus flower.
Christmas cacti love humid environments.

A word of caution is to avoid putting them in cold drafts and also keep them away from home heaters or fireplaces. Remember to fertilize them in spring when growth appears. 

Christmas cacti love humid environments. For people who live in arid areas, it’s essential to keep your plant moist. The easiest and best way to do this is just placing a tray of water near the plant. The water will evaporate into the atmosphere and provide the needed humidity. 

Another alternative of providing humidity is getting gravel and putting it in a dish then filling it with water. Then place your potted cactus in it. You can also mist your plant with a spray bottle. 

The cold-hardy Christmas cactus

The Christmas cacti tend to bloom around Christmas hence the name. They flower during winter to produce white, red, pink or lilac flowers which are usually 3 inches long. The cold hardiness of this species is higher than for other cacti. They can’t withstand frost, but they need cold temperatures to force bloom. 

freezing Leaves.
These cacti hate frost and snow, so avoid exposing them to these. A slight exposure damages the pads

How to treat a Christmas cactus exposed to cold

As much as these species bloom in winter, they also don’t love freezing temperatures. If they stay out too long, the water that’s usually stored in the tissues will freeze making them expand. This damages the stems.

Once the water thaws, the tissues will contract, but they will be left damaged. This, in turn, leads to rotting spots and dropped leaves. 

When you notice your cactus looks like this, you need to treat it and try to revive it. The first step is removing any tissues that seem rotten. Water the plant lightly and place it at temperatures of 60F or 15 °C. Monitor the plant and if it survives at least six months, you can then fertilize it using a cactus-specific fertilizer. It only requires diluted solutions. 

Christmas cactus near the window.
Christmas Cacti bloom in winter, they also don’t love freezing temperatures.

The idea is, if you grow your Christmas cactus outdoors, you need to take it indoors when the temperatures are extreme to avoid doing damage control. 

To encourage the blooming and healthy growth of your plant, make sure you consider repotting. You can re-pot any time between 1 and 3 years. Sometimes, you’ll notice that your cacti roots are poking their way out of the drainage holes. This is a clear indication you need to re-pot. 

All in all, proper care should be taken to all cacti species because they are more likely to have damages in these extreme weather conditions. The above tips should help your cactus stay safe. 

Related Questions

How can I cold protect my cactus? Cactus need to be protected from the freezing winter temperatures. If your cactus is in container plants, you can quickly bring them inside your house to protect it from the freezing temperatures outside. Alternatively, for the landscaping plants, you cover them with frost blankets or bedsheets during late afternoons. Make sure the covers don’t touch the plants. You can look for support frameworks. You can remove the coverings the next day when the temperatures rise above freezing point. 

Can cactus survive with artificial light indoors? When you decide to grow your cactus indoors, you need to consider the light aspect. Light may be insufficient, and they may not thrive. Artificial lights act as a substitute for sunlight. They grow well with no issues. Make sure you attach your grow lights to a timer so that it’s easier to control the light the cactus receives.  

Why does a cactus turn yellow? There are a few reasons why cactus turn yellow. One, they can be sunburned. If they have been living indoors and are taken under direct sunlight, they will certainly become yellow. Introduce them to direct sunlight gradually to avoid this. The other reason is that they may be infested by pests such as mites. These little animals such the cacti tissues. Lastly, it could be because of root rot. Rotting is one of the significant effects of overwatering your cactus. Avoid overwatering; you’d preferably underwater than overwater.