How to Cut Adenium Caudex: A Step-by-Step Guide

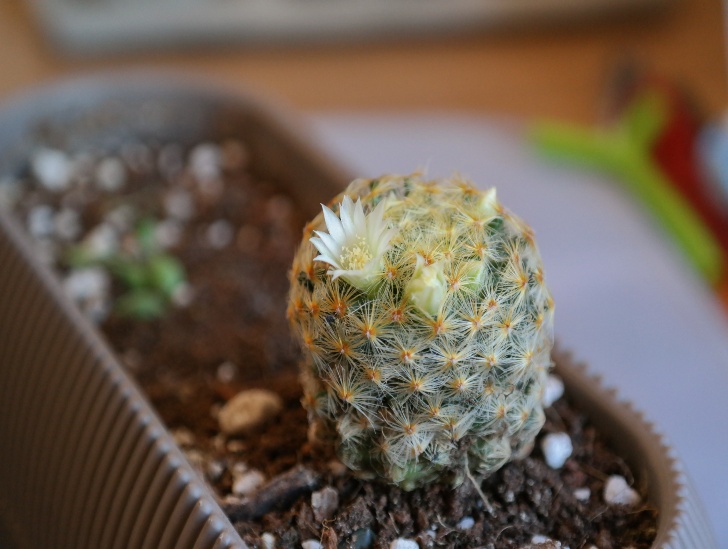
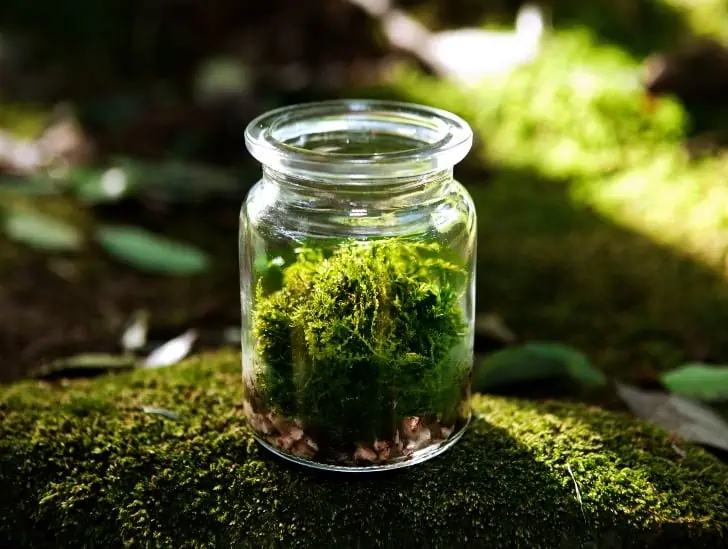
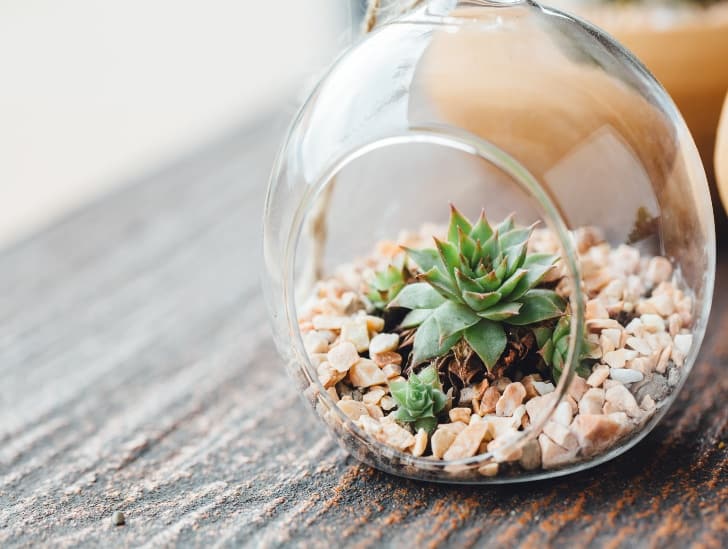
A adenium caudex in a small pot.

Adenium Caudex, also known as the Desert Rose, has been capturing the hearts of gardeners worldwide. With its unique swollen trunk-like structure, colorful flowers, and ability to thrive in harsh conditions, this charismatic succulent has become a staple in home gardens, balconies, and indoor spaces. What truly distinguishes Adenium caudex is its regenerative capabilities, allowing it to propagate from cuttings quite easily. However, mastering the art of cutting Adenium caudex is challenging for many gardeners. That is why we are here to help you master the skill of cutting your Desert Rose.

So, how do you cut Adenium caudex? Gather the necessary tools and materials, such as sharp pruning shears, a clean cutting board, rooting hormone, and well-draining soil. Next, select a caudex that is healthy, mature, and ready for cutting. Before taking the plunge, it is crucial to prepare the plant by removing excess leaves and branches, ensuring a clean canvas for the cutting process. Place the sharp pruning shears at a 45-degree angle, making a clean cut through the caudex, about 1 inch deep. Take care not to damage any nearby nodes or vital structures. Place the cutting in well-draining soil, ensuring it receives enough sunlight and water. Maintain a warm and humid environment to encourage root development.

This blog post outlines the basics of cutting Adenium caudex, equipping you with the confidence to tackle the challenge yourself. Read on to learn more.

Why Is Cutting Adenium Caudex Important?

Adenium caudex tends to grow tall even though its overall growth rate is a bit slow. The branches of this succulent usually become thin and leggy if left unpruned for a long time. This can have a devastating impact on the blooming cycle and the health of flowers.

Therefore, it is crucial to cut off some branches of the succulent regularly to encourage blooming.

Regular pruning also plays a critical role in restricting the plant’s overall height, which is crucial if you are growing it as a houseplant.
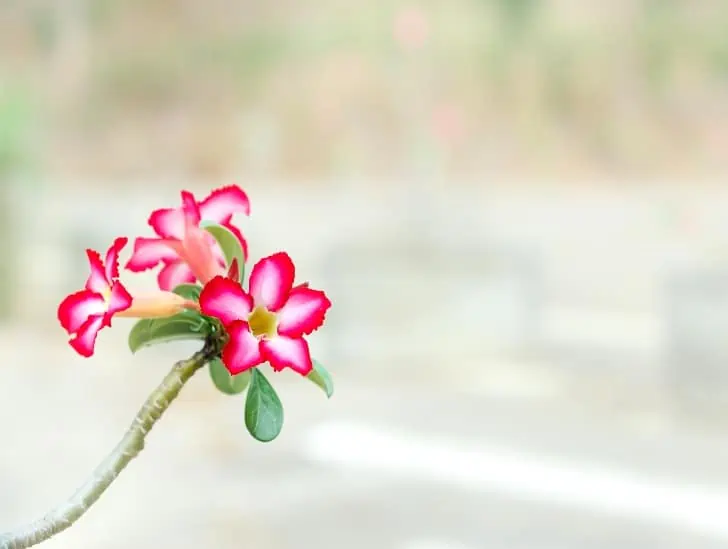
A desert rose flower stem.
Adenium caudex tends to grow tall even though its overall growth rate is a bit slow.

Even without the leggy branches, you should consider cutting your Adenium caudex occasionally to maintain its health.

Pruning helps you get rid of damaged leaves, pests, and mold. Cutting the infected parts prevents the damage from spreading further.

Overall, regular cutting of Adenium caudex maintains the plant’s clean and neat appearance. You don’t have to worry about an overgrown parts spreading to spaces where they are not wanted.

When Is the Best Time to Prune Adenium Caudex?

While it is important to prune your Adenium caudex regularly, it is important to do so at the right time.

You can prune the leaves and branches of your succulent lightly at any time of the year, especially if you notice infected, damaged, or dead leaves.

Ideally, you should perform light pruning of your Adenium caudex annually well in advance of the flowering season so that you don’t interfere with the health of the flowers. Aim to finish the light pruning by late winter or early spring.

However, you should avoid any form of trimming or pruning during late autumn because this may lead to new growth that may become over-sensitive to the effects of winter, such as cold temperatures and frost.

Desert rose in a pot.
Aim to finish the light pruning by late winter or early spring.

Hard pruning should be done every two years or so. The best time for hard pruning is during the active growth period, usually in spring or early summer.

This gives the plant ample time to recover and heal before entering a period of reduced growth in winter.

What Should I Do Before Cutting Adenium Caudex?

You need to do a few things before cutting your Adenium caudex. The first thing you need to do is cut the water intake a few days before cutting. Consider cutting water intake three or four days before pruning.

This will help your plant cope well after cutting since it is now weakened and cannot absorb too much water. Sticking to the usual watering schedule before and after cutting can lead to irreversible root rot.

It is also important to monitor the temperature while cutting your Adenium caudex. It should be warm enough for your plant to heal quickly after cutting because high temperatures stimulate growth and counteract shock on your plant.

How to Cut Adenium Caudex: Step-By-Step Guide

Now that you know the basics of cutting Adenium caudex, it’s time to dive deeper into the step-by-step guide. Follow these steps to prune your Desert Rose correctly:

Step 1: Gather Necessary Tools and Supplies

Gather the necessary tools and materials, such as sharp pruning shears, a clean cutting board, rooting hormone, and well-draining soil.

Having sharp and clean cutting tools is essential for making clean and precise cuts. Pruning shears or a sharp knife are suitable for cutting through the branches or stems of the succulent.

Cutting a crassula ovata.
Having sharp and clean cutting tools is essential for making clean and precise cuts.

Blunt tools can crush the plant tissue, leading to slower healing and an increased risk of infection.

If you plan to propagate the cuttings from your Adenium caudex, consider having a rooting hormone to increase the chances of successful rooting and new growth.

Rooting hormone contains growth-promoting substances that encourage root development. It is available in powder, gel, or liquid form.

While it is optional, using rooting hormone can speed up the process of establishing new plants from cuttings.

Step 2: Select the Right Caudex

Look for a caudex that is healthy, mature, and ready to be cut. Your first target should be leaves and branches infected with pests or diseases.

This is a very important step because you want to avoid spreading the damage from infected parts of the plant to uninfected ones. So, take your time to inspect the stem carefully before proceeding with the cutting process.

Once you have identified all infected, damaged, and dead leaves, get rid of them before you identify healthy parts of the plant that can be cut for propagation.

The sections you choose for propagation must be healthy and free of damage or infection.

Step 3: Prepare the Plant for Cutting

Before taking the plunge, it is important to prepare the plant by removing excess leaves and branches, ensuring a clean canvas for the cutting process. This will help you make precise cuts without damaging vital structures.

A young desert rose.
it is important to prepare the plant by removing excess leaves and branches.

Trimming off excessive foliage also reduces the chances of transplant shock and infection.

Step 4: Sterilize the Cutting Tools

Before you begin cutting, it’s crucial to sterilize your pruning shears or knife to minimize the risk of introducing pathogens or diseases to the plant.

You can do this by wiping the blades of your tools with rubbing alcohol or hydrogen peroxide. This step helps prevent the spread of potential infections to the plant and reduces the chances of causing harm during the pruning process.

Alternatively, dip the blades in boiling water for a few minutes. This will help kill germs or bacteria on the cutting tools.

Step 5: Make Clean Cuts

Now that you have identified the parts for cutting, gently place your pruning shears at a 45-degree angle to ensure a clean cut.

Don’t press too hard because it may damage the nodes or other vital structures in the stem.

If you plan to propagate the cuttings, make sure each cutting has at least two nodes to root successfully.

Step 6: Apply Rooting Hormone (Optional)

If you have chosen to use rooting hormone, dip your prepared cuttings in the hormone solution or powder and tap off any excess.

This encourages the development of healthy and strong roots in the new plants. Remember to wear gloves when handling the rooting hormone because direct contact with skin can be harmful.

Step 7: Planting Cuttings

Once you are done making all your cuts, it is time to plant them in well-draining soil. Ensure the stem is securely planted in the soil up to the first node.

Keep the cuttings in a warm and moist environment and water them lightly every few days. In a few weeks, your cuttings should root properly.

Once they have rooted, you can transfer them into bigger pots or containers with well-draining soil.

Step 8: Provide Proper Care

Place the potted cuttings in a bright, indirect light location.

Avoid exposing them to direct sunlight because it can stress the young plants. Keep the soil lightly moist because overwatering can lead to root rot.

If necessary, create a humid environment around the cuttings to prevent excessive moisture loss.

As the cuttings establish roots and show signs of new growth, gradually acclimate them to normal conditions.

Step 9: Monitor and Maintain

Keep an eye on the cuttings for signs of growth and root development.

Once the cuttings have rooted and established themselves, you can gradually transition them to more typical care routines for Adenium caudex plants.
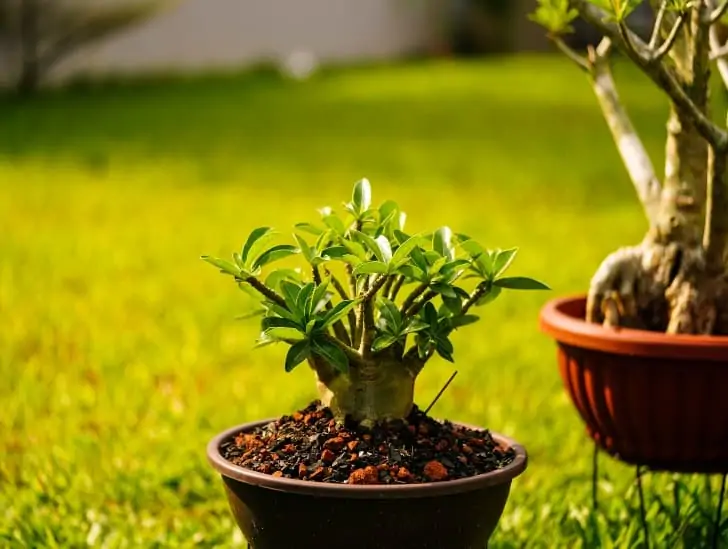
Adesert rose seedlings outdoors.
Keep an eye on the cuttings for signs of growth and root development.

Remember that every plant is unique, and some variations in care may be required based on individual circumstances.

Patience and observation are key to successfully propagating and maintaining Adenium caudex plants.

Summary

Pruning Adenium caudex is an important part of keeping it healthy and beautiful.

With the right tools and knowledge, you can easily prune it for propagation or to simply maintain its overall appearance.

The key is to make your cuts cleanly and efficiently while leaving behind no stray wounds that could lead to infections or disease.
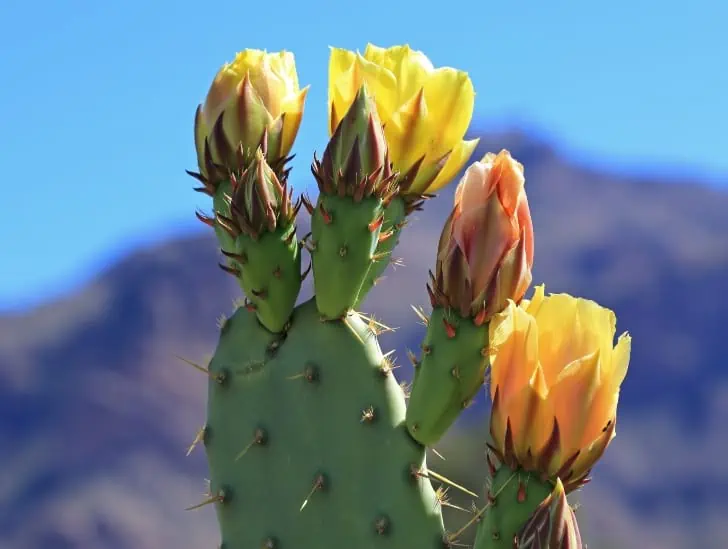
Are Your Cacti Flowers Real or Fake? Learn How to Tell the Difference!

A blooming cactus.

If you visit the gardening department in major home stores or your local gardening store, you will most likely stumble upon some cacti plants that have beautiful flowers on top of them. At first glance, you may think you have found a nice plant with beautiful flowers, but that is not the case. A closer look will reveal that the flowers are not real. These are fake flowers stuck on the cacti plants with glue to attract potential buyers. The trick is often used to increase sales and profit margins for plant sellers.

So, are your cacti flowers real or fake? One of the easiest ways to differentiate real cacti flowers from fake ones is to look for signs of life. Real cacti flowers will show signs of freshness and vibrancy, such as being firm and plump, having bright, and vibrant colors. On the other hand, fake flowers will most likely be made from plastic or fabric materials that are flimsy and dull in colour. The position of the flower can also tell if it is real or fake. Real flowers develop from the stems and follow a specific pattern. So, if the flower sits at the top of the plant, it is probably fake.

This blog post highlights different ways of recognizing fake cacti flowers and how to remove them from your plant. Read on to learn more.

Do Cacti Plants Flower?

So, you may think that cacti plants don’t flower hence the need to fix fake flowers on the plants to make them attractive. Unfortunately, that is not the case at all.

Almost all cacti plants flower. Depending on the species, some cacti plants will flower faster than others.

The only thing you need to do is ensure your cactus is exposed to the right conditions that encourage blooming. Sometimes, you must take care of your plant for several years before it starts showing signs of flowering.

A spider cactus blooming.
The only thing you need to do is ensure your cactus is exposed to the right conditions that encourage blooming.

Some cacti species, such as Mammillaria and Parodia, will flower faster and prolifically than other species. The flowers of different cacti plants come in various shapes, sizes, and colors.

If you want your cactus to flower, consider growing it on a balcony or close to a windowsill where it can receive plenty of sunlight. Real cacti flowers may open for a few hours or days before fading.

Why Do Sellers Attach Fake Flowers to Cacti?

The primary reason sellers attach fake flowers to cacti is to make their plants more marketable. The aim is to boost sales and ensure the cacti plants get new homes as fast as possible.

When buying a cactus, it is your responsibility to check the plant carefully and establish whether the flowers are real or fake. You can always avoid plants with fake flowers if you are unhappy with them.

You are free to ask the seller about the flowers, and he/she should be 100% honest if you ask. However, it is not the seller’s fault if you don’t ask.

Mammillaria nejapensis exposed to sunlight.
You can always avoid plants with fake flowers if you are unhappy with them.

The truth is that blooms make cacti plants look more vibrant and highly attractive to potential buyers. Therefore, sellers will do everything possible to capture your attention.

While it may be difficult to differentiate between fake and real cacti flowers, especially if you are a beginner, things improve as you become more experienced.

In fact, some people can easily differentiate between fake and real cacti flowers by just looking at them.

Identifying Fake Cacti Flowers

Fortunately, identifying fake cacti flowers isn’t hard at all. The first thing you must remember is that real cacti flowers only last for a couple of days. You heard that right; real flowers don’t remain fresh for over a week.

So, if you come across cacti flowers that have lasted for months or even years, they are most likely fake.

Most cacti species flower in summer or right after summer. Therefore, it is almost impossible to find flowers on cacti plants during winter and autumn.

Real cacti flowers will also have unique characteristics, such as bright colours and freshness, among other features. On the other hand, fake cacti flowers may be dull in colour or lack petals altogether.

The position of the flower can also be indicative of whether it is fake or not. Generally, you should expect to see real cacti flowers growing out of a stem or area close to the stem, and they will usually follow a specific pattern.

A golden barrel cactus flowering.
Real flowers don’t remain fresh for over a week.

Fake flowers are normally stuck at the top of the plant, which can be a huge giveaway.

Look at how the flower is attached to the cactus plant. If you are keen enough, you may notice hot glue on the sides of fake flowers. This is how sellers attach fake blooms to cacti plants.

Sometimes, they use a pin, but all real flowers will be attached to the plant’s stem with a receptacle.

What Are the Issues with Fake Cacti Flowers?

The main problem with fake cacti flowers is how they are attached to the plant. Most sellers use hot glue to attach the flowers, although some use pins.

Hot glue creates a massive wound on the cactus and sticks to the spines permanently. A pin is equally bad since it pierces through the cactus, creating a wound.

You must be extra careful when removing the fake flowers from your plant to avoid causing further damage.

A thelocactus blooming in a pot.
The main problem with fake cacti flowers is how they are attached to the plant.

Pulling the flowers out without a plan will tear off areoles, spines, and even a section of the skin, creating an open wound.

With pins, you don’t have any other option than taking the pin out and letting the wound heal with time. Either way, you will be left with a permanent scar on your plant after removing the fake flowers.

How to Remove Fake Cacti Flowers

If you have bought cacti plants with fake flowers, the good news is that it is possible to remove them. Below are different methods of removing fake cacti flowers from your plant:

1. Removing by Hand

You can start by trying to remove the fake flowers by pulling them off gently and slowly. Pay close attention to how the glue has been applied to the plant.

If the glue is relatively loose, use your hand to move the fake flower back and forth a couple of times until it comes off.

Don’t move too fast since it may damage the spines. The back-and-forth movement must be done slowly to minimize potential damage.

Mammillaria Bocasana flowering in a pot.
Pay close attention to how the glue has been applied to the plant.

If the hot glue used to attach the fake flowers to the plant is too hard, this method might not work. The primary aim is to eliminate the fake flowers while causing minimum damage to the plant.

2. Use a Pair of Scissors and Brush

If the hot glue has adhered tightly to the plant, consider using scissors and a brush to remove it.

Start by snipping away all attached petals before brushing gently with a soft brush.

If you find the tip of the scissors touching your cactus, it is time to stop since you might damage the plant further.

Sometimes, you may be forced to cut off some sections. You may lose some spines in the process, but that won’t cause terrible damage to your plant. Just be careful not to cut more than you should.

3. Use a Hair Dryer

You can also use a hair dryer to remove the fake flowers from your plant if the hot glue is too hard on the plant. Carefully blow hot air on the glued area and slowly move it back and forth.

The heat from the hair dryer will eventually loosen up the glue. Once you are sure the glue is loose enough, use your fingers to remove the fake flowers gently while avoiding potential damage to the spines.

Remember not to blow hot air around the plant for too long. If you blow hot air around the cactus for too long, you may end up causing irreversible damage because many cacti species can’t withstand hot air blowing on them for a long time.

4. Use Tweezers

Tweezers can be used to remove fake flowers without causing extensive damage. You can use tweezers to pull out both the flowers and glue.

Be careful when using tweezers and take things slowly because quick movements may damage the plant.

5. Leave It As It Is

If the glue is too hard, consider leaving the fake flowers as they are.

The fake flowers will eventually go down as the cactus grows. It may take a season or two for the fake flowers to fall off without you doing anything.

However, you may have to tolerate the fake flowers on your plant for some time before they finally fall off. This shouldn’t be a big issue as long as your cactus stays healthy.

Summary

Although cacti flower naturally, some sellers attach fake flowers to their plants to make them appear more attractive to potential buyers.

It is important to differentiate between fake and real flowers since there are potential problems that come with having fake flowers attached to your cactus plant.

Several methods can be used to remove these fake flowers, such as pulling them off by hand, using scissors and a brush, using a hairdryer, or using tweezers. Ultimately, it is up to you whether you prefer to remove the fake blooms or leave them as they are.

Mammillaria Nejapensis: The Colorful and Resilient Cactus of the Desert

Mammillaria Nejapensis in a pot top view.

The Mammillaria nejapensis, commonly referred to as the silver arrow cactus or owl eye cactus, is a popular flowering cactus that belongs to the Cactaceae family. It is native to Mexico and usually forms globular stems with white, sharp spines. The spine length varies depending on the cultivar but averages about 2.5 cm. This cactus is also known for its bright and colourful flowers, which bloom in spring and summer, producing yellow-orange petals with a light pink centre.

So, what makes the Mammillaria nejapensis cactus so popular? The cactus is incredibly resilient and can withstand extreme temperatures. It is drought tolerant, preferring dry conditions but can also tolerate low temperatures. The Mammillaria nejapensis is relatively easy to care for, requiring just occasional watering and pruning of spines to thrive. It makes a great addition to any garden or backyard, especially in areas that experience high temperatures. Planting this cactus in sunnier spots will promote faster and more prolific flowering.

This blog post discusses everything you need to know about Mammillaria nejapensis. Read on to learn more about this resilient and colourful cactus and how to care for it.

Mammillaria Nejapensis: Quick Overview

The Mammillaria nejapensis cactus showcases a distinctive appearance that sets it apart from other cacti species.

It typically forms solitary or clustering globular stems, which can grow up to 10 centimetres in height and diameter. Its surface is covered with prominent, tightly packed tubercles, giving it a distinctive knobby texture.

Each tubercle features silvery-white or creamy-yellow radial spines that emerge in a star-like pattern, creating contrast against the cactus’ green body.

The central spines are darker and slightly longer than the radials. As the cactus matures, it may produce small, funnel-shaped flowers in shades of pink, white, or yellow, adding an elegant touch to its appearance.

Mammillaria Bocasana flowering in a pot.
Its surface is covered with prominent, tightly packed tubercles, giving it a distinctive knobby texture.

The cactus is native to Mexico. It primarily thrives in the arid and semi-arid climates of its natural habitat, characterized by rocky, well-draining soils and limited rainfall.

This cactus species can often be found growing in crevices between rocks or nestled under the protection of larger plants, making it well-adapted to survive in harsh and challenging conditions.

The Mammillaria nejapensis is a slow-growing cactus species that takes time to establish itself and mature. It tends to maintain a compact size, making it well-suited for container gardening and smaller spaces. Its clustered growth habit adds an interesting visual dynamic to your home garden.

Mammillaria Nejapensis: Classification

Mammillaria nejapensis belongs to the Cactaceae family and is closely related to other Mammillaria species, such as Mammillaria bombycina and Mammillaria pectinifera.

Despite belonging to the same genus, these cactus species have distinct characteristics that make them easily identifiable.

For example, the Mammillaria nejapensis has a distinctive globular form covered in tightly packed, white-and-yellow spines.

It can easily be distinguished from other cacti in its family due to its unique coloration and growth habit.

Mammillaria Nejapensis: Indoor or Outdoor Succulent?

Many people believe that Mammillaria nejapensis is an outdoor succulent, but it can also thrive indoors if the growth conditions are right.

The cactus thrives in an outdoor environment where it can get plenty of sunlight it needs to grow.

Mammillaria lasiacantha flowering.
It will greatly benefit from exposure to bright, direct sunlight.

If you must grow your Mammillaria nejapensis indoors, consider moving it outdoors during the warmer months. It will greatly benefit from exposure to bright, direct sunlight.

Whether grown indoors or outdoors, the most important things you need to pay close attention to include well-draining soil, proper watering, sunlight, temperature, and humidity.

Mammillaria Nejapensis: Flowering

This cactus usually flowers during spring and summer. The blooms are a combination of white, cream, and light pink colors. The flowers can be numerous, covering the entire top of the plant.

You can encourage blooming by holding back on your watering schedule during winter. Providing your plant with too much water during the cold season can deter flowering.

Applying fertilizer at quarter strength every two or three weeks during the active growing season may also encourage your Mammillaria nejapensis to set more flowers.

Mammillaria Nejapensis: Care Instructions

To properly care for the Mammillaria nejapensis cactus, you must provide the right environment and soil conditions. Below are some tips that will make your plant thrive:

1. Light Requirements

Mammillaria nejapensis generally thrives in properly lit environments. The amount of light your cactus receives will largely depend on whether it is grown indoors or outdoors.

If you are growing it indoors, choose the brightest spot in your house. A south or east-facing windowsill is a perfect spot for your cactus. A west-facing windowsill can still work perfectly.
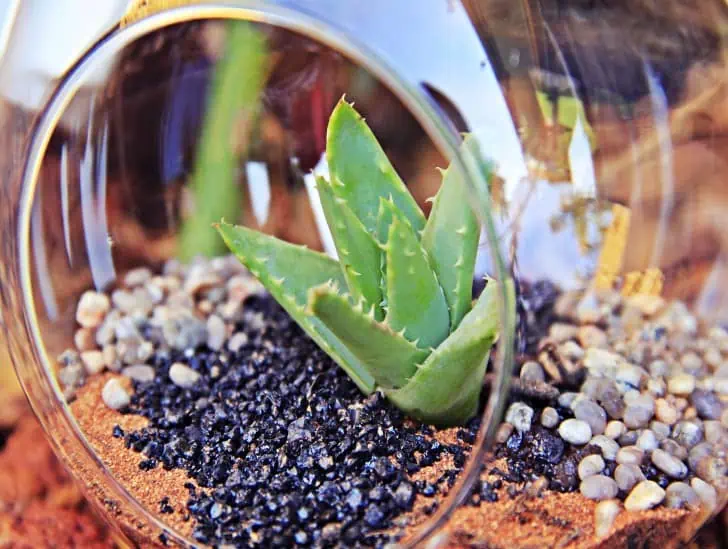
Window spots are good because they are generally sunnier than other spots in your house. In fact, these spots receive the most sunlight from outdoors.

When choosing where to position your plant indoors, don’t hesitate to move it around a couple of times until you find the perfect spot. The primary objective is to ensure your cactus receives plenty of sunlight.

Mammillaria nejapensis exposed to sunlight.
If you are growing it indoors, choose the brightest spot in your house.

The cactus prefers an open spot with plenty of sunlight when grown outdoors. However, you need to ensure the plant is not completely exposed to intense heat because it can lead to irreversible sunburn.

Consider providing it with bright, partial shade during the hottest time of the day. In fact, you should consider positioning your Mammillaria nejapensis in a sunny spot with plenty of afternoon shade. It will thrive without any issues.

2. Soil Requirements

The Mammillaria nejapensis prefers well-draining soil, so avoid using regular soil or potting mix. An ideal soil mix for this cactus combines 60% pumice and 40% peat or compost.

You can either combine these materials on your own at home or purchase a mix of good quality from your local plant store.

Whether you purchase the medium or make your own at home, it is important to ensure that it has good drainage properties and enough room for the roots to breathe in.

A well-draining potting mix will ensure your plant’s roots remain healthy and won’t rot. It is also light and nutrient-rich, crucial for the growth and development of your Mammillaria nejapensis.

3. Water Requirements

Mammillaria nejapensis is a resilient cactus that can survive in harsh and challenging conditions. However, this doesn’t mean you shouldn’t water it regularly. It only means you should be careful with how much water you give.

For outdoor Mammillaria nejapensis, natural rain should take care of the plant’s watering needs if you don’t live in an arid area.

However, if it doesn’t, consider watering your cactus once a week during summer and once every two weeks during winter.

A water droplet in a cactus.
Mammillaria nejapensis is a resilient cactus that can survive in harsh and challenging conditions.

You should only water your Mammillaria nejapensis when necessary. Check for signs of moisture on the soil before you water your plant, and only do so if necessary.

Generally, you should wait until the soil is dry before watering it again. Also, consider allowing the water to drain off completely after each watering session.

Indoor Mammillaria nejapensis may not need to be watered as much as outdoor Mammillaria nejapensis, especially if it is not exposed to a lot of sunlight.

4. Frost Tolerance

The Mammillaria nejapensis can withstand winter frost only up to a certain point. The cactus can survive in temperatures as low as -5°C (23°F), but it may suffer damage if exposed to temperatures beyond this threshold.

Extremely cold temperatures can force the cactus into a state of dormancy, reducing its growth rate and making it appear less vibrant.

To avoid frost-related issues, consider keeping your Mammillaria nejapensis indoors during winter or in a greenhouse where the temperature and conditions can be easily controlled.

For gardeners living in areas that experience extremely harsh winters, it is highly recommended that you plant your Mammillaria nejapensis in containers. That way, you can easily move them indoors when outdoor temperatures fall below freezing.

If you cannot afford to bring your plants indoors during winter, consider protecting them using frost cloths.

Be sure to choose a good quality cloth that can withstand temperatures well below freezing without letting frost get through.

5. Feeding Requirements

Mammillaria nejapensis does not require frequent fertilizer application during its growth period, especially if you have already added a good amount of compost to the soil during sowing.

Mammillaria nejapensis top view in a pot.
Mammillaria nejapensis does not require frequent fertilizer application.

Once your cactus has grown for several months, consider feeding it with a balanced fertilizer like an 8-8-8 formula once every two weeks. This will provide the essential nutrients it needs for healthy growth and development.

6. Humidity Requirements

Mammillaria nejapensis is a very resilient cactus that can survive in dry climates. However, it still benefits from having the right amount of humidity in its environment.

If growing your Mammillaria nejapensis indoors, consider placing it on a pebble tray filled with water. This will provide extra humidity to the air, and your plant will greatly benefit from it.

In addition, consider misting the leaves of your cactus once or twice a week using lukewarm water. This will help to increase humidity levels and keep the plant healthy and vibrant.

Final Thoughts

Mammillaria nejapensis is an easy-to-care-for cactus that can grow indoors and outdoors. It requires plenty of bright, direct sunlight but should not be exposed to intense heat or frost.

So, if you are looking for a unique and easy-to-care-for cactus to add a touch of vibrancy to your home garden, the Mammillaria nejapensis is worth considering.

The Ultimate Guide to Caring for Caudex Plants

A caudex plant.

Caudex plants, also referred to as “fat plants,” “pachycauls,” or “stem succulents,” are a unique group of plants known for their distinctive swollen stems. The stems are known as caudices. These remarkable plants have captured the fascination of botanists, collectors, and enthusiasts alike due to their intriguing history, diverse habitats, and distinct characteristics. Over the years, these plants have exploded in popularity because they are relatively easy to care for, beautiful, and unique. They are good indoor ornamental plants and make an excellent addition to outdoor gardens.

So, how do you care for caudex plants? The first rule of thumb is to keep them out of direct sunlight and away from any sources of heat or cold drafts. Direct sunlight can damage their delicate stems severely. Water your caudex plants sparingly and only when the soil is completely dry. It’s important to note that too much water can cause irreversible root rot. These plants love well-draining soil and a temperature range of between 40-90°F. If you live in a colder climate, bring your caudex plants indoors during winter and position them in a bright spot to help them get enough light. You can also fertilize your plants occasionally to replenish soil nutrients.

This blog post provides you with extensive information on how to care for caudex plants. Read on to find out everything you need to know.

Caudex Plants: History, Habitat, and Characteristics

The history of caudex plants dates back centuries, with evidence suggesting that they were first cultivated by ancient civilizations such as the Egyptians and Romans.

These plants were loved for their ornamental value and often featured in gardens and horticultural displays. Over time, they became symbols of resilience and adaptation, surviving in arid and semi-arid environments.

Today, caudex plants continue to captivate gardeners and plant enthusiasts, showcasing an array of forms and adaptations that have evolved over the years.

These plants are renowned for their ability to thrive in diverse habitats, particularly in regions with harsh climatic conditions. They are commonly found in arid and semi-arid areas, such as deserts, rocky slopes, and savannas.

A caudex plant.
They became symbols of resilience and adaptation, surviving in arid and semi-arid environments.

The caudex is an adaptive feature, allowing the plants to store water for prolonged periods. This unique adaptation has enabled caudex plants to colonize harsh landscapes and become masters of survival in the face of adversity.

The most distinctive feature of caudex plants is their swollen stem, known as a caudex. The thickened stem serves as a reservoir for water storage, allowing the plant to endure prolonged drought periods.

Many caudex plants also feature attractive foliage adorned with exciting textures, colors, and patterns. The aesthetic appeal adds to their popularity among collectors and gardeners.

How to Take Care of Caudex Plants

Most caudex plants are relatively easy to grow with relatively low demands. Below are some of the things you need to focus on to ensure your caudex plant thrives:

1. Light Requirements

Light plays a critical role in the lifecycle of caudex plants. It influences various physiological processes, such as photosynthesis. Light exposure also affects leaf production, water uptake, and nutrient absorption.

Caudex plants exhibit varying preferences when it comes to light conditions. Generally, they are adapted to thrive in bright and sunny environments, mimicking their natural habitats.

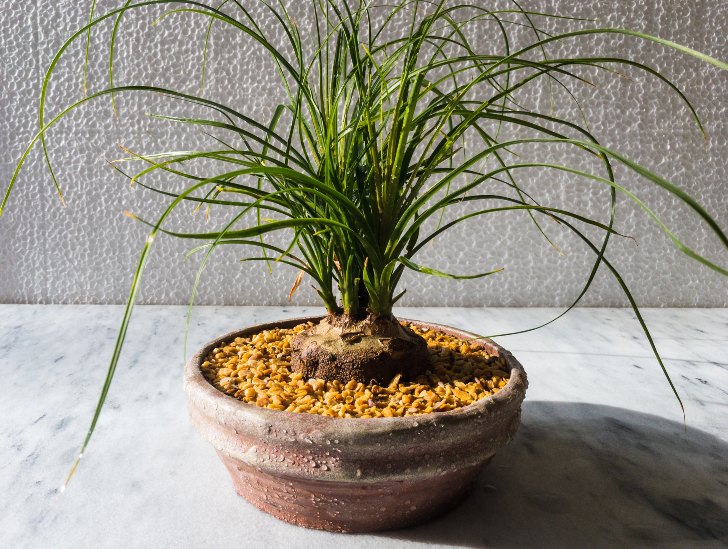
A Madagascar palm caudex plant exposed to sunlight.
Light plays a critical role in the lifecycle of caudex plants.

Therefore, providing your plants with bright, indirect sunlight is essential. Position them near a south or east-facing window to ensure they receive ample light without being overexposed to harsh, direct rays that could scorch their leaves.

Consider filtering direct sunlight through sheer curtains, blinds, or using a light-diffusing material to create suitable light conditions for your caudex plants.

For outdoor cultivation, choose a location with partial to full sun, depending on the species of your caudex plants. Gradually acclimate plants to outdoor conditions to prevent sunburn and stress.

You can also consider supplementing natural light with artificial light, such as fluorescent or LED grow lights, if you live in an area that doesn’t receive plenty of natural light.

Position the artificial lights 6 to 12 inches above the plants and keep them on for 10 to 14 hours daily.

2. Watering Requirements

It is extremely easy to water caudex plants. Since most of them are adapted to growing in arid and semi-arid areas, they don’t need frequent watering to thrive.

Typically, you only need to water your plant once a week or every two weeks, depending on the season.

Let the potting mix dry out completely between watering sessions. Keep in mind that caudex plants hold moisture for a relatively long period.

So, the plant can still survive for a couple of days or weeks without watering, even if the soil feels dry.

When you water, place your plant in a sink and let them sit in lukewarm water for about 15 or 20 minutes.

Carefully remove them after the time lapses and rinse them using a gentle stream of lukewarm water. Ensure that excess water drains out from the potting mix to prevent root rot and other problems associated with soggy soil.

The best time to water your caudex plants is early morning or in the evening when temperatures are relatively low.

Avoid watering during the afternoon because the temperatures are high and could result in root burn due to quick evaporation of excess water.

3. Temperature and Humidity Requirements

Caudex plants prefer an ideal temperature range of 40-90°F (4-32°C). The higher temperatures encourage faster growth, whereas lower temperatures slow the process. Keep your caudex plants away from any sources of cold drafts to prevent stunted growth or death.

A beaucarnea poytail palm caudex plant.
Caudex plants prefer an ideal temperature range of 40-90°F (4-32°C).

If you live in a colder climate, bring your caudex plants indoors to protect them from low temperatures during winter.

Humidity is not a significant requirement for caudex plants, but ensuring that the air around your plant is sufficiently humid is vital.

You can mist your plant regularly or place the pot on top of a humidity tray filled with wet pebbles. Alternatively, use a room humidifier to increase the overall humidity around your plant.

4. Soil Requirements

Caudex plants generally require a well-draining potting mix to thrive. You can create your own potting mix by combining equal parts of sand, perlite, and peat moss, or purchase a ready-made cactus potting soil from the local garden store.

The key is to ensure that the potting mix drains quickly and doesn’t hold too much water for too long because it could cause irreversible root rot.

Consider using a humus-rich potting mix to help the plant retain enough moisture without becoming soggy.

5. Fertilization Requirements

Fertilization is a crucial aspect of caudex plant care, supplying essential nutrients that support various physiological processes. These nutrients are vital for photosynthesis, root development, flower formation, and overall growth.

Proper fertilization helps caudex plants attain their full potential, showcasing vibrant foliage and encouraging flowering.

Consider feeding your caudex plants at least once during the active growing season (spring and summer).

Use a well-balanced, water-soluble fertilizer with an N-P-K ratio suitable for the growth stage of your caudex plant (e.g., 10-10-10 or 20-20-20).

You must also ensure that your preferred fertilizer contains essential micronutrients. Fertilizers designed exclusively for succulents or cacti plants are the best option.

Alternatively, use organic fertilizers that can gradually release nutrients and improve soil structure. Well-decomposed compost or worm castings can be used as natural fertilizers.

6. Repotting

With time, your caudex plants will outgrow their current pots and require repotting to provide enough space for long-term growth.

Repotting is critical in ensuring that the root system has plenty of room and access to oxygen, allowing them to absorb resources more efficiently.

Report caudex plants once they outgrow their existing pot or every two years during the active growing season.

A bonsai being prepared to repot.
Your caudex plants will outgrow their current pots and require repotting to provide enough space for long-term growth.

Choose a pot with drainage holes that is slightly larger than the current one. Remember to provide a well-draining potting mix and water moderately for two weeks after repotting.

This will help your caudex plants adapt to their new environment without going through any unnecessary stress.

7. Winter Care

During winter, these plants usually go dormant. The dormancy period may last for about three to four months. The plant may shed its leaves to signify the start of its dormancy period.

Reduce the watering frequency during this period and let your plant rest. Instead of watering once a week, consider watering your plant every two or three weeks.

Don’t apply fertilizer during the dormancy period because the plant doesn’t need any nutrients.

If possible, move the plant to a cooler location during winter. This will help reduce stress and slow down growth.

You can also place your caudex plants outdoors for some fresh air but bring them back indoors if temperatures drop below 40°F (4°C).

Final Thoughts

Caudex plants are remarkably easy to care for and can survive in various conditions. They only require minimal maintenance to thrive, which makes them an ideal choice for gardeners of all levels.

Ensure you provide your caudex plants with the right conditions — temperature, humidity, water, sunlight, soil type, and fertilization —to keep them healthy and happy.

With proper care, your caudex plants will reward you with their beauty and vibrant space for many years.

7 Tips for Perfectly Caring for Your Hanging Flowering Succulents

A hanging succulent.

If you’re looking to add some vibrance and beauty to your garden or indoor space, hanging flowering succulents are an excellent choice. These unique plants provide striking foliage and produce stunning flowers that can brighten up any space. However, caring for hanging flowering succulents is more than just tending to plants; it is an art form that allows you to create stunning displays and bring nature’s beauty into your living space.

So, how do you care for hanging flowering succulents? Like any other succulent, hanging varieties require bright, indirect light. Place your hanging basket where it can receive at least six hours of sunlight daily. Water them thoroughly, allowing the soil to dry out completely between watering sessions. Plant your hanging flowering succulents in well-draining soil for better results. Go for a succulent-specific potting mix, or create your own by combining regular potting soil with perlite or pumice. You should also consider feeding them with a well-balanced fertilizer during the growing season to promote healthy growth and vibrant blooms.

This guide will explore the world of hanging flowering succulents, providing essential tips and insights to care for these plants. Read on to learn more.

Hanging Succulents: A Quick Overview

Hanging succulents, also known as trailing or pendulous succulents, have a natural trailing growth habit. Their stems gracefully spill over the edges of containers or hanging baskets, creating a stunning visual display.

As the stems of these succulents grow, they root when they come into contact with soil or any other growing medium. This rooting pattern contributes to the plants’ stability and creates a lush appearance.

These succulents come in various shapes, sizes, and colours, offering a wide range of options to suit different aesthetic preferences. Some have delicate, fine foliage, while others feature bold rosettes or elongated leaves.

Succulents hanging.
Hanging succulents, also known as trailing or pendulous succulents, have a natural trailing growth habit.

Many hanging succulents produce colourful and vibrant flowers that contrast beautifully with their foliage. These blooms can add an extra layer of visual appeal and attract pollinators.

Some popular hanging succulent species include Senecio radicans (String of Bananas), Senecio rowleyanus (String of Pearls), Sedum morganianum (Burro’s Tail), and Rhipsalis spp.

How to Care for Flowering Hanging Succulents

So, how do you take care of flowering hanging succulents to benefit from their beauty? Here are some essential tips to get you started.

1. Choose the Right Container

Everything starts with the type of container you choose for your succulents. Consider a hanging container made of terracotta, ceramic, plastic, or lightweight concrete.

These materials are less likely to retain excess moisture than glass or metal containers. The latter has poor drainage capabilities and could lead to root rot issues.

In areas with extreme temperature fluctuations, consider containers with thicker walls, such as ceramic or terracotta, since they provide some insulation to protect the roots from rapid temperature changes.

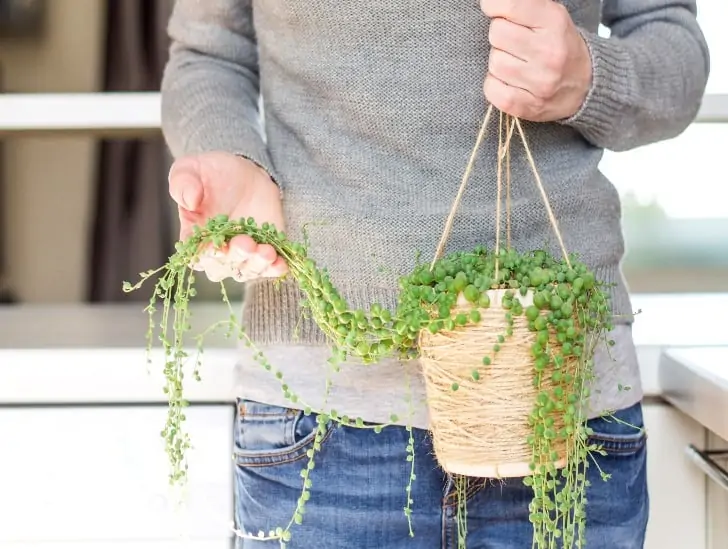
A man holding a string of pearls.
These materials are less likely to retain excess moisture than glass or metal containers.

The container should be sized to accommodate the succulent, leaving enough space for root growth. The shape of the container can influence the aesthetics and growth rate.

Shallow containers are generally better for succulents because they don’t hold too much water and promote good drainage. You must also ensure the container has plenty of drainage holes at the bottom.

Good drainage is essential to prevent water from pooling at the roots, which can lead to overwatering and root rot.

Take time to choose a container that complements the style of your space and enhances the overall visual appeal of your hanging succulent arrangement.

Fortunately, hanging containers come in varying colors, patterns, and designs, allowing you to express your personal taste.

2. Focus on Sunlight and Watering

Hanging flowering succulents are sun-lovers, so ensure they receive at least six hours of direct sunlight daily.

However, you may want to offer them some shade during summer. This will help prevent wilting and encourage healthy growth.

A string of dolphin freshly watered and exposed to sunlight.
Avoid frequent watering because it can cause root rot due to overly wet conditions.

Consider positioning the hanging basket where it can receive plenty of bright, indirect sunlight, such as near a south-facing window.

Avoid putting them in direct sun for extended periods because it can lead to irreversible sunburn.

Water your succulents when the soil is completely dry. Avoid frequent watering because it can cause root rot due to overly wet conditions. Your goal should be to keep the soil slightly moist but not soggy or waterlogged.

When it comes to irrigation, choose a low-pressure watering system that delivers light mist rather than a hard spray. Too much pressure can damage the succulents’ delicate foliage and disrupt their root systems.

3. Use Well-Draining Potting Mix

Succulents generally love a well-draining potting mix. Choose a specialized succulent soil designed to provide excellent drainage and aeration.

The soil must contain a combination of ingredients such as coarse sand, perlite, and organic matter to prevent water-logging.

Well-draining soil allows excess water to flow through it quickly, preventing water accumulation around the roots. Adequate aeration ensures that the roots receive oxygen, essential for healthy growth.

You can purchase the potting mix or make one at home. If you prefer to create your own mix, combine regular potting soil with coarse sand, perlite, or pumice in a ratio of 1:1.

Before planting your succulents, perform a simple test by moistening the soil and observing how quickly the excess water drains from the drainage holes. If it drains slowly, adjust your soil mix accordingly.

4. Fertilizer

Feed your hanging flowering succulents with a balanced fertilizer during the growing season. A 10-10-10 or 20-20-20 water-soluble fertilizer is ideal since it contains all the essential nutrients these plants need.

Choose a fertilizer with a low nitrogen content to prevent unwanted vegetative growth and encourage blooming.

Feeding your succulents at least once every four to six weeks should be enough, especially if you live in a region with mild summers.

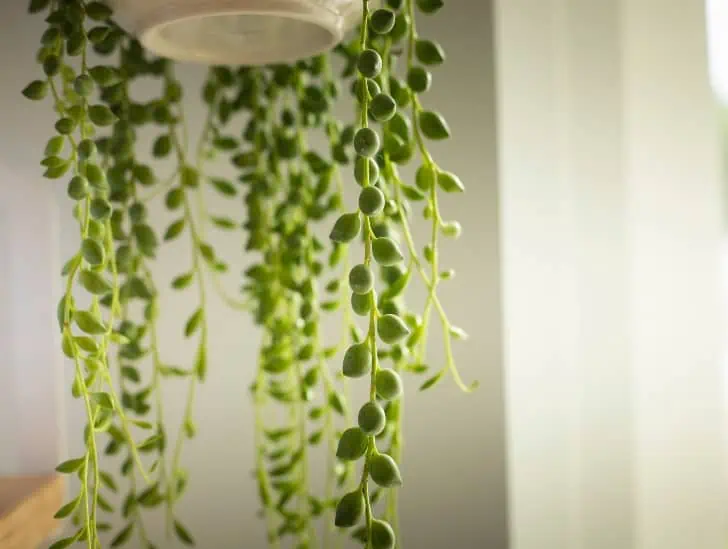
A string of pearls hanging exposed to sunbeam.
Feed your hanging flowering succulents with a balanced fertilizer during the growing season.

In colder climates, feeding them during autumn can help strengthen the plants and encourage vigorous root growth in preparation for winter.

However, avoid fertilizing your succulents during winter since it can cause them to become soft and susceptible to frost damage.

5. Rotate for Even Growth

Hanging succulents can develop uneven growth if they receive light from one direction. Rotate the container every few weeks to ensure all sides of the plant get adequate light exposure.

Rotating prevents your succulent from becoming lopsided, leading to a more visually appealing display.

It also leads to better plant health because photosynthesis is optimized when all sides of the succulent receive adequate light exposure.

Aim to rotate your hanging succulents every two to four weeks. This timeframe allows the plant to receive sufficient light from all angles before it starts stretching out.

You don’t need to perform a full 180-degree rotation every time. Simply turning the container a quarter or half turn will be good enough.

Try to maintain a consistent rotation pattern. For instance, always turn the container clockwise or counterclockwise so you don’t inadvertently rotate the plant back to the same position.

Also, consider keeping a simple journal or calendar that can help you track your rotation schedule and ensure consistent care.

6. Prune and Propagate

As your flowering hanging succulents mature, they may need occasional pruning to maintain their shape and size. Pruning encourages healthy growth and prevents the plants from becoming overcrowded.

You can prune your succulents at any time of the year, depending on the severity of overgrowth. Use sterilized scissors or a sharp knife to snip off unwanted foliage and stems.

However, you must be careful not to over-prune since it can cause severe damage. If you aren’t sure how much to prune, start small and gradually work your way up.

A string of heart.
Pruning encourages healthy growth and prevents the plants from becoming overcrowded.

Propagation is also easy with hanging succulents. All you have to do is snip off healthy plant material and insert it in fresh soil.

Keep the new cuttings lightly moist until they form firm roots; then, you can transfer them to a hanging container of their own.

You can also propagate these plants from seed, although this method is only ideal for highly experienced gardeners.

Planting from seed can be challenging and requires a lot of patience to achieve desired results.

7. Pest and Disease Control

Lastly, inspect your succulents regularly for signs of pests like mealybugs, aphids, or spider mites. If you notice any issues, isolate the affected plant, and treat it promptly with insecticidal soap or neem oil.

If you notice any signs of fungal diseases like powdery mildew, increase air circulation around the plants and reduce overhead watering.

Additionally, treat the affected areas immediately with a fungicide to help control the spread of disease to unaffected areas.

Final Thoughts

Hanging flowering succulents are gorgeous, low-maintenance plants that can add pop and colour to any outdoor or indoor setting.

With the right care, they will reward you with abundant blooms and lush foliage all year round.

The key is to provide them with consistent care — plenty of bright sunlight, well-draining soil, occasional watering, fertilizing, and pruning, and prompt pest and disease control.

Follow these simple tips, and you’ll be able to enjoy the beauty of your hanging flowering succulents.

What Makes Lobivia Arachnacantha a Must-Have for Cactus Lovers?

Spider cactus on a rocky garden.

Calling all cactus lovers! If you’re searching for a new addition to your cactus collection that will captivate your heart and mesmerize your eyes, look no further than the Lobivia arachnacantha. Also known as the Spider Cactus or Arachnid Cactus, the Lobivia arachnacantha is a beautiful cactus species native to the high-altitude mountains of Bolivia. This stunning species is a true gem among cacti, boasting unique features, captivating growth habits, and a rich history.

So, what makes Lobivia arachnacantha a must-have for cactus lovers? One of the most remarkable features of this cactus is its unique spines that resemble delicate spider legs, giving it an otherworldly charm. The cactus boasts a compact and globular shape, making it a perfect choice for indoor and outdoor cultivation. The other intriguing aspect of the Lobivia arachnacantha is its unique growth habits. Unlike many cacti that grow solitary, this species tends to cluster, forming delightful clumps of spidery wonders. But what truly makes the Lobivia arachnacantha a must-have for any cactus enthusiast is its resilience and adaptability.

This blog post takes you on a journey into the world of the Lobivia arachnacantha, exploring its unique features, growth habits, and more. Read on to learn everything you need about this stunning cactus species.

Lobivia Arachnacantha: Quick Overview

Lobivia arachnacantha, commonly known as the Spider Cactus, belongs to the Cactaceae family and is a member of the Lobivia genus. It is characterized by its unique appearance and intriguing growth patterns.

Its name, derived from the Greek words “lobos,” meaning “lobe,” and “arachne,” meaning “spider,” perfectly captures its distinctive appearance.

The cactus features a globular or cylindrical shape, and its stem is covered in prominent tubercles, which are small, rounded projections. These tubercles give the cactus a textured and bumpy appearance.

Spider cactus on pots.
It is characterized by its unique appearance and intriguing growth patterns.

One of the most captivating features of this species is its striking supination. It generally has long, hair-like spines that emerge from the tubercles, resembling spider legs, hence the name “Spider Cactus.

Native to the high-altitude regions of Bolivia and Argentina, Lobivia arachnacantha thrives in rocky areas and arid environments.

It is well-adapted to withstand harsh conditions such as low rainfall and intense sunlight. This cactus has evolved to grow in altitudes ranging from 3,000 to 12,000 feet above sea level.

Lobivia arachnacantha is a slow-growing cactus species. It forms a solitary globular shape in its early stages, which elongates over time.

As it matures, it may produce offsets or “pups,” which grow around the base of the main plant. This allows the cactus to reproduce, forming a cluster of plants.

Lobivia arachnacantha plays an essential role in its ecosystem. As a native cactus species, it contributes to biodiversity and provides shelter for various tiny organisms.

Its flowers also serve as a valuable nectar source for pollinators, aiding in the reproduction of other plant species in its vicinity.

What Makes Lobivia Arachnacantha a Must-Have Plant for Cactus Lovers?

Now that you have a better understanding of the Lobivia arachnacantha let’s explore why it is such an attractive and desirable cactus species.

1. Distinctive Appearance

The Lobivia arachnacantha is an eye-catching cactus species. Its unique spherical shape and spidery spines give it a captivating appearance that sets it apart from other cacti. Its intricate web-like spines create a mesmerizing pattern resembling a spider’s web.

The visual effects mesmerize and enchants, creating a plant that draws attention and sparks conversation. As it grows, its spines continue to develop and expand, creating a dynamic and evolving visual display.

This growth pattern ensures the plant remains captivating and engaging, encouraging ongoing interest and admiration.

Spider cactus on a pot top view.
Its intricate web-like spines create a mesmerizing pattern resembling a spider’s web.

The contrasting colors of the spines against the cactus’s green body create a visually striking contrast that further emphasizes the spider web-like pattern.

When light plays across the surface, the spines can create fascinating shadows and highlights, adding depth and dimension to the plant’s appearance.

Due to its visually striking appearance, Lobivia arachnacantha can serve as the centerpiece of cactus displays, arrangements, or terrariums.

Its presence can anchor and enhance the overall aesthetics of a collection, drawing the eye and complementing other cacti species or decorative elements.

2. Compact Size

Lobivia arachnacantha typically remains relatively small, making it suitable for indoor cultivation or small spaces. Its compact size makes it easier to manage and care for than larger cactus species.

A mature Lobivia arachnacantha can reach a maximum height of 10-15cm, although this can vary depending on the environment and care.

Its size makes it ideal for container gardening or as accent plants in outdoor gardens.

Container gardening is a great way to express creativity and experiment with various design elements to create captivating displays.

The cactus may form offsets or “pups” around its base as it matures. This allows it to reproduce and create a cluster of visually appealing and space-saving plants.

3. Low Maintenance Requirements

Lobivia arachnacantha is a low-maintenance cactus species, making it a perfect option for novice gardening enthusiasts or busy gardeners.

It requires minimal attention and can survive in various environments and soil types as long as the surrounding environment is not too damp or humid.

Due to its native habitat, Lobivia arachnacantha is well adapted to withstand intense sunlight and low rainfall.

Spider cactus in a pot exposed to sunlight.
Lobivia arachnacantha is a low-maintenance cactus species.

As such, it can tolerate periods of drought and requires minimal watering once established.

It also does not require frequent pruning or maintenance since it grows slowly. The cactus can survive for long without fertilization and should only be fertilized when necessary.

4. Unique Growth Habits

Unlike other cacti species, Lobivia arachnacantha has some unique growth habits.

It generally grows in a globular shape and forms a solitary plant when young. As it matures, the cactus can produce offsets or “pups” around the base of the main plant. This allows it to reproduce and form clusters of plants that create an attractive visual display.

Lobivia arachnacantha’s pattern of growth makes it easier to propagate. The offsets from the parent plant can be removed and planted elsewhere, allowing it to spread quickly and easily.

It is also not uncommon for Lobivia arachnacantha plants to produce flowers. These flowers typically bloom between winter and spring, creating a burst of beauty and color.

5. Rare and Unusual

The spider web-like spines are quite uncommon in the cactus world, making Lobivia arachnacantha a rare and sought-after species among collectors who appreciate unique and unusual cacti.

Its rarity and uniqueness make it an ideal plant for those looking to build a distinctive collection of rare cacti species or add something special to their existing collection.

6. Charming Flowers

While the primary attraction is its spines, Lobivia arachnacantha produces vibrant and captivating flowers during the blooming season.

Typically, the Lobivia arachnacantha flowers during spring or summer add a touch of color and life to the plant’s overall appearance.

A spider cactus blooming.
They usually have a trumpet-shaped form and may be solitary or clustered together in bunches.

Depending on the cultivar, the flowers can be red, yellow, orange, or white. They usually have a trumpet-shaped form and may be solitary or clustered together in bunches.

These flowers are highly attractive to pollinators such as bees and butterflies and serve a critical role in the environment since they produce nectar.

7. Ideal for Container Growth

Due to its small size, Lobivia arachnacantha can thrive in containers, making it an excellent choice for enthusiasts who enjoy creating visually appealing cactus arrangements and miniature gardens.

Container gardening also offers greater flexibility since the plant can be easily moved and repositioned to suit your aesthetic needs or environmental conditions.

Moreover, containers provide drainage for excess water that may accumulate in soils with poor aeration and thus prevent root rot and other diseases from developing.

However, you need to be careful with the type of container you use to ensure that the plant has enough space to grow and that its roots are not constricted.

8. Having the Cactus in Your Home Contributes to Conservation

Many species within the Lobivia genus, including Lobivia arachnacantha, are threatened in their natural habitats due to habitat loss and illegal collection.

By cultivating and propagating Lobivia arachnacantha, cactus enthusiasts can contribute to the conservation of this unique and valuable species.

Not only does this help ensure the survival of Lobivia arachnacantha, but it also raises awareness about its importance and encourages people to value and protect these rare species in their natural habitats.

9. Resilience and Adaptability

One of the main reasons that make the Lobivia arachnacantha a must-have for any cactus enthusiast is its resilience and adaptability.

It can survive in various climatic conditions since it is quite tolerant to temperature fluctuations and can withstand intense sunlight and low rainfall.

Close up image of spider cactus.
It can survive in various climatic conditions.

As such, it makes an ideal choice for both novice gardeners looking for a resilient cactus species that will add joy and beauty to a home garden.

Summary

The Lobivia arachnacantha is a stunning cactus species that comes with many benefits, making it a must-have for cactus enthusiasts. Its distinctive appearance and intriguing growth patterns provide visual intrigue and captivate the eye.

It is also low maintenance, compact in size, and rare – all traits that make it an ideal choice for those looking to add a unique element to their collection.

So, if you’re looking to bring something special and distinctive into your cactus arrangements, the Lobivia arachnacantha is worth considering.

How to Grow and Care for Succulent Senecio Plants

A senecio rowleyanus.

Senecio is a term used to refer to a large genus of plants consisting of about 1250 species dispersed worldwide. Most species are lovely, tender, and easy to care for at home. Out of the 1250 species, about 100 are succulents. Succulent Senecio plants are popular indoor plants often cultivated in hanging baskets with attractive foliage and peculiar flower heads. Some of the most popular Senecio succulents include string of bananas and string of pearls.

So, how do you grow and care for succulent Senecio plants? These plants mostly tolerate warm climates and are relatively easy to grow indoors. They prefer bright, indirect light but can tolerate some shade. Succulent Senecio plants thrive in well-draining potting mix with a pH range of 6-7. Most varieties thrive in USDA hardiness zones 10 to 12 since they are drought-tolerant. Since they grow in sandy soils, regular fertilization is necessary to replenish nutrients. However, you should avoid overfeeding because it can cause leggy growth.

This blog post discusses some of the most important tips for growing and caring for succulent senecio plants. Read on to find out everything you need to know.

Senecio Succulents: A Quick Overview

Senecio succulents are native to various regions worldwide, primarily in Africa and parts of South America.

They are well-adapted to arid and semi-arid climates and can be found in various habitats, including deserts, rocky outcrops, and dry savannas.

These plants have evolved to thrive in areas with limited water availability, making them well-suited for drought-prone regions.

The most distinguishing feature of Senecio succulents is their ability to store water in their thick, fleshy leaves and stems. This adaptation allows them to survive extended periods of drought without any problems.

A string of pearls hanging exposed to sunbeam.
Some Senecio succulents have a trailing or climbing growth habit.

Senecio succulents are generally fast-growing plants, especially when provided with the right growing conditions.

With adequate sunlight and well-draining soil, many species can reach maturity within a relatively short period.

Some Senecio succulents have a trailing or climbing growth habit. This makes them well-suited for use as hanging succulents or allowing them to cascade down from elevated locations, creating a visually stunning display.

How to Grow and Care for Succulent Senecio Plants

Now that you know a bit about Senecio succulents, let’s talk about how to grow and care for them.

1. Watering Requirements

Senecio succulents are highly sensitive to water. In fact, one of the greatest enemies of these plants is overwatering.

These plants are native to arid and semi-arid areas and have devised ways to survive through heat. Therefore, they don’t need frequent watering to thrive.

Always allow the top few inches of your potting mix to dry out completely before watering. These succulents need more water in summer when they are actively growing than in winter when they are dormant.

Consider using the soak-and-dry watering technique to avoid root rot. This watering method involves soaking the soil with water until it begins to drain out of the bottom of the pot and then allowing the soil to dry out completely before watering again.

Younger senecio succulents usually require more water than well-established plants. Consider watering young plants frequently, especially during the propagation period.

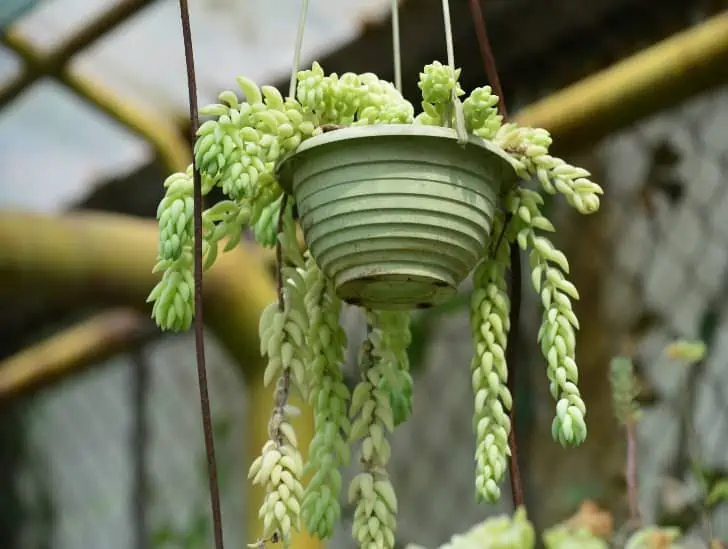
A donkey tail hanging.
These plants are native to arid and semi-arid areas and have devised ways to survive through heat.

Once established, the plants become drought-resistant since their root system grows wide to absorb more water.

Well-established senecio succulents can go for several months without water if you live in a relatively humid climate.

But you still need to keep an eye out for dry soil and other signs of dehydration, such as shriveled leaves.

2. Location & Lighting

Most Senecio succulents prefer bright, indirect light. This means they should receive bright light throughout the day but not direct sunlight.

Direct sunlight can be too intense, causing sunburn or damage to the plant’s leaves. Position your plants near a window with filtered light or use sheer curtains to diffuse the sunlight.

Some Senecio succulents can tolerate a few hours of direct sunlight, especially during the morning or evening when the sun is less intense.

Morning sun exposure allows plants to benefit from gentle sunlight that helps with photosynthesis without causing harm. Avoid exposing them to harsh midday sunlight.

The amount of light available changes with the seasons. During winter, when the sun is lower in the sky and days are shorter, Senecio succulents may need to be moved closer to the window to receive sufficient light.

Succulents hanging.
Avoid exposing them to harsh midday sunlight.

Conversely, in the summer, they may require some protection from intense sunlight or be moved further away from direct light.

If you live in an area with limited natural light or want to grow Senecio succulents indoors, you can use artificial lighting to supplement their light requirements. LED grow lights or full-spectrum fluorescent tubes are suitable options.

Place the artificial light source a few inches above the plants and keep it on for about 12-14 hours daily to mimic natural light conditions.

3. Soil Requirements

The key to growing healthy succulent Senecio plants is to use a well-draining potting mix.

A cactus or succulent potting mix works great since it contains all the necessary ingredients for your plant’s health and growth. Make sure to mix in some perlite or gravel for added drainage.

Senecio succulents also prefer slightly acidic soil with a pH range of 6-7.  If you’re unsure how to test your potting mix’s pH level, consider buying an inexpensive soil testing kit from your local garden center or hardware store.

4. Temperature and Humidity Requirements

Senecio succulents generally prefer warm temperatures and are well-adapted to thrive in arid and semi-arid climates.

Ideally, they should be kept in a temperature range of 65°F to 80°F (18°C to 27°C) during daytime.

These plants can tolerate slightly higher temperatures for relatively short periods, but prolonged exposure to extreme temperatures can be stressful.

During winter, it is essential to protect Senecio succulents from freezing temperatures because they are not frost-tolerant. A temperature range of 50°F to 60°F (10°C to 15°C) or above is ideal.

A donkey tail hanging.
These plants can tolerate slightly higher temperatures for relatively short periods.

Avoid placing your plants near drafty windows or areas with temperature fluctuations because sudden temperature drops can be harmful.

Senecio succulents are naturally adapted to low-humidity environments, making them well-suited for drier conditions. They can tolerate low humidity levels commonly found in arid regions and indoor environments.

Ideally, a relative humidity level of around 40% to 50% is suitable for these succulents.

In more humid climates or during humid seasons, ensure adequate airflow around the plants to prevent excess moisture buildup, which can lead to fungal issues and stem rot.

If you live in a highly humid area, consider using a dehumidifier or placing a fan nearby to improve air circulation around the plants.

5. Fertilizer Requirements

Senecio succulents do not require regular fertilization. Since they are native to arid and semi-arid regions, these plants can survive in nutrient-poor soil for long periods.

In fact, overfeeding your plants is more likely to cause harm than good since it can lead to root rot or other issues due to a buildup of salts in the soil.

If you decide to use fertilizer, go for slow-release options specially designed for cacti and succulents. Follow the instructions on the package regarding application rates and timing.

Generally, it is best to fertilize your Senecio succulents during spring and summer when they are actively growing. During winter, they require less fertilizer since their growth slows down or stops.

6. Repotting

Repotting is an essential aspect of routine care for Senecio succulent plants. With time, your plants may outgrow their current containers or deplete the soil’s nutrients, necessitating a larger pot and fresh growing medium.

These succulents generally require repotting every one to two years, depending on their growth rate and current container size.

Younger plants tend to grow more rapidly and may need repotting annually, while more mature plants can go longer between repotting sessions.

The best time to repot Senecio succulents is during the active growing season, typically in spring or early summer.

Avoid repotting during the dormancy period because they are more susceptible to disturbance during this time and may not recover.

7. Propagation

Senecio succulents are usually propagated through leaf cuttings. The leaves should be carefully removed and then allowed to callus for a few days before planting in a moist potting mix.

It is important to use a well-draining potting mix for propagating Senecio succulents since they are highly susceptible to damping-off and root rot. A mixture of cactus potting soil, coarse sand, and perlite works well.

String of pearls on water propagation.
Senecio succulents are usually propagated through leaf cuttings.

Keep the propagated cuttings in bright, indirect light and maintain consistent moisture in the potting mix. With time, new roots will begin to form, and small offsets from the parent plant will gradually emerge.

Once the offsets are large enough, remove them and plant in separate containers. With regular care, your Senecio succulents should thrive and bloom for several years.

Summary

Senecio succulent plants are low-maintenance and easy to care for, making them an ideal option for novice and experienced gardeners.

With proper light, soil, temperature, humidity, fertilizer, repotting and propagation requirements met, these succulents can thrive and bring a pop of colour to any indoor or outdoor space.

Terrarium Troubles: The Real Reasons Behind Mold Growth

A closed terrariums.

Terrariums are more than just a delightful piece of nature tucked into your living space; they’re an escape into a world of wonder and tranquility. As you gaze into the lush greenery and observe the delicate balance of life thriving within, it is easy to see why terrariums have captured the hearts of many succulent enthusiasts. However, terrariums are not without their challenges. One of the most common issues is mold growth. In fact, mold growth can be a frustrating problem that threatens to disrupt the delicate balance of your wonderful ecosystem.

So, why does mold grow in terrariums? There are several key factors at play. Excess moisture is often the primary culprit, creating the perfect breeding ground for mold spores to take hold and flourish. Poor ventilation, improper temperature, lighting conditions, and overwatering can also contribute to mold growth. Other causes include poor drainage, improper cleaning, inappropriate terrarium design, and decomposition of organic matter.

This blog post delves deep into the fascinating world of terrariums and explores the real reasons behind mold growth. Read on to learn more.

Understanding Mold Growth

Mold is a type of fungus that can thrive both indoors and outdoors. It is an essential part of a natural ecosystem since it helps to break down organic matter, returning nutrients to the soil. Despite its role in nature, mold growth inside terrariums is usually unwelcome.

Mold reproduces via microscopic spores, released into the air and spread by wind, water, or animals. When the conditions are right, these spores enter terrariums and begin to grow, forming unsightly colonies of fuzz and mold.

A terrarium
Despite its role in nature, mold growth inside terrariums is usually unwelcome.

Mold colonies can spread quickly, depriving plants of oxygen and nutrients for healthy growth.

The Real Reasons Behind Mold Growth

So, what causes mold growth in terrariums? The truth is that several factors can contribute to mold growth in a terrarium. Below are some of the top reasons for mold growth in terrariums:

1. Excessive Moisture

    Excessive moisture is a crucial factor contributing to mold growth in a terrarium. Remember that a terrarium is a closed or semi-closed environment mimicking a miniature ecosystem, consisting of a transparent container, plants, soil, and sometimes additional elements like rocks or decorative items.

    The terrarium’s water cycle plays a crucial role in maintaining the balance of the ecosystem. Moisture is usually introduced into the system through watering or misting.

    As the terrarium absorbs heat and receives sunlight, the moisture evaporates and rises within the container.

    Upon reaching the cooler upper walls or lid, the warm, moist air condenses back into water droplets, drip down to the potting mix and plants, completing the water cycle.

    The biggest contributor to excessive moisture in a terrarium is overwatering since it leads to saturated soil and waterlogged conditions. The excess water may not evaporate efficiently, causing prolonged high humidity.

    A jar converted to a closed terrarium.
    As the terrarium absorbs heat and receives sunlight, the moisture evaporates and rises within the container.

    Moreover, limited ventilation can also trap the moist air inside the terrarium, preventing its escape and leading to humidity buildup. Maintaining optimal moisture levels in the terrarium can be challenging in regions with high humidity.

    Excessive moisture will always lead to mold growth issues. Mold spores, naturally present in the environment, thrive in damp conditions.

    Excessive moisture provides an ideal breeding ground for the spores, leading to unsightly and potentially harmful mold growth on terrarium plants and surfaces.

    Proper care and maintenance practices are essential to prevent excessive moisture and mold growth in a terrarium. Water wisely and be mindful of the water needs of your plants and terrarium size.

    Allow the potting mix to dry between watering sessions and provide proper ventilation. Ensure the terrarium has adequate airflow. This can be achieved by periodically opening the lid to allow fresh air circulation and excess moisture to escape.

    2. Poor Ventilation

    Ventilation is another important factor that contributes to mold growth in terrariums.

    Warm moist air will get trapped inside the closed environment without adequate air circulation, leading to humidity buildup and mold growth.

    It is essential to ensure your terrarium has enough ventilation. Open the lid periodically to allow fresh air circulation and excess moisture to escape.

    A closed terrarium on a shelf.
    Ventilation is another important factor that contributes to mold growth in terrariums.

    Provide extra ventilation by creating small openings in the container walls or lid for improved air circulation.

    3. Organic Matter Decomposition

    Organic matter decomposition is another significant cause of mold growth in a terrarium. Various organic materials naturally occur within the terrarium ecosystem. These materials include fallen leaves, flowers, or plant debris that undergo a natural life cycle.

    With time, organic materials break down into simpler compounds through decomposition.

    The decomposition process involves the activity of microorganisms such as bacteria and fungi, collectively known as decomposers.

    They feed on the decaying organic matter, breaking it down and releasing nutrients into the soil.

    Mold and fungi are crucial in decomposition because they are the primary decomposers responsible for breaking down plant matter.

    Mold spores, abundant in the environment, can find their way into the terrarium and settle on the decaying material.

    When organic matter, such as dead leaves or flowers, accumulates in the terrarium without being removed, it provides an abundant food source for mold.

    The moisture present in the decaying material further facilitates mold growth since mold thrives in damp environments.

    Once mold establishes itself on decaying organic matter, it can quickly spread to other surfaces in the terrarium.

    The spores become airborne, settling on plants, soil, and other decorations. This leads to the further expansion of mold colonies.

    4. Incorrect Light and Temperature Conditions

    The light and temperature conditions in your terrarium can also contribute to issues with mold growth.

    Incorrect lighting or temperature levels can cause excessive moisture to remain trapped inside the terrarium, furthering the ideal environment for mold spores to thrive.

    A open terrarium outdoor exposed to sunlight.
    Check the temperature regularly and ensure the terrarium doesn’t become too hot or cold.

    Ensure your terrarium is placed in a location with bright but indirect light sources.

    If your terrarium is exposed to direct sunlight, it can heat up quickly and cause water to evaporate too quickly, leading to waterlogged conditions and mold growth.

    The terrarium’s temperature should also remain within optimal levels for plants in your system. Check the temperature regularly and ensure the terrarium doesn’t become too hot or cold.

    5. Poor Terrarium Design

    The design of a terrarium plays a crucial role in its overall health and functionality. Poor terrarium design can create an environment that encourages mold growth and other issues.

    Certain design elements may trap excess moisture or prevent proper air circulation, making the terrarium susceptible to mold problems.

    One common design flaw is inadequate ventilation. Terrariums need proper airflow to prevent the buildup of stagnant, moist air.

    If the terrarium lacks sufficient openings or vents, the trapped humidity can create a favorable environment for mold spores to thrive, leading to mold growth on surfaces and plants.

    Another aspect of poor design is the choice of lid or closure. If the terrarium has a completely sealed lid, it may trap moisture inside, leading to high humidity levels and an increased risk of mold.

    A lady smiling holding a closed terrarium.
    The design of a terrarium plays a crucial role in its overall health and functionality.

    Instead, a terrarium should have a partial lid or openings, allowing air exchange and moisture dissipation.

    The selection of materials also impacts the terrarium’s susceptibility to mold growth. Certain materials may retain moisture more effectively, contributing to higher humidity levels.

    For example, a terrarium made entirely of non-porous materials like glass or plastic can lead to moisture accumulation, making it necessary to take extra precautions in managing humidity.

    6. Improper Cleaning

    Your terrarium requires regular cleaning to maintain its health. Over time, organic debris, such as dead leaves or flowers, can accumulate in the ecosystem and form an ideal environment for mold growth.

    Incorrect cleaning techniques can exacerbate this problem and further promote the spread of mold spores.

    If you use a damp cloth or sponge to clean your terrarium, make sure it is thoroughly wrung out before wiping down surfaces to prevent additional moisture from being added.

    Also, avoid overwatering when cleaning your terrarium since it can cause waterlogged conditions and mold growth.

    Use a dry cloth or paper towel for gentle wipe-downs of the glass walls, decorations, and other surfaces.

    If you find mold growing on any surface within your terrarium, you can get rid of it by scrubbing it with a dry brush or sponge.

    Remove infected plant parts and dispose of them safely to prevent further contamination. Make sure all debris is removed from the terrarium to discourage mold growth.

    7. Use of Contaminated Soil

    Lastly, using contaminated soil can also cause mold problems in your terrarium.

    Unsterilized dirt or compost may contain fungi or bacteria spores that facilitate the development of mold colonies.

    A close round terrarium with succulent.
    The design of a terrarium plays a crucial role in its overall health and functionality.

    Therefore, it is essential to use sterilized soil when planting your terrarium and avoid using potting media that could contain any contaminants.

    To ensure the health of your terrarium, provide optimal conditions for plant growth, and prevent mold problems, it is necessary to check for any signs of mold growth regularly.

    Summary

    Mold growth in terrariums is a common issue caused by excessive moisture, poor ventilation, and incorrect lighting and temperature conditions.

    Proper care and maintenance practices are essential to providing an optimal environment for your terrarium plants to thrive and prevent mold growth.

    Water wisely according to your plants’ needs, use sterile soil, and clean regularly to prevent the buildup of organic matter. Proper terrarium design is also important for ensuring adequate air circulation and preventing mold growth.

    Ensure you watch for potential signs of mold in your terrarium and act promptly if any issues arise.

    Succulents + Rocks = Perfect Match: Here’s How to Plant Them

    A closeup image of lithops.

    Succulents have undoubtedly won the hearts of gardening enthusiasts worldwide with their diverse shapes, colors, and textures. Whether you’re a seasoned horticulturist or just beginning to explore the joys of gardening, these resilient plants are a delight to nurture. But have you ever considered pairing them with rocks to create stunning arrangements that reflect the rugged allure of nature? We are here to provide all the information you need to get started.

    So, how do you pair succulents with rocks? The first thing you need to do is establish why you are pairing rocks with succulents. If you plant succulents for short-term aesthetics, you don’t have to worry about potting mix and other stuff. However, if you are thinking of a long-term project, you can’t plant the succulents on rocks alone. You need a well-draining potting mix for your succulents to stay healthy. Now find the best succulents that pair well with jade, houseleek, and ice plant rocks. Use porous rocks to ensure proper air circulation, and avoid using moss in your rock garden. Provide succulents with as much light as possible and only water when necessary.

    This blog post will delve into the art of planting succulents in rocks. You will discover why succulents and rocks make a perfect match and uncover the secrets behind planting them seamlessly. Read on to learn more.

    Can You Plant Succulents in Rocks?

    The answer to this question is both yes and no.

    Yes, you can plant succulents in rocks if the arrangement is meant to be short-term and won’t require long-term care.

    On the other hand, if you intend to keep your succulents longer, you must provide them with some support system like potting mix or soil.

    The rocks will support the succulents and provide a beautiful aesthetic, but they won’t be able to keep the succulents nourished in the long run.

    A succulent on a can planted on Gravel.
    You can plant succulents in rocks if the arrangement is meant to be short-term and won’t require long-term care.

    Remember that rocks don’t absorb moisture and can’t store water for your succulents. Succulents planted in bare rocks without support will eventually dry up and die since their roots can’t absorb water.

    Even low-maintenance succulents still need water and nutrients to thrive.

    Planting succulents in bare rocks without soil denies them access to vital nutrients such as potassium, magnesium, phosphorous, nitrogen, and others.

    Rocks don’t produce these nutrients. Therefore, your succulents will only survive for weeks or months before they die.

    However, adding some soil at the bottom of the container and using rocks as the top layer will work fine in the long term.

    Some may argue that rocks contain valuable minerals that succulents can depend on for survival. But the truth is that rocks don’t release these nutrients fast enough to sustain the plants.

    The rock minerals disintegrate over a very long period and don’t provide enough sustenance for the succulents.

    How Can I Get It Right?

    Fortunately, there are different ways to plant succulents in rocks without compromising long-term survival. Here are some exciting ways to pair succulents with rocks:

    Add Rocks/ Pebbles to a Glass Jar

    Succulents growing in a terrarium always look great. In fact, this is one of the best ways of pairing succulents with rocks. Consider using rocks of different sizes to hide the potting mix.

    Creating a rock + succulent terrarium is easy. The first thing you need to do is decide on the rocks that will show outside. Carefully place these rocks at the bottom of your glass container.

    An open terrarium with succulent.
    This is one of the best ways of pairing succulents with rocks.

    Now fill the gaps between the rocks with pumice or pebbles. Consider using geo-baric to stop the potting mix from touching the glass surface.

    The next thing you need to do is build rocks around the glass to create an illusion of rocks + succulents with no soil.

    Carefully insert your succulent cutting or seedling in the soil and sprinkle some pumice on top to cover the soil layer. Pumice also aids drainage.

    Potted Succulents and Rocks

    Another way to pair succulents with rocks is to use them in potted succulent arrangements. Remember that you need a container with drainage holes.

    Fill the pot halfway with drainage material such as gravel or pebbles. Now add soil and carefully insert the cuttings, seedlings, or mature plants.

    A sand dollar cactus in a pot.
    Remember that you need a container with drainage holes.

    Cover your soil with moss and carefully layer the rocks on top. You can also build a mound of rocks at one side to create a mini-hill or keep them flat for a more traditional look.

    Succulents + Rocks in Plastic Pots

    It is easy to grow some succulents in plastic pots. Since most plastic containers are opaque, you don’t have to worry about visual aesthetics so much.

    The first thing you need to do is fill your plastic container with some gardening soil. Add some pumice or pebbles for drainage. Now add your succulents and cover the soil with rocks or stones.

    Keep in mind that pumice is white rock. Sprinkling them on top of your setup helps with soil drainage and improves the overall aesthetics of your setup.

    A 10cm plastic container can typically accommodate up to six succulent cuttings.

    Pair Succulents with Rocks Outdoors

    If you plan to plant succulents outdoors, then you need to remember that the installation shouldn’t be too deep. Succulents don’t like being planted in thick soil or mud as the roots won’t be able to access oxygen.

    First, you must use chalk or string to mark a spot for your succulents and rocks. Carefully dig a shallow hole and fill it with gravel or pebbles.

    Now insert your succulents in the gravel and carefully cover them with a thin layer of soil.

    Finally, add rocks around the succulent to create an attractive display. Consider using larger stones, which won’t blow away on windy days. The use of medium-sized rocks provides better aesthetics too.

    A sempervivum on a rocky garden.
    Add rocks around the succulent to create an attractive display.

    Remember to water your succulents regularly and provide them with plenty of sunlight. Apart from that, you don’t have to do much to keep the succulents healthy and thriving.

    What Are Some of the Best Succulents for Rocks?

    Below are some of the best succulents for pairing with rocks. These succulents thrive in outdoor environments and are highly resilient.

    Some are slow growers, but they are hardy enough and provide a beautiful ground cover to make your succulent + rocks garden look beautiful.

    Jade

    The jade plant is one of the most common Crassula succulents. Its oval-shaped leaves make it an ideal choice for rock gardens. It is a slow grower and can survive in hot and dry climates.

    It produces pink flowers during the blooming season, making your garden look stunning.

    Pig Face

    The Pig face is an evergreen succulent that grows both indoors and outdoors. This plant has stunning maroon foliage and can tolerate partial shade, making it a great option for rock gardens. It produces yellow flowers in spring and summer, adding beauty to your garden.

    Aloe Vera

    Aloe vera is a popular succulent due to its therapeutic properties. Not only does it look great when paired with rocks, but it can also treat minor cuts and wounds. It has long, thin leaves with a light green hue. It needs plenty of sunlight and moderate watering for optimal growth.

    A variegated aloe vera.
    Aloe vera is a popular succulent due to its therapeutic properties.

    Tips on Planting Succulents in Rocks

    Below are some tips that will make it easy to create a perfect combination of rocks and succulents in your home.

    • Choose the right succulents: Some of the best succulents to plant in rocks are jade, houseleek, and ice plant. These plants thrive in dry conditions and require little maintenance.
    • Use porous rocks: Porous rocks such as lava rock or pumice will allow air to circulate around your succulents better than denser materials like marble or granite.
    • Choose an appropriate pot/container: Ensure the container is big enough for the succulent’s roots to grow but not too large that it causes water to stagnate and affects plant growth.
    • Consider using a tray: Placing a tray under the pot will help with drainage and prevent your succulents from getting overwatered.
    • Group succulents together: Planting different types of succulents together will make your display more aesthetically pleasing. Ensure the plants are spaced out enough to allow them room to grow and receive adequate sunlight.
    • Don’t forget to water regularly: Succulents in rocks need regular watering like other plants. Make sure to check the soil moisture before watering and adjust accordingly. You can also use a spray bottle for an easier option.
    • Don’t forget to fertilize: Feeding your succulents with a balanced fertilizer every now and then will help them grow faster and stronger. You can buy liquid fertilizer or use organic matter such as compost, manure, or fish emulsion.

    Summary

    Pairing succulents with rocks is a great way to create stunning arrangements that reflect the rugged allure of nature.

    Remember to use porous rocks and provide plenty of light and water for your succulents when pairing them with rocks.

    With a little bit of care, you’ll be able to create a unique display of rocks and succulents that will thrive for many years. Good luck!