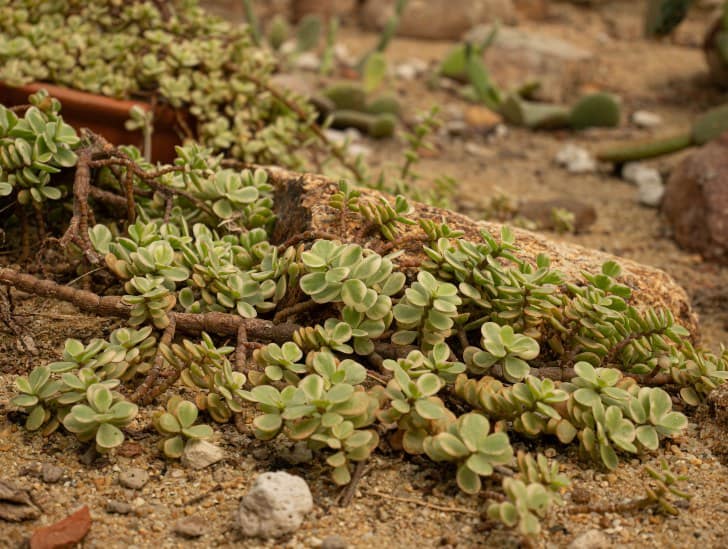
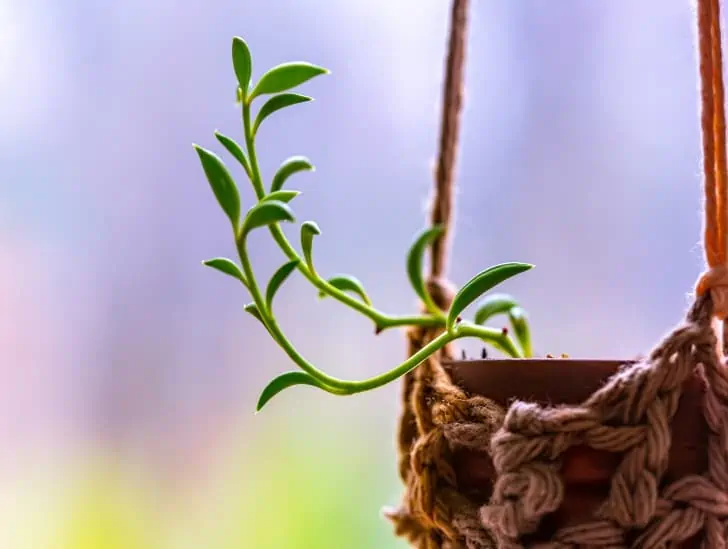
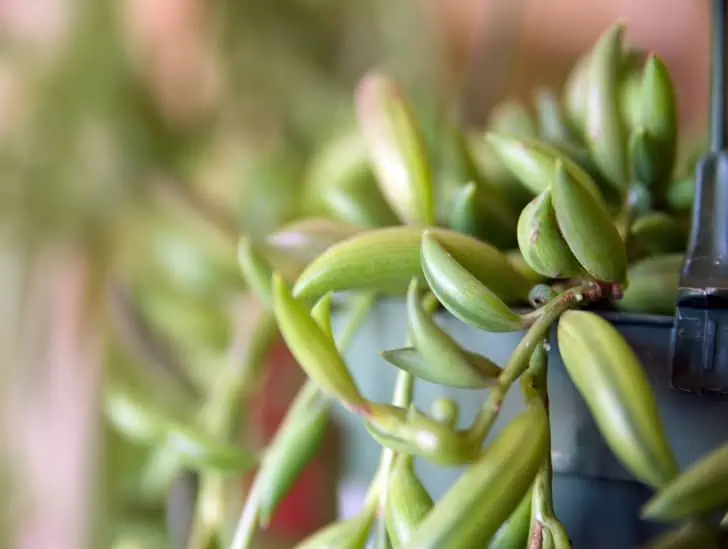
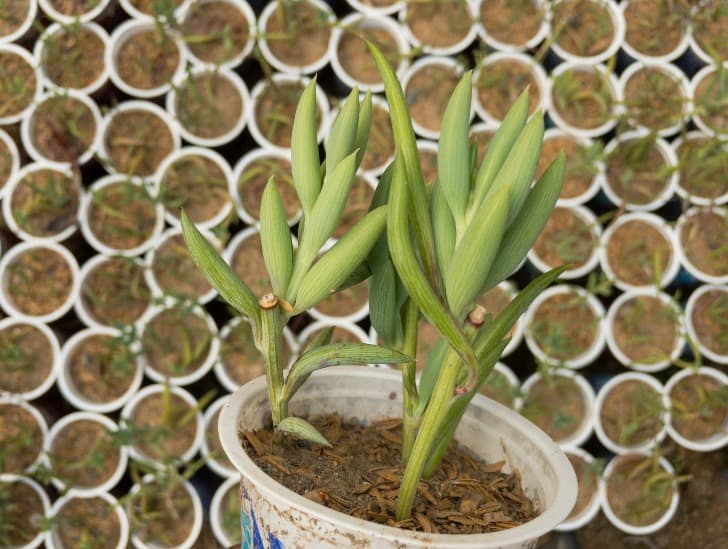
How To Easily Propagate Crassula Ovata?

When you think of succulents, the first thing that probably comes to mind is a cactus. But did you know that there are other types of succulent plants? Crassula ovata, also known as Jade Plant or Friendship Tree, is a popular type of succulent plant that has been used in gardens for centuries.

Crassula ovata is easy to propagate succulent, and this is seen as it tends to get weedy outside its natural habitat when left unattended. This blog post will explore why to propagate the Jade plant and propagate Crassula ovata.

If you have been into the world of succulents and don’t know which one may work for you, we suggest you try this excellent plant. Well, it might require low maintenance like almost every other succulent, but here is why you should consider propagating Crassula ovata:

Why Plant Crassula ovata?

1. Cleans Air Quality

Introducing a Jade plant in your home helps purify the air. Indoor air can be polluted as much as the outside air. Proper ventilation is usually the best case to clean indoor air, but this is usually not the case. 

If you have been suffering from exhaustion, weakness, or insomnia due to Volatile Organic Compounds (VOC) that comes from paints, moth repellents, and wood preservatives, planting Crassula ovata indoors helps curb these problems.

2. CO2 Absorption at Night

Jade plant conducts Crassulacean Acid Metabolism (CAM) process. The plant absorbs CO2 at night and helps reduce the amounts of CO2 in the house.

3. Raises Humidity Level

The surrounding dry air is likely to affect your health and beauty. You can opt for humidifiers, but this means increased bills. The Jade plant helps increase indoor humidity levels during the CAM process.

Jade plant near the window.
There are two rooting methods that you may want for your Crassula ovata before planting.

Finally, you know the benefits of growing Crassula ovata indoors as it helps you live healthy and wealthy, in addition to decorating your home. But how do you propagate it?

How to Propagate Crassula ovata

Propagating Crassula ovata is mainly from cuttings, either leaf or stem cutting. While getting a leaf-cutting is more straightforward, they take much time before becoming a Jade plant.

Items Necessary for Propagation

  • A pair of scissors or sharp knife
  • Rooting hormone liquid or powder
  • Suitable soil (a succulent soil or cactus mix)
  • A pot or container with drainage holes
  • Working space
  • Where to lay cuttings to dry, paper towel or dry surface

Crassula ovata Propagation from Stem Cuttings

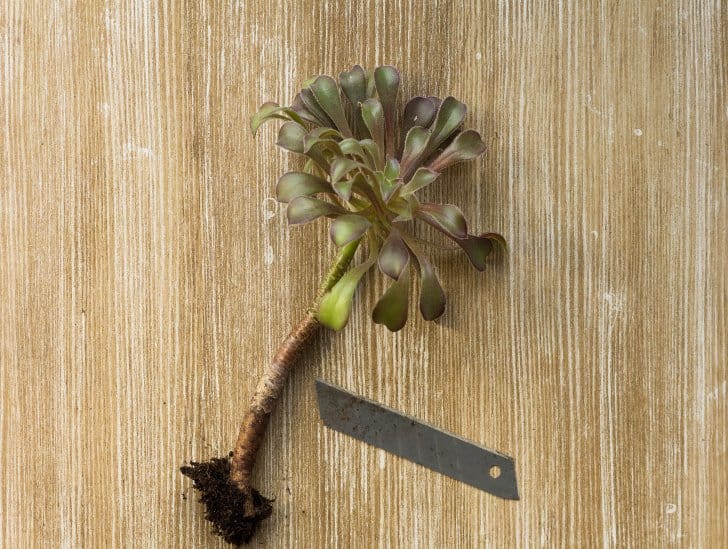
  1. Cut as near to a node as possible using your sterile knife. Nodes are sections of the stem where new leaves and stems develop. Make the incision four to five inches long.
  2. Prune off leaves at the bottom of your cutting. The lower part of the cutting is used as the anchor when planting.
  1. Place the cutting on a paper towel or dry surface to dry. Let the cutting dry for two to four days, or until the leaves and stem cut form a callous.
  2. Apply the rooting hormone, either liquid or powder, at the bottom inch of the cutting. For powder rooting hormone, you may need to moisten the stem first for the powder to stick.
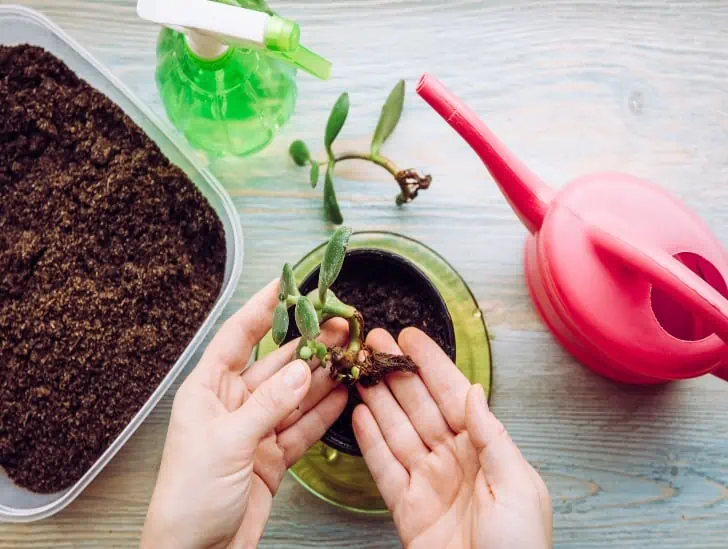
A jade plant being transferred on a new pot.
There are two rooting methods that you may want for your Crassula ovata before planting.

Now your stem cutting is ready for planting; however, there are two rooting methods that you may want for your Crassula ovata before planting. Here is how to root Crassula ovata:

Rooting Crassula ovata in Soil

You can directly plant your Jade plant stem cutting in the soil. Succulents are pretty tenacious, so this method almost always works. The only disadvantage is that you won’t be able to monitor your cutting’s development until new leaf growth begins to appear.

  • Get your container or pot with drainage holes. A standard plastic nursery planter also may do the work.
  • Fill the pot with well-draining soil or succulent mix. Crassula ovata isn’t picky about soil; hence you may use any kind of potting soil plus a decent handful of perlite for better drainage.
  • Water the soil just enough to make it moist. Don’t let the soil be too wet.
  • Use a stick or finger to dig a small hole in the soil. It just needs to be deep enough for the stem cutting to stand up.
  • Move the pot into a shade, let your cuttings receive bright indirect light, and water them every few days once the soil is dry.

Pro Tip: Once the stem cuttings start drooping, it’s the time most of them are growing roots. You don’t need to worry. They will grow new leaves and look healthy and fresh.

A person cutting a stem of a crassula ovata plant.
Once the stem cuttings start drooping, it’s the time most of them are growing roots.

Rooting Crassula ovata in Water

Rooting Crassula ovata in water for propagation is a favorite for many since it’s often easier and faster. And perhaps even more importantly, you get to see the roots growing in real-time!

To root in water, immediately the calloused part has healed, pop it into a vase or glass of water. Now move the glass or vase with the cutting into bright, indirect sunlight and a well-ventilated location.

The only thing you’ll be doing is changing the water once or twice a week. Immediately you note the roots, move your Jade plant into a new home for planting. Remember not to leave it for long in water once the plant has grown roots, lest they start rotting.

Crassula ovata Propagation from Leaves

To propagate Crassula ovata from leaves, simply pluck off leaves entirely from a stem. Identify healthy leaves and pluck. The leaves are even very easy to grow.

Once you have plucked the leaves, let them form callous for at least two days or until the node area has dried.

Prepare a potting mix. You can use ordinary soil with 50% coarse sand or perlite to enhance water sipping into the soil. Porous soil lets water sip through and helps maintain wetness but is not soggy. Soggy soil causes bacterial infection to Crassula roots hence roots rotting.

A close up image of Crassula ovata.
A Jade plant in your home helps purify the air.

Once the cut area has dried up, apply some rooting hormone to encourage fast rooting.

Rooting Crassula ovata Leaves on Water

Rooting leaf cuttings in water might seem impossible, but you may use toothpicks or mesh to suspend the leaves in a vase of water or glass. Ensure only the calloused areas are in contact with water.

Again, you will have to change the water every week to prevent the rotting of the leaves. Once you note rooting, you can repot baby Jade plants into a new pot for growing. 

Pro Tip: It may take a while for leaf cuttings to develop into a Jade plant. It takes time before they form stems.

Rooting Crassula ovata Leaf Cuttings in Soil 

The easiest way to root Crassula ovata is by soil. All you need to do is place them on the well-draining soil and make sure the calloused area touches the soil. That’s it! Amazing right?

Leaves are an excellent resource for getting new Jade plants. The best part about leaves is that you may put many of them in the same container to improve your chances of success. The resulting plants will be tiny at first, and once grown, transplant them into separate containers.

Crasula ovata on hand.
The easiest way to root Crassula ovata is by soil.

When you’ve repotted all of your leaves into new pots, move them into bright, indirect light and spray them every few days to keep the soil gently wet.

You may transition to a regular succulent watering schedule after the roots, and young plants become apparent.

Tricks and Tips to Grow Crassula ovata

  • Crassula ovata is a succulent; hence it retains most of its moisture in its stems and leaves. This trait makes the Jade plant very delicate to water supply. Too little water is just as bad as too much water.
  • The plant’s root development appears to be aided by periods of drought. The roots expand in all directions and clamp the plant securely to the soil in search of moisture. This also keeps the plant from falling over or prevents becoming ‘top-heavy.’ Furthermore, in these times, the soil dries up between waterings.
  • Many people can tell when their Jade plant needs water just by the appearance of its leaves after having it for a while. If the leaves aren’t as plump and cheerful as usual, it’s time to water them.
  • Jade takes a long time to grow, so be patient and allow it to develop.
  • A clay container is the best choice. Clay, rather than plastic, will assist in evaporating moisture and help dry the soil, preventing it from being soggy.
  • This plant thrives in a south-facing window with lots of natural light and at least four hours of direct sunshine. Do not introduce your baby Jade plant to the sun immediately. Start by slowly moving it into a bright spot before introducing it to direct sunlight. Let it gradually adjust.

Final Thoughts

You can propagate Crassula ovata from leaf or stem cuttings. Using leaves will take time as they’ll have to grow to form strong stems for new branches. Unlike stem cutting, branches will start growing from the primary cutting.

We hope you find the above different propagation tips helpful, and you are now free to plant Crassula ovata and watch them grow to fill your garden. 
How to Propagate Crown of Thorns Plant?

Crown of Thorns, also known as Christ thorn or the Christ plant, is an ideal succulent to add to your plant collection since it is a great decoration for Easter and Christmas. You can easily create a beautiful view by arranging small pots of the Christ plant cuttings on tabletops, at place settings, or across mantels. You can even give a young crown of thorn plant as a gift to your friends and relatives. Fortunately, it is relatively easy to propagate crown of thorns plants to help you achieve all the above.

So, how do you propagate the crown of thorns plant? The simple answer is through cuttings and seeds. The most common propagation method is through cuttings, but you can still collect seeds of the plant after the flowering season and sow them. If you want to propagate through cuttings, ensure you water your plant at least one day before taking the cuttings. This will ensure the cuttings have enough water stored, which is crucial for rooting. For seeds, make sure you sow them at the surface of the well-draining potting mix and cover the container with plastic. The seeds germinate within two or three weeks.

This blog post discusses everything you need to know about propagating crown of thorns plant. Read on to learn more on how you can expand your crown of thorns plant collection.

When Is the Best Time to Propagate Crown of Thorns Plant?

Crown of thorns plant cuttings and even seeds require relatively warm conditions and bright indirect light to root or germinate. Therefore, an ideal time to carry out propagation is during spring or early summer.

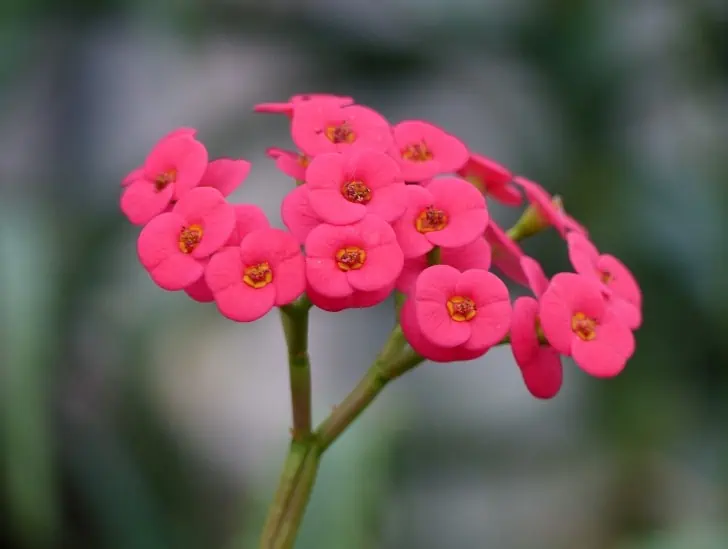
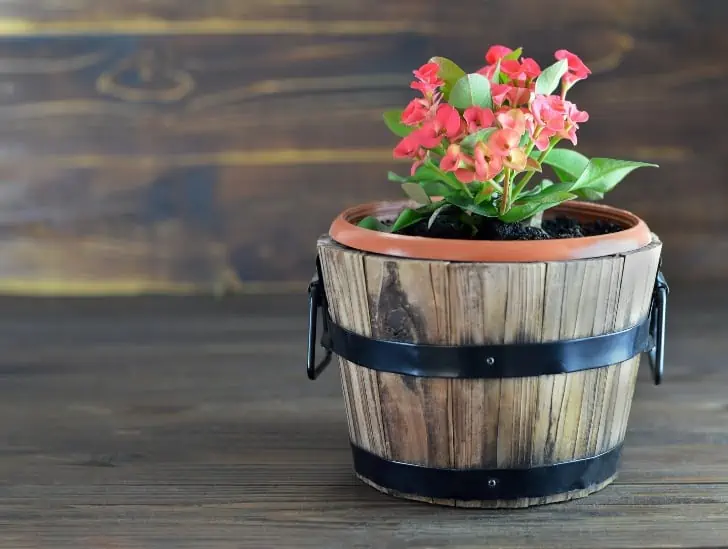
A beautiful bunch of flowers on a pot.
An ideal time to carry out propagation is during spring or early summer.

Avoid taking cuttings in fall or winter because the cuttings won’t have enough time to root and develop new growth before extreme cold sets in and disrupts everything.  Propagating crown of thorns plant in fall or winter will most likely produce unhealthy and short-lived plants.

Propagating Crown of Thorns through Cuttings

The most common method of propagating a crown of thorns plant is through cuttings. The process is relatively easy to accomplish, but you must be careful because this succulent has plenty of sharp spines and a slightly toxic sap.

A girl wearing a gloves.
The process is very easy to accomplish, but you must be careful since it has plenty of sharp spines and a slightly toxic sap.

Once you have taken the cuttings, let the sap dry completely before placing them in a growing medium. It can take up to 24 hours for the sap to dry out completely.

Follow the steps outlined below to propagate a crown of thorns plant through cuttings:

1. Taking the Cuttings

To take cuttings from a mature crown of thorns plant, you will need a sharp razor blade, knife, or bypass pruner. Carefully lift one side of your plant and lop off short pieces of growth.

Ensure the cut pieces are relatively short. They should be anywhere between three to six inches long with only the tail end leaves in place.

Consider taking your cuttings when the newest growth is still available, preferably in spring or early summer. Be sure to take more cuttings than what you need in case some of them fail to root.

Before taking cuttings, ensure you prepare for the plant’s resistance. Between its sharp spines and toxic sap, the plant will try to put up a fight when it senses that it is in danger.

However, preparation minimizes the risk of injury to the plant and yourself. Wear gloves to protect your fingers from the sharp spines and sap. You should also clean the knife or razor blade you intend to use with alcohol to sterilize it.

If the sap comes in contact with your skin, wash it off with warm, soapy water as soon as possible. To harden the sap and prevent it from running, place the cuttings in cold water and also spray down the plant from which they were taken with water.

2. Preparing the Growing Medium

A good medium for growing shrubs such as the crown of thorns plant must consist of equal parts of peat moss and either perlite or sand. You can also use equal parts of bark and peat moss to prepare your potting mix.

Ensure the soil is well-draining. Like other succulents, the crown of thorns plant doesn’t like being waterlogged. A growing medium with poor drainage may lead to severe rot, preventing the cuttings from rooting.

You also need to ensure that the growing tray or pot has plenty of drainage holes at the bottom. This is to allow excess water to drain away as soon as possible. Whatever medium you choose to use in your propagation, ensure it is moist but not wet.

3. Rooting and Transplanting the Cuttings

Once the sap on the cuttings has dried, and the growing medium is ready, take the cuttings and plant them in the soil. Only a small part of the cutting should go into the soil (approximately one inch).

Water lightly and expose the cuttings to plenty of bright indirect light. If you can’t find a good spot in your house that receives plenty of indirect sunlight, use artificial growing lights.

Crown of thorns, soil, and shovel top view,
Take the cuttings and plant them in the soil.

The cuttings will start to sprout into new plants in three to six weeks. This is the perfect time to transplant them if that was your aim.

If the cuttings are relatively small, consider transplanting them into a soil-less potting mix. However, feel free to use regular succulent soil if they are reasonably big.

4. Rooting in Water

Besides growing medium, you can also root your crown of thorns plant cuttings in water. Simply take the dry cuttings and place them in a relatively tall, narrow glass with approximately one inch of water in the bottom.

Keep the cutting in bright but indirect sunlight, and the roots will start to form in one or two weeks. Once the roots form, carefully transfer the cuttings into a special soil mixture specially designed for succulent plants.

5. Taking Care of the Cuttings

The truth is that crown of thorns cuttings require little attention once they have been potted. All you have to do is set the potted cutting in a warm and dry spot where temperatures stay above 70oF. Do everything possible to protect your cutting from direct sunlight.

A crown of thorns plant in a pot.
Consider using a propagation mat to warm your growing container.

Consider using a propagation mat to warm your growing container or pot if your home is in a relatively cold place.

Drizzle water around the base of the cuttings whenever the potting mix feels completely dry in the top inch but be careful not to waterlog the soil.

As long as you do everything right, you should start seeing new growth sprout on the cuttings within one or two weeks.

Essential Tips for Taking Crown of Thorns Cuttings

Follow the simple tips outlined below if you want to increase your chances of successfully propagating the crown of thorns plant from cuttings:

  • Always use a sharp and clean cutting tool that has been sterilized using alcohol or a solution of nine parts water and one part bleach.
  • Take cuttings early in the morning.
  • Take cuttings from new growth.
  • Take cuttings from a healthy, disease-free crown of thorns plant.
  • Always cut on the diagonal.
  • To encourage rooting, dip the cut end of the cutting in root-forming hormone powder before planting.
  • Take more cuttings than you need because some may fail to root. If all of them root, you can always give the new plants away as gifts.

Propagation through Seed Germination

Another way to propagate the crown of thorns plant is through seed germination. You can pollinate flowers yourself to form seeds or purchase them from your local plant store. To pollinate the crown of thorns flowers, carefully transfer pollen from one flower to another using a fine paintbrush.

If done correctly, the plant flowers will turn into a capsule. Wait until the capsule ripens, remove it from the plant, and split it over a paper sheet to collect the seeds.

Don’t store the seeds for a prolonged time because they may fail to germinate. In fact, you should consider sowing the seeds immediately after collection.

Red crown of thorns flowers.
You can pollinate flowers yourself to form seeds.

Sprinkle the seeds on a well-draining potting mix, cover them with a light layer of sand and keep everything moist. To help with germination, cover up the growing tray or pot with plastic and place it in a greenhouse where it can access bright but indirect sunlight.

If you don’t have a greenhouse and can’t find a good spot in your house, feel free to use artificial grow lights. Maintain the temperature at around 65oF and 75oF.

The seeds will typically germinate within one to three weeks. You should only remove the cover when the seeds have fully germinated. Be sure to maintain a moist surface even after you remove the cover.

Give the seedlings one or two weeks before you start transplanting them outdoors. The extra time allows the young seedlings to develop a more robust root system and leaves that will play a critical role in their survival once they are transplanted.

Can I Propagate Crown of Thorns by Division?

Yes, you can propagate the Crown of Thorns plant by division, although the success rate may be too low for your liking.

The process is relatively simple and straightforward. Gently remove offsets or young shoots from the mother plant and re-plant them elsewhere. To get the best results, consider propagating in spring when temperatures are warm and light conditions are favorable for growth.

Be sure to divide the succulent into several parts since a single shoot will take longer to establish its root system and form new leaves. The younger shoots are more successful when propagated by division than mature clumps.

You should also use a potting mix suitable for succulents or cacti and lightly water the young shoots. Keep the soil moist but not too wet.

Monitor your crown of thorns for pests and diseases and address any problems spotted immediately. With proper care and maintenance, your pups should start showing signs of growth within two to three weeks after being planted.

It may take several months before the young plants are fully established and start producing flowers. Be patient and keep providing the proper care to enjoy your success.

Should I Bleach Cutting Tools When Propagating Crown of Thorns?

Yes, you can use bleach to disinfect the cutting tools when propagating the crown of thorns.

Mix a small amount of bleach in a cup of water and sterilize your blade before taking cuttings from the mother plant. This simple step helps prevent any potential infection or disease from spreading and infecting your succulent.

Rinse your tools with clean water after disinfection and dry them thoroughly before storing them for subsequent use.

How Long Does It Take for Crown of Thorns to Flower?

The flowering period varies depending on the species. Most varieties of this succulent start blooming in late spring or early summer and continue until fall. Some types may even flower through winter in warm climates.

Generally, it takes about one year after planting your cuttings for them to flower. However, the wait can be longer if you propagate mature plants or the conditions aren’t ideal for growth.

Provide your crown of thorns with enough sunlight and water regularly to encourage blooms. With proper care, you should be able to enjoy its colorful flowers in no time.

Summary

Crown of thorns is one of the most beautiful succulents that are easy to care for and propagate. Learning how to propagate crown of thorns provides you with an opportunity to start multiplying your plant collection.

We hope you have learned valuable tips to kickstart your crown of thorns propagation journey. We wish you all the best in your propagation journey.

How to Easily Propagate String of Dolphins?

With its signature kind of foliage, the String of dolphins is undeniably a lovely plant, making it a perfect plant in your garden. Propagating the String of dolphins is a cost-effective and straightforward way to grow your garden collection. Whether a beginner or an expert, multiplying the strings is a short and fantastic method. Though it is easy to propagate this succulent, it requires some skills to do it better. 

How do you propagate a String of dolphins? You take a stem or a leaf cutting from a healthy and well-established plant, set it aside for days until it forms callous, then plant it in a pot. Reading the article will help you decide which form of propagation will best suit you and how to go about each of them. Most importantly, I will take you through two standard propagation to reproduce a string of dolphins.

Why Should You Know How to Propagate the String of Dolphins?

Firstly, the String of dolphins is propagated to salvage the plant when it is failing or dying. When the mother plant has some parts damaged or it is drying up due to age, propagation is an easier method than buying a new plant and starting all over again. Secondly, most gardeners propagate the strings of dolphins because it is an enjoyable and straightforward practice. It is a delightful plant at home, and propagation can create more of them in a home. 

A string of dolphin hangging.
It is a delightful plant at home, and propagation can create more of them in a home. 

The plant is drought tolerant and can thrive well in little water. Proper propagation may only be done on healthy parts of the plant. If propagation is the only way to salvage a failing string of dolphins, act before it is late. Propagation to create a collection is best when it aligns with the growing seasons of the plant.

The two methods to propagate the String of dolphin succulent includes

  1. Taking a leaf cutting from the plant.
  2. Taking a stem cutting from the plant.

Taking a Leaf Cutting From the Plant

Firstly, the process involves using a sharp and sterilized knife to remove a healthy leaf from the bottom side of the plant. While cutting, ensure that you remove the entire leaf without damaging it or leaving some sapping stuck on the stem of the mother plant. Once the leave is out, place it in a clean place for two to three days to allow the wound to heal. Then, put it in a cool place where it does not receive direct sunlight. 

A string of dolphin stem.
A string of dolphins will do well in arid and well-draining soil.

After some time, the leaf will make a “callus,” indicating that it is ready for the next step. After callus formation, prepare a good and clean pot with a proper soil mix. Like other succulents, a string of dolphins will do well in arid and well-draining soil. Commercially available succulents are suitable, but you can also make your mix.

For a homemade mix, combine

  • 2 Parts potting soil
  • 1 part pumice or perlite
  • 1 part sand

When the soil is ready, place the prepared leaf on top without burying it. To moisten the ground, use a sprayer bottle to spray the leaves with water. Do not keep the pot under direct sunlight, but ensure it accesses enough light to provide the propagated String of dolphins is warm and moist. The leaves will begin to sprout after three to four weeks. Next, they will start developing small roots. 

The presence of roots does not signify time to transplant the succulent. It may take a couple of months before the plant is big enough for transplant. Therefore, waiting as the plant develops strong roots before transplant is essential. Hurrying the plant with weak roots kills it permanently. 

Propagating by Cutting the Stem of the Strings of Dolphins

These can be done in two different processes.

  • Stem cutting and propagating in water
  • Stem cutting and propagating in soil

Stem Cutting Propagation in Water

Propagating plants in water is an easy way to make new plants. All you need is a sterile cutting object, a big glass jar, and a healthy selection of your String of dolphin’s plant. The steps below will guide you on how to propagate the succulent.

A plant being propagated in water.
Plant propagation is an easy way to propagate your plant.
  • Take a suitable strand off your String of dolphins of around 4 inches of length. Cut the stem cleanly and carefully with your scissors or knife. If the mother plant has some low-bearing foliage near the bottom, remove them to prevent rotting.
  • Immediately, place the cut strand in a glass or jar filled with rain or distilled water. Tap water contains chemicals like chlorine and fluoride that affect the cutting progress.
  • Place the jar in a place it receives proper lighting but away from direct sunlight. A west-facing window can work better.
  • For proper growth and formation of the root system of the String of dolphins, replace the jar’s water in a week to replenish nutrients and oxygen.
  • After a few weeks, long tendrils-like roots should start developing. This means that it is time to transfer it to a well-draining soil and in a proper container.

Stem propagation in water is enjoyable as you will see the roots develop. In addition, this method reduces the chances of bacteria/fungal infection than the soil method.

A string of dolphin a pot with sunlight.
Stem propagation in water is enjoyable as you will see the roots develop.

Stem Cutting Propagation in Soil

The soil method can also propagate the stings of dolphins’ plants. However, this process is more successful when the succulent starts its active growth period. The period could either be before the dormant stage (end of the winter months) or the growing stage (during the spring period). The succulent has a high chance of surviving the propagation stage and maturing during these growth periods. 

 For this process to be successful, the following guidelines should be followed.

  • Make a correct cut using a sterilized knife of the spring of dolphins with enough branches. Choose a relatively short stem as this ensures it grows actively, increasing chances of success.
  • When cutting the stem, hold it at the brick of the bottom to have a clean cut. If the stem is damaged when cutting, replace it with another one immediately.
  • Place the cutting in a clean place to allow the cut to heal and develop a callus. These may take two days to form.
  • Place the cutting in a container with already prepared proper soil mix as explained above.
  • If possible, you can help the growth of the roots by dipping the end of the cutting in a rooting hormone to promote new and accelerated root growth.
  • Keep the container in a bright space with direct sunlight and only water if the soil is arid. When watering it at this delicate stage, remember that overwatering will cause the plant to rot, while underwatering reduces chances of survival.

Propagating by using soil can adequately secure the cutting and strengthening of the roots. This method also reduces the stress of transplanting the plant after it has already developed. However, when the plant is still young, always ensure to check on the condition of the plant as they are more susceptible to fungus and bacterial infections. Soil should contain sandy and perlite to promote good drainage and proper aeration of the roots.

The Commonly Associated Problem when Propagating

One of the significant troubles when propagating the strings of dolphins is the root rot. It may occur in any process of propagation. However, in soil propagation, overwatering is the primary cause of the root rot as water clumps in the root area, suffocating the roots.

Root rot can happen when transferring the plant into a new pot in water propagation. It is also essential to give the cutting enough time to heal before placing it in soil. Soiling a leaf cut with a fresh wound will expose the plant to disease and fungal infections.

Best Care when Propagating

The right amount of water

A grown string of dolphins can survive long without water. You need to water correctly to ensure that your propagating plant has the best chances of survival during propagation, especially during the early days. Overwatering the String of dolphins during propagation will submerge the leaves to water, and they will start rotting before they even fully develop. The best watering condition for the plant is to ensure it remains moist.

A string of pearls that has been watered.
You need to water correctly to ensure that your propagating plant has the best chances of survival.

The right temperature 

A string of dolphins makes an excellent indoor plant due to its ability to tolerate medium temperature and thrive well in it. The right temperature of around 23oC is appropriate during propagation to nurture the plant.

Indirect but bright light

The amount of light the plant will be exposed to effects the plant’s health. Though a well-developed plant can manage direct sunlight, the plant is vulnerable to dehydration and scorching during propagation. To manage proper lighting for the plant to succeed, a bright space with indirect light will work better. This lighting is essential as it provides the plant with a good growth pattern and strengthens its transportation system.

Bottom Line

With the above-detailed guidelines on how to propagate the String of dolphins, it’s time to try propagating the strings of dolphins and ensure you have quite a few in your garden. The guidelines could help you create more of these lovely succulents with only one plant and spread them to another part of your home or even bless a neighbor. Propagation will not just save you money, but it is an enjoyable practice worth your time, as the results are pretty fulfilling.

Ultimate Guide: How to Care For Portulacaria Afra

Succulents are fast gaining popularity across many homes. These hassle-free plants are great if you work all day or are just not good at taking care of plants. Portulacaria Afra is one succulent that you should consider giving a spot in your home. The Rainbow Bush Plant, elevated and shrub-like, originates from South Africa. 

If you shop for a houseplant, you will realize that this beauty goes by Elephant Bush Cactus, Rainbow Elephant Bush, Spekboom, Dwarf Jade Plant, and Porkbush. However, most gardening stores stock the petite and multicolored variety, the Rainbow Bush. 

In this guide, we will discuss the Elephant Bush Cactus, the best conditions necessary for your plant to thrive, and what to avoid, and with time you’ll get the hang of it. So let’s get into it.

The popular Uses Of Portulacaria Afra

The Elephant Bush plant is a delicacy to South African natives and prepares stew and salads. The plant has been used traditionally to treat fatigue and exhaustion. The plant also makes a good feed for elephants, tortoises, and goats. In addition, it improves air quality by absorbing carbon and converting it to plant matter. Most homeowners go for this plant for its aesthetic value. The wild-growing sprawling Rainbow Bush plant is decorative and can be very appealing in a hanging basket.

The Different Plant Varieties

Before you settle on your preferred cultivar, you should know the recommended varieties and choose the one best suited to you. 

  • Variegata- Petite variation with cream-colored leaf edges; the leaf is variegated.
  • Cork Bark- Has a corky bark
  • Medio-picta- Deep red stems with variegated leaves
  • Prostrata- Glossy green leaves; great as ground cover
  • Aurea- Leaves are bright yellow in full Sunlight
An Elephant Bush Plant in a pot.
The Elephant Bush Plant with the Jade Plant as they are strikingly similar.

Be careful not to confuse the Elephant Bush Plant with the Jade Plant as they are strikingly similar. The main difference is that Portulacaria Afra requires support to stay upright while the Jade Plant does not.

Light & Temperature

The Portulacara Afra plant blossoms in warm conditions require bright and unfiltered light. Direct Sunlight will scorch the leaves. Please place it in a south-facing window, although east or west-facing windows can also do. The plant requires at least 5-6 hours of light. Occasionally put it outside to get the full sun for a few hours.

A Elephant bush plant under the sun.
Place it in a south-facing window, although east or west-facing windows can also do.

You can use a grow light if your environment does not get adequate light or in case of poor lighting in your home. However, be careful not to let your plant stay outside too long because too much heat can damage it. If you live in hot areas, you can place them under a shade to protect your Elephant Bush from sunburn.

This succulent can only tolerate mild frost and low temperatures for a short time. Unfortunately, freezing temperatures are destructive to the Elephant Bush Plant, which cannot take too much frosting. 

Soil

The Dwarf Jade Plant has minimum soil requirements as long as the potting mix is well-draining and the plot has enough holes to pour out any excess water. Succulent plants store water in their stems, which they rely on for nourishment in dry seasons. For that reason, think about the air-circulation needs of your plant and buy cactus potting soil

Portulacaria Afra on the ground.
It has minimum soil requirements as long as the potting mix is well-draining.

The recommended mix keeps excess moisture from impairing the stems and roots. You can also come up with your potting mix. To create a rich blend, you need peat moss, perlite, and sand. We suggest using a 2:1 ratio of cactus mix to perlite or 2:1 of potting mix to coarse sand. You can get the materials at your local hardware store or buy them online.

The peat moss can hold in any excess moisture and release it when needed. In addition, perlite and sand assist with stimulating the drainage rate. 

Transplanting

Prepare a new potting mix before you transfer your Portulacaria Afra for the renewal of the nutrients.

Watering

The Elephant Bush is drought tolerant, so it does not require watering daily. Your plant’s watering requirements will depend on the climatic conditions of your region. Water your plant more regularly during the summer because of warmer temperatures. If there is intense heat, you can water your Porkbush every seven to ten days.

Throughout the growing season, usually from spring to fall, give your plant a good drink of water. Pour out any excess water collected and allow excess moisture to drain out. We recommend a watering frequency of once every 10-14 days.

When it’s winter, space out the watering schedule because the plant is dormant during this time. We suggest watering your plant once every three to four weeks during freezing temperatures. Overwatering will lead to root rot and yellowing of leaves.

The elephant Bus plant leaf with water droplets.
When spraying, don’t just mist the surface but make sure the water gets to the roots.

How can you tell that it’s time to water your plant? First, check if one or two inches of the surface soil is completely dry before your next watering session. Underwatering can be equally damaging to your plant and is characterized by droopy and mushy leaves.

You can use a spray bottle to control your plant’s amount of water. When spraying, don’t just mist the surface but make sure the water gets to the roots. If you are confused about watering your plants, use moisture meters to gauge the soil humidity.

Feeding

The ideal time to feed your Rainbow Bush is in spring when the temperatures are at least 15°C. Before fertilizing your plant, make sure you water it. Use a fertilizer that can easily dissolve in water to keep the roots from getting burned. We recommend using a well-balanced fertilizer with equal amounts of Nitrogen, Phosphorus, and Potassium. Pour half the dose of diluted liquid fertilizer into the soil and wait for it to drain out. You can also use organic substances like manure soaked in water, soluble fish emulsion, and coconut fiber.

Flowering

The Dwarf Jade Plant does not bloom readily, but it can bring some flowers in clusters if you give it the best possible care. The flowers grow in contrasting shades of pink, white or purple. The star-shaped blooms develop once the plant is relatively mature, mainly following a rainy season. To protect your young flowers from decaying, keep your plant dry. To encourage your plant to bloom, provide adequate lighting and keep them cool and dry during the wintering period.

The Propagating Process

The Portulacaria Afra can be propagated from seeds, leaf cuttings, or stem cuttings. The best time for propagation is during spring and summer. You can either let leaf cuttings be when they land in the pot or use the whole leaf plus the base to propagate. Stem cuttings are faster than seeds that may take some time to mature depending on age and storage conditions. Apply these simple steps to get started.

Portulacaria Afra Leaf propagation.
You can either let leaf cuttings be when they land in the pot or use the whole leaf plus the base to propagate.
  1. Dissect some healthy stems at the foot of the parent plant using a sharp kitchen knife or a pair of scissors.
  2. You can also settle for the outgrowths which fall from the parent plant and develop on the container edges.
  3. Sterilize your scissors to avoid infecting the freshly propagated cuttings with trouble-some diseases.
  4. Dry the cuttings for about 24hrs so that the wounds heal and form a callus.
  5. Dip the bottom bit of the cuttings in apple cider vinegar to stimulate root growth. You also dilute a teaspoon of vinegar with 5-6 cups of water and use the solution. Alternatively, buy the rooting hormone.
  6. Plant the cuttings in a cactus mix to allow water to drain through it seamlessly without stagnating. If you use leaves, you can stick them in or place them flat-out on the soil.
  7. Position your cuttings in a spot that has indirect light. The roots will begin forming anytime from 2-4 weeks. After about a month, the cuttings will be firmly rooted, and new growth will develop from the top.

Pests and Diseases

The Spekboom Plant attracts mealybugs, spider mites, and whiteflies, which feed on the plant fluid from succulents. For a quick fix, you can wipe the affected areas with cotton sponges that have been immersed in an alcoholic solution. Early detection is vital in controlling any infestations.

Common Problems Portulacaria Afra Face

Yellow Leaves

Yellow leaves are caused by poor draining soil. If the medium is too wet, your plant will display signs of stress. Move the plant to another container with a well-draining potting mix to remedy the situation.

Lack of nutrients can also lead to yellowing. Repot your plant every two years to avoid depletion of nutrients. Alternatively, you can feed your plant with the recommended fertilizers discussed earlier.

Leaves Dropping

Underwatering and overwatering is possible reason for the dropping of leaves. Though both scenarios will lead to leaf dropping, under-watered leaves will appear shriveled and flat, while excess water will lead to soft and mushy leaves.

Bottom Line

The Portulacaria Afra Plant is an excellent choice for your indoor garden if you are looking for a succulent with many benefits and pleasing to the eye.

How to Easily Propagate String of Bananas?

The String of Bananas plant is a trendy plant for trailing arrangements. This hanging succulent is highly similar to the String of Pearls plant, and the only difference is the banana-shaped leaves. 

The hardiness of the plant makes it an ideal choice for beginners. Additionally, the plant flowers in mid-December add to the perks of this beauty. You can propagate the String of Bananas at any time of the year, though spring, summer, and early fall are the best when the plants are actively growing.

Requirements for String of Bananas Propagation

You should have the following:

  • Disinfectant
  • Container with potting/succulent mix
  • String of Bananas
  • A pair of scissors
  • Rooting Hormone (Optional)
  • Patience

Steps To Follow When Propagating String of Bananas

Propagation of String of Bananas is a five-step process.

A close up image of a string of bananas.
This hanging succulent is highly similar to the String of Pearls plant.

Choose the propagation method

You can propagate your String of Bananas in either water or soil. Either way, start by sterilizing your cutting tools using alcohol or disinfectant.

Take your Cuttings

Select a healthy stem from your plant. Use a disinfected cutting tool to obtain pieces with a few leaves. Make sure the stem cuttings are long enough, at least 10cm, and cut off the bottom leaves.

Ensure that the cutting has a node from where the roots emerge. You can take multiple cuttings to increase the chances of successful propagation. Give the cuttings two to three days to dry to prevent rot.

Put the Cuttings in your preferred medium

Use either water or soil as your propagating medium. The soil should be loose for easy formation of roots and excellent water drainage to prevent rot.

Wait for root growth

As you wait for your cuttings to root, avoid overwatering them. Ensure the soil is dry before the next watering session. Propagation in water is much faster though more time-consuming. Repot the cuttings from your medium once the roots are established.

A string of bananas.
Select a healthy stem from your plant and make sure the stem cuttings are long enough.

Feed Your Plant

After about half a year, you can feed your plant with succulent liquid fertilizer. When providing your String of Bananas, be careful not to over-fertilize as this can weaken your plant. Use a balanced houseplant fertilizer with half strength. Do not feed your plants during dormancy.

Methods of Propagation

The main propagation methods of String of Bananas are leaf propagation, seed propagation, and stem cuttings.

Seed Propagation

For successful propagation from seeds, the flower heads will require pollination. If planting indoors, put the seeds in the succulent mix but not allow the blend to dry up. Cover the pot with a plastic bag to provide humid conditions if you cannot water the plant daily. Germination can take a few months, although the seeds germinate faster in summer.

Leaf Propagation

You can propagate the String of Bananas plant from a single leaf. However, this method has a shallow success rate and can take some time. Choose a plump leaf for better success. Succulents are delicate, so take the leaf off by carefully twisting.

Poor cuttings will cause your leaf not to sprout roots. Dry out the leaves on a paper towel for the cut ends to dry. Once the cut ends have become calloused, frequently place them on a potting mix and water. 

The leaves thrive well under bright and filtered sunlight. Mist them as soon as the soil dries. First, the roots will grow after approximately two weeks, then the shoots much later. Do not expect much using this method as the leaves tend to rot.

How to Propagate String of Bananas using Stem Cuttings

First, you will need to select a strand. Go for long and mature stems. Mature stems are easier to propagate because they have already developed some roots. Select items that have left and are luscious and firm. Avoid dehydrated and shriveled ones. 

You might lose some cuttings in the process, so always take more than one cutting. Most succulents require drying after cutting to prevent rot; however, the String of Bananas does not need to be dried for long because the stems are pretty thin. You can dry the cuttings for a couple of hours. However, give it a few days before planting it in a humid environment.

A tailing stem string of bananas.
Mature stems are easier to propagate because they have already developed some roots.

The stems should be dry before planting to avoid infection by fungus or bacteria. After taking your cuttings, you can dip the cuttings in the rooting hormone. This step is not mandatory, but you could consider it to speed things up. Let’s get into the various ways to propagate your stem cuttings:

Soil Requirements When Propagating String of Bananas

To propagate your String of bananas in soil, consider the following:

  • Find a suitable soil mixture for succulents because they need excellent drainage. You can choose a pre-mixed option or mix equal parts of grit and Potting Soil.
  • Use a container with drainage holes at the base to enhance drainage and stop stagnant water from causing rot.
  • Position the container in a bright but shaded area with indirect sunlight.
  • Spray the plants frequently at first to avoid disturbing the cuttings. Once rooted, switch to a regular watering schedule.

Stick the Cuttings in Soil

Cut a few inches from the base of the plant and stick in the soil. You can remove some beads from the stem to make sticking them in the ground easy. Also, use chopsticks to create the holes. Ensure that you attach the cut-off end to the soil for faster rooting. The cuttings can be heavy; you can use floral pins to secure them down.

Use a potting mix that drains out well. You can blend equal strengths of cactus mix and perlite. To increase the drainage capacity, add coarse sand. Give your plant time to root, about two weeks. After approximately a month, shoots should be visible.

A string of bananas in a plastic pot.
Mature stems are easier to propagate because they have already developed some roots.

Place your cuttings away from direct sunlight to prevent sunburn during propagation and rooting. Sprinkle the soil after some days or whenever the soil surface feels dry. Once your cuttings have developed roots. You can reduce the amount of watering depending on how humid your area is.

Lay the Cuttings directly on the soil

Place the cuttings horizontally on the soil and ensure that the stem is in contact with the ground. The plant will develop roots at all points of contact with the soil leading to a fuller top. We recommend using an excellent succulent potting mix. You can combine coarse sand, perlite, and cactus soil equally.

Mix the soil when the soil surface is dry. Watering will also depend on how deep you have planted the cuttings. Shallow plantings tend to dry out faster. After your cuttings are rooted and established, shift to watering your plant at least once a week.

In about two weeks, new roots should emerge. The rate will be much faster if the cuttings already have roots. Position your plant in a shaded area where it can receive indirect light from the sun. You can combine both methods for a complete trailing plant if you have a big pot. 

Coiling Strands on the Soil’s Surface

This method is relatively easy and leads to a full crown. Coil strands on the surface and make sure they are in direct contact with the soil for root growth to get started. Water the plant thoroughly and give it some time. Once the roots have begun growing, expose the plant to lots of sunlight. Make sure the surface is dry before watering. 

Propagate the Cuttings in Water

Take your cuttings and stick the tips in the water. Use a clear glass vessel to monitor the water levels and rooting progress. Place the glass container in a warm spot. We recommend using purified water though you can use any water. 

Change the water after some days until roots form. Make sure that the nodes are submerged. New roots will emerge in a few weeks. The rate at which the sources develop depends on the season. Rooting can be quite fast during summer, while it can go up to months in winter.

When noticing numerous new roots, transfer to a well-draining potting mix with a 1:1 cactus mix and perlite solution. Spray the soil only when it feels dry and then water, typically once the plant is well established. You can tell the plant is set if you notice new growth on the top of your plant. Shield the plant from direct sunlight.

Caring for your newly propagated String of Bananas

If you notice that your propagated plants have stunted growth, you can add diluted nutrient-rich fertilizer. Water your String of Bananas until the excess water drains through the drainage holes. Though your newly propagated plant is unlikely to suffer from pests, you can scrub using soap if you notice any infestation.

A string of bananas in a pot.
Water your String of Bananas until the excess water drains through the drainage holes.

Bottom Line

Propagating String of Bananas is not only fun but incredibly easy. If you want to adorn your home with green waterfalls, this low-maintenance plant is for you. With a bit of patience, these eye-catching succulents will be all over your home.

Ultimate Guide: How to Care for Venus Flytrap

What makes the Venus Flytrap such an intriguing plant? First, it’s exciting eating habits. The plant’s knack for luring prey into its trap and suddenly snapping shut is fascinating. Venus Flytraps use sweet nectar to attract their game. An electric charge will close the trap once an insect touches the trigger hairs two consecutive times.

 As the insect continues struggling, the trap seals and produces enzymes that dissolve the prey’s tissues. After re-absorbing the nutritious soup, the Venus Flytrap uses the carcass to draw new victims. Unfortunately, this single species plant native to North and South Carolina is threatened by extinction because of habitat destruction. 

The Venus Flytrap is a relatively easy plant to look after despite popular belief that the plant is complicated. Once you understand the best environment for your plant to thrive, you will realize that this is one of the most rewarding houseplants. Let’s get started.

Venus Flytrap Cultivars

The Venus Flytrap has only one species, Dionaea muscipula; however, many varieties have been bred for their desired traits. Most forms feature petioles that end in a trap. The traps of mature plants can go up to 5cm in length.

Cultivars are selected for their color, size, or mutation. The most popular are the all-green like ‘Justina Davis’ and all-red forms, including the Red Dragon. Similarly, larger varieties include the ‘South West Giant,’ which originated in the UK. Lastly, we have the mutants which result from tissue culture mishaps.

The Best Places to Get Your Venus Flytrap Plant

Carnivorous plant nurseries are the best places to buy Venus Flytraps. You can also order from various US Retailers. Additionally, you can take a trip to your local nursery though the plants here might not be of the best quality due to light deprivation and watering with impure water. Large retailers like Walmart are not a bad idea if you don’t mind plants that have been on the shelf for some time.

Light Requirements

Venus Flytraps require bright and indirect sunlight for optimum growth. Go for a south-facing sunny windowsill. We recommend 12 hours of adequate sunlight supply. Insufficient sunlight may lead to weak and floppy leaves plus a lack of red coloration inside the trap. Grow Lights can come in handy if you feel that your plant is not getting enough light; place it at least 6 inches above it. 

A Venus flytrap outside.
Insufficient sunlight may lead to weak and floppy leaves plus a lack of red coloration inside the trap.

Temperature Levels

The Venus Flytrap can briefly tolerate extreme temperature changes. This hardy plant can take temperatures as high as 86°F to as low as 20 degrees Fahrenheit as long as it is sheltered from the elements. Indoor temperatures that are warmer than average are ideal.

Water Requirements

Carnivorous plants need pure water; the Venus Flytrap is no exception. Getting pure water can be challenging, especially for new growers. Be warned that bottled, filtered, or tap water will increase dissolved salts and minerals, ultimately killing your plant. We recommend using rainwater, distilled or demineralized water. Alternatively, use water that has been purified through reverse osmosis. So how do you get pure water?

  • Buy purified water

You can buy distilled and deionized water from hardware shops. Local aquarium specialists may also have purified water.

  • Collect rainwater

Place some trays outside and accumulate the rainwater in plastic bottles. Once your plant collection has grown, you can use rain barrels.

  • Fix up a Reverse Osmosis System

Mount a reverse osmosis system under your sink to remove contaminants. Though pricey, this investment will pay off in the long run.

To water your plant:

  1. Stand your container in 1-2cm of water and refrain from flooding from the top.
  2. Keep the soil moist throughout the growth period but make sure your plant is not waterlogged. The pot should have drainage holes because excess moisture leads to root rot.
  3. Reduce the frequency of watering during winter.

Soil

Carnivorous plants receive their nutrients from their prey, so they don’t need nutrient-rich soils; they instead prefer acidic soils. A word of caution, do not use standard potting soil. Instead, use sphagnum peat moss blended with lime-free coarse sand or perlite. The ratio should be 2:1. Alternatively, use one part peat moss with one part perlite. Both options offer superior aeration and drainage for your plant in addition to increasing acidity. Venus Flytraps also do well in pure sphagnum.

Venus flytraps in a pot.
They don’t need nutrient-rich soils but they instead prefer acidic soils.

Dormancy

The dormancy period is necessary for carnivorous plants and happens from fall when sunlight levels are lower. Provide a cold resting period for your Venus Flytrap by moving your plants to a more relaxed place in your garage or shed. The leaves start turning black as temperatures drop. Do not panic; this is normal. Weed out any dead growth. After the end of the dormancy period, it’s time to repot your plant. If the weather warms up and your plant does not brighten up, the plant could be sickly. 

Repotting

Regular repotting of the Venus Flytrap gives your plant enough room to grow. We suggest repotting once a year for your Venus Flytrap to develop strong roots. The best time to repot your plant is in spring or early summer. Do not repot the plants during the active flowering stage. When you purchase your plant, repot it if there are any impurities. Follow these basic steps for the best outcome when repotting:

  1. Choose the right potting mix

Standard potting mix will kill your Venus Flytrap. Instead, use carnivorous plant soil mix when repotting your plant. You can either buy it or come up with something. A 1:1 mixture of peat moss and perlite is recommended. Peat moss provides acidity while perlite retains moisture.

2. Choose the right pot.

Venus Flytraps have a deep root system, so choose a pot with a bit of depth; a minimum of 4 inches is okay. We recommend plastic pots for Venus Flytraps because the plants need proper insulation.

Venus Flytraps in pot.
Choose a pot with a bit of depth; a minimum of 4 inches is okay.

Tools needed

You will need:

  • A garden spade
  • Small plastic pot
  • Recommended potting soil

Instructions

  • Fill the pot with the recommended mixture
  • Water the potting mixture
  • Create a hole in the center where you will place your Venus Flytrap
  • Gently lift the Venus Flytrap from its parent pot, being careful not to disturb the roots
  • Place your plant in the new potting mixture
  • Lastly, water the plant and let the excess water drain out through the drainage holes

Aftercare

If done correctly, your plant will require no extra care after repotting. There might be a stall in growth but give your plant time.

Pruning

Pruning is not essential for the Venus Flytrap’s survival. However, it can provide health and aesthetic benefits. Some of the benefits include better aesthetics, growth promotion, and prevention of pests and mold. You will need sharp and thin scissors. Next, cut the dead leaves starting from the base and carefully prepare the bulb and healthy leaves.

Venus flytrap in white pot.
Cut the dead leaves starting from the base and carefully prepare the bulb and healthy leaves.

Only trim your plant when the traps have completely dried. Do not pull the dead leaves for proper trimming, which can damage your plant. Instead, use scissors to cut them out. Altogether remove the dead leaves. Be careful not to activate the traps because this will waste your plant’s energy. Do not prune too often; only do it when you see some black leaves.

Flowering

Mature Venus Flytraps bloom in spring and thrive during summer. Flowering diverts energy from trap-making. If you let your plant bloom regularly, it might exhibit signs of exhaustion such as sluggishness and droopiness. If your flytrap is small, pinch off the flowers before they grow too tall. 

Feeding

Once you have met the growing needs of your Venus Flytrap, feed it on arachnids and insects, either live or dead. We recommend Mealworms, Spiders, Blood Worms, or Crickets. Feed your flytrap once a week. Remember, the trigger hairs have to be stimulated once the trap closes. Here are some things to remember when you are feeding your plant;

  • Feed your Venus Flytrap on bugs only.
  • Venus Flytrap prefers nutrient-free soil, so do not fertilize it.
  • Prey that is too large will make your plant rot.
  • Tickle the hairs if using dead bugs using a toothpick for digestion to start. If you skip this part, your plant will pop open after a few hours, hardly absorbing any nutrients.
A Venus flytrap with a fly trapped,
Tickle the hairs if using dead bugs using a toothpick for digestion to start.

The Propagation Process

The best way to propagate the Venus Flytrap is to let them grow through division. A mature plant sends offshoots in early spring, replanted as new plants. Make sure the shoots include roots so that the new plant will grow. You can also use seed or leaf cuttings to propagate. 

Pests

Venus Flytraps do not just feed on bugs, as some can be harmful. These include mites, aphids, and mealybugs and mostly attack in spring. To keep pests and diseases at bay, ensure your plant gets enough sunlight and not waterlogged soil.

Bottom Line

The Venus Flytrap can be difficult to care for if you are not well prepared. Give your plant the attention it requires, and you will enjoy having the flytrap as an indoor plant.

How to Easily Propagate Venus Flytrap?

Venus flytrap

The Venus flytrap is quite an interesting plant. It is one of the very few carnivorous plants in the world that is easily recognizable. The plant mainly gathers nutrients from the soil and gases in the air. Native to South and North Carolina, the plant’s mouth is always open, making its short hairs, commonly referred to as trigger hairs, visible. If anything touches these hairs, the lobes close, trapping whatever landed on the plant. One good thing about this plant is that it is relatively easy to propagate, and you don’t need special tools or knowledge to multiply your venus flytrap collection.

So, how can you propagate the venus flytrap plant? The plant is relatively easy to grow and can be propagated by leaf cuttings, seed germination, or division. For division, it should be divided in late winter or early summer. Carefully cut off the offshoots from the mother plant but ensure the part you want to cut off has its own root system. The best time to propagate leaf cuttings is early summer. Seed germination can be done any time of the year because seeds aren’t too sensitive to climatic conditions like leaf cuttings and offshoots.

This blog post discusses the different ways of propagating the Venus flytrap plant and how you can take care of your newly propagated plant. Read on to find out everything you need to know.

Propagation through Stem/Stalk Cuttings

Propagating venus flytrap through leaf or stalk cuttings is relatively easy. First, you need to identify a healthy part of the stem and carefully cut the flower stalks when they reach 2-4 inches long.

Once you have the stalks or stem cuttings, plant them in carnivorous soil. Water lightly and provide sufficient light for the cuttings to start growing.

What Materials Do You Need to Propagate Venus Flytrap through Cuttings?

Typically, you will need the following materials for your cuttings propagation:

  • Pure water: Ensure you are not using tap water or bottled water. Instead, you need distilled water, rainwater, or reverse osmosis water.
  • Carnivorous plant soil: It is crucial to use the right soil type. If you cannot make your own carnivorous soil, be sure to purchase it from your local plant nursery.
  • Pot with plenty of drainage holes: You need to ensure the pot you will use to grow your venus flytrap has plenty of drainage holes because this plant hates sitting in water for prolonged hours.
  • Mature Venus flytrap: Ideally, you should have a venus flytrap plant that is already flowering. Most of these plants start flowering in spring, a few weeks after the winter dormancy.
  • You will also need a pair of sharp scissors and a water tray.

The Process

To successfully propagate your venus flytrap plant through stem/stalk cutting, make sure you follow the steps outlined below. If you do everything right, you will have another set of plants in no time.

1. Fill the Pot with Appropriate Soil

The first thing you need to do is prepare the growing pot for stem or stalk cutting. Add the soil to the container and moisten it with distilled water until it is completely saturated.

Use your fingers to press the soil slightly while moistening it. Continue adding soil to the pot until it is almost full. Just leave one or two inches of space from the top of the pot.

2. Cut the Stems or Flower Stalks within the Right Time

Venus flytrap plants usually produce flower stalks in spring. The stalks can take a few weeks or one month to grow and flower.

Venus Flytrap White flower.
Most of these plants start flowering in spring.

To increase your chances of success with stalk propagation, consider obtaining the stalks before they start flowering. Typically, you should obtain the stalks when the flower stalks are approximately three or four inches long.

To separate the flower stalk from the mother plant, use a sharp pair of scissors and make a clean cut as close to the base of the plant as possible. Be careful not to harm any bulb or leaf.

3. Divide the Stalks into Smaller Pieces

Once you have obtained your three or four inch-long stalks, consider subdividing them into relatively smaller pieces that are approximately two inches long. The number of pieces you obtain from each stalk will depend on the original length of the stalk.

Use the same pair of sharp scissors you used to obtain the initial cutting from the mother plant for subdivision. When cutting the stalk into smaller pieces, cut at an angle instead of making a straight cut.

Venus Flytrap in a pot.
Cut at an angle instead of making a straight cut, This will increase you chances in propagating.

This will increase your chances of successfully propagating the venus flytrap. Cutting at an angle produces a relatively larger surface area for root growth and water intake.

4. Plant the Flower Stalks

Now it is time to set your flower stalks into the potting mix and watch them turn into new plants. Carefully stick the stalk into the potting mix vertically. The flower cuttings should remain out of the soil.

Generally, only half an inch of the stalk cutting should go into the soil. If you made your cut at an angle, ensure the side cut at an angle goes into the soil.

Venus flytrap white flower.
Set your flower stalks into the potting mix and watch them turn into new plants.

Once you have planted all the flower stalks you managed to obtain; everything is set. The only thing you need to do is provide the cuttings with proper care and observe them carefully. Venus flytrap cuttings usually start turning into new growth within two to five weeks.

Propagation through Division

If your venus flytrap plant is healthy and has enough space in the pot, it will automatically start to multiply by itself every year. You can still leave the plant in the same pot until it gets too tight before you get it out and separate the rhizomes from the mother plant.

The best way to know if your plant is already producing rhizomes is to count its leaves. If it has more than seven leaves, it means the plant is already producing rhizomes that can be separated and turned into new plants.

Carefully remove the plant from its growing pot and divide its root ball. If you are lucky enough, the parts will separate themselves once you pull the plant out.

Venus flytrap and tools top view.
Pot them in separate growing containers to continue cultivating them as new plants.

If they don’t, use a sharp knife or pair of scissors to separate the root ball. Make sure each section of the root ball has its own rhizomes and leaves.

Take the divided sections and pot them in separate growing containers to continue cultivating them as new plants. In the first two or three weeks, ensure the pots are in a strategic spot that receives plenty of bright indirect light but don’t expose them to direct sunlight.

Propagation through Seed Germination

Lastly, you can also propagate venus flytrap through germination. To accomplish this, you need to pollinate flowers during the flowering season. You can pollinate the flowers using a brush and wait for the seeds to form after flowering.

If you cannot pollinate the flowers of your plant and harvest the seeds yourself, you have the option of buying the seeds from your local plant nursery.

Carefully harvest the seeds into a bag and keep them in a cool and protected area away from light until you are ready to sow them.

Venus flytrap seeds.
You can pollinate the flowers of your plant and harvest the seeds yourself.

The best time to sow the seeds is at the beginning of spring. Carefully sprinkle the seeds on the carnivorous potting mix. Make sure you use the right potting mix to achieve the desired results.

Consider using 80% shredded sphagnum moss and 20% perlite or vermiculite if you are making your own potting mix. You can also use peat pellets that you can purchase online.

Sow your venus flytrap seeds so thinly on the soil so that once they germinate, they can go for an entire season without the need of transplanting them due to overcrowding.

Another reason why you should sow the seeds thinly is that you are looking for larger plants and not smaller plants that will sprout out due to overcrowding.

Taking Care of Newly Propagated Venus Flytrap Plants

After sowing your seeds, expose the pot or planting tray that contains your seeds to as much light as possible. In the case of germinating seeds, more light is always better than less light. Feel free to use either natural or artificial light.

Artificial light in the form of fluorescent bulbs has a slight advantage because it provides you with an incredible opportunity to expose your seeds to light for prolonged hours. Ideally, you should leave them turned on for 16 hours a day.

For watering, ensure the potting mix is moist to the touch but not soggy. The seedlings will also germinate better in a relatively humid environment. One of the easiest ways to increase humidity is by placing a saran wrap style plastic wrap over the planting tray or pot holding the seeds.

Maintain the temperature between 80-85oF to achieve better results. Typically, seeds and seedlings tend to do better in a relatively warm environment which is why many gardeners use heat pads and heat coils while germinating seeds.

Should I Fertilize Newly Propagated Venus Flytrap?

If you use a high-quality potting mix containing all the essential nutrients, you shouldn’t fertilize your newly propagated venus flytrap plants.

If you want to give them a little boost, consider using a very dilute solution of liquid fertilizer meant for carnivorous plants. Once every two weeks should be more than enough.

Use fertilizer high in nitrogen, such as 30-10-10 or 20-10-20, because these nutrients are essential for the growth of new leaves.

Avoid using chemical fertilizers because they can damage the delicate roots of your newly propagated plants. Organic fertilizer is always a better option.

How Do I Transplant My Venus Flytrap?

When it comes to transplanting, the best time to do it is in early spring or late fall. The plant is dormant during these times and will have an easier time adjusting to a new pot or location.

Start by preparing the new pot or location. If you are transplanting to a new pot, make sure it is big enough to accommodate the roots of your plant. The pot should also have drainage holes at the bottom to allow excess water to drain out.

Fill the pot with carnivorous plant potting mix and gently remove your plant from its current pot. Be very careful not to damage the roots in the process.

Carefully place the plant in the new pot and fill in any empty space around the roots with more potting mix. Water the plant well and ensure the potting mix is moist but not soggy.

Place the pot in a location that receives plenty of light. Ideally, you should use artificial light, such as fluorescent bulbs, for 14-16 hours daily.

When Is the Best Time to Transplant Newly Propagated Venus Flytrap Plants?

The best time to transplant newly propagated venus flytrap plants is in early spring or late fall. The plant is dormant during these times and will have an easier time adjusting to a new pot or location.

Start by preparing the new pot or location. If you are transplanting to a new pot, make sure it is big enough to accommodate the roots of your plant. The pot should also have drainage holes at the bottom to allow excess water to drain out.

The plant is highly susceptible to transplant shock, so it is important to take your time and be careful not to damage the roots.

Summary

That is it about propagating the venus flytrap plant, and we hope we have covered everything you need to know to start multiplying your plant collection. As long as you do everything right and be a little bit patient with the entire process, you will have a huge venus flytrap plant collection in no time.

 8 Golden Rules for Watering String of Bananas

The String of pearl is close relative to a string of bananas. These succulents are known for their ability to grow fast and are easy to care for. Native in South Africa, the String of bananas are characterized by glossy, banana-shaped leaves that are long with hanging tendrils. Based on the training, it makes an excellent hanging house plant or could grow on a moss pole.

This article will learn the 8 golden rules for watering the String of bananas. Unlike many succulents, they are preferred because of their exciting foliage rather than their bloom. The plant is an excellent outdoor plant, especially in warm climates. In cooler temperatures, it is suitable as an indoor plant. The watering rules include:

1. Water less Frequently During the Winter Season

The String of bananas enters a period of dormancy during the winter season. Water the plant deeply but less frequently to avoid overwatering during this cold period. The plant does not use water because there is no active growth. A string of bananas is better off-dry during the winter than too wet. 

The plant during the winter season receives less than ideal light and cooler than average heat lengths and temperatures. As a result, little evaporation occurs, thus water enough to prevent the plant from drying. If you are not sure whether to water, not watering could work better. You can wait till the plant shows signs of thirst before you water, though, as the plant is likely to die.

2. Underwatering a String Plant is better than Overwatering

Remember that the easiest and the fastest way to kill a succulent is through overwatering. These plants are highly susceptible to root rot when they have been overwatered. Strings of bananas are not exceptions because of their thin root structure. It is essential to know some of the signs to look for when the plant is overwatered. 

Some of these signs include

  • The plant automatically starts having an unhealthy appearance
  • The plant becomes soft and mushy
  • The foliage of the plant burst when touched. 

If some of these signs show up, they are telltale signs that you should cut on your watering or lose the plant.

3. Plant the Succulent in Well-draining Soil

The plant can rot, and watering may not be the cause. Your watering behavior might be perfect; the proper amount of water is given at the right frequency. But have you checked on the type of soil your succulent is in?

String of bananas plant
Plant Strings of bananas flourish in a well-draining soil that does not hold water for long.

If you’ve done everything correctly, check on the quality of the soil. Plant Strings of bananas flourish in a well-draining soil that does not hold water for long. Succulent soil or cactus soil is the best soil. Sometimes garden soil with sand soil rather than clay helps improve drainage.

Well-draining soil only drains appropriately in a pot with an adequate drainage hole. Draining soil ensures the roots are not submerged for long in the water. A draining pot will ensure that the water is removed from the jar. Proper draining pot like the terracotta pot will help remove excess water from the pot.

4. Water the Plant when the Soil Feels Dry

 The bananas’ watering strings should only be done when the soil feels dry upon touching, as it lacks moisture. Regular checkup of the plant is essential to ensure it does not go for long without water. When the soil feels dry, tested by dipping a finger into the ground, soak the soil properly with water. Soak the soil until excess water starts to drain from the bottom of the pot. 

After soaking the soil, it should be dry before watering it. However, when the soil is left for long without water, the plant starts showing signs of thirst. Some of these signs include

A plant being watered.
Soak the soil until excess water starts to drain from the bottom of the pot. 
  • The plant leaves begin to wilt and wither because they use reserved water in the succulents.
  • When the plant is left for a long without water, the plant starts to develop wrinkles on its foliage
  • When String of bananas are deprived of water, they look limp and withered
  • The foliage lose their plumpness and become flat, and feel soft

Remember, it is easier to treat underwatering than overwatering. This is because, with underwatering, you give your plant enough water.

5. Spring of Bananas is a Great Proponent of Bottom Watering

To ensure that the entire surface of the soil gets wet, the String of bananas requires bottom watering. Bottom watering ensures that the soil remains moist consistently, allowing the plant to absorb water properly at any time. In addition, bottom watering prevents the plant from overwatering, providing the plant gets just enough water. Therefore, bottom watering is beneficial to the plant and you as a gardener. 

A pot in a bowl with a water.
Bottom watering ensures that the soil remains moist consistently, allowing the plant to absorb water properly at any time.

If you have less time to attend to your String of banana gardens, bottom watering ensures the plant remains safe. You save time but still ensure your spring of bananas remains healthy. Always ensure your succulent plant is in a pot with at least a single drainage pot. If necessary re-pot to enjoy maximum bottom watering benefits.

Ensure the following factors are met before bottom watering:

Light

During the spring or the summer season, keep your plant in a brightly lit spot. Spring of bananas requires direct sunlight only for two hours to ensure maximum growth. Excess exposure of the plant to direct sunlight negatively affects the plant, causing sun scorch. Bottom watering works perfectly in the summer because the light is balanced appropriately. 

A string of bananas in outdoor.
Spring of bananas requires direct sunlight only for two hours to ensure maximum growth.

Fertilization 

For a string of bananas, it is recommended that you fertilize the plant every two months during their growing period. The most appropriate time to apply the fertilizer is during the active growing seasons. Fertilizing in winter may lead to the plant burning.  

Though a regular house plant fertilizer can work well, a specified labeled feed for the banana spring can work better. Fertilizer should be in liquid form for easier absorption and prevent the burning of the crop. Only water the plant a few days after applying fertilizer. 

Temperature

The ideal temperature range for a growing string of bananas is 210C-2700C. This means that the average room temperatures suitable for this dangling plant to grow require medium watering. Ensure to keep the String of bananas from extreme temperatures, such as too much cold or heat.

6. There is No Universal Schedule

Get me right that there is no universal schedule proven or recommended to water your springs of banana. Watering this succulent depends on many reasons that vary from place to place. Study the environment of this plant to help determine how often to water the plant. The succulent must survive.

A string of banana hanging.
Watering succulents depends on many reasons that vary from place to place.

In places with too much sunlight, the evaporation rate is high due to high temperatures. Therefore, the plant needs frequent watering. Conversely, the soil is moist in areas where the plant receives less sunlight, thus less watering. The focus should be on understanding when the plant needs less or more water. 

7. Water Strings of Banana Early in the Morning

Like most succulents, the best time to water this plant is early in the morning before the sun sets in. Morning hours are cool, and the light’s temperatures are less intense. Watering in the morning gives the plant enough time to absorb the water and prepare for the day. Watering during the morning hour also ensures that water does not evaporate from the soil. 

The soil is moist enough to allow the roots to absorb water supplied to other parts of the plant. When you water during the daytime, it evaporates the pot before the roots absorb it. The location of your plant will also determine how often to water the plant. For example, a plant growing near a window with much light needs more water than one placed in a relatively dark area. The rule involved is checking the soil first before watering your plant. Use your finger to establish the soil condition and moisture level. 

8. Watering works well when the String of Bananas are Pruned 

Pruning is of great importance to the String of bananas. Pruning the dangly stems helps control their length while still promoting more growth. In addition, both mulching and pruning are effective measures to improve the soil water evaporation of the plant and plant transpiration rate. When pruning the String of bananas, you can snip off the banana strands halfway down their length.

Bottom Line 

Strings of bananas are easy-hanging succulents to grow indoors. However, some conditions can affect the well-being of the plant. One of the problems with why the plant starts to die is overwatering. Prolonged exposure to direct sunlight or waterlogged soil.

Checking out the water requirements of bananas’ stings helps solve more than half of the trouble the plant experiences. Although these plants tolerate the drought conditions, they need some water to survive. So the best thing to do is, learn the rules often and apply them to the plant correctly. It will never disappoint.

A Step By Step Guide For Propagating Tree Houseleeks

Aeonium with white flower.

The aeonium plant is one of the most popular succulents for use in gardens. Growing your own plants can be rewarding and you will always have fresh cuttings to share with friends. However, its propagation can be easier said than done as some varieties simply do not root well. It may require a bit of trial and error before you achieve success, but with a little patience, it can be done.

So how do you propagate the aeonium plant? The most common way to propagate an aeonium is by rooting cuttings taken from the tips of the branches. For best results, use young shoots that are not yet flowering. Cut off a section about four inches long and remove the lower leaves. Make a diagonal cut just below a leaf node and insert the cutting into moist soil. It is best to use a well-draining succulent mix or cactus potting soil. Water sparingly until the cutting has rooted, then water regularly according to the individual plant’s needs.

Aeonium is a popular houseplant that you can’t afford to miss in your home garden. We take a look at best practices when propagating this succulent.

Types of aeonium propagation

There are three main ways to propagate aeonium plants:

1.       By rooting cuttings taken from the tips of the branches

2.       By division

3.       Seeds

Propagation  by cuttings

Propagating aeonium by cutting is by far the most common method. This explains why so many gardeners are surprised when they have difficulty propagating it. Some varieties simply do not root well, so you should be prepared to try several times before success is achieved. With practice, however, you will be able to propagate most aeonium varieties.

Aeonium plant and a blade.
Propagating aeonium by cutting is by far the most common method.

Steps for propagation by cuttings

Step 1:

The first step is selecting the right part of the plant to cut from. Look for young shoots that have not yet flowered and are four inches or less in length. Remove the lower leaves before making a diagonal cut just below a leaf node.

Step 2:

Cure the cutting by placing it in a warm, dry spot for about one week before planting. This helps the cutting to form a callus and reduces the chances of it rotting. Do not allow the cutting to wilt or stay wet during this time.

Step 3:

Insert the cutting into moist soil. It is best to use a well-draining succulent mix or cactus potting soil. Water sparingly until the cutting has rooted, then water regularly according to the individual plant’s needs.

Step 4:

Caring for your newly propagated aeonium cuttings is vital to their success. Be sure to keep the soil moist but not wet and do not overwater. Too much moisture will rot the cutting. Provide plenty of bright light but avoid direct sun exposure. Fertilize with a balanced fertilizer every other week.

It may take several weeks before you see any signs of new growth. Once the cutting has rooted, it will start to grow and eventually produce flowers. Enjoy your newly propagated aeonium plant.

Propagation by division

If the aeonium plant is an older one, then cuttings may not root easily and it will be necessary to divide them instead. This technique is fairly easy as long as you take the plant apart carefully.

Aeonium pllant.
This technique is fairly easy as long as you take the plant apart carefully.

Steps to propagating aeonium through division

Step 1:

Use a sharp knife to separate off smaller divisions from around larger ones until you have several healthy shoots each with its own roots and stems. Ensure the knife is clean and sterilized to prevent the spread of any diseases.

Step 2:

Remove as much soil as possible from the divisions before replanting them into a fresh succulent mix. This helps stop the spread of disease and fungus. It also ensures the divisions have plenty of room to establish new roots before becoming crowded.

Step 3:

Water well and place in a bright location until you see signs of new growth. Once they are growing, treat them as cuttings for best results. Propagated aeoniums grow quickly when given proper conditions and can flower within six months.

Propagating aeoniums by seeds

Aeoniums produce small black seeds that are easy to germinate. The plants will not flower from seed, but the process is a fun project for kids or anyone who wants to try their hand at growing aeoniums from scratch.

Aeonium yellow flower.
Propagated aeoniums grow quickly when given proper conditions and can flower within six months.

Steps to propagate aeonium by seeds

Step 1:

Collect the ripe black seeds from the spent flowers of the plant. To collect the seeds, break open the flower heads and scoop out the insides. Place them in a paper envelope for one day to allow them to dry before storing until planting time.

Step 2:

Fill small pots with a moist cactus mix or potting soil that is well-drained. Plant two or three seeds into each pot, pressing them into the soil but not burying them.

Step 3:

Water well and place in a bright location until you see signs of new growth. Once they are growing, treat them as cuttings for best results. Propagated aeoniums grow quickly when given proper conditions and can flower within six months.

Alternatively, you may opt to prepare a nursery bed outdoors in the garden. Sow the seeds on the surface of a well-draining soil mix and keep moist until germination, which should occur within two to four weeks. Aeoniums do not transplant well, so it is best to wait until they are a couple of inches tall before transplanting them into the garden.

It may take several weeks before you see any signs of new growth. Once the seeds have become seedlings, treat them as cuttings for best results and enjoy your newly propagated aeonium plant!

Why propagate Aeoniums?

Aeoniums are easy to propagate and grow quickly when given the proper conditions. This makes them a great plant for beginners, as well as anyone who wants to have a large number of plants without spending a lot of money.

When propagated correctly, aeoniums will produce beautiful flowers that add color and interest to any garden or patio. Aeoniums are also easy to split, so they can be divided up among friends and family as gifts for special occasions or just because you love them.

Aeonium in pot.
Aeoniums are also easy to split, so they can be divided up among friends and family as gifts.

Aeonium flower colors include yellow, orange, red, pinkish-red, and purple with white highlights that appear in the center of the petals. Plants produce blooms in the spring and summer, with colors that range from pale yellow to deep purple.

Propagating aeoniums is also fun for kids who may find it easier than growing other plants or flowers. The seeds are small but easy to handle, so even very young children can participate in the process of germinating them before watching their tiny aeonium plants grow into big beautiful flowers.

Can Aeonium propagate in water?

Aeoniums can be propagated in water, but the success rate is not as high as when they are propagated by cuttings, division, or seeds. To propagate aeoniums in water, cut off a stem that has at least two leaves and place it in a glass of water. Change the water every day and wait for new roots to form. Once the roots have formed, transplant the aeonium into soil and water well.

Aeonium with water droplets.
To propagate aeoniums in water, cut off a stem that has at least two leaves and place it in a glass of water.

It may take several weeks for new roots to form, so be patient. When propagating aeoniums in water, it is important to use fresh clean water every day. You will also need to change the water frequently if you are propagating several plants in one glass.

While propagating aeoniums in water is possible, it is not the best method for beginners or anyone who wants to quickly increase their collection of this lovely plant.

The dos and don’ts when propagating aeoniums

When propagating aeoniums, there are a few things to keep in mind for the best results. These will help you ensure that your plants grow quickly and produce beautiful flowers.

Do:

  • Always use fresh, clean water.
  • Be patient when waiting for new roots to form in water or soil.
  • Cut off a stem that has at least two leaves and place it in a glass of water. Change the water every day and wait for new roots to form before transplanting into soil.
  • Root stimulator is beneficial when propagating aeoniums by cutting or division.
  • Sunlight is important for new growth.
  • Water in the morning to allow leaves time to dry before nightfall.
  • If you are new to propagating aeoniums, start with cuttings or divisions and use all your skills to create beautiful gardens full of the color and texture that only these lovely plants can provide.

Don’ts:

  • Do not propagate aeoniums in water if you don’t change the water every day and clean it frequently, as this will lead to root rot that kills your plant.
  • Do not keep propagating new plants too close together, as this will inhibit their growth.
  • Propagate aeoniums by seeds if you live in a cold climate, as they may not germinate correctly.
  • When using seeds, do not bury too deep as the seeds will not germinate.
  • When using the water method, do not keep propagating new plants too close together as this will inhibit their growth.
  • Don’t use root stimulators when propagating aeoniums by division or cuttings, because it can kill your plant if used incorrectly.

Final Word

The Aeonium plant is one of the most popular succulents for use in gardens. Growing your own plants can be rewarding and you will always have fresh cuttings to share with friends. However, its propagation can be easier said than done as some varieties simply do not root well.

It may require a bit of trial and error before you achieve success. With patience, however, it can be done by rooting cuttings taken from the tips of the branches on young shoots that are not yet flowering or using leaf nodes on mature stems.

How To Water A Sedum (Stonecrop) So It Doesn’t Die

Sedum is a genus of plants that are also known as Stonecrops. These succulent plants come in many shapes, sizes, and colors. They are great for adding interest to gardens with contrasting foliage colors, textures, and forms. The Sedums are well-suited for container gardening because they do not need much water or care. However, it is important to follow proper watering procedures when growing this plant.

So what are the golden rules for watering sedum? Sedums like it hot and dry, but they can’t handle arid conditions in summer. Plants in containers need more water than those planted in the ground. Take care not to underwater or overwater as it can be fatal to Sedums. Water them in the evening, and avoid watering the leaves if possible. Most importantly, water while the plant is actively growing (spring to fall).

Sedums are interesting plants to grow, but they can be unforgiving if you mess with its watering schedule. This article will discuss 7 golden rules for watering sedum and properly caring for this succulent. Let’s get started.

1.     Do not overwater

One common mistake that people make is over watering Sedum plants. This can be especially harmful in the winter when cold temperatures freeze water sitting on top of leaves and stems, causing them to rot or become sickly looking. To avoid overwatering a Sedum, it’s best not to allow the soil to become completely dry before watering, but not to water too often. A good way to test if your sedum needs water is to stick your finger in the soil. If it feels dry, then it’s time to water.

2.     Do not underwater

This is another common mistake when watering Sedum plants. This can cause the leaves to droop, and the plant will not look healthy. To ensure you are watering properly, wait until the top inch of soil feels dry before watering. You can tell if a Sedum needs water by checking the color of the leaves. If they are starting to turn pale, then it’s time to water.

Stonecrop in a pot.
You can tell if a Sedum needs water by checking the color of the leaves.

To avoid underwatering,  it’s best to water in the evening when evaporation is less likely to occur. This way, by morning, any excess water will have evaporated, and your sedum will be ready for another day of bright sunlight!

3.     Water them in the evening

Another key tip for caring for a Sedum is to water them in the evening. At this time, the sun has gone down and cooled off. This will help reduce wilting during hot days and minimize the risk of root rot.

 Watering in the evening also reduces the chance of water getting on leaves and creating a place for mold or mildew to grow.

4.     Never pour any water on their leaves or stems

The Sedum (Stonecrop) plants should only be watered from the soil. Never pour any water on their leaves or stems, as this can cause them to rot and die. For better results, use a spray nozzle to provide a gentle shower which will also help the sedum’s leaves and stems retain moisture.

Alternatively, you can also use drip irrigation to water your Sedum plants. This method allows you to water them slowly and efficiently without overwatering or under watering, which is the best way for growing healthy succulent plants like this one.

5.     Avoid watering the leaves

One mistake that’s easy to make when watering a Sedum is accidentally wetting the leaves. This can cause them to rot and die, so be very careful. If you do happen to get water on your plant, try using a small paintbrush or cotton swab to dab it off of each leaf as soon as possible.

When planting sedum, be sure to give it the proper amount of room. These plants grow slowly and don’t require much space, so you can plant them close together for a full effect.

6.     Allow soil to dry out between waterings

Try to water your Sedums about every two weeks. When planting, be sure that you allow the soil to dry out a bit between each time you water them. This will help reduce root rot and keep your plant looking healthy for years. In case of a major heatwave, you may need to water them more often.

A sedum plant growing on the ground.
When planting, be sure that you allow the soil to dry out a bit between each time you water them.

For better results, use a spray nozzle to water them gradually. In the hotter months, you may need to be watering your Sedums every few days for them to stay hydrated and healthy-looking.

7.     How much water does stonecrop need?

As a rule of thumb, Sedum plants only need water when the top inch of soil feels dry. You can tell if a Sedum needs water by checking the color of the leaves. If they are starting to turn pale, then it’s time to water.

Air plant dying.
You can tell if a Sedum needs water by checking the color of the leaves.

The amount of water needed will depend on the climate, the size of the pot, and how much sun the plant is getting. In general, try to water them about every two weeks or so.

8.     Avoid watering in direct sun

Another key tip for caring for your sedum is to avoid watering them when the sun is directly shining on them. This can cause the plant to burn and wilt, so try to water them in the morning or later in the evening when they won’t be in direct sunlight.

When you decide to water your Sedum plants, try not to leave any puddles on top of the leaves after you’ve watered because this can cause mold or mildew to grow.

9.     Water more often while the plant is actively growing (spring to fall)

Watering a Sedum in the winter is usually unnecessary, as they will go into a dormant stage. However, during the spring and fall, when they are actively growing, you may need to water them more often- about once a week.

Closeup image of Stonecrop.
During the spring and fall, they are actively growing.

During this period, the plant will need more water. In general, keep an eye out for any signs that your sedum needs to be watered, such as dry leaves or a few cracks in the soil.

Steps to watering your Sedum (Stonecrop)

Watering a Sedum plant is easy once you know the proper steps. This helps reduce the chance of overwatering or underwatering and keeps your plant healthy for years.

Step One:

 Check the top inch of soil to see if it’s dry. If the top inch of soil feels dry, it’s time to water your plant. 

Step Two:

 If you’re using a drip irrigation system, then just plug in your hose and allow it to run until the soil is completely saturated.

If you’re watering with a spray nozzle or water can, use a gentle spray to water the soil evenly. Be sure not to wet the leaves, as this can cause them to rot and die.

Step Three:

 Once you’ve saturated the soil, let it run until it begins to trickle out of the bottom. This ensures that your plant has enough water and helps flush excess salt from fertilizers or other chemicals in the soil. If you have a drip irrigation system, just plug it back in when done.

Step Four:

 Wait until the soil dries out before watering again. As a general rule, Sedum plants only need water when the top inch of soil feels dry to the touch.

Repeat this process every two weeks or so, depending on the climate and size of your pot.

Best water type to use on Sedum (Stonecrop)

Sedums prefer slightly acidic water, so you can use distilled or rainwater to feed them. Tap water is usually fine if it has been left sitting out overnight and allowed to evaporate some of the chlorine in it. This will help reduce leaf burn when watering your plant with tap water.

A water.
Sedums prefer slightly acidic water, so you can use distilled or rainwater to feed them.

However, if you live in a very hard water area, it’s best to use distilled or rainwater on your Sedum plants because they will need the extra calcium and magnesium. If you can’t locate either of these types of water, then tap is fine as long as you allow it to sit out overnight before using it for watering.

Final Word

Watering your Sedum (Stonecrop) plants will keep them looking healthy and beautiful for years. The next time that you’re thinking about planting succulents like this one in your garden or container pots, remember to water them properly. Proper watering will not only keep your plants healthy but will also help them resist pests and diseases. Like most succulents, Sedum plants are drought tolerant and very low maintenance. However, this is not to say that you can neglect them and still thrive.

Drip irrigation is the best way to water succulents like sedums because it delivers a slow, steady stream of water directly to the roots. This helps reduce the chance of overwatering or underwatering and keeps your plant healthy for years. If you don’t have a drip irrigation system, using a spray nozzle or water can with a gentle stream is the next best option. Watering from the top can also help flush excess salt from fertilizers or other chemicals in the soil.