Why Is Your Rosemary Turning Woody? Learn How to Keep It Fresh!

A rosemary in a pot with a hand spraying water.

Rosemary remains one of the most awesome herbs in your home garden. Native to the Mediterranean region, the herb adds a unique flavor to your recipes and provides a beautiful visual element with its dark-green leaves and spiky stems. You can even use its leaves to kill some insects. However, one common issue with rosemary is that it may start turning woody with time. You may end up with brittle leaves and stems, making the herb inedible. To help you out, we’ve provided some valuable tips to prevent your rosemary from becoming woody.

But why is your rosemary turning woody, and how can you keep it fresh? The answer lies in how well you take care of your plant – rosemary can become woody due to improper maintenance, such as lack of pruning, freeze damage, overwatering, and insufficient light. The herb may also turn woody due to its natural woodiness. The best way to keep your herb fresh is by pruning it on time, ensuring it receives sufficient light, and avoiding overwatering.

This blog post discusses some possible causes of rosemary turning woody and what you can do to keep it fresh. Read on to find out everything you need to know.

1. Natural Aging

While many of us believe that rosemary is a herb, the truth is that it is not. This plant is a woody dwarf shrub usually grown as a perennial. The only difference between rosemary and other shrubs is that it develops woodiness slowly.

If you notice your plant developing woodiness relatively quickly, it is a sign of an underlying issue you must solve to save it from potential death.

But given that the plant is a shrub, you should expect its stems to become thick and woody as it ages. Natural woodiness usually starts at the base of the plant.

A rosemary in a pot.
This plant is a woody dwarf shrub usually grown as a perennial.

This is perfectly normal and should not be a cause for concern. Natural woodiness can be easily prevented to avoid the excessive development of old wood in specific plant sections.

Even though rosemary is a natural evergreen plant, it will no longer produce its tasty and fragrant leaves when the stems get woody.

The natural woodiness process is a mechanism that helps the plant to survive the dry and rocky environment of its natural habitat. The woody layer protects it from drought, salt, and Mediterranean animals such as deer.

What Is the Solution?

Even though it is pretty hard to control natural woodiness, there are a few things that you can do to delay it or make it less prominent on your plant.

The best way to achieve it is by keeping your rosemary compact through regular pruning or harvesting.

Regular harvesting/pruning will prevent the base of your plant from getting woody. However, you must avoid cutting back the old wood because you make new shoots to grow out of the area. Instead, prune about five to six inches from the top of the plant.

Ensure the cutting only happens on the soft and bending part of the plant’s stem. Feel free to use the cutting in your cooking or propagate them in soil for new plants.

Also, consider thinning your older rosemary bushes occasionally. The primary objective is to remove some of the older stems to make way for new growth.

2. Lack of Pruning

In their natural habitat, rosemary is kept in its shape naturally. Brooding summers, thin soils, strong winds, and grazing animals all influence the shape of the herb.

In most gardens, these forces are absent. This is why it is essential to prune your rosemary to keep its desired shape and prevent it from becoming woody.

Pruning a rosemary.
It is essential to note that you must not prune your plant during the winter or fall season.

You can do manual pruning or use a pair of shears. Manual pruning is more suitable for bigger rosemary bushes, while shears should be used when dealing with thin stems.

It is essential to note that you must not prune your plant during the winter or fall season because it can damage the new shoots.

What Is the Solution?

The solution to lack of pruning is relatively straightforward – prune your rosemary shrub regularly.

You can always harvest the young leaves and stems at any time without causing problems to your plant.

The shrub will be fine if you don’t cut it off in half.

However, there are a few things you need to remember when pruning your rosemary. If you prune the plant at the wrong time, you may cause irreversible damage. You must also know the right time to prune.

Generally, spring or early summer is the best time to prune your rosemary.

Winter pruning may be catastrophic if you are not careful. This is because the shrub mainly grows during summer and spring. In fact, it slides into dormancy during winter.

You will need a sharp knife or pruning shears to accomplish the task. Shears are suitable for thin stems, while knives should be used only on thick ones.

The first thing you need to do when pruning is to get rid of the faded flowers and dead branches. Cut off the dead stems at their base.

The next thing you need to do is carefully trim about one to two inches from the outermost layer of the rosemary bush. Make sure you use your hand to feel the stem and confirm it is tender before cutting.

Avoid cutting deep into your rosemary bush. You can always pinch off excess leaves and smaller stems but leave enough healthy foliage on the shrub for it to survive and grow.

Remember to give the shrub a good shape by removing excessively bulging branches. This will help reduce the woody layer and maintain the desired shape of your rosemary bush.

3. Freeze Damage

It could imply frost damage if you notice bare stems on your rosemary after winter. Sometimes, your shrub may not even survive the cold season.

That is why it is highly recommended that you prune your shrub at the end of the flowering season, which happens in summer. This will play a critical role in protecting it from freezing temperatures.

A rosemary outdoors covered with snow.
Consider covering your rosemary with a high-quality frost cover to protect it.

Remember that temperatures below 18 degrees Fahrenheit are too low for rosemary to survive.

If you live in an area that experiences extremely low temperatures during winter, consider covering your rosemary with a high-quality frost cover to protect it.

The shrub usually requires relatively warm temperatures, soil with good drainage, and lots of sunlight to thrive. Please fulfill these conditions to make it easier for your plant to survive.

The shrub requires around ten hours of direct sunlight daily to survive the active growing season. The bare minimum is six hours of direct sunlight.

You must also ensure the soil is well-draining, sandy, and relatively gritty. Avoid planting the shrub in heavy soils that hold water for too long. This may lead to irreversible root rot and many other fungal diseases.

What Is the Solution to Frost Freeze?

The best solution to rosemary frost damage is prevention. Start with covering the shrub with a frost cover before winter approaches.

You may also need to bring your potted rosemary indoors in winter in an area that experiences freezing temperatures. Then, move it back outside when the temperatures become warm again.

It is also important to prune your rosemary at the right time. As mentioned, spring or early summer is the best time to prune.

4. Excessive Watering

Lastly, your rosemary may be turning woody due to overwatering. It is essential to know that rosemary only thrives with relatively low to moderate watering.

The shrub has a well-established root system; other adaptations make it highly drought resistant.

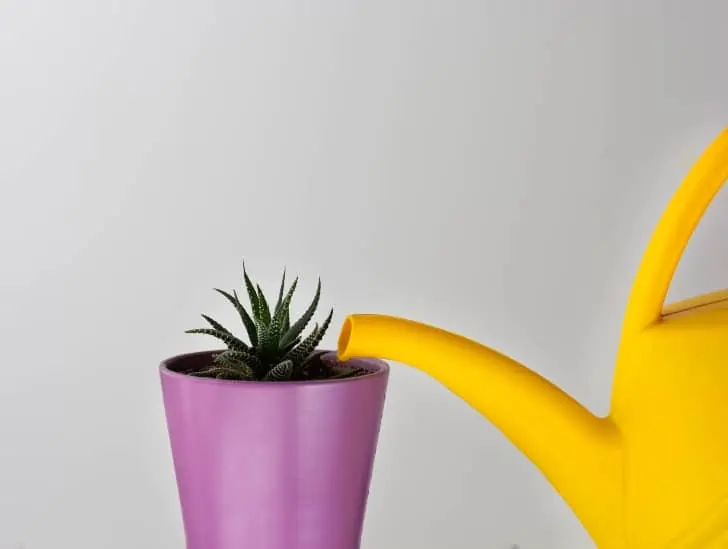
A person watering a rosemary in a pot,
It is essential to know that rosemary only thrives with relatively low to moderate watering.

However, it also means that it is highly susceptible to root rot. Therefore, you must be extra careful with your watering schedule. Only water your rosemary when the potting mix is completely dry.

What Is the Solution?

Fortunately, it is relatively easy to avoid overwatering a rosemary plant. Be careful with the amount of water and err on the side of underwatering if you are not sure of something.

Water your plant sparingly and allow the potting mix to dry completely between watering sessions. Always keep in mind that rosemary is native to dry climates.

An inch of water every one or two weeks is always enough to keep a rosemary plant healthy. You can cut down the watering to about one inch a month during winter.

Also, pay close attention to the composition of your potting mix. Ideally, you want a potting mix with excellent drainage properties.

Add sand and perlite to the soil to improve texture and ensure proper drainage.

Furthermore, consider using a drainage saucer or pot feet when watering to ensure your plant doesn’t stand in water. This will be critical in preventing root rot and other fungal infections that could lead to woodiness.

Summary

Woodiness in your rosemary shrub is natural and inevitable if you don’t take measures to control it. Regular pruning and harvesting are the best ways to prevent woodiness from taking over your plant.

The primary objective should be to keep the plant dense and bushy.

Other conditions, such as cold temperatures, excessive watering, and poor soil drainage, could also lead to woodiness.
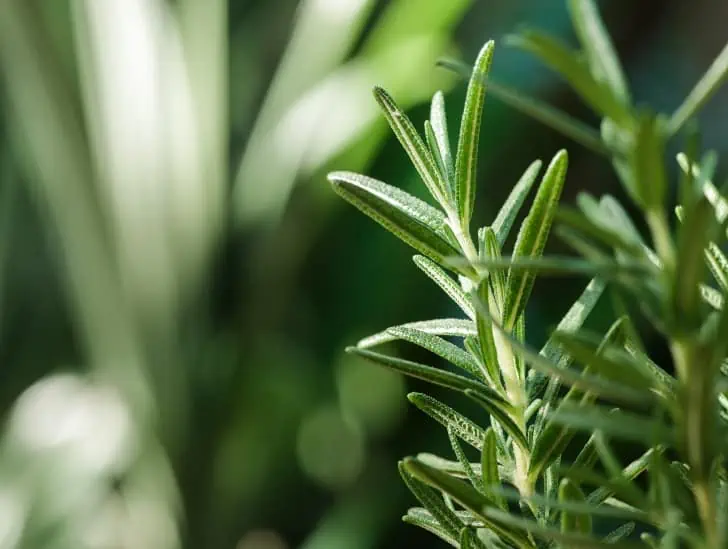
A closeup image of a rosemary.
Regular pruning and harvesting are the best ways to prevent woodiness from taking over your plant.

It would be best to take preventive measures such as using frost covers, proper pruning techniques, and well-draining soil to ensure your rosemary doesn’t turn woody.
Discover the Secrets of Growing Haworthia fasciata Zebra Plant!

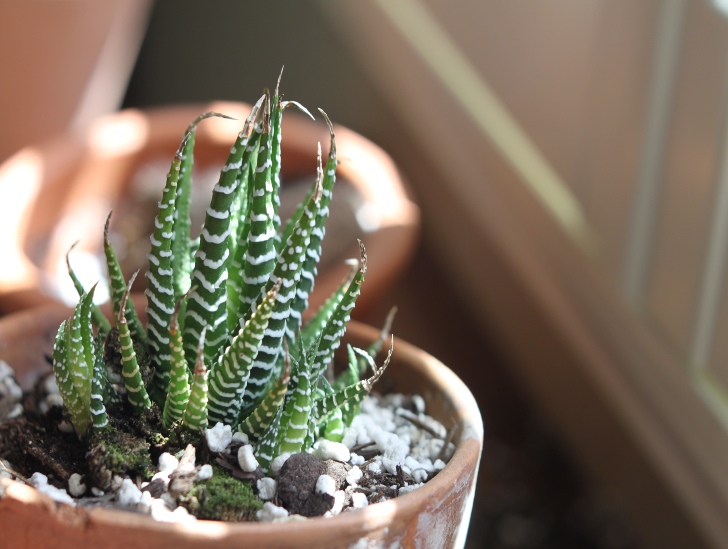
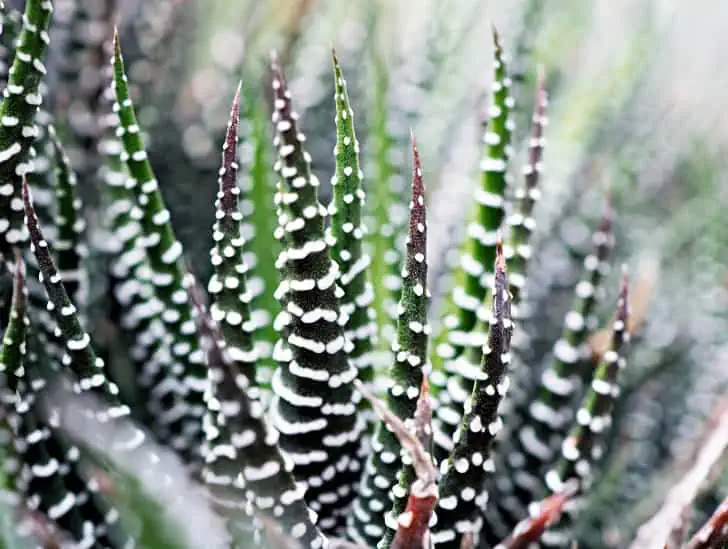
A zebra plant.

Haworthia fasciata zebra plants are attractive succulents with variegated, gray-green leaves with unique white stripes. Native to South Africa, this succulent is relatively small and shares many characteristics with members of the aloe family. Haworthia fasciata is mostly mistaken for Haworthia attenuata even though the former has smoother inner leaves, unlike the latter, which displays tubercles on its leaf surface. The Zebra plant is a relatively slow-growing succulent with a lifespan of up to 50 years. It can take up to 12 years for it to mature.

So, what are some of the secrets of growing Haworthia fasciata (Zebra plant) at home? This succulent thrives in bright light and a well-draining potting mix. Haworthia fasciata must be watered deeply about once every two weeks in the summer but only once every three weeks in winter. Allow the top 1-2 inches of soil to dry completely before watering because overwatering can lead to root rot. Repotting should happen every 2-3 years. Also, consider fertilizing the plant monthly with a succulent-specific fertilizer during the active growing season to enhance its growth.

Zebra Plant: A Quick Overview

The Zebra plant belongs to the Haworthiopsis genus, which has 18 succulent species. The plant shares the genus with other beautiful succulents such as Haworthia attenuata, Haworthia viscosa, Haworthia glauca, Haworthia bruynsii, and Haworthia nigra.

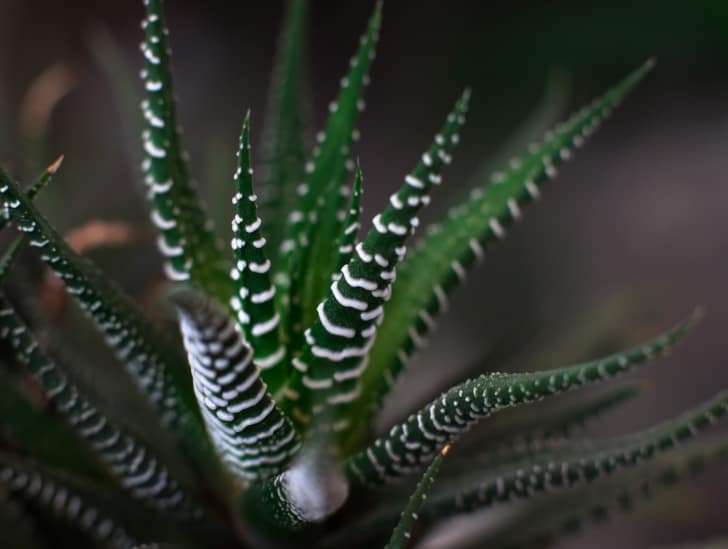
The succulent gets its name from its beautiful zebra-like stripes on its leaves. They form a pattern that is not seen in any other succulent and gives the plant an attractive appearance. The plants also have pointed tips, making them look even more interesting.

The Zebra plant is an evergreen perennial succulent native to South Africa. It usually forms rosettes of thick, narrow, and rectangular leaves. The rosettes can reach up to six inches in diameter.

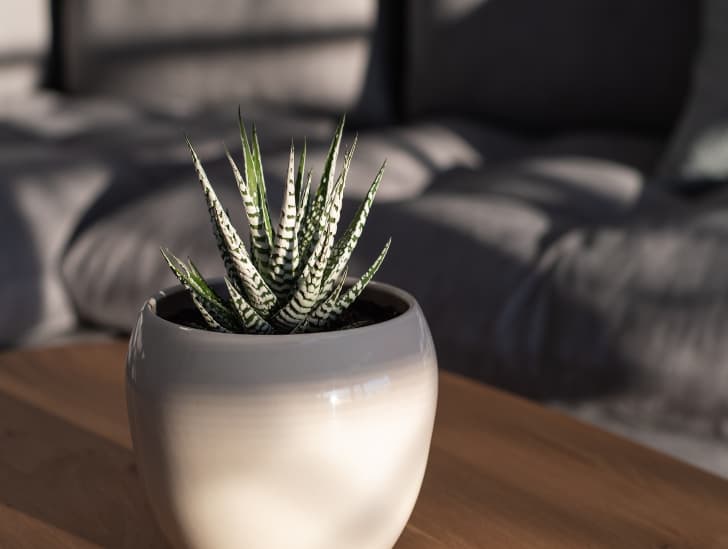
A zebra plant on a white pot.
The plants also have pointed tips, making them look even more interesting.

The succulent flowers during summer produce tiny, tubular, white blooms at the end of their long and slender stem. The flowers exhibit shades of green, red, brown, or white.

Haworthia fasciata can be propagated using offsets or leaf cuttings, making it a great choice for anyone looking to grow a unique and beautiful succulent.

A mature Haworthia fasciata plant produces many offsets that can grow with the mother plant. The offsets can also be plucked from the mother plant and propagated easily into new plants.

Discover the Secrets of Growing Haworthia fasciata

Now that you know more about the Zebra plant, it’s time to discover the secrets of growing this succulent indoors and outdoors.

Watering Guide

The Zebra plant is a perennial succulent adapted to growing in areas with little to no rainfall.

Their natural habitat has forced these plants to find ways of withstanding long periods of drought and be resilient to neglect. It means that the plant can survive with minimal watering.

The zebra plant only requires a relatively small amount of water to thrive. Some gardeners believe the plant only requires about half a cup of water weekly. However, you should always check the soil before watering the plant.

If it feels dry to the touch, then you can go ahead and water it. Ensure you do not overwater your Zebra plant since it can cause root rot and eventually kill the plant.

A simple way to check for soil dryness is to use a wood skewer or bamboo stick to measure water uptake.

Carefully insert the wood skewer or bamboo stick into the potting mix or the base of the plant and wait for a few minutes.

Pull it out and feel it. If the stick feels completely dry with no soil particles attached to it, then it is okay to water your zebra plant. Otherwise, give it a few more days and test it before watering.

Watering a haworthia.
Go easy on watering when the plant is dormant.

Generally, you should water your Zebra plant every three weeks during summer but change the schedule to once every month during winter. Go easy on watering when the plant is dormant.

The best type of water for the Zebra plant is rainwater, free of impurities and chemicals. Feel free to use distilled water in place of rainwater.

However, you should avoid tap water since it contains minerals and chemicals unsuitable for the plant.

Light Requirements

Haworthia fasciata is an outdoor succulent and requires a lot of light to thrive. It can handle full sun during summer, but you should provide some shade during the hottest hours of the day. Ideally, you should provide it with at least six hours of direct sunlight daily.

The succulent can also be grown indoors near a bright window or under artificial lighting such as LED grow lights. Consider positioning your Zebra plant on a south or east-facing windowsill for best results.

Be extra careful when using artificial grow lights. Ensure your zebra plant’s light level is neither too low nor too high. You can use a sunlight meter to measure the light the plant receives and adjust accordingly.

Soil Requirements

Like other succulents, the Zebra plant thrives in well-draining soil. The potting mix should have good sand and perlite to ensure proper drainage. This type of soil helps reduce the risk of overwatering and root rot.

Although many people prefer to purchase succulent potting mixes from their local stores, you can also make one at home. All it takes is some garden soil, perlite, and sand mixed in equal parts.

A zebra plant exposed to light.
The potting mix should have good sand and perlite to ensure proper drainage.

However, you must be careful when mixing because regular soil can get too dense and cause root rot.

Choose the Right Container

Choosing the right container for your Zebra plant is closely related to the soil aspect. This succulent prefers a pot with at least one drainage hole in the bottom to allow the excess water to run away and prevent root rot.

Select a pot size that allows enough room for the roots of your zebra plant to grow without being cramped.

A terracotta pot is ideal for this succulent because it helps absorb excess moisture and keeps the soil dry.

Avoid using any container made of plastic since it can trap too much moisture and lead to root rot. We must emphasize the point of drainage holes because it is crucial if you want to prevent potential root rot.

Temperature and Humidity Requirements

Haworthia Fasciata does well in mild to warm temperatures ranging from 50-90°F (10-32°C). The succulent will not tolerate cold temperatures below 40°F (4°C) and should be kept away from chilly drafts.

Humidity levels should be relatively low for the plant to thrive, with the ideal humidity level ranging between 30-50%.

You can keep track of the humidity levels using a hygrometer. If the humidity outside is too high, you can use a dehumidifier or an air conditioner to restore balance.

Fertilizer Guide

The Zebra plant can be fertilized with succulent-specific fertilizer to enhance its growth during the active growing season.

Fertilizing once a month should be enough, but you can also make more frequent applications depending on the growth rate of your plant.

A close up image of haworthia.
Fertilizing once a month should be enough.

If you are unsure which fertilizer to use, you should use a liquid or water-soluble type with low nitrogen content.

Never overfertilize because too much fertilizer can damage the roots and create problems for the plant.

Pruning Guide

This succulent does not need much pruning, but you can still remove damaged or dead leaves. Use clean, sharp scissors for the job, and avoid using dirty tools that can spread diseases in your garden.

It is also important to watch for pests such as mealybugs and scale. You can use neem oil, insecticidal soap, or alcohol swabs to remove them.

If the infestation is too severe, you may need to discard the plant and start anew with a healthy one.

Repot At the Right Time

Even though Haworthia fasciata is a relatively slow-growing succulent, you still need to repot it once every one or two years. Ensure you use a pot with proper drainage and allow the soil to dry out completely between watering sessions.

A zebra plant being repot,
Ensure you use a pot with proper drainage and allow the soil to dry out completely.

Propagation

The Zebra plant can be easily propagated using offsets or “pups that grow from the mother plant.

To propagate, carefully pluck the pups from the mother plant and place them in a potting mix of equal parts perlite and peat moss.

Water the offsets lightly and keep them in a bright location with plenty of sunlight. The offsets should start sprouting within a few weeks, but check on them regularly for any signs of distress.

Once the pups are established, you can transfer them to their pots and start caring for them as usual.

Summary

The Haworthia fasciata (Zebra plant) is a slow-growing succulent that can give your home a unique look with its striped leaves.

It is fairly easy to care for and can thrive indoors without difficulty if you remember the basics of watering, fertilizing, pruning, repotting, and propagating.

With proper care and attention, your Zebra plant will bring lots of life to any room in your home.

The Ultimate Guide to Caring for Your Toothpick Cactus

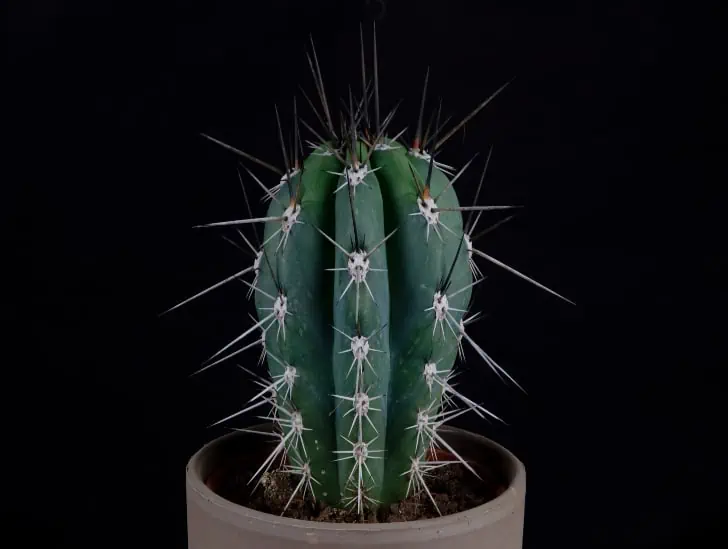
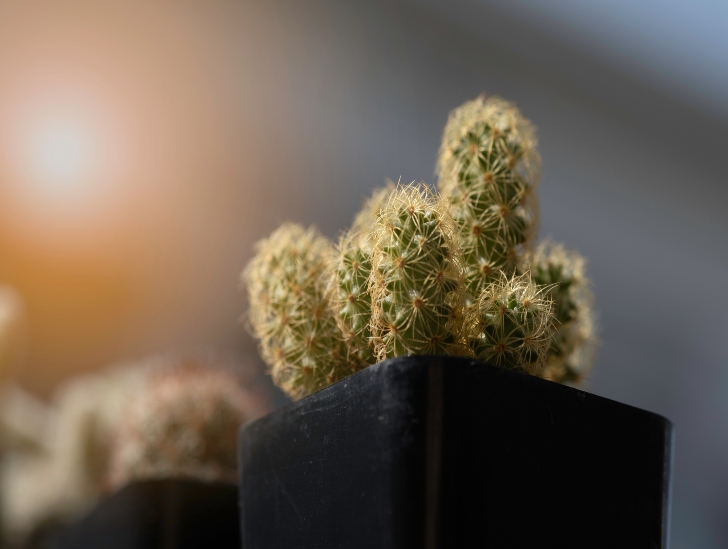
Toothpick cactus on a pot.

Native to Bolivia and Argentina, the Toothpick cactus sports a beautiful, fanned-out shape and delicate white flowers. This plant is unique in appearance and makes an excellent addition to any home. Its relatively long spines resemble a toothpick you would use on your teeth hence the name “Toothpick cactus.” The spines come in tight clusters of up to ten. Like any other cactus plant, the Toothpick cactus requires proper care to remain healthy and thrive in your home.

So, how do you care for a Toothpick cactus? To begin with, you will need to provide your Toothpick cactus with plenty of light. Your cactus should receive at least four hours of direct sunlight per day. Toothpick cacti love well-draining soil with plenty of gravel. The soil should have a good balance of nutrients and be slightly acidic, with a pH ranging from 5.5 to 6.5. It’s also important to water your Toothpick cactus regularly. However, moderation is key. Avoid over-watering because it can lead to irreversible damage. Feed your cactus with a well-balanced organic fertilizer during the active growing season. Be sure to follow the instructions on the packaging for application rates.

This blog post discusses everything you need to know about caring for your Toothpick cactus. Read on to learn more.

Toothpick Cactus: A Quick Overview of the Plant

Stetsonia coryne, commonly called the Toothpick cactus or Argentine cactus, is one of the most fascinating and eye-catching cacti species. The succulent is mainly cultivated as a houseplant in different parts of the world.

It features dense clusters of spines that resemble toothpicks. The cactus is native to the semi-deserts and deserts of Paraguay, Argentina, and Bolivia. The cactus can reach up to nine meters tall in its natural habitat, making it one of the tallest cacti species.

A toothpick cactus.
It is one of the most fascinating and eye-catching cacti species.

This cactus is a relatively slow-growing succulent that can take up to ten years to reach maturity. It produces branches that resemble candle flames and eventually bloom in late spring with white flowers.

Caring for Your Toothpick Cactus: Tips and Tricks

The key to a healthy Toothpick cactus is the right care. Here are some tips to help you keep your cactus thriving:

1. Watering

The Toothpick cactus is one of the best drought-tolerant succulents that doesn’t require frequent watering. The Toothpick Cactus can survive for several months with water. You only need to water it when the potting mix is completely dry.

Typically, you should water your cactus in the summer months and reduce the amount of water during winter. Make sure to use lukewarm water and not cold or hot.

When potted, water it slowly from the top and wait for it to flow to the bottom. Stop watering once you notice plenty of water flowing through the drainage holes. Don’t let it sit in excess water for too long because it can lead to root rot.

The cactus grows actively in spring, summer, and fall, sliding into dormancy during winter.

Consider watering it twice a week during the active growing season but cut it down to once a week or two weeks during winter.

The best type of water to use is rainwater or distilled water since it is free from chemicals and other contaminants that can harm your cactus.

A woman watering the cactus.
Don’t let it sit in excess water for too long because it can lead to root rot.

Avoid tap water since it contains chlorine and other minerals that can wreak havoc on your cactus.

Long-term use of tap water can lead to soil compaction. Do everything possible to avoid soil compaction since it can hinder the growth and development of your Toothpick cactus.

2. Light

The Toothpick cactus loves a lot of bright light and direct sunlight to stay healthy. Generally, it requires at least four hours of direct sunlight daily to thrive.

Place the plant near an east-facing window or outdoors in partial shade during summer. A south-facing windowsill can still be a good option if you don’t have an east-facing one.

You should avoid exposing your Toothpick cactus to extremely hot or cold temperatures because it could damage it.

If growing your cactus indoors, use artificial grow lights to ensure your plant gets enough light. This is especially important during winter when the days are shorter and natural sunlight is scarce.

Aim for at least eight hours of indirect sun or fluorescent light.

3. Temperature and Humidity

Closely related to the aspect of light is temperature and humidity. If you want your Toothpick cactus to thrive, it needs temperatures between 55-90°F (13-32 °C).

Regarding humidity, the Toothpick cactus thrives in dry conditions like its natural environment. It doesn’t require high humidity levels like other succulents.

Consider placing a shallow dish of water near the cactus to help increase humidity levels but keep it away from direct sunlight.

Alternatively, you can purchase a humidifier and set it up near the cactus. Be sure to monitor the levels of humidity. It is best not to have any extreme highs or lows.

4. Soil

Cacti plants thrive in well-draining soil that mimics the arid conditions of their natural habitat. The best type of soil for cacti is a mixture that provides good drainage while retaining some moisture.

Ideally, you want the soil to stay moist, not wet. You can purchase commercial soil from your local plant store or make your soil at home.

A cactus soil.
The best type of soil for cacti is a mixture that provides good drainage while retaining some moisture.

To make your cactus soil, consider using a mixture of standard potting soil and sand in a ratio of 2:1. It means that for every two parts of potting soil, add one part of sand.

You can also add some pumice or perlite for better drainage and aeration. You should avoid using too sandy or clay-like soils because they can cause root rot.

If growing outdoors, choose an area with sandy, well-draining soil. If growing indoors, repot your cactus every two to three years to refresh the soil.

5. Container

Closely related to the aspect of soil is the type of container. One of the most critical factors you must remember when choosing a container for your Toothpick cactus is drainage.

Always choose a pot with plenty of drainage holes to allow excess water to drain quickly. This prevents root rot, one of the most common problems for most cacti plants.

Choose a pot with plenty of room for your cactus to grow and spread its roots. Generally, bigger pots are always better than smaller ones since they allow the roots to spread.

You should also pay attention to the potting material. Ensure that the material used allows air to flow through it. Terracotta or ceramic containers work best because they have excellent drainage and aeration properties.

Avoid plastic pots as much as possible since they tend to trap moisture and can increase the risk of root rot.

6. Fertilizer

The Toothpick cactus doesn’t require much fertilizer, but it can benefit from a light application of liquid fertilizer once or twice a year during active growth periods (spring and summer).

Use a balanced fertilizer manufactured explicitly for cacti and succulents, such as 10-10-10 or 20-20-20. Make sure to read the instructions on the packaging and mix the fertilizer with equal parts of water.

Only fertilize your cactus during its active growing season, and never use a high-nitrogen fertilizer, as it can burn the plant’s roots.

7. Pruning

Pruning is not necessary for a toothpick cactus, but you should remove any dead or damaged stems or leaves that may be present.

You can also prune your cactus to control its shape and size. You can easily cut off excess growth with a sterile knife if your cactus is getting too tall or wide for its pot.

A lady finger cactus exposed to light.
You should remove any dead or damaged stems or leaves that may be present.

Be sure to sanitize the knife before use and wear gloves if you have sensitive skin. After pruning, let the cactus heal by keeping it dry for several days.

It would be best to avoid direct sunlight after pruning since it can cause damage to the plant’s exposed parts.

8. Repotting

Even though a Toothpick cactus is a relatively slow-growing plant, it may need repotting every two or three years.

Repotting your cactus is essential to provide fresh and nutrient-rich soil to continue growing healthy and strong.

It’s best to repot your cactus during its active growing season in the spring or summer. Choosing a pot one or two sizes larger than the current one is also essential.

For instance, if your cactus is currently in a 5-inch pot, choose a 6- or 7-inch pot for repotting. Make sure to use fresh and well-draining soil, as mentioned before.

Remove the cactus from its current container and shake off any excess soil when repotting.

A golden barrel cactus on hand being repot.
Repotting your cactus is essential to provide fresh and nutrient-rich soil.

After repotting, avoid direct sunlight for several days and keep the new soil consistently moist until your cactus has become established in its new home.

Summary

The Toothpick cactus is a low-maintenance succulent that doesn’t require much care.

To ensure the health and growth of your cactus, choose the right pot with lots of drainage holes, only use fertilizer during its active growing period, and report it every two to three years.

Your Toothpick cactus will surely thrive and bring you joy for many years with proper care and attention. Good luck!

The Ultimate Guide to Summer Succulent Care

A sedum succulent.

Summer is rapidly approaching, and temperatures are about to rise exponentially. You look at your succulents and feel proud of the great job that you have done. But one big misconception can easily ruin your hard work and dedication that you need to be aware of. Many people believe that since succulents are native to hot climates, they don’t need special care during summer. While this is generally true, you still need to provide them with proper care to avoid irreversible damage.

So, how do you take care of succulents during summer? To keep your succulents healthy and thriving, you should know five main areas of succulent summer care: water, sunlight, temperature, nutrients, and pests. You must ensure your plants receive enough water to sustain them through the intense heat waves. Be sure to provide shade to prevent the scorching summer from causing sunburn, and regularly check the soil temperature to ensure it is not too hot. Additionally, provide your succulents with a balanced supply of nutrients using specially formulated fertilizers, and watch out for any pests lurking around.

This blog post provides you with a list of detailed tips on succulent summer care. Read on to find out everything you need to know.

What Does Summer Mean for Succulents?

Before we dive deep into the topic, it is essential to understand what summer means for succulents. Succulents thrive in hot climates, and summer is the perfect time to flourish. The intense heat allows them to stretch out their leaves fully and absorb more light.

However, this also means you must be extra vigilant when caring for your succulents during this season. As temperatures rise, so does the risk of dehydration and sunburn.

Remember that succulents generally have thick and fleshy stems, making them more vulnerable to heat damage. Therefore, you must be prepared to provide optimal care to keep them healthy and strong.

Succulent Summer Care

Caring for summer succulents can be tricky, but you don’t have to freak out. Here are some valuable tips to get you started:

1. Water Properly

A common misconception is that succulents don’t need much water to thrive. But the truth is that these plants need to be watered deeply and thoroughly to survive.

Succulents planted outdoors or in a greenhouse need to be watered at least once every week during summer. You can allow the soil to approach dryness before watering.

Indoor succulents can also be watered at the same rate, but ensure you check the potting mix for dryness before watering.

Succulent rain water.
Don’t allow the soil to dry out completely for extended periods.

Succulents planted in black plastic pots must be checked frequently since the black color increases the temperature and evaporation rate.

It is essential to ensure that your succulent receives enough water during summer. Don’t allow the soil to dry out completely for extended periods because it may damage the plant’s fine root filaments leading to stunted growth.

You can test the moisture content in the potting mix by simply touching it with your finger. If the soil feels dry and crumbly, it is time to water your succulent.

The watering technique you use also matters. Ensuring the soil is fully saturated to the deepest roots when watering well-established succulents is crucial.

Consider watering your succulent until you start to see water sipping out of the bottom of the pot. Deep watering is good because it promotes healthy root growth and healthier succulents.

The best time of the day to water your succulents during summer is early morning before temperatures soar. Avoid watering your plant in the afternoon when the temperatures peak.

If you cannot water your plant early in the morning, consider watering it in the evening when the temperatures are relatively low.

However, watering in the evening is not good practice during winter. Leaving succulents waterlogged all night makes them susceptible to root rot and other fungal diseases.

2. Provide Enough Sunlight

Ignoring your succulents’ need for sunlight during summer is easy. However, providing them with adequate sunlight is essential for healthy growth and their overall health.

During summer, try to place your succulent in a spot that receives at least six hours of direct sunlight daily.

Avoid areas with excessive shade because insufficient light can cause your plant to become leggy and weak.

If you are growing your succulents indoors, place them close to an east or south-facing window where they can receive ample light.

A kalanchoe exposed to sunlight outdoors.
Providing them with adequate sunlight is essential for healthy growth and their overall health.

You should also consider using fluorescent grow lights if natural sunlight is insufficient in your home.

However, you must be careful not to expose your succulents to too much sunlight during summer. Doing so may cause sunburn, which can be fatal for your plant.

3. Pay Close Attention to the Potting Mix

You may be forgiven for thinking that any potting mix will work for your succulents. But that’s far from the case.

The wrong soil and planting environment can be detrimental to the health of your succulent, especially during summer.

The best potting mix must be well-draining, light, and full of organic matter. This allows for a good balance between moisture retention and adequate drainage.

If you are about to report your succulent, use the best soil mix. You can also use a mixture of potting soil and perlite or sand to improve drainage and aeration.

4. Provide Shade

The intense heat during summer can be very damaging to succulents if they are not provided with enough shade.

Prolonged exposure to the direct sun can cause sunburn and dehydration resulting in yellowed or brown leaves.

The appearance of black or beige patches on your succulents could be a sign of sunburn.

These patches indicate that some cells in your succulent leaves have already been damaged, and you need to act fast to save the rest of the plant.

A string of dolphin on the shade.
The appearance of black or beige patches on your succulents could be a sign of sunburn.

You may be lucky if the spots appear on outer leaves since new growth from the center of the succulent may conceal the sunburned areas with time.

It may be the same case if the damage is on lower leaves because those naturally fall off after some time.

To prevent sunburn, look for a shaded spot to place your succulent. If you are growing your succulent outdoors, you can create shade by planting it under trees or building a canopy.

If you have an indoor succulent garden, try to keep it away from windows and other sources of direct sunlight. You can also use sheer curtains to filter the light and protect your plant from sunburn.

Another way to protect succulents during summer is by using a plastic or paper shade cloth over them. Shade cloths are available in different colors, sizes, and densities, so choose one that suits your needs.

5. Provide Adequate Ventilation

Succulents need proper air circulation to prevent them from succumbing to fungal diseases and pest infestations.

Good air circulation is also crucial during summer since it helps prevent the leaves of your plants from drying out too quickly.

A sempervivum exposed to a partial sunlight.
Good air circulation is also crucial during summer.

Keep your succulents in an open space away from crowded areas with little or no ventilation. If you keep them indoors, place a fan facing the plants to increase air circulation.

6. Mulch

Mulching your succulents during summer can play a crucial role in keeping the evaporation rate of your soil to a minimum.

Remember that soil tends to dry out much quicker when exposed to direct sun. This makes mulch an essential tool for regulating soil temperature and moisture levels.

When choosing the best type of mulch for your succulent, pick one that is well-draining. Organic mulch such as pine needles, wood chips, bark pieces, or cocoa shells are great options.

You can also use rocks and gravel as mulch to add texture and interest to your succulent garden.

7. Fertilize Carefully

Succulents need very little fertilizer during summer. Too much fertilizer can cause them to become leggy, so use only a quarter of the recommended amount of fertilizer in your plants.

You can also opt for organic fertilizers such as compost or fish emulsion instead of chemical-based alternatives.

Fertilizer on the soil mix.
Use only a quarter of the recommended amount of fertilizer in your plants.

This will minimize the risk of burning succulents with too much fertilizer and keep them healthy during summer.

8. Monitor Your Plants’ Health

Finally, inspect your succulent occasionally during summer for any signs of damage.

Pay special attention to the leaves and stems of your plant since these are usually the first parts to be affected by intense heat and inadequate watering.

Also, keep a close eye on the soil. If it is drying out too quickly, you may need to adjust your watering routine or add more mulch to slow down the rate of evaporation.

Final Thoughts

Summer is an essential season for succulents since they are prone to many issues.

Understanding how to care for succulents and providing the right environment is essential if you want them to thrive during summer.

Following the tips outlined will ensure you provide your succulents with the best-growing conditions and allow them to thrive during the warmer months.

With a few adjustments, you can easily ensure that your succulents stay healthy and happy all year round!

The Ultimate Guide to Growing Crassula Platyphylla: Tips and Tricks

A red orange crassula ovata.

Also known as “burgundy,” Crassula platyphylla remains one of the best succulents to grow at home. Native to South Africa, this succulent is famous for its thick and fleshy leaves. The leaves turn burgundy or red when the plant is under stress. The succulent is part of the Crassulaceae family and Crassuloideae subfamily. The Crassula platyphylla is a relatively slow-growing succulent that can reach approximately six inches in height when mature. The plant grows in dense clusters and takes an upright, oval shape.

So, how do you take care of Crassula platyphylla? Growing Crassula Platyphylla is relatively easy and can be done indoors or outdoors. The succulent is drought-tolerant and prefers well-draining soil with lots of air pockets. It can thrive in USA hardiness zones 9 to 11b without issues. Don’t expose it to temperatures below 25 degrees Fahrenheit; be careful with watering. The biggest threat to the overall survival of your Crassula platyphylla is overwatering. Ensure the potting mix is completely dry before watering. Feed the succulent every two weeks during the active growing season to aid growth. Ensure you dilute the fertilizer before using it.

This blog post discusses everything you need to know about growing Crassula platyphylla. Read on to learn more.

Crassula platyphylla: Quick Overview

Crassula platyphylla is a clumping and spreading succulent known for its thick, waxy leaves with red margins that tend to intensify when the plant is stressed.

The plant is native to South Africa and usually blooms during spring and summer. The flower stalks emerge with yellow flowers.

A red crassula ovata.
It is known as ‘burgundy’ because of its red-tinged leaves under drought conditions.

The succulent belongs to the Crassulaceae family and Crassuloideae subfamily. It is known as ‘burgundy’ because of its red-tinged leaves under drought conditions.

It grows to a height of six inches even though it doesn’t have an extensive root system. Typically, it grows in clusters and takes an upright, oval shape.

How to Grow Crassula Platyphylla

Growing Crassula platyphylla is relatively easy and can be done indoors or outdoors. Here are a few tips on how to grow this succulent:

1. Watering Requirements

Since the Crassula platyphylla is a succulent, it has the exact watering needs of other succulent plants. You must be careful with the amount of water if you want it to thrive and stay healthy.

Don’t overwater the succulent, and don’t allow it to sit in water for too long.

The succulent requires regular watering during the active growing season between April and September.

However, you must reduce the watering frequency during autumn and winter when the succulent slides into dormancy. Water sparingly during this time to avoid damaging the plant.

The best type of water to use is rainwater. Avoid tap water at all costs since it contains fluoride or chlorine that could cause irreversible damage to your plant.

If you must use tap water, consider diluting it with distilled water before use. Also, let it sit still in an open container overnight before use.

There are two popular watering methods that you can use to water your Crassula platyphylla.

The first method involves watering the succulent at the base, while the second consists in placing water on a tray at the bottom of the growing pot so that the plant soaks water upwards.

Watering a crassula ovata.
Don’t overwater the succulent, and don’t allow it to sit in water for too long.

Each method has its advantages and disadvantages. The advantage of the first method is that you’re sure all the water reaches the plant’s roots.

The drawback is that it could lead to root rot if you allow the plant to sit in the water for too long.

On the other hand, with tray watering, you don’t have to worry about root rot since excess water can quickly be drained out of the pot.

The downside is that only some water reaches the plant’s roots, meaning they need more hydration.

2. Light Requirements

Crassula platyphylla is native to warm parts of South Africa and has adapted to the bright sun. As such, this succulent needs plenty of direct sunlight to thrive.

You should expose your plant to direct sunlight for up to six hours daily to absorb enough light energy for growth and development.

If you’re growing it indoors, place it near a bright window with plenty of sunlight. A south-facing windowsill will do, but you can still use an east- or west-facing one.

If you live in an area with intense sun rays, consider providing your succulent some shade during the day to avoid sunburn.

On the contrary, you may be forced to install artificial light if you live in an area with the uncertainty of sunlight or during winter when days are short.

Place the plant at least 12 inches away from the artificial light source and supplement it with natural sunlight during the day.

A crassula hangging exposed to sunlight.
If you’re growing it indoors, place it near a bright window with plenty of sunlight.

Be careful when choosing an artificial light source. Some lights produce more heat than others, so avoid such lights to prevent your succulent from getting burned.

Ideally, use full-spectrum LED lights that produce little to no heat.

3. Temperature and Humidity

Closely related to the light requirements are the temperature and humidity. Crassula platyphylla is not a cold-hardy plant and will only thrive in temperatures of between 50-86°F (10-30°C). However, it can still tolerate occasional cold snaps or heat waves.

But don’t be fooled by the succulent’s sun-loving traits because it can still suffer irreversible sunburn when exposed to too much heat.

Consider making an appropriate shade to protect it from extreme heat during summer.

Another thing you must be extremely careful with when growing this succulent at home is humidity levels. Crassula platyphylla is a low-humidity plant that thrives in dry climates.

Therefore, you must keep the humidity levels around its growing area as low as possible to prevent it from becoming diseased or being attacked by pests like aphids and mealybugs.

4. Fertilizer Requirements

Apart from providing your Crassula platyphylla with the right light, temperature, humidity, and watering requirements, it would be best to feed it appropriately.

This succulent species is known to be a slow grower, meaning you don’t have to fertilize it too often.

A good rule of thumb is to fertilize your plant once every three months during spring and summer using an all-purpose fertilizer.

You can also use a liquid fertilizer and dilute it to ¼ of its potency before application on your succulent.

Avoid fertilizing during fall, winter, or when there’s too little light because it may not absorb all the nutrients, and you risk over-fertilizing it.

5. Soil and Potting Requirements

Regarding soil, Crassula platyphylla prefers a well-draining mix with lots of air pockets. If you grow your succulent in a pot, use a potting mix specifically made for succulents and cacti.

The ideal growing container should have plenty of drainage holes to prevent waterlogging. The potting mix you choose for your Crassula platyphylla must be lightweight and quality.

Avoid using soilless potting media when growing this succulent because it will cause it to sit in water for too long, which can lead to irreversible damage.

While there are many different types of potting mix, one of the most popular choices is cactus potting soil.

Alternatively, use a regular potting mix mixed with perlite and pumice to encourage fast draining of excess water. This mixture also creates air pockets needed for the survival of Crassula platyphylla.

Consider adding some compost to your potting mix before planting to increase the nutrient supply for your succulent. This will encourage growth and ensure your plant stays healthy.

6. Repotting

Consider repotting your Crassula platyphylla every two or three years. When you notice new growth begins to appear on your plant in early spring or late winter, you should know it is a clear sign for repotting.

Generally, the Crassula platyphylla growing container should have approximately three inches of free space. So, a three-inch Crassula platyphylla should be planted in a six-inch pot.

Repoting a crassula.
The first thing you need to do is to remove the plant from its existing pot.

The repotting process can be pretty tricky, especially for beginners. The first thing you need to do is to remove the plant from its existing pot.

Carefully lift it and gently shake off some old soil before transferring it into a new container with a fresh, well-draining mix.

Gently press down on the soil around the plant’s base and water generously to give your succulent a good start in its new home.

7. Pruning

Lastly, pruning is an excellent technique that ensures your plant remains beautiful and healthy.

Any time your Crassula platyphylla grows larger than intended, clip off the excess growth with clean pruning shears.

Only trim off dead or discolored leaves since they steal nutrients from other parts of your plant.

Prune carefully and be sure not to cut too deeply into the foliage, which can result in irreversible damage.

Cutting a crassula ovata.
This will ensure your plant remains beautiful and healthy.

The best time to prune your succulent is in late winter or early spring. This helps to encourage new growth, which means more flowers for you to enjoy during the growing season.

Pruning also keeps your plant neat and prevents it from becoming too wild and overgrown.

Summary

The Crassula platyphylla is an easy-to-care-for and low-maintenance succulent that adds a touch of beauty and elegance to any garden or home.

With enough sunlight, the right temperature, a regular watering schedule, low humidity levels, and appropriate fertilizing, you can ensure your plant stays healthy and happy for many years.

How to Care for Trichocereus Grandiflorus: A Beginner’s Guide

A trichocereus grandiflorus.

Trichocereus grandiflorus, commonly known as the red torch cactus or the Desert’s blooming jewel, is a beautiful and unique species native to South America. Its striking red flowers make it a popular choice among gardening enthusiasts. The cactus is gorgeous, and its magnificent blooms capture the attention of everyone. It stands upright, with its branches growing splendidly from its base. Its stems are bright green with a slightly yellow hue and are covered in golden spines. The flowers appear in late spring and summer in clusters of red and yellow colors, providing a stunning display.

So, how do you care for a red torch cactus? Like any other cactus plant, a red torch is relatively easy to care for. The main issues are with overwatering. Occasional watering when the potting mix is completely dry will make your red torch cactus thrive. Ensure the soil is loose and well-drained, and you provide temperatures above 70 degrees Fahrenheit. This cactus can tolerate direct sunlight but ensure that it gets some shade during the hottest parts of the day. Feed it occasionally with a balanced cactus fertilizer for it to bloom. Pruning is also essential because it helps maintain its shape and prevents unwanted growth.

This blog post provides you with an essential guide on how to care for your Trichocereus grandiflorus. Read on to find out everything you need to know.

Trichocereus grandiflorus: A Quick Overview

Trichocereus grandiflorus is one of the most popular cactus species known for its bright red blossoms. It can reach up to 4 feet in height, with the main stems growing upright while secondary branches form at the base.

The stems are greenish-yellow and covered in golden spines, protecting the plant from predators. Its unique star-like shape gives it a majestic look.

The cactus is native to South America, mainly Argentina, but it is cultivated worldwide as a potted or rockery plant.

It looks great on its own but can grow in different locations of your home as clusters. As an ornamental and drought-tolerant plant, the cactus is commonly used in xeriscape landscaping, such as rock gardens.

A Trichocereus grandiflorus red flower.
Trichocereus grandiflorus is one of the most popular cactus species known for its bright red blossoms.

However, some gardeners prefer growing it alongside other desert plants, such as agaves and cacti. When planting, ensure you allow for enough vertical clearance.

Also, give it enough room to spread horizontally since it produces many branches from its base.

Caring For Trichocereus Grandiflorus

Trichocereus grandiflorus is easy to care for, but getting the basics right is crucial if you want your plant to thrive. Here is what you should know to get started:

1. Watering

Watering is one of the most critical aspects of caring for Trichocereus grandiflorus. Like most cacti, excessive watering can lead to irreversible root rot, eventually killing the plant.

Remember that these plants are native to dry areas and have adapted to survive with little water. Consider watering your Trichocereus grandiflorus sparingly during the active growing season (spring and summer).

Check the level of soil moisture before watering. You can insert a finger into the soil and check if it is dry. If the soil still feels moist, don’t water your cactus.

If the soil feels completely dry, proceed with watering. The best way to water a Trichocereus grandiflorus is from below using an open tray.

Fill the tray with water and let your cactus sit in it for about 30 minutes. After that, discard excess water.

2. Light

Trichocereus grandiflorus prefers full sun or light shade but can tolerate partial shade. The best spot for it is a sunny window or outdoors in an area with plenty of sunlight and shade during the hottest parts of the day.

When grown outdoors, it can thrive in full sun without any issues. Remember that the cactus has little cover in its natural habitat and has adapted to thrive under harsh desert conditions.

You must be careful with the shade you provide, even during summer. Too much shade can lead to etiolation.

A trichocereus grandiflorus outdoors.
When grown outdoors, it can thrive in full sun without any issues.

If you live in a region that experiences mild winters, you can easily cultivate Trichocereus grandiflorus outdoors, where it will receive direct sunlight throughout the day.

If you plan on growing the cactus indoors, choose a perfect spot with plenty of sunlight.

A bright south-facing window is an ideal spot for the cactus, but an east or west-facing windowsill can still work perfectly.

One thing you must keep in mind is that this cactus does not thrive in low-light environments, especially indoors.

So, if you plan to transfer your Trichocereus grandiflorus indoors during the winter, know it will need more light.

You can supplement natural sunlight with an artificial grow light to ensure the plant receives enough light to thrive.

3. Temperature

Closely related to the aspect of light is temperature. Trichocereus grandiflorus prefers warm temperatures and can tolerate a wide range of temperatures, from the mid-50s to the mid-90s°F (10-35°C).

During winter, it grows slowly and requires lower temperatures than during summer. Place your cactus in a cool spot below 50°F (10°C) if growing it indoors.

If you live in an area that experiences cold winter climates, moving the pot indoors to receive more light and shelter from frosty conditions is best.

It’s also important to note that Trichocereus grandiflorus requires good air circulation and should never be placed in stuffy spots.

4. Container

If you intend to cultivate this cactus indoors, you will need an appropriate container to hold it.

Look for a container with plenty of drainage holes that allow excess water to drain from the bottom as quickly as possible.

Drainage is a critical aspect of caring for Trichocereus grandiflorus. A growing pot with enough drainage holes will work best. Instead, it may lead to severe root rot, eventually killing your plant.

A trichocereus grandiflorus in a pot.
A growing pot with enough drainage holes will work best.

Pots made out of terracotta tend to absorb some of the water from the potting mix. This can be a good thing if you accidentally overwater your plant.

However, it also means that you must water your Trichocereus grandiflorus frequently during summer.

Glazed ceramic containers, plastic pots, and wooden containers are also great options for your cactus. Choosing the perfect pot for your cactus boils down to personal preference.

Whichever type of container you choose, fill it with a well-drained potting mix with plenty of organic matter.

5. Soil Requirements

The most important thing when it comes to soil requirements is drainage. Trichocereus grandifloras needs a fast-draining soil mix that retains some nutrients but allows for enough air circulation.

You can buy a pre-mixed succulent and cactus potting mix at your local garden center or prepare one with perlite, compost, sand, peat moss, and some pumice.

If you plan to grow cacti in containers outdoors, choose a well-drained soil mix that has a good amount of organic matter. A combination of soil, sand, and compost should work perfectly.

6. Fertilizing Requirements

Applying fertilizer to your Trichocereus grandiflorus is essential because it gives it the best colors and aids blooming. The flowers can easily become fruits when your plant receives enough nutrients.

But you must be careful with the fertilizer type and its application. Feed your cactus with a balanced fertilizer with equal amounts of nitrogen, phosphorus, and potassium during the growing season.

You can also mix some slow-release fertilizer in the potting soil when you plant it or sprinkle a thin layer on top of the soil every two to three months during the growing season.

When applying fertilizer, always follow the directions on the label carefully. Over-fertilizing can burn your cactus’s roots and lead to stunted growth.

7. Pruning Requirements

The Trichocereus grandiflorus has a relatively slow growth rate. Pruning is only necessary to maintain the shape of your cactus or eliminate damaged parts.

Use sharp and clean scissors or garden shears to make precise cuts when pruning. Make sure you sterilize your tools before and after each use with a solution of one part bleach and ten parts water.

A blue pruner.
Use sharp and clean scissors or garden shears to make precise cuts when pruning.

Do not prune the cactus during the dormant period because it can hinder proper growth. If you want to shape it, wait until the next growing season and then prune when necessary.

8. Repotting

Lastly, you must repot your Trichocereus grandiflorus every two or three years. When you report it, ensure the root ball is tightly packed and has ample space in the new container to grow.

Use a slightly larger pot with enough drainage holes, as discussed earlier. Repotting with fresh soil will also help replenish the potting mix’s essential nutrients.

A trichocereus grandiflorus top view.
Ensure the root ball is tightly packed and has ample space in the new container to grow.

Generally, repot your cactus in spring or summer when it grows actively. When done correctly, this will help promote healthy growth and blooms.

Summary

Taking care of a Trichocereus Grandiflorus can be challenging, but with this beginner’s guide, you will surely provide your plant with all it needs to thrive.

All factors discussed above will help ensure a healthy and long-lasting Trichocereus grandiflorus.

Ultimately, the key to success in caring for your cactus is consistency and paying attention to its individual needs.

We are confident you’ll keep your cactus happy and healthy with these tips.

Can You Plant Succulents in Gravel? Find Out Here

A succulent on a can planted on Gravel.

Succulents provide a unique way to add life and color to your home or garden. These plants are hardy, drought-tolerant, and relatively low maintenance, making them perfect for beginner gardeners or busy people with little time to tend to their plants. Like other plants, succulents require soil to grow. However, one question that often arises among succulent enthusiasts is whether or not they can be planted in gravel. Don’t worry; we are here to address this concern and help you make an informed decision.

So, can you plant succulents in gravel? The answer is yes! Succulents can be planted in gravel, but a few conditions must be met. Gravel provides adequate moisture drainage, essential for succulents since they don’t need much water. However, some soil is still necessary to give the plants nutrients and support their root system. It is also essential to make sure the gravel you use is porous so that excess water can drain away from the roots of the succulents. Avoid non-porous rocks like pea gravel, river rocks, fish rocks, sand, and other materials that could trap moisture and encourage fungi or bacteria growth.

In this blog post, we will discuss how to plant succulents in gravel and provide tips on how to care for them. Read on to learn more.

Succulent Care – Quick Overview

Generally, succulents are highly tolerant plants. They are not fussy and will thrive if you provide them with the right conditions.

One critical aspect of succulent care is potting mix/soil. These plants generally love rocky/sandy potting mix that is well-draining. These plants store water in their stems and leaves.

The efficient water storage capabilities mean that these plants don’t need to be watered often and must not be allowed to sit in water for too long. Leaving them waterlogged for too long can lead to irreversible root rot.

Their roots and leaves can only take up as much water. So, any excess water begins to hurt the plant causing the stem, roots, and leaves to become mushy. The soil must be well drained to remove the excess water as quickly as possible.

A miniature echeveria on hand.
Leaving them waterlogged for too long can lead to irreversible root rot.

When planting succulents in pots, the regular potting mix is often mixed with rocks, sand, or gravel to increase drainage. Succulents can also be planted directly in gravel if the material is porous and provides good drainage.

Can Succulents Grow in Gravel?

As mentioned earlier, succulents can survive in gravel, but there are a few caveats.

Firstly, the gravel must be porous so that excess water can drain away from the roots of the succulents. If the gravel is non-porous and traps moisture, it could encourage fungi or bacteria growth, hurting your plants.

Secondly, you must also include some soil in the gravel to provide the plants with nutrients and support the root system. You can use potting mix, cactus soil, or both.

The soil should be mixed with the gravel to provide an environment where succulents can thrive.

Lastly, you must ensure that your succulents get enough light and water. Succulents need bright, indirect light to thrive and should be watered deeply but infrequently.

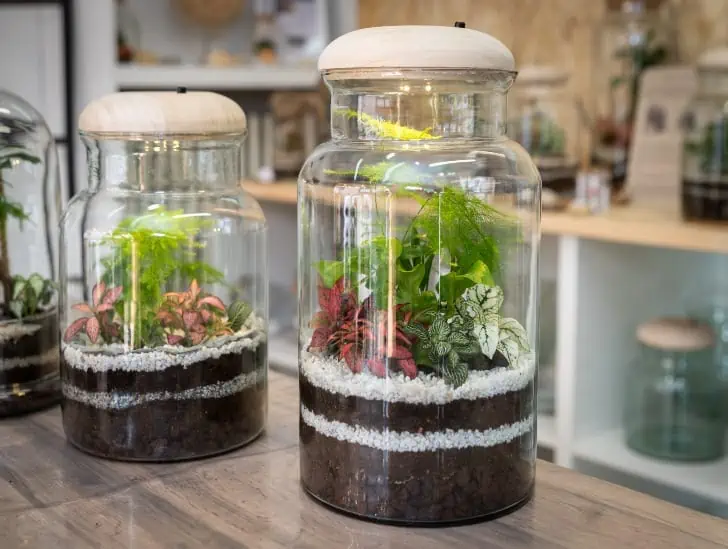
A two closed terrarium.
You must also include some soil in the gravel to provide the plants with nutrients and support the root system.

Remember, succulents are not epiphytes. While epiphytes can comfortably grow and thrive without soil, succulents need soil, even if the quantity is minimal.

Succulents and Gravel Make a Good Pair

Most succulents are native to regions that experience minimal rainfall. Most of their habitats are rocky and sandy. That is why combining succulents and rocks/gravel will always make perfect sense. They belong together.

Most succulents tend to survive well in gravel at home as they do in rocks in the wild. Since most are low-maintenance plants, they require less water and nutrients to thrive. These plants know how to absorb and store water for an extended period.

This is what makes them survive even when grown in gravel. Hardy succulents don’t like excess water. Since gravel promotes water drainage, growing succulents in gravel can help manage the water content.

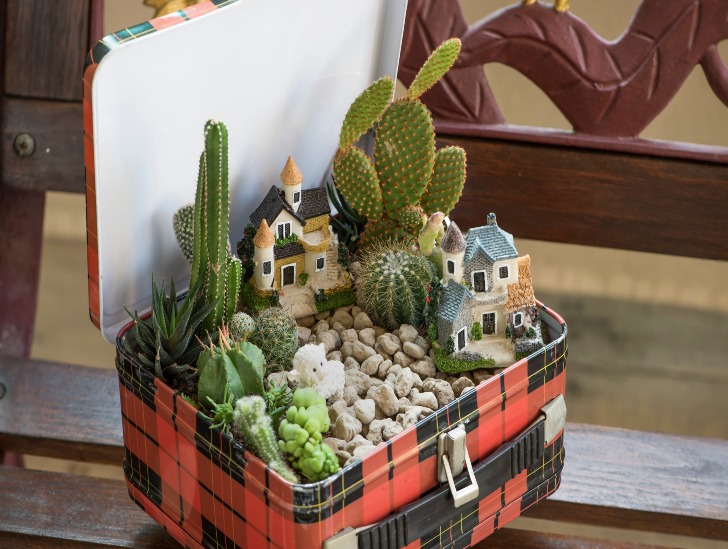
A succulent box arrangement.
Most succulents tend to survive well in gravel at home as they do in rocks in the wild.

Gravel also helps sun-loving succulents get enough direct sunlight by raising their elevation from the ground. This is crucial for succulents since they love heat and sufficient light.

Therefore, you should never be afraid of growing succulents in gravel. Feel free to find succulents of different colors, shapes, and sizes and use them to make your succulent gravel garden.

You can even have some in a pot. Add a little potting mix to the container, then cover it up with different types of gravel.

The setting automatically hides the soil and makes it appear like your succulents are growing in pure gravel with no soil.

You can position the pots in a strategic position near a sunny window to serve as a beautiful decoration piece in your home. The primary objective is to ensure that the succulent doesn’t die.

How To Plant Succulents in Gravel

The process is relatively simple if you want to plant succulents in gravel. Here’s a basic overview of how to do it:

  • Put a layer of porous gravel at the bottom of the container.
  • Put a thin layer of potting mix on top of the gravel.
  • Place your succulents in the container and ensure they are firmly in place.
  • Add more soil around them so that they have plenty of support.
  • Cover the container with a thin layer of gravel to give it a neat and decorative look.
  • Water your succulents deeply but infrequently.
  • Place your succulent gravel garden in an area with plenty of bright, indirect light.
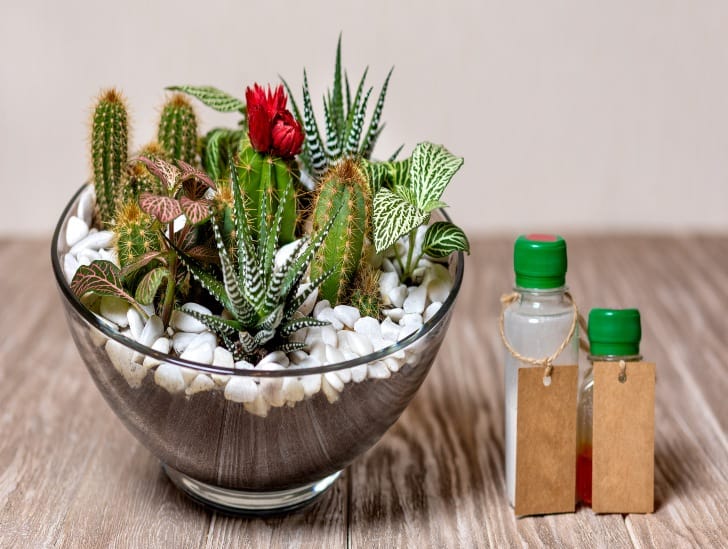
Be careful with how much water you use, and ensure that your succulents are only standing in standing water for a short time. They should thrive in their gravel garden if you keep an eye on them.

How to Care for Succulents Planted in Gravel

You must stay on top of the routine care schedule if you want your succulents to thrive in gravel.

Provide adequate sunlight light to your succulents because these plants are generally sun-loving. Ensure you expose them to filtered sunlight for at least six hours daily. If you live in a hot climate, you may need to provide some afternoon shade.

Water your succulents deeply but infrequently. The soil should be allowed to dry out completely between watering sessions.

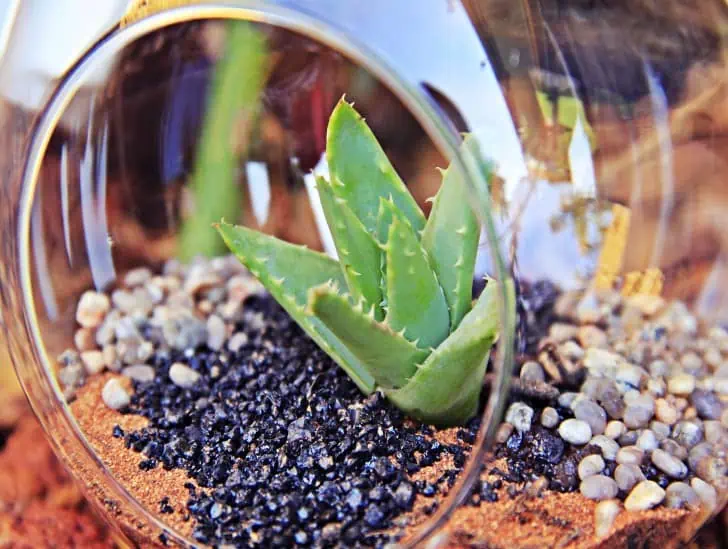
A close round terrarium with succulent.
Letting the soil dry out completely is always better than keeping it moist.

Monitor the moisture content of the gravel and adjust your watering schedule accordingly. Letting the soil dry out completely is always better than keeping it moist.

Fertilize your succulents regularly with a balanced liquid fertilizer to help them thrive in their gravel garden.

In addition, prune the succulents when necessary and remove any dead or decaying leaves or stems to keep your succulent garden neat and healthy.

Which Succulents Grow Best in Gravel?

The best succulents to grow in gravel are hardy varieties that thrive in dry and hot climates. Some of the most popular ones include Aloe vera, Burro’s tail, Echeveria, Sedum Morganianum (donkey’s tail), Crassula ovata (jade plant), and Aeonium arboreum.

These succulents are well-known for their ability to survive in dry climates, making them ideal candidates for a gravel garden.

As long as you have the right combination of soil and gravel, you can successfully grow any succulent in your gravel garden. Ensure you provide the proper care and select a suitable variety for your climate.

Is There Any Alternative to Gravel?

If growing succulents in gravel sound tricky and more work than it’s worth, there is an alternative you can try out clay pebbles.

Also known as lightweight expanded clay aggregate or LECA, these pebbles resemble gravel but can absorb water and nutrients, releasing them to your plants when needed.

You can think of LECA as a more versatile form of gravel. Planting succulents in clay pebbles is easy, and you won’t need to change the substrate as often as you would with regular gravel.

Bonsai tree in the windowsill exposed to sunlight.
You must know that LECA may be more expensive than regular succulent soil.

Pebbles offer many benefits, from moisture and nutrient retention to low maintenance. This option is ideal for gardeners who continually overwater their succulents. Clay pebbles only draw up water when needed.

They allow you to use transparent glass containers without worrying about drainage.

However, you must know that LECA may be more expensive than regular succulent soil. But the difference in cost is worth the quality and convenience it offers.

To grow succulents in LECA, rinse off an existing potting mix from the roots and gently place them in the clay pebbles. You can use a transparent glass container pot with no drainage.

Keep in mind that the clay pebbles don’t contain any nutrients. They only hold onto the nutrients you add to the water. So, it is essential to fertilize your succulents regularly for optimal growth.

Summary

Growing succulents in gravel is an easy way to add greenery to any space. The primary benefit of this type of gardening is that it requires minimal maintenance, making it ideal for busy gardeners.

You can also grow succulents in clay pebbles, which act like a more versatile form of gravel.

The key to success is providing the proper care, choosing the suitable variety for your climate, and having the correct combination of soil and gravel or LECA.

Is Sand the Perfect Home for Your Succulents?

A colorful succulent terrarium.

Succulents are relatively hardy plants and can survive in almost any climate. They are highly forgiving because they store much water in their stems and thrive in harsh environments where other plants would die within days. But the big question is; can these plants survive when grown in the sand? Most importantly, how long can they survive in the sand, and what must you do to make them thrive if you decide to go down that route? We are here to help you unravel this mystery.

So, is sand the perfect home for your succulents? The short answer is both yes and no. Like other plants, succulents require some nutrients in the potting mix to thrive. Although sand aids fast drainage, which is critical to the overall growth of succulents, pure sand doesn’t have enough nutrients to sustain succulent growth. But it doesn’t mean succulents won’t grow in pure sand ultimately. Some of the most beautiful succulent arrangements you see grow in pure sand. Just make sure to provide supplemental nutrients for your succulents occasionally.

This blog post discusses everything you need to know about growing succulents in pure sand and whether sand is the perfect home for your plants. Read on to learn more.

Understanding the Natural Habitat of Most Succulents

Before we dive into the nitty gritty of whether sand is suitable for succulents, it’s essential to understand where these plants naturally grow. Most succulent species come from desert regions in Africa, Mexico, and North America.

For many of them, especially cacti plants, their natural habitats are typically arid and relatively sandy. These areas receive minimal rainfall, and the soil is mainly sand and gravel. It’s safe to say that succulents are used to living in sandy conditions.

Succulents Terrarium
They have adapted to relatively kinder growth conditions and require some nutrients to thrive.

Plants and animals that survive in these areas have adapted to the harsh conditions. They embrace what mother nature offers and fight their way to survival.

Succulents rely on the infrequent rainy seasons to gather and store enough water in their stems and leaves.

Furthermore, pure desert sands hold few minerals. That is why some desert succulents get their food from the air.

These plants experience a unique type of photosynthesis where they collect carbon dioxide in their leaves and store it.

Once the sun comes out in the morning, they use the sunlight to convert the stored carbon dioxide into glucose and other nutrients. That is how they manage to get their daily portion of valuable nutrients.

However, you must understand that growing succulents at home is a different ball game. Plant experts and specialists have carefully propagated and nurtured most of the succulents we grow in our homes.

Different kinds of cactus in a terrarium.
You must understand that growing succulents at home is a different ball game.

Therefore, they have adapted to relatively kinder growth conditions and require some nutrients to thrive.

Mixing other components with the sand is crucial when growing succulents at home.

If you make the mistake of growing such succulents in containers filled with pure sand, they will only survive for a short time because you are reverting them to their primary survival mode.

Although most of them will try to hang on for some time, the truth is that they will eventually give in and die.

Can Succulents Survive in Sand?

As we mentioned, the answer to this question is yes and no. You can successfully grow succulents in pure sand; however, it requires much work.

The key thing to understand here is that all plants need some form of nourishment for their growth and normal functioning. Succulents are no different in this regard.

Therefore, if you want to grow succulents in pure sand, you must consider providing them with additional nutrients occasionally.

So, it’s not about the sand but how much effort and attention you give your plants.

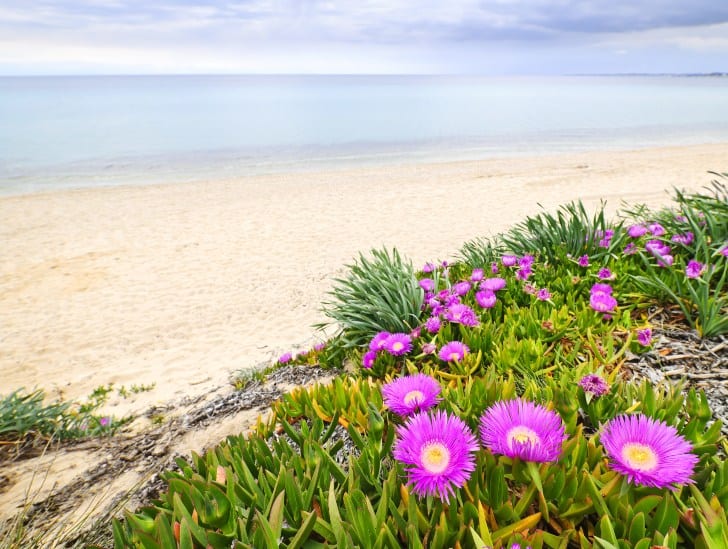
A ice plant blooming.
You can successfully grow succulents in pure sand; however, it requires much work.

If you plant succulents in the sand without providing additional nutrients, they will only survive for a short time. In this case, you should only think of short-term fun projects that last only a short time.

Furthermore, unlike other houseplants, succulents can survive without organic medium for a relatively long time. That means they don’t require potting mix rich in nutrients to thrive.

What Is the Biggest Problem with Growing Succulents in Sand?

One thing you must remember before you decide to grow your succulents in the sand is that sand doesn’t hold water. This may sound great because these plants don’t like being waterlogged, but it has a downside.

Even though these plants don’t like sitting in water for too long, their roots still need enough time to absorb enough water for the plant’s needs.

The organic material added to regular succulent soil plays a critical role in retaining moisture, giving the roots enough time to absorb sufficient water for future use.

We have also mentioned the problem of sand’s inability to contain nutrients. Even though succulents don’t need many nutrients to thrive, they still need some to survive.

That is why it is vital to your succulents’ health that you provide them with additional nutrients from time to time. Otherwise, your plants will need more energy and resources for normal functioning.

How to Grow Succulents in Sand

When growing succulents in sand, you should always mix them with other components to give your plants additional nutrients.

You can use coconut coir chips and perlite to loosen the soil and help it retain moisture.

You can also add a thin layer of fertilizer at the bottom of your container before adding the sand. This will give your succulents some much-needed minerals and other elements needed to thrive.

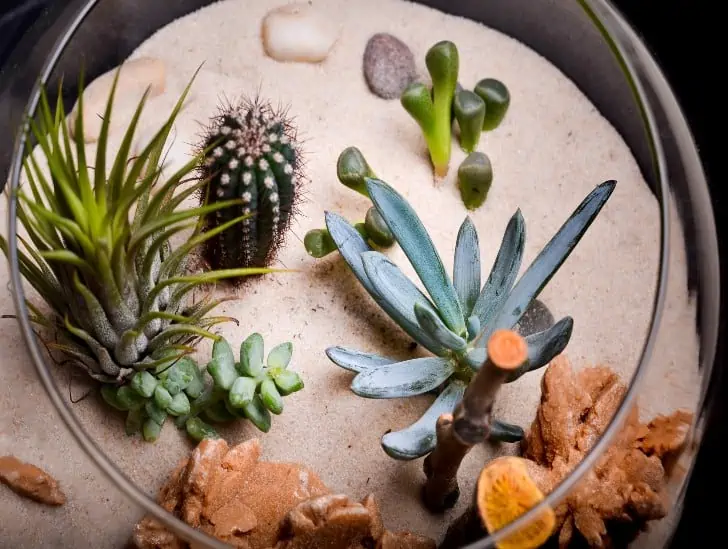
A round sand terrarium.
Growing succulents in the sand should be easy.

Another important point is always to use a potting mix explicitly designed for cacti and succulents, not regular potting soil. Typical soils are too rich in organic matter, which can quickly rot the plant roots.

Water your succulents regularly but be careful not to overwater them. Overwatering can cause root rot, a common problem in succulent-filled containers.

Once you have all of these things taken care of, growing succulents in the sand should be easy.

Which Succulents Do Best in Sand?

Most succulents will do well in sand, but some are more adaptable. Here are some of the most popular and hardy varieties for growing in sandy soil:

These succulents have one thing in common — they are all low-maintenance plants that generally thrive in sandy soils in their natural habitats.

Some have even developed unique features, such as thick and waxy leaves to help them survive in harsh conditions.

What Is a Good Alternative to Growing Succulents in Sand?

An excellent alternative to growing your succulents in the sand is using a mixture of sand and regular succulent soil.

The large sand particles are crucial in aiding drainage, while the soil particles provide valuable nutrients for your succulent to thrive.

A simple recipe involves 1 part sand and two parts succulent soil. It is important to note that you should always use a commercial potting mix designed for cacti and succulents, not regular potting soil.

Add some perlite or pumice to the mix to loosen it up further. This will help create a well-aerated environment with proper drainage, essential for healthy succulents.

Caring for Succulent Grown in Sand

Maintain your routine care schedule when caring for succulents growing in pure sand. You must ensure that watering, repotting, fertilizing, and pruning are done regularly.

Watering succulents grown in the sand is a tricky task. You must be aware of the level of moisture it contains and only add water if necessary. Overwatering can lead to root rot, so take extra caution when watering your plants.

To check for the dryness level, use the knuckle test — stick your finger into the soil up to your first knuckle and if it feels damp, then hold off from watering it.

A person watering the plant in the terrarium.
Always use a well-drained potting mix for growing cacti and succulents when repotting.

Fertilizers should also be used sparingly since sand cannot retain nutrients long. Your succulents will need some additional support from you in the form of supplements to help them grow and thrive.

You may also be required to repot your succulents every few years since sand only retains water or nutrients for a short time.

Always use a well-drained potting mix for growing cacti and succulents when repotting.

You may also be forced to prune your succulents at some point due to overcrowding. Pruning should be done carefully and only when necessary, as it can damage your plants.

Final Thoughts

Growing succulents in the sand can be done successfully if you know how to do it right.

You should always mix the sand with other components, such as coconut coir chips and perlite, and use a commercial potting mix for succulents.

Do not overwater your plants and provide them with additional nutrients occasionally.

You can keep your succulents thriving in a sandy soil environment for many years with proper care and attention.

How to Repot Bonsai Seedlings and Trees – Step by Step

A bonsai plant repotted.

Bonsai trees need sufficient nutrients to thrive. As your bonsai seedling grows, it will consume all nutrients from the potting mix. Keeping it rootbound without doing anything to replenish the nutrients will only starve your tree further. A simple solution to this problem is repotting your bonsai regularly to keep it healthy and thriving. Repotting allows ample pot space and a good soil and nutrient supply to encourage blooming.

So, how do you repot bonsai seedlings and trees? The first thing to do is to cut and remove any wire holding the tree in place. Next, inspect the roots of your bonsai seedling, checking for rot, damage, or compactness. Rake away any old dirt from the bottom and sides of your bonsai seedlings. Then trim the roots as this will encourage finer roots to grow, thus creating new branches and twigs. Prepare the new pot, then go ahead to repot your Bonsai tree. Before doing this, you may add a new soil mixture to the new pot. Lastly, water your bonsai tree to help settle the new soil with the plant roots.  

This blog post will discuss everything you need to know about repotting bonsai seedlings and trees. Read on to learn more.

Why Should You Repot Bonsai Seedlings and Trees?

Bonsai trees require enough nutrients to flourish, regardless of their size or species. In fact, all trees need extra support when planted in a pot!

Since bonsai trees are just ordinary, intentionally miniatured trees, their care, and nutritional requirements are similar to those of their full-size counterparts.

The only difference is that bonsai trees are confined in a pot, lacking access to the same amount of nutrients. Repotting bonsai trees and seedlings aims to rekindle and replenish their nutrients and stimulate the tree’s growth.

That’s because the limited supply of soil and nutrients in your bonsai tree’s pot depletes with time. Your tree will gradually die from a lack of nourishment if you keep it in the same pot for a long time!

A sack of soil and a bonsai without a pot.
The only difference is that bonsai trees are confined in a pot, lacking access to the same amount of nutrients.

Repotting a plant also allows you to examine the roots. Your bonsai tree’s roots are a good indicator of how healthy and robust it generally is.

By properly repotting your tree’s roots, you can manipulate them to accommodate the desired design and get them back to growing as they should.

When Should You Repot Bonsai Seedlings and Trees?

Timing is crucial when it comes to repotting bonsai. Consider the time of the year and other work you have done to your bonsai before repotting it.

For example, if you did heavy pruning at the start of the year, it is not advisable to repot your bonsai tree the same year.

Plant experts agree that early spring is the best time to repot Bonsai trees. So, watch your tree closely as winter comes to an end.

Repot it once the weather warms up and the buds on your tree have not opened. While certain species respond well to repotting in the fall, most Bonsai do well when repotted in the early spring.

Some indoor tropical Bonsai species can tolerate summer repotting. But generally, summer and winter are not the best seasons for repotting bonsai because your tree’s energy is redirected somewhere else. 

Your bonsai won’t have the strength to recover from a stressful activity like repotting as time passes.

The best time is early spring since this is when your tree will focus its energy on developing its leaf and root systems.

Tools For Repotting Bonsai

You should pick a few tools before you repot bonsai seedlings and trees. Some of the tools that will help you accomplish your repotting mission include:

  • Root sickle for compacting root ball from the pot.
  • Small stick or rake for removing old soil from your bonsai tree’s roots.
  • Wire cutters for cutting the wire that secures the bonsai on the pot
  • Wire and wire mesh to secure your bonsai tree to the bottom of the new pot.
  • Root/pruning shears for pruning the roots of your bonsai tree.

How to Repot Bonsai Seedlings and Trees

Here is a simple step-by-step process to repot bonsai seedlings and trees.

Step 1: Cut the wire

Before repotting, remove old wires securing the bonsai seedlings and trees onto the pot. Then use your finger and a rake to dig into the soil and carefully take out your bonsai.

A man training bonsai.
Remove old wires securing the bonsai seedlings and trees onto the pot.

Usually, bigger trees have wires pushed through the drainage holes to hold the bonsai in place.

But when repotting, there won’t be a wire to hold it down.  All you have to do is remove the bonsai and put it in a larger pot.

Step 2: Remove the Bonsai tree from the pot and inspect the roots

The next thing is to remove the bonsai tree from the pot. You may cut the container if it is biodegradable.

You can easily remove it from the container if it is a seedling. However, you may need a root saw if it is an older tree.

Detach your bonsai tree from the pot using the root saw. Be careful not to cut the root ball when separating it from the pot’s walls. 

Next, inspect the roots of your bonsai seedling or tree. The soil should not be wet when repotting your tree. Are there roots encircling the pot and the root ball? Are they leaking out the pot?

If they are, you must repot your bonsai because they don’t have enough room to disperse. Repotting is necessary because roots assume the pot’s shape and nutrients in the soil get depleted.

Check for tiny bugs in the roots. For instance, some white bugs called root aphids feed on the sap of roots. Use pesticides to control these or any pests you find.

Step 3: Discard old soil

Remove old dirt from the bonsai roots before you begin repotting the tree. For a start, your fingers will do. This will help remove all dry soil, but it may fall off.

You can use a claw or root rake to make this easier. This helps detangle the roots if they are growing densely together.

A bonsai on hand.
Only dig outward, and for weak roots, use a stick.

Detangle the roots by gently working the rake through the root ball. Only dig outward, and for weak roots, use a stick.

Old soil contains healthy bacteria, so make sure to retain some. You can incorporate some in your new soil.

Step 4: Trim the roots

Trimming the old roots out will encourage your bonsai seedlings and trees to grow healthy. It will also allow more room for the bonsai to bloom and help it develop new roots- hence new twigs and branches.

You will see new roots sprouting from old, dense roots as you remove the old soil. Trim these old roots using clean shears or scissors. Also, ensure you remove any dead or rotten roots.

Be mindful of how much you trim since it may kill your bonsai. Do not cut out more than two-thirds of the Bonsai roots.

If you take out too much, a healthy bonsai will die because it cannot absorb nutrients and water as it should.

So, while it is essential to trim old roots to promote new growth, avoid overdoing it. Also, remember to prune any dying leaves and debris.

Step 5: Prepare the new pot

This step should precede removing your bonsai from the old pot. Find a new pot and rewire it – aluminum wire is the best.

Make drainage holes on the pot’s base and cover them with plastic mesh. To fix the wire on the pot, curve it into a U shape, then run this wire from the inside to the outside via the drainage holes.

A bonsai being prepared to repot.
Find a new pot and rewire it – aluminum wire is the best.

After that, insert two wires from the pot’s base via these drainage holes. These are meant to secure the bonsai tree in the new pot. After placing the bonsai in the pot, bend these wires and shove them into the soil.

Wiring beforehand is crucial because bonsai roots can adapt and balance well and won’t stress the entire tree.

Step 6: Repot your Bonsai

Your bonsai tree is ready for repotting once you finish the leaf pruning and root trimming.

You can add new soil, but pack it with the tree’s roots so there are no air spaces in between. Cover all roots with soil but don’t compact them.

Step 7: Water your Bonsai

Lastly, water your newly repotted bonsai trees. Watering helps settle the newly added soil around the bonsai roots.

Watering also protects the newly repotted bonsai from acute winds. But avoid overwatering your bonsai since you have already trimmed many roots.

A person watering a bonsai.
Watering helps settle the newly added soil around the bonsai roots.

Water sparingly and place it in partial shade because freshly repotted plants tend to go into shock mode. It would be best if you keep it comfortable for some weeks.

Final Thoughts

Repotting Bonsai is easier than it sounds. You can keep your bonsai seedlings and trees healthy and thriving with just a little knowledge.

The most important thing is to be careful with the soil mixture, pot size, and root system.

If you follow the appropriate steps, your tree will grow into a centerpiece that enhances your home’s beauty, just like a piece of painting.

The Ultimate Guide to Donkey Tail Succulent Care

A donkey tail hanging.

Sedum morganianum, also known as the donkey’s tail, is one of the most common houseplants. The succulent has long, trailing stems covered in small, fleshy leaves. It is a very forgiving plant and requires minimal care. Despite its unique appearance and hardiness, it still needs special care to thrive.

So, how should you care for a donkey’s tail? Typically, this succulent prefers bright, indirect sunlight and warm temperatures between 65-75°F (18-24°C). To encourage lush growth, water the succulent thoroughly when the soil is completely dry. Allow the excess water to drain away, and never let the plant sit in water. During warmer months, feed the succulent a balanced fertilizer every two weeks to encourage blooming and vigorous growth. It would be best if you also used well-draining, slightly acidic soil. A good potting mix contains peat, perlite, vermiculite, and sand. Keep in mind that over-watering is the biggest threat to your donkey tail succulent.

This article discusses everything you need to know about caring for your donkey’s tail Succulent, including light, temperature, fertilization, soil, and water requirements.

Read on to learn more.

Donkey’s Tail Succulent: A Brief Overview

The donkey’s tail succulent is a unique-looking member of the Sedum family. It has long, trailing stems covered with small fleshy leaves and bright yellow flowers when blooming.

The succulent is native to Mexico but can be found in other regions. It does best when grown indoors and is usually kept as a hanging plant.

Donkey tail in a white pot.
It has long, trailing stems covered with small fleshy leaves.

The succulent enjoys bright, indirect sunlight and warm temperatures in its natural habitat. It also grows under partial shade and requires well-draining soil.

Donkey’s Tail Care Guide

Now that you know a bit about the Donkey Tail succulent, it’s time to learn how to care for it. Here’s a quick guide on what your donkey tail needs:

1. Light Requirements

The donkey tail succulent thrives best in relatively warm, indirect sunlight. If you want to grow it indoors, position it on a reasonably sunny balcony, patio, or windowsill that gets many hours of bright indirect sunlight every day.

If you live in an area that doesn’t receive plenty of sunlight, consider using artificial lighting to help your succulents thrive.

A simple fluorescent tube light kept at a distance of about 12 inches will provide adequate lighting for the donkey’s tail. Keep the light on for at least 12-16 hours a day.

Donkey tail exposed to sunlight.
The donkey tail succulent thrives best in relatively warm, indirect sunlight.

If you want to grow the succulent outdoors, make sure you position the growing pot in an open spot that receives plenty of morning sunlight but enjoys partial shade during the afternoon. Failure to protect your donkey tail from excessive sunlight can lead to severe sunburn.

If you notice that your donkey tail is no longer vibrant with its blue-green color but instead is turning gray or dull green, it is exposed to harsh sunlight.

If you don’t take appropriate steps to protect it from excessive sunlight, it will eventually turn chalky white with a relatively waxy appearance. The succulent produces waxy as a way of protecting itself from scorching sunlight.

2. Water Requirements

Like other succulents, the donkey tail succulent doesn’t need much water. Allow the soil to dry out completely between watering sessions. When you do water, ensure that you provide enough moisture, so the entire root system is soaked.

Allow any excess water to drain away, and never let your plant sit in still water, as this can lead to it becoming water-logged, leading to rotting and eventual death.

During warmer months, you should water the succulent more frequently than during cooler seasons. You may also need to increase the amount of water given to help with growth during this period.

The watering method you use matters a lot too. Ideally, you should water the plant deeply and wait until the soil is dry before watering again.

The best time to water your plant is in the morning or evening when sunlight is relatively lower.

3. Soil Requirements

The donkey’s tail prefers slightly acidic soil with excellent drainage. A good potting mix for this succulent will contain peat, perlite or vermiculite, and sand.

Adding some organic matter like compost or manure to the soil mix is an excellent idea to help with water retention.

Top view of a donkey tail.
A good potting mix for this succulent will contain peat, perlite or vermiculite, and sand.

If you are growing your plant in a pot, make sure it has drainage holes so that excess water can easily drain away to avoid causing root rot.

4. Temperature and Humidity

This succulent prefers relatively warm weather to thrive. However, it can withstand somewhat cooler temperatures quite well.

Averagely, try maintaining temperatures between 65 degrees to 75 degrees Fahrenheit to keep your succulent happy. This temperature range is ideal for both indoor and outdoor donkey’s tails.

The succulent can survive in a temperature as low as 40 degrees Fahrenheit but only if the exposure is brief.

Therefore, bringing your outdoor donkey’s tail plant indoors is critical before the first frost forms. Alternatively, remove your plant from drafty windows during cold winter.

A donkey tail cactus exposed to sunlight.
it can withstand somewhat cooler temperatures quite well.

When it comes to humidity, this succulent has no special needs. It tends to thrive in average humidity levels. Exposure to high humidity levels can be catastrophic since it becomes highly susceptible to rot.

Avoid misting the leaves regularly if you are not watering the plant. You should also keep it away from the relatively humid parts of your house, such as the bathroom.

5. Growing Container

The donkey tail succulent does best in hanging pots or relatively tall containers that allow its long, braided stems to trail down the sides and show off its beauty.

When choosing a pot, opt for ceramic and terracotta pots with plenty of drainage holes at the bottom to allow excess water to escape and prevent root rot.

You can modify the container further by layering it 1-2 inches of gravel or rocks to prevent the succulent from sitting in water for too long.

Make sure the pot offers enough room for growth since this succulent can grow quickly.

6. Fertilizer Requirements

The donkey’s tail succulent doesn’t require frequent fertilization. Feed the plant once every two months with a balanced liquid fertilizer to ensure healthy growth. Avoid over-fertilizing as this can lead to nutrient burn.

Focus on feeding your donkey tail at the beginning of the active growth season (early spring). Use a controlled-release, balanced 20-20-20 fertilizer containing equal parts of potassium, phosphorus, and nitrogen.

However, a mature donkey’s tail succulent may prefer the fertilizer at one-quarter strength as opposed to young plants that like it with less nitrogen.

7. Propagation Requirements

The donkey’s tail succulent is relatively easy to propagate. It can be propagated from stem cuttings or by separating the offsets, also called ‘pups.’

To propagate from stem cuttings, snip off a section of the stem and plant it in moist soil. The cutting should be about 3 inches long and have at least a few leaves.

Donkey tail in a pot.
It can be propagated from stem cuttings or by separating the offsets, also called ‘pups.

Place the cutting in indirect sunlight for about three weeks and then gradually introduce it to direct sunlight.

To propagate by offsets, carefully break off the pups from the main plant, ensuring that some roots remain attached. Plant each pup in its pot and keep the soil consistently moist. The succulent should root within a month.

8. Managing Pests and Diseases

The succulent stays free of pests and diseases provided it is grown in the right conditions. However, it can be prone to mealybugs, aphids, scale insects, and occasional root rot when over-watered.

Mealybugs can be treated by wiping them off with a damp cloth or spraying the plant with an insecticidal soap solution. Scale insects can be treated with neem oil.

Root rot can be prevented by allowing the soil to dry out between watering sessions and checking for drainage before planting. If root rot does occur, treat it immediately with a fungicide formulated for succulents.

9. Potting and Repotting

The donkey’s tail succulent does not have strict potting requirements. However, it is a good idea to repot the plant every few years to refresh the soil and prevent nutrient deficiencies.

When repotting, use a slightly bigger container with a fresh, well-drained cactus mix or succulent soil for best results. Remember that this succulent does not like to be disturbed, so handle it carefully.

Water the plant thoroughly after repotting and continue watering as usual. Avoid misting the leaves for a few days after potting or repotting to allow the roots to settle.

The succulent is highly fragile, and great care should be taken when potting or repotting to avoid causing damage.

Ensure the potting mix is completely dry before repotting the plant to reduce the risk of shock. Add some slow-release fertilizer when potting or repotting to ensure healthy growth.

Conclusion

The donkey’s tail succulent is an interesting and relatively easy-to-care-for plant that can add charm to your home.

However, it requires specific conditions to thrive. An essential part of caring for this plant is ensuring that it gets enough sunlight and water, has good soil drainage, and is not exposed to too much humidity or cold temperatures.

It’s also important to remember to fertilize the plant regularly and only let it sit in waterlogged soil for a short time. With proper care, you can enjoy your donkey tail succulent for many years!