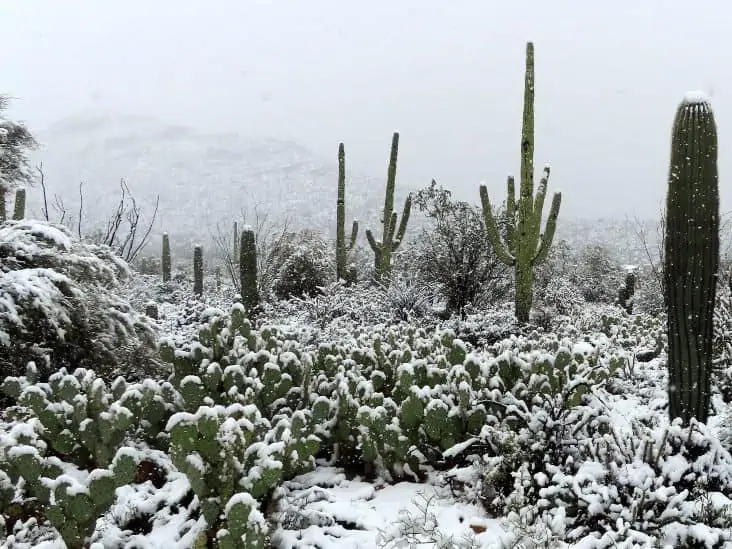
How To Care Of Cactus In The Winter?

Cacti have become increasingly popular plants among garden enthusiasts throughout recent years. But when you move a desert-native to an area with frigid winter landscapes, keeping these prickly plant companions healthy can seem like an impossible task. Luckily, there are ways in which you can help your cactus thrive, even when the weather outside is more frightful than it is delightful.

So, how do you care for cactus in the winter? How you care for a cactus in the winter varies, depending on if they’re indoors or outdoors. For indoor cacti, you’ll need to maintain a comfortable temperature, water about once a month, and allow adequate sunlight. Outdoor cacti need to be watered less and covered with burlap to protect them from the cold.

In this article, we’ll review how to prepare cacti for winter weather and how to care for indoor and outdoor cacti during the season. We will also be providing you with a few suggestions on winter-tolerant cactus species that may be better adjusted to your area’s winter temperatures.

Preparing Your Cactus Before Winter Arrives
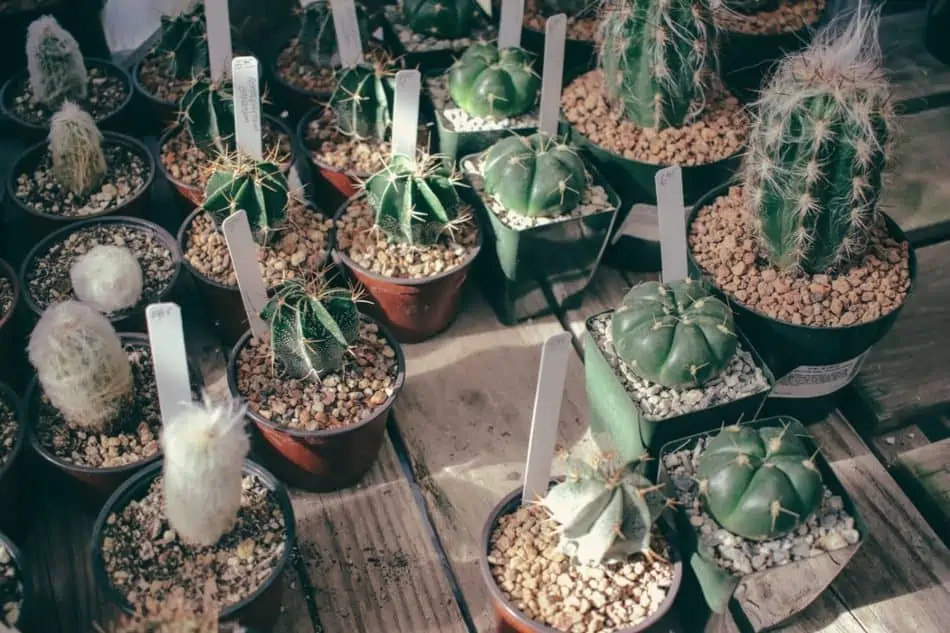
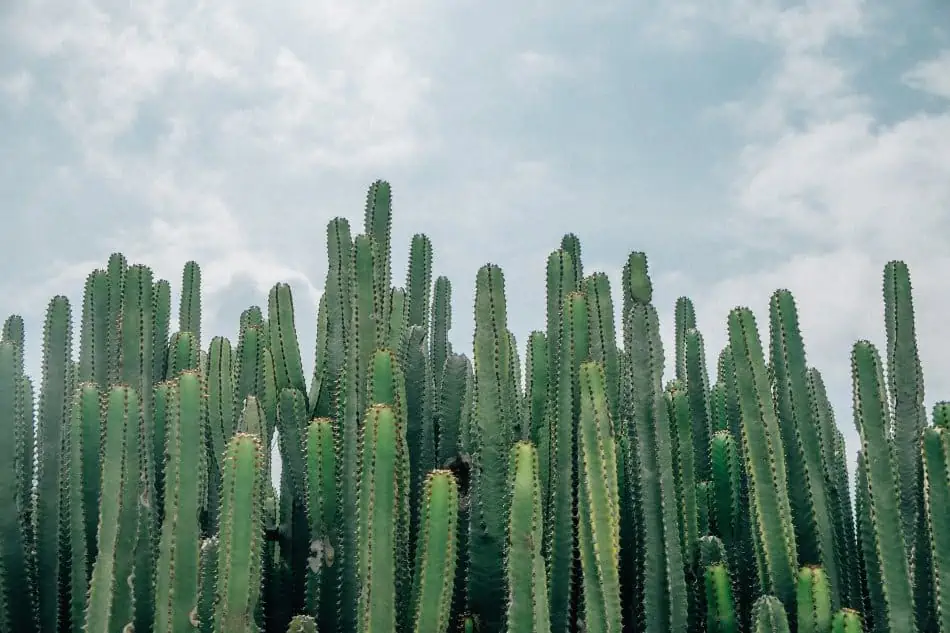
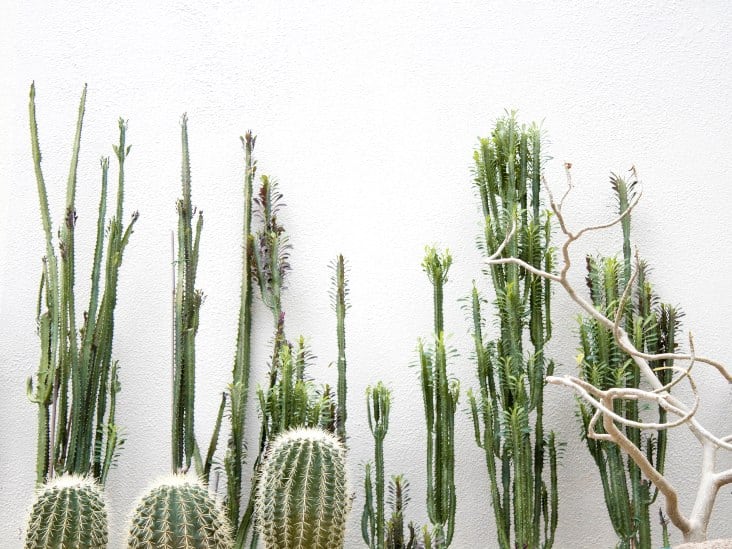
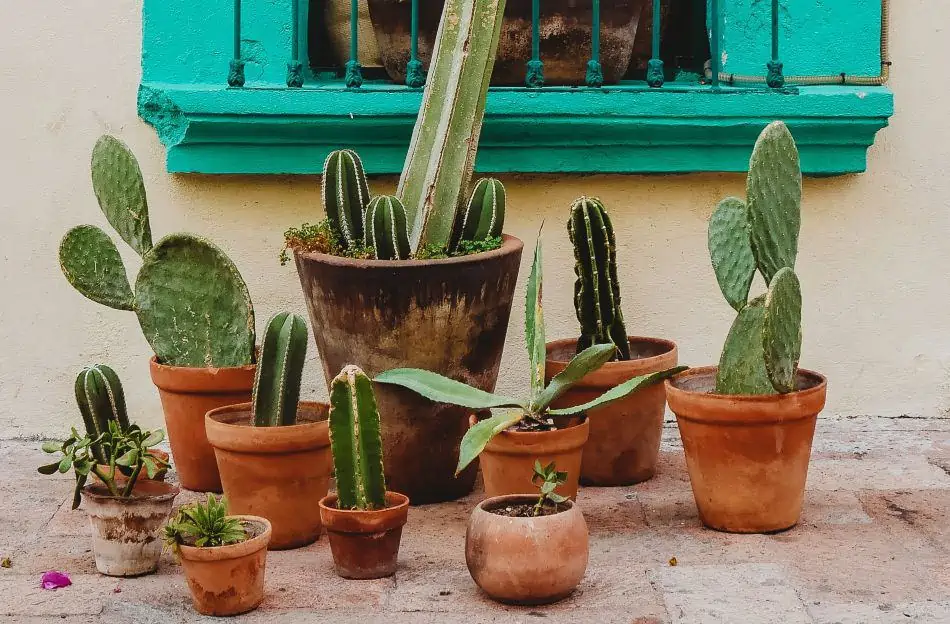
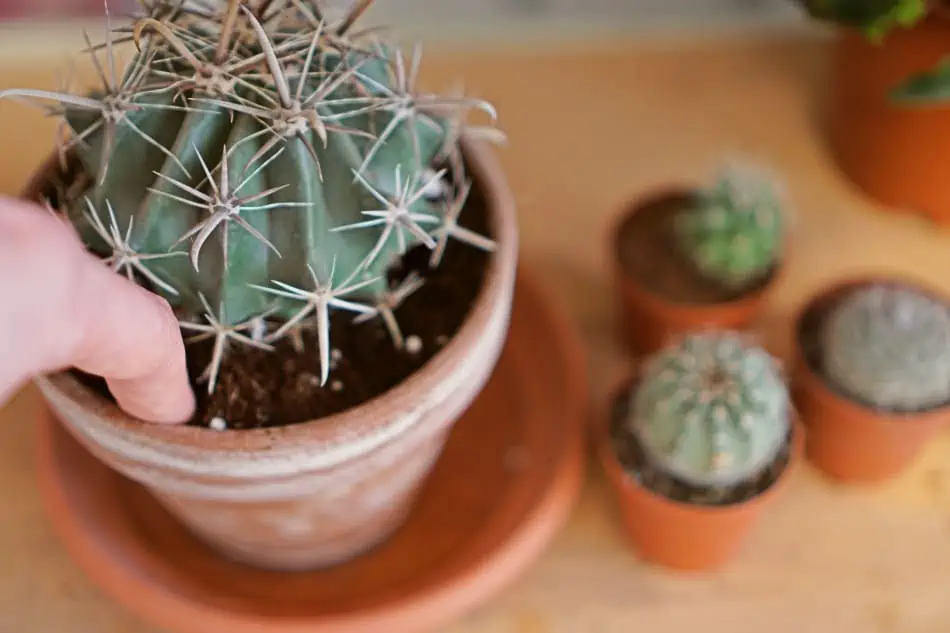
Different kinds of cactus.
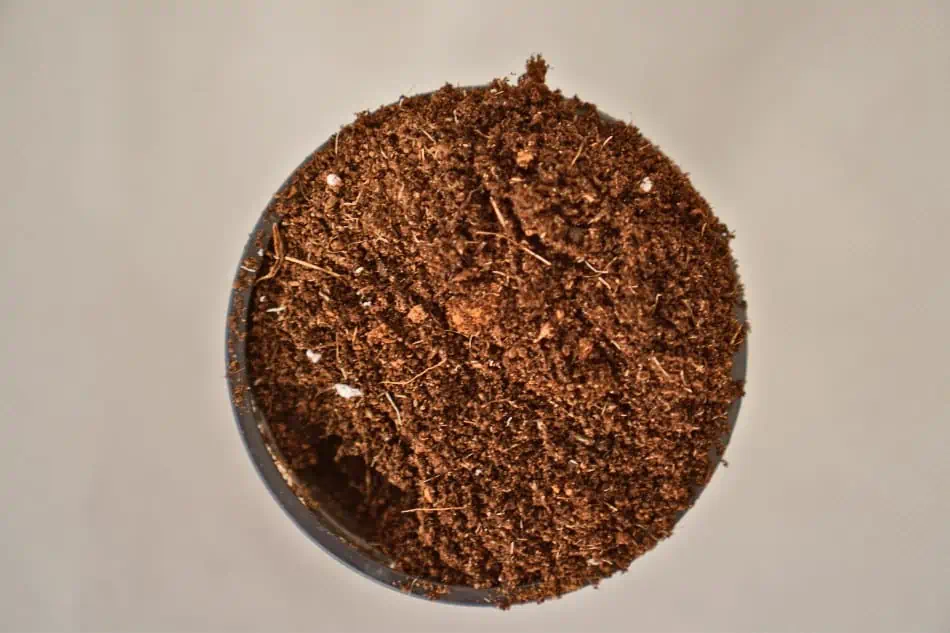
You should plan your cacti in nutritious soil and fertilize before winter.

First things first: your cactus should be well-equipped to deal with winter before it strikes. A cactus that is overall unhealthy before the cold comes will undoubtedly be worse off when it finally hits.


Here are a couple of ways that you can ensure that the odds are in your cactus’ favor this winter:

  • Plant your cactus in a nutrient-dense, sandy soil to allow for proper water drainage. You can supplement regular potting mix with ⅓ sand to make the dirt more favorable for your cactus. Or, you can purchase a soil tailored to the needs of cacti, like the Hoffman Organic Cactus and Succulent Soil Mix. This mix is specially crafted for both jungle and desert cacti and is organically made, making it better for your cactus and the earth.
  • A few months before winter strikes, fertilize your cactus with a fertilizer that contains nutrients such as minerals. A 10-10-10 fertilizer, like this Lilly Miller All Purpose Planting And Growing Food, will give your cactus that extra oomph as it prepares for the upcoming cold weather.

Taking especially good care of your cactus (or cacti) during the times when the weather is dandy will help your cactus better prepare itself for any potential damage that may come from being dormant in winter.

How to Care for Indoor Cactus in the Winter

Caring for cacti indoors is worlds easier in the winter than caring for them whenever they’re planted outside. This is because your home’s temperature can be easily adjusted to the liking of your plant, and where there is a lack of sunlight, you can supplement with a grow light.

The following steps will help you to maintain your indoor cactus during the colder months:

1.   Watering

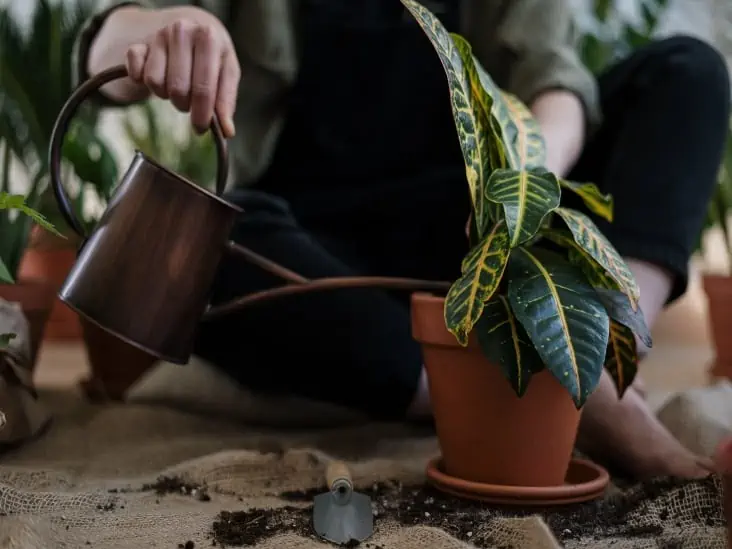
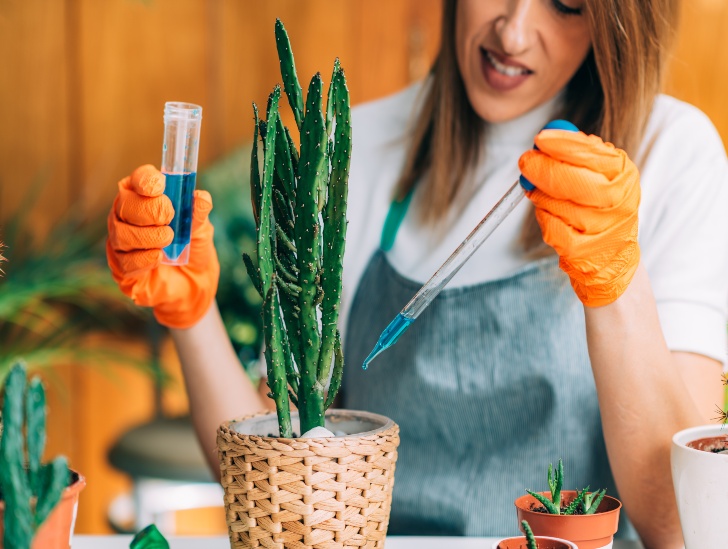
A person watering.
Only water your indoor cacti once a month during winter and make sure the soil is well-drained.

The amount of water your cactus will need differs from species to species, but as a general rule of thumb, you should only water your indoor cactus once a month during the winter. With indoor cacti, watering is “business as usual,” so however much you water your cactus in the warmer seasons is exactly how much you should be watering it during the cooler seasons.

Watering Tips

  • Avoid overwatering your cactus. When it comes to moisture, less is more. Too much water can lead to root rot in cacti.
  • Ensure that your cactus is draining water properly. While overwatering can be a cactus-killer, so can poor drainage. Use a sandy soil in your cactus pots to encourage drainage.

Double-check the water requirements for your specific cactus plant if you’re unsure of how often you should be watering it.

2.   Temperature Control

A thermostat.
Make sure the temperature is in the 65-70-degrees Fahrenheit range during winter.

The average indoor temperature of a home is generally perfect for maintaining a cactus plant. Anywhere between 65- and 70-degrees Fahrenheit is ideal for most cactus species and will prevent the outdoor temperatures from having too much of an influence on your cactus if it’s close to a window or glass door.

Temperature Control Tips

  • Take care not to fluctuate the temperatures in your home dramatically. Maintaining a consistent temperature is best for keeping cacti healthy in the winter.
  • Be sure that the area your cactus is in isn’t exposed to freezing drafts. Cacti will go dormant during the colder months whenever temperatures drop below approximately 55 degrees Fahrenheit. Any lower could possibly even kill your cactus.

If your cactus is placed near a frequently used door to the outside, it may be best to move it to a different location until the weather begins to warm. Even if the overall temperature in your home is consistent, frequent exposure to freezing temperatures isn’t ideal.

3.   Sunlight Exposure

A sunlight.
During winter months, you should expose your cacti to sun for 4-8 hours a day.

During the winter, the sun is less beneficial for everyone involved: people get sick with more colds and flu due to the lack of Vitamin D, and cacti become dormant, colorless, and droopy.

As with watering, the amount of sunlight your cactus will need depends on its species. Some cacti will only require 4 hours of sunlight to be happy, while others will need between 6 to 8 hours. Find an area of your home that receives the most sunlight and place your cactus plant there (preferably a little way from the window itself).

Sunlight Exposure Tip

To supplement the light your cactus may be lacking, try using a grow light. Grow lights, like the KINGBO 5000Lux Led Grow Light, will provide your cactus with any light that it misses throughout the day. It could also provide additional warmth to a cactus in homes that get chillier during the winter nights.

Remember that while sufficient sunlight is necessary for a healthy cactus, too much light can be harmful, leading to spine discoloration, an unattractive texture in furred cacti, and overall wilting and sunburn. If you’re unsure as to how much light your cactus will need during the winter, refer back to its species information.

How to Care for Outdoor Cactus in the Winter

When it comes to caring for outdoor cacti in the winter, the process can be a tad trickier. Depending on the species of your cacti, some may tolerate colder temperatures, and others may die off completely without your added care. In general, you’ll want to water your outdoor cactus less in the winter than you do during the warmer months, and you’ll also need to provide the proper protection from freezing winds (as this could lead to frostbite).

Consider the following steps to keeping your outdoor cactus safe and secure during the winter season:

1.   Watering Your Outdoor Cactus
A plant on the water can.
During winter months, most of the outdoor cacti do not require to be watered at all.

Though cacti are usually watered about once each month, during the winter, you may not need to water your outdoor cactus at all.

This is because, during the winter, it’s best just to let nature run its course and water the plants whenever need be. Melting snow can provide your cacti with adequate water, thus making your added watering efforts void. Additionally, if you decide to water your cacti during the winter (and the temperatures are freezing—or will get there), this could result in freezing the cactus internally and killing it.

Outdoor cacti that have been growing in your yard are likely acclimated to the seasons and, before winter strikes, will begin preparing for the upcoming coldness by storing the water they need.

2.   Preventing Runoff

If your cactus is planted in a particularly low area of your yard, you may want to consider taking measures to revert water (namely, melted snow) away from your plants. Excess water—near-freezing water—is a death sentence for cacti.

If your cactus is potted, you can solve runoff problems simply by relocating your cactus to another area of your property. An excellent place to set an outdoor, potted cactus is on a covered patio or woodshed. Moving a cactus to these areas could also block biting winds.

On the other hand, if your cactus is planted in the ground, you could consider adding an attractive and efficient landscaping feature, such as a dry riverbed, around the surrounding area. The sunken ground and spaces between the rocks will encourage any melted snow runoff to disperse away from your cacti. You could also consider placing a water drain in your yard that leads to the road.

3.   Protecting Outdoor Cacti from the Elements

Cacti won’t need protection so much from a little snowfall here and there—it’s the nipping winds and cold and dryness that can lead to frostbitten plants.

To prevent your outdoor cactus (no matter if it’s potted or planted in the ground) from becoming frostbitten, gently cover it with burlap. Burlap is porous enough to allow cacti to breathe but sturdy enough to keep ice and strong winds from negatively impacting your cactus.

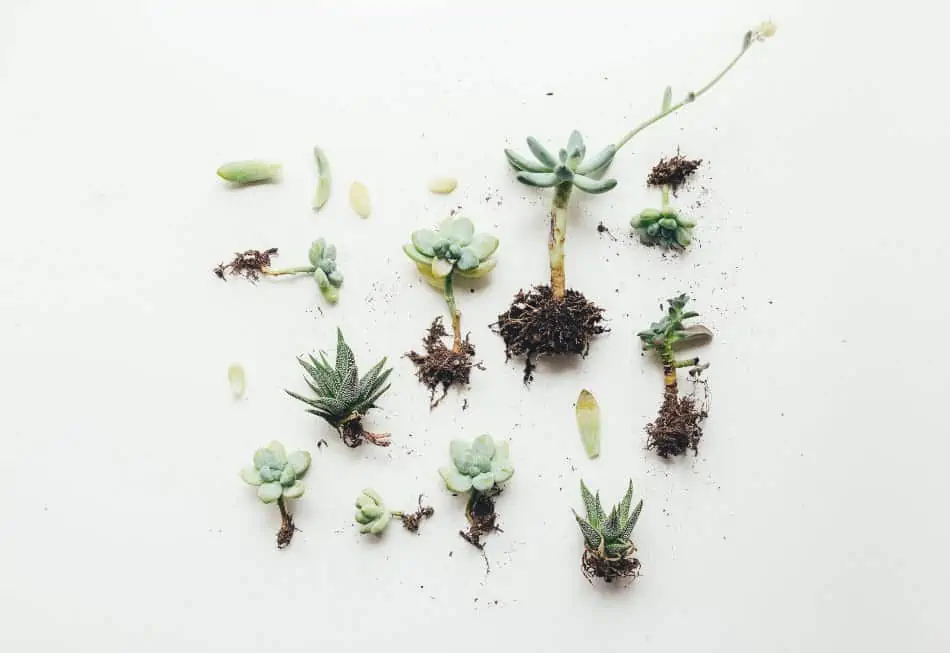
A mix of succulent and cactus plants.
Flower houses are relatively affordable and will somewhat maintain a tolerable temperature for your cactus.

If you’re especially worried about the elements harming your cacti, you can place a flower house, like this one, over them. Flower houses are relatively affordable and will somewhat maintain a tolerable temperature for your cactus while it protects it from the harshest outdoor elements.

Choosing Cacti That Tolerate the Cold

While you can take measures to protect your cactus plants from the cold, some species of cactus are simply too sensitive to freezing temperatures to survive. If you live in a region that sees snowy winters or chilly temperatures frequently, it’s in your best interest to raise hardy cacti.

In the next few sections, we’ll be discussing a few of our favorite low temperature-tolerant cacti.

1.   Brittle Prickly Pear (Opuntia fragilis)

Able to withstand temperatures as low as -35 degrees Fahrenheit, it’s safe to say that the Brittle Prickly Pear cactus could last throughout winters practically all over North America.

This gorgeous cactus can bloom vibrant, 2-inch, yellow flowers during the spring and summer. However, blooming can be iffy, as some plants only bloom once a year (or once every other year), while some don’t even bloom at all. The spikes on the Brittle Prickly Pear are no laughing matter, as they can grow up to an inch long and are generally in clusters. These plants can grow quite large, spanning multiple feet wide and tall, making them suitable for outdoor use.

In general, the Brittle Prickly Pear is a beautiful option that would fare well in large gardens that receive yearly doses of dramatically dropping temperatures.

2.   Pincushion Cactus (Escobaria vivipara)

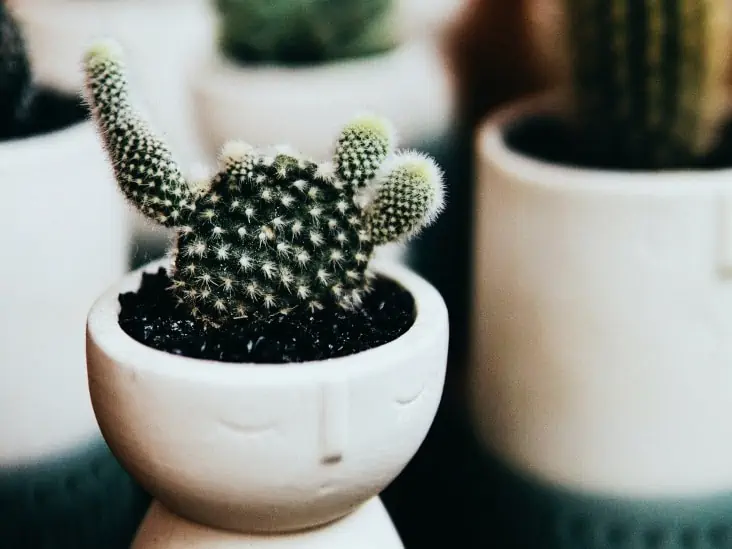
A top view of tiny Pincushion Cactus.
Tiny Pincushion Cactus is adapted to harsh environments and can tolerate winter cold.

Short and stout, the Pincushion cactus may be small and cute, but it is mighty.

Sitting low to the ground at approximately 5 inches tall, and only reaching about 2 to 8 inches in diameter, the round cluster of cacti known as the Pincushion or Spinystar can withstand temperatures as low as 0 degrees Fahrenheit. It’s very well adapted to the climates of multiple regions and can be found naturally from Mexico to Canada. Remarkably, the Pincushion Cactus is one cactus species out of only four that can tolerate the climates found in Canada.

Hundreds of spines are clustered over the entirety of these little cacti, and, during the late spring and summer, flashy pink blooms can be seen atop the plant. Later in the season, the Pincushion Cactus will develop green fruits.

3.   Kingcup Cactus (Echinocereus triglochidiatus)

Known for its glorious 3-inch red blooms that span across the entirety of the plant, the Kingcup Cactus is nothing short of what you would expect from a self-proclaimed royal. During the spring and summer months, this cactus is adorned in vibrant colors, and the body of this cactus spans multiple feet (around 4) across, though it stays relatively low to the ground. Following the orange-red blooms are bright red fruits.

These cacti can tolerate temperatures as low as -10 degrees Fahrenheit and do best when they’re hugging up against taller plants.

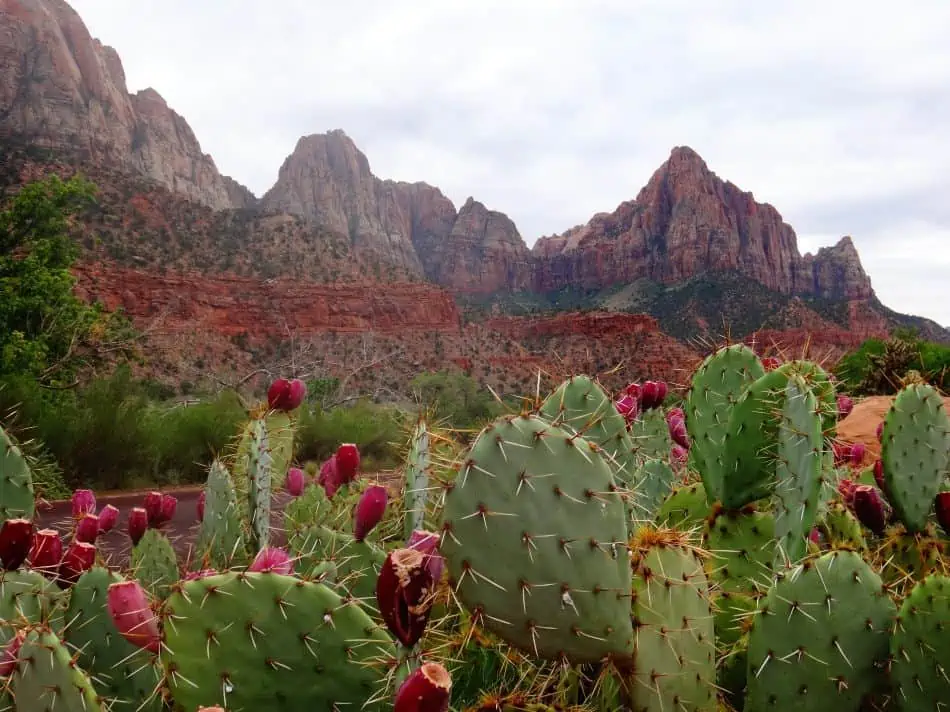
4.   Eastern Prickly Pear (Opuntia humifusa)
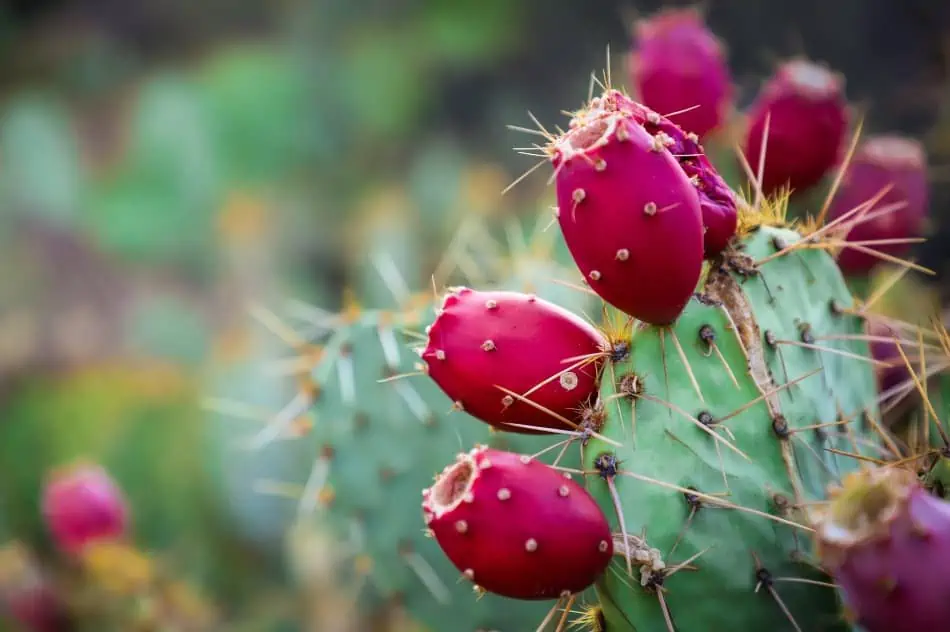
A prickly pear cactus bearing fruit.
Eastern Prickly Pear contains anti-freeze chemicals allowing the plant survive in cold weather.

Withstanding temperatures that drop into the negatives, the Eastern Prickly Pear is a hardy cactus plant that will last throughout the winters to see the next spring. Interestingly enough, these cacti actually contain anti-freeze chemicals within their cells to prevent them from dying off during the harsh winter months of northern and middle America.

These are mostly low-lying cacti that generally spread further outwards than they do upwards. Eastern Prickly Pear will only grow a little over a foot tall on average and are usually found in large clusters across the United States. However, in the hotter southern states, these cacti have been known to grow as tall as 6 to 7 feet, appearing more shrub-like.

During the late spring and early summer months, Easter Prickly Pear will boast yellow flowers at the ends of their pads, with some flowers displaying a deep orange ring in the innermost part of the petals.

5.   Chollas (Cylindropuntia)

Growing in wiry, long, cylindrical bristles, Chollas (a Mexican native) can endure temperatures reaching lows of approximately -30 degrees Fahrenheit. Chollas extends upwards as they grow, rather than along the ground, and will branch out the taller they get. Generally, Chollas will not extend past 10 feet tall.

Thousands of thin spines cluster tightly on the branches, insomuch that you often won’t be able to see the green coloring of the cactus’ skin underneath.
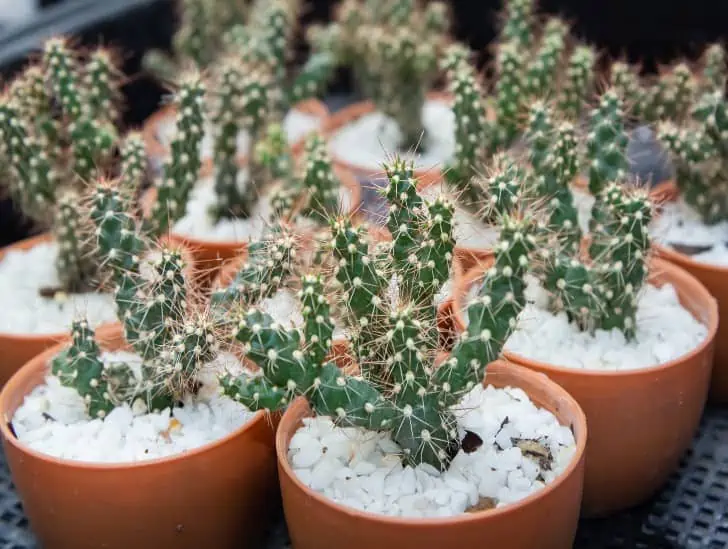
Cholla cactus in a pot.
Chollas extends upwards as they grow, rather than along the ground, and will branch out the taller they get.

Warning: these cactus plants have the potential of being extremely dangerous to children and pets. Their spines are readily available to stick to anyone or anything that ever-so-slightly brushes against it, and trying to remove these thin spines is a painful process. It’s best to admire from a distance, as the barbs will even cling to hair, fur, and clothing.

The flowers that bloom late spring or early summer are cup-shaped and can come in a variety of colors. Though the flowers are most commonly yellow, colors can range from light green and orange to red tones.

6.   Old Man of the Andes (Oreocereus celsianus)
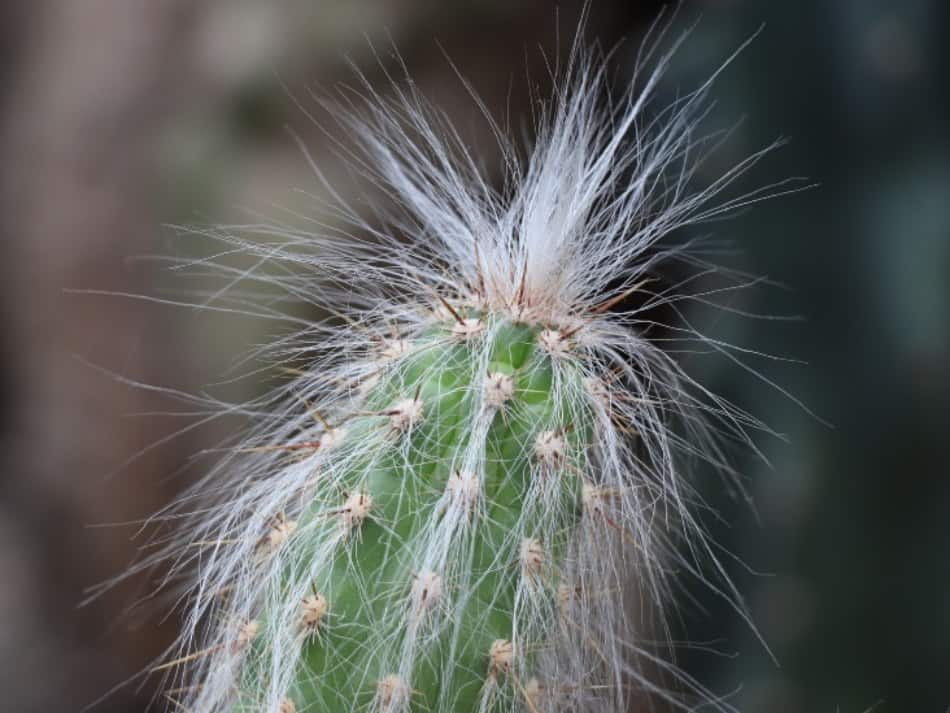
A old man cactus.
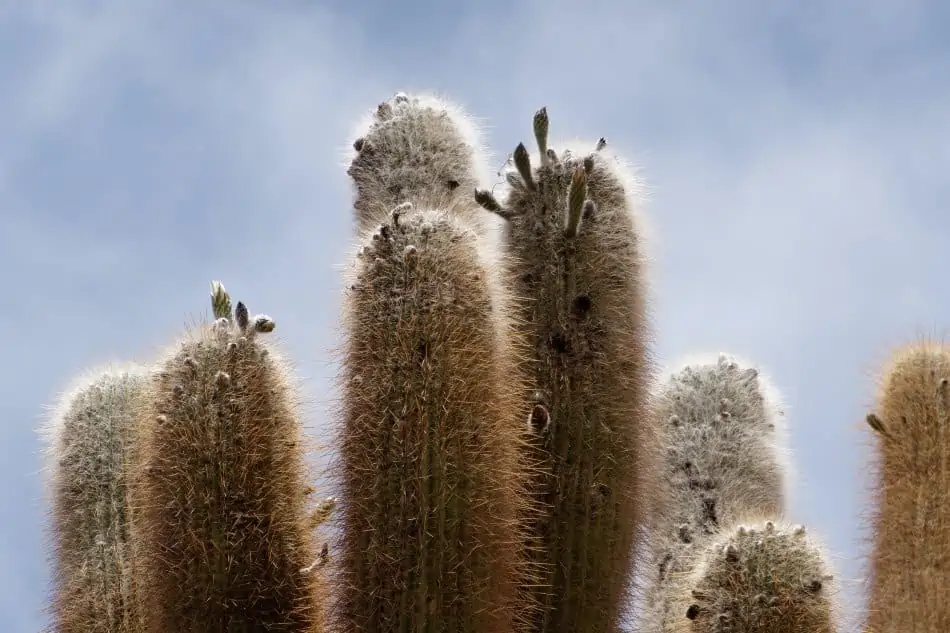
Wool-like white hairs of Old Man cactus protect the plant from cold winds.

Resembling the white beard of an older man, it’s no wonder that this cactus is labeled as the Old Man of the Andes. Able to withstand short periods of frost, the white hairs surrounding this cactus plant protect against cold winds.

Though this cactus will fare well in areas where winters aren’t as harsh, it may not survive temperatures far below freezing.

Final Thoughts

No matter if you’re trying to care for your indoor or outdoor cactus during the winter, it’s vital that you take the proper actions to strengthen and protect your cactus—not only when winter strikes but in the months leading up to it, as well. Keep in mind that, before winter rolls around, you should fertilize your cactus at least once (but not too often) to give it a boost of nutrients.

And, when Jack Frost begins nipping at your nose, ensure that your indoor cactus is in a room with a consistent temperature, adequate light (whether it be artificial or natural), and a good watering once a month. As for your outdoor cactus, don’t water it. And, if it isn’t so tolerant of the lower temperatures as the species we mentioned at the end of our article, consider covering it with burlap or a flower house to protect it from stinging winds and moisture.

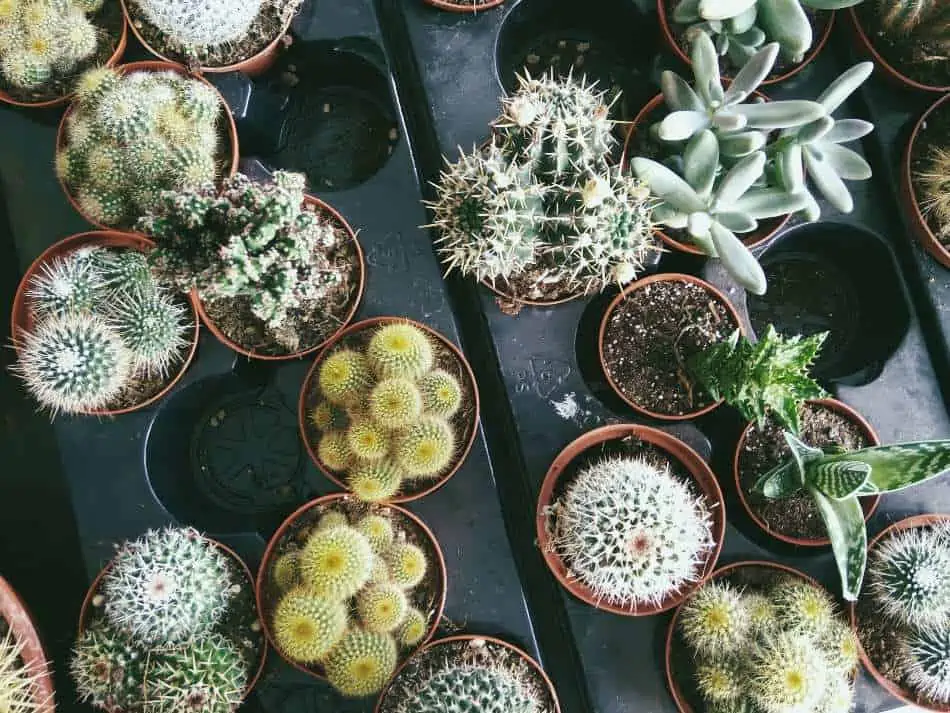
How Often To Water A Cactus?

Knowing how often to water your cactus is vital to support blooming and fruiting. How often you should water your cactus will depend on what kind of cactus you have. While we most often associate cacti with deserts, some cacti have adapted to growing in the rainforest.

How often should a cactus be watered? A cactus typically needs to be watered about once a week, depending on the season and the cacti’s environment. A cactus can survive in extremely dry conditions. However, the key is making sure your cactus is thriving and not merely surviving.

You can do many things to make sure your cactus is thriving no matter the season or the environment. Keep reading for more water and cactus care tips.

How Often to Water a Cactus

Each cacti species is different and requires a different amount of water, so the best thing you can do is look up your specific species and learn all you can about it. Let’s walk through a few things that influence how much you should water your cactus.

Indoor Cacti

A top view of different kinds of cactus in a pot.
Smaller indoor cacti need to be watered more often than larger ones.

Keeping an eye on your plant is the best way to know when and how often to water your cacti. Once your soil has thoroughly dried, it’s time to water your cactus again.

Here are a few other factors that will help determine how often you should water your indoor cactus:

  • The size of your cactus. Smaller cacti are younger and need more water, whereas larger cacti are older and don’t need to be watered as frequently.
  • The size and type of your pot. If your cactus is in a large pot, it won’t need to be watered very often as its volume will contribute to holding water; however, a smaller pot will need to be watered more frequently. Smaller pots are recommended for cacti since it’s not good for them to sit in water.

Plastic pots tend to hold onto moisture for a while. While they can still be used for planting cacti, keep in mind that plants probably won’t need to be watered as much and be sure to check the soil before watering. Terra cotta pots are porous and allow the soil to dry quicker. Terra cotta is also a super inexpensive pot that can be purchased in any size or shape. Regardless of what type of pot you choose, keep in mind a pot with drainage holes is the way to go.

The specific species of your cactus can also help you determine how much water will ensure your cactus is thriving.

Checking your soil is essential when it comes to watering your cactus, but also a great way to ensure you’re not over-watering your plant. To properly check your soil, you should:

  • Poke a finger into the drainage holes and check if the soil is dry.
  • Use a small stick or skewer to check if the soil is dry or damp at the bottom. If the soil is still damp, it will adhere to the stick or skewer, and if the soil is dry, the stick or skewer will come up clean.
  • Poke your finger a few inches into the soil, if the soil is dry, you can add some water, and if the soil is still damp, you can hold off on watering.

Outdoor Cacti

A matired outdoor cacti.
Typically, outdoor cacti need to be watered every two weeks.

Watering cacti outdoors can be a little trial and error, so if you do your research and find a routine that works for you and you notice your plants thriving, stick with it.

Generally speaking, a deep soak is great for outdoor cacti. This mimics its natural environment more. A deep soak is achieved by allowing your hose to drip steadily for several hours, depending on how big or small your cacti are.

As a general rule, you’ll want to plan on watering cacti every two weeks; however, if you live in a warmer climate you may find yourself needing to water cacti more often, and if you live in a cooler climate you’ll probably find you won’t need to water your cacti as frequently. Just as with indoor plants, smaller cacti will require more water while larger cacti are able to store more water and won’t need to be watered as much as smaller ones.

A super helpful tip if you’re repotting or planing a new cactus, plant it dry and give them roots about one week before exposing them to water.

Spring, Summer, Fall, & Winter

The 4 seasons.
Cacti need to be watered roughly once a week during warm months and less frequently in winter.

Spring and summer are the peak growing season for cacti, so plants will need to be watered about once a week during these warmer months. Still make sure before you water again that the soil is mostly dried out to avoid overwatering.

During this time, when plants are thriving and experiencing a lot of growth, it’s also a good idea to fertilize plants once a month. 

The cooler months of fall and winter are dormant, or rest periods, for cacti. This means plants are alive, but not actively growing If you have a cactus that will flower during the winter, it’s important to keep your plant warm and to water regularly; however, if your cactus doesn’t bloom during the winter and prefers warm, dry climates, you’ll find yourself watering your cactus less frequently.

More Watering Tips

Here are a few more tips to keep in mind as you fall into a routine of watering your cactus:

  • Make sure you always allow the soil to dry completely before adding water to your cactus. To ensure your soil is dry, you can opt to use a water gauge or simply dig your finger a few inches into the dirt.
  • If your cactus is planted in a pot, it will need watered more frequently than cacti that are planted outdoors.
  • It’s important to note that the hardness of your water will affect your cactus. If you have hard water, you’ll want to plan on repotting your cacti every couple of years to avoid salt buildup.

Too Little Water? Or Too Much?

Just as easy as it is for some to neglect a cactus, you can easily over water a cactus as well. Here are a few signs you may be neglecting your cactus, as well as signs you may be killing your cactus with kindness.

Signs of Under Watering

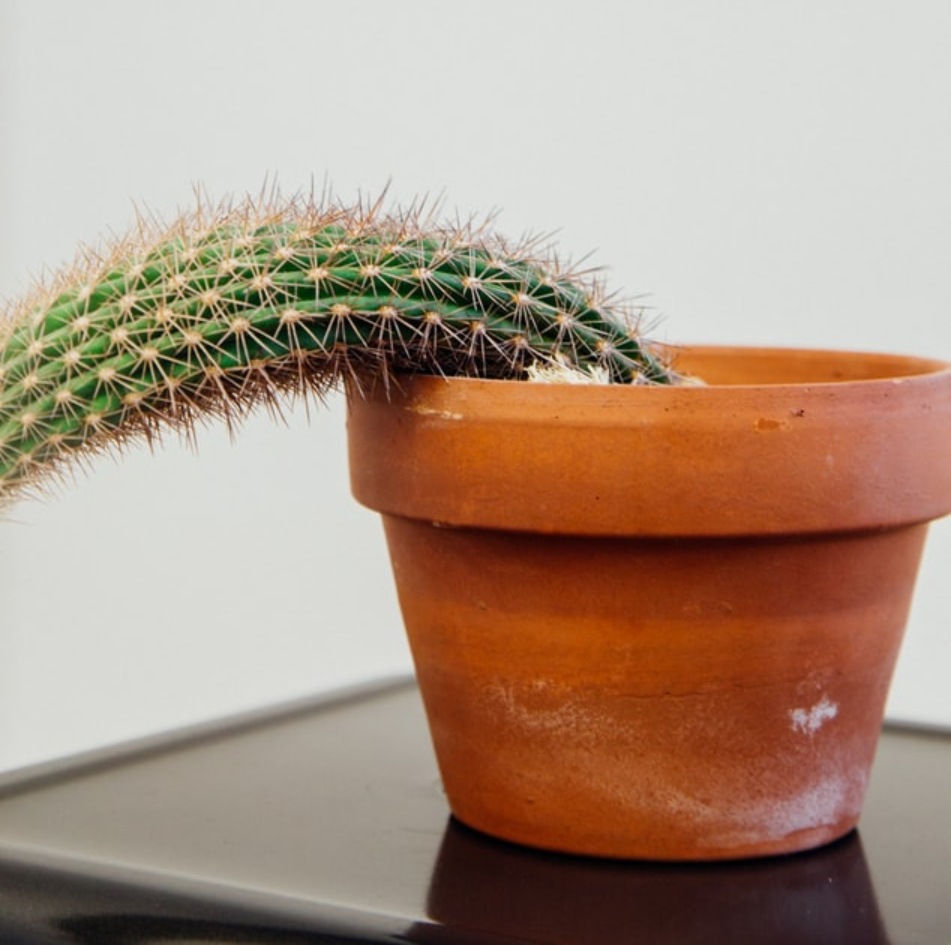
A cactus lack of water on a clay pot.
Cacti might get softer, change color, and lean to one sight in the case of water deficiency.

Cacti can still survive even if you’ve neglected them for a little while, but if you start noticing any of the following signs, it’s time to give your cactus some love and maybe start a cactus watering schedule.

  • Cactus appears to be limp and/or soft.
  • Cactus is leaning to one side.
  • Cactus has changed color; typically when cacti are suffering from drought, they will turn a paler color.

It’s important to keep an eye on your cactus and if or when you start to notice any of these things occurring to go ahead and increase the amount of water your cactus is getting. Consider keeping a spray bottle of water near you or your plant and using it as you need to give your plant some extra moisture.
Signs of Over Watering

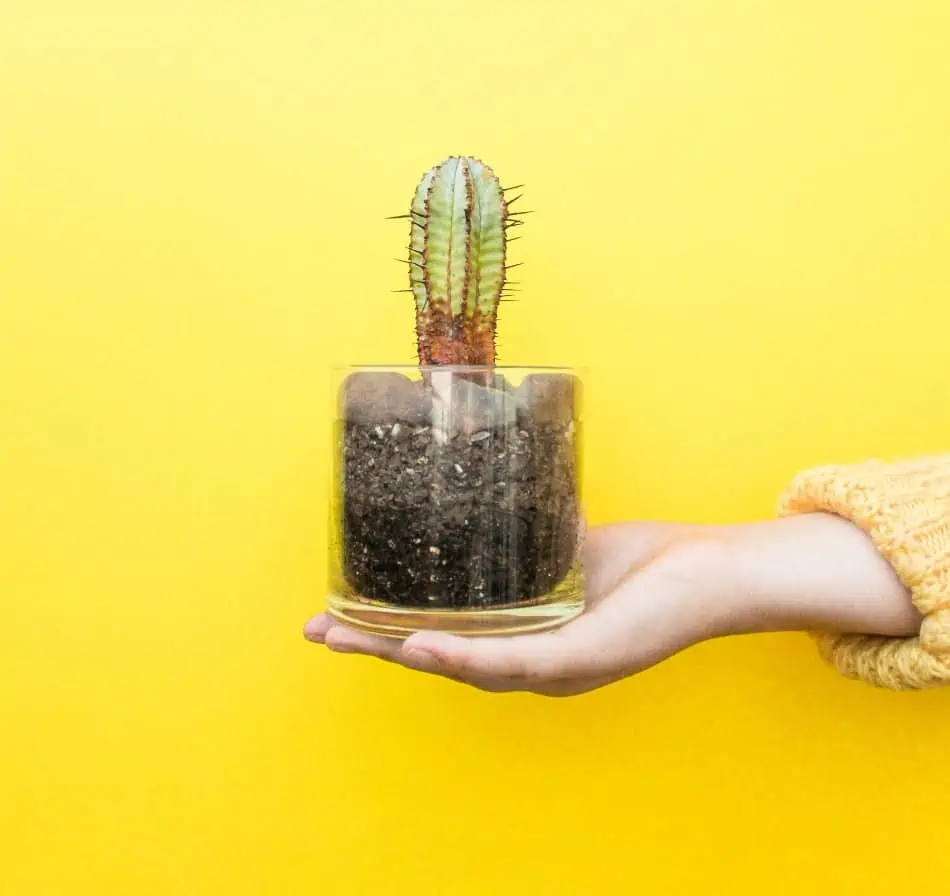
A cactus on hand,
Overwatering your cacti can change the color of the stems to brownish-yellow.

Too much watering will cause cactus roots to rot, can cause bacterial and fungal growth, and doesn’t allow the cactus to absorb nutrients properly. Unfortunately, your plant will appear to be happy and healthy on top, while it is suffering underneath. Here are a couple of signs you may be giving your cactus too much water:

  • Look for extremely fast growth. If you notice your cactus has recently gotten plum and is growing quickly, cup back on watering for a bit.
  • If you notice your cactus turning yellow, wilting, or softening, it may be too late to save it.

To avoid overwatering, make sure that the pot you have your cactus planted in has drainage holes in the bottom so that the roots aren’t sitting in water, and opt for a fast-draining soil to plant your cactus in. It may also be helpful to track when you water your cactus by creating a plant schedule.

More Cactus Care Tips

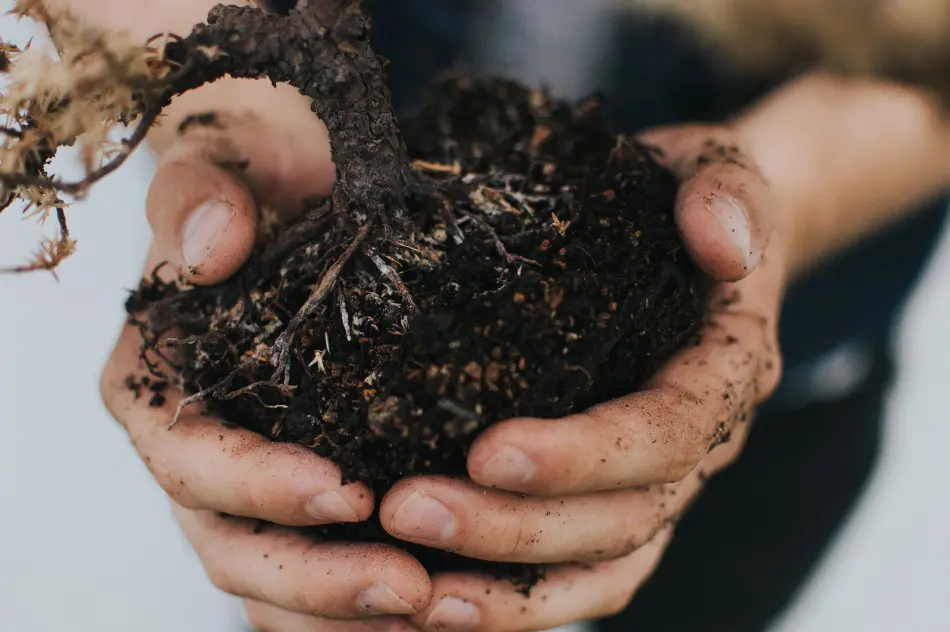
A soil on hand.
Using suitable soil mix for your specific cactus species is essential.

Cacti are pretty low-maintenance plants, but they still require a certain amount of love and attention. Here are a few things you can do to make sure your cacti are staying happy and healthy:

  1. The soil you plant your cactus in is super important, and soil used to plant a cactus in needs to allow drainage to avoid allowing the cactus to sit in water. Check out this Succulent Planter Soil Kit or this Succulent and Cactus Soil Mix. Research the kind of soil your specific cacti prefer; some prefer soils with more gravel, while others prefer a sandy mix.
  1. Cacti love sunshine, but there is such a thing as too much. Cacti can begin to burn if they happen to be sitting in a window that receives a lot of direct sunlight. Look for color changes on the side facing the sun. Your cactus may need to be moved to a different spot with less sunshine if you notice they begin to burn.
  1. Read up on your cactus and learn how to care for your specific plant, and should you have any questions, don’t be afraid to ask a local nursery. Plants typically come with a tag that includes basic information, including the name, for your plant; if not, take a picture to your local nursery, and they can help you identify your plant, or look at pictures online to discover what species of cacti you have.
  1. Cacti can benefit greatly from some fertilizer, especially fertilizers that are made specifically for cacti and succulents such as Cactus Juice or this Dynamite Cactus and Succulent Food. Typically you’ll just sprinkle a little fertilizer with each watering, but read the instructions on your fertilizer before use.

Mistakes to Avoid

Here are a few common mistakes to avoid as you begin to care for a cactus:

  1. Using a peat-based moss. Many nurseries use this moss for cacti and succulents, and while peat moss may work for a while, at some point, it will get and stay too wet, which isn’t good for cacti.
  2. If you plan on using cacti for landscaping, consider your cacti’s specific needs before planting. Poor planning can lead to unhealthy and potentially dead cacti. Again, be sure to do your research on the specific species of cacti you have so you can find the perfect spot outdoors with sufficient sun and shade.
  3. Roots need room to grow, and as they become too tight, the roots may not be acquiring the nutrients the plant needs causing the plant to die. If you can see roots through the drain hole, it’s time to re-pot.
  4. While succulent and cacti gardens are super popular right now and look great, mixing different species of plants that require different watering schedules and amounts of sunshine could cause cacti, or other succulents, to die. While it takes a little more research and planning, taking the time to choose cacti and/or succulents with similar needs will be worth it in the long run.

Best Indoor Cacti

A Angle wing cactus, flowering old lady cactus flowering and christmas cactus.
Some of the best indoor cacti species include Old Lady Cactus, Christmas Cactus, and Angel Wings Cactus.

If you’re wanting an indoor cactus, but aren’t really sure what species to go for, here are a few ideas:

  1. Rat Tail Cactus – The Rat Tail cactus is a hanging basket cactus that can grow up to 3 feet long. This cactus blooms bright magenta and takes direct sunlight.
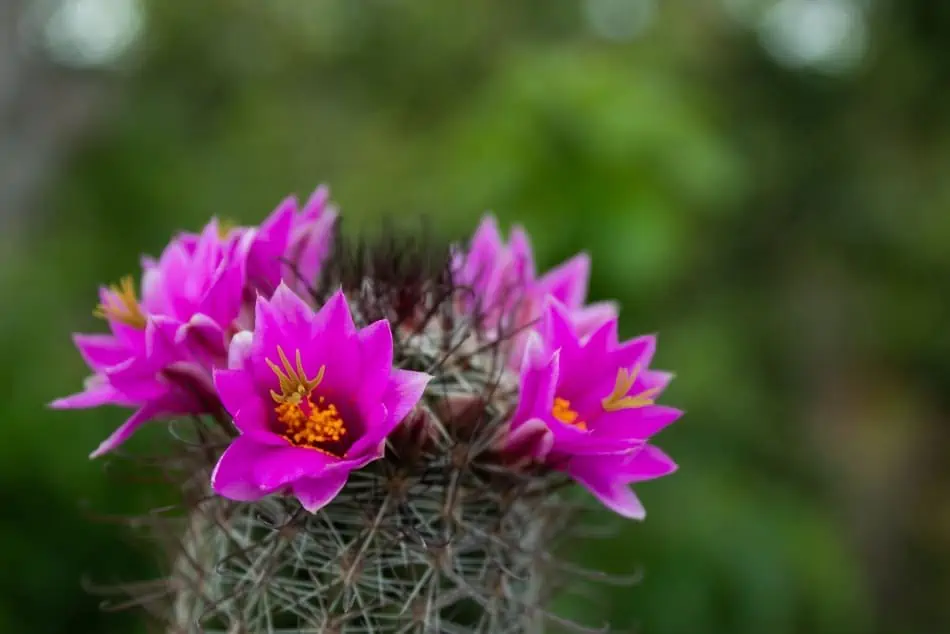
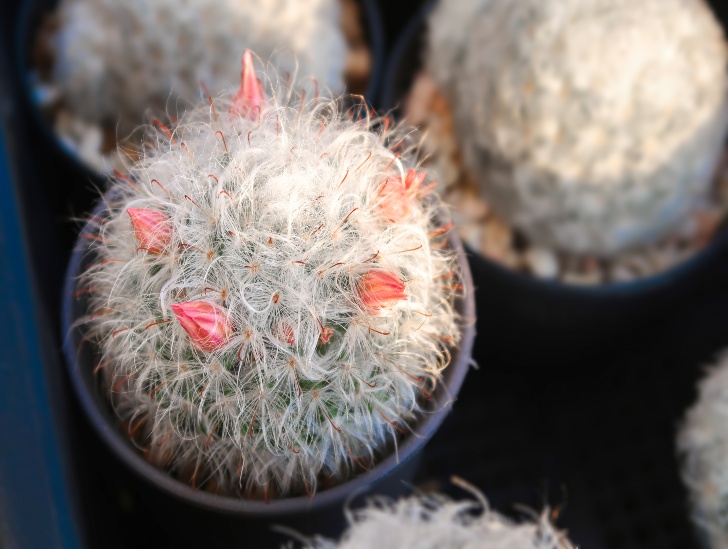
  2. Old Lady Cactus – The Old Lady cactus is a unique looking plant that consists of spheres with white hairs and spines. On the healthiest of plants, you’ll notice small pink blooms that form a circle at the top of the spheres. Old lady cacti like sandy potting mix, bright light, and to be watered bi-weekly to monthly.
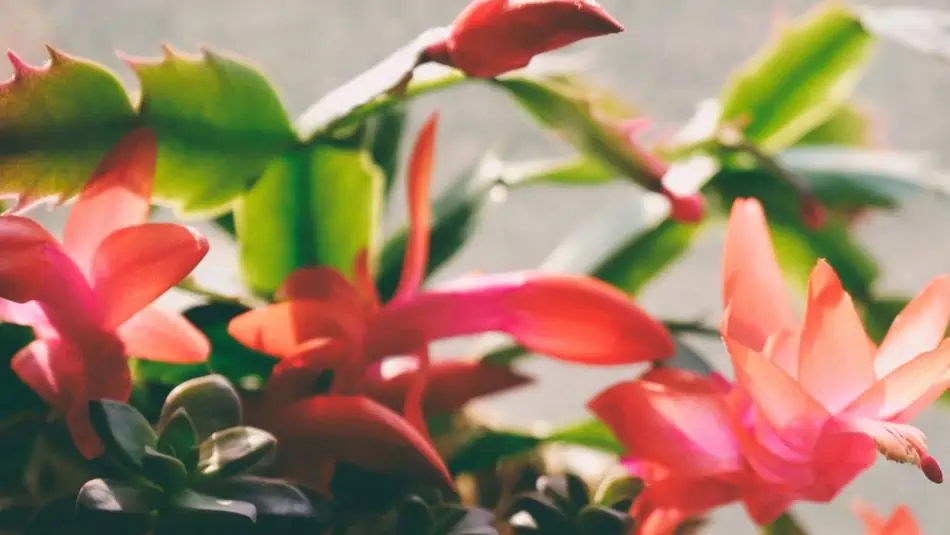
  3. Christmas Cactus – The Christmas cactus has no prickles and bears beautiful flowers that bloom in red, pink, orange, or white. This cactus requires diffused light, and slightly cooler temps during the winter months.
  4. Angel Wings Cactus – This cactus has hair instead of spines, grows to be about two feet tall, requires full sun, and will have pale yellow blooms.
  5. African Milk Cactus – The African Milk cactus is a slow grower but can grow up to 8 feet tall. This cactus likes partial to full sun and likes watered about twice a month.

Best Outdoor Cacti

Cacti typically thrive indoors, but there are some that do great outdoors as well. If you’re interested in planting cacti outside, check out these species:

  1. Claret Cup Cactus – The Claret Cup cactus can grow up to 3 feet high and 6 feet wide. These cacti bear a juicy fruit that turns bright orange as it ripens. Claret Cups like soil with a lot of gravel and prefer full sun.
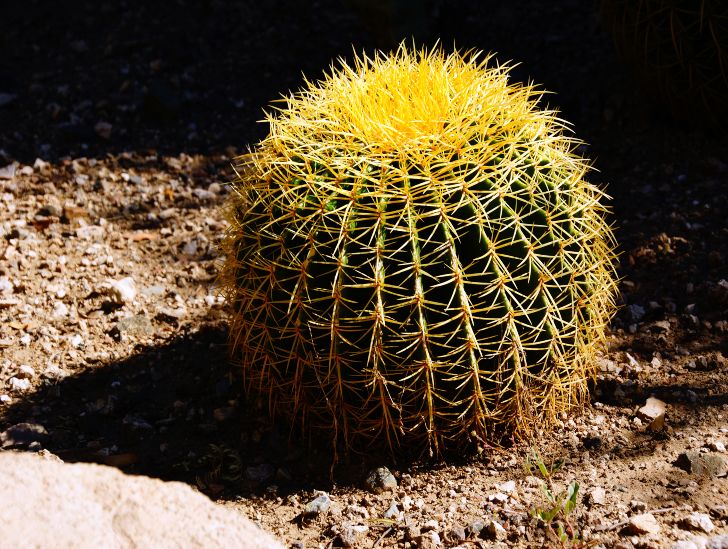
  2. Golden Ball Cactus – Golden ball cacti are also known as Lemon Ball or Yellow Tower because of its color. These cacti can grow up to 3 feet tall, are great for beginners, and enjoy some shade during the hottest part of the day.
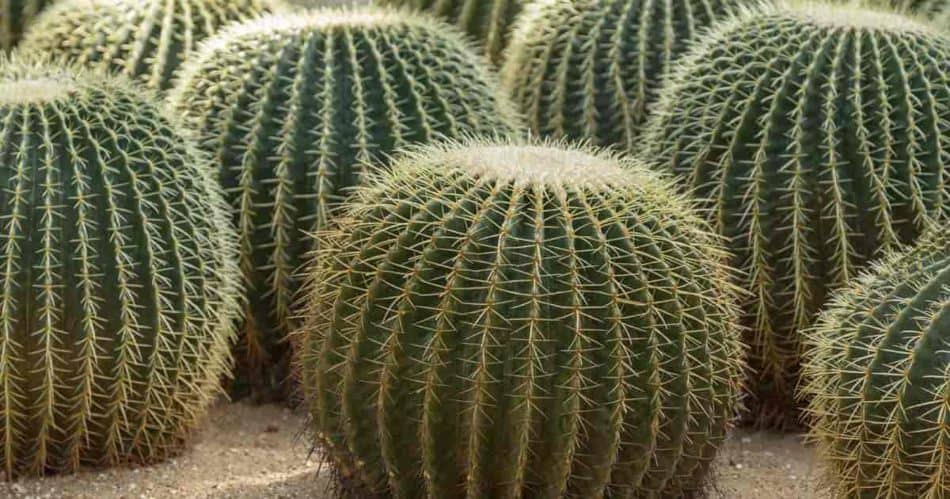
A golden barrel cactus.
These cacti can grow up to 3 feet tall and are great for beginners.
  1. Strawberry Hedgehog Cactus – The Strawberry Hedgehog cactus grows to be about 28 inches tall, loves all the sun, and has beautiful purple-magenta blooms.
  2. Old Man Cactus – Old Man cacti grow as tall columns covered by woolly white hair. These cacti can grow an impressive 49 feet tall and enjoy full sun.
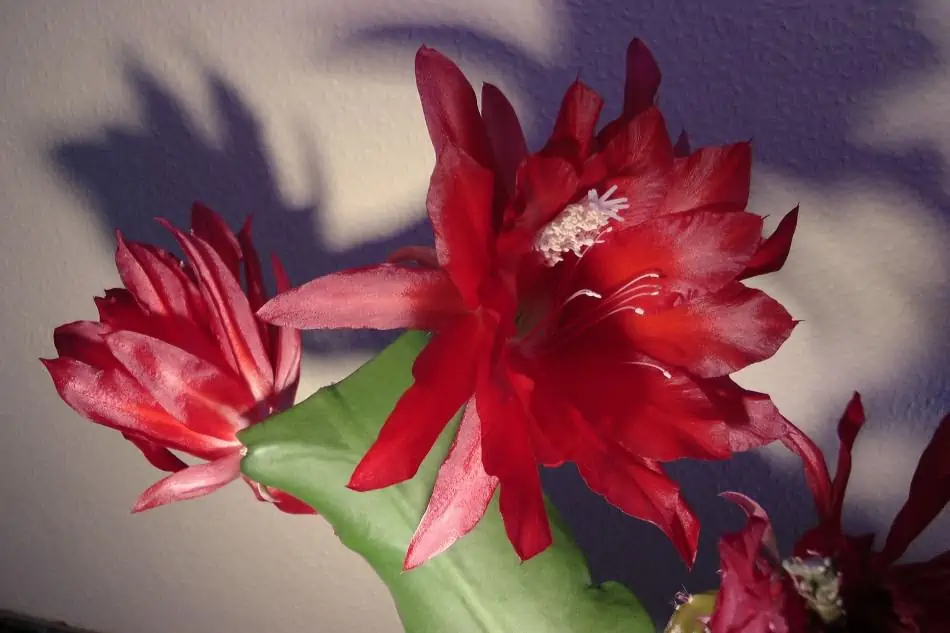
  3. Orchid Cactus – The Orchid cactus is a beautiful plant that can grow as long as 225 feet, and grow gorgeous blooms in pink, red, white, yellow, or orange. These cacti require filtered sunlight.

Final Thoughts

How often you water your cactus is vital to making sure it’s not only surviving but also thriving. Several factors will contribute to how often you water your cactus, such as the location of your plant and what climates you experience where you live, among other things.

For example, if you keep your plants indoors, you will want to keep an eye on the soil, and once it’s dry, you can add water. For indoor cacti, you’ll more than likely fall into a routine after a while. For outdoor cacti, the general rule to follow is a deep soak about once a week.

During the warmer months, it’s normal to need to water cacti more frequently and to hold off on watering during the cooler months.

Something to be mindful of with a cactus is that while they can die from not getting enough water, too much water is just as bad for them. Softness, leaning to one side, and lightening in color are all signs your cactus may be thirsty, while extremely quick growth may be a sign your cactus is being overwatered.

Being mindful of the soil you use, noting how much sunshine your cactus is getting versus how much it requires, researching the specific species of cactus you have, and fertilizing your cactus are all ways you can ensure your cactus is staying happy and healthy.

Cacti are pretty versatile, low-maintenance plants making them great for beginners and green thumbs alike, so whether this is your first plant or one of many, enjoy the process and happy gardening!

13 Best Types Of Cactus To Grow Indoors

If there’s one plant that seems easy to grow, especially for newcomers trying to have houseplants, it’s cactus. It’s easy to see why. They are low maintenance and look gorgeous all year long. There are so many though that it is not easy to know which ones to start with.

What are the best types of cacti to grow indoors? This can vary from person to person, but most people agree that the best types of cacti to grow indoors include

  • Star Cactus
  • Bunny Ears
  • Old Lady Cactus
  • Fairy Castle Cacti
  • Barrel Cacti
  • Barbary Fig
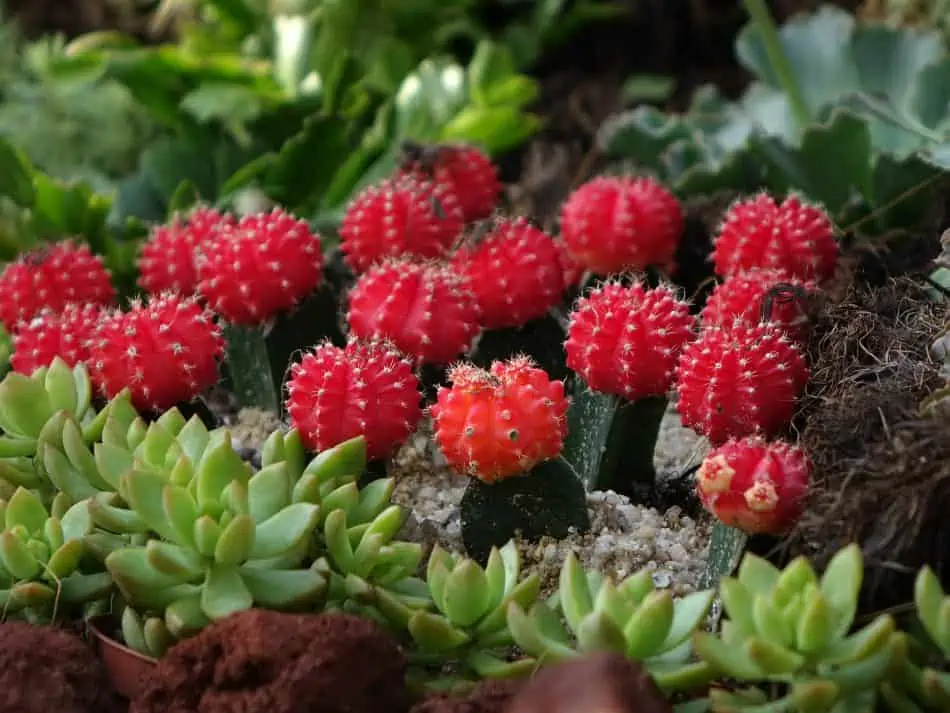
  • Moon Cactus
  • Easter Cactus
  • Ladyfinger Cactus
  • Parodia
  • Christmas Cactus
  • Saguaro Cactus
  • Queen of the Night

Finding the right cactus for your home can be a little tough, especially if you are new to growing plants. Each cactus has its own needs, blossoms, and aesthetics. Before you decide to buy, it is a good idea to know what you should look for.

The 13 Best Cacti to Grow Indoors

Are you looking to get your indoor gardening on, but don’t quite know where to begin with cacti? You are not alone. Thankfully, we decided to break down the perks, pitfalls, and needs of each type of indoor-friendly cactus to make the decision easier for you.

Star Cactus – Best for Desktop Growth

A star cactus.
Star Cactus with white-yellow to pinkish flowers can be used as a beautiful desktop decoration.

It’s hard to ignore the beauty of this petite flowering cactus type. These gorgeous cacti offer up white-yellow flowers with a red center when they hit their blooming season. Since they don’t grow too large, they are an ideal choice for desktop gardening.

These cacti reach a top diameter of six inches and spend their first two years as small, round, slightly star-shaped cacti. If you’re patient and care for your cactus, you should expect to see it blossom in two years.

Believe it or not, these cacti work well in the cold. They typically thrive from 20 to 50 degrees Fahrenheit and require easy-draining soil. With a little watering and love, they will be amazing flowery companions.

Bunny Ears – Best for Statements

A bunny ears cactus.
Bunny Ears Cactus, is a plant with soft pricks. The cactus needs lots of daylight to blossom.

These humorously nicknamed cacti are a favorite in the American Southwest for both indoors and outdoors growing. Unlike the Star Cactus, Bunny Ears cactus grow to a reasonably large size. Depending on care and age, you can expect these clump-forming cacti to grow up to six feet in height and three feet in width.

Plant parents who are looking for a large, attention-grabbing cactus will like Bunny Ears. These cacti don’t have spines but do have pricks. When cared for properly, you can expect a small amount of milky yellow flowers, followed up with deep purple fruits.

Bunny Ears cacti are major sun lovers, so you will need a bunch of daylight to make these cacti blossom. To ensure that you get the gorgeous blooms you want, you’ll need to have indoor temperatures ranging from 55 to 100 degrees Fahrenheit.

Old Lady Cactus – Best for Easy Care

A blooming old lady cactus.
Old Lady Cactus is a low-maintenance cactus with gorgeous purple flowers.

Old Lady Cacti, also known as Mammillaria Hahniana, are one of the most popular types of cacti to grow in Central Mexico. Though it’s a favorite among modern homes, it still has a greyish, fuzzy appearance caused by its many, many spines.

Round and petite, the Old Lady Cactus is adorable with its petite four-inch high stature. When it’s in bloom, it shows off beautiful purple flowers that are bound to get compliments from those who visit.

This plant is an excellent indoor-outdoor cactus. It requires loads of sun, minimal watering, and time outdoors during the warmer months of the year. This makes it one of the best cacti for people who want a plant with minimal care.

Fairy Castle Cacti – Best for New Gardeners

A fairy castle cactus.
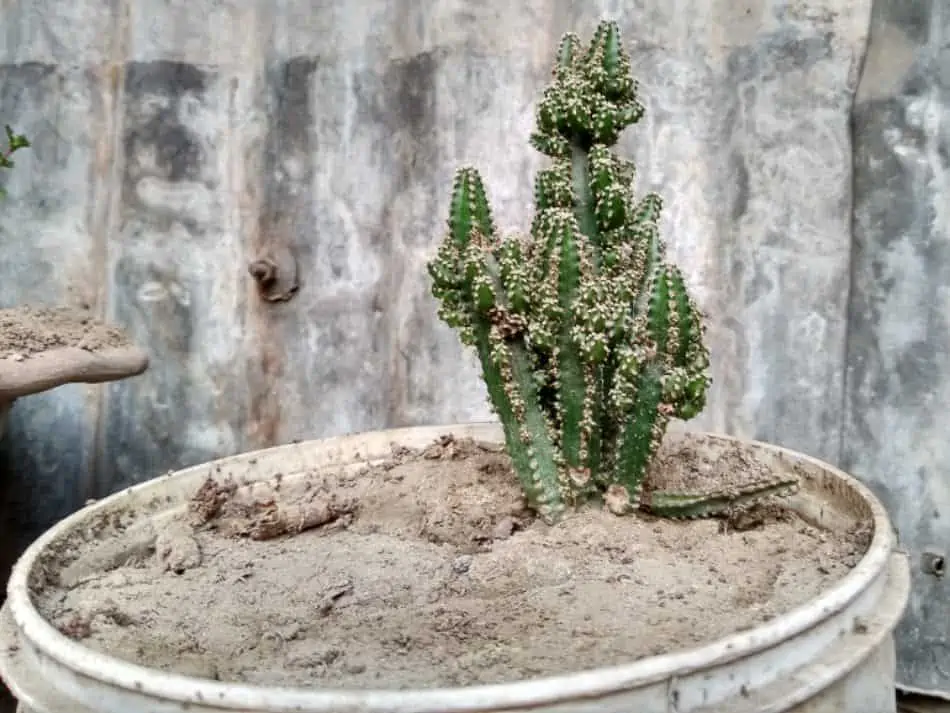
Fairy Castle Cactus with several long spiny stems can grow up to 6-feet tall.

With its traditional “cactus” appearance, the Fairy Castle Cactus is known for its multiple long stems and noticeable spines. Because it tends to look somewhat like a pint-sized building due to its bulkiness, people call it a “fairy castle.”

This beautiful cactus is a great option for people who are looking for a long-term project. Though you can buy them at a very petite size, these cacti can grow to a whopping six feet in height. They grow very slowly, so you won’t have to worry about them outgrowing your home for years.

If you’re interested in getting a Fairy Castle of your own, you should grab some cactus potting soil and expect to place it in full-grown sun. After ten years or so, you should expect to see some beautiful white blooms.

Barrel Cactus – Best for Low Nutrient Growers

A golden barrel cactus.
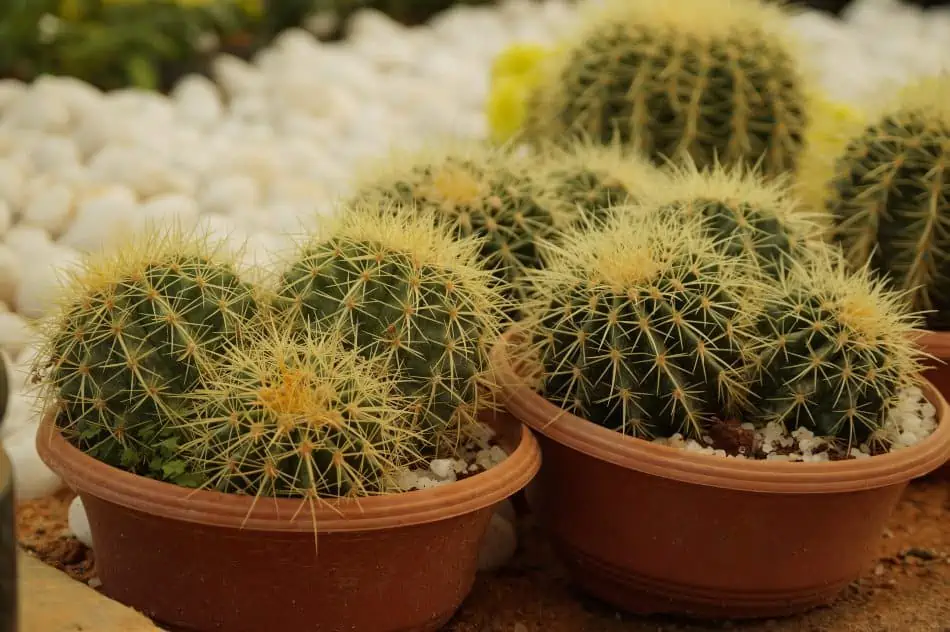
Barrel cacti are characterized by cylindrical shape with spines all over the surface.

Barrel cacti come in a wide range of sizes, but they all have the same cylindrical, ribbed, and spiny appearance in common. Most barrel cacti that are sold in stores don’t get too large in height, making them a great mid-size cactus that will draw attention with ease.

Among interior designers, they love the look of these cacti and their (typical) foot-long height. Among gardeners, barrel cacti are known for being exceptionally low maintenance, even among other cactus species.

These cacti require minimal (read: almost no) watering and do better in low-nutrient soil. These cacti are so easy to work with, you only need to fertilize them once a year!

Barbary Fig – Best for People Who Want Homegrown Food

A prickly pear cactus.
Barbary Fig, also known as Prickly Pear, is a fruit-bearing cactus with initial red and yellow blossoms.

The Barbary Fig is a unique cactus in the sense that it is a popular cactus to grow for commercial purposes. While it’s got the potential to reach a staggering 33 feet in height, it will stay petite if placed in a small pot. So, you have a lot of control when it comes to the size it grows to.

You might be wondering why commercial growers love the idea of growing Barbary Figs. The reason is simple: they are one of the few cacti that grow mouthwateringly delicious fruit in large quantities. Needless to say, having a Barbary Fig is a great addition to your kitchen!

If you want to get a Barbary Fig, you can expect to see beautiful red and yellow flowers shortly before this cactus bears fruit. Like most other cacti, these cacti work best with minimal watering and full sun. If possible, try to grow these in a hot climate since they require hot temperatures!

As for the actual fruit, they’re best peeled and eaten raw. Yum!

Moon Cactus – Best for Shady Homes

A moon cactus.
Growing up to 8 inches in height, Moon Cactus is a plant with bright pink, orange, or yellow upper body.

It’s hard to ignore the beauty of a moon cactus. These impressive cacti grow anywhere from one to eight inches in height. What makes them unique is that they take a lot of effort to seed, graft, and cultivate due to a novel mutation. Thankfully, growing them once they have sprouted is a cinch.

With their bright pink, orange, or yellow tops, moon cacti must be specially cultivated due to their inability to produce chlorophyll. Store-bought cacti are already made grafted and ready to produce chlorophyll, which is why they are your best option.

Moon cacti are one of the rare types of cacti that work well with shade. Too much sun can and will scorch them. Though they do not need too much sunlight, they will need a little heat. Temperatures as lower than 48 degrees will hurt them.

Easter Cactus – Best for Flower Lovers

A blooming easter cactus.
Easter Cactus features bright red lotus-like blossoms during April and May.

Most cacti flower, but rarely enough that it’s a big deal when they do. This is not the case with Easter Cacti, which are known for their bright, beautiful, lotus-like flowers that shoot right out of its green stem. They have so many flowers that you would be forgiven if you mistook them for a regular flowerbed plant!

The thing about Easter Cacti you should be aware of is that they only flower two months in the year—April and May. However, they’re perennial and will bloom again and again. When cared for properly, you can expect these cacti to grow to a size of one square foot. That makes them great plants for smaller homes.

Considering their top blooming season, it’s unsurprising that they like warm-ish temperatures. Do not put them in direct sunlight, though, since the harsh sun can easily wilt those tender flowers. A better option would be to put them in bright, yet indirect natural sun—-much like what you would get from light through sheer curtains.

Ladyfinger Cactus – Best for Windowsills

With its petite “towers” of spiny greenery, it’s easy to see where the nickname of “ladyfinger” came from. They bear a remarkable similarity to the sandwich cookies. Unlike those popular cookies, these cacti bear pretty little flowers that will bring a splash of color to any home.

People looking for a small cactus that thrives in sun to partial shade are going to love the small, cute, and easy to care for fun that ladyfingers offer. This cactus requires minimal water during the summer. When it goes dormant in winter, you might not need to water it at all.

This cactus has strikingly similar needs to succulents, especially when you consider the low maintenance requirements. That makes it a great starter plant for people who just want a little windowsill beauty.

Dwarf Chin Cactus – Best for Heavy Shade

If there is one thing that this list proves, it’s that cacti rarely ever are just all green towers of spines. They have the propensity to have flowers and fruit that add serious color that can rival any rose, tulip, or peony. The Dwarf Chin Cactus is an excellent example of this in action. 

Though these spiny cacti will only grow to a maximum of six inches, they pack a serious punch of beauty. When they are in full bloom, these cacti produce flowers that come in a wide range of colors—brilliant red, sunny yellow, rich salmon, and hot pink, just to name a few. 

Surprisingly, these cacti do best in heavy shade. So, if you thought that you needed to have brightly lit areas to have a cactus inside your home, you’re wrong. The Dwarf Chin Cactus is a perfect pick for your indoor garden. 

Christmas Cactus – Best for Wintery Cheer

A blooming christmas cactus.
Christmas Cactus requires nutrient-rich soil to blossom in the middle of winter, usually in December.

The Christmas Cactus doesn’t get its name for its orange blooms atop its green spine. Rather, it gets its nickname from its tendency to bloom in the middle of winter, mostly in the middle of December. The stalks of these cacti droop over pots and have leaf-like folds, giving them a unique shape that raises eyebrows.

If you decided to go indoor gardening during the winter, this might be one of the few cacti you will see for sale. They are regularly offered up as Christmas centerpieces, particularly in the American Southwest. Finding them during other times of the year can prove to be a little tricky.

This cactus is unusual in that it needs a lot of lush, nutrient-rich soil to thrive. Aside from that, doing the routine of minimal water and moderate sunlight is all you need to make them happy.

Saguaro Cactus – Best for Traditionalists

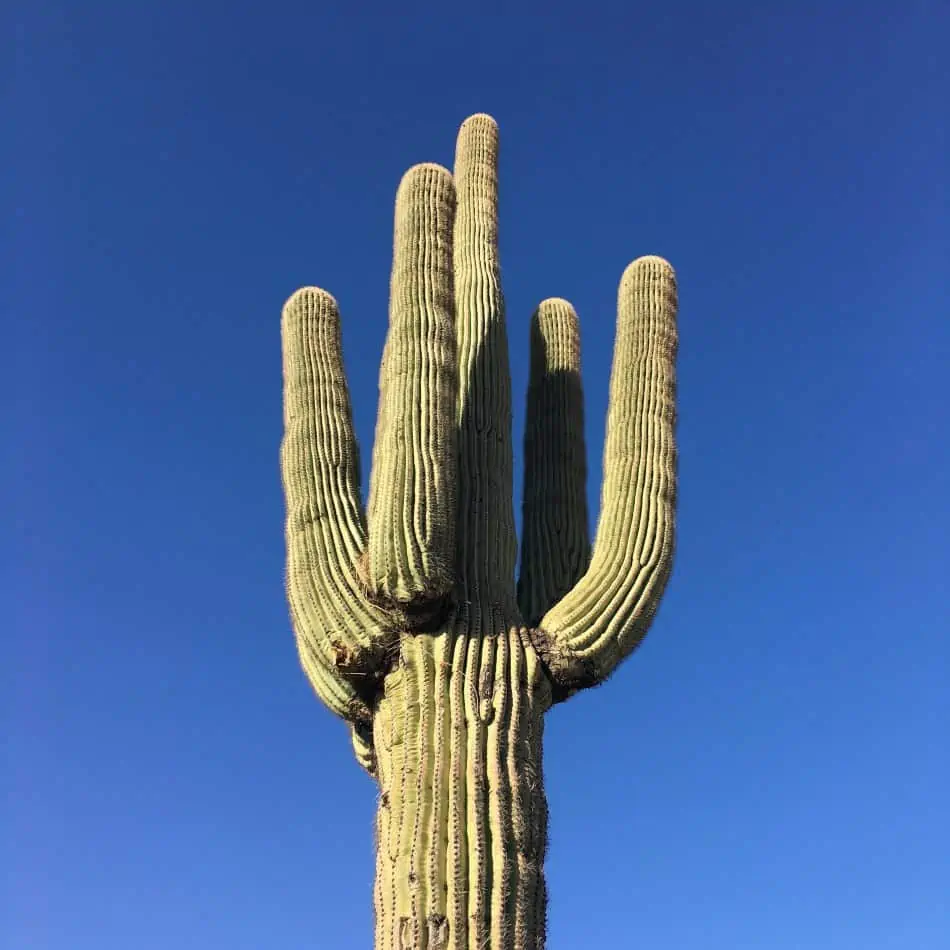
When most people think of a cactus, they are thinking of a Saguaro cactus. These cacti are the tall, spiny plants that are typically tower above people when they’re left to grow out in the United States. Their reputation for being extremely tall often dissuades people from having them, but don’t dismiss them quite yet.

Saguaro cacti are known for being huge, but they start off incredibly petite. They also are notoriously slow growers, so the fear of having your cactus poke holes in your ceiling is unfounded. If you love petite cacti, you will love how cute Saguaros can be when they are young and placed in a small pot.

If you choose to get a Saguaro, you might need to be a little more involved than a typical cactus owner. You will need to house it in draining grit and give it minimal water. Lots of sun and warm weather are a must-have for these gentle giants.

Believe it or not, Saguaro cacti can blossom. However, chances are you will not see them bloom since it can take up to 35 years or more before a single blossom can happen.

Queen of the Night Cactus – Best for Night Owls

A blooming queen of the night cactus.
Queen of the Night Cactus displays its mesmerizing pearly white to pinkish blooms during nighttime.

Cacti typically bloom in the daytime, but not this one. The Queen of the Night only will display its gorgeous flowers during nighttime. Despite the gothic name, the flowers on this home-friendly cactus are a beautiful, almost pearly white.

Like Saguaros, the Queen of the Night is a cactus species that has a reputation for being a tall grower—and rightfully so. These perennials can grow up to a whopping 10 feet tall if they are given enough space and time. These plants love shady areas that mimic the darkness of jungle floors.

When adding soil, make sure that your cactus gets a nice amount of ventilation. If you want then to bloom, make sure to add fertilizer to their soil once during the spring. These cacti are slow growers, so don’t be disappointed if they do not seem to noticeably grow.

Picking the Right Cacti for You

Every cactus is a little different in terms of maintenance, biological needs, and appearance. Some cacti are known for being a little on the plain side, while others are celebrated for their vibrant flowers. Some, such as the Barbary Fig, are noted for their edible fruits.

You cannot treat cacti like a “one size fits all” matter. If you want to choose a good cactus for your lifestyle, it’s important to consider these factors:

  • Sunlight. Most cacti require bright, direct sunlight. If you live in a shady area, this limits the number of cacti you can grow. You might be better off with a Queen of the Night, or a Moon Cactus in those cases.
  • Free Space. Cacti vary greatly in size. Some can be as tiny as an inch high. Others can grow up to dozens of feet tall. If you have limited space, it’s important to choose a cactus that “maxes out” at a small size or that grows exceptionally slowly.
  • Temperature. Though some cacti can survive in temperatures as low as 10 degrees Fahrenheit, most require a temperature around 50 to 70 degrees to live. Some thrive in even higher daily temperatures, so placing your cactus near a heater might not be a bad idea.
  • Blooms. Not all cactuses have flowers, though most of them do. If you are focused on aesthetics, then you might want to learn more about how each cactus blooms and what it means for your apartment or home’s look.
  • Potting. Believe it or not, some cacti have a hard time sharing pots with others. For example, the Saguaros are famous for competing with other plants’ resources and killing them through nutrient draining. Other cacti work well in groups.
  • Required Maintenance. Cacti might be low maintenance compared to most other types of plant life, but that does not mean they all have virtually no need for help. Some cacti are more demanding than others—especially when it comes to fertilization, water, or sunlight. If you are worried about being tight on time, getting a notably low-maintenance cactus is ideal.

What Are the Best Types of Cacti to Grow Indoors?

The best cacti for newbies all have a couple of traits in common. They are hardy, they require little water, and they are not going to grow too tall too quickly. 

Are Cacti Safe to Have Around Pets?

Unlike other plants, cacti are generally not poisonous. This makes them a great choice for people who have pets that like to chew on things or kids who might be a little too curious for their own good. Though they might not be poisonous, they still aren’t for every household.

Some cacti have spines that harbor bacteria on their spikes, which can cause a variety of ailments. You should research the cactus’ toxicity before bringing it indoors if you’re concerned about poisonous plants near your pets or children. While most commercially sold cacti are not poisonous, it’s always better to be safe than sorry.

What Do You Need to Grow Cactus?

Growing cactus is not as demanding as other flowers, like roses or orchids. That’s one of the reasons why they’re appealing to newbie gardeners and why busy homeowners tend to love having them around.

Though they are easy to grow, you still need to get supplies. While the distinct needs of each cactus species can vary, these supplies below are usually advisable:

  • Clay Pots. Most cacti need to be in clay pots rather than plastic pots. The clay helps wick away excess moisture and keep soil dry.
  • Cactus Soil. While some cacti can use regular potting soil or a mixture of sand and soil, getting quality soil designed with cacti in mind is usually ideal. If you cannot find cactus soil near you, most cactus types can also make do with potting soil that has small amounts of sand mixed in.
  • Fertilizer. Though cacti don’t need a lot of nutrients in most cases, a little fertilizer is still necessary. This is doubly true if you want them to bloom.
  • Gravel. This isn’t required, per se, but a lot of homeowners find that adding a light (or sparse) layer of multicolored gravel can help bring a new level of beauty to a potted cactus or succulent.

Are Cacti Safe to Have Around Kids?

Since cacti are generally prickly (unlike succulents), it’s important to make sure that any cacti you choose to raise will not be near klutzy people or near kids who might get reckless and prick themselves.

Certain age groups are at particular risk of getting pricked or having cactus-related injuries. If you are a parent to a toddler or children under the age of six, it’s best to consider getting plants other than a cactus.

Are There Any Types of Cacti You Should Avoid?

For the most part, commercial growers do not sell cacti that are openly dangerous or unusually high maintenance. If you are new to growing cacti, you should stick to common, mainstream species.

Exotic species are rare to find in households for a reason. They are often species that require extremely specific growing conditions, cannot be sprouted naturally, or are poisonous to the touch. There are also exotic cacti that cannot be grown indoors or transplanted into a different pot. That is usually why stores are hesitant to sell them.

It’s not always easy to know if a cactus is exotic or poisonous. If you are in a specialty store, the best thing you can do is ask some of the staff members to advise you on which cacti are better for indoor gardens or beginners.

Can You Plant Multiple Cacti in One Pot?

The general answer is yes, as long as the cactus types you choose are not known for competing for resources and are given ample space. Many cactus gardeners start out their indoor gardens with larger pots containing multiple types of cacti.

Mix of succulent and cactus in a pot.
It’s better to stick multiple plants of the same type in a single pot.

If you choose to go this route, make sure to choose cacti that require similar soil types. Otherwise, you might end up causing one plant to suffer due to improper potting. If you want to keep things on the safe side, it’s better to stick multiple plants of the same type in a single pot.

How to Keep Your Cactus Alive During the Winter

Cacti are perennials that are a lot hardier than people make them out to be. The worry about keeping them at high heat is often unfounded since most cacti only need to have an average temperature between 40- and 60-degrees Fahrenheit. Some can go even lower, with a minimum temperature of 20 degrees.

It’s a common misconception that cacti look the same year-round, Many, if not most, cacti go dormant in the winter. If you notice your cactus looking a little wilted or brown, do not panic. Check to see if it’s time for it to go dormant and reduce your watering schedule. With time, it will be able to bloom once more.

Conclusion

When you’re just starting your own indoor garden, getting a cactus seems like an easy way to get a splash of color for minimal effort—and it absolutely can be. When in a house filled with responsible individuals, owning one or more cacti can be a great way to have a low-maintenance indoor garden that makes a serious statement.

Choosing a cactus that is appropriate for your indoor garden isn’t something you should take lightly. While everyone loves Moon Cacti, Barbary Figs, and Saguaros, the space and conditions you have available to you will need to play a deciding factor in which plants you choose to get.

After you choose the right cacti, the rest of your indoor gardening journey is pretty straightforward. All you have to do is follow the care instructions your cactus comes with, and with time, you’ll be able to see beautiful cactus blossoms and enjoy your garden for years to come.

Top 10 Desert Plants You Can Plant In Your Garden

No matter if you live in an arid environment or your thumb just isn’t as green as you’d like it to be, desert plants can make a gorgeous addition to your landscaping and give you a garden you can be proud of. Usually, when the desert is mentioned, our minds automatically revert to miles of sand and nothingness. Surprisingly, there is a large variety of desert plants with different colors, textures, sizes, and features to make your yard stand out.

The top ten desert plants you can plant in your garden are:

  • Texas Sage
  • Mexican Feather Grass
  • Pencil Plant
  • Living Stone
  • Zebra Cactus
  • Desert Marigold
  • Ocotillo
  • Aloe Vera
  • Fox Tail Agave
  • Paddle Plant

In this article, we’ll be discussing each of the above plants in detail, as well as providing you with some desert garden inspiration.

1.  Texas Sage (Leucophyllum frutescens)

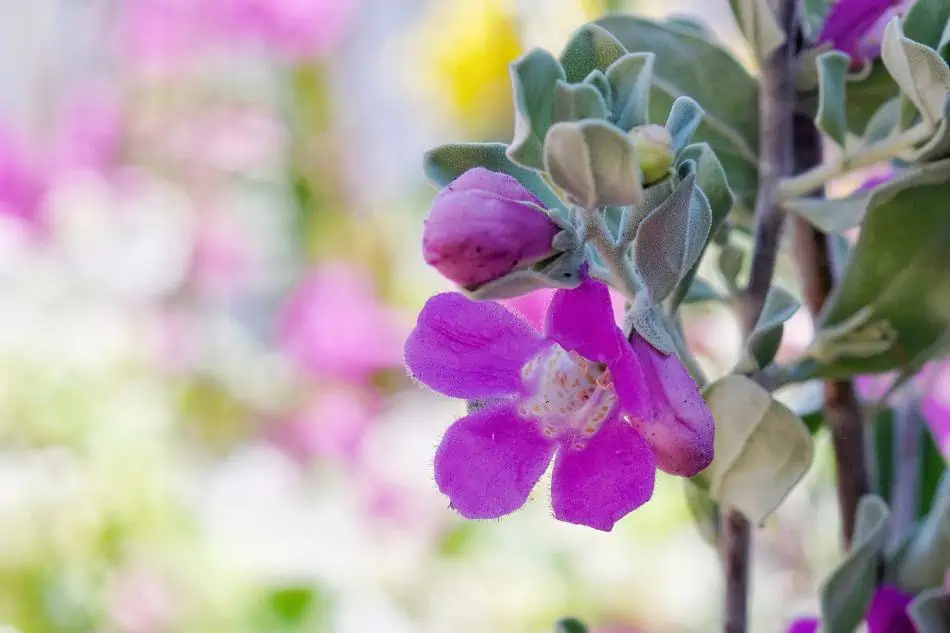
A texas sage plant.
Texas Sage is a beautiful low-maintenance desert plant with purple blooms.

A drought-tolerant desert shrub, Texas Sage is a hardy plant that can withstand areas with high heat and even low winter temperatures (down to 10 degrees Fahrenheit).

Though its thin branches and rounded, soft leaves may give this plant a dainty appearance, Texas Sage is tough and long-lasting, providing deer resistance to your garden and acting as a preventative to soil erosion thanks to its robust root system. Perfect for filling in significant gaps in your desert garden, this sage plant can grow upwards of 5 feet tall and wide.

While Texas Sage is mostly a pale green throughout the year, during summer, this shrub produces vibrant blooms of primarily lavender purple or white on each stem and continues to blossom through the fall.

Texas Sage Care

Because Texas sage is a desert plant, care is minimal and infrequent. Follow these guidelines for healthy Texas Sage:

  • Texas Sage should be placed in an area of your garden that receives full sun daily (around 6 to 8 hours).
  • This desert plant won’t need to be pruned. It’s best to let it be to keep it healthy and lush.
  • You should water Texas Sage once every week for about three weeks until your plants are well established in your garden. Then, rainfall should suffice to keep your Texas Sage quenched. If drought persists, water once and then water again when the soil is visibly dry. Don’t overwater. Too much water can kill Texas Sage.
  • Soil should drain quickly. Texas Sage is prone to root rot and should not be placed in areas that hold water for long periods.

In general, Texas Sage is a breeze to care for. You’ll barely have to water it and won’t have to water it at all during the rainy season, and it can survive pretty extreme year-round temperatures. Take care not to overwater, as these desert plants are sensitive to too much water.

Texas Sage Uses

  • Place at the back of a desert garden bed as a backdrop.
  • Use as a privacy screen around a patio or along the line between you and your neighbor’s property (be sure the plants are obviously on your side to avoid potential conflict).
  • Plant Texas Sage as a natural border around pool areas or to separate gardens.
  • Use as an outline around garden features such as dry riverbeds.

2.  Mexican Feather Grass

If you’re looking to add a flowy appearance to your desert garden, Mexican Feather Grass is the way to go. Hundreds of thin, long blades cluster together to create a wispy aura and are darker in color the closer you get to the roots. In the summer, this desert plant’s seed heads are a pale golden color and silky in appearance.

Mexican Feather Grass is a drought-resistant plant, as well as a deer preventative, making it great for hot climates. However, this ornamental grass is quite invasive and will readily spread to wherever it pleases. A plus side to its invasiveness is that it helps immensely with erosion, thanks to Mexican Feather Grass’ complex and deep root system.

Mexican Feather Grass Care

Like most desert plants, Mexican Feather Grass doesn’t require much babysitting. Here’s how to maintain these beautiful, dancing plants:

  • Plant in an area that receives full sun each day (around 6 to 8 hours) for the best results.
  • For the most part, rainfall is enough to keep Mexican Feather Grass watered sufficiently. However, for particularly hard summers, you may want to deeply water these plants once every month or two months.
  • Mexican Feather Grass should be planted in an area with well-drained soil that doesn’t flood.

To prevent spreading, remove the seed heads from your Mexican Feather Grass each summer and early Fall. 

Mexican Feather Grass Uses

  • Along hillsides.
  • In areas prone to erosion.
  • Along drive and walkways.
  • Near garden edging.
  • As a backdrop behind shorter plants.

3.  Pencil Plant

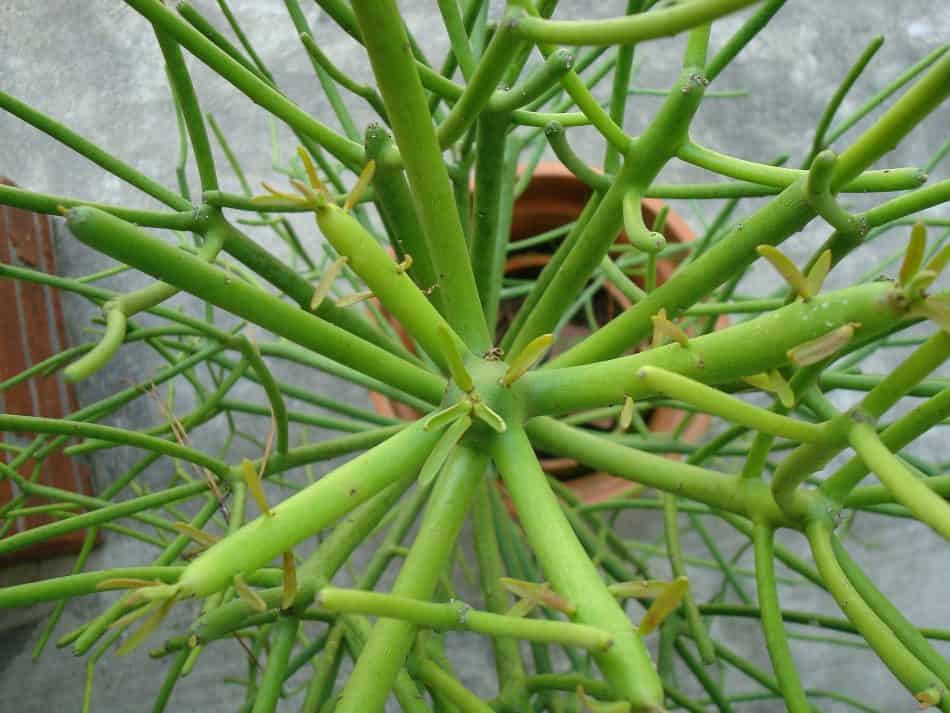
A pencil plant.
Pencil Plant is a drought-tolerant with rounded branches.

Native to Africa, the Pencil Plant is a highly drought-tolerant and interesting plant that would bring intrigue to any desert garden.

Naturally green in color, the Pencil plant will turn a coral or yellowish shade if it’s under environmental stresses such as too little water or cooler temperatures. Its branches are rounded and smooth in appearance and branch off of a central stem. In their ideal habitat, Pencil Plants can grow as tall as 30 feet and a few feet wide. In most North American habitats, it’s not unusual to see them reach heights of 6 or more feet.

Pencil Plant Care

Care for a Pencil Plant, though a little more than the previous plants on our list, is still relatively low:

  • The plant should receive between6 to 8 hours of full sun each day.
  • Pencil Plant should be watered once every 2 or 3 weeks in the summer. Not at all in the winter.
  • Plant in soil that is gritty and well-drained.

Pencil Plant Uses

  • Use as a splash of color in your desert garden. Purposefully withholding water (for example, only watering once a month) can change the color of your green Pencil Plant to coral.
  • Plant on any high ground. Because Pencil Plant can grow so large, their towering figures would look beautiful on hilly landscapes.

4.  Living Stone

A living stone.
Living Stone is characterized by the stone-like appearance and the ability to stay alive in harsh conditions.

A definite show-stopper and conversation-starter, Living Stone is a desert plant you won’t want to miss out on. A low-lying succulent (around an inch tall) with a slick-top surface, Living Stone resembles just that — a colorful, patterned desert stone. This Africa Native thrives in blistering temperatures and would make a unique addition as fillers for your desert garden.

Living Stone Care

Doing best in extreme environments, it’s important not to baby your Living Stone plants to keep them happy and healthy.

  • Don’t water when dormant (fall to spring). In the summer, rainfall should suffice. If it’s particularly dry, water once a month when the ground is visibly parched.
  • Plant in full sun (6 to 8 hours daily).
  • Soil should be sandy and well-drained.

Take care not to overwater. These plants have adapted to harsh conditions. Too much water will kill Living Stone.

Living Stone Uses

  • As filler plants. Any small space that is barren could be made green with Living Stone.
  • Plant between boulders or in a rock garden.
  • Plant alongside a walkway.

5.  Zebra Cactus

A zebra cactus plant.
Zebra Cactus is pretty similar to Aloe Vera, but it has white stripes like a zebra.

To add a pattern to your desert garden, consider the eye-catching Zebra Cactus. With a similar appearance to Aloe Vera, one striking difference of this plant is its oddball coloring resembling the stripes of a zebra.

Though the rigid leaves are dark green, they boast bright white stripes that are enough to draw anyone’s attention right to your desert landscape. They’re generally small in size, around 5 inches tall, and slow-growing, making them great for virtually any garden.

Zebra Cactus Care

These plants aren’t one to make a fuss out of severe living conditions. Care is minimal and infrequent:

  • Zebra Cactus does best in partial sun (4 to 6 hours daily).
  • Watering is okay every 3 to 4 weeks. As a general rule of thumb, water thoroughly and then allow the soil to dry out before watering again.
  • Soil should be well-drained. Rocky soil is also okay.

Zebra Cactus Uses

  • As a filler or anywhere that needs color.
  • As a focal point in a desert garden.
  • Would look beautiful in a rock garden.

6.  Desert Marigold

A flower of Desert Marigold.
Desert Marigold forms bright yellow flowers with 2-inch diameter.

For a splash of color in a neutral-toned desert garden, the Desert Marigold has your back. These dashing desert perennials can grow to two feet tall and wide and adorn themselves in bright yellow florets at the end of each stem. You can expect them to bloom in spring and continue to bloom throughout the summer. Frequent rains in the fall have even been known to encourage a few more blooms.

These colorful flowers are sturdy, seedy, and will come back year after year, providing you with an even more colorful garden as their offspring take root.

Desert Marigold Care

Caring for Desert Marigold isn’t very difficult. For the most part, these flowers can thrive just about anywhere and are practically self-sufficient.

  • Desert Marigold should be planted in an area that receives full sun (around 6 to 8 hours daily).
  • Generally, rainfall is enough to keep these plants happy. However, you can water whenever the soil is completely dried out to encourage more prominent blooms.
  • Desert Marigolds don’t require a specific soil, as long as it’s well-drained.

Desert Marigold Uses

  • A great option for color. Could be used as a focal point or for splashes of color throughout a large desert garden.

7.  Ocotillo

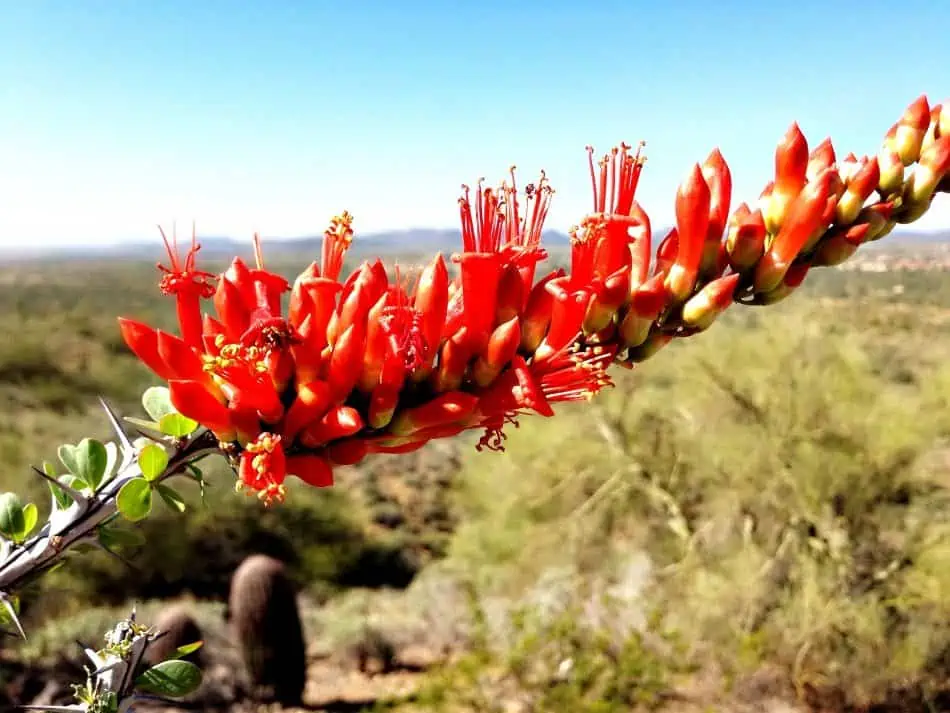
A Ocotillo.
Ocotillo comprises 20 to 30-feet tall individual spiny stems and bright red flowers at the end of each branch.

Another excellent choice for color in a desert landscape, Ocotillo is a desert-native that features red tubular flowers at the end of each spiny branch. They bloom March through June and their flowers cluster. When water is plentiful, Ocotillo will grow 2-inch leaves along the length of their stems, creating a fluffy, wispy appearance.

These beautiful plants can grow to heights as tall as 20 feet and have a lifespan similar to that of the average person. They’re also a friend to hummingbirds and finches, thanks to their bright red florals and abundant supply of nectar. Ocotillo can withstand the highest of desert temperatures and make it through winters with temperatures that drop as low as 10 degrees Fahrenheit.

Ocotillo Care

Strong and adapted to harsh weather, Ocotillo won’t need a hand to hold throughout its long life. A little care here and there is all that this desert plant needs:

  • Watering is few and far between. For newly planted Ocotillo, water once every couple of weeks in the summer. Once they’re established, water your Ocotillo plants once a month.
  • Plant Ocotillo in full sun (6 to 8 hours daily).
  • Ocotillo grows best in rocky, sandy, well-drained areas. A well-drained, sandy, or gritty soil will help your Ocotillo thrive.

Ocotillo Uses

  • As a natural barrier. Because it grows so tall and wide, Ocotillo would make the perfect natural fence.
  • For landscaping on hillsides or land that is barren. If you own acreage or have hilly land, these tall shrubs would add some color to your landscape.

8.  Aloe Vera

A aloe vera plant
Growing in sunny areas, Aloe Vera comprises long and spiny leaves with a triangular shape.

Aloe Vera isn’t only good for burns and cuts — it’s also a staple in desert gardens. With a variety of Aloe species on the market (and an even greater variety of sizes, textures, and colors), you’re bound to find one that fits your desert garden perfectly.

The size of Aloe ranges anywhere between 2 feet to the much larger 70-foot plants and consist of long, spiny, triangular leaves that spread upwards and outwards as they grow. They’re generally green in color, but can be yellow or sprout flowers of bright orange and red.

Overall, Aloe is an excellent option for desert gardens, especially gardens that are gravelly or sandy and receive lots of sun.

Aloe Vera Care

While Aloe Vera is generally drought-resistant and tolerant to bugs, its care can vary based on species. The following are general guidelines for keeping your Aloe healthy:

  • Sunlight requirements vary for Aloe. As a general rule of thumb, the smaller the species, the less light it needs. Small Aloe varieties usually do best in part sun (around 4 to 6 hours each day). Larger Aloe plants require full sun (6 to 8 hours per day).
  • As with the majority of desert plants, Aloe Vera should only be watered when the soil is visibly dry all the way through — about once every three weeks.
  • Plant in a well-drained, gravelly, or sandy soil for best results.
  • Don’t plant in a low-lying area that collects water.

Take care not to overwater your Aloe Vera plant, as these desert plants are most often killed by root rot and cannot tolerate sitting in water for long periods.

Aloe Vera Uses

  • Would look brilliant in a succulent desert garden.
  • Place them in between low-lying, bushy desert plants for height and texture variation.
  • Plant alongside walkways for a dramatic visual to the front door.

9.  Fox Tail Agave

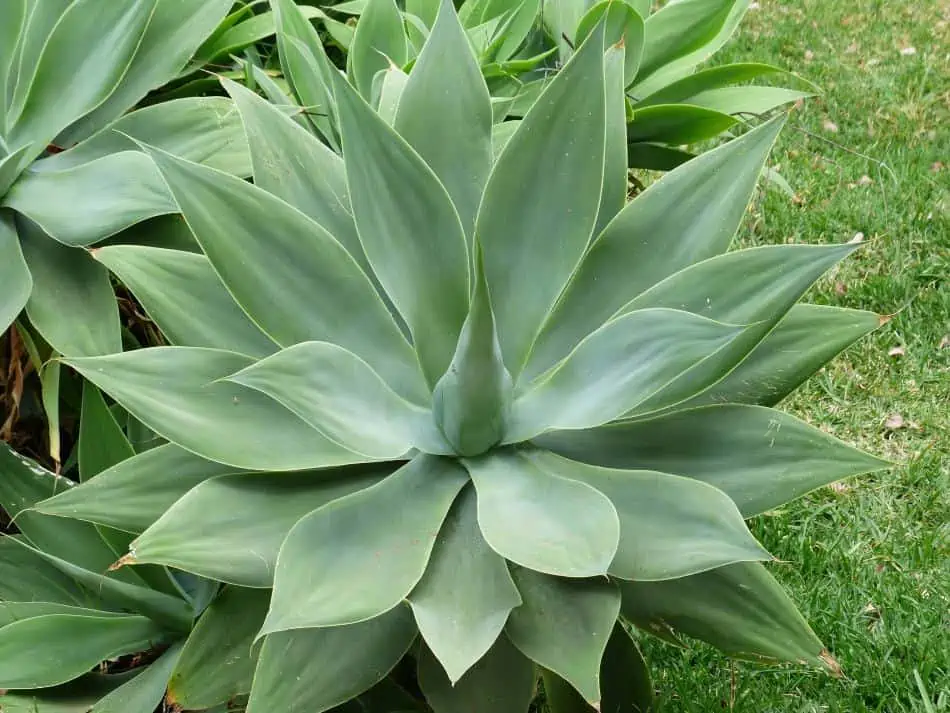
A fox tail agave plant.
Fox Tail Agave needs slightly acidic and sandy soil which can also be well-drained.

Unlike the other desert garden plants on our list, the Fox Tail Agave is an evergreen succulent, meaning that it’s green and gorgeous all-year-round. With the appearance of a flower, Fox Tail Agave consists of multiple, triangular-shaped leaves that curve upwards, creating a cupped look. This plant can reach 4 feet wide and 4 feet tall and often features a 5 to 10 feet tall flowering stalk that emerges from its rosette in the summer.

If you live in an area with plentiful fauna, you’ll be happy to know that Fox Tail Agave is deer-resistant and virtually pest and disease-free.

Fox Tail Agave Care

Though still a fantastic choice for a desert garden, Fox Tail Agave is a bit more sensitive to actual desert conditions:

  • Place Fox Tail Agave in full sun (6 to 8 hours daily). If your garden doesn’t receive full sun, place in a part shade area.
  • Soil should be slightly acidic, rocky, sandy, and well-drained.
  • Though it tolerates drought, Fox Tail Agave should be watered whenever the soil is visibly dry.
  • This plant doesn’t do well in harsh winter conditions. Be sure to cover to protect from the cold.

Though Fox Tail Agave is a Mexican desert native, it still requires a bit more care than the other desert natives on our list. Be sure to water whenever the soil looks dry.

Fox Tail Agave Uses

  • Great as a focal point plant. If your desert garden consists of mainly low-lying plants and shrubs, Fox Tail Agave will serve as an eye-catching focal point.
  • Plant with other large succulents, like Aloe, to create a lush desert oasis feel.

10. Paddle Plant

An increasingly popular plant for desert gardens, the Paddle Plant features bright red coloring along the edge of each of their green leaves — ideal for adding a pop of color to your desert landscaping. The texture of the Paddle Plant is smooth with rosettes of round, flat leaves, reaching 6 inches in length. Paddle Plants may grow as tall as 2 feet. During the summer, a mature Paddle Plant may sprout sweet-smelling, yellow blooms.

A cactus paddle plant exposed to sunlight.
The texture of the Paddle Plant is smooth with rosettes of round, flat leaves, reaching 6 inches in length.

Paddle Plant Care

An Africa native, Paddle Plants are pleasantly drought-resistant and heat-tolerant. They require minimal care but can burn when exposed to too much sun.

  • Place in an area that receivespart sun daily (around 4 to 6 hours) or in an area that receives bright, indirect full-sun.
  • Water whenever the soil is visibly dry. Do not overwater, as Paddle Plants are prone to root rot.
  • Plant in soil that is sandy and well-drained.
  • Place in an area that doesn’t retain water. Higher elevation is best.

Take care not to water the leaves of Paddle Plants. This will help to prevent the leaves from rotting and result in a longer lifespan.

Paddle Plant Uses

  • Paddle Plant would look beautiful in between large cacti or wide-spread, tall succulents.
  • Perfect for adding vibrant color in areas that are dull, such as rock gardens or desert gardens with neutral-colored plants.

Final Thoughts

As you can see, desert gardens aren’t limited to cacti. Desert plants such as Fox Tail Agave, Ocotillo, and Desert Marigolds can add a splash of color and interesting textures to your landscape without increasing the amount of time you spend maintaining your garden.

Cactus Fruit: How To Cut, Health Benefits, Tips, And Risks

Disclaimer: The author is not a medical doctor or veterinarian. The information presented is purely to share our experience and for entertainment purposes. As always, check with a doctor and/or veterinarian before making any health or nutrition decisions and consult with a doctor and/or veterinarian regarding any question or problem that you have. The author and blog disclaim liability for any damage, mishap, or injury that may occur from engaging in any activities or ideas from this site.

Cactus fruit is a staple produce item for many people in Mexico, especially during the summer when the fruit is at its most ripe. The fruit is widely available across Mexico as it grows wild, on plantations for mass production, and can even be grown at home.

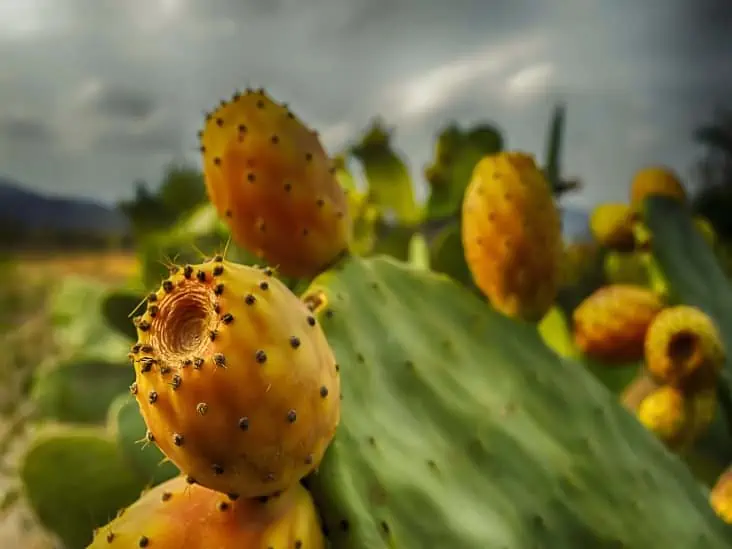
What is cactus fruit? How to cut and eat cactus fruit? Cactus fruit refers to the fruit that grows on the prickly pear cactus, often called tunas. The fruit can be eaten after using a knife to score and then remove the skin. The fruit may be cut into chunks and eaten raw or is used as a key ingredient in many dishes and beverages.

The popularity of cactus fruit is growing outside of Mexico because of its delicious natural flavors, versatility, and health benefits. You may have heard of cactus fruit referred to as prickly pear or tuna fruit. If you do not know much about the fruit, how to eat it, or what to use it in this article will give you all you need to know.

All About the Prickly Pear and Its Fruit

A prickly pear cactus.
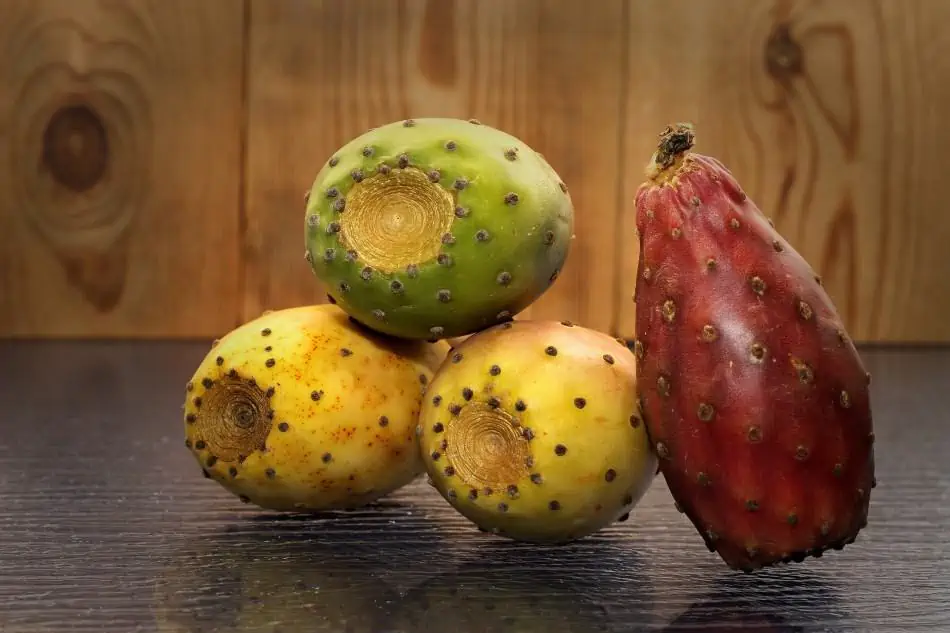
Prickly pear cactus bears fruit that might have yellowish-orange, green, or dark pinkish color.

Prickly pear cacti have flat, thick pads that look like large leaves, but actually function more like branches or stems to the plant. The pads are responsible for water storage, photosynthesis, and flower production. These pads are also known as nopales. Nopales are edible and often sold in stores under the name nopalito.

The fruits of prickly pears, more commonly known and sold in stores as tunas, vary based on the species of prickly pear. The cactus fruit will vary in size, with the largest varieties comparable to the size of a kiwi. The cactus fruit is round, with some varieties being longer and others more spherical. The color of cactus fruit can vary from shades of yellow, green, and deep magenta. The sweetness of the cactus fruit will depend largely on the color of its skin.

Yellow-green cactus fruits are the less sweet variety, but they are most popular in Mexico. In contrast, the deep magenta cactus fruits are very sweet; they are compared to bubblegum or syrup by some.

On both the cactus fruit and cactus pads are glochids, tiny, barbed spines. These spines can be difficult to see, making them extra bothersome if one is to stick to your skin. Glochids need to be removed entirely before consuming the cactus fruit, which will be explained further in the article!

Where Can You Get Cactus Fruit?

Cactus fruits can be store-bought or, depending on where you live, harvested fresh off the prickly pear cactus. Keep reading to know what to keep in mind while picking your cactus fruit!

Picking Cactus Fruit

A gloves.
To protect your hands from glochids and spines, wear safety gloves while handling cactus fruit.

For safety, protecting your hands is very important while picking cactus fruit. Because of spines on the cactus pads, and glochids on both the fruit and pads, you will not want to touch the cactus or its fruit with your bare hands.

To protect your hands, you can use:

  • Thick, protective gloves
  • A thick towel or cloth
  • A pair of long tongs

You will also need a durable bag or basket to safely hold the fruit until you get the chance to remove the glochids later.

No cactus fruit is poisonous, so all are safe to pick, but some will be better tasting and for cooking than others. You will want to look for the darker-skinned, sweeter fruits. Fruits of lighter color are less ripe and will taste less sweet. However, check darker fruits for any wrinkling or bruising that may suggest they are over-ripe. To pick the fruit off the plant, just grip and twist the fruit. Ripe fruits should come off without much force.

Store-Bought Cactus Fruit

A cactus fruit.
If you do not want to waste time and energy on removing glochids, you can purchase the fruit in the store.

Store-bought cactus fruit will usually have the glochids removed before being put on the shelves. This makes picking up the cactus fruit at a store a convenient option. 

When shopping in your store’s produce section, you will want to be mindful of the color of the cactus fruit to get the sweetness you are looking for. Also, look out for any bruising that may have been caused by damage to the fruit during shipping or any wrinkling that may suggest the cactus fruit is overripe.

How to Remove the Glochids

A potato peeler, tape, glue and flame.
You can use household items to remove glochids from cactus fruit: potato peeler, flame, non-toxic glue, or tape.

Luckily, the skin of cactus fruit is not eaten. With the skin removed, it is highly unlikely any glochids would ever be consumed. Still, you will want to be very careful that there are no glochids on the fruit before you begin handling it.

Removing glochids is essential if you picked cactus fruit yourself. Again, store brought fruit is, in most cases, safe to handle already. Remember to pay attention to the tops and bottoms of the fruit, because the glochids are often more closely clustered there.

There are a few ways to go about removing the glochids. Pick one that is most convenient for you and what you have handy in your kitchen!

  1. A Potato Peeler. With thick gloves and a potato peeler, you can remove the glochids by cutting them off with the potato peeler.
  1. An Open Flame. A flame will singe off any glochids. You can take advantage of this by using a small flame and a long pair of tongs to hold the cactus fruit over it. Rotate the fruit carefully as not to burn the skin. Continue until all the glochids are removed.

The spots where the glochids are clustered and growing from getting darker when they have fallen off. Do not worry if you hear popping noises or see little sparks from the fruit as the glochids are coming off.

  1. Non-Toxic Elmer’s Glue. This method will use the stickiness of the glue to pluck the glochids off the fruit. Again, while using gloves, apply a thin layer of glue over the surface of the fruit. It may be helpful to use a small brush to apply the glue, as you cannot smooth the glue out with your hands. When the glue is visibly dry, peel it back gently, lifting the glochids from the cactus fruit’s skin.
  1. Tape. If you do not have glue, you can follow the same process using tape that has a non-toxic adhesive. Just secure the tape on to the fruit’s skin and gently peel back, removing the glochids.

Helpful Tip: If any glochids, especially the hard to see ones, do latch on to you, you can use the glue or tape method to remove them from the skin as well!

How to Thoroughly Wash Cactus Fruit

A person washing his hands.
Before consuming cactus fruit, it is crucial to thoroughly wash it and remove remaining glochids.

Washing the cactus fruit is important as is washing any fruit, but also because washing will further remove any of the finer, hard to see glochids.

If you picked your cactus fruit, you will want to make sure it is clean after coming in from outside. If you bought your cactus fruit you will want to make sure it is cleaned thoroughly after any shipping and handling and can ensure any glochids missed in large scale removal are washed away.

  1. Use a colander and place enough cactus fruit to fill only roughly halfway, the exact amount will vary with the size of your colander and cactus fruits.
  2. Rinse under cold water, gently swirling around the cactus fruit in the colander for at least thirty seconds to a minute. You can add fruit and vegetable wash to this step if you wish. Be careful to be abrasive enough that they are all moved around and rinsed thoroughly, but without bruising the fruit.
  3. When finished, lay out to dry or carefully pat dry.

How To Cut Cactus Fruit and Remove the Skin

A cactus fruit.
After getting rid of all glochids, you should cut the cactus fruit and remove the two layers.

Once your glochids are thoroughly removed, and the fruit is clean, you are ready to cut into it! Cutting a cactus fruit will mainly serve to remove the skin, revealing the delicious pear-shaped fruit inside.

The skin of the cactus fruit has two layers to it. This is important to know, so you are sure to remove the skin thoroughly. There is the thin outer layer of skin and attached to that is a thicker, softer layer around the fruit as well. The underneath layer may seem like part of the fruit as it has a pulp-like consistency, but it should be noticeably different than the fruit underneath, and it is attached to the outer layer, so it should easily peel off it with it.

  1. Start by slicing off the end of the fruit. Remove about a quarter of an inch off each end.
  2. Make four lengthwise slices in the skin from top to bottom. The slices should cut through the tough outer skin and the pulpy layer of skin underneath too.
  3. Now your skin should be divided into four sections. Starting from the top peel back each section one by one.

Once you have the cactus fruit peeled, how you eat it is up to you! Eating the fruit raw is very common. To do so, you can simply cut the fruit in half lengthwise and eat it with your hands, or you can enjoy it by chopping the fruit into cubes or slices.

When you cut open the cactus fruit, you will see that the center has small, round seeds. These seeds are tough and cannot be bitten through but are safe to consume. It is a personal preference if you choose to remove the seeds by scooping them out or spitting them out while eating or to eat the fruit and seeds in entirety simply. 

Health Benefits of Cactus Fruit

A person measuring her waist line.
Cactus fruit is a nutrient promoting weight loss, decreasing blood sugar levels, and improving digestion.

Like any other fruit, cactus fruit can be a healthy and nutritious part of any diet. Choosemyplate.gov recommends 2 cups of fruit a day for most women and men. Cactus fruit is a great way to get your daily fruit intake up!

Cactus fruit has many health benefits:

  • Cactus fruit is micronutrient dense.

Like all fruits, cactus fruit contains essential micronutrients. The cactus fruit is a source of iron, magnesium, vitamin C, potassium, calcium, and vitamin B6. Vitamin C and magnesium have the highest percentage values in a serving of cactus fruit.

  • Cactus fruit is a great weight-loss food.

As a food low in calories, but high in micronutrients, cactus fruit is a great choice for those looking to lose weight or maintain a healthy weight. The fiber found in the cactus fruit keeps people fuller for longer, a helpful component to weight loss.

  • Cactus fruit can improve digestion.

High levels of fiber and anti-inflammatory properties make the cactus fruit a great way to support proper digestion. The fruit can help food move along the digestive tract and be digested efficiently.

  • Cactus fruit is good for heart health.

The cactus fruit is a great source of fiber, which is why the fruit has been associated with lowering cholesterol. Soluble fiber may help lower total blood cholesterol levels and provide other heart benefits as well. (Source:mayoclinic.org)

  • Cactus fruit can decrease blood sugar levels.

Cactus fruit has been shown to decrease blood sugar levels, making this fruit a helpful dietary component for many people with diabetes. (Source:webmd.com)

Cosmetic Uses of Cactus Fruit

An oil being applied on the skin.
Olives derived from prickly pear are rich in vitamin E and can be used as a skincare product.

Just as the prickly pear cactus has an array of positive health effects when eaten, it can be a powerful ingredient in cosmetic products. Specifically, the oil derived from seeds found in the prickly pear cactus have become a major ingredient in many skincare products.

Prickly pear seed oil is high in vitamin E.  The oil has been found to have three times the vitamin E found in argan oil. (Source: munskin.com) Along with vitamin E the oil contains lower concentrations of other essential fatty acids, antioxidants, and vitamin K.

Prickly pear seed oil benefits the skin by reducing the appearance of fine lines, preventing the formation of wrinkles prematurely, brightening dark under-eye circles and reducing hyperpigmentation. Some find that the prickly pear oil’s antiinflammation properties can be of help to those who suffer from rosacea as well. (Source: victoriahealth.com)

Using prickly pear seed oil protects the skin’s barrier and increases moisture. The moisturizing properties of prickly pear seed oil can also benefit dry, damaged hair or dry, brittle nails, and cuticles.

The oil from prickly pear seeds in light and absorbs quickly when used. Unfortunately, prickly pear seed oil is among the costliest of beauty oils available. The price tag reflects the large amount of seeds that are required to exact even just an ounce of the oil.

Possible Side Effects and Risks

While cactus fruit has many potential health benefits, you should exercise caution introducing any new food into your diet, and the fruit is no exception.

Some side effects of eating prickly pear can include:

  • Nausea
  • Diarrhea
  • Increased stool volume and/or frequency
  • Headaches

When eating cactus fruit, be sure to practice healthy portions and proper washing for the safest possible experience. If you are pregnant, breastfeeding, or on any medication ask your doctor if cactus fruit is a safe addition to your diet and discuss possible consequences.

Ways to Eat Cactus Fruit

Cactus fruits on deserts, salads, and sweetener.
Cactus fruit can be used as a primary ingredient in salads, sorbet, syrup, jam, or gummy candy.

While cactus fruit is great when eaten raw, it can also make a great key ingredient in many delicious recipes. The sweet flavor of cactus fruit can be used in many different recipes and treat, ranging from simple to more complex. Here are a few ideas on how to use your cactus fruits in a new way!

  1. Add Cactus Fruit to Salad. Whether adding it into a fruit salad or as a sweet note in a savory salad, the cactus fruit mixes well with other fresh flavors. Adding cactus fruit to a salad brings in a kick of sweetness and pop of color to the dish.
  2. Fruit Jam. Cactus fruit can be a great base for a beautifully bright jam. The jam will store well and be a versatile item to have around the kitchen, going great with toast, on yogurt, in pastries, and more!
  3. Cactus Fruit Sorbet. A perfect summer treat to cool down with can be a scoop of sweet and brightly colored cactus fruit sorbet. Simply substitute cactus fruit, the main ingredient in your favorite sorbet recipe. You can even save from fresh cactus fruit to throw on top!
  4. Cactus Fruit Gummy Candy. The sweet taste of cactus fruit is reminiscent of candy naturally. By combining the fruit with pectin, added sugar, and optional ingredients, you can make your own gummy candy from the cactus fruit!
  5. Cactus Fruit Simple Syrup. By cooking prickly pear fruit down in a simple syrup recipe, you can create a fruity syrup that is perfect for adding to drinks or topping ice cream.

Drinks Made with Cactus Fruit

Drinks made from cactus fruits.
Cactus fruit can be used to make different drinks, including lemonade, aguas frescas, margaritas, and sangria.

Prickly pear syrup and juice are also commonly used to add flavor and sweetest to drink. Whether you prefer non-alcoholic options or want to add a boozy kick with the cactus fruit flavor, there is a drink option for everyone to try and enjoy.

Prickly pear juice or syrup are commonly added to:

  • Lemonade. The sweet flavor of the cactus fruit combines with the tartness of lemon to make a perfect balance of flavors. The combination is a mix of refreshing summery flavors everyone can enjoy.
  • Aguas Frescas. Aguas frescas, meaning cool waters, are non-alcoholic drinks made by mixing fruit juices, sugar or honey, and water. Cactus fruits are a perfect compliment to these sweet refreshments.
  • Margaritas. The sweetness of cactus fruit syrup pairs great with the sourness from lime juice and adds a pop of bright pink color that will surely make your margaritas stand out!
  • Sangria. Adding cubes of cactus fruit to this fruity drink only makes sense! You can add cactus fruit to your favorite sangria recipe or find a new recipe made just to compliment the fruit’s flavor. Popular ingredients in a cactus fruit sangria are white wine, citrus, and even mint leaves.

Different Types of Prickly Pear Cactus Fruit

As mentioned earlier, there are many species of prickly pear cactus, which is where the variation in fruit size, color, and taste comes from.

  • Indian Fig Prickly Pear. This is the most commonly known and consumed species of the prickly pear cactus. The fruits of this cactus vary in color yellow, to shades of pink and red. The fruits are very sweet and commonly used to make cactus fruit flavored candies, jellies, or drinks.
  • Spineless Prickly Pears. While this species does not have sharp spines, the glochids are still present on the cactus pads and fruits. This variety is very similar to the Indian fig prickly pear. Spineless prickly pears bear sweet fruit with flavor that is compared to kiwi. The fruits of this prickly pear cactus are smaller in size than most and contain smaller seeds than other varieties.
  • Purple Prickly Pear. These prickly pears are recognized for a beautiful, light purple hue on the pads. Cooler temperatures, drought, and other stresses on the plant will bring out the blue hue more significantly. The fruits of this prickly pear cactus are mildly sweet in taste.
  • Naranjona. Naranjona is a type of cactus fruit with a honey-sweet flavor that has a subtle spice to it. The texture is especially smooth. These cactus fruits are round and orange in color, which is where they get their name from. Naranja is the Spanish word for orange.
  • Juana. Juana cactus fruit, also called roja, are a notably tart variety. The juana cactus fruit is round and with purple and reddish toned skin. The seeds are this fruit are chewier than other varieties, making it preferable to some people who enjoy eating the raw fruit and seeds.
  • Xoconostle. This species of cactus fruit is very sour and best when used in cooking as opposed to being eaten fresh. This species is also unique in that it has an edible peel, which is sour as well. This cactus fruit may be used in sauces and as a spice. Xoconostle cactus fruit is small and a light yellowish green in color.

If you are interested in the fruit of the prickly pear cactus, knowing a bit about the different types can be helpful knowledge. Likewise, if you are following a recipe which uses prickly pear, be sure to get the suggested species or that the species you use compliments the recipe you are making.

Cooking the Pads of the Prickly Pear Cactus

A prickly pear cactus bearing fruits.
Prickly pear pads can be used as a food ingredient. Nopales is a Mexican dish incorporating these cactus pads.

Just as the fruits of the prickly pear cactus are edible and commonly incorporated into Mexican cuisine, so are the pads of the cactus. As mentioned, they are sold as nopales or nopatilos and are eaten like a vegetable. The pads are thick and fleshy; some may even describe them as appearing slimy before being cooked.

When they are cooked, the flavor of nopales is comparable to green beans. For cooking, nopales are sold whole or can be found cut into strips or cubes for convenience.

Nopales can be cooked in a variety of ways:

  • Boiling Nopale. Boiling nopales may require multiple changes of water, because the sap in the pads is very thick and gets released during boiling. Once the nopale is soft and finished boiling, rinse the pads in cold water to remove any sap that may have been in the last batch of water.
  • Grilling Nopale. Grilled nopale is tender and should have slightly browned skin.
  • Sautéing Nopale. Sautéed nopale will be similar to grilled with a tender texture and browning on the skin.  
  • Steaming Nopale. Another method of cooking nopale is steaming. This will make the skin and insider texture entirely tender.

Once cooked nopales are very versatile and useful in a wide variety of dishes. Common ways of eating nopales include:

  • Tossing into salads
  • Cooking into stews and soups
  • Adding into omelets
  • Baked into breads
  • As a side serving of vegetables
  • Soaking the noaples in brine and using it as a condiment

Conclusion

Cacti are an intriguing group of plants that are unique in their appearance and resilience in tough terrain. Among cacti, the prickly pear cactus stands out on its own. With all of the uses and benefits from the plant’s fruit and pads, it is no wonder the little plant with a spiky, tough exterior is so widely consumed and enjoyed.

Interest in the cactus fruit is widely growing. Research continues to strengthen the relationship of cactus fruit consumption to health benefits, to the point some are beginning to argue it deserves the title of superfood. The cosmetic industry is just learning of its powerful cosmetic effects and finding new ways to incorporate the prickly pear’s seed oil into beneficial products for consumers.

A peeled prickly peared cactus fruit.
Research continues to strengthen the relationship of cactus fruit consumption to health benefits, to the point some are beginning to argue it deserves the title of superfood.

And of course, the traditional Mexican recipes of cactus fruit and the raw, natural flavor of the fruit are being enjoyed by more and more people. Likewise, those just discovering the fruit are sure to get creative and cultivate new, delicious recipes with it.

Whatever way you come to hear of cactus fruit, you now know what this little fruit is all about, and that it is more than just a passing fad on the market. Share your favorite way of eating or preparing cactus fruit with us below. We’d love to try it out!

How to Water Cactus: The Ultimate Guide

Cacti and succulents can be a gardener’s best friend. They are easy, low maintenance, and can grow just about anywhere, indoors or out. Some might say they require no care at all.  But those folks would be wrong. Just like any other plant, cacti and succulents do require care. It is just a different kind of care than many traditional plants you are accustomed to.

How do you water a cactus?  Saturate the soil, then allow it to fully dry out before watering again. In landscape, for desert cacti, you want a dry depth of 2” or more, depending on cactus size. For indoor potted cacti, a dry depth of at least 1½” to 2” is best. Good drainage is key to avoiding root rot.

There is an old joke… how do you water a cactus?  VERY carefully! Though that is true, there is a lot more involved than wearing chain mail gloves and standing 6’ away. Issues include where is the cactus located, what season is it, what kind of cactus or succulent do you have, what type of soil are you using, what is the ambient temperature and on and on and on?  Each answer can play a role in “how to water cactus.”

Cactus or Succulent?

A top view of different kinds of succulents and cactus,
To know how to properly water your plant, you should first identify if it is a cactus or other type of succulent

First, not everyone knows if they have a cactus or a succulent. These are different, but related plants. A cactus is a type of succulent, but not all succulents are cacti.  With me so far? An example might help. A Prickly Pear or Saguaro is a cactus. Aloe Vera is not a cactus, but it is a succulent.

In this context, a succulent is defined by Cambridge Dictionary as “a plant such as a cactus in which the leaves and stem are thick and can store a lot of water.” On the other hand, a cactus is defined as “any of a type of plant that grows in the desert, having thick stems for storing water and usually spines”. There are more than 1,750 different cactus species throughout the world.

In a true cactus, the base or “stem” is extremely thick and almost tree-like in some species.  The “spines” or “thorns” are actually modified leaves, that help reduce moisture loss by being tightly furled. Like more traditional plants, cacti have stomata to exchange oxygen and carbon dioxide with their environment. However, in cacti, the stomata are located in the base or trunk, rather than the leaves.

A cactus stores water in its trunk/stem. In some species, you can actually see the plant change in size and shape before and after thorough watering.  The barrel cactus and the saguaro cactus are both good examples of that. Pad-type cacti, like the prickly pear for example, also store water in their pads.

There is an incorrect assumption that cacti (the plural of cactus) do not need water, or at least not much. Not accurate. Cacti are much better at storing water than other plants, but that does not reduce their need for water.

Cacti are simply very drought resistant. Their natural environment is the desert, where water comes and goes intermittently. When there is good access to water, the base will expand or the “pads” will expand, depending on species.

If you have ever cut into a cactus or a succulent, you know the interior is a wet, juicy, pulpy material. This is how the water is stored. As water is needed, the cactus can pull it from the pulp and use it in normal cellular functions.

Additionally, during dry time or drought conditions, most cacti can go into an almost suspended state. Growth is greatly reduced or stopped until conditions improve.

Succulents, overall, also need less frequent watering than cactus because they also are able to store water in their fleshy areas. Unlike cacti, succulents lack substantial spines or thorns as a prominent feature.

Location and Soil Type

Now that we’ve identified if you have a cactus or a succulent, the next thing to note is where is your plant located and what type of soil does it have?

Indoors

A cactus near the window.
You can always monitor and modify soil type, heat, humidity, and sunlight for indoor cacti.

If your cactus is indoors, planted in a pot, you are able to control external variables like heat, humidity and sunlight. The most important thing to note, in this event, is what type of soil is in your container? Cacti, and succulents in general, prefer soils that drain or percolate very well.  The worst thing you can do to your spiny little friend is to put him in some peat moss and keep him damp all the time.

Cacti do best in loose, porous, pebbly or sandy soil materials.  They require good aeration and, as noted, plenty of drainage. Their root systems are specialized to live within these harsh conditions. 

  • First, they are covered with a cork-like outer layer, that helps reduce water loss to the soil itself.
  • Second, they have an extensive shallow root system that acts almost web-like to catch as much water as possible when it is available. New roots form quickly when water is available.
  • Third, cacti are able to dehydrate new root growth when the soil begins to dry. This leaves small air pockets in the soil, preventing any water from seeping back out of the root system.

Living in a pot in your home, you need to keep this root system in mind. Make certain your pot is more than adequate to allow for good root growth. Remember, we’re talking lateral growth, not vertical. With controlled environments, most cacti will not need to be watered more than every 10 days, or so. The biggest risk you have with this situation is overwatering the little guy and causing “root rot”.

Cactus roots are simply not designed to sit in a wet environment. You need to water very thoroughly, then allow the soil to completely dry out before another watering occurs. Check soil depths as far down as 2” to make sure they are fully dried before you water again. Do not “mist” your cactus. It does no good, whatsoever.

Outdoors

A matured cactus.
You can take proper care of outdoor cacti by thorough observations.

I live in Arizona. We get less than 9” of rain annually. However, over 2/3 of that comes in a 2-month timeframe.  We call them the “monsoons”. A storm will build over the course of the day. In the afternoon, a torrential rain may occur. It can drop up to ½ inch or more in less than 30 minutes. Then, it’s gone.  These storms pop up in different locations and rain off and on throughout the entire southern third of the state in the months of July and August.

Beyond that….it’s dry as a bone. Seriously, the lead-in story on the news is when it rains. Cacti LOVE it! Most desert environments are comparable.  It is VERY hot and dry 9-10 months per year. Then, you have a short “wet” season, where the rains will torrent down. Flash flooding is common.  This is prime growth season for cacti.

Because deserts tend to have sandy soils, the water drenches the roots well, but does not linger. This wet/dry cycle is the key to good cactus water management. You need to mimic this watering cycle, as best possible. You need a good draining, loose type of soil. Do not go out and buy moisture-retaining mulches, this will just lead to root rot.

When the weather is hot, DRY, and sunny, you will water more frequently. If it is cooler, or you live in a humid area, your watering levels will decrease. Some species actually go dormant during the off-growing season. In that event, you may go months without needing to water, depending on the rainfall in your area.

If there is a lot of humidity, the ground will stay wet longer, reducing your watering frequency. Like an indoor plant, when you do water, you will want to saturate the soil, then allow it to fully dry out before watering again. With larger outdoor plants, you may need to check down as far as 6” to 8” to make certain that soil has dried.

What Type of Cactus Is It?

Regular, houseplant types of cacti generally come in two forms. The first is the “traditional” cactus. You know, spiny thorns, lives in the desert, grows in shapes likes paddles, balls and obelisks. 

The other form is the “forest” cacti. This type of cactus is native to wetter, more temperate areas. Like their name indicates, they are indigenous to temperature forests, and include tropical and subtropical regions. A good example is the Christmas cactus. As you can probably guess just from that information, these cacti have very different care needs, including watering.

Traditional or Desert Cacti

A Saguaro cactus.
Saguaro is one of the desert cacti, which prefers drained soil and temperatures from 55 to 55° to 80°F.

As we discussed earlier, traditional or desert cacti prefer well drained soil. If you’re using a commercial brand, make sure it has a high perlite content. For forest cacti, regular potting mix is fine.

Traditional or desert cacti prefer temperatures in the 55° to 80°F plus areas. During their growth season, traditional cacti will do much better in the warmer temperatures, but you will want to keep them cooler and protect from drafts during their rest periods. They are also not fond of a lot of humidity. If you live in a humid area or it is during your rainy season, the desert/traditional cacti water frequency needs to drop substantially.

Forest or Jungle Cacti

A Rhipsalis clavata.
Rhipsalis Clavata needs to be watered more often compared to desert cactus species.

Many forest cacti don’t really look much like cactus at all. They lack the spines or thorns we generally associate with cactus. They are usually either epiphytic, meaning they grow on trees or other organic materials or they are lithophytic, meaning they grow on rocks. Both get their water and nutrients from rain, dust, air, dead leaves, etc. Neither are parasitic, they simply utilize the other structures for support.

For obvious reasons, you will want your soil to mimic these conditions as closely as possible. Good soil materials include orchid bark, potting soil, pumice and oak leaf mold. It is important that the soil is loose, airy and provides extremely good drainage. Forest cacti are watered more like a regular houseplant than like a cactus. You will want to water it regularly during the summer months and especially when buds begin to appear.

During its resting period, you will water only when the soil is dry to the touch. Like other succulents and cacti, overwatering can result in root rot. Forest cacti have a temperature range comparable to desert cacti but will do well dropping to the 50s even during their growth season.

Unlike desert cacti, you will want to re-pot your forest cactus every 2-3 years. The best time to do so is after it has finished blooming. Providing fresh new soil mix at that time is a good idea.

With your forest or jungle cacti, you will want to water after the top 0.5cm (a little less than 1/4”) is dry. It the stem segments are shriveled, and the soil is dry, the plant is probably in need of water. Be careful, shriveled stem segments can also be a symptom of overwatering. The soil itself is the best gauge of watering frequency.

Other concerns that may affect your forest cacti include lighting and humidity levels.  A really great resource for forest cacti specifically is worldofsucculents.com.

Identifying your type of cactus may be as easy as reading the little tag in the pot when you buy it. If not, you may need to do some research.  There are some very good online sources for identification. My favorites include plantsam.com, cactiguide.com, and drought-smart-plants.com.

Watering Your Cacti

A person watering plants.
Knowing how to water different types of cacti is of enormous importance for their proper growth.

We’ve been addressing this question throughout our conversation, but I think it’s best if we pull it all together in one location. That way, we avoid any misunderstandings.

Watering Your Indoor Desert Cacti

Starting with indoor desert cacti. You will generally water these about every 10 days, or so. For the first month or two, there will be a little trial until you identify the best schedule for your cactus to thrive.

Thoroughly soak the soil. If your pot has a hole at the bottom, make sure the water is running through the hole.  Begin checking soil moisture about 7 days later. If you have a moisture guide, that makes it easy. If not, put your finger in the soil. You want to be dry at least 2” down.

If you aren’t sure if it’s dry or not, a telltale sign is the soil being cooler toward the top than it is lower, that temperature gradient is indicative of moisture. When you hit that magic 2” mark, it is time to water again. Over the course of a couple of watering cycles, you’ll establish how often to water. Remember, watering frequency will need to increase when it is hotter than normal indoors. If you have evaporative cooling, it will need to decrease based on the increased humidity in your home.

Watering Your Indoor Forest Cacti

A christmas cactus.
Christmas cactus requires fully saturated soil that can drain through the hole at the bottom of the pot.

If you have indoor forest cacti, you want to fully saturate the soil. Again, if you have a pot with a hole at the bottom, make sure the water is running out the hole. If not, don’t be afraid to put some significant water on it.

Begin checking soil after 5 days. With forest cacti, you only need to be dry down about ¼”, rather than the 2” for desert cacti.

Some aficionados prefer to place a saucer of water under the pot and allow the cacti roots to pull the water up. This can work, but it is imperative the roots do not touch directly in the water, as that would lead to root rot. The safest way for your cactus is the soil down method.

There is no need to spritz or mist either type of cactus. They don’t get their moisture in this fashion, so it does absolutely no good, whatsoever.

Watering your Outdoor Forest Cacti

A watered cactus.
Outdoor forest cacti should be watered every 3 days during hot months and once a week during winter.

Honestly, most people keep forest cacti indoors, as they are a very decorative plant. However, that is not a requirement, so we should address the possibility here.  Most do not do well in direct sun, so please be sure you have planted in an appropriate location.

You will probably want to maintain this in a pot, rather than plant it directly in the ground. If that is true for your forest cacti, begin with the same instructions as indoor plants. Do not be surprised if you have to increase water frequency to less than once per week, however.

During the warmer, summer months, the watering frequency may increase to as often as every 3 days, depending on temperature, wind and humidity levels.

Watering Your Outdoor Desert Cacti

A matured golden barrel cactus.
Golden Barrel cactus needs to be watered considering the temperature, humidity level, and size.

Outdoor desert cacti are the trickiest of the bunch. So much is dependent on the temperature, humidity level, size of the plant and other variables. With smaller plants, less than 2’ high, the 2” depth margin for dry soil remains a good yardstick. However, if you have larger plants, like saguaro or good-sized prickly pear, you need to adjust accordingly.

Recommendations would be waiting to water until soil conditions are dry 3” down for plants 2’ to 4’ tall and dry down to 4” for plants taller than 4’. Regardless of height, you will want to saturate the soil thoroughly, remembering this must be good draining soil.

Overwatering = Root Rot

A different kinds of plants.
To prevent your cacti roots from rotting, you should never overwater them.

The biggest risk to your cacti, whether it is indoor or outdoor, desert or forest is the risk of overwatering. Remember how we talked about cactus roots being specialized to live in low-water environments? This specialization is what lead to problems with overwatering. When your cactus sits in too much water, the roots can’t handle it properly. The outer coating begins to break down and rot sets in.

Over time, you can actually see the rot occurring, as your base near the soil turns first mushy, then brown, then ultimately black and shriveled.  All hope is not lost! The sooner you identify the rot, the more likely you are to salvage the situation and save the plant.

Here are the steps to salvaging an indoor plant with root rot:

1.        Remove the entire cactus from the pot. You’ll probably want to use kitchen tongs or a comparable tool to do this. Place it gently on its side and remove as much dirt from the root system as you can without causing any further damage.

2.        Trim off any roots that are brown, black, smelly, or oozing.  The affected roots will be very obvious. It is recommended you use bypass pruners for this step. Dust the remaining roots with powdered sulfur and allow the plant to lay in the air, roots exposed for 1-7 days, to allow the cuts to scab over. Be sure to disinfect the pruners thoroughly before you put them away.

3.        Using a pot (terra cotta is best) slightly larger than the former pot the cactus was in, fill it about 2/3 full of commercial cactus potting mix. Place the cactus carefully in the pot, without bending any of the now brittle roots. Fan the feet across the soil. Continue filling the pot loosely with enough soil to bring the level back to where it was in the former pot.

4.        Wait about 2 weeks before watering the cactus deeply.  Then, begin your water regimen again, remember to check soil moisture levels carefully before re-watering.

Steps to salvage an outdoor (landscape) cactus with root rot are a little different:

1.        Mark the north side of the cactus with chalk before you begin to dig it up. It is important to keep the cactus oriented the same way when you re-plant. Uproot the cactus by cutting a circle around it with a shovel about 6” from the base. Be sure you use the shovel to lift it gently from the base area before lifting it from the ground.

2.        Using tongs for smaller cacti or a garden hose for larger ones, move the cactus into a wheelbarrow and transport to a shady area to assess the situation.

3.        Lay it on its side, with plastic sheeting underneath. Brush away as much loose dirt as possible to get a good view of those roots. Using pruning shears, remove any roots that are black, brown, soggy or smelly. Dust the remaining roots with powdered sulfur. Place a shade cover over the cactus and leave the roots exposed to air for at least 2 days to allow for scabbing over the cuts. Disinfect your pruners!!!

4.        While you wait for the scabs to form, we need to identify the problem. It is probably a drainage issue, so let’s dig a hole about a foot deep where you’re going to re-plant. Fill the hole with water and wait for it to drain. Then, fill it again. This second-time monitor how long it takes to drain. If you’re draining less than 2” per hour, you have some work to do.

5.        If we’ve identified a drainage issue in step 4, we’re going to address it here. Loosen the soil 18” to 24”. Add 2” of sand to the loosened soil and mix thoroughly. Test the drainage again by filling the hole and monitoring the drainage rate. If you have added more than 4” of sand with no improvement in drainage, you will need to prepare a large terra cotta pot full of commercial cactus mix to re-plant the pot in.

6.        To re-plant, carefully place with cactus in the hole you’ve prepared or the partially filled terra cotta pot. Remember to face the chalk mark north. Carefully spread the roots out on the soil, while being careful not to bend them. Fill in soil around the cactus until you’ve reached the area the soil was at prior to the rot occurring.

Withhold water for 2 weeks. Then water deeply. Allow soil to dry out to a depth of 2” to 3” before watering again. Monitor your water frequency closely and check soil moisture routinely prior to watering.

Final Thoughts

Though cacti and succulents are wonderful plants to grow both indoor and outdoor, lack of knowledge about their needs and requirements can be deadly. I’m not suggesting you need to go become a cacti expert if Aunt Edna gives you a nice little Christmas cactus, but I am saying your lack to understanding its needs can be detrimental.

If you want that gift to thrive, or even survive, first you need to know what you have and how to care for it. Remember, Christmas cactus and other forest-type cacti prefer indirect sunlight, moderate temperatures and moisture frequencies of around a week.  Let their soil dry out to a depth of at least ¼” before watering again.

A freshly watered christmas cactus.
Water requirements will fluctuate greatly throughout the year.

Water requirements will fluctuate primarily based on growing season, interior temperature and humidity. Desert cacti love direct sunlight, warm temperatures and low humidity. Remember to let their soil dry out to a depth of at least 1½ “ to 2” if they are in pots and 2” or more if they are landscaped, depending on size.

Water requirements will fluctuate greatly throughout the year. Primary variables will include temperature, sunlight, wind, humidity and growing season. Take care of your cactus or succulent and you can enjoy it for years.

Can You Cut Off A Piece Of Cactus And Plant It?

Overly active children, marauding cats, a careless bump, or an unexpected accident can easily knock a piece off your loved cactus plant. If such a thing ever happens to you, no need to worry because you don’t have to throw away the cut piece.

While the main plant can still survive even after losing part of its stem, it may seem wasteful to throw away the dislodged part and forget everything.

So, can you cut off a piece of cactus and plant it? The simple answer is yes. A significant number of cacti species can easily be propagated from cuttings. Some of the common cacti species usually propagated from cuttings include a hedgehog, prickly pear, and branching columnar cacti such as the night-blooming cereus. 

Also, if a section of your cactus breaks off accidentally, don’t throw away the broken piece. Instead, root it and let it grow into a new plant.

In this post, we discuss everything you need to know about propagating cacti plants from cuttings. Whether you have taken the cutting from your plant intentionally or it has broken off accidentally, we are going to teach you how to grow new plants from the cuttings.

Taking a Cutting from Your Cactus

A small pot with a different kinds of cactus.
Carefully taking the cuttings is essential for the proper growth of the cactus.

When it comes to propagating a cactus from cuttings, you need to be careful with how and where you take your cutting. In fact, this step will determine your success in the long run. If you make a mistake at this point, your cactus cutting may fail to grow into a new plant.

The first thing you need to do is choose a healthy and mature plant where you will be taking your cutting from. If your plant has pads, be sure to select a mature one even if other smaller pads have started growing on top of it.

Once you have identified a good plant to take cuttings from, put on protective gloves and carefully cut off a section of the plant that is at least a few inches from the top. You can use a sharp knife or hand saw to accomplish this step.

Make sure you take the cutting at an angle so that rainwater doesn’t start collecting on the parent plant because it can lead to rot issues. You should also disinfect the knife or handsaw before you take the cutting.

This is to ensure that you don’t transmit bacteria to the plant via existing wounds on its surface. If you don’t feel comfortable holding a cactus plant with your hands, feel free to use a pair of cactus pliers or tongs.

Rooting Your Cactus Cutting

Once you have your cutting, you will need to do a few things before you root it.

First, set your cutting in a dry, cool area away from direct sunlight for a few days. If possible, keep the cutting in a vertical position to prevent roots from growing out on the sides of the cutting and to help it remain straight while drying.

Let the cutting rest for a few days to form a callous at the cut end. Don’t take the cutting and plant right away because it will only rot and you will have nothing at the end of it.

Callousing seals and protects the wound from bacterial and fungal organisms that could easily cause the cutting to rot once it has been planted.

1. Rooting in a pot

A pot with drainage holes.
While rooting the cuttings, you should select a proper container along with suitable potting mix.

Once your cutting has dried and calloused completely, it is time to root it so it can start growing into a new plant. You can choose to root your cutting in a planting pot or the ground. We shall talk about both methods.

If you decide to root your cutting in a pot, make sure you find the right pot size. For a cutting, you don’t need an enormous container.  Just find something appropriate that won’t appear too large for your cutting. Ensure the container you choose has plenty of drainage holes.

The next thing you need to do is fill your pot with an appropriate potting mix. Let us discuss a few things about the soil because it plays a crucial role in the survival and rooting of your cactus cutting.

Just like mature cacti plants, your cactus requires porous, well-draining soil. Keep in mind that if the soil holds water for too long, it may cause rotting of the cutting at the base. To be on a safe side, consider adding plenty of perlite or sand to your soil to improve drainage.

Now, fill the growing pot with the potting mix and carefully insert the cutting into the container.  Your cutting should penetrate at least two inches into the soil if it is small (less than six inches) and three to four inches deep if the cutting is more than six inches long.

Consider supporting your cutting with small stones or two wooden stakes with twine to keep it in an upright position.

Keep the newly planted cuttings away from direct sunlight. You can position your pot in a brightly lit location but make sure the cutting is well protected from direct sunlight until roots are well established.

You want to avoid sunburns and dehydrating your cutting before it develops a stable root system.

2. Rooting in the ground

If you don’t have an appropriate pot size, you can still root your cutting in the ground.  If you choose to take this route, be sure to loosen the soil in the spot where you want to plant your cutting.

After that, dig a hole in the loosened soil that is deep enough to place the calloused end of your cutting in the ground a few inches deep.

Small cactuses on the ground.
Be sure to loosen the soil in the spot where you want to plant your cutting.

In most cases, you may be forced to mound small stones around the cutting for support, especially if the cutting is from a columnar cactus.

Once you are sure that roots have successfully formed and your cutting is now firmly anchored in the ground, remove the stones.

Should I Water the Cutting Immediately After Planting?

A person watering the plant.
Overwatering will not make the cactus grow faster. Excess water will rot them and might even kill your plant.

When it comes to taking care of cacti plants, watering is a critical factor that you need to handle carefully. By now, you must be aware of the fact that overwatering kills these succulents much faster than underwatering.

So, how often should you water your cutting after rooting?  At the time of planting, consider wetting the soil thoroughly. From there, you don’t have to worry so much about watering because the cutting can remain in good shape for a few days or weeks before it requires another watering.

Any subsequent watering must be light and consistent. A good rule of the thumb is to lightly water your cutting once every week to keep it moist.  You should aim to keep the soil damp, not too wet.

Don’t try to force faster rooting by overwatering because the cuttings will only rot.

How Long Does It Take a Cactus Cutting to Develop Roots?

Typically, the rates at which cuttings develop new roots depend on a wide range of factors such as the size of cutting, type of cactus, and watering regimen.

Generally, it takes four to six weeks for the roots to form, but smaller cuttings tend to develop roots much faster than large cuttings.

To achieve better results, make sure you take time to prepare your cuttings properly beforehand and pot them in sterile rooting material to keep them from rotting or withering before they root. After rooting, most cacti plants will be ready for transplantation approximately one month later.

If a Cactus Breaks Off, Can I Plant the Broken Pieces?

Yes, you can.  Don’t throw away broken pieces of your plant because they can give you new plants. The only thing you need to do is to make sure that you are following the right steps in preparing the broken pieces for planting.

The first thing you need to do is to check the broken end of the piece. If it is crooked or broke, use a sharp knife to make a fresh cut to even the end out.

Set the broken piece aside for a few days to allow the wound to callous over in preparation for rooting. Make sure the cut end is dry and sealed over before you proceed to root it.

3 Tips for Successful Propagation

As a gardener, your joy is to see your cuttings /seeds develop into new plants to increase your plant collection. These tips will help you when it comes to propagating cacti plants:

1. Develop technical and mechanical skills

Take time to train your hand and eye because they are crucial in propagation. Most of the time, your head will know how, but your hand won’t be willing to do it. The best way to improve your skills is by practice.

2. Know your cacti species and its best form of propagation

A cactus on a claypot outdoors.
Each cactus is unique, know your plant species and what that works best for it

There are over 2500 cacti species in the world, and each one of them is unique. Therefore, strive to know your plant species and the form of propagation that works best for it.

3. Know the different plant structures and how they grow

The best way to learn about your cactus is to study it. Make an effort to know something new about your plant every day. Let it teach you, and once you understand how they grow, you will have an easy time propagating them.

Final Thought

Now that you know how to propagate cacti plants from cuttings, it’s time to go out there and practice what you have learned.

Feel free to experiment with new things and let us know how it goes. We love talking to cacti lovers all over the world. Subscribe to our email list for the latest gardening tips.

How To Propagate Cactus Pups?

A significant number of people start out with cacti plants as a gift plant and usually don’t think about propagation in the early days. However, as it grows and starts to blossom, many of them quickly turn into collectors, and questions such as “how do I propagate my cactus?” begin to rise. Fortunately, there are several ways of propagating cactus. 

So, how to propagate cactus pups? Generally, this is one of the easiest methods of propagating cacti since it doesn’t involve a lot of things. Pups are smaller versions of the parent plant that tend to grow at the base.  The process involves removing the offsets from the parent, rooting them in appropriate potting mix and watering appropriately.

Propagating cacti pups not only produces new plants but also plays a critical role in decongesting crowded pots.

Read on to find out everything you need to know about cactus propagation from pups and how to take care of newly propagated offsets.

Propagating Cactus from Pups- A Quick Overview

Top view of different kinds of cactus plants.
Various cactus species produce small offsets, called pups, which can be used for vegetative propagation.

Propagating cactus by pups is a vegetative form of plant propagation because it doesn’t involve transfer of seeds. The parent plant produces an offset asexually, and this is what you use to get a new plant.

The pup occurs as a small clump that you can easily separate from the parent plant and grow a new cactus from it. This is probably the easiest method of propagating cacti. Most of the time, it is relatively easy to separate the pup from the parent plant, and it will grow its roots and settle pretty quickly and often successfully.

In most cases, the pups will already have a small set of their own roots. Unfortunately, not all cacti species can produce pups. Therefore, before you start considering this propagation method, make sure the cactus species in your garden can produce offsets.

Types of cacti that grow pups/offsets

A golden barrel cactus.
The majority of barrel cacti produce pups at the base of the plant.

Many of the barrel and rosette types of cacti do produce offsets. Typically, the big barrel cacti form the biggest pups, and it is one of the best types of succulents to propagate using this method. The barrel cactus has a unique way of providing nutrients and water to its offsets and shading them from the harsh sun.

Most pups form at the base of the plant, but you may also find some along the stem or even on the pads. You can remove any of these offsets and root them in a container so they can grow into a new plant.

Cactus propagation by offsets/pups is easy and fast as long as you take clean cuts and allow the offsets to callous before rooting.

Generally, cacti plants you should consider propagating with pups must be large, round, and clump producing. The parent plant must be large, and the offsets must be at least the size of a small ball.

How to Propagate Cacti Using Pups- The Process

Once you are fully convinced your plant has good offsets/pups for propagation, follow the steps outlined below to turn your pups into new plants.

Removing cactus pups from the parent plant

A person checking the moisture content of the plant.
To successfully propagate cactus pups, you should cut away the offset at a 45o angle.

The first thing you need to learn is how to remove the offsets from the parent plant. Get a sharp kitchen knife and wipe it with some alcohol or a 10% bleach solution. This will disinfect it and prevent pathogens from finding their way into your cactus through the cut areas.

Locate a good pup and carefully cut it away at a 45o angle. Make sure your cut is slanted to deflect water so that the cut area doesn’t rot before it callus. Some gardeners love to dust the cut end of the pup with sulfur powder to prevent rot issues and fungal infection.

However, sulfur powder may not be necessary as long as you allow the cut end to callus fully before rooting. This may take a few weeks or one month, depending on the conditions in your home. You will know that the offset is ready for rooting when the cut end is dry, hardened, slightly shriveled, and whitish.

When obtaining the offset, make sure you remove soil from the top of the pup to see the joint between the parent plant and the offset. If the joint is clear, you may realize that disconnecting the pup manually is much easier.

If there is any part of the parent plant on the offset, be sure to cut it off. Otherwise, it will start to rot, and that may affect your pup severely.

Rooting the pup

After obtaining the pup, the next thing you need to do is root it. This step is only necessary if your pup doesn’t have any roots. To root your pup, consider placing it in a dry soil with some gravel for a few days or up to one week. Monitor it carefully and get it out as soon as it grows a few roots.

You can also place the offset in a small pot with sand, ground charcoal, and some perlite for it to grow roots.  Skip this step with all pups that have small roots.

Growing the offset

Once your pups have developed a few roots, it is time to pot them. Start by preparing the container and the potting mix for your offsets. Make sure the container has plenty of drainage holes and is of the right size. Cactus pups need a pot that is just slightly larger than their diameter at the base.

The soil should also have good drainage and gritty. You can purchase commercial soil or make your own by combining 50% perlite or pumice with 50% compost or peat.

Carefully place your pup in the soil, but do not push inside the potting mix too much. Only ¼ of the pup’s stem should be under the soil. Ensure your pup is stable enough so that it doesn’t fall over. Place the pot in a spot that receives bright but indirect sunlight and keep the soil moist.

However, do not water your offsets straight after planting. Wait for at least five days or one week before watering. This minimizes the chances of root rotting and fungal infections.

Another critical point to note is that some cacti plants tend to produce tiny pups beneath their stems. These offsets are often too small because they get less sunlight.

After separating such pups from the parent plant, dry them up for a couple of days before planting. After planting, leave them in the shade for a few days before you gradually move them to a bright spot.

What Kind of Potting Mix Should You Use for Pups?

A soil.
To properly propagate cactus pups, well-draining soil should be used.

The most crucial consideration when it comes to choosing cactus soil is drainage. Cacti plants love well-draining soil that doesn’t hold water for too long. If you are a beginner, we’d recommend going for a commercially prepared cactus soil.

However, if you are an experienced gardener, then you probably know how to make your own potting mix. Here are a few tips for success:

  • Dampen the potting mix thoroughly, but do not get it too soggy. Remember the fact that wetter soil encourages rapid fungal growth and root rot. Before introducing your pups into the soil, consider dipping them in a rooting powder containing a fungicide.
  • If you want to avoid the moisture problem completely, consider using pumice to start your pups and then transplant them to their permanent containers after they get some growth.
  • Keep your pups in a relatively warm area with plenty of bright, indirect sunlight and excellent air circulation. Give the offsets a little misting once in a while but do not water them heavily.
  • To achieve better results, just set the offsets on top of the soil. There is no need to bury them deep into the soil. As long as they are stable, they will automatically send out roots in search of soil.

How Often Should You Fertilize Propagated Pups

For a start, there is no need to fertilize your pups. Moderate watering and exposure to a sufficient amount of sunlight should do the trick. However, as the pups start to grow into plants, you should begin to apply fertilizer at least once in a year.

Woman applying fertilizer to the cactus.
Consult experts from your local plant nursery to establish the best type of fertilizer for your plant.

Do not apply fertilizer during winter because your cactus is dormant. Wait until spring or summer when the active growing season begins and give your plant a good dose of recommended fertilizer to promote growth and blooming.  Consult experts from your local plant nursery to establish the best type of fertilizer for your plant.

PS: After you give your cactus plant water that contains fertilizer, make sure you rinse the plant body. Otherwise, if you leave any fertilizer on the skin of the plant, there is an increased risk of the plant being sunburned or burned by the chemical itself.

Summary

That is it on how to propagate cacti from pups/offsets. Keep in mind that this is probably the easiest way to propagate cacti, and you shouldn’t experience any problems if you stick to the procedure outlined in this article.

The best time to propagate pups is late spring or early summer. Just make sure your pups dry up completely before planting.

If you have any comments or questions, let us know in the comments section below.

What Is The White Hair On Some Cacti Plants? Introducing The “Old Man” Cactus

Cacti plants have different appearances depending on their species and where they grow. For instance, a jungle cactus such as the holiday cactus plant has a different appearance from the Saguaro plant that thrives in arid areas.  However, one cacti species that stands out from the rest is the Cephalocereus senilis that is covered in white hair.

What is the white hair on some cacti plants?  The white-haired cactus plant is known as the “old man” cactus or Cephalocereus senilis. The most striking feature of this cactus is the shaggy coat of relatively long white hairs suggestive of unkempt hair on an old man. The coat is particularly noticeable in young plants. As the plant grows old, its stem begins to lose its covering, and some of the hairs start to fade away. Therefore, if your cactus plant is covered with white hairs, you could be cultivating the old man cactus plant.

In this post, we discuss everything you need to know about the old man cactus plant. Read on to find out where this beautiful grows, its optimum growing conditions, and how to take good care of it.

Why Cephalocereus Senilis Called The Old Man Cactus?

A matured old man cactus.
Due to white hairs all along the stems, Cephalocereus Senilis is commonly known as an Old Man Cactus.

Before we dive deep into other aspects of this plant, it is good to know why many people out there choose to call it the Old Man cactus.

One of the reasons why this plant is known as the Old Man cactus is obvious; the existence of long white hairs on the surface. After all, most of us associate white hair with old people. However, this is not the only reason why this plant attracted such a unique name.

Apart from the white hair, the plant is also incredibly long-lived. Typically, when grown in the wild, the Old Man cactus can live for as long as 200 years and grow to about 20 feet tall.

Cacti experts say that the primary reason why this plant can survive for such a long time is that its long, soft, and white hair protects it from both excessive heat and cold, which helps it to retain moisture for a relatively long period.

Although the relatively long hairs are quite soft, the plant still needs to be handled with a lot of care. The shaggy white hair covers sharp spines that can cause severe injuries when they penetrate your skin.

The species name of this plant (Senilis) is derived from Latin and loosely translates to “Old Man” in English.  The Old Man cactus is typically tall, thin, and its head and stem are covered with white hairs just like an old man.

Cephalocereus Senilis: A Brief Background

The Old Man cactus is a native of Mexico. It is one of the many species of cacti that grow in this country. The plant is also known as the Hoary Old Man cactus, and it thrives in semi-desert regions and rocky slopes at elevations of up to 5,900 feet above sea level.

The plant is a member of the family Cactaceae and the genus Cephalocereus. The Old Man cactus is closely related to other cacti species such as the Peruvian old man, Hedgehog cactus, and old man of Mexico. It blooms between April and May. The flowers are nocturnal and white or pale pink.

The Old Man cactus is one of the slowest-growing cacti. However, if you provide it with optimum growing conditions, it can grow up to 1 inch per year.

The plant can grow to a height of about 20 feet and a diameter of 2 feet. It typically takes between 50 and 60 years for the plant to reach its full potential size.

Growing an Old Man Cactus at Home

If you are looking for a beautiful houseplant with unique properties, then you should consider growing the Old Man cactus. Its unique appearance is quite reminiscent of an old man lightly cushioned by beautiful long wavy hair.

In this section, we cover some of the essential things you need to know about growing the Old Man cactus at home.

Cultivation

A pot with drainage hole.
Along with using suitable soil mix, you should select a pot with drainage holes for the soil to drain properly.

The Old Man cactus does well in fast-draining soil and full sun. If you prefer potting your plant, make sure you use a good potting mix, and the container should also have plenty of drainage holes to let out water pretty quickly.

You can purchase commercial soil or prepare your own potting mix by adding equal parts of pumice, perlite, or coarse sand to regular soil. If you are growing your plant outdoors, be sure to mix grit or sand with equal parts of native soil or compost to improve drainage.

The plant does well in slightly alkaline soil, so adding a handful of calcium to the soil at the planting time is an excellent way of keeping it happy.

When it comes to watering, make sure you water your Old Man cactus only when the potting mix is completely dry. During watering, soak the pot thoroughly and allow excess water to drain out as quickly as possible.

This plant requires very little fertilizer to thrive. Therefore, there is no need for overfeeding it because the results can be catastrophic. Always use a well-balanced water-soluble fertilizer once or twice a year to feed the plant.

Feeding should happen between April and October and make sure you dilute the fertilizer top its half strength.

Propagation

A top view of a soil, container and other gardening materials.
To propagate Old Man cactus, you should either use seeds or obtain fresh cuttings and root them in soil.

There are several ways of propagating Old Man cactus, but propagating from seed is the most effective way. In fact, some experts believe that it is the only way of propagating the plant. However, when kept indoors, these plants rarely produce any flowers or fruits, which make propagating from seed quite difficult.

Another way of propagating the plant is by removing and potting the small offsets that usually form at the base of the plant.

Be patient until the offsets are about two inches tall, and then break them off from the main plant. The good news is that pieces of any part of the Old Man cactus can easily grow into a new plant.

Once you take a cutting, let it cure for at least two days before rooting. This helps to prevent rotting.

Once the cutting form callus, carefully insert it into a mixture of half sand and half moist peat moss.  Position your container in a brightly light space, but make sure you are keeping your plant out of direct sunlight.

Keep in mind that it might sometime before you start noticing any significant growth. Just be patient and give your cuttings the best care possible.

Watering and Feeding

Water your Old Man cactus only when the potting mix is completely dry. During watering, soak the pot thoroughly and allow excess water to drain out as quickly as possible.

This plant requires very little fertilizer to thrive. Therefore, there is no need to overfeed it because the results can be catastrophic. Always use a well-balanced water-soluble fertilizer once or twice a year to feed the plant.

Feeding should happen between April and October, and make sure you dilute the fertilizer to its half strength.

Pests and Diseases

One of the good things about the Old Man cactus is that it is not susceptible to any serious pests or diseases. However, mealybugs and scale can be a problem, especially when the plant is not getting enough light.

If you notice any pests on your plant, the best course of action is to remove them by hand. You can also use a cotton swab dipped in rubbing alcohol to remove them.

Make sure you check for any signs of rotting, such as yellowing or wilting of the plant. This usually happens when the plant is getting too much water. If you notice any of these signs, cut back on watering and ensure the pot has good drainage.

Old Man cactus requires extra care

Old man cactus on hand.
The Old Man cactus requires special care to grow healthy and stay alive for years.

Unlike other cacti plants, the Old Man plant requires a bit of special care if you want to keep it alive for many years.  But it doesn’t mean that the Cephalocereus Senilis is hard to grow at home. It only requires special attention to thrive.

Everything starts with the potting mix- therefore; make sure you follow our advice on a well-draining potting mix. In fact, the plant is an endangered species, and having one in your home can be a massive privilege.

During summertime, when the sun is so bright, don’t be afraid to take your plant out and let it enjoy the bright light. The Old Man cactus loves the bright light and heat. If you don’t want to move it out, position it in a window that receives plenty of sunlight and let it rest there throughout the summertime.

During winter, keep your plant indoors but strive to provide as much light as possible in a cool and dry setting.  Typically, the plant grows well in temperatures of between 50oF and 60oF. Also, make sure you reduce the watering frequency during winter.

Bonus care tip: Consider planting your Old Man cactus in terracotta or unglazed pots because they are good at absorbing moisture and keeping the potting mix relatively dry.

Once you have potted your plant, do not disturb it at all. Avoid changing spots now and then and only consider repotting once every three to five years.

Does the Old Man Cactus Grow Better Outdoors or Indoors?

This plant is native to Guanajuato and Hidalgo in Eastern Mexico. These areas are relatively dry most parts of the year.  Coming from such conditions means that the plant is a little bit picky and requires specific conditions to survive and thrive at home.

If you can provide the right conditions outdoors, your plant will grow massively large and flower impressively.  You will have every reason to smile because the Old Man cactus can be a stunning addition to your outdoor cactus garden.

Old Man cactus expose to sunlight.
Don’t be afraid to take it outdoors during summer because it loves bright light and heat.

However, if you feel like you cannot provide the plant with the right growing conditions outdoors, feel free to keep it indoors where you can easily control the environment.  But don’t be afraid to take it outdoors during summer because it loves bright light and heat.

After How Long Does the Old Man Cactus Flower?

Just like other cacti plants, the Old Man cactus will flower under the right conditions. But one thing you must keep in mind is that this is a slow-growing plant, and you might have to wait for a relatively long time before you start to see it bloom.

When everything is done right, it can take between 10 and 20 years for this cactus to start blooming. If you feel like you have waited for too long, be sure to consult a cactus expert in your area to help you out.

Sometimes, you might not be providing your plant with the right conditions to aid in its flowering.

How Many Years Does the Old Man Cactus Live?

The lifespan of this plant is relatively long. If you can provide it with the right growing conditions, your plant will live for decades and might even outlive you. That’s why we advise that you take good care of it and ensure it stays healthy all year round.

On average, an Old Man cactus growing outdoors can live up to 100 years. However, those kept indoors have a shorter lifespan of between 50 and 60 years.

But this is still a long time, and you can be sure your plant will provide you with plenty of enjoyment during its lifetime.

The Old Man Cactus Is an Incredible Cactus!

The Old Man cactus is a unique plant that can add joy and personality to your home. The plant is popular because of its long, white hair that makes it look like an old man or a fairy tale troll.

Over the past few years, a few people have shifted to calling it “The Bunny cactus or the White Persian Cat cactus.”

No matter how you call it, we can’t deny the fact that this is a personable cactus that you should consider adding to your collection!

Can You Grow A Cactus From A Cutting?

Gardeners must always find a way of propagating new cacti plants to minimize the cost of acquiring new plants. In the wilderness, propagation from seeds is the most common way these succulents use to multiply, but that doesn’t mean it is the only way. As natural habitats of cacti and other succulents decline, the need to propagate and maintain these species through home gardening is more crucial.

So, the big question is, can you grow a cactus from cutting? The simpler answer is “yes.” In fact, propagating a cactus from a cutting is one of the easiest and cheapest ways of growing new cacti from existing cacti. A significant number of cacti species can be propagated by small cuttings taken from the stem of an existing plant, which are then allowed to dry out and be callous.

It doesn’t take long before the cuttings eventually start rooting from the cut end and growing into a new plant.

In this post, we discuss everything you need to know about propagating cactus from a cutting. Keep reading to discover how to expand your cactus collection easily.

Propagating Cacti from a Stem Cutting

Let us take a look at the process of propagating a new cactus from an existing plant. To complete this process, you will need the following materials:

  • A healthy cactus
  • Heavy-duty gloves
  • Well-draining soil
  • A pot/container
  • A clean, sharp knife
  • Rooting powder (optional)
  • Tongs or cactus pliers (optional)

Once you have all the mentioned requirements, proceed with the steps outlined below:

Obtaining a stem cutting

A person arranging small plant in a small pot.
Taking healthy cuttings from the cactus is the first step for propagation.

You will be taking a healthy cutting from the top of your cactus plant. If your cactus has pads, make sure you choose one that is mature enough- even if a few smaller pads have started growing on top of it.

Using a young pad is quite dangerous because it may fail to root successfully. For columnar cacti, be sure to select a thin stem that will root much faster than a chunky one.

On columnar cacti, carefully cut off the stem at least a few inches from the top. Make the cut clean and straight and be careful not to crush the rest of the stem. If you are dealing with pads, then you can easily snap off one by hand.

Before you begin obtaining cuttings from your existing plant, make sure you disinfect your knife thoroughly. Keep in mind that there may be open wounds on your cactus that can easily contract bacteria leading to other issues. Also, wear gloves to avoid coming into direct contact with the spines.

For extra protection, consider holding the cactus cuttings with tongs or a pair of cactus pliers instead of your hands.

Rooting your cactus cuttings

A gravel with a soil.
After drying up the cut ends, you can root your cuttings into a proper-sized pot.

So, you now have your cuttings, what do you do next?  Set the cutting aside for a few days to allow the cut end to dry up. Make sure the cutting is stored in a safe place away from sunlight and soil. Once the wound has healed, it will form a callous, which is an indicator that the cutting is ready for potting.

Sometimes, you may be forced to use a little sulfur on the cut end to speed up drying and protect the cutting from bacterial infection. The sulfur may turn a few colors, but that should worry you at all. Just check after a few days to see if the end is dry.

Once the cut end has formed callous, you are ready to jump on to rooting.

Fill your new pot with a moist potting mix and level the soil. Carefully stick your cutting into the potting mix with the cut side down. Be careful while sticking it into the container to avoid opening up the dried wound.

If it can’t stand on its own, simply lay it on top of the soil. If you have rooting hormone powder, make sure you dip your cutting into it right before planting.

Use the right type of soil

A soil on hand.
Choosing a suitable soil type for your specific cactus is essential for growing the cuttings.

The type of soil plays a critical role in establishing whether the cutting grows into a new plant or not. Therefore, you need to ensure you are using the right type of soil.

Go for a porous potting mix that is well-draining. Typically, almost all cacti plants require soil that drains much quicker than your average houseplant soil. If the soil holds water for too long, it may cause severe rotting of your cutting at the base.

Consider adding gravel, sand, or perlite to your soil to improve its drainage.  If the soil is already moist, do not water the cutting after planting. If you are not sure of anything, feel free to ask your local nursery center for basic cactus soil mix, and you are good to go.

Watering a Newly Planted Cactus Cutting

While the roots are developing, your newly planted cutting will mainly be relying on stored nutrients and water. Therefore, you need to keep the soil continually moist to supplement the supply and encourage deep root growth.

Consistent watering may also play a critical role in yielding great results.  Light water the soil every few days to keep it moist. However, be careful not to soak the soil with water since it may lead to rot issues. Just keep it damp.

The root-growing speed will largely depend on the type of cactus, size of cutting, and watering frequency. In most cases, small cuttings grow roots faster than large cuttings. Your cactus cutting can take anything from a couple of days to one month or even more to develop roots.

Once the roots have settled fully into the soil, switch to a typical cactus watering regime. Always make sure the soil dries out completely between watering sessions.

At this point, start introducing your young cactus to more sunlight gradually. Keep in mind that even though the roots are growing, you won’t see any significant stem growth for at least one year.

Can You Root a Cactus in Water?

A plant in the water.
While desert cacti cannot be rooted in water, jungle cacti cuttings are perfectly fine for water rooting technique.

To answer this question efficiently, you need to understand the type of cactus you are dealing with. Typically, there are two broad types of cacti; desert cacti and jungle cacti. 

A desert cactus only thrives in arid areas and is extremely drought-resistant, while jungle desert grows in tropical regions that receive plenty of rainfall. A good example of a jungle cactus is the Christmas cactus.

Although you cannot root a desert cactus in water, jungle cacti (specifically the Christmas cactus) can be rooted in water. If you prefer taking this root, you will need to do everything right to achieve better results.

Start with obtaining between one and four cuttings from a healthy Christmas cactus. Make sure each cutting is approximately four inches long, with a minimum of three leaves on each.

From there, take an empty glass jar and fill the bottom with pebbles/stones to about two inches deep. Carefully add water such that it rises above the stones/pebbles.

Carefully place your Christmas cactus cuttings in the glass jar containing water and make sure the bottom of each cutting touches the water. The majority part of the cutting should be in the glass jar but above the water level.

The humidity in the glass jar will help your cuttings to root without rotting. Always keep a close eye on the water level so that it doesn’t evaporate. Add more water to the glass jar every time you notice a significant drop.

Also, consider using rainwater or distilled water for better results. If you must use tap water, let it sit for at least 48 hours so that the chemicals and salts can evaporate.

Tap water contains significant amounts of fluoride, which is harmful to young cuttings since it travels through the plant and settles on the leaves. This makes the leaves turn brown, which can spread to the rest of the plant quickly if you continue feeding it with fluoridated water.

Can You Replant a Broken Cactus Part?

Yes. Just like the cuttings, you can also replant a broken part. However, you will need to inspect it carefully to determine if it is mature.
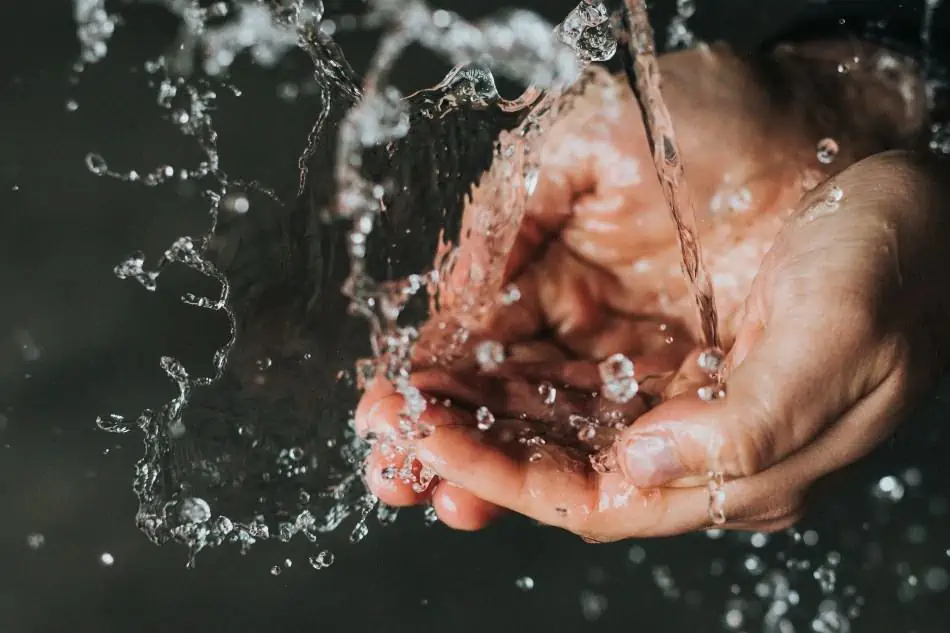
Once you are satisfied that the broken part is mature enough for propagation, carefully check the broken end of the cactus. If it is uneven or crooked, make a fresh cut to even it out.

Baby cuttings.
Remember the fact that the cut end must be dry and sealed over before you root it.

From there, set the piece aside for a few days to allow the cut end to heal and callous over. Remember the fact that the cut end must be dry and sealed over before you root it.

The amount of time it takes for the cut end to dry and callous will depend on the thickness of the cut and amount of humidity in the air.

After it has dried and calloused over, follow the steps outlined above to root it.

Should I Fertilize a Newly Propagated Cactus Cutting?

Yes. Applying small amounts of succulent fertilizer is essential for a newly propagated cactus to maintain its health and grow rapidly.

However, be careful not to feed the young plant too much fertilizer since it may cause significant damage. Also, avoid using chemical-based fertilizers since they may contain too many salts that can burn the young cactus plant.

You should only fertilize the cutting once it has grown roots. From there, apply fertilizer twice every month but reduce the amount with time as the cactus grows. If you are unsure of anything, consult your local nursery center for basic fertilizer guidelines specific to cacti plants.

It is also essential to ensure that the other conditions for your newly propagated cactus are optimal, such as the right soil mixture and watering frequency. Pay attention to these aspects, and you will have a healthy cactus in no time.

Is Propagation from Cuttings Same as Grafting?

Many people confuse propagation from cuttings with grafting. The two techniques are entirely different and should never be confused.

Grafting is the process of attaching a part of one plant onto another to form a new plant. When done correctly, the two plants can grow side by side as one unit. This method is mainly used when it’s practically impossible to propagate from cuttings.

Propagation from cuttings, on the other hand, is a much simpler and straightforward process. As explained above, it only involves creating small cactus cuttings and rooting them in soil or water. The new plant produced will be genetically similar to the original parent plant.

Grafting is generally more complicated and requires more expertise. It is mainly used when a certain plant species or variety cannot be propagated from cuttings. Therefore, it is best to try the propagation from cuttings method before trying your hands on grafting.

If things fail, you can consider grafting as an alternative technique. However, propagating cuttings is the best way to go if you want to clone your favorite cactus plant and have more of them without breaking the bank.

Final Thought

Cactus plants are relatively easy to propagate from cuttings. In most cases, you will get faster and more predictable results if you decide to propagate a cactus from cuttings than you would from planting seeds.

While it is more common to propagate cacti from cuttings indoors, you can also do it outdoors and expand your home garden.