How To Propagate Sedum (Stonecrop) The Easy Way

Have you been looking for an evergreen plant for your home that is easy to propagate? Sedums or Stonecrops can easily fit any space in your garden or planter. Growing Stonecrops is one of the simplest plant endeavors because of their low cultural needs and simple upkeep endeavors.  

Stonecrops belong to the genus Crassula, consisting of other succulents such as Echeveria and Jade plants. The Stonecrop perennial plant does well in hot sunny climates, making it easy for you to propagate and take care of.

What to Note Before Propagating Sedum

Stonecrops are a great way to get started as a gardener. They can thrive in either artificial light indoors or natural sunshine outdoors. The Stonecrop plant is excellent for container gardening, pathways, perennial borders, and rockeries. Moreover, Stonecrop succulents seldom suffer from diseases or pests, making them an ideal candidate to have at home.

Sedum has a shallow rooting system which means you can plant it on a tray or shallow pot. Sedum doesn’t like competition from weeds or other plants for nutrients. As such, you can only add some small stones or mulch at the base of the plant to offer support, decoration and keep away pests.

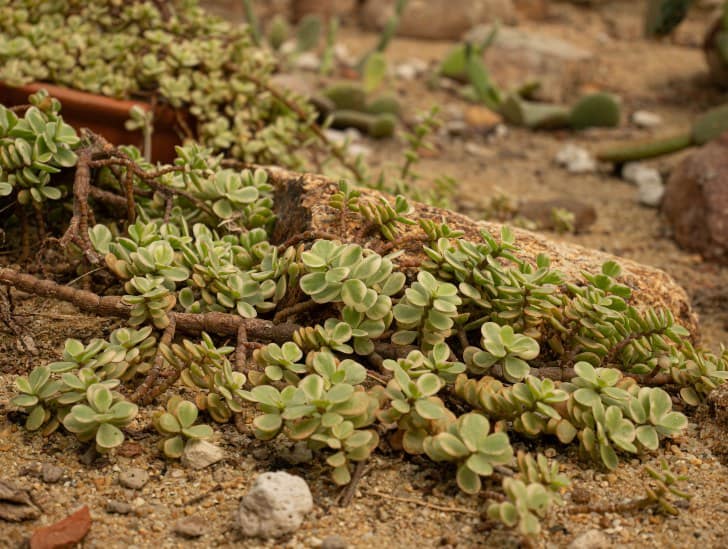
Stonrecrop on the ground.
Sedum has a shallow rooting system which means you can plant it on a tray or shallow pot.

The soil must be well-drained, rich in organic additives; you can use low nitrogen fertilizer during the growing season. When the plants are young, water them every two days; however, they should not require any additional water afterward. In the fall and winter, watering is not needed at all.

Overwatering is the most common problem with Stonecrops. Use unglazed clay pots to encourage evaporation of surplus water when planting in containers.

How to Propagate Sedum

You can propagate Sedum plants from seeds, leaf cuttings, stem cuttings, and division(offshoots).

Propagating Sedum Using Seeds

Sedum seeds should be handled with care. They are quite small, thin, and lightweight. You can purchase them from gardening centers or pick them from your existing Sedum plant at home.

Here is how you can your own seeds from an existing Sedum plant:

To collect your seeds, remove several seedheads immediately after the Sedum plant blooming period is over, and the formed seed heads start changing color from green to brown. 
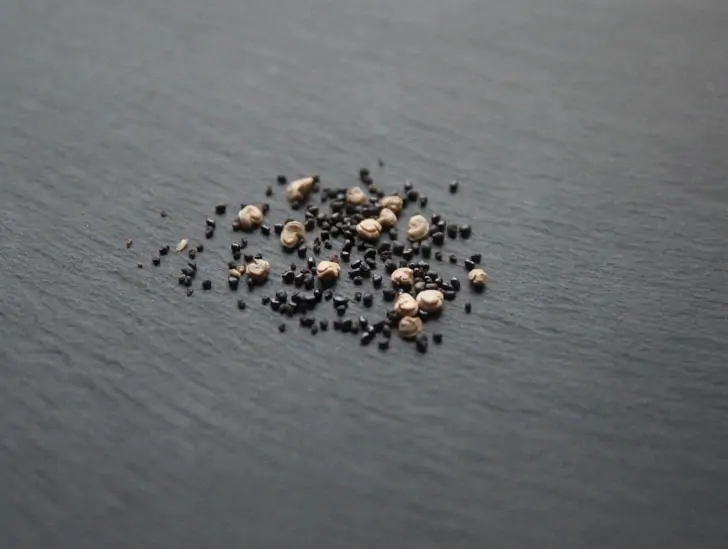
A plant seeds.
Sedum seeds are quite small, thin, and lightweight.

Place the seedheads in a paper bag and keep them in a cool, dry area for at least two weeks to allow them to dry. If you plant the seeds without drying or place them in a damp place, they will rot.

Remove the seedheads from the bag once they’re completely dry, then thresh them to collect seeds using your fingers. Do this over a very fine screen and place the screen over a bowl or tray. This allows seeds to pass and collect in the container, retaining all the debris on the screen.

After collecting all the seeds, put them in a bag labeled with the Sedum’s name and date of collection. Seeds collected from a fall-blooming Sedum plant can be sown the following spring. While waiting to sow the seeds, you can store them in your fridge for one year.

In the spring, when temperatures range from 45 to 65℉, is the best time to propagate your Sedum seeds.

Prepare a fine-textured, sterile seed-starting soil mix and soak it to make it damp and not soggy. Take the seeds and sow them on the potting mix and enures not to cover them with much soil.

It usually takes two to four weeks for the seeds to germinate, but you must keep the soil moist during the germination period. Once the seedlings have developed, repot them or plant them in our garden and tend to them until they thrive.

How to Propagate Sedum from Leaf Cutting

Propagation of Sedum plants from seed is slower and less predictable than propagating them from leaf cuttings. You have the potential to fill your garden or containers with new Stonecrop plants as every Sedum leaf is a potential cutting to develop into a new plant. 

To propagate Sedum from leaf cuttings, you need the following:

  • Sharp knife/Pruning shear
  • Alcohol rub
  • Rooting hormone

To plant your Sedum from leaf cuttings, simply snap off only healthy leaves from the parent plant using your pruning shear or sharp knife to plant your Sedum from leaf cuttings. Remember to sterilize your cutting tool using alcohol rub to prevent transmitting or spread of pests and diseases.

Take the rooting hormone and apply it at the cut area or leaf node. Rooting hormone is for encouraging fast rooting. Now, take the leaves, and you can either root them in water or soil.

A closeup image of a leaf cuttings with roots.
Containers with new Stonecrop plants as every Sedum leaf is a potential cutting to develop into a new plant. 

If rooting in the soil, ensure the soil is well moisturized and doesn’t retain water. Place the leaf on the well-draining potting mix slightly, covering the leaf node area.

If you have a gardening heating pad, use it to keep the pot or tray bottom about 70℉. Proceed to spray the container with water on a regular basis to maintain proper humidity levels. Alternatively, cover the pot or tray with clear plastic and place it under indirect light.

After two to three weeks, the plant will develop new roots, and you can observe new Sedum plants sprouting around the base. Transplant the young plants, and then you can discard the old leaf.

If rooting in water, you may need a mesh or something like a toothpick to support the leaves in a glass of clean water. You will have to constantly change the water for it not to get stagnant and cause the leaves to rot. Once you spot roots shoot, it’s time to transplant your Sedum.

How to Propagate Sedum from Stem Cuttings

Cut a stem about three to four inches long.

Tip: The bigger the plant, the bigger section you will need for planting.

If there are any leaves below the planting surface, cut them off and let the stem cutting have just a few leaves above. Be careful when cutting the leaves not to cause damage to the stem.

Now, dip the stem in water, followed by a rooting hormone powder. Water helps the powder to stick.

Go ahead and root the stem either in water or in soil. If rooting in the soil, prepare a well-draining soil and water it. Take the stem cutting and slowly push it into the potting mix.
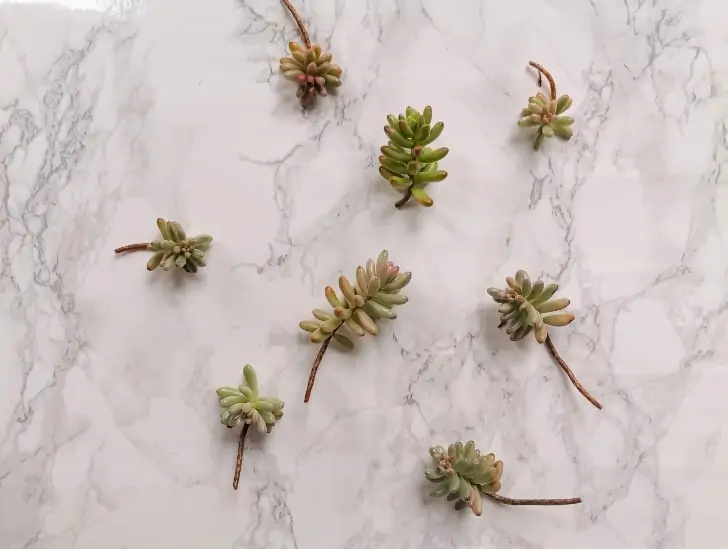
Sedum stem cuttings.
The bigger the plant, the bigger section you will need for planting.

Water the soil lightly every time it dries up. Sedum cutting needs water at this time to develop roots and thrive. You can water it at least once a day, only when necessary. It might take three weeks for your cuttings to establish roots and, once they have, start watering them less.

If you are rooting your stem cutting in water, add clean water in a glass or bowl and dip your cutting into the container. Make sure there are no leaves in contact with the water and always change the water on a daily basis. After two to three weeks, you will note rooting, which is when you can transplant your stem cuttings into pots.

How to Propagate Sedum from Division(Offshoots)

If you are a home gardener, the best way to propagate Sedum is by dividing your plants when it produces offshoots. It is usually very easy and most successful, making it ideal for novices.

Some items you will need:

  • A clean, pruning shear or sharp knife  (for cutting)
  • A shovel or trowel (to dig up the plant)

Spring is usually the growing season for Sedum, and at this time, it will start producing new green shoots. Your goal is to separate the shoots from the parent plant.

If looking to separate a grown Sedum plant, the procedure is similar to separating clones from a mother plant. 

Closeup image of sedum offshoots.
One of the best way to propagate Sedum is by dividing your plants when it produces offshoots.

Dig up the whole plant, making clean cuts with the shovel on both sides. Make sure the shovel is driven deep enough, and you have the full root ball.

Begin by cutting the core portion and working your way outward, aiming for two or more roots-bearing sections, and in each piece, there is a green bud. The ideal scenario is to get sections with multiple roots.

Make sure your divisions are replanted as soon as possible to avoid drying out. Plant the divided Sedum at the same depth before and at the base, add some mulch or compost. This will help keep the soil wet.

Final Thoughts

Sedum plants can be propagated easily following the above different ways and have hundreds of them popping up all over your home. All you need to do is a little care when planting, and once they grow, they require little caring

Go ahead and plant some to gift your friends and relatives.

Venus Flytrap Care – Do They Need Direct Sunlight?

The Venus flytrap, a well-known carnivorous plant, grows to 5-6 inches in diameter, with traps typically up to 1.5 inches in size. Therefore, one of the essential requirements of Venus flytraps is proper lighting.

It is famous as a potted plant in many parts of the world, but sadly most of the sold Venus flytraps have been grown or harvested from declining wild populations. As with all plants, the Venus flytrap derives its energy from the sun through photosynthesis.

Venus flytraps are expected to grow under direct sunlight for at least 6 hours a day to stay healthy and optimally receive over 10 hours of direct sunlight. Venus flytraps can also develop with artificial lighting, but light specifications must be appropriate for carnivorous plants.

Proper illumination is essential to keep a Venus flytrap healthy. In the active growing season, Venus flytraps should receive a minimum of 12 hours of light. At least 4 hours of sunlight is recommended. The more direct sunlight the plant gets, the healthier it will be.

Sunlight Requirement for Venus Flytrap

While growing, grow your fly trap outdoors in full sun. Allow 6 hours or more of direct sun for solid growth. If full sunlight is not possible, plan for a minimum of 4 hours of direct sunlight with indirect light throughout the rest of the day. Your plant won’t be as vibrant or sturdy as one grown in full sun, but you will be able to maintain its overall health.

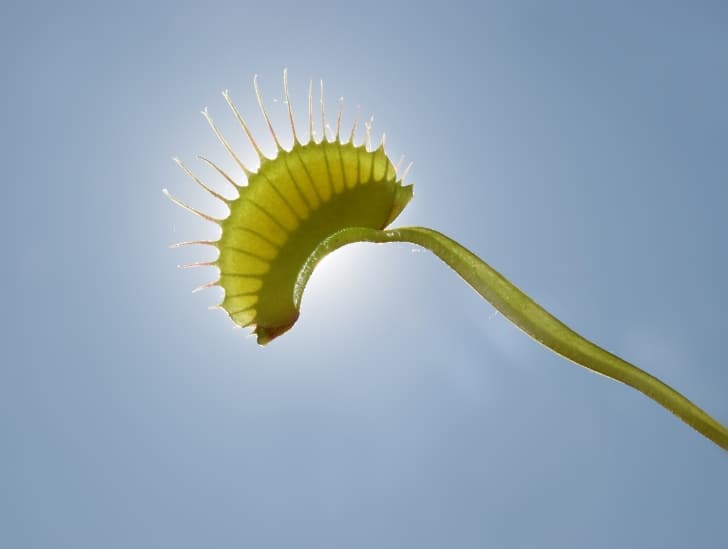
Venus flytrap and a sky.
Proper illumination is essential to keep a Venus flytrap healthy. I

Direct Sunlight Versus Indirect Sunlight

Venus flytraps may grow in a location where they receive direct sunlight for a few hours, followed by indirect sunlight for the rest of the day.

Six hours’ direct sunlight is the minimum recommended for Venus flytraps. However, Venus flytraps may survive under indirect sunlight as long as they receive a combination of direct and indirect sunlight with a minimum of 4-6 hours of direct sunlight.

Venus flytraps grow faster and seem much healthier when grown with more sun. Ideally, Venus flying traps will receive more than 10 to 12 hours of sunshine.

Venus Fly Trap Sunlight Tolerance

Venus flytraps cannot take too much sun. Therefore, extended exposure to light will only boost growth and enhance the plant—supply of 12 hours of sunshine, particularly during the growing season.

The only scenario in which Venus flytraps could suffer when exposed to a large amount of sunlight is if temperatures are aggressively elevated.

Venus Flytrap in a pot.
Extended exposure to light will only boost growth and enhance the plant

Venus flytraps can resist high summer temperatures over 90F. However, once temperatures rise above 100 F, Venus flytraps may dry up. Therefore, place the Venus flytraps in a water tray during warm summer days or partially cover them during temperature peaks.

Artificial Lights and Venus Flytraps

Venus flytraps require a lot of lighting to remain healthy, but such lighting does not require sunlight.

As a rule of thumb, Venus flying traps can stay healthy if exposed to more than 6 hours of sunlight or artificial lighting. When using artificial lights, provide long hours of light (10h ) using LEDs or fluorescent bulbs with over 1500 lumens.

Venus flytraps can be grown indoors, but providing enough lighting with fluorescent lights or LEDs is tricky. If you choose to use fluorescent lamps, keep the Venus flytrap less than 8 inches from the light to ensure that the Venus flytrap receives enough light to stay healthy. The nearer the plant gets to the light, the better.

A compact fluorescent light bulb is cost-effective when selecting a lighting installation for your Venus flytrap. Use bulbs labeled “cool white” or “cool blue” in the color temperature, which have a color temperature range of 6500-kelvin, perfect for growth.

Because artificial lighting can be less effective than sunlight, you should strive to provide light for more extended periods. Venus flytraps may also grow with sunlight and artificial lightings, such as growing them in the sills of windows or a sun porch.

Best Location Indoors for Venus Flytraps

Venus flytraps require constant and extended exposure to light all year long. Therefore, they should be strategically located. For example, if you grow your plant on a window ledge, I recommend using artificial lights to complement its growth.

Venus flytraps can grow on a windowsill as long as the windowsill receives over 6 hours of direct light. If the window sill fails to meet this requirement, use artificial lights as a supplement.

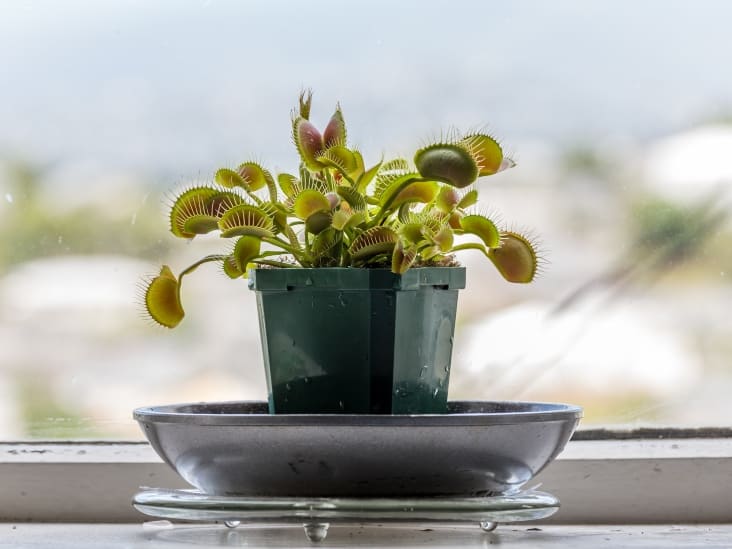
Venus flytrap near the window.
Venus flytraps can grow on a windowsill as long as the windowsill receives over 6 hours of direct light

A south-facing sunlight window is your best option. As long as the Venus flytrap receives 4 hours of direct sunlight into the window, it should thrive. A windowsill facing east or west may also work.

If you live in a basement or flat with only north-facing windows, you may need artificial lighting to help your plant grow properly. Venus dies if grown under fluorescent lights all year long with the same light every day.

Best Outdoor Location for Venus Fly Traps

The best part of growing your Venus flytraps out is that you don’t have to worry about making sure they get the proper light. Instead, they will obtain all the light they need to be healthy.

Venus flytrap in a whote pot outside.
You can put the plant into the full sun directly outside your house.

It is best to provide shelter against the noon sun in a dry and stifling climate so that Venus flytraps are not burned or dried. Again, shading fabric will work well. Similarly, a faint light through the leaves of a shade tree will provide some respite from the intense sun while providing adequate light for optimum health.

Acclimate Your Venus Flytrap

Venus flytraps that grow in sheltered or heavily controlled conditions, such as indoors under artificial lighting or in a greenhouse, will take some time to adapt to outdoor growing conditions.

Slowly bring the plant into the sunlight to keep its leaves from burning and dying. Venus flytraps from sheltered environments require gradual exposure to sunlight to prevent sunburn.

Begin by giving it an hour or two of direct sunlight during a few days. Then, raise exposure to sunlight to a few hours for a few days and continue until you can leave it in the sun all day.

Alternatively, you can put the plant into the full sun directly outside your house. All leaves burn, turn yellow or brown, and eventually darken. However, the new leaves and traps will be fully hardened by sunlight.

How to Toughen Your Venus Fly Trap

There are some ways to harden Venus flytraps. These include:

1) Place the plant in a place protected against the full sun but receiving brilliant indirect sunlight. These places include under a large tree that shades the area all day, under a shade cloth, or under a deck where a particular dappled light still gets through.

2) Place the plant outside early in the morning each day for a set period, then return the plant inside or to a more protected area. Begin with an exposure time of 30 minutes and gradually increase the exposure time for a month until the plant is outdoors in full sun throughout the day.

3) Position the plant outdoors in full sun, provided it is early enough in the growing season, and the sun is not too intense. Again, people in northern latitudes may fare with this much more easily than those in the South.

Can Venus Fly Trap Survive in Low Light Conditions

Under suitable artificial lights, Venus flytraps can live free of sunlight. Direct sunlight is ideal for Venus flytraps, but fluorescent light and LED can meet the requirements of these plants. It is advisable to provide 10 hours of artificial lighting inside.

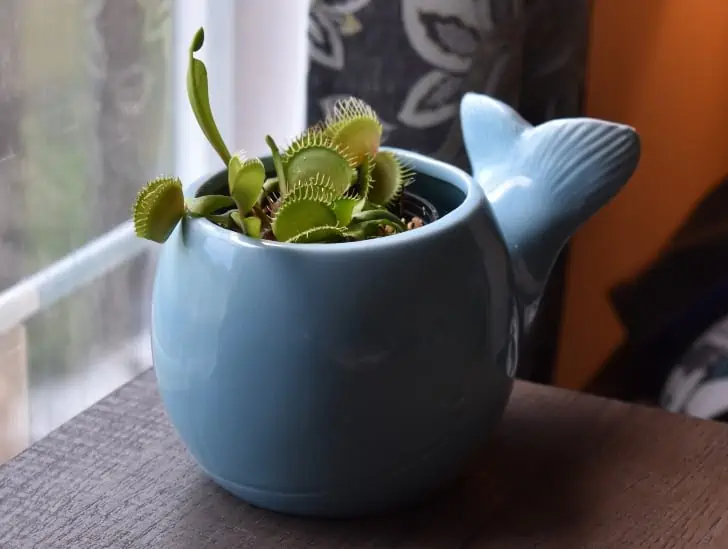
Venus flytrap in a whale pot.
Direct sunlight is ideal for Venus flytraps.

Irrespective of the climate and your living situation, you can grow healthy Venus flytraps. Artificial lights allow anyone to grow a Venus flytrap. If you can put your plants out, do so. Venus flytraps grow outdoors with ample access to water, light, and insects. However, outdoor growing is not always an option.

Signs That Your Venus Fly Trap Is Not Getting Sufficient Sunlight

Venus flytraps won’t last long if they do not have good light exposure. So these are some key signs to identify if your Venus flytrap suffers from light starvation.

Large petioles: Occasionally, Venus flytraps produce large petioles to aid photosynthesis. Broad petioles are a frequent sign of poor light exposure. However, it would be preferable to consider many different types of Venus flytrap, and some have thinner/broader leaves.

Discoloration: The healthy flying traps of Venus present vivid colors. Venus flytraps do not have bright red traps unless they have access to a large amount of lighting. When Venus flying traps suddenly lose their color, it may mean terrible growing conditions (not enough light).

Droopy: Sometimes, Venus flytraps begin to look droopy when they don’t have enough access to enough water or light.

Lack of traps: In extreme cases, Venus flytraps stop growing in their leaves with insufficient lighting. The plant does not produce traps since its principal objective is photosynthesis. However, when light exposure is corrected, the plant will regrow leaves with traps.

Bottom Line

Proper lighting is essential for the maintenance of a healthy Venus flytrap. The more direct light received by the plant, the healthier it is.

Sansevieria Care Tips and How To Grow Sansevieria Indoors

If you are new to gardening or simply looking for an easy-care houseplant, sansevieria is the perfect plant for you. These plants are some of the toughest plants you can get, and they are popular because of their adaptability to most growing conditions. Whether you want to plant it indoors, on the balcony, or in your garden, these hardy plants can put up with almost everything.

Sansevieria plants are easy to grow, but there are a few things that you need to know as a beginner. These essential tips will help you care well for this plant to its maturity. We will discuss the 11 most fundamental tips that have been proven and worked well when applied to this plant. As you keep on reading these tips, you will realize how low maintenance these plants need.

If you grow to want to grow this plant and enjoy the flowering beauty, and quality air in your room or balcony, the following tips are a MUST DO.

1.    Soil

A snake plant is easy to grow because of its soil requirements. They do well in a free-draining soil mix. Always use a free-draining soil mix, because the Sansevieria plant is prone to rot if the roots are dipped for long in the water. You can grow the plant in commercial succulent soil or cactus soil.

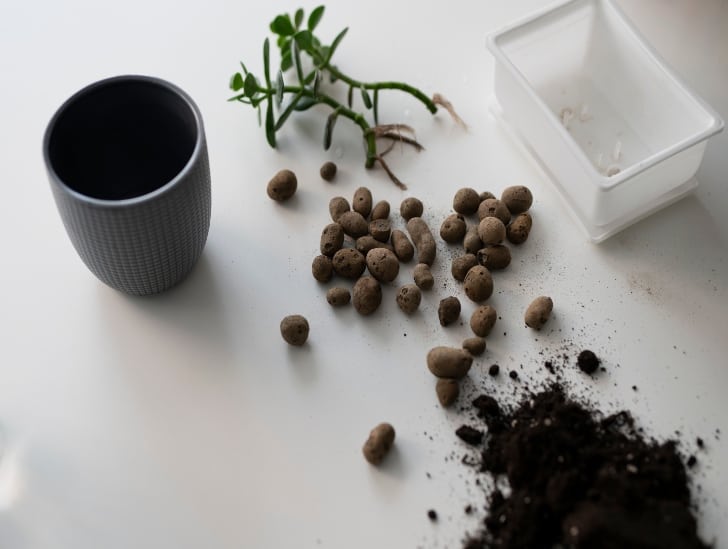
A top view of soil propagation of Snake plant.
You can grow the plant in commercial succulent soil or cactus soil.

This commercial soil has added sand that helps in drainage. You can also decide to make your mix of soil, and the plant will still grow well. An accessible blend will require

  1. 1 part potting mix or garden soil
  2. 1 part peat moss or coconut coir
  3. Two parts of sand or perlite

This mixture will ensure maximum water drain from the container and provide a nutritious planting medium for the plant, allowing it to glow.

2.    Choose the Correct Pot.

Different pots have different looks and different functions. Example of common materials used for potting includes terracotta, plastic, ceramic, or wood.

As a beginner, there is something pretty in combining this gorgeous plant with a beautiful and proper working pot. Choose a pot that has suitable drainage holes. They are prone to overwater, and they may die from root rot. A terracotta pot will work well with you.

Choose a pot considering the place you will grow the plant. If the plant is to be planted outdoor, you may need to choose a pot that will withstand adverse conditions like wind. If you want to plant it on a desk, you may need a decorative pot.   

A correct pot will only leave 2 inches of space between the pot and the plant. Not planting a snake plant in that kind of pot makes the plant susceptible to rot.

3.    Proper Lighting is Essential

Snake plants should always get enough light. Droopy and sad-looking leaves are always the effects of lack of enough light. Snake plant prefers indirect but steady light with some direct sunlight once in a while. However, they also tend to do well in shady corners or other low-light areas of your home.

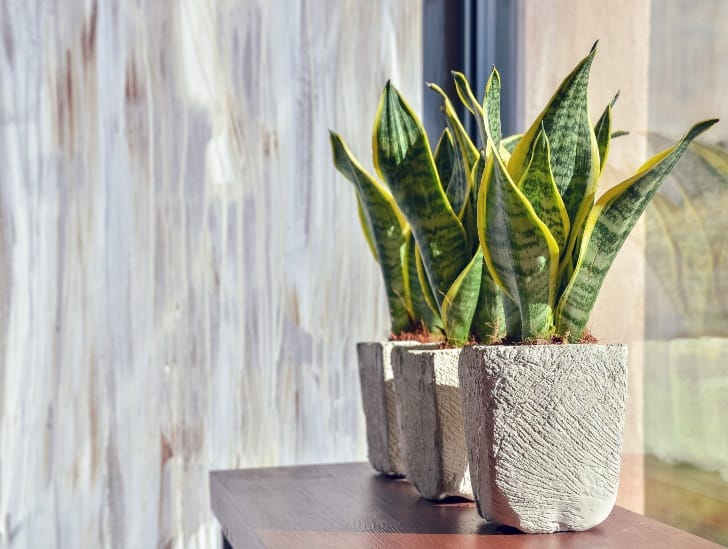
A snake plant in a gray pot.
Snake plant prefers indirect but steady light with some direct sunlight once in a while.

Too much sunlight may make the plant susceptible to leaf burn, but only in very severe cases will the leaf burn causing any long-term damage. During the winters, ensure that you protect the plant from drafty windows. Lack of light for a long time can make a plant die from chlorosis.

4.    Know How to Water Your Plant

Do not water your plant so frequently. Let the soil dry before watering. To know when it’s time to water, don’t rely on the appearance of the surface of the soil. Instead, stick your finger 2 inches into the soil and feel the moisture.

When watering the snake plant, ensure that you water it at the bottom of the pot. This encourages the roots to grow downwards and reduces the splash of water to the leaves. Watering from the bottom will also stabilize the plant’s thick, tall leaves supported by strong roots.

5.    Always Monitor Temperature and the Humidity Levels

Snake plant is a surviving plant that will tolerate fluctuating temperature, but not too cold or too hot. An optimum room temperature of 16-320C is most favorable for the plant. At this temperature, the plant will grow tremendously.

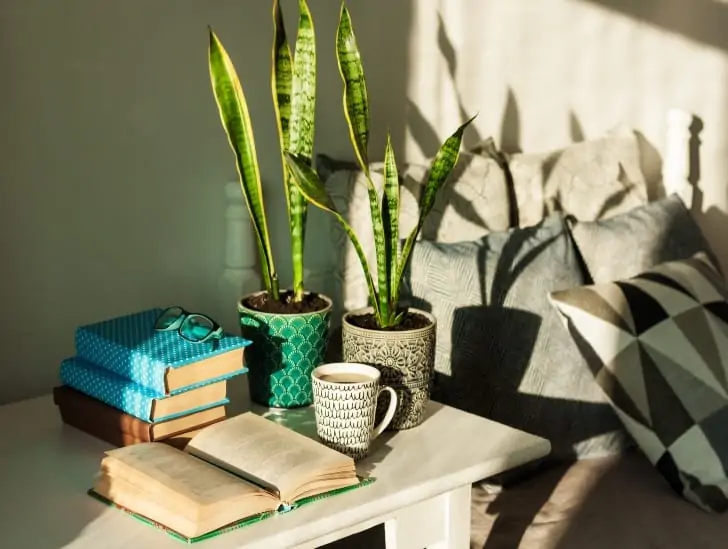
A decorative snake plant on the table.
An optimum room temperature of 16-320C is most favorable for the plant.

In cold conditions, the plant develops mushy white areas to the leaves, which may occur 1-4 weeks after exposure to cold. During the winter season, get the plant from outdoors to indoors to prevent the plant from dying.

6.     Fertilizer

Snake plants do not need a lot of fertilizer. If need be, it should be done during the spring or the summer season. During the winter season, the plant is at rest; hence fertilizing should be avoided. It is also essential to ensure that the plant is not under stress during fertilizing.

 How often to fertilize the plant, depends on several factors. When fertilizing, use a composed 10-10-10 or 20-20-20 fertilizer for proper growth. It is recommended that you apply half of the dose of the total strength to avoid over-fertilization. These factors include:

  • Size of the plant and the pot. The larger the pot or the plant, the higher the use of fertilizer.
  • The type of fertilizer used.

In a nutshell, most snake plants are fertilized after 4-6 weeks and only during the growing seasons.

7.  Pruning

Pruning is essential as it encourages new growth. To prune, use sterilized pruning shears or a sharp knife. Remove leaves at the soil line or cut off damaged mature leaves and leave the developing leaves to grow. Pruning is best done during the growing season as new leaves can grow.

Pruning the plant during the off-season may make it stressed; hence it is best done when the plant is healthy. Pruning is also done to control the height of the snake plant. To do this, cut the tall leaves carefully and leave the rest. Also, get rid of spoilt leaves.

8.  Propagating a Snake Plant

You can quickly multiply your sansevieria plant for your home as a gift to share with friends because; these plants are incredible to propagate. There are two ways to propagate the plant.

Propagate leaf cutting in water

Cut a healthy sansevieria plant leaf near its base. Make a notched upside-down V cut at the bottom and place it in a clean jar of water, which should be slightly above the V cut. In about 3-5 weeks, you will see roots growing from the leaf-cutting. You can transplant it into the soil or keep it growing in the water.

Propagate leaf-cutting in soil

Cut off a healthy sansevieria near its base and let the cut dry for 1-2 days. Plant the cutting in potting soil, water it regularly, and let it grow. Don’t let the soil get too dry or wet as the plant is still very young and sensitive.

A hand holding a young snake plant in a pot
Choose a pot considering the place you will grow the plant.

9.  Common Pests

The snake plant is hardy, and it is rarely infested with pests. Overwatering, high humidity, and air poor circulation are the root causes of pest infestation. Scales, gnats, spider mites, and whiteflies are the common pests attracted to this plant.

If the snake plant is already infested, the methods used depend on the severity of the infestation. You can mix alcohol with water and spray it to the plant or wipe the leaves with a solution to deter the problem. If the plant is severely infected, you should prune the infested leaves and leave the rest to grow.

10.  How to Get Snake Plants to Bloom

Snake plant tends to flower annually when water, sun, and humidity level are optimally met. During flowering, the snake plant develops creamy white, tubular flowers that look like lilies. Shifting the plant’s location from indoors to outdoors regularly can encourage blooming as the plant rarely blooms when kept indoors for long.

Three snake plant in a white pot.
Shifting the plant’s location from indoors to outdoors regularly can encourage blooming.

The coming of spring kicks the plant from its dormancy stage and spurs its growth. Its flowers are fragrant, and it blooms at night. After some time, these flowers drop on their own hence no need to cut them.

11.  Don’t Overwater or Underwater the Plant.

There is nothing as dangerous as overwatering your plant. Overwatering is the fastest way to kill your plant. But because the snake plant is excellent, it will always tell by the look on its leaves. The leaves become heavy, squishy, and limp and sometimes may even fall. The leaves start to rot, therefore spread to other parts of the plant.

Though it is a dry plant, don’t let it go for long without water. Underwatering will show itself in the leaves. The leaves might bend over, become limp and die. The old leaves start becoming yellow, turn brown, and lastly, break.

Bottom Line

As I promised earlier, snake plants are almost comically simple to grow. You will encounter minor troubles with them, but they are plants that can thrive well even in neglect.

 All in all, watering the sansevieria plant is the most important thing. It may survive from other conditions, but not overwatering. Follow these simple tips and be assured of a healthy snake plant in your house, office, or even outdoors.

Sansevieria – Does It Need Direct Sunlight?

A snake plant indoor exposed to sunlight.

Sansevieria remains a trendy hardy plant because of its easy adaptability to a range of growing conditions. The plant is well known for its tolerance to dark areas. This makes it a perfect indoor plant. These plants are very flexible when it comes to light requirements.

Direct sunlight for long hours makes the plant dry out quickly. If not checked, could dry out the entire plant completely. Although they can do well in direct sunlight, you should always be watchful for the signs of a leaf burn.

But because the plant is adapted to arid conditions, does it really need direct sunlight? Sansevieria can do well in all lighting levels, from darkness to direct light. Most snake plant species do well in bright indirect sunlight. Direct sunlight will affect this plant depending on the amount of time the plant has been exposed. 

How Much Light Does a Sansevieria Plant Need?

Snake plants can tolerate most indoor and outdoor lighting conditions compared to other succulent species. However, the amount of light that the plant receives has a huge impact and makes a significant difference in how the plant thrives.

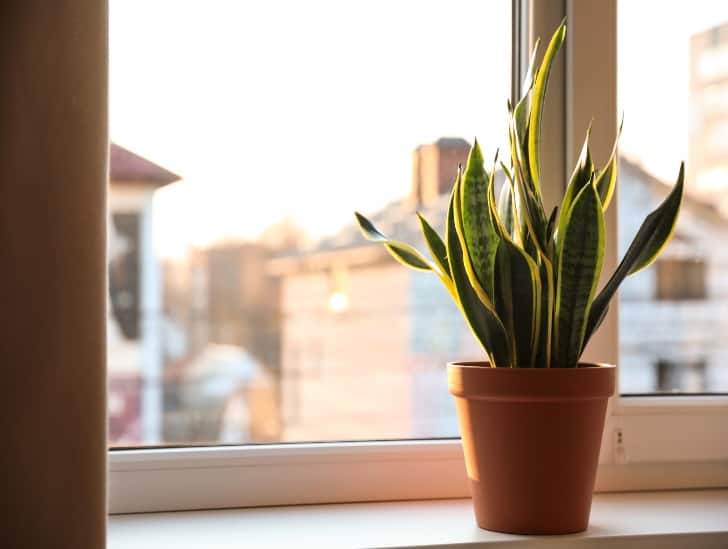
Snake plant near the window.
The amount of light that the plant receives has a huge impact.

Most species of the snake plant prefer at least 8-10 hours of bright, indirect light every day. Indirect sunlight, this plant can tolerate up to 5-6 hours of direct sunlight. Placing them in east-facing windows or using grow light can bring the best results.

Does Sansevieria Need Sunlight?

The snake plant’s native environment consists of a dry condition. Though this hardy plant can do well in low light conditions, they tend to grow very slowly without enough light. Every plant needs light to create not just its food but also to strengthen its stems for support.

One of the reasons a snake plant is grown indoors is because of its beauty. When this plant is denied proper sunlight, it starts to grow spindly as its leaves stretch for the light. This effect destroys their appearance in the house. To prevent this, place the plant next to a window.

If your snake plant is not getting enough sunlight, the plant becomes droopy, leggy, and sickly. They appear sad-looking as their health keeps on deteriorating. Do not suddenly move your plant from a dark corner to light. Instead, you should train your plant bit by bit until it adapts to proper lighting.

Snake plant near the window in a grey pot.
One of the reasons a snake plant is grown indoors is because of its beauty.

While moving the snake plants towards proper sunlight, ensure to keep its humidity levels high. In cases with low humidity levels with high sunlight, the plant is susceptible to sunburn. Sunburnt leaves show signs of a thin leaf that darkens. The tips of the plant also get flimsy.

 Signs That Your Snake Plant is not in the Excellent Light Spot

1. It leans towards the light source

Snake plants tend to gravitate towards the source of light when in a spot without enough light. For optimal photosynthesis to take place, snake plants use red and blue light. The plant will always lean towards the direction that these rays are coming from. An indication it is craving direct sunlight.

Despite being rigid and thickened, the leaves of this plant will stretch as much as possible to reach the light. Temporarily, you may correct this by rotating the pot to the other side to get the light. A long-term solution is relocating the plant to a spot where it gets enough sunlight.

2. Thin, floppy growth

Your plant will strive to grow even amid low light. In the absence of enough light, the plant will respond by just striving to stay alive and healthy. This means the plant will want to conserve most of its energy. This is achieved by remaining thin, floppy with leggy growth.

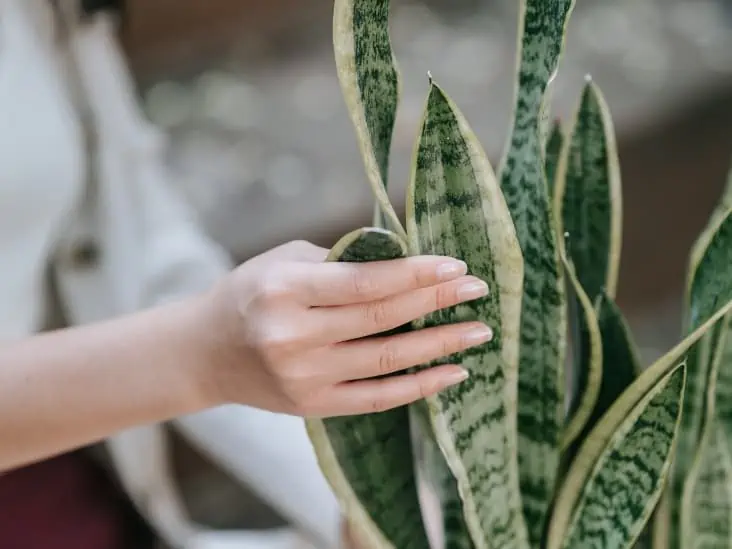
A woman touching the leaf of the Snake plant.
The absence of enough light, the plant will respond by just striving to stay alive and healthy.

A snake plant that is not receiving much light tends to have longer than normal internodes. You may notice this by looking at the plant closely. You will notice that the spacing between the internode increases. If they are longer than usual, it signifies that your plant is receiving less light.  

3. small leaves

Sunlight is a source of vital energy for the snake plant. This energy is essential in the growth and development of the plant via photosynthesis. Without enough light, the plant cannot correctly nurture its roots, leaves, and even new shoots cannot develop.

4. Leaves start to fall over

Leaves falling may be attributed to other causes like overwatering. However, poor light can be a reason why your mother-in-law’s leaves are falling over. The extended absence of exposure or direct light causes the leaves to weaken, fall over, or bend randomly.  

5. Browning of the leaf tips

Let us put it in simple terms; a snake plant will do much better when exposed to bright light. During the low light periods, your plant will only resolve to stay alive. Some of the parts of the plants are adversely affected by this effect. The tips of the leaves are the most affected, as they start browning.

Older leaves and young ones will turn yellow and develop brown-like leaf margins. Ensure you establish the real The Browning of leaves cause should not be confused as too much light also causes the leaves to become brown. When in too much light, try relocating the plant to a place where it will get proper sunlight.

Direct Light vs. Dark Room: Which one does a Snake Plant prefer?

Snake plants can grow in a dark room for as long as exposed to some direct light. Snake plants do not necessarily need much light, which means that even artificial light can help the plant to grow. Without any light, the plant cannot carry out the process of photosynthesis, which in turn hinders its growth.

If you have placed your snake plant in a dark room and expect it to grow fast, try taking it to a place where it receives light. If the room has no natural light, you may try using artificial light, which may somehow help the plant to grow but slowly.

How to Ensure Your Snake Plant Survives Adverse Heat Waves from Direct Sunlight

You cannot control the conditions brought about by different seasons. There is much sunlight during the summer season, and hence the heat waves and the temperatures are high. This becomes even more complicated when these high heat waves last for extended periods. The snake plant is exposed to more risks, especially when in direct sunlight. To protect your snake plant during these periods, the steps below can be of great help.

1. Take your plant to where there is a shade

During this period, one of the most essential things you can do is to take the mother-in-law to a shade. You may not have helped much with the heat, but you will avoid the direct sunlight waves. This is mainly for the young and the less healthy snake plants.

Indoor Snake plant.
You may not have helped much with the heat, but you will avoid the direct sunlight waves.

Move the vulnerable plants to places they can get a shade or, better yet, take them indoors. For the mature and healthy snake plants, though they may be fine for some time in the sun, you should maintain a close eye on them to prevent sunburn.
2. Do not fertilize the plant

Fertilizing your snake plant is proper to ensure that they grow correctly and fast. During sunny or hot seasons, no growth takes place. It is not recommended to water the plant at these particular periods.

During the heatwave periods, snake plants need more water than nutrients. The plants should fertilize during the spring period when active growth occurs. Introducing fertilizers during this period may end up harming the plant.

3. Be keen on water levels

During heat waves, the amount of evaporation is high. Proper water practices should be practiced. While the rate of intake of water by the plant is low, the amount of evaporation keeps on rising. This means that the plant needs more water to avoid drying up.

The watering frequency should also increase to cater to the loss of water. Watering the plant should be done early in the morning to allow enough time to absorb the water. Watering snake plants during sunny hours or high heat waves may destroy the plant due to shock.

4. Avoid repotting

During sun waves, it is not the right time to repot your snake plant. Repotting during this time causes stress to the plant and can lead to the death of the plant. The best time to repot is during the spring season or when the temperatures are back to normal.

A person repotting the plant.
Repotting during this time causes stress to the plant and can lead to the death of the plant.

Bottom Line

Light can determine the appearance of your plant and how well your plant can grow. Too much sunlight can cause the snake plant to wilt, sunburn, and even wash out. For the leaves falling out, you can prune them out and leave the healthy ones.

Too little light will make the plant have a leggy growth. The plant may stretch too much and become thin as it strives to reach the light source. For snake plants, bright light is the optimal light for the plant. Expose the plant to 6-8 hours of bright light for maximum growth. For a maximum of 5 hours, indirect sunlight should be enough for the plant.  

Do I Need To Plant My Portulacaria Afra In Direct Sunlight?

Portulacaria Afra “Elephant bush” is a large succulent with woody stems that can grow to incredible heights with proper nutrients, enough time, and good growing conditions. The plant can develop into many sizes and can be placed in almost all the house spaces. The plant can grow anywhere between six inches and 20 feet tall, making them great for ornamental planting.

With proper growing conditions, this plant appears in many varieties, which often have reddish-colored stems and variegated foliage that is shiny and plump. Gardeners adore these sun-loving succulents because they are edible When planted indoor, they absorb carbon dioxide purifying your air.

Does Portulacaria Afra need direct sunlight? The Elephant plant will thrive well when it receives sunrays like other succulents; it needs bright indirect light for the better part of the day. Elephant bush plants can manage heat, but not the direct intense one from the direct scorching sun.

How Many Hours of Sunlight does Portulacaria Afra Need?

Like many succulents, Elephant bush will require at least 4-6 hours of sunlight a day to keep them happy and thriving. They love when placed in bright sunny spots because it represents their natural habitat. Under poor lighting, the plant will have elongated leaves as the plant stretches to reach the light. This weakens the stem leading to poor growth. 

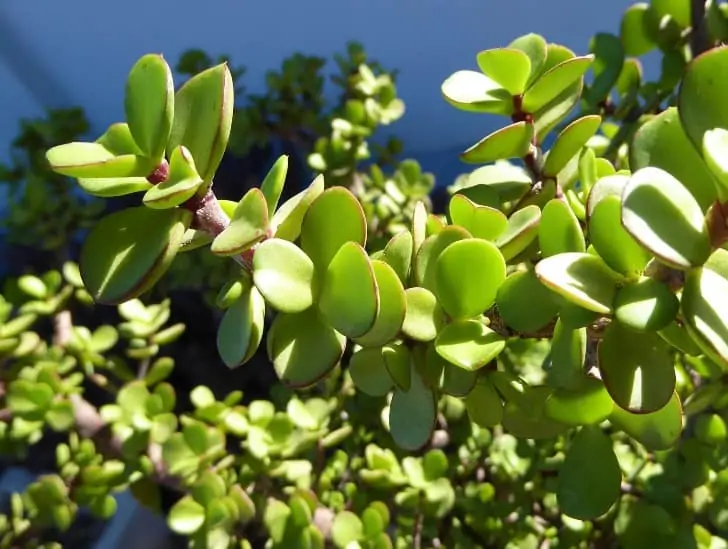
Elephant bush exposed to sunlight.
Elephant bush will require at least 4-6 hours of sunlight a day to keep them happy and thriving.

The elephant in low light will also lose its pigmentation and paleness. If you want to see the true beauty of the Portulacaria Afra, place it in a bright spot. You will have broad blooming leaves all through. 

Sunlight Requirements for Portulacaria Afra

The Elephant bush plant needs plenty of bright light to grow properly, it can also tolerate full sun but during its early days, or when the plant is somehow old, you may need to acclimate the plant to full sunlight. Under very extreme temperatures, you can find a shade for your plant as it may experience mild sunburns.

Indoor Lighting

When you plant Portulacaria Afra indoors, choose a site where it can receive direct sunlight for some time and indirect light for the rest of the day. East or west-facing windows will work best for the lighting. While finding the right spot for the plant, you may need to move it as many times as possible to find the most appropriate site.

Ideally, the plant will require 5-6 hours of light a day to grow and thrive appropriately in a window. However, if your area does not receive adequate sunlight or there is poor lighting in your room, consider using artificial light sources. These include the grow light so that the plant can achieve the light requirements.

Portulacaria afra in a pot.
Finding the right spot for the plant, you may need to move it as many times as possible to find the most appropriate site.

Portulacaria Afra pot placed in a window may need to be rotated several times to ensure that all the sides of the plant receive proper lighting. The succulent leaves should be far from the window to avoid direct contact with the window panes. Direct contact may cause the leaves to burn. 

Proper lighting will also go hand in hand with high humidity. Use a humidifier in the room where you plan on growing your Portulacaria Afra. You can also achieve this by elevating the plant’s pot a little higher to increase the level of humidity. While the plant is receiving proper lighting, the moisture will ensure that the plant is not much affected by the lighting.

Outdoor Lighting.

Portulacaria Afra succulent loves a place where it receives plenty of sunlight and shade. Elephant plants can tolerate partial sun to full sun, but they will do well in bright filtered sunlight, preferably in the shade. During the afternoon hours or in full sun, acclimate the plant to prevent sunburn.

If you place your plant outdoor, put it in a bright sunny place. As the plant grows, slowly increase the sun lighting hours to fully get used to the sun and prevent the leaves from sunburn. When you plant your Elephant bush outside, keep in mind that intense heat and heatwaves can also cause sunburn.

Portulacaria Afra planted directly to the ground.
If you place your plant outdoor, put it in a bright sunny place.

During the intense summer seasons, sunshades can significantly save the plant. Taking the plant indoors during these seasons will help the plant because the sun outside tends to be harsh. Keep an eye on the water demand of the plant outdoor.

Can Portulacaria afra be affected by too Much Sunlight?

Like other succulents, Portulacaria Afra can also be affected by too much sun or extended exposure to direct sunlight. Too much sun, especially the intense sun, will cause the beautiful leaves of the Portulacaria Afra to have sunburns and sun damage. Portulacaria Afra requires at least 4-6 hours of bright sun. Sunburn can happen quickly in less than an hour when the plant is exposed to much of it during the hot seasons. 

Sunburn can also be a gradual process. Brown sports start to occur, usually the first signs of sunburns. When you recognize these signs early, you still have time to save your plant. You can remedy the plant by placing it in the shade to cushion it from further damage. When the sunburn has progressed for some time, put the plant in a dark area to try and reverse the damage.

Though some succulents may toughen and survive in harsh conditions, is it essential to risk your Portulacaria Afra. Because you don’t want to take any chances. Always protect your plant during intense sunlight.

Can Portulacaria Survive without Sunlight?

Your elephant plant will survive indefinitely under very little sunlight or without sunlight. But the plant will only survive and not thrive. The plant will soon start exhibiting signs that tell you it is in trouble and needs proper lighting. Some of these signs include

  • The leaves of the Elephant bush will start elongating more than usual, as the plant stretches to reach for the light.
  • The plant will begin to experience stunted growth
  • When the plant is given much water and little light, it may begin to succumb due to root rot
  • And when root rot sets in, it will be hard to reverse the mess

For your plant to grow well, place it where it will receive proper lighting. Not giving the succulent enough light is trying to introduce a new nature that the plant is unfamiliar with and can’t survive in, for long.

Summer Care for Portulacaria Afra

Summer seasons are made of harsh conditions that are not favorable for the plant. However, don’t let the intense sun and the high temperatures of the summer months kill your plant. Although heat is not a significant concern for elephant plants, the plant will not thrive well in temperatures above 80 degrees. However, the heat is not the only concern during the summer season. 

Watered Portulacaria Afra plant.
Help your elephant bush by watering it early in the morning before the sun sets in to give it time to absorb the water.

The heat plus the sun will be deadly to your Portulacaria Afra. During this time, use sun protection to cover the plant from extreme temperatures. You can also move the plant to a place it gets shade and help your elephant bush by watering it early in the morning before the sun sets in to give it time to absorb the water. These will help the leaves from drying as there is available moisture for evaporation and cooling of the plant.

How to Fix an Etiolated Portulacaria Afra

Two factors could cause etiolated leaves. The first one is too much watering, and the second one is if the plant is receiving little light. The first sign of etiolating leaves is bending down of the lower leaves to create more surfaces to catch more light.

You can behead the leggy succulent and replant the top of the plant that is not much affected. These will help because the plant will not shrink down to standard size. However, if the lighting situation does not improve, the new growth will also start to etiolate, further weakening the plant.

To save the plant from this mess, give this succulent enough light for the new growth to come in the compact. Etiolated leaves don’t necessarily mean a lack of light. If your lighting is okay, try cutting down on the water to slow down the stretching.

How to Set-Up an Artificial Light for Your Succulent

 Indoor plants may need artificial lighting, especially during the winter when there is frost and no sunlight. To set up an artificial lamp, start by selecting the correct light bulb to use. Some light bulbs include incandescent, fluorescent, LED, and HID lights.

Several Portulacaria Afra in a pot.
Indoor plants may need artificial lighting, especially during the winter when there is frost and no sunlight.

The second step is to choose the right light fixture. You can use any fixture to hold your grow light if only it is appropriate for the type and size of the bulb you will buy. Most supplemental lighting should be placed 6-12 inches from the light source. For a plant receiving no sun from outside, leave the light for up to 16 – 18 hours a day. These will mimic the plant’s natural cycle and supplement the natural light from the window.

Bottom Line

Portulacaria Afra will be happy to be in at least 6 hours of sunlight and partial shade each day. Don’t leave them outdoors in the frost at night as the plant has low frost resistance. Proper lighting will give your plant a healthy look and a lovely appearance in your compound.

Propagate Portulacaria Afra, The Perfect Desert Plant

Portulacaria Afra is a small succulent shrub native to South Africa. It can grow to about 13 feet tall but can be much smaller under gardening. It has a smooth brownish-like trunk that is thick and heavily branched with a large amount of bright green succulent leaves. Elephant bush is an adorable and exotic succulent, and that is why you need more of them in your home.

Propagating Portulacaria Afra does not take much effort, despite the big rewards. The plant propagates from stem cuttings that root fast in easy-draining soil under warm temperatures. In a few weeks, you have a strong elephant plant with roots ready for transplant.

So how do you perform the propagation? The best way to propagate an elephant bush is using stem cuttings and plump leaves during the spring or the summer periods. The stem used should be left out to heal and to callus for a few days before they are propagated. Roots development takes about 1-3 weeks before developing. With everything in place, propagating the Portulacaria Afra should be easy. Keep reading this article that we have prepared to ensure that you have everything in place and your propagation is a success.

Propagate During the Spring and Summer Months

The best time to propagate Elephant bush is in the spring and the summer months. During this period, they grow rapidly when propagated and will quickly grow new leaves. New leaves from your cutting indicate that it is time to transplant it to its destination.

Portulacaria plant in a pot
The best time to propagate Elephant bush is in the spring and the summer months.

While you can still propagate the Portulacaria Afra during the winter and the fall months, they do not grow much because they are in their dormant stage. Propagating in the cold season means not seeing new leaves until the spring, but the roots still grow. Leaves show signs of shriveling, especially when not receiving enough water.

Best Ways to Propagate Portulacaria afra

The Elephant plant is rarely grown from seeds. Most gardeners propagate this succulent from cuttings. The reason being the process takes a short time and is enjoyable. Propagating Portulacaria can happen in two ways.

  1. Propagating from the stem cutting
  2. Propagating from the leaf-cutting

1.    Propagating from the Stem Cutting

This is the most preferred method to propagate the Portulacaria Afra. The method is easier and takes a shorter time than the leaf method. To do it successfully, follow the steps below:

1. Obtain the right stem and cut it

The first step is to obtain a few cuttings from a healthy stem. Stems with plump leaves have a good water reserve and grow fast. They develop new leaves when needed. Look for branches that are thick with four sets of healthy leaves and fresh trucks.

You can also measure 5 inches from the tip of the branch and make an angle of about 45 degrees using pruning shears or sharp scissors. It is not necessary to measure the length of the stem. But focus on increasing the probability of a perfect result. 

You need to cut the stems right under their nodes. Stems have a node after a particular distance between two stem segments. Be careful not to cut through the node. It slows down the growth of new roots.

A plant stem being cut for propagation.
Most gardeners propagate this succulent from cuttings.

Place the Portulacaria Afra in a warm, waterless place away from direct sunlight. Allow the cutting to heal. The healing process takes a few days. The cutting has to be left until it develops callous before propagating it. This ensures the plant does not rot before the roots form.

2. Prepare the soil

The second step is to prepare a good pot for the plant. Select a fairly small pot with a depth of at least 5 inches with several drainage holes. The pot selected should not be too big for the plant as it will hold more moisture that can lead to root rot.  

Fill the pot with cactus potting mix or a mixture of equal parts standard soil and grainy sand. The soil should hold moisture for long but still drain the excess water. This soil will help the Elephant bush cutting to root properly.

Remember that this soil is used until the plant grows roots but after the roots have been established, transfer the plant to a more draining soil to prevent root rot. You can also increase the size of the pot as the plant grows.   

Top view of the plant, pot, and soil
The pot selected should not be too big for the plant as it will hold more moisture that can lead to root rot.

With your calloused stem cutting, it’s now time to bury it into the soil. Poke a 3-inch hole in the succulent soil mix. Insert the cutting of the elephant bush cutting into the hole and press slightly the soil around it. You can add a small layer of about 0.5 inches of gravel over the top of the pot to conserve water and prevent spilling over the edge when watering.

2.    Propagating from leaf cutting

Although most people prefer to propagate Portulacaria from the stem, rooting them from the leaves is also possible. Propagating from the leaves is not a preferred route due to the time taken by the plant to grow. When propagating from the leaves, first identify a good leaf that is neither too young nor too old. The leaf taken should include the stalk where it attaches to the branches of the Portulacaria plant because a leaf taken without the stalk will die.

Place the leaf in a cool place where it does not receive direct light. Let the leaf dry for a day to prevent it from rotting when planted into the soil. The cutting of the leaf will develop callus after some time which indicates that it is ready for planting.

Though not necessary, you can dip the leaf into a rooting hormone to speed up the process. Once the leaf is healed and dry, stick it to a well-draining soil mix like mentioned above. Laying the leaf flat can also be a way of making it grow.

Keeping it away from direct light and watering it when the soil feels dry will have the leaf rooting in a while. You can also take the healthy leaves that have fallen, throw them in the pot, and let them do their things. Amazingly, some of them end up developing roots.

Watering the Portulacaria Afra Propagated Cutting

Watering this plant during propagation depends on the environmental conditions of your area. With a good soil mix, water the plant once or twice a week after propagating. You can also do this when the soil seems dry or when it has stayed for a day.

Portulacaria afra plant with water droplets.
Lack of proper watering will make your plant stay for long before rooting.

 It depends on whether your area is humid or dry or whether you are propagating outdoors or indoors. The soil should not be left to dry for too long. The plant is still developing and can easily dry. Lack of proper watering will make your plant stay for long before rooting.

How Much Light is needed while Propagating Elephant bush?

Do not place the propagated cutting in direct sunlight. If the plant is outdoors, place it where it gets indirect sunlight, preferably in the shade. If kept indoors, leave the plant near a window that receives proper lighting.

Propagating the elephant bush in direct sunlight causes the leaves to be sunburnt. The plant is still young and cannot get enough water from the soil due to a lack of roots. Hence direct light could be preferable as they mature.

When to Water Your Portulacaria afra Cutting

Watering this plant depends on the environmental conditions of your area. With a good soil mix, water the plant once or twice a week after propagating. You can also do this when the soil seems dry or when it has stayed for a day.

 It depends on whether your area is humid or dry or whether you are propagating outdoors or indoors. The soil should not be left to dry for too long. The plant is still developing and can easily dry. Lack of proper watering will make your plant stay for long before rooting.

Common Problems Associated with Portulacaria afra during Propagation?

Improper Sunlight requirements

During propagation, place it in bright sunlight or a warm environment to grow the roots. When the plant is kept for too long in intense temperatures it may die. If the plant is grown indoors, provide as a bright light as possible for them in the house.

Elephant bush in a pot.
Place it in bright sunlight or a warm environment to grow the roots.

 If your place does not receive proper sunlight or there is poor lighting, consider a glowing light so that the plant can meet its lighting requirements. When grown outside, ensure to check on the plant regularly for proper growth.

Watering conditions

Watering will largely depend on the place you stay. These plants is adapted to their native settings, and when they are propagating, they are more sensitive to water levels. Do not apply much water to them. The soil should just remain moist for the roots to develop properly.

Frost will kill a propagating Portulacaria

Elephant bush can tolerate mild frost and cold temperatures when it is fully grown. During propagation in extremely cold places, grow these plants in a container and they should be kept indoors. A propagating Portulacaria should be treated like a child who is not adapted to most things.

Bottom Line

Portulacaria Afra succulent is an amazing plant, and growing it has many advantages. It is easy and fast to grow and take care of. If you find the optimal place for it in your indoor or outdoor garden, this succulent can best suit you.

With the information above, you can propagate as many Elephant bushes as possible using the same steps. The ball is now on your side to build a bonsai collection with this information. Success!

7 Simple Steps To Watering A Portulacaria Afra Plant

Watering succulents can be tricky for new gardeners because they don’t need to be watered as often as tropical houseplants. So, if you naturally try to water them like other plants, they may not survive. Many variables and factors affect how and when you should water these plants. Since it grows both indoors and outdoors, the watering rules may vary.

With simple watering rules and methods, you can make your Portulacaria Afra thrive better and fast. This article has prepared the 7 rules to water your Portulacaria Afra properly. Though the plant is drought tolerant, it performs better when following important rules during watering. Have a look at the following:

1. How Often to Water the Plant

How often to water your succulents plants differ from one area to another and from one plant to another. Some of the factors that determine how often to water your plant include

Humidity

This is the necessary amount of water vapor in the atmosphere. And since succulents absorb moisture from the atmosphere, their watering schedule may differ from one place to another, based on the level of humidity. For example, if you live in areas with high humidity, the soil takes more time to dry out completely. Therefore, water the plant less frequently. 

Plant inside a bottle with water vapor.
Humidity is the amount of water vapor in the atmosphere.

However, humidity is less in dry and warm conditions, and the soil will dry out faster. Therefore, watering them more regularly is recommended. On the other hand, winter conditions mean high humidity. Thus, water the plant less frequently. 

Succulent size

How often you water your Elephant Bush depends on how big or small your plant is. Bigger plants have a more robust root system that store important nutrients, helping them go for days without water. In that case, they have lower water demand. On the other hand, smaller plants are actively growing, and their water demand is high.

Sunlight

Elephant Bush exposed to more sunlight for long hours has different water demands to those under the shade. So, before watering succulents, what does the rule say? Before proceeding, check out the soil first by dipping your finger into the soil a few inches to see if the soil is dry. If dry, then water the plant, but if still moist, wait until it dries to avoid overwatering. 

Elephant bush in a pot outside absorbing sunlight.
A plant that is exposed to more sunlight for long hours has different water demands.

2. Indoor Plant Consumes Less Water than the Outdoor.

Elephant Bush planted indoors may require less water compared to the outdoor ones. Outdoor, there is a higher evaporation rate due to high temperatures, and the airflow is high. Indoor environment limits the airflow, managing low temperatures. It means the evaporation rate is low. Thus the plant needs less water. 

When watering, give your indoor plant less water than your outdoor plant. Indoor plants also tend to hold water for long. Reason being, the slow rates of evaporations. Therefore, water them less to prevent overwatering the plant.

3. Water the Plant in the Root Zone

When watering Elephant plants, your focus should only be on the root area. Remember, only the roots need access to water. Avoid watering the stem or the leaves. Water absorption happens in the roots and is later distributed equally to other plant parts.

Wetting the foliage does not only wastewater but is also dangerous to the Portulacaria Afra plant. The plant will be exposed to diseases when leaves are watered. Also, wetting the leaves and exposing them to sunlight immediately leads to slight burn marks.

When the plant is watered in the evening, and you spread water on the leaves, it may cause the leaf mound disease. Efficient watering means the water reaches the roots and not the leaves. Too little water quantities reach the topsoil but will not get to the root cap of the plant. Water the plant deeply, and ensure that the can is near the roots to prevent water spillover. 

4. Use a Well-Drained Potting Mix

Some people tend to overlook the soil they use to plant the Elephant Bush. Soil determines a lot, especially when it comes to watering. However, there are different choices of soil to use when planting Portulacaria Afra. Always remember to grow the plant in well-draining soil.

A cactus on the pot.
Soil determines a lot, especially when it comes to watering.

Think about the environment the bush plant flourishes. It is an arid plant, meaning it needs minimal rainfall. Therefore, the plant adapts well in areas with little water. Also, the roots absorb water quickly. This means that soil used for this plant should drain fast to avoid rotting. 

Here is a suggestion on making good soil with good drainage.

To get the best potting soil, start with an essential cactus soil available in most garden centers. Then, mix the soil with organic matters like peat moss or coir, the main ingredient for potting soil. You can also add an inorganic substance that allows water to quickly soak and drain out of the soil. In addition, the inorganic substance maintains a crumbly and airy mix.

5. Type of Pot Matters

Figuring out the best watering routine that you can use for your Elephant Bush can be somewhat tricky. But knowing the type of pot you have is a deciding factor to know how often your plant needs water. Some materials used to make these pots determine their ability to drain or retain the water.

Terracotta pots, for example, are porous and the most breathable pots to use. However, planting your Elephant Bush in the terracotta pot means the watering should be habitual. This is critical if you reside in hot areas. Plastic pots and ceramic ones, on the contrary, help to conserve water but are less breathable compared to terracotta’s, hence the need to reduce watering intervals.

Elephant bush plants in a separate pots.
Knowing the type of pot you have is a deciding factor to know how often your plant needs water.

Whether using terracotta or ceramic pots, observe the rules associated with watering succulents. Water when the soil is dry to prevent dampness and molds. Regardless of the soil material used, ensure the pot has holes at the bottom to drain excess water from the pot. When watering, pour water continuously until it starts to drain from the base of the can.

6. Know the Correct Water Type for the Plant

Rainwater is the best option when deciding on the type of water to use. Rainwater contains more oxygen than tap water. The rainwater chemistry, including airflow and oxygen retention, is better than tap water. Rainwater has chemicals that have vital nutrients needed by the plant. When carbon dioxide mixes with other minerals, the chemicals formulate, releasing zinc and manganese.

Rainwater has 78 % nitrogen, an element that makes the plant greener. Other ingredients in rainwater essential for the plant include nitrate and ammonium forms. When they drop from the skies, they are absorbed by the plant immediately, through the roots and the leaves. The nutrients make the plant more robust and healthy. 

If there is no rainwater, use distilled water for watering the Elephant Bush. Purified water is also perfect for the plant. Avoid using tap water because it contains treated chemicals that will build up in the soil as salt when choosing water type. If rainwater and distilled water are unavailable, boil water at night and let it settle the whole night to water in the morning.

7. Water the Plant in the Morning and the Evening

Watering the Elephant Bush in the morning prepares the plant for the long hours of sunlight during the day. Watering the plant in the evening cools the plant. Watering at the two intervals helps the plant retain water and ensure it absorbs as much as possible. Watering the plant in the afternoon, especially during the summer season, makes the plant lose all the water through evaporation.

A girl watering the plants in the morning.
Watering the plants in the morning prepares the plant for the long hours of sunlight during the day.

However, watering in the morning could be preferable to watering in the evening during the winter. Soaking the plant in the evening soaks the leaves in freezing water for long, and it causes root rot. Morning watering is again preferred because the plant has enough time to dry before the sun goes down. However, the water can shock the plant during this time as it cools down indefinitely, thus the need for moderation.

Signs of Underwatered Elephant Bush

Now that you know the rules for watering the elephant plant, you should also know how to identify an underwatered elephant plant. Underwatered Portulacaria Afra has flat and limp leaves. Don’t worry if you notice such a sign, as it is an indication that the plant needs a proper soak. Underwatered Elephant Bush will have faded foliage, dull in color, and if left for too long without water, some leaves start to fall off the plant when touched.

Signs of Overwatered Elephant Bush

Overwatering this succulent is a big mistake any gardener can make. However, the plant can forgive you for underwatering but not overwatering. Overwatered Elephant Bush develops a mushy stem, and the leaves start yellowing and are more transparent. When you notice such signs, cut back the watering frequency until the plant recovers, or it will begin to rot.

Bottom Line

When watering the elephant plant, soak and dry methods are the best. During the dormant seasons, water the plant less as there is no growth, and the plant uses less water. Water the plant appropriately and enjoy its beautiful foliage. Remember that your plant always communicates what it wants and does not want. Therefore, never ignore the signs it is giving you. 

Nepenthes propagation guide: what you need to know

Nepenthes, also known as Pitcher, is an attractive carnivorous plant with an ornamental appeal while entertaining and educating about a unique nutrition method. These plants may sound exotic, but the propagation of pitchers is no more complicated than the propagation of any other plant.

There are several ways to multiply pitchers, but planting seeds or rooting cuttings is the best way to succeed and is the most common method for growers. Pitchers plants can be propagated using tissue culture, grains, or cuttings.

The ideal way to propagate pitcher plants depends on the type, but you can grow many common varieties quickly from cuttings, divided roots or rhizomes, or seeds.

Propagation Methods for Nepenthes

Plants in nature generate offspring by seed. Baby plants take a long time to grow, and fertilization is erratic. The Pitcher produces male and female flowers on distinct seedlings. The two genders look identical, and it is almost impossible to ensure that you have one of each.

In addition, plants have to flower simultaneously to enable pollen from the male to be transferred to the female flowering. Therefore, rooting cuttings is a much easier and more secure way of spreading pitcher plants.

Nepenthes Male Flower.
The Pitcher produces male and female flowers on distinct seedlings.

If you want to undertake propagation through the seed, you will require patience and luck. Cuttings, however, grow fast and are manageable even for a beginner to take up. Cuttings of mature plants with active growing stalks work better.

Propagation of Nepenthes Through Cuttings

There are various ways to remove cuttings. First, select a plant with one or two basal shoots in the vining phase. By doing so, the plant will inject energy into the base in case the main vine dies. And opt for green vines. Do not cut from the dark wooded stem.

Use a clean, sharp razor blade or scalpel for your cuts. Take three to five knots and make your cut. Check for a tall stem that actively climbs and grows, with leaves widely spaced out. Take your cutting near the tip of the branch, which is where much of the new growth will occur.  

After making your cuts, cut the lower leaf from the stem or cut it in half. You can also leave the two upper leaves and bud intact. Do not forget to cut the tendrils so that the cut does not waste energy in the production of pitchers.

Nepenthes Cuttings.
It takes at least a few weeks for your cuttings to begin growing new roots.

Position the extremity of the stem in the root medium. Choose a neutral or slightly acid medium, like sphagnum moss, 50:50 sphagnum moss, and perlite, or 50:50 coir and perlite. Place the medium in a pot and moisten it.

Do not water it to such an extent that it is soggy, or your cuttings may become moldy. Instead, push the end of the cut stalk into the potting medium deep enough to have at least one growth node below the soil surface.

Place the jar into a clear plastic bag and drill 2-3 small holes into the bag. Alternatively, you can put the pot in a small terrarium. Check the rooting area every 2-3 days to see if it is still moist.

If it feels dry, humidify with water from a spray flask. Place the plant in a bright area close to a sunny window. However, keep it out of direct sunlight, which will be too hard for new seedlings.

Repot the cuttings after you see new growth. It takes at least a few weeks for your cuttings to begin growing new roots. After about one month, try to pull your potted cutting very slowly. If there is any resistance, then new sources are starting to form.

Propagating Nepenthes by Seed

Cultivating new Nepenthes from seeds works, but it will take years for a new plant to ripen and bloom. For Nepenthes seeds to be produced, you must ensure that the female plant is pollinated with male pollen. Seeds should form within a few weeks, and you will need to sow them soon after forming.

Collect Nepenthes seeds at the beginning of fall. You can quickly start seeds of pitcher plants on a bed of sphagnum moss. As is well known, pitcher seedlings are difficult to grow from seeds. However, if your Pitcher is pollinated, it will produce little round pods in late summer or autumn. As soon as you see the pods browning, please pick them up and place them into a wrapper. Allow them to dry for one to two days, open the pods and remove the tiny seeds.

Nepenthes plant with growing seeds.
Pitcher seedlings are difficult to grow from seeds.

Don’t forget that cultivating pitchers from seeds takes more time than other methods. Store the seeds in a wrapper in your refrigerator until ready to use. When removing the seeds, let the container heat up to room temperature before removing the seeds from the shell to shield them from condensation.

Put the seeds in a plastic bag with moist sphagnum moss. Sphagnum moss should be wet but not damp. If you have no sphagnum, the peat moss works too. Sprinkle the seeds in the bag and seal them. Make sure the bag has air in it when you close it.

Alternatively, sow the seeds in a jar with a peat mixture. A blend of peat and sand works great. Distribute the seeds about 0.5 cm apart in the pot and sprinkle enough sand on top to cover them. Wrap the containers and place them under a lamp.

Place the posts inside transparent plastic bags or place them in a terrarium or under a moisture dome. Put them under a LED light instead of in the full sun. Maintain a temperature between 70 and 90 degrees F until seedlings are ready to be potted.

Propagating Through Rhizome Division

The best time to split the rhizomes is at the beginning of spring. Rhizomes are the fleshy bulb-shaped structures at the base of the plant, underneath the soil. Splitting the rhizome is the fastest and easiest way.

Gently remove the Pitcher from the old jar, making sure to clear the roots and soil as well as the leaves. If the plant is on the ground, carefully remove it. Place it on a clean surface after removing the plant from the pot, such as a table.

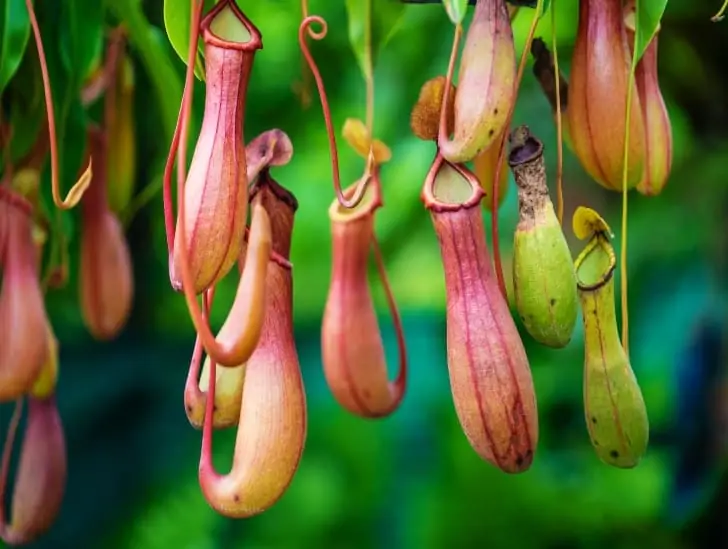
Nepenthes Hanging.
Splitting the rhizome is the fastest and easiest way.

After removing the plant from the pot, begin to gently draw the base of the plant, looking for weak spots between the rhizomes. When a soft spot is identified, press carefully to disconnect the rhizomes. Alternatively, you can use pruning shears to separate the harder rhizomes.

Thoroughly inspect divided plants for signs of decay or insect infestation. Throw away any dead or decaying plants or rhizomes to help you grow a fresh, healthy crop of pitchers. Once you have split the rhizomes, use sharp cutters to reduce the leaves.

Put the divided rhizomes back into separate pots. Fill each jar with equal blends of peat moss and perlite. Coarse sand is another alternative to perlite. Plant the rhizomes just below the ground surface, so the bases of the leaves are right on the surface. Place the pot in a sunny place and water the plant regularly to keep the ground moist.

Propagative Mediums in Nepenthes

Pitcher cuttings can be propagated in several ways and rooted in water or a soil-free environment.

Propagating Nepenthes in Water

This procedure for rooting Nepenthes cuttings is straightforward. Make cuttings, put them into the water, keep moisture high, change the water regularly and wait. Use rainwater or distilled water and immerse the end of the cut and the first growing knot in the liquid. Put the glass in a light zone where the temperatures are moderately hot. Change the water a minimum of once a week.

The stem should split within two weeks and begin to produce minute roots. Could you put them in sphagnum moss when the cuttings have six roots? Keep the cutting moderately moist.

Nepenthes in a body of water.
It is relatively easy to propagate the pitchers in water, but you must monitor the cut for signs of fungus or rot.

The plant will develop a traditional pitcher shape in six months or more. It is relatively easy to propagate the pitchers in this way, but you must monitor the cut for signs of fungus or rot. Some Nepenthes have very high success rates, while others have less. In some cases, Nepenthes will continue to develop quite well in the water, producing even pitchers capable of trapping insects.

Propagating Nepenthes Cuttings in Moss

Harvest a cutting and use rooting hormones at the end of the cut to improve the plant’s ability to send out roots.

Sphagnum Moss or a 50/50 mixture of coir and perlite creates ideal conditions when growing pitchers from cuttings. Pluck out the basal leaves and put your stem cutting in the middle.

Moisten the medium slightly, then place the container in a plastic bag. Keep the vessel in a well-lit location. It may take six months to a year to see further growth while rooting occurs. Do not disturb nor repot the plant before observing new growth.

Bottom Line

The fastest way to propagate Nepenthes is to root the individual through stem cuttings. You may also copy the parent individual by dividing the rhizomes and leaves to produce new growth. We recommend stem cuttings because they tend to be slightly faster.

Does Kalanchoe Need Full Sunlight To Grow?

Kalanchoe is a beautiful succulent plant with thick leaves that store water to grow in drought.

As with all other plants, Kalanchoes need a lot of sunlight to thrive. Therefore, they do well when planted in direct sunlight and partial shade. 

So, Does Kalanchoe Need Full Sunlight To Grow? Kalanchoe needs a lot of sunshine at every stage of their life cycle. Sunshine is crucial because chlorophyll uses solar energy to make food, widely known as photosynthesis. Therefore, if plants lack adequate sunlight, they will not achieve the normal photosynthetic process and will be stressed.

Keep your Kalanchoe plants outside in a sunny place where they receive full or partial sunshine. The indoor kalanchoes must be kept near a sunny and bright window if you want to expose them to the sun. Provide your succulent plants with the right amount of light and watch them become healthy and happy.

Protect your Kalanchoes from the sun’s rays as they may cause sunburn. In addition, do not starve them to sunlight because they may become leggy or stretched. Kalanchoe grows best under full sun or sunlight. What, then, is bright, indirect sunlight?

Understanding bright indirect light in succulents

Most indoor succulent plants originated on the floors of tropical forests where an aerial canopy of tree foliage shaded them, so they prefer indirect sunlight.

Indirect light is bright enough to project a shadow, although not dark and clearly defined. Instead, use transparent curtains, white curtains that you can see through between the panels and plants on the windows that receive direct sunlight.

A kalanchoe near the window.
The amount of light your plants get often depends on where your windows are facing.

Rooms or hallways that do not have windows may not provide bright enough light for indoor plants. You can create an indirect light with fluorescent or LED lamps for these areas.

The best way to create indirect sunlight for your plants is to use your windows and sun direction.

The amount of light your plants get often depends on where your windows are facing and how clear those windows are. Don’t forget the white walls will reflect more light towards your plants than the dark colors.

The relationship between the direction of the window and sunshine

South-facing windows

Suppose your south-facing window gets a lot of sun during the day; place plants that need indirect light within a few feet of the window. Place it as far away as possible for the sun’s rays to never reach them. If the window is shaded or draped to diffuse light, place your plants near it. Keep the drapery between them and the glass.

West-facing Windows

The afternoon light that a non-shaded west-facing window receives tends to be hotter and brighter than an east-facing window. Therefore, you will either want to place your plants 3 to 5 feet back in the windows facing west or insert a simple curtain between them and the window.

Eastward-facing windows

Although an eastward-facing window with no shade receives direct sunlight in the morning, the rays are softer than those later in the day. Consequently, most plants that prefer indirect light can be placed near or even on the edge of an eastward-facing window without the need for a dispersion curtain.

North-facing windows

You can place sun-loving plants that prefer bright and indirect light on a north-facing window because it seldom receives direct sun. Then, with low light levels in winter, place a mirror in front of the window to bounce more light on the plants. Alternatively, consider purchasing a fluorescent or LED grow light.

How do I move a Kalanchoe from an indoor to an outdoor setting?

Most commonly, Kalanchoe is grown in pots as an indoor plant with bright colors, but they can also be used as outdoor plants if you live in a suitable climate. The Kalanchoe, indoors and outdoors, prefer damp, light, and well-drained soil.

outdoor Kalanchoe.
They can also be used as outdoor plants if you live in a suitable climate.

Immediate exposure of the succulent to the outdoors under direct sunlight can be detrimental to the plant’s health. In addition, succulent leaves can have sunburn caused by sudden exposure to sunlight. Consequently, plants should be exposed to the full sun to adapt to the new environment.

First, put the succulent in a place that gets filtered or partly bright sunlight. Once the succulent adapts, gradually move it under the full sun, where it will get a lot of the sun for several hours a day and a little shade in the afternoon hours.

Outdoor light demands of Kalanchoe 

The plant will adapt easier if you progressively introduce it into its new environment. For example, if you immediately put a succulent kalanchoe in full sun, its leaves can burn. So, firstly, please place it in a place that receives the partial sun or under a tree that gets the filtered sun. Then slowly move the pot to a place where it will receive full sun for most of the day and some shade in the afternoon.

A blooming kalanchoe.
Kalanchoe succulents grow best in a sunny spot that receives partial sunlight.

Kalanchoe succulents grow best in a sunny spot that receives partial sunlight from the brutal afternoon sun. You can plant succulent plants beneath the trees to provide partial shade. Move your indoor Kalanchoe outdoors when the temperature gets hot in late spring or early summer.

Indoor Light demands of the Kalanchoe 

If you grow succulent Kalanchoe indoors all year round, they will do well in areas where they get a lot of sunshine. Therefore, they should be kept on a sunny window sill to provide the required amount of sunlight. The more sunlight your Kalanchoe gets, the better it will be. Under low light conditions, floral buds tend not to open, and foliage becomes thorny.

Kalanchoe in a pot.
They should be kept on a sunny window sill to provide the required amount of sunlight.

If your house does not have a bright and sunny place to keep your Kalanchoes inside, you can increase the lighting by using extra or artificial growth lights. However, be careful; try not to keep your succulent Kalanchoe too close to an incandescent bulb, as it creates heat that can burn the succulent leaves.

Put your Kalanchoe outside during the summer months in a shady place where it will only get 1-2 hours of direct sunlight daily. The plants do well if they get some months outdoors, as it helps them thrive and prepares them for the shorter days of fall.

What happens if a succulent Kalanchoe gets too little sunlight?

If a Kalanchoe does not get enough sunlight, it will begin to stretch its stalk and appear stretched and leggy. The legginess is because the succulent begins to project her growth toward the source of light. If you look at the plant under this condition, it will seek light or move towards the light.

A Kalanchoe leggy or stretched will eventually become weak and break down leaves.

Signs of insufficient light exposure include elongated stems, unbalanced growth, pale or deformed foliage, falling leaves, and the absence of flowers. If there is not enough exposure to natural light, move the plant to a brighter place or add a light lamp for additional light.

Signs of Overexposure to sunlight

Pigments look washed out and bleached.

Leaves appear to have blotchy burns in white, yellow, or brown

Wrinkled, scaly, or crispy leaves

Do Kalanchoe succulents have specific sunlight requirements for blooming?

Many people tend to throw out their succulent plants once they have finished blooming. But instead of throwing your plants away, you may deceive them into blooming again. The Kalanchoe succulents have specific light requirements that must be satisfied to bloom again in the next growing season. Therefore, succulent plants have different light requirements in both phases during the average growth period and the inductive blooming period.

Different colors of Kalanchoe.
Do not place them in direct sunlight, burning the leaves and reducing flowering.

A six-week period triggers the flowering cycle of this plant, where the plant undergoes a minimum of 14 hours of darkness every day. About four months after that time, the plant will begin to flower. However, it is possible to maintain the flowering almost a year-long if winter darkness resets the flowering cycle.

The kalanchoe plants cultivated indoors need a lot of light to bloom, so they must be kept in a room with abundant natural and bright light. However, do not place them in direct sunlight, burning the leaves and reducing flowering. Kalanchoe plants are plants that are sensitive to light. Therefore, a Kalanchoe flower must receive light and dark cycles to develop floral buds and bloom in the following season. 

How to Shift Light Levels for your Kalanchoe

Where you put your plants directly affects the light levels. Whether inside or out, there are several ways to influence light levels. Moving your plant to an open area is the easiest way to shift light levels. However, if that’s not an option, you can purchase an LED cultivation lamp to give your factory the additional light it needs.

Bottom Line

Kalanchoes prefer to receive natural sunlight that is relatively bright; however, they will usually not do well in full sunlight. Kalanchoe will also prosper in a house that gets a lot of sunshine and natural light. But they don’t like direct sunlight and may be stunted when you leave them in full sun all day long. That’s because too much sunlight will make the leaves burn, particularly the afternoon sun.

9 Types Of Haworthia For The Beginning Gardener

Native to parts of South Africa, the Haworthia genus features over 70 different types of species. These plants are relatively easy to grow and care for, making them one of the most popular houseplants in different parts of the world. Generally, Haworthia requires less light than other succulents to thrive. These plants usually form a star-like rosette with inconspicuous white flowers.

So, what are some of the best types of Haworthia to grow? Since there are over 70 different types of Haworthia, choosing the right type for your home can sometimes be challenging. But don’t worry because we are here to help you. Some of the best types of Haworthia to grow include Haworthia attenuata, Haworthia Setata, Haworthia Cooperi, and Haworthia cymbiformis. Others include Haworthia Limifolia, Haworthia Truncata, Haworthia obtusa, Haworthia Coarctata, and Haworthia Concolor.

This blog post discusses some of the best types of Haworthia to grow at home and what you need to do to keep them happy and healthy. Keep reading to learn more.

Haworthia vs. Aloe vs. Agave

Before we dive deep into discussing some of the best types of Haworthia to grow at home, it is essential to understand the differences between Haworthia, Aloe, and Agave because these plants look similar. It is pretty easy to confuse one for the other.

Visually, aloe vera and agave plants look fairly similar to the human eye. They both fall into the category of succulents that form rosettes. In fact, some people believe that aloes are basically agave without weapons (they don’t have spikes and strong teeth).

Haworthia plant in a black pot.
Haworthia and aloe vera have similar-looking long stems.

However, these succulents belong to different families, and even their flowers look different. Haworthia and aloe vera have similar-looking long stems, but the leaves of Haworthia are more pointed and greener, with relatively intense white encrustations running horizontally.

Additionally, Haworthia plants have rusty tips and form tight rosettes, while aloe vera and agave have flat-leaf tips.

Sometimes, the common aloe vera plant can look different from other aloe types, such as the aloe variegate, commonly referred to as Tiger Aloe.

There is also a species within the aloe family known as Haworthia-leaved aloe, whose sharp spines usually give it a fuzzy appearance. Its spines are sharper than the usual ones.

The Haworthia-leaved aloe resembles some plants in the Haworthia family, but it doesn’t belong there. Therefore, it might cause some confusion if you are not careful.

Though slightly different in appearance, these plants are good companions because they have similar care requirements, and all of them are slow-growing succulents. Therefore, you can combine them in your succulent arrangement.

Best Types of Haworthia to Grow

So, what are some of the best types of Haworthia to grow at home? Let us find out.

1. Haworthia coarctata

Haworthia coarctata resembles a hand clenched in a fist. It has prominent, reddish leaves and claws that join to form tight clusters. It can easily turn pink in extreme cold or with sufficient light, and produces offsets quite easily.

This succulent also has white horizontal stripes on its deep green leaves. The plant is commonly referred to as Haworthiopsis Coarctata and can grow to a height o up to 30 cm.

A Haworthia coarctata
It has prominent, reddish leaves and claws that join to form tight clusters.

Haworthia Coarctata requires well-prepared cactus compost soil, minimal watering, and exposure to full sun to thrive in a home environment. The minimum temperature should be 25oF.

2. Haworthia attenuata

Haworthia attenuata is among the most popular Haworthia types that are relatively easy to grow. The clump-forming perennial succulent makes a magnificent windowsill container display with its spiky and flesh stems. Its spines/leaves have pointed edges, and white horizontal stripes adding to its fine, rich texture.

The plant produces long, tubular, white flowers. Typically, flower petals start to form on mature plants from spring to fall. Haworthia attenuata can grow to a height of up to 8cm and can spread up to 30cm.

Since its leaves are relatively stiff, the succulent can survive for a prolonged time without water, but you still need to water it regularly in summer and autumn. Allow the potting mix to dry completely between watering sessions and water sparingly in winter.

The minimum temperature should be kept above 50oF and provide sufficient exposure to light. You should also consider re-potting your Haworthia attenuata every three years in spring when root-bound.

3. Haworthia cymbiformis

Haworthia cymbiformis is a wonderful succulent plant that resembles Aloe Vera. It has distinctive flesh stems covered with pointed leaves.

Typically, the plant grows to about 2cm tall and 9 inches wide though it can grow up to 5 cm tall in some cases. The flowers are dark-red on reddish stalks.

A Haworthia cymbiformis
Haworthia cymbiformis is a wonderful succulent plant that resembles Aloe Vera.

This succulent plant is easy to grow and can be a beautiful addition to a windowsill with strong light. For strong growths, the soil should be well-drained and less acidic.

4. Haworthia Cooperi

Haworthia Cooperi is a low-growing succulent with fine leaves that form rosettes. It is among the best types of Haworthia to grow indoors and looks terrific in a hanging basket or pot display.

The plant produces pinkish flowers with white filaments from summer to autumn.

Haworthia Cooper thrives in low to medium light conditions, warm temperatures, and it is highly tolerant of drought.

For watering, allow the top of the potting mix to dry out completely between watering sessions and water sparingly.

The minimum temperature should be kept above 60oF and provide sufficient exposure to light, such as in a spot where they receive at least six hours of direct sunlight every day.

A Haworthia Cooper
It is among the best types of Haworthia to grow indoors.

This succulent spreads slowly and can grow to a height of up to 15 cm over several years.

5. Haworthia Obtusa

Haworthia obtusa is a low-growing succulent plant that stays compact and produces offsets. The plant has triangular leaves with dark green lines running along the length of each leaf. It produces flowers from August to September, which are white with pinkish stalks.

The ideal temperature range for this type of Haworthia should be 80oFand below. It needs well-drained soil and thrives in low light conditions.

Water sparingly and allow the top of the potting mix to dry out before re-watering it. The minimum temperature should be kept above 60oF and provide sufficient exposure to light, such as in a spot that receives at least three hours of direct sunlight every day.

6. Haworthia Limifolia

Haworthia Limifolia is among the easiest types of Haworthia succulents that you should consider growing. This is because of its ease in cultivation, and it is a less fussy succulent that tolerates poor, dry soil.

The plant does not require much maintenance and can survive in different conditions ranging from low light to full sun exposure.

The Haworthia Limifolia is an active grower during autumn and produces small sweetly-scented white flowers during early summer.

A Haworthia Limifolia
It is among the easiest types of Haworthia succulents.

The succulent can grow to a height of 10cm, but its spread is dependent on the number of offsets it produces.

This type of Haworthia requires regular watering and drainage in the winter months, but switch to light watering throughout spring and autumn.

7. Haworthia Marginata Variegated or Zebra Cacti

Haworthia Marginata Variegated is among the most popular types of cacti. It can easily adapt to different growing conditions and features distinctive triangular leaves with white margins.

The plant produces pinkish flowers from winter to early summer, and during the winter months, the leaves turn a reddish-brown color.

The Haworthia Marginata Variegated can spread to a height of 20cm and can survive in a minimum temperature of about 50oF.

For watering, allow the top of the potting mix to dry out completely between watering sessions and water sparingly during the dormancy season.

8. Haworthia Pygmy Variegated

Haworthia Pygmy Variegated is a low-growing succulent with variegated leaves and can make an excellent choice of a potted cacti display for your home.

The plant produces pinkish flowers from early autumn to winter. Haworthia Pygmy Variegated thrives in warm temperatures, bright light, and rich soil with good drainage.

This succulent is known for its drought resistance ability. So, you should only water it when the top of the potting mix is dry.

The minimum temperature should be kept above 10oC and provide sufficient exposure to light. This succulent spreads slowly and can grow to a height of up to 8 cm over several years.

9. Haworthia Turgida

Haworthia turgida is a small cactus with thick triangular leaves that can turn red in winter and spring, but the most notable feature is its tubular white flower during the summer months.

The Haworthia Turgida thrives in low light conditions and can grow to a height of up to 10 cm.

This succulent is known for its drought resistance, and it does not require much watering. Allow the top of the potting mix to dry out completely between watering sessions and water sparingly.

Summary

There are many types of Haworthia that you can grow in your garden. Some have a more prolific growth rate than others, and some may be better suited for certain climates or areas with less rainfall.

We’ve discussed the top 9 best types of Haworthias, based on our experience as experts in gardening and horticulture.   

Knowing which type you want before purchasing is essential as some varieties need more sunlight than others. For instance, those from South Africa require a lot of sunlight while those from Australia prefer shade.