Golden Rules for Watering Golden Barrel Cactus

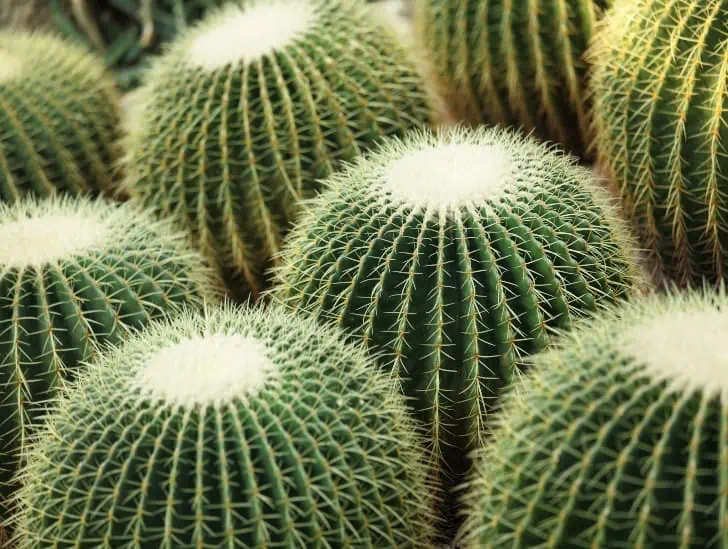
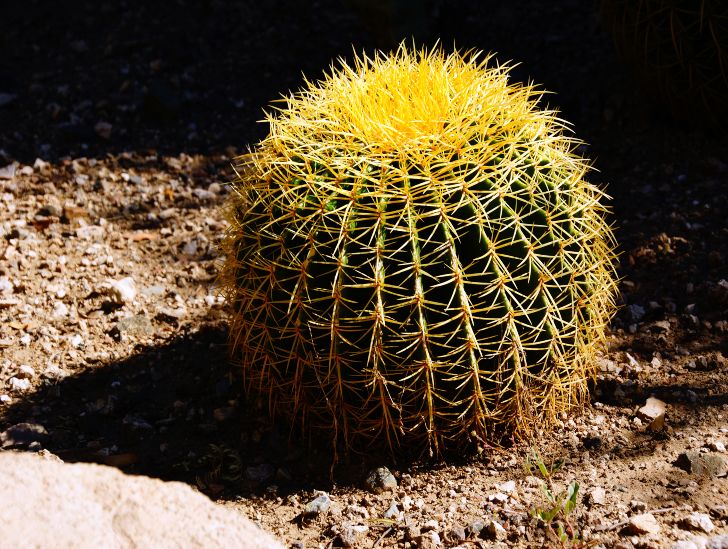
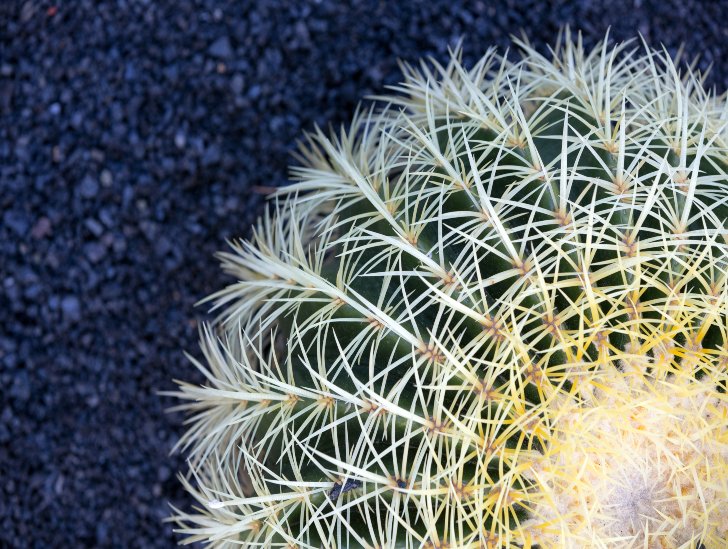
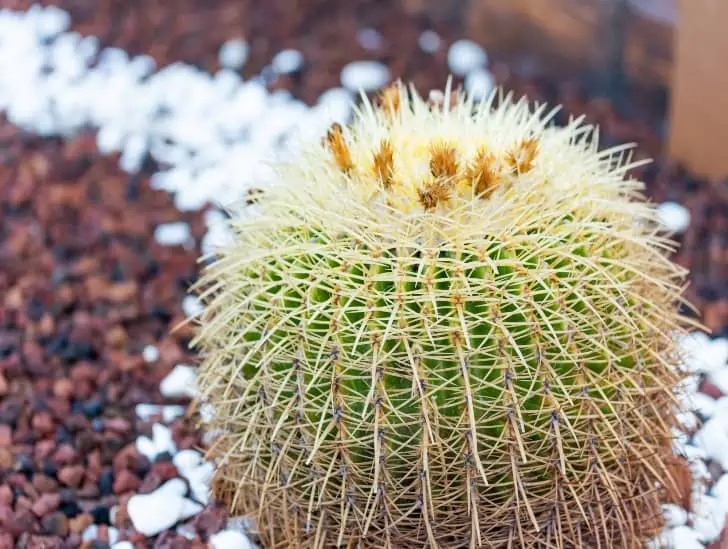
A closeup image of a golden barrel cactus.

The Golden Barrel Cactus (Echinocactus grusonii) is a beautiful and popular cactus native to Mexico. It is easily recognizable by its round shape and yellow spines. Although it is a relatively easy plant to care for, it still needs careful watering to ensure your Golden Barrel Cactus stays healthy and happy. A single mistake when watering this cactus can lead to problems such as root rot that could be fatal.

You should only water your Golden Barrel Cactus once a week or when the top inch of soil is completely dry. Be careful not to overwater your cactus because it can lead to root rot. During winter, reduce watering to about once every two weeks. Use filtered or distilled water for your cactus, and ensure that you are using well-draining soil. Water the succulent early in the morning so the leaves have time to dry off before nightfall.

This article discusses everything you need to know about watering your Golden Barrel Cactus. Read on!

Golden Barrel Cactus: General Water Requirements

Before you start watering your golden barrel cactus, it’s important to understand the plant’s general water requirements.

Golden barrel cactus native habitat is the arid regions of Mexico and thus has evolved to be quite a drought tolerant. In its natural habitat, the Golden Barrel Cactus will only receive rainwater a few times per year.
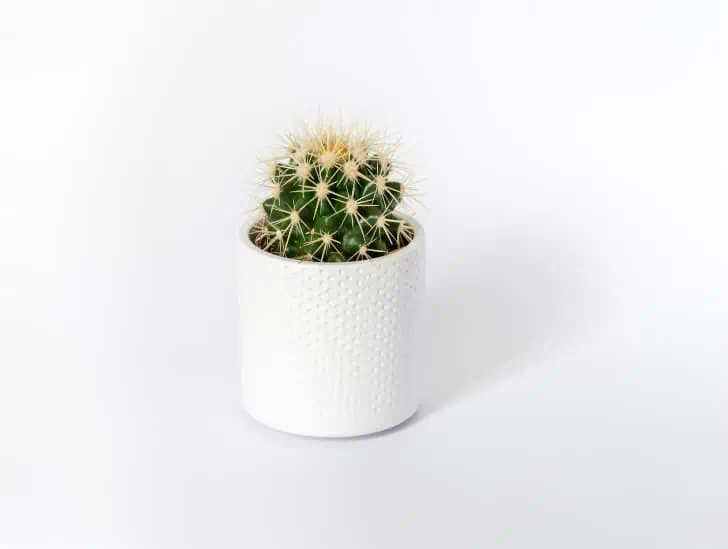
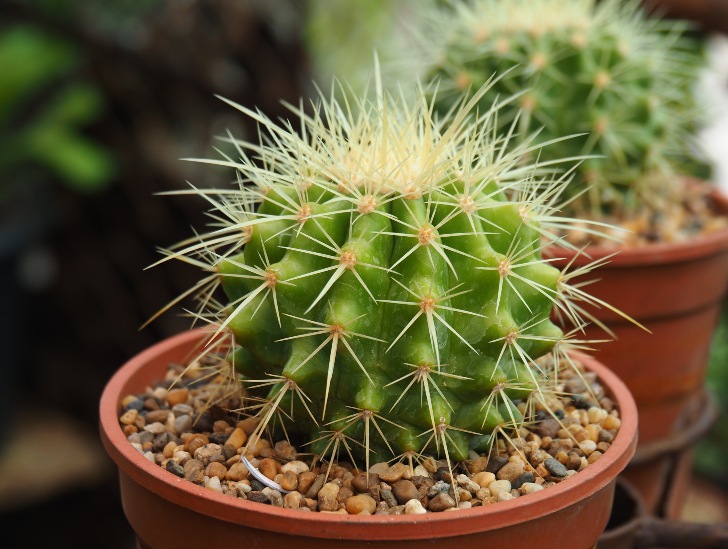
A golden barrel cactus in a white pot.
You may need to water more often in hotter weather or if the plant is growing rapidly.

The key to correctly watering your Golden Barrel Cactus is to mimic its natural habitat as closely as possible. This means that you should only water your cactus when the top inch of soil is completely dry.

Once every week is usually sufficient, but you may need to water more often in hotter weather or if the plant is growing rapidly.

During the winter months, you can reduce watering to about once every two weeks. It is important not to overwater your Golden Barrel Cactus because this can lead to root rot, a common problem with this plant.

If you think your cactus is getting too much water, check the soil to see if it is soggy or if the roots are starting to rot. If so, you will need to reduce watering and ensure that the plant gets sufficient drainage.

Golden Rules of Watering a Golden Barrel Cactus

You need to be careful not to make any mistakes when watering and caring for your golden barrel cactus. Here are some specific watering tips to keep in mind.

These golden rules will help you avoid common problems with golden barrel cactus such as root rot and ensure that your cactus stays healthy and happy.

Rule #1: Use Distilled Water or Rainwater

One of the most crucial factors to consider when watering your Golden Barrel Cactus is the type of water you use. It is best to use either distilled water or rainwater. This is because tap water often contains minerals that can build up in the soil and harm your cactus.

If you don’t have access to distilled water or rainwater, use tap water but let it sit out for 24 hours before using it. This will allow some of the minerals to dissipate.

A green barrel for rain.
It is best to use either distilled water or rainwater.

If you don’t allow the tap water to sit out for 24 hours, the minerals can build up in the soil and harm your cactus.

Rule #2: Water Early in the Morning

Another important rule to follow when watering your Golden Barrel Cactus is to do it early in the morning. This will give the water time to soak into the soil and hydrate the plant before the heat of the day sets in.

The best time to water your cactus is between 6:00am and 10:00am, so leaves have time to dry off. It also provides the succulent with enough time to absorb enough water.

If you cannot water your cactus early in the morning, do it in the evening instead. Just be sure that the leaves have time to dry off before nightfall. If they stay wet overnight, they can develop diseases or start to rot.

Rule #3: Let the Soil Dry Out Completely Between Watering Sessions

It is important to let the soil dry out completely between waterings. This will help prevent root rot, a common problem with Golden Barrel Cacti.

To check if the soil is dry, stick your finger about an inch into the pot. If it feels dry to the touch, it’s time to water your plant.

If you’re unsure whether the soil is dry, it’s better to err on the side of caution and wait another day or two before watering.
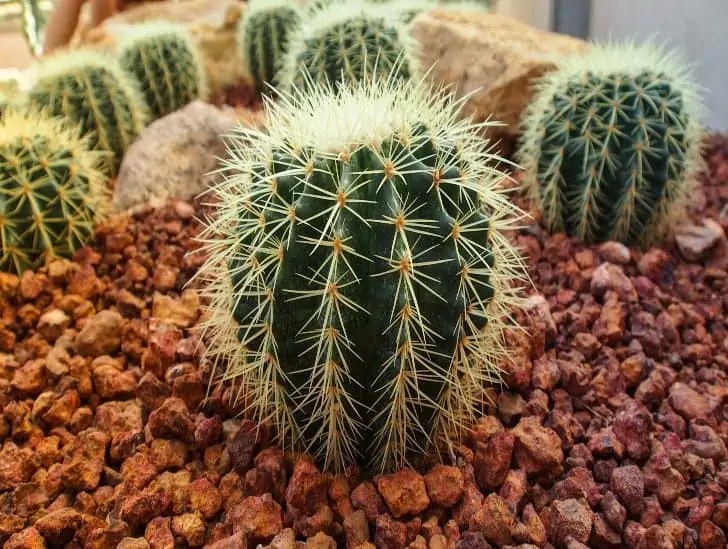
A golden barrel cactus on a rocky soil.
It is important to let the soil dry out completely between waterings.

If you are not confident in your ability to manually check for soil moisture, consider purchasing a moisture meter. These devices are specifically designed to measure the water content of soil and can be a helpful tool for keeping your cactus healthy.

A typical moisture meter is calibrated to give readings in percentages. For Golden Barrel Cactus, the ideal range is between 20% and 40%.

Rule #4: Use a Pot with Plenty of Drainage Holes

Another important rule to follow when watering your Golden Barrel Cactus is to use a pot with good drainage. This succulent does not like sitting in soggy soil, so it is important to ensure that water can drain freely from the pot.

The best type of pot to use is one with several drainage holes at the bottom. If your pot has no drainage holes, you can drill some yourself or choose a different pot.

Rule #5: Use the Right Watering Method

You can use many different watering methods for your Golden Barrel Cactus. The method you choose will depend on your plant size and the pot you are using. Remember, proper watering is one of the ways to keep your Golden Barrel Cactus healthy.

It is best to water small plants in pots without drainage holes using the “drench and drain” method. To do this, fill the pot with water and let it sit for 15 minutes. This will allow the water to soak into the soil and reach the plant’s roots.

A person watering the plant.
You can use many different watering methods for your Golden Barrel Cactus.

After 15 minutes, empty any remaining water from the pot. Be sure to do this, even if it means tipping the pot upside down and shaking it a bit. It is important that the pot drains completely so that the roots do not sit in water.

You can water larger plants in pots with drainage holes using the “soak and dry” method. To do this, water the plant until the water begins to drip out of the drainage holes.

Let the plant soak for 30 minutes to an hour, then empty any remaining water from the saucer or catch basin. Again, ensure the pot drains completely, so the roots do not sit in water.

Whichever watering method you choose, it is important to stick to a regular schedule. Watering your cactus once a week is usually sufficient, but check the soil moisture level before watering to avoid overwatering.

Rule #6: Avoid Getting Water on the Leaves

When watering your Golden Barrel Cactus, be careful not to get water on the leaves. This is because the leaves can easily rot if they stay wet for too long. Instead, focus on watering the soil around the base of the plant.
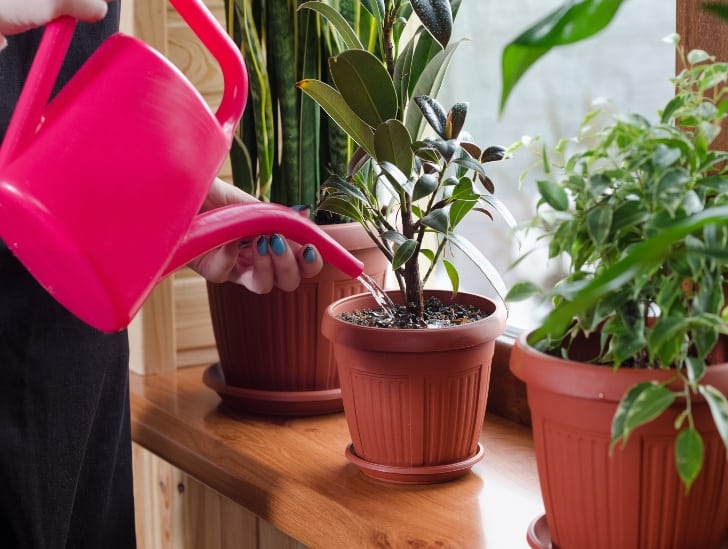
A person watering the plant using a pink water can.
Be careful not to get water on the leaves.

If you do get water on the leaves, be sure to dry them off as soon as possible. The best way to do this is to use a soft cloth or paper towel and gently pat the leaves until they are dry.

Rule #7: Water More Often During the Growing Season

During spring and summer, your Golden Barrel Cactus will be actively growing. This means that it will need more water than usual.

Generally, you should water your cactus once a week during the growing season. But as always, check the soil moisture level before watering to avoid overwatering.

This is also the right time to feed your cactus. Use a high-quality cactus fertilizer and follow the instructions on the package. Fertilizing your cactus will help it to grow strong and healthy.

Rule #8: Water Less Often During the Winter

During fall and winter, your cactus will enter a period of dormancy. This means that it will need less water than usual.

You should water your cactus once every two weeks during winter. You can even water it once per month if the weather is particularly cold.

Do not fertilize your cactus during winter because it will not be actively growing and doesn’t need extra nutrients.

Waiting to fertilize until spring helps to prevent root burn, which can happen when fertilizer is applied to dormant plants.

Summary

Watering your golden barrel cactus is one of the ways to care for your plant and ensure it grows well. No plant can survive without water, even those used to desert conditions.

Your golden barren cactus needs you to adhere to strict watering schedule so it grows well and avoid some water problems such as root rot. The above simple tips can keep your golden barrel cactus healthy and thriving for many years.

Remember to adjust the watering schedule based on the conditions in your area, and always err on the side of caution when deciding whether or not to water your plant.

With a little bit of care, your golden barrel cactus will be a beautiful addition to your home or garden for many years to come.

6 Golden Rules for Watering Your Kalanchoe

The Kalanchoe is a beautiful succulent native to Madagascar. It is a popular houseplant since it’s relatively easy to care for and does not require a lot of water or attention to thrive. However, even though the Kalanchoe is a drought-tolerant plant, it still needs to be watered regularly to stay healthy. Failure to do so can result in the plant becoming wilted, yellow, and eventually dying.

You should only water your Kalanchoe when the soil is dry. Be sure to water deeply without overdoing it. Use the bottom-up watering method to avoid getting water on the leaves. After watering, allow the excess water to drain out of the pot before putting the succulent back in its place. Also, allow the plant to dry out completely between watering sessions.  

If you adhere to strict watering, your Kalanchoe is sure to thrive. Read on to learn some basics of watering this precious plant.

Kalanchoe: General Watering Requirements

Before we dive deep into discussing the golden rules of watering a Kalanchoe Blossfeldiana plant, it is essential to understand the plant’s general watering requirements.

The Kalanchoe is a drought-tolerant succulent that can store water in its leaves. This means that it does not require as much water as other plants. However, it still needs to be watered regularly to stay healthy.

Generally, you should only water your Kalanchoe when the soil is dry. This succulent does not like to sit in wet soil. Be sure to water deeply but careful not to overdo it as this might cause other problems that might be fatal.

Indoor kalanchoe near the windor.
The Kalanchoe is a drought-tolerant succulent that can store water in its leaves.

If you are unsure whether or not the soil is dry, stick your finger about an inch into the potting mix. You don’t need to water the plant if it feels moist. If it feels dry, then it is time to water.

Some of the critical factors that determine the watering frequency of a Kalanchoe are the plant’s size, potting mix, and weather. For example, a small Kalanchoe in a fast-draining potting mix will need to be watered more often than a large Kalanchoe in a slow-draining potting mix.

Temperature also plays a role in how often you need to water a Kalanchoe. The plant will need to be watered more often in warmer weather and less often in cooler weather.

The best way to determine how often to water your Kalanchoe is to pay attention to the plant and its leaves. It’s time to water the plant if the leaves start to wilt, turn yellow, or turn brown.

Golden Rules for Watering a Kalanchoe

 Proper watering of your Kalanchoe needs you to adhere to some rules so you avoid making any fatal mistakes. To care for your kalanchoe plant with proper watering, you need to follow these rules:

1. Watering Frequency

You should only water your Kalanchoe when the soil is dry. To check if the soil is dry, stick your finger about an inch into the potting mix. It is time to water the plant if it feels dry to the touch.

If you are unsure whether or not the soil is dry, you can also check the leaves of the plant. You should also water your succulent if the leaves are wilting, turning yellow, or brown.

A person watering the kalanchoe.
It is time to water the plant if the soil feels dry to the touch.

You need to avoid overwatering your Kalanchoe. This plant does not like to sit in wet soil, and too much water can cause serious root rot issues. If you think you have overwatered your plant, allow the excess water to drain out of the pot before putting the succulent back in its place.

2. Watering Method 

When watering a Kalanchoe, be sure to water deeply but be careful not to overdo it. The best way to water this succulent is to use the bottom-up watering method.

To do this, simply place the pot in a sink or container of water and allow the plant to soak up water from the bottom.

Be sure to remove the plant from the water after a few minutes so it does not sit in wet soil for too long, as this can lead to root rot issues.

After watering, allow the excess water to drain out of the pot before putting the succulent back in its place.

Alternatively, use the soak-and-dry method. This involves watering the plant until the soil is saturated and then allowing it to dry out completely before watering again. This method is best for Kalanchoe plants placed in pots with drainage holes.

3. Reduce Watering During Winter

One of the golden rules for watering a Kalanchoe is to reduce watering during winter. This is because the plant goes dormant in winter and does not need as much water.

If you live in an area with a winter climate, you can reduce the watering frequency of your Kalanchoe to once every few weeks. Keep an eye on the plant and water it when the soil is dry.

Houseplant in the windowsill during winter.
If you live in an area with a winter climate, you can reduce the watering frequency of your Kalanchoe to once every few weeks.

The plant will generally show signs of underwatering if it is not getting enough water. These signs include wilting leaves, yellowing leaves, and brown edges on the leaves.

If you notice any of these signs, water your plant immediately.

4. Use Rainwater or Distilled Water

The type of water you use can significantly impact your plant’s health. It’s best to use rainwater or distilled water for watering as these types of water do not contain chemicals or minerals that could harm the plant.

You are advised to collect rainwater in advance and store it in a rain barrel or other container for future use.

If you don’t have access to rainwater, then you can use distilled water instead. This can be easily purchased from a grocery store or online.

If you cannot get hold of rainwater or distilled water, you can use tap water.

However, let the tap water sit out for 24 hours before using it on your plant. This will allow the chemicals in the water to dissipate and make it safe for your Kalanchoe.

5. Water Deeply

When you water your Kalanchoe, give it a good soaking. This means you should water until the water runs out of the bottom of the pot. This ensures that the plant’s roots get enough water and helps avoid problems such as root rot.

It is best to water your Kalanchoe in the morning, so the plant has time to dry out during the day. Aim for the hours between 6:00 am and 10:00 am for watering.

Watering in the evening can cause the plant to stay too wet overnight, leading to problems such as root rot.

If you cannot water during this time, water in the early afternoon. Avoid watering late in the day, as this can cause the plant to stay too wet overnight.

6. Pay Attention to the Plant

As with any plant, it is essential to pay attention to your Kalanchoe and look for signs that it is not getting enough or too much water.

If the leaves of your plant are wilting, yellowing, or turning brown, then this is a sign that it is not getting enough water. On the other hand, if the leaves are mushy or soft, then this is a sign that the plant is getting too much water.

Kalanchoe in a pot.
If the leaves are mushy or soft, then this is a sign that the plant is getting too much water.

It is crucial to act quickly if you see any of these signs, as Kalanchoes are very sensitive to changes in watering.

If you think you have overwatered your plant, allow the excess water to drain out of the pot before putting the succulent back in its place.

6. Fertilizing Kalanchoe Plants

Kalanchoe plants don’t need to be fertilized often, and too much fertilizer can actually harm the plant. It’s best to only fertilize your Kalanchoe once every two months during the growing season.

To encourage blooming, you can fertilize your Kalanchoe once a month during the blooming season. Just be sure to use a fertilizer that is low in nitrogen, as too much nitrogen can prevent flowers from forming.

Kalanchoe wrapped in a cloth.
If you see that the leaves of your Kalanchoe are yellowing or browning, this is a sign that you are over-fertilizing the plant.

When applying fertilizer, follow the instructions on the package, as different fertilizers have different application rates.

Also, water the plant before applying fertilizer, as dry soil can cause the fertilizer to burn the roots of the plant.

If you see that the leaves of your Kalanchoe are yellowing or browning, this is a sign that you are over-fertilizing the plant. Cut back on the amount of fertilizer you use, and be sure to flush the soil with water to remove any excess fertilizer.

Bottom Line

Watering a Kalanchoe is not difficult, but there are some golden rules that you should follow to ensure that your plant stays healthy.

Be sure to water only when the soil is dry, use the bottom-up watering method, and reduce watering during winter.

Also, use rainwater or distilled water for watering as these types of water do not contain chemicals or minerals that could harm the plant.

By following these simple watering tips, you will be sure to keep your Kalanchoe healthy and happy. Your plant is sure to reward you with beauty.

8 Golden Rules for Watering Monkey Tail Cactus

Monkey tail cactus hanging.

The monkey tail cactus, also known as the rat tail cactus, is a succulent native to Mexico. This cactus gets its name from its long, thin, tail-like stems that can grow up to 3 feet in length.

The monkey tail cactus is a popular plant for indoor and outdoor gardens, as it is relatively easy to care for. However, one of the most challenging aspects of caring for this plant is watering it properly. One mistake can be fatal to the plant.

The first rule of thumb when watering any cactus is too little water rather than too much. Consider watering your monkey tail cactus once every two weeks during spring and summer and once every month during fall and winter. Make sure your planting pot has plenty of drainage holes to allow excess water to drain away properly. Also, remember that the monkey tail cactus is highly sensitive to fluoride and chlorine. So, if you are using tap water to water it, let it sit out for at least 24 hours to allow these chemicals to evaporate.

If you’ve just planted Monkey Tail Cactus for the first time and wondering how to water, this article is for you. We’ll discuss everything including watering your monkey tail cactus, including how often to water it, what type of water to use, and what to do if you think you’ve overwatered your plant. Read on!

Monkey Tail Cactus: General Water Requirements

One of the ways of caring for your monkey tail cactus is to adhere to strict watering requirement. So, what are those basics that apply when it comes to watering your Money Tail Cactus?

As a general rule of thumb, you should water your monkey tail once every two weeks during spring and summer and once every month during winter. However, these are just general guidelines.

A hanging monkey tail cactus
It is always better to err on the side of too little water rather than too much.

The actual frequency with which you water your plant will depend on various factors. Some of the things that play a role include the size of your pot, the type of potting mix you’re using, and the temperature and humidity levels in your home. You should also consider whether or not your plant is receiving enough light.

Generally, it is always better to err on the side of too little water rather than too much. Overwatering is one of the most common mistakes of caring for cacti and succulents, and it can be fatal to your plant.

So, if you’re unsure whether or not to water your monkey tail, it’s always better to wait a few extra days.

Keep in mind that it is relatively easy to revive an underwatered monkey tail cactus, but much more difficult to save an overwatered one.

If you think you may have overwatered your plant, carefully get the plant out of the pot and check the roots. If they are mushy or have started to rot, unfortunately, you cannot do much.

Golden Rules for Watering Monkey Tail Cacti

Now that we have covered the basics of watering monkey tail cacti, let’s go over some specific tips that will make you a pro.

Rule #1: Use the Right Type of Water for Your Monkey Tail Cactus

Ideally, you should use rainwater or distilled water for your plants. This is because tap water often contains high levels of fluoride and chlorine, which can harm your cactus.

If you cannot access rainwater or distilled water, the next best option is to let your tap water sit out for at least 24 hours before using it. This will allow the chemicals to evaporate.

A green rain barrel for plants.
You should use rainwater or distilled water for your plants.

Collect as much rainwater as possible during the rainy season and store it in a clean container for future use. This will ensure you never have to worry about using tap water, which is crucial to your plant health.

Rule #2: Water Your Monkey Tail in the Morning

The best time of day to water your monkey tail is in the morning. This is because the plant will have the entire day to absorb the water and dry out before nighttime.
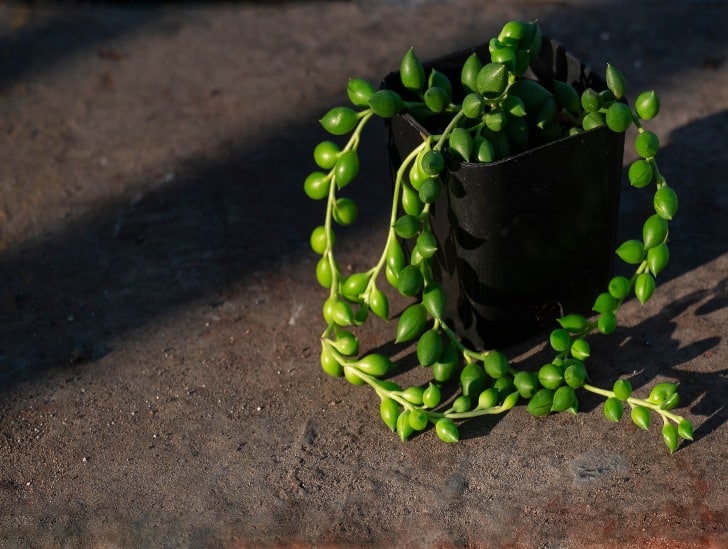
Always aim for the hours between 6:00am to 10:00am for the best results. When temperatures are cooler, and there is higher humidity.

Watering your cactus in the evening can increase the risk of fungal diseases, as the plant will be sitting in moisture for several hours overnight.

If you cannot water your plant during this time frame, the next best option is to water in the late afternoon, around 4:00 pm.

Rule #3: Check the Soil Before Watering

Before watering your monkey tail cactus, checking the soil is always a good idea. The easiest way to check the soil for moisture is to stick your finger about an inch into the potting mix.

If the soil is dry, it’s time to water. If the soil is still damp, wait a few more days before watering again.

Another way to check the soil is to lift the pot. A pot that is light in weight means the plant is thirsty, while a heavier pot indicates that the plant still has enough moisture.

Monkey tail in a rocky soil.
Before watering your monkey tail cactus, checking the soil is always a good idea.

You can also purchase a moisture meter, which will help you to gauge more accurately when your plant needs water. The moisture meter is usually calibrated to show the percentage of water in the soil, so all you need to do is insert it into the potting mix and read the display.

A meter that reads “dry” means it is time to water, while a reading of “moist” or “wet” means the plant is still hydrated.

Rule #4: Do Not Water on a Schedule

One of the most common mistakes of watering plants is sticking to a rigid schedule. Just because it’s been two weeks since you last watered your monkey tail cactus doesn’t mean it’s time to water again.

The watering frequency will vary depending on the time of year, the size of the pot, the type of potting mix, and the temperature and humidity levels in your home.

In general, smaller pots will need to be watered more frequently than larger pots, and pots placed in direct sunlight need to be watered more often than those in shaded areas.

During the hot summer months, your monkey tail cactus will need to be watered more frequently than during the cooler winter months.

The best way to water your plant is to check the soil before watering and only water when the soil is dry. This may mean watering once a week, or it may mean watering every few days.

The key is paying attention to your plant and water when needed, not on a schedule.

Rule #5: Avoid Getting Water on the Plant’s Foliage

When watering your monkey tail cactus, be careful not to get water on the plant’s foliage. This can cause the plant to rot.

Instead, water at the base of the plant, saturating the potting mix. If possible, use a watering can with a long spout to direct the water exactly where you want it to go.

If you get water on the plant’s foliage, remove any excess moisture with a clean, dry cloth.

Rule #6: Ensure Your Planting Pot Has Plenty of Drainage Holes

Your pot must have adequate drainage to prevent the roots of your monkey tail cactus from rotting.

If you are unsure whether your pot has enough drainage holes, add a few more. It is better to err on the side of too many holes than not enough.

Monkey tail in a pot.
If you are unsure whether your pot has enough drainage holes.

To test drainage, fill the pot with water and then empty it out after a few minutes. If the pot drains quickly, it has adequate drainage. If the water takes longer than five minutes to drain out, add a few more holes to the pot.

Rule #7: Choose the Right Watering Method

You can use different watering methods to water your monkey tail cactus, and the best method for you will depend on the size and type of pot you are using.

The easiest way to water small pots is to submerge the entire pot in a sink or basin of water. Allow the pot to soak for a few minutes, until the potting mix is saturated. Then, remove the pot from the water and allow any excess water to drain before placing it back in its spot.

For larger pots, you can use a watering can, or a garden hose fitted with a spray nozzle. Fill the pot with water, allowing it to soak until the potting mix is saturated, then remove any excess water from the saucer beneath the pot.

Rule #8: Use the Right Potting Mix

When potting or repotting your monkey tail cactus, be sure to use a potting mix designed for cacti and succulents. These mixes are usually light and airy, and they drain well.

A golden barrel cactus being repot.
Be sure to use a potting mix designed for cacti and succulents.

Do not use standard potting soil, as it will not drain properly and could cause your plant to rot.

When purchasing a potting mix, read the label and look for one specifically designed for cacti and succulents.

If you can’t find a potting mix specifically designed for cacti, you can make your own by mixing together equal parts sand, perlite, and potting soil.

Final Thoughts

Monkey tail is one of the easiest plants to care for if you do it right. Following these simple tips can keep your monkey tail cactus healthy and happy! Remember to only water when the soil is dry, and give your plant a good soaking each time you water it.

Avoid letting your plant sit in water, and empty the drip tray after each watering session. With just a little bit of care, your monkey tail cactus will thrive.

8 Golden Rules for Watering the Venus Flytrap

The Venus flytrap is a carnivorous plant native to the subtropical wetlands of Carolina in the United States. In its natural habitat, the plant grows in nutrient-poor soil and gets a majority of its nutrient requirements from the insects it catches. Therefore, the Venus flytrap is a highly sensitive plant that requires specific watering and feeding requirements.

The most important rule is to water your Venus flytrap when the soil is completely dry. Be careful not to overwater, as this can lead to root rot. Only water the plant with distilled water, rainwater, or deionized water.

Always check the humidity level of your plant’s environment before watering. If the air is too dry, your plant will not be able to absorb enough moisture from the soil and may become dehydrated. You must also be careful not to splash water on your plant’s leaves, as this can cause fungal growth.

Interested in learning more about how to water your Venus Flytrap plant? This article has it all.

Venus Flytrap General Water Requirements

Before we dive into the details of watering and caring for your Venus flytrap, it is essential to understand the plant’s natural habitat and water requirements.

The Venus flytrap is native to the wetlands of North and South Carolina. In its natural habitat, the plant grows in nutrient-poor soil and gets a majority of its nutrient requirements from the insects it catches.

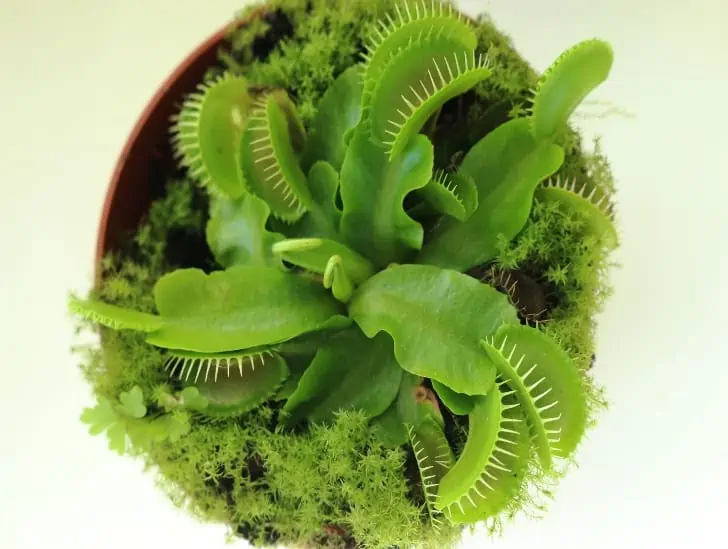
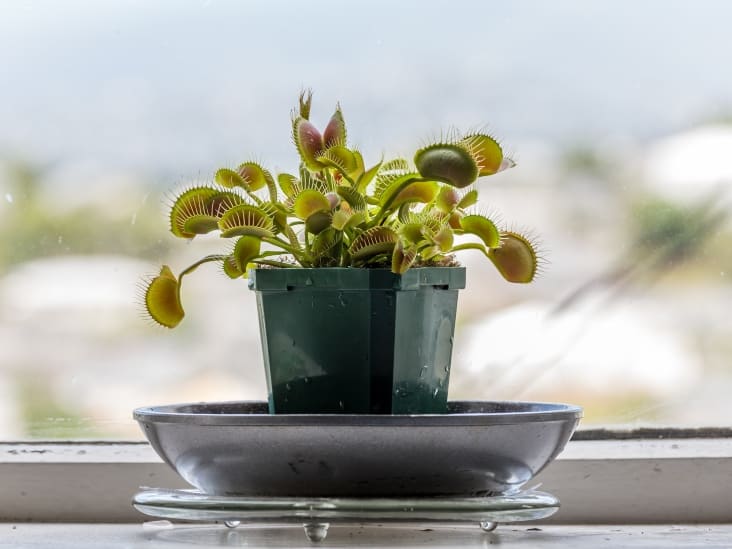
Venus flytrap
Venus flytrap (Dionaea muscipula), carnivorous plant

The plant is highly sensitive to water and light. One mistake in the watering can be fatal for the plant.

Typically, the plant thrives in moist soil with a humidity level of around 60%. In the wild, the plant gets its water from rain and local streams.

When grown at home, Venus Flytrap prefers a humid environment but can tolerate periods of dryness. If the air is too dry, your plant will not be able to absorb enough moisture from the soil and may become dehydrated.

Therefore, you need to be careful not to overwater or underwater your plant. The general rule is to water your Venus flytrap when the soil is completely dry.

Golden Rules for Watering the Venus Flytrap Plant

Now that you understand the general water requirements of the Venus flytrap, let us take a look at the golden rules for watering this sensitive plant.

1. What Type of Water Should I Use?

In its natural habitat, the plant grows in water high in minerals. However, Venus flytrap prefers distilled water, rainwater, or deionized water when grown at home. Do not use tap water as it contains chlorine and other chemicals that can harm the plant.

If you do not have access to distilled or deionized water, you can let tap water sit for 24 hours so that the chlorine has a chance to evaporate.

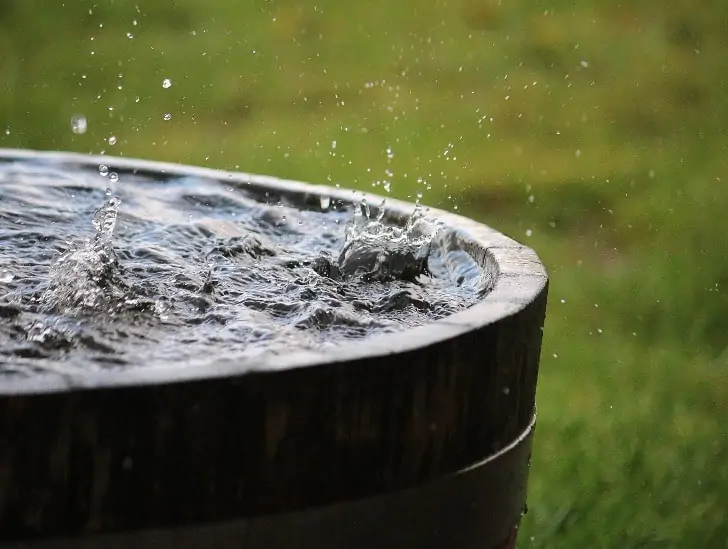
Water in a container.
Do not use tap water as it contains chlorine and other chemicals that can harm the plant.

However, you are highly encouraged to collect as much rainwater as possible during the rainy season and store it safely for watering your Venus flytrap plant. Rainwater is free of harmful chemicals and contains beneficial minerals for the plant.

2. How Often Should I Water?

Generally, you should water your Venus flytrap when the soil is completely dry. Be careful not to overwater, as this can lead to root rot.

It is best to check the soil moisture level every few days to get a better idea of when your plant needs watering. To do this, stick one of your fingers into the potting mix. If it feels dry to the touch, it is time to water the plant.

If you are unsure whether the soil is dry, err on the side of caution and do not water the plant. It is better to underwater your plant than overwater it.

3. Avoid Overwatering

You must avoid overwatering your Venus flytrap plant at all costs. Overwatering is the leading cause of death for Venus flytraps.

If you overwater your plant, the roots will start to rot. This will lead to a decrease in the plant’s ability to absorb nutrients and water. As a result, the leaves will turn yellow and eventually die.

A plant being overwatered.
If you overwater your plant, the roots will start to rot.

Ensure the soil is completely dry before watering your plant to avoid overwatering. In addition, it is best to use a well-draining potting mix and drain any excess water from the pot after watering.

If you think you have overwatered your plant, stop watering it immediately and let the soil dry out completely. Once the soil is dry, you can resume watering your plant according to the schedule.

4. Avoid Underwatering

While overwatering is the leading cause of death for Venus flytraps, underwatering is the second most common reason these plants die.

Underwatering can stress the plant and lead to a decrease in its ability to catch insects. In addition, the leaves will start to turn yellow and eventually die.

To avoid underwatering your plant, make sure to water it when the soil is completely dry. In addition, it is best to use a well-draining potting mix and drain any excess water from the pot after watering.

A kid watering the plant.
To avoid underwatering your plant, make sure to water it when the soil is completely dry.

If you think you have underwatered your plant, water it immediately, then resume your regular watering schedule.

5. Avoid Getting Water on the Leaves

One of the facts about Venus flytraps is that the leaves are covered in tiny hairs that are sensitive to the touch. When these hairs are triggered, the leaf will close around the item that touched it.

If water droplets fall on the leaves and trigger the hairs, the Venus flytrap will use up energy to close the leaves. Over time, this can stress the plant and lead to death.

To avoid getting water on the leaves, water the soil around the base of the plant. Do not pour water directly on the leaves or let the leaves touch the water in the pot.

If the leaves get wet, gently shake off the excess water or use a paper towel to blot them dry.

6. What Time Should I Water My Plant?

The best time to water your Venus flytrap plant is early morning. This will give the plant time to absorb the water before the hot sun evaporates it. Aim for the hours between 6 and 10 am.

In addition, watering in the morning will prevent the leaves from staying wet for too long. Wet leaves are more susceptible to fungal diseases such as powdery mildew.

If you cannot water your plant in the morning, you can water it in the evening. Just be sure to avoid watering at night, as this can promote fungal growth.

If you must water in the evening, do so early enough so that the leaves have time to dry before nightfall.

7. Use the Right Watering Method

There are different watering methods you can use for your Venus flytrap plant. The best method is to water the soil around the base of the plant using a watering can or hose with a shower head attachment.

Avoid using a sprinkler or pouring water directly on the leaves, as this can trigger the hairs and cause the plant to close its leaves. In addition, avoid using a watering can with a fine nozzle, as this can also trigger hairs. If you use a hose, keep the water pressure low to avoid damaging the leaves.

Alternatively, use the bottom watering method. To do this, fill a tray with water and place the pot in the tray. Allow the plant to soak up the water from the bottom for about 15 minutes.

After 15 minutes, remove the pot from the tray and allow any excess water to drain out. Bottom watering is a good option if you are worried about water getting on the leaves. However, be sure not to leave the pot in the water for too long, or the roots may start to rot.

8. Monitor Your Plant for Signs of Stress

Overwatering or underwatering your plant can stress it and lead to death. In addition, other factors such as heat, cold, or draughts can also stress the plant.

Monitor your plant for signs of stress, such as wilting leaves, yellowing leaves, or slow growth. If you notice any of these signs, take action to correct the problem.

For example, if your plant is wilting, water it immediately. If the leaves turn yellow, this could signify too much or too little water. Check the soil to see if it is too dry or too wet, and adjust your watering schedule accordingly.

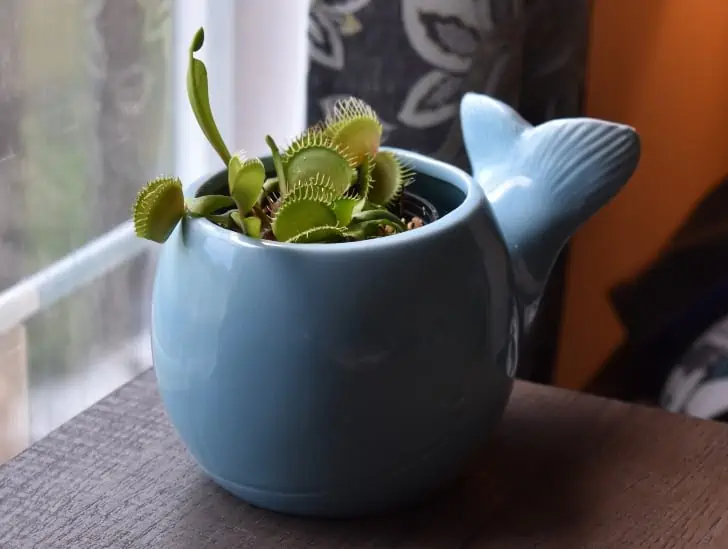
Venus flytrap in a whale pot.
Common causes of stress include excessive heat or cold, lack of light, or poor drainage.

If you notice that your plant is not growing as quickly as it should, this could be a sign of stress. Try to identify the cause of the stress and take action to correct it.

Common causes of stress include excessive heat or cold, lack of light, or poor drainage. Once you have identified the cause, take steps to fix the problem.

Summary

Venus Flytraps can be sensitive, but it’s a rewarding plant if you learn to care for their water needs. By following these simple rules, you can ensure that your Venus flytrap stays healthy and happy.

Remember to use rainwater or distilled water only, water when the soil is dry, and fertilize sparingly, if at all.

The Golden Rules for Watering Your Crown of Thorns Plant

The Crown of Thorns plant is a beautiful flowering plant native to Madagascar. It is a popular houseplant because it is easy to care for and thrives in a wide range of climates. However, if you are thinking about adding a Crown of Thorns plant to your home, there are a few things you need to know about watering it.

Water your Crown of Thorns plant regularly, allowing the soil to dry out between watering. Be careful not to overwater your plant because it doesn’t like soggy soil. Also, ensure good drainage in the pot so that the roots do not become waterlogged. During the winter months, you can reduce watering to once every two weeks or as needed.

If you have a crown of thorns or plan on planting one, you need to learn how to water it correctly. This article discusses everything you need to know about watering a Crown of Thorns plant.

Crown of Thorns Plant: General Water Requirements

Before we dive deep into discussing the specific watering needs of a Crown of Thorns plant, it is crucial to understand the plant’s general water requirements.

The Crown of Thorns is a succulent, which means it is adapted to survive in arid conditions. In its natural habitat, the Crown of Thorns only receives rainwater sporadically. As such, it has developed the ability to store water in its leaves and stems.

Crown of thorns exposed to sunlight.
If you live in an area with high humidity, you may need to water your crown of thorns more often.

The Crown of Thorns is very tolerant of drought conditions and can survive for long periods without water. But this doesn’t mean that the plant does not need water. Watering regularly is one of the ways to take care of your crown of thorns, especially when it is actively growing.

During the growth period, water your plant once a week or as needed to keep the soil moist but not soggy. Make sure you allow the top few inches of soil to dry out between waterings.

If you live in an area with high humidity, you may need to water your crown of thorns more often. The extra humidity in the air will make it harder for the plant to lose water through evaporation, so you will need to water it more frequently to compensate.

The Golden Rules of Watering the Crown of Thorns Plant

Now that you know the general water requirements of the Crown of Thorns plant let’s discuss the golden rules of watering this beautiful succulent.

Rule #1: Watering Frequency

The first rule for watering a crown of thorns plant is to do it regularly. This plant needs to be watered at least once a week. You may need to water it more often if the weather is hot and dry or if the plant is growing vigorously.

Red crown of thorns.
Closely monitor your succulent for signs of drought stress, such as wilting leaves or stems.

During winter, the plant will enter into a semi-dormant state and need less water. You can reduce watering to once every two weeks or as required.

Closely monitor your succulent for signs of drought stress, such as wilting leaves or stems. If you see these signs, water your plant immediately.

Rule #2: Allow the Soil to Dry Out Between Waterings

The second rule of watering a crown of thorns plant is to make sure the soil has a chance to dry out between waterings.

This plant does not like soggy soil, so it is essential to let the top few inches of soil dry out before watering again.

If you water your plant too often, the roots will start to rot, which can lead to the death of the plant. Check the soil before watering, and only water your crown of thorns if the top few inches of soil are dry.

Rule #3: Be Careful Not to Overwater

While it is crucial to water your Crown of Thorns plant regularly, you also need to be careful not to overwater it. Allow the water to drain completely after each watering, and promote good drainage in the pot.

Watered crown of thorns.
If you think your plant has root rot, it is best to consult a succulent expert for advice on how to proceed.

If the soil stays too wet for too long, the roots will start to rot. This can lead to problems such as wilting leaves, yellowing leaves, and stunted growth. If you see any of these signs, stop watering your plant until the soil has dried out completely.

Root rot is a serious problem and can be difficult to fix. If you think your plant has root rot, it is best to consult a succulent expert for advice on how to proceed.

Rule #4: Use the Right Watering Technique

The best way to water a crown of thorns plant is to use the soak-and-dry method. To do this, water your plant until the soil is saturated and then allow the water to drain completely.

Do not water again until the top few inches of soil are dry. This method will help ensure your plant gets the moisture it needs without overwatering.

If you are using a watering can make sure to water slowly and evenly so that the water can soak into the soil. Do not pour all the water at once, or it will run off the pot without wetting the soil.

You can also water your plant from the bottom by placing the pot in a bowl of water and letting the plant soak for a few minutes. Once the soil is saturated, remove the pot from the water and let it drain completely before you place it back in its usual spot.

Rule #5: Check for Signs of Drought Stress

Even if you follow all of the watering rules, it is still possible to underwater or overwater your plant. That is why it is essential to check for signs of drought stress and take action if necessary.

Some signs of drought stress include wilting leaves, yellowing leaves, stunted growth, and dry, crispy leaves. If you see any of these signs, it is vital to water your plant immediately.

Once you have watered your plant, closely monitor it for any further signs of stress. If the problem persists, it is best to consult a succulent expert for advice on how to proceed.

Rule #6: Use Distilled Water or Rainwater

When watering your Crown of Thorns plant, it is best to use distilled water or rainwater. Tap water contains chemicals that can build up in the soil and eventually harm your plant.

Water on a container.
When watering your Crown of Thorns plant, it is best to use distilled water or rainwater.

If you must use tap water, allow it to sit out for 24 hours before using it. This will allow the chemicals to dissipate and make the water safe for your plant.

Continued use of tap water can eventually lead to mineral build-up in the soil, making it difficult for your plant to absorb moisture. This can lead to problems such as wilting leaves, yellowing leaves, and stunted growth.

Rule #7: Avoid Getting Water on the Leaves of Your Plant

Depending on the watering method you use, it is inevitable that some water will end up on your plant’s leaves. However, it is essential to avoid getting the leaves too wet as this can lead to problems.

If the leaves stay too wet for too long, they can start to rot. This can eventually kill your plant. Soggy leaves are more susceptible to fungal diseases, such as powdery mildew.

To avoid getting water on your plant’s leaves, water from the bottom or use a watering can with a long spout. If you get water on the leaves, dry them off as soon as possible.

Rule #8: Water Early in the Morning

Lastly, water your crown of thorns plant early in the morning between the hours of 6.00 am and 10.00 am. This will give the plant time to absorb the water before the heat of the day sets in.

Watering in the evening can also be problematic as the water on the leaves will not have time to evaporate before nightfall. This can create a humid environment ideal for fungal diseases, such as powdery mildew.

Crown of thorns exposed to morning sunlight.
This will give the plant time to absorb the water before the heat of the day sets in.

If you must water in the evening, do so early enough so that the water has time to evaporate before nightfall.

Bonus Tip: Use a Moisture Meter

If you want to take the guesswork out of watering your crown of thorns plant, it is best to use a moisture meter. This tool will help you to determine when your plant needs water and how much to give it.

To use a moisture meter, insert the probe into the soil near your plant. The meter will then give you a reading that will tell you the moisture content of the soil.

Most moisture meters have three readings: dry, moist, and wet. Use the following guidelines to water your plant accordingly:

  • If the soil is dry, water your plant.
  • If the soil is moist, do not water your plant.
  • If the soil is wet, do not water your plant and allow the excess water to drain away.

Summary

Your crown of thorns is sure to reward you with active growth and beauty if you water it. Following these simple golden rules will help keep your crown of thorns plant healthy and happy.

Remember to water it when the soil is dry, use room temperature water, avoid overwatering, and cut back on watering during winter. With proper care, your crown of thorns plant will thrive for many years!

The Golden Rules for Watering a Buddha’s Temple Plant

If you are lucky enough to have a Buddha’s temple in your garden, you will want to ensure you take good care of it. One of the critical aspects of caretaking is watering the succulent properly. While watering this plant is not difficult, there are a few golden rules you must follow to ensure your plant stays healthy and happy.

The best time to water your Buddha’s temple is early in the morning before the heat of the day sets in. Use lukewarm water to avoid shocking the plant, and be sure to water the entire root ball thoroughly. Allow the plant to drain before putting it back in its spot, as standing water can lead to fungal growth and root rot.

The frequency will vary depending on the time of year and your plant’s location. In general, succulents like to be dryer in the winter and damper in the summer. Avoid getting the leaves wet, and don’t overwater.

This article discusses everything you need to know about watering a buddha’s temple.

Buddha’s Temple: General Water Requirement

Before we get into the specifics of watering a Buddha’s temple, it’s essential to understand the plant’s general water requirements. In general, succulents are drought-tolerant and only need to be watered every 1-2 weeks. However, a few things will affect how often you need to water your plant.

Buddhas Temple plant
If your plant is in a sunny spot, it will need more water than if it were in a shadier location.

For example, if your plant is in a pot, it will dry out quicker than if it were in the ground. The time of year also makes a difference – succulents need less water in the winter and more in the summer.

If you live in a hot, dry climate, your plant will need to be watered more frequently than in a cooler, wetter climate. And finally, if your plant is in a sunny spot, it will need more water than if it were in a shadier location.

Golden Rules for Watering a Buddha’s Temple

Now that we have covered the basics let us get into the golden rules of watering a Buddha’s temple.

2. The Best Time to Water Your Buddha’s Temple

The best time to water your Buddha’s temple is in the morning, before the heat of the day sets in. This gives the plant time to absorb the water before it evaporates. Aim for the hours between 6 and 10 am for better results.

However, you can water your plant anytime as long as you avoid the heat of the midday sun. If you water in the evening, do it early enough so the plant has time to dry out before nightfall.

Watering your plant late in the evening is highly discouraged because the leaves will stay wet overnight, leading to fungal growth or root rot.

3. What Type of Water to Use

It’s best to use lukewarm water when watering your Buddha’s temple. This is because too cold or too hot water can shock the plant and cause harm.

If you can’t get lukewarm water, err on the side of using cooler water rather than hot water. Hot water can scald the plant’s roots, leading to root damage and death.

Water in a water container.
It’s best to use lukewarm water when watering your Buddha’s temple.

You should also ensure the water is distilled if you cannot access fresh, clean water (preferably rainwater). Avoid using tap water since it contains chemicals that can build up in the soil and harm your plant.

If you must use tap water, let it stay out for 24 hours before watering your plant to allow the chlorine to evaporate.

4. How Much Water to Use

When watering your Buddha’s temple, make sure you water the entire root ball thoroughly. Allow the plant to drain before putting it back in its spot, as standing water can lead to fungal growth and root rot.

The amount of water you use will depend on your plant and pot size. A good rule of thumb is to use about 1 cup (240 ml) of water for a small plant in a 4-inch (10 cm) pot. For a larger plant in an 8-inch (20 cm) pot, use 2 cups (470 ml) of water.

A freshly watered agave plant.
Allow the plant to drain before putting it back in its spot, as standing water can lead to fungal growth and root rot.

If you’re unsure how much water your plant needs, it’s better to err on the side of using less rather than more. Too much water can cause root rot, killing your plant.

5. How Often Should You Water Your Buddha’s Temple?

The watering frequency will vary depending on the time of year and your plant’s location. In general, succulents like to be dryer in the winter and wetter in the summer.

If your plant is in a pot, it will need to be watered more frequently than if it were in the ground. This is because pots dry out more quickly than soil.

The type of climate you live in will also affect how often you need to water your plant. If you live in hot, dry weather, you will need to water your plant more often than in a cooler, wetter climate.

A small buddhas temple ina apot.
If it is still moist, wait another day or two before watering.

Finally, the amount of sunlight your plant gets will also affect watering frequency. If your plant is in a sunny spot, it will need to be watered more often than if it were in a shadier location.

A good rule of thumb is to water your plant every 7-10 days in the summer and every 14-21 days in the winter. However, you should always check the soil before watering to see if it is dry.

If it is still moist, wait another day or two before watering. Only water your plant if the soil is bone dry.

6. Watering Method

There are different ways to water your Buddha’s temple; the best method will depend on the size of your plant and pot.

You can use a watering can or a small cup for small plants in 4-inch (10 cm) pots or less. Be careful not to overwater, as too much water can lead to root rot.

For larger plants in 8-inch (20 cm) pots or more, you can use a watering wand attached to a hose. This will allow you to water the plant without getting the leaves wet.

If you get the leaves wet, dry them off as soon as possible to prevent fungal growth.

However, the best watering rule for almost all succulents is bottom watering. In this method, you place the plant in a pan of water and allow the roots to soak up moisture for about 15-30 minutes.

Remove the plant from the water once it is fully soaked and allow it to drain before putting it back in its spot. This method is especially beneficial for plants prone to root rot, as it prevents the leaves from getting wet.

7. Avoid Overwatering

It’s important not to overwater your Buddha’s temple. Allow the soil to dry out between watering sessions, and never leave the plant sitting in water for extended periods.

If you notice the leaves start to yellow or wilt, this is a sign that the plant is not getting enough water. On the other hand, if the leaves are turning brown and mushy, this is a sign of overwatering.

If you think you are overwatering your plant, stop watering for a week or two and see if the plant improves. If not, you may need to repot the plant in dryer soil.

8. Reduce Watering During Winter

During winter, reduce watering somewhat as the plant will be dormant and won’t need as much water. However, don’t let the soil dry out completely, as this can damage the roots. A good rule of thumb is to water once every two weeks during winter.

A buddhas temple with succulent.
Don’t let the soil dry out completely, as this can damage the roots.

If you live in a particularly cold climate, you may need to water even less often. If the temperature dips below freezing, it’s best not to water as this can cause the roots to freeze and die.

9. Fertilizing

One last thing we must mention that is highly related to watering your Buddha’s plant is fertilizing. Fortunately, you don’t need to fertilize your Buddha’s temple very often, as succulents are not heavy feeders.

In general, you should only fertilize during the growing season from spring to summer. If you choose to fertilize, use a cactus or succulent fertilizer with a lower nitrogen content.

Too much nitrogen can harm your plant, so it’s best to err on the side of caution and use a weak fertilizer solution. Fertilize once every month or two during the growing season, and then stop fertilizing altogether during winter.

Summary

As you can see, watering your Buddha’s temple is as simple as 1,2,3. With these eight golden rules for watering a Buddha’s temple, you’ll be sure to keep your plant healthy and happy all year round.

Just remember to water in the morning, use lukewarm water, avoid wetting the leaves, and don’t overwater. Also, remember to fertilize monthly during the growing season, give extra water during hot weather, and reduce watering during wintertime.

Follow these guidelines, and you’ll have a beautiful Buddha temple in no time!

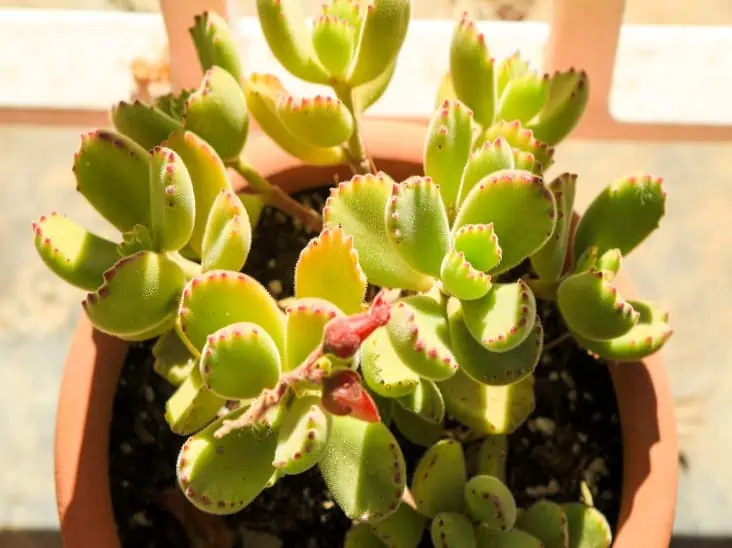
Golden Rules for Watering Your Bear’s Claws Plant

The Bear’s Claws plant is a beautiful and unique addition to any home garden. However, because of its delicate nature, it’s essential to take care when watering this plant to ensure it doesn’t become overwatered or dried out. A slight mistake when watering your Bear’s Claws plant can mean the difference between a healthy plant and one that slowly dies.

So, what are the golden rules for watering your bear’s claws plant?

Water deeply, but not too often. The Bear’s Claws plant needs deep watering about once a week to ensure its roots get enough moisture. Water early in the morning using tepid water rather than cold water. Cold water can shock the plant and cause its leaves to drop. Water your plant more frequently during summer due to the heat, and know when to ease watering. Always check the potting mix before watering and avoid getting the leaves wet. Remember to give your plant enough rest from time to time and watch for any signs of overwatering or underwatering.

This blog post discusses everything you need to know about watering your Bear’s Claws plant. Read!

Bear’s Claws Plant: General Water Requirements

So, what are claw plants’ general water needs?

The Bear’s Claws plant is a succulent, which means it has adapted to store water in its leaves and stems. The plant does not need as much water as other plants. In fact, too much water can be detrimental to the plant as it can lead to root rot.

However, the Bear’s Claws plant still needs water to survive. The roots of the plant need moisture to absorb nutrients from the soil. If the roots are not moist, they will not be able to function properly, and the plant will slowly die.

Bear claws exposed to sunlight.
The Bear’s Claws plant is a succulent, which means it has adapted to store water in its leaves and stems.

The amount of water your Bear’s Claws plant needs will depend on a few factors, such as the size of the plant, the potting mix, the temperature, and the amount of light it receives. In general, the Bear’s Claws plant needs about 1 inch of water per week.

The most important thing is to strike a balance between underwatering and overwatering your plant. If you’re not sure how much water your plant needs, it’s always better to err on the side of underwatering rather than overwatering.

Golden Rules of Watering a Bear’s Claws Plant

Now that you understand the general water needs of a Bear’s Claws plant let’s discuss the golden rules of watering this succulent.

Golden Rule #1: Water Deeply, But Not Too Often

The first rule of watering your Bear’s Claws plant is to water deeply but not too often. Bear’s Claws need deep watering about once a week to ensure their roots get enough moisture.

When you water your plant, make sure to water slowly and evenly until the water begins to drain out of the bottom of the pot. This will help ensure that the roots are getting evenly moistened.

Bear claw plant with water droplet and exposed to sunlight.
The first rule of watering your Bear’s Claws plant is to water deeply but not too often.

Don’t water your plant more frequently than once a week. Overwatering can lead to root rot, which can kill your plant.

Golden Rule #2: Water Early in the Morning

The second rule for watering your Bear’s Claws plant is to water early in the morning. Watering early in the day will give the plant plenty of time to absorb the moisture before the heat of the day sets in.

Watering in the evening can also harm the plant by encouraging fungal growth. So, it’s best to avoid evening watering if possible.

Aim for the hours between 6 am and 10 am for watering your Bear’s Claws plant. If you cannot water your plant in the morning, go for late evening hours between 6 pm and 10 pm.

Bear claw plants exposed to sunlight.
Watering in the evening can also harm the plant by encouraging fungal growth.

Remember that you still need to allow the leaves to dry out completely before nightfall to prevent fungal growth.

Golden Rule #3: Use Tepid Water

The third rule for watering your Bear’s Claws plant is to use tepid water rather than cold water. Cold water can shock the plant and cause its leaves to drop.

Tepid water is simply water that is not hot or cold. The best way to achieve tepid water is to let the water sit out for about 30 minutes before watering your plant. This will allow the water to reach room temperature, which is ideal for watering succulents.

If you don’t have time to let the water sits out, add a small amount of warm water to the cold water to bring it to a tepid temperature.

Golden Rule #4: Avoid Overwatering

The Bear’s Claws plant is a succulent native to desert regions. It means that it is adapted to survive with very little water. You must learn how to care for your Bear’s Claws and water properly, as too much water can be harmful.

Overwatering can lead to root rot, a condition caused by wet, poorly drained soils. Root rot can kill your plant, so it’s important to avoid overwatering.

A young bear claw plant.
It means that it is adapted to survive with very little water.

If you’re not sure whether or not your plant needs water, it’s always better to err on the side of underwatering. It’s much easier to revive a dehydrated plant than to save a plant that has been overwatered.

Some common overwatering signs include yellow or wilting leaves, soft or mushy leaves, and brown or black spots on the leaves. If you see any of these signs, stop watering the succulent and allow the potting mix to dry out completely before you water again.

Golden Rule #5: Use Rainwater or Distilled Water

The type of water you use to water your plant is also important. The best water to use for your Bear’s Claws is distilled water or rainwater.

Tap water often contains minerals that can build up in the soil and harm the plant. Rainwater is free of these minerals and is much better for watering plants. If you don’t have access to rainwater, you can use distilled water.

Using tap water should be your last resort. If you must use tap water, allow the water to sit out overnight before watering your succulent. This will give the harmful minerals time to dissipate.

Golden Rule #6: Apply Water to the Soil, Not the Leaves

When watering your Bear’s Claws plant, apply the water to the soil, not the leaves. The leaves are very delicate and can easily be damaged by water.

Water droplets on the leaves can also encourage fungal growth, so it’s best to avoid getting the leaves wet if possible.

If you must water the leaves, use a soft sprayer or mister. Avoid using a hard sprayer, as this can damage the leaves. Sometimes, it’s best to just water the plant at the base so that the water seeps down to the roots.

Golden Rule #7: Use the Correct Watering Method

There are different ways to water plants, and not all methods are equal. When watering your Bear’s Claws plant, make sure you use the correct watering method.

The best way to water succulents is from the bottom. In this watering method, you place the plant in a bowl or saucer of water and allow the roots to soak for about 30 minutes.

After the roots have soaked, remove the plant from the water and allow it to drain. Be sure to empty the bowl or saucer so that the plant is not sitting in water.

Bottom watering is ideal because it allows the roots to soak up water without getting the leaves wet. This prevents fungal growth and minimizes the risk of leaf damage.

Bear claw plants in a pot.
Allow the plant to drain for a few hours before watering again.

Another watering method you can use is called “drench and dry.” This method involves watering the plant until water runs out of the drainage holes. Allow the plant to drain for a few hours before watering again.

Drench and dry is not ideal because it can cause leaf damage and encourage fungal growth. However, it’s an excellent method if your plant is severely dehydrated.

Golden Rule #8: Allow the Soil to Dry Out Between Waterings

Another rule for watering your Bear’s Claws plant is to allow the soil to dry out completely between waterings. This succulent does not like wet feet, so it’s essential to make sure the soil has a chance to dry out before watering again.

One way to tell if your plant needs water is to stick your finger into the soil. If the soil is dry up to your first knuckle, it’s time to water the plant. If the potting mix still feels moist, wait a few more days before watering.

Golden Rule #9: Watch for Signs of Stress

Even if you follow all of these tips, your Bear’s Claws plant may still suffer from stress due to changes in temperature or light levels. Watch for signs of stress, such as leaf drop or wilting, and adjust your care accordingly.

Summary

Watering your Bear’s Claws is simple if you take the time to learn its moisture requirements. By following these simple tips, you can help ensure that your Bear’s Claws plant stays healthy and hydrated all season long.

Just remember to check the soil before watering, water deeply but not too often, avoid getting water on the leaves, and know when to give your plant a break when necessary. With a bit of care, your Bear’s Claws plant will thrive in no time!

Does String of Pearls Need Direct Sunlight?

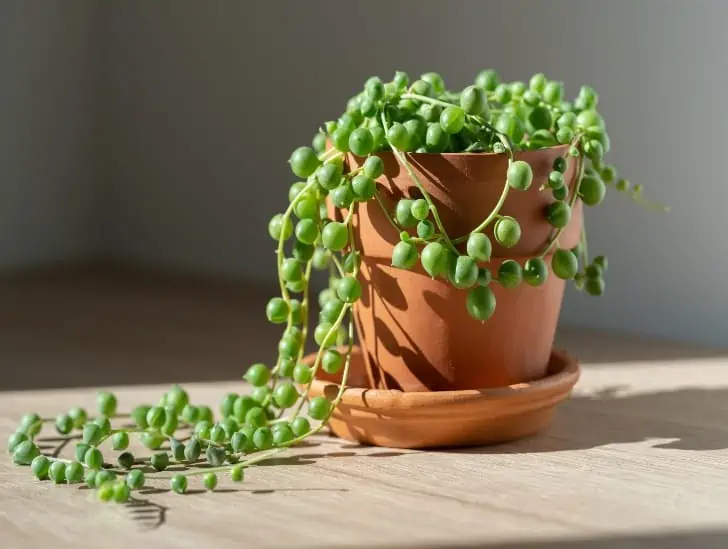
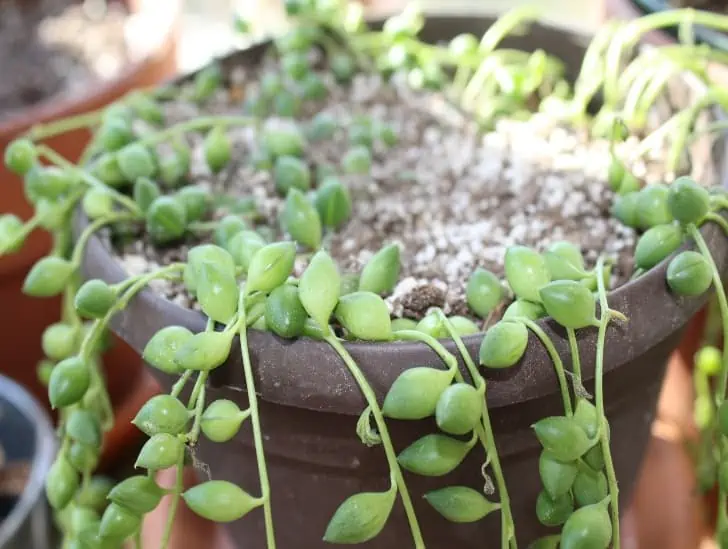
String of pearls in a pot exposed to sunlight.

If you’re looking to add a touch of greenery to your home, you may have considered getting a string of pearls plant. Also known as Senecio rowleyanus, this succulent is native to Africa and is prized for its long, cascading stems and round, pearl-like leaves. But before you run out and buy one, there’s something important you need to know: does a string of pearls need direct sunlight? We are here to help you make an informed decision.

So, does a string of pearls need direct sunlight? The answer is both yes and no. While a string of pearls can tolerate direct sunlight, too much sun can cause the leaves to fade from green to yellow. If you live in an area with scorching summers, place your plant in a spot that gets partial sun. That way, it will still get enough light to thrive without being exposed to too much heat.

Also, remember that the plant is succulent, meaning it stores water in its leaves. Therefore, the leaves are highly susceptible to burning if exposed to direct sunlight for too long.

This blog post discusses everything you need to know about the string of pearls and sunlight. Read on to learn more.

String of Pearls: Light and Temperature Requirements

To understand whether the string of pearls plant requires direct sunlight to survive or not, we need to look at its natural habitat. The plant is native to arid regions of Africa, specifically the northern parts of Kenya and Sudan.

The climate is hot and dry most of the year in these parts of the world. During the rainy season, which typically lasts from July to September, the string of pearls plant experiences a brief period of growth. The plant produces small white flowers during this time.

String of pearls ina cup.
The string of pearls is adapted to surviving in low-light conditions.

After the rains end, the temperature and sunlight increase significantly. The climate becomes arid again, and the string of pearls goes dormant until the next rainy season.

Based on its natural habitat, it’s safe to say that the string of pearls plant is accustomed to high temperatures and direct sunlight. However, the plant does need a period of dormancy to thrive.

In its natural habitat, the string of pearls experiences a dormant period during the dry season. The plant conserves its energy and stores water in its leaves.

When grown as a houseplant, the string of pearls plant also needs a dormant period. This can be achieved by reducing the amount of water and fertilizer you give the plant during winter.

It’s also important to note that, like all succulents, the string of pearls is adapted to surviving in low-light conditions. If you live in an area with little sunlight, you can grow the plant indoors near a window that gets indirect light.

What Is Direct Sunlight in the Context of Growing Plants?

When we talk about direct sunlight, we’re referring to the sun’s rays that hit the earth’s surface directly. This sunlight is typically very intense and can cause plants to overheat, especially during summer.

If you live in an area with hot summers, place your string of pearls plant in a spot that gets partial sun. That way, it will still get enough light to thrive without being exposed to too much heat.

A string of pearl exposed to sunclight.
Place your string of pearls plant in a spot that gets partial sun.

Generally, the plant is highly susceptible to sunburn. If the leaves are exposed to direct sunlight for too long, they will start to fade from green to yellow. In extreme cases, the leaves can become brown and crispy.

If you notice that your plant is getting sunburned, it’s best to move it to a spot with less direct sunlight.

How Can You Provide Shade for Your String of Pearls Plant?

There are a few ways to provide shade for your string of pearls plant. One option is to grow the plant indoors near a window with indirect light. Ensure the spot is not too shady, as the plant needs some light to photosynthesize.

Another option is to place the plant outdoors in an area that gets dappled sunlight. Dappled sunlight is sunlight that filters through the leaves of a tree. This light is less intense than direct sunlight and won’t scorch your plant’s leaves.

If you grow the plant outdoors, consider placing it under a tree or porch where it will be protected from the harsh midday sun. You can also build a simple shade structure for your plant using a piece of cloth or lattice.

You can also grow the plant under a sheer curtain or in a spot where it will only be exposed to sunlight for a few hours each day.

How Much Sunlight Is Enough for a String of Pearls?

Now that we know the string of pearls plant can tolerate direct sunlight, you may wonder how much sun is enough. The answer depends on several factors, including the climate you live in and the type of potting soil you use.

If you live in an area with hot summers, position your string of pearls plant in a spot that gets partial sun. That way, it will still get enough light to thrive without being exposed to too much heat.

String of pearl hanging.
Position your string of pearls plant in a spot that gets partial sun.

Generally, the plant is highly susceptible to sunburn. If the leaves are exposed to direct sunlight for too long, they will start to fade from green to yellow. In extreme cases, the leaves can become brown and crispy.

If you notice that your plant is getting sunburned, it’s best to move it to a spot with less direct sunlight.

What Happens If the String of Pearls Gets Too Much Sunlight?

If the string of pearls plant is exposed to direct sunlight for too long, the leaves will start to fade from green to yellow. In extreme cases, the leaves can become brown and crispy.

If you notice that your plant is getting sunburned, it’s best to move it to a spot with less direct sunlight.

You can also provide some shade for the plant by placing it under a tree or porch, where it will be protected from the harsh midday sun.

Alternatively, consider growing it under a sheer curtain or in a spot where it will only be exposed to sunlight for a few hours each day.

Can the String of Pearls Plant Receive Too Little Sunlight?

While most of us entirely focus on ensuring our string of pearls plant doesn’t get too much sunlight, it’s important to remember that the plant can also suffer from too little sun.

If the plant isn’t getting enough light, it will start to stretch and become leggy. The leaves will also become smaller and more spaced out. In extreme cases, the plant may stop growing altogether.

A tring of pearl in a pot.
It’s important to remember that the plant can also suffer from too little sun.

If you notice that your plant is not getting enough sun, move it to a spot where it will receive more light. You can also increase the amount of time the plant is exposed to sunlight daily.

A combination of too little sunlight and too much water can also lead to root rot. Root rot is a severe condition that can kill the plant.

If you notice the leaves of your plant turning yellow and falling off, check the roots to see if they’re soft and mushy. If they are, it’s best to replant the succulent in a fresh potting mix.

How Often Should You Water a String of Pearls Plant?

The string of pearls plant is a succulent, which means it’s adapted to store water in its leaves. As a result, the plant doesn’t need to be watered very often.

In general, you should only water the string of pearls plant when the potting mix is dry. The frequency will depend on several factors, including the size of the pot, the type of potting mix, and the climate you live in.

If you live in a hot, dry climate, you may need to water the plant more often. Conversely, if you live in cool, humid weather, you may only need to water it once every few weeks.

It’s important not to overwater the plant, as this can lead to root rot. If you are not sure whether the succulent needs water, err on the side of caution and wait a few extra days.

A string of pearls freshly watered.
String of pearl is adapted to store water in its leaves.

If the leaves of your plant start to turn yellow and fall off, this is usually a sign that you’re watering them too often. If this happens, stop watering the plant for a week or two and see if the problem improves.

Summary

In conclusion, a string of pearls needs direct sunlight to thrive but can also tolerate lower light levels.

If you are growing a string of pearls indoors, place it near a window where it will get plenty of bright light throughout the day.

And if you live in an area with sweltering summers, consider giving your string of pearls some afternoon shade to prevent leaf scorch.

We hope you enjoyed this post. For more gardening tips and advice, check out our blog regularly.

How To Propagate Lithops (Living Stones)

Lithops, also known as Living Stones, are a tiny stemless succulent that has the appearance of stones. The plant can be a striking addition to your home or garden. 

In the summer is when Lithopss plants tend to bloom. They produce yellow or white daisy-like flowers and are available in a variety of textures, forms, and colors. The succulents are native to some of the driest parts of southern Africa; hence they need very little water for growth – the majority of them survive on the humidity from mist and fog.

If you have been wondering how to multiply this beautiful Living Stone at home, stick around and learn how to propagate it.

How to Propagate Lithops (Living Stones)

Lithops are propagated by division from current plants or afresh from seeds. Because they are slow-growing succulents, divisions don’t generally occur every year, but after several years, the earliest being three years. 

Due to the slow growth, if you are after a quick fix to propagate it, you can opt for the seeds or care for your existing Living Stone plant and divide it once it rows offshoots or pups. However, the seeds might take several months to germinate and years to attain full maturity.

A lithop rooting on hand.
You can opt for the seeds or care for your existing Living Stone plant and divide it once it rows offshoots or pups.

How to Propagate Lithopss from Seeds

Getting Lithopss succulent seeds from a Lithopss plant might take several years—usually, three to five years when it can flower and produce seeds. Before you can propagate the plant from seed, here is where you can get the seeds.

Where to Purchase Living Stone Seeds

Local Gardening Centers

Lithops and other succulent seeds are commonly available in brick-and-mortar shops, much like other plant products. Visit a local plant nursery or a gardening store and try your luck.

Amazon

It may be difficult to find anything on this website, but a simple search for Lithopss succulent seeds will get you started.

Online Sellers

If you’ve got no luck with the first options, then you better browse online for succulent sellers specifically for Lithops. Many sellers will ship the seeds right to your doorstep.

How to Grow Lithops from Seeds

To start the process, here are a few items you will need:

  • Spray bottle
  • Plastic wrap
  • Planting tray
  • Pot
  • Potting Soil and perlite

Prepare a well-draining soil to germinate the Lithops seeds. Use 50% potting soil with 50% perlite soil.  In case you don’t have access to perlite, you can add coarse sand to the mix. The soil needs to be well-draining and less compact.

Add the prepared potting mix to the planting tray, seedbed, or pot. A planting tray is preferable because it has all the elements required for an ideal growing environment – a moisture-retaining dome, adequate sunshine, plenty of space, and adequate drainage.

However, if you have no access to a tray, you can use a well-draining pot with drainage holes. If the container doesn’t have holes, make your holes for drainage. A clay-made pot is perfect for germination of seeds and water draining.

6 Golden Rules for Watering Lithops
A clay-made pot is perfect for germination of seeds and water draining.

Add some compost onto the soil for additional nutrients, and water the soil using the spray bottle. Ensure the soil is not wet but moist. Allow it to drain all water before you can sow LithopsLithops seeds.

Gently sow the seeds on the damp soil and barely cover them; if you cover the seeds with too much soil, they may not germinate. If you have a tray with cells, you will need to place one to two Lithopss seeds per cell. Conversely, scatter the seeds evenly on the soil if you have a larger tray.

You should not cover the seeds deep into the soil.

Cover your tray’s dome to create a conducive germination environment. The dome should help retain enough moisture content and higher temperatures of more than 70℉. If you planted the seedlings on a pot, use the clear plastic wrap to conserve the soil moisture and maintain higher humidity levels.

Take the pot or tray and place it in a warm area receiving direct sunlight. Ensure the pot/tray is in a high temperature location. If you have a heating mat, place the tray or pot on it when necessary.

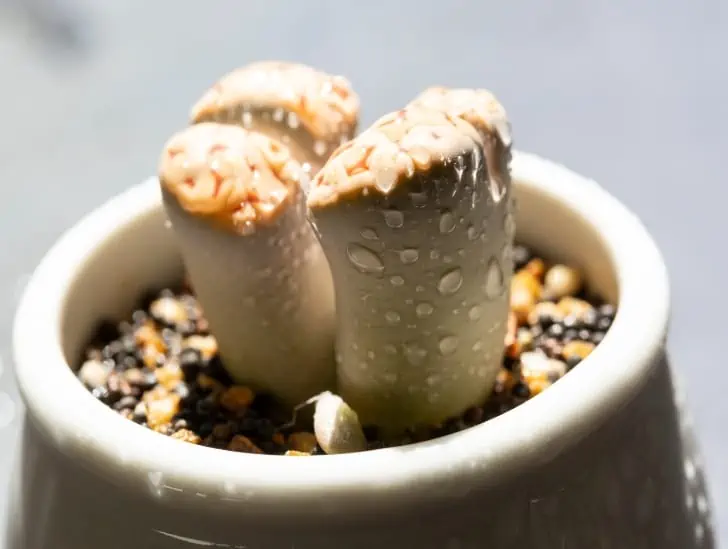
A freshly watered lithops.
Let them get sunlight for at least five hours a day.

Always ensure the soil is damp throughout this period. You can water the soil when you note the top layer is getting dry.

After two to 15 weeks, you will note the Lithopss seedlings germinating. Immediately spot young plants, uncover the tray or take off the clear wrap from the pot for proper aeration.

Transplant the seedlings to individual pots when they begin to crowd each other and are large enough to support, which is generally after one year. Place the containers in a location receiving full sun. The morning sunshine is ideal. Again, let them get sunlight for at least five hours a day. Proceed to water them once every two weeks, and you should avoid overwatering. Also only water during the growing period—beginning end of summer.

Pro Tip: Every year, Lithopss grow new pairs of leaves. They only grow two leaves at a time, so the old ones will start falling off once the new leaves start growing. However, the growth of new leaves is generally delayed until after the bloom period has passed. In preparation for the next growth phase, Livingstone plants go into dormancy after flowering.

How to Propagate Lithopss by Division

If you already have a Living Stone plant at home, then you can wait till it grows and starts producing ‘pups’ or new offspring around the mother plant. Alternatively, you can purchase freshly cut pups from your local succulent stores.

As your Lithops plant age, you might notice young Living Stone plants naturally growing around the parent plant. You can easily start new Lithopss from these pups. Furthermore, these pups are clones of the parent plant.

Items you need:

  • Hand trowel
  • Cutting Knife
  • Pot
  • Succulent Mix

To divide pups from the parent plant, use the hand trowel to dig up the whole plant, complete with its roots. Be careful not to damage other Lithops plants in the surrounding area when digging. 

Lift the whole tap root, then using your knife, make a division to separate the parent plant from the offshoots.

A close up image of a lithop.
Most of this plant’s body is down in the ground.

Prepare well-draining soil mix. Coarse sand or fine gravel with some compost is ideal. Alternatively, you can use a succulent mix. Ensure the soil is not compact as Lithopss do well in loose soil.

Add the soil onto your pot and water the soil. The pot must have drainage holes. Dampen the soil only to retain moisture but not wet. Lithopss plants will rot if they are overwatered or left in wet soggy soil.

Take your division and plant it in the pot. Plant them in the same depth as they were when you uprooted them. Ensure the soil covers almost the whole plant. Most of this plant’s body is down in the ground. Water the pup every week once you note the soil is dry and place the container in a sunny or bright area. 

Come the end of summer is when you will note the massive growth from your young Livingstone plant. Once they develop, care for it until it reaches full maturity. For more tips on how to care for your plant, find them here.

Common Problems to Look Out for As You Propagate Lithops

  1. Etiolation

Lithops may stretch out or elongate when exposed to insufficient light like any other succulents. As a result, if you detect that the seedlings are stretched out in one direction. Bring them closer to a lighting source.

If you take a while before correcting the plant’s location, you will have to wait several growth periods before getting back to their normal posture or attaining normal growth.

  1. Overwatering

Overwatering is dangerous to Lithopss, just like any other succulent. When planting the seeds and the soil is wet, the soil is most likely to rot. The same applies to propagation by division; the pups’ roots will rot and finally kill the plant. So always pay attention to watering needs.

  1. Diseases

Overwatering the soil creates a conducive environment for fungal growth and bacteria, which are likely to attack the planted division or seeds. Again, when dividing pups from the mother plant, ensure the cutting tool is sterilized so as not to spread disease to young Living Stone plants.

A close up image of lithops.
When planting the seeds and the soil is wet, the soil is most likely to rot.

Bottom Line 

All you need are Lithopss seeds or divisions to propagate this wonderful plant. We hope you can use this guide to multiply this wonderful plant for your home. To add some decorations, add some pebbles or stones around it to add some style to the plant.

Amazing Facts You Didn’t Know About the Golden Barrel Cactus

The golden barrel cactus (Echinocactus grusonii) is a type of cactus native to Mexico. It is also known as the ‘mother-in-law’s cushion’ because of its spiky appearance. The cactus can grow to about three feet tall and five feet wide. It is usually covered in thick, yellow spines. The golden barrel cactus is a relatively popular succulent for both gardens and homes since it is relatively easy to care for.

So, what are some of the amazing facts about the golden barrel cactus? Perhaps, the fascinating thing about this cactus is that it can live for up to 200 years! That means that if you take good care of your golden barrel cactus, it could potentially outlive you.

The golden barrel cactus is native to Mexico and gets its name from its spherical shape and yellow color. The cactus grows in dry, desert climates and can reach up to three feet high. It typically blooms between April and May with yellow, red, or orange flowers. This succulent is not only an interesting plant to look at, but it is also relatively easy to care for.

This blog post highlights the top ten facts about the golden barrel cactus. Read on to learn more about this remarkable succulent!

Golden Barrel Cactus: A Brief Overview

Before we dive into the facts, let’s take a quick overview of the golden barrel cactus. As we briefly mentioned before, this cactus is native to Mexico. It gets its name from its spherical shape and yellow color.

The cactus belongs to the cactus family, one of the most prominent families of flowering plants. There are over 1,500 different species of cactus! Specifically, it belongs to the genus Echinocactus, which contains about 30 other cactus species.

Golden barrel cactus is quite a popular succulent in the world. It stores plenty of water in its leaves and stems, which is crucial to its survival in harsh environments.

A golden barrel cactus flowering.
Golden barrel cactus flowers between April and May, with yellow, red, or orange flowers.

It is often used as an ornamental plant in gardens or homes since it is easy to care for. The cactus typically grows to about three feet high and five feet wide. It flowers between April and May, with yellow, red, or orange flowers.

Some people believe that having the golden barrel cactus in their home will bring them good luck. It is also known as the mother-in-law’s cushion because of its spiky appearance.

13 Fascinating Facts About Golden Barrel Cactus

Now that we have a brief overview of this plant let us highlight some amazing facts you didn’t know about this cactus. We break down each of the ten facts below.

1. Native to Mexico

The golden barrel cactus is native to Mexico. It is mainly found in the desert regions of northern Mexico, such as Coahuila, Nuevo Leon, and Tamaulipas. The cactus grows at elevations of up to 4,000 feet above sea level.

It is one of the most popular cacti in cultivation and is often used as an ornamental plant in gardens and homes. The golden barrel cactus gets its name from its spherical shape and yellow color.

2. Beautiful Appearance

The golden barrel cactus is a large, spherical succulent that can grow up to three feet tall and five feet wide. It is usually covered in thick, yellow spines. The cactus has a thick, fleshy stem that is green in color.

Golden barrel cactus in pot.
It has deep roots that help it to access water underground.

The golden barrel cactus typically blooms between April and May with yellow, red, or orange flowers.

The cactus is adapted to survive in dry, desert climates. It has deep roots that help it to access water underground. The cactus also can store water in its fleshy stem, which helps it to survive periods of drought.

3. Easy to Care for and Grow at Home

The golden barrel cactus is a relatively easy plant to care for. It prefers full sun and well-draining soil. The cactus should be watered about once a week, allowing the potting mix to dry out between watering sessions.

The cactus can be fertilized with a cactus fertilizer about once a month during the growing season.

The golden barrel cactus is susceptible to fungal diseases if it is overwatered. If your cactus develops brown spots on its stems or leaves, it likely has a fungal disease.

Treatment involves removing the affected parts and increasing the amount of airflow around the cactus.

4. Need Full Sun to Thrive

Golden barrel cacti need full sun to partial shade to thrive. They should be placed in an area of your home or garden that receives at least six hours of direct sunlight per day.

If you live in an area that experiences hot summers, consider providing some afternoon shade for your cactus.

A golden barrel cactus exposed to sunlight.
They should be placed in an area of your home or garden that receives at least six hours of direct sunlight per day.

The cactus can be grown outdoors in USDA hardiness zones nine through 11. If you live in a climate too cold for the cactus to survive outdoors, it can be grown indoors as a houseplant.

5. Slow-Growing Plant

The golden barrel cactus is a slow-growing plant. It typically only grows about one inch per year. However, the cactus can reach its full size in just a few years if grown in ideal conditions.

If you are patient, you can allow your cactus to grow to its full size before transplanting it to a larger pot.

Fortunately, there are a few things that you can do to encourage faster growth. One is to water your cactus with a diluted fertilizer solution about once a month during the growing season.

You can also increase the amount of light your cactus receives by moving it to a sunny spot or using grow lights.

6. Excellent Container Plant for Patios, Decks, and Other Outdoor Areas

Golden barrel cacti make excellent container plants for patios, decks, and other outdoor areas when they mature. They can also be used as accent plants or focal points in gardens.

The cactus can be transplanted into a larger pot as it grows. Be sure to use a pot with plenty of drainage holes to prevent the roots from sitting in water for too long.

7. Highly Susceptible to Pests

This cactus is highly susceptible to mealybugs and scale insects. These pests can be controlled with insecticidal soap or neem oil.

If your cactus is infested with mealybugs, you will likely see white, cottony masses on the stems and leaves of the plant. Scale insects appear as small, brown bumps on the stem of the cactus.

8. Susceptible to Overwintering

The golden barrel cactus is not frost-tolerant and should be brought indoors during winter.

The cactus should be placed in a sunny spot, and the temperature should be kept above 50 degrees Fahrenheit.

A topview of a golden barrel cactus.
The golden barrel cactus is not frost-tolerant.

The cactus should be watered about once every two weeks during the winter, allowing the soil to dry out completely between waterings.

9. An Interesting Addition to Your Home

This succulent is a beautiful and fascinating plant that is relatively easy to care for. A golden barrel cactus is an excellent option if you are looking for a plant that can add some color and interest to your home.

10. Easily Suffers Root Rot

Root rot is one of the most common problems with the golden barrel cactus. Typically, root rot happens when the plant is overwatered and the roots start to rot.

Signs of root rot include yellowing leaves, wilting, and stunted growth. If you think your cactus has root rot, it is essential to stop watering it and allow the soil to dry out completely.

You can then repot the plant in fresh, well-draining soil.

11. One of the Most Iconic Cacti

The golden barrel cactus is an iconic plant featured in many movies and TV shows. It is also a popular choice for gardens and homes.

A golden barrel cactus is a great option if you are looking for a plant that is easy to care for and can add some interest to your space.

When you take good care of this plant, you can be rewarded with beautiful blooms, adding more color and life to your home.

12. Endangered Species

The succulent is considered an endangered species in its native habitat due to illegal collecting and habitat loss.

A person replanting the golden barrel cactus.
Help conserve this species by planting one in your garden or home.

The cactus is protected by Mexican law, and it is illegal to remove it from the wild. To grow this plant, you must purchase it from a reputable dealer.

Help conserve this species by planting one in your garden or home. You can also help by donating to organizations that are working to protect the natural habitat of the golden barrel cactus.

13. Golden Barrel Cactus Fruit Is Edible

Its fruit is edible and has a sweet taste. The fruit can be eaten raw or cooked. It can also be made into jelly or jam.

If you want to harvest the fruit, it is best to wait until the cactus is ten years old. The fruit is typically ripe in the summer months.

To harvest the fruit, cut it from the cactus with a sharp knife. Be sure to wear gloves to protect your hands from the spines.

Wrapping Up

The golden barrel cactus is a beautiful plant that makes a great addition to any garden or landscape!

The succulent is low maintenance and relatively easy to care for; you only need to give it plenty of sunlight and well-drained soil!

Did you know all of these fascinating facts about the golden barrel cactus? Share this article with your gardening friends so they can learn more about this unique plant!