Introduction
Cacti are hardy plants, but their stems can still snap or break under certain conditions. Common reasons for a broken cactus include accidental falls or knocks, pest or animal damage (e.g. a curious pet or wildlife nibbling on the plant), improper handling (grabbing or moving the cactus without supporting its weight), and environmental factors like strong winds or rapid temperature changes. When a cactus breaks, acting quickly is crucial. An open wound on a cactus can invite infection and rot, so prompt care helps the plant heal before decay sets in.
In this guide, we’ll explain how to fix a broken cactus step by step – from assessing the damage to repairing the cactus and ensuring it makes a full recovery.
Step-by-Step Repair Process
Assessing the Damage
Before you begin repairing, examine how your cactus broke. Determine if the broken part is still partially attached or completely detached:
- Partially attached: If a branch or segment is bent or cracked but not fully severed, you might be able to brace it in place to heal. In this case, proceed with the reattachment steps below.
- Completely detached: If a piece of the cactus has broken off entirely, you’ll need to decide whether to graft it back onto the original plant or propagate it as a new plant. Factors to consider include the size and importance of the broken piece and the condition of the break. Very large or important pieces can sometimes be grafted back, whereas small pads or segments often do better being potted up as cuttings.
If the broken piece is mushy or rotten at the break, skip to the rot treatment steps – a rotting piece should not be reattached (see the FAQ on rot and our guide on How to Save a Rotting Cactus). Otherwise, if the pieces are firm and healthy, you can attempt a repair. Always wear thick gloves or use tongs when handling broken cactus pieces to protect yourself from spines.
Tip: If the break happened recently and the wound is still fresh (moist), you have a better chance of a successful reattachment. If the broken ends have already dried and callused over, you may need to trim them slightly (as explained below) before rejoining or propagating.
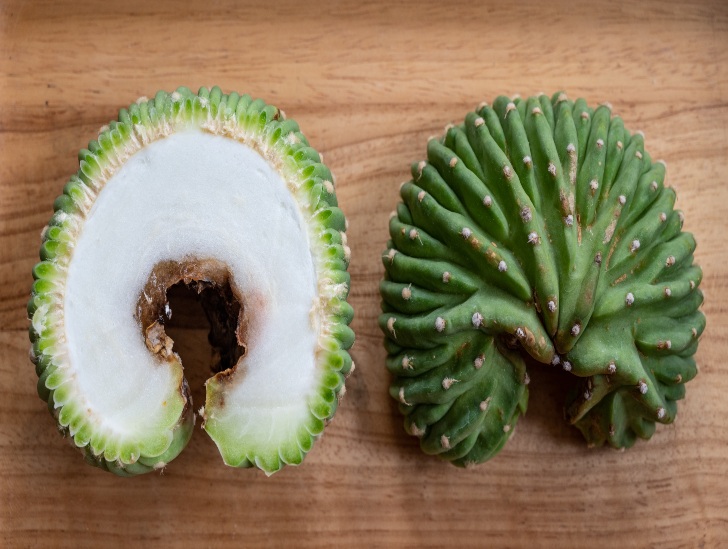
A cactus that has broken into two pieces can often be saved with the right techniques. In the photo above, the top of the cactus has completely broken off, but both the base and the broken piece can still recover. Quick intervention will help prevent rot and give your cactus the best chance to heal.
Reattaching Broken Parts (Grafting the Cactus Back Together)
If you want to repair the cactus by reattaching the broken part, essentially you will be grafting the pieces back into one plant. This works best for a clean break on a larger cactus where you want to preserve its original shape. Here are the steps to reattach:
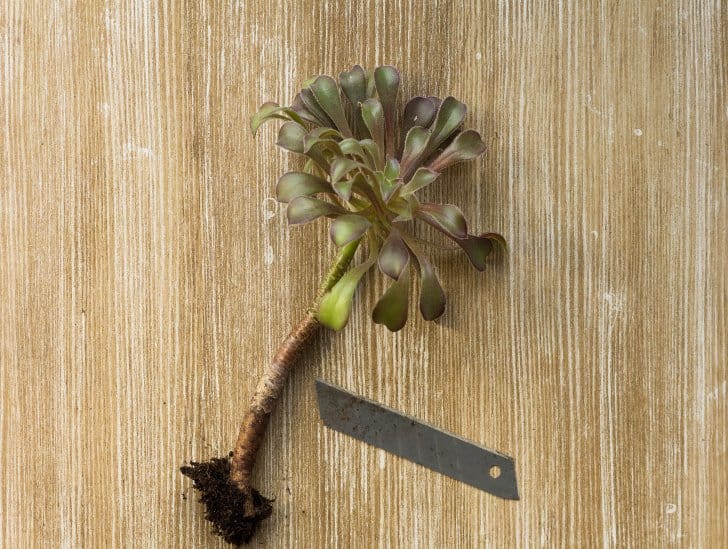
- Prepare the broken surfaces: Examine the break on both the main plant and the broken piece. If the wound surfaces are jagged or have started drying out, use a sterilized sharp knife to cut a thin slice off each broken end. Removing a thin “pickle slice” of tissue will create clean, flat surfaces of fresh flesh on both pieces. This step is important because a flat, clean cut on each side will allow the pieces to fuse more easily and removes any dried or damaged tissue. (Remember to sterilize your knife with rubbing alcohol before cutting to prevent introducing bacteria.)
- Let the cut ends dry briefly: After trimming, allow the cut surfaces to dry and callus slightly. This might mean leaving both pieces in a dry, shaded location for a few hours up to a day. The cut should not be sopping wet when you join the pieces, but also not so dry that it’s hardened completely. You want the surfaces to be tacky dry – this helps prevent rot but still allows connection.
- Reattach and align the pieces: Carefully place the broken piece back onto the main cactus exactly how it was oriented before. Align the cactus so that the vascular rings (the circle of tissue visible in the cross-section) match up as much as possible on both the base and the top piece. This ring is where the cactus transports water and nutrients, and aligning it helps the graft heal. Gently press the pieces together. They will not fuse immediately, so you’ll need to secure them (next step).
- Secure the cactus in place: Use soft string, twine, or even rubber bands to hold the broken piece onto the base. Wrap the string around the cactus gently but firmly, avoiding the sharp spines. Wind the string in a crisscross fashion over the break, going around the cactus and crossing over the top of the graft point and under the pot to anchor if needed. Aim to cover about an inch above and below the break with the wraps. The string acts like a bandage and a splint, keeping the pieces tightly together while they heal. Make sure it’s snug enough to support the cactus but not so tight that it cuts into the flesh. If the cactus is large or the broken arm is heavy, you may also use a stake or stick for extra support — place a stake alongside the cactus and tie the cactus to the stake so it doesn’t wobble. This external support will prevent the repair from shifting.

Once the cactus piece is tied in place, avoid moving or disturbing the plant.
- Let it heal: After securing the graft, place the cactus in a location out of direct harsh sunlight (bright indirect light is ideal) and where it won’t be bumped. Do not water the cactus immediately after reattaching – excess moisture at the break can invite rot. It’s best to wait at least a week before the first light watering. In the meantime, the cut surfaces will begin to knit together. Over several weeks, the top piece may start to regain firmness as it reconnects with the base. Monitor for any signs of rot at the graft (such as foul smell or oozing); if you see these, you’ll need to take the pieces apart and let them dry out (see FAQs below). Otherwise, be patient. Cacti heal slowly, and it may be a couple of months before you see new growth or the piece fully fuses.
- Remove the support: Leave the string (and stake, if used) in place for at least a few months. Eventually, you might notice the cactus pushing outward against the string or even new growth forming. At that point, you can carefully remove the string to avoid it cutting into the cactus’s flesh. If the pieces feel firmly attached, the graft was successful. (If not, leave it supported longer.) Some scarring may remain at the break, but over time the cactus can grow and hide the scar.
Propagating a Broken Cactus Segment (Creating a New Plant)
If reattaching isn’t feasible or you’d prefer to grow a new cactus from the broken piece, you can propagate it. Propagating a broken cactus segment essentially means treating the broken piece as a cutting and rooting it in soil. Many cacti can reproduce this way, and it’s often the best option for pads (like prickly pears or Christmas cactus segments) or when the break is too jagged to graft. Follow these steps:
- Trim and clean the broken piece: If the break was uneven, use a sterilized knife to cut the bottom of the broken piece so that it has a clean, flat base. Remove any small decayed bits if present. You want a healthy green surface that will form a callus. (If the piece already has a clean break, you may not need to cut it further – just ensure there are no ragged edges.)
- Let the cut end callus (dry out): This step is critical for propagation. Place the broken piece in a dry, warm, shaded area (out of direct sun) and let the cut end air-dry for several days. Typically, 2-7 days is enough for a callus to form, depending on the size of the cutting (larger, thicker cacti might require up to a week or more). The cut end will toughen and seal over – it might turn whitish or light brown and feel dry to the touch. This callus tissue protects the cutting from rot when it’s planted. (Do not pot the cactus or water it during this time!)
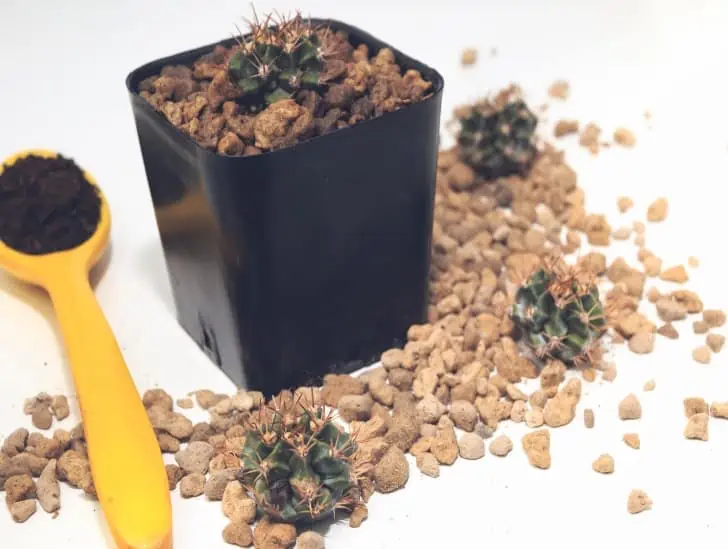
- Prepare a pot with suitable soil: Choose a pot that’s just a bit larger than the cactus piece (with a drainage hole) and fill it with a well-draining cactus mix. An ideal mix is one formulated for succulents/cacti or a DIY mix of regular potting soil with plenty of perlite or coarse sand mixed in. The soil should be dry. For extra insurance, you can even place a layer of coarse sand or grit on the top where the cutting will sit – this keeps the base of the cutting dry. (Tip: Using a terra cotta pot can help absorb excess moisture, but any pot with good drainage will work.)
- Plant the callused cutting: Take the callused cactus piece and place it on the soil in the new pot. Set the dried end slightly into the soil — just enough so the piece can stand upright or is in good contact with the soil. Do not bury it deeply; usually planting the base an inch or two into the soil is sufficient, or even just resting it on top of the soil for flat pads. You may prop the cutting with small rocks or stakes to keep it upright if needed. The idea is to have the cut end touching the soil so it can start sending out roots. (For very large, heavy cactus sections, you might plant a bit deeper (several inches) so it stands on its ownifixit.com, but avoid burying too much of the green part.)
- Initial watering (or lack thereof): Do not water immediately after planting the cutting. The soil should remain dry for about a week to further ensure the cut end heals. After that, you can start lightly watering to encourage rooting. The safest approach is to mist the top of the soil occasionally rather than soaking itifixit.com. After about 4-5 days of being in the dry soil, give the soil a light watering or mist – just enough to introduce a bit of moisture but not so much that the cutting’s base sits in water. Over the next few weeks, continue to sparingly water the soil (e.g. a small sprinkle once a week or when the soil is completely dry). Too much water too soon can cause the cutting to rot before it grows roots, so err on the side of underwatering. The cutting has stored moisture in its tissues and can survive on that for a while.

- Provide warmth and light: Place the potted cutting in a warm environment with bright but indirect light. Avoid intense direct sun until it has roots (since without roots the cactus can’t take up much water to cool itself, and it could desiccate or sunburn). A spot near a window with filtered sunlight or a bright shade outdoors is ideal. Warm temperatures (70–85°F / 21–29°C if possible) will help speed up root development. Cacti generally root faster in the growing season (spring/summer) than in winter.
- Wait for roots to form: Rooting a cactus cutting takes time, so be patient. It may take a few weeks to a couple of months for roots to establish, depending on the cactus species and conditions. You can check for root development by gently tugging on the cutting after a few weeks. If it feels anchored or resists being pulled up, roots have likely formed. Another sign of success is seeing new growth (such as tiny buds, offsets, or the tip of the cactus starting to grow). Do not tug too hard and don’t disturb a cutting that is starting to root; this is just a gentle check. Once you know it’s rooting, continue a careful watering routine (water deeply but infrequently, always letting soil dry out in between). Over time, the cutting will begin to behave like a normal cactus, and you can gradually give it more light if it’s a sun-loving variety.
- Care for the original plant: Don’t forget the original cactus (the part that was left in the pot after the break). If you had to trim its broken end, that stub should also be allowed to dry and callus. Keep it dry for a week or so. In many cases, the original base will heal over and might produce new growth (pups) around the cut in a few months. Resume normal light watering for the base plant after a week or two, being careful not to soak the broken top. With time, you may see baby cactus shoots emerging from where it broke, especially if it’s a species that readily pups. This way, you could end up with two plants: the original sprouting a new branch, and the rooted cutting growing on its own.
Aftercare for a Repaired Cactus
Whether you reattached the broken piece or propagated it, proper aftercare is crucial to help the cactus recover fully. Here are some aftercare tips for your repaired cactus:
- Watering: Cacti are prone to rot if overwatered, especially when they have fresh wounds. After a repair, hold off on heavy watering. For a grafted/reattached cactus, wait about 1–2 weeks before the first light watering. Then water sparingly for the next few months. For a propagated cutting, as mentioned, only mist or lightly water until strong roots have formed. Always let the soil dry out completely between waterings. It’s better to under-water than over-water at this stage. Too much moisture is the enemy of a healing cactus – remember that. Once the cactus shows new growth and is stable, you can gradually increase watering to a normal schedule (which for most cacti is infrequent, e.g. every 2-4 weeks depending on climate and season).
- Soil and Pot: Ensure the cactus is in well-draining soil. If you repaired it in the same pot, make sure the soil isn’t waterlogged. If you rooted a cutting, use a cactus/succulent potting mix with extra perlite or sand. Good drainage prevents rot by keeping the roots and cut base from sitting in water. The pot should have drainage holes, and it’s often best to use a pot that’s proportionate to the cactus’s size. An oversized pot holds excess soil and water, which can lead to rot. Also, consider the pot’s weight and stability – a heavy clay pot or one with a wide base can help prevent tall cacti from tipping over easily in the future.
- Light: After a break and repair, cacti benefit from bright light but not extreme heat or direct sun until they’re healed. Too much direct sunlight can stress a recently broken cactus (especially a cutting without roots) and cause it to desiccate or scorch. Place the cactus in a location with bright, indirect light or gentle morning sun and afternoon shade. As it recovers over the following weeks, you can gradually increase sun exposure according to its species’ needs. A healthy cactus needs plenty of light to grow strong stems (to avoid weak, etiolated growth that can break again), but ease it back into full sun if it was used to it, so you don’t shock it while it’s vulnerable.
- Temperature: Keep the cactus in a warm environment while it heals. Ideally, keep it in a range of around 65–85°F (18–29°C). Avoid exposing a recovering cactus to cold drafts or freezing temperatures. Cold, damp conditions especially should be avoided, as they can invite rot. If the cactus was outdoors and it broke due to a storm or wind, consider moving it to a sheltered spot until it’s stronger.
- Monitor for growth and problems: Over the next several weeks to months, watch your cactus for signs of successful healing. For reattached parts, check that the top part remains firm and green. Eventually, you may see new spines or buds forming, which is a great sign. For propagated cuttings, look for new buds or leaves (in the case of leafy cactus like Christmas cactus) and check that the cutting isn’t shriveling significantly (a slight wrinkle is normal, but it should not turn yellow or mushy). Callus formation at the break should be dry and hard; if you see any soft, brown, or black areas, that could indicate rot. Also, after some time, gently feel the base of the cutting for any resistance (indicating root growth).
- Be patient: Cacti are slow growers. It may take several months for a broken cactus to fully recover and even longer to regain its original height or fill in new growth. As long as the cactus remains free of rot and is getting a bit of light water and good light, it’s likely working on rooting or healing internally even if you don’t see much happening on the surface. Patience is key. Sudden changes (like overwatering out of impatience) can do more harm than good.
By following these aftercare steps, you greatly increase the chances that your repaired cactus will survive and thrive. Once you notice robust new growth, you can consider the cactus healed. At that point, you can return to a normal care routine. For general cactus care tips (watering, fertilizing, etc.), check out our guide on Cactus Care: 11 Essential Tips for Beginners for more advice on keeping your cactus healthy.
Preventative Measures
After you’ve saved your cactus, you’ll want to prevent future breaks. Here are some preventative measures and tips to keep your cactus from breaking again:
- Use an appropriate pot: A top-heavy cactus in a small or lightweight pot is an accident waiting to happen. Make sure your cactus is potted in a sturdy container that gives it stability. A wider, heavier pot (like ceramic or clay) can help prevent tipping. Also ensure the cactus is planted deep enough so it’s well-anchored by its roots. If your cactus has grown and now seems too large for its pot, consider repotting into a slightly larger pot that can better support it (especially if it has become very tall or off-balance).
- Stake or support tall cacti: For very tall or columnar cacti, or those with multiple arms, it’s wise to provide support before a break happens. You can insert a cactus stake or a wooden stick into the pot and loosely tie the cactus to it for stability. Use soft bands or garden tape that won’t damage the cactus skin. There are also special cactus supports (like metal plant rings or stakes) available. A gentle support will keep a cactus upright during strong winds or if it gets brushed, reducing the risk of it snapping under its own weight. This is especially important for cacti that have experienced rapid growth or those with thinner, weaker stems.
- Handle with care: Many breaks happen when moving or handling a cactus. Always handle your cactus carefully. Wear protective gloves and consider wrapping the cactus with layers of newspaper or an old towel when you need to lift or repot it (this protects both you and the plant). Support the base of the cactus while moving it; never grab a cactus by an arm or top-heavy section without supporting the bottom, as this can cause it to shear off. If you need to transport a large cactus, secure it so it won’t tip or roll in transit.
- Proper light and feeding: Believe it or not, the way you care for your cactus can influence how breakable it is. A cactus grown in low light may become etiolated (stretched out and thin), which creates weaker tissues that break more easily. Give your cactus adequate sunlight for sturdy growth (according to its species’ needs). Also, avoid over-fertilizing or overwatering, which can make a cactus grow too quickly and become physically weaker or unstable. Overwatering in particular can lead to root rot or an oversized, water-heavy stem that can collapse under its own weight. Keep a balanced care routine to encourage strong, healthy cactus structure.
- Pest and disease control: Regularly inspect your cactus for pests like mealybugs or fungus that could weaken the cactus tissues. Insect infestations can cause sections of the cactus to decay or become brittle. If you notice any unusual spotting, oozing, or small insects, treat the issue promptly. A healthy cactus is more resilient and less likely to suffer structural damage.
- Reinforce weak points: If your cactus has a known weak spot (for example, a previous injury or a narrow junction between segments), keep an eye on it. You can preemptively reinforce such an area by tying a soft cloth or nylon around it (not tight, just for support), or by bracing the cactus near that point with a stake. This is similar to how you might support a branch of a fruit tree that’s heavy with fruit – giving it a little extra support to prevent breakage.
- Safe placement: Lastly, consider where your cactus lives. If it’s in a high-traffic area where people or pets often bump into it, you might want to move it to a safer spot to avoid accidents. Likewise, keep indoor cacti away from edges of shelves or sills where they might get knocked over. Outdoors, place tall cacti in areas less exposed to extreme wind, or use windbreaks for protection.
By implementing these preventative measures, you can significantly reduce the chances of facing another broken cactus. Protecting your cactus’ physical stability and overall health goes a long way in keeping it intact. Remember, it’s easier to prevent breaks than to fix them, so taking a little care in how you situate and tend your cactus will pay off in the long run.
FAQs
Can a cactus heal itself if broken?
Answer: It depends on what you mean by “heal itself.” A cactus won’t magically reattach a completely broken-off piece on its own – if the top of your cactus snapped off, it’s not going to fuse back without intervention. The broken surfaces will simply dry out and seal (callus) to prevent losing moisture. However, this doesn’t mean the cactus is doomed! The base of the cactus (the part still in the pot) can heal over and often sprout new growth (such as new stems or “pups”) after some time. And the broken-off piece itself can potentially grow into a new cactus if you plant it properly. Cacti are remarkably resilient: you can take a piece that’s broken off and replant it to root into a new plant.
In nature, many cacti pads or segments that fall to the ground will root themselves. So while a cactus won’t rejoin its broken limb alone, both parts can heal in their own way – the mother plant might branch out and the detached piece can become a whole new cactus. Just be sure to help the process along by following the steps above (callusing and potting the piece, or grafting it back onto the original cactus if you choose that route).
How long does it take for a broken cactus to recover?
Answer: Repairing cactus stems is a game of patience. You will likely see the initial healing (callus formation) within a week or two. If you reattached a part, the joining tissue might start to knit in a few weeks, and a propagated cutting may start growing tiny roots in a few weeks as well. However, noticeable new growth (like new buds or the cactus starting to plump up and grow) can take anywhere from 4-6 weeks to a few months
Cacti grow slowly, and when they’ve been injured, they often focus on healing internally before putting out new outward growth. To fully “recover” to the point where the cactus looks as it did before the break (for example, regaining similar size or filling in a scar), could easily take several months to a year
Don’t be alarmed if your cactus seems to be in stasis for a long time after the injury – as long as it isn’t rotting and is gradually getting a little sun and water, it’s likely healing beneath the surface. Once you see new green growth or new spines, that’s your sign that the cactus is on the road to recovery. From there, normal growth resumes (still at the cactus’s natural slow pace). So, in short: a broken cactus can take a few months to truly recover, and you’ll need to give it consistent gentle care during that period.
What if my cactus turns brown or mushy after breaking?
Answer: If your cactus tissue is turning brown, black, or mushy at the break site (or anywhere on the plant), that’s a sign of rot setting in. Unfortunately, rot can spread rapidly and a cactus cannot heal from rot by itself. You’ll need to take immediate action to save your plant. Act fast: remove the rotted portion before it spreads. Using a clean, sharp knife, cut away all the mushy or discolored tissue from the cactus. Cut a bit into the healthy flesh if needed, until you see only firm, green (or white-ish internal) tissue on the remaining cactus. Essentially, you are performing surgery to amputate the rot. If the rot was in the middle of the cactus, this might mean cutting the cactus in two – and you might end up with a top part that is now a separate cutting (which you can try to save by callusing and replanting) and a bottom part that hopefully can recover. After cutting, let the healthy cut ends dry and callus for several days. It’s often helpful to dust the cut surfaces with a fungicidal powder or even simple powdered cinnamon (which has natural anti-fungal properties) to ward off infection while it heals. Once callused, you can pot the salvaged pieces in fresh dry soil and begin the propagation process as described above. Be sure to disinfect your knife between cuts – you don’t want to accidentally spread the rot organisms. Also, discard the infected tissue far away from your other plants. Going forward, carefully monitor the remaining cactus for any further signs of rot. Keep it in a dry, airy environment as it heals. Rot is basically an infection, and the only cure is to cut it out completely. If the rot was caught early and removed, your cactus stands a good chance of survival. (For a full guide on dealing with cactus rot, including illustrations of what healthy vs. rotted tissue looks like, see our article on How to Save a Rotting Cactus.)
By following this guide, even beginners can confidently tackle the challenge of a broken cactus. Remember: quick action, proper technique (reattaching or propagating as needed), and patience in aftercare are the keys to repairing a cactus stem successfully. With time, your cactus should bounce back from its injury, and you’ll barely be able to tell it was ever broken! Good luck, and happy cactus caregiving.