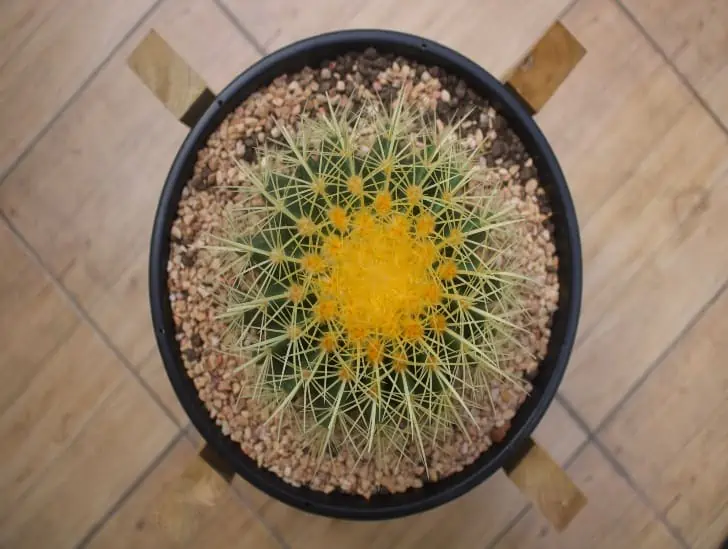
Golden Barrel Cactus: Bloom Or No Bloom?

Golden barrel cactus blooming.

Resembling a large sewing pincushion, the golden barrel cactus offers intimidating spines across a highly ribbed, spherical body which is perfect for your desert terrarium. Although the barrel cactus may look mundane for most parts of the year, its appearance changes at certain times of the year when the blooms burst forth.

So, does barrel cactus bloom? The simple answer is “yes.”  The cactus blooms wonderfully in spring and summer. The flowers burst into life with a neon brilliance putting on a spectacular show. Its flowers are exceptional with red spines that reflect natural light in the evening when the sun is setting. When the conditions are right, these flowers get pollinated, producing relatively large fruits filled with seeds that feed different types of animals in the wilderness. Typically, the cactus starts to flower once it reaches approximately six inches wide or after about 15 years.

Do you have a barrel cactus in your home and wondering whether it will ever bloom? If so, you have come to look for information in the right place. This blog post discusses everything you need to know about the golden barrel cactus and how it blooms.

When Does the Golden Barrel Cactus Bloom?

The golden barrel cactus is one of the most popular indoor cacti species. It generally grows slowly and doesn’t bloom during its early years. In most cases, this cactus starts to produce flowers when its barrel is at least six inches wide. To achieve this width, the cactus must be at least 15 years old.

So, if you have a relatively young barrel cactus that isn’t showing any signs of flowering, you don’t need to worry a bit. When the cactus is mature enough and the conditions are right, it will start producing flowers.

The cactus mainly blooms during spring and summer – mostly between mid-April and September. In some cases, the flowering may start in May, but it rarely extends to October.

Golden barrel cactus pink flower.
When the cactus is mature enough and the conditions are right, it will start producing flowers.

During spring and summer, the long sunlight hours stimulate the cactus’ growth and reproduction. The succulent’s brightly colored flowers attract bees for cross-pollination, resulting in the formation of fruits.

The resulting fruit serves as a source of food for the local wildlife, which helps to spread the seeds throughout the area.

The cold winter and fall months are dormant periods for the golden barrel cactus. During this time, the succulent slides into dormancy, and growth stops. It is not until spring that the plant becomes active and starts to show signs of growth.

How Long Do Golden Barrel Blooms Last?

While some succulents bloom and wither within a day, most golden barrel cactus species will retain their flowers for up to six weeks. Some of the crucial factors that determine how long the flowers will last include the amount of watering it receives and the temperature of the surrounding environment.

When the flowers don’t receive sufficient watering in relatively hot temperatures, they tend to wither pretty fast.

The flowers are mostly two to three inches wide and grow in a crown near the top of the stem. Most of them generally last for one or two weeks, but if you keep the conditions right, you might enjoy the impressive show for six or even seven weeks.
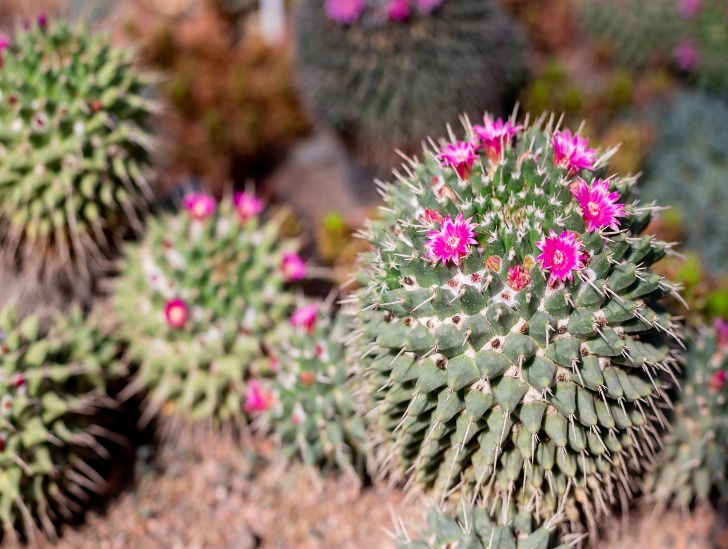
Golden barrel cactus flowering.
You need to make sure that your plant is always receiving the right amount of water all the time.

Although the cactus requires minimal care to survive, dropping or wilting flowers within a few days is usually a clear sign of improper watering or sudden temperature changes.

Keep in mind that watering is a critical aspect of barrel cactus care. So, you need to make sure that your plant is always receiving the right amount of water all the time. Avoid underwatering or overwatering your plant for the best results.

The flowers remain open during the day but close at night. It means that pollination of the flowers can only happen during the day.

How Can You Get Your Golden Barrel Cactus to Bloom?

If your cactus is already more than six inches wide or 15 years old, but it isn’t showing any signs of flowering, it could be a clear sign of poor maintenance.

Luckily, there are a few things you can do to change the situation and encourage your plant to flower. They include:

1. Water Properly

Most cacti species are known for their acclimation to relatively drought conditions. These plants have developed a wide range of survival mechanisms that make them highly drought-resistant. They store plenty of water in their stems to push them through the dry season.

However, a barrel cactus grown at home may have slightly different water needs than one in the wilderness. A barrel cactus grown at home requires slightly more watering to flower. But be careful not to overwater your plant because it can lead to root rot issues.
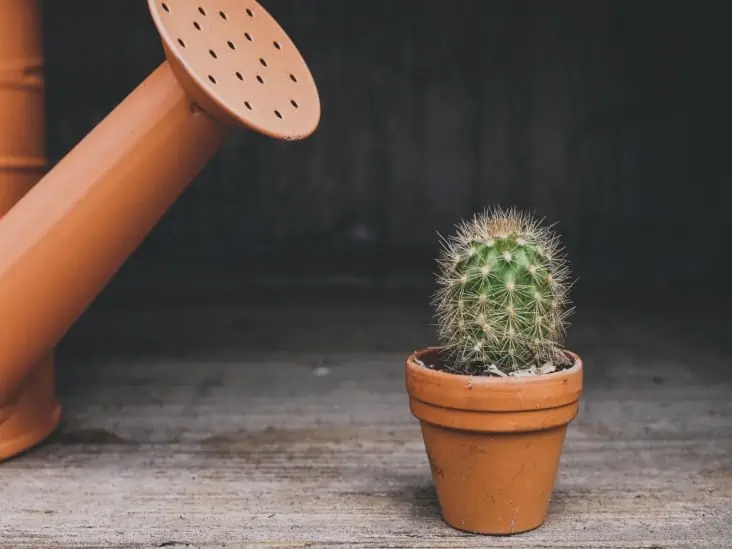
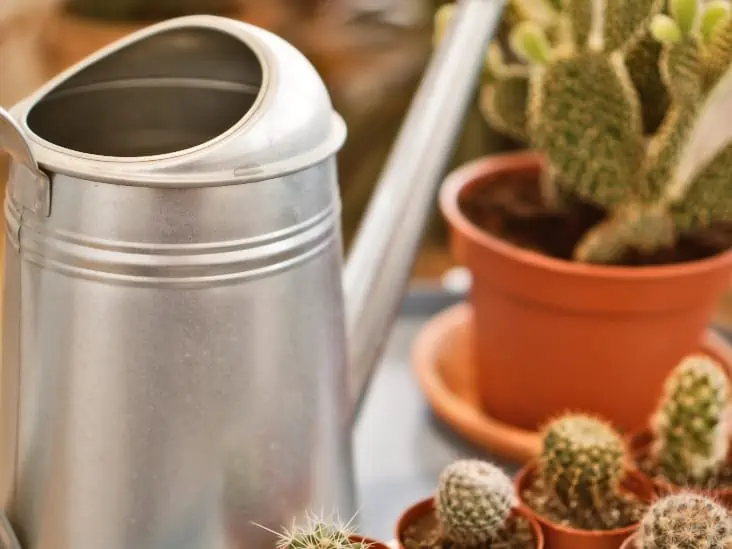
Water can and a cactus.
Ensure you stick to the recommended watering schedule.

Keep in mind that a truly shriveled barrel cactus doesn’t have a lot of energy to initiate flowering. Even if you don’t want to be a little bit more generous with watering out of fear of overwatering, ensure you stick to the recommended watering schedule to give your plant the best chance of flowering.

Typically, a barrel cactus that retains an average amount of water from regular watering should be able to flower in spring and summer without any issues.

2. Soil Requirements

The type of potting mix you use to grow your barrel cactus can also significantly impact its flowering. Although the cactus can grow in different types of soils, ensure you stick to a well-drained and rich potting mix.

Well-draining potting mix prevents waterlogging, which is crucial to the flowering process. Fertilize your plant during the growing months with a 5-10-5 ratio mixture that will help accelerate flowering. The numbers represent the nitrogen, phosphorous, and potassium quantities in the fertilizer.

The relatively higher amount of phosphorous in the mixture promotes the formation of blooms over stem growth. Take fertilization seriously because poor soil nutrients can lead to low flower output.

Furthermore, poorly draining soils that lead to waterlogging of the roots may contribute to root rot and blossoming problems. Generally, a barrel cactus cannot survive for long in poor drainage soil conditions.

3. Light Requirements

Flowering can also be affected by too much or too little sunlight. The golden barrel cactus must be exposed to full sunlight in spring and summer to produce the gorgeous flowers that form at the crown of the stems.

Generally, blooming will be stunted if the plant doesn’t receive plenty of sunlight. The flowers formed won’t last for long either.

However, if you move your plant indoors during winter, you need to be careful with introducing it to sunlight in spring. Aim to do it gradually. You can start by exposing it to a few hours of morning sunlight and increase the number of hours of sunlight exposure slowly until it is ready for full sunlight.
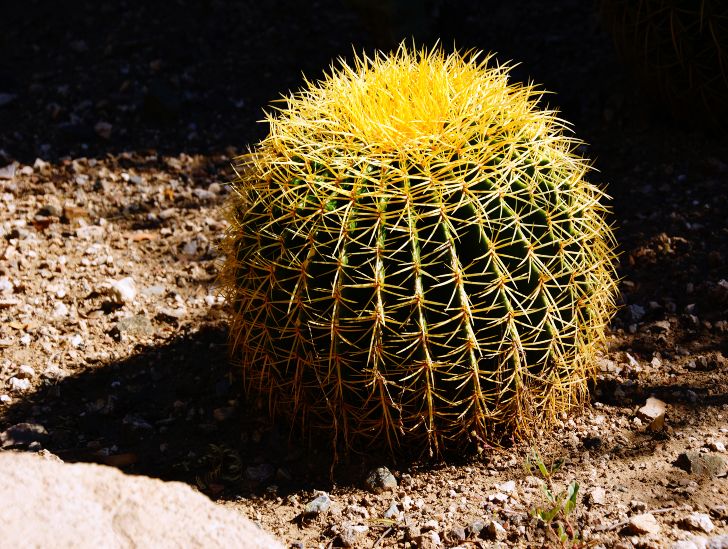
Golden Barrel cactus expossed to sunlight.
You want to expose your barrel cactus to 12 hours of constant light.

If you throw your plant out hastily, it may fail to bloom as a result of the shock that it will develop. Furthermore, it may suffer from severe sunburns that don’t heal.

Ideally, you want to expose your barrel cactus to 12 hours of constant light to give it the best chance of blooming. If you can’t achieve that with natural sunlight, consider complementing it with artificial grow lights.

What Happens to Golden Cactus Blooms?

Once your golden barrel cactus has produced flowers, they start to attract insects. These insects feed on the flowers and also facilitate the process of cross-pollination. Bees are the most common pollinators.

When the flowers are cross-pollinated, they close, and seeds start to form inside the ovary of the faded flower. The process may take a couple of weeks.

Pollinated flowers will eventually turn into fruits. The golden barrel cactus fruits are usually embedded in the dense hairs on the tip of the plant. In the wilderness, squirrels usually harvest the fruits to feed on the seeds.

The fruit has a yellowish fleshy wall that turns brown when it is fully ripe. It contains black seeds that remain viable for a relatively long time.

To collect the seeds for propagation, gently pluck the fruit from the plant. Take the fruit to a work table and break them open to remove the seeds.

Leave the seeds to dry for a couple of days before propagation. Generally, the seeds require warm and moist conditions to germinate.

To obtain the best results, use a clean and shallow pot with plenty of drainage holes and a soilless potting mix to germinate the seeds. Fill half of the container with the potting mix and spread the seeds on top of it.
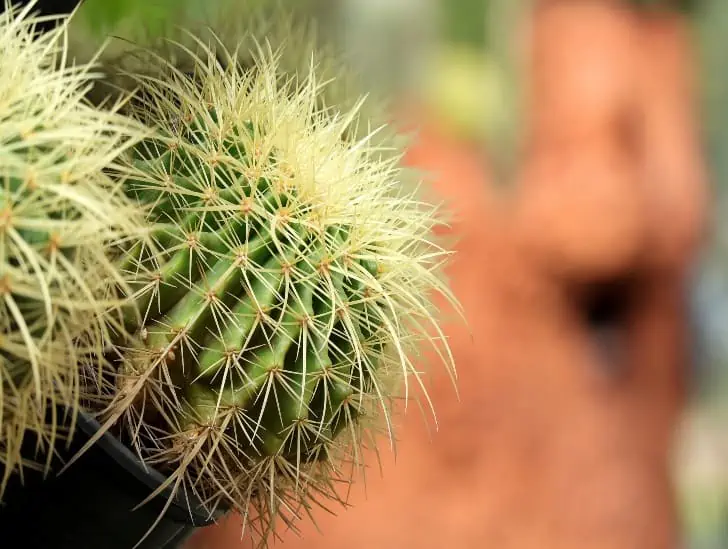
A golden barrel cactus closeup image.
The golden barrel cactus fruits are usually embedded in the dense hairs on the tip of the plant.

Water the pot from the bottom, cover it with plastic then position it in indirect sunlight. Check the potting mix regularly and ensure it stays moist. The seeds should start germinating after six or seven weeks.

Final Thoughts

Golden barrel cactus flowers are a beautiful addition to any garden, and with a little bit of care, you can get your own cactus to bloom. Make sure to water properly, give it the right soil, light conditions, and wait for the blooms to form.

With proper care, the blooms can last for up to six weeks, turning into fruits with plenty of seeds that you can propagate to expand your golden barrel cactus collection.

Which Succulents Go Well Together in a Succulent Arrangement?

Do you want to create a perfect succulent arrangement that will add life to your garden or indoor spaces? If so, then there are a few things you need to know about pairing these sun-loving plants. Most succulents already look fabulous on their own, but they can look even better when they are arranged together. The primary goal is to know which succulents can be grown together to save your time and effort in caring for the plants.

So, what succulents go well together in a succulent arrangement? The truth is that there are many types of succulents, and if you want to arrange these plants, a general rule is to choose those with similar needs. If you pair succulents with similar needs, they will grow in harmony and maintain a beautiful appearance throughout their time together. Mixing plants with different needs will not do you any good. For instance, Graptosedum California Sunset is a wild summer grower, while Crassula is a winter grower. So, planting these two together wouldn’t be a good idea at all.

This article discusses critical things you need to evaluate when determining which succulents go well together to avoid losing some of the plants. Read on to learn more.

Which Succulents Can Be Paired Together?

Almost all kinds of succulents can be paired together, but you still need to consider a few things to ensure your pairing and arrangement will survive over the long term.

When choosing which succulents to plant together, the most critical considerations are the conditions for maintenance and the general growth period. Basically, you want to combine succulents with similar care requirements and grow the same season.

Their watering needs, temperatures requirements, light requirements, humidity requirements, and even fertilizer requirements should be similar.

You should also pay attention to other things such as their form, color, and texture, which are crucial to developing a visually-appealing succulent arrangement.

So, what criteria should you follow when determining which succulents can go well together in your succulent arrangement? Let us find out.

1. General Care Requirements

Most succulents are generally easy-care plants. They all can store water in different parts (roots, stems, and leaves) and are drought-resistant.

However, you need to remember that some succulent species require more water than others. Some prefer exposure to full sunlight, while others thrive under shade. Some succulents are winter-dormant, while others are summer-dormant.

Hardy succulents can easily withstand freezing temperatures and frost, but the tender species are less tolerant to extremely harsh weather conditions.

Succulents on hand.
Remember that some succulent species require more water than others.

Therefore, when planting succulents together, consider their general care needs such as water requirements, growth season, temperature, and light requirements.

Generally, succulents with thin leaves usually require more water than their thick-leaved counterparts. So, if you mix thin-leaved and thick-leaved succulents and supply them with the same amount of water, you risk losing one of them due to either underwatering or overwatering.

If you must plant them together, then you will be forced to give the thin-leaved succulents a “direct dose” of water while trying to leave the other succulents dry. This alone can turn out to be a lot of work which you can avoid if you choose your succulent pairings carefully.

2. Height

Besides the growth needs, it is also good to consider the height of your succulents while planting them together. Generally, your succulent arrangement should have a thriller, filler, and spiller.

Choose the tallest succulent you can lay your hands on as the thriller because its primary job is to make the entire arrangement look outstanding. Relatively shorter succulents can be used around the thriller as fillers.

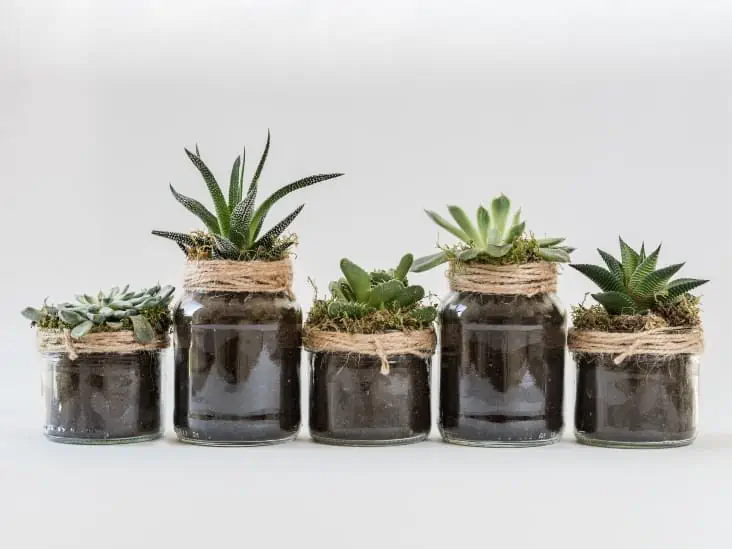
Succulents in a jar.
It is also good to consider the height of your succulents while planting them together.

You also need to find some trailing or cascading succulents to serve as spillers to make your succulent arrangement complete.

Some of the tall-growing succulents you can use as thrillers include Sansevieria and Aeonium. Short growing succulents that serve as great fillers include Sempervivum, and Echeveria while some examples of cascading/trailing varieties include String of Pearls, String of Hearts, Sedum, and Senecio.

Keep in mind that these are only a few examples, but there are numerous options for each category that you cannot exhaust. Feel free to apply your own ideas and go with something that looks good to your eyes.

3. Color

Generally, choosing a good theme for your succulent home arrangement is relatively easy. Whether you want it to be monochromatic or colorful, there are many different kinds of succulents that can make your combination look great.

There are three main ways to combine colors in your succulent arrangement; analogous, monochromatic, and complementary.

For a monochromatic arrangement, you need to combine succulents with the same colors but with different shades. For instance, the typical green succulents come in various hues. Therefore, you can easily make more textured succulent arrangements using different shades of the same color.

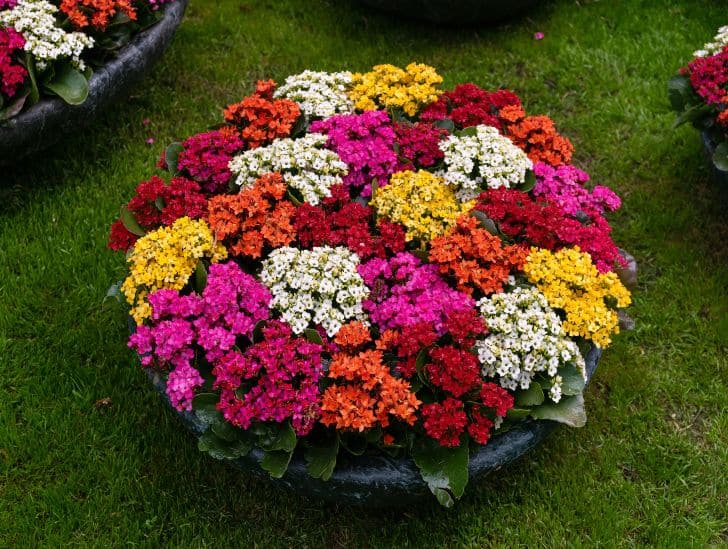
Different colors of kalanchoe.
You want it to be monochromatic or colorful?

In an analogous arrangement, your primary goal is to combine succulents with colors sitting next to each other in the primary color wheel. For instance, yellow, yellow-green, and green are excellent analogous arrangements that provide you with different options when picking succulents.

A complementary arrangement calls for the use of colors found on opposite sides of the color wheel. For instance, you can use green and red in your arrangement.

4. Shape and Texture

You can easily achieve an interesting succulent arrangement by using various plants with different shapes, textures, heights and other special features such as hairs.

You can always choose among the relatively tall and upward growing succulents such as Aeonium or Sansevieria or go with rosette-forming succulents such as Echeveria and Sempervivum.

Your options are truly endless when it comes to choosing succulent shapes and textures. As long as the plants you choose have similar care requirements, you are good to go.

You can also play with succulents with varying heights to achieve something more interesting. Some gardeners prefer to create a relatively uniform design using succulents of the same height but different colors and textures.

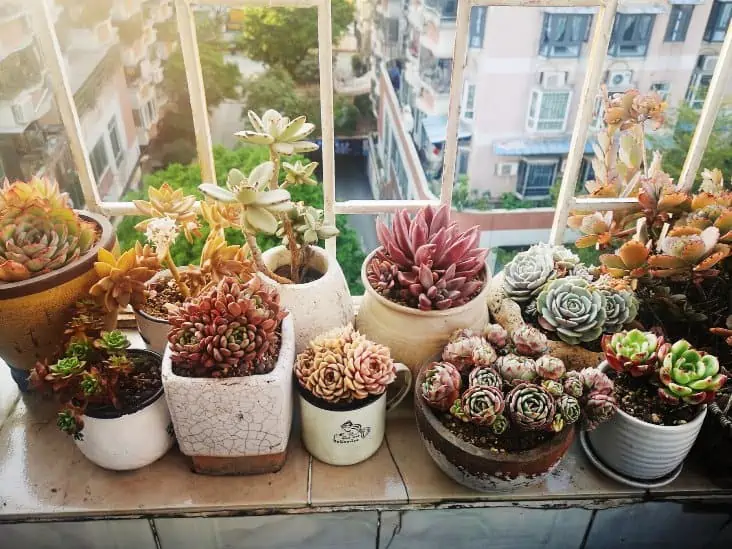
Different kinds of succulents.
Your options are truly endless when it comes to choosing succulent shapes and textures.

Some succulents such as Aloe Vera, Haworthia, and Gasteria usually provide a fantastic texture with their unique white markings. Any type of cacti will also add wonderful texture to your arrangement with their spines and unique stems.

Although most succulents are popular for their unique stems and chubby leaves, some of them produce stunning flowers during the flowering season.

So, if you include a flowering succulent in your arrangement, you can be sure of enjoying a beautiful floral display during the blooming season.

5. Pots and Containers

Pots and containers also play a critical role in determining which succulents can grow together in a succulent arrangement. Choosing the right container and experimenting with its shape, scale, texture, and even color can be as fun as arranging your succulents.

Terrariums
Go for one with color, texture, and shape that will either complement your succulents.

When choosing a growing pot to use in your succulent arrangement, go for one with color, texture, and shape that will either complement your succulents or offer a fascinating contrast. Don’t choose a growing pot just for the sake of it.

Gardening experts with plenty of experience in succulent arrangement say that choosing a pot carefully can make a significant difference since there are different forms of top dressing, such as broken blocks or pebbles, that will only look good in specific types of containers.

Can You Combine Succulents with Other Plants?

The simple answer is “yes.” Although we have been talking about succulent arrangements exclusively, it doesn’t mean that you cannot combine succulents with other types of plants to achieve a truly mesmerizing arrangement.

Combining succulents with herbs usually works best because most herbs are used to survive in the kitchen. It means they have developed some level of drought resistance and love bright light. Furthermore, they usually don’t require a lot of care and maintenance to thrive.

It means that herbs resemble most succulents in their growth and general care needs. Additionally, herbs tend to add a range of colors and textures to your succulent arrangement. They even have unique fragrances that give a new dimension to your succulent garden.

Some of the herbs that can be grown together with succulents include Oregano, Curry, Savory, Thyme, Rosemary, Marjoram, Sage, and Lavender.

The most important thing you need to pay close attention to when growing herbs and succulents together is how you water your plants. This is because most herbs are used to growing in-ground and are usually provided with slightly more moisture than succulents.

Therefore, if you combine herbs and succulents in your succulent arrangement, you need to give your herbs slightly more water than succulents. You can still use regular succulent soil in your container but find a way of watering the herbs slightly more than your succulents.

Final Thoughts

Combining several succulents in one pot helps to accentuate their beauty. You can even pair succulents with non-succulents and play around with your design to see what you can achieve.

However, if you decide to pair succulents and non-succulents, ensure the potting mix you use is specially formulated for succulent plants.

The truth is that there is no limit to your succulent arrangement possibilities, and everything is 100% possible. So, don’t be afraid to take your chances and experiment until you find something that works perfectly for you!

How To Easily Propagate Buddha’s Temple?

Buddha’s plant is a beautiful succulent that grows in columns, and most of the time, every column will produce a new branch. When mature, it blooms pinkish flowers, and they’ll make your home beautiful, especially if you have your plant in a decorated pot. This makes it a collectors plant for your home.

But if you want to propagate it, what should you do? It’s not difficult for you to propagate the Buddha’s Temple plant. You can grow them in your garden or indoors with fewer maintenance needs at home. 

Besides, this succulent is easy to look after; you might find yourself watering it a few times when it’s young, but once it grows, occasionally!

How Do You Propagate Buddha’s Temple?

Leaf cuttings, seeds, and offsets are the most effective methods of growing a new Buddha’s Temple. However, if you cannot obtain offsets or purchase Buddha’s Temple plant from gardening stores, you may consider seed propagation.

Since Buddha’s Temple grows slowly, planting one from seed may take time before the seed germinates and grows into a grown plant. But the time shouldn’t deter you from planting one.

How to Propagate Budhha’s Temple from Seeds

Buddhas Temple is a slow grower from seeds; therefore, you must have some patience before you consider planting its seeds. In contrast, this is the easiest way to grow Buddha’s Temple.

How to plant Buddha’s Temple from seeds:

Purchase seeds from a gardening center or stores near you. Ensure the seeds are fresh. You can check out the date of packaging or collection date. The more fresh the seeds are, the high likelihood they’ll germinate.

Prepare a good potting mix that is draining well for your seeds and add it to a good pot with drainage holes or well-draining ground. You can add some succulent fertilizer with a half-strength to the soil to enhance healthy growth. 

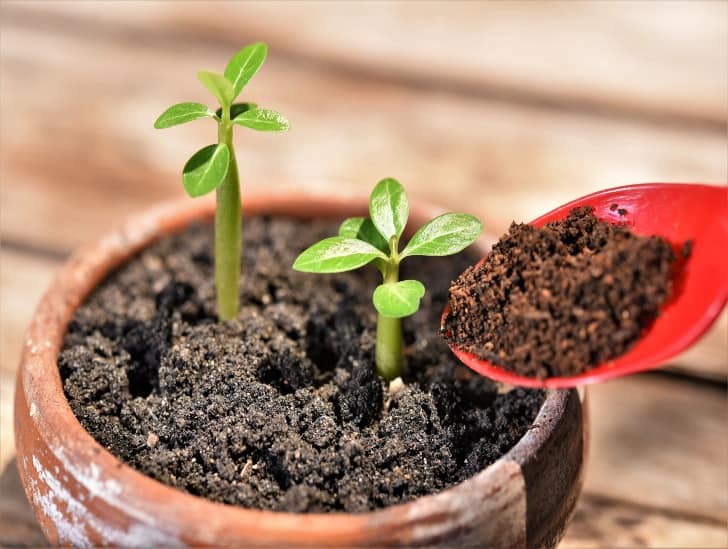
Plant seeds on hand.
Buddhas Temple is a slow grower from seeds but this is the easiest way to grow it.

If planting in a pot, water the potting mix until water drains out from the pot. Deep your finger one inch into the ground to confirm whether the soil is moist when planted outdoors. If dry, pour more water.

Sow the seeds in the soil, barely covering them. Ensure to provide enough spacing for the seeds when planting.

Pro Tip: The best time to sow seeds is during spring or summer. 

Once the seeds sprout, you should water only when the soil is dry. Place them in a location with shade and has adequate ventilation. Continue doing this until the baby Buddha’s Temple plants are firmly established.

Remember, seed sowing is only an option when you can’t get leaf cuttings or offsets.

Beginners who only have one plant are especially prone to this. When you get your second Buddha’s Temple, you can then start propagating new plants through offsets or leaf cuttings.

How to Propagate Budhha’s Temple Plant from Offsets

Adult Budhha’s Temple plants produce offsets at the base. However, before you can pluck them for planting, you need the following:

  • Alcohol rub
  • Knife or pruning shear
  • Rooting hormone

Sterilize the knife or pruning shear to prevent bacterial or fungal infection to the mother plant and offset using the alcohol rub.

Locate a healthy offset and make a clean cut. Dust off any soil from it and let it dry or callous for two days at least. Prepare a well-draining soil and water it ready for planting the offset.

Buddha's temple offsets.
Budhha’s Temple plants also produce offsets at the base.

Apply rooting hormone to enhance faster rooting and initiate rapid growth in the calloused area. Proceed to plant the offset in the potting mix. Ensure to offer enough space of about four inches from each plant.

Water the soil occasionally whenever it gets dry. Once your Buddha’s Temple plant has grown, repot them to new large containers with drainage holes. In addition, place them where they can receive the morning and evening sun; shade them from the afternoon sun.

How to Propagate Budha’s Temple from Leaf Cuttings 

To plant leaf cuttings, you also need:

  • Rooting hormone
  • Knife 
  • Alcohol rub

You can forgo the knife and pluck a leaf entirely from the mother plant. But if you wish to make a cutting, sterilize the knife using the alcohol rub first and make your cutting. Here is how to propagate from a leaf cutting:

Leaf cuttings of several succulent plants.
Leaf cuttings is one of the most effective methods of growing a new Buddha’s Temple.

Cut/pluck a healthy leaf from the mother plant. The first step is to discover a healthy mother plant and grasp a mature and hard leaf. After that, twist the leaf until it comes off entirely with little pressure applied.

If the leaf breaks in two, you’ll have to find a new one. It might be a little stressful to get a leaf-cutting initially, but don’t be afraid to cut one. Always be gentle when cutting leaves, and sooner or later, you’ll have enough leaf cuttings for further propagation.

The next critical stage after getting your leaves cuttings is to allow them to dry or callous for a day or two. Have the cuttings dry in a container with adequate ventilation and partial shade.

Don’t hurry to plant them immediately after cutting because this is where successful development begins. If you put the leaf cuttings straight into the soil without drying them, the cut area will be infected, and your plant will perish.

Prepare a well-draining succulent mix for your buddha’s plant leaf cuttings and apply rooting hormone to the leaves. However, this process is optional, but you can use it to attain rapid success in rooting.

Place the leaf cuttings on the soil, ensuring the calloused part is in soil, and the remaining part is exposed to indirect sunlight or under shade.

Before watering again, wait for the soil to dry.

As you are looking to plant a Buddha’s plant, you have to get it right for the type of soil, and well, you should water it to thrive.

Right Type of Soil for Buddha’s Plant

Because succulents thrive in well-draining soil, a solid drainage channel is essential for maintaining their health – and also this is necessary for the Buddha’ as well. You may use a cactus mix with coarse sand or perlite to improve drainage.

If you can’t find the cactus potting mix in your region, use regular soil and combine it with coarse sand or perlite. This ensures the soil doesn’t retain much moisture that may cause rooting rot.

A group of buddhas temple plant on one pot.
If you can’t find the cactus potting mix, use regular soil and combine it with coarse sand or perlite.

It should be crumbly rather than forming into a ball when you squeeze the mixture. If it does form a ball, add more coarse sand or perlite until you reach the ideal combination. Lastly, water the soil and check for drainage.

How to Water Buddha’s Plant

Budha’s plants thrive in a moist atmosphere, so excellent drainage soil is essential.

When it comes to watering, note the climate in your region. Places with high humidity levels retain moisture in the soil for more extended periods; hence water it at least once in two weeks.

You’ll notice a difference when you move from an area with a lot of heat and humidity to one without, and here water it at least once a week.

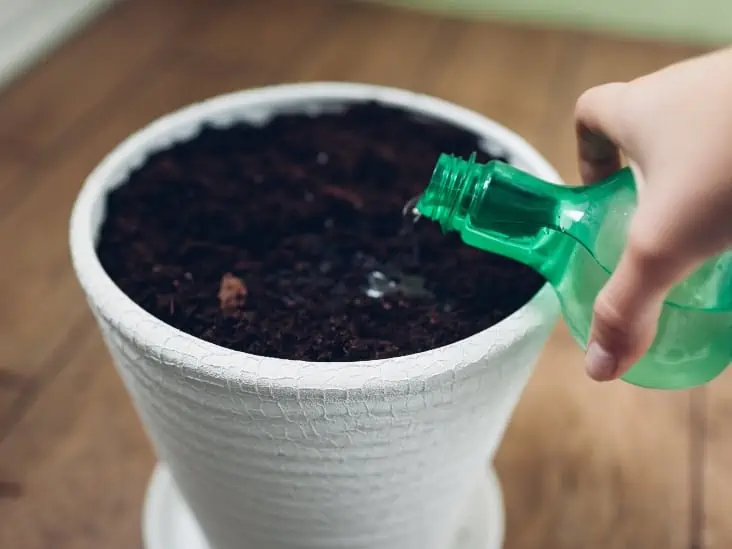
During propagation, you should only mist the soil and not water it. You can use a spray bottle or bottom water the soil. Place your drainage pot in a dish full of water and let the pot seep water through the drainage holes. Let the soil soak for at least thirty minutes.

A person watering the soil of the plant.
Let the pot seep water through the drainage holes.

When you get these conditions right for your succulent, you will have less to do to maintain it to grow. You should watch out for the amount of light, temperatures, and humidity levels.

Now that you can plant your buddha’s plant at home, how do you know it is the right houseplant to decorate your home?

Buddha’s Plant Overview

  • A Buddha’s Temple develops a stunning columnar rosette with densely packed overlapping leaves that curve upside at the end, creating a square shape. This reminds us of the curved rooflines of a Buddhist temple.
  • Budha’s temple can grow up to 6 inches tall, making it the right container plant.
  • Buddha’s Temple develops spherical red, white, or orange flowers that are eye-catching and later turn pink. The blooms appear on mature plants in early spring to late winter.
  • Buddha’s Temple is an evergreen plant that can grow in subtropical and Mediterranean climates. If you reside in cooler regions, it’s best to bring it inside to protect it from frost.
  • Crassula cv. Buddha temple is poisonous to dogs, cats, and perhaps other pets. If you have a pet, keep it away from the plant.

Final Take

You can’t get enough of this plant only by looking at its pictures. The skillful symmetry arrangement of its leaves is almost hypnotizing. 

Buddha’s Temple perfectly fits in rockeries or dish gardens, making it ideal for your space, and the good thing; now you can easily propagate some for yourself.

If you are looking at fast growth, then leaf cutting propagation is your preferred method to grow new plants.

We hope you find these guides helpful. Go ahead and plant as many and share this remarkable plant with your family.

How To Propagate Desert Rose?

Desert Rose is a favorite houseplant if you are looking for a low-attention plant for your garden or decorating your patio. This plant grows in arid locations like rocky outcrops or dry riverbeds, but they adapt well in tropical and sub-tropic environments.

Desert Rose has a short stem that forks into two at ground level, each branch bearing multiple leaves arranged spirally up its length.

When it reaches its blooming period, it produces flowers with shades of white or yellowish-white with a red spot on the lower lip; your home brightens up during this period. 

How can I plant a Desert Rose?

You can propagate Desert Rose from cuttings or seeds. You can purchase Desert Rose seeds at specialty nurseries or online; however, make sure you’re getting a fresh seed. The fresher the seed, the greater your chances of getting a strong, healthy plant. 

The resulting plant will typically lack a thick and fascinating root system above ground when propagating Desert Rose from a cutting. The caudex forms from a seed and is easily noticeable when it grows.

The main benefit of starting with a cutting is that you can perform all sorts of creative things, such as grafting cuttings with one flower color to plants with another. You may also join many distinct cuttings together to make an attractive arrangement.

Starting Desert Rose From Cuttings

Step 1: Make your cuttings

Identify a healthy mother plant to make your cuttings from. Ensure you have clean, sterilized gardening tools to create a cutting.

Cut healthy branches at least six inches which is ideal for rooting, and lay them on a paper towel or newspaper in a dry place away from sunlight. Allow the cuttings to dry before planting for at least 48 hours.

Step 2: Prepare Potting Mix

After two days, prepare a container or pot with a gravelly, well-drained potting mix. Alternatively, you may use a commercial mix designed for succulents and cacti or one made up of equal parts of potting soil, peat moss, coco coir, sand, and gravel.

Remember to line the pot’s bottom with a layer of coarse gravel for better drainage.

A soil, plant and tools for gardening.
You may use a commercially mixed potting mix or gather all materials needed such as soil, moss, coco coir, sand, and gravel.

Step 3: Plant The Cuttings

Sprinkle the cut end with rooting powder to enhance rooting and poke it into the potting mix about two inches deep. Soak the planting mix thoroughly with a spray bottle and let it drain. Mist every few days to keep the soil wet but avoid getting it soggy. 

Desert Rose dislikes it when the soil is soggy; if you allow its soil to become overly damp, the roots will rot.

Proceed to place the container in a warm, bright indirect light and still setting indoors or outside and monitor it closely. 

If you’re growing it indoors and start growing leaves, turn it every day or two to ensure it gets equal light. It will bend toward the sun if you don’t do this.

How to Propagate Desert Rose from Seeds

To plant Desert Rose seeds, prepare your growing medium of 50% coco coir or peat moss and 50% perlite or sand. Place the mix in a tray or shallow pot, and ensure after planting the seeds, you place the pot in bright indirect light.

Another thing, you may provide a warming pad to create the perfect temperature for seed germination of between 80 to 85°F. Here is a quick fix to plant your seeds:

Step 1: Plant The Seeds

Place an equal amount of seeds in each container. Evenly sprinkle the seeds across the surface of the medium and just barely cover them with the planting mix.

A seedling tray.
When putting the seeds in a container, make sure to evenly spread them out and cover them with potting mix.

Saturate the growth medium uniformly with water using a spray bottle. Repeat this procedure on alternate days until the seeds sprout.

Step 2: Care for The Seedlings

Once the seeds start sprouting in approximately three to seven days, continue to mist them once or twice a week to keep them moist without overwatering.

Seedlings should be large enough to be transplanted into individual containers in around a month.

When the plant sprouts new leaves, it’s time to move it to a sunnier location. Grown Desert Rose plants enjoy bright direct sunlight.

You can plant Desert Rose plants directly in the ground outdoors, but since they are not cold tolerant, growing them in containers for easy moving indoors during winter is preferable.

Winter makes the leaves droop and might kill the plant when exposed to cold for long.

How Can I make Desert Rose Grow Faster?

For your Desert Rose to grow faster, ensure you provide enough or sufficient of these conditions:

  • Sunlight
  • Water
  • Fertilizer
  • Keep away pests and diseases
  • Pruning

Your Desert Rose will grow to bloom if you get all these conditions correct and provide the right care. The blooms last long depending on your environment and are attractive to hummingbirds and pollinators like bees and butterflies.

How Often Should You Water Desert Rose? 

The Desert Rose likes a warm, rainy season but cut back on watering at the onset of winter. Always check on the soil; once the soil is dry, water moderately for at least twice a week. Water it moderately in warm conditions and sparingly during winter.

Don’t let your soil get soaked in water as it can kill your plant.

Soak the soil, but never let it become wet. Wet soil will make the roots rot, killing your plant. You can plant your plant on an inclined landscape to encourage water drainage if grown outdoors.

Outdoor grown Desert Rose grow and become drought tolerant, making them need little watering once they mature. Water deeply during severe drought with a slow drip for some time during the coolest times of the day. 

How Much Sunlight Does Desert Rose need?

The Desert Rose plant loves sunlight, and it will bloom to its full potential with direct, intense sunshine with temperatures between 70°F up to 100°F.

They may also flourish in the morning or afternoon sun, but they do not flower as frequently. These plants become lanky and weak-stemmed when kept under shade.

A young desert rose.
They require intense sunshine to reach its full potential.

Too much sun may also affect them, especially the midday sun, which may cause a burning effect on its leaves. When the weather changes and temperatures fall to 55°F or below, it will go into a dormant phase. Prune the plant and bring it inside or provide a good shade with warm conditions.

Add Some Nutrients for the Plant Growth

You can give your plant a light feeding of water-soluble liquid fertilizer or slow-release fertilizer every few weeks during the growing season. You may use Epsom Salt to give lusher and greener foliage for a start. 

Give your Desert Rose a diluted feeding once every two weeks in the spring as the plant gets up from its winter dormancy.

Reduce the frequency to once a month during the summer. As winter approaches, stop feeding the plant and let it wind down for dormancy.

If you bring your Desert Rose indoors for the winter, give it one moderate feed in mid-winter; however, this is not required because the plant will be in a state of semi-dormancy.

Which Pest and Problems Affect Desert Rose?

The most prevalent problem with Desert Rose is root rot. Over-watering is critical to note, as these plants have thick roots that retain water. These plants do not require or want to be in the water for long; therefore, you are causing harm rather than good by overwatering them.

Remember to water cautiously and ensure that your plant’s drainage system is functioning correctly.

Pests that may harm Desert Rose plants include:

  • Mealybugs
  • Aphids
  • Spider mites

You can treat these pests using neem oil insecticides. For other pests such as caterpillars, handpick them from your plant. Always wear gloves when picking them, and later treat the plant using Bacillus thuringiensis (Bt) as soon as possible.

The caterpillars can devour and reduce your Desert Rose plants to a stem very fast. Once they have defoliated your plant and you treated the plant, don’t despair. The plant will spring back new leaves.

Is Pruning Necessary for Desert Rose?

Because these plants can grow to be quite huge, frequent pruning and under-potting are required to keep them in check.

Constant pruning will keep your plant vigorous, fresh and well-groomed.

A young plant in a pot having fertilizer.
Pruning can make your desert roses become fresh and well-groomed.

During the growing season, trim or cut back undesirable growth. Trim back excessive development before bringing the plant inside for winter to make the dormancy period more effective. Furthermore, it will be simple to maintain a smaller, more compact plant indoors throughout the winter months.

Prune your Desert Rose before placing the plant outside come spring. Remove any dead or damaged leaves and vegetation to allow low competition for nutrients. Reduce straggly branches to improve the form of the plant. These limbs may be used as cuttings to grow new plants.

Bottom Line

Now you know all you need to do to make your Desert Rose grow faster. One cutting of this beautiful plant is enough to provide you with enough for your garden. 

Furthermore, you can graft it with several plants like oleander and have it style your home when it blooms with unique flowers.

All these wonderful things make Desert Rose become part of the family. As you care for and enjoy this fascinating plant throughout the seasons and years, you’ll come to think of it as a valued friend.

How to Propagate Air Plant?

Air plants, also known as Tillandsias, are drought-resistant plants that are relatively easy to grow and make remarkable house plants. With just a single air plant, you can easily multiply your collection. The most important thing you need to do is know when your air plant is ready to be propagated and act swiftly before it becomes too late. The plant doesn’t need soil to root because it gets its essential nutrients from air and water.
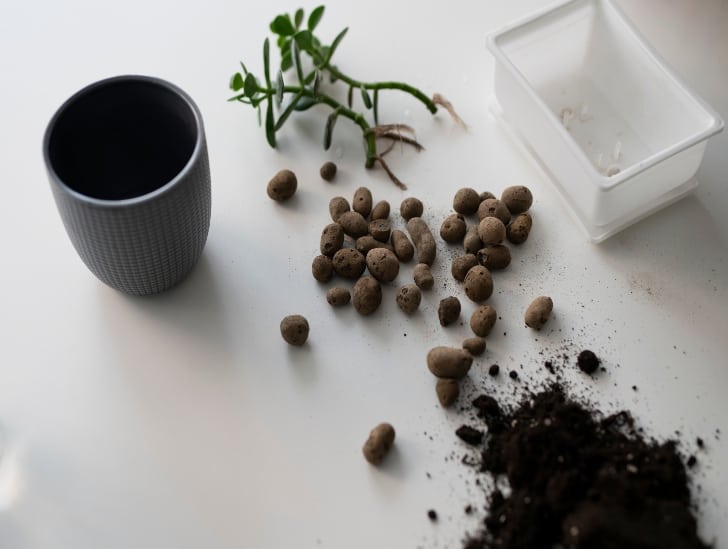
So, how do you propagate air plants? The easiest way to propagate air plants is through pups. You will need to carefully peel back the plant’s leaves or cut them off to access the pups at the base. Ensure you feel the area where your plant connects with the roots system to feel the pups before you start cutting the leaves. Once you have the pups, you can root them in water or soil. You can also propagate air plants by germinating seeds or rooting stem cuttings.

In this blog post, we discuss everything you need to know about propagating an air plant. Read on to learn more.

Propagating Air Plant Using an Offset/Pup

The truth is that there are several ways of propagating air plants, but dividing pups is perhaps the easiest, most effective, and most common propagation technique.

It is highly recommended that you conduct the process of pup separation during the morning or early afternoon hours.

The entire process of separating pups from the mother plant is relatively easy and doesn’t consume a lot of time. All you need is a sharp knife or razor blade, some kind of light, and an excellent place to grow the pups.

Feel the base of the mother plant to ensure there are pups. Pull the leaves up and carefully cut the pup away from the mother plant right at the base. Be careful to avoid damaging the pup or error on cutting more from the mother plant than what is necessary.

Cutting pups from the mother plant is an easy process that almost anyone can perform with ease. Sometimes, the positioning of the pups can allow you to easily snap it off without using a cutting object.

Once you have removed the offset, feel free to grow them just like you would with a full-sized air plant. It is that simple. You can decide to root the pups in potting mix or water.

The most important thing you need to do is keep the pup fully hydrated by placing it in a bowl of water.

An air plant in a pot without soil.
You need to keep the pup fully hydrated by placing it in a bowl of water.

Some people prefer mounting the offset on a growing board using crafting wire and setting it in a relatively bright spot indoors. If you don’t have a good spot indoors, feel free to position your pup outdoors in a relatively shaded area.

However, if you are propagating your air plant during winter, ensure you keep your newly separated offsets indoors so that they don’t suffer frost damage.

When Do Air Plants Start Producing Pups

Air plants will generally start producing offsets after their first blooming cycle. Sometimes, it can take them up to six months to start producing pups. Some varieties take much longer to bloom before they start producing offsets.

Patience is a virtue you will need when it comes to propagating air plants. These succulents tend to do things in their own sweet time, and there is nothing you can do about it other than wait.

The pups serve as a beginning of an entirely new and independent air plant that will eventually mature, bloom, and start producing its own set of pups.

Air plant in a small jar with water.
Plant pups normally grow after the first blooming cycle of an air plant. Sometimes, it can be up to six months.

It is highly recommended you let the pups grow to at least one-third or half of the mother plant size before you cut them off and propagate them separately.

In the wild, the pups usually remain attached to the mother plant until it dies. Once the mother plant dies, the pups develop into a new beautiful plant. Therefore, removing the offsets isn’t necessary if you want to let them grow out naturally.

How Many Pups Does an Air Plant Produce?

The number of pups an air plant produces depends on the plant’s species. However, the typical Tillandsia species usually produce between two to eight pups.

Even the time the offsets are produced will depend on your plant’s species.  Some air plant species start producing pups before their flowering cycle starts, while others will take much longer after blooming before they begin to produce pups.

What Can You Do to Encourage Pup Growth?

Normally, your air plant should start producing pups after the blooming cycle without any problems. The time it takes before your plant starts to bloom may vary, but the fact is that it will bloom at some point and produce pups.

However, some air plant varieties, such as the xerographica, are relatively slow to bloom and produce offsets. Your air plant requires exposure to sufficient light, airflow, and water to flower and produce healthy pups.

image of xerographica plant
This is an example of a xerographica plant

The exact amount of light intensity and exposure your plant will require to produce pups will depend on its variety. You can also use plant fertilizer specially formulated for air plants to encourage blooming and subsequent pup production.

But you must keep in mind that fertilizer has to be used in moderation and doesn’t replace proper care and growing conditions.

What Happens If I Don’t Separate the Offsets?

In the natural habitat, the pups are usually attached to the mother plant until it dies. You can also take the same route if you don’t want to separate the pups and cultivate them into new plants.

There is no harm in failing to separate the pups, and it only gives you a large ball of plants which is relatively rare.

So, if you want something unique for your garden or indoor plant collection, just leave the pups attached to the mother plant and see what will happen.

How can You Make Your Air Plant Flower?

So far, you already understand that flowering is the recipe for pup production. So, if you can get your air plant to flower sooner, you can be sure of pup production.

As long as your plant is healthy and you take good care of it, flowering shouldn’t be a problem. But there are still a few things you can do to accelerate the process.

The most critical thing you need to do is ensure your air plant is getting enough sunlight. Position it on a north-facing window or in a good spot where it gets partial shade. If you notice that isn’t helping much, consider transferring your plant into a brighter spot.

A seedling planted.
To make your air plant flower faster, you need to provide enough sunlight to accelerate the process

Water your plant regularly using a combined method to ensure it is absorbing enough water needed for growth and flowering. Consider soaking your air plant in water for at least 30 minutes per week if you stay in a humid area.

Water it more often if you notice it is drying out quickly, especially during the hot summer months.

Lastly, fertilize your air plant at least once a month during the active growing season. Fertilization will promote faster growth and keep your plant well-fed for healthy blooming. Just ensure you use an air plant-specific fertilizer or bromeliad fertilizer.

Propagation through Germinating Seeds

You can also propagate air plants through seed germination, although it takes a lot of time to achieve desired results.

Collect seeds from your existing flower plant after the flowering season. Soak the seeds in a bowl of water for between three and four weeks until they start to swell and grow in size. That is an indication that they are starting to germinate.

You don’t need to cover the seeds nor expose them to direct sunlight while they are soaked. If your plant doesn’t produce seeds during the flowering season, consider purchasing the seeds from your local nursery.

seed germination process
One way to also help your air plant propagate is through seed germination

Once your seeds have swollen and started showing signs of germination, get them out of the water and place them on a piece of cheesecloth in indirect sunlight. Ensure you spread the cheesecloth in an area that receives plenty of indirect sunlight, such as your patio or porch.

Spritz the seeds with water at least once every week. If the seeds aren’t getting enough water, they will slowly start to wither and curl.

You can also nourish the germinated seedlings with half-strength essential liquid fertilizer. Ensure the liquid fertilizer you use is specially designed for air plants. Use a spray bottle to fertilize the seedlings.

Once the seedlings have grown to about one or two inches, transfer them to their own containers and start taking care of them. Avoid overwatering them, and keep in mind that these succulents grow slowly. Sometimes, it may take up to nine months for the plants to reach their full size.

Can You Propagate Air Plants Through Cuttings?

While it is indeed possible to propagate air plants through cuttings, there’s a catch. These plants can only be propagated through offset cuttings since they cannot regenerate from leaves or stems, rendering these types of cuttings unsuccessful for propagation purposes.

Propagation through offset cuttings follows the same steps described above for normal propagation through offsets.

Gently remove the offset from the parent plant using clean scissors or pruning shears and allow it to cure or dry for a day or two to eliminate potential rot issues.

Once the offset has cured, plant it in a suitable growing medium or mount it onto a desired surface to spur growth.

After planting, ensure that the new offset receives appropriate care. This includes providing sufficient air circulation, indirect light, and occasional misting or soaking to maintain the required moisture levels.

Taking Care of Newly Propagated Air Plants

Congratulations on successfully propagating your air plants. However, that was only the first step in ensuring that you multiply your plant collection successfully.

The next part involves taking care of the newly propagated plants so that they grow into mature air plants.

Place your newly propagated air plants in a location with bright, indirect light. Avoid direct sunlight because it can lead to irreversible sunburn.

An east or west-facing window is usually ideal. If you’re unsure about light levels, opt for more shade rather than excessive light.

Since air plants thrive on good air circulation, ensure there is adequate airflow around newly propagated plants.

Consider placing them in an area with good ventilation, such as a balcony. This helps prevent moisture buildup and reduces the risk of stem rot.

Mist your air plants 1-2 times a week or gently soak them once a month. Use a spray bottle to mist the plants thoroughly.

For soaking, submerge the plants in room temperature water for about 20-30 minutes, then allow them to dry completely upside down to prevent water from pooling at the base.

Lastly, consider feeding your newly propagated air plants with a diluted, balanced, water-soluble fertilizer once a month during the active growing season (spring to early fall).

However, you should avoid fertilizing the plants during the dormant winter months.

Final Thoughts

That is it about air plant propagation, and we hope you have learned how to grow your plant collection. The most important thing is to ensure that you are taking good care of your younger air plants and watering them only when necessary. It is now time for you to go out there and start propagating your air plant to increase your collection.
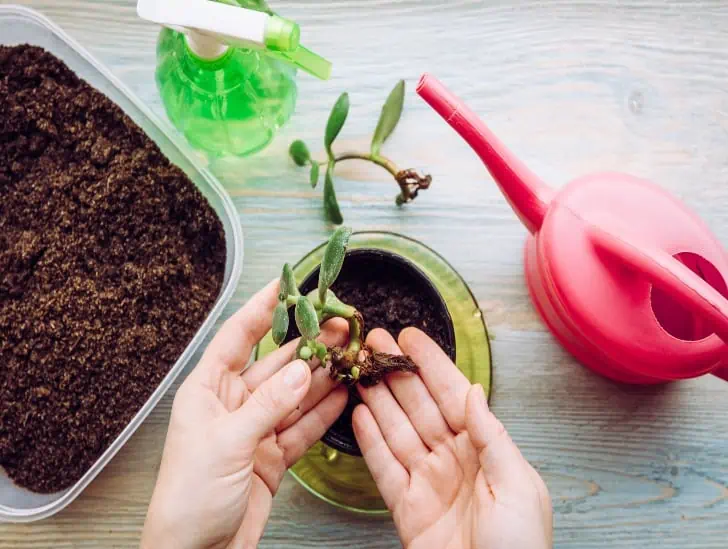
Ultimate Guided: How To Care For Crassula Ovata?

The Crassula Ovata, also known as the jade plant, is a small succulent that grows up to 3 feet tall and 2 feet wide. You don’t need luck in caring for the jade plant; they just require a little work and attention to keep them alive and attractive. 

A Crassula Ovata that is well taken care of is more attractive, especially if you place it in the garden or inside your home in a beautiful container. Let’s dive into how to grow, care and finally identify various types of crassula plants.

Planting Crassula Ovata

Are you looking to plant Crassula Ovata for the first time? Well, here are some things to note to ensure a healthy jade plant.

Choose a wide and sturdy pot with a moderate depth since jade plants may grow top-heavy and fall over.

Use soil that drains appropriately; excessive dampness might cause soft leaves and fungal diseases like root rot. However, if you want to grow succulents in a plastic pot, ensure it has adequate drainage. A 2:1 ratio of potting mix to perlite is ideal. Alternatively, use pre-made cacti or succulent planting mix.

Watering a jade plant too soon may lead to root rot. It’s critical to wait at least one week before watering after planting, allowing the roots to settle and heal from any damage.

ProTip: Keep the jade plant root-bound in a small container and restrict water to encourage it to blossom. In the winter, cooler temperatures promote bloom.

Growing Jade Plant From Stem or Leaf

Crassula Ovata is very easy to grow from a stem or its leaf. When grown outside and a leaf falls, the chances a new plant will grow from it are high.

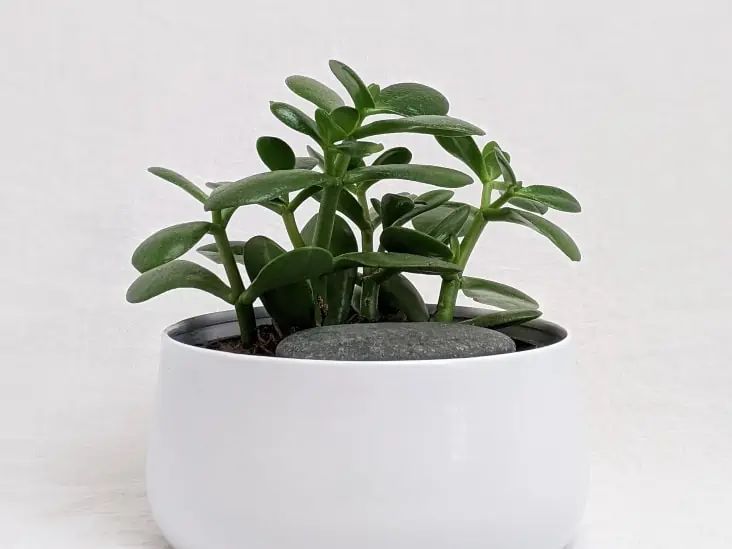
A pot of plant.
Jade plants may grow top-heavy and fall over

Here is how you can grow a jade plant from leaf or stem:

  1. Take a stem cutting or remove a leaf from a well-established plant. A good stem cut should be 2–3 inches long and have at least two pairs of leaves.

    Allow a stem cutting or leaf to sit in a warm location for several days, about four days. The cut area will form a callus, helping to prevent rot and promote rooting.
  2. Get your pot and a good-draining potting mix. Ensure the soil is not wet but slightly moist to prevent leaf or stem cutting rot.
  3. Take the leaf and set it on top of the soil. Cover the cut end with some soil. Make sure you don’t apply too much soil to it. For stem cutting, place it upright in the soil. If it does not stand by itself, prop it up with a few rocks or toothpicks.
  4. Set the pot in a warm, bright location with indirect light. Don’t water it.
  5. After a few days, the leaf or cutting will start to develop roots. You can give the plant a slight poke or tug a week after to see if it has rooted itself in place. Suppose it hasn’t; wait a little longer before testing it gently every two days.
  6. When the plant appears to be firmly rooted, water it thoroughly and gently. You may use a turkey baster to apply a fine water spray without disturbing the roots too much.

    Ensure that the top layer of soil is not only wet, as you want to promote the new jade plant roots to grow downward for water rather than up toward the surface.
  7. Allow the soil to dry between waterings and keep the plant out of direct sunshine until at least eight weeks.

How to Care Crassula Ovata

Now let’s learn about how you can care for your jade plant and pass it down through generations. Some of the common factors to consider are light, type of soil, and watering.

Read on as we discuss each and every factor in detail.

Light

Jade plants require at least 6 hours of direct sunshine per day. Young plants should be exposed to bright, indirect sunlight; adult jade plants can withstand more direct sun exposure.

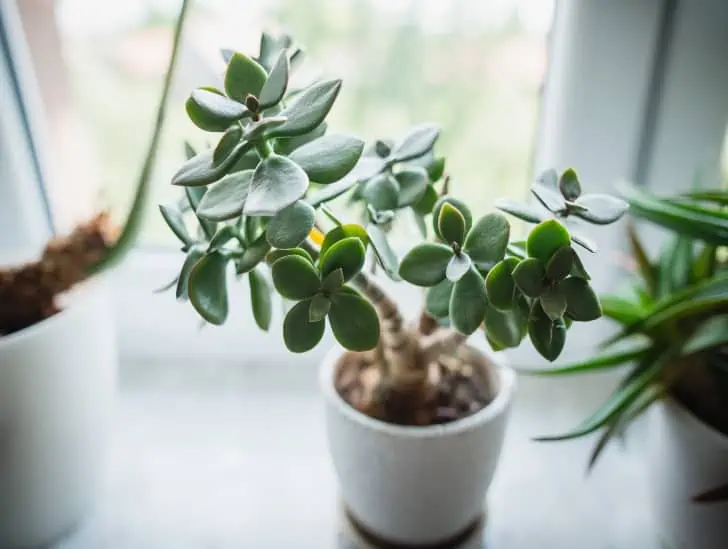
A plant near the window.
Young plants should be exposed to bright, indirect sunlight.

If jade plants are grown in low-light conditions, they may become leggy and top-heavy. This condition makes them vulnerable to damage if they fall over or can no longer support their own branches!

Water

It’s critical to water jade plants correctly! The most common problem that people have with their jades is improper watering. 

  • In the spring and summer: When the plant grows, it will need more water than at other times of the year. Wait until the soil has dried out before watering it again. This ensures the soil is sufficiently wet throughout—not just at the surface. Because of this, you may end up watering it once a week or once a month—it all depends on how quickly its soil dries out.
  • In the fall and winter: The plant may pause or experience slow growth during this period; it may go dormant. At this time, it will require less water. Water it less frequently than in the summer and spring. Fully grown jade plants might require watering only once or twice during this period.
A plant being watered.
When watering, try to avoid splashing water on the leaves, as this might cause them to decay in a humid atmosphere.

When watering, try to avoid splashing water on the leaves, as this might cause them to decay in a humid atmosphere.

Water that contains too much salt can burn or kill jade plants. If your tap water isn’t ideal, use filtered or distilled water instead.

If the plant’s leaves begin to fall, become shriveled, or develop brown spots, it is an indication that it requires more water. Alternatively, if the plant is receiving too much water, the leaves may get squishy and waterlogged.

Soil

Crassula plants thrive in sandy, rocky blends created especially for succulents, and they require well-draining soil. They prefer neutral to slightly acidic soil, but even highly high pH levels seldom harm the plant. The roots of Crassula plants can rot easily in boggy, wet soils because of their sensitivity.

A plant preparation.
It thrive in sandy, rocky blends created especially for succulents, and they require well-draining soil.

Temperature

Jade plants thrive at room temperature 65° to 75°F, but they like it a bit cooler at night and during the winter down to 55°F.

Keep in mind that jade is not frost tolerant, so if you keep it outside during the summer, bring it inside as soon as temperatures drop below 50°F in late fall.

When caring for Jade plants during winter, move jade plants away from chilly windows and out of drafty rooms. Jade plants’ leaves may fall as a result of cold temperatures.

Maintain Shape

Pruning is quite bearable, and you should do it in the early spring. Start by cutting off any deformed or sick branches. Then imagine the look you want for your tree and go until you’re 1/3 of the way through its development, taking thin, clean cuts just above a branching point or node. 

When you cut back a node, two new branches will grow from that point, so cut where you want to see more fullness.

Add Some Fertilizer

Jade plants don’t need high levels of nutrients, so feed them sparingly. A diluted combination of a regular liquid houseplant fertilizer or a fertilizer designed for succulents and cacti should suffice. Also, make sure you read how to apply the fertilizer on the package.

Repotting

In a tiny pot, jade plants don’t mind being root-bound. Keeping them root bound will make a Crassula Ovata smaller and easier to handle.

Repot young jade succulents every 2 to 3 years to stimulate growth if they have overgrown the current pot. For older jade plants, 4 to 5 years repotting is okay or as needed for overly grown jade plants.

A plant being transferred.
Repot young jade succulents every 2 to 3 years to stimulate growth.

The ideal time to transplant is in the early spring, just as the growing season begins. Wait a week or two after repotting before watering the plant. 

Diseases and Pests

Although pests and diseases may vary between species, most Crassula plants are plagued by aphids, spider mites, mealybugs, and other typical insect pests—mainly when cultivated indoors. 

Pest problems are best addressed with non-chemical techniques that may not kill the plant, such as neem oil or other horticultural oils.

Looking for Different Types of Crassula Plants?

Jade plants come in a variety of hues, shapes, and sizes. Many different types of jade plants are available, ranging from the common green-leafed jade to several variegated types. Here are some interesting crassula plants you might plant:

  • Crassula pellucida variegata: This plant’s leaves are heart-shaped and variegated in pink, greens, and ivory white.
  • Crassula erosula ‘Campfire’: In winter, the distinctive red-leaved variety of this plant has lime leaves that grow long and branched. It’s a clumping plant that grows to be about 4 to 8 inches tall and 2 feet broad when mature.
  • Crassula ‘Morgan’s beauty’: The pretty pink late spring flowers of this half-hybrid cultivar are dusted in white. It reaches a height of about 4 inches.
  • Crassula perforata: The common name for this plant, also known as the stacked Crassula, comes from its unique leaves around its central stem.

Final Thoughts

Overall, Crassula is a great plant to have in your garden or home! It adds a unique texture and color to any environment. They’re also an excellent choice for a low-maintenance, drought-tolerant plant. 

In addition to their resilience and low maintenance, they’re ideal for both novices and experts alike since they are easy to grow from leaf or start from cuttings.

Ultimate Guide: How to fight succulents Diseases and Pests

Succulents Diseases And Pests

Succulents mainly comprise cactuses and fleshy-leaved plants. Gardeners love these plants because they are difficult to kill. However, there might be instances where your succulents’ plants appear less healthy.

It might be because of pests and diseases, regardless of how well you water them. Pests trigger different diseases, some of which are difficult to deal with. 

Learning how to deal with these diseases ensures your succulents’ plants look healthy. Succulents’ pests and diseases have different symptoms. Understanding these symptoms may help detect pests and conditions before they spread to the entire plant.

The below tips help prevent pests on your succulent collections:

  • Using fertilizer during the growing season: Fertilizer makes succulents healthy and strong. This reduces the chances of your plants succumbing to pests.
  • Dead leaves are one of the breeding grounds for pests and molds. Therefore, remove dead leaves that might be near your succulent garden. 
  • Don’t reuse dead leaves or soil from a previously used infected plant. Some eggs might have survived to infect your plants.
  • Using pesticides is another popular technique for preventing pest infestation. Consider pesticides made from natural products. There are two types of pesticides to choose from, namely systematic and contact pesticides. Systematic pesticides get absorbed on the roots and poison pests when they feed on them. On the other hand, contact pesticides require physical contact to kill pests. 
  • Keeping your succulent plants and soil dry: Pests like gnats and mealybugs are some animals that breed in wet conditions.

Common Pests Infestations in Succulents Plants 

Pest infestations are prevalent, especially if you love gardening. Therefore, don’t be shocked if pests infest your succulents, despite your gardening experience. Some pests develop resistance to pesticides, which is a common problem.

Luckily, pesticides are regularly enhanced to deal with mutating pests and diseases. Tiny pests also hide in unseen places, making it difficult to spot them. Some common pests in succulent plants include:

Mealybugs 

It is considered among the most dangerous succulent pests. These pets are small in size, generally between 1/3 to 1/5 inches in length. Mealybugs appear white with both a cotton and waxy appearance if you keenly look.

A mealybugs on the plant.
Mealybugs hide on the underside of leaves and joints.

This pest is common in succulent spines and veins. At times, mealybugs hide on the underside of leaves and joints. This pest sucks juices from succulent plants, hence the wrinkled and shriveled leaves.

Sometimes, the infestation can be severe, resulting in the death of the plant. Black mold is one of the common symptoms of Mealybugs infestation. You should also be on the lookout for Mold growth.

Mealybugs secrete a substance that promotes mold growth. Separate any succulent plant that displays these symptoms from the rest. Regularly inspect your plants because this pest can destroy them.

A systemic pesticide is recommended when it comes to treatment, significantly when your succulent plant is growing. However, those using contact insecticides should use high concentrations because of the protective covering on this pest. 

Fungus Gnats 

This pest looks like mosquitoes and usually is black. Their length can be 1/6 to 1/8 inches and mostly attack the succulent plant’s roots. Root damage slows down the growth rate of a plant or withers to death. 

Fungus Gnats  on the leaf.
Soil with a lot of moisture is the breeding ground for fungus gnats.

Soil with a lot of moisture is the breeding ground for fungus gnats. Therefore, choose only well-draining soil when planting your succulent collections. Avoid overwatering by giving soil enough time to dry out. 

Use pumice to drain any excess water and also regulate moisture. In addition, cinnamon powder contains anti-fungal properties, reducing the chances of fungus gnats’ infestation. So, sprinkle some cinnamon powder where you have planted your succulent plants.

Spider mites mostly attack succulent plants because of their sweet sap. They suck juices out of plants. Additionally, their length is 1/50 inch, one of the reasons it can go undetected when it attacks plants. 

Spider Mites 

A spider mite.
They suck juices out of plants.

Watch out for Brown dots and webbing in your succulent plants. These are among the warning symptoms of spider mites infestation. Eventually, the succulent plant might turn lighter and finally white. 

Quarantine your plant if you notice the above symptoms. This preventative measure ensures an infestation doesn’t spread to other plants. Cotton dipped in rubbing alcohol can remove spider mites from your plant.

Systemic pesticides are also used to prevent spider mites infestation. Place your plant away from direct light after using systemic pesticides. 

Aphids 

The common aphids are green in color. This pest is mainly found on the leaves or the soft tissues of succulent plants. Aphids excrete a white substance when feeding on plants, which promotes the growth of black mold. 

The common aphids are green in color.
This pest is mainly found on the leaves or the soft tissues of succulent plants.

Misshaped leaves and slow growth are the common symptoms of Aphids infestation. Systematic insecticides are recommended for severe infestation, but only during the growing season. Soapy mixture and high-pressure water are other popular ways of getting rid of aphids before spreading to the entire plant.

Scale

The scale pest mainly attacks the leaves and stems of a plant. It makes plants have wrinkled leaves because they suck out plant juices. Small brown bumps are the most common symptom of scale infestation.

Act when you see brown bumps on your plant because this plant multiplies quickly. Also, separate it from other plants so that this pest doesn’t spread. Apart from physical removal, systematic insecticide is another popular way of removing this pest from your succulent plants. 

Common Disease in Succulent Plants 

Like other plants, succulent plants are also prone to diseases. However, most of these diseases are unpredictable and appear when we least expect them. These diseases are divided into four main categories, namely:

Fungal Diseases

Succulents growing in humidity and cool temperatures areas are prone to fungal diseases. Black spot, Rhizoctonia rot, black spot, Anthracnose, pythium, and Epiphyllum mosaic disease are examples of fungal diseases. 

Succulent plants infected with fungal diseases exhibit spots. Webbing on the soil around the infected plant is also common. 

Almost nothing can be done when a plant is infected with a fungal disease. Therefore, uproot it from the soil so that it doesn’t infect other plants. 

Viral Diseases

Viral infections are very popular in succulent plants. Mainly, insects spread viruses when feeding on the plant’s sap. Therefore, controlling insects that cause viral infections is the best preservative method. 

Common symptoms of viral diseases are quick shoots’ growth and stunted growth. Discard any plant with viral infection since there is no remedy. 

Conditions Diseases

These diseases arise due to poor care of your plants. Desiccation, etiolation, over-watering, pot-bound roots, and sunburn are examples of these conditions. Over-watering is the top condition succulent plants encounter. It causes splitting or rots. 

Etiolation occurs when your succulent collections require more sunlight. In such situations, additional growth might be necessary.

Unfortunately, such growth is mostly deformed and sickly. Under-watering plants results in drying up or desiccation. 

Excessive sun can also trigger sunburn in your plants. Usually, the side facing the sun turns either brown or white. Crowded roots are another common problem for succulents planted in pots.

It prevents moisture from adequately moving from roots to other parts of the plant. 

Deficiencies

Just like humans, succulents also require nutrients to survive. Lack of nutrients is one of the common diseases in succulent plants. Turning yellow is one of the symptoms your plant lacks some nutrients.

Measure the soil you will use for planting to determine if there are sufficient nutrient levels. 

 Effective Pests and Diseases Management Tips 

As earlier stated, pests and diseases may attack your plants when you least expect them. Understanding some management tips gives an idea of what to do when you notice your succulent plants are ailing. Below are proven management tips worth trying out:

Flowers being exposed in the light of the sun.
Pests and diseases may attack your plants when you least expect them.
  • Succulent plants have different climatic requirements. Growing your plants in the right region makes them healthy. A healthy plant can easily fight off disease and pests. Therefore, understand the water requirements, sun exposure requirements, and temperature requirements of a plant. It helps determine if a plant can grow in your region or not. 
  • Keep the pots and containers clean. Some pests hide on dead flowers and leaves. Therefore, get rid of flowers and leaves that might be around containers. 
  • Always quarantine any new succulent before mixing it with your plant collection. During this time, watch out for signs of diseases or pests. Treat your plant if there are pests or diseases before setting it next to your plants. 
  • Using insecticides and pesticides. This is one of the recommended techniques, especially when preventing the infestation of different pesticides and insecticides. 
  • Regularly inspect your plants for pests or diseases symptoms. It helps detect an infestation on time before it spreads to the entire plant or your garden. 
  • Correctly identify the problem in case of an infestation. Always be keen on the symptoms displayed by a plant. It helps detect the correct infestation and come up with the proper treatment. ‘The right treatment controls the infestation and prevents it from occurring again. Therefore, confirm the infestation before administering any treatment on your plants. 
  • When it comes to deficiency diseases, choose healthy soil when planting your succulent plants. Healthy soil promotes the healthy growth of plants, which can comfortably fight off infections and pests.

Fighting Succulent Diseases and Pests 

Generally, there are two common ways of fighting pests and diseases, namely chemical and biological. These methods have effectively fought off pests and diseases. Understand these two methods and choose the best.

Chemical technique 

The chemical method helps fight succulent pests and diseases. However, this technique is all about administering poisonous substances to the pests. On the other hand, chemical pesticides serve to purpose, namely preventing and treating. 

A chemical Pesticides being applied on the plant.
Protection pesticides minimize the chances of your succulent plants being attacked when you least expect. 

Overall, no one can predict pests or disease infestation. However, protection pesticides minimize the chances of your succulent plants being attacked when you least expect. 

Pesticides treat different infestations. Detecting an infestation on time determines if the pesticide will be effective or not. In addition, pests and diseases require different pesticides. Therefore, proper diagnosis is essential before administering any treatment. 

Pros about Chemical method

There are numerous advantages why this technique is commonly used across the globe. Below are some pros worth checking out:

  • They are affordable, making it pocket-friendly to treat or protect your succulent collections. 
  • Pesticides are available for different pests and diseases. In short, there is a solution for different kinds of infestations.
  • This technique has a positive track record. The effectiveness and stability of the chemical method are practically witnessed across the globe. Therefore, administer the right pesticide to your plants and slowly witness your plants regaining their health.
  • Pesticides are effective for a long time. Hence, you don’t have to administer a pesticide to your succulent plants regularly.

Natural Method

As the name suggests, this technique uses natural methods to both prevent and treat infestations. This technique traces its origin to the 4th century. Start by setting a suitable environment for your succulent plants. This entails healthy soil, the correct water levels, enough sunlight, and nutrients.

A pot with different sets of plants
Natural methods entails healthy soil, the correct water levels, enough sunlight, and nutrients.

Also, remove dry leaves or dirt that might be around your plants. This is an excellent breeding place for some pests and viruses. Finally, regularly boost the nutrient levels in your soil so that your plants can absorb different nutrients. Test your soil to determine which nutrients should be boosted. A healthy plant efficiently fights off both diseases and pests. 

Another natural method is draining off excess water in the plants. Excess moisture is an invitation to pests and different diseases. When watering your succulent plants, focus on the roots, not leaves. It determines when the water is enough for your plant. 

Regularly observe your plants. This natural technique helps detect infected parts of your plant. Then, use clippers to cut off infected parts in your plants and throw them away.

Soapy water is also another natural ingredient you can use to protect your succulent collections.

Pros about Natural Method

  • You don’t have to worry about health hazards attributed to chemicals.
  • It is always effective, especially if diseases and pests can b discovered early before spreading to the entire plant.
  • At any given time, you won’t use any amount. This makes it cost-effective at any given time. 
  • You can easily monitor results then determine if it’s working or not. 

How to Safely Use Pesticides on Your Succulent Plants 

Pesticides come in different forms. Safely is paramount at all times, especially when administering to your plants. Below is a step by step guide on how to handle pesticides:

  • Read the instructions on your pesticide. A lot of people ignore the instructions accompanied by a pesticide. Always read the instructions before consuming a product. You will learn how the pesticide should be used, the amounts to use, and how it should be administered, among others.
  • Pay attention to the warning label. Some pesticides are harmful to plants, pets, and humans. Reading the warning label helps avoid accidents. Some pesticides are highly flammable, whereas others irritate when they come into contact with skin.
  • Always measure the right amounts of pesticides. The quantities you measure determine if the pesticide will be effective or not. Low amounts might prove ineffective against pests or diseases. On the other hand, high doses might affect your plants.
  • Mix only the amount you intend on using. Pesticides are reusable anytime, provided they have not expired.
  • Use safety equipment, especially if you are spraying the entire plant. Some pesticides cause a lot of irritation if they come into contact with skin. 

Bottom line

As you start your journey of taking care of your succulent plants, be prepared to fight off pests and diseases. Some plants might be treated, whereas others might have to be plucked or thrown away. It depends on when the condition was detected. Unfortunately, there are instances when pests and diseases spread to the entire plant, and nothing can be done.

Try your level best to keep the environment clean. It minimizes the chances of pests or viruses breading around your plants. Get rid of any dirt that might be a breeding ground for pests. This applies to succulent plants in gardens or containers. 

A plant being sprayed with water on the leaf.
You have to keep the environment clean since it minimizes the chances of pests or viruses breading around your plants.

Ensure your plants grow in the recommended conditions. Research the succulent plants that grow well in your region, and choose from the list. Water, sunlight, and the type of soil should also be kept in mind. They contribute to the healthy growth of your plants.

Don’t allow pests or diseases to spread before you take action. Separate the infected plant from other plants. Determine the pests or disease as soon as possible and the infection level. It determines if treatment is necessary or it’s too late. Ensure your plant is free from pests and disease before integrating it back with your succulent collections. 

Lastly, understand the symptoms of different pests and diseases. You should also know how your plants look like when healthy. This makes it easy to detect if something isn’t okay. Follow this guide and have a happy time growing and maintaining your succulent plants. Remember, early detection increases the chances of the selected treatment working. 

Can You Cut Off A Piece Of Kalanchoe And Plant It?

Kalanchoe (Kalanchoe blossfeldiana) is a vast group of succulents native to Madagascar; this plant has distinct foliage with stunning blooms in some species. 

Some develop into a towering bush, while others creep along the ground, and still, there are those kalanchoes primarily used as houseplants.

Like any other succulent, the kalanchoe is easy to plant, maintain and look after until it blooms. If you are looking to plant one, stick around and find out how to get yourself one for decorating your home.

How to Propagate a Piece of Kalanchoe and Nature It?

You can plant kalanchoes from the stem, leaves, or offshoots. Ensure you cut the stem or offshoot appropriately for it to root and grow.

How to Cut a Piece of Kalanchoe for Growing

To remove a kalanchoe vegetative part, use a clean knife or small pruning shears to cut it cleanly away.  The vegetative part is a stem or offshoot that has no flower growing on it. Ensure the cutting is at least three inches long.

Before making the cutting, always sterilize the gardening tools for use. Doing this prevents any diseases or pests from spreading onto the new plant. You can use chlorine, household disinfectant, or isopropyl alcohol for sterilizing the tools.

A tool used to cut or prune a plant, pruning shear.
To remove a kalanchoe vegetative part, use a clean knife or small pruning shears to cut it cleanly away. 

How to cut kalanchoe:

Step 1: Wait until the kalanchoe has finished blooming or in the spring to make a cutting. 

Step 2: Sterilize your gardening tools.

Step 3: Make a sharp straight cut on the stem close to the main stem using a gardening shear or knife. A rugged cut may invite pests and diseases to attack.

Now you have your cutting with you. How do you go about planting your new Kalanchoe plant? 

How to Plant Kalanchoe Plant From Cuttings

Here is a step-by-step guide to planting your stem cutting for a new kalanchoe plant.

Step 1: Let Your Cutting Dry

After you’ve cut the stem away, it’s important to let it dry out. The cut on the stem will form a callous, keeping the cutting clean and disease-free. Depending on the thickness of the stem, this process might take anywhere from 1 to 3 days.

Dip the end of your cutting in a rooting hormone powder to promote rapid and healthy root development. Dipping into the rooting hormone should be done after the wound has healed.

Step 2: Plant Kalanchoe Cutting

Kalanchoe needs a soil mix that drains fast and well. Like every other succulents, they despise sitting in water, which is often the cause of root decay. Because of this, you can purchase soil specially mixed for growing succulents or cactus soil.

Alternatively, you can create a 2:1 soil mixed with peat moss and sand (you can use perlite. Adjust the proportion so that when watered, the soil is wet rather than soggy.

Plant the kalanchoe cutting on a big enough pot. However, keep in mind that once the plants sprout, they will require additional room.

A pot of soil.
Adjust the proportion so that when watered , the soil is wet rather than soggy

Fill the pot you’ve chosen with moist soil and gently press each cutting into the soil in an upright position.

The available humidity content determines how fast the plant will sprout. Cover the container with a clear plastic bag to increase the amount of moisture available to your plant.

Make a few slits or holes on the bag to allow for air circulation. Once the plants start growing, remove the bag.

Step 3: Wait for Kalanchoe to Grow

Immediately your kalanchoe starts growing, expose it to bright but indirect light. If in the house, place it on a south-facing window.

For outdoor kalanchoes, do not expose them to direct sunlight as this will cause their young leaves to suffer burns. Their growing temperature conditions should be above 50° F.

You should not water them while young but keep the soil moist. have a spray bottle or light water the plants during the early stages. When the soil becomes dry, it is the only time you can water your kalanchoe plant.

A yellow Kalanchoe.
This plant has distinct foliage with stunning blooms in some species.

When your cutting starts to have new stems and leaves begin to grow, you may begin caring for it as if it were a fully grown kalanchoe.

Grow Kalanchoe From Seeds

Kalanchoe seeds are very tiny, dust-like for every ounce you collect. You can purchase the seeds from a gardening store near you or crossbreed kalanchoe plants if you already have them and have a hybrid plant.

While propagating succulents from seeds is not an everyday thing, yes, you can grow a kalanchoe plant from seeds.

Seeds on the hand.
Kalanchoe seeds are very tiny, dust-like for every ounce you collect

Here is how you can grow the plant from seeds:

Step 1: Sow the seeds

Sow the seeds preferably during spring because of the good conditions for the seed to grow. You can initiate an artificial climate if you plant the seeds during winter; planting during winter is only conducive for indoor kalanchoes.

Have the seeds about an inch deep into a cactus mix soil or succulent soil. Secondly, offer warm temperature and moist conditions to enhance growth.

Step 3: Wait for the seeds to germinate

Have the seed pot or tray sit on an indirect light when the seeds start to germinate. If growing the seedlings outside, make sure to provide shade to the bed.

Immediately the seedlings sprout, make them accustomed to light. Expose the plants in the early morning or evening sun for a few minutes for indoor plants. Outdoor-grown seedlings, always uncover them to receive sunlight before covering them again with the shade.

Caring for Kalanchoe

The Kalanchoe plant requires care for it to grow and bloom. There are some conditions you should meet for the plant to thrive.

Feed the plant with fertilizer

During growth periods for new plants, fertilize kalanchoe. Every two weeks, use one-half to one-quarter of the manufacturer’s suggested amount of 20-8-20 fertilizer. 

Fertilize only when necessary and use it sparingly. Also, fertilize just during the early growth stages of your plants.

Pests and Diseases

Outdoor Kalanchoes are more vulnerable to pests. Spider mites, nematodes, aphids, and scale insects can all attack the plant.

Signs of pests infestation include torn or bitten leaves, honeydew on leaves, or faded leaves.

To treat kalanchoe for insects and avoid harming the plant, use non-toxic pesticides or other remedies available such as neem oil.

Watering

Kalanchoe has low water needs, most so outdoor kalanchoes. Only water those grown outside if the topsoil is dry.

The plants can withstand drought, although this will impact their growth.

For indoor kalanchoes, a clay pot is the best medium for planting them. Clay pots help keep the soil moist while draining excess water from the soil.

What is the right temperature for Kalanchoe?

Kalanchoes thrive well in temperatures between 65 to 85° F as they are tropical and subtropical plants. 

During winter, the plants require frost protection as they are sensitive to cold. However, in summer, prolonged sunlight exposure will damage the leaves. Plant them under a shade if outdoor-grown.

Pro Tip: To bloom the next season, kalanchoe requires 14-16 hours of total darkness for six weeks during the fall and winter.

Pruning

Some Kalanchoe plants may require pruning but often ensure your gardening tools are clean before you can begin.  

You should prune your kalanchoe plant when:

  • At the onset of the blooming period, and 
  • After the blooming period

Pruning during the blooming phase is to encourage new growth. This period is when you can also get yourself new cuttings for planting. Lastly, after the blooming period, pruning is to remove the flower stalks and extra stems to conserve energy for the plant.

Always be on the lookout for dead leaves or brown leaves. In case of any, remove them first as they might die and spread disease to the main plant.

After pruning, you should water less your plant.

Potting and Repotting

Kalanchoe plants love their space and spread a lot. You can always repot the plants once a year. Also, when repotting, always remove the offshoots and pot them separately; this will help make the plant thrive with less competition for nutrients.

Three kalanchoes in a pot.
You can always repot the plants once a year.

Always care and attend to the plants, especially when grown in your garden. If left unattended, they will grow and cover the whole garden.

Various Kalanchoe to Plant in Your Home

Kalanchoe plants have bright colors when blooming, and there are various colors you might want for your home. Here are various options to choose from for propagating:

  • Orange Varieties
  • Red and Magenta
  • White
  • Pink 
  • Yellow

Final Thoughts

Now you can easily cut a piece of kalanchoe and plant it. If you have the plant already and looking to grow more, reduce the cost of purchasing new plants. Good for you!

You can propagate many other succulents other than kalanchoe, and you can also try out different varieties of kalanchoe and decorate your home with this plant. Add some color and vitality to your home with this succulent.

How to Make Succulents terrarium?

Succulents Terrarium

A terrarium is any glass or container vessel with soil and plants. These types of gardens require low maintenance. Therefore, it can easily be incorporated in an office or home setting. Terrariums create an ecosystem that supports plant growth. You can come up with any environment, be it rainforest or desert, among others. Besides, terrariums allow you to be as creative as possible.

Succulent plants are examples of plants you can grow in your terrarium. These plants grow well in soil or arid conditions. Succulent terrariums are popular because they give you numerous planting options. In addition, a lot of people prefer open succulent terrariums because they allow plants better airflow. Open terrariums also reduce the risks of molds and condensation, which can shorten the lifespan of your succulent plants.

At the same time, some people prefer closed succulent terrariums since they require zero maintenance. However, this is limited to specific succulent plants since not all can survive in such an environment.

Succulent terrariums are an excellent choice, especially for those new to terrariums. You will have an easy time growing your collections. Furthermore, any succulent terrarium setting looks good.

The Different Succulent Plants

Thousands of plant species are categorized under succulents. However, each plant has its particular requirements in terms of water, light, and lifespan. Therefore, carefully choose plants with the same conditions when setting up your succulent terrariums.

Succulent plants can be categorized as follows:

  • Low light: These succulent plants can survive in areas with low or dim light. Mood moss, sheet moss and pillow moss are example of succulent plants that can survive under low light.
  • Bright light: There are plenty of succulent plants to choose from under this category. Such plants thrive in open terrariums. Haworthia, Sempervivum, and Echeveria are examples of succulent plants that thrive well in bright light.
  • Medium light: These plants grow well in close terrariums. Examples of these plants are Nerve plant and Oxalis triangularis.
Succulents low light
Succulent plants can survive in areas with low or dim light

Keep in mind the following things before making a succulent terrarium:

  • Determine the size of the terrarium you intend on setting up. The size of the plants influence the size you will come up with.
  • Choose the plants you will plant in your terrarium. You can choose a single plant species or mixture. The plants you choose determine the environment you will set in your terrarium.
  • Available materials when setting up your succulent terrarium. Ensure all the necessary materials are readily available before setting up your portable garden.
  • Decide where you are going to place your terrarium. Plants in a terrarium should receive the required sunlight or humidity levels to properly grow.

Setting up a Succulent terrarium

Materials needed to set up succulent terrariums vary, depending on the type of terrarium. You can either set up an open or closed terrarium. Setting up a succulent terrarium requires specific items, namely:

  • Succulent plants
  • A glass or plastic container
  • Soil
  • Sheet moss
  • Rocks
  • Charcoal or perlite
  • Garden trowel

Step by step guide for making Succulent terrariums

You can set up either an open or closed terrarium. An open terrarium is recommended for succulent plants because of low humidity levels. Choose a transparent container or glass for an excellent view of your portable kitchen. Ensure the selected glass or container is clean. Determine the size of plants for an idea of how long the terrarium should be. Remember, plants shouldn’t be so squeezed inside the terrarium.

Now, pick some rocks and place them at the bottom of your glass or plastic container. Rocks help with aeration and drainage. Be reasonable when arranging rocks inside your container. For the next layer, you can use either charcoal or perlite. Perlite or charcoal reduces condensation, attributed to foul odors and fungus growth. 

A plant in the glass
An open terrarium is recommended for succulent plants because of low humidity levels.

Set up the next layer using sheet moss. Soak Sheet moss in water for a minute. Remove from water, squeeze and place on top of the rocks. Generally, sheet moss ensures soil or charcoal doesn’t sift into the rocks.

Finally, the soil is at the top of the succulent terrarium. It is advisable to have at least 3 inches of ground for your terrarium. Use a garden trowel and dig a small hole inside your terrarium. Plant your succulent collections and pack the soil around the plants.

Now lightly water your terrarium. Avoid overwatering your plants at any given time. Place different decorative materials at the top of the soil. Now, place your terrarium in a visible spot, either in your house or office.

 How to Properly Take Care of Your Succulent Terrariums

Succulent terrariums, like any terrariums, require care. People prefer succulent terrariums because of their low maintenance. Caring for plants is paramount if you want them to be healthy.

Below are effective ways of taking care of your succulent terrariums:

  • Pruning: Terrariums have limited space and soil. This why pruning is vital for plants growing in terrariums. It ensures your succulent plants don’t outgrow your terrariums at any time. Also, pruning gives plant a neat look. Unhealthy or infested parts should also be trimmed off before they spread to the entire succulent plant.
  • Watering: The type of succulent plants grown in your terrarium determines the watering frequency. Avoid overwatering your plants, since it is a breeding ground for bacteria, fungi and different diseases. You should also give soil time for moisture to dry out before watering your plants.
A watering can.
Avoid overwatering your plants, since it is a breeding ground for bacteria, fungi and different diseases.
  • Light: Succulent plants require different amounts of light. Some require plenty of light, whereas others can thrive in medium or low light. Therefore, give your succulent plants sufficient light since it plays a crucial role in their growth.
  • Cleaning your terrariums: Condensation and dust are two maintenance issues for terrarium owners. Regularly clean your terrariums, especially moisture reduce the chances of fungus breeding in your portable garden. Dust interferes with the appearance of your terrarium.
  • Nutrients: Plants require nutrients to thrive under any condition. Add fertilizer on your terrarium at least twice a year, preferably organic fertilizer.
  • Quarantine: Always quarantine your plants before planting them in your terrarium with other plants. It helps confirm if they are disease and pest free. Therefore, keep an eye for symptoms of infestation.

Warning signs to watch out on your Succulent Terrariums

Pests and diseases might attack your succulent terrariums. In most instances, pests and diseases attack your plant when you least expect them. Understanding these problems helps determine the quickest ways of reviving your succulent plants. Examples of these problems include:

A plant inside the jar.
A terrarium is any glass or container vessel with soil and plants.
  • Leaves turning yellow: Are your succulent plants turning yellow? This is most likely caused by overwatering your plants. This is the leading cause of succulent plants’ death. Succulents can’t survive in soil with excess water for long.  Consequently, these plants don’t thrive well in wet areas. Therefore, limit how you water your terrarium and understand the water requirements of your plants. Replant your plant in a dry soil if it exhibits yellow leaves. Now, give your plants a few weeks to recover.
  • Brown spots: In most instances, brown spots indicate pest infestation. These brown spots spoil the color of your succulent plants. Isolate your terrarium if you notice brown spots on your plants. Afterward, spray pesticides on plants in your terrarium. Observe your terrarium for a week or so until the brown spots start disappearing.
  • Wrinkling leaves: Overall, succulents can stay for long without water. However, don’t completely ignore them. Regularly water your plants or the leaves will start wrinkling and eventually drop off. Wrinkled leaves are a sign plants in your terrariums are receiving less water.
  • Stretched leaves: Your succulent plants in terrariums require enough sunlight. If kept in darkness for long, the leaves can stretch to the sunlight direction. This is referred to etiolation. Ensure your succulent plants get enough sunlight.

The Best Succulent Plants for Terrariums

Not all succulent plants can be planted in terrariums. Therefore, research the best succulent plants before making a decision. Some of the recommended succulent plants for terrariums include:

  • Jade plant: This is among the easy to care succulent plants.  Jade plant is recommended for indoor since it blends with any decision. An open terrarium is the best option for this plant. Unlike most succulent plants, this plant requires regular watering. Watch out for leaf spots or lose leaves on your terrarium. It’s an indication this plant isn’t receiving enough water.

Ultimate Guide: How to Care for Kalanchoe

With its relatively large, glossy leaves, the kalanchoe remains one of the most attractive and easy-to-grow plants ideal for your indoor or outdoor garden. It produces beautiful flowers in the shades of magenta, orange, red, pink, and yellow, which forms a spectacular view. The foliage is also attractive. Since the plant is easy to care for and highly resistant to some of the common plant diseases, it is one of the best low-maintenance indoor/outdoor plants for your home.
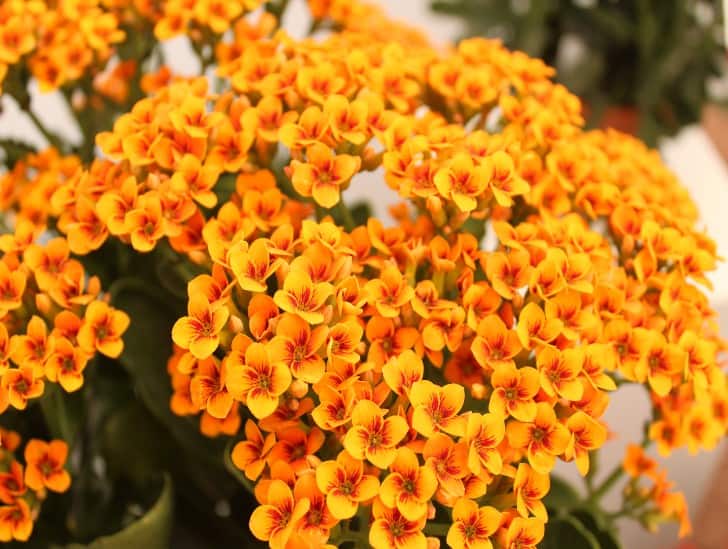
So, how do you care for kalanchoe? Kalanchoe plants require relatively sunny and bright locations with moderate to warm temperatures. Your indoor kalanchoe will do well if positioned near a window, receiving plenty of indirect sunlight. It will thrive in a well-draining potting mix complemented with the right pot size. Typically, you should only water your kalanchoe when the soil is completely dry and only feed it with fertilizer when it is almost bloom time. You should also watch out for dead stalks or foliage once your plant has bloomed and prune them off.

In this guide, you will learn everything you need to know about taking care of and growing kalanchoe in your home. So, let us get started.

A Brief Overview of Kalanchoe

The genus Kalanchoe comprises more than 100 different species of plants, but only a few are known and cultivated at home. The most famous one is the Kalanchoe blossfeldiana that has acquired the title “Kalanchoe” over time.

Native to Madagascar’s tropical and sub-tropical climate, the plant tends to thrive in a relatively arid environment, making it one of the best and most popular succulents to have in your home. Plant lovers are usually attracted to kalanchoe thanks to its beautiful leaves and flowers that bloom consistently throughout the year.

beautiful pink and white kalanchoe
Kalanchoe showing off its beautiful leaves and flowers

Kalanchoe is a slow-growing succulent and will take between two to five years to mature and reach its maximum height, which can be up to 45cm tall. Younger plants in nurseries and flower shops are usually available in yellow, white, pink, and red shades.

Kalanchoe is readily available in most plant nurseries, florist shops, and even grocery stores, especially during the holiday season.  While this is one of the best succulents to have in your home, you need to be careful if you own curious pets because almost all parts of the plant are toxic to both dogs and cats.

Taking Care of Kalanchoe Plant

If you are looking to grow an almost perfect succulent that offers a magnificent floral show throughout the year, then look no further than the kalanchoe plant. Like other succulents, this is a relatively hands-off plant that only requires minimal care to thrive.

As long as you provide it with plenty of sunlight, well-draining soil, and know when to water it, everything will be fine. It can survive in a wide range of temperatures and will bloom at the beginning of spring.

The flowers last for several weeks and can reoccur at different times throughout the year as long as the plant receives plenty of sunlight and is pruned appropriately between blooms.

Here is a comprehensive list of some of the most critical things you need to do to take care of your kalanchoe and enjoy the many benefits that it offers:

1. Sunlight and Temperature Requirements

Due to its high sensitivity to cold, kalanchoe tends to do well when grown as a houseplant where the temperature is maintained at between 60oF and 85oF. However, if you want to grow them in your outdoor garden, you need to ensure the temperatures are at least 45oF for them to thrive.

The most important thing you need to keep in mind is that these succulents are highly sensitive to cold and won’t survive long if you don’t maintain the right temperature.

Kalanchoe will also thrive in a home that gets plenty of bright and natural sunlight. But they don’t like direct sunlight and may portray stunted growth if you leave them in direct sunlight all day.

plants getting sunlight
Only give your kalanchoe plants bright and natural sunlight.

You can position them on east or south-facing windowsill but keep them away from the windowpane since the hot surface can result in severe burns.

Generally, the more bright and indirect sunlight you give to your kalanchoe, the brighter and more colorful the flowers will be. In low-light conditions, the flowers may fail to open, and its leaves turn spindly.

So, if you are purchasing a kalanchoe for your low-light rooms, ensure you get one that is already flowering. You can always substitute the natural light with artificial growers’ light.

2.Humidity

Kalanchoe plant generally thrives in normal indoor humidity levels. If you are growing them in an area with high humidity, provide sufficient air circulation to prevent powdery mildew and other fungal diseases.

Extremely high or low humidity levels can cause the leaves to drop or turn yellow. You can use a humidifier if the room is dry and a dehumidifier if there’s too much humidity. The most important thing is to ensure that your kalanchoe is comfortable.

3. Watering

Kalanchoe plant is succulent, which means it doesn’t require a lot of water to survive. In fact, too much watering can lead to root rot and other issues. Its leaves are highly sensitive to water which can cause irreversible damage when overwatered.

With that in mind, you should only consider watering your kalanchoe when the potting mix is completely dry. Try to avoid wetting the leaves and flowers during watering.

When your plant stops flowering, you need to cut down on watering and let the soil remain reasonably dry. Increase watering during spring or summer when you start to notice signs of new growth on your plant.

For the watering method, it is highly recommended to use the bottom watering method. The method allows you to avoid getting the leaves and flowers wet by accident while ensuring your plant gets the sufficient amount of water it requires to stay happy and healthy.

You can also water your plant the conventional way, which is from above the pot. The only thing you need to ensure is that no leaves or flowers of the plant should come in direct contact with the water.

If you accidentally splash some water on the plant’s leaves, get a tissue and wipe it off immediately. Don’t forget to drain the excess water from the growing container.

4. Use the Right Potting Mix

A kalanchoe plant will only thrive in a well-draining potting mix because it is a succulent. So, make sure you choose or create a perfect blend of succulent soil that doesn’t retain too much moisture.

You can achieve good drainage by mixing 50% regular potting mix and 50% cactus mix or 60% peat moss and 40% perlite mix.

plant preparing to be repotted
Kalanchoe plants only thrive in well-draining potting mix.

To ensure proper drainage of your kalanchoe potting mix, try as much as possible to avoid a moist environment. You are free to grow your kalanchoe in a clay pot which can help drain excess water from the potting mix.

5. Fertilizing Kalanchoe

Typically, you don’t need to fertilize your kalanchoe plant. All you need to do to keep your plant happy is to provide it with some top dressing for nutrients.

Consider dressing the topsoil with some compost and worm castings at the start of spring. You should top dress your kalanchoe whether it is growing indoors or outdoors.

If you don’t have a top dress combo, consider fertilizing your plant with an organic liquid fertilizer at a half-strength only once during spring. If you fertilize the plant with a full-strength fertilizer, it can result in severe burning of the tip of the leaves.

two indoor plants with orange pots
One way to take care of your kalanchoe is to put a top dress combo at the start of Spring

Don’t top dress or fertilize your kalanchoe plant after summer because it enters into a period of dormancy. During this time, the plant only focuses on recovering from the stress of the growing season and preparing for the next flowering season.

If you are still a newbie to these plants, you may easily mistake the dormancy for death, and you may even be tempted to throw it away.

But the only thing you need to do is water the plant one last time and keep it in a relatively dark room until spring. When spring kicks in, water your plant, return it to a spot that receives plenty of indirect sunlight and watch it put on a spectacular floral show.

6. Watch Out for Common Pests

Although these succulents are highly resistant to pests and diseases, they can still get infected by scale, nematodes, spider mites, and aphids, especially when grown outdoors. These insects feed on the plant’s leaves.

succulent plants without their pots
As pests and diseases are almost inevitable for every plant, make sure to remove them using hose pipe or sink sprayer.

To remove common pests such as aphids, quickly pass your plant through a stream of fast-flowing water from a hose pipe or sink sprayer. For mealybugs and other pests that won’t be washed away by water, dab them off from the plant with an alcohol-saturated cotton swab.

You can also get rid of scale insects from your plant using a plastic bank card. Simply scrape the insects from the plant, and you are good to go.

7. Pruning

Kalanchoe usually requires some pruning to remove damaged or dead branches and to shape the plant. Prune it plant before it goes into dormancy to help prepare the plant for the next flowering season.

To prune your kalanchoe, use scissors or shears to cut away dead flower heads and dried leaves. Cut back the stems as much as 65% of their length when they become lanky or stretched out.

Be sure to use a pair of sterilized scissors or shears when pruning your plant to avoid spreading diseases or fungus. You should also consider labeling your pruning tools and storing them away safely when not in use.

With proper pruning, your kalanchoe will reward you with plenty of blooms and lots of appreciation from your visitors.

8. Propagation

Kalanchoe can be propagated through stem cuttings and leaf cuttings. For stem cutting propagation, take a healthy kalanchoe branch that is at least four inches in length, remove the lower leaves and place it in a soil-free medium such as vermiculite or perlite.

Keep the pot with the stem cuttings in a bright spot where it can receive plenty of indirect light but avoid direct sunlight. Water the cuttings regularly until new growth appears.

For leaf propagation, you need to take a healthy and undamaged leaf from your kalanchoe plant and place it in a soil-free medium for about four weeks or until the roots start to appear.

Once roots appear, transfer the leaf cutting into a pot with moist soil and water it regularly until new growth appears.

Summary

The bottom line is that caring for kalanchoes is relatively easy because these succulents are less demanding.

As long as you provide them with a well-draining potting mix, water them appropriately, top dress the soil once every spring and expose them to bright indirect sunlight, they will survive and thrive.

Good care is a recipe for flowering, which is amazing because their flowers are long-lasting and have rich green foliage that you will surely love. This is definitely one of the great blooming succulents to brighten your outdoor garden or indoor spaces.