How to Save and Repair a Broken Cactus: Step-by-Step Guide

Introduction

Cacti are hardy plants, but their stems can still snap or break under certain conditions. Common reasons for a broken cactus include accidental falls or knocks, pest or animal damage (e.g. a curious pet or wildlife nibbling on the plant), improper handling (grabbing or moving the cactus without supporting its weight), and environmental factors like strong winds or rapid temperature changes. When a cactus breaks, acting quickly is crucial. An open wound on a cactus can invite infection and rot, so prompt care helps the plant heal before decay sets in​.

In this guide, we’ll explain how to fix a broken cactus step by step – from assessing the damage to repairing the cactus and ensuring it makes a full recovery.

Step-by-Step Repair Process

Assessing the Damage

Before you begin repairing, examine how your cactus broke. Determine if the broken part is still partially attached or completely detached:

  • Partially attached: If a branch or segment is bent or cracked but not fully severed, you might be able to brace it in place to heal. In this case, proceed with the reattachment steps below.
  • Completely detached: If a piece of the cactus has broken off entirely, you’ll need to decide whether to graft it back onto the original plant or propagate it as a new plant. Factors to consider include the size and importance of the broken piece and the condition of the break. Very large or important pieces can sometimes be grafted back, whereas small pads or segments often do better being potted up as cuttings.

If the broken piece is mushy or rotten at the break, skip to the rot treatment steps – a rotting piece should not be reattached (see the FAQ on rot and our guide on How to Save a Rotting Cactus). Otherwise, if the pieces are firm and healthy, you can attempt a repair. Always wear thick gloves or use tongs when handling broken cactus pieces to protect yourself from spines.

Tip: If the break happened recently and the wound is still fresh (moist), you have a better chance of a successful reattachment. If the broken ends have already dried and callused over, you may need to trim them slightly (as explained below) before rejoining or propagating.
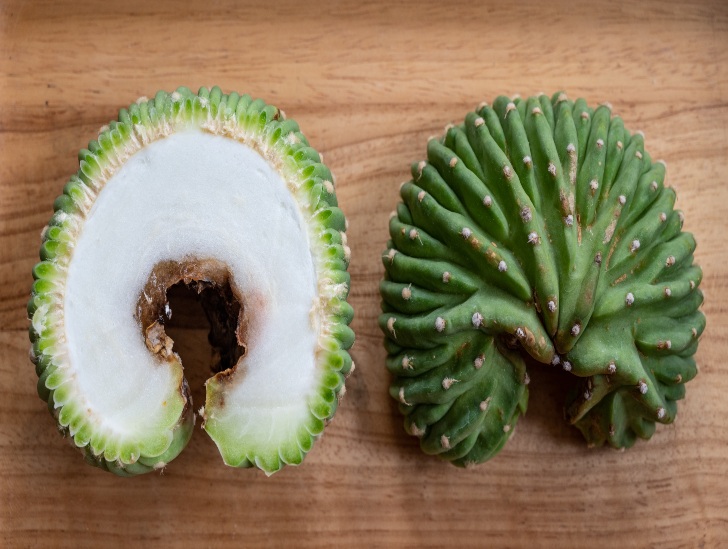
A cactus that has broken into two pieces can often be saved with the right techniques. In the photo above, the top of the cactus has completely broken off, but both the base and the broken piece can still recover. Quick intervention will help prevent rot and give your cactus the best chance to heal.

Reattaching Broken Parts (Grafting the Cactus Back Together)

If you want to repair the cactus by reattaching the broken part, essentially you will be grafting the pieces back into one plant. This works best for a clean break on a larger cactus where you want to preserve its original shape. Here are the steps to reattach:

  1. Prepare the broken surfaces: Examine the break on both the main plant and the broken piece. If the wound surfaces are jagged or have started drying out, use a sterilized sharp knife to cut a thin slice off each broken end​. Removing a thin “pickle slice” of tissue will create clean, flat surfaces of fresh flesh on both pieces​. This step is important because a flat, clean cut on each side will allow the pieces to fuse more easily and removes any dried or damaged tissue. (Remember to sterilize your knife with rubbing alcohol before cutting to prevent introducing bacteria.)
  2. Let the cut ends dry briefly: After trimming, allow the cut surfaces to dry and callus slightly. This might mean leaving both pieces in a dry, shaded location for a few hours up to a day. The cut should not be sopping wet when you join the pieces, but also not so dry that it’s hardened completely. You want the surfaces to be tacky dry – this helps prevent rot but still allows connection.
  3. Reattach and align the pieces: Carefully place the broken piece back onto the main cactus exactly how it was oriented before. Align the cactus so that the vascular rings (the circle of tissue visible in the cross-section) match up as much as possible on both the base and the top piece. This ring is where the cactus transports water and nutrients, and aligning it helps the graft heal. Gently press the pieces together. They will not fuse immediately, so you’ll need to secure them (next step).
  4. Secure the cactus in place: Use soft string, twine, or even rubber bands to hold the broken piece onto the base. Wrap the string around the cactus gently but firmly, avoiding the sharp spines​. Wind the string in a crisscross fashion over the break, going around the cactus and crossing over the top of the graft point and under the pot to anchor if needed. Aim to cover about an inch above and below the break with the wraps. The string acts like a bandage and a splint, keeping the pieces tightly together while they heal. Make sure it’s snug enough to support the cactus but not so tight that it cuts into the flesh. If the cactus is large or the broken arm is heavy, you may also use a stake or stick for extra support — place a stake alongside the cactus and tie the cactus to the stake so it doesn’t wobble. This external support will prevent the repair from shifting.

Once the cactus piece is tied in place, avoid moving or disturbing the plant.

  1. Let it heal: After securing the graft, place the cactus in a location out of direct harsh sunlight (bright indirect light is ideal) and where it won’t be bumped. Do not water the cactus immediately after reattaching – excess moisture at the break can invite rot. It’s best to wait at least a week before the first light watering. In the meantime, the cut surfaces will begin to knit together. Over several weeks, the top piece may start to regain firmness as it reconnects with the base. Monitor for any signs of rot at the graft (such as foul smell or oozing); if you see these, you’ll need to take the pieces apart and let them dry out (see FAQs below). Otherwise, be patient. Cacti heal slowly, and it may be a couple of months before you see new growth or the piece fully fuses.
  2. Remove the support: Leave the string (and stake, if used) in place for at least a few months. Eventually, you might notice the cactus pushing outward against the string or even new growth forming. At that point, you can carefully remove the string to avoid it cutting into the cactus’s flesh​. If the pieces feel firmly attached, the graft was successful. (If not, leave it supported longer.) Some scarring may remain at the break, but over time the cactus can grow and hide the scar.

Propagating a Broken Cactus Segment (Creating a New Plant)

If reattaching isn’t feasible or you’d prefer to grow a new cactus from the broken piece, you can propagate it. Propagating a broken cactus segment essentially means treating the broken piece as a cutting and rooting it in soil. Many cacti can reproduce this way, and it’s often the best option for pads (like prickly pears or Christmas cactus segments) or when the break is too jagged to graft. Follow these steps:

  1. Trim and clean the broken piece: If the break was uneven, use a sterilized knife to cut the bottom of the broken piece so that it has a clean, flat base. Remove any small decayed bits if present. You want a healthy green surface that will form a callus. (If the piece already has a clean break, you may not need to cut it further – just ensure there are no ragged edges.)
  2. Let the cut end callus (dry out): This step is critical for propagation. Place the broken piece in a dry, warm, shaded area (out of direct sun) and let the cut end air-dry for several days. Typically, 2-7 days is enough for a callus to form, depending on the size of the cutting (larger, thicker cacti might require up to a week or more). The cut end will toughen and seal over – it might turn whitish or light brown and feel dry to the touch. This callus tissue protects the cutting from rot when it’s planted​. (Do not pot the cactus or water it during this time!)
  3. Prepare a pot with suitable soil: Choose a pot that’s just a bit larger than the cactus piece (with a drainage hole) and fill it with a well-draining cactus mix. An ideal mix is one formulated for succulents/cacti or a DIY mix of regular potting soil with plenty of perlite or coarse sand mixed in. The soil should be dry. For extra insurance, you can even place a layer of coarse sand or grit on the top where the cutting will sit – this keeps the base of the cutting dry. (Tip: Using a terra cotta pot can help absorb excess moisture, but any pot with good drainage will work.)
  4. Plant the callused cutting: Take the callused cactus piece and place it on the soil in the new pot. Set the dried end slightly into the soil — just enough so the piece can stand upright or is in good contact with the soil. Do not bury it deeply; usually planting the base an inch or two into the soil is sufficient, or even just resting it on top of the soil for flat pads. You may prop the cutting with small rocks or stakes to keep it upright if needed. The idea is to have the cut end touching the soil so it can start sending out roots. (For very large, heavy cactus sections, you might plant a bit deeper (several inches) so it stands on its own​ifixit.com, but avoid burying too much of the green part.)
  5. Initial watering (or lack thereof): Do not water immediately after planting the cutting. The soil should remain dry for about a week to further ensure the cut end heals. After that, you can start lightly watering to encourage rooting. The safest approach is to mist the top of the soil occasionally rather than soaking it​ifixit.com. After about 4-5 days of being in the dry soil, give the soil a light watering or mist – just enough to introduce a bit of moisture but not so much that the cutting’s base sits in water. Over the next few weeks, continue to sparingly water the soil (e.g. a small sprinkle once a week or when the soil is completely dry). Too much water too soon can cause the cutting to rot before it grows roots, so err on the side of underwatering. The cutting has stored moisture in its tissues and can survive on that for a while.
A person watering the plant in the terrarium.
  1. Provide warmth and light: Place the potted cutting in a warm environment with bright but indirect light. Avoid intense direct sun until it has roots (since without roots the cactus can’t take up much water to cool itself, and it could desiccate or sunburn). A spot near a window with filtered sunlight or a bright shade outdoors is ideal. Warm temperatures (70–85°F / 21–29°C if possible) will help speed up root development. Cacti generally root faster in the growing season (spring/summer) than in winter.
  2. Wait for roots to form: Rooting a cactus cutting takes time, so be patient. It may take a few weeks to a couple of months for roots to establish, depending on the cactus species and conditions. You can check for root development by gently tugging on the cutting after a few weeks. If it feels anchored or resists being pulled up, roots have likely formed​. Another sign of success is seeing new growth (such as tiny buds, offsets, or the tip of the cactus starting to grow). Do not tug too hard and don’t disturb a cutting that is starting to root; this is just a gentle check. Once you know it’s rooting, continue a careful watering routine (water deeply but infrequently, always letting soil dry out in between). Over time, the cutting will begin to behave like a normal cactus, and you can gradually give it more light if it’s a sun-loving variety.
  3. Care for the original plant: Don’t forget the original cactus (the part that was left in the pot after the break). If you had to trim its broken end, that stub should also be allowed to dry and callus. Keep it dry for a week or so. In many cases, the original base will heal over and might produce new growth (pups) around the cut in a few months​. Resume normal light watering for the base plant after a week or two, being careful not to soak the broken top. With time, you may see baby cactus shoots emerging from where it broke, especially if it’s a species that readily pups. This way, you could end up with two plants: the original sprouting a new branch, and the rooted cutting growing on its own.

Aftercare for a Repaired Cactus

Whether you reattached the broken piece or propagated it, proper aftercare is crucial to help the cactus recover fully. Here are some aftercare tips for your repaired cactus:

  • Watering: Cacti are prone to rot if overwatered, especially when they have fresh wounds. After a repair, hold off on heavy watering. For a grafted/reattached cactus, wait about 1–2 weeks before the first light watering. Then water sparingly for the next few months. For a propagated cutting, as mentioned, only mist or lightly water until strong roots have formed. Always let the soil dry out completely between waterings. It’s better to under-water than over-water at this stage. Too much moisture is the enemy of a healing cactus – remember that. Once the cactus shows new growth and is stable, you can gradually increase watering to a normal schedule (which for most cacti is infrequent, e.g. every 2-4 weeks depending on climate and season).
  • Soil and Pot: Ensure the cactus is in well-draining soil. If you repaired it in the same pot, make sure the soil isn’t waterlogged. If you rooted a cutting, use a cactus/succulent potting mix with extra perlite or sand. Good drainage prevents rot by keeping the roots and cut base from sitting in water​. The pot should have drainage holes, and it’s often best to use a pot that’s proportionate to the cactus’s size. An oversized pot holds excess soil and water, which can lead to rot. Also, consider the pot’s weight and stability – a heavy clay pot or one with a wide base can help prevent tall cacti from tipping over easily in the future.
  • Light: After a break and repair, cacti benefit from bright light but not extreme heat or direct sun until they’re healed. Too much direct sunlight can stress a recently broken cactus (especially a cutting without roots) and cause it to desiccate or scorch. Place the cactus in a location with bright, indirect light or gentle morning sun and afternoon shade. As it recovers over the following weeks, you can gradually increase sun exposure according to its species’ needs. A healthy cactus needs plenty of light to grow strong stems (to avoid weak, etiolated growth that can break again​), but ease it back into full sun if it was used to it, so you don’t shock it while it’s vulnerable.
  • Temperature: Keep the cactus in a warm environment while it heals. Ideally, keep it in a range of around 65–85°F (18–29°C). Avoid exposing a recovering cactus to cold drafts or freezing temperatures. Cold, damp conditions especially should be avoided, as they can invite rot. If the cactus was outdoors and it broke due to a storm or wind, consider moving it to a sheltered spot until it’s stronger.
  • Monitor for growth and problems: Over the next several weeks to months, watch your cactus for signs of successful healing. For reattached parts, check that the top part remains firm and green. Eventually, you may see new spines or buds forming, which is a great sign. For propagated cuttings, look for new buds or leaves (in the case of leafy cactus like Christmas cactus) and check that the cutting isn’t shriveling significantly (a slight wrinkle is normal, but it should not turn yellow or mushy). Callus formation at the break should be dry and hard; if you see any soft, brown, or black areas, that could indicate rot. Also, after some time, gently feel the base of the cutting for any resistance (indicating root growth).
  • Be patient: Cacti are slow growers. It may take several months for a broken cactus to fully recover and even longer to regain its original height or fill in new growth​. As long as the cactus remains free of rot and is getting a bit of light water and good light, it’s likely working on rooting or healing internally even if you don’t see much happening on the surface. Patience is key. Sudden changes (like overwatering out of impatience) can do more harm than good.

By following these aftercare steps, you greatly increase the chances that your repaired cactus will survive and thrive. Once you notice robust new growth, you can consider the cactus healed. At that point, you can return to a normal care routine. For general cactus care tips (watering, fertilizing, etc.), check out our guide on Cactus Care: 11 Essential Tips for Beginners for more advice on keeping your cactus healthy.

Preventative Measures

After you’ve saved your cactus, you’ll want to prevent future breaks. Here are some preventative measures and tips to keep your cactus from breaking again:

  • Use an appropriate pot: A top-heavy cactus in a small or lightweight pot is an accident waiting to happen. Make sure your cactus is potted in a sturdy container that gives it stability. A wider, heavier pot (like ceramic or clay) can help prevent tipping. Also ensure the cactus is planted deep enough so it’s well-anchored by its roots. If your cactus has grown and now seems too large for its pot, consider repotting into a slightly larger pot that can better support it (especially if it has become very tall or off-balance).
  • Stake or support tall cacti: For very tall or columnar cacti, or those with multiple arms, it’s wise to provide support before a break happens. You can insert a cactus stake or a wooden stick into the pot and loosely tie the cactus to it for stability​. Use soft bands or garden tape that won’t damage the cactus skin. There are also special cactus supports (like metal plant rings or stakes) available. A gentle support will keep a cactus upright during strong winds or if it gets brushed, reducing the risk of it snapping under its own weight. This is especially important for cacti that have experienced rapid growth or those with thinner, weaker stems.
  • Handle with care: Many breaks happen when moving or handling a cactus. Always handle your cactus carefully. Wear protective gloves and consider wrapping the cactus with layers of newspaper or an old towel when you need to lift or repot it (this protects both you and the plant). Support the base of the cactus while moving it; never grab a cactus by an arm or top-heavy section without supporting the bottom, as this can cause it to shear off. If you need to transport a large cactus, secure it so it won’t tip or roll in transit.
  • Proper light and feeding: Believe it or not, the way you care for your cactus can influence how breakable it is. A cactus grown in low light may become etiolated (stretched out and thin), which creates weaker tissues that break more easily​. Give your cactus adequate sunlight for sturdy growth (according to its species’ needs). Also, avoid over-fertilizing or overwatering, which can make a cactus grow too quickly and become physically weaker or unstable. Overwatering in particular can lead to root rot or an oversized, water-heavy stem that can collapse under its own weight​. Keep a balanced care routine to encourage strong, healthy cactus structure.
  • Pest and disease control: Regularly inspect your cactus for pests like mealybugs or fungus that could weaken the cactus tissues. Insect infestations can cause sections of the cactus to decay or become brittle. If you notice any unusual spotting, oozing, or small insects, treat the issue promptly. A healthy cactus is more resilient and less likely to suffer structural damage.
  • Reinforce weak points: If your cactus has a known weak spot (for example, a previous injury or a narrow junction between segments), keep an eye on it. You can preemptively reinforce such an area by tying a soft cloth or nylon around it (not tight, just for support), or by bracing the cactus near that point with a stake. This is similar to how you might support a branch of a fruit tree that’s heavy with fruit – giving it a little extra support to prevent breakage.
  • Safe placement: Lastly, consider where your cactus lives. If it’s in a high-traffic area where people or pets often bump into it, you might want to move it to a safer spot to avoid accidents. Likewise, keep indoor cacti away from edges of shelves or sills where they might get knocked over. Outdoors, place tall cacti in areas less exposed to extreme wind, or use windbreaks for protection.

By implementing these preventative measures, you can significantly reduce the chances of facing another broken cactus. Protecting your cactus’ physical stability and overall health goes a long way in keeping it intact. Remember, it’s easier to prevent breaks than to fix them, so taking a little care in how you situate and tend your cactus will pay off in the long run.

FAQs

Can a cactus heal itself if broken?

Answer: It depends on what you mean by “heal itself.” A cactus won’t magically reattach a completely broken-off piece on its own – if the top of your cactus snapped off, it’s not going to fuse back without intervention. The broken surfaces will simply dry out and seal (callus) to prevent losing moisture. However, this doesn’t mean the cactus is doomed! The base of the cactus (the part still in the pot) can heal over and often sprout new growth (such as new stems or “pups”) after some time. And the broken-off piece itself can potentially grow into a new cactus if you plant it properly. Cacti are remarkably resilient: you can take a piece that’s broken off and replant it to root into a new plant​.

In nature, many cacti pads or segments that fall to the ground will root themselves. So while a cactus won’t rejoin its broken limb alone, both parts can heal in their own way – the mother plant might branch out and the detached piece can become a whole new cactus. Just be sure to help the process along by following the steps above (callusing and potting the piece, or grafting it back onto the original cactus if you choose that route​).

How long does it take for a broken cactus to recover?

Answer: Repairing cactus stems is a game of patience. You will likely see the initial healing (callus formation) within a week or two. If you reattached a part, the joining tissue might start to knit in a few weeks, and a propagated cutting may start growing tiny roots in a few weeks as well. However, noticeable new growth (like new buds or the cactus starting to plump up and grow) can take anywhere from 4-6 weeks to a few months

Cacti grow slowly, and when they’ve been injured, they often focus on healing internally before putting out new outward growth. To fully “recover” to the point where the cactus looks as it did before the break (for example, regaining similar size or filling in a scar), could easily take several months to a year​

Don’t be alarmed if your cactus seems to be in stasis for a long time after the injury – as long as it isn’t rotting and is gradually getting a little sun and water, it’s likely healing beneath the surface. Once you see new green growth or new spines, that’s your sign that the cactus is on the road to recovery. From there, normal growth resumes (still at the cactus’s natural slow pace). So, in short: a broken cactus can take a few months to truly recover, and you’ll need to give it consistent gentle care during that period.

What if my cactus turns brown or mushy after breaking?

Answer: If your cactus tissue is turning brown, black, or mushy at the break site (or anywhere on the plant), that’s a sign of rot setting in. Unfortunately, rot can spread rapidly and a cactus cannot heal from rot by itself. You’ll need to take immediate action to save your plant. Act fast: remove the rotted portion before it spreads. Using a clean, sharp knife, cut away all the mushy or discolored tissue from the cactus​. Cut a bit into the healthy flesh if needed, until you see only firm, green (or white-ish internal) tissue on the remaining cactus. Essentially, you are performing surgery to amputate the rot. If the rot was in the middle of the cactus, this might mean cutting the cactus in two – and you might end up with a top part that is now a separate cutting (which you can try to save by callusing and replanting) and a bottom part that hopefully can recover. After cutting, let the healthy cut ends dry and callus for several days. It’s often helpful to dust the cut surfaces with a fungicidal powder or even simple powdered cinnamon (which has natural anti-fungal properties) to ward off infection while it heals. Once callused, you can pot the salvaged pieces in fresh dry soil and begin the propagation process as described above. Be sure to disinfect your knife between cuts – you don’t want to accidentally spread the rot organisms. Also, discard the infected tissue far away from your other plants. Going forward, carefully monitor the remaining cactus for any further signs of rot. Keep it in a dry, airy environment as it heals. Rot is basically an infection, and the only cure is to cut it out completely​. If the rot was caught early and removed, your cactus stands a good chance of survival. (For a full guide on dealing with cactus rot, including illustrations of what healthy vs. rotted tissue looks like, see our article on How to Save a Rotting Cactus.)


By following this guide, even beginners can confidently tackle the challenge of a broken cactus. Remember: quick action, proper technique (reattaching or propagating as needed), and patience in aftercare are the keys to repairing a cactus stem successfully. With time, your cactus should bounce back from its injury, and you’ll barely be able to tell it was ever broken! Good luck, and happy cactus caregiving.
11 Golden Rules For Watering A Cactus

Cacti are often associated with the stark landscapes of deserts, but they’re versatile plants that can be found in a variety of climates, including tropical rainforests. Their ability to thrive in arid conditions is attributed to their extensive root systems, which can draw water from a large surrounding area, allowing them to endure even during dry spells.

Proper watering is crucial to maintaining a healthy cactus, whether it’s situated in a natural habitat or cultivated at home. The task involves more than just the amount and frequency of water; understanding the specific needs of your cactus is essential. There are several key guidelines that should be taken into consideration to ensure that your cactus can flourish.

Key Takeaways

  • Cacti can survive in diverse environments, from deserts to rainforests, due to their adaptive mechanisms.
  • Proper watering techniques are vital for cactus health and depend on several factors.
  • Thorough knowledge of your specific cactus species can aid in optimal care and prevent over or underwatering.

1. Understanding Cactus Watering Frequency

Watering cacti is more than just a routine—it is a critical aspect that determines the health and vibrancy of your plant. It’s important to water based on the plant’s specific needs which can change with its environment and state of growth.

  • Growing Season: From March to September, cacti are in their active growth phase and require more frequent hydration, typically once a week. This consistent watering helps prevent dehydration. Fertilization should coincide with this watering schedule.
  • Dormancy Period: In the dormant months, reduce watering significantly. Check the soil’s moisture by touching it; if it’s entirely dry, it’s time to water, but if there’s still moisture, wait longer.
  • Checking Soil Dryness: Before another round of watering, the topsoil must be completely dry. For accurate measurement, use a soil moisture gauge. Alternatively, a simple method is to insert a stick into the soil—if it emerges without soil sticking, the cactus needs water.

When a cactus does not receive enough water, it may appear washed out and limp, with a lighter coloration. Conversely, receiving too much water can cause the plant to swell beyond its normal size, which may eventually lead to root decay.

Careful observation of these signs and the appropriate adjustment of the watering method is key to a healthy cactus. Whether it’s an occasional deep watering or a more regular weekly schedule, the goal is to cater to the plant’s needs without overdoing it.

2. Assessing Water Needs Based on Cactus Dimensions

  • Young Cacti: High growth rate necessitates more frequent watering.
  • Mature Cacti: Despite a lower surface area to volume ratio leading to reduced evaporation, watering is still necessary.
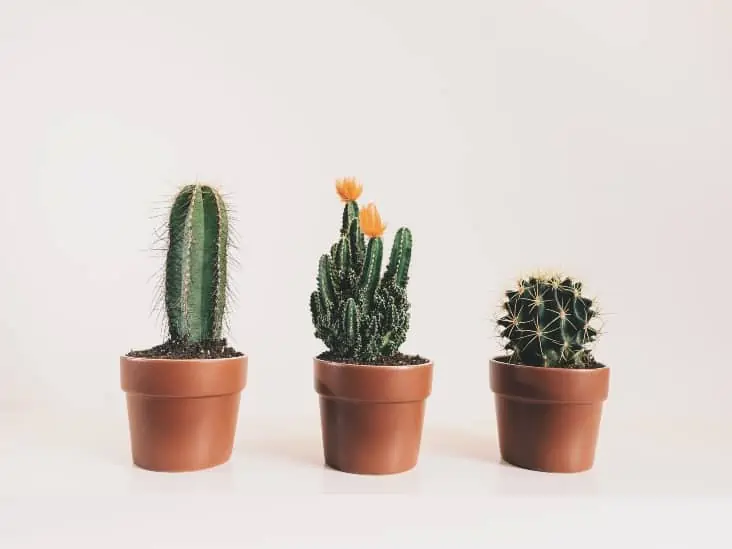
Three cactus plants on a pot.
Small younger cactus will often need more water since their growth rate is high.

3. Soil’s Role in Cactus Hydration Requirements

Soil Composition and Water Retention

The soil mix used for cacti is paramount in regulating how much water the plants hold onto. Ideal cactus soil should possess a fine balance between moisture retention and the ability to let excess water escape swiftly through the pot’s drainage holes. A soil that drains well keeps roots from standing in water, reducing the risk of rot.

  • Sandy Soil: Increases drainage and prevents water-logged roots.
  • Pebbles or Grains: Enhance soil structure and aeration.
  • Organic Material: Provides essential nutrients and retains moisture efficiently, permitting brisk drying as well.
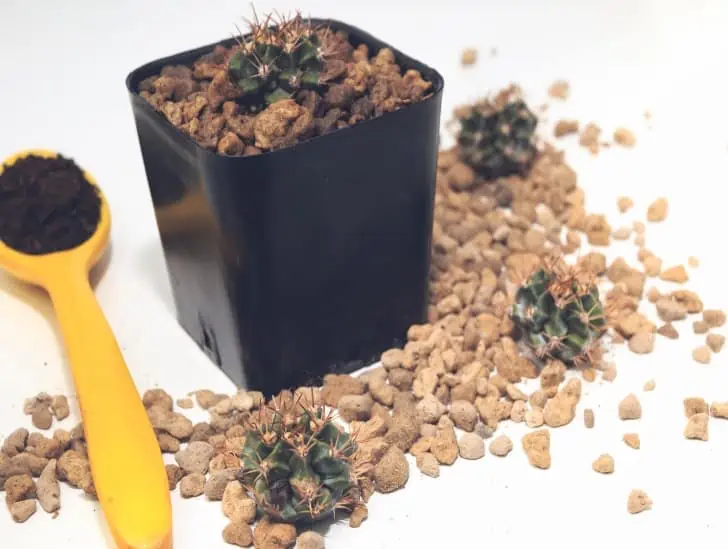
Cactus soil and equipment for planting.
You can make your own potting mix to ensure once you water, it drains effectively.

Customizing Your Potting Mix

Making a custom potting mix can be more cost-efficient and ensures optimal drainage tailored to your cactus type:

  • Desert Cacti Blend:
    • Mix equal parts sandpumiceperlite, or vermiculite with pre-prepared potting mix.
    • Aim for a quick-drying, light mix that does not retain excessive water.
  • Tropical Cacti Blend:
    • Integrate one part coarse builder’s sand with two parts potting mix base of ground fir bark mixed with peat moss or coconut coir.
    • This blend should retain slightly more moisture to cater to tropical species’ needs.

Note: Whether sandy or pebbly, it’s crucial that your soil type is porous enough to facilitate quick water passage while hitting the right mark of moisture delivery to the cactus roots.

Assessing Drainage and Moisture Level

Before you plant or repot, testing your soil for proper drainage ensures that your mix meets your cactus’s specific needs. Discard compact and heavy topsoil if present, as it can hinder water flow and air circulation.

  • Moisture Assessment: Using a touch-test or a moisture meter helps gauge if the soil has dried out completely before the next watering.
  • Soil Condition: A homogeneous, lump-free soil signifies a well-blended mixture.

Once your cactus is settled in the correct type of soil prepared as above with all ingredients stirred evenly, water the plant thoroughly to establish a healthy water cycle right from the start.

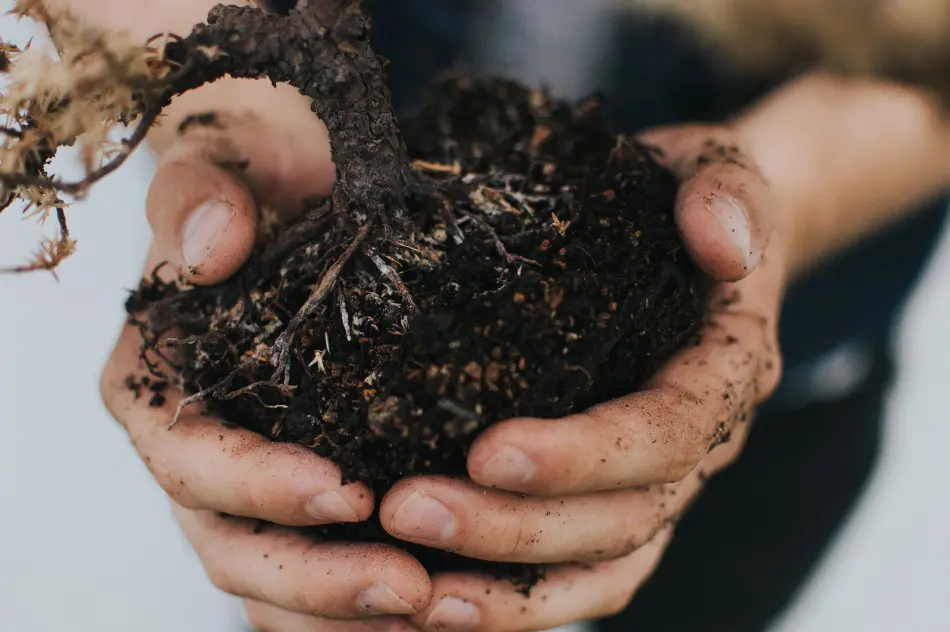
Person holding the plant from the pot.
Soil is a crucial aspect of growing cactus as it determines if it retains or drains the water

4. Seasonal Watering Patterns for Cacti

Chilly Season Care

In the cooler months, cacti enter a rest phase and their growth pauses as temperatures fall. To accommodate this dormancy, watering should be reduced, with a good rule of thumb being moistening the soil once every four weeks.

Reawakening Period Nourishment

With the arrival of milder weather, cacti begin to emerge from their dormant state. The increase in natural precipitation serves as a cue for watering needs, which generally translates to hydrating cacti once per week to support their renewed growth.

Heatwave Hydration

The rise in heat during summer leads to faster soil drying. Cacti in this season may need water more frequently—up to two or three times per week, depending on the specific climate and soil dryness. It’s essential to check the soil manually to determine when water is necessary.

Autumn Adjustments

When autumn temperatures stay above 40 degrees Fahrenheit, a weekly watering is a good practice to maintain. Consistent soil moisture helps cacti adapt to the changing conditions as they prepare for cooler months ahead.

5. Choosing the Right Containers for Your Cacti

Container Material and Watering Frequency

Different materials used for cacti containers can affect how quickly the soil dries and how often you need to water these resilient plants. It is crucial to understand the properties of each container type to ensure the health of your cacti.

Cactus plant on the container.
The container will determine the amount of water

Clay Containers

Clay containers are excellent for promoting soil aeration due to their porous nature. Unglazed options tend to wick away moisture, which can be beneficial for cacti that thrive in dry conditions. However, you must regularly monitor soil moisture levels, as these pots can dry out more rapidly than others, requiring more frequent watering. These containers offer a steady temperature for the plant but can be more expensive and may crack in cold weather.

Earth-colored Pots

Characterized by their natural clay construction, these pots are similar to ceramic but typically unglazed. Their porosity allows for quick drainage and breathability for the roots, requiring more attentive watering schedules to prevent the soil from drying out too fast. They are lightweight and reasonably priced but should be protected from freezing temperatures to prevent cracking.

Monkey tail cactus in a clay pot.
The clay absorbs moisture from the potting soil, especially if the cactus prefers dry soils.

Synthetic Pots

Lightweight and versatile in design, synthetic pots, made from materials like plastic, are widespread in plant cultivation. They can retain moisture longer due to their non-porous nature, which means less frequent watering is necessary. Nonetheless, additional care is needed to ensure the soil does not remain overly wet, which could harm cactus roots.

Woven Containers

These containers are crafted from a mix of resin and fibers, offering the look of traditional pots with the added benefit of durability and resistance to weather conditions. Those designed specifically for cactus care usually come with built-in drainage holes. If using fiberglass containers, be cautious with watering, and do so only when the soil has dried out completely.

Metal Pots

Offering a sleek and durable option, metal pots can be used for cacti with proper care. They are not typically designed with drainage in mind, so watering should be minimized and carefully controlled to avoid root issues. In warm environments, metal can conduct heat excessively, potentially causing harm, so consider placement carefully.

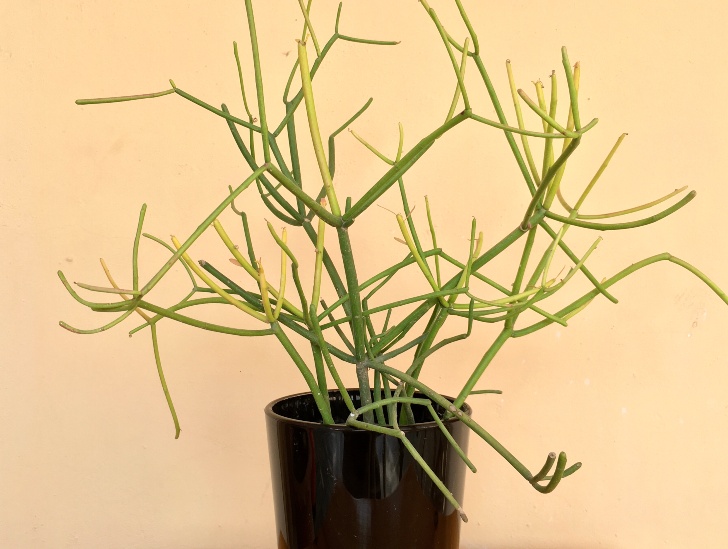
Pencil cactus in a black plastic pot.
They are light and can be crafted to look like terracotta or ceramic pots.

Wooden Planters

Natural and rustic, wooden plant containers provide an attractive and sturdy option. They retain moisture and can be slower to dry out. To prevent potential root rot, cacti in wooden containers should be watered less frequently. A plastic liner can be beneficial to protect both the wood and the cactus’s roots from moisture damage.

In all cases, ensure that your chosen container has proper drainage, which is vital for cactus health. If drainage is lacking, consider using bottom watering techniques or a saucer of water to allow the plant to absorb moisture from the bottom up. Implement good drainage practices, be it through the use of containers with drainage holes or by manually controlling the watering amount to create an ideal growing environment for your cacti.

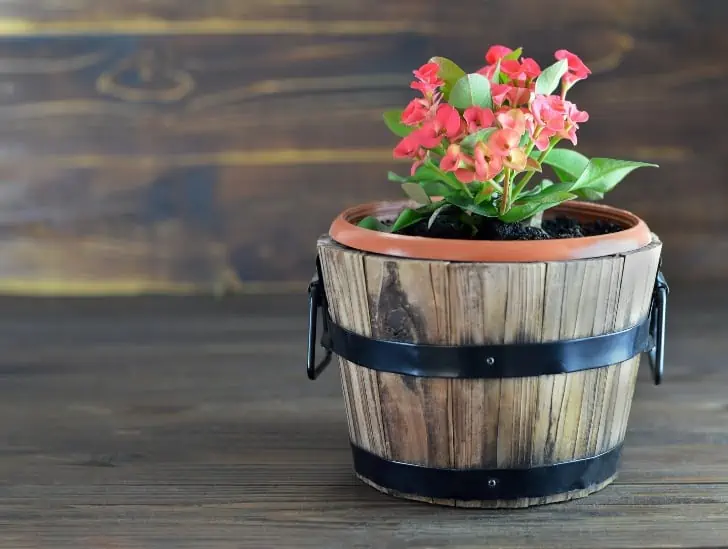
A plant in a wood pot container.
These types of containers hold moisture in and are slow to dry out completely.

6. Watering Considerations for Cacti Based on Location

Watering Techniques for Cacti Inside Homes

To properly maintain indoor cacti, understanding their water retention in leaves and stems is key. These plants are prone to root rot if overwatered, and can shrivel up when not receiving enough water. During the active growth period, water should be applied until excess flows out of the pot’s drainage holes — this is critical to removing any build-up of salts in the soil.

  • Frequency: In the growing months, watering roughly every 10 to 14 days is appropriate.
  • Dormancy: Check for soil dryness and offer water only every three to four weeks in their dormant phase.
  • Seasonal heating: Consider a humidity tray or a humidifier to rebalance moisture levels when indoor heating is in use, mitigating the dry conditions that heaters create.

Observation is a reliable guide; if the cactus appears lackluster, it may need an increased watering schedule. Aim to provide less water rather than more to avoid complications from overwatering.

Cactus plants outside on clay pot.
Outdoor cacti Vs Indoor cacti

Optimizing Watering Practices for Outdoor Cacti

Cacti grown outdoors experience a different environment from their indoor counterparts, demanding an adjusted watering strategy. Moisture levels in the soil should guide your watering decisions.

  • Moisture Checking: Utilizing a moisture meter can prevent both over- and underwatering. Insert the probe carefully into the soil, taking care not to harm the roots, and consult the meter to judge when watering is needed.
  • Growth Season Watering: Increase watering frequency to once every 7 to 10 days, ensuring full soil saturation until water drains freely from container holes.
  • Dormant Season: Similar to indoor cacti, limit watering to once every three to four weeks. You’ll eventually recognize the plant’s needs by its appearance and behavior.

The best time for watering outdoor cacti is in the morning, allowing the plant to hydrate adequately before the hotter part of the day, which helps prevent potential heat stress and sunburn. This consistent schedule will help in maintaining a robust and thriving cactus.

Remember, both indoor and outdoor cacti are sensitive to their environments, and successful watering largely depends on observing and responding to the plant’s conditions. Whether dealing with the controlled climate indoors or the variable elements outside, adjust your watering practices to align with the needs of your cacti.

 7. Optimal Water Types for Cacti Care

Considerations for Softened Water

Utilizing water that has undergone mineral removal processes, commonly involving sodium or potassium, one must exercise caution. If this treated water carries high sodium levels, it can accumulate within the soil, potentially leading to dehydration and nutrient uptake issues in cacti.

Impact of Hard Water on Cacti

Hard water, characterized by its higher content of calcium and magnesium, is known to leave residue on cacti and in the soil. Over time, this can be harmful to the plants. To mitigate the negative impact, repotting every one to four years might be necessary, as this can remove the accumulated minerals.

Benefits of Harvested Rainwater

Rainwater is fundamentally optimal for cacti irrigation, due to its balanced mineral content. Being a seasonal resource, collecting rainwater when possible for subsequent use is a valuable practice. Additionally, blending tap water with stored rainwater can temporarily lower the concentration of salts in the soil, though periodic repotting is still advised to ultimately reduce salt accumulation.

For cleansing mineral deposits from a cacti, a mild solution can be created by combining a tablespoon of vinegar with distilled water or rainwater. Using a cotton ball dipped in this mixture, one can gently clean any mineral stains present on both the cactus and its container.

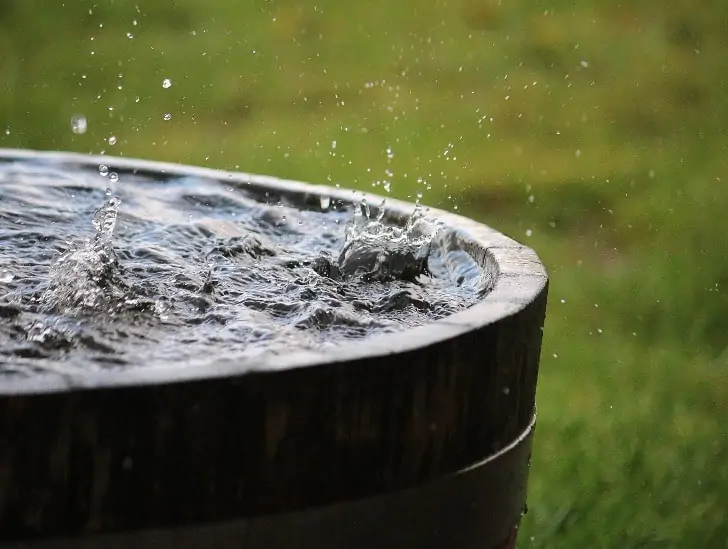
A water in a water container.
Since rainwater is not available year-round, you can store the water for later use.

8. Understanding Cactus Species and Their Water Needs

Cacti exhibit diverse water requirements, largely influenced by their native habitats. Species originating from rainforest regions—such as the Christmas cactus—thrive with more frequent watering and retain moisture well. In contrast, desert cacti, like the Prickly Pearflourish with less water and demand fast-draining containers to prevent root rot and promote healthy growth.

Appropriate Watering Patterns Based on Habitat:

  • Desert Varieties:
  • Rainforest Varieties:
    • Can tolerate more moisture
    • Pots that retain some water
    • Regular watering to echo humid environments

Understanding the species of cactus one owns is critical; it allows for a more targeted care approach, ensuring the plant not only survives but thrives in its new environment.

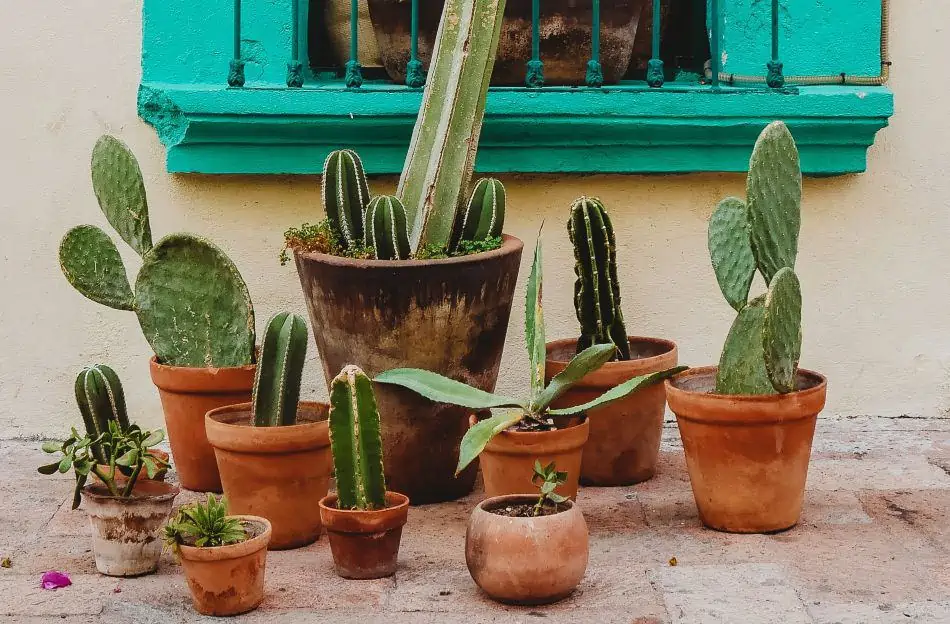
TOp view of cactus plants in different containers.
The idea is to know the specific species so that you can water it accordingly

9. Selecting the Appropriate Pot Size

When it comes to repotting your cactus, the choice of pot size plays a crucial role in the plant’s well-being. A well-sized pot ensures proper drainage, preventing excess water from causing root rot—a common issue in oversized containers. Here are key considerations:

  • Small Pots: Suitable for keeping the soil from staying wet too long. Typically, such pots may require watering weekly, but always check the soil’s dryness first.
  • Larger Pots: These retain moisture longer, extending the time between watering sessions to 4-6 weeks. Be cautious, as prolonged wet soil can harm the roots.
  • Optimal Pot Size: Upon repotting, choose a pot that’s roughly 10% wider than the cactus’ width to accommodate growth without excess space.

Remember, a cactus thrives when its roots are neither too dry nor too wet. Thus, finding the balance through the right pot size is essential.

10. Considerations for Cactus Lighting

Sun Exposure and Watering Frequency:

  • Direct Sunlight: Increases soil drying, leading to more frequent watering needs.
  • Indoor Placement:
    • South-facing windows: Cacti demand regular watering due to increased light.
    • North-facing windows: Cacti require less frequent watering due to reduced light.

11. Identifying Watering Issues in Cactus Plants

Signs of Underwatering in Cactus

A dehydrated cactus presents distinct visual cues that it’s not receiving enough water. These indicators include:

  • A lighter coloration, indicating water depletion.
  • Shriveling of the cactus body as water reserves become utilized.
  • The plant’s surface feeling brittle or bone-dry upon touch.
  • Observable drooping or collapse of the structure.
  • Noticeable decrease in pot weight due to moisture loss.

Correcting underwatering is straightforward. Proper hydration can restore the plant’s vigor within several days.

Recognition and Implications of Overwatering

Overwatering poses a serious threat to cactus well-being, often leading to decay and fungal infections. The hints of excess moisture are:

  • Swollen, discolored areas trending toward brown or black.
  • Softening of tissue, particularly at the base, signaling rot.
  • A mushy appearance and texture, contrasting the typical firmness of a healthy cactus.

The root system suffers significantly during overwatering, becoming vulnerable to rot, hindering its ability to nourish the plant.

Addressing Root Rot

If root rot is suspected due to the above symptoms, a root inspection is vital. Healthy roots appear white, while infected ones are darkened. Salvaging a partially affected cactus involves:

  • Excising the decayed roots with sterilized shears.
  • Replanting in fresh soil to encourage recovery.

Sanitize all tools post-use to forestall spreading the disease.

Watering Techniques for Cacti

Tailor the watering method to the specific needs of your cactus species. Some well-established methods include:

  • Saturation watering, allowing excess water to drain freely.
  • Bottom watering by placing the plant in a saucer until the soil is moist halfway up.
  • Drip watering with a hose for gradual soil hydration.

Understanding the cactus variety and its environmental adaptations informs the appropriate watering regime and method.

Small cactus plants in a small pot.
When your cactus show signs of underwatering, water it thoroughly. It should bounce back to healthy leaves and stems in a few days

Essential Insights on Cactus Hydration

Spring and Summer Care: During these growth-centric seasons, cacti require adequate hydration, which promotes cell growth, flowering, and fruit development.

  • Observation is Key: Owners should observe their cacti to learn specific hydration needs.
  • Replicating Natural Habitat: Aim to emulate the plant’s natural environment for optimal growth.

Note: When buying a cactus, gather information about its native conditions to better recreate its preferred habitat at home.

Do Cacti Need Sun? Understanding Their Light Requirements

Cacti are a diverse group of plants that have adapted to a variety of lighting conditions over time. Found in a range of habitats from dense forests to barren deserts, these resilient plants have developed unique ways to survive. Commonly associated with arid desert environments, many people assume that all cacti thrive in intense sunlight. However, this is a simplification, as different species have adapted to various degrees of sun exposure. While sunlight is a crucial element for photosynthesis and the overall health of a cactus, the amount and intensity of light required can significantly vary from one cactus species to another.

Understanding the specific sunlight needs of cacti is key to ensuring their growth and vitality. For some cacti, direct sunlight fuels their development and flowering, while others may prefer the dappled light of a forest understory. The light requirements of cacti can dictate not only their health but also their ability to flower and produce seeds. Moreover, as the seasons change, so do the light conditions, and understanding how to care for cacti as these conditions vary is essential for any enthusiast or gardener. By placing a cactus in its ideal lighting situation, whether it is the full desert sun or the indirect light of an indoor setting, these fascinating plants can flourish.

Key Takeaways

  • Sunlight is critical for cactus health, but needs vary across species.
  • Cacti have adapted to different light environments, influencing care practices.
  • Seasonal changes impact light availability and cactus care routines.

The Importance of Sunlight for Cactus Health

Cactus plants rely heavily on sunlight for essential processes such as photosynthesis and have adapted to handle intense desert light conditions. The way they utilize and respond to sunlight is pivotal to their health and success as a desert plant.

Photosynthesis and Sunlight

Cacti engage in photosynthesis to convert sunlight into the energy they need for growth. They differ from other plants in their method of photosynthesis, using a process called CAM (Crassulacean Acid Metabolism) that allows them to minimize water loss in arid environments. Cacti must absorb sufficient sunlight to effectively convert carbon dioxide and water into glucose and oxygen, which are vital for their survival and continued growth.

Sun-Induced Stress and Adaptation

While cacti thrive in sunlight, they can also experience sunburn if exposed to too much direct light, especially when not acclimated. Cacti exhibit a range of adaptations to manage intense sunlight, such as growing spines that provide shade and reducing the surface area exposed to direct sunlight. Over time, these adaptations have enabled cacti to flourish in the harsh conditions of the desert.

Growth and Etiolation

Without adequate sunlight, cacti may exhibit etiolation, where they grow elongated and pale as they seek out more light. This stretching can weaken the plant and make it susceptible to damage. Utilizing a grow light might be necessary in conditions where natural sunlight is insufficient to prevent etiolation and maintain healthy growth. Maintaining the right balance of light exposure is crucial to prevent etiolation and ensure that cacti remain robust and healthy.

Cacti Light Requirements and Environments

Understanding the light requirements of cacti is crucial for their survival and growth. These resilient plants have diverse needs based on their natural habitats, the environments they are placed in, and the specific species.

Cacti Natural Habitats

Cacti originate primarily from desert environments, where they have adapted to thrive under conditions of intense sunlight and arid climates. They are accustomed to experiencing direct sunlight for the majority of the day. For instance, species like the prickly pear are well-suited for outdoor desert landscapes, often basking in sunlight for ample periods.

Indoor vs. Outdoor Cacti

When cultivating cacti indoors, it is important to mimic their natural environment to some extent. Indoor cacti should be placed in a bright location, such as a windowsill, ideally a south-facing window. This ensures they receive a minimum of 4 to 6 hours of sunlight daily, simulating their native conditions. In contrast, outdoor cacti can tolerate more direct sunlight, although care should be taken to prevent sunburn in extremely harsh conditions.

Species-Specific Sunlight Needs

Different cactus species have varying sunlight requirements. The Christmas cactus (Schlumbergera), for example, does not require as much direct sunlight as desert-dwelling cacti and can even prosper in shade or indirect light. It’s essential to research the specific species of cactus to provide the appropriate amount of light, whether placing them indoors or outdoors, to ensure their health and longevity.

Caring for Cacti in Various Light Conditions

Cactus care requires understanding their specific light requirements and knowing how to adjust to different conditions to maintain their health and growth.

Managing Sun Exposure

Cacti typically flourish under conditions that provide ample sunlight. Full sun species need approximately 10-12 hours of sunlight, but exposure beyond 14 hours can lead to sun damage. For those living in environments where the natural light is too intense, creating partial shade can protect cacti from excessive exposure. Shade tolerant cacti may suffice with less sunlight and can thrive in conditions that offer filtered light.

Utilizing Artificial Light

For indoor cacti or those grown in regions with insufficient sunlight, artificial light, specifically designed cactus grow lights, can be an excellent substitute. These grow lights should provide a spectrum of light that mimics natural sunlight, supporting photosynthesis and healthy growth. It’s typically recommended to position grow lights 6-12 inches above the cactus and use them for 12-14 hours daily to replicate natural light cycles.

Preventing Sun Damage and Disease

Excessive direct sunlight can lead to sun damage characterized by bleaching or yellowing of the cactus. To mitigate this, cacti should be gradually acclimated to sunlight, especially if they were previously grown in lower light conditions. Diseases like root rot can be a result of overwatering, especially in conjunction with inadequate light. Ensuring a proper balance of light and moisture is critical to prevent such issues and keep cacti healthy.

Cactus Care Throughout the Seasons

Cactus care requires adapting to seasonal changes, particularly light and watering needs. Understanding these variations is key to maintaining healthy, vibrant, and blooming cacti.

Seasonal Light Variations

Spring and Summer: Cacti thrive with ample natural light. They require full sun, defined as at least 6 hours of direct sunlight daily, to maintain their vibrant colors and prevent becoming leggy. Shade-tolerant cacti may survive with less, but adequacy of light is critical during their active growth periods.

Fall: As the natural light shifts, so should the care for cacti. During fall, indirect but bright light supports blooming for varieties such as the Thanksgiving cactus, which prepares to flower at this time.

Winter: Cacti enter a dormant state in the cooler, darker winter months. Diminished light is appropriate, and the plants benefit from a rest period with reduced sunlight and a cooler environment, mimicking their natural habitat.

Watering and Light during Growth Periods

Active Growth: In spring and summer, cacti need consistent watering as they soak up the sun. When the soil is dry to the touch, watering encourages growth and flower development. Always ensure pots have drainage to prevent waterlogging.

Dormancy: Less is more when it comes to winter watering. Cacti require water just enough to prevent shriveling. Along with less light, reduced watering helps cacti rest and store energy for the next growth cycle.

Advanced Considerations for Optimal Cactus Care

When cultivating cacti, gardeners must account for specific light requirements and adapt care strategies to changing climates to ensure survival.

Measuring Light Intensity

Measuring the intensity of sunlight reaching a cactus is vital for its health, particularly in cultivation. Lux meters are tools that provide gardeners with the ability to quantify light levels, informing them whether their cacti are receiving the optimal amount of sunlight. Cacti thrive with substantial light; however, the exact lux requirement varies by species. Gardeners should aim for an environment that mimics the plant’s natural habitat to prevent issues like etiolation.

Specialized Cacti Care Strategies

Cacti have evolved using crassulacean acid metabolism (CAM) photosynthesis, an adaptation allowing them to withstand drought by opening their stomata at night to minimize water loss. Gardeners should recognize the unique watering and feeding schedules that these plants demand, which differ greatly from those of other plants. Research suggests that providing conditions for adequate nighttime ventilation can optimize this natural process, enhancing growth and health.

Adapting to Changing Climates

Climate change is creating more erratic weather patterns, including increased heatwaves, which affect how cacti are cared for. Gardeners need to protect cacti from extreme temperatures that could damage the plants. Strategies include adjusting the location of potted cacti to more shaded areas during heatwaves or increasing water slightly to compensate for higher evaporation rates while still being mindful of overwatering risks. Monitoring weather forecasts and climate trends assists in making informed decisions about cactus care and ensuring their survival in a shifting environment.

Cactus Turning Yellow: Causes and Solutions

When a cactus begins to turn yellow, it can be a cause for concern for any plant enthusiast. The vibrant green hues typically associated with these resilient desert plants may lose their luster, signaling that the cactus is not in optimal health. This discoloration can be attributed to a range of factors, from environmental stresses and care mistakes to natural life cycle processes. It is crucial to observe the cactus closely and consider the various reasons why this change in color might be occurring.

Understanding the specific cause of yellowing is essential as it guides the necessary steps for intervention and recovery. Environmental conditions such as lighting and watering practices play a significant role in the health of a cactus, and improper care can lead to stress and discoloration. Simultaneously, biological factors like age, pests, and disease may also contribute to a cactus turning yellow. By identifying the root cause, cactus owners can take appropriate measures to restore the plant’s natural color and prevent future occurrences of yellowing.

Key Takeaways

  • Yellowing in cacti indicates a potential health issue or natural aging process.
  • Environmental factors, incorrect care, and biological influences can cause discoloration.
  • Correct diagnosis and proper care are crucial for the recovery and maintenance of cacti.

Recognizing Signs of Yellowing in Cacti

Identifying yellowing in cacti is critical for maintaining plant health. Yellowing can manifest in various ways. Here are some signs to look for:

Color Changes: Initially, one may notice a subtle shift in color from vibrant green to a pale, lightened hue. Over time, the yellowing can become more pronounced, with certain areas or the entire plant turning a distinct yellow color.

Region Specific Yellowing: Yellowing can occur in specific regions of the cactus. It’s essential to observe whether the yellowing is uniform or localized to gauge the possible causes.

Texture and Firmness: Alongside coloration, the texture of the cactus may change. A healthy cactus should feel firm, while a yellowing cactus may feel soft or mushy, especially at the base.

Leaf and Stem Appearance: In cacti that possess leaves, such as epiphyllum, one might observe yellow leaves. The stems of cacti can also show signs of yellowing, often starting at the base and moving upwards.

Sign of YellowingDescriptionPossible Significance
Pale Color TransitionSubtle lightening of green hues.May indicate early stages of yellowing
Distinct Yellow ColorPronounced yellow coloration.Possible advanced yellowing
Soft or Mushy TextureLoss of firmness in the plant tissue.Potential overwatering or rot
Localized DiscolorationYellowing in certain areas of the plant.May suggest disease or injury presence

Careful observation and timely response can make a significant difference in the treatment of a yellowing cactus. By recognizing these signs, one can take steps to diagnose the underlying issues and rectify them to restore the cactus to good health.

Common Causes of Yellowing

When a cactus turns yellow, it often indicates a cultural or environmental issue. Addressing the problem early can prevent further damage and promote recovery.

Watering Issues

Overwatering is a primary cause of yellowing in cacti, leading to root rot and a yellow discoloration that typically starts at the base of the plant. Conversely, underwatering can also result in yellowing due to a lack of water necessary for maintaining healthy tissues. It’s crucial to establish a consistent watering schedule that takes the plant’s environment into account and provides adequate moisture without excess.

Light and Sun Exposure

Cacti require a significant amount of sunlight to thrive. However, too much direct sunlight, particularly in already hot climates, can cause sunburn, leading to a yellowing or whitening of the cactus skin. Conversely, insufficient light exposure can cause cacti to become pale and yellow. Partial shade may be necessary for some species or during the hottest part of the day.

Soil and Nutrient Factors

The right soil mix is critical for cacti health. A mix that drains well helps prevent overwatering and root rot. Nutrient deficiencies due to lack of nutrients in the soil can cause yellowing, which may be corrected with appropriate fertilizer application. Using the wrong soil type can also hinder nutrient uptake and water drainage.

Temperature and Environmental Stress

Cacti are well-suited to arid environments and can suffer when exposed to extreme temperature fluctuations or drought-like conditions. Cold temperatures, particularly in winter, can induce stress and yellowing in cacti not adapted to the cold.

Pest Infestation and Diseases

Pests like spider mites, scale, and mealybugs can cause stress and damage that results in yellowing. Diseases such as fungal infections or root rot can also manifest as yellowing tissues, often accompanied by other signs like soft spots or blackening. Chlorosis, a condition caused by a lack of chlorophyll, can lead to yellow leaves and is often associated with pest infestations or disease.

Prevention and Care for Healthy Cacti

Maintaining vibrant and healthy cacti requires attention to their specific needs, such as appropriate watering, lighting, soil conditions, and temperature adaptation. By carefully managing these aspects, one can prevent common issues like yellowing and ensure the longevity of these resilient plants.

Optimal Watering Practices

Cacti thrive when the watering schedule mimics their natural arid environment. Allow the soil to completely dry out between waterings, and use drainage holes in pots to prevent overwatering. Conversely, underwatering can be just as detrimental as too much water. The goal is to strike a balance, typically watering once a week during growing seasons and reducing the frequency in winter.

Suitable Lighting and Placement

Provide cacti with adequate sunlight while avoiding prolonged exposure to intense direct sunlight that may scorch them. A spot with bright, indirect light or partial shade is ideal. Cacti positioned in indoor environments benefit from south or east-facing windows to access the light without the harsh midday sun.

Soil and Fertilization Techniques

The best soil mix for cacti is one that drains quickly yet retains essential nutrients. A commercial cactus mix or a homemade blend with sand and perlite can be used. Regarding fertilization, use a balanced, water-soluble fertilizer during the growing season to prevent nutrient deficiency, but avoid fertilizing in the dormant winter months.

Adapting to Temperature and Seasonal Changes

Cacti are best suited to stable conditions that don’t fluctuate dramatically. Most species prefer temperatures between 55°F to 85°F (13°C to 29°C). During temperature changes, especially in winter, reduce watering and protect your cacti from frost to replicate their natural growth cycle, allowing them to rest.

Diagnostic and Intervention Strategies

To maintain the health of a cactus, it’s crucial to accurately diagnose the issue causing yellowing and then apply specific treatments or corrections. This section details methods for confronting diseases, tackling pest problems, and adjusting care practices regarding watering and nutrition.

Identifying and Treating Diseases

Diseases such as fungal infections and root rot contribute to cactus yellowing. Identification hinges on the presence of soft, brown roots or a base, and a musty odor. Treatment may involve removing affected parts and applying a fungicide. In the case of root rot, it’s imperative to consider repotting the plant in fresh, well-draining soil.

Addressing Pest Related Issues

Pests like spider mites, scale, and mealybugs can siphon nutrients from a cactus, leading to yellowing. Observing for small bugs or cottony deposits is key to identification. An insecticidal soap or a neem oil solution are efficient treatments, directly targeting the pests while protecting the cactus.

Correcting Watering and Nutritional Imbalances

Proper watering practices are fundamental for cactus health. Overwatering can induce yellowing, signaling the need to reduce frequency and ensure good drainage. Conversely, underwatering causes the cactus to deplete its stored water, leading to pale or yellowing tissue. A balanced approach with occasional fertilizer application can rectify nutrient deficiencies. Regular checks and adjustments can prevent these issues from progressing.

The strategies detailed above arm a cactus enthusiast with the necessary steps to diagnose and address yellowing in their plants, thus sustaining a thriving and visually appealing cactus collection.

Restoration and Recovery of Yellowing Cacti

When a cactus turns yellow, it is crucial to diagnose the cause to revive the plant effectively. Recovery involves several steps that one must undertake with careful attention to detail.

Steps to Save a Yellowing Cactus:

CauseAction Required
OverwateringReduce watering frequency, ensure proper drainage.
UnderwateringWater the plant generously until soil is moist.
Poor LightingMove cactus to a location with adequate sunlight.
Nutrient DeficiencyFertilize with a cactus-specific formula.

An overwatered cactus often has a soft, yellow appearance. The primary step in restoring such a cactus is to adjust watering habits. They should allow the soil to dry out completely before the next watering session.

Conversely, an underwatered cactus can appear yellow and wrinkled. One should hydrate the cactus until the soil is evenly moist, not saturated, to replenish the moisture levels.

If the yellowing is due to inadequate lighting conditions, relocating the cactus to an area that receives a full day of direct sunlight can be beneficial, especially since most cacti thrive under such conditions. However, when direct sunlight is the cause of yellowing, they should shift the plant to a location with bright, indirect light.

Lastly, the yellowing might signify a nutrient deficiency; a specialized fertilizer can help restore the cactus to its natural color. During recovery, monitoring the cactus for changes in its condition is essential, as is adjusting care routines to avoid future instances of yellowing.

Caring for Cacti in Special Conditions

Properly maintaining cacti under unconventional outcomes requires a nuanced set of strategies tailored to their specific needs during dormancy, in diverse climates, and through processes of repotting and propagation.

Handling Cacti During Dormancy

During the dormant period, typically in the winter, cacti slow down their growth and require different care than in the growing season. They should be kept in a cooler, but not freezing, environment, with temperatures ideally between 55°F and 65°F. Watering should be minimized to prevent rot, providing just enough to keep the cactus from shriveling.

Managing Cacti in Varied Climates

Cacti can thrive in an arid environment but may experience stress when conditions deviate from their native habitats. In humid climates, it’s critical to ensure good drainage by using a soil mix with perlite or sand and having pots with drainage holes. Conversely, in cooler areas, protecting cacti from excess moisture and cold is the priority.

Repotting and Propagation Methods

When cacti outgrow their current container, or for propagation, handling the plant should be done cautiously. Use a soil mix designed for drought-resistant plants to provide adequate drainage and avoid compacting the soil. Repot during the active growing season and water sparingly until the plant shows new growth, indicating that it has acclimated. To propagate, cut a piece from a healthy cactus, allow the cut to callous, and plant it in a suitable potting mix.

Advanced Cactus Care Techniques

Advanced cactus care involves strategic practices that ensure a cactus not only survives but thrives. This section covers meticulous pruning, acclimating cacti to new environments, and understanding water quality’s significant impact on cactus health.

Pruning and Maintenance

It’s essential to prune cacti periodically to remove dead or unhealthy tissue and promote healthy growth. Cacti benefit greatly from careful removal of any yellow or damaged parts. Use sterilized, sharp tools to prevent infection. Remember, pruning also regulates growth and helps maintain an attractive shape.

Acclimatization to New Environments

Cacti often require time to acclimatize to new temperature and light conditions, particularly if they are moving from an indoor to an outdoor environment or vice versa. Gradually expose them to new conditions over several days to reduce shock, closely monitoring for signs of stress such as discoloration.

Water Quality and Its Effects

Water is a pivotal factor in cactus care – too much or too little can be detrimental. Use distilled water or rainwater to avoid the potential negative effects of chemicals in tap water. Cacti prefer infrequent, deep waterings that mimic drought and downpour cycles, rather than frequent, shallow watering. This approach encourages the development of a robust root system capable of withstanding drought-resistant conditions.

Further Insights and Best Practices

When tending to cacti, one must recognize that these succulents require particular care to maintain their vibrant color and health. Despite being low-maintenance plants, a few best practices can prevent them from turning yellow.

It is crucial to ensure that the cactus plant gets adequate sunlight. While these plants thrive in bright conditions, too much direct sunlight can cause sunburn. They benefit from sunlight that mimics their natural habitat, which is typically bright and indirect. Cacti prefer to be in a sunny spot that is protected during the hottest part of the day.

Watering requirements are unique for cacti. Overwatering can lead to root rot, while underwatering can cause the plant to shrivel and turn yellow. The best practice is to provide a thorough watering once the soil has completely dried out. This usually means less frequent watering than one might expect.

Common IssueIndicationBest Practice
OverwateringSoft, yellow patchesAllow soil to dry out
UnderwateringWrinkled, pale stemsThorough soak, then dry
SunburnWhite or yellow spotsFiltered sunlight
Poor DrainageWatersoaked spotsWell-draining soil

Ensuring proper drainage is another critical aspect. Cacti are not fond of ‘wet feet’ and require well-draining soil. Thus, containers should have drainage holes, and heavy, compact soils should be avoided.

Lastly, inspect the cactus routinely for signs of pest infestation, which can also lead to yellowing. If pests are detected, one should isolate the affected plant and treat it with appropriate measures, such as insecticidal soap or neem oil applications.

These insights should enable enthusiasts to provide the care needed to keep their cacti vibrant and healthy.

Tall Cactus Care: Essential Tips for Healthy Growth

Tall cacti are among the most iconic and recognizable plants in arid environments. With their remarkable height and unique silhouettes, these plants can rise dramatically out of the desert landscape. The towering stature of some cacti species allows them to dominate their surroundings and serve as a testament to their survival capabilities in harsh climatic conditions. These succulents have adapted to thrive in environments where water is scarce, possessing a variety of structural and physiological traits to maximize water retention and minimize loss.

The growth and development of tall cacti are a marvel of nature’s engineering. They must balance the need to reach sunlight with stability in windy and sometimes eroded environments. Varieties like the Saguaro and the Mexican fence post cactus are excellent examples of plants that not only withstand drought conditions but also grow to impressive heights. Their ability to stock water and nutrients enables them to survive long periods without rainfall. Not only are these towering flora adapted to survive in the outdoors of their native habitats, but they often become focal points in landscapes and cultivated gardens around the world, where conditions permit.

Key Takeaways

  • Tall cacti are drought-tolerant succulents that adapt to harsh, arid climates.
  • These plants demonstrate significant growth, reaching remarkable heights outdoors.
  • Their unique physical characteristics have practical uses and cultural significance.

Scientific Classification

In the world of plant taxonomy, the classification of cacti is both intricate and definitive. The scientific categorization system allows botanists and enthusiasts alike to identify and understand the unique characteristics that define these resilient plants.

Cactaceae Family

The Cactaceae family is known for encompassing a wide variety of cacti that are classified as succulents. This plant family is characterized by its members’ ability to retain water effectively, an adaptation that allows them to thrive in arid environments. Members of the Cactaceae family share several distinctive features such as areoles, from which spines, branches, or flowers grow.

Genera and Species:

  • Genera: There are approximately 127 recognized genera within the Cactaceae family.
  • Species: These genera account for around 1,750 species, showcasing a vast diversity in form and size.

Major Characteristics:

  • Photosynthesis: Cacti perform a unique form of photosynthesis called CAM (Crassulacean Acid Metabolism), which is highly efficient in arid conditions.
  • Stem Structure: Unlike many other plants, cacti store water in their stems rather than their leaves, often presenting a thick and fleshy appearance.

Habitat:

  • Cacti predominantly inhabit regions such as the Sonoran and Chihuahuan deserts in North America, along with other desert and semi-desert areas across the globe.
  • Some species, like the saguaro (Carnegiea gigantea), have adapted to specific desert conditions, exemplifying the family’s ability to specialize and survive in challenging environments.

Famous Tall Cacti Types

Tall cacti are a formidable presence in the landscape, often symbolizing the resilience and beauty of desert ecosystems. Among these, some species are particularly renowned for their impressive height and unique characteristics.

Saguaro Cactus

Scientific Name: Carnegiea gigantea

The Saguaro Cactus is iconic to the Sonoran Desert and can grow to lengths in excess of 40 feet. Not only is it celebrated for its size, but it is also known for its ancient lifespan, living upwards of 150 years or more.

Mexican Giant Cardon Cactus

Scientific Name: Pachycereus pringlei

Known as the tallest cactus in the world, the Mexican Giant Cardon Cactus is magnificent and holds a record for reaching heights over 60 feet. It’s an impressive specimen commonly found in the deserts of Baja California, Mexico.

Organ Pipe Cactus

Scientific Name: Stenocereus thurberi

The Organ Pipe Cactus features a unique growth structure resembling the pipes of an organ, reaching upwards of 25 feet. Typically native to Mexico, this cactus thrives in arid conditions and flowers with striking white blooms.

Mexican Fence Post Cactus

Scientific Name: Pachycereus marginatus

The straight, columnar form of the Mexican Fence Post Cactus makes it a popular choice for landscaping. It can grow tall, beyond 16 feet, and is known for the neat rows of spines that accent its ribs, similar to a natural fence.

Totem Pole Cactus

Scientific Name: Lophocereus schottii var. monstrosus

The Totem Pole Cactus is recognized for its smooth and spineless skin, featuring patterns of lumps and bumps reminiscent of a totem pole. It can grow upwards of 20 feet, adding a unique sculptural element to the spaces it inhabits.

Growth and Development

The growth and developmental phases of cacti are influenced by their species, age, and environmental conditions. Throughout their lifespan, these plants showcase varied growth rates and heights, with tall cacti exhibiting notable upright growth habits.

Cactus Age and Height

As cacti age, they may achieve impressive heights, depending on the species and growing conditions. Some tall cactus species such as the Saguaro (Carnegiea gigantea) and African Baobab (Adansonia digitata) grow steadily over many years and can reach over 60 feet. The height of a cactus is directly tied to its age; older cacti are typically taller, but this growth takes decades due to their slow-growing nature.

Slow-Growing Varieties

Many cacti are known for their slow-growing attributes. Varieties such as the Barrel cactus (Ferocactus) and the Christmas cactus (Schlumbergera) may take years to reach maturity. For instance, the Saguaro cactus, which can tower at heights of 40 to 60 feet, only grows about 1 to 1.5 inches annually during the first eight years of life. This incremental growth reflects the persistence and resilience of these plants in harsh environments.

Upright Growth Habits

Tall cacti typically exhibit upright growth habits to maximize their exposure to sunlight, which is crucial for their survival in desert conditions. Their structured, vertical growth patterns support their ability to reach significant heights while maintaining stability. Growth habits can vary among species; some, like the Peruvian Apple Cactus (Cereus repandus), grow in a columnar fashion, while others may branch out as they mature.

Adaptations and Habitat

Cacti showcase remarkable adaptations that enable their survival in extreme conditions. These adaptations are critical for thriving in habitats such as the arid Sonoran Desert.

Drought Tolerance

Cacti have evolved to maximize water storage and minimize loss, making them extraordinarily drought-tolerant. Their roots spread out widely just under the soil surface to absorb water quickly during rare rainfalls. The stem’s thick, fleshy structure acts as a reservoir, storing water during prolonged dry spells. Spines, which are modified leaves, provide shade and reduce airflow around the cactus, lessening water loss.

Desert Ecosystem Survival

To survive in hot, dry climates, cacti possess a range of structural adaptations. The stem’s green surface not only stores water but also engages in photosynthesis, due to the absence of true leaves which could result in more water loss. Their reproduction methods are also adapted to desert ecosystems, with flowers that open at night to attract pollinators like moths and bats, a time when desert temperatures are cooler and more hospitable.

Physical Characteristics

The quintessential features of tall cacti include their formidable spines, diverse and vibrant flowers, as well as their structural arms. These characteristics are not only distinctive but also instrumental to the plant’s survival in arid environments.

Cacti Spines

Cacti spines, which are actually modified leaves, serve several functions such as water conservation and plant protection. For instance, the Mexican Fence Post Cactus stands tall with its bright white margins accentuating the spines. These spines are positioned closely together, creating a formidable barrier for any potential predators.

Cactus Flowers

Flowers of tall cacti are often large and showy, providing a stark contrast to their spiky exterior. These flowers can range in color, displaying white flowers or even red flowers, depending on the species. The Saguaro Cactus, specifically, is renowned for its sizeable large white flowers, which bloom under the night sky.

Cactus Arms

The arms of a cactus are not just for show; they play a critical role in reproduction and growth. Saguaros, for example, may not develop arms until they are 70 years old, but once they do, these arms help increase the plant’s reproductive capacity by providing more surfaces for flowers and fruits. The structure also aids in photosynthesis, allowing the cactus to thrive in its sun-drenched habitat.

Practical Uses and Cultivation

Tall cactus plants are valued for both their aesthetic appeal and practical applications, notably in xeriscaping projects due to their minimal water requirements and the consumption of their edible parts. Cultivating these towering succulents involves specific considerations to ensure their optimal growth and utility.

Edible Parts of Cacti

Many cacti bear edible fruits that can be consumed fresh or made into jellies and other preserves. The fruits of the Saguaro and the Prickly Pear, for example, offer nutritional benefits and are widely used in various culinary preparations. To ensure fruit production, one must provide conditions mimic to their natural habitats, with ample sunlight and well-draining soil.

Cacti in Landscapes

Incorporating tall cactus plants into rock gardens and xeriscape designs not only provides structural diversity but also conserves water resources. Plants such as the towering Saguaro or the sculptural Organ Pipe cactus can serve as focal points in such landscapes. When cultivating these plants, it’s crucial to provide ample space for growth and to consider sunlight patterns, as most cacti thrive in full sun.

By taking into account the specific needs of each species, including sun exposure, drainage, and spacing, gardeners can successfully integrate tall cacti into their outdoor spaces, fulfilling both practical and ornamental purposes.

Conservation and Environmental Impact

The ongoing well-being of tall cacti is deeply intertwined with their utility in desert ecosystems and their ability to thrive under harsh conditions. Efforts to conserve these plants are crucial given their role in supporting biodiversity and maintaining the balance of desert food chains.

Role in Desert Food Chain

Tall cacti, such as the iconic Saguaro (Carnegiea gigantea), serve as a fundamental food source in the desert ecosystem. They provide sustenance to a variety of desert fauna, from nectar-feeding bats to birds that consume their fruit. These cacti also offer shelter and nesting sites for certain birds, making them an indispensable part of the desert ecology. It is essential that conservation measures are taken to protect tall cacti, as their decline could threaten the species that rely on them for survival.

Through a variety of adaptations, tall cacti are able to thrive in extreme environments. Their water storage capabilities, thick skins, and protective spines make them well-suited to life in places where other plants might not survive. However, despite their resilience, tall cacti still face challenges such as climate change and habitat destruction, which can impact their ability to thrive and in turn, affect the larger food web.

Cultivation Challenges and Care

Tall cactus varieties present unique challenges that require specific care strategies. These undemanding plants are often considered easy to care for and low-maintenance, but their impressive height can introduce complications.

Care for Tall Cactus Varieties

When nurturing tall cactus varieties, ensuring sturdy support is paramount. Owners might stake the plant by sinking a support deeply into the soil to prevent leaning or toppling, particularly important for cacti that reach significant heights. The use of soft fabric strips can gently secure the cactus to the stake without damaging the plant.

Pruning becomes necessary when the cactus grows too tall for its environment, which can be done by cutting it back and allowing it to cure for several weeks in indirect light. This process is typically followed by the application of a rooting hormone and repotting in a suitable cactus potting mix.

Pests and Diseases

While tall cacti are relatively low-maintenance, they are not immune to pests and diseases. Common issues include:

  • Mealybugs and spider mites: These pests can be controlled by periodic inspection and when needed, applying insecticidal soap or neem oil.
  • Rot: Caused by overwatering or poor drainage. Ensure that cacti are planted in well-draining soil and watered sparingly to mitigate this risk.

It’s essential to monitor for symptoms such as discoloration or soft spots, which may indicate the presence of pests or disease and prompt timely intervention.

State Symbols and Recognition

Cacti have not only adapted to thrive in harsh desert climates but have also become integral elements of cultural identity within certain U.S. states. Specific species have been designated as state symbols, signifying their unique importance and recognition in the region.

State Wildflower of Arizona

The Saguaro Cactus (Carnegiea gigantea), named to honor philanthropist Andrew Carnegie, is the state wildflower of Arizona. This iconic cactus is celebrated for its towering presence and longevity. The Saguaro Cactus can reach impressive heights, symbolizing the grandeur of Arizona’s desert landscapes.

Cacti Beyond the Americas

While cacti are predominantly associated with the arid regions of the Americas, several species have adapted to environments across the globe. The following is a focused look at such varieties found in Africa.

African Varieties

The African Milk Tree (Euphorbia trigona) often referred to as the African cactus, is a prime example of a cactus-like plant native to the continent. Though not a true cactus, it resembles one due to its upright, columnar growth and spiny ridges. This species thrives in the varied climates of Africa, from the tropical West to the drier South.

  • Common Name: African Milk Tree
  • Scientific Name: Euphorbia trigona
  • Native Regions: West and South Africa
  • Growth Habits: Upright, can reach up to 9 feet tall
  • Appearance: Green stems with V-shaped patterns and sporadic spines

Geographically distant from their American cousins, African varieties like the African Milk Tree showcase the Earth’s evolutionary diversity. They possess adaptations that allow them to conserve water and thrive in less than hospitable environments, much like the cacti of the New World.

Cacti in Arts and Culture

Cacti have long stood as symbols in various forms of art and cultural expressions. Their distinctive shapes and resilience have made them a favorite subject in the Southwestern arts scene, particularly within the United States.

In painting and photography, the stark silhouettes of tall cacti like the Saguaro are often used to represent the beauty and harshness of the desert. Artists such as Georgia O’Keeffe have incorporated cacti in their works to capture the essence of the American Southwest.

The film industry frequently depicts cacti to instantly set a scene in the desert. Their unique forms contribute to the visual storytelling of movies and television shows set in arid landscapes.

In music, references to cacti appear in lyrics to evoke feelings of solitude or to illustrate a Western setting. Country and folk genres, in particular, may use cacti imagery as part of the narrative of life in arid regions.

Cacti also make appearances in literature, acting as metaphors for isolation, survival, and beauty in arid conditions. They are featured in poems, novels, and travel writing.

Here is an illustrative list of cacti’s roles in various cultural contexts:

  • Visual Arts: Symbol of desert beauty
  • Photography: Emblematic desert subject
  • Film: Scenic desert background element
  • Music: Lyrically symbolizes Western themes
  • Literature: Metaphor for resilience

Cacti in arts and culture often carry an underlying message of endurance and adaptability, reflecting not just the plants’ biological traits but also a wider human significance.

Vertical Gardening with Succulents and Cacti: A Comprehensive Guide

Vertical gardening with succulents and cacti is a unique way to add greenery to any space, whether indoors or outdoors. Succulents and cacti are ideal plants for vertical gardens due to their low maintenance requirements and water retention abilities. Vertical gardening is a technique that involves growing plants on a vertical surface, such as a wall or a fence, instead of planting them in the ground. It is becoming increasingly popular due to its space-saving benefits and ability to create a stunning visual display.

When it comes to vertical gardening with succulents and cacti, there are a few basics that need to be understood. Choosing the right plants is crucial, as not all succulents and cacti are suitable for vertical gardening. Designing the vertical garden is also important, as it can affect the growth and health of the plants. Building the vertical garden requires some DIY skills, but it can be a fun and rewarding project. Proper irrigation and drainage, as well as soil and growing medium, are also essential for the success of a vertical garden. Finally, maintenance and care are important to keep the plants healthy and thriving.

Key Takeaways

  • Succulents and cacti are ideal plants for vertical gardens due to their low maintenance requirements and water retention abilities.
  • Choosing the right plants, designing the garden, building it, and proper irrigation, drainage, soil, and maintenance are all crucial for the success of a vertical garden.
  • Vertical gardening is a space-saving technique that can create a stunning visual display and is becoming increasingly popular.

Basics of Vertical Gardening

Understanding Vertical Gardens

Vertical gardening involves growing plants vertically, utilizing wall space to create a green wall of foliage. This method is particularly well-suited for succulents and cacti, as these plants are adapted to thrive in arid environments and require minimal maintenance. The vertical succulent garden provides an aesthetically pleasing and space-efficient way to incorporate greenery into indoor and outdoor spaces.

Benefits of Vertical Gardening

Vertical gardening offers several advantages, including maximizing limited space, reducing the need for extensive ground-level garden beds, and providing an innovative way to display succulents and cacti. It allows for better air circulation around the plants, minimizing the risk of pests and diseases. Additionally, vertical gardens can serve as natural insulation, regulating indoor temperatures and improving air quality.

By incorporating succulents and cacti into a vertical garden, individuals can create visually striking displays while benefiting from the low-maintenance nature of these plants.

Choosing Plants for Vertical Gardens

Vertical gardens offer a unique way to incorporate greenery into limited spaces. When it comes to selecting plants for vertical gardens, succulents and cacti are ideal choices due to their low-maintenance nature and adaptability to various environments.

Why Succulents and Cacti are Ideal

Succulents and cacti are well-suited for vertical gardens due to their ability to thrive in arid conditions. Their water-storing capabilities make them low-maintenance, requiring minimal watering and care. Additionally, their compact and versatile nature allows them to flourish in vertical arrangements, making them an excellent choice for creating visually appealing displays in limited spaces.

Selecting the Right Varieties

When choosing succulents and cacti for vertical gardens, it is essential to select varieties that are well-suited for vertical growth. Opt for trailing succulents such as String of Pearls (Senecio rowleyanus) or Burro’s Tail (Sedum morganianum) that gracefully cascade down the vertical structure, adding a cascading effect. For cacti, varieties such as Christmas Cactus (Schlumbergera) and Easter Cactus (Hatiora gaertneri) can be excellent choices, as they are not only visually appealing but also well-adapted to vertical growth.

In summary, succulents and cacti are versatile and low-maintenance plants that are well-suited for vertical gardens, making them an ideal choice for creating stunning and space-efficient green displays.

Designing Your Vertical Garden

When it comes to designing a vertical garden with succulents and cacti, there are numerous creative ideas for layout that can be explored. Utilizing wooden boxes, pallet gardens, or living walls can provide an interesting and visually appealing backdrop for the plants. For instance, arranging the succulents in a tiered fashion within wooden boxes can create a cascading effect, adding depth and dimension to the overall design.

Incorporating aesthetics into the vertical garden design is essential for achieving an attractive and harmonious display. Using a variety of succulent species with different colors, textures, and shapes can create a visually stimulating arrangement. Additionally, strategically placing cacti with unique forms and sizes can add an intriguing focal point to the garden. Incorporating a mix of succulents and cacti in a balanced and visually pleasing manner can enhance the overall aesthetic appeal of the vertical garden.

Building a Vertical Garden

When it comes to building a vertical garden, there are two main aspects to consider: the DIY project and choosing the right planters.

DIY Vertical Garden Projects

One of the most important things to consider when building a vertical garden is the project itself. There are a lot of different DIY projects available online, each with their own unique features and benefits. Some popular DIY projects include using wooden pallets, picture frames, and shadow boxes as the base for the planter.

It’s important to choose a project that fits your skill level and budget. Some projects require more tools and materials than others, so it’s important to do your research and choose a project that you feel comfortable with. Additionally, it’s important to consider the size of the project. A larger project may require more time and effort to complete, so it’s important to choose a project that fits your schedule and lifestyle.

Choosing the Right Planters

Another important aspect of building a vertical garden is choosing the right planters. Succulent planters come in a variety of shapes, sizes, and materials, so it’s important to choose planters that fit your needs and preferences.

When choosing planters, it’s important to consider the size and shape of the plant. Some succulents and cacti grow better in smaller planters, while others require more space to thrive. Additionally, it’s important to consider the material of the planter. Some materials, like terra cotta, are better suited for certain types of succulents, while other materials, like plastic, may not be as durable over time.

Overall, building a vertical garden with succulents and cacti can be a fun and rewarding project. By choosing the right DIY project and planters, you can create a beautiful and unique garden that will thrive for years to come.

Irrigation and Drainage

Watering Systems for Vertical Gardens

Vertical gardens with succulents and cacti require a watering system that prevents waterlogging and provides adequate moisture to the plants. One option is to use a drip irrigation system that delivers water directly to the roots of the plants. This system can be set up with a timer that automatically waters the plants at specific intervals, saving water and ensuring that the plants receive a consistent amount of moisture.

Another option is to use a wick watering system, which involves placing a wick in the soil of each planter box. The wick draws water from a reservoir located at the bottom of the vertical garden and delivers it to the plants. This system is easy to set up and maintain, and it also helps prevent over-watering.

Preventing Root Rot

Succulents and cacti are prone to root rot, a condition that occurs when the roots are exposed to too much moisture. To prevent root rot, it is important to ensure that the soil in the planter boxes is well-draining and that excess water is able to drain away.

One way to improve drainage is to mix sand or perlite into the soil. These materials help create air pockets in the soil, allowing excess water to drain away from the roots. Another option is to use a soilless mix, such as a peat-based mix, which is lightweight and provides excellent drainage.

In addition to improving drainage, it is important to avoid over-watering the plants. Succulents and cacti are adapted to dry conditions and can survive for long periods without water. Watering the plants only when the soil is dry to the touch can help prevent root rot and ensure that the plants thrive in the vertical garden.

Soil and Growing Medium

Best Soil for Succulents and Cacti

When it comes to growing succulents and cacti, the right soil is crucial. These plants prefer well-draining soil that allows excess water to drain away quickly. A growing medium that retains too much moisture can lead to root rot and other problems.

The best soil for succulents and cacti is a well-draining soil mix that is specifically designed for these types of plants. This type of soil mix typically contains a high percentage of inorganic materials such as perlite, pumice, or coarse sand, which help to improve drainage and prevent soil compaction.

Organic seeds can also be used to grow succulents and cacti, but it’s important to use a well-draining soil mix even when starting from seed. This will help to prevent damping-off, which is a fungal disease that can kill young seedlings.

When choosing a soil mix for succulents and cacti, it’s important to avoid mixes that contain too much organic matter, such as peat moss or compost. These materials can retain too much moisture and lead to problems with root rot.

In summary, the best soil for succulents and cacti is a well-draining soil mix that is specifically designed for these types of plants. This type of soil mix typically contains a high percentage of inorganic materials such as perlite, pumice, or coarse sand, which help to improve drainage and prevent soil compaction. It’s important to avoid mixes that contain too much organic matter, such as peat moss or compost, and to use a well-draining soil mix even when starting from seed.

Maintenance and Care

Routine Care for Vertical Gardens

When it comes to maintaining a vertical garden with succulents and cacti, it’s important to note that these plants are generally low-maintenance. Regular watering is essential, but it’s crucial to avoid overwatering, as succulents and cacti are prone to root rot in excessively moist conditions. It’s recommended to check the soil moisture levels before watering and ensure that the soil dries out between watering sessions. Additionally, periodic pruning may be necessary to remove any dead or decaying foliage and promote healthy growth.

Managing Sunlight and Photosynthesis

Succulents and cacti thrive in bright, indirect sunlight. When designing a vertical garden, it’s crucial to position the plants in a location where they can receive ample sunlight for photosynthesis. However, it’s important to shield them from direct, intense sunlight, as this can lead to sunburn and damage the plants. Utilizing shading techniques or selecting a suitable location can help regulate the amount of sunlight the plants receive, ensuring optimal conditions for photosynthesis and growth.

Indoor and Outdoor Vertical Gardens

Vertical gardens with succulents and cacti can be adapted for both indoor and outdoor settings. While outdoor vertical gardens offer more space and sunlight, indoor vertical gardens can be just as beautiful and provide a unique way to bring nature into your home.

Adapting Vertical Gardens for Indoors

When adapting a vertical garden for indoor use, there are a few things to consider. First, the amount of light available will be limited, so it is important to choose succulents and cacti that can thrive in low-light conditions. Some good options for low-light indoor vertical gardens include snake plant, ZZ plant, and pothos.

Second, it is important to choose a location for the vertical garden that is not in the way of foot traffic and that won’t get knocked over easily. A good location for an indoor vertical garden could be a wall in the living room, kitchen, or bedroom.

Third, it is important to choose the right type of container for the vertical garden. Containers with drainage holes are important to prevent water from accumulating at the bottom of the container and causing root rot. A good option for indoor vertical gardens is a modular system that can be easily mounted to the wall.

Outdoor Vertical Garden Considerations

When creating an outdoor vertical garden, there are a few things to consider. First, it is important to choose a location that gets plenty of sunlight. Succulents and cacti thrive in full sun, so a south-facing wall or balcony is ideal.

Second, it is important to choose the right type of container for the vertical garden. Containers made of durable materials like metal or plastic are ideal for outdoor use. It is also important to choose containers with drainage holes to prevent water from accumulating and causing root rot.

Third, it is important to choose the right type of soil for the vertical garden. Succulents and cacti require well-draining soil to prevent root rot. A good option for outdoor vertical gardens is a mix of cactus soil and perlite.

Overall, with the right planning and care, vertical gardens with succulents and cacti can be a beautiful addition to any indoor or outdoor space.

Companion Planting

Companion planting is the practice of growing different plants together in a way that benefits each other. In a vertical garden with succulents and cacti, companion planting can help to improve soil fertility, attract beneficial insects, and deter harmful pests.

Integrating Herbs and Vegetables

Herbs and vegetables can be great companion plants for succulents and cacti in a vertical garden. For example, herbs like rosemary, thyme, and basil can repel pests such as aphids, spider mites, and whiteflies. They also add color and fragrance to the garden.

Vegetables like lettuce and peas can also be grown in a vertical garden with succulents and cacti. Lettuce is a great companion plant for succulents because it grows quickly and provides shade for the succulents. Peas, on the other hand, add nitrogen to the soil, which is beneficial for succulents.

When integrating herbs and vegetables into a vertical garden with succulents and cacti, it is important to consider their growing requirements. For example, some herbs prefer full sun, while others prefer partial shade. Similarly, some vegetables prefer cooler temperatures, while others prefer warmer temperatures.

To ensure that all plants in the vertical garden thrive, it is important to choose companion plants that have similar growing requirements. This can be achieved by grouping plants together based on their light and temperature requirements.

In conclusion, companion planting is a great way to improve the health and productivity of a vertical garden with succulents and cacti. By integrating herbs and vegetables into the garden, gardeners can create a diverse and beautiful space that benefits both the plants and the environment.

Sustainability and Environmental Benefits

Vertical gardening with succulents and cacti has numerous benefits for the environment. One of the most significant benefits is water conservation. Succulents and cacti are drought-tolerant plants that require minimal watering. Vertical gardening with these plants can help save water, especially in areas where water is scarce.

Conservation Through Vertical Gardening

According to Coohom, vertical gardening with succulents and cacti can reduce water usage by up to 50%. This is because the plants are grown in a vertical arrangement, and the water is supplied directly to the roots. This reduces water wastage, as water does not evaporate as quickly as it would in traditional gardening methods.

In addition to water conservation, vertical gardening with succulents and cacti has other environmental benefits. According to Mike’s Backyard Garden, vertical gardens can help reduce noise levels. The plants absorb sound waves, reducing noise pollution in the surrounding area. This is especially beneficial for those living in urban areas where noise pollution is a significant problem.

Another benefit of vertical gardening with succulents and cacti is that it can help reduce air pollution. According to Conserve Energy Future, plants absorb harmful toxins and release oxygen into the air. This can help improve air quality, especially in areas where air pollution is a significant problem.

Overall, vertical gardening with succulents and cacti is a sustainable and eco-friendly way to garden. It can help conserve water, reduce noise pollution, and improve air quality. With these benefits, it is no wonder that vertical gardening with succulents and cacti has become increasingly popular in recent years.

Troubleshooting Common Issues

Vertical gardening with succulents and cacti can be a fun and rewarding experience, but sometimes problems can arise. Here are some common issues that gardeners may encounter and how to deal with them:

Dealing with Pests and Diseases

Succulents and cacti are generally hardy plants that are resistant to pests and diseases, but they can still fall victim to a few common problems. Here are some of the most common pests and diseases that can affect succulents and cacti:

  • Mealybugs: These small, white, cotton-like insects can be found on the leaves and stems of succulents and cacti. They suck the sap from the plant, causing it to weaken and wilt. To get rid of mealybugs, wipe them off the plant with a cotton swab dipped in rubbing alcohol. You can also use a neem oil spray to kill them.
  • Spider mites: These tiny, red or brown insects spin webs on the leaves of succulents and cacti and suck the sap from the plant. To get rid of spider mites, spray the plant with a mixture of water and dish soap. You can also use a neem oil spray.
  • Root rot: This is a fungal disease that can affect succulents and cacti if they are overwatered or planted in soil that doesn’t drain well. To prevent root rot, make sure your plants are planted in well-draining soil and water them only when the soil is completely dry.
  • Powdery mildew: This is a fungal disease that appears as a white, powdery substance on the leaves of succulents and cacti. To get rid of powdery mildew, spray the plant with a mixture of water and baking soda. You can also use a neem oil spray.

By following these tips, you can keep your vertical garden of succulents and cacti healthy and thriving.

How to Easily Propagate Mangaves at Home? Step-by-Step Guide

A queen victoria agave plant.

Mangaves, the enchanting botanical fusion of Agave and Manfreda, have taken the succulent world by storm with their striking appearance and remarkable hardiness. These captivating succulents are a perfect blend of Agave’s architectural elegance and Manfreda’s distinctive colors and patterns. But what’s even more fascinating is their propensity for propagation, making it possible for you to multiply your Mangave collection and share their beauty with friends and family.

So, how can you propagate Mangaves at home easily? Mangaves can be propagated through leaf cuttings, offsets (pups), stem cuttings, and seed germination. The most common and easiest propagation method is through offsets or stem cuttings. While seed germination is a bit more challenging, it can also be rewarding. You only need a little patience, and soon, you’ll have your Mangave family flourishing.
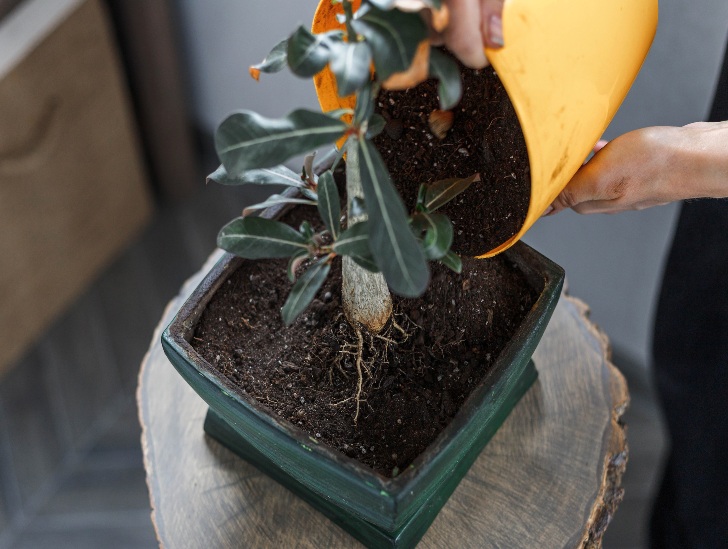
Today, we embark on a journey into the world of Mangave propagation, unveiling the secrets to multiplying these unique succulents effortlessly. Read on to find out everything you need to know.

Mangaves: Quick Overview

Mangaves are like nature’s delightful experiments, blending the toughness of Agave with the creativity of Manfreda. These unique succulents have caught the eye of plant lovers around the world.

They come from a mix of two different succulent families. The first part of their name, “Man,” comes from Manfreda, while “gave” comes from Agave.

Manfreda, a relative of Agave, adds exciting colors and patterns to the Mangave family. This hybrid combination is like a succulent superhero, blending the best traits of both plants.

Some Mangaves have rosette shapes, with leaves forming a circle like a beautiful green rose. Others have long, arching leaves that can make them look like elegant, flowing fountains. No matter the pattern, they always look cool.

One thing that makes Mangaves special is their leaves. They can be bold and spiky or soft and wavy, and they often have amazing colors and patterns.

Some Mangaves have spots, stripes, or even splashes of red, making them stand out in the succulent world. Plus, these plants are tough cookies, able to handle hot sun and dry spells like champs.

A variegated agave.
No matter the pattern, they always look cool.

These succulents are highly versatile, meaning you can grow them in your garden or pots. Their spiky or flowing forms can add a touch of drama to your outdoor space. In pots, they look fantastic on a patio or as an indoor houseplant.

If you’re looking for easy-to-care-for plants, Mangaves are a great choice. They don’t need much attention. Just give them lots of sunlight, well-draining soil, and don’t water them too often. They’ll reward you with their unique beauty.

How to Propagate Mangaves at Home

Now that you have a little background on these lovely succulents, let’s dive into how to propagate them at home.

Propagating Through Offsets (Pups)

Offsets are small baby plants that grow around the base of the parent Mangave. These tiny replicas are genetically identical to the parent plant and can easily be separated and replanted to create new individuals.

Propagation of Mangave through offsets is one of the most reliable and straightforward methods.

You’ll need a healthy Mangave plant that has produced offsets (pups) at its base. Use a clean, sharp knife or pruning shears to separate the offset from the parent plant.

However, you need to prepare the offset before making the cut. Carefully remove any surrounding soil to expose its base and root system. Inspect the offset to ensure it is healthy, with no signs of rot, pests, or disease.

Agave pups.
Use a clean, sharp knife or pruning shears to separate the offset from the parent plant.

Gently and carefully separate the offset from the parent plant. Make the cut close to the base of the offset to minimize damage.

Once separated, place the offset in a dry, shaded area for a day or two to allow the cut end to callus. This step helps prevent rot when planting.

Prepare a pot or container with a well-draining succulent or cactus potting mix for propagation.

After the callusing period, plant the offset in the prepared container. Create a small hole in the potting mix, insert the offset (root end down), and gently pack the soil around it to secure it in place.

While it is not necessary for Mangave offset propagation, you can use rooting hormone to encourage root development if you wish.

Water the newly planted offset lightly, ensuring the soil is evenly moist but not soaked. Overwatering can lead to root rot, so exercise caution.

Timing is crucial for offset propagation. Wait until the offset (pup) has grown large enough to be separated from the parent Mangave plant.

Typically, this occurs when the offset has several roots and a few inches of leaf growth. Do not rush this process because the offset needs to be strong enough to thrive on its own.

Growing from offset is the fastest way to propagate Mangaves, with a high success rate.

Propagating Through Stem Cuttings

Stem cuttings are another easy and fast way of propagating Mangaves. This method works best if you have a leggy or stretched-out Mangave plant with a long stem.

Use a clean, sharp knife or pruning shears to cut off a small stem section. Ensure you have several inches of stem with some leaves at the top.

A agave stem.
Stem cuttings are another easy and fast way of propagating Mangaves.

Leave the cutting in a dry, shaded area for a day or two to callus over before planting. Then, plant the cutting in well-draining soil and water lightly, as you would with offsets.

With proper care and environmental conditions, your Mangave cutting will develop roots and new leaves in a few weeks. Be patient, and you’ll soon have a new Mangave plant.

Propagating Through Leaf Cuttings

Leaf cuttings are an excellent way to propagate Mangaves, especially if you have limited space or want to grow several plants from one. This method may take longer than offsets and stem cuttings, but it’s still worth trying.

Choose a healthy, plump leaf from the parent Mangave plant. Use clean scissors or pruning shears to cut the leaf off at the base, ensuring a clean cut without jagged edges.

Place the cutting in a dry, shaded area to callus for a day or two before planting. Once it is calloused, prepare a pot with well-draining soil and insert the leaf-cutting into it, burying about half of it.

A agave plant with water droplets.
Choose a healthy, plump leaf from the parent Mangave plant.

After a few weeks, you should see new roots forming at the base of the leaf. Once these roots are a few inches long, you can gently transplant the new Mangave plant into its own container or garden bed.

Propagating Through Seed Germination

Propagating Mangave through seed germination is a rewarding but relatively slow method. The success rate can vary due to the hybrid nature of Mangave plants, but it’s a great way to grow unique plants.

Ensure you have a healthy Mangave plant that has produced mature seeds. Collect the seeds when they are fully ripe and ready for propagation.

Once you have collected your seeds, the next thing you need to do is fill the seed tray or small pots with the seed-starting mix, leaving some space at the top. Moisten the mix slightly before sowing the seeds.

Carefully scatter the Mangave seeds evenly over the surface of the seed-starting mix. Do not bury the seeds; they need light to germinate.

Agave seed on hand.
Ensure you have a healthy Mangave plant that has produced mature seeds.

Place the seed tray or pots in a shallow container or tray and cover them with clear plastic wrap or a plastic dome. This creates a mini-greenhouse effect and helps retain moisture.

Place the containers in a warm, brightly lit area without direct sunlight. The seeds should germinate within two to four weeks.

Once the seedlings have developed a few leaves and are strong enough to handle, transplant them into individual pots with well-draining soil. Continue caring for them as you would with mature Mangave plants.

Growing your Mangave plants from seeds is a fantastic way to experiment with new hybrids and create unique plants. However, it can take several years for the plant to reach maturity, so patience is key.

How Do I Care for Newly Propagated Mangave Plants?

When propagating Mangaves, providing them with the right care and environment is essential to ensure success. Here are some tips for caring for newly propagated Mangave plants:

  • Proper Lighting: Like mature Mangave plants, offsets, stem cuttings, leaf cuttings, and seedlings require bright but indirect sunlight. Place them in a location where they can receive at least six hours of sunlight daily.
  • Adequate Watering: Mangaves are drought-tolerant plants, and too much water can lead to root rot. Water newly propagated plants sparingly, only when the soil is dry.
  • Proper Drainage: Ensure the pot or container you use for propagation has proper drainage holes. This will prevent water from accumulating and causing root rot.
  • Suitable Soil: Mangaves thrive in well-draining soil, so use a cactus or succulent potting mix when propagating them. You can also add some sand or perlite to improve drainage.
  • Temperature and Humidity: Mangaves prefer warm temperatures between 65-85°F and low humidity levels. Avoid placing them in rooms with high humidity, such as bathrooms.

Final Thoughts

Propagating Mangave plants is a fun and rewarding process that allows you to create new plants from your existing ones.

Whether you propagate through offsets, stem or leaf cuttings, or seed germination, each method has advantages and challenges.

By following these methods and tips, you can successfully propagate your Mangave plants and expand your collection.

Revolutionize Your Garden with Pumice: Here’s How

A pumice on a cactus pot.

Creating organic soil is vital to growing healthy succulents. To achieve this, it is critical to select the right soil amendment. Pumice is one of the best options available. This lightweight volcanic rock has become increasingly popular among gardeners due to its many benefits. Pumice is formed from volcanic eruptions, producing frothy lava with high gas bubbles. As the lava cools, these bubbles are trapped, resulting in a porous and lightweight stone.

So, how can you revolutionize your garden with pumice? Pumice plays a crucial role in improving the drainage and aeration of soil, which are both essential for succulent growth. Adding pumice to your garden soil also helps with water retention, preventing overwatering and root rot. Its porous nature also allows for better absorption of nutrients by plant roots. Furthermore, pumice is environmentally friendly and sustainable. It is a natural resource that does not harm the earth when mined. It can also be used as a top-dressing option for succulent plants. This helps to reduce soil compaction and aids in preventing weeds from growing. The rough texture of pumice also acts as a natural barrier against pests, making it an excellent choice for organic gardening.

This blog post discusses everything you need to know about pumice and how you can use it to revolutionize your garden. Read on to find out everything you need to know.

What Is Pumice?

Pumice is the result of volcanic activity. When volcanoes erupt, they expel a mix of hot gases and molten lava. As this lava cools rapidly, it traps the expanding gases, creating a frothy, sponge-like structure.

These pockets of trapped gas define the unique characteristics of pumice, such as its lightweight nature and exceptional porosity.

One of pumice’s distinctive features is its lightweight composition. Unlike dense rocks, pumice has a low density, due to its porous structure.

It can float on water; even the largest pumice stones are significantly lighter than other volcanic rocks.

A closeup image of a pumice.
When volcanoes erupt, they expel a mix of hot gases and molten lava.

Pumice stones often appear in shades of white, gray, or even pale green, depending on the mineral content of the volcanic source.

The numerous pores and cavities in pumice are a boon for soil. Pumice’s exceptional porosity allows it to absorb and hold water and nutrients, making it a valuable addition to soil. These tiny pores retain moisture and provide space for oxygen, a vital element for healthy root development.

Pumice has a porous structure, which aids in soil aeration and drainage. When mixed into soil, pumice creates air pockets that allow roots to access oxygen while preventing soil compaction. This promotes root health and overall plant vitality.

Depending on the volcanic source, pumice may contain trace minerals such as potassium, phosphorus, and calcium, which can provide essential nutrients to plants over time. These minerals contribute to the multifaceted benefits of using pumice in soil.

Pumice is an excellent soil conditioner for improving soil structure. It can be incorporated into heavy clay soils to increase drainage and aeration, preventing waterlogged conditions.

Conversely, it can be added to sandy soils to enhance water and nutrient retention. Its ability to balance soil moisture levels makes it a versatile amendment for various soil types.

Using Pumice as a Soil Amendment Option

With its exceptional qualities, pumice can be a game-changer when incorporated as a soil amendment.

Before adding pumice to your soil, choosing the right type of pumice is important. Look for horticultural-grade pumice since it’s been cleaned and screened to remove impurities.

You can typically find pumice at garden centers or online suppliers. Ensure the pumice is dry and free from contaminants.

The ideal ratio of pumice to soil depends on the specific needs of your plants and the existing soil conditions. In general, adding 10-20% pumice to your soil mix can significantly improve aeration and drainage.

You might use a higher percentage for heavy clay soils to enhance drainage, while a lower percentage for sandy soils will help with water retention.

For container gardening, add pumice directly to your potting mix. Blend it thoroughly with the soil, ensuring an even distribution. This will create a well-aerated, fast-draining medium, ideal for container plants.

Fertilizer on the soil mix.
For container gardening, add pumice directly to your potting mix.

Ensure there’s a layer of pumice at the bottom of the pot to prevent soil compaction.

When amending in-ground soil, first determine the type of soil you’re working with. Dig a hole or trench and mix the pumice into the soil you’ve removed.

Add it at the recommended ratio for your specific soil type. Then, place the amended soil back into the hole, creating a pumice-enriched planting area.

Monitoring the moisture levels of your soil regularly is crucial when using pumice. While it enhances drainage, it also improves water retention.

Ensure your plants receive adequate watering, especially during hot and dry periods, to moisten the soil.

After adding pumice as a soil amendment, keep a watchful eye on your plants. Observe their growth, overall health, and response to the amended soil.

Adjust your pumice usage or watering practices as necessary, ensuring your plants receive the right balance of nutrients and moisture.

How To Use Pumice in Your Garden

Pumice is available in different grades and sizes, but the most suitable size for gardening is 1/8″ to 3/8″. It is usually sold in bags, making it easy to handle and apply. Here are some ways you can use pumice in your garden:

  • Add it directly to the potting mix – Mix pumice into your succulent or cactus soil mix for improved drainage and aeration.
  • Use as a top dressing – Spread a layer of pumice on top of your soil to prevent compaction, retain moisture, and deter weeds.
  • Amend garden beds – Mix pumice into your existing garden bed soil for improved drainage and aeration.
  • Use as mulch – Mulching with pumice can help regulate soil temperature and prevent water loss through evaporation.
  • Create a pumice garden bed – For a more extensive succulent or cactus garden, consider creating a raised bed filled with pumice for optimal drainage and moisture control.

What Are the Advantages of Using Pumice as a Soil Amendment Option?

Let us now explore the numerous benefits of incorporating pumice into your soil:

1. Enhanced Aeration

Pumice’s porous structure creates air pockets in the soil, improving aeration. This is crucial for healthy root growth because plant roots require plenty of oxygen to thrive.

2. Improved Drainage

Pumice is exceptional at promoting drainage. When mixed into heavy or clayey soils, it helps excess water to move away from the root zone efficiently.

A bonsai plant repotted.
Pumice is exceptional at promoting drainage.

This prevents waterlogged conditions that can lead to root rot and other issues. In sandy soils, pumice aids in retaining moisture, ensuring a consistent water supply for plants.

3. Root Health and Development

Healthy roots are the foundation of healthy plants. Pumice’s ability to enhance aeration and drainage directly contributes to robust root systems. This, in turn, leads to better nutrient uptake and overall plant vitality.

4. Water Retention

While pumice excels at promoting drainage, it also retains moisture. The numerous pores in pumice can hold water, providing a steady supply to plants, even during dry spells. This makes it a versatile option for various soil types and climates.

5. pH Neutral

Pumice is pH neutral, meaning it won’t alter the alkalinity or acidity of your soil. This makes it a versatile choice for many plants, whether they prefer acidic or alkaline growing conditions.

6. Nutrient Retention

Pumice can help your soil retain essential nutrients. As water passes through the pumice-amended soil, it holds onto nutrients, preventing them from leaching away. This is valuable in maintaining healthy nutrient levels for your plants.

A caudex bonsai in a pot.
Pumice can help your soil retain essential nutrients.

7. Weed Suppression

Using pumice as a top dressing or mulch in your garden can help suppress weeds. Its presence on the soil surface makes it difficult for weed seeds to germinate and establish, reducing the need for manual weeding.

8. Environmental Sustainability

Pumice is a natural and sustainable soil amendment. It is mined from volcanic deposits, and its use minimizes the need for chemical additives or artificial soil conditioners. This aligns with eco-friendly gardening practices and minimizes the environmental impact.

9. Versatility

Pumice is a versatile soil amendment used in various gardening applications. Whether you’re working with container plants, in-ground gardens, or specialty gardens like succulent arrangements, pumice can suit your needs.

What Are the Disadvantages of Using Pumice as a Soil Amendment Option?

While pumice offers a range of benefits as a soil amendment, it’s important to consider potential disadvantages to make an informed decision about its use in your garden.

Horticultural-grade pumice can be relatively expensive, especially if you have a large garden or plan to use it as the primary component of your soil mix. Its cost may be a limiting factor for gardeners on a tight budget.

Pumice is a relatively inert material, meaning it doesn’t provide significant nutrients to plants. While its ability to retain nutrients is advantageous, it doesn’t supply essential elements such as nitrogen, phosphorus, or potassium. This necessitates the addition of fertilizers to ensure plants receive adequate nutrition.

A sack of soil and a bonsai without a pot.
Pumice is a relatively inert material, meaning it doesn’t provide significant nutrients to plants.

For gardeners working with specific plants that require acidic or alkaline soils, pumice’s pH neutrality may be a disadvantage. It won’t contribute to altering the pH of the soil, which may be necessary for certain plant species.

Final Thoughts

Pumice is a versatile and environmentally friendly soil amendment option that can revolutionize your garden.

Its lightweight and porous structure makes it suitable for various gardening applications, including improving drainage, moisture retention, and root health.

While it may have some limitations, its numerous benefits make it a valuable addition to any garden.

Hanging Succulents Made Easy: A Step-by-Step Guide

Monkey tail cactus hanging.

There’s an undeniable allure to hanging succulents – a touch of greenery that defies gravity and adds life to any room. Whether you want to add visual interest to a bare corner or create an eye-catching display, hanging succulents are the perfect solution. And best of all, they create a living masterpiece that draws the eye and thrives with minimal fuss. In fact, a garden full of hanging succulents is almost every gardener’s dream – and with this step-by-step guide, it’s easier than you might think.

So, how do you create a garden of hanging succulents? The first thing you need to do is gather the necessary materials. These include a growing container with plenty of drainage holes, a potting mix, a small trowel, gloves, a watering can, and sphagnum moss (optional). Prepare your growing container by filling it with potting mix – use a mix specifically formulated for succulents. You can also add sphagnum moss on top of the potting mix, which will help retain moisture in the soil and create a lush look. Choose your succulents. Look for varieties known for their trailing or cascading growth habit, such as string of pearls, burro’s tail, donkey’s tail, and certain types of echeveria. Prepare the succulents and plant them. Water the succulents appropriately before hanging them.

This post demystifies the seemingly intricate process of creating a perfect hanging succulent garden, breaking it down into easy-to-follow steps. Read on to find out everything you need to know.

Hanging Succulents: The Artful Garden

Few plants have captivated the hearts of gardeners worldwide, quite like hanging succulents. These remarkable botanical wonders have surged in popularity for many reasons.

One of the key reasons for the popularity of hanging succulents lies in their extraordinary resilience. As a group, succulents are renowned for their ability to thrive in arid conditions, thanks to their water-storing capabilities.

When these hardy plants take to the air in hanging arrangements, their inherent strength meets an element of elegance, creating a harmonious juxtaposition.

A donkey tail hanging.
One of the key reasons for the popularity of hanging succulents lies in their extraordinary resilience.

Hanging succulents can endure fluctuations in moisture levels and even periods of neglect, making them a perfect choice for both experienced gardeners and beginners.

These plants have an innate ability to transform any space into a work of art. Their cascading growth habit, combined with an astonishing diversity of shapes, sizes, and colors, allows for endless creativity in garden design.

From the delicate tendrils of String of Pearls (Senecio rowleyanus) to the rosette clusters of Donkey Tail (Sedum morganianum), each hanging succulent variety offers a unique visual delight.

The way hanging succulents drape and flow adds depth and dimension to any setting. Whether suspended in elegant macramé planters, woven into living walls, or allowed to spill from hanging baskets, they introduce an element of enchantment and natural beauty.

The way they interact with light, casting intriguing shadows and highlighting their intricate details, further enhances their aesthetic appeal.

Hanging succulents are exceptionally versatile in terms of design possibilities. They effortlessly adapt to a wide range of containers, from rustic terracotta pots to modern geometric planters.

They can be artfully combined with other succulents, trailing vines, or flowering companions to create captivating arrangements that reflect your personal style.

Moreover, hanging succulents have the magical ability to blur the boundaries between indoor and outdoor spaces.

They thrive equally well in well-lit living rooms, sun-drenched patios, or shaded garden nooks. This versatility allows you to seamlessly integrate these botanical masterpieces into various areas of your home or landscape, enhancing the ambiance and aesthetics of each space.

A Step-by-step Guide to Creating a Perfect Hanging Succulent Garden

Now, let’s dive into how you can create your own stunning hanging succulent garden.

Step 1: Gathering Materials

As mentioned earlier, to create a hanging succulent garden, you will need:

A hanging succulent.
Hanging succulents have the magical ability to blur the boundaries between indoor and outdoor spaces.
  • A growing container with ample drainage holes
  • Potting mix specifically formulated for succulents.
  • Small trowel
  • Gloves
  • Watering can
  • Optional: sphagnum moss to retain moisture in the soil and add a lush look.

Step 2: Preparing the Container

Choose a container that is large enough to accommodate your desired number of succulents. Ensure it has ample drainage holes, as succulents do not do well in waterlogged soil. Fill the container with potting mix, leaving some space at the top to accommodate your plants.

Step 3: Prepare the Succulents

Gently remove the succulent plants from their nursery pots. Be careful not to damage the roots. If the roots are tightly bound, you can loosen them slightly. Consider trimming off any dead or damaged roots.

A string of hearts hanging.
Gently remove the succulent plants from their nursery pots.

If you have chosen to use sphagnum moss, wet it before planting the succulents. This will help retain moisture in the soil and create a lush look.

Step 4: Plant the Succulents

Make small holes in the potting mix where you want to place your succulents. Space them evenly, taking into consideration the mature size of each plant.

Insert the succulents into the holes and lightly pack the soil around each plant to secure them in place.

Step 5: Watering

Water the succulents thoroughly but gently until you see water draining from the bottom of the planter. Allow any excess water to drain completely. Be cautious not to overwater because succulents prefer slightly drier conditions.

Step 6: Hang Your Container

Choose an appropriate location for your hanging succulent container. Ensure it receives the right amount of sunlight based on the specific requirements of your succulent varieties.

Typically, bright, indirect light works well for most succulents. You can get creative and hang your container from a tree branch, ceiling hook, or wall bracket.

Step 7: Maintenance

Regularly check the moisture level of the potting mix. Water your succulents when the soil is dry to the touch, which may vary depending on your climate and indoor conditions.

Prune or trim your succulents as needed to maintain the desired shape and size of your hanging arrangement.

A donkey tail hanging.
Regularly check the moisture level of the potting mix.

Fertilize your succulents sparingly, typically during the growing season (spring and summer), using a diluted succulent fertilizer. This step is optional; some gardeners prefer not to fertilize their succulents.

Do Hanging Succulents Need A lot of Water to Thrive?

The simple answer is “no. Like other succulents, hanging succulents prefer the “soak and dry” method to thrive. It means that you should water the succulent thoroughly and allow the potting mix to dry out completely before the next watering session.

However, we must mention that the watering needs of hanging succulents can vary depending on the specific species or variety.

Some hanging succulents, such as the “String of Pearls” (Senecio rowleyanus) and the “String of Bananas” (Senecio radicans), are adapted to more arid conditions and require less water. Others, such as the “Burro’s Tail” (Sedum morganianum), have slightly higher water requirements.

The best way to determine when to water hanging succulents is to observe the soil’s moisture level and the plant itself. Water your succulents when the top inch or two of the potting mix feels dry to the touch.

Do Hanging Succulents Need Direct Sunlight?

As mentioned earlier, most hanging succulents prefer bright, indirect light. However, some varieties can tolerate more intense sunlight, while others may need slightly less light.

It is essential to research the specific needs of your chosen succulent varieties and position them accordingly.

Furthermore, remember that even though succulents are known for their drought tolerance and ability to thrive in bright light, they still need protection from intense midday sun, especially during the summer months.

If you live in a hot and arid climate, consider providing afternoon shade for your hanging succulents to prevent sun damage.

Can Hanging Succulents Thrive Indoors?

Hanging succulents can thrive indoors, as long as they receive adequate sunlight and other essential care requirements.

Indoor locations with bright, indirect light, such as near a sunny window or under artificial grow lights, are ideal for most hanging succulent varieties.

However, keep in mind that indoor environments can be drier than outdoor spaces due to heating and air conditioning systems.

Therefore, you may need to water your hanging succulents more frequently or provide additional humidity through misting or using a humidifier.

Also, consider rotating your hanging succulent container periodically to ensure even sunlight exposure and prevent the plant from growing toward the light source.

Can I Propagate My Hanging Succulents?

Yes, you can propagate your hanging succulents through various methods, such as leaf or stem cuttings and division.

For stem cuttings, simply snip off a healthy stem and remove the lower leaves. Allow the cutting callus over before planting it in moist potting mix. Keep the soil lightly moist until roots form.

A sedum burrito hanging.
For stem cuttings, simply snip off a healthy stem and remove the lower leaves.

For division, gently separate the offshoots or “pups” from the mother plant and plant them in their own containers. Keep the potting mix slightly moist until they form roots.

For leaf cuttings, gently snip off a healthy leaf and place it on top of a moist potting mix. Keep the soil lightly moist until new plants form at the base of the leaf.

Final Thoughts

Hanging succulents are a delightful addition to every garden, bringing a touch of natural beauty and elegance to any space.

Their resilience, versatility, and aesthetic appeal make them an excellent choice for experienced and novice gardeners.

With the right materials and simple steps outlined above, you can create your own stunning hanging succulent garden and enjoy the artful wonders of these unique plants.

Cactus Care 101: How to Protect Your Plants from Winter Burn Damage?

Cactus on windowsill during winter.

Winter brings a serene and often magical transformation to our landscapes as snow blankets the earth. However, for cactus gardeners, the start of winter can be a time of concern. Cacti, with their reputation for thriving in arid desert conditions, may appear ill-equipped to handle the harshness of cold weather. Yet, with the right care and precautions, you can safeguard your cherished plants from the dreaded winter burn damage that can occur during frigid months.

So, how do you protect your cactus plants from winter burn damage? You can help your cactus plants adapt to winter conditions by watering them less frequently, sheltering them, using mulch, moving them indoors, or making a frost blanket.

Read on for more details.

How Does the Cold Damage Plants?

Extreme cold affects plant tissue in two main ways. The first relates to plant biology.

Like any other organism, there’s an ideal temperature for all cellular processes that plants require to thrive. The colder the plants get, the harder it becomes for them to keep up with these processes.

Most plants become dormant at this point, just as deciduous trees do in winter. However, dormancy cannot last forever because plants cannot repair tissue damage or grow in this state.

Freezing is the other risk associated with extremely cold temperatures and is destructive for plants.

Mini succulent in the windowsill furing the winter.
There’s an ideal temperature for all cellular processes that plants require to thrive.

When the temperature drops to the freezing point, water crystalizes into ice. If you have ever left a bottle of water in the freezer, you know that ice expands after crystallizing.

The combination of sharp water crystals and expansion raptures plant cells. That explains why frozen plants become mushy and discolored.

How Cactus Plants Adapt to Freezing Winter Temperatures

Fortunately, not all plants are affected by cold. Cactus is a good example.

Cactus plants adapt in several ways to survive during winter, and regulating water is the reason behind all these adaptations.

Cacti usually go dormant during winter when temperatures tend to drop below freezing point. They reduce their cellular activity and stop growing, which allows them to survive on minimal water.

This is among the best adaptations of most desert plants, but also one that prevents cactus plants from dying when frost covers the ground.

When a plant has less water, it is less likely to crystalize due to freezing.

a snow on cactus.
Cactus plants adapt in several ways to survive during winter, and regulating water is the reason behind all these adaptations.

The low water content means other compounds in the plant cells are abnormally concentrated. The high concentration makes them work as a natural antifreeze, thus protecting the cactus.

The cactus could move water into the interstitial spaces between cells if the water level fails to go low enough to trigger this natural antifreeze.

Even if bigger crystals form here, they cannot harm the plant’s cells. Certain proteins found on the cell surface help repel those large crystals.

These adaptations are only partially failsafe, but their impact is impressive. Some cacti species can withstand temperatures below -30°F.

Normally, plants can’t endure such frigid conditions for long, but the hardy cultivars won’t be deterred by one or two freezing nights in the middle of winter from regenerating when the warm weather sets in again.

What Species of Cactus Pants Can Freeze?

Despite having a reputation for thriving in hot climates, some cactus species grow naturally in colder northern regions. Some cactus types are even native to Canada. Here are some of the cold-resilient cacti species:

Prairie hedgehog cactus

These little mounded cacti, native to the Great Plains and American Rockies, are hardy and attractive.

They can withstand any winter conditions but thrive better when covered with snow or mulch during colder months.

Fishhook barrel cactus

This species is unique because it can endure extremely high and low temperatures.

It grows in arid regions of the southern United States and northern Mexico, where daytime and nighttime temperatures vary considerably. Water moderately for optimum growth.

Texas barrel cactus

Texas barrel cactus resembles a bird’s nest made of thorns because protruding spines cover it.

A closeup image of a golden barrel cactus.
Temperatures below 5°F can damage the plant.

It is mostly found in the Chihuahuan Desert and can withstand freezing up to 5°F. Temperatures below this can damage the plant.

Santa Rita prickly pear

Prickly pears come in different cold-hardy species, with the Santa Rita being one of the most common.

When not in the active growing phase or just mildly stressed, its pads turn a spectacular dark purple that adds color to the landscape all year round.

Although it is frost-hardy, Santa Rita can grow up to six feet tall, making it difficult to protect when cold weather approaches. 

Eastern prickly pear

This cactus species is native to the United States and often found in the central and eastern states.

It is widely picked for food, like many other prickly pear cactus plants, since the pads and the fruits are edible.

Prickly pear cactus.
This cactus species is native to the United States and often found in the central and eastern states.

However, the eastern prickly pear shrivels as temperatures drop, eventually lying flat on the ground. It comes back to life during spring.

How to Protect Cactus from Winter Burn Damage

Water less frequently

Help your cactus plants gradually adapt to the cold weather as temperatures drop. One way to do this is watering your plants less often, down to once every six weeks for most species.

Reducing watering frequency encourages cacti to enter dormancy, enabling them to survive through winter.

Shelter your cactus from cold air

Avoid waiting until the frost is severe to protect your cactus plants from the cold air. If your plant is small and potted, you can move it to a sheltered location, like behind a wall or away from strong winds. 

Old furniture is another alternative you can use to protect your cactus. You can place a chair over your cactus to help trap some of the heat.

If your cactus is small, you can turn plastic containers upside down over the plant but leave some space for air to enter.

Use mulch or stones

Sometimes, the soil loses its heat faster as the weather cools. Fortunately, you can protect your cactus by covering the ground with materials to help retain the heat.

Some darker stone varieties are excellent for trapping the soil’s heat. Black lava or brown and red rocks can help retain the warmth in the soil, depending on the environment.

You can also use mulch to cover the soil as an alternative to stones. Mulch will keep your cactus comfortable by retaining heat.

Avoid using too much mulch because it might trap moisture and cause your cactus plants to rot since they cannot tolerate excess moisture.

Move your cactus indoors

It could be better to move your cactus indoors if you reside in an extremely cold climate.

But when doing this, be careful not to cause shock to your cactus by changing the temperature, light, or humidity abruptly because this might affect its normal adaptation process.

When moving your cactus indoors, place it in a spot with adequate sunlight or add a cactus-specific grow light to your plant room.

Cactus on windowsill.
Remember to adjust the room’s temperature and humidity to match the outdoor weather conditions.

Also, ensure that no dust or obstructions are on the plant’s surface so that it can absorb enough sunlight.

Remember to adjust the room’s temperature and humidity to match the outdoor weather conditions.

Make a frost blanket

This is a quick and effective technique for protecting your cactus from freezing. You can do this in various ways.

There are high-quality, special frost blankets that retain heat in the air layer surrounding the cactus. You can also use plastic sheets, burlap, and other materials.

A frost cloth, especially white, allows sunlight to pass through, and burlap allows airflow. However, you should leave space for air if using a plastic sheet.

The most important thing is to ensure the blanket does not touch the cactus in any way.

The heat produced this way comes from the layer of trapped air, so if the material touches your plant, it might cause a drop in temperature and create room for frost damage.

Use a sturdy object like a chair to support the blanket and prevent it from shifting. You may need to use several layers of cloth if where you are is extremely cold.

Another option, especially when moving your cactus indoors, is adding artificial light inside the blanket to raise the temperatures further.

How to Revive a Frozen Cactus

Even after doing all this, your cactus may still suffer winter burn damage. Or perhaps your cactus got damaged by the frost because you had no idea how to protect it.

Either way, you can still revive it, so there’s no cause for alarm.

When frost harms your cactus, you notice mushy tissue around the damaged parts. These damaged parts turn white at first. Do nothing at this point and wait for the cactus to repair itself.

The damaged parts will soon turn purple and eventually black. If it turns black, that means the tissue is damaged beyond repair.

At this point, prune the cactus and remove all damaged black areas to prevent further damage.

Summing Up

Cactus plants are highly adaptable to survive extremely hot and cold temperatures. But if you live in areas prone to freezing temperatures, you can protect your cactus plants from winter burn damage by following the simple techniques outlined above.