Overly active children, marauding cats, a careless bump, or an unexpected accident can easily knock a piece off your loved cactus plant. If such a thing ever happens to you, no need to worry because you don’t have to throw away the cut piece.
While the main plant can still survive even after losing part of its stem, it may seem wasteful to throw away the dislodged part and forget everything.
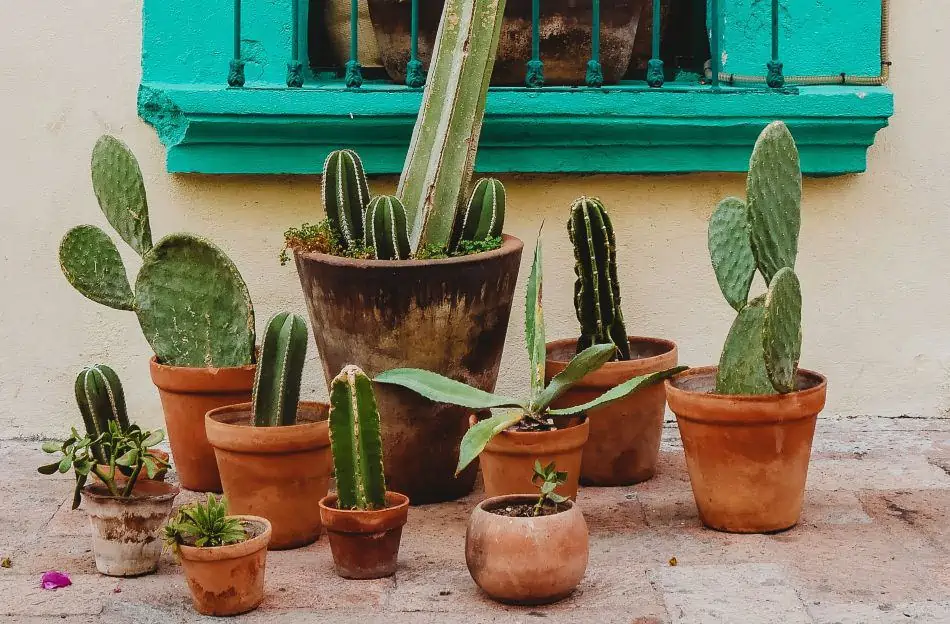
So, can you cut off a piece of cactus and plant it? The simple answer is yes. A significant number of cacti species can easily be propagated from cuttings. Some of the common cacti species usually propagated from cuttings include a hedgehog, prickly pear, and branching columnar cacti such as the night-blooming cereus.
Also, if a section of your cactus breaks off accidentally, don’t throw away the broken piece. Instead, root it and let it grow into a new plant.
In this post, we discuss everything you need to know about propagating cacti plants from cuttings. Whether you have taken the cutting from your plant intentionally or it has broken off accidentally, we are going to teach you how to grow new plants from the cuttings.
Taking a Cutting from Your Cactus
Carefully taking the cuttings is essential for the proper growth of the cactus.
When it comes to propagating a cactus from cuttings, you need to be careful with how and where you take your cutting. In fact, this step will determine your success in the long run. If you make a mistake at this point, your cactus cutting may fail to grow into a new plant.
The first thing you need to do is choose a healthy and mature plant where you will be taking your cutting from. If your plant has pads, be sure to select a mature one even if other smaller pads have started growing on top of it.
Once you have identified a good plant to take cuttings from, put on protective gloves and carefully cut off a section of the plant that is at least a few inches from the top. You can use a sharp knife or hand saw to accomplish this step.
Make sure you take the cutting at an angle so that rainwater doesn’t start collecting on the parent plant because it can lead to rot issues. You should also disinfect the knife or handsaw before you take the cutting.
This is to ensure that you don’t transmit bacteria to the plant via existing wounds on its surface. If you don’t feel comfortable holding a cactus plant with your hands, feel free to use a pair of cactus pliers or tongs.
Rooting Your Cactus Cutting
Once you have your cutting, you will need to do a few things before you root it.
First, set your cutting in a dry, cool area away from direct sunlight for a few days. If possible, keep the cutting in a vertical position to prevent roots from growing out on the sides of the cutting and to help it remain straight while drying.
Let the cutting rest for a few days to form a callous at the cut end. Don’t take the cutting and plant right away because it will only rot and you will have nothing at the end of it.
Callousing seals and protects the wound from bacterial and fungal organisms that could easily cause the cutting to rot once it has been planted.
1. Rooting in a pot
While rooting the cuttings, you should select a proper container along with suitable potting mix.
Once your cutting has dried and calloused completely, it is time to root it so it can start growing into a new plant. You can choose to root your cutting in a planting pot or the ground. We shall talk about both methods.
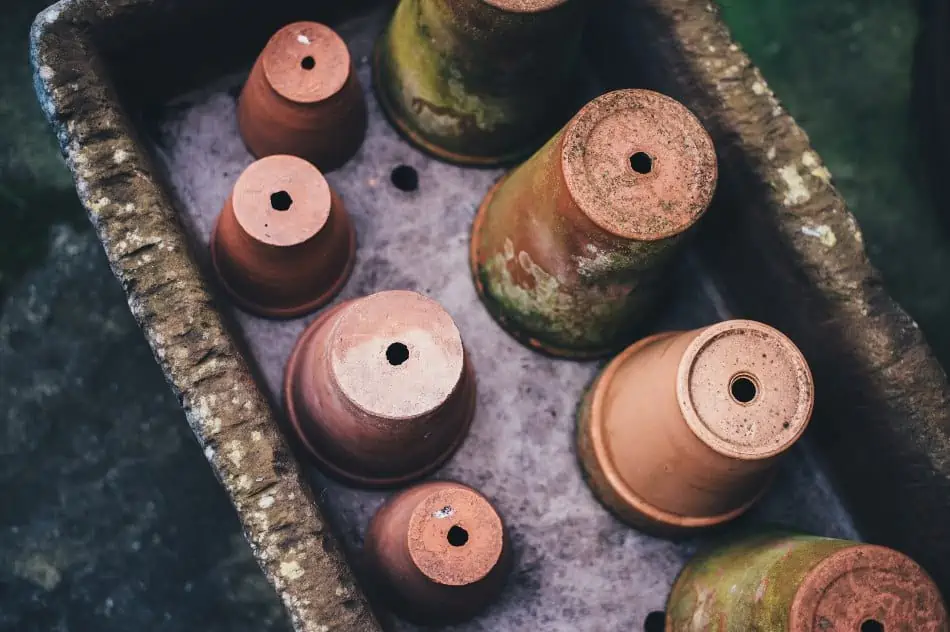
If you decide to root your cutting in a pot, make sure you find the right pot size. For a cutting, you don’t need an enormous container. Just find something appropriate that won’t appear too large for your cutting. Ensure the container you choose has plenty of drainage holes.
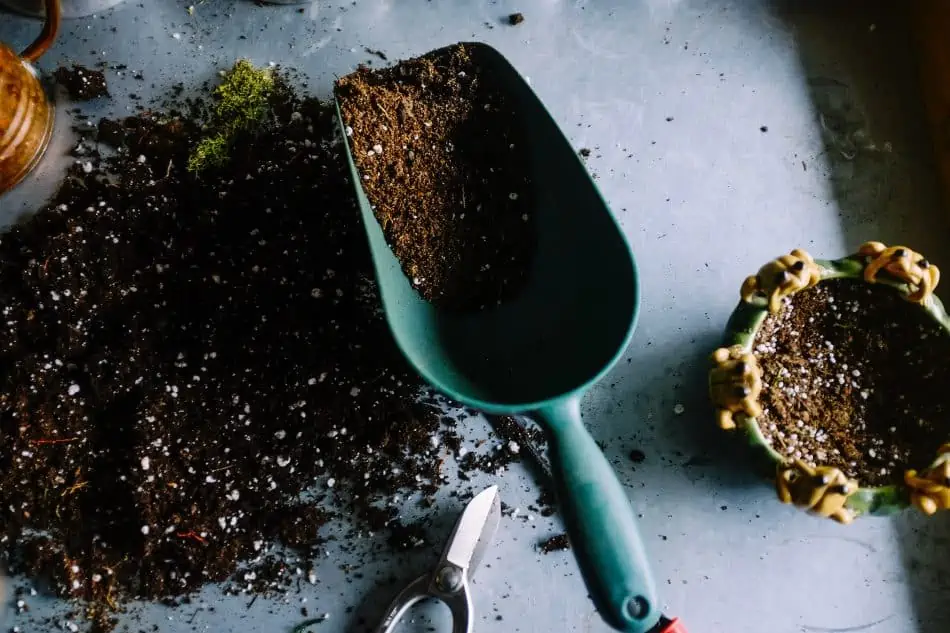
The next thing you need to do is fill your pot with an appropriate potting mix. Let us discuss a few things about the soil because it plays a crucial role in the survival and rooting of your cactus cutting.
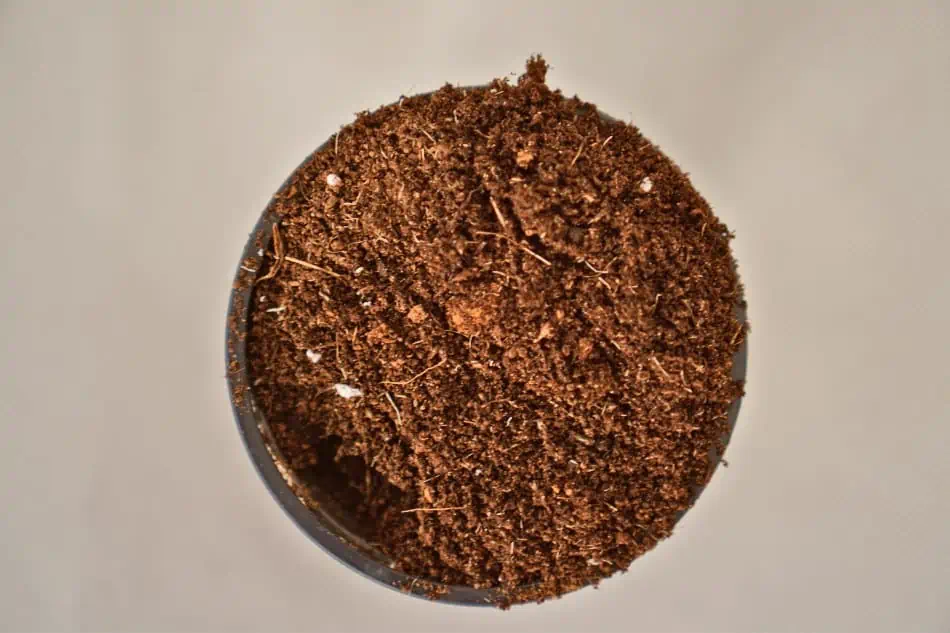
Just like mature cacti plants, your cactus requires porous, well-draining soil. Keep in mind that if the soil holds water for too long, it may cause rotting of the cutting at the base. To be on a safe side, consider adding plenty of perlite or sand to your soil to improve drainage.
Now, fill the growing pot with the potting mix and carefully insert the cutting into the container. Your cutting should penetrate at least two inches into the soil if it is small (less than six inches) and three to four inches deep if the cutting is more than six inches long.
Consider supporting your cutting with small stones or two wooden stakes with twine to keep it in an upright position.
Keep the newly planted cuttings away from direct sunlight. You can position your pot in a brightly lit location but make sure the cutting is well protected from direct sunlight until roots are well established.
You want to avoid sunburns and dehydrating your cutting before it develops a stable root system.
2. Rooting in the ground
If you don’t have an appropriate pot size, you can still root your cutting in the ground. If you choose to take this route, be sure to loosen the soil in the spot where you want to plant your cutting.
After that, dig a hole in the loosened soil that is deep enough to place the calloused end of your cutting in the ground a few inches deep.
Be sure to loosen the soil in the spot where you want to plant your cutting.
In most cases, you may be forced to mound small stones around the cutting for support, especially if the cutting is from a columnar cactus.
Once you are sure that roots have successfully formed and your cutting is now firmly anchored in the ground, remove the stones.
Should I Water the Cutting Immediately After Planting?
Overwatering will not make the cactus grow faster. Excess water will rot them and might even kill your plant.
So, how often should you water your cutting after rooting? At the time of planting, consider wetting the soil thoroughly. From there, you don’t have to worry so much about watering because the cutting can remain in good shape for a few days or weeks before it requires another watering.
Any subsequent watering must be light and consistent. A good rule of the thumb is to lightly water your cutting once every week to keep it moist. You should aim to keep the soil damp, not too wet.
Don’t try to force faster rooting by overwatering because the cuttings will only rot.
How Long Does It Take a Cactus Cutting to Develop Roots?
Typically, the rates at which cuttings develop new roots depend on a wide range of factors such as the size of cutting, type of cactus, and watering regimen.
Generally, it takes four to six weeks for the roots to form, but smaller cuttings tend to develop roots much faster than large cuttings.
To achieve better results, make sure you take time to prepare your cuttings properly beforehand and pot them in sterile rooting material to keep them from rotting or withering before they root. After rooting, most cacti plants will be ready for transplantation approximately one month later.
If a Cactus Breaks Off, Can I Plant the Broken Pieces?
Yes, you can. Don’t throw away broken pieces of your plant because they can give you new plants. The only thing you need to do is to make sure that you are following the right steps in preparing the broken pieces for planting.
The first thing you need to do is to check the broken end of the piece. If it is crooked or broke, use a sharp knife to make a fresh cut to even the end out.
Set the broken piece aside for a few days to allow the wound to callous over in preparation for rooting. Make sure the cut end is dry and sealed over before you proceed to root it.
3 Tips for Successful Propagation
As a gardener, your joy is to see your cuttings /seeds develop into new plants to increase your plant collection. These tips will help you when it comes to propagating cacti plants:
1. Develop technical and mechanical skills
Take time to train your hand and eye because they are crucial in propagation. Most of the time, your head will know how, but your hand won’t be willing to do it. The best way to improve your skills is by practice.
2. Know your cacti species and its best form of propagation
Each cactus is unique, know your plant species and what that works best for it
There are over 2500 cacti species in the world, and each one of them is unique. Therefore, strive to know your plant species and the form of propagation that works best for it.
3. Know the different plant structures and how they grow
The best way to learn about your cactus is to study it. Make an effort to know something new about your plant every day. Let it teach you, and once you understand how they grow, you will have an easy time propagating them.
Final Thought
Now that you know how to propagate cacti plants from cuttings, it’s time to go out there and practice what you have learned.
Feel free to experiment with new things and let us know how it goes. We love talking to cacti lovers all over the world. Subscribe to our email list for the latest gardening tips.
A significant number of people start out with cacti plants as a gift plant and usually don’t think about propagation in the early days. However, as it grows and starts to blossom, many of them quickly turn into collectors, and questions such as “how do I propagate my cactus?” begin to rise. Fortunately, there are several ways of propagating cactus.
So, how to propagate cactus pups? Generally, this is one of the easiest methods of propagating cacti since it doesn’t involve a lot of things. Pups are smaller versions of the parent plant that tend to grow at the base. The process involves removing the offsets from the parent, rooting them in appropriate potting mix and watering appropriately.
Propagating cacti pups not only produces new plants but also plays a critical role in decongesting crowded pots.
Read on to find out everything you need to know about cactus propagation from pups and how to take care of newly propagated offsets.
Propagating Cactus from Pups- A Quick Overview
Various cactus species produce small offsets, called pups, which can be used for vegetative propagation.
Propagating cactus by pups is a vegetative form of plant propagation because it doesn’t involve transfer of seeds. The parent plant produces an offset asexually, and this is what you use to get a new plant.
The pup occurs as a small clump that you can easily separate from the parent plant and grow a new cactus from it. This is probably the easiest method of propagating cacti. Most of the time, it is relatively easy to separate the pup from the parent plant, and it will grow its roots and settle pretty quickly and often successfully.
In most cases, the pups will already have a small set of their own roots. Unfortunately, not all cacti species can produce pups. Therefore, before you start considering this propagation method, make sure the cactus species in your garden can produce offsets.
Types of cacti that grow pups/offsets
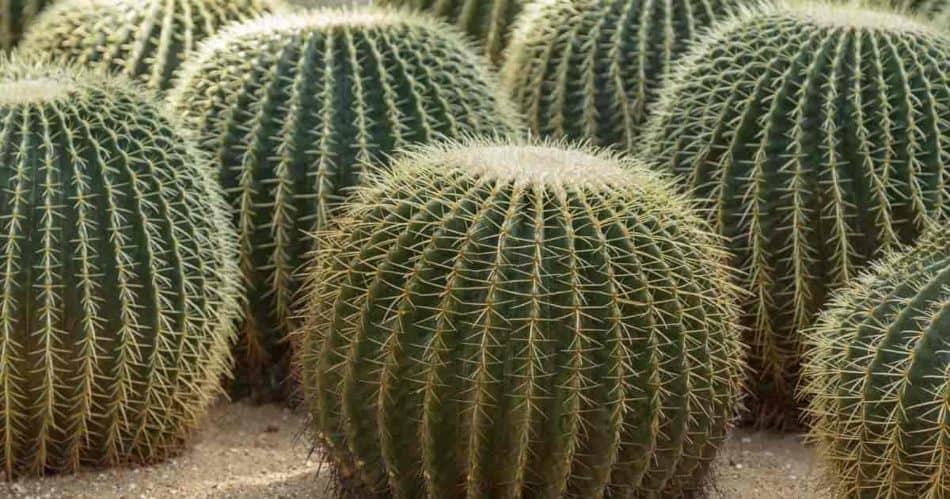
The majority of barrel cacti produce pups at the base of the plant.
Many of the barrel and rosette types of cacti do produce offsets. Typically, the big barrel cacti form the biggest pups, and it is one of the best types of succulents to propagate using this method. The barrel cactus has a unique way of providing nutrients and water to its offsets and shading them from the harsh sun.
Most pups form at the base of the plant, but you may also find some along the stem or even on the pads. You can remove any of these offsets and root them in a container so they can grow into a new plant.
Cactus propagation by offsets/pups is easy and fast as long as you take clean cuts and allow the offsets to callous before rooting.
Generally, cacti plants you should consider propagating with pups must be large, round, and clump producing. The parent plant must be large, and the offsets must be at least the size of a small ball.
How to Propagate Cacti Using Pups- The Process
Once you are fully convinced your plant has good offsets/pups for propagation, follow the steps outlined below to turn your pups into new plants.
Removing cactus pups from the parent plant
To successfully propagate cactus pups, you should cut away the offset at a 45o angle.
The first thing you need to learn is how to remove the offsets from the parent plant. Get a sharp kitchen knife and wipe it with some alcohol or a 10% bleach solution.This will disinfect it and prevent pathogens from finding their way into your cactus through the cut areas.
Locate a good pup and carefully cut it away at a 45o angle. Make sure your cut is slanted to deflect water so that the cut area doesn’t rot before it callus. Some gardeners love to dust the cut end of the pup with sulfur powder to prevent rot issues and fungal infection.
However, sulfur powder may not be necessary as long as you allow the cut end to callus fully before rooting. This may take a few weeks or one month, depending on the conditions in your home. You will know that the offset is ready for rooting when the cut end is dry, hardened, slightly shriveled, and whitish.
When obtaining the offset, make sure you remove soil from the top of the pup to see the joint between the parent plant and the offset. If the joint is clear, you may realize that disconnecting the pup manually is much easier.
If there is any part of the parent plant on the offset, be sure to cut it off. Otherwise, it will start to rot, and that may affect your pup severely.
Rooting the pup
After obtaining the pup, the next thing you need to do is root it. This step is only necessary if your pup doesn’t have any roots. To root your pup, consider placing it in a dry soil with some gravel for a few days or up to one week. Monitor it carefully and get it out as soon as it grows a few roots.
You can also place the offset in a small pot with sand, ground charcoal, and some perlite for it to grow roots. Skip this step with all pups that have small roots.
Growing the offset
Once your pups have developed a few roots, it is time to pot them. Start by preparing the container and the potting mix for your offsets. Make sure the container has plenty of drainage holes and is of the right size.Cactus pups need a pot that is just slightly larger than their diameter at the base.
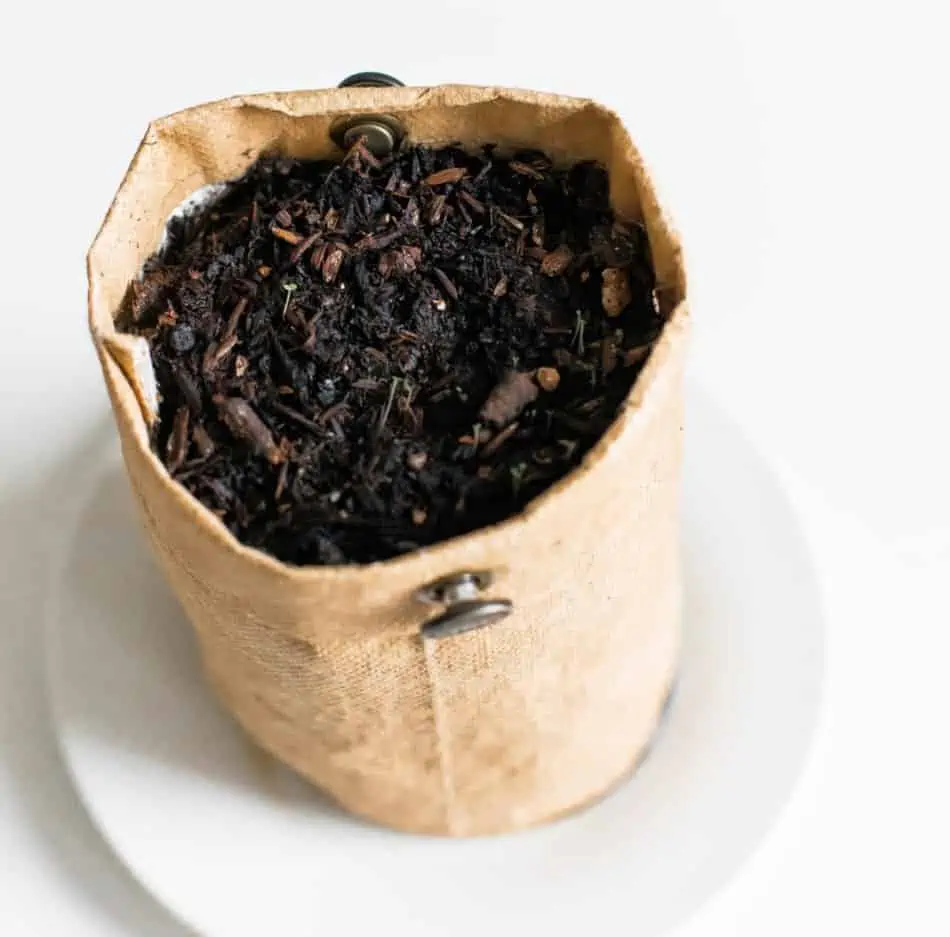
The soil should also have good drainage and gritty. You can purchase commercial soil or make your own by combining 50% perlite or pumice with 50% compost or peat.
Carefully place your pup in the soil, but do not push inside the potting mix too much. Only ¼ of the pup’s stem should be under the soil. Ensure your pup is stable enough so that it doesn’t fall over. Place the pot in a spot that receives bright but indirect sunlight and keep the soil moist.
However, do not water your offsets straight after planting. Wait for at least five days or one week before watering. This minimizes the chances of root rotting and fungal infections.
Another critical point to note is that some cacti plants tend to produce tiny pups beneath their stems. These offsets are often too small because they get less sunlight.
After separating such pups from the parent plant, dry them up for a couple of days before planting. After planting, leave them in the shade for a few days before you gradually move them to a bright spot.
What Kind of Potting Mix Should You Use for Pups?
To properly propagate cactus pups, well-draining soil should be used.
The most crucial consideration when it comes to choosing cactus soil is drainage. Cacti plants love well-draining soil that doesn’t hold water for too long. If you are a beginner, we’d recommend going for a commercially prepared cactus soil.
However, if you are an experienced gardener, then you probably know how to make your own potting mix. Here are a few tips for success:
Dampen the potting mix thoroughly, but do not get it too soggy. Remember the fact that wetter soil encourages rapid fungal growth and root rot. Before introducing your pups into the soil, consider dipping them in a rooting powder containing a fungicide.
If you want to avoid the moisture problem completely, consider using pumice to start your pups and then transplant them to their permanent containers after they get some growth.
Keep your pups in a relatively warm area with plenty of bright, indirect sunlight and excellent air circulation. Give the offsets a little misting once in a while but do not water them heavily.
To achieve better results, just set the offsets on top of the soil. There is no need to bury them deep into the soil. As long as they are stable, they will automatically send out roots in search of soil.
How Often Should You Fertilize Propagated Pups
For a start, there is no need to fertilize your pups. Moderate watering and exposure to a sufficient amount of sunlight should do the trick. However, as the pups start to grow into plants, you should begin to apply fertilizer at least once in a year.
Consult experts from your local plant nursery to establish the best type of fertilizer for your plant.
Do not apply fertilizer during winter because your cactus is dormant. Wait until spring or summer when the active growing season begins and give your plant a good dose of recommended fertilizer to promote growth and blooming. Consult experts from your local plant nursery to establish the best type of fertilizer for your plant.
PS: After you give your cactus plant water that contains fertilizer, make sure you rinse the plant body. Otherwise, if you leave any fertilizer on the skin of the plant, there is an increased risk of the plant being sunburned or burned by the chemical itself.
Summary
That is it on how to propagate cacti from pups/offsets. Keep in mind that this is probably the easiest way to propagate cacti, and you shouldn’t experience any problems if you stick to the procedure outlined in this article.
The best time to propagate pups is late spring or early summer. Just make sure your pups dry up completely before planting.
If you have any comments or questions, let us know in the comments section below.
Gardeners must always find a way of propagating new cacti plants to minimize the cost of acquiring new plants. In the wilderness, propagation from seeds is the most common way these succulents use to multiply, but that doesn’t mean it is the only way. As natural habitats of cacti and other succulents decline, the need to propagate and maintain these species through home gardening is more crucial.
So, the big question is, can you grow a cactus from cutting? The simpler answer is “yes.” In fact, propagating a cactus from a cutting is one of the easiest and cheapest ways of growing new cacti from existing cacti. A significant number of cacti species can be propagated by small cuttings taken from the stem of an existing plant, which are then allowed to dry out and be callous.
It doesn’t take long before the cuttings eventually start rooting from the cut end and growing into a new plant.
In this post, we discuss everything you need to know about propagating cactus from a cutting. Keep reading to discover how to expand your cactus collection easily.
Once you have all the mentioned requirements, proceed with the steps outlined below:
Obtaining a stem cutting
Taking healthy cuttings from the cactus is the first step for propagation.
You will be taking a healthy cutting from the top of your cactus plant. If your cactus has pads, make sure you choose one that is mature enough- even if a few smaller pads have started growing on top of it.
Using a young pad is quite dangerous because it may fail to root successfully. For columnar cacti, be sure to select a thin stem that will root much faster than a chunky one.
On columnar cacti, carefully cut off the stem at least a few inches from the top. Make the cut clean and straight and be careful not to crush the rest of the stem. If you are dealing with pads, then you can easily snap off one by hand.
Before you begin obtaining cuttings from your existing plant, make sure you disinfect your knife thoroughly. Keep in mind that there may be open wounds on your cactus that can easily contract bacteria leading to other issues. Also, wear gloves to avoid coming into direct contact with the spines.
For extra protection, consider holding the cactus cuttings with tongs or a pair of cactus pliers instead of your hands.
Rooting your cactus cuttings
After drying up the cut ends, you can root your cuttings into a proper-sized pot.
So, you now have your cuttings, what do you do next? Set the cutting aside for a few days to allow the cut end to dry up. Make sure the cutting is stored in a safe place away from sunlight and soil. Once the wound has healed, it will form a callous, which is an indicator that the cutting is ready for potting.
Sometimes, you may be forced to use a little sulfur on the cut end to speed up drying and protect the cutting from bacterial infection. The sulfur may turn a few colors, but that should worry you at all. Just check after a few days to see if the end is dry.
Once the cut end has formed callous, you are ready to jump on to rooting.
Fill your new pot with a moist potting mix and level the soil. Carefully stick your cutting into the potting mix with the cut side down. Be careful while sticking it into the container to avoid opening up the dried wound.
If it can’t stand on its own, simply lay it on top of the soil. If you have rooting hormone powder, make sure you dip your cutting into it right before planting.
Use the right type of soil
Choosing a suitable soil type for your specific cactus is essential for growing the cuttings.
The type of soil plays a critical role in establishing whether the cutting grows into a new plant or not. Therefore, you need to ensure you are using the right type of soil.
Go for a porous potting mix that is well-draining. Typically, almost all cacti plants require soil that drains much quicker than your average houseplant soil. If the soil holds water for too long, it may cause severe rotting of your cutting at the base.
Consider adding gravel, sand, or perlite to your soil to improve its drainage. If the soil is already moist, do not water the cutting after planting. If you are not sure of anything, feel free to ask your local nursery center for basic cactus soil mix, and you are good to go.
Watering a Newly Planted Cactus Cutting
While the roots are developing, your newly planted cutting will mainly be relying on stored nutrients and water. Therefore, you need to keep the soil continually moist to supplement the supply and encourage deep root growth.
Consistent watering may also play a critical role in yielding great results. Light water the soil every few days to keep it moist. However, be careful not to soak the soil with water since it may lead to rot issues. Just keep it damp.
The root-growing speed will largely depend on the type of cactus, size of cutting, and watering frequency. In most cases, small cuttings grow roots faster than large cuttings. Your cactus cutting can take anything from a couple of days to one month or even more to develop roots.
Once the roots have settled fully into the soil, switch to a typical cactus watering regime. Always make sure the soil dries out completely between watering sessions.
At this point, start introducing your young cactus to more sunlight gradually. Keep in mind that even though the roots are growing, you won’t see any significant stem growth for at least one year.
Can You Root a Cactus in Water?
While desert cacti cannot be rooted in water, jungle cacti cuttings are perfectly fine for water rooting technique.
To answer this question efficiently, you need to understand the type of cactus you are dealing with. Typically, there are two broad types of cacti; desert cacti and jungle cacti.
A desert cactus only thrives in arid areas and is extremely drought-resistant, while jungle desert grows in tropical regions that receive plenty of rainfall. A good example of a jungle cactus is the Christmas cactus.
Although you cannot root a desert cactus in water, jungle cacti (specifically the Christmas cactus) can be rooted in water. If you prefer taking this root, you will need to do everything right to achieve better results.
From there, take an empty glass jar and fill the bottom with pebbles/stones to about two inches deep. Carefully add water such that it rises above the stones/pebbles.
Carefully place your Christmas cactus cuttings in the glass jar containing water and make sure the bottom of each cutting touches the water. The majority part of the cutting should be in the glass jar but above the water level.
The humidity in the glass jar will help your cuttings to root without rotting. Always keep a close eye on the water level so that it doesn’t evaporate. Add more water to the glass jar every time you notice a significant drop.
Also, consider using rainwater or distilled water for better results. If you must use tap water, let it sit for at least 48 hours so that the chemicals and salts can evaporate.
Tap water contains significant amounts of fluoride, which is harmful to young cuttings since it travels through the plant and settles on the leaves. This makes the leaves turn brown, which can spread to the rest of the plant quickly if you continue feeding it with fluoridated water.
Can You Replant a Broken Cactus Part?
Yes. Just like the cuttings, you can also replant a broken part. However, you will need to inspect it carefully to determine if it is mature.
Once you are satisfied that the broken part is mature enough for propagation, carefully check the broken end of the cactus. If it is uneven or crooked, make a fresh cut to even it out.
Remember the fact that the cut end must be dry and sealed over before you root it.
From there, set the piece aside for a few days to allow the cut end to heal and callous over. Remember the fact that the cut end must be dry and sealed over before you root it.
The amount of time it takes for the cut end to dry and callous will depend on the thickness of the cut and amount of humidity in the air.
After it has dried and calloused over, follow the steps outlined above to root it.
Should I Fertilize a Newly Propagated Cactus Cutting?
Yes. Applying small amounts of succulent fertilizer is essential for a newly propagated cactus to maintain its health and grow rapidly.
However, be careful not to feed the young plant too much fertilizer since it may cause significant damage. Also, avoid using chemical-based fertilizers since they may contain too many salts that can burn the young cactus plant.
You should only fertilize the cutting once it has grown roots. From there, apply fertilizer twice every month but reduce the amount with time as the cactus grows. If you are unsure of anything, consult your local nursery center for basic fertilizer guidelines specific to cacti plants.
It is also essential to ensure that the other conditions for your newly propagated cactus are optimal, such as the right soil mixture and watering frequency. Pay attention to these aspects, and you will have a healthy cactus in no time.
Is Propagation from Cuttings Same as Grafting?
Many people confuse propagation from cuttings with grafting. The two techniques are entirely different and should never be confused.
Grafting is the process of attaching a part of one plant onto another to form a new plant. When done correctly, the two plants can grow side by side as one unit. This method is mainly used when it’s practically impossible to propagate from cuttings.
Propagation from cuttings, on the other hand, is a much simpler and straightforward process. As explained above, it only involves creating small cactus cuttings and rooting them in soil or water. The new plant produced will be genetically similar to the original parent plant.
Grafting is generally more complicated and requires more expertise. It is mainly used when a certain plant species or variety cannot be propagated from cuttings. Therefore, it is best to try the propagation from cuttings method before trying your hands on grafting.
If things fail, you can consider grafting as an alternative technique. However, propagating cuttings is the best way to go if you want to clone your favorite cactus plant and have more of them without breaking the bank.
Final Thought
Cactus plants are relatively easy to propagate from cuttings. In most cases, you will get faster and more predictable results if you decide to propagate a cactus from cuttings than you would from planting seeds.
While it is more common to propagate cacti from cuttings indoors, you can also do it outdoors and expand your home garden.
Some of us seem to be born with a green thumb, while others among us are constantly accused of houseplant homicide. Fortunately, for those of us who are herbology-challenged, there is a wide variety of cacti capable of tolerating our foibles. Cactus plants require little attention, can withstand infrequent watering, and do okay in a fairly wide range of temperatures. They may be the perfect option.
How does a cactus live without water? Well, simply put, it doesn’t—but it’s easy to understand why you might think otherwise. The truth is that cacti, like all living things, need water to survive. But they’ve evolved and adapted in ways that make them very efficient users of the water they receive. That means that they’re able to go long stretches between watering and get by well on just a little bit.
Whether you live in an area with a climate that is perfect for outdoor cactus cultivation or you’re just looking for a houseplant that you can’t kill—you can’t go wrong with a cactus. Once you understand all of the ways they’ve adapted to become resistant to drought, you’ll have a better idea of how to keep them happy. They will add beauty to your indoor or outdoor spaces and require little in return.
A Cactus Can Be Happy Without Much Water
Cacti are drought-resistant and do not require frequent watering.
Perhaps the first and most important thing that you need to know about cacti is that there are more than 1,000 individual species. In fact, the plant genus that is home to all cactus plants is so diverse that it includes some cacti that have leaves instead of spines. The natural habitat of cacti ranges from the southernmost tip of South America all the way north to western Canada.
If you’re like a lot of people, the first thing that comes to mind when you think of a cactus is cartoon coyotes or cowboys in ponchos with stubby cigars. But the tall, lobe-branched cacti that you see in those settings are just one of a wide variety of species. Unless you live in the desert southwest of the United States or in northern Mexico, that probably isn’t the best cactus to set your sights on.
One thing that works in your favor is that no matter what species of cactus you decide to bring home as an indoor or outdoor botanical confidence builder, you’ll be getting a drought-resistant and hearty houseguest. Let’s look at some of the ways that cacti have evolved to be such efficient water users.
Leaves
Having sharp spines can help cacti absorb water and stay hydrated.
The easiest way to recognize a plant as a member of the cactus is family is to notice what they don’t have—leaves! But that’s not 100% accurate for a couple of different reasons. The first reason is that their spines are highly-adapted leaves. The second is that some members of the cactus family have leaves instead of spines.
So why did most cacti evolve spines where their leaves ought to be? And how do spines make a cactus more efficient at water consumption than other plant species? The leaves of most broad-leafed plant species have at least two important jobs to do. First, they are an important part of the plant’s respiratory system. Second, they play a crucial role in photosynthesis. Many broad-leafed plants rely on their leaves to contribute significantly to their water gathering efforts as well.
The part of a plant that takes in the carbon dioxide that the plant will convert to oxygen during photosynthesis is called a stoma, and it is usually located in the leaf stem of broad-leafed plants. Of course, photosynthesis is the process by which plants convert sunlight to nourishment.
So, beyond taking in the fuel for photosynthesis, leaves also collect the sunlight that provides the missing ingredients. Cacti have come up with creative twists on each of these processes to become better at surviving without much water.
Stomata
Most plants don’t have to worry about conserving water the way that cacti do. So, their stomata are located in places that tend to permit a great deal of evaporation. They open during daylight hours, which further compounds the rate of evaporation. Cacti can’t afford to be so cavalier with their precious stores of water.
Because most cacti have evolved and adapted to make survival possible in environments that would kill most broad-leafed plants, they’ve had to get creative about the respiratory and light-absorbing processes that they use to accomplish photosynthesis.
A cacti’s stomata are still located at the base of their spines, which we noted earlier, are just highly-adapted leaves. The spines themselves make a big difference in the rate of evaporation because of their reduced surface area in comparison to broad leaves. But the real difference in how a cactus plant’s stomata help them survive on limited water can be found in their adopted schedule.
Most plants take the easiest route between where they are and where they want to be. When it comes to photosynthesis, that means opening their stoma during daylight hours to take advantage of the abundant light. But if a cactus were to do this, they would lose unacceptable amounts of moisture to evaporation during the heat of the day.
Day and Night
Compared to other plant families, cacti respire at night to prevent evaporation of too much water.
Because cacti have to do everything they can to conserve water, they’ve adapted a unique biological clock that strikes a balance between the need to breathe and the fear of losing all of their stored water. A cacti’s stomata open at night when there is less risk of evaporation. Since desert environments have plentiful sunlight, they are able to get by on what they collect through the membranous coatings on their stalks.
Conducting all of their breathing at night means that cacti have to store the carbon dioxide that they take in overnight until they can use it in photosynthesis when the sun comes up. This is another evolutionary adaptation that makes cacti capable of doing what they do in the places where they do it.
Spines
Spine not only protect cacti from predators but also help them absorb more water.
We’ve already noted the difference that surface area makes in the different rates of evaporation between leaves and spines. The fact that a cactus taps the cells of its main body for light absorption means that cacti don’t miss the metabolic contributions that are lost in this trade-off. When you get right down to it, most cacti are nothing more than fleshy, leafless stems with an array of spines.
But why does a cactus have spines if the stomata are located on the stalk, and the stalk does the lion’s share of the photosynthetic work? There are two main functions that the spines serve in the life of the cactus plant. The first one is pretty obvious if you think about it, but the second function might not be as easy to pick up on just by looking at a cactus.
The first thing that spines do for a cactus is to protect it from grazing animals. Think about all of the broad-leafed plants that get munched on by birds, insects, and mammals. Now, think about how attractive a plant would be to those same grazers if it was located in the middle of a desert and filled with life-sustaining moisture. If it weren’t for their body armor of effective spines, cacti wouldn’t stand a chance.
Spines also do their part to help a cactus plant capture every drop of water that comes within its range. The spines may be angled to channel water toward the plant’s stalk and downward toward the root system, or they may be fine enough to gather the morning dew until it forms droplets that will fall to the ground. Each species has its way of doing things, but in the end, it’s all about the H2O.
Stalks
When you look at a tree, you see a trunk, branches, stems, and leaves. When you look at ornamental or edible flowering plants, you see a stalk, stems, leaves, and flowers. But, as we noted earlier, a cactus is just a root network underground with a single stem that is covered in spines. The body of the cactus plant has a number of advantages that cacti rely on to survive in dry climates.
It isn’t as simple as changing one or two things about the way you do business when you set out to evolve and adapt to the harshest climates on the face of the planet. It takes an all-hands-on-deck approach. So, cacti have had to incorporate contributions from every part of its body to maximize water efficiency and become capable of thriving where other plants wouldn’t survive at all.
Body Styles
The majority of cacti have globular body shape, which enhance the ability of a cactus to preserve water.
The stem or stalk that makes up the main body of a cactus plant is a highly specialized version of a trunk or stalk that you would find on broad-leafed plants like trees and flowers. It has evolved to be as efficient at water storage and conservation as it is possible for a plant to be. This has required cacti to adapt the internal composition, exterior surface, and even shapes that their main bodies feature.
Most cacti bodies are globular, and some even incorporate ridges. These features enhance a cactus plant’s ability to conserve water. Storage capacity and water retention are the primary concerns for most cactus plants, so it just makes sense that they devote so much of their bodies to ensuring that these two tasks get taken care of.
Of course, everything that lives also wants to grow and reproduce. Even the way that cacti approach these basic biological imperatives reflects the central importance of making the most out of the limited amount of water they get. The life cycle of a cactus plant is directly linked to its ability to gather, store, and conserve water.
Storage and Conservation
Globular shape, the presence of ridges, and waxy surface allow cacti to better absorb and conserve water.
There are at least three key features of a cactus plant’s body that play important roles in the ability to store and conserve water. The first is the globe-shaped body style that many cactus plants have. The second is the presence of ribs or ridges on the body that act like accordion folds that allow the cactus plant’s body to expand as it absorbs more water. The third feature is a thick, waxy exterior surface.
The benefit of a globular body is that it offers more internal storage capacity with less exposure to the pressures of evaporation. Whereas a vining body-style like you find with ivy or a tall, thin stalk and broad flower like you find with sunflowers leave the plant at a disadvantage to evaporation, a cactus holds all of its water inside.
The ridges and ribs that accentuate many cactus plants’ bodies offer important benefits to this approach toward water conservation. When rain is infrequent, and dewfall is minimal, a cactus has to be able to grab as much as it can during the rare times when water is plentiful. If the plant’s body weren’t capable of accommodating the swelling that comes along with taking on water, it wouldn’t be able to make the feasts sustain it through the famines.
Of course, it wouldn’t matter how much water a cactus could absorb if it weren’t able to hold onto that water for long periods of time. The wax-like coating that is on a cactus plant’s exterior surface works like a waterproof raincoat in reverse. Instead of keeping the water out, it works to hold the water in.
Life Cycle
Without getting too philosophical about it, we can probably agree that there is more to life than simply surviving. So, it makes sense that a cactus wants to survive not just for the sake of surviving but for the purpose of growing and reproducing. But with water at a premium, the cactus has to factor the energy demands of growth and reproduction into its plans.
It makes sense that a cactus wants to survive not just for the sake of surviving but for the purpose of growing and reproducing.
That means that most cacti only grow larger during times when water is abundant. It also means that most cacti have evolved to go dormant with regard to blossoming except for those times when water is plentiful. In this way, their life cycle resembles those of other species that have evolved as highly-specialized desert dwellers. A desert landscape after a rainstorm will look vibrant for a time only to return to normal as things dry out.
But even the end of its life isn’t enough to get a cactus plant to give up its water reserve. Scientists have cut into the bodies of cactus plants many months after they have died only to find that they still retain the essential, life-sustaining moisture that they were storing when they died.
Roots
Broadly dispersed root system of cacti is dedicating to saving the plant when there is a deficit of water.
The final aspect of a cactus plant’s physical adaptations that need to be considered in relation to its water consumption is the root system. Most plants can rely on their root system for stability and water collection at the same time without having to make any trade-offs in the process. But for a cactus, that just isn’t the case.
Most cactus plants have shallow and broadly dispersed root systems. This means that all of the water gathering capacity of the plant is close to the surface. The approach makes sense when you consider the low availability of moisture deeper in the soils of desert landscapes. But the trade-off is that some cacti are susceptible to blowing over in strong windstorms.
Even the root system of a cactus plant is committed to the survival of the plant during long stretches when water isn’t available. The root network of a plant will grow when water is plentiful but die-off and shrink back toward the plant’s body when the plant can’t afford to spare the water required to sustain the wider root system.
While it is true that sending roots deeper would provide the plant with more stability, it would also require more energy to grow and more water to sustain. For most cacti, the extra stability just isn’t worth the expenditure of vital resources. Cacti get a better return on their investment by keeping their roots closer to the surface where they can soak up every drop of rainfall possible.
Summary
This article has outlined the numerous ways that cactus plants have evolved and adapted to be the premier specialists at water conservation in the plant world. The evolutionary tricks that the cacti have picked up throughout history incorporate the leaves, stems, stalks, and roots. It is a team effort when it comes to being efficient at water consumption. That is what it takes to thrive where few other plant species can survive, and that is what set cacti apart from most plants.
If you want to add more greenery to your apartment, office, or home, then you can’t go wrong with a cactus. You won’t have to worry about getting someone to water your plants while you’re on vacation or what will happen to your office décor if you’re traveling for business for a week or two. And now that you know how rare cactus blossoming is, you’ll appreciate the beauty of their flowers that much more.
Bringing a new cactus home is enough to excite any home gardener, but when it begins to die without an apparent reason, it can be a frustrating process. Luckily, there are ways to get to the bottom of your cactus woes and address the issue to get its health back on track.
So why is your cactus dying? Cacti are generally resilient plants, so a dying cactus mainly stems from improper care or harsh environments. The three possible reasons that your cactus is dying include:
You are overwatering (or underwatering) your cactus.
Your cactus is not getting its recommended daily sunlight.
The soil drainage for your cactus is inadequate.
In this article, we’ll be discussing a few reasons why your cactus may be dying, along with providing you with some proper care tips to help you better maintain your cactus plants.
Why Your Cactus May Be Dying
The following three reasons are the most common bad habits that new cactus owners make that result in a dying cactus:
1. You Are Overwatering (or Underwatering) Your Cactus
If you overwater or underwater your cacti, the plant might die.
Cacti are very specific about how much water they receive, and on average, less is more when it comes to watering them. Cactus plants are prone to root rot, a condition that affects plants that are sitting in pooled water or are watered too often. This causes the cactus to rot from the roots, killing the plant slowly (but surely). If you’re watering your cactus daily, or even weekly, this could be the reason why it’s dying.
On the contrary, you could also not be watering your cactus enough. If half a year has gone by before you think of watering your cactus, and it doesn’t have access to rain, that’s probably the issue. Though cacti don’t need as much water as most other plants, they still need some access to water to thrive.
If you’re a “plant and forget” type gardener, be sure that you have planted your cactus in an area that receives rainfall. Leaving the watering up to nature’s natural cycle is usually plenty for a cactus anyway.
2. Your Cactus is not Getting Its Daily Recommended Sunlight
If your plants are getting either less or more light than required, they might slowly die.
Cacti are desert plants. Because they’re native to desert landscapes, they’re naturally exposed to heaps of sunlight. Not allowing your cactus to get enough sun can result in:
drooping or shriveled stems
scraggly hairs
dull coloring
little to no flowering or fruiting during the season
Likewise, placing your cactus in an area that receives too much sun at high temperatures can result in:
sunburn
blackened or browned ends of the stems
a dried or dull appearance
3. The Soil Drainage for Your Cactus is Inadequate
Cacti should be planted in pots with drainage holes for the soil to drain well and get rid of excess water.
Though it’s essential to water your cactus whenever it needs it, it’s just as crucial to ensure that your cactus is planted in a soil that drains well. A cactus should never be left to sit in water and requires a preferably sandy or slightly gravelly soil. If you have your cactus planted in a pot without a drainage hole or in soil that absorbs too much water, this may be what’s killing your plant.
Another problem to consider is the fertility of your cactus’ soil. Even if you have it planted in cactus-perfect dirt, it could be lacking the nutrients it needs to stay healthy and green. To combat any lack of nutrients in the soil, you should fertilize your cacti, though infrequently.
Additional Reasons for a Dying Cactus
You may be watering your cacti only when necessary, giving it adequate sunlight and proper soil and yet still have an issue with dying cacti. Here are a few additional reasons for a dying cactus that may have slipped your mind:
You’re not covering it in the winter. Some cacti don’t tolerate winter conditions and temperatures as well as other species and will need to be covered in burlap or in a flower house to prevent frostbite.
You’re watering your cactus in the winter. Cacti should not be watered in the winter, as this could result in them freezing internally. During the warmer months, cacti will store the necessary amounts of water needed to last through their dormant season.
Though there are cacti that can survive frigid temperatures, your average garden cactus likely will not (or will receive some damage in the process). Covering them and refraining from watering them whenever the temperature drops will help them to endure the colder months better.
How to Properly Care for a Cactus
Now that you’ve found out the possible culprits behind your dying cactus, it’s time to take a look at how to care for your plant to keep it looking its best.
Watering
One of the best ways to prevent your cacti from dying is to properly water your plant once a month.
Cacti are incredibly hardy plants and will store water in their cells to prepare for drought or their dormant season (the winter). In most areas throughout the United States, rainfall is enough to keep an outdoor cactus adequately moist and healthy.
However, if you’re experiencing a particularly rough drought or your cactus is indoors, it’s recommended that you water your cactus once a month. If the soil still looks moist when the next watering cycle comes around, wait another week before watering.
Watering in the winter is something that shouldn’t be done unless you’re in an area where winters don’t drop below the mid-60s degrees Fahrenheit. If your winters are practically none, you should still water your cactus less than you would during the warmer months — only about once or twice during the winter, depending on the temperatures.
How to Water Cacti
Though there are a few jungle varieties of cacti, in general, cacti are desert plants. Rather than receiving their water from spritzes of humidity or constant rainfall, a cactus’s roots deeply penetrate the soil to reach the remaining water from the last rainfall and stores as much as possible until the next rain shower.
Because cacti aren’t native to areas with high humidity, watering your cactus with a fine mist or by pouring water directly on its stem will dull the appearance of your cacti, and eventually, lead to surface rot. Instead, you should eitherapply water directly to the soil (taking care not to water the base of the plant directly) or set your potted cactus in a saucer of water so that its roots can reach and water themselves. Be sure to take the cactus out of the saucer once the soil is dampened.
When watering the soil directly, you should use a slow-moving stream, such as a garden hose turned on low, and water deep enough so that it begins draining from the pot.
Sunlight Requirements
Typically, cacti need an average of 4-6 hours to be exposed to sunlight.
Though the amount, and type, of sunlight a cactus needs varies from species to species, most cacti will need about 4 to 6 hours of sunlight per day. Remember to check the light requirements for your particular plant, as some species will need full sun, part sun, or minimal sun each day.
If your cactus isn’t receiving the proper amount of sunlight, it will begin to display signs of weakness and discolorations such as:
Paleness or other discoloration
Stems begin to stretch out to reach more light
Cactus isn’t blooming or producing fruits in season
Branches become weak or squishy
Hairs look dull or browned
On the other hand, a cactus that receives adequate light will:
Be a vibrant deep green
May produce colorful flowers and fruit
Have visually strong stems, needles, or hairs
Placing your indoor cactus in a south-facing window will ensure that it receives enough light during the day. Most cacti will not need direct sunlight and can thrive on indirect light, so just as long as the window is receiving bright, indirect light, your cactus should do well.
As for outdoor cacti, it’s best to plant them in an area that is shielded from intense, direct sunlight at the hottest hours of the day. For example, plant your cactus in an area that is shaded around noon, but receives around 6 hours of sunlight in the afternoon and evening.
The Effects of Too Much Sun
If you place your cactus in an area that receives too much sun, especially the direct sun, you risk sunburn damage to your plant. Sunburn in cactus manifests itself in brown or yellow spots on the pads of the cactus and will also lead to a dried appearance if the problem isn’t remedied.
An excellent way to combat the effects of sunburn is simply by moving your cactus to another area or by planting taller, thicker plants, such as desert shrubs, next to the cactus to block any harsh sunlight. You’ll want to act swiftly, though, because sunburn in cacti happens rapidly and will end in an unfortunate demise for your plant if nothing is done.
Soil Conditions
You might want to choose sandy or gravelly soil for your cactus to grow in a soil that drains well.
Because cacti were created to retain water for extended periods, they also suck any moisture up quickly and won’t need to have wet soil to stay healthy. In fact, moist soil will actually cause root rot in cacti, so it’s essential to plant your cactus in a soil that drains well to avoid any health issues.
Sandy or gravelly soil is best and is especially useful for seasons where rain is frequent or abundant. This is because well-drained soil allows any excess moisture that may be provided to your cactus to move away from the roots, protecting them from pooling and rot. You can either find a premade cactus soil online or at your local plant nursery or substitute ⅓ of your regular potting soil with sand to create the ideal soil for cacti.
The Best Soil for Cacti
Our favorite cactus potting mix is the Hoffman 10404 Organic Cactus and Succulent Soil Mix. It’s formulated with both jungle cacti (like Christmas Cactus) and desert cacti in mind, providing the proper drainage to allow your cactus to get adequate water without puddling excess moisture at the roots.
It’s also organic, meaning that it’s a healthier formula not only for your cacti but also for the earth and your family. Lastly, it contains an abundance of nutrients to encourage growth, vibrant colors, and brilliant floral blooms in the spring and summer.
What We Like:
Affordable, even for those that may be on a budget
Formulated organically for a safer product
Contains a wide variety of nutrients to keep your cacti looking its best and prolong the life of your plant
Drains properly without stripping moisture from your cactus
Perfect for both desert and jungle species
Fertilizing Your Cactus
Cacti should be fertilized in the spring for them to store nutrients for winter months.
There is a time and place for everything, and that includes fertilizing your cactus. Cacti should be fertilized, but infrequently (only once every 2 to 4 weeks), and only in the spring when the plant is growing and preparing for the upcoming months of dormancy.
Fertilizing your cactus in the spring will help it to store essential nutrients to sustain itself whenever nutrients are scarce in the winter. You don’t want to fertilize your cactus during the harsher months of summer and winter because your plant’s primary focus during those times is to stay alive rather than grow.
The Best Plant Food for Cacti
Of course, you should always opt for a fertilizer that is formulated especially for succulents and cacti. We suggest the Miracle-Gro Succulent Plant Food for indoor cacti. It’s very affordable for all gardeners (even the budget-conscious) and works well to provide instant nutrients to your plants.
This fertilizer is a liquid and comes in an easy-to-use pump bottle. You can apply it directly to the soil or mix it with water the next time you water your cactus to give it an additional boost. It’s recommended that you use this fertilizer once every two weeks for cacti that have been relocated to a new area of your yard, repotted, or brought indoors after being purchased.
Once your cactus plant is established in its new home, you can lengthen the amount of time between fertilizing to 4 weeks or a month. Take special care not to apply this fertilizer directly to the cactus, as it will cause chemical burns on the pads.
What We Like:
Affordable, lasting fertilizer
Perfect for both new and established cacti
Only needs to be applied every 2 to 4 weeks for best results
Encourages rapid, but healthy, growth and blooms if applicable to your cactus species
Simple, pump-action bottle
Can be applied directly to the soil or mixed with water
Instantly provides top-notch nutrients to the soil for the cactus’s roots to absorb
Overall, the Miracle-Gro formula for cacti is an excellent option for potted cacti or outdoor cacti that aren’t receiving the nutrients they need from the soil.
Maintaining Cacti During the Cold Months
No matter how well you care for your cactus during the spring and summer, when winter strikes, it can be a death sentence for many cacti species. Though there are cacti that can withstand temperatures sometimes as low as -30 degrees Fahrenheit, the majority of cactus species on the market for home gardening can only survive down to freezing — and for very short periods.
It’s essential to take the necessary precautions before winter rolls around to prevent frostbite or potential withering of your cactus. Care (watering, light, and temperature) for your cactus also changes slightly from care during the rest of the year.
Winter is the dormant season for cacti, meaning their processes naturally slow to keep them from expending energy and nutrients during the harsh season. Indoor cacti have the advantage of not being directly exposed to outdoor elements. However, with the decrease in light and increase in the frigid temperatures, there is some improvising involved in its care.
General Tips:
If your cactus isn’t getting 4 to 6 hours of sunlight during the winter,try using a grow light to supplement the lack of sun it’s getting.
Keep watering your indoor cactus regularly.Watering during the winter should be as often as you do around the year (about once a month).
The indoor temperature should be a warm, comfortable 65 to 70 degrees Fahrenheit. Cold spells can kill a cactus, so keep the temperature of your home consistent.
If your cactus is by a frequently-used door to the outside, move it.Once again, cold bursts of air can potentially harm your cactus. It’s best to move it as far away from the chilly outside world as possible.
If your cactus usually sits close to a window, move it a little farther away. Glass gets chilly, and having your cactus too close to a window can make your plant colder than it needs to be.
When you water your cactus, use room-temperature water rather than cold water from the tap.
Caring for Your Outdoor Cactus
Because your outdoor cactus is in direct contact with the icy elements, there will be a bit more work to do on your part to keep it from too much exposure. Frigid winds can lead to frostbite in exposed cacti, and too much snow can lead to both surface and root rot once it begins to melt.
General Tips:
Cover your cactus in burlap sacks. The burlap sacks are porous enough to allow sunlight to come through, but thick enough to keep some heat in and protect the cactus from snow, ice, and wind.
If your winters are particularly harsh, consider a plant house. Pop up greenhouses, like this flower house, help to increase the temperature around the cactus and protect from winter elements without blocking sunlight.
Do not water your cactus. Watering an outdoor cactus during the winter will almost certainly kill it because of the water freezing inside of the cactus. Instead, water consistently during the months leading up to winter so that your cactus has enough stored in its cells to survive.
If your winters aren’t too bad and you have a large, potted outdoor cactus, you can move it to a covered deck to block it from the wind and snow.
The Toughest Cacti Species for Forgetful Gardeners
If your thumb just doesn’t turn green no matter how hard you try, the following hard-to-kill cactus plants may be the perfect choice for giving you a lively indoor or outdoor garden — with as little effort as possible on your part.
Barrel Cactus can handle direct sunlight for up to 8 hours and does not require fertilizing at all.
One of the most popular cacti species among desert gardeners, the Barrel Cactus, is hardy and cute. This Mexican desert-native can endure winters of mild frost and scorching temperatures. Their sizes can vary and can either sit low to the ground or grow as tall as 10 feet and 3 feet wide.
They do well both indoors and outdoors and can withstand direct sunlight for upwards of 6 to 8 hours. They won’t need to be watered, but once every 3 to 4 weeks if indoors and, if outdoors, rainfall will keep this beautiful cactus going with no problems whatsoever (in most North American regions). Sufficient water in the spring will result in a large yellow flower.
Barrel Cactus also won’t need any fertilization, as they naturally grow in low-fertile areas. If you want to keep it looking vibrant, you can fertilize it once a year during the spring.
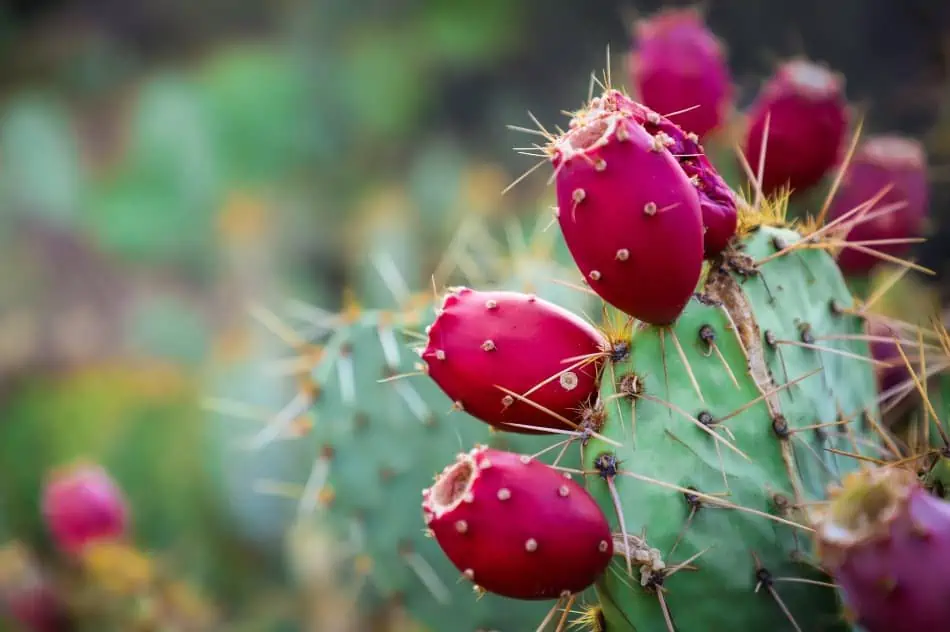
Prickly Pear is a fruit-bearing cactus, which blooms in the spring and summer.
Found in all of the deserts of the American SouthWest, Prickly Pear has adapted to survive harsh summers, and some varieties have even adapted to withstand the cold of winters further north (as low as -35 degrees Fahrenheit!).
These cacti are a fantastic option for an outdoor garden because they:
Do well in full, direct sun
Only need watering when the soil is dry and rainfall is infrequent
Can grow several feet wide and tall over time
In the spring and summer, with enough rainfall, Prickly Pear Cactus will bloom bright yellow flowers and, later on, edible fruits.
Chollas is a SouthWest American desert native cactus that:
is drought-resistant
can withstand temperatures as low as 5 degrees Fahrenheit
is tolerant of full sun conditions
has moderate watering needs and little overall care requirements
Chollas is probably one of the toughest cacti on the market and won’t need to be watered often. Too much water is the problem this cactus species faces the most, as they’re incredibly prone to root rot. Watering only whenever droughts are persistent is all that’s needed for Chollas if they’re outdoors.
While you can have chollas indoors, it is strongly advised against, as its tiny, thin, and clustered barbs are prone to sticking to anything and everything and are extremely painful to remove, digging deeper into the skin with every tug. It is recommended that you plant these tall-growing plants away from your home or at the rear of a desert garden.
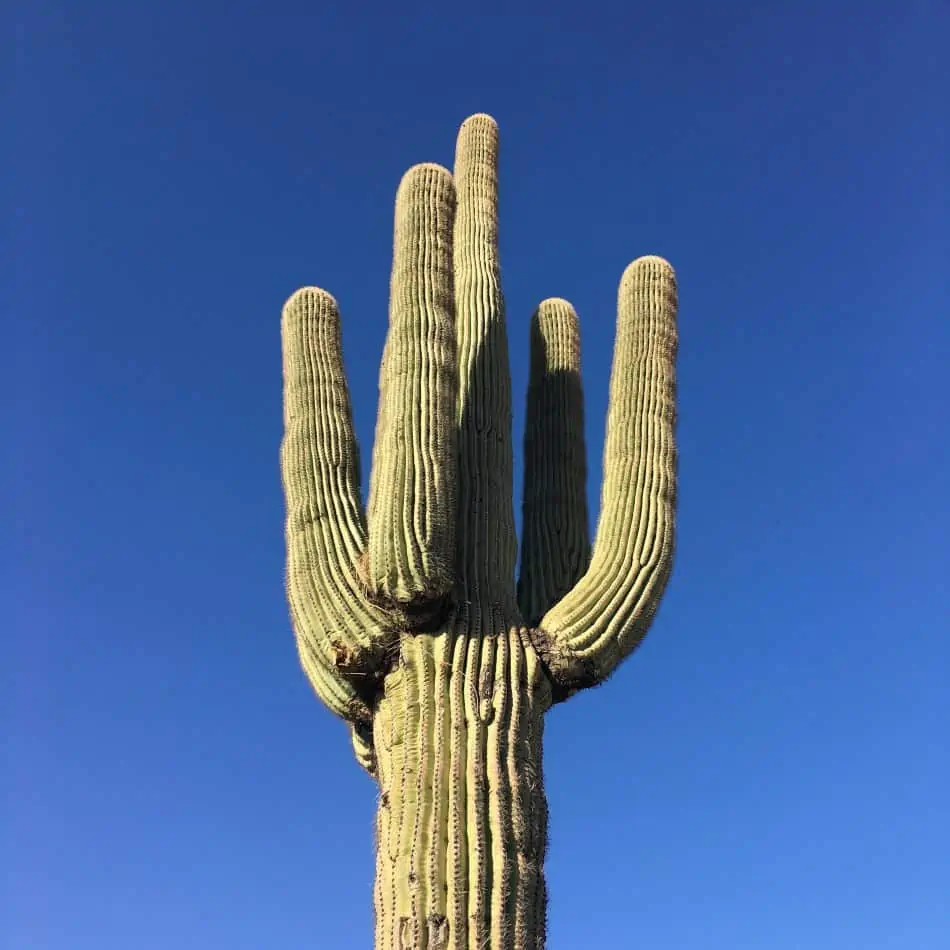
Saguaro is a long-lasting cactus growing about 30 feet in height, which can handle even harsh conditions.
One of the longest-living cactus species in the world, the Saguaro Cactus, is said to live as long (or longer) than people do. Some are even as old as an estimated 200 years! This cactus is as tough as they come and can withstand drought and hours of direct, hot sunlight.
Rainfall is more than enough to keep this cactus thriving, as it has such a large capacity for water storage — enough to allow it to bloom creamy white flowers every year, regardless of the amount of rainfall during the rainy season.
Though slow-growing, these cacti have the potential of reaching 30 feet in height and several feet in diameter, so it’s best to plant them outdoors in an area that is well-drained and receives a lot of light.
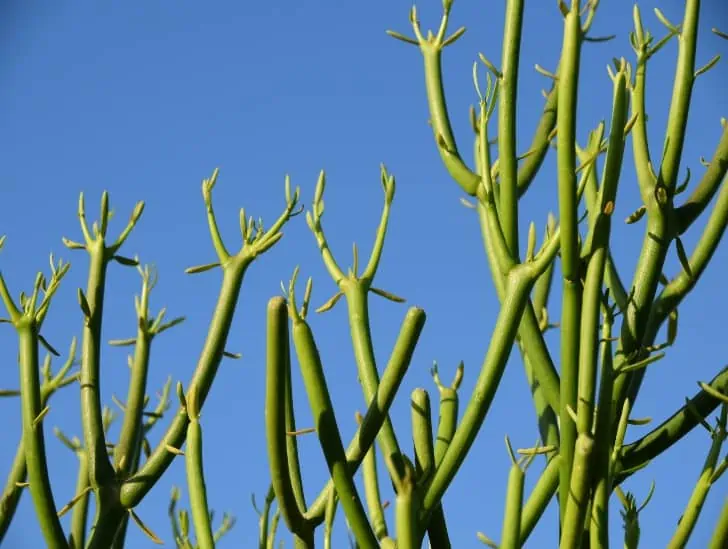
Native to African deserts, the Pencil Plant is no stranger to high heat and harsh conditions. When water is plenty, they’re green in color, but when lacking water, turn a bright coral color. It’s not at all uncommon for gardeners to purposefully restrict water from their Pencil Plants to achieve these brilliant colors, and this cactus does perfectly well without the abundance.
When water is plenty, they’re green in color, but when lacking water, turn a bright coral color.
Rainfall is generally enough for this cactus. However, you can water it once a month if the summers are too hot. Plant in an area that receives partial to full sun.
Final Thoughts
When a cactus begins dying, it comes down to basic care. Cacti are such resilient plants that it’s practically impossible to kill them unless you’re merely caring for them too much. Overwatering is one of the most common mistakes new gardeners make with these desert plants, as root rot is an actual reality with these species. Take care to provide your cactus with adequate sunlight, water only when necessary, and keep it out of direct cold elements.
Some species require more care than others. If you find yourself unable to care for your cactus correctly, consider purchasing one of the previously mentioned species. Cacti like Saguaro Cactus don’t require much upkeep and can live in an arid environment for decades.
Succulents and cacti are unique plants in that they are explicitly designed with survival tactics in mind. Found in dry and often hot climates, these plants have adapted for efficient water retention, given their harsh environment. Their unusual structure and appearance have made them popular in many homes.
What Is the difference between succulents and cacti? Succulents comprise a broad category of plants that store water. Cacti are a family of plants within the larger succulent family, making all cacti forms of succulent. For a succulent to be considered a cactus, it needs to have an areole, which is specific only to cacti species.
Areoles and other specific characteristics help you to identify cacti from similar-looking succulent variations. Succulents are found in a wide variety of plant families, all with the ability to store water, bringing their similarities into view. In this article, we will break down the different types of succulents and cacti, so you know what to look for in spotting the differences.
Scientific Differences Between Succulents and Cacti
Succulents represent a broad category of plants among which cacti are just one of the families.
Let’s first examine the differences between succulents and cacti in their classification and scientific differences. This will help to explain how they are related to one another and what separates them.
A succulent is defined as any plant that has naturally adapted its structure to maximize the storage of water. They are characterized by thick tissue that can store water in their stems, leaves, or roots depending on the specific plant species. Cacti are a type of succulent that use their stems and branches for storing water.
Therefore, all cacti are succulents, but not all succulents are cacti.
Plant Taxonomy Classification Hierarchy for Succulents and Cacti
Plants are classified into hierarchal categories to organize and group related plants. This hierarchy starts with larger groupings and becomes more specific as plants are more similar to one another. Knowing how this classification works is essential to understand how succulents and cacti are related (as well as any other plants).
The general classification hierarchy for plants and organisms is:
Kingdom: This category differentiates between different varieties of life, including animals, plants, fungi, bacteria, and other small organisms.
Phylum/Division: Division is the more common term used in botany, and there are around four divisions in the plant kingdom. These divisions point to plants with ferns, conifers, flowers, and mosses.
Class: This splits plants into groups of dicots and monocots. It differentiates between plants with two seed leaves and one seed leaf, respectively.
Order: This classification further breaks down the different classes into more specific groups.
Family: Plants that start to share many features are arranged into families. Usually, this is where groupings of plants are referred to with species of plants being placed into these categories.
Genus: Within a family, specific plants are grouped that are more similar to each other than others.
Species: This refers to the individual plant that is being examined. Typically, plants are written as genus and then species for their scientific classification. For example, a saguaro cactus is scientifically known as Carnegiea gigantea, with Carnegiea being the genus and gigantea being the species within the genus.
Variety: Some plants may be further broken down into variety if there are minor differences within a species. This will be noted with ‘var’ and the variation name, but many species will not have variations.
In comparing succulents and cacti, we are going to go as far down as differences in family. Of the 452 plant families identified by botanists, over 50 families contain succulent plants. Not all families that contain succulents are entirely comprised of them, but all cacti are classified under the Cactaceae family. This specific family contains over 1,800 species of plants.
Some of the common plant families that include succulents are:
Yucca, Adenium, Faucaria, and Aloe Vera are from the following succulent families: Agavaceae, Apocynaceae, Aizoaceae, and Aloaceae respectively.
Agavaceae/Asparagaceae: This family includes popular plants like Agave and Yucca.
Aizoaceae: This family contains a significant number of succulent species, with nearly 2,000 different ones falling under this category. Popular plants include ice plant, Conophytum, Faucaria, and Lithops.
Aloaceae: This family includes aloe, which has been further broken down for specificity into the Xanthorrhoeaceae family.
Apocynaceae: Adenium and Pachypodium are among popular plants in this family. Periwinkle, milkweeds, and oleander also fall into this category.
Bromeliaceae: Pineapples, Dyckia, and Spanish moss are popular plants in this family.
Cactaceae: Other than the Aizoaceae family, Cactaceae make up the largest family of succulents. These are the families that contain plants with the definable areoles that separate cacti from other succulents.
Crassulaceae: In this family, you’ll find jade plant and stonecrop, among other succulents. This family is responsible for the identification of unique photosynthesis processes that are specific to cacti and some succulent variations. This is known as CAM photosynthesis.
Euphorbiaceae: Many plants in this family are not succulents, but the ones that are usually have leaf and stem succulents. They are one of the few succulent varieties that can be poisonous.
Succulent is a general term for plants that store water with cacti being a specific family of succulent plants. If you break down the classification hierarchy for cacti, it looks like this:
Order: Caryophyllales (includes many succulent plants)
Family: Cactaceae (Cactus family)
Genus: Will vary by specific plant
Species: Most specific to individual cactus plants
Variety: Must be looked at on an individual cacti species basis
Noting the scientific differences in taxonomy and classification helps botanists and gardeners to understand how the plants they work with are organized better as well as similar behaviors for growth patterns and care.
Structural and Visual Differences Between Succulents and Cacti
Cactus comprises areoles, small spots out of which hair-like spines or spikes grow.
Looking at the specific structure and characteristics of a cactus makes it easier to know what to look for in comparing them to a broader range of succulents. Cacti separate themselves from other succulent families and species in specific ways. Remember, all cacti are considered succulents, but some succulents are not related to cacti.
The most significant difference that separates a cactus from any other succulent or plant is the presence of areoles. These are spots on a cactus that hair, spines, bristles, and spikes come out of. These may vary in their appearance, including size, color, and shape. Some species may grow new branches from these areas, but they are most similar to the creation of a bud.
Areoles are specific to cacti, so you can easily spot the difference between this family and other succulent plants. Because there are so many species of cacti, areoles are one of the only characteristics that remain consistent across the family of plants.
Other characteristics that are common among this family (but not all) include:
While succulents have regular leaves, cacti species comprise spines, which mainly protect them from predators.
Stem succulents: Most water is stored in the stems of the cacti as there is often most space and mass for water retention.
No leaves: Cacti do not have leaves – they have spines instead.
Spiny protection: The spikes that protrude from the areoles are designed as a defense mechanism against animals and predators.
Flower producing: All cacti will produce some form of flower, as they are classified under the Magnoliophyta division of plants.
Many other succulent species may also contain similar characteristics to cacti but will not contain areoles. The only similarity among all succulents is their ability to store water. There is significant variation between various succulent plants, with cacti typically being distinguished and separated due to the different characteristics and sheer number of variations to study.
While cacti typically store water in their stems, other succulents use their leaves (no leaves for cacti) and roots for water storage as well. Most succulents do contain leaves, with many of them being oriented in unique and mesmerizing patterns. These leaves are often thick to retain water. Additionally, not all succulents are flowering plants, unlike cacti, and they don’t typically have spikes.
Differences in Care and Survival for Succulents and Cacti
The survival and growth of succulents and cacti vary widely as different species are native to varying environments. These plants have adapted to maximize their chances of survival, whether it is related to climate, nutrients, or protection from their surroundings.
There are five primary categories where succulents and cacti draw both similarities and differences:
Water demands and care
Light requirements and photosynthesis methods
Weather variations and needs
Protection from predators
Propagation methods and techniques
Understanding these requirements and needs for survival not only compares succulents to cacti, but it also allows for more effective care techniques and approaches.
Water Demands for Succulents and Cacti
Since succulents and cacti similarly store water, water demand and care techniques are related.
Succulents and cacti are more similar than they are different in terms of plant care as they are both designed for survival. Specific species of both may have different care routines, but for the most part, they need to be cared for in similar ways. In terms of watering, these plants do not do well in wet environments or if they are overwatered.
All succulents are designed to take advantage of environments where little water is provided, making sparse watering necessary. For at-home care, it is recommended that these plants are only watered once a week and with ample drainage. This is a fairly regular schedule for these plants to be best suited for growth, especially during the summer months.
Cacti and succulents also need lots of water when they are watered. This means that they need to be drenched to absorb enough water to fill their stems (cacti) or leaves and roots (succulents). This will leave them with a plump or bloated appearance as they fill with water.
In the winter months, watering should occur far less frequently due to dormancy. Almost all cacti and some succulent species will become dormant in the wintertime. Specific succulents will not become dormant, creating another difference between cacti and succulents.
Light Requirements and Use for Succulents and Cacti
While both succulents and cacti need lots of sunlight to survive, cacti require more direct sunlight.
All succulents need sufficient light to survive. Some succulent varieties, including the cacti family, have adapted their photosynthesis process to account for arid climate conditions. Many desert succulents use CAM photosynthesis or crassulacean acid metabolism photosynthesis. It was named for the succulent family that this method was discovered.
Stomata (holes in leaves) in all plants will open to complete photosynthesis by collecting carbon dioxide. In CAM photosynthesis, this opening only occurs at nighttime during cooler temperatures so that the cacti do not lose moisture they need to maintain. They hold the carbon dioxide until the daytime when the process is completed with sunlight.
Some, but not all succulents, will use this CAM photosynthesis process to best adapt to their natural environments. Pineapple is another common succulent that uses this process. This is another difference that distinguishes between cacti and many succulent species.
Weather Variations and Needs for Succulents and Cacti
Despite similarities, cacti and other succulent families differ in how they deal with different seasons and weather conditions. Cacti are more tolerant to hot and dry environments, while any other succulent prefers mild climates.
While both designed for water retention, the environments that succulents and cacti grow in can be quite different. Cacti and other desert succulents are quite similar in the tolerance to hot and dry weather conditions, while other succulents are native to tropical environments with more temperate climates.
Cacti can withstand more considerable temperature changes than many succulent species as deserts get very hot in the summer and very cold in the winter. This helps to explain why they practice dormancy in the winter months when temperatures drop significantly. Many succulents cannot survive these massive temperature fluctuations.
Most succulents and cacti thrive in warm environments, between 65 and 90 degrees Fahrenheit, with specific variations adapting to temperatures that fall above and below. Most cacti do not do well in humid environments, while some succulents, especially tropical variations, are more welcoming and tolerant of these wetter conditions.
Protection from Predators for Succulents and Cacti
Cacti have developed various types of spiky and sharp spines to defend against predators.
Many plants grow or adapt in structure to protect themselves from predators. Especially in desert climates, succulents are susceptible to being eaten as they often contain water and can be nourishing to many animals. To avoid this, many plants have developed rigid or harmful defense mechanisms to keep animals away.
Cacti are most famous for this protection as they often contain a variety of spines and sharp, spiky features. Growing from the areoles, these structures can be dangerous and injure those who try to touch or eat them. A vast majority of succulent varieties do not contain these spikes, making them much easier to uproot and eat if needed.
Cacti separate themselves from most succulents in their threatening appearance and ability to ward off predators. If you have touched many common succulents, you’ll find that they are quite soft to the touch. These make it easy for animals to eat them. Plants such as aloe and agave contain sharp edges on their leaves for similar defense purposes.
Beyond physical structure, their chemical composition is also used for protection. The majority of cacti species are not poisonous, relying on the anatomical structure for defense. Conversely, some succulents are deemed poisonous, especially for animals.
These are some common succulent species that may be harmful to humans or animals:
Aloe vera: While it can be ingested or used topically (and often is by humans) for antioxidants and burn relief, aloe is toxic for dogs, cats, and horses.
Euphorbia family: This family of plants is toxic to both humans and animals. The sap found in them can be irritating to your skin. This same reaction can occur internally if ingested.
Jade: This is a common succulent variety, and it is toxic to animals. There are different variations of jade plants, and all should be avoided by animals.
Kalanchoes: These succulents are not dangerous to humans but can make animals sick if ingested. They are characterized by small pink or red flowers arranged in clusters.
The most danger arises from their structural spikes and injuries that may occur from physical contact. This is more of a concern with cacti than succulents as they are not usually as spiky.
Propagation (Breeding) Requirements for Succulents and Cacti
To propagate succulents, you need to remove its part from the root of the plant. On the contrary, propagation of cactus can be done by removing its stems.
Propagation is the process of reproducing or breeding a plant by taking a portion of the plant from its parent. This can be completed with sexual reproduction, requiring pollen and egg to join for seed creation. This occurs in the floral sections of a plant. Asexual reproduction uses roots, stems, or leaves to create identical offspring from one parent plant.
Succulents and cacti propagate quickly, which is another survival strategy for various species. This is not only important in nature, but if you are interested in growing these plants, it makes it a simple process to do at home. Succulents are generally reproduced by separating them from the root of the plant, while cacti can be propagated by removing individual heads.
The method of cutting succulents and cacti for propagation engages in asexual reproduction. Because not all succulents are flowering, this method is taken advantage of most frequently. Because all cacti are flowering plants and not all contain structures for cutting, cacti can reproduce through both sexual and asexual reproduction. Stem cutting is often the easiest.
You may find that leaves or structures of both succulents and cacti that naturally fall have formed into a new plant. This is a survival mechanism, especially if the plant has been damaged or tampered with. Its fallen component can grow into a new plant and continue the survival of the species.
Different Types of Succulents and Cacti
There are thousands of species of both succulents and cacti, offering an extensive range of plants that vary in conditions for growth as well as physical appearance. We wanted to point out some of the most common variations in succulents and cacti and the key characteristics that separate them from one another.
While cacti are considered succulents, they are generally not included among popular succulent species because they have such specific characteristics and thousands of species within their own family. We will break them down into two separate categories for clarity.
The most common and popular succulent varieties include:
Haworthia, Echeveria, Jade Plant, and Sempervivum are among the most common succulent
Aloe vera: One of the most popular succulents for their historical healing qualities, they are characterized by long and thick leaves that branch out from one stem. Aloe is often covered in small serrations as protection.
Zebra plant: Scientifically known as Haworthia, they are white and green with a pattern similar to a zebra. They have pointy leaves and will bloom small flowers.
Snake plant: Also known as Sansevieria trifasciata, they have tall and upright leaves, giving them a unique look compared to other succulent varieties. The leaves have unique streak patterns and will thrive in low-light environments.
Echeveria: One of the most popular succulent varieties for their rose-like configuration, this genus is found in the Crassulaceae family. They come in a beautiful range of colors and have commercially become most recognizable among all succulents.
Agave: Native to Mexico and the southwestern United States, multiple species fall under this genus. Many agaves are spiked for protection, and some species are edible. Flowers, stalks, and the sap are used to make many edible products, including syrups and nectars.
Stonecrop:Sedum is a popular succulent that is often used as a groundcover in garden applications. They come in many varieties, often with small spiky leaves and will produce flowers.
Jade: Scientifically known as Crassula ovata, they are characterized by thick branches with hearty but small leaves. ‘Jade’ points to their green coloring, but this can vary based on the plant.
Hens and chicks: Also known as Sempervivum, these are also rose-like in appearance. Their leaves are typically more pointed and spikier than Echeveria.
All of these plants are designed to thrive in low-water environments are typically characterized by having waxy or glossy looking surfaces to retain moisture best.
When filled with water, the leaves, roots, or stems will appear swollen or expand to accommodate more water in their tissues.
Cacti also come in a variety of species (over 1,800!), and most of them are found in the Western Hemisphere. Because there are so many, we have broken them down by their growth shape and appearance, with specific species mentioned in each.
These are general categories for different types of cacti:
Tree-like: Your larger cacti typically fall into this category, including saguaro (Carnegiea gigantea) with a long stem and tall branches. This is one of the most popular visual representations of large cacti in the desert. Pereskia is a rarer genus that looks like tropical trees, with bark that does not often resemble most cacti.
Columnar: Tall and shaped like a column, these cacti are usually single tubes and are put into the Cereus genus due to their elongated bodies. These include organ pipe cacti (Stenocereus thurberi) and hedgehog cactus (Echinocereus).
Globular: As their name suggests, these small cacti are shaped like little globes or balls. Some common types include golden barrel (Echinocactus grusonii) and moon cactus (Gymnocalycium mihanovichii).
Bush-like: These often grow in a cluster-formation with various branches and pads growing from stems. Popular variations include prickly pear (Opuntia) and Christmas cactus (Schlumbergera),
The broad species variety has made both succulents and cacti popular because they appear in very unique and beautiful appearances. For home growth, they are both easy to care for and low maintenance due to their limited watering requirements and ability to grow in a wide variety of environments.
Succulents vs. Cacti
This article has demonstrated that succulents and cacti have specific differences but draw many similarities as all cacti fall under the broad category of succulent plants. With areoles being there one key distinguisher, physical appearance is often the best way to determine the difference between the two upon visual inspection.
Succulents represent a broad category of plants among which cacti are just one of the families.
Cacti tend to be much more resilient plants as they are often found in more arid and challenging climate environments, such as the desert. Many succulents cannot withstand the intense temperature fluctuations that cacti experience in their native environments. Natural environments for species determine the conditions in which they can best thrive.
Whether you plan to grow them at home or merely appreciate them in nature, their unique adaptations for survival have resulted in long-lasting and exciting looking plants that are appreciated by scientists and gardeners alike. While all cacti are succulents for their water-storing abilities, not all succulents are cacti, and they definitely stand out!
Most of us tend to think that cacti plants don’t require water to survive. Images of these plants growing in deserts abound in media tend to reinforce this perception. However, the reality is quite different. Just like any other living thing, cacti plants require plenty of water to thrive. When it comes to growing cacti plants at home, it is not just about watering but how you do it that matters. Let us see how you are supposed to water cacti from the bottom.
So, how do you water cactus from the bottom? The method involves immersing your potted plant in a sink or water pan. The drainage holes in your pot allow the potting mix to absorb water over some time (usually five to ten minutes) without over-saturating it. After that, you let the excess water drain out before taking your plant back to its resting place.
The most important thing you need to know about the bottom watering method is that your pot must contain sufficient drainage holes.
In this post, we discuss everything you need to know about bottom watering. How to do it right, its effect on your cactus, and much more. Read on to discover more.
What Is Bottom Watering?
In simple terms, bottom watering refers to watering your cactus plant from the bottom up. When you water potted cactus using this technique, its roots get stronger because they are always growing downwards towards the moisture.
Also, you will always be sure that water reaches the bottom of the container and drains out as expected. When you do it correctly, this watering method can help you achieve great success with both indoor and outdoor cacti plants.
How to Bottom Water Your Cactus Plant
When it comes to bottom watering, the key is timing. You need to know when your plant is thirsty to avoid overwatering it. The best way to accomplish this is by checking the dryness of your potting mix. Keep in mind that good potting soil should be fast-draining.
To check if the soil is completely dry, carefully stick your finger into the pot. Make sure your finger penetrates at least two inches deep. If the soil feels damp, wet, or colder than the surface, then you shouldn’t water your plant. Give it a few more days.
As the first step of bottom watering procedure, you should fill a sink or large container with sufficient water.
The first thing you need to do is fill a sink or large container with enough water that will accommodate your plant pot. If your plant pot is filled with soil and nothing else, then you are good with any water level.
However, if you have got pebbles or drainage rocks at the bottom of the container, the level of water in your sink or container needs to be a little higher than the rocks/pebbles so that it can reach the soil.
You should also keep in mind that different types of potting mix will absorb water differently. If you are using cactus soil that has a lot of pebbles and perlite, it might take a longer period to absorb water.
But for a standard potting mix with minimal inorganic matter, you should expect the process to be faster.
No matter the type of your potting mix, make sure you have got enough water in your sink/container that will allow your cactus to soak in as much as it wants. If you don’t put enough water in your container/sink, you will simply underwater your plant.
Step 2: carefully immerse your pot in the water
You will need to carefully place the pot with the cactus in the sink or water container.
Carefully immerse your plant pot into the sink or container containing water. If you are still using a grow pot and the soil is too dry, the pot may start floating. If this happens, you’re your pot upright for a few minutes before you leave it alone.
If you don’t take necessary precautions, the plant may tip over and cause a mess that you will have to clear.
Step 3: Leave the plant to rest in the water
Don’t be so quick to take the cactus plant out of water. Leave it to rest in the bath for approximately ten minutes before you check on the progress. You will know that it is time to take it out when the soil is sufficiently moist to the top.
Sometimes, the very top of the potting mix may fail to get wet, which is okay. If that is the case, let your plant rest in the water for about ten minutes, take it off, and water the dry tip manually.
Step 4: Drain out your sink/container
After ten minutes, drain out the sink or container that was holding the water and let your plant stand out for a few minutes to drain fully.
Bonus tip: Use distilled or filtered water to bottom water your cactus. Avoid using tap water because it contains too much chlorine, which might damage your plant in the long run. You should also keep in mind that bottom-up watering works best on small to medium-sized cacti plants that are easy to move.
Why Do Experts Recommend Bottom Watering?
Bottom watering technique makes the cactus roots grow downwards and absorb sufficient water.
Well, the truth is thattop watering never saturates your potting mix. Technically, it means that water is not reaching the roots of your plant.
With top watering, small amounts of water trickle down to the soil and start dripping to the bottom. This gives you a false impression that you have watered your plant adequately.
In reality, you are underwatering and leaving your plant feeling thirsty most of the time. Cacti plants need complete soaking to absorb as much water as possible. The difference should be in how frequently you water your plant, not how thoroughly you do it.
Instead of dripping each plant individually, you can keep putting more plants into the same sink/ container of water until the water is used up.
In a nutshell, bottom watering keeps your cactus healthier, and it is easy to use.
How Often Should You Water Your Cactus?
Now that you know how to water your cactus using the bottom watering technique, you might be wondering how often you should do it. Cacti plants are hardy and may not need frequent watering compared to other plants. Nonetheless, you need to make sure you aren’t underwatering.
Some of the factors that influence the timing of watering include; are your plants grown in the ground or containers? How much light are they exposed to? What is the air temperature, humidity, and soil type where they are growing?
Keeping everything constant, one thing you must keep in mind while watering a cactus is its inability to survive in standing water. This is the primary reason why you must ensure your potting mix is fast draining.
As long as the soil is porous enough, occasional overwatering may not be a big issue since the excess water can easily drain awayquickly. Heavy and compact soils that capture and retain water for a long time may cause root rot.
You need to be cautious with watering to avoid causing problems.
Generally, you need to water your plants more frequently in warmer seasons than colder seasons. During summer, your plant requires frequent watering to fuel growth. At this time, you should consider watering your plant once or twice a week.
However, things change during the colder seasons. In winter, most cacti species enter into a state of dormancy. No growth occurs at this time. Therefore, you need to be cautious with watering to avoid causing problems. Generally, water your plant once every three or four weeks during the colder season.
More Tips for Success
You should never overwater the plants. Add some fertilizer to the water to provide extra nutrients.
Here are a few more tips to help you utilize bottom watering effectively:
1. Watch the time, carefully
While this method is good in making your plant stronger and healthier, you should also keep in mind that it is easy to overwater it.
If you leave the plant to sit in the pool of water for too long, the effects can be devastating. Overwatering can result in death. Always keep an eye on your plant and find the perfect time to let it sit in the water, based on the size of your pot and soil type.
2. Add nutrients to the water
If you are giving your plant more food, bottom watering is an incredible way to do that. Just add the food/fertilizer to your water, and you are good to go.
3. Do not overcrowd the pool
Be careful not to overcrowd the sink with plant pots. The best approach is to water one plant at a time.
Technically, the number of plants you have got in the sink will change the amount of water you require. Be extra careful with young plants that can break easily.
Final Thought
That is it about bottom watering. Just remember to be sensible when watering your cactus and find out what works best for you. If you haven’t tried the bottom watering technique, be sure to try it out and let us know the outcome.
There is a misconception out there that cacti plants love excess sunlight because most of them grow in deserts. In fact, a significant number of gardeners believe that a cactus plant will happily sustain full blazing sunshine all day long, and nothing will happen to it. But, is it true? Are these succulents resistant to sunlight, no matter how severe it is? We shall find out in a moment.
So, can a cactus get sunburn? Yes. Although these plants are fairly hardy, they are still susceptible to a wide range of diseases and environmental stress. Exposing your cacti to high-intensity sunlight that they cannot handle will result in sunburn and shriveling of your plants.
And the most unfortunate thing is that sunburn is not only unsightly but also dangerous to your plant’s health. Severe sunburn can cause irreversible damage to your plant, leading to death.
In this blog post, we discuss everything you need to know about cacti plants and sunburn. How does sunburn occur? How can you know that your plant is experiencing sunburn? How can you stop it, and how can you prevent it from happening in the future? So, let us get started.
General Light Requirements for Succulents
Before we start looking into sunburn, it is essential to understand the light requirements of a cactus. As with all other plants, cacti also need light for photosynthesis — the process in which they make food from sunlight.
Most succulents require bright sunlight and warmth throughout the day, but some species can tolerate partial shade. It is always recommended to look up the specific light requirements of your plant, as they can vary.
Generally, you should strive to provide your succulent with at least six hours of direct sunlight daily. And if your plant is placed near a window, it should have some protection from the afternoon sun’s intensity since this can be too strong for most cacti species.
If growing succulents indoors, consider positioning them on a south or west-facing window. This will help them get enough sunlight without putting too much stress on them. You can also opt for artificial lighting to supplement natural light if required.
If your plant starts looking dull and pale, you may need to increase its light exposure. On the other hand, scabrous or swollen surfaces, yellowing leaves, and soft spots are all signs of sunburn.
Can a Cactus Get Too Much Sun?
Excess exposure to light might cause sunburns and damage the plant.
As mentioned earlier, all plants need plenty of food to survive. Sunlight is an essential requirement in the process of photosynthesis, which helps every green plant to manufacture food. Technically, it means that if your cactus doesn’t receive sunlight, it won’t synthesize food, and it will eventually die.
But, there is a limit to how much sunlight every plant species requires. If the amount of sunlight provided exceeds a certain threshold, it is no longer useful to the plant. Instead, it becomes damaging, and unless you take measures to save your plant, it will eventually die.
It is true that cacti plants, just like other succulents, love sunshine and can withstand direct sunlight for certain amounts of time. In fact, most cacti species tend to thrive in relatively warm temperatures of between 60oF and 80oF. Some species, such as the Old man cactus, will still do well in higher temperatures.
However, when you combine high temperatures and direct sunlight, then your plants may start straining to contain the intense heat and will start running into trouble. In the same way, you would be comfortable sitting under direct sunlight for an hour when the temperature is maintained at 70oF but will quickly take cover when it rises to 80oF.
It is the ultraviolet (UV) rays and the strong intensity of sunlight that will burn your cactus and not actually the heat. But still, relatively higher amounts of heat can also lead to rapid water loss and higher internal temperatures, which makes your plant more susceptible to physical damage, including sunburn.
How Do You Know Your Cactus Is Getting Sunburned?
One of the first signs of cactus sunburn is discoloration of stems and the presence of yellowish color.
When a cactus is exposed to too much sun, it will start to develop internal stress. However, if you manage the exposure effectively, the plant may adapt to the extra sunlight and heat by producing some brightly colored pigments. If you fail to manage the exposure effectively, then it will become sunburned.
One of the earlier signs of sunburn is the development of patches on the leaves of the plant. If only a section of the plant is exposed to excessive sunshine, there may only be a few parts of the plant showing symptoms of sunburn.
Depending on the severity of the burn, the patches may be brown, black, or tan in color.Typically, the more severe the sunburn, the darker the discoloration will be.
A severely sunburned cactus may also be permanently scarred. The dark, discolored patches that develop on sections of your plant that have suffered sunburn are usually permanent. But it takes some time before the damage becomes irreversible.
If you notice the appearance of dark scars on different parts of your cactus, be sure to touch the spots and feel their texture. If they are slightly dark, but their texture feels smooth, then it is only a sign of impending sunburn, and the damage is reversible at this stage.
All you have to do is move the plant to shade before the actual permanent scarring occurs. With time, your plant will heal, and the scars will disappear.
It is also good to mention that a cactus may respond to excess sunlight and heat by changing from green to yellow-green. This is usually a sign of stress and a pre-sign of potential sunburn. Although this change doesn’t leave behind any scars, the effects can be quite severe if you don’t act quickly.
The moment you notice the green-yellow color, consider moving your plant to shade and let it rest there for some time. The green-yellow sections will disappear when the temperatures drop, and the stressed tissue of the plant will return to normal.
Why Is Your Cactus Getting Sunburned
At this point, you might be wondering why cacti plants suffer from sunburn in the first place. Well, there are two major causes of sunburn that you need to know.
Sudden change in growth conditions
Although most cacti species love sunlight and a little more heat, they need time to adapt to it. Keep in mind that almost every cactus plant you will find in your local store is grown in a greenhouse. This means that the growth conditions that these plants are accustomed to are consistent.
When you bring your new cactus home and put it in direct sunlight, the conditions change drastically, and the result can be unpleasant. Exposing your plant to full and direct sunlight at this point will only result in severe sunburn within a few hours or days.
Another critical aspect of growth you need to be careful with is moving your cactus from one place to another.
For instance, if your plant has been growing with one side facing south where it is exposed to maximum light and the other facing nothing which is shadier, then turning your plant 180 degrees could be a big mistake.
When the other side that has been in the shade for a long time is suddenly exposed to direct sunlight, it can develop severe sunburn within hours. If you want to turn your plant, do it gradually, giving the other part that has been in shade enough time to adapt to the new conditions.
Change in habitat
By now, you need to have understood the fact that the cactus family is large and features over 2500 different cacti species that grow in different habitats.
For instance, you will find the jungle cactus in tropical rainforests while the Saguaro will grow happily in the blazing heat of the Arizona desert.You will even find some cacti species in the high Andes Mountains of South America and the foggy coast of California.
What we mean is that before you go out and purchase a cactus plant, take time to understand where your preferred species is found and the general conditions it prefers to grow in. This way, it becomes a little bit easier to provide the right conditions because you already have a clue.
When you finally bring your cactus in, pay close attention to the growing conditions the plant has been in and try to simulate them in your home. Also, if you are bringing your plants outside after the winter season, be sure to introduce them to the spring sunlight gradually.
Caring for Sunburned Cactus
You can take care of your sunburn cactus by putting away from sunlight, watering, and protecting from pests.
If you catch the sunburn before it becomes severe, you can save your plant from the irreversible damage.
The first thing you need to do is to get it out of direct sunlight. If you notice any yellowing on the surface of your plant and it is in full sun, be sure to move it even if you have to assume the task of taking it in and outside every day.
But we understand the fact that moving the plant is only possible if it is in a pot that is small enough to move. If you have a large cactus plant that you suspect is developing sunburn and you cannot move it, then try to cover it using a shade cloth during the hottest part of the day.
Secondly, keep your plant watered but be careful not to overwater it because it can lead to other problems. Typically, if a cactus is stressed or sunburned, it will go into a state of dormancy regardless of the season.
During this stage, the plant is going to cease growing and focus on repairing the damaged tissues and re-establishing itself. Frequent watering may help the cactus in the long run, but don’t be tempted to overwater it.
Lastly, strive to protect your plant from pests and other diseases. Keep in mind that if your plant is sunburned, then it is weaker and more susceptible to disease and pest infestation.
Therefore, take time to check for bugs and ants that may cause more damage than what the plant has already suffered from sunburn. If you notice signs of diseases or pest infestation, be sure to take appropriate action.
How to Prevent Sunburn in the Future
You can prevent sunburns by gradually changing the environment and slowly exposing them to sunlight.
When it is time to move your cacti plants outside after spending winter indoors, you need to be careful with the process. Do it gradually to avoid stressing the plant. Typically, you should introduce your plants to increased levels of sunlight slowly over two or three weeks.
During the first few days, consider putting your cactus into full sunlight for just a few hours a day and slowly increase the time every few days.
Once the plant has received plenty of sunlight for the day, move it to a shady area, or if you cannot move it, cover it with a shade cloth. Moving your plant to a shady area or covering it during the hottest part of the day will help to prevent sunburn.
Also, avoid fertilizing your cactus during the summer. Fertilizers are high in salts and minerals that can damage your plant, especially when exposed to direct sunlight. Wait until winter before you start fertilizing again.
Finally, remember to water them regularly but not too much because plants will often suffer from sunburn when they are stressed.
Be observant and identify signs of sunburn early before it is too late. This way, you can take the right steps to protect your cacti plants effectively.
Light vs. Temperature: Is There a Difference?
When it comes to succulents and sunlight, it is not just the intensity of light that matters but also the temperature.
Many cacti species are sensitive to heat and can easily suffer sunburn if the temperature is too high. This can happen when the plants get too close to a windowpane or are positioned in direct sun for too long.
So, if you want to avoid sunburn, pay attention to the temperature of your succulents as well. If you can feel intense heat radiating from the outside surface of a pot, then that is an indication that the temperature inside may be too hot for your cactus plant.
Can I Save a Sunburned Cactus Plant?
Yes, you can save a sunburned cactus plant. The key is to identify the signs of sunburn early and take effective steps to protect the plant from further damage.
Move the cactus out of direct sunlight, provide enough but not too much water, and avoid fertilizing during summertime.
Lastly, check for signs of pest infestation or disease and take appropriate action. The most common pests that may infest your cactus are mealy bugs, scales, and spider mites.
With the right care, your sunburned cactus plant can recover and thrive.
Summary
We hope you understand how to take care of your cactus to prevent sunburn. Caring for these succulents can sometimes be difficult, but you have to learn the tricks along the way. If you have got any questions or comments, please let us know in the comments section below.
For many people, how cacti can survive in arid regions with limited water is still a mystery; it seems like they only need the bare minimum. However, just like any other plant, a cactus still needs the basics to thrive, like water and sunlight.
What do cactus need to survive? To survive in any environment, a cactus needs the following:
Sunlight
Air
Water
Drainage
Nutrients
Because cacti are hardier than most other plants, they do not require a lot to survive. However, there is a unique way you must care for it. The remainder of this article will discuss how sunlight, air, water, drainage, and nutrients work together to help a cactus thrive, and how you can provide your plant with these essential needs.
5 Things Cacti Need to Survive
There’s a common misconception that cacti can continue to thrive even when neglected, but this is certainly not the case. To survive, a cactus will need the following five essentials:
1. Light
Exposure to sunlight is essential for a cactus to grow properly.
We all learned in science class that all plants require light for photosynthesis. No matter what type of plant it is and how much light they actually need, there must be light. Cacti are no different. In fact, a cactus’ natural habitat is full of sunlight, so they generally love it.
When it comes to how much light a cactus needs, the amount may differ across various species, but most cactus can survive under strong, direct sunlight.
However, there is such a thing as too much light. If a cactus is exposed to high-intensity light for too long, it can become sunburned. It is recommended that you provide your cactus protection from intense light to avoid this issue, especially if you are trying to acclimate it to a new environment.
On the other end of the spectrum, if you don’t provide sufficient sunlight to your cactus, it will grow tall and thin, and in search of the light it needs—a process known as etiolation. In addition, the plant will not be able to flower since it does not have enough exposure to sunlight for photosynthesis.
So, where’s the happy medium? Cacti require direct sunlight, but if your cactus will be kept indoors, you will need to expose it to 12 to 14 hours of full-spectrum light. Full-spectrum light provides all the wavelengths that sunlight provides, giving your cactus the light it needs. You can use A Plus LED Grow Lights for Indoor Plants or this Fauna 100W COB Plant Grow Light Full Spectrum, which has a timer to manage the hours of light you expose to your cactus.
Here are some quick cactus lighting tips to keep in mind:
Choose where you keep your cactus carefully. Regardless if you keep it indoors or outdoors, make sure the area it’s in receives adequate sunlight.
If you are transplanting a cactus or transitioning it to a new area, gradually increase its exposureto light to avoid shock.
If your cactus is indoors, try to adjust lighting based on seasonal changes. If you bring your cactus inside during the winter, make sure you continue to provide it with the light it needs, although the amount may decrease to account for the change in season.
Be attentive to the look of your cactus; if you notice a slight sunburn on its surface, take measures to provide light protection right away.
2. Air
As obvious as this may seem, your cactus needs to be in an aerated space; like any other plant, it needs air to survive. You need to keep it in a well-ventilated space where it can take in carbon dioxide and output oxygen freely.
A cactus can help improve the air quality at night by increasing oxygen, that’s no reason to stuff it in a closet or tight, enclosed space.
One of the reasons why cactus survive in hot and dry environments is the difference in how they breathe. To avoid losing water, a cactus keeps its stomata closed during the day and opens it at night while most plants do the opposite.
But although a cactus can help improve the air quality at night by increasing oxygen, that’s no reason to stuff it in a closet or tight, enclosed space. You need to keep your cactus in an open, aerated environment, especially at night, so that it can breathe properly.
3. Water
One of the most common mistakes cactus owners make is underwatering; they assume that because cacti can live in hot environments, they can go for weeks without water. Not providing a cactus with enough water usually leads to it dying; even though they are tough plants, they still require regular watering to survive, just like other plants.
On the other hand, there are also cacti owners who may overwater them. The water may collect at the bottom of the pot, eventually leading to root rot. So, it is important to understand that cacti are drought-tolerant, but they prefer the minimal water life.
Overwatering or underwatering might lead to root rot and eventual death of the plant.
So, how much water does a cactus need? According to experts at the Cactus & Succulent Society of San Jose, you need to water a cactus once a week. You should make sure the soil it’s planted in is loose, and the pot has holes at the bottom so excess water can drain easily. You will need to water the cactus until the soil is saturated, and water starts coming out of the drainage holes.
Know the cactus species you’re dealing with. It’s vital to know where your cactus originates from. Some cacti thrive in extremely dry conditions with minimal water, while others need you to protect them against the sun and may need more water.
Younger cacti need more water, but as they get older, they need less to survive.
The growing medium you use matters, so if yours is loose and loses water fast, you’ll have to water differently than with a cactus in a medium that retains water more.
Keep the season changes in mind. In fall, you can stick to the weekly routine. During winter, watering once a month is okay since as the temperature drops, evaporation rates reduce. During summer and spring, you can observe your plant and water as required.
The shallower the potting container is, the higher the evaporation, so keep that in mind while working your watering cycles.
Indoor cacti can survive up to two weeks without water, while most outdoor cacti need weekly watering schedules.
Use soft water and rainwater when possible; hard water can destroy your cacti.
Avoid misting the cactus since the humidity available is enough to provide it with any needed moisture.
Assess the type of environment you live in to determine the watering cycles your cactus requires accurately. Most importantly, continue to observe your cactus’ appearance so you can adjust its watering as needed.
4. Drainage
It is suggested to use a pot with one or more drainage holes to prevent excess water from accumulating.
Since cacti are drought-tolerant, they can’t survive in waterlogged soil. Therefore, it’s important to search for a pot with ample drainage—preferably with a hole or multiple holes at the bottom; how many drainage holes a pot has will usually depend on its size. *
*Note: Some indoor cactus owners may not prefer to use a pot with holes to prevent introducing dirt into their living space. In these instances, it is recommended to use a planter with drainage holes plus a tray that can hold excess water and soil that may come out of the pot.
Here are some recommended cactus planters:
Alpspro Succulent Plant Pots
T4U Ceramic Succulent Pot Planter
AppyHut Square Plant Pots
Onig Succulent Plant Pots
It’s equally important to pot the cactus with well-draining soil; this will not only help with allowing water to seep through but will also keep the cactus roots aerated.
5. Nutrients
Fertilizers should be used to provide nutrients for the cactus to properly grow.
Cacti also need nutrients to grow and process food. Over time, a cactus may lose fertility in the soil it’s planted in; therefore, a little fertilization can go a long way in helping the cacti survive.
You will only need to fertilize your cactus during their active growing period; for most cactus, this usually takes place in the fall, summer, and spring. Cacti only require fertilization at least once per year.
The following are cactus fertilizers you can use:
Schultz Cactus Plus Liquid Plant Food
Grow More Cactus Juice
EarthPods Premium Cactus & Succulent Plant Food
Hoffman Organic Cactus & Succulent Soil Mix
Final Thoughts
Many people prefer keeping cacti as a houseplant because they are low-maintenance and easy to care for. As long as you provide it with sufficient light, air, water, drainage, and nutrients, your cactus will not only survive but also thrive.
Cacti have a reputation for their abilities to survive in incredibly dry environments like deserts. But these hardy plants are also commonly kept as houseplants. If you have some cacti of your own and want more without spending money, you might try to root your own.
Does cactus root in water? Cactus is a type of succulent that can root in either water or dirt. Some varieties of cacti will root better in dirt, but many will also root in water. By rooting your cactus in water, you can try getting more plants without buying them since you use plants you already have.
There is no guarantee that any cactus will grow in water or dirt; sometimes, the environment just is not what the plant wants. The good thing is that it is easy to at least try rooting your cactus in water, and you do have a good chance of success.
Rooting a Cactus in Water
A new plant can be propagated by using part of plant’s stem, rooting it in water, and then transferring to soil.
The process of growing a new plant from a piece of the parent plant is called propagation. Although you can grow new cacti and other succulents from seeds, you can also propagate them by using part of the original (parent) plant’s stem.
Propagating your plants is not always successful, but it is a process that you can easily attempt without any major consequences. Propagation is also an easy way for you to expand your plant collection without spending more money on buying new plants. Plus, you get the satisfaction of having rooted your own plant.
You can also propagate your cactus in soil, which is more traditional. It may seem counterintuitive to place plants that do not usually like much water in a glass of water, but it does work. If you want to be able to see the process of a cactus rooting, then it is best to propagate it in water.
Some people may also find that they have no luck propagating plants in soil, or vice versa. If you are having trouble propagating your plants in dirt or just want to see if water will work too, then you can easily try to propagate your cactus in water.
Materials
To propagate your cactus in water, you only need a few things:
Parent plant: Naturally, you will need the parent plant to propagate from.
Scissors: You can use sharp scissors or garden shears. These will be needed to gather cuttings.
Glass: You can use any sort of glass vessel. It does not have to be see-through, but it does add a cool element if you can see the roots.
Water: You will need plain water.
Plastic wrap: This is an optional material.
Step 1: Gather the Cuttings
To root your cactus part in water, you should first collect the cuttings from the parent plant.
The first thing you need to do is find where you will take cuttings from. Look at your parent plant and locate a new growth that has some stem. Carefully cut the piece off of the parent plant.
You want to have some of the stem exposed, so you may have to remove a few of the lowest leaves. If you are unsure of how your propagation will go, you may decide to gather a few cuttings from multiple cactus plants to try.
Step 2: Dry the Cuttings
Once you have the cutting, you need to leave it out for a few days. This allows the cut part of the stem to heal a bit. The cut side of the stem needs to be calloused over before you try to root it in water.
Depending on the environment, it may take closer to a week or so for the cuttings to completely dry. Just be patient and let the stem heal itself.
Step 3: Place the Cuttings in Water
Fill your vessel with water. The amount you put in will depend on how long the cutting is. You want the root of the cutting to be in water, but not any of the leaves, so fill the glass accordingly.
You have the option of covering the top of the glass with plastic wrap and poking a hole in the center to put the stem through. This adds a layer of protection between the leaves and the water.
Place the cutting in the water so that the stem is either just above or inside the water. This might take a bit of experimentation. Some people find that placing the stem slightly above the water encourages the plant to see out the moisture and root.
Step 4: Wait
After rooting the cactus in water, you can transfer it to a pot while using suitable soil for the plant to grow.
Place the vessel with your cuttings in an area with lots of light. At this point, you need to have patience and let the plant root. It might take several weeks or even a month to start rooting.
Be sure to regularly check the water in the glass. You will likely need to change it and refill it. If the water starts to get murky, you should change it to prevent fungus and bacteria from forming.
Once the cactus starts rooting in the water, you can either leave it there or transport it to a pot with soil. If you decide to move the cactus to a pot, make sure that you use a soil mixture meant for succulents. You can buy bagged versions for ease or make your own mixture out of materials like pumice, perlite, and sand.
Care of a Cactus
Each species of cactus will have slight differences in their needs. Generally, cacti need to be in an area with lots of light. It does not necessarily need to be direct sunlight, but cacti do need substantial light to grow.
One of the most important aspects of caring for a cactus is the soil. If you are planting a cactus in a pot or other container, the soil must be able to drain well. It is important to note that although the soil for cacti needs to drain well, you can still root a cactus in water.
For a potted cactus, you want to make sure that you do not overwater the plant. You should only water the plant when the soil is completely dry. Depending on the environment and time of year, you may only water your cactus once a week.
You also need to make sure that the cactus is getting enough light. If you notice the cactus leaning toward a window or its color turning pale, you should try finding a different spot with more light.
Safety with Prickly Cactus Plants
To keep your hands safe, you should always wear gloves while working with prickly cacti with sharp spikes.
Not all cacti have sharp spikes, but those that do can be quite painful if you touch them with your bare skin. Always use thick gloves or folded papers to handle these types of cactus.
If you have pets or small children around, make sure that they cannot reach prickly cacti plants. Pets will not know any better, and children may not understand why they cannot touch the cactus until they prick themselves.
Cactus Lifespans
Cacti that are in natural environments like deserts can live for centuries. Indoor cactus plants can live for around a decade if they are cared for properly.
Despite their ability to live for a long time, cacti are not indestructible. They are sensitive to being overwatered and underexposed to light. Cactus plants can also be broken if you are not careful in handling them.
Indoor cactus plants can live for around a decade if they are cared for properly.
You should always be extremely cautious when you move your cactus. Every time there is damage done to the cactus, the mark will always be there. This is especially true with older cacti, so be careful not to move them in a way that could compromise their structure.