How To Choose The Right Pot For Your Cactus

My passion for cactus has driven me to watch hundreds of Youtube videos on how to take care of them. I’ve read multiple blogs, research journals, books, and any material online and in the libraries, I can find about the cactus.

But before I tell you all the details I uncovered in my research, I realized something significant that many cactus lovers forget before buying the pots. Here are some of the things you should think about before heading out to find the right pot for your cactus.

Questions to Answer Before Your Buy The Pots

  • Are you looking for pots for indoor or outdoor plants?
  • Where exactly do you plan to place the cactus?
  • If you’re looking for pots for your indoor cacti, what colors will complement your home decor?
  • Would you want a masterpiece pot that makes a statement or would you prefer all the pots to be of the same color?
  • If you’re repotting your cactus, what is the size of the current pots?

Here is a detailed report on my research to help you make the right decision when choosing the right pot for your cactus.

What Factors  Should You Consider When Choosing A Pot For Your Cactus?

Drainage

The cactus plant is biologically adapted to survive for an extended period without water.  These adaptations also work against it when you water it so much and too frequently. Therefore, when choosing a pot, ensure that it has drainage holes to drain excess water. If it doesn’t have them, ensure that you drill the holes before using it to plant your cactus.
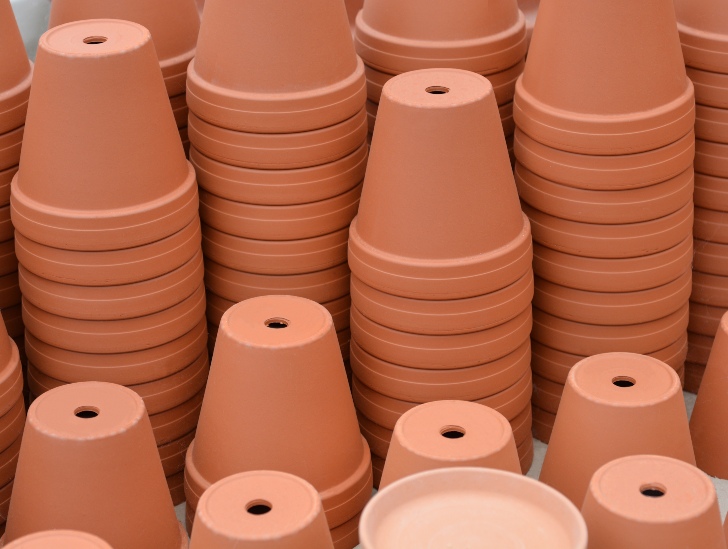
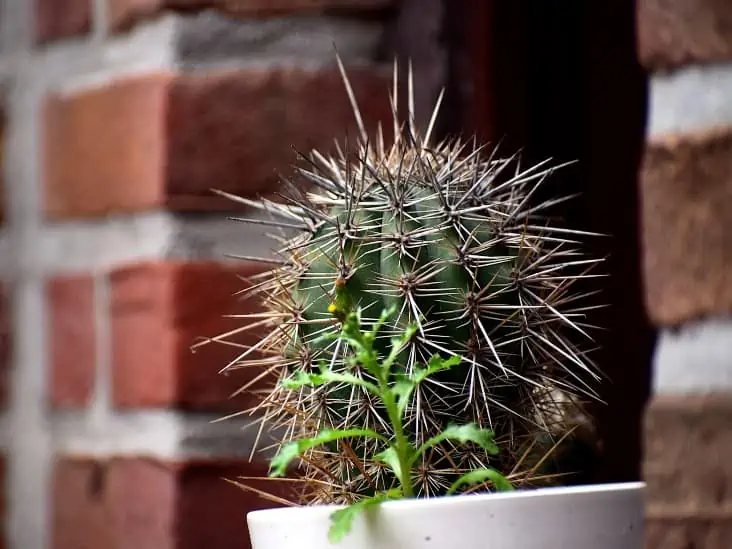
Cactus with hole.
When choosing a pot, ensure that it has drainage holes to drain excess water.

Material

This is usually the first thought in the minds of many cactus lovers. There are many options to consider when looking for the right material. However, there is no good or bad material. It all depends on your preferences. Here are the materials available and some of the facts you should know about each:

1. Clay (Terra Cotta)

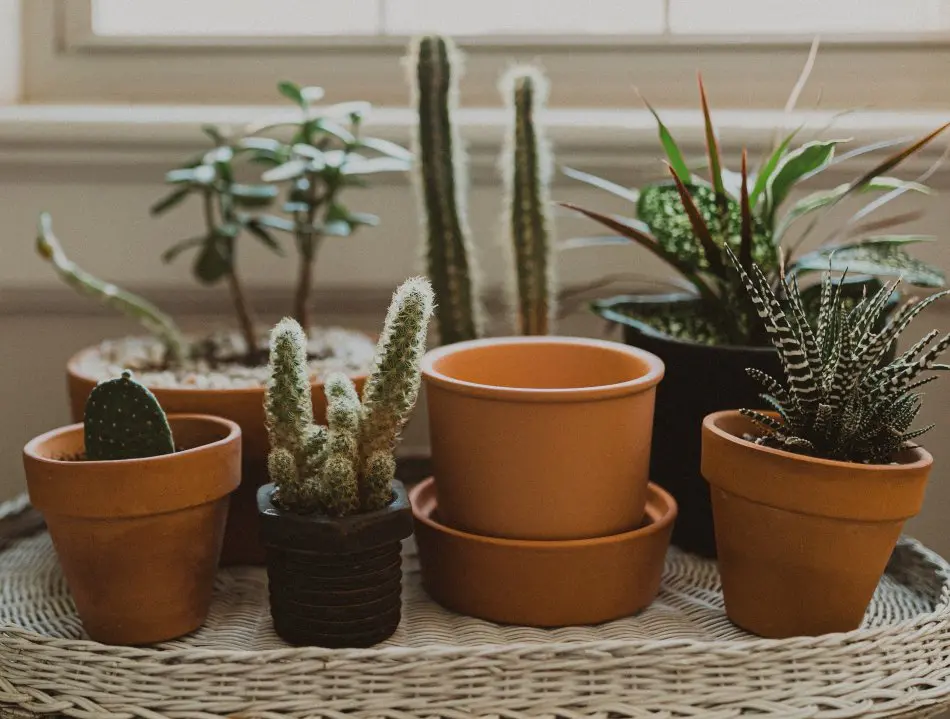
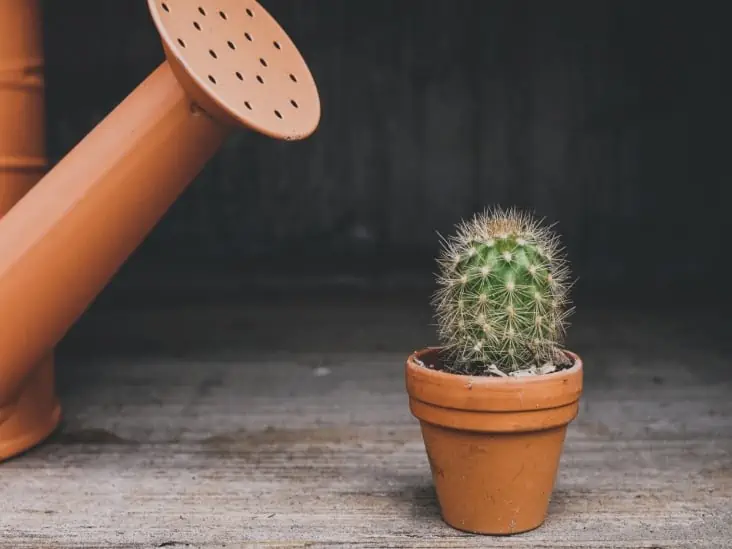
The clay pots are some of the most popular mostly because they drain quickly. Their porous nature creates a conducive environment for the cactus. Also, because they absorb water, it’s pretty easy to estimate the moisture level in the soil. This is because, when the clay pots soak up the water, they turn dark. Finally, these clay pots are affordable as compared to other planters. And, it’s easy to find them in a uniform color for consistency in your home decor.

On the flip side, the clay pots are highly delicate: they immediately shatter if they fall or hit on a rock-solid. Also, due to their high drainage rate, the water can dry out very fast in summer.  Therefore, when you transplant a cactus into a clay pot, pay close attention to it to prevent it from drying out. And, the clay pots are susceptible to breaking in winter.

Note, clay pots might be a challenge when repotting because sometimes the cactus roots might penetrate the clay pot walls. This challenge doesn’t happen with any other kind of pot. However, clay is perfect for people who live in humid areas and do not have an issue with space (they take up a lot of space) and don’t need to move the cactus.
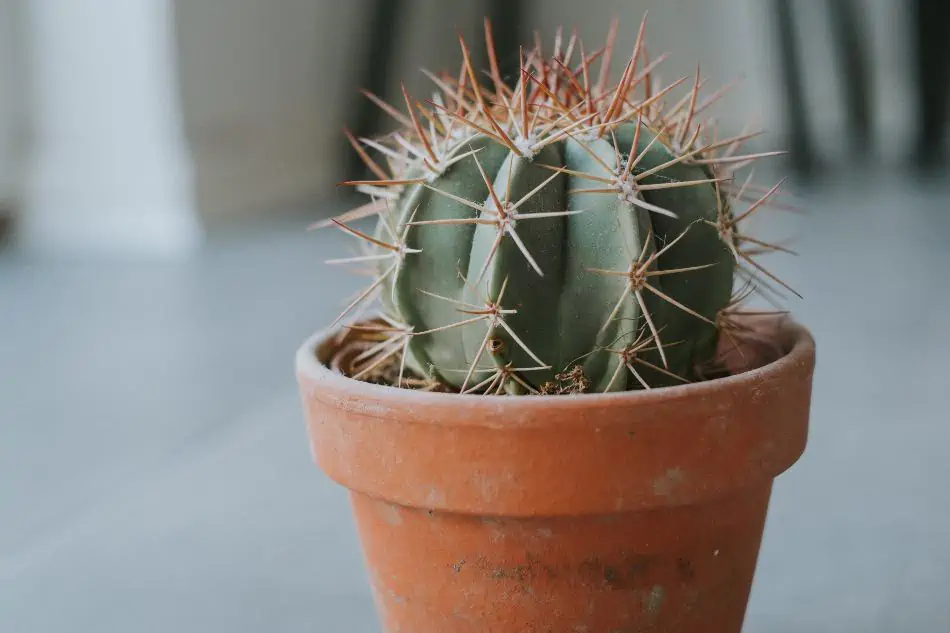
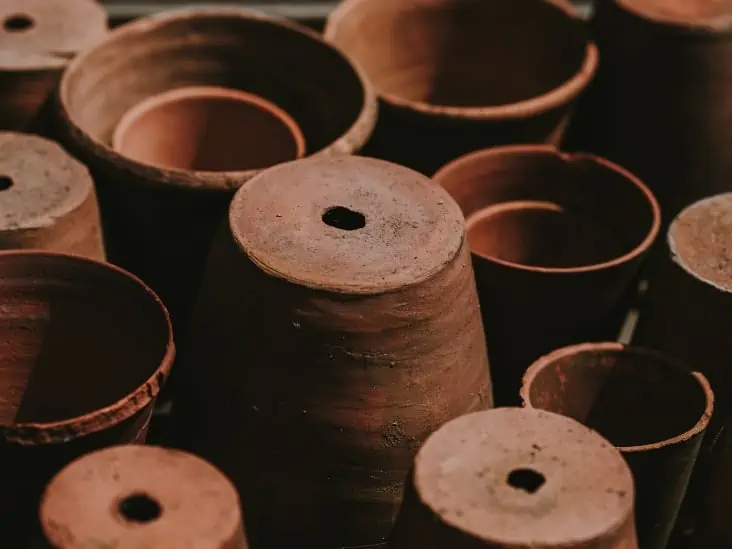
A cactus in a clay pot.
The clay pots are some of the most popular mostly because they drain quickly

2. Wood

Wood is perfect for outdoor cactus. It’s resistant to cold temperature and can hold water for a relatively long period. This makes it ideal for outdoor cactus. All in all, wood is a beautiful material. It can transform the home decor. And, it’s easy to get beautifully crafted wood containers for your cactus.

The major problem with the wood planter is the fact that they’re prone to rotting. This can affect the health of the cacti. Therefore, to prevent this, line the inside of the planter with a plastic bag.

Doing this also compromises the drainage capability of the wood planter. Therefore, ensure that you poke a few holes in the plastic lining to facilitate drainage.

3. Plastic

Plastic pots are some of the most convenient planters you can use. It’s because they’re cheap, readily available and you can easily reuse them. They’re available in all sizes, shapes, and colors.

Plastic pots came into popularity as a better alternative to clay pots due to their functionality. Unlike the clay pots that turn color due to salt build-up after evaporation, indoor plastic pots remain to look beautiful for a long time. 

On the contrary, these plastic containers are inferior in drainage and as such need to be well-drained to avoid soaking up the cactus in water. They’re also not ideal for outdoor use since they’re brittle and can be destroyed by constant exposure to sunlight.
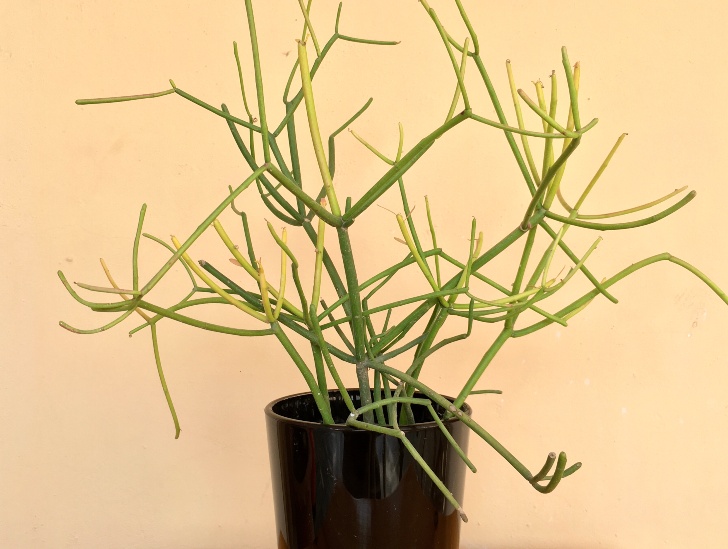
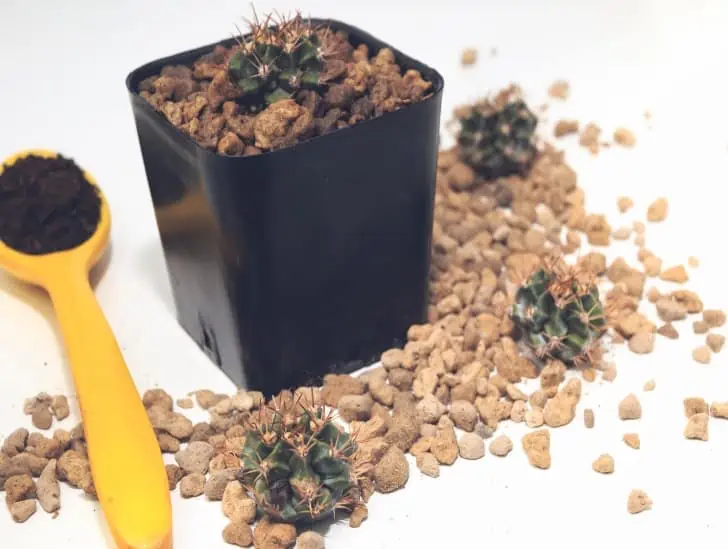
Cactus in a black plastic pot.
Unlike the clay pots that turn color due to salt build-up after evaporation.

If you’re looking for a planter that will add color and design into your home decor, but you’re operating on a budget, you should consider plastic material planters. With technology, plastic planters can now be painted to look like rocks and also manipulated into different shapes. 

4. Ceramic

If you’re looking for a planter that will add elegance to your home decor, a ceramic pot is the right choice for you. They come in different shapes, sizes, and colors, making them ideal as indoor planters.

However, these beautiful ceramic pots can be quite heavy, making them not ideal for bigger cactus that require bigger sized planters. 

There are two types of ceramic pots:

  • Unglazed ceramic
  • Glazed ceramic

Unglazed ceramic pots are porous and most suitable for cactus since they are permeable to water and air. This allows for the healthy growth of the plant.

Glazed ceramic pots are not porous. This makes them very poor in drainage and therefore, the only ideal for the cactus that doesn’t mind a lot of moisture.

If you’re looking for beautiful planters to use for small-sized cactus, you should consider this material. But, be ready to pay extra for the beauty than you would for other materials.

5. Fibreglass

Fiberglass planters come in different colors, shapes, and sizes. They’re mostly moulded and colored to look like clay or wood planters. Due to their lightweight, they’re ideal for planting cactus that will be continuously moved. Additionally, the material is very durable and can withstand changes in temperature, thereby keeping your cactus healthy.

However, these nicely shaped planters have zero drainage. Therefore, to prevent root rot, you’d have to drill holes on them. Since they’re recommended for indoor planting due to their aesthetic nature, you might consider planting your cactus in a plastic container that has holes and fitting the planter into the bigger fibreglass container.

6. Metal

Metal planters can be very aesthetic since they come in different shapes, colors, and sizes. This makes them an excellent additive to your interior design. Metal is very durable and as such can be reused to plant cactus for many years. Copper and brass make some of the most trendy pots due to their attractive nature.
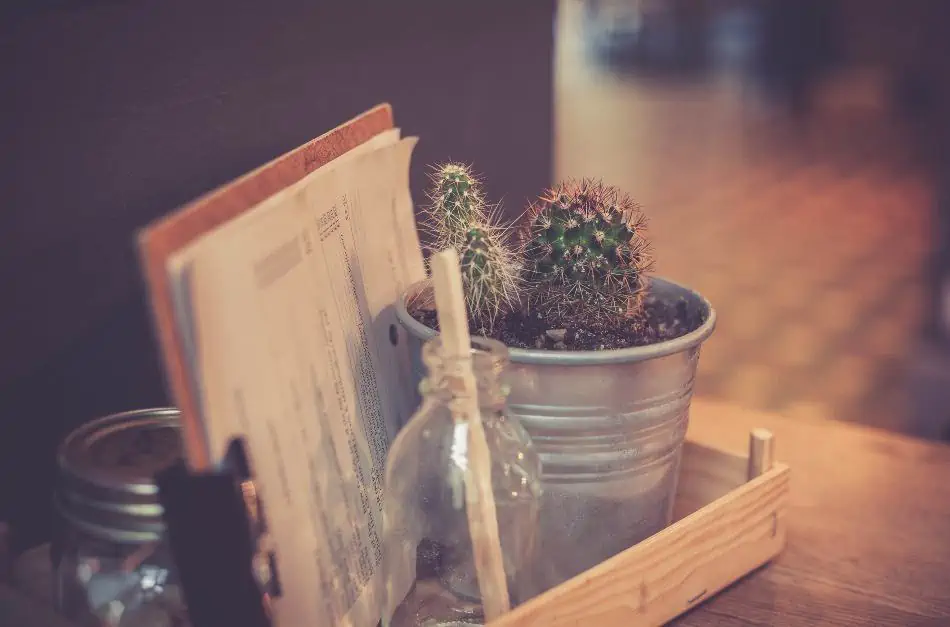
A cactus in a metal pot.
Metal planters can be very aesthetic since they come in different shapes, colors, and sizes. This makes them an excellent additive to your interior design

However, metals such as iron are susceptible to rust. Rusting can be prevented by applying a rust-resistant sealant once every year. Additionally, metal is heavy and therefore not ideal for cacti that you plan to keep on moving.

Lastly, metal, being a good conductor of heat, can get very hot during summer. It might end up burning the cacti. Also, during the cold season, the extremely low temperatures might affect the plant. Also, if the metal container doesn’t come with holes, it might not be ideal for your cactus due to poor drainage.

7. Concrete and Cast-Stone

First, these planters are ideal for outdoor settings. They can withstand various weather conditions, thereby keeping your cactus healthy. Since they can be moulded into different shapes, they add aesthetic value to your landscape.

Concrete is porous and allows water and air to move in and out freely. This quality makes the concrete pots ideal for cactus since it prevents root rot. However, concrete produces lime which lowers the water pH. This can interfere with the health of your cactus. To prevent this, simply water it frequently to drain the excess lime.
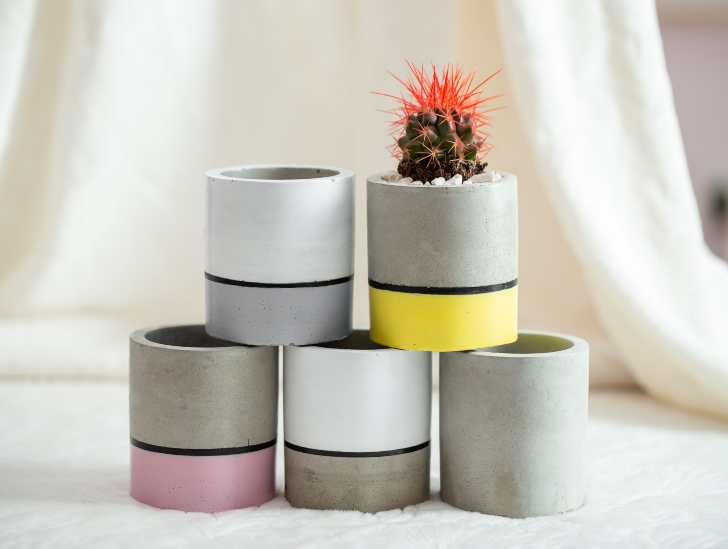
A red needle cactus plant in a cancrete pot.
They can withstand various weather conditions, thereby keeping your cactus healthy.

8. Stone

Stone pots are ideal indoor planters. They come in different shapes and sizes, making them physically appealing. 

Note, there are two types of stone pots: natural stone which has been carved into a planter and limestone mixed with fibreglass.  To note the difference, lift each pot and note the difference in the weight. Natural stone planters are very heavy.

Naturally, the stone pots are durable but, if you drop the natural stone pot, it’s likely to break. The fibreglass and limestone pots are more durable but with less drainage capacity.

Color

Color is a huge determinant, especially when choosing an indoor planter. Ideally, you’d want a planter with a color that compliments your home decor.

However, if you’re buying a pot for an outdoor cactus, the color might not be a big priority.  All in all, if you’re purchasing several pots for many cacti, you might consider purchasing a uniform color to consistency or mix and match the shade for a splash of beauty and fun personality.

How to choose the right pot with the right size

Does the size of the pot matter?

Yes, it does. When getting a succulent, you will note that they’re referred to in specific measurements.  A 4″ cactus doesn’t apply to the length of the cactus. Instead, it refers to the diameter of the pots that are appropriate for the plant.

The general fact to know when choosing the right size of the planter is that the size of the pot should allow for the natural growth of the plant as if it were its natural habitat. Cactus plants usually don’t require big pots. However, if you choose a tiny pot, it will constrict the roots leaving no room for the soil. On the other hand, if you choose a vast container, you will- most likely over water the plant. Therefore, it’s incredibly essential to choose just the right size for the cacti. 

The Best Size

The ideal pot size should have a ¼ of an inch between the main body of the cactus and the end of the rim of the pot.

The depth

The depth of the pot is also very significant since if you choose the wrong depth, it might interfere with the growth of the cactus. The depth is dependent on the type of succulent you’re planting.  The depth of the pot should be proportionate to the natural growing process of your cactus. If your cactus grows tall and tends to have deep roots, get a deep pot to accommodate the deep roots. If the cactus has shallow roots, you can easily use a small pot with minimal depth.

Note, the depth factor is one of the primary reasons why you need to repot. Usually, when the plant is young, it will have a minimal root system and as such, will require a small pot to avoid overwatering. After a few years, you will need to repot it as it grows to accommodate the growing roots and to prevent the roots from getting bound in the small pot.  The one sure way to check whether you need to repot is top check the drainage holes at the bottom of the pot. If there are protruding roots, it’s time to repot to a bigger sized pot.
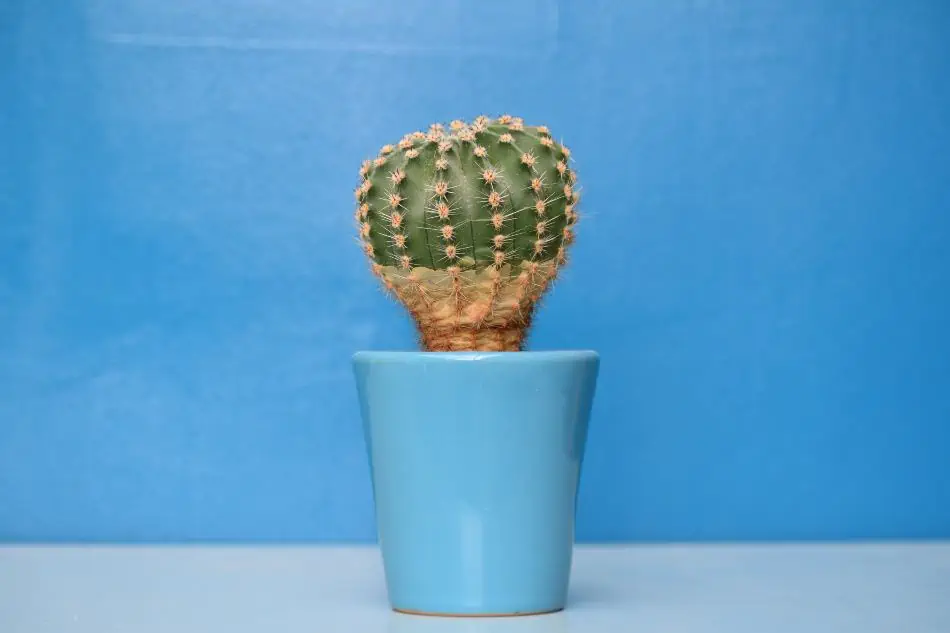
A cactus in a blue pot.
The depth of the pot is also very significant since if you choose the wrong depth, it might interfere with the growth of the cactus

Width

There are quite several cactus species that have shallow roots which grow horizontally. Such types of cacti will not thrive in deep pots. Therefore, always know as much as possible about the species of cactus you’re buying or growing.

If you plant such a species in a slender and deep pot, you will start to notice the roots showing on the sides of the container. Once this happens, it’s time to repot the cactus into a wider pot.

Another tip to help you select the right width for your cactus is the width of the plant. Check the width of the cactus and choose a pot that is only 10% wider than the plant.  Therefore, if a plant is 4 inches wide, select a pot that is only 4.5 inches wide. 

Is it possible to grow several types of cactus in a single pot?

Yes, it is. However, when choosing the pot, you need to know the growth characteristics of each plant. As much as most cactus grow at a languid speed, some do grow relatively fast. If you pot these species together with the ones that grow slowly, you might need to repot them soon.
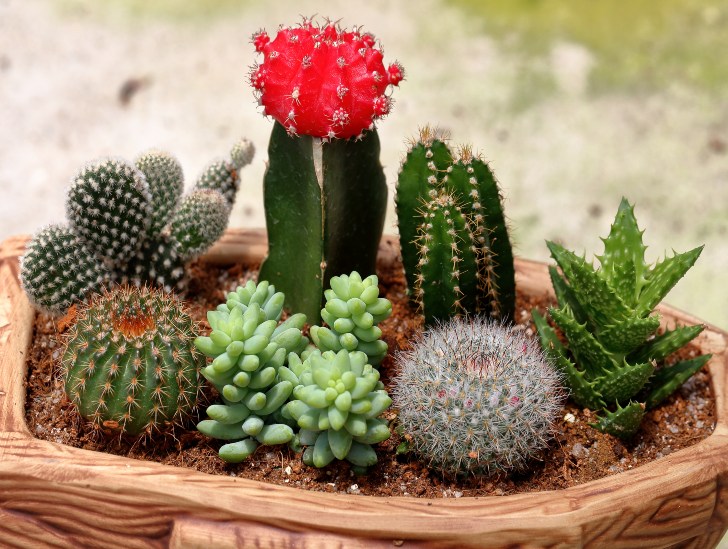
Different species of cactus in one pot.
Ensure they’re not crowded in the pot by giving them a large bowl.

Therefore, when choosing a pot to plant different types of cactus, select the species that have similar characteristics. Also, ensure they’re not crowded in the pot by giving them a large bowl.  Note, when you have several cacti in one pot, you’ll need to be very observant. Ensure the pot size, as well as other conditions of the soil, aren’t favouring certain species while straining the others.

How to Choose the Right Pot When Repotting

As the cactus grows in size, you will need to transfer it to a bigger pot. It helps to facilitate it’s growth and also prevent its roots from getting rootbound. Note, do not be tempted to take shortcuts and repot it using a pot which is double the size of the initial size.

Repotting a cactus is like buying new clothes for your child as it grows. Usually, you buy clothes that fit. If you buy your child’s clothes that are way too big to avoid buying more clothes, later on, they will look awful dressed in oversized clothes.

However, for the cactus, it will not look ‘overpotted,.’ Instead, it will run the risk of root rot by being overwatered. Therefore, if you are transferring a cactus from a 4 inches pot, repot it using a 6 inches pot.

Pro-tip

For your indoor cactus, you’d want a pot that looks stylish. If you’re not getting ceramic pots-which to have poor drainage, it might be hard to get elegant containers. Therefore, instead, get a plastic pot and decorate them using beautifully designed cloths. Alternatively, you can make your own ‘DIY’ pots for small cactus that look elegant and the perfect fit. This is an excellent option for the people who love to get their hands dirty and are quite artistic.
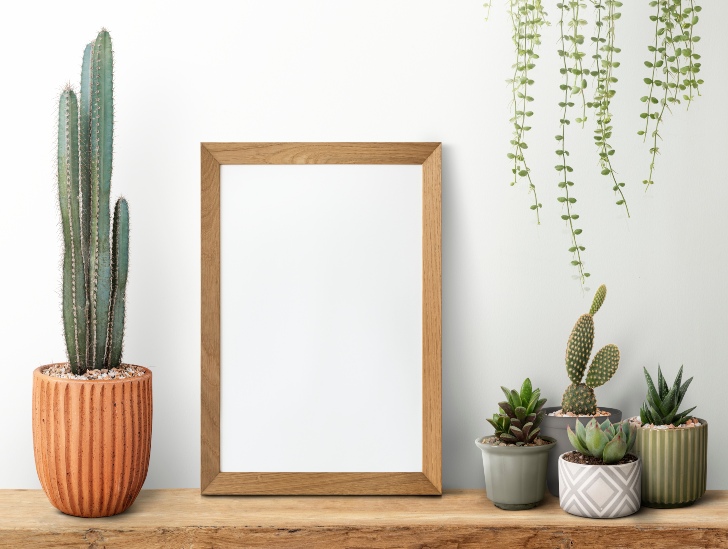
Indoor cactus pot.
You can make your own ‘DIY’ pots for small cactus that look elegant and the perfect fit.

Bottom Line

Remember, do not over pot the cactus. Meaning, do not plant a cactus in a large pot. This will most likely lead to root rot. If your cactus has a dense stem structure but a minimal root network, plant it in a small pot, but to increase the support, place the small pot in a bigger container. Fill the space between the two pots with gravel. It will give your top-heavy cactus enough base support without running the risk of root rot due to overwatering.

How To Grow Cactus From Seed

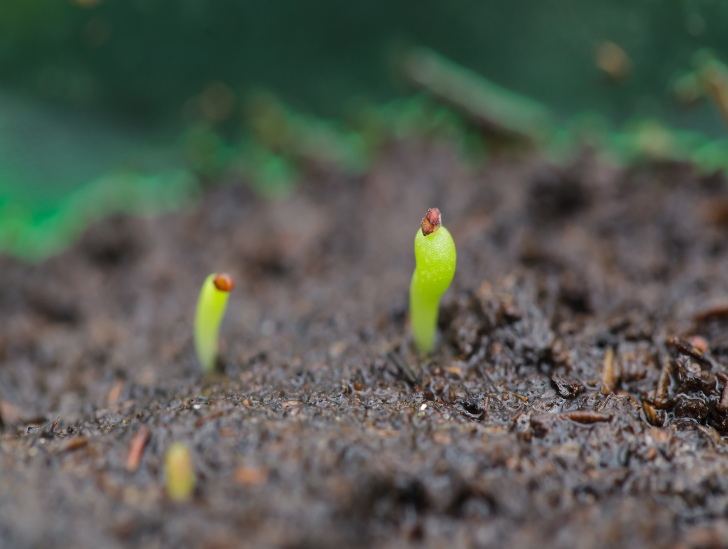
The time a cactus takes to grow from seed depends on the species and the climate. Cactus seedlings are quite sensitive, and they continuously need protection from direct sunlight. If possible, keep them indoors then introduce them to the outdoors slowly. 

How long does a seed take to germinate?

The seed germination time depends mostly on the species and where you are growing your cactus. When you choose to grow your cactus indoors, they are more likely to germinate fast. Indoors are a more controlled environment, and seed germination can take between three months and several months. 

On the other hands, if you decide to grow your seeds outside, they take years to germinate. Here, cacti will have to wait for the ideal moisture and temperature for them to grow unlike indoors where you have the option of placing them in a light shade windowsill. 

Cactus seedlings need proper care and protection. They need sun protection for the first few years until they are about 3 inches long. Placing them indoors or in a shaded place is the best way to help in seed germination. 

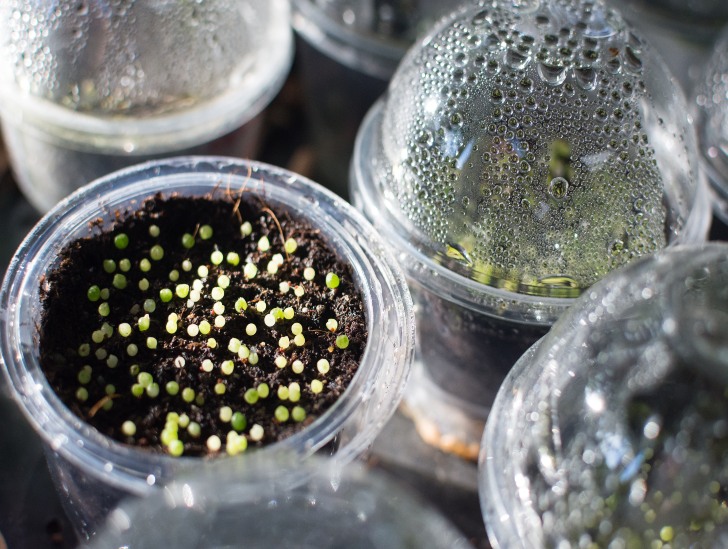
Cactus seedling cups,
Cactus seedlings are quite sensitive, and they continuously need protection from direct sunlight.

When they are about 1 inch long, you can start introducing them to the sun. Go increasing the light intensity and keep them off if they start scorching. If after some time you comfortably leave them on the windowsill consistently, then it may be time to take them outdoors. 

Why Grow Seeds?

You may be wondering why opt for cactus seeds instead of propagating from cuttings? Here are a few reasons:

Seeds are an inexpensive option because they may end up costing a few cents. You can even collect them from your other cactus plants or get them from a friend. 

It is easier to get different species that may not be available as plants.

With seeds, you can easily give away as gifts to friends.

When you notice cactus seedlings starting to develop, you can gradually begin to remove the transparent cover that covers them. However, when to remove is quite essential, and it will depend on the species. The best way to ascertain when to remove is when the seedlings start developing spines. 

When removing the cover, don’t just remove it wholly, start by cutting sections of it to introduce the plant to the change. Cacti the size of a marble, which are usually about six months are okay for planting in pots. 

A closeup image of cactus.
With seeds, you get to see the whole life cycle of the cactus from the very beginning

The Steps To Growing Cactus From Seed

1. Acquiring the seeds

The first step to planting cactus seeds is purchasing them. Most garden supply stores will have the seeds, and you also have the option of buying online. The good thing about buying online is you can select your preferred species through a simple click on your laptop and delivery is done to your doorstep. Some stores will even sell the seeds in packets of different species. 

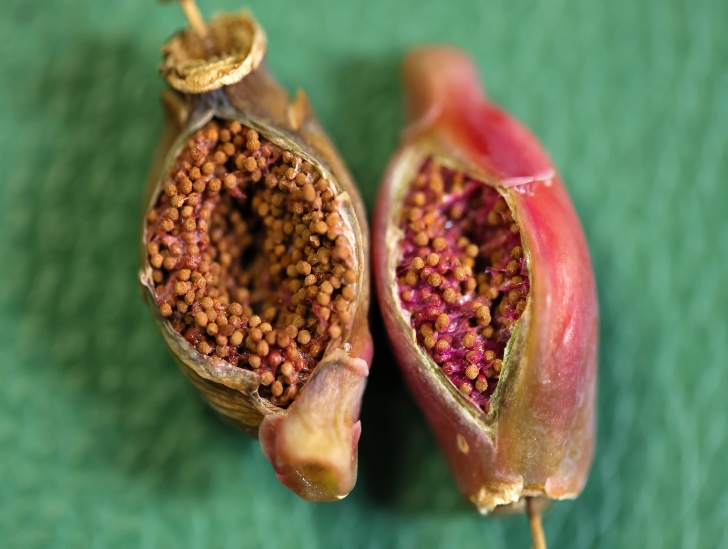
The other option would be to pick your own seeds from already blooming cactus in case you grow them. The seed pods are usually some brightly-coloured off-shoots that bear flowers. Once the flowers fall off, what is left is the pod. 

Sowing your seeds in late winter or early spring is the best time because it will give the seedlings ample time to grow during summer. 

2. Harvesting from the pods

As mentioned, if you decide to harvest the seeds yourself, then you need to remove the pods. It is recommended to remove the pods when they are still damp but not wet. The seeds are usually inside the pod. 

A closeup image of cactus seeds.
If you decide to harvest the seeds yourself, then you need to remove the pods.

Once you remove all mature pods from your cactus, you need to remove the seeds. Using a knife, slice the pods and scrape off the seeds. Note, seed color varies from different species. Some are usually black or have some reddish dots. They also vary in size; some are extremely small. 

3. The soil you plant the seeds in is significant

One thing about cactus seedlings is that they are intolerant to poorly draining soil. You need to protect your seedlings from common cactus problems such as bacteria and molds, which means the soil needs to be sterilized. 

To sterilize the soil, you can bake or microwave the soil mix. 

Sterilizing soil

There are various ways you can sterilize your soil before using it to plant the seedlings.

  • Using steam

You can steam the soil using a pressure cooker. Pour in a few cups of water into the pressure cooker and place shallow pans of soil (not more than 4 inches deep) over the rack top. For each pan, cover it with foil paper and then close the lid. Steam for about 30 minutes.

In case you don’t have a pressure cooker, pour an inch of water into a sterilizing container and place soil-filled pans (usually covered with foil) on a rack on the water. Cover the container and steam for about 30 minutes. 

A gravel with soil.
One thing about cactus seedlings is that they are intolerant to poorly draining soil

For both methods, after steaming, allow the soil to cool while wrapped with foil until you are ready to use. 

  • Using a microwave

If you decide to use a microwave, fill microwave-safe containers with moist soil and covered with a lid. Don’t use foil here. Ensure there are ventilation holes on the lids to prevent pressure buildup.

Heat your soil for 90 seconds. Leave the soil to cool by covering the ventilation holes with tape.

The other option would be putting two pounds of moist soil into a polypropylene bag. Place the soil in the microwave with the top left part open to allow ventilation. Heat the soil for about 2minutes 30 seconds full power. Once you are done, close the bag and allow it to cool. 

  • Using an oven

For the oven, you need a container that’s specific for oven use. Put soil about 4 inches deep into the container and cover it with foil. Using a thermometer, place it at the centre and heat at 180F for about 30 minutes. 

Once the time lapses, allow the soil to cool and remove the foil only when you are ready to use the soil. 

When coming up with a soil mixture for your cactus seedlings, you need to find the right proportions for your seedlings to germinate. You will need 

  • Pumice or granite stone
  • Cactus soil
  • Vermiculite
  • Perlite

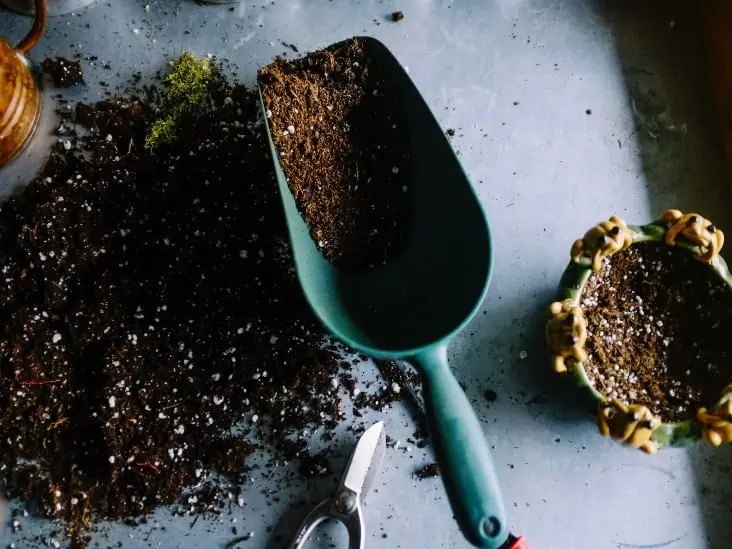
First, the base of the soil mixture should be pumice stone and the cactus soil. Start by removing any chunks in the cactus soil because they may potentially be a breeding place for bacteria as well as not drain water well. 

Once you sift the cactus soil, mix with the pumice or granite stone. In case you don’t find pumice stone, you can use limestone screenings, which is also a cheaper option. Make sure the pumice is more by about 10% than the cactus soil. 

Pour the mixture where you intend to plant the seeds and avoid packing it in, let it stay as natural-looking as it can. Since seedlings are quite small, using a 2-inch pot is sufficient. You can even use existing materials to act as pots for the seeds. 

In the case that you are reusing pots, make sure you clean them thoroughly to prevent potential pests from killing the seedlings even before they germinate. To clean them, you can use bleach water and rinse thoroughly. 

What these seeds need is a high-drainage soil. Make sure you moisten the soil but make sure the water drains completely. 

Spread your cactus seeds on top of the soil, don’t force them into the soil. You can then cover them with a thin layer of either sand or cactus soil. The reason for not burying them deep in the soil is because they only have small amounts of stored energy which may not reach deep into the soil before running out. 

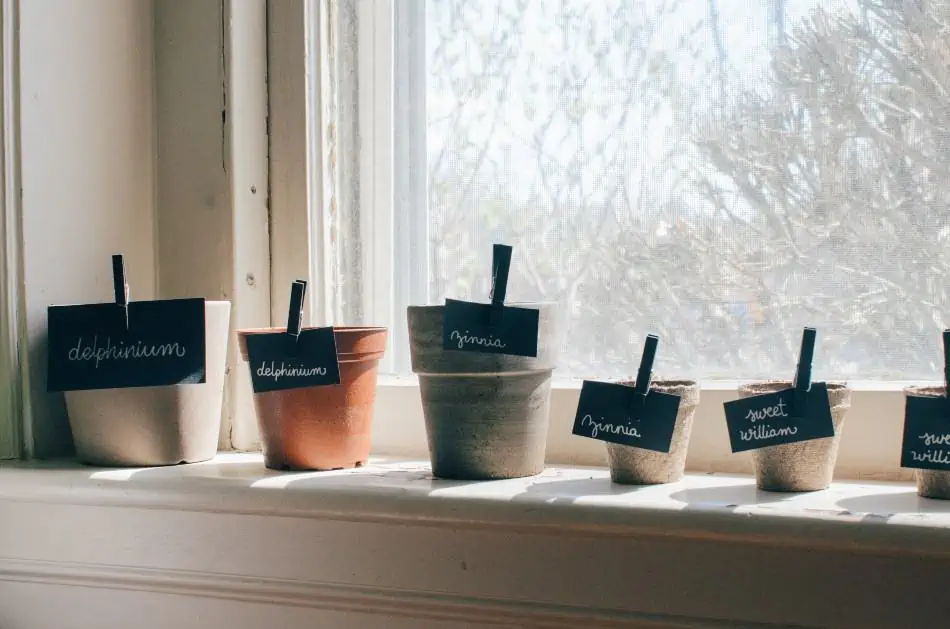
Make sure to label your containers once you spread the seedlings. It is crucial especially if you plant species by species in different containers are they are great so that you can take specialized care on each species. You don’t want to have difficulties when growing them because some species are too similar to each other and you may confuse one for the other. 

4. Exposing the seeds to the sun

After soil moistening and covering the seeds with sand, you need to cover them in a transparent lid or plastic wrap. Place your seeds in a strategic location, preferably indoors, where they have access to the right amount of sun. Consider placing them on a sunny windowsill. 

Don’t place them outside because they don’t like intense sunlight. The purpose of the transparent lid retains moisture and helps the cacti sprout as well as allowing light to reach the plant. 

Monitor your seedlings carefully. If they start turning purple or becoming red, the chances are that they are getting sunburned. Reduce the amount of light access. 

During the initial stages, as much as the seeds need sun, they need the heat more. Warm areas of the house like the kitchen are ideal. However, you can also purchase a heating mat that you place under the seed containers is a way to boost germination. 

Heat and light are essential as the cactus grows to avoid retaliation where the plant grows thinner and soft such that it breaks when touched.  

Plants with label exposed to sunlight.
Place your seeds in a strategic location, preferably indoors, where they have access to the right amount of sun

In most cases, cacti need a temperature of between 70F and 90F for germination. 

5. What to do when germination starts

Like earlier mentioned, cacti grow slowly, and you need the patience to see them through the whole process. After planting and having the right light and temperature, you should see your seedlings start germinating. It could take a month or more before they do. 

Tiny spines start forming at this stage. This is your cue to let the plant breathe away from the plastic wrap or transparent lid. However, do it gradually, leave the top open for a few hours during the day and then go increasing the hours. 

Keep doing this until you establish that the cactus doesn’t need the wrap. 

Keep in mind that when you uncover the cactus, water evaporates much faster, which will need you to have a watering schedule to avoid the plant dying. 

A cactus growing from seeds.
Some species don’t have spines, so an indication of growth is when the seedlings sprout.

Fresh or distilled water is ideal for preventing the growth of bacteria and algae. If you feel your tap water tastes like chlorine, don’t use it on your cacti. Since the roots are quite tender, using water with chlorine will burn them. This could end up in killing the cactus. 

Even as the seedlings sprout and seem to be doing well, the truth is, below the ground, the roots are still at a tender position and can’t adequately absorb enough nutrients. Keep the seedlings in the plastic wrap until they overgrow.  The high humidity is what facilitates nutrient and water absorption in the roots until they are strong enough. 

Some species don’t have spines, so an indication of growth is when the seedlings sprout. Make sure you don’t leave any water on the soil. Keep checking for signs of overwatering. No standing water should be in the container. You can dip your finger into the soil to feel how dry or wet it is. 
When germination occurs, keep the same timetable you had when you started watering them. Be on the lookout of certain signs such as seedlings thinning, which could be a cause of poor light. The algae may be top of the soil, which could be a cause of overwatering. A fungus infected cacti will start having black spots. 
6. Repotting

When the seeds are overgrown, it is now time to repot. Choose your potting container wisely as you need one that drains quickly. You need one with drainage holes so that during watering, the excess water drains to avoid root rot

Terracotta and unglazed ceramic pots are some great examples of good drainage pots. However, other types of containers can also work, but the key is getting one that drains water quickly and doesn’t leave the soil clogged with water.

Even as you get the ideal container, how much you water the cactus also contributes to whether your plant rots or not. 

Naturally, as cactus grow slowly, they may take even a year to reach the size of a marble. At this point, you need to repot to give it room to thrive well. Get the right pot size because getting small-sized one prevents the plant’s proper growth. 

Once you remove the cactus from its previous plastic wrap, using the same formula you used for its last soil, make a new mixture. After making it, place the plant in the container then pour in the soil mixture. 

Water the mixture after 3-4 days and make sure you don’t use any plastic wrap or lid to cover the plant. 

Plants on a pot.
Terracotta and unglazed ceramic pots are some great examples of good drainage pots

7. Recovery time after repotting

Once you repot, allowing the plant to take in the new changes helps it avoid any problems. Repotting can be stressful to plants, and they need recovery time. If you previously placed it near a place with ample sunlight, try keeping it in the shade for a few days until it recovers. You can then re-introduce it to the sunlight slowly until it can fully take on the heat. 

Unlike other potted plants, cacti have low water requirements. They are succulents, and they often store water to use when the soil dries up. A general rule of the thumb is to wait until the soil dries before watering the plant again. 

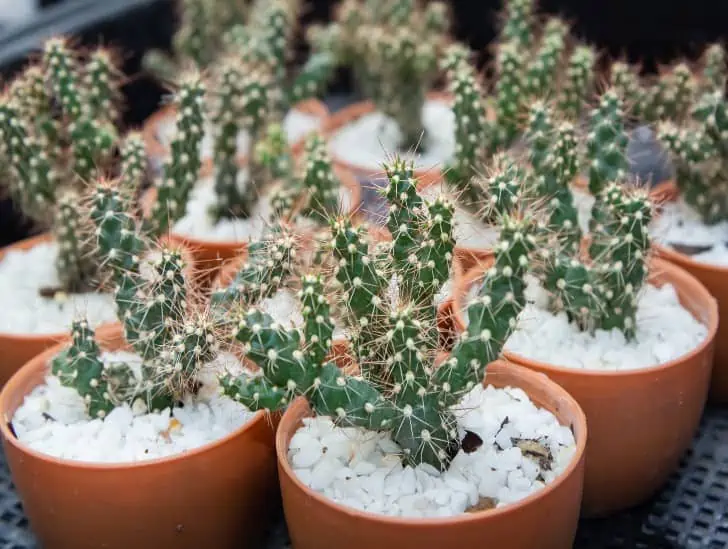
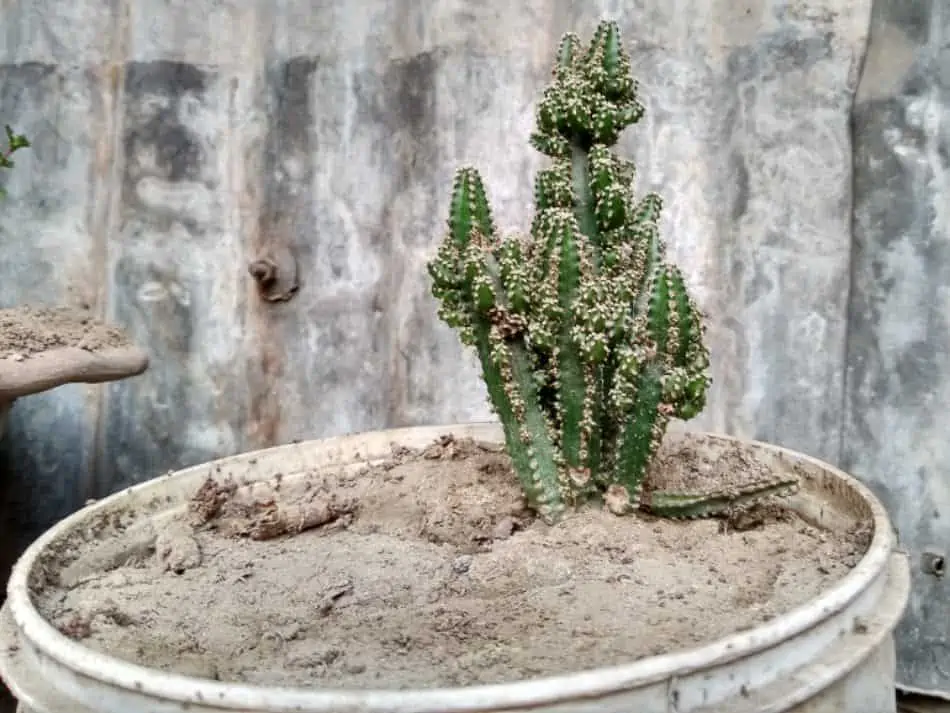
Cholla cactus in a pot.
Use a cactus fertilizer to help in the growth process.

Once your plant grows, you can even water monthly. During winter is when their water requirements are low for most species. At this time, only water when the plant needs it. You’d rather have an underwatered plant than an overwatered one because it is easier to deal with insufficient water than excess. 

During the growing months, use a cactus fertilizer to help in the growth process. Cacti generally need a lower amount of fertilizer than the rest of the plants. 

The above process should help you grow your cactus seamlessly from seed. If you want to experience the joys of watching it grow from the seeds all the way up, you can do this effortlessly. 

Related Questions

How do you ensure your cactus germinate faster? Usually, cactus have slow growth and may end up taking years to grow. However, you can help them germinate more quickly. Soak them in warm water for about 30 minutes as this will loosen up the seed coat and activate germination.

How does a cactus produce seeds? For a cactus to produce seeds, its flowers have to undergo pollination. Pollen has to be transferred from one plant to another by insects or birds. Once pollination takes place, fruits develop that contain the seeds. One cactus plant has the potential of producing a million seeds. 

Learn How To Fertilize A Cactus

Just like other plants, you need the correct fertilizer for proper growth and helping them adapt quickly. Even though these plants may be used to harsh conditions, once you take them in as a houseplant or grow them outside in your garden, they require some care and maintenance. 

When is the right time to feed cactus?

It is natural to think that your cactus doesn’t need any sort of feeding because of the environment they are used to growing. However, they have the same needs as other leafy plants.  

First, you need to know that cactus don’t need excess water or fertilizer. Knowing when to feed them is important because you don’t want to have stunted growth. Fertilizing once in a year is okay, but in case you have a schedule, you can do so two to three times a year. Preferably during spring, fall and summer. However, some cacti species grow in winter, make sure you fertilize them during that period. 

During their active growth periods, cactus require fertilizer. However, too much fertilizer will ultimately weaken the plant.  Avoid overfeeding them as this will give them the chance to stay healthy. 

Small cactus in a black pot.
Knowing when to feed them is important because you don’t want to have stunted growth.

Is it necessary to use fertilizer?

The truth is, cactus can survive without using any fertilizer on them. However, fertilizer is just a way of boosting them by making them healthier and more colorful. Be careful with indoor cactus and preferably fertilize once a year. Once you feed them, make sure you take them out under a shade in a bright place. 

Some people don’t have enough space outside, grow lights can be an alternative, mainly when you use fertilizer. 

Grow lights are alternative artificial lighting to help make it sufficient just as natural light would. They help increase the chances of your plant’s vibrancy. 

There are three types of grow lights: fluorescent grow lights, LED grow lights, and Positioning grow lights. 

What nutrients does a cactus need?

Cacti are not heavy feeders hence need a diluted fertilizer that’s half or quarter the strength. Too much concentration may lead to root rot, which is one of the leading causes of cacti deaths. 

Root rot may not be evident in the first weeks, but as you progress, the cactus starts turning pale, you notice black spots as well. Once you notice this, the damage may be a lot worse. You need to remove the cactus from the pot to see if you can save it or not.

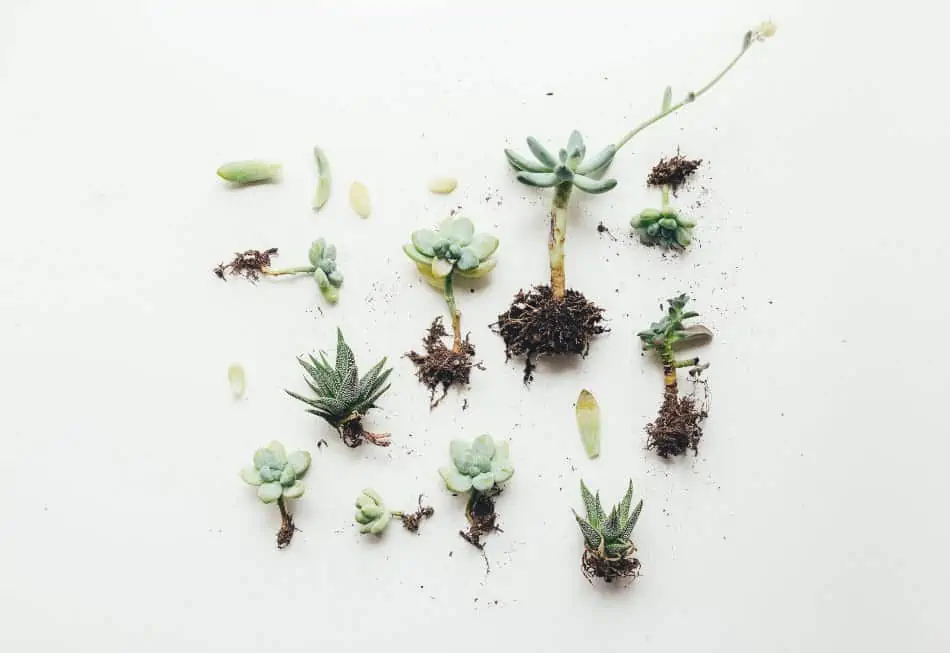
Succulent plants.

When removing the cactus, ensure you are protected, especially if it has spines. Get leather gloves and wrap the plant with a newspaper before pulling it out. To make the process easier, dig around the cactus to soften the soil, then you can slowly remove it. 

Once you remove it, you can now access the damage. Sometimes, it may be just some roots that have rot, and you can easily prune them and re-pot the other part of the cactus. 

Fertilizers with high nitrogen content are more likely to cause root rot. Get the right blend of fertilizers. Get one with a reasonable ratio of Nitrogen(N), Phosphorous (P) and Potassium (K); N:P:K. 

Nitrogen is mainly responsible for assisting in the growth of leaves while Phosphorous is helpful in the root growth and fruit and flower development. Potassium improves the overall functionality of the plant. 

A girl wearing gloves.
When removing the cactus, ensure you are protected, especially if it has spines.

Ideal Fertilizer Blends

Keep in mind that a fertilizer that’s high in nitrogen promotes plant growth while one with a higher potassium ratio is suitable for flowering. Lastly, one with a high phosphorous ratio will be better for disease resistance.   

Different ratio formulas can work. You can use equal blends of 10-10-10, 10% nitrogen, 10% phosphorous, 10% potassium.  A low balanced soluble houseplant fertilizer does the trick for the plant. Also, the ratio of 5-10-5 is ideal. 

If you are using the ratio of 5-10-5, if the instructions say you use 1 tablespoon of the fertilizer with 1 gallon of water, when using it on cactus, use ½ the tablespoon. In case your cacti species is a tropical type one like the Christmas Cactus, use ¼ of the tablespoon. 

Another alternative is getting a specified cactus fertilizer blend. These ones usually have a ratio of 1-7-6 or 2-7-7. They will generally instruct you on how to use the fertilizer on your cactus. Water your plant with the fertilizer solution just the same way you do when watering them. Let the excess one drain out of the soil to avoid the plant sitting on the solution and risking root rot. 

Dry fertilizers available

Instead of making a solution of fertilizer and water, there are dry fertilizers available on the market. We have granular slow-release fertilizers. For these, you need to mix them with the potting mix or the topsoil. However, be on the lookout as sprinkling them on top of the soil can make them not sip down to the roots when you water them. 

Types of slow-release fertilizers:

1. Synthetic Organic Slow-Release Fertilizers (nitrogen-based)

When shopping for fertilizer, you may have seen some labeled  Methylene Urea or Urea Formaldehyde. These ones are the synthetic ones, and they are usually composed of 70% WIN( Water Insoluble Nitrogen)

The rate at which these fertilizers release nutrients depends majorly on the bacterial activity. These particular ones can provide nutrition for a couple of weeks others extending to months. 

There are also other known as IBDU/isobutylidene-diurea that is 90% WIN. The rate at which nutrients are released from this product depends on pH levels and soil moisture. 

What determines the rate at which nutrients are released from these fertilizers is the size of particles. In case the fertilizer has small particles, nutrients are released faster. 

2. Natural Organic 

We have natural organic fertilizers as well, which makes them a popular choice for most people. Different types of organic fertilizers release nutrients at different rates. What affects these speeds is temperature, bacteria, and fungi in the soil. 

Some examples of these organic ones are:

  • Manure
  • Compost
  • Fish emulsion
  • Soybean meal
  • Cottonseed meal
  • Blood meal

Considering indoor cactus when using fertilizer

Since indoor cactus may not receive enough sunlight when growing, fertilize them sparingly as they may become weak. Also, in case you use containers that have no drainage holes, use these fertilizers sparingly because they don’t drain water. 

Cacti planted outside on the ground may need as much fertilizer because they quickly get nutrients from the soil. Only use half/quarter the slow-release fertilizers during the active growing seasons. 

Using manure teas as an alternative fertilizer

Manure tea is similar to compost tea and is an organic alternative to the chemical-based fertilizers. It is made from collecting manure from any livestock. Manure tea is quite easy to make. 

A Manure tea.
Using manure teas as an alternative fertilizer

Steps to making manure tea

  • Fill a bucket (5 gallons/18.9l) with water 
  • Shovel your manure into a sack (use the ratio of 5 parts water to 1 part manure)
  • After putting manure into the sack, tie a knot
  • Then place the tied sack into the water in the bucket
  • Make sure to cover the bucket with a lid due to the bad smell attracting flies
  • Leave the mixture for a few days so that it forms a golden brown color
  • Slowly remove the sack in the bucket and allow the solution to drip into the bucket until it doesn’t anymore
  • For the solution strained from the sack, dilute it with clean water 
  • Once you dilute it, you can pour in the manure tea into the cactus soil for fertilizing

When using the manure tea, you can use a spray bottle or simply pour it until it drains away through the drainage holes

What makes manure tea a great organic fertilizer is a fact that it’s sustainable and mild such that there are no chances of burning the cactus. Also, the tea dissolves quickly in water, and it’s quite easy to use a spray can. 

The manure that was left after straining the tea can be used in the garden too. 

Benefits of using manure tea

1. It is natural

Manure tea contains no synthetic or chemical additives; it is natural. What’s even exciting is you can use cow, goat, horse manure, among others. 

2. Less expensive

If you own any livestock or know somebody who does, then it can be inexpensive and a great option other than purchasing the ones available. The process itself is also quick, with easy steps to follow.

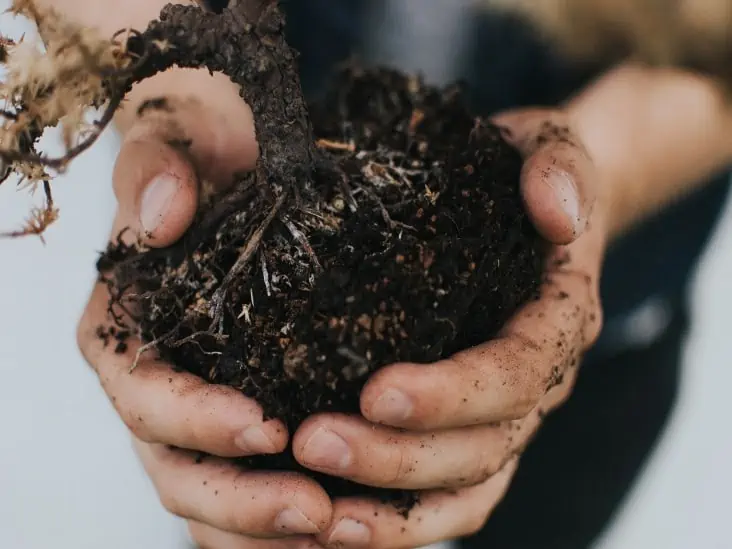
A manure fertilizer soil mix.
Manure tea is rich in nitrogen and is perfect for the growth of your cactus.

3. Doesn’t burn the plant and is friendly to the soil

Some other fertilizers can easily destroy the soil and burn your cactus. However, for the manure tea, it doesn’t kill beneficial fungi, but it conditions the soil so that the plant can absorb the much-needed nutrients.

4. Quick to provide nutrients

Unlike other chemical products that are slow-release and may take up to months for the fertilizer to take effect on the plant, the tea is quite the opposite. It provides the plant quickly with essential nutrients for better growth. 

5. No measuring

Sometimes, it can be a bit tedious to keep measuring the ratio of water to the fertilizer and making sure you don’t put too much fertilizer that risks burning your cactus. Manure tea does not need measuring, you just need to pour it to the soil, and you are good to go. It is a total time saver.  

However, it is easy to overwater your plant, which is a leading cause of root rot. Use the manure tea sparingly and ensure the soil dries first before using it again on your plant. 

Manure tea is rich in nitrogen and is perfect for the growth of your cactus. However, you might want to back off when the cactus wants to flower (if you have a species that blooms.) 

Some of the best manures  to make your tea from are:

  • Cow manure (the best)
  • Horse manure
  • Goat manure
  • Chicken litter 
  • Turkey litter
  • Pig/cat/dog manure

Out of all the above, chicken litter has the highest nitrogen composition. Use it sparingly as it can burn the plants. Before using it, make sure it is well-aged. The same applies to all manures when you are making them. Make sure they have composted in the sun long enough (a week or so) for better results. 

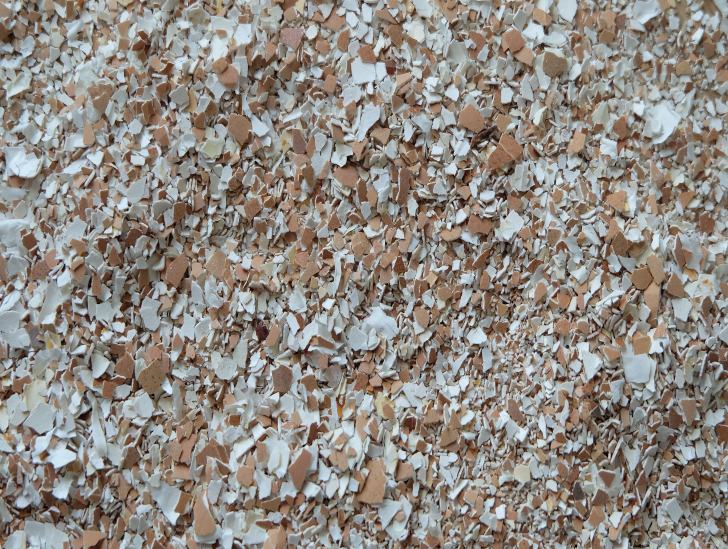
A mashed chicken eggshell.
Out of all the above, chicken litter has the highest nitrogen composition.

As much as it’s easy to make manure tea bags, some people don’t have access to the resources. Therefore, you can purchase readily available manure tea bags sold and are a great alternative to chemical fertilizers. Be sure to use nose plugs as it doesn’t exactly have a great smell. 

Storing Manure Tea

Manure tea can be stored for between four to six days in a sealed container that is light-proof. However, if you need to store it for a longer time, you need to provide aeration with an aquarium pump or bubbler stone.

Be on the lookout to avoid storing it for a long time because the longer it stays, the higher the chances of losing its nutrient value. 

Organic vs. Inorganic Fertilizers

Before settling for a particular fertilizer, you need to know the different types available. The broadest categories are organic and inorganic. 

Both types are used to provide nutrients to the cactus. Organic (natural) fertilizers work gradually to provide a healthy environment for the growth of your plant. They contain plant and animal-based products as their work is to provide nitrogen, phosphorus, and potassium. The reason they work slowly is that the first work on enriching the soil instead of quick action. 

On the other side, inorganic fertilizers provide more rapid/quick nutrition for them as they feed the cactus with high concentrations of nitrogen, phosphorus, and potassium directly to your cactus. 

What determines what you use is your cacti needs, the environmental impact, and the costs. Note, inorganic fertilizers may leave product buildup on your cacti over time, and they don’t enrich the soil. 

I. Organic fertilizers

"organic" leaves

Organic fertilizers consist of only animal or plant-based materials that are usually end-products or by-products of processes that are naturally occurring. Such examples can be manure, compost, or leaves. 

These types of fertilizers only produce nutrients when the soil is moist or warm. Nutrients are often released quite slowly because they mainly rely on soil organisms in breaking down the organic matter. 

When it comes to using them, there are no exact rates of nutrients they contain. This makes it hard for you to know if the particular fertilizer meets your plant’s needs. However, cactus have a low requirement, which makes them perfect. 

Natural fertilizers are initially expensive, but since they enrich the soil over a long period even when the plants take the nutrients they need, they become worthwhile. 

When you look at the environmental impact, these fertilizers may cause a buildup of some nutrients. However, this buildup is not toxic. 

Since organic fertilizers are from natural sources, the greenhouse gas that’s emitted into the air is low. 

II. Inorganic fertilizers

They are commonly referred to as synthetic fertilizers meaning they are not natural. This means they are manufactured artificially and they contain synthetic chemicals/minerals. Fertilizers that are high in the three main macronutrients will almost certainly contain products such as magnesium sulfate, ammonium sulfate, ammonium nitrate, and triple superphosphate. 

Inorganic fertilizers are ‘quick-release’ types meaning they are plant-ready. They should be used sparingly, especially on your cactus, because of the chances of the quick-release increase of burning them. 

The application process is usually straightforward because there are instructions on how to use them. You can specifically get fertilizers that are designed for your cactus.  You will commonly see them written 12-6-4 which meant the particular fertilizer contains 12% of nitrogen, 6% of phosphorous and 4% of potassium (N-P-K.) Sometimes, it is crucial to know the ratio of nutrients so that you can know what to use for your cactus because different plants have different needs. 

Their ease of use makes them favorable as they are available in water-soluble powders, liquid concentrates, and dry granules. Some other tabular forms or spikes are specifically designed for container or indoor plants. 

Chemical fertilizers.
Chemical imbalances are quite popular with this kind of fertilizers because they can quickly burn your plant.

These fertilizers are not costly and are quite affordable. The reason for their cheap costs is that they are usually mass-produced. The dry granular controlled-release fertilizers are cost-efficient than even the other types. The downside though is they only work on providing nutrients to the plant but do nothing to the soil over time. 

Even though the fertilizers are immediately available to your cactus, unlike the organic ones, they are susceptible to leaching.

These fertilizers can be washed away by rainwater or when watering them, especially if you have planted your cactus outside. This way, the nutrients are washed away, which could leave your plant deprived of the fertilizer. 

Chemical imbalances are quite popular with this kind of fertilizers because they can quickly burn your plant, which causes a buildup of toxic salt that concentrates on the soil. It then ends up destroying your once vibrant plant. 

Applying fertilizer on your cactus

Using the correct fertilizer is what determines the growth of your cactus. Here’s an example of how to use your fertilizer.

What you’ll need:

  • Measuring spoon
  • A watering can
  • Low nitrogen fertilizer that is soluble
  • 1-gallon container with a lid

1. To know when to fertilize your cactus, start inspecting it early spring to see if there are any growths such as the size of spines, increased stem size. Etc. If you notice new growth, you can now start the fertilization process. 

2. Assuming that you had already purchased a low nitrogen fertilizer, which is a 5-10-10 blend, use 1 tablespoon of it and dissolve it in 1 gallon of water. After mixing the solution, water your cactus until the soil becomes moist. 

Another option is using a 1-7-6 cactus blend. Take 1 tablespoon of the mixture and mix it with 1 gallon of water and pout it into the soil until it’s moist. 

3. For the 5-10-10 blend, apply every eight weeks during spring and summer for three fertilizer applications. If you choose to use the 1-7-6 blend, apply after every two weeks during the cactus growing season

Note: cactus don’t require fertilizer during fall and winter as they enter the dormant and semi-dormant period. 

4. In case the fertilizer you are using remains, you need to seal it in an air-tight container until the next time you use it. 

 Some cactus species such as the Christmas cactus grow and flower during winter and are dormant during summer. Therefore, you need to reverse your fertilization process during winter. Feed them during winter because that’s their active growing period.

The difference between composting and fertilizing

Composting is the use of natural decaying organic matter from the kitchen or garden and decomposing them to have rich nutrients that have the capability of fertilizing the soil. Some people refer to this as “black gold” because it is fertile soil. I

Advantages of using compost

  • They feed the entire soil which helps in the overall health of the soil
  • They help in soil aeration and help retain moisture 
  • They enrich the soil in a way that it can provide nutrients to your plants
  • Enhances healthy microbe growth within the soil
  • Helps in assisting in the resistance against diseases
  • For your outdoor garden cactus, it’s easy to control weeds.
  • The only major setback for using compost is that, if you are planning to make your own, it takes quite some time before it’s effective for use. Make months before using to allow it to decay. 
Plant on the ground.
When making the compost, make sure not to add any plant remains that contain soil-borne pathogens into the compost mixture. They may increase the chances of infestation on healthy plants

Making your own compost

Things you need:

  • A carpet or polythene
  • Fresh soil and manure
  • Garden waste
  • A coarse draining material such as twigs
  • Water (optional)

Method:

1. You need to apply about four inches of the coarse material to the bottom of the self-assembly bin.

2. In alternate layers of different materials, apply six inches of garden waste to form a sandwich.

3. You can add water when applying garden waste if the mixture is quite dry.

4. Since compost needs to heat up so that it can work effectively, make sure you add some vital mass to your mixture. To easily do this, you can sprinkle some soil or manure on top so that it brings bacteria so that it breaks down the organic matter. 

5. After you are done, cover the mixture with your piece of carpet or polythene.

6. You then leave it for about three months. Once you exhaust the months, you can then uncover the mixture and remove the compost. After allowing in some air, you can then leave it for another three months. 

7. After the extra three months, your compost turns brown and is crumbly to touch, which is then ready to use. 

Fertilizing involves using fertilizers to feed your cactus. As earlier mentioned, it’s either organic or synthetic. 

Using fertilizers is equally beneficial as it enables your cactus to grow faster, especially if you choose the fast-release ones. Fertilizing though may have a few disadvantages such as becoming high risk, especially in case they find their way to nearby water bodies. 

All in all, go with whatever option you feel works for your plants. 

A composter organic waste.
Composting is the use of natural decaying organic matter from the kitchen or garden.

Learning how and when to fertilize your cactus is equally essential as having a watering schedule and choosing the right potting mix. All these factors work hand in hand in providing the right environment for the proper growth of your succulents. 

Remember that; you only use fertilizers or compost when the cactus needs them. Don’t overfeed them because just like other succulents, their fertilizer needs are minimal. 

Related Questions

Can you use coffee grounds on your cactus?

Coffee grounds can be used in place of a seasonal fertilizer by merely shaking them on the cactus. They help increase the chances of blooming. 

Can Miracle Grow Cactus Fertilizer be used on cactus? Yes, you can use this type of fertilizer but be careful not to overfertilize the cactus. Too much fertilizer burns the plants, and the effects can be as extreme such that your plant dies. Be cautious on the portioning to avoid burns and build up. 

What is the best fertilizer for a Christmas Cactus? Unlike most cacti species, the Christmas Cactus blooms during winter as opposed to summer. The best fertilizer depends on what it needs; either blooming or plant strength and nutrition. A 20-20-20 or 10-10-10 fertilizer would be ideal with nitrogen, phosphorus, and potassium having equal percentages. Get a water-soluble one for better effects. 

How To Choose The Perfect Soil For Your Cactus?

I have been researching extensively about cactus and how to grow them healthily. One thing I have discovered is you need the perfect soil mix for a longer lifespan. When you are purchasing your cactus, you don’t need the ideal plant but also the right soil mix for better results. I went on a pursuit to knowing how to get the perfect soil. Stick around for my findings.

Cactus is commonly referred to as a desert plant, but it also grows in tropical rainforests. The idea when purchasing a cactus is trying to mimic its previous growing conditions. One of the ways to do that is ensuring you have the right potting mix.

Starting with the right kind of potting mix will be easier as it will make work easier for you. Naturally, cactus are not high-maintenance plants. 

Type of soil a cactus needs

A cactus will require soil that’s pebbly, sandy, porous and one that provides excellent drainage and aeration. The right type of soil will need to dry quickly after you water the plant. The mixture should also be able to meet the nutritional needs of the cactus. 

Cactus need a potting mix that’s ideal for them.

What is a cactus mix?

Cactus mix is soil specially designed for growing cactus. The mix is available in garden centers and most nurseries. You have the option of purchasing the mix or making one on your own. The right kind of combination has superior drainage qualities and quick dry out time upon watering. 

What happens is, when you water cactus, they take in all the water they need and store it. Therefore, there is a need for good soil that drains well so that it can drain the excess water. This will prevent root rot and fungal infections. 

Commercial mixes (those you purchase) are designed in a way that they use the elements where these plants grow naturally, and they then add peat which holds moisture. When the peat absorbs moisture and then dries out, it rarely soaks in water which leaves the pot dry. 

Alternatively, you can create a homemade mix customized for your plant. Sometimes, one mix doesn’t fit all cacti species, and yours may be different from the ones at the local store. It also depends on your location and what the cactus is used to. For example, you can not use the same mix for tropical and desert cacti as the living conditions are a bit different. 

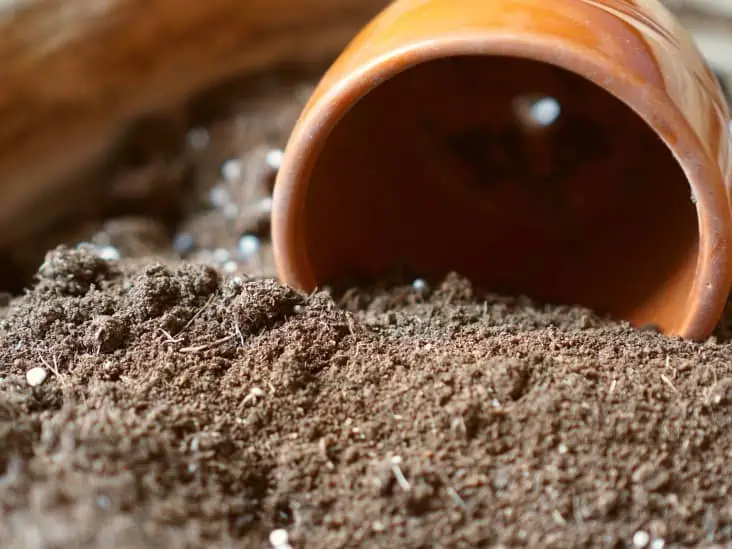
A soil on the gravel.
Making your mix can be great because you get to add your own taste and preference than the ones found in garden stores

Why you need a good cactus soil

You probably are aware of how cactus have adapted to their harsh conditions on how to store water through their waxy coatings and succulent tissues. 

The desert cactus roots have also adapted, which is why you need a potting mix that can dry out quickly. 

Cactus roots are susceptible to rot when they soak in excess water. They can store water for long through their shallow roots that spread away. The root formation helps them take in enough water to take them for a long time. The roots can adapt quickly if there are any changes in the water supply. 

Due to the way they are, they quickly collect water but can be quick to rot, especially if they are planted in a pot and don’t have the right cactus soil mix. It is, therefore, crucial to making sure your soil mix is up to par with their requirements. 

Before we start, here is a list of our favorite and recommended soil mix (Here)

Tips To Choosing The Perfect Soil For Your Cactus

After you buy cactus, you need to know what to look out for when choosing the soil mix. Below are some pointers to getting the desired soil for healthy cacti:

1. Organic vs. Inorganic matter

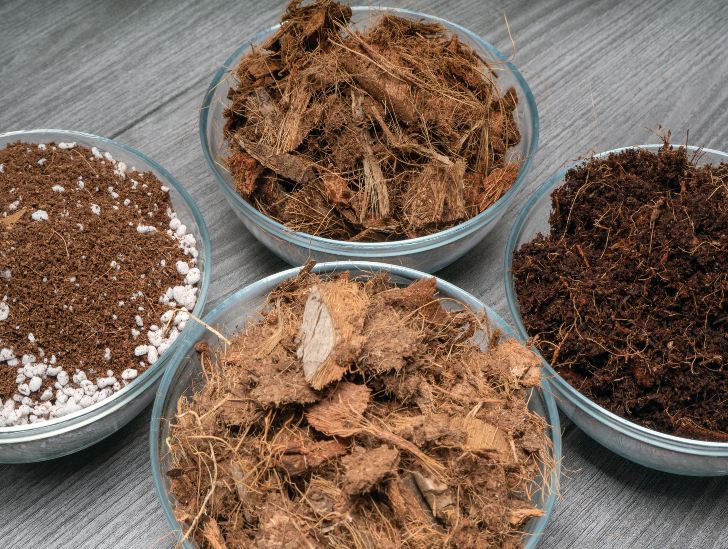
Organic matter helps the water to penetrate the soil quickly. Peat moss, ground coconut fibers, and ground bark are some examples of organic matter

The only downside about this is that it has a possibility of retaining too much water. There are soil mixes that contain peat moss such as Perfect Plants, Miracle-Gro, and Hoffman. 

Coconut fibers and soil.
Peat moss, ground coconut fibers, and ground bark are some examples of organic matter. 

Inorganic matter is ideal and helps keep the soil well-drained. Some of the ingredients are sand and perlite. 

2. The soil composition

A well-drained cactus soil

The main cause of cactus not thriving is the issue of overwatering them. Some common signs of overwatering are: 

When purchasing your soil, you don’t want one that will retain too much water such that your cactus ends up dying. 

An ideal soil composition should be pebbly and gritty. One that drains well and is aerated. Also, the particle size ingredients need to be ¼ inch so that there is free airflow and moisture is easy to control.

Soil with the right PH

The most significant advantage of using a purchased potting mix for growing your cactus is the fact that they are specially designed in a way that they have the right PH.  The soil you use should have the correct PH. You don’t want soil that’s too acidic. A soil with a PH of 5.5 or 6 is excellent and will be right for your plant. 

Sometimes, if your cactus is not growing, it could be because there is no PH balance. It could also be because the soil has water, which raises its alkalinity. The plant may not be growing because it doesn’t absorb the much-needed nutrients for its health.

Using rainwater is ideal because it will keep the soil PH balanced. 

There are types of PH testers available in the market where you can test your soil to ensure it has the right PH. 

Testing soil PH 

I. Using a commercial test probe

First, dig a hole and break off the soil to remove any debris. Using distilled water (available at your local pharmacy) fill the hole until it’s muddy at the bottom. Using your clean probe, insert it into the muddy pool and hold it for 60 seconds then take your reading. The tester is usually on a scale of 1-14. 

If the PH is 7, it is neutral. If it is above 7, it is alkaline, and if it’s below 7, it is acidic.

Soil PHBelow 77Above 7
Acidic Neutral Alkaline

II. Using PH test strips

Test strips are also known as litmus paper. You can purchase them at the garden store. To test the soil, pick a small portion of your soil and mix it with distilled water in a bowl, and then stir to ensure the mixture is even. 

Holding the non-reading end, dip your test strip into the mixture for about 20 seconds. Always refer to your test strip as this time may vary depending on the strip type. Once the time is up, you can then dip the strip briefly in distilled water to dilute the dirt. 

Using your key that comes together with the test strip, check what color is close to the results. The color will be in the form of numbers where you can translate your results. 

It is also possible to change your soils PH by lowering to make it more acidic, which is ideal for growing cactus.  Mix your soil with one cup of organic matter such as decomposed leaves or peat moss. Keep testing and adding organic matter until it reaches your desired level. 

The pH Scale.
Take several measurements for accuracy

3. The soil ingredients

What the soil mix contains is what determines if the cactus will grow healthy or not. Choose the appropriate soil combination.

Some of the common elements in the soil are:

The Japanese hard akadama

Just as the name suggests, its origin is Japan and is exclusively mined there. It is a clay-like mineral that’s used as soil for potted plants. It can act as one element that can be combined with others, such as sand to give a rich soil mixture. The akadama can retain water and nutrients and can break down, allowing the roots to grow and avoiding water from staying around the roots hence reducing risks of root rot. 

Pumice

Pumice is a volcanic rock in the form of lumps. Due to its numerous gas bubbles, it floats on water. The reason why pumice is excellent as a cactus soil ingredient is because it is porous. It is used as an additive for potting mixes so that there can be great drainage conditions for the plants. 

It is loose and with a lot of space for the roots and air. With high drainage, it leaves enough space for air so that it retains enough moisture so that it reduces the number of times you water your plant to reduce the chances of root rot. 

In most cases, a potting mix will contain 25-30% of pumice. 

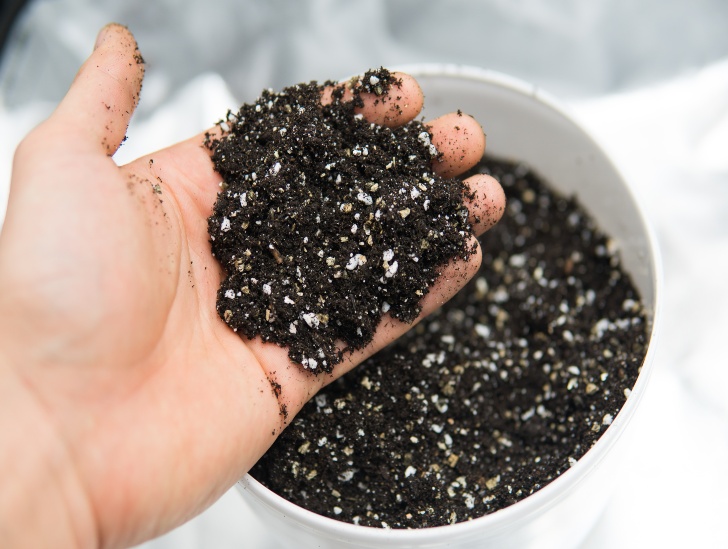
Perlite

Perlite is usually a form of volcanic glass mined globally and is white. It has high water content and can be used to make potting mixes for cactus and other succulents that don’t require moisture. Perlite has a neutral PH and is best known for its aeration qualities. 

A soil with Perlite.
It has high water content and can be used to make potting mixes for cactus and other succulents.

Using perlite helps as it retains moisture and drains any excess water making the soil dry and great for the cactus as they don’t thrive in water.

Vermiculite

Vermiculite is hydrated laminar minerals. In most cases, it usually has a PH of 7, which means it’s neutral. It’s light and easily mixes with the rest of the ingredients in the soil. The medium, as compared to the rest, is better at water retention and soil aeration. Below are some of the uses of vermiculite.

Vermiculite uses

  • It can be used for growing plants where it’s easier for them to absorb calcium, magnesium, potassium, and ammonium, which are all required for accelerated growth.
  • You can add it to soil together with peat for soil lightening and conditioning to promote the growth of the roots.
  • Mix half vermiculite and half soil in potted plants as it does away with any excess water and is perfect for aeration.
  • Vermiculite can be used alone or mix with some soil or peat for seed germination. In the case that you use the vermiculite alone, make sure you pour in some weak fertilizer after the first leaves appear. 
  • It is also used when transplanting. Carefully dig a hole that’s larger than the plant roots and fill it with vermiculite and the topsoil you had removed when digging the hole. This helps the roots spread and control excess moisture as well as protecting the roots from completely drying out. 
  • The medium grade one can be used for root cuttings directly. You just need to water thoroughly.
  • You can use vermiculite when arranging flowers. Fill your pot/container with vermiculite and saturate it with water. Pour off the excess water and arrange your flowers. There will be no need for changing the water, and it will keep your flowers fresh all day. Be sure to use the horticulture vermiculite though.

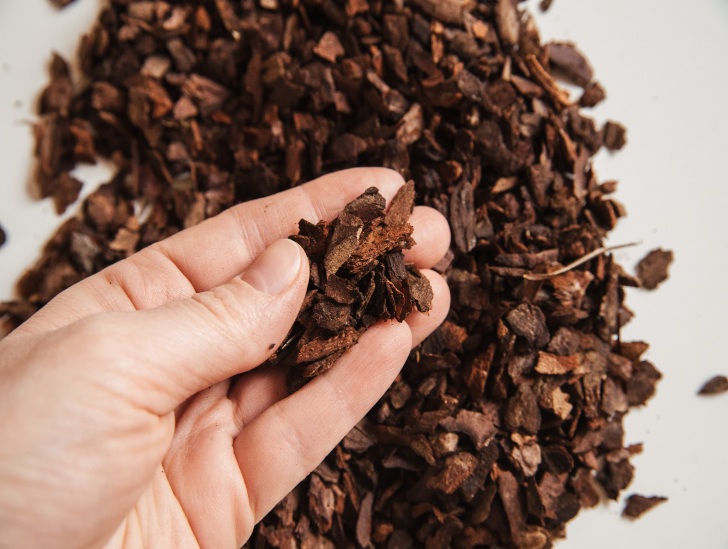
New Zealand pine bark

Also known as Enzogenol, it is a 100% natural extract found in New Zealand pine trees. The bark can last for years when used in pots without breaking. It holds water which makes it perfect for cacti and other succulents. 

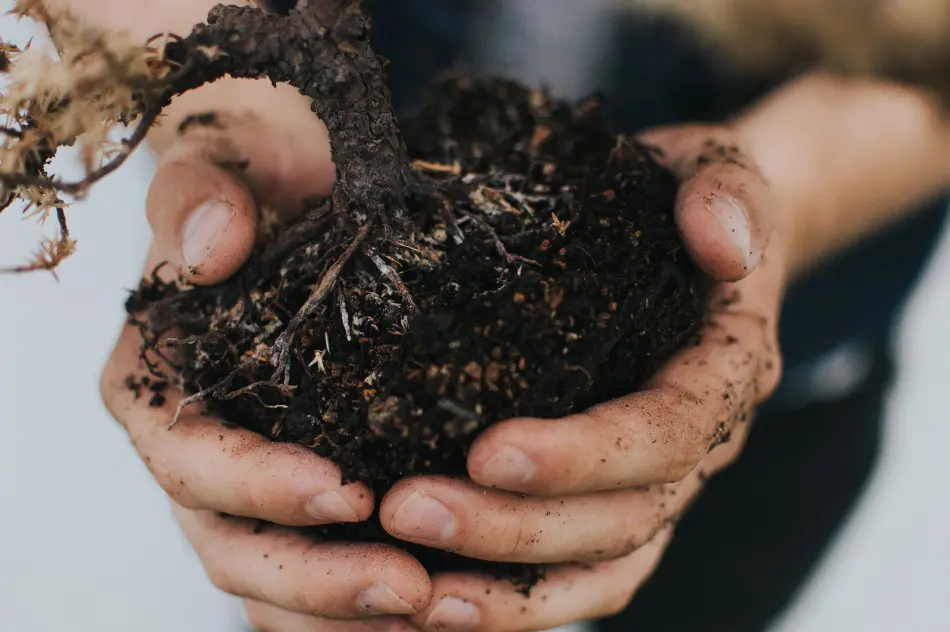
A hand holding a pine bark.
The bark can last for years when used in pots without breaking

Haydite

Also known as expanded shale, it absorbs any excess water and eventually releases it slowly to the roots. This way, there are no issues of the cactus roots rotting. 

Coco coir and composted rice musks

These two are among the best organic matter to include in your potting mix. What makes them perfect is that they are long-fiber that absorb excess moisture and dry out quickly as well. They last long, have good nutrient bonding properties and are rot-resistant. 

Sand

In most cases, sand is used to ensure the soil drains well. You can mix gravel and grit into your potting mix for better drainage. If you decide to use sand, make sure you use construction sand since it’s coarse and inexpensive. 

A cactus on a sand.
If you decide to use sand, make sure you use construction sand since it’s coarse and inexpensive

4. Researching on the commercial potting mixes in the market

If you decide to go with a commercial potting mix at your local garden store, you’ll need to choose the best. There are numerous ones in the market, and some are specially designed for cactus. However, some may not be the best for your indoor plant, and upon purchasing, you may need to add some pumice or any other coarse material. This improves soil porosity

If you are not quite familiar with making your own cactus potting mix, then purchasing the commercial mixes is a better option for you. Some of the best-known mixes are Hoffman Organic Cactus and Succulent Mix, Cactus mix with Mycorrhizae from Green Planet Naturals and Espoma Organic Cactus Mix. 

The best potting mixes will always have good drainage as well as an excellent water-holding feature. They will also not dry out completely to leave some moisture for the roots when they dry out. 

Cactus will absorb the water quickly and store it in their bodies while the excess water drains out through the drainage hole of the pot/container.

This is why it’s crucial when buying a pot, consider if it has drainage holes. You need one that has so that water drains out. This way, there is no excess water left hanging around to cause root rot. 

The potting mixes available have the basic elements of a potting soil, which is why you need to add peat moss to create an overall better mixture. These mixes will usually grow the cactus from propagation all the way to maturity. 

5. Knowing what type of cactus you purchase

As mentioned, cactus live in either arid or tropical areas. Determining what kind of soil is ideal for your cactus first needs you to identify your cactus type.

Tropical cactus

Tropical cacti are found in places such as the South American jungles. Since they are epiphytes, they grow attached to the trees. Such species are the Holiday Cacti such as the Christmas Cactus. These cacti are soft and have spineless leaves, unlike the arid ones.

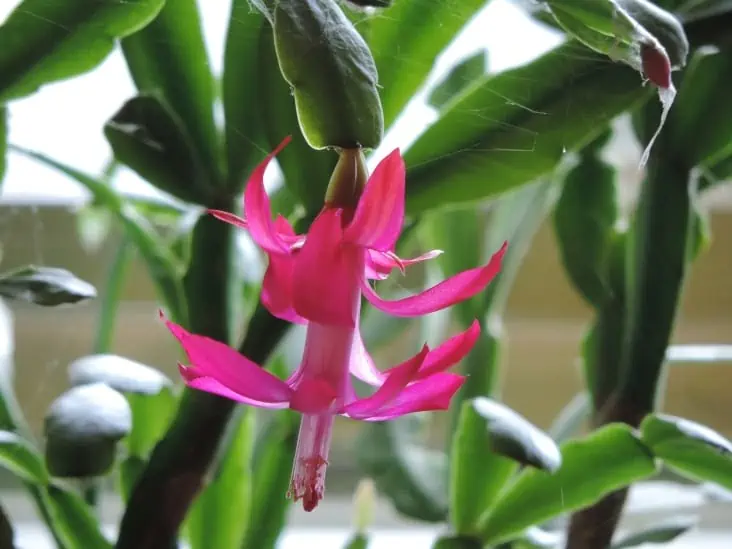
Christmas cactus flowering.
For tropical cactus, they need soil with more organic matter. 

Even as the tropical areas are rainy, cacti drain freely because they hang on the trees; hence, their roots never rot. As such, they need evenly moist soil but one that does not become waterlogged. They need one that drains effectively. 

Generally, all cacti species require well-draining soil. However, for tropical cactus, they need soil with more organic matter. 

You can mix 1 part of garden soil to 2 pieces of peat moss and 1 part of sand. 

Arid cactus

Even as most cacti grow in desert areas and bear fruits and flowers, they are mostly grown for their shapes, sizes, and colors. In recent years, research has also shown the health benefits of cactus fruits and pad (nopals). From weight loss to healthy hair, the benefits are quite numerous.  

They have spines that are a protective way of keeping away predators. However, there are still some daring animals such as camels that eat them even with their spines. They usually have hardened structures in the mouth known as papillae that help protect them from scratches of the spines. 

A mature arid cactus.
Arid cactus

Arid cactus need dry soil as they are used to in the desert areas. They hate waterlogged soil, which is a common cause for root rot. Making your mix can be helpful, and it’s recommended you use 1 part soil mix and 2 parts of sand so that you provide the right growing environment for them for proper drainage. 

6. Consider the option of making your own potting mix

Instead of purchasing the usual commercial potting mix, you can make your potting mix. You get to customize it for your plant. The first step is getting a container big enough to hold all the ingredients without any spillovers. 

Here are some sample recipes for making a cactus potting mix.

Ingredients:

  • 1 part builder’s sand
  • Four parts bagged potting soil 
  • Five parts perlite
  • A pinch of rock dust

Make sure the top part is dressed with aquarium stones or pea gravel. 

Recipe for the desert cactus

If you plant cactus in pure sand, it will not thrive well. Therefore, get a rich-nutrient soil that’s rocky that is in a pot that has adequate drainage holes. Nutrients you need will include peat moss, perlite/vermiculite, coconut coir, and pumice. All of these combined make the perfect potting mix that’s great for aeration and drainage. 

To start, use ordinary potting soil as your base. Then add 2 parts of pumice as it is a volcanic rock which is porous and is light. In case you don’t get pumice, chicken grit can be a great substitute. Check for oil dry number 8822. You can also substitute with perlite or vermiculite. This is a crucial stage because water quickly passes the potting mix while still providing aeration. 

Next, pour in some coconut coir as it gradually decomposes. The upside for this is that it helps the cactus mix hold moisture. 

Recipe for jungle cactus

As earlier mentioned, the potting mix you use for desert cacti is not what you’ll use for the jungle ones. Since jungle cacti are epiphytic, which means they can grow literally on rocks, you’ll need a well-customized mix. 

A cactus near the window.
This potting mix provides more aeration, which makes it the perfect blend for your tropical cactus. 

This means that they can get nutrients from dead leaves. They can even get their needs from the air, which is great. 

The idea is to try and mimic those living conditions in your potting mix. Try to make it as natural as it can be. For this, you need a combination that has coconut coir, orchid or fir bark, peat moss, oak leaf mold, and pumice. 

The mix will be almost similar to the dry soil mix but change up a bit. You need 1 part pumice and 2 parts orchid bark (coarse.) This potting mix provides more aeration, which makes it the perfect blend for your tropical cactus. 

Another alternative for tropical and arid cactus

Ingredients:

  • Ground fir bark
  • Bucket
  • Coconut coir/peat moss
  • Vermiculite/perlite/pumice/coarse sand

In the bucket, mix equal portions of peat moss and ground fir bark. This creates an ideal base mixture for both desert and tropical cacti. As an alternative, instead of using peat moss, you can use coconut coir or leave out the ground fire bark. 

Next, mix the base potting mix you made with one part of the coarse builder’s sand. This is applicable to the tropical cactus as they need more moisture and can tolerate slow water drainage as compared to the desert species. Alternatively, you can use perlite, vermiculite, or pumice instead of the coarse sand.

For the desert cactus, use equal portions of the base potting mix and the coarse sand or pumice/perlite/vermiculite. They do well with a mix that drains water quickly and can’t stand too much water retention.

After the above, mix all the ingredients until they are uniformly combined. In the case that there are any lumps formed, blend the soil until it is even. 

The last step is equally as important. Before you plant the cactus, water the mixture to allow the peat or coir to absorb the water, do this for approximately an hour. Squeeze the soil to make sure no water droplets are running down to be sure it’s safe to plant the cactus. 

Sometimes, you’ll need to add 1 tablespoon of vinegar to 5 gallons of water when you are watering to raise the soil’s acidity slightly. 

Note that there is no specific recipe that is ideal for everybody. The best one for your plant will depend on your preferences and your plant. The recipes above are to guide you so that you can create a well-balanced mixture. 

Different kinds of Plants on the pot.
Instead of purchasing the usual commercial potting mix, you can make your potting mix

Characteristics of an excellent potting mix

The soil needs to drain fast to prevent the cactus roots from rotting. An excellent remedy for root rot is re-potting and cutting the damaged roots carefully. 

The potting soil should also be able to retain some moisture so it can provide when the plant dries out. 

Get one that is rich in nutrients that contain porous inorganic materials for proper drainage and part of it having organic materials that will provide nutrients to the roots when they need them. 

Even as you use regular potting soil, ensure you add a bit of pumice to improve the soil’s ability to drain water effectively. 

The above points should help you make a decision when you want a potting mix for your cactus. If you wish to purchase the mix or make your own, the guide will help you. Also, remember, even after you make the potting mix, you will need to re-pot them ideally every two to four years. Once the roots start showing through the drainage holes, it is time to re-pot them. 

Here is a list of our favorite and recommended soil mix (Here)

7 Steps for the Perfect Cactus Garden

Cactus Gardens are great to create because they require such little maintenance. Cacti can thrive in many different growing conditions, making them wonderful plants, especially for those of us who have a hard time caring for plants.

Cactus gardens, in particular, are so much fun to care for because there are many different ways to create them and care for them. Whether you want to create an indoor or outdoor cactus garden, I have created this 7-step guide to help you start your cactus garden journey as fast and easy as possible:

1. Picking Out Your Cacti

Before you start putting together your cactus garden, you need to make several decisions. The first and maybe most important decision you should make is what kind of cacti to include in your cactus garden.

The type of cacti you use depends mostly on whether you want to create your cactus garden: indoors or outdoors.

Indoors VS Outdoors

Cacti love sunlight and warm weather. Cactus gardens do great outside when you live in a hot and dry environment and have mild winter weather. If you live in a humid area with cold winters, your cactus garden would do much better if you created it indoors in a container.

There are thousands of different cacti to choose from when creating your cactus garden. Some of the best plants to include in your indoor cactus garden include:

  • Pincushion plants
  • Hens and chicks
  • Sea urchin cactus
  • Ruby ball cactus
  • Hedgehog cactus
  • Crown cactus
  • Pilosocereus pachycladus
  • Christmas cactus
  • Eastern prickly pear cactus
  • Crow’s claw cactus
  • Pipe organ cactus
  • Totem pole cactus
  • Barrel cactus

These are just a few ideas of great indoor cacti to get you started. You are not limited to only these plants! If you have considered starting your cacti as seeds, I would highly recommend against it because it actually takes cacti an extremely long time to grow from seeds.

Cactus flowers?

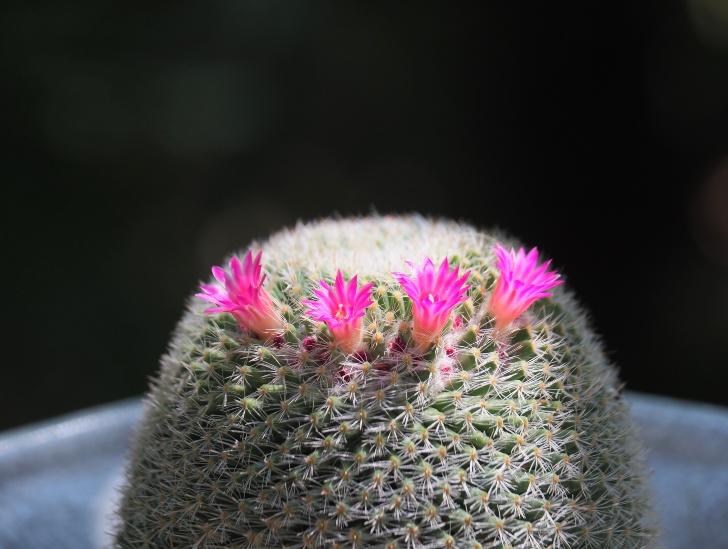
One thing to think about when researching which cacti you want to put in your cactus garden is whether or not you want blooming cacti. Not all cacti bloom, but there are a few that do, such as Mammillaria, Gymnocalycium, and Parodia. Knowing which, if any, of your cacti bloom is important because it could determine where you place it in your cactus garden layout or it might affect your decorations.

Cactus plant flowering exposed to sunlight.
Not all cacti bloom, but there are a few that do, such as Mammillaria, Gymnocalycium, and Parodia.

Variety is the key

In fact, you don’t have to have only one type of plant in your cactus garden. In fact, the best cactus gardens include a variety of cacti and other plants. If you were wondering if you could put a cactus and succulent together, the answer is yes! Cacti and succulents do extremely well when placed together in the same container. Not to mention, cacti are succulents. Even though not all succulents are cacti, call cacti are succulents because succulents are named for their ability to retain moisture.

The only thing to keep in mind when choosing different plants for your cactus garden, including mixing cacti and succulents, is to pick plants that are similar in size and care requirements (i.e. need the same amount of light and the same amount of water), especially if you are putting them in the same container.

Choosing plants with different care requirements for the same container would make it extremely hard to care for each plant individually and would eventually lead to over or under watering or other damaging issues.

2. Location, Location, Location

After you know what kind of cacti you will be putting in your cactus garden, you will need to choose a location for it. Every cactus has different care requirements and the perfect location will depend on the type of cacti you will be using, especially if you are choosing between an indoor and outdoor cactus garden.

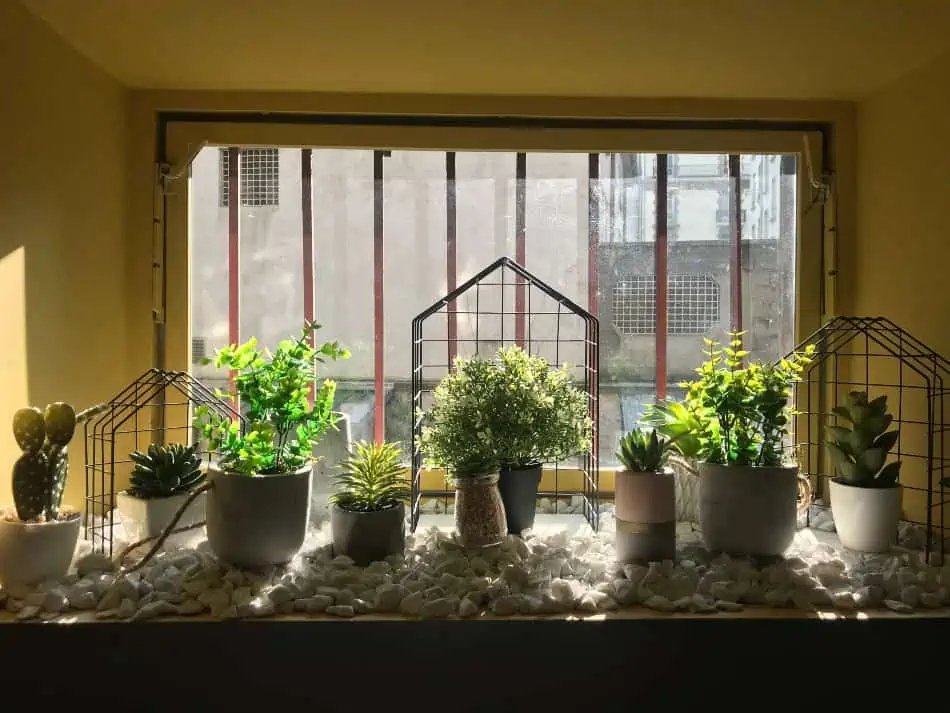
Plants near the window exposed to sunlight.
A south or east-facing window will be the best choice for your cactus

If you are planting an outdoor cactus garden, choose a location that gets plenty of sunlight. If you are planting a cactus garden in a container indoors, you should put it in a sunny window that gets lots of direct sunlight.

Most likely, a south or east-facing window will be your best bet. In either location, your cactus garden should get at least 6 hours of direct sunlight a day.

The location of your indoor cactus garden also depends on what kind of container you choose and how you choose to display it. Creating an indoor cactus garden is full of possibilities. You could have a hanging cactus garden, one in one large container, one in many different containers, or even one in a terrarium.

You could even use a teacup or saucer as a container for your cacti! Each kind of container has different location requirements, so make sure to choose one that works best in the sunniest area of your home. For instance, do not choose to have a hanging cactus garden if there is nowhere to hang it in the sunniest window of your home.

3. A Container for Your Cacti

As previously mentioned, there are many different kinds of containers you can use to create your indoor cactus garden. If you have an outdoor cactus garden, you can skip this step as you won’t be needing a container.

When choosing a container for your indoor cactus garden, look for one that is shallow and has at least one drain hole.

Draining is very important when planting cacti, so make sure to keep that in mind while choosing a container. If the water is unable to drain off from the cactus, the cactus will be sitting in water and be more likely to experience root rot, something that could eventually kill the plant. Cactus roots are pretty shallow, so shallow containers work well to ensure that the cactus won’t sit in too much water, as well.

Cactus and succulent plants in a pot.
Different type of containers for a different type of cacti

The type of container you choose also depends on how many cacti you plan on including in your cactus garden. Make sure to choose one large enough to house all of your cacti comfortably. Cacti can be planted right up under each other, but make sure there is enough room for each one to get plenty of sunlight.

Terracotta pots are very popular for cactus gardens because of their variety of sizes and great drainage, as well as the fact that it creates a pretty aesthetic.

4. It’s All About the Soil

After you have the perfect container and all your plants, it’s almost time to plat. But first, you need the proper soil. Cacti require special soil. Regular potting soil is not good for cacti because it holds way too much water.

If you plant your cactus in regular potting soil, it will not do well and will possibly die. In fact, without proper drainage, your cacti may begin to experience root rot where the roots are sitting in too much water and rot the plant from the roots up. Root rot is fatal to cacti if it goes on too long without correction.

A pot and a cactus soil.
Making you own cactus soil allows you to control the amounts of each item you use.

Cactus soil is specially formulated for optimum drainage. You can buy cactus potting soil, or you can prepare the soil for your cactus garden yourself.

Cactus potting soil is created with a mixture of one-third regular potting soil, one-third coarse sand, and one-third pumice or perlite.

The regular potting soil serves as the base for your cactus potting soil. Coarse sand allows for drainage in soil mix and can be the sand you buy to put in a sandbox. Finally, pumice or perlite are other additives that create good drainage and retain very little moisture.

All you have to do is mix all three items together to create your own cactus potting soil. Also, to ensure the best drainage possible, line the bottom of the container of your indoor cactus garden with pebbles or gravel before adding the cactus potting soil.

A person holding a plant from the pot.
Cacti require special soil

Making your own cactus potting soil can actually be much cheaper than buying a store-bought mix. It’s also a good idea because it allows you to control the amounts of each item you use.

Once you create your first batch of cactus potting soil and start using, you may find that you want to add more or less of one of the ingredients, which is totally fine! The more cacti you plant and take care of, the more you will be able to understand what ratios work best for your cacti.

To plant your cactus garden in the ground outdoors, the same principle applies: the soil should have great drainage in order for your cactus garden to thrive. While you don’t necessarily need to create a large mix of cactus potting soil, you may need to add some items to the ground soil before planting.

To know if you need to alter the ground soil, dig holes for your cacti that are less than a foot deep and fill it with water. Allow 30 minutes to pass and then check it. If water is still standing in the hole, add coarse sand and some rocks to the bottom of the hole before finally planting your cacti. If water is not standing in the hole, you should be good to go. However, if you want to add sand and rocks to the hole anyway just to be sure, it wouldn’t hurt the drainage for your cacti at all.

5. Finally Time to Plant

Once your soil is optimized for drainage and your container is filled, it’s finally time to plant your cactus garden! Before you start to put your plants in the soil, take a minute to think about how you want to layout your cactus garden.

There is no right or wrong way to layout your cactus garden. The only thing to keep in mind is to try not to plant the cacti where some get more light than others. Make sure all of them have access to the direct sunlight. That’s the only rule!

You can be creative as you want when planting your cactus garden. Create a shape with your cacti or give them a more natural layout and plant them in clusters. You could even create layers, planting some taller than others. It’s your garden, so plant them whatever way makes you most happy!

A top view of a purple flower cactus.
One issue you may run into when plating your cactus garden is how prickly cacti can.

When you are ready to finally place your cacti in the soil, dig small holes in the soil, just deep enough for the cacti’s roots to fit. Place all of your cacti in their holes before you pack down the soil just in case you want to change the placement of the cacti once you see what it looks like.

When you are finally happy with where all the cacti are, pat down the potting mix, give it just a little water, and you are good to go!

One issue you may run into when plating your cactus garden is how prickly cacti can be. If you are worried about your hands getting stuck, use thick gloves to avoid getting pricked. Or, you could even use kitchen tongs so you don’t have to touch the cacti with your hands at all! Even a folded newspaper will work to help you not prick your hands.

If you have trouble getting the cacti out of the containers you bought them in, you can knock on the container a couple of times to knock the roots loose, or use an old, dull knife and scrape around the edges until the cactus comes loose.

6. Decorate

Now comes perhaps the most fun part of creating a cactus garden: decorating! Just like with the layout of your cactus garden, there are endless possibilities for decorating it and it is all up to you and your preferences!

There are lots of different things you can use to decorate your cactus garden like colored pebbles, small stones, large rocks, figurines, and so much more. Decorations can be as extravagant or simple as you want.

When using a cactus garden as décor, many people start with the container. When you choose a container for your cactus garden, choose one that matches the theme of the décor you are looking for. For instance, if you are going for a southwestern themed décor, terracotta pots are the way to go. Or, if you want something more modern, choose a clear glass terrarium.

The options don’t even end there! You can always hand paint and decorate whatever container you have lying around to fit your décor theme!

After your container is filled with plants in your desired shape or layout, then you can add more décor.

Different color of plant in a pot.
Decorations can be as extravagant or simple as you want

Here are some ideas to get you started:

  • Layer the soil with a single layer of pebbles colored white or red
  • If you have a clear glass container, lay down multiple layers of different colors to be seen through the side of the container
  • Create even more patterns with many different colored pebbles
  • Use large rocks or tall figurines to all more dimensions to your cactus garden.

Once your decorations are all in place, you are all done!

7. Care for Your Garden

Now that you are done creating your cactus garden, all that’s left to do is care for it!

Sunlight

As mentioned before, your cactus garden needs plenty of sunlight. Check on your cactus garden every day to ensure it is healthy and thriving. If your cacti aren’t getting enough sunlight, you will notice their leaves and stems stretching towards the sunlight. You may also notice some discoloration.

Golden cactus barrel exposed to sunlight.
It is also possible for your cactus garden to get too much sunlight.

If you see any of these warning signs, slowly move your cactus garden into more direct sunlight until leaves or stems begin to perk up and colors become more vivid.

It is also possible for your cactus garden to get too much sunlight. If this happens, your cacti will lose its green color and potentially become sunburnt with rough and calloused skin.

To correct this, simply move your cactus garden out of the sunlight into an area with lower light. When moving your cactus garden, always keep an eye on it after its move to make sure it’s still getting enough sunlight.

Water

Another major component of caring for your cactus is water. Cacti don’t need a lot of water. In fact, to know when to water your cacti, feel the soil. If it is dry to the touch, go ahead and water it thoroughly. If the soil is wet, your cacti don’t need any water.

You can tell if your cacti are not getting enough water if its skin or leaves are puckered or shriveled. If your cacti are getting too much water, your cacti will feel mushy and potentially begin to experience root rot.

A person checking the moisture of the soil of the cactus plant.
You can tell if your cacti are not getting enough water if its skin or leaves are puckered or shriveled.

If any damage happens to your cactus garden, it does not mean it is dying. There is always a chance to correct it. Any damage done to leaves due to too much sun, too little sun, too much water, or too little water is permanent. However, you can always prune the damaged leaves or stems away.

Fertilize

You may decide that you want to fertilize your cactus garden at some point. Cacti are hearty plants that can thrive in almost any condition, so you don’t necessarily need to fertilize it.

However, give your cactus garden a dose of fertilizer that can give it an extra boost to thrive no matter the season or growing conditions.

If you choose to fertilize your cactus garden, most any fertilizer that you use for house plants would work for cacti. You may also use a fertilizer specific for cacti, like Miracle Grow Cactus Fertilizer.

Look for a fertilizer higher in phosphorus than nitrogen. You can fertilize cacti as little as once a year. Or, you can fertilize it 2-3 times a year if you can keep up with a fertilizing schedule.

Bottom Line

And that’s it! As I said, cacti are easy plants to take care of. They require very little maintenance and as long as you give it the proper setup, they will thrive for a very long time. If you follow this 7 step guide for creating your own cactus garden, you will have a thriving garden up and running in no time!

Cactus Care: 11 Essential Tips For Beginners

I have always loved cacti and how easy they are to manage. They are your ideal room-mate as they are easy to grow with less attention. The most exciting part is when they bloom! Depending on what type your cactus is, they may have red, pink, blue, yellow, or white flowers.

As a beginner, it’s important to note that you need to know how to care for your cacti. If you overwater them, they may end up rotting. Keeping them in the right conditions will see them thrive and live for decades.

We have compiled a beginner’s guide on caring for cactus, here are 11 easy to do tips: 

1. Start with a bang – the potting mix is everything

The truth is, different cacti species live in different conditions. There are those that prosper in dry sandy soils while others do well in tropical rainforests. When you decide to purchase your cacti, ensure you know its species and what type of conditions make it thrive. 

After buying it, you need to get a potting mix that is appropriate for it. If you get a potting mix designed for tropical cacti but use it for the arid plant, it will not thrive. 

The ideal tropical cactus soil

Epiphyllums are a species of cacti found in the tropical rainforests. If you decide to go with such species, ensure the potting mix is ideal for it. Tropical cacti will drain quickly as they are usually suspended in trees so that their roots don’t rot due to too much water. 

For such a cactus to thrive, it needs soil that drains well. For tropical cacti, they need a little bit more organic matter in the potting mix than the arid cacti.  

The arid cactus soil

Most of the cacti that grow in arid areas, if they grow in poorly draining soils, they will eventually not grow. Most of these cacti will thrive in purchased potting mixes specifically for cacti. 

A person holding the plant from the pot.
Ensure you know your cacti species and what type of conditions make it thrive

A few steps to making the best cactus soil

There are available potting mixes in the market that are ready for use. You can purchase such and skip all the processes of making your own potting mix. However, making your own mix helps you have the right nutrients for your young cacti

To make the potting mix, follow the following steps:

  • Use equal portions of ground fir bark and peat moss in a bucket for either arid or tropical cacti.  
  • For a tropical cactus, use the mix above to add builder’s sand because they require more moisture. You can also use vermiculite or pumice instead of the sand for the desert cactus.
  • Ensure you mix everything to make sure the mixture blends evenly.
  • You need to water the mixture before transferring it to the pots where your cacti will grow. Leave it to absorb for an hour such that even when you squeeze the mixture, no water droplets form. 
  • Don’t add any fertilizer at this point because cacti have minimal nutrient requirements.

2. When should you water your cacti? 

Even as some of the cacti are usually in arid areas, they require water. Therefore, even when you purchase a cactus that’s designed for such areas, you need to have a watering schedule. 

Cacti are naturally juicy, which means they store moisture. One of their adaptations is that they store water so they can use it during the dry seasons. They can stay for quite some time without water, but most often you’ll tell when it is insufficient as they start yellowing.  

A small cactus on a clay pot and a water container.
A water gauge can help in determining the soils moisture — only water when the topsoil is dry.

Most cacti experience growth during the warmer seasons. During this time, you need to water them adequately. In cold seasons, winter and spring, they require less moisture. 

Watering depends on where your cactus is placed. If it is outside in direct sunlight, you may need to water regularly as compared to when it’s indoors. 

On average, during spring/summer, you can water once a week or even more, depending on whether the soil dries or not. 

A water gauge can help in determining the soils moisture — only water when the topsoil is dry. Overwatering cacti will make its roots rot, and the plant will start turning pale. Another alternative would be using a stick to poke the soil to see if the bottom has water. If soil sticks on the stick, then there’s still water. 

There is also a downside to underwatering. The cactus turns pale, and it bends in a particular direction. 

The idea with watering cactus is ensuring you strike a balance and avoid under or overwatering. 
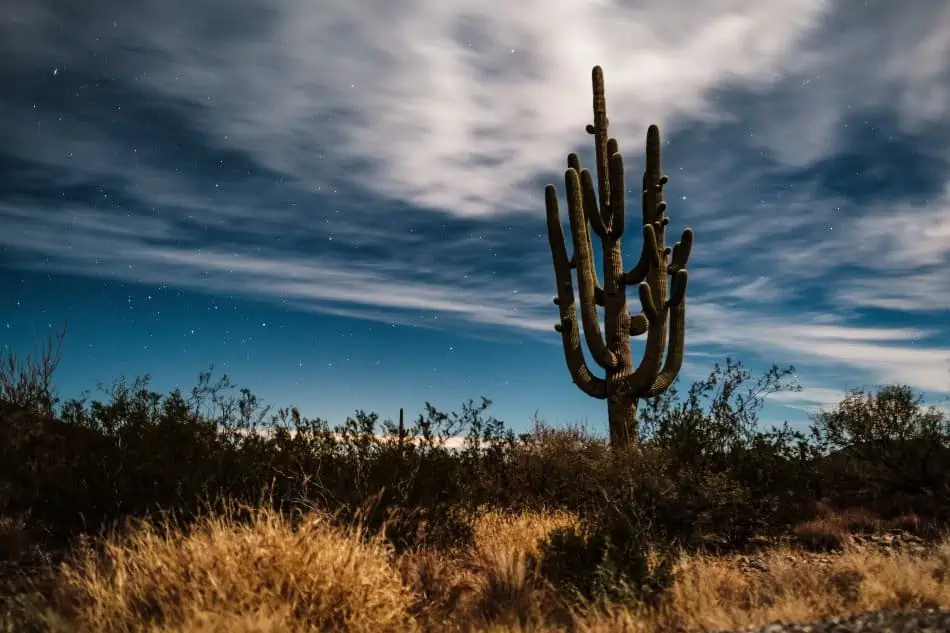
A person watering the plant.
On average, during spring/summer, you can water once a week or even more

Tips to guide you through watering cactus

  • The cactus size

You’d think that a bigger cactus in size will need more watering, but in the real sense, the smaller, younger ones have a higher growth rate, which means they need more water. The smaller ones will need frequent watering than large ones. 

  • Pot size also affects how frequent you water

Small pots are necessarily ideal when watering because cacti don’t love sitting in water as they are more likely to rot. 

A cholla cactus on a pot.
Make sure to use a pot that removes the excess water thoroughly.

Large pots will take time for water to drain, which make the cactus susceptible to not thriving. 

Get a pot that’s just enough for your cactus. 

  • The type of pot you use

Even as we consider the kind of pot that’s ideal for growing cactus, what matters the most is if the soil is aerated. 

Plastic pots can be used but take time to dry out as compared to terra cotta pots. They ensure there is maximum air movement and drain excess water faster, reducing chances of the roots rotting. Make sure to use a pot that removes the excess water thoroughly.

3. Is using a fertilizer necessary?

A plant needs nutrients to thrive. For proper care, you need to purchase a fertilizer designed for cacti. They need additional nutrients for them to grow well. For most cacti, their growing season is usually the warmer months. 

When looking for fertilizer, ensure you get a low-nitrogen one but high in phosphorus. This helps in maintaining the healthy looks of the cactus.

Always ensure you inspect your cacti during spring to monitor any new growth. Only apply fertilizer when you notice the growth. 

The fertilizer should be in the ratio of 1 tablespoon of the low-nitrogen fertilizer with 1 gallon of water. Use this solution to water the cactus. Use this every eight weeks during spring/summer. 

Safety tip:

If you recently potted or repotted the cactus, don’t use fertilizer until the plant establishes itself in the new pot. This can take up to two months. 

Some cacti such as the Christmas cacti bloom in winter and remain dormant during summer. In this case, fertilize them in winter. 

4. Give your cactus the sunlight they need

Light is a necessity when caring for cactus. Desert cacti love direct sunlight and would do with four hours a day of some direct sunlight. The tropical cacti such as Christmas cacti prefer partial shade. During winter, tropical cacti such as Rhipsalis would ideally need direct sunlight because that’s when they bloom. If possible, expose them to direct sunlight for their growth. 

Get to know your cacti well and know what works for them. 

For indoor cacti, to get adequate light, ensure they are 4 feet of the window if it faces the east or south. Keep rotating the plant because too much sunlight will make them turn yellow or white. 

During winter and autumn, cacti will need temperatures of between 8-10°C. In summer and spring, even as they require proper ventilation, they can do with higher temperatures.

If you are growing your cactus indoors, it is important to rotate it preferably every month. This is because cacti will tend to grow towards the light. Rotation strikes a balanced growth. Rotate the pot a quarter turn. 

A cactus in a pot exposed to sunlight.

Can using grow lights work?

In the case that you think you won’t be able to provide sufficient sunlight, you can buy grow lights. 

Grow lights are artificial lamps designed to help with indoor plants that require light but is insufficient in the growth of plants. 

A Russian botanist first discovered them. 

We have three types of grow lights: light emitting diodes (LED), fluorescent lights, and high-pressure sodium (HPS) or high-intensity discharge (HID). 

  1. Fluorescent lights are used to grow herbs and vegetables indoors. 
  2. For the HPS, you need to place your cactus a distance away from them as they produce quite high amounts of heat. They also require you to invest heavily in setting them up and having a system that will manage the temperature. 
  3. The LED is more efficient than the other two types, and the light is far more focused. There is also very minimal heat produced if any. 

A grow light will be able to imitate sunlight, which will help the cactus during their growing stage and help them to bloom. 

5. Be on the lookout for pests as they are a major concern

In most cases, the most common cacti problems are bacterial and fungal diseases caused by overwatering. However, once in a while, pests such as mealybugs will attack them. Controlling these pests may be difficult because they may keep recurring or become stubborn and end up damaging the cacti. 
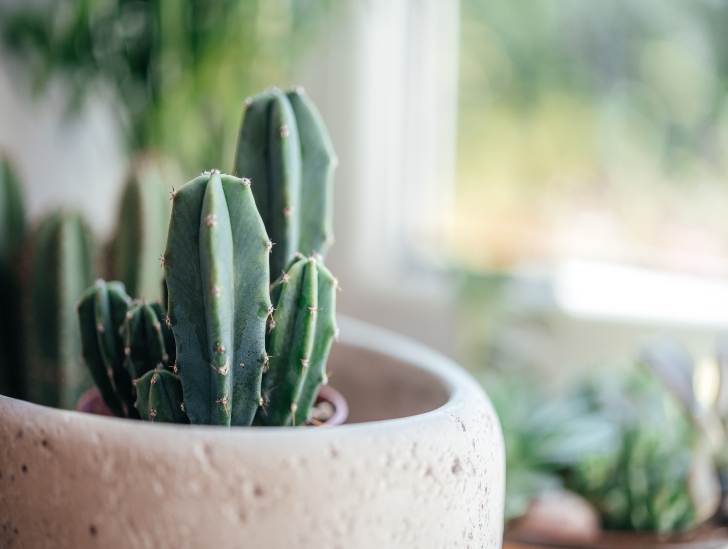
Mealybugs and scale

These two insects are the most common insects that manage to get past the cactus spines and can do a lot of damage that may end up killing the cactus. 

Mealybugs are usually in clusters and have a white, waxy and cotton appearance. They are not easy to spot because they stay in hidden parts of the cactus. They are mostly found on the underside of the leaves and hidden joint areas. 

They mostly attack the leaves and stems. There are those that attack the roots and will usually suck the root juices causing the cactus rot due to bacterial infections

Scale insects are dome-shaped, and just like mealybugs, they also attack the leaves and stems. 

Spider mites

To know if spider mites have attacked your cactus, the first indication is usually webbing and some small brown dots on the plant. They are quite small and only noticeable when you tap the affected area with a piece of paper because they resemble dust. 

Fungus Gnats

These particular pests resemble mosquitoes. They mostly hover around the soil. The larva lives in the soil, which ends up consuming the organic matter, which deprives the cactus its nutrients. If you were just starting and you had planted cactus seedlings, they may end up not growing. 

A pest in the pot.
Pests can be a major concern

How do we manage these pests? 

In as much as cacti don’t need much care like some other plants, it’s essential to ensure you observe them keenly for any pests. They may be the reason your cactus is not growing

  • Practice measures to prevent pests

How you nurture your cactus also contributes to its health. Ensure your plant gets the right amount of water, sunlight, and drainage. When it thrives, it has a lower risk of pest attacks. Keep the cactus pots free from any dead leaves as they may end up attracting pests. 

  • Control the new cacti plants

Sometimes, you may end up having an old infected cactus, ensure that it is not near the new cacti as you risk the pests transferring to it. Quarantine them until you confirm they don’t have any pests. You can even choose to discard the old infected cactus

  • Use cotton swabs to deal with mealybugs

If your cactus is already infested, use cotton swabs that are dipped in alcohol to remove mealybugs and scale insects. 

Spraying the plant with an alcohol solution diluted in water may ruin the plant’s epidermis. You can test the solution on a small area before spraying the whole area. The solution will help you get rid of unnoticeable pests as well. 

  • Washing off spider mites

Wash away the spider mites with water. Make sure you cover the pot to avoid overwatering. 
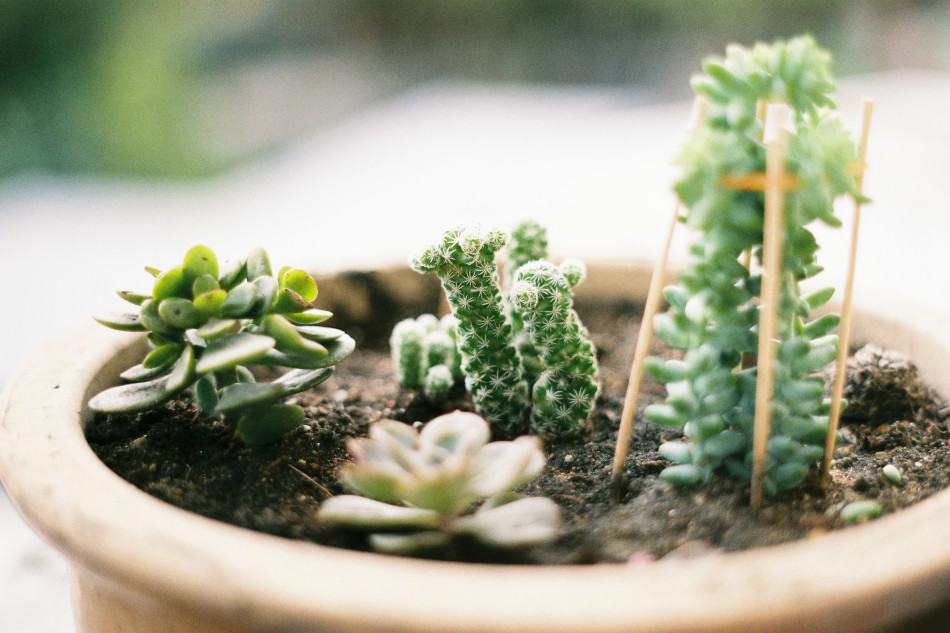
  • Using insecticidal soap 

Insecticidal soap can be used to wash off the pests. However, note that it can damage the plant as cacti have wax that could be damaged by the soap. Make sure you read the label to ensure that it’s safe for use on the cactus. 

  • Safe insecticides

Insecticides are also an option but should be used sparingly. Always read the product’s label before applying to see if it’s safe to use on your plant.  

A person spraying insecticide on the cactus.
Limit the sunlight by placing the cactus in a dull place until the pesticide works.

Some insecticides are oil-based, meaning oil remains on the plant, and exposure to sunlight could make the cactus have a tan. Limit the sunlight by placing the cactus in a dull place until the pesticide works then you can return it to its usual place. 

6. Observation is key

You know how delicate babies are and you have to keep checking what works for them and what doesn’t? The same applies to cactus. Keen observation in their growth helps you know what works for them. How they grow will tell you what they are lacking. 

For example, when you see the leaves growing towards sunlight, it is a clear indication that they are not getting enough. Change their location and get a place that has better lighting or consider investing in grow lights. 

If the cactus seems faded, it means it is getting too much light. Move it to a place with less light. 

7. Profile your plants

As a beginner, you probably don’t know much about cactus. When you decide to purchase one, you need to know the basics. Like what species is it? Where was it picked from? What were the living conditions?

The idea here is to ensure you have a little background about your plant so that you can mimic its old living conditions. Ask the person in charge during the sale to give you their contacts in case you need advice on how to nurture the young plant. Some stores will provide you with an overall guide on what you should and should not do.  

A flowering golden cactus.
It’s incredible how much information you can get online.

When purchasing the cactus, inspect it to ensure that it looks healthy. Remember that an old cactus will have a bit of scarring which should not worry you. However, if the plant seems discolored, don’t buy it. 

Once you know a bit of the cactus, research more on success stories. The internet should be your best friend here. It’s incredible how much information you can get online. After you have all the information, get started with growing it and trying to follow what you know.

With time, you get accustomed to the cactus. Every plant is unique, along the way you will learn how to treat it to get it growing and even blooming. The biggest advantage of cacti is that they live for decades some going even up to 200 years. 

For example, for the Christmas Cactus which is commonly grown indoors, the best time to propagate is late spring because that’s when they grow. Some cactus never bloom at all. However, to trigger the Christmas Cactus, the nights need to be 14 hours and days 8-10 hours for about six weeks. You may need to cover your cacti at night if there’s light. 

Know when you need to fertilize your cactus and when to water it. 

8. Joining groups of people who care for cactus

Sometimes, doing this alone is not as effective as when you have a group of people helping you. Find people who grow cacti and get to learn from them. It can be as simple as getting our Facebook group or checking your neighborhood for people who have similar interests. 

Take the chance to ask as many questions as possible for people to help. You may be surprised to find that you are also helping them because there must be some things that will work for you and feel the need to share. 

9. Repotting should be at the top of your mind 

When you start noticing roots finding their way out of their pot, it’s time to report. Since cacti are not very demanding, you may think that they don’t need repotting, but the truth is, you need to take care of them for them to have proper growth. 

It’s advisable to repot every 2-4 years. If you fertilize, do so after every four years but if you don’t, repotting every two years is ideal. 

Cactus and succulent plants on a pot.
Repotting can be a great way to reviving your cactus

Follow these steps when repotting:

  • Get the necessary tools 

Before you begin the process, have a unique potting mix in a pot that’s a size up the previous one. Since most cacti are spiky, you could wrap the plant in layers of newspaper and secure with tape. Alternatively, get leather gloves to avoid the cactus pricking you.

You will also need a good pot (clay ones are perfect) that quickly drains any excess water. 

  • Loosening the soil

Using a blunt/dull knife, loosen the soil until you are able to remove the cactus. Be careful not to damage the plant. Using your leather gloves or the wrapped newspapers around the cactus, gently pull it out. Pulling the cactus out with barbecue tongs can also work. 

Put into consideration that different species have different sizes of spines. For example, the Prickly Pear has tiny unnoticeable spines that break easily and can easily stay lodged in your skin. Therefore, ensure you have gloves that will shield you from any spines. 

  • Cleaning and inspecting the roots

After you’ve pulled the cactus out, brush off any lumps of soil on the roots. It’s important to you check the roots for any rot, or pests. 

If you notice any pests, use insecticides that are safe for the cactus. Check the label for instructions.

If there are any dead roots, cut them off as well. 

  • Drying the roots

Letting the roots dry is an essential step before transferring the plant to a new pot. Leave them for about three days. 

When removing the cactus from its previous pot may have damaged some roots and if you transfer it immediately at its state may prevent it from thriving. Letting it reduces the chances of infection. 

  • Use an appropriate pot

Once your roots are dry, the next step is transferring it to the next pot. Always choose a container that’s just slightly bigger than the previous one to allow growth. The danger of using a large pot is water retention is high, which increases the chances of root rot. 

Species such as Ariocarpus and Aztekium are more susceptible to rotting. 

  • Adding soil to the pot

Before adding soil to the pot, add some gravel or crocks for easy drainage when watering the plant. Purchase a potting mix or make your own enough to keep the cactus planted. Try to avoid putting excess or less soil. 

  • The planting process

After you’ve added soil, use the barbecue tongs or newspaper you had when pulling the cactus out to place it at the center of the new pot. Place it gently on the soil in the soil and don’t forcefully place it as this could cause damage to the roots. 

Pour in more soil to hold the plant. Ensure it entirely covers the roots. Add some compost to help maintain the soil’s acidity. 

  • Allowing the plant some recovery time

Most importantly, once you’ve repotted, don’t add water immediately. Wait for some days before you water the cactus so that it dries and recovers. 

If you have a particular species that rots quickly, wait for a week or two before watering. After that, you can smoothly go back to your routine of caring for your cactus. 
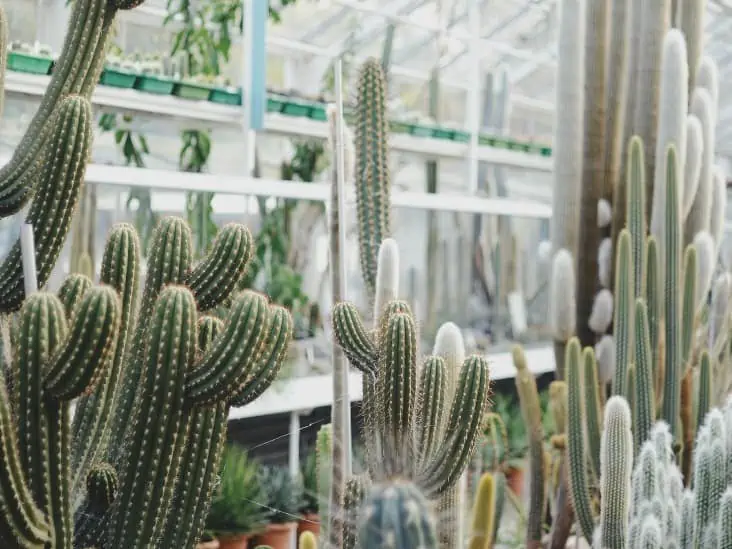
 Tip:

Repot during summer because it is easy for the roots to break or rot during winter. 

10. Proper air circulation for the growth of your cactus

Let’s face it; cacti hate stiff breezes. They grow well in places where there is sufficient fresh air. If you grow your cactus indoors, then make sure the conditions are right to do so.

 Open your vents and windows during summer and incorporate ceiling fans for better air circulation. 

11. Put your potted plant outside sometimes

For you to keep your cactus at its peak, if you strictly do indoor growing, place them outside during summer. Make sure they get the light they need to avoid edema. Select a sheltered spot. During the rainy season, ensure they don’t soak in rainwater and be on the lookout for snails as they may end up destroying the juicy stems. 

A cactus outside exposed to sunlight.
Make sure they get the light they need to avoid edema.

Bottom line:

The idea of having cactus on your patio or indoors is exciting. As a beginner, you don’t have things already figured out. However, the above tips should help you get started on how to care for cacti. 
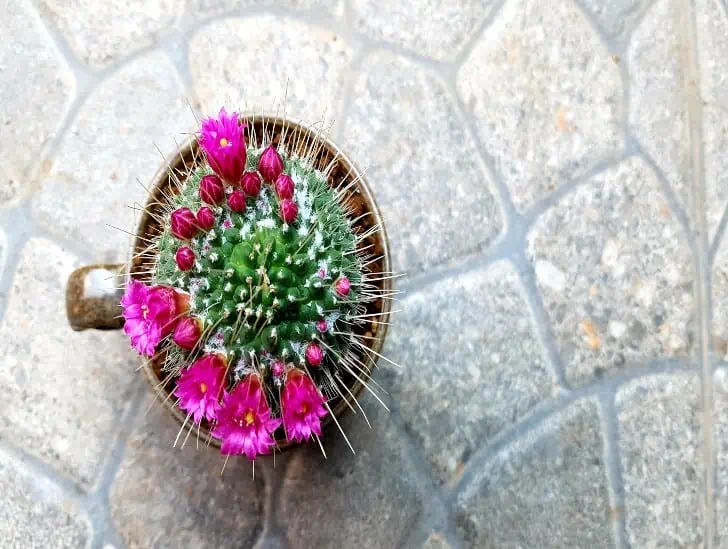
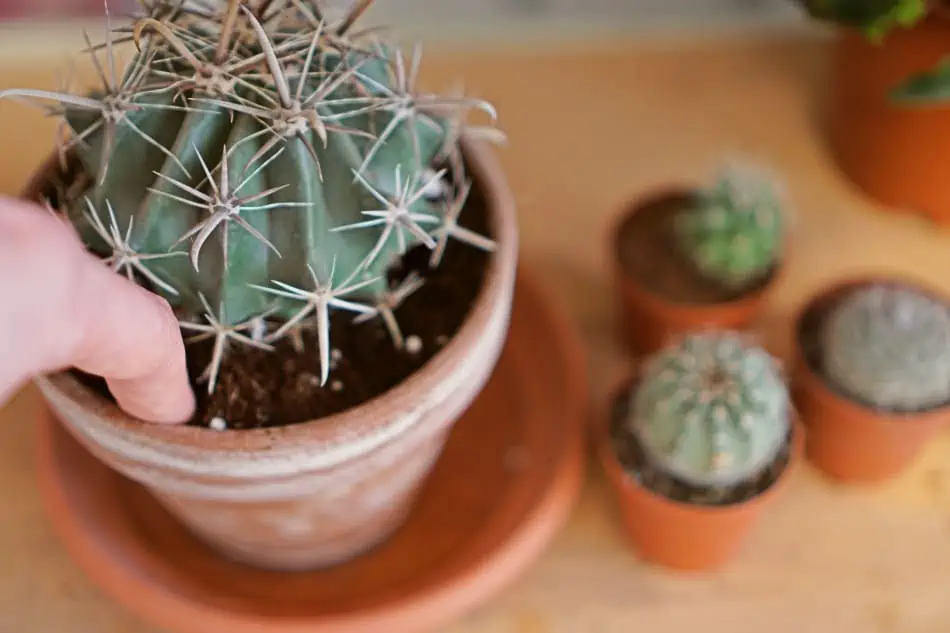
Cactus is great indoors because you can use it as part of the decor. Some cute white pots with a Christmas Cactus makes the house look alive. Whether you want it in your bedroom or the kitchen, it is a great addition. With the findings above, you can be sure that your cactus will grow healthy.