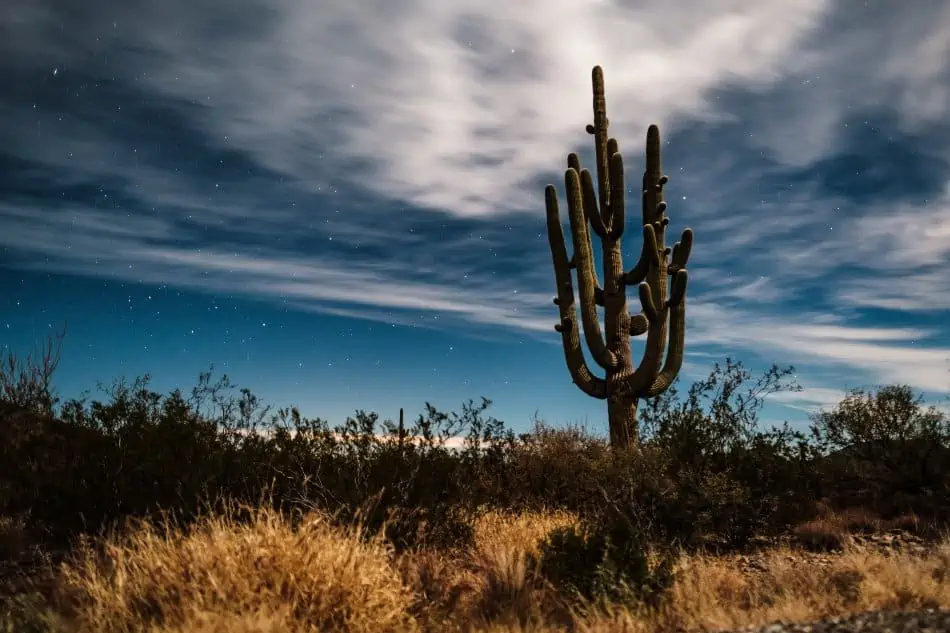
Can A Cactus Get Sunburn? And How To Prevent It

There is a misconception out there that cacti plants love excess sunlight because most of them grow in deserts. In fact, a significant number of gardeners believe that a cactus plant will happily sustain full blazing sunshine all day long, and nothing will happen to it. But, is it true?  Are these succulents resistant to sunlight, no matter how severe it is?  We shall find out in a moment.

So, can a cactus get sunburn? Yes. Although these plants are fairly hardy, they are still susceptible to a wide range of diseases and environmental stress. Exposing your cacti to high-intensity sunlight that they cannot handle will result in sunburn and shriveling of your plants.

And the most unfortunate thing is that sunburn is not only unsightly but also dangerous to your plant’s health.  Severe sunburn can cause irreversible damage to your plant, leading to death.

In this blog post, we discuss everything you need to know about cacti plants and sunburn. How does sunburn occur? How can you know that your plant is experiencing sunburn? How can you stop it, and how can you prevent it from happening in the future?  So, let us get started.

General Light Requirements for Succulents

Before we start looking into sunburn, it is essential to understand the light requirements of a cactus. As with all other plants, cacti also need light for photosynthesis — the process in which they make food from sunlight.

Most succulents require bright sunlight and warmth throughout the day, but some species can tolerate partial shade. It is always recommended to look up the specific light requirements of your plant, as they can vary.

Generally, you should strive to provide your succulent with at least six hours of direct sunlight daily. And if your plant is placed near a window, it should have some protection from the afternoon sun’s intensity since this can be too strong for most cacti species.

If growing succulents indoors, consider positioning them on a south or west-facing window. This will help them get enough sunlight without putting too much stress on them. You can also opt for artificial lighting to supplement natural light if required.

If your plant starts looking dull and pale, you may need to increase its light exposure. On the other hand, scabrous or swollen surfaces, yellowing leaves, and soft spots are all signs of sunburn.

Can a Cactus Get Too Much Sun?

A sunlight.
Excess exposure to light might cause sunburns and damage the plant.

As mentioned earlier, all plants need plenty of food to survive. Sunlight is an essential requirement in the process of photosynthesis, which helps every green plant to manufacture food. Technically, it means that if your cactus doesn’t receive sunlight, it won’t synthesize food, and it will eventually die.

But, there is a limit to how much sunlight every plant species requires.  If the amount of sunlight provided exceeds a certain threshold, it is no longer useful to the plant. Instead, it becomes damaging, and unless you take measures to save your plant, it will eventually die.

It is true that cacti plants, just like other succulents, love sunshine and can withstand direct sunlight for certain amounts of time. In fact, most cacti species tend to thrive in relatively warm temperatures of between 60oF and 80oF. Some species, such as the Old man cactus, will still do well in higher temperatures.

However, when you combine high temperatures and direct sunlight, then your plants may start straining to contain the intense heat and will start running into trouble. In the same way, you would be comfortable sitting under direct sunlight for an hour when the temperature is maintained at 70oF but will quickly take cover when it rises to 80oF.

It is the ultraviolet (UV) rays and the strong intensity of sunlight that will burn your cactus and not actually the heat. But still, relatively higher amounts of heat can also lead to rapid water loss and higher internal temperatures, which makes your plant more susceptible to physical damage, including sunburn. 

How Do You Know Your Cactus Is Getting Sunburned?
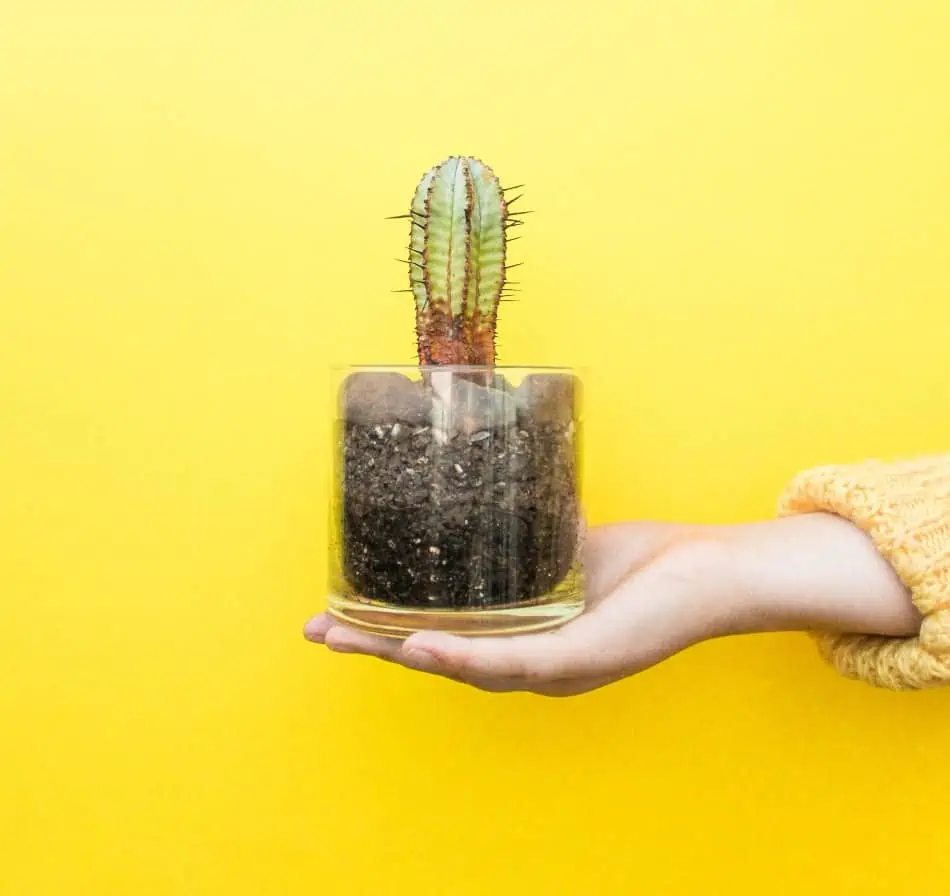
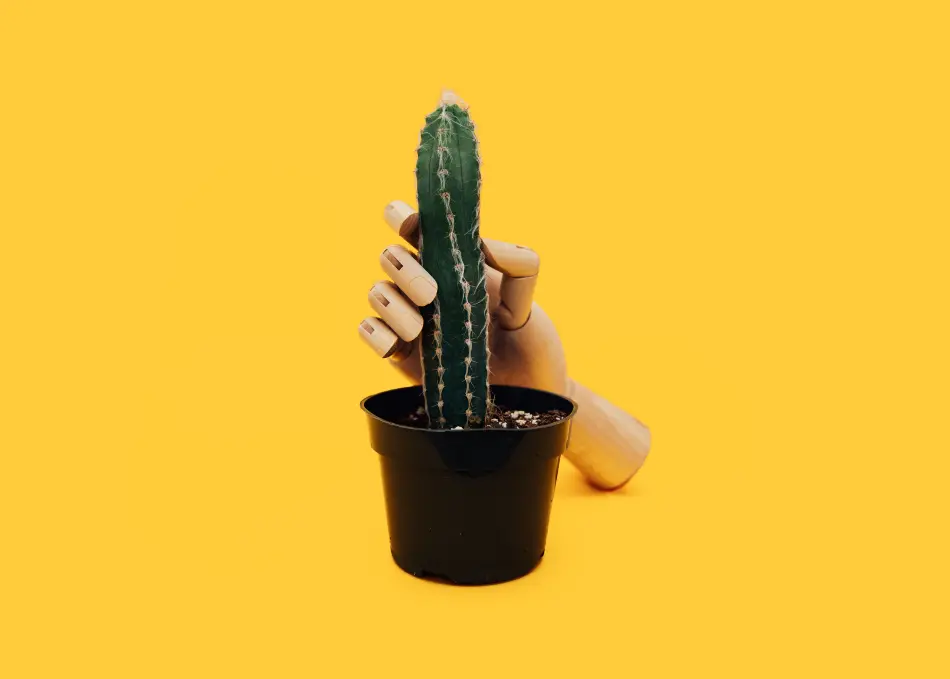
Cactus on hand.
One of the first signs of cactus sunburn is discoloration of stems and the presence of yellowish color.

When a cactus is exposed to too much sun, it will start to develop internal stress.  However, if you manage the exposure effectively, the plant may adapt to the extra sunlight and heat by producing some brightly colored pigments. If you fail to manage the exposure effectively, then it will become sunburned.

One of the earlier signs of sunburn is the development of patches on the leaves of the plant. If only a section of the plant is exposed to excessive sunshine, there may only be a few parts of the plant showing symptoms of sunburn.

Depending on the severity of the burn, the patches may be brown, black, or tan in color. Typically, the more severe the sunburn, the darker the discoloration will be.

A severely sunburned cactus may also be permanently scarred. The dark, discolored patches that develop on sections of your plant that have suffered sunburn are usually permanent. But it takes some time before the damage becomes irreversible.

If you notice the appearance of dark scars on different parts of your cactus, be sure to touch the spots and feel their texture. If they are slightly dark, but their texture feels smooth, then it is only a sign of impending sunburn, and the damage is reversible at this stage.

All you have to do is move the plant to shade before the actual permanent scarring occurs. With time, your plant will heal, and the scars will disappear.

It is also good to mention that a cactus may respond to excess sunlight and heat by changing from green to yellow-green. This is usually a sign of stress and a pre-sign of potential sunburn. Although this change doesn’t leave behind any scars, the effects can be quite severe if you don’t act quickly.

The moment you notice the green-yellow color, consider moving your plant to shade and let it rest there for some time. The green-yellow sections will disappear when the temperatures drop, and the stressed tissue of the plant will return to normal. 

Cactus outside along the wall.

Why Is Your Cactus Getting Sunburned

At this point, you might be wondering why cacti plants suffer from sunburn in the first place.  Well, there are two major causes of sunburn that you need to know.

Sudden change in growth conditions

Although most cacti species love sunlight and a little more heat, they need time to adapt to it.  Keep in mind that almost every cactus plant you will find in your local store is grown in a greenhouse. This means that the growth conditions that these plants are accustomed to are consistent.

When you bring your new cactus home and put it in direct sunlight, the conditions change drastically, and the result can be unpleasant. Exposing your plant to full and direct sunlight at this point will only result in severe sunburn within a few hours or days.

Another critical aspect of growth you need to be careful with is moving your cactus from one place to another.

For instance, if your plant has been growing with one side facing south where it is exposed to maximum light and the other facing nothing which is shadier, then turning your plant 180 degrees could be a big mistake.

When the other side that has been in the shade for a long time is suddenly exposed to direct sunlight, it can develop severe sunburn within hours. If you want to turn your plant, do it gradually, giving the other part that has been in shade enough time to adapt to the new conditions.

Change in habitat

By now, you need to have understood the fact that the cactus family is large and features over 2500 different cacti species that grow in different habitats.

For instance, you will find the jungle cactus in tropical rainforests while the Saguaro will grow happily in the blazing heat of the Arizona desert. You will even find some cacti species in the high Andes Mountains of South America and the foggy coast of California.

What we mean is that before you go out and purchase a cactus plant, take time to understand where your preferred species is found and the general conditions it prefers to grow in. This way, it becomes a little bit easier to provide the right conditions because you already have a clue.

When you finally bring your cactus in, pay close attention to the growing conditions the plant has been in and try to simulate them in your home. Also, if you are bringing your plants outside after the winter season, be sure to introduce them to the spring sunlight gradually.

Caring for Sunburned Cactus
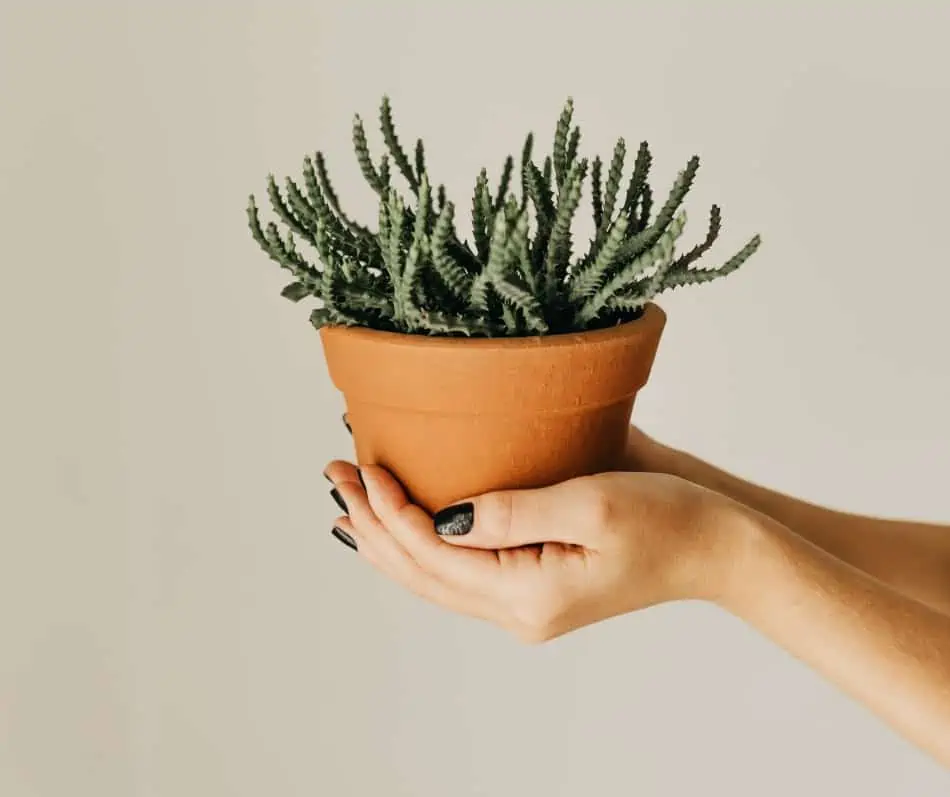
A person holding the plant on a clay pot.
You can take care of your sunburn cactus by putting away from sunlight, watering, and protecting from pests.

If you catch the sunburn before it becomes severe, you can save your plant from the irreversible damage.

The first thing you need to do is to get it out of direct sunlight. If you notice any yellowing on the surface of your plant and it is in full sun, be sure to move it even if you have to assume the task of taking it in and outside every day.

But we understand the fact that moving the plant is only possible if it is in a pot that is small enough to move.  If you have a large cactus plant that you suspect is developing sunburn and you cannot move it, then try to cover it using a shade cloth during the hottest part of the day.

Secondly, keep your plant watered but be careful not to overwater it because it can lead to other problems. Typically, if a cactus is stressed or sunburned, it will go into a state of dormancy regardless of the season.

During this stage, the plant is going to cease growing and focus on repairing the damaged tissues and re-establishing itself. Frequent watering may help the cactus in the long run, but don’t be tempted to overwater it.

Lastly, strive to protect your plant from pests and other diseases. Keep in mind that if your plant is sunburned, then it is weaker and more susceptible to disease and pest infestation.

Therefore, take time to check for bugs and ants that may cause more damage than what the plant has already suffered from sunburn. If you notice signs of diseases or pest infestation, be sure to take appropriate action.

How to Prevent Sunburn in the Future

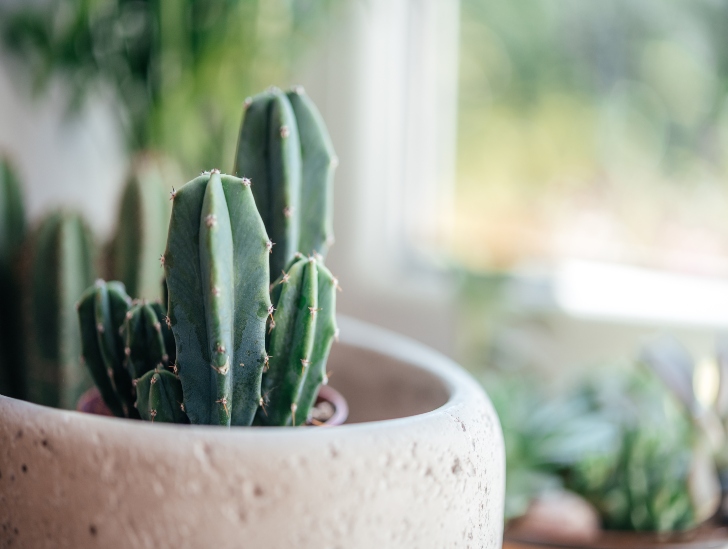
Cactus on pot and other plants near the window.
You can prevent sunburns by gradually changing the environment and slowly exposing them to sunlight.

When it is time to move your cacti plants outside after spending winter indoors, you need to be careful with the process. Do it gradually to avoid stressing the plant. Typically, you should introduce your plants to increased levels of sunlight slowly over two or three weeks.

During the first few days, consider putting your cactus into full sunlight for just a few hours a day and slowly increase the time every few days.

Once the plant has received plenty of sunlight for the day, move it to a shady area, or if you cannot move it, cover it with a shade cloth. Moving your plant to a shady area or covering it during the hottest part of the day will help to prevent sunburn.

Also, avoid fertilizing your cactus during the summer. Fertilizers are high in salts and minerals that can damage your plant, especially when exposed to direct sunlight. Wait until winter before you start fertilizing again.

Finally, remember to water them regularly but not too much because plants will often suffer from sunburn when they are stressed.

Be observant and identify signs of sunburn early before it is too late. This way, you can take the right steps to protect your cacti plants effectively.

Light vs. Temperature: Is There a Difference?

When it comes to succulents and sunlight, it is not just the intensity of light that matters but also the temperature.

Many cacti species are sensitive to heat and can easily suffer sunburn if the temperature is too high. This can happen when the plants get too close to a windowpane or are positioned in direct sun for too long.

So, if you want to avoid sunburn, pay attention to the temperature of your succulents as well. If you can feel intense heat radiating from the outside surface of a pot, then that is an indication that the temperature inside may be too hot for your cactus plant.

Can I Save a Sunburned Cactus Plant?

Yes, you can save a sunburned cactus plant. The key is to identify the signs of sunburn early and take effective steps to protect the plant from further damage.

Move the cactus out of direct sunlight, provide enough but not too much water, and avoid fertilizing during summertime.

Lastly, check for signs of pest infestation or disease and take appropriate action. The most common pests that may infest your cactus are mealy bugs, scales, and spider mites.

With the right care, your sunburned cactus plant can recover and thrive.

Summary

We hope you understand how to take care of your cactus to prevent sunburn.  Caring for these succulents can sometimes be difficult, but you have to learn the tricks along the way. If you have got any questions or comments, please let us know in the comments section below.

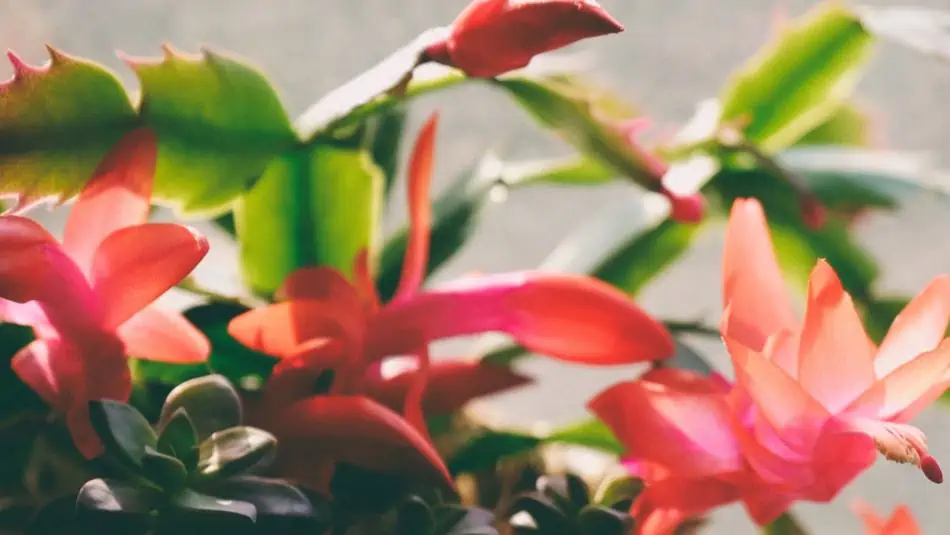
How Long Does An Indoor Cactus Live?

Cacti are unique plants that belong to the family Cactaceae. The family is pretty large and features over 127 genera and 2500 species.  These plants thrive both indoors and outdoors and are always an excellent option to add to your plant collection.  Indoor cacti plants require little maintenance to thrive and are beneficial in a wide range of ways. But how long do indoor cacti plants live?  Let us find out.

How long does an indoor cactus plant live? In the wilderness, these plants can survive for hundreds of years, but things change when they are grown indoors.  On average, indoor cacti plants survive for ten years or slightly more. However, with the right growing conditions and ideal care, the lifespan of an indoor cactus plant can be increased significantly. 

But, you should know that the lifespan of these succulents depends on a lot of factors. The three main factors that will affect the lifespan of your indoor cactus are species, growth conditions, and care.

In this post, we discuss everything you need to know about the lifespan of indoor cacti plants and what you can do to make sure your spiny friend lives longer.  So, let us get started.

The lifespan of a Cactus Plant Indoors: Detailed Discussion

Generally, cacti plants growing in the wilderness tend to live much longer than their indoor counterparts. In an ideal setting, an outdoor cactus plant can survive for up to 200 years or more.

However, indoor plants have to adapt to a new environment and new conditions which tend to destabilize the plant. On average, an indoor cactus plant will survive for ten years. Some delicate species will even die after a few months, but that shouldn’t worry you so much.

As long as you are taking good care of your plant and providing it with good growing conditions, you can be sure to have it around for a prolonged time.

Before we dive deep into our discussion, let’s take a few minutes to discuss the general lifespan of some of the famous cacti species. 

How long does a Christmas cactus live?

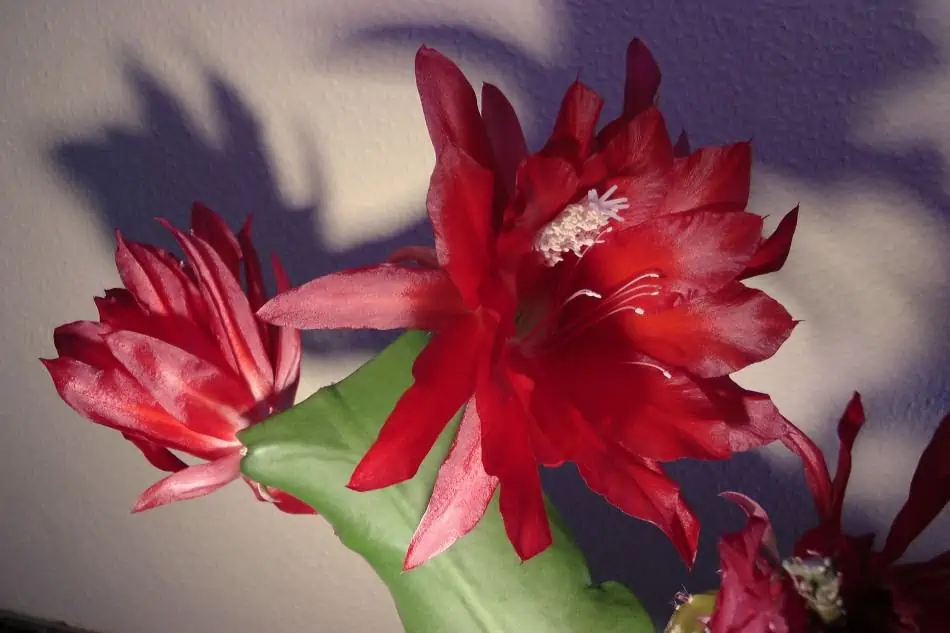
A christmas Cactus blooming.
Christmas cactus lives for about 20 to 30 years if proper maintenance is provided.

Let us start with one of the most common types of cacti grown indoors; the Christmas cactus. This beautiful indoor plant belongs to the genus Schlumbergera, and many plant scientists consider it a hybrid between two different cacti species. 

Generally, the Christmas cactus closely resembles the Schlumbergera truncate, which is commonly referred to as the Thanksgiving cactus.

Its name is derived from its unique characteristic of blooming in the winter around the Christmas period. The plant is native to the tropical rainforests of Brazil and tends to grow better in relatively cool temperatures.

The average lifespan of a Christmas cactus is approximately 20 to 30 years, but a lot depends on the care and maintenance you provide.

Proper care, in this case, includes providing a relatively cool and humid environment, frequent watering, and a moderately sunny location.

However, you need to be careful not to overwater your plant because it can cause severe and irreversible damage.

How long does a Saguaro cactus live

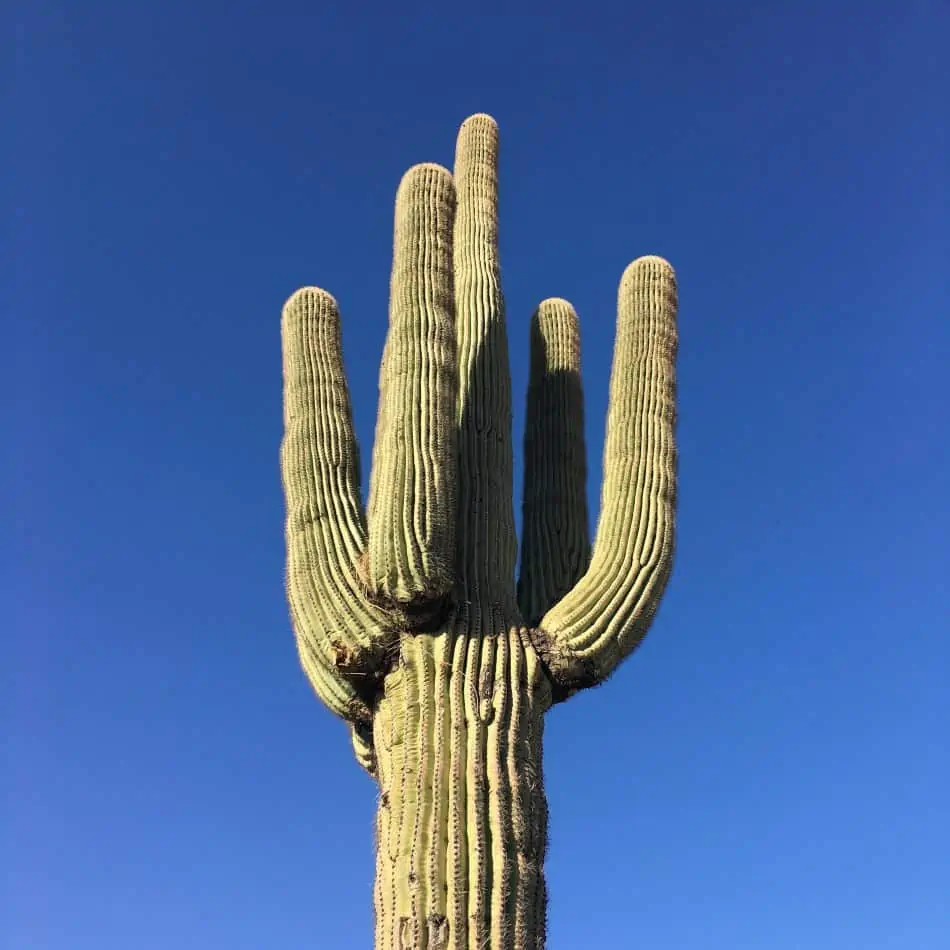
A Saguaro cactus.
Saguaro is a type of gigantic cactus with the height of over 50 feet. The cactus can last for up to 200 years.

Another famous cactus plant is the Saguaro that is native to North America. The plant belongs to the Carnegiea genus and gigantea species. The Saguaro is a slow-growing plant, but it is gigantic. In fact, a fully grown Saguaro can reach a height of up to 50 or 60 feet.

One thing that is unique about this cactus is that young Saguaro plants cannot live independently. In most cases, there will be an adult Saguaro nursing and protecting a baby Saguaro until a certain age.

Sometimes, the older plants die in the process, leaving the younger plants to take up their space.

It is also interesting to note that in its first ten years, a Saguaro plant doesn’t grow more than two inches.  Furthermore, it doesn’t start flowering until when it is over 30 years old and the first arm will only start growing when the plant is more than 75 years old.

On average, a saguaro cactus can live for up to 200 years, but that aging will depend on a wide range of factors. The average age of an adult is about 125 years.

If you want to grow this plant in your home, make sure you grow it outdoors and in the ground to provide it with enough space to stretch out and attain its maximum size.

How long does a Moon cactus live?

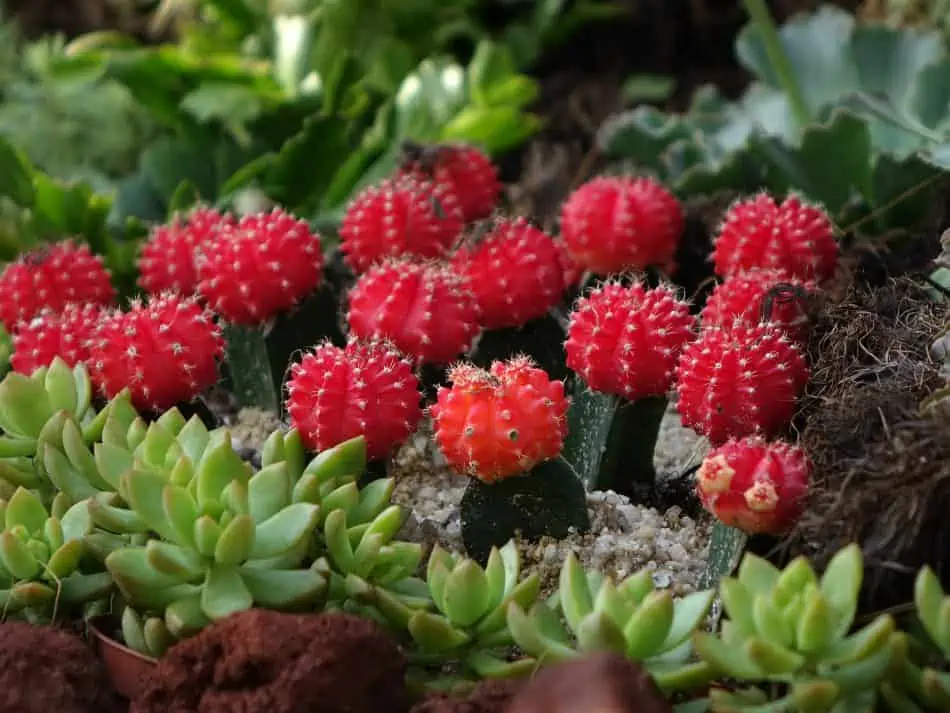
A moon cactus.
The lifespan of gorgeous Moon cactus can range anywhere between a few months to several years.

Moon cacti are also popular houseplants in different parts of the world. The plant has a wide range of different names, such as the Hibotan cactus, Red Cap, and the Ruby Ball plant.

Many people love the Moon Cactus for its attractive appearance that resembles a lollipop. The lower part of the plant carries and supports a round moon-like part that is usually red, yellow, orange, or purple.

Determining the exact lifespan of a moon cactus is sometimes tricky because it is a combination of two different cacti species.

For instance, the Gymnocalycium (one of the parents of the moon cactus) doesn’t grow more than a few inches tall and lacks chlorophyll while the Hylocereus (the other parent plant of moon cactus) grows to a height of up to 30 feet and is evergreen.

You will notice that the two species that come together to form the moon cactus have entirely different characteristics and growth requirements.

Consequently, the moon cactus becomes a unique combination of two different and incompatible cacti species. This means that the plant is relatively weak and unstable. Therefore, it can only survive for a relatively short time before it dies.

Typically, a moon cactus has a shorter lifespan that ranges from months to a few years. Sometimes, it may die within three months or survive for up to a decade.

Proper care and suitable growing conditions can increase the lifespan of the plant quite significantly.

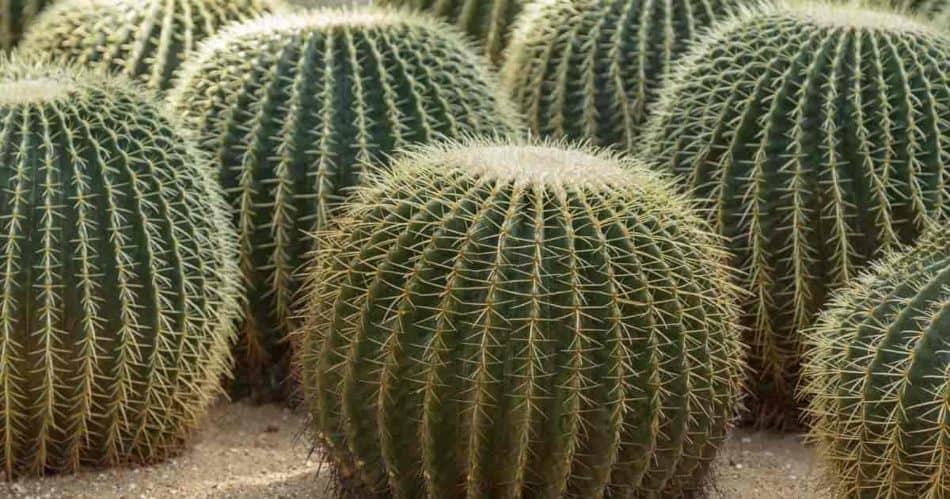
How long does the Golden Barrel cactus live?

The golden barrel cactus is native to the Sonoran Desert in Mexico and Arizona. It gets its name from its unique shape, which looks like a large, round barrel.

This cactus can reach heights of up to 5 feet when fully grown, and its spines are yellow or golden.

The golden barrel cactus is a very hardy and resilient plant, so it can live for quite a long time if given the proper care. It generally has an average lifespan of 30 to 50 years; some species have been known to live for up to 100 years or more.

However, it is essential to note that the golden barrel cactus will not reach its full size until it is around 15 years old.

If you want to keep your golden barrel cactus healthy and long-lived, make sure to provide it with enough sunlight and water. Regular pruning can help the plant stay healthy and free from pests and diseases.

Overall, it is a relatively easy plant to take care of and can provide you with many years of beauty and enjoyment.

How long does the prickly pear cactus live?

Another common indoor cactus plant is the prickly pear cactus, which belongs to the Opuntia genus. It is a low-maintenance plant that thrives in sunny locations and requires minimal watering.

The exact lifespan of a prickly pear cactus will depend mainly on the size of the cactus and its growing conditions. On average, a small prickly pear cactus can live for up to 40 years, whereas a large one may live for more than 200 years.

Good growing conditions and proper care will help to extend the life of the cactus significantly. If you want your prickly pear to last longer, ensure it is exposed to plenty of sunlight and not overwatered.

How To Grow Cactus Indoors for a Longer Lifespan

Indoor cactus near the window.
As long as you follow the instructions you will not have any issues with growing a thriving cactus.

Growing cacti plants indoors is not a difficult thing to do, but you need to ensure you are providing your plant with the right conditions for better results.

Successful gardening of these succulents does require sticking to simple rules and being perfect in doing the small things that matter.

Here are some tips on how to look after your cactus indoors if you want it to live long.

1. Watering

Watering is perhaps the most important thing you need to master if you want to have a cactus plant for longer. Although underwatering is an issue, overwatering is by far the most common cause of death for these succulents.

The trick to getting it right is to follow the plant’s natural seasonal habits. For instance, you should always treat winter as a period of rest for the plant. During this time, you don’t need to water your plant frequently because it is in a state of dormancy. In this case, only water when the potting mix is completely dry.  

During spring and summer, you need to water your plant frequently because this is the active growing season. Every time you water, allow the excess water to drain out quickly and let the soil dry slightly between watering.

You can also feed your cactus with some fertilizer during this time to boost growth.   Check out our simple guide on how to fertilize your cactus and the type of fertilizer to use.

2. Potting

Potting is another important aspect of indoor cacti plants that you should pay close attention to. When choosing a pot for your plant, make sure it is the right size and weight. Even if you decide to go for a relatively heavier pot for purposes of preventing it from tipping over, you have to get the size right.

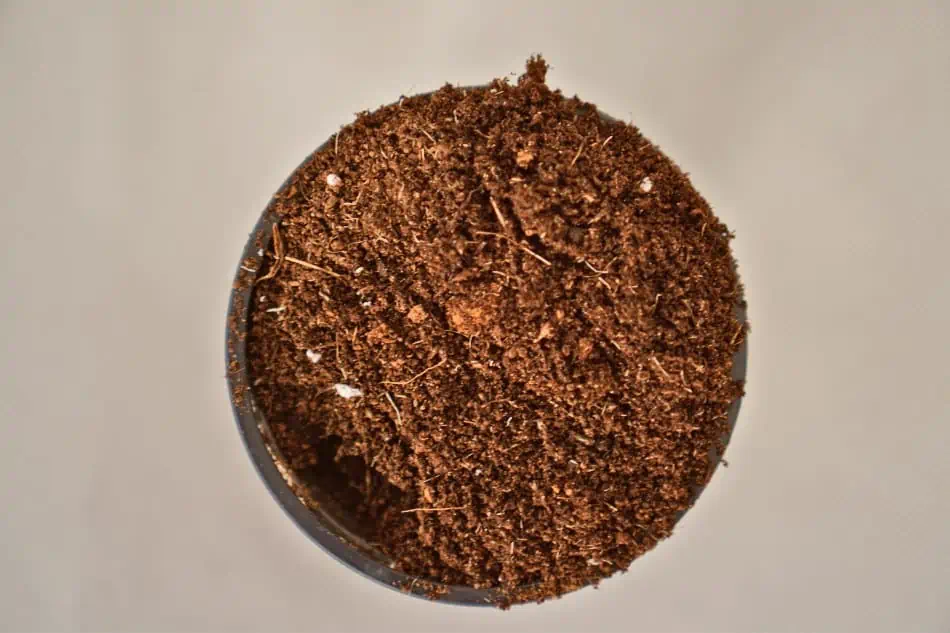
The potting mix you use should be fast-draining and full of nutrients for better results. If you cannot make your own potting soil, go for the commercially prepared options, but be sure to check on drainage thoroughly.

When your plant becomes bigger, consider repotting it into a new and bigger container to allow growth without causing root damage. Typically, you should consider repotting your cactus plant once every two years.

3. Position

Lastly, where you position your plant plays a critical role because it determines the amount of sunlight that it receives.  Most cacti species love a lot of light and airy spaces, but make sure you are not exposing your plants to extremely bright light because they can suffer sunburns.

Also, after winter, if you want to take your plants out, do so gradually. You can start by positioning them under shades for a few days before you expose them to direct sunlight.

Cactus near the window.
Position your plants close to north-facing windows so that they can receive plenty of sunlight.

If you are living in the southern hemisphere, position your plants close to north-facing windows so that they can receive plenty of sunlight. If you are living in the northern hemisphere, east-facing windows will be a good option.

4. Fertilizing

While many cacti species don’t require regular fertilizing to thrive, it is always a good idea to give them some extra nutrients during the growing season.

Always go for a balanced fertilizer that either has an NPK ratio of 10-10-10 or 6-12-6 and use it in moderation. Fertilizing should be done once every two months, but always reduce the frequency during winter because most cacti species slide into a state of dormancy.

For better results, you can also add some organic matter to the soil, such as compost or worm castings. This will give your cacti the essential nutrients it needs to grow and thrive indoors.

Final Thoughts

Cacti plants come in different colors, structures, and sizes. These plants are unique and good houseplants since they require little maintenance to survive.  They are hard, resilient, and live for many years.

Generally, outdoor plants live longer than indoor plants because the indoor environment tends to have a significant impact on the structure and adaptation of the plant. While some indoor cacti can survive for more than ten years, others will die after only a few months.

Fortunately, there are lots of things you can do to increase the lifespan of your indoor plants. Providing an ideal growing environment and proper care can go a long way in increasing the lifespan of your indoor plants.

What Do Cacti Need To Survive?

For many people, how cacti can survive in arid regions with limited water is still a mystery; it seems like they only need the bare minimum. However, just like any other plant, a cactus still needs the basics to thrive, like water and sunlight.

What do cactus need to survive? To survive in any environment, a cactus needs the following:

  • Sunlight
  • Air
  • Water
  • Drainage
  • Nutrients

Because cacti are hardier than most other plants, they do not require a lot to survive. However, there is a unique way you must care for it. The remainder of this article will discuss how sunlight, air, water, drainage, and nutrients work together to help a cactus thrive, and how you can provide your plant with these essential needs.

5 Things Cacti Need to Survive

There’s a common misconception that cacti can continue to thrive even when neglected, but this is certainly not the case. To survive, a cactus will need the following five essentials:

1.   Light

A sunlight.
Exposure to sunlight is essential for a cactus to grow properly.

We all learned in science class that all plants require light for photosynthesis. No matter what type of plant it is and how much light they actually need, there must be light. Cacti are no different. In fact, a cactus’ natural habitat is full of sunlight, so they generally love it.

When it comes to how much light a cactus needs, the amount may differ across various species, but most cactus can survive under strong, direct sunlight.

However, there is such a thing as too much light. If a cactus is exposed to high-intensity light for too long, it can become sunburned. It is recommended that you provide your cactus protection from intense light to avoid this issue, especially if you are trying to acclimate it to a new environment.

On the other end of the spectrum, if you don’t provide sufficient sunlight to your cactus, it will grow tall and thin, and in search of the light it needs—a process known as etiolation. In addition, the plant will not be able to flower since it does not have enough exposure to sunlight for photosynthesis.

So, where’s the happy medium? Cacti require direct sunlight, but if your cactus will be kept indoors, you will need to expose it to 12 to 14 hours of full-spectrum light. Full-spectrum light provides all the wavelengths that sunlight provides, giving your cactus the light it needs. You can use A Plus LED Grow Lights for Indoor Plants or this Fauna 100W COB Plant Grow Light Full Spectrum, which has a timer to manage the hours of light you expose to your cactus.

Here are some quick cactus lighting tips to keep in mind:

  • Choose where you keep your cactus carefully. Regardless if you keep it indoors or outdoors, make sure the area it’s in receives adequate sunlight.
  • If you are transplanting a cactus or transitioning it to a new area, gradually increase its exposure to light to avoid shock. 
  • If your cactus is indoors, try to adjust lighting based on seasonal changes. If you bring your cactus inside during the winter, make sure you continue to provide it with the light it needs, although the amount may decrease to account for the change in season.
  • Be attentive to the look of your cactus; if you notice a slight sunburn on its surface, take measures to provide light protection right away.

2.   Air

As obvious as this may seem, your cactus needs to be in an aerated space; like any other plant, it needs air to survive. You need to keep it in a well-ventilated space where it can take in carbon dioxide and output oxygen freely.

Small cactus plant outside,
A cactus can help improve the air quality at night by increasing oxygen, that’s no reason to stuff it in a closet or tight, enclosed space.

One of the reasons why cactus survive in hot and dry environments is the difference in how they breathe. To avoid losing water, a cactus keeps its stomata closed during the day and opens it at night while most plants do the opposite.

But although a cactus can help improve the air quality at night by increasing oxygen, that’s no reason to stuff it in a closet or tight, enclosed space. You need to keep your cactus in an open, aerated environment, especially at night, so that it can breathe properly.

3.   Water

One of the most common mistakes cactus owners make is underwatering; they assume that because cacti can live in hot environments, they can go for weeks without water. Not providing a cactus with enough water usually leads to it dying; even though they are tough plants, they still require regular watering to survive, just like other plants.

On the other hand, there are also cacti owners who may overwater them. The water may collect at the bottom of the pot, eventually leading to root rot. So, it is important to understand that cacti are drought-tolerant, but they prefer the minimal water life.

A water can with a plant.
Overwatering or underwatering might lead to root rot and eventual death of the plant.

So, how much water does a cactus need? According to experts at the Cactus & Succulent Society of San Jose, you need to water a cactus once a week. You should make sure the soil it’s planted in is loose, and the pot has holes at the bottom so excess water can drain easily. You will need to water the cactus until the soil is saturated, and water starts coming out of the drainage holes.

Here are some cactus watering tips you can use to keep it healthy:

  • Know the cactus species you’re dealing with. It’s vital to know where your cactus originates from. Some cacti thrive in extremely dry conditions with minimal water, while others need you to protect them against the sun and may need more water.
  • Younger cacti need more water, but as they get older, they need less to survive.
  • The growing medium you use matters, so if yours is loose and loses water fast, you’ll have to water differently than with a cactus in a medium that retains water more.
  • Keep the season changes in mind. In fall, you can stick to the weekly routine. During winter, watering once a month is okay since as the temperature drops, evaporation rates reduce. During summer and spring, you can observe your plant and water as required.
  • The shallower the potting container is, the higher the evaporation, so keep that in mind while working your watering cycles.
  • Indoor cacti can survive up to two weeks without water, while most outdoor cacti need weekly watering schedules.
  • Use soft water and rainwater when possible; hard water can destroy your cacti.
  • Avoid misting the cactus since the humidity available is enough to provide it with any needed moisture.

Assess the type of environment you live in to determine the watering cycles your cactus requires accurately. Most importantly, continue to observe your cactus’ appearance so you can adjust its watering as needed.

4.   Drainage

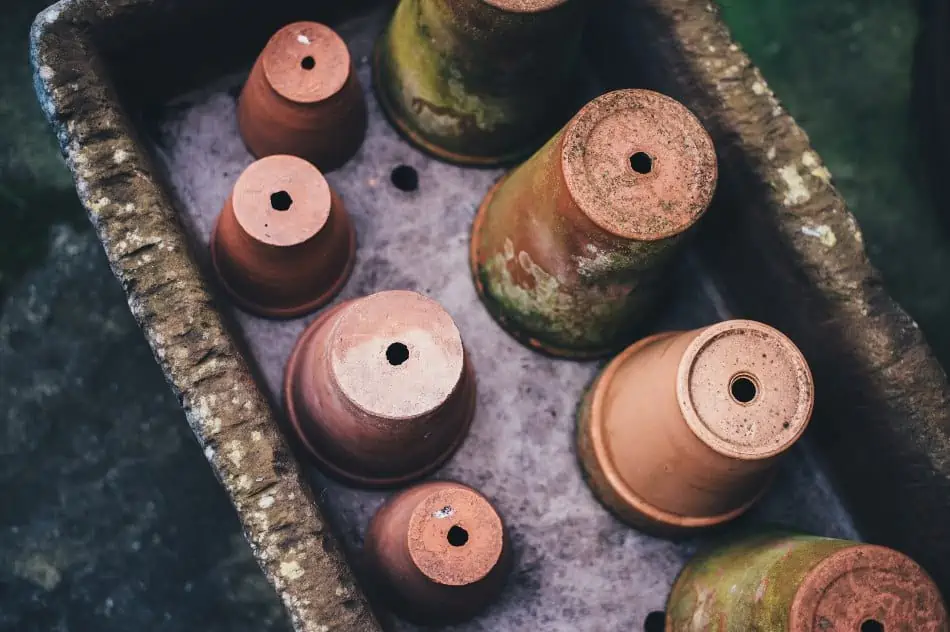
A pot with drainage hole.
It is suggested to use a pot with one or more drainage holes to prevent excess water from accumulating.

Since cacti are drought-tolerant, they can’t survive in waterlogged soil. Therefore, it’s important to search for a pot with ample drainage—preferably with a hole or multiple holes at the bottom; how many drainage holes a pot has will usually depend on its size. *

*Note: Some indoor cactus owners may not prefer to use a pot with holes to prevent introducing dirt into their living space. In these instances, it is recommended to use a planter with drainage holes plus a tray that can hold excess water and soil that may come out of the pot.

Here are some recommended cactus planters:

  • Alpspro Succulent Plant Pots
  • T4U Ceramic Succulent Pot Planter
  • AppyHut Square Plant Pots
  • Onig Succulent Plant Pots

It’s equally important to pot the cactus with well-draining soil; this will not only help with allowing water to seep through but will also keep the cactus roots aerated.

5.   Nutrients

A plant fertilizer.
Fertilizers should be used to provide nutrients for the cactus to properly grow.

Cacti also need nutrients to grow and process food. Over time, a cactus may lose fertility in the soil it’s planted in; therefore, a little fertilization can go a long way in helping the cacti survive.

You will only need to fertilize your cactus during their active growing period; for most cactus, this usually takes place in the fall, summer, and spring. Cacti only require fertilization at least once per year.

The following are cactus fertilizers you can use:

  • Schultz Cactus Plus Liquid Plant Food
  • Grow More Cactus Juice
  • EarthPods Premium Cactus & Succulent Plant Food
  • Hoffman Organic Cactus & Succulent Soil Mix

Final Thoughts

Many people prefer keeping cacti as a houseplant because they are low-maintenance and easy to care for. As long as you provide it with sufficient light, air, water, drainage, and nutrients, your cactus will not only survive but also thrive.

Does Cactus Root in Water?

Cacti have a reputation for their abilities to survive in incredibly dry environments like deserts. But these hardy plants are also commonly kept as houseplants. If you have some cacti of your own and want more without spending money, you might try to root your own.

Does cactus root in water? Cactus is a type of succulent that can root in either water or dirt. Some varieties of cacti will root better in dirt, but many will also root in water. By rooting your cactus in water, you can try getting more plants without buying them since you use plants you already have.

There is no guarantee that any cactus will grow in water or dirt; sometimes, the environment just is not what the plant wants. The good thing is that it is easy to at least try rooting your cactus in water, and you do have a good chance of success.

Rooting a Cactus in Water

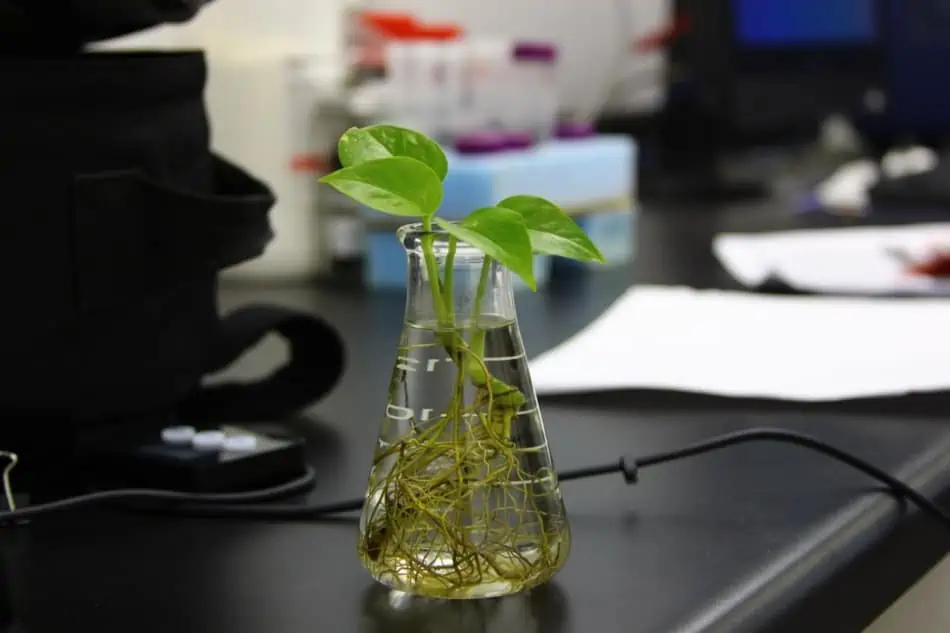
Plant on water.
A new plant can be propagated by using part of plant’s stem, rooting it in water, and then transferring to soil.

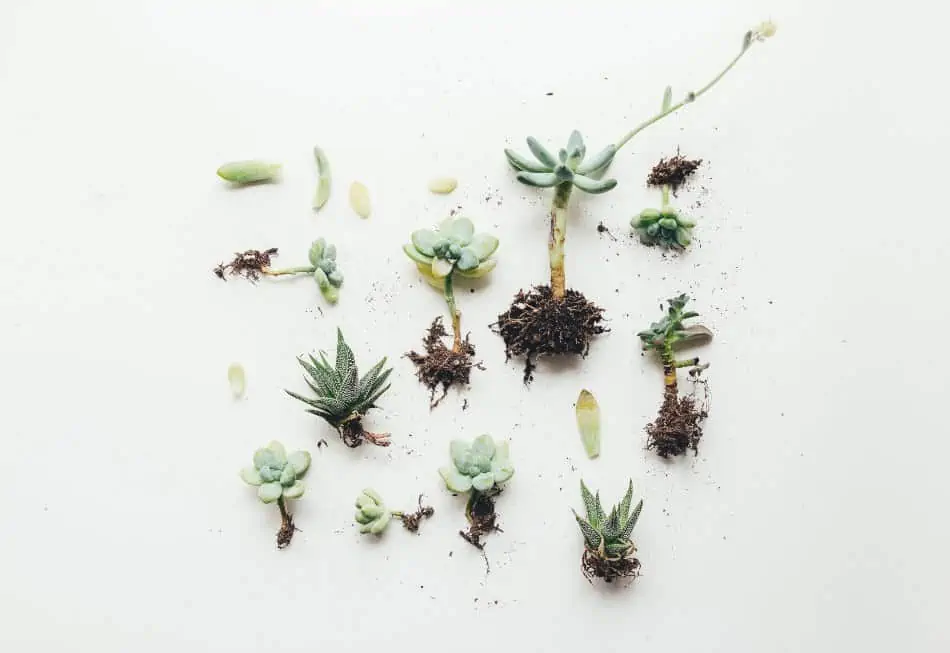
The process of growing a new plant from a piece of the parent plant is called propagation. Although you can grow new cacti and other succulents from seeds, you can also propagate them by using part of the original (parent) plant’s stem.

Propagating your plants is not always successful, but it is a process that you can easily attempt without any major consequences. Propagation is also an easy way for you to expand your plant collection without spending more money on buying new plants. Plus, you get the satisfaction of having rooted your own plant.

You can also propagate your cactus in soil, which is more traditional. It may seem counterintuitive to place plants that do not usually like much water in a glass of water, but it does work. If you want to be able to see the process of a cactus rooting, then it is best to propagate it in water.

Some people may also find that they have no luck propagating plants in soil, or vice versa. If you are having trouble propagating your plants in dirt or just want to see if water will work too, then you can easily try to propagate your cactus in water.

Materials

To propagate your cactus in water, you only need a few things:

  • Parent plant: Naturally, you will need the parent plant to propagate from.
  • Scissors: You can use sharp scissors or garden shears. These will be needed to gather cuttings.
  • Glass: You can use any sort of glass vessel. It does not have to be see-through, but it does add a cool element if you can see the roots.
  • Water: You will need plain water.
  • Plastic wrap: This is an optional material.

Step 1: Gather the Cuttings

Different kinds of succulent and cactus in a pot.
To root your cactus part in water, you should first collect the cuttings from the parent plant.

The first thing you need to do is find where you will take cuttings from. Look at your parent plant and locate a new growth that has some stem. Carefully cut the piece off of the parent plant.

You want to have some of the stem exposed, so you may have to remove a few of the lowest leaves. If you are unsure of how your propagation will go, you may decide to gather a few cuttings from multiple cactus plants to try.

Step 2: Dry the Cuttings

Once you have the cutting, you need to leave it out for a few days. This allows the cut part of the stem to heal a bit. The cut side of the stem needs to be calloused over before you try to root it in water.

Depending on the environment, it may take closer to a week or so for the cuttings to completely dry. Just be patient and let the stem heal itself.

Step 3: Place the Cuttings in Water

Fill your vessel with water. The amount you put in will depend on how long the cutting is. You want the root of the cutting to be in water, but not any of the leaves, so fill the glass accordingly.

You have the option of covering the top of the glass with plastic wrap and poking a hole in the center to put the stem through. This adds a layer of protection between the leaves and the water.

Place the cutting in the water so that the stem is either just above or inside the water. This might take a bit of experimentation. Some people find that placing the stem slightly above the water encourages the plant to see out the moisture and root.

Step 4: Wait

Cactus in a pot.
After rooting the cactus in water, you can transfer it to a pot while using suitable soil for the plant to grow.

Place the vessel with your cuttings in an area with lots of light. At this point, you need to have patience and let the plant root. It might take several weeks or even a month to start rooting.

Be sure to regularly check the water in the glass. You will likely need to change it and refill it. If the water starts to get murky, you should change it to prevent fungus and bacteria from forming.

Once the cactus starts rooting in the water, you can either leave it there or transport it to a pot with soil. If you decide to move the cactus to a pot, make sure that you use a soil mixture meant for succulents. You can buy bagged versions for ease or make your own mixture out of materials like pumice, perlite, and sand.

Care of a Cactus

Each species of cactus will have slight differences in their needs. Generally, cacti need to be in an area with lots of light. It does not necessarily need to be direct sunlight, but cacti do need substantial light to grow.

One of the most important aspects of caring for a cactus is the soil. If you are planting a cactus in a pot or other container, the soil must be able to drain well. It is important to note that although the soil for cacti needs to drain well, you can still root a cactus in water.

For a potted cactus, you want to make sure that you do not overwater the plant. You should only water the plant when the soil is completely dry. Depending on the environment and time of year, you may only water your cactus once a week.

You also need to make sure that the cactus is getting enough light. If you notice the cactus leaning toward a window or its color turning pale, you should try finding a different spot with more light.

Safety with Prickly Cactus Plants

Cactus in a plastic container with a hand.
To keep your hands safe, you should always wear gloves while working with prickly cacti with sharp spikes.

Not all cacti have sharp spikes, but those that do can be quite painful if you touch them with your bare skin. Always use thick gloves or folded papers to handle these types of cactus.

If you have pets or small children around, make sure that they cannot reach prickly cacti plants. Pets will not know any better, and children may not understand why they cannot touch the cactus until they prick themselves.

Cactus Lifespans

Cacti that are in natural environments like deserts can live for centuries. Indoor cactus plants can live for around a decade if they are cared for properly.

Despite their ability to live for a long time, cacti are not indestructible. They are sensitive to being overwatered and underexposed to light. Cactus plants can also be broken if you are not careful in handling them.

Cactus in a clay pot.
Indoor cactus plants can live for around a decade if they are cared for properly.

You should always be extremely cautious when you move your cactus. Every time there is damage done to the cactus, the mark will always be there. This is especially true with older cacti, so be careful not to move them in a way that could compromise their structure.

The 10 Best Types Of Cactus To Grow Outdoors

Whether you’re a beginner gardener or a seasoned green thumb, cacti and succulents make great landscaping plants because they are so simple to take care of and can grow and thrive practically anywhere regardless of the climate you live in. Cacti also come in a variety of unique sizes, shapes, and colors, and produce beautiful blooms and interesting fruits, making them a fun plant to not only grow but research and learn about as well.

What are the best cacti to grow outdoors? The 10 best cacti to grow outdoors are:

  1. Beavertail Cactus
  2. Turk’s Cap
  3. Rat Tail Cactus
  4. Claret Top Cactus
  5. Old Man Cactus
  6. Orchid Cactus
  7. Peanut Cactus
  8. Totem Pole Cactus
  9. Star Cactus
  10. Prickly Pear Cactus

Choosing the best outdoor cacti will depend greatly on the climate you live in, what type of soil you have, and where you intend on planting cacti. The best way to find cactus plants that are sure to thrive where you want them is to read plant tags and decide if you can give them what they need.

The 10 Best Types of Cactus to Grow Outdoors

Read on to learn about the 10 best species of cacti to grow outdoors, types of cacti, how to transplant and plant cacti plants, tips for ensuring your cacti thrive, and more.

1.   Beavertail cactus (Opuntia basilaris)

A Beavertail cactus.
The beavertail cactus produces alluring pink flowers and brownish-gray fruit.

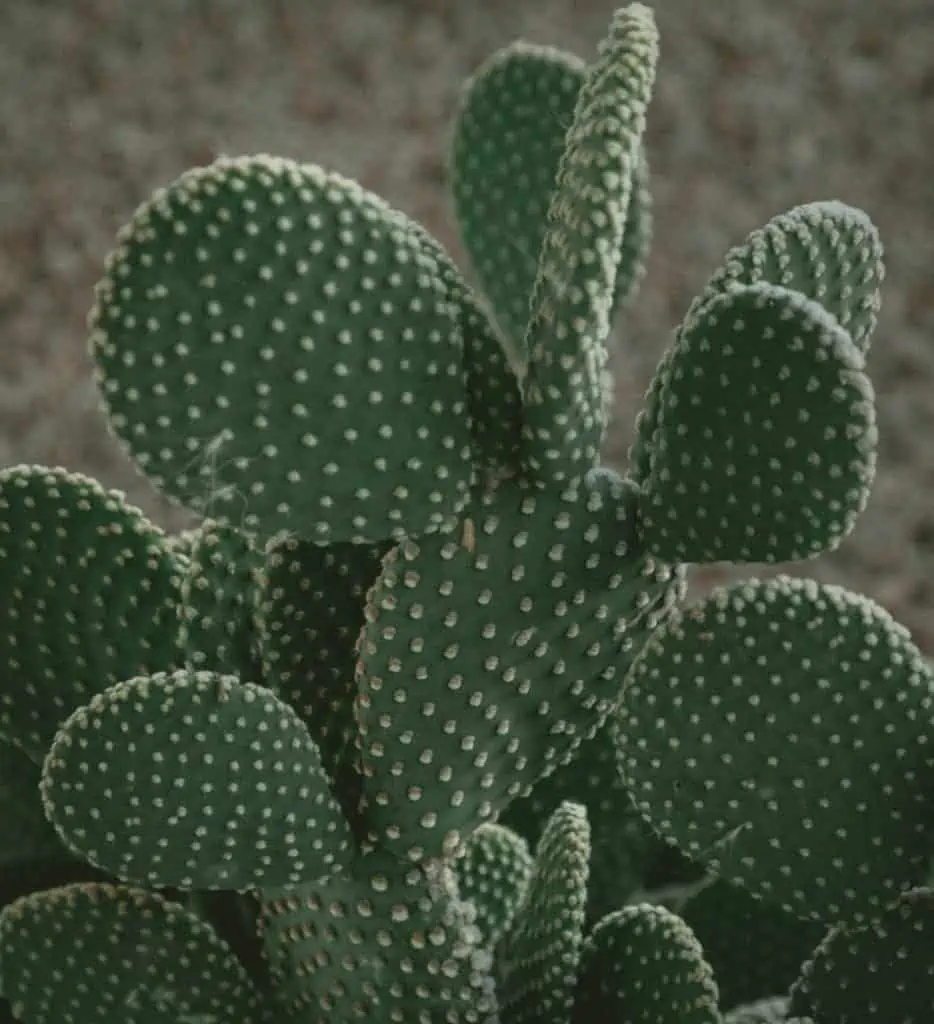
The beavertail cactus is a low spreading prickly pear cactus whose pads are wide and flat, resembling a beavertail. This cactus is blue, green, and gray in color that produces large bell-shaped bright pink flowers that smell like watermelon in the early summer. After the blooms come and go, this cactus will produce a small brown/gray fruit that birds love to eat.

The beavertail cactus requires full sun and grows roughly 6 – 12 inches tall and up to 4 feet wide. This cactus is low-maintenance, making it ideal for desert landscaping in rock and/or cactus gardens. Beavertail cacti require little water and are very drought tolerant. Plan on watering this cactus eerie 2 – 3 weeks during the spring and summer, then reduce watering during the winter months. It’s important to note that this cactus is susceptible to root rot and should never sit in soggy soil.

There is no need to fertilize this cactus, nor is it necessary to prune. Simply remove dead pads. If you’re keeping the cactus in a limited space, you can prune to prevent overcrowding. The beavertail cactus is deer and rabbit resistant and attracts songbirds, hummingbirds, and bees. The type of soil recommended for this cactus is a well-drained loam or sand.

2. Turk’s Cap (Melocactus matarizarius)

A Turk's Cap.
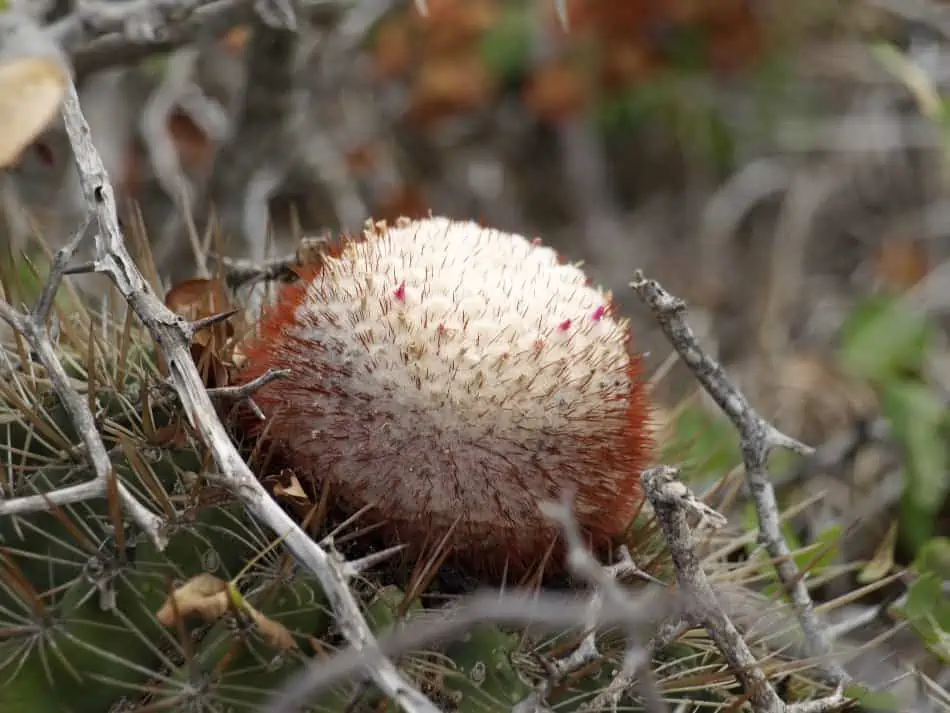
Turk’s Cap is a cactus with a wool-covered sphere growing on top of it.

The Turk’s Cap cactus is native to the Caribbean and is unique because it has a wool-covered sphere that grows on top of its body that looks like the traditional Turkish fez hat that was worn during Ottoman rule. This cactus grows roughly 2 – 4 inches tall and 3 – 4 inches wide.

The spheres that are grown on top are known as cephalium. As the cephalium begins to form, the body of the cacti stops growing. The cephalium is red or white in color and grows small pink blooms, and produces tube-shaped fruits that appear waxy.

The Turk’s cap cactus loves sunshine and needs to be in temperatures above 70 degrees; this cactus will not survive cold or frost. Unlike most cacti, the Turk’s cap cactus loves moist environments; however, it does not love sitting in soggy soil as this will rot the roots. A general rule for cacti is to let the solid dry, then water, but these guys like to stay watered, so avoid letting them dry out completely between waterings.

This cactus enjoys fertilizer during the growing months of spring and summer. The Turk’s cap cactus is considered a bit more high-maintenance than most species. The suggested soil for this cactus is a basic cactus and succulent soil mix.

A fun fact about this cactus is that it’s believed to have been discovered by Christopher Columbus in the West Indies, among other plant species, then brought back to Europe.

3. Rat Tail Cactus (Aporocactus flagelliformis)

The rat tail cactus is native to southwest Mexico and parts of Central America and is known and recognized for its unique long trailing stems that can grow to be 4 – 6 feet long; as well as it’s long, tubular violet-red blooms in the spring. While this cactus produces many flowers, the flowers only live for a couple of days.

This cactus loves bright sunlight and afternoon shade and can be grown in hanging pots, hanging baskets, or tree branches. During the spring and summer, this cactus will need regular watering, cut back watering during the fall, and unless the plant is excessively dry, it doesn’t require watering during the winter. The rat tail cactus can handle temperatures as warm as 90 degrees, and as cool as 40 degrees, but will not handle frost. This cactus requires rich potting soil.

If you opt to plant this cactus in any kind of container, it will need to be repotted once a year after it has flowered. While this plant is pretty low-maintenance, it does enjoy a diluted liquid fertilizer once every couple of weeks during the spring and summer and is susceptible to red spider mites. It’s a good idea to keep a pesticide nearby as spider mites can cause damage to the plant’s tissue. While these are hard to spot, you’ll know if your cactus has an infestation if you spot their webbed nests. Like most cacti, the rat tail cactus is susceptible to root rot, so avoid letting it sit in soggy soil.

4. Claret Top Cactus

The claret top cactus is also known as hedgehog cactus, Mojave mound cactus, kingcup cactus, and/or strawberry cactus. This cactus grows to be about 3 feet tall and 6 feet wide and produces a juicy fruit that turns bright orange as it ripens and tastes like strawberry.

The claret top cactus is a low-maintenance plant that enjoys full sun, thrives in heat, and is very drought tolerant. After planting, give the cactus a good soak; then for the first month, it will need to be watered every 5 – 7 days, every 2 – 4 weeks during the spring and summer, less frequently during the fall, and can be kept dry all winter. The claret top cactus will thrive in soil in volcanic regions.

5. Old Man Cactus (Cephalocereus senilis)

A mature old man cactus.
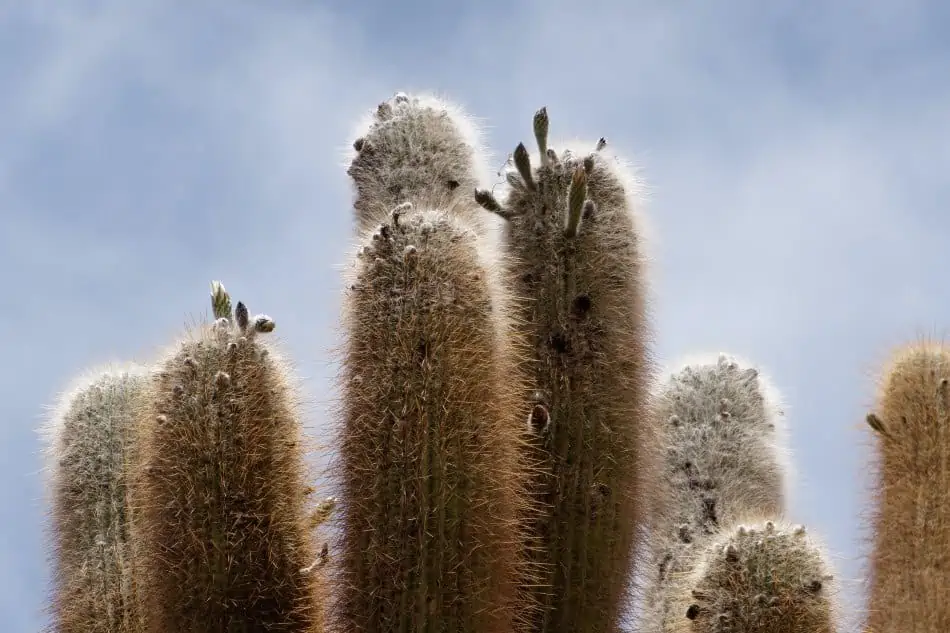
Old Man cactus is a species native to Mexico, with wooly white hairs all over its stems.

The Old Man cactus is also known as the Old Man of Mexico or, in reference to the Addams Family, Cousin It. This cactus is uniquely covered in long wooly white hairs and can grow up to 49 feet. Old man cacti produce flowers that bloom at night around mid-spring, but only after reaching approximately 20 feet in height. These flowers are pink and fragrant.

Old man cacti are drought tolerant and love full sun. In fact, the hairs on the cactus will grow longer and thicker in full sun. Some plant owners like to wash the hair on their old man cactus; if you notice the hair is dirty or discolored, you can “shampoo” your cactus with soap and organic soap. Be sure to rinse all the soap off, then comb hair upwards to dry. It’s important to make sure cactus dries completely as it is susceptible to mildew, and mildew can spread very rapidly.

This cactus is also susceptible to root rot, as well as spider mites and mealybugs. Both spider mites and mealybugs will hide in cacti’s hair, so be sure to check through hair occasionally and keep a mild insecticide on hand just in case you should find either of these pests. The old man cactus does best in a cactus mix of soil.

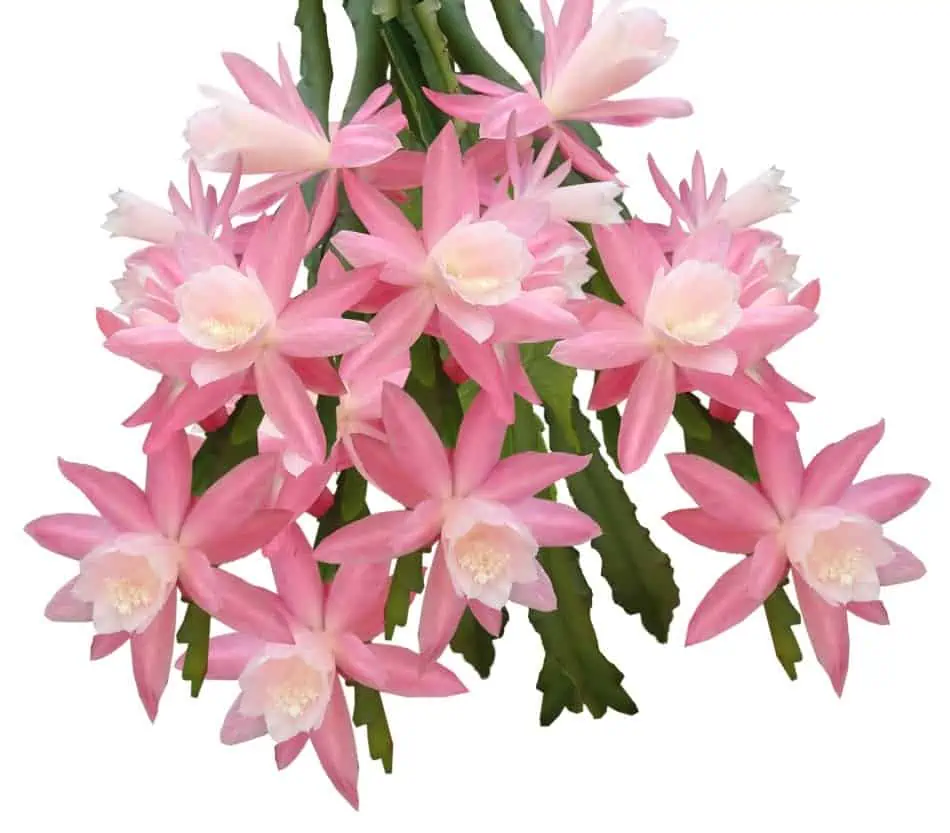
6. Orchid Cactus (Epiphyllum hybrids or phyllotactic)

A orchid cactus.
The orchid cactus is a beautiful species with 4-inch long pink, red, white, yellow, or orange flowers.

The orchid cactus is native to the tropical rain forests of central and South America. This cactus can grow as long as 225 feet and produces 4-inch blooms in pinks, reds, whites, yellows, and oranges. Orchid cacti can grow in hanging baskets or from large tree branches, and like bright light, but not direct sunlight. Blooms from this cacti appear mid to late spring and into summer.

During the fall, winter, and spring, this cactus likes a diluted fertilizer until flowering begins, then you may discontinue fertilizing until the next fall. During the winter, this cactus needs exposure to cooler temperatures around 50 – 60 degrees for a couple of weeks to encourage future blooming. The orchid cactus is susceptible to root rot and tends to attract fungus gnats. The best soil for this cactus is standard potting soil mixed with peat and sand.

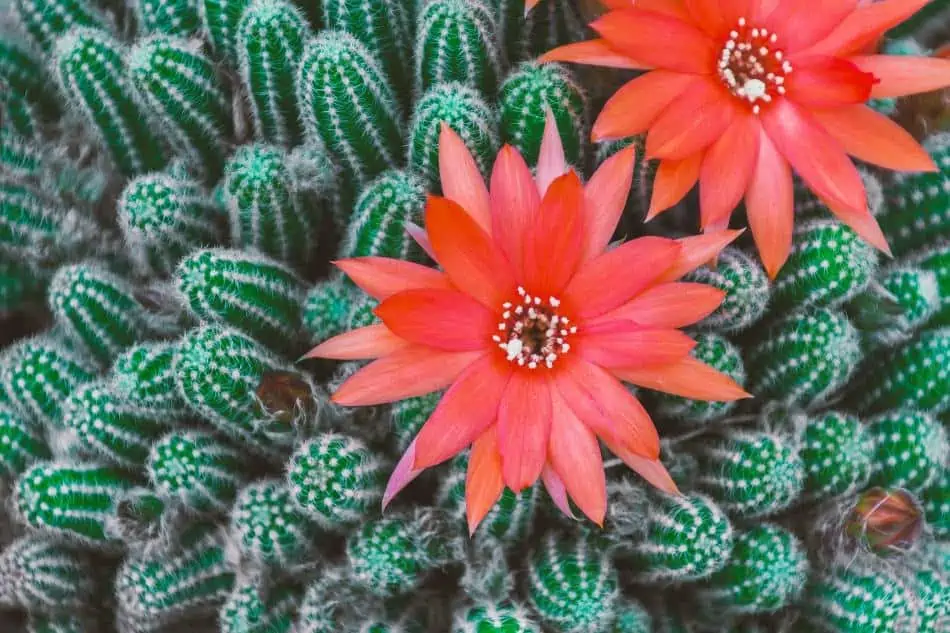
7. Peanut Cactus (Echinopsis chamaecereus)

A flowering peanut cactus.
The peanut cactus is among the low-maintenance species that only need to be fertilized once a year.

The peanut cactus is a branched cactus that grows up to 6 inches tall. This cactus consists of several stubby stems with white bristles and produces vase-shaped flowers that bloom orange and red. You will notice several flowers appearing late spring to early summer. Flowers are open during the day, close at night, and are unscented. It’s important to note that buds drop off the plant if it experiences movement or extreme temperature changes after flowering begins.

During the spring and summer, this plant will need to be watered thoroughly, but you may discontinue watering during the winter. Don’t be alarmed if your cactus begins to shrivel and turn a reddish-brown; this is normal and once springtime arrives, cacti will plump up and return to its normal color again.

If you live in a hot and dry climate, this plant will need partial shade, while if you live in a cooler climate, full sun is fine. The peanut cactus is ideal for rock gardens or shallow containers. If being added to a rock garden, this cactus will grow and spread quickly and fill up space in a matter of a couple of years.

The peanut cactus is a pretty low-maintenance plant and only needs to be fertilized once a year at the beginning of the growing season. The best soil type for the peanut cactus is a well-drained gritty soil.

8. Totem Pole Cactus (Lophocereus schotti forma monstrosus or pachycereus schotti)

The totem pole cactus is a unique knob shaped cactus with no spines or ribs and can grow upwards of 10 feet tall and 3 – 6 feet wide. This cactus is a great statement piece to add to landscaping plans as it is smooth-skinned, and has no needles but is covered in lumps and bumps. The totem pole cactus does not flower.

This cactus is drought tolerant and loves full sun. When watering, water deeply but allow to dry completely before watering again. The totem pole cactus also likes fertilizer about once a month. The main thing to keep in mind when caring for this plant is not to over-water and not to expose to cold temperatures. The recommended soil for totem pole cacti is a cactus and succulent blend.

An interesting fact about this plant is that it is believed to be discovered on a dirt road in 1931 by American plant explorer Howard Gates near Playa El Areo.

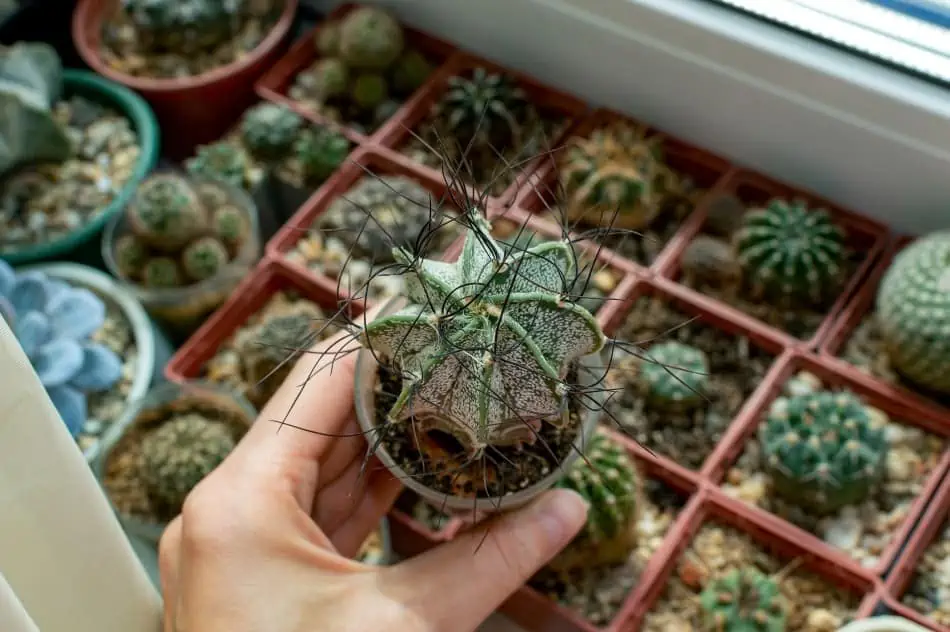
9. Star Cactus (Astrophytum ornatum)

A star cactus on hand.
Star cactus is characterized by green body with yellow-brownish spines and yellow flowers when blossoming.

The star cactus, also known as monkshood, grows roughly 12 – 39 inches tall and 6 – 12 feet wide. This cactus is unique because it’s 5 – 8 ribs actually twist into a spiral; the body of this cactus is green with yellow and brown spines and yellow flowers on top while fruit forms a star pattern.

The star cactus likes full to partial sun and will not tolerate frost. This cactus requires little water and can, in fact, go all winter without water, possibly needing water 1 – 2 times per month at most. This cactus is susceptible to root rot, so the soil should be dry before adding moisture.

The plant will need to be fertilized once every 4 – 8 weeks during spring and summer months; while this plant is a slow grower, fertilizing will speed up the process. The star cactus is low-maintenance but does require patience. The best soil type for a star cactus is a sandy composite soil mix.

It may be a good idea to keep a mild pesticide on hand as these cacti may encounter aphids or scale. You can also opt to simply wipe these pests away should you find them.

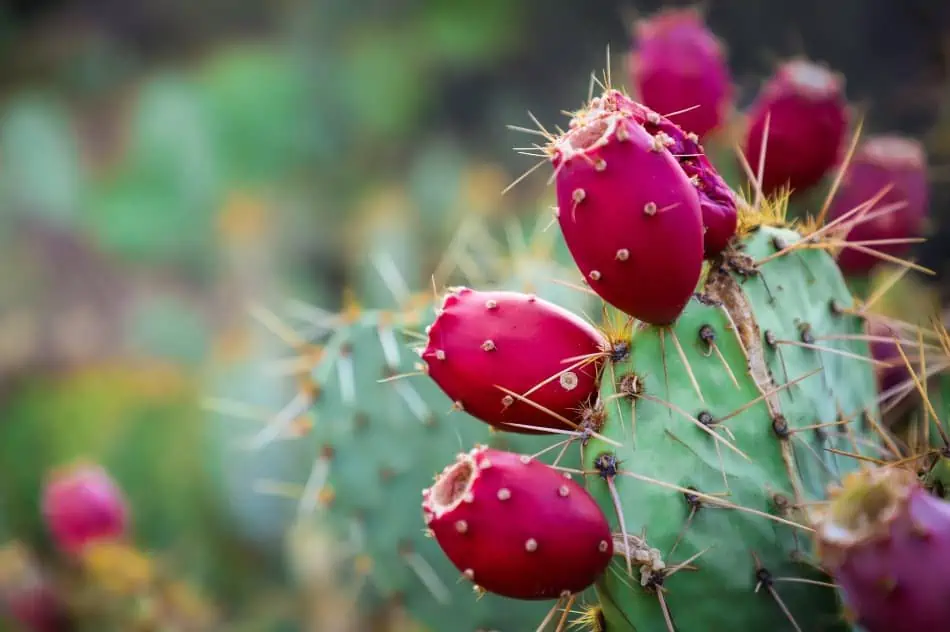
10. Prickly Pear Cactus (Opuntia ficus indica)

A prickly pear cactus.
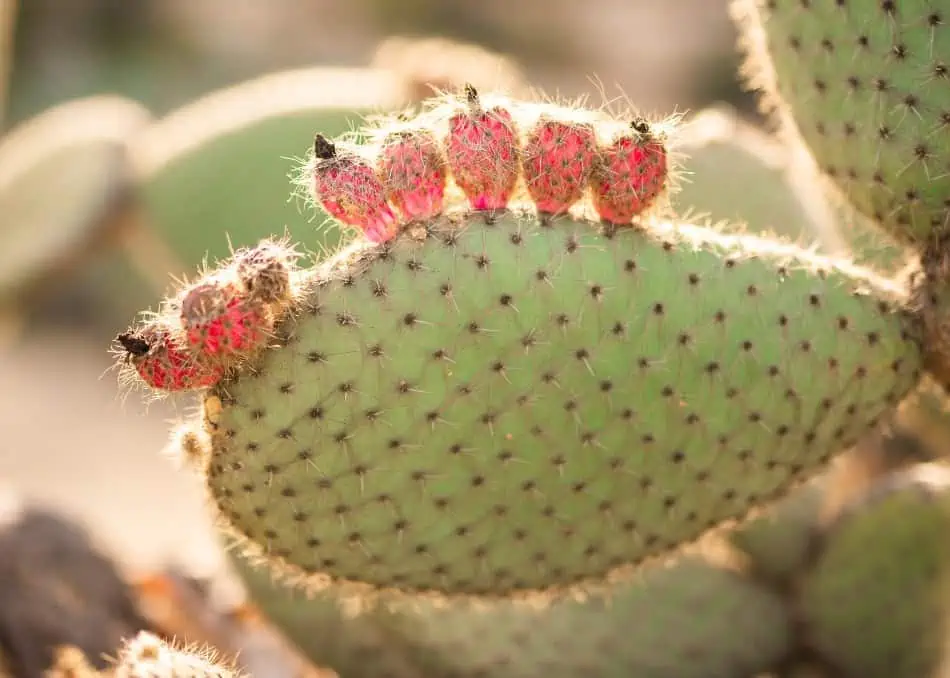
The prickly pear is fruit-bearing cactus, which do not require fertilization and can be grown in desert gardens.

The prickly pear cactus is also known as barbary fig, mission cactus, or tuna cactus, as it grows fruits known as tunas. These tuna fruits are red or yellow in color. Plant will grow to be about 15 feet tall and 6 feet wide. These cacti are ideal for desert gardens and, if grown outdoors, do not require any fertilizing.

The prickly pear cactus likes full sun with some partial shade throughout the afternoon. During the winter months, the pads may appear shriveled and/or wilted, but this is totally normal and come springtime, cacti will plump up once again. The best soil for a prickly pear cactus is a well-drained sandy or gravely mix.

The pads of this cactus can be harvested at any time; however, it’s important not to remove more than ⅓ of the pads to ensure the cactus will continue to produce fruits.

For the ultimate flavor, remove in the mid-morning as this is when acid content is at its lowest. Next, carefully scrape pads and peel fruit. While holding the pad with tongs, remove all spines and glochids. You can choose to eat raw or cooked; either way, the fruit will taste citrusy. Red fruits are ripe when glochids fall off, around September, to harvest these fruits, simply twist off. These can be eaten raw or used for making jams and jellies.

Types of Cacti

Different kinds of cactus.
There are different types of outdoor cacti with varying colors, shapes, and sizes.

Cacti come in a variety of sizes, colors, and shapes. Here are a few of the most common types of cacti.

  • Prickly pear. Prickly pear cacti have flat padlike stems, and most have yellow, red, or purple flowers. All parts of these cacti are edible.
  • Barrel. Barrel cacti are shaped like a barrel with numerous ribs and long spines.
  • Cholla. A cholla cactus has many thin round stems that make this plant one you don’t want to accidentally brush up against.
  • Pincushion. Pincushion cacti are small ball-shaped spherical plants that resemble a pincushion. This is typically a flowering cactus that has small buds that are white, pink, or red in color and appear in a ring around the top.
  • Totem pole. Totem pole cacti are short trunked cacti with branched stems that grow tall and are spineless.
  • Organ. Organ cacti have several columns rising from the base, and are covered in brown spines.

Cactus Care Tips

Different kinds of cactus in a pot.
The majority of outdoor cacti only require a couple of simple steps to grow healthy and beautiful.

Cacti are generally pretty low-maintenance plants, but there are a few things to keep in mind as you’re caring for them to ensure your plants are thriving.

  • Watering. It’s super important to avoid overwatering cacti, as they can typically survive drought-like conditions, but will suffer greatly from too much water. Overwatering can be hard to spot as plants may appear healthy and plump on top, but could be suffering from root rot on the bottom. Before you add more water to the soil, make sure the soil is dry a good 2 – 3 inches below the surface.

Overwatering creates a number of issues with cacti, including plants losing the ability to absorb nutrients, root rot, and excess moisture attracting pests. If you notice your cactus has gone limp or soft, root rot may have gotten the best of your plant.

  • Root rot. If your cactus is suffering from root rot you will first have to remove the entire plant from the soil, then scrape the rotted roots off, and change soil before replanting.
  • Soil. Drainage is another important variable that contributes to how happy and healthy your cactus is. If the soil holds too much moisture, this will cause root rot, so the soil you plant cacti in should allow plenty of drainage. If your garden or yard doesn’t naturally have the proper soil, you can create it based on the needs of your specific plant.
  • Lighting. Most cacti love direct sunlight and lots of it, but certain species prefer some shade, especially during the hottest part of the afternoon, so make sure where you plant your cacti, you’re accommodating your specific plant’s needs. Too much sunlight for a plant that prefers filtered sunlight can be damaging to your plant.
  • Hail. Hail can be extremely damaging to cactus plants, so if there is a chance of hail, you can cover plants with a cardboard box to protect them. If plants are outdoors, but in containers, you can simply move them to a different area until the storm passes.

If cacti do suffer from hail damage, it’s likely they won’t heal from it though there is a good chance they may grow out of the damage slightly.

Transplanting and Planting Cacti

A gravel with a soil.
It is essential to follow correct potting techniques to grow a healthy cactus at home.

It is recommended to transplant cacti during the spring and summer so roots can get established in their new home before the dormant seasons of fall and winter.

For smaller cacti, begin by loosening the soil with a garden trowel, then after slipping the trowel under the roots, go ahead and llift the cactus. To protect yourself from needles, it’s best to wrap the cacti up in newspaper and to wear thick gloves and long sleeves. Once you’ve successfully and safely lifted the cactus, inspect the roots for damage and trim off ones that need to be removed, then set the cactus in a shaded area to allow the roots to dry before planting.

For larger cacti, you’ll begin by loosening the soil approximately 4 – 6 inches from the base. Next, tie an old rope or old hose around the cactus to make it easier to pull on and lift while another person carefully tends to the roots with a spade. Again, trim the damaged roots and allow roots to dry for a couple of days before replanting. It’s important to protect yourself from these needles as well by wearing thick gloves and long sleeves.

To plant your cacti, you’ll begin by digging a hole deep enough for the plant’s roots. After you have a hole that is deep enough, you can set your cactus in the hole. For the next month, you’ll need to water your cactus enough so that the soil is moist; this will ensure that the new roots are getting established.

Is Cacti a Good Outdoor Plant?

Cacti are great for outdoors as long as you know what your cactus needs and can provide that for your plant. If your yard is prone to flooding, make sure to find an area with good drainage or consider growing plants in containers. Cacti grow pretty uniquely, while some grow tall, others tend to spread. Make sure you allow enough space between plants, so your garden or yard doesn’t become overcrowded. If plants begin to crowd each other, you risk losing your cacti.

However, not every cacti species can be grown outdoors, so the number one way to ensure successful outdoor cacti is to do your research and make sure you’re buying cacti that thrive outdoors and that you can provide everything they need. Luckily cacti are generally pretty low maintenance.

A cholla cactus.
Cacti grow pretty uniquely, while some grow tall, others tend to spread.

When shopping for plants and ultimately choosing cacti to bring home, look for any bruises or scarring, and check to make sure the flesh is firm. These are all signs of a healthy cactus.

Final Thoughts

Cacti and succulents are great for landscaping because they’re so easy to take care of and are super unique to look at. Choosing the best outdoor cactus will depend on a number of things, such as the climate where you live, the soil you have, and where you plan on planting, among other things. The best thing you can do is research cacti and learn which species will thrive where you live.

There are a number of species of cacti that do great outdoors, including the beavertail cactus, the claret top cactus, the old man cactus, and the prickly pear cactus.

Understand cacti terminology will better help you understand the characteristics of a cactus such as size, color, and shape. For instance, the term prickly pear refers to a cactus that has flat padlike stems, and a totem pole cactus refers to a plant that is spineless and grows tall.

While cacti are pretty low-maintenance, there are a few things to keep in mind, such as watering and being extra careful not to overwater your cactus; Cacti are pretty drought tolerant, but will suffer and die from root rot. Soil, lighting, and potentially damaging storms are all other variables to consider as you plant your cacti.

Transplanting and planting cacti is a process that is recommended to take place during spring and summer so roots can get established before their dormant season. When planting or transplanting, it is super important to make sure you’re taking safety precautions against the needles by wearing thick gloves and long sleeves. During this process, it’s important to trim damaged roots off and allow the new roots to dry before planting.

As long as you know what the cactus needs and can provide that for your plant, you’ll have a successful garden though not every cacti species can be grown outdoors. Make sure to research and only purchase cacti for outdoors that will thrive in that environment.

Cacti are fun and unique plants to grow. As long as you can meet their needs, your plants will thrive.

How Do You Revive A Dying Cactus? 10 Easy Steps

Adding plants to your home is a great way to get a fresh view and is a pastime that many absolutely love. One of the best plants that you can add to a home, both indoors or outdoors, is a cactus, which ranges vastly in size, shape, and even beauty. Of course, keeping your plants alive and well can become a challenge for many. This leads to the question many unfortunately have, which is:

How do you revive a dying cactus? Just like many other plants, cacti can run into several problems that lead to their early demise, but there are steps you can take to revive them, including:

  1. Fixing root rot
  2. Monitoring watering, temperature, and light
  3. Replanting
  4. Using new soil
  5. Set up a feeding schedule

While some plants may be difficult to revive even with proper steps and diligent effort, most can be brought back to life with just some extra care. The remainder of this article will discuss several ways you can bring your dying cactus back to life.

10 Ways to Bring Back Your Dying Cactus

If your cactus is beginning to look less than beautiful, it is time to act and bring it back to life. Most plant owners put a lot of time and thought into their cacti, and it can be challenging to see them getting weaker. However, if you follow these easy steps and look for the common signs of distress, you have a great chance of saving your beloved plant.

1 – Look for and Fix Root Rot

Different kinds of plants.
Checking the roots of your cacti is essential since one of the reasons causing the death of a cactus is root rot.

One of the most common issues that cacti suffer from is root rot, which can be commonly diagnosed and luckily is not impossible to fix. If you notice that your cactus has discoloration, shakiness, or mushy roots, you are probably dealing with a case of root rot. You may also see that the plant is beginning to turn a brown or black color.

Cacti have a wide and shallow root system, which is great for maximizing water collection but can be a challenge if they are constricted within a smaller pot space. When you combine a small pot, too much water, compacted roots, and/or a poor drainage system, it is easy for root rot to develop. You may notice that the issue is primarily near the base of the cactus and not the root itself, but it can quickly take over the plant if not dealt with.

When you notice your plant has begun to suffer from root rot, you want to act quickly to get rid of the problem. If you recognize that it is a problem before it gets too extensive, you can handle the issue, and the plant should bounce back quickly. The basic ways to deal with root rot are:

  • Remove the plant from the pot that it is in and check to see the full condition of the roots. Allow the plant to dry and heal out of the soil before repotting it in a clean container with a fresh potting medium. You will want to wear protective gloves when dealing with these pokey plants or wrap them in a newspaper to avoid the spines.
  • Many cacti respond well to excising any diseased tissue that you may notice. This can be a problem if the rot has gone too far, so you will want to approach this with caution. However, you can take a sharp and sterile knife and dig out the damaged flesh. You will need to allow any holes to dry out before repotting; do not water the wound as it closes.
  • If the roots are covered in rot, you will want to wash the roots well and replant in sterile soil. However, if the root rot is excessive, your plant may be too far gone to save. While some plants do recover, it can be a major challenge.
  • Another option that you may want to take into consideration when it comes to your cactus is that you can grow a new plant with your dying plant’s cuttings. You can take cuttings from the plant and allow them to callus over for a few days before inserting it into the medium. The cutting will begin to root, and a new, healthy cactus will grow from your dying plant.

2 – Monitor Your Watering

A person watering the plant.
You should always follow the proper watering rules depending on the species of your cactus.

If you begin to inspect your plant’s roots and you do not think the rot is the problem or if you notice the rot is not too severe, it could be an issue with watering the plant. Too much water can be just as damaging as not enough water when it comes to many types of cacti. Since these are desert plants, you want to use less water rather than more.

There are two issues that arise from watering frequency: you could either be underwatering or overwatering the plant, and you will want to do your best to remedy these problems.

Under-watering Your Cactus

While your cactus does not need an abundance of water, you do need to give it water regularly for proper growth to take place. You will notice that the plant begins to pucker or shrivel, maybe even becoming brown, dry, or callused from lack of water.

If you notice that your plant looks dehydrated, you can simply give it a good watering and continue watering it regularly, which should lead to a restored and growing plant.

Overwatering Your Plant

If you notice that your plant is becoming mushy, it may be because you are overwatering the plant, and this can even lead to root rot. The problem that many plants have is not the amount of water you are giving them but simply that they cannot drain the water off properly. You will want to start by lowering the amount of water you give the plant and how frequently you do so. If this does not help, seek other action.

Your plant may be holding too much water because of the pot that it is currently in as well. You will want to find a pot that is slightly larger than the cactus and repot it using a classic cactus mix. A clay pot is a great choice for this as it can wick away moisture quickly, and the fresh mix should help with the process.

3 – Offer Your Cactus a New Home

A gravel with sand.
A cactus with compacted roots might need to be re-potted in a larger container.

Your cactus may begin looking a little weak because it is time to get a new pot for the plant. A common reason that many growers need to repot their cactus is because it needs a larger growing space. Like most plants, a cactus will eventually outgrow the container that it is in, and the roots will become overly crowded and compacted.

If you are not providing your plant enough space to grow, it will begin to experience stunted growth, which can lead to death. If you notice that your plant has:

  • Begun to fill the container
  • Noticeably crowded roots (roots growing out of drainage holes or above soil levels)
  • Water running right through the container
  • Leaves that look unhealthy

It is time to repot. You will want to move your plant up to the next larger container size and allow the roots to spread.

When choosing your pot and repotting the plant, you will want to keep a few things in mind:

  • Make sure that you always thoroughly disinfect the new pot with one-part bleach and one-part water. This cuts down on any bacteria that may be present and provides your plant with a safe new start.
  • Find a pot that fits the size of your cactus. You do not want to pick a pot that is too small or the same size as your current pot; instead, pick one that is a little larger. This will give your plant room to grow and will still be stable enough to support it.
  • If you do choose a pot that is too large, it can lead to even more issues. These pots have too much excess soil and can hold too much water, leading to the issues mentioned previously.

4 – Try a New Soil

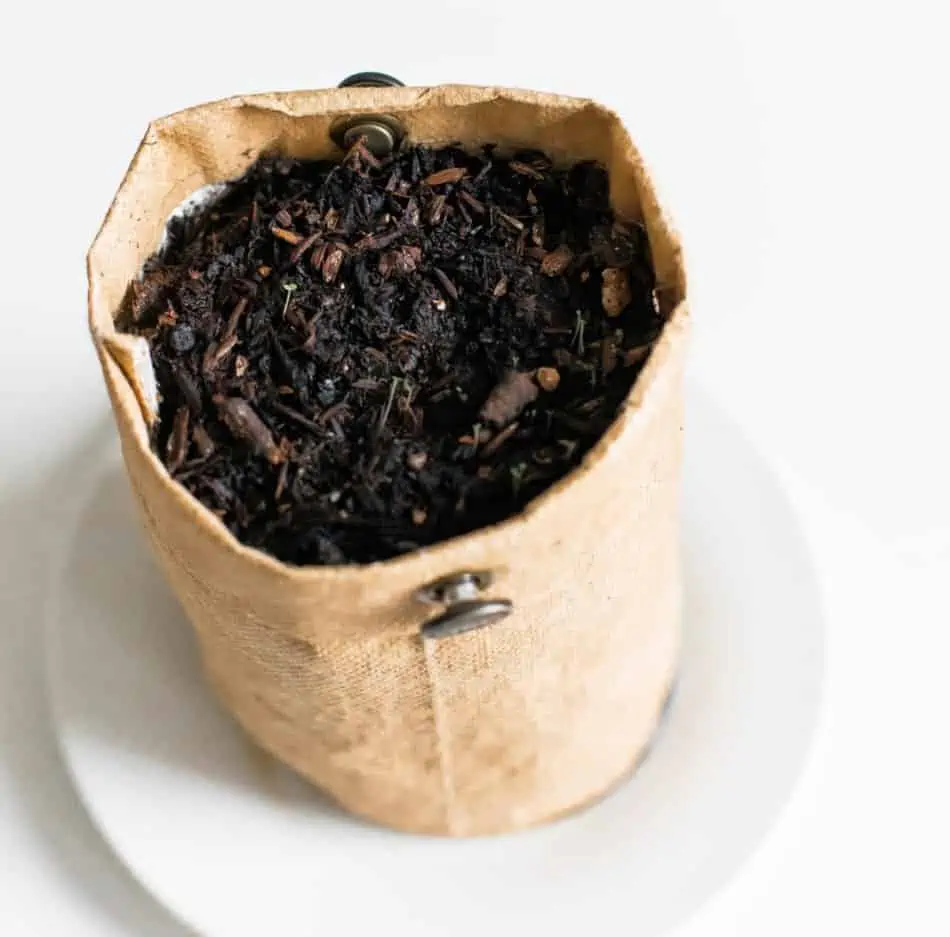
A soil.
Changing the current soil to a new potting mix might also help you get rid of rot and save your precious plant.

Whether your original intentions were to repot your plant or not, changing soil can be a good way to revive your plant. If you are dealing with overwatering issues, small pots, or simply cannot find the true cause of your cactus’ issues, you may want to try new soil. Often, the reason why root rot or other similar issues arise is that there is a member of the water mold known as Phytophthora spp present.

This rot is common in soil that has adequate moisture, which can happen from overwatering or from lowered drainage. If you notice root rot, it is because these pathogens are in the current soil, so replacing the soil is key. Also, some potting mixes are too heavy and can hold more water than most cacti will need.

If you are repotting your plant, you will want to change to a lighter, more porous potting soil. Most classic cacti mixes work well for this and are readily available on the market today. These blends are often resistant to the pathogens that cause root rot and are great at draining or absorbing any excess water.

5 – Check for Mealybugs

A cactus with pest.
To avoid the problem of bugs, you should consider natural treatment methods and save your gorgeous plant.

Just like many other plant species, the cactus is no stranger to invasive bug species. Mealybugs, in particular, will suck the sap from the cactus plant, also known as phloem, which can lead to its demise. When they attack your plant, they will reduce its vigor. The bugs also excrete sticky honeydew and wax, reducing plant quality.

If you notice mealybugs present near your plant, you will want to act. Higher populations of these bugs can feed on the foliage or stem of the cactus and greatly inhibit growth. While most healthy plants can handle a small population of the bug, almost no plant can withstand large numbers.

Many have found that cacti are more vulnerable to the bugs because they have a year-round mild temperature, which encourages bug population growth. Also, if you have an indoor cactus that attracts mealybugs, they do not have any natural predators ridding them from the area. You will want to monitor the plant regularly for the bug and take action should you see them.

Of course, there are some chemical ways that you can get rid of the bugs, but there are also many natural remedies. Some simple DIY ways to lower the mealybug population are:

  • Use a cotton swab with denatured alcohol that you can dab the bugs with, which will kill them. However, note that this treatment requires you to repeat it often until the bugs are all removed from the plant. Make sure to check every few weeks for new bugs.
  • You can use a fumigating smoke cone regularly to cut down on bug numbers.
  • You can spray the cactus with a few drops of dish soap that has been diluted into one cup of water. This is an easy way to kill the bugs effectively. This treatment may also need to be repeated often for full effectiveness.

6 – Set Up a Good Feeding Schedule

A cactus fertilizer.
To provide proper nutrition for your cactus, you can use special cactus fertilizers but never over-fertilize them.

A big problem that many cactus owners run into is that their plant is lacking proper nutrition. While many cacti can grow and thrive without any fertilizing, adding this extra nutrition can help them get healthier and more colorful. This makes it extremely important for you to feed your cactus with a recommended fertilizer at a regular frequency.

Ideally, you will want to feed the plant every two weeks with a complete cactus fertilizer from spring through early fall. During the fall and winter months, feed the cactus around once a month. If you are not great at keeping up with a schedule, aim for once every few months or even once a year after the plant is growing properly.

You want to ensure that you are not over-fertilizing the plant, which can lead to just as many growth issues as lacking nutrition. If you notice that your cactus’ leaves are getting soft, feel like they are made of cloth, or are even turning brown, it can mean you are feeding the plant too much. You will want to make sure that you are always following the packaging instructions when feeding your plant. If you are ever questioning yourself, opt for feeding it less instead of more.

Of course, the amount of fertilizer used for feeding is just as important as the type of fertilizer that you offer the plant. Since cacti are not heavy feeders, you want to dilute any fertilizer that you offer them to half or even a quarter strength. Too much concentration of fertilizer may lead to root rot for your plant.

Some important things to remember when it comes to finding and using fertilizer are:

  • Look for different ratio formulas to find one that fits your plant’s needs. You can use a blend of 10% nitrogen, 10% phosphorous, and 10% potassium. You can also use a lower, balanced solution that is a 5-10-5 ratio. The main thing you want to look out for is too much nitrogen, which can become a problem.
  • Once you find a good fertilizer, you will want to mix as the bottle states. For example, if it says to mix one tablespoon fertilizer with one-gallon water, you will want closely follow this and even drop the fertilizer level down by ½ for healthy plants.
  • If you are growing a cacti species that is more of a tropical breed, you will want to reduce the fertilizer even more at ¼ the ratio. A common tropical species is the Christmas Cactus.
  • After feeding your cactus, you will want to move the plant into the sunlight. Removing them from the shade helps the plant utilize the fertilizer properly and enhances growth. Of course, limit the level of light and high temperatures as you would normally.

7 – Ensure You Are Offering Proper Light

A cactus on pot exposed to sunlight.
To prevent a cactus from being floppy and pale, you should offer your plant natural or artificial light.

If your plant is not receiving the proper amount of light, it can become floppy, pale, and shed its leaves. This lack of light is almost guaranteed to lead to the death of your plant. If your plant is growing, but you notice that the new growth is pale or more flimsy than normal, light could be your issue.

Of course, there are plenty of ways that you can offer your plant light if a lack of it is a problem. Some ways to increase light exposure for your plant are:

  • Move it to a windowsill for temporary natural lighting.
  • Move it closer to the light source, whether this is natural or artificial.
  • Pick up a quality artificial light source if you live somewhere with increasingly darker days. LED bulbs or grow lights are relatively inexpensive and a great way to increase the light exposure for your plant.

While not enough light can be an issue for your cactus, having too much light can also be a major problem. If your plant is getting more light exposure than needed, it can lead to an issue called cactus corking. This is when a firm, brown, or even a tissue that resembles bark can develop just above the soil on a healthy plant.

This is part of the natural aging process of most plants and often starts at the base of the cactus, moving upward. If you notice that your cactus is turning brown from the top down, this is a clear sign that your plant has too much sun. Just like humans, your cactus can get sunburn with extended exposure.

If your plant is experiencing mild sunburn, it can begin as a whitish discoloration that is at the top of the plant or on the side that is facing the sun. Severe burns will appear similar to corking, with hard brown scabs on the surface. If your cactus has reached the point of having these scabs, it is permanently damaged.

To allow your plant time to heal from small burns or to stop it from getting more extensive damage, you will want to move it into the shade. While cacti grow in the desert, they are not accustomed to a large amount of sunlight, and many are used to never experiencing full sun all day. You will want to acclimate the plant to extended sun exposure slowly or simply limit the level of light that the plant gets daily.

8 – Monitor the Temperature

A thermostat.
Monitoring the temperature is essential for maintaining the ideal temperature for your specific cactus species.

While most cacti do grow in warmer weather environments, this is not always the case, and they need regular temperature variations. One sign that they are having health issues is because they are not blooming properly. This may be due to the level of light that they are getting, or it could be due to the temperature at which you keep them.

Most cacti do need warm weather to survive, but it is important to remember that this ideal temperature should be between 65 degrees and 90 degrees Fahrenheit. However, during the cooler dormant months, you will want to lower these temperatures for proper growth. These dormant month temperatures should be closer to 45 to 55 degrees Fahrenheit.

For most cactus plants, flowers will only form when the plant is between 50 and 55 degrees. While many cacti have adapted to living in higher humidity locations, they still will die if the humid habitats are too extreme. Also, if the temperatures are too low, you can kill the plant by allowing it to get too cool.

9 – Induce Plant Rooting

A soil on hand.
You should properly root and induce new cactus rooting before transferring it to another pot.

Many of our methods of saving your cactus involve repotting the plant or removing it from its current home. This can be dramatic for the cactus, and without proper rooting can lead to death. If you notice that the roots of your plant have been damaged from rot or excessive watering, you need to encourage new rooting in its new soil.

As mentioned in our first step involving root rot, you may need to cut away damaged tissue from the plant. This can lower the amount of roots present and makes growing new roots critical for survival. Luckily, cacti are some of the best plants at regenerating, with a whole cactus plant easily grown from a small portion of healthy tissue.

To properly induce new rooting, you can do a few extra steps before planting the cactus:

  • Let the cactus dry out for several days until thick scabs form on the cut sections.
  • Place the remaining cactus section into a pot with cactus soil or some other porous, quality soil that you know works well.
  • Bury the cactus about one inch deep. If the only remaining tissue is quite small, simply bury it about halfway. You want to ensure a large amount is in the dirt, and some remain above the soil.
  • Avoid overwatering the cactus, even stopping watering entirely for the first week.
  • Once the first week has passed, you will want to water the plant sparingly and look for new growth to appear.

10 – Simply Leave it Alone

Cactus in a mug.
Although it might seem ridiculous, living your cactus on its own can also help them revive.

This final step to saving your cactus may seem like a silly one, but too often, it is the most effective. There are times when your plant may look a little weak or simply off to you, but it truly does not need your saving. It may simply be going through its normal die off and shredding of its buds phase.

If your plant is looking a little less than perfect, examine the vital areas and look for any signs that may be alarming. Take a glance at the roots, check for any bugs, and evaluate your normal care routine. If everything seems to check out, simply give your cactus a little break and let it take care of itself.

If you are concerned, give your plant a good drink of water and leave it be. Put the cactus in an area that gets a fair amount of sunlight, like a windowsill, and give it time to grow. You will want to revisit it now and then to water it again and give it a little checkup.

The best thing to do once you have diagnosed and hopefully repaired your plant is to establish a good routine that you can follow from here on out. Some basics to keep in mind are:

  • Stop overwatering your plant. Only supply water to the cactus every couple of weeks, depending on the size and species of plant that you have. Research your specific cactus type, as well as keep a record of which watering schedule leads to quality growth.
  • Supply your plant with a proper amount of sunlight and offer them cooler, dormant months as needed. Make sure to check for signs of sun damage or too much light, adjusting the plant accordingly.
  • Give your plant a break to allow it to heal and grow. Most of these saving techniques can be quite traumatic, and most plants do well just being left alone and cared for as needed.

5 Signs Your Cactus Needs Less Water

Who doesn’t love growing things? Unfortunately, for many of us who don’t have a green thumb, it may be challenging to keep plants alive. However, a cactus is an example of one plant that is low-maintenance and is often recommended for new plant growers. But, even though cacti are easy to care for, you still need to remain mindful of how much water you give them, just like any other plant.

What are the signs that a cactus is overwatered? Five signs will let you know a cactus is receiving too much water:

  1. Splitting
  2. The skin of the cactus is mushy and puckered
  3. Soil stays moist for too long
  4. Cactus is starting to die in winter
  5. Black/brown discoloration, especially at the base

Because cacti are very drought-tolerant, they need far less water than you think. The remainder of this article will discuss the reasons why these succulents do not need a lot of water, and signs that your plant may be getting too much water. With a few simple steps, you can still save your plant and get it to perk back up! 

Why does a cactus need limited water?

Different kinds of Cactus.
Cacti absorb and store water and can survive with less watering compared to other plants.

A cactus is part of the succulent plant family, which thrives on very little water by storing most of what they absorb beneath their skin. This is an adaptation for plants that evolved in low-water areas such as desserts or steppes. When they cannot rely on much water from the sky or the ground, they need to keep as much as possible to last them through the months-long dry seasons.

Cacti, specifically, are succulents that are covered in spines. These spines can be thick and large, small, and soft, and everywhere in between. They grow from areoles spaced out along the skin and serve several purposes, including helping cacti absorb every water droplet in receives.

Since the spines have 360 degrees of surface area, they can prevent water from running down off the plant and into the ground. Instead, they can direct the water to where it can be more easily absorbed by the cactus.

Another feature that helps keep the cactus hydrated is its waxy skin. This coating prevents moisture from leaving once it has been absorbed.

Cactus Roots

Succulent  roots.
The root system of a cactus is responsible for absorbing the water from the soil.

The cactus has a root system that is also specially designed for absorbing water. With a shallow and extensive root system, the plant doesn’t have to wait for the water to sink in too far before they get to it. This is especially important for desert-dwelling plants because rainfall is less likely to soak into the lower layers of dirt than it is to be evaporated by the hot sun and dry air.

Taproots aid in stabilizing larger columnar cacti. These also help the large cactus store even more water to support its massive size.

CO2 Intake

"And Breath" LED Light.
Cacti respire (breathe) during the night through Crassulacean Acid Metabolism to preserve stored water.

Another feature of cacti’s skin allows them to employ a unique breathing process. As we know, all plants intake carbon dioxide (CO2) and expel oxygen (O2). Typical plants do this during the daytime as part of photosynthesis, or the chemical process by which plants use light from the sun to synthesize foods from carbon dioxide and water.

Cacti do not breathe during the day because while this would allow CO2 to enter the plant, and would allow precious water to escape via transpiration. Instead, they use crassulacean acid metabolism(CAM), which means they reserve breathing for nighttime. To do this, the plant stores carbon dioxide in the form of malic acid until daylight. Then, it uses the CO2 for photosynthesis.

Because this entire process takes place during the late hours of the day when it is cooler and more humid, a cactus significantly reduces its water loss.

5 Signs Your Cactus Needs Less Water

As cacti are very slow growing, you may have invested a lot of time and effort into your little plant. Unfortunately, many of us kill our cacti with kindness, that is, by overwatering it.  This is the main culprit of a struggling house cactus. Fortunately, they are pretty good at letting you know when you are doing this.

So, pay attention to these signs, and you’ll be able to save your spiky friend!

  1. Your cactus splits.
  2. Your cactus is mushy and puckered.
  3. Your soil stays moist for too long.
  4. Your cactus is starting to die in winter.
  5. Your cactus is turning black or brown, especially at the base.

1.     Your Cactus Splits

Maybe you forgot your cactus for a while, or you went on an extended vacation. When you came back, the soil looked super dry, so you dumped a bunch of water on it. The next thing you know, the cactus has a split in its skin.

This happens when a cactus takes up too much water at one time. Since these plants are highly efficient at absorbing and storing water, they pull in more water than other house plants. While they are designed to expand during times of rain, too much expansion can be harmful. This is what causes the split.

Cactus near the window.
Cacti have adapted to repair themselves from this kind of damage by creating a callus and sealing off the area.

Also, when they have been dry for too long, the plant has likely contracted, specifically to survive its arid conditions. You’ll want to reintroduce water slowly to your plant to allow it to expand and grow at its own rate, especially if it’s been a long time since its last watering!

But don’t worry! Splitting does not cause long-term damage to the plant. Cacti have adapted to repair themselves from this kind of damage by creating a callus and sealing off the area. Just continue watering lightly, and your plant should grow as usual.

To learn more about cacti splitting, check out this YouTube video by Desert Plants of Avalon.

2.    Your Cactus is Mushy & Puckered

The problem with puckered succulent leaves or cacti is that it can be attributed to too little or too much water.

A healthy cactus will be plump and firm because of the water stored inside it. These stores are used as reserves for times when new water is scarce. As the cactus dries out, it will begin to tap into these reserves to survive. If it draws too much from them, the skin begins to pull inward as water volume is lost. This is a sign of too little water and usually happens at the bottom of the plant first.

Conversely, if the cactus absorbs too much water, then the storage space will run out. As water is stored in the cells of the plant, these cells will burst if too full, and the plant will literally fall apart from the inside out. This results in a puckered and mushy plant.

Therefore, you should make sure to pay attention to your watering habits to determine if you are under- or over-watering your cactus. To remedy this, ease into adding more water or decreasing watering time slowly so as not to shock the plant too much.

Do you think one of these things is happening to your plant? If you’re not sure what you should be looking for in terms of mush or puckering, check out the photos in this article from Pistils Nursery. There are good examples of what these signs usually look like.

3.    Your Soil Stays Moist for Too Long

A soil on hand.
Keeping soil watery for long periods of time will make the cactus absorb more water than it actually needs.

While you may be tempted to use standard potting soil or compost for your new cactus, this should be avoided. Regular potting soil is designed to hold moisture close to the plant. This is because other houseplants are not as good at quickly absorbing water as cacti. 

Cacti are gluttons for water. That is, they soak up as much water as quickly as possible. This is because the soil in which these plants are found is naturally poor and arid. Any rainfall is not likely to stick around long—whether it drains by runoff or disappears by evaporation. This means the cactus needs to get it before it’s gone.

Therefore, if the soil stays wet around the roots for too long, your cactus will keep drinking it until it oversaturates itself; it doesn’t know when to stop! And worst yet, this oversaturation could lead to root rot and other problems.

To prevent this, you can change your potting medium to a specially-designed cactus soil that is coarse and low in nutrients. This soil tends to be equal parts:

  • Sand
  • Soil
  • Gritty mixture (pebbles or pot shards)

Some mixes even contain:

  • Peat
  • Pumice
  • Coir
  • Pearlite
  • Limestone
  • Coconut fibers

The necessity of these additional ingredients really depends on the type of cactus you have, so read the instructions carefully. For example, peat is useful if you live in a very arid climate. It is designed to hold moisture, but if you allow it to get too dry, it will not rehydrate well.

You can buy a commercial cactus mix or make your own, but the benefit of this mixture is that it will drain faster and encourage evaporation. Once you’ve changed the potting medium, make sure to let it dry out thoroughly between watering. And don’t forget to empty the drainage saucer if there is one!

4.   Your Cactus is Starting to Die in the Winter

Cactus leaning down on the pot.
If you noticed that your cactus is starting to die, you have most probably overwatered your precious plant.

You may be thinking that your cactus is dying because you are currently in the coldest months of the year. While these plants do love warm temperatures and sun, since they are desert-dwellers, they are no stranger to chilly nights. So, if you keep your cactus indoors and it’s not directly near a cold window, it’s unlikely that the winter weather is causing it to die.

As with all plants, cacti go semi-dormant or dormant in the winter. Their growth slows considerably, and their soil generally does not dry out as fast. This means they generally need less water than in the summer months. Therefore, if you have kept up the same watering schedule even as the days grow shorter, you may be watering your cactus too often.

All plants, in general, need less water over the winter, and cacti are no exception. While you may water your cactus once a week in the summer (or more if you give it outside time in the hot sun), that may be too much for the winter. Try to simulate the cactus’s natural habitat.

Most plant experts recommend only watering the cactus two or three times during the entire winter season. And when you do, make sure to follow tip number one above and not give it too much water at one time!

5.    Your Cactus is Turning Black or Brown

A cactus plants on clay pot.
If your cactus is changing its color to brownish, you might have underwatered or overwatered your plant.

Discoloration can also be another sign of either under- or over-watering. It is essential to know the difference between different shades and textures that may appear as a result of how you water your cactus.

For a cactus that is too dry, it may be turning brown and crispy at the tips. These look like callouses or sunburns. If this is your cactus’ symptom, try giving it more water and over time, the plant will heal its damage. But make sure the soil is fully draining!

On the other hand, if the leaves or stems are turning black or dark brown, that could be a sign of root rot because of overwatering. These dark spots usually occur at the bottom of the plant or on the lower leaves/appendages. They are soggy and can even be oozing or leaky. This means that your plant has so much water that it’s now collected in the roots.

If you suspect this is the case, gently pull your succulent out of its pot and examine the root base.  If the root network is expansive and looks healthy, then your plant may survive. Repot it in fresh, dry soil and decrease your watering.

If the roots look dead or blackened, then your succulent is in trouble. It is most likely that you will need to try to salvage its healthier sections in order to keep it growing well.

Not sure if your cactus is experiencing root rot or dryness? Check the photo examples from this article on Pistils Nursery to compare your plant to.

Saving Your Cactus from Overwatering

Top view of different kinds of Cactus in a pot.
To keep your cacti healthy and beautiful, you must prevent them from being overwatered.

So, what if you have changed the potting medium and readjusted your watering routine, but your cactus still seems sad, and you notice continued mushy spots or dark patches? This may mean your cactus has developed some type of rot, which is slowly spreading through the rest of the plant. Plants cannot heal already rotted flesh, so if you notice these spots, it is best to remove them if at all possible.

Removing Rot from the Top

If the damage is at the top of your cactus, you have a better chance of saving it. Take a sharp, clean knife and dig out the damaged tissue gently. Allow the hole to dry out and heal over. Make sure not to water the plant from above to prevent moisture and bacteria from getting into the wound.

If you give it time, the plant should callous over, and while now looking a little scrappier, it should continue to grow and get healthier!

Removing Rot from the Roots

If you suspect root rot, this is a more difficult problem to tackle. It is possible to save the plant, but it will take extra care and even a little luck.

  • Determine if any healthy roots are left. First, remove the plant from its soil and inspect the roots. If all of them are blackened, limp, or broken off, your plant may not survive. However, if any are still viable, you may try to replant it.
  • Separate the dead tissue. Remove any infected tissue and all surrounding soil from the cactus.
  • Wash the roots thoroughly. This will remove any remaining diseased soil or rot from around the roots.
  • Repot in sterile soil. Plant the cactus in a fresh batch of potting medium, ensuring that its amount and type is suitable for your cactus. This is also an excellent time to check your pot size, making sure it’s not too large or too small.

Root a Cutting

If you determine that the roots of your cactus are no longer viable, you may still be able to root a cutting. Depending on the plant, if there is a healthy part still left, you can cut that piece off from the rest and help it grow new roots.

First, allow the cutting to callous over for a couple of days before placing it in the soil. When planting, make sure to bury it at least an inch into the medium so it can begin to root. While this process may take weeks, you should see a brand-new, healthy baby cactus that is quite similar to the parent plant!

Conclusion

While over-watering can be a death sentence for your little cactus, it doesn’t have to be.  Paying attention to the signs above, and catching them early enough, will allow you to save your succulent just in time. If you follow these simple tips, you and your new houseplant can celebrate many great years together!

Cactus Type: The 10 Most Popular On Earth

Many people are looking to incorporate green spaces in their homes. Fortunately, one doesn’t need to have a green thumb to do just that. Cacti and succulents are easy to care for and are low-maintenance options for those who want to add a touch of green but have difficulty keeping regular plants alive or those who simply don’t have the time to tend to a garden.

What are the most popular types of cactus? The most popular types of cactus as listed by cactus enthusiasts and cactus growing sites include:

  • Moon cactus
  • Ladyfinger cactus
  • Easter cactus
  • Old lady cactus
  • Bunny ear cactus
  • Blue columnar cactus
  • Star cactus
  • Barrel cactus
  • Fairy castle cactus
  • Saguaro cactus

What makes them popular? We will talk about each one in detail and how easy or difficult they are to care for and propagate.

1. Moon Cactus (Gymnocalycium mihanovichii)

A Moon cacti.
Moon cacti with spherical shape and vibrant red color, which can flourish in warm and dry environments

Moon cactus, also known as Hibotan cactus or ruby ball cactus, is a hybrid and grafted variety of cactus. It is one of the most popular and easiest to recognize because of its perfectly spherical shape with thorns and bright colors, due mainly to its inability to produce chlorophyll. Its inability to photosynthesize means that the moon cactus needs to be grafted onto a compatible rootstock that produces plenty of chlorophyll upon which the moon cactus can sustain itself.

These cacti come in vibrant shades like red, orange, yellow, peach, and purple. They are most commonly grafted onto rootstocks like Hylocereus and Stenocereus. They also make perfect gift plants because they are small, generally an inch in diameter.

Water, Temperature, and Sunlight Requirements

Moon Cacti are native to the deserts of South America. They can be found anywhere warm, dry, and sunny because they are easy to cultivate and propagate. Moon Cacti thrive in temperatures at least 48 degrees Fahrenheit.

These cacti love bright but indirect sunlight. Prolonged exposure to direct sunlight can be harmful to them. As such, they are best placed in a shaded area or under taller plants where sunlight cannot penetrate directly. You can also take them indoors and put them in a spot where they are shielded from sunlight during the brightest time of the day.

It is best to bring your Moon Cacti indoors during the winter, especially when the temperature drops below 40 degrees Fahrenheit. If not, cover them up with a light blanket to protect them from the cold weather. Otherwise, they will freeze when the cold weather gets harder.

Water requirements are minimal. You will need to water your moon cacti deeply and allow the soil to dry entirely at the base before you water again. Overwatering would cause root rot. During the winter, we recommend that you stop watering your adult moon cacti completely.  If you have a young Moon Cacti, give it just a bit of water.

Moon Cacti love shallow pots with proper drainage holes. It is also recommended that you put a thin layer of gravel into the bottom of your pot to better drain the water.

How to Propagate

You can start propagating your moon cactus when a baby sphere appears on the surface.  Multiple spheres usually appear at the same time. Wait for these baby spheres to grow large enough and carefully nip them off the mother sphere.

Prepare your rootstock by slicing off its top portion. Make sure your rootstock is already well-rooted and stable and planted in a pot with excellent drainage. Slice off the bottom of your baby sphere and graft it onto the rootstock.

Check out this video to know how grafting a Moon Cactus is done:

2. Ladyfinger Cactus (Mammillaria elongata)

A top view of Mammillaria Elongata.
Mammillaria Elongata, known as a Ladyfinger Cactus, is a cactus with finger-like stems of cylindrical shape

Also called gold lace cactus, ladyfinger cactus is a petite cactus with clustered cylindrical and finger-like stems that grow only up to 6 inches tall and 1.2 inches in diameter. While it grows slowly, this plant is easy to care for.  If you provide it with enough light, it grows well when placed indoors.

This cactus has an invariable number of curved spines that vary from white to brown to golden yellow. It flowers in spring and the blooms, usually one centimeter in diameter, are either white, pinkish, or pale yellow.
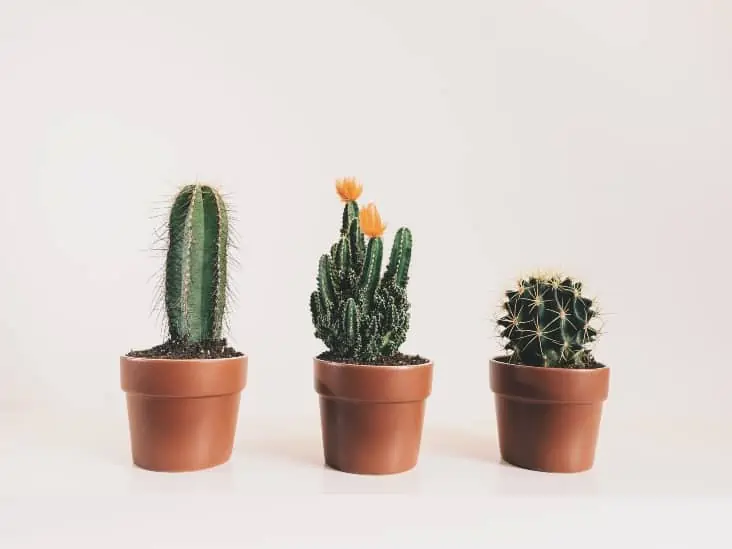
Water, Temperature, and Sunlight Requirements

Ladyfinger is native to central Mexico but is now cultivated in other countries with a warm and sunny climate.

This cactus loves partial to full sun. So plant it in a spot that gets about four hours of sunlight each day. Moreover, ladyfinger cactus is not cold hardy, so if you live in a place that can get colder than 20 degrees Fahrenheit, plant it in a container and keep it indoors. Just make sure that it gets lots of sunlight. In the winter, the Ladyfinger goes dormant, so you can water it sparingly to prevent rotting.

Ladyfinger cacti do not need frequent watering. It is best to use the soak-and-dry method, where you soak the soil completely in water and then let the soil completely dry out before you water it again. That also means that you should plant them in well-draining soil in a pot with a sufficient drainage hole.

While most other cacti have ribs that serve as storage devices, ladyfingers have raised tubercules, where the spines emerge. The flowers will also bloom from the axils of the tubercles on the previous year’s growth. During watering, these tubercules will expand to store water.

How to Propagate

You can propagate ladyfingers from cuttings. Gently pull away one of the cylindrical stems from the clump or use a cutting knife to break a stem off. Wait several days for the end of the cut stem to callous over before you plant it in well-draining soil.

3. Easter Cactus (Rhipsalidopsis gaertneri)

A flowering easter cactus,
Easter cactus is pretty similar to Christmas and Thanksgiving cacti, but it is native to drier forests

The Easter cactus, which is also called Spring cactus, is a segmented type of cactus that blooms at certain times of the year, specifically around late winter to early spring.  Since this coincides with several winter holidays, it is called a holiday plant. Other holiday plants include the Christmas cactus, which blooms during the winter holidays, and the Thanksgiving cactus.

The holiday plants are all hybrids of the Brazilian forest cactus. But while the Christmas and Thanksgiving varieties are from the rainforests of Brazil, the Easter cactus is from drier forests.

The Easter cactus is unique as it has flattened stems or segments, which also serve as the leaves. These segments are lightly serrated on their edges. Its star-shaped flowers come in a range of colors, from white to pink, to peach, to orange, to purple. These blooms open at sunrise, and they last for several weeks.

Water, Temperature, and Sunlight Requirements

People growing Easter cacti would say that it can be a bit of a prima donna. These plants tend to act up, dropping entire segments, if they are not watered correctly and refusing to flower for years if they do not feel like it.

Easter cacti love being in bright, but indirect, sunlight. And unlike dessert cactus species, Easter cacti need cooler temperatures. When exposed to nighttime temperatures in the 55 to 60 degrees Fahrenheit range, they will have an easier time setting buds and blooming. They also flower more easily and abundantly in February and March.  If you want to see those blooms, water them sparingly in October and November.

With Easter cacti, you would need to keep the soil lightly moist and wait for it to dry out before you water them again. Proper care for Easter cacti also requires that you re-pot them every couple of years in spring. They love being in pots, so you can just change the soil and plant them again in the same pot.

If your area is dry, make sure to provide these cacti some humidity. Place each pot on top of a saucer or tray filled with pebbles and a little water. The evaporation will provide moisture in the air around the plants.

You can fertilize Easter cacti after they flower.

Growth and Propagation

Easter cacti are slow but steady growers. They tend to spread out rather than grow tall.

To propagate your Easter cactus, cut off a part of the stems with two or three segments. Allow the cut to dry for a couple of days and insert it a few centimeters into a pot with soil. Make sure to plant it with the lower segment on the soil and the upper segment at the top.

Keep the newly planted cuttings slightly moist.

4. Old Lady Cactus (Mammillaria hahniana)

A Mammillaria Hahniana plant with a reddish-purple flower.
Mammillaria Hahniana, also called Old Lady Cactus, is gorgeous cactus with reddish-purple flowers

Old Lady cactus is a powder puff-looking type of cactus that is popular because of its attractive lone spherical stems covered in sharp white spines and white down. It is made even more unique by its pretty reddish-purple flowers that form a crown or halo on top. Cactus enthusiasts love having this kind of cactus in their collection because it is easy to care for.

This plant can grow up to 4 inches tall and 8 inches in diameter. It may, however, evolve to grow up to 10 inches tall over several years. This cactus hates being alone and often produces new spheres, thus growing in groups.

The Mammillaria family has around 200 species of cacti, and most of them are native to Mexico.

Water, Temperature, and Sunlight Requirements

Old Lady cacti are known to be an outdoor variety, but they can thrive indoors, too. They love dry and hot conditions, with minimal water, so it is still best to keep them outside where they can get lots of sunlight. Generally, they would need around four to six hours of sunlight a day for long-term health. But during the hottest time of the day or a heatwave, you may want to keep them in bright, partial shade to avoid sun damage.

If you choose to keep them indoors, just be sure to place them in a warm and sunny area, typically by the window. However, keep in mind that the spot by the window is cooler during the cold months. As such, don’t hesitate to move your old ladies around to more suitable locations as the seasons and the temperatures change.
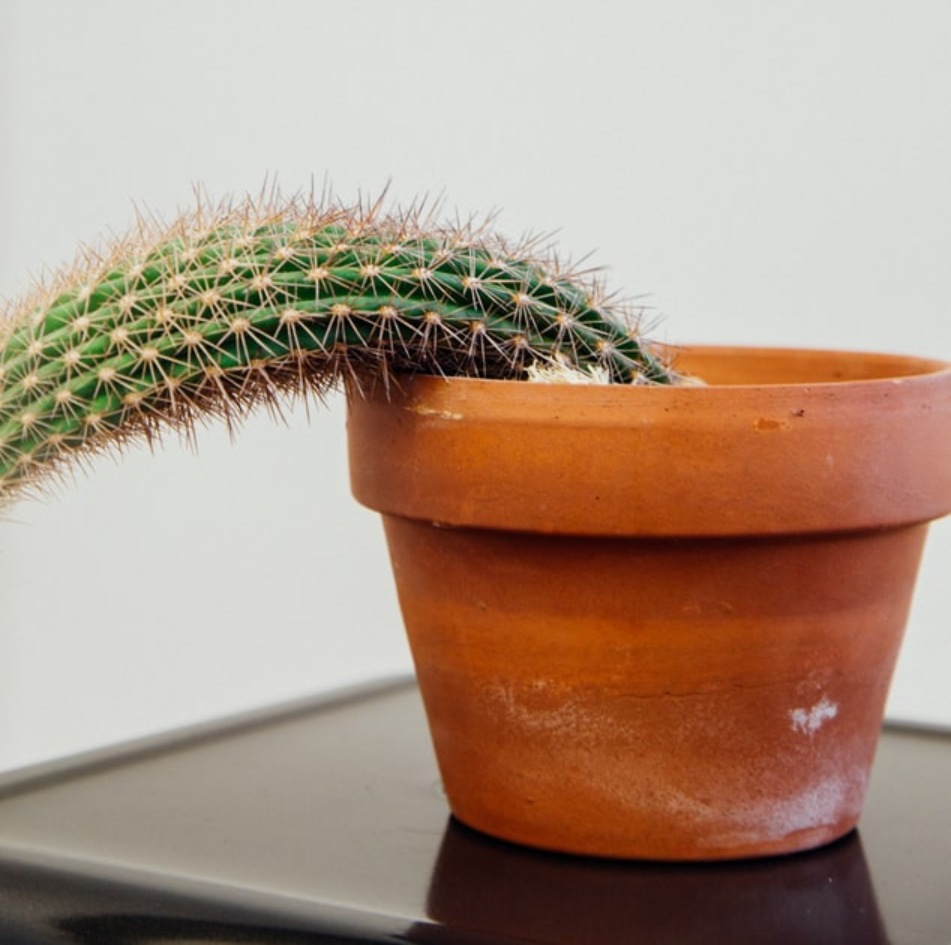
Moreover, the plant goes dormant during the winter. So not a lot of growth takes place around this time. Their growth peaks during the spring and summer.

We recommend that you wait for the soil to become completely dry before watering it again.

Old Lady cacti also thrive in soil rich in potassium. So add in a potassium fertilizer during the summer months.

How to Propagate

To propagate your old lady cactus, start by gently removing offsets from the mother plant. Be sure to wear gloves to protect your fingers from the sharp spines. Allow the newly cut offset to dry out and wait for a scab-like growth over the area where you had cut it.

Plant the calloused end into the soil. Place the pot in a bright spot without direct sunlight and water once a week or when the soil is dry. Allow the new plant to establish itself before placing it in direct sunlight.

5. Bunny Ear Cactus (Opuntia microdasys)

A Opuntia Microdasys.
Made up of individual oval-shaped segments, Opuntia Microdasys is among the low-maintenance cacti

Bunny Ear cactus, also known as Angel’s Wings and Polka-dot Cactus, originated from northern Mexico and the desert regions that stretch to Arizona. This cactus has no central stem, and its body is made up of individual oval-shaped segments. New segments form on top of existing segments, and they usually come in pairs, just like a bunny’s pair of ears.

The new segment growths are usually red, but they turn dark green as they mature and are covered with closely spaced polka-dot-like glochids, which are tiny mounds of prickles. These fuzzy glochids resemble bunny hair.  They are loosely attached, so a strong breeze can easily blow them off.

Flowers, meanwhile, sprout from the terminal ends of the Bunny Ear’s segments. Budding starts in late spring, and flowers bloom in early summer. Its 2-inch-wide flowers are creamy yellow that fades to peach. They will eventually turn into 2-inch-long purplish-red fruits.

Water, Temperature, and Sunlight Requirements

Bunny Ears are low-maintenance, and growing them is easy and straightforward, especially if you are living in a dry place with low humidity and plenty of sunlight. You only need to water them when the top of the soil gets dry. However, you need to keep in mind that they need consistent moisture in the spring and summer.

Bunny Ears love full sunlight during the spring and summer. During the winter season, their exposure to sunlight should be reduced to partial. Because Bunny Ears love low-humidity conditions, you might consider getting a dehumidifier in the room if you are keeping them indoors.

Use pots with good drainage holes to allow water to drain properly, and make sure to remove excess water from the tray if you are using one. In the fall and winter, you can water sparingly, like every three to four weeks.

The ideal temperature for Bunny Ears is 70 to 100 degrees Fahrenheit. However, during the cold months, they will also require lower temperatures of 50 to 65 degrees Fahrenheit. They need this cooler spell throughout the entire winter when the segments turn light gray.

Growth and Propagation

In their native habitat, Bunny Ears grow up to 2 to 3 feet tall with a spread of 4 to 5 feet. When grown at home, they are slow-growing plants that can reach 2 feet tall and spread to 2 feet. They make excellent container plants.

You can propagate them by removing a segment off a segment from the plant. Wait for the end to callus for a few days then plant it an inch deep into the soil. Water regularly. New roots will shoot within a few weeks. Cuttings work best during early summer and when done in groups of three or more.

As for fertilizing your bunny ears, you can apply a diluted cactus formula or houseplant food every other water period in the spring and summer with a diluted houseplant food or cactus formula.

6. Blue Columnar Cactus (Pilosocereus pachycladus)

A Blue Columnar cactus in a orange pot.
Blue Columnar cactus native to warm countries is a tall tree-like cactus with greenish-blue, turquoise color

The Pilosocereus genus of columnar cacti originated in Mexico, Brazil, the Caribbean, and other warm countries. Those who would like their cacti big and majestic would love the Blue Columnar cactus. This popular tree-like cactus can grow up to 33 feet tall and develop a distinct light blue-green or turquoise trunk with plenty of erected branches that can grow to 4.4 inches in diameter.

 The surface of the cactus will be covered with areoles, where long, white bristles grow out. The spines of this cactus are translucent with an orange or yellowish hue that turn to gray as they mature. Blue Columnar cactus flowers are funnel-shaped and are up to 3 inches long and 2 inches in diameter. These flowers are usually white, green, and reddish outer segments.

This cactus type is popular because of its color and size, its hardiness, and low maintenance.

Water, Temperature, and Sunlight Requirements

If you want this cactus to grow to its full splendor, plant it on the ground. This kind of cactus tends to do better outdoors because it needs plenty of direct sunlight and space. It would outgrow containers faster than your average cactus, so keeping it in a pot may mean having to continuously upgrade to a bigger pot.

This plant also needs slightly more water than most other cactus species, especially during the summer. And while you need to make sure the soil is well-drained and does not contain sphagnum moss and other water-retaining organic material, you should keep it moist during the growing season.

The Blue Columnar cactus thrives best in hot temperatures. But it can tolerate temperatures of at least 20 degrees Fahrenheit.

How to Propagate

This cactus can be propagated easily from cuttings. Just sever a branch and let the cut end dry out and callous. Then plant it in moist and well-drained soil.

7. Star Cactus (Astrophytum asterias)

A top view of a Star Cactus.
Star Cactus is a spinless cactus of grayish-brown color, which is divided into 5-8 sections

The Star Cactus goes by many names: Sand Dollar Cactus, Sea-urchin Cactus, and Star Peyote. It is a spineless cactus with a chubby round body that looks like a sand dollar. It has gently ridged sides that are covered with tiny white dots. Its body is divided into five or eight sections, each lined with little clumps of fine white hairs.

This cactus, which originated from Mexico, is green to grayish-brown. It can grow 2 to 6 inches in diameter. With proper care, it can give you a 3-inch yellow flower on top around March to May. This flower can turn to gray, pink, or reddish berries or drupes with wooly hair in late spring.

Water, Temperature, and Sunlight Requirements

People love this cactus because it is easy to grow and thrives on neglect, thanks to its excellent water storage capacity. However, it still needs to be watered occasionally. Depending on specific environmental conditions, you can water it two to four weeks apart. If left dry for too long, its body will turn brown and flatten out. During the winter, however, you will need to water ever more sparingly as the plant is dormant.

This cactus loves being kept in a pot so that you can take it indoors. You just need to make sure its container has good drainage and does not keep excess moisture. You should also make sure it gets direct sunlight for a few hours each day.

While the Star Cactus loves the sun, it can tolerate temperatures as low as 20 degrees Fahrenheit.

How to Propagate

The only way to propagate Star Cacti is through seeds. The seeds need to be planted as soon as you harvest them, as this boosts their chance of germinating and producing new plants.

Just remember to keep the soil moist from germination up to when the baby cacti are ready to be transplanted to their own pots. Ideally, you can transplant them when they are half an inch tall.

8. Golden Barrel Cactus (Echinocactus grusonii)

A golden barrel cactus.
Golden Barrel cactus is characterized by the spherical body and yellow lowers growing in mid-summer

The Golden Barrel cactus is popular due to its exotic appearance and hardy nature. It is native to arid desert regions but is now rarely found in the wild. Instead, it is commonly seen in gardens and homes across North America and Europe.

This cactus has a spherical shape with deeply ribbed lobes and is coated with evenly spaced rows of golden spines, making it look like a pincushion. It is almost perfectly round when it is young, but as it matures, it usually stretches and becomes more oval.  It can grow up to three feet in height and diameter. Its bright yellow, funnel-shaped flower blooms from the crown in mid-summer. And when it is fertilized, the flower produces a fleshy yellow fruit that bears seeds.

Water, Temperature, and Sunlight Requirements

This cactus grows best outdoors as it loves the sun. However, at the height of summer, move it away from direct southern sunlight to prevent it from getting burnt. You can also grow it in a pot and keep it indoors if it is in a bright, sunny, and warm room. The only drawback to growing it inside the house is that it makes it unlikely for the plant to produce flowers.

We suggest you water your Golden Barrel once a week during the summer. Adequate water in springtime would encourage it to flower. In the winter, however, the plant is dormant and won’t need much watering. Water it only once between December and February.

Keep your Barrel Cactus at low to moderate temperatures during the day, specifically between 50- and 75-degrees Fahrenheit on average. Do not expose your cactus to a temperature that is lower than 40 degrees Fahrenheit as extreme cold and frost could kill it. Moreover, this cactus does best without humidity, although it is fine in a regular household environment.

This cactus grows naturally in low-fertility soil, so it has low nutrient needs. As such, fertilize it with a low-nitrogen liquid fertilizer only once a year, particularly at the start of its growing season in spring, after its dormant state.

How to Propagate

Golden Barrel cacti are usually propagated by seed. Plant the seeds just below the surface in a cactus mix and keep the potting medium warm and moist slightly. The seeds will readily germinate. When the seedlings are big enough, you can transplant them into a larger container.

9. Fairy Castle Cactus (Acanthocereus tetragonus)

A fairy castle  cactus.
Fairy Castle cactus is a tall columnar cactus with lots of curved branches making up a castle-like shape

The Fairy Castle cactus is native to North America, Central America, northern South America, and the Caribbean. It is a tall, columnar cactus that produces many curved branches resembling castle turrets.

This slow-growing cactus is easy to care for. It can reach up to 6 feet, and the stems are five-sided with spines along each plane and have woolly bases. The turret-like limbs are bright green, and they turn a darker, brownish shade as they age. The Fairy Castle produces large white or yellow flowers, but this happens rarely and not until the cactus is at least ten years old.

The Fairy Castle Cactus is popular among beginners and is often sold as an indoor cactus.

Water, Temperature, and Sunlight Requirements

Fairy Castle cacti love partial sun and partial shade. As such, if you are growing them indoors, place them in a bright and sunny area, away from air conditioning and drafts.

This cactus is not cold hardy.  If the temperatures get below 30 degrees Fahrenheit, you should take it inside the house. It actively grows in spring and the fall.

When watering, wait until the water comes out of the container’s drainage holes to ensure it’s been done thoroughly. Allow the soil to dry out completely before you water your Fairy Castles again. You can cut the watering in half during the winter as they stay dormant.

How to Propagate

You can propagate Fairy Castle cactus by seeds or by stem cuttings. For cuttings, simply sever a stem from the main plant using a knife, wait several days for the cut stem to dry out and harden, then plant in moist and well-drained soil. Water using the soak and dry method and allow the new cactus to form roots before transplanting it.

Propagating through seeds is not recommended as this cactus is a slow grower. But if your plant has already produced a fruit, you can harvest the seeds and sow them in well-draining soil.

10. Saguaro Cactus (Carnegiea gigantea)

A full grown Saguaro cactus.
Saguaro is a giant cactus with smooth and waxy skin, which grows from 15 to 60 feet in height

The Saguaro is a tree-like cactus species that can grow to a great height, anywhere from 15 to 60 feet. It is made up of a tall, fluted columnar stem that can go as thick as 24 inches. It has a smooth and waxy skin, and its trunk and arms have two-inch spines clustered on its ribs. Saguaros feature pleats that expand like an accordion when they drink water and contract as they use up this water supply.

This cactus is a very slow-growing plant that takes five to seven decades before its barrel-like body would start growing its first arm. This means that the adult Saguaros you see in photos, with several arms curving upward, are at least 125 years old. The average old Saguaro boasts five arms and a length of 30 feet.

Saguaro cacti only grow in the arid Sonoran Desert, which covers parts of California, Arizona, and Northwestern Mexico. Saguaro flowers are the state flower of Arizona. While this cactus can only be found in this region, it is one of the most popular and recognizable cactus species, as shown in many movies.

Its flowers are creamy-white with yellow centers. They are three inches wide and usually bloom in May and June during cooler desert nights. These flowers are clustered near the end of the arms.

Additionally, Saguaros are an essential part of the desert’s ecology, both as a food source and as a habitat.

Saguaro Cactus Care

Saguaros are found in areas of the Sonoran Desert that don’t get freezing temperatures.  Also, they cannot be found in areas beyond 4,000 feet above sea level. As such, they can only survive on the south slopes.

Taking a Saguaro home is illegal, so you cannot exactly grow one. Besides, an adult saguaro is estimated to weigh six tons.  Hydrated, it weighs even more.  It is impossible to care for one in your backyard.

Bottom Line

There you have it—our top 10 cactus types.  If any of these appeal to you, we are sure you will be able to get your hands on them if you look hard enough.  Whatever kind you get, you’re sure to enjoy it.

How To Care For Your Christmas Cactus: Light, Soil, Watering And Bloom

The Christmas cactus, hailing from Brazil, is a beautiful plant that blooms a light red and white flower. Also known as the Schlumbergera, its beautiful color scheme makes it the perfect natural addition to your holiday season decorations. However, these plants need to be purchased and cared for long before Christmas Eve.

What are the most important things to remember when caring for your Christmas cactus?

  • Cooler temperatures
  • Humidity is good, but too much watering is bad
  • Balance daylight and nighttime
  • Special fertilizer only used at the right time
  • Prune yearly
  • Monitor for and remove insects
  • Displaying area is different from growing area

Let’s explain those steps in more detail and then discuss your additional options.

Steps to Prepare Your Christmas Cactus for the Holiday Season

A christmas cactus.
Christmas cactus, which needs adequate care to bloom and be used as a beautiful Christmas decoration

Just keep in mind as you go through these points that a plant is a living thing, not a product out of a factory. As such, do not be afraid to tinker with these instructions ever so slightly. Christmas cacti especially are used to a little disruption. Use your judgement and a little tender loving care to keep your plant happy and satisfied.

Cooler Temperatures

A thermostat.
You should always keep the temperature from 65 to 75 degrees Fahrenheit for the Christmas cactus to grow healthy

The Christmas cactus is native to the jungles in Brazil, where it grows adjacent to larger trees and under their canopies. As such, they like average temperatures ranging from 65 degrees to 75 degrees. They can be outside in the summer, but keep them under some sort of balcony roof or awning to avoid direct sunlight. Prolonged sunlight can burn them, causing a yellowing color and preventing bloom later in the year.

To time a proper bloom exactly right, your Christmas cactus will need to be placed in cooler temperatures for about 12 hours a day starting in late September to early October. That way they will start to bloom 8 to 10 weeks later in early December. If you live in a temperate climate, leaving your plant outside should work just fine as long as you monitor weather fluctuations. Too cold and it will develop frost, which will kill the plant.

On the other hand, if a hot day pops up in October, bring it inside into the air conditioning. In general, 55 to 60 degrees should do the trick. If you live in a desert or tropical climate, place your Christmas cactus in your basement or at least a closed off closet during this time.

Humidity vs Watering

Watering the plants.
Although Christmas cacti like humidity, they should not be watered that often

Here is where it becomes tricky. The Christmas cactus is technically not a cactus, as it does not grow in the desert. Being from the tropics, this plant likes it humid. However, liking humidity does not mean that it likes being watered all the time. In fact, the Christmas cactus name in derived from the fact that it rarely likes to actually be watered. If this plant were a guy at a Florida resort in July, he would sit under an umbrella outside by the pool all day but never jump in the water.

How do you keep something humid without watering it? It is easier than you might think. If you already live in a humid climate, putting the plant outside is obviously the best thing you can do. If not, follow these steps:

  1. Find a small, shallow tray just larger than the bottom of cactus’s pot. A plate is too shallow, but something like a frisbee or garden stone with ridges will do fine.
  2. Fill it up with small stones, enough so that they sit just above the ridge.
  3. Fill that tray with water.
  4. Place the Christmas cactus on top of the rocks.

By using this method, you are not watering the plant. However, the water in the tray will very slowly evaporate through the pot and around it past the leaves, keeping the plant reasonably humid. Check on the water every so often and fill up the tray again as necessary.

That being said, it is not like a Christmas cactus never wants water. Check on it once a week to see if there is any significant drying out in the soil or yellowing in the leaves. It will generally need water once every 1 to three weeks. Still a lot less often then your common florist bouquet.

It is also important to adjust watering patterns depending on the season. Once a week or so is great in the Spring and Summer. But the Christmas cactus will only bloom if it feels like it needs to. Frankly, if it feels like it is dying needs to reproduce. In the fall, you definitely want to dial it back to 2 or 3 weeks.

Daylight and Nighttime

Outside of blooming preparation, a Christmas cactus’s relationship with sunlight is mostly average. They can sit outside or in the windowsill (temperature permitting). Again, just avoid too much direct sunlight. If you need to choose though, err on the side of too much sunlight over not enough.

Blooming preparation, starting in September, is when it becomes more complicated. Along with cooler temperatures, the Christmas cactus also needs 12 to 14 hours a day of complete darkness. The plant will attempt to look for more sunlight somewhere, hence it will start to bloom. Make sure it receives a healthy amount of sunlight during the day, and then at night move it into complete darkness. Artificial light still counts as light, unfortunately. Try one of these options to make sure it gets adequate amount of “sleep”:

  • Put it in your basement
  • Place it delicately in a closed closet or room by itself
  • If it is too big to move from outside, put a tarp or thick sheet completely over the top of it so that all leaves are covered.
  • Later in the season, when nighttime lasts a lot longer, simply placing it in your backyard (away from car lights and such) works well. Again, if you are keeping it outside, beware of frost.

Fertilizer

A soil on the gravel.
Along with adequately selected soil, Christmas cacti need fertilizer (not during the bloom season) to help them grow

We already know how picky the Christmas cactus is with water. What about fertilizer? That is quite a different story. As long as it is used correctly, fertilizer is a beneficial and necessary ingredient to help your plant do well. But keep it out of the bloom season, as this could be detrimental by interfering with the timing of that process.

During the spring and summer, it is recommended to add fertilizer to your Christmas cactus about once a month. This time of the year is the growing season, so any help is beneficial. In fact, fertilizer will even help you better align your plant’s annual overall rhythm of growth and bloom. Use one with a high rating on its middle number, like 8. Try one of these fertilizers:

  • Tiger Bloom: This simply works for a fair price and is recommended by top horticulturists. Particularly useful in promoting budding in the Fall
  • Miracle-Gro: You probably already know Miracle-Gro from your lawn fertilizer. Well they specialize in houseplants too. It is not specialized to cacti specifically, but it works.
  • Jacks Classic: Cheaper than the rest but will still keep those leaves looking green and the rest of the plant strong throughout the year.

Pruning

You really do not need to be cutting back your Christmas cactus, even during all-out growth season. This could be even worse during budding season because you will be losing tiny buds that are still not completely visible. Remember, this plant is used to growing in treacherous conditions. It is used to finding whatever space it needs to survive. Not pruning will never affect the health of your plant.

However, Christmas cacti can live up to 30 years, meaning they will eventually become too large. Or they may even start growing uneven or otherwise just become unsightly in some way. If you need to prune your Christmas cactus, it is rather easy: just cut on the skinny piece in between two leaf segments. The plant practically marks it for you.

You can cut up to one third off of your Christmas cactus without disturbing its health or growth rate. Also, do not overdo it: you should only be pruning it roughly once a year. After you prune, save a handful of leaf segments! More on that later.

Watch for Bugs

Let’s face it. After everything you have read so far, especially concerning darkness and lack of watering, it sure is tempting to just put your Christmas cactus in your spare bedroom and shut the door. See you in two weeks. Not a good idea. You should at least go in once a day and check on your plant. It could need more water in its humidity tray. But most importantly, you also need to watch for bugs.

A bug on cactus.
Be sure to avoid overwatering because that is usually the main attractor of bugs.

Insects could be infesting their way inside the pot without you even noticing. If this happens, your dream of a beautiful Christmas cactus adorning your living room by the fireplace could die in September. Look out for:

  • Root mealybugs
  • Flower thrips
  • Fungus gnats

If you see any of these, prune off the infected area and discard it so it hopefully does not infect the rest of the plant. Then use an insecticide that is safe on plants. Be sure to avoid overwatering because that is usually the main attractor of bugs. Also keep your Christmas cactus in a thinner, breathable pot so it dries faster.

Display Area

So far, we have almost exclusively discussed placing your Christmas cactus in cold dark rooms or on balconies. The problem is we do not usually roast marshmallows and open presents in a closet. You are obviously going to have to move your plant into a prominent spot in your living room. During the holiday season, it is time for this beautiful plant to shine. Here are some tips on displaying your Christmas cactus:

  • Unlike its holiday plant colleague, the poinsettia, it is not poisonous to cats and dogs. No worries there.
  • Keep it up on an end table though so your pets do not poke at its semi sharp edges. You do not want the kids pulling apart something that took a year to bloom either.
  • If there is less sunshine in your living room, just try to keep it as close to the window as you can. Do not forget that more darkness is better this time of year anyway.
  • Avoid the fireplace. Smoke is bad for the plant. And obviously fire is not great either.

Propagating

A plant on the water.
You can make your own Christmas cactus by rooting leaf segments into a pot filled with soil mix

If your Christmas cactus is in its twenties and has begun to see better days, it might be time to get a new one. Luckily for you, there is no need to buy a new one because you can make one yourself! Grab those leaf segments from before and follow these steps:

  1. Leave the segments out on a dry surface for a few days so that they dry and the tips heal
  2. Assemble a new pot (6 inches in diameter is fine for a now) filled with soil mix. This soil is purposely coarse to allow for plenty of aeration. Here is a list of our favorite and recommended soil mix (Here).
  3. Place three or four leaves in the soil for their old cut stems down. They should all be buried about halfway. Keep a handful to the side in case the leaves in the pot do not take.
  4. Follow normal care. Pay extra attention to humidity.
  5. In about two weeks, growth will occur. Together they will have a brand-new root system.

Where to Buy Your Christmas Cactus

If you do not have a Christmas cactus at all and do not have a way of acquiring a few leaves, you will need to buy one. Before you do, buyer beware: a lot of “holiday cacti” are not actually Christmas cacti. Plenty of companies try to sell the Thanksgiving cactus, which looks similar and is a lot easier to grow, and pretend it is a Christmas cactus. Further troubling is that some people try to sell imitation plants in the place of all holiday cacti! Make sure you are buying from a reputable source like one of the following.

Amazon

Amazon application
Christmas cacti can be purchased on Amazon. Choose a reliable seller to receive an authentic Christmas cactus

We have come a long way from buying our favorite books on Amazon. Believe it or not, Amazon has a huge selection of live plants. The Christmas cactus is no exception. There are a few varieties to choose from, all of which are typically fulfilled locally. If they cannot be fulfilled locally, they are shipped with careful climate-controlled means. Be careful though, as that will probably increase shipping charges. Here are a few ideas:

  • Hirt’s Gardens– $15 is not bad for a plant ready to go and already in a 4 inch pot
  • American Plant Exchange– This is really a larger co-op network of sellers who bid together for simplified pricing. Comes in a larger pot.
  • JM Bamboo– Similar to the Hirt’s Gardens one but better quality and bigger price

Your Hardware Store

You may know your local hardware store as just a good place to buy your favorite gardening tools. While that is true, plenty of them have branched out into floral selections as well. Home Depot and Lowes in particular have vary large gardening sections, often located outdoors, which feature everything you will need to start growing your plant. And of course, the plant itself. Check in to your local store usually around August or September, when the holiday decorations start moving in, and that will typically be when they will have the Christmas cactus in stock. That would be the perfect time to pick it up for your first year, as that is the start of blooming season.

Local Florist

A flower shop.
Commonly, local florists offer Christmas cacti but be aware that they might not have it in stock before September

The most convenient option for many of us is just going to our local florist. Even though they will have a much larger flower selection, they still might not have the Christmas cactus in stock before September. Many people believe certain things should be bought in person, not online, so you can examine quality before you buy. And when it comes to quality, nothing beats buying from your local florist and bringing the plant home that same day.

Cacti for Other Holidays

There are a couple cacti out there for other holidays besides Christmas. There is the Thanksgiving cactus, as previously mentioned, and also the Easter cactus. They are in the family as the Christmas cactus, but have slightly different properties and care practices. Let’s go through those in case you are thinking of keeping the cactus trend going year-round. It is also a good idea to know these things, so you are not bamboozled on your next Christmas cactus purchase.

Thanksgiving

The Thanksgiving cactus is often used as an imitation of Christmas cactus. It is similar in color and appearance. It also is more abundant and therefore cheaper to sell at a markup. However, you will be able to tell the difference.

The Thanksgiving cactus has leaves that are pink and white, not red and white. If you are buying the plant when it has already budded, that will be a dead giveaway. If not, take a look at the leaves. The Thanksgiving cactus leaf has hooked edges, almost like lobster claws. A Christmas cactus should have smaller and smoother edges.

In addition, pay careful attention to the directions. When they tell you to start the budding process in late July or early August, you will know something is up. These plants are designed to blossom a month before the Christmas cactus, in time for Thanksgiving. So naturally they need to start the budding process a month earlier.

Easter

The Easter cactus is a lot different. Although it comes from a similar area in brazil, it is prone to more of a forest environment than a nature one. Also, with its bright pink or even orange colors, there is no way you would get it confused with a Christmas cactus.

As the name suggests, the growth cycle is radically different too, which allows it to bloom in the Spring right around Easter. Caretaking for this plant is similar to the Christmas cactus, just moved later in the year. You will want to start the blooming period back in November if you can, since it might be too cold and too dark during the deep winter. Not enough sunlight at all means more time to get to full bloom. Watering and moisture stay the same. It should also go without saying that the Easter cactus should not be outside during the winter. You can bring outside in the early Spring, weather permitting.

Diseases and How to Avoid Them

Like humans, plants can also become ill. The Christmas cactus, unfortunately, is no exception. The diseases that commonly affect this plant are:

  1. Basal Stem Rot
  2. Botrytis Blight
  3. Impatiens Necrotic Spot Virus

1. Basal Stem Rot

Basal stem rot occurs when fungus builds up around the roots. This may not be outwardly noticeable since you will not see any fungus on the plant or the pot. However, the plant will start to grow slower than it should. If you have other Christmas cacti, it will clearly be smaller than them. It will also start to miss important benchmarks. Even, most critically, the start of blooming season.

How does this happen? Too much water. If you do not overwater, you do not have to worry about basal stem rot. But if it is already happening, you may need to consult an expert.

2. Botrytis Blight

On the other hand, Botrytis Blight is completely noticeable on your Christmas cactus. At first the leaves and flowers will wilt. Then a fuzzy blue fungus will grow. To prevent this, make sure you do not go overboard on the humidity. Keep a close eye on your cactus. If this begins to happen, immediately cut off any infected leaves.

3. Impatiens Necrotic Spot Virus

Like we mentioned before, you should be routinely inspecting for insects on or in your Christmas cactus. Insects, after all, do more than eat your plant. They also carry disease! One infection carried by insects that is perhaps the most detrimental to plants is called Impatiens Necrotic Spot Virus. The symptoms include:

  • Leaves turning purple or off-color
  • Wilting
  • Stunted growth
  • Spots on both the leaves and the flowers

Unfortunately, there is no easy cure to Impatiens Necrotic Spot Virus. Insecticide will not help because the damage is already done. Not to mention the virus usually dives deep into buds and inside stems. The best you can do is cut off the infected area and hope enough of the virus is removed.

4. Phytophthora Root Rot

Phytophthora Root Rot has symptoms very similar to the other diseases. That makes it really hard to diagnose to the untrained eye. Leaves turning yellow will be quite common. However, before you decide to start cutting off stems, cut into the them just a little bit. Take a look at the color. Reddish brown discoloration in the stem is the biggest indicator that the problem in your Christmas cactus is down below in the roots, not the leaves and stems.

Luckily, this problem is quite fixable. It usually occurs from the water not being able to drain properly. Try switching to a thinner pot that allows the soil and roots to dry out faster.

Other Holiday Plants

The Christmas cactus is not the only plant for the holidays. Consider purchases one of the following to fill out the décor of your holiday living room.

Poinsettia

A Poinsettia plant.
Poinsettia is another Christmas plant, which can be used along with a Christmas cactus to decorate the room for the holiday

The poinsettia is the most famous of all Christmas plants with its appropriately green and red colors. Buy a couple of these and place them next to your Christmas cactus for an inspired look. Just make sure you keep them off the floor, as they are dangerous to eat for your dog or cat.

Like the Christmas cactus, take care not to over water your poinsettias either. Also, if you want to keep it for next year, place it in your windowsill and water only occasionally. Pruning can be done liberally, and fertilizer can be given every two weeks.

Cyclamen

A Cyclamen flower.
Cyclamen is a gorgeous flower blossoming for about eight weeks from Thanksgiving through Christmas

The cyclamen has a similar green and red color scheme. However, the bud is decidedly rounder and dainty, for a softer feel. It can also bloom for an impressive eight weeks, which well comfortably take you from right after Thanksgiving through New Year’s Day, if you time it right. They also handle colder temperatures a lot better. Do not put them outside on a frigid day, but you can leave a cyclamen on your balcony well into early December.

Amaryllis

A Amaryllis Flower.
Amaryllis is a mesmerizing flower which can be used to fulfill any type of holiday decor

The Amaryllis is more of a flower than a full plant, but it is pretty nonetheless. These come in all red or all white. There are sometimes ones that produce both color flowers, made by planting both in the same pot of soil. The Amaryllis nicely fills up any leftover space on your holiday display and looks good adjacent to your Christmas cactus.

If you enjoyed the show, you do not have to toss this flower out after New Year’s. Although it may look dead, you can always store the bulb in a cool dark place and replant it next year.

Why Do Cacti Have Spines?

We’ve all seen the pictures of the tall cacti that populate the deserts of the American West. The spines that we see Wile E. Coyote picking from his backside aren’t just there to protect the plant. A cactus spine has several functions.

Why do cacti have spines? A cactus has spines for several different reasons. They are:

  • Reproduction
  • Shade
  • Water Regulation
  • Cooling
  • Protection

The spines are one of the many amazing things that cacti produce. If you are skeptical about the plant or are looking for something to make your desert garden, keep on reading and learn some fantastic properties the cactus has to offer.

What Function Do Cactus Spines Have?

When it comes to all the things that cactus spines can do, you would be shocked. Everyone knows that they keep predators at bay, but did you know they also aid in reproduction? The main functions of cactus spines are:

Top view image of cactus.
Cactus spines bear multiple functions, including reproduction, shading, water regulation, cooling, and protection

Reproduction

Life in the desert is a tough go. The animals that live there make a hard life with little water and even less food. One of the favorite foods of desert animals is the cactus. Animals like the hummingbird and bats are the primary pollinators of the plant. Its skin contains large amounts of water as well. These animals do this at their own peril, because some tiny cacti material can remain lodged in their skin and lead to serious illness or death.

Golden barrel cactus closeup image.
Its skin contains large amounts of water as well.

The spines do a fantastic thing when they are encountered with one of these animals. When they go in for a nice juicy bite of cactus juice, the needles will pierce their skin and remove from the cactus. What they do next is amazing and perpetuates the species. When the barb detaches from the plant, it takes a tiny bit of cactus material with it. As the animal moves, the spine will dislodge and begin to take root where it lands.

Shade

The temps in the desert can reach as high as 130 degrees Fahrenheit. All the plants and animals search for precious shade, which could mean the difference between life and death. An unexpected place that a cactus gets shade is from its spines. As the sun moves, a tiny sliver of shadow protects the essential parts of the stem or trunk.

A cactus spine is tiny and isn’t a place you would think the shade would be abundant. The good thing is that a cactus can have thousands of them, and when they are all closely located, they do an excellent job of being shady. The larger the surface of the cactus, the more spines there will be.

Cacti in a pot.
Cacti get shade from their own spines, preventing the essential parts of the plant from drying out

The giant Saguaro cactus has longer prongs that won’t reach maturity until the plant is over 100 years old. These prongs have a tiny forest of smaller spines at their base that protect the genetic material. This critical spot at the bottom of each prong provides the shade that allows the plant skin to retain water.

You wouldn’t think it, but some cacti have a root system that can spread out over 100ft in search of water. The arms and spines of larger plants will cast shade on the ground that will keep the sun from eroding its waterbed.

Water Regulation

If you live where most cacti live, you would understand how important water can be. A desert receives less than 10 inches of rain a year. That means that if it does rain, it is infrequent, and every drop must be utilized for survival.

Spines on a cactus are inactive, which means that they do not absorb water. What they do is provide an area for tiny particles to be collected and funneled down to the wet skin beneath. Their surface area means that a high percentage of water that does hit the plant gets where it needs to go.

Different kinds of cactus.
Spines keep a cactus hydrated through collecting tiny water particles and transferring them to the plant skin

Cooling

The spines on a cactus keep cooler air closer to the skin of the plant. The temperature is kept cooler, but not free from the heat. It works by making sure that there aren’t large drops or rises in the skin temp. The heat range in the desert can swing more than 70 degrees once the sun goes down. At night, the cactus soaks up cool air and the morning sun turns it into water vapor. Which the plant then uses as a cooling agent or for a drink.

Spines on the cactus act like an extra layer of clothing by shedding or collecting heat. The temps in the desert have a high fall off in degree from the daylight until the moon is up. A shift in temperature could be damaging the plant or even kill it.

Glochids, the tiny hair-like spines at the base of prongs, trap water moisture as it splashes off the large leaves. This splashing creates a far more wet environment that will promote the growth of lush plant skin.

Protection

The legendary sharpness of cactus spines doesn’t need much of an explanation. They provide ample protection from all the plant-eating animals of the desert. That doesn’t mean that animals aren’t relying on the fruit of the cactus. Smaller animals, like mice and rodents, disregard the spines and eat the fruit regardless.

What you might not see are some nasty tiny fibers that could cause infection if not removed. Spines are barbed like fishhooks. When one of them enters the skin of an animal, or you, it creates more debris if it is removed. The remnants aren’t quickly taken care of and will cause a nasty infection if they remain in the skin.

A reptile with cactus behind.
The sharpness of spines protects the cactus from plant-eating animals, especially in the desert

What Is A Cactus Spine?

If you were to call the spines on a cactus prickles or thorns, you’d be wrong. When it comes to thorns, they are just a kind of branch for a smaller plant. A spine is a mutated leaf bud. It grows from the areoles on the surface of the cactus.

When it is mature, a spine shares little or nothing in common with a leaf. Think of it as a fingernail. It grows new material only at the base, and everything else has dead cells. When you talk about spines, it would be a mistake not to also talk about glochids.

Glochids

Growing closer to the surface of the areole are tiny hair-like spines called glochids. The average spine can pierce the skin and lodge deep into your flesh. However, once they are removed, they can be treated like any other wound.

When it comes to glochids, you might not be that lucky. Not only can they pierce your skin, but they will embed themselves so that they cannot be removed. The size of them makes it an impossible task to remove one. Things to look for when treating a possible glochid wound are:

Sabra dermatitis (Prickly-pear contact dermatitis)

Sabra dermatitis is an illness that is associated with glochids from certain fruits. The pickers will have problems with scabies like outbreak that they can’t remember receiving the wound. Sabra can also be caught when the glochids of certain fruits become airborne. Finding tiny cactus spines in your throat sounds like an unpleasant experience.

Once a person has been diagnosed with sabra dermatitis, picking the fruit must come to an end. An ointment or salve, maybe a tiny dosage of antibiotic, is the best way to treat dermatitis. Once the medicines have run their course, around a week, you should be able to return to your normal routine.

A Prickly pear cactus bearing fruits.
Glochids from some cactus fruits can lead to Sabra Dermatitis, which is an irritant contact dermatitis.

Removing Glochidia

If you see pustules and swelling around an area there’s a good chance a tiny sliver of glochid remains. The barbs on the outside of the sliver will root the material there unless you take steps to remove it.

If a tiny sliver of a glochid remains in your skin, you could be in for a world of hurt. The most effective way to remove them is to do it the old fashioned way with tweezers. The tweezer is going to take time and might be painful. A newer approach is to wax them like you would body hair.

Place a bead of wax along the infected area, allow it to dry, and it is party time. This method will also be pretty painful, but much quicker and less effective. You could have to do it a few times to make sure that they are all removed.

The Cacti Of North America

The cactus is an interesting plant that evolved to become a stem succulent. That means that they have developed what was once leaves to process water taken inside the trunk of the cactus. Photosynthesis is the process that plants use to create food and oxygen. When the leaves of the cactus began to evolve out, the stem, or trunk, began to photosynthesize and store water. The root system also saves a decent amount of water, but most storage happens in the trunk.

The leaves have gone away over time to become the beloved spines of recent discussion. They are members of the family Cactaceae with almost 1800 subspecies of cactus. They come in a cast array of sizes and colors. A large portion of these types is found in the Americas from Patagonia to Northern Canada. The most common forms of cactus in North America are:

  1. Echinocereus
  2. Ferocactus
  3. Mammillaria
  4. Opuntia engelmanii
  5. Saguaro
  6. Coryphantha
  7. Triangle cactus

1. Echinocereus

This cactus is very prevalent in the Southwest, with about 70 species residing there. They are long cylinders that have some neat colored spines that can make some fantastic designs. A significant feature of the Echinocereus is its flowers. It has a bright red flower that can be eaten if needed. The flowers are also in bloom for much longer than their cousins.

People often choose this breed for its decorative feel. The skin color, combined with the spines coloration, will add much-needed variety to your garden. It requires a rocky and sunny environment to survive and will have a hard time with wet, cold climates.

2. Ferocactus

A Ferocactus in a pot.
A Ferocactus is a barrel-shaped cactus native to Southwest and Western parts of Mexico

A Ferocactus is a smaller barrel-shaped cactus that is low to the ground and usually forms in clusters. It starts like other cacti, as a long blade, but as they get older, they spread out by creating ribs. Ferocactus is native to the Southwest and Western parts of Mexico. It is a drier climate cactus. It has to have an arid climate but can withstand some severe drop of temps as well.

The incredible innovation of this type of plant is that it shifts to be closer to areas where water can pool or be stagnant. The root system will extend itself towards a constant water source. Also, the plant itself moves by increasing several ribs in the direction of the root system. These ribs extend the barrel shape of the cactus.

3. Mammillaria

A flowering Mammillaria.
Mammillaria can be found throughout the Caribbean as well as in certain parts of Northern South America

This plant is what most people call the pin-cushion cactus. It is the type of cactus that comes in tiny pots and is grown on your windowsill. Mammillaria is the most prevalent species of cactus with over 200 species in this family alone. They grow mostly in Mexico but can be found all over the Caribbean and parts of northern South America.

The explosion of the popularity in this cactus has made locking down all the naming nomenclature an intensive pursuit. For decades, plant nurseries named every cactus Mammillaria. Thereby negating any scientific opinion on the subject. Be cautious when purchasing any cactus that is labeled Mammillaria. If you are going to add a Mammillaria to your garden, be sure that it is the correct species. Not all have flowers, and some never leave the tiny pot stage.

4. Opuntia engelmannii

This cactus is better known by the name Texas Prickly-Pear. It is a long flat blade that has clusters of spines on its face. They are found in the Southwest US and Northern Mexico. That also can bloom with beautiful yellow flowers, which make a nice contrast with their blue-green skin. The blooms are fascinating in that they only live for one 8-hour period from April to May. Making them somewhat of an oddity to be watched as well as tended in the garden.

They are best known for growing in large clusters, some as large as 11 feet high. For generations, the prickly-pear that is produced has been a food staple for many indigenous people in the Southwest.

5. Saguaro

Saguaro is the type of cactus that is most often depicted in the media. It is a tall trunk, usually with a couple of branches. A saguaro can grow to be 40 feet tall and weigh 5000lbs. What makes this type of cactus grow so vast is the gigantic root system that it forms. A root system for a saguaro can grow up to 100 feet in every direction from the cactus base. That’s a tremendous amount of space. But, it could take them as long as 75 years to gain any real size.

After the first year of planting, they are still only 1/4in tall. They also need large amounts of water to reach this size. That is why the largest specimens are reported in Arizona, where they get more rain than their Mexican cousins. The largest Saguaro ever found was 78 feet tall. As large as an average pine tree.

A Saguaro Cactus.
Saguaro cactus

6. Coryphantha

One of the most exciting cacti in the Americas is coryphantha. This plant has a fantastic flower that can range from bright yellow to a deep purple. It grows from the top of the cactus, which makes it more unique than others. Another thing that makes it stick out is that it doesn’t have ribs, but tubercules. This plant is also well known for having a spine grouping that fans out like a large umbrella. It does great at providing shade, which is essential for these arid living plants. The coryphantha has two subgenera and over 50 sub-species.

7. Triangle cactus

It wouldn’t be a list without the most popular cactus in Florida! The home of several gators and snakes also houses one of the most amazing plants in the family. They are also found around the Caribbean and are distinguished by their columnar shape and protruding arms. The triangle cactus can grow to over 20 feet and in a much shorter lifespan than their brother, the Saguaro. They have a distinctive flower that encompasses all shades of white into a vibrant flower, which looks great in any desert garden.

Cactus as Food

Not only are the cacti of the desert an excellent place to search for water, but they are also a decent source of food. A unique way to tell if a cactus is good to eat is by the shape of the leaves. If they are oval-shaped and look like ping pong paddles, they should be good to eat. These types of cactus are called Nopales or Prickly Pear. The meat from the cactus is famous across the Americas and even some locations in Europe.

The texture of the plant is sticky with a middling crunch factor. They are usually canned or made into acitrones, which means they are just candied and stored in syrup. Preparation means that all spines, skin, and areolas are removed from the plant. Some prefer to eat the meat raw, while others will steam it like you would a normal veggie side. It is a versatile plant that can be added to almost any meal with surprising results.

Steamed cactus is one of those condiments that you find out west that blows your mind. It can be added to any meal with eggs or added to a taco. One of the most popular and tasty, sounding dishes comes from Mexico, where they pair it with spicy peppers and corn. A very palatable option is to throw the chunks into a tossed salad in place of cucumber. It will give the dish a refreshing flavor, not unlike guacamole.