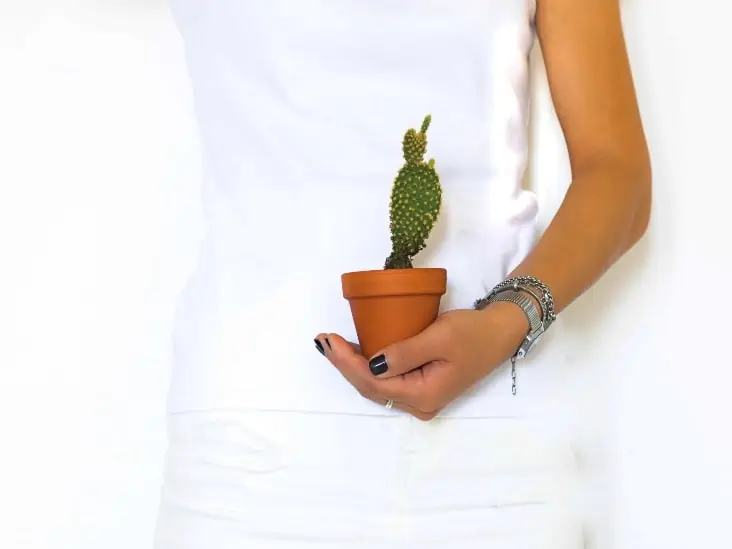
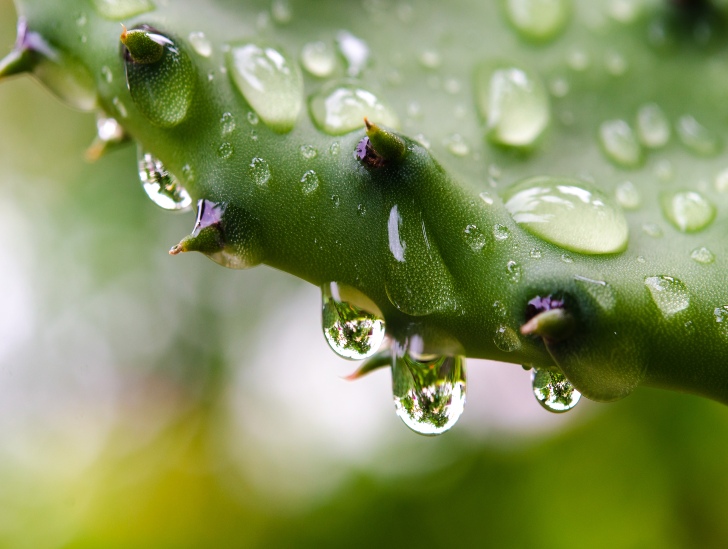
This Is How To Cut And Propagate A Cactus Easily

Cactus is undoubtedly a great addition to your indoor or outdoor garden, thanks to its unique shape, striking sizes, and colorful flowers. Having said this, you may have been prompted to ask, ‘how can I reproduce my cactus?’ Well, the answer is simple; through propagation! Propagation is one of the most effective ways to increase your collection of cacti without spending a penny. All you need to do is learn the best practices in cutting and propagating cactus.

So how do you cut and propagate a cactus? Most cacti species can be propagated through stem, leaf or offshoot cuttings. For species whose stems grown in segments like the Christmas cacti and the prickly pears, individual segments are cut off the main plant before propagation. For offshoot propagation, the sections are cut or snapped from the parent plant before being repotted in a new container.

How to cut and propagate cacti from stem cuttings

Step 1:

Take your cutting from the top of a mature cactus. Ensure you go for a mature and disease-free piece from your cactus. In the case of columnar cacti, go for the thin stem that will root faster.
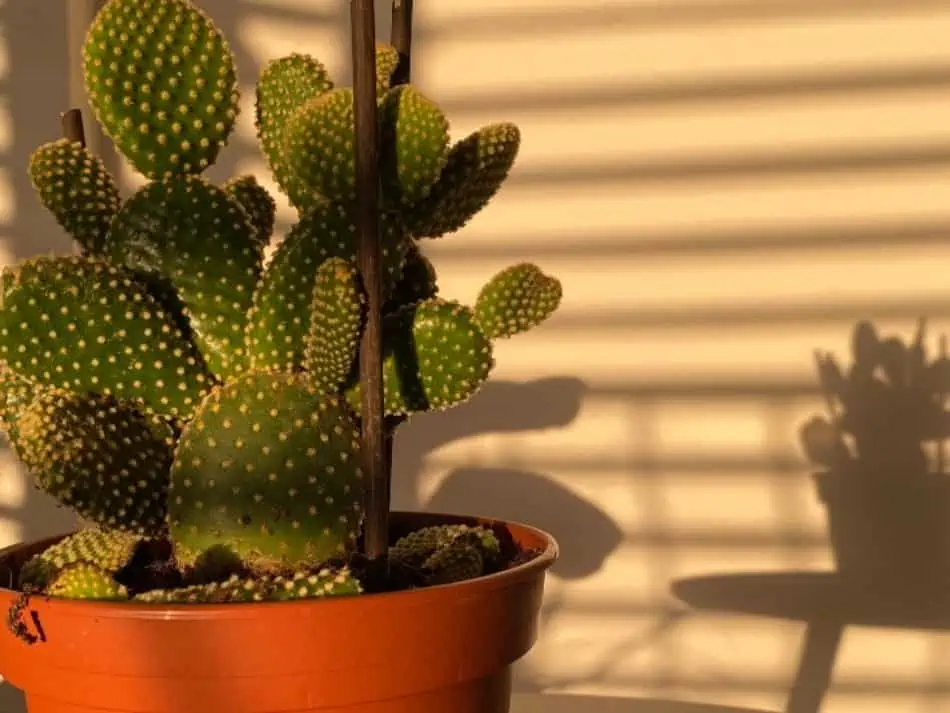
When propagating cactus via stem cuttings, select mature and healthy pieces of the plant.

Step 2:

Cut off the stem just a few inches from the top. Do this using a clean cutting tool to avoid infection risk to both the propagated and parent plants. Ensure the cut is as clean as possible without any traces of dents or crushes.

Let the new cutting rest in the sun for a few days to allow the wound to form a callous.

Step 3:

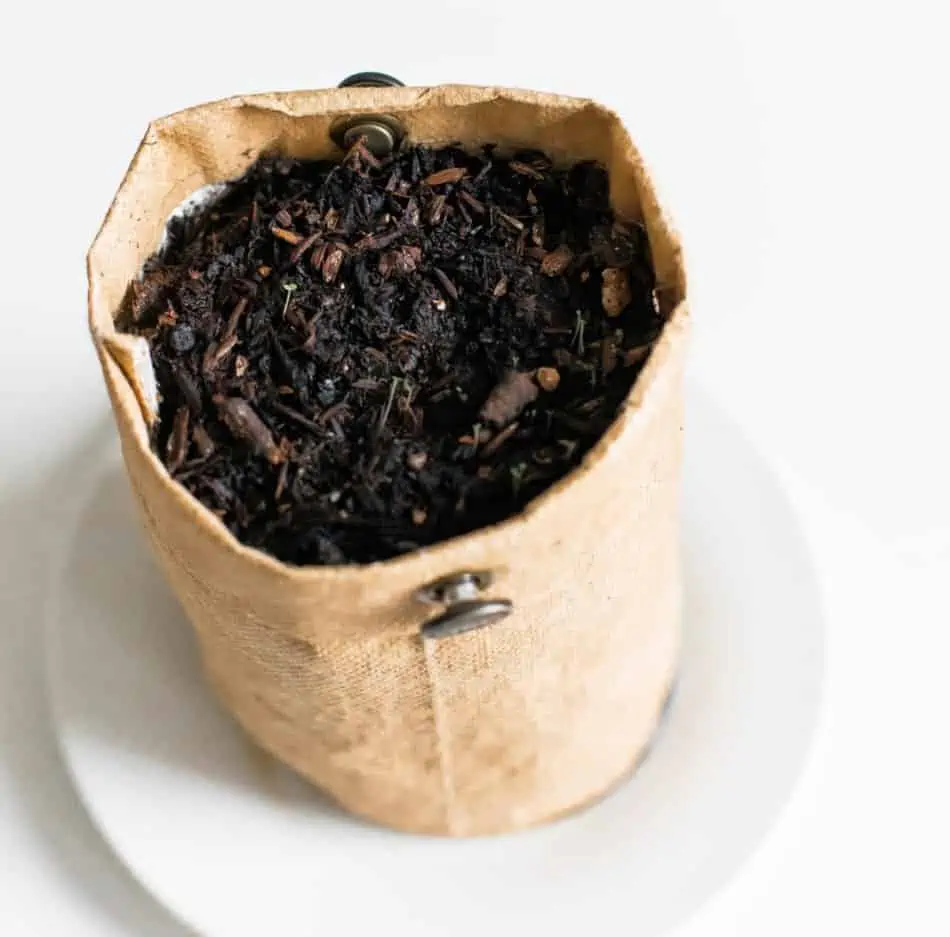
Fill your pot with good potting soil ideal for cactus. This should be a light soil mix that allows proper drainage (Here are our recommended ones).

Step 4:

Once the end of your cutting dries out, stick it upright into the soil mix with the wound end facing down. You may want to dip your cutting in some rooting hormone before planting to help spur root development.
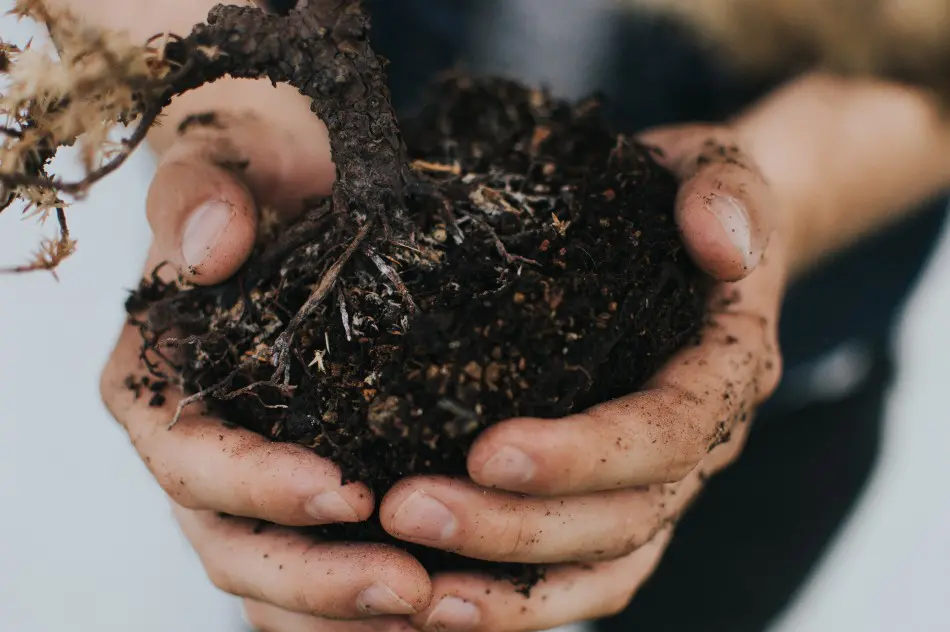
Allow the plant to develop roots before you actually plant it.

Step 5:

Lightly water the soil. Keep doing this every few days to help encourage the development of roots.

By following these steps, your cactus should root within a few weeks. However, the speed of root growth will be dependent on the cactus variety, size of the cutting and efficiency in watering. You can then introduce your new cacti to sunlight to help maintain color and shape. The roots will keep growing, but you may not experience any substantive stem growth within the first year.

How to cut and propagate cactus through crafting

What you will need:

  • The Rootstock and Scion
  • Sharp Knife
  • Electric Tape
  • Rubber bands
  • Heavy Gloves

Grafting is a process where two pieces of plants are blended to produce a stronger hybrid. Here, the top portion (scion) is grafted onto the plant with roots on the ground (rootstock). For cactus, grafting is often preferred for ornamental or colorful species like the moon cactus and the coral cactus.

To propagate ornamental or colorful cactus species like the moon cactus, you should use grafting methods.

Step 1:

Choose a healthy scion and rootstock. The two plants will need to be closely related and similar in size. The more closely related they are, the better the chances of survival and overall development into a healthy plant.

Disinfect your knife by rubbing in alcohol or simply washing with warm soapy water. This helps avoid the introduction of fungal infections and other diseases.

Step 2:

After determining that the diameters are similar, cut the two plants using a sharp knife. You can choose to do a diagonal cut or a v-shaped cut, depending on your preference. Make the cuts as perfect as possible to help create a perfect match.

Step 3:

Place your scion onto the rootstock without leaving any gaps in between. For better chances of survival, ensure that the ring in the middle of the stem, hereby called the vascular cambium, matches up. This part comes in handy to help transport nutrients from the roots to the top of the plant.

Step 4:

Secure your graft by wrapping and electric tape, rubber bands or twine around the grafted area. Keep the grafted cactus in a warm location away from direct sunlight.

Step 5:

Water your cactus cautiously to avoid water getting in contact with the grafted area. With time, the vascular cambiums will match and create a new plant.

Within a few months, the graft should merge successfully, and you can then remove the binding. As a rule of thumb, the rootstock should be a fast-growing plant, while the scion can be a slow-growing variety. Some common cacti species that can be used as scions include trichocereus and Spachianus.

Propagating through offsets/offshoots

Propagation by use of offsets or pups is another popular and effective way to reproduce cactus.  This is especially so for cactus species that produce such offsets. Some cactus species would send out mature offsets to grown on their own while in the wild. However, you can do this personally for your indoor cactus. By removing these offsets, the parent plant focuses more on its strength, health and production of even more offsets. Notably, propagation of cactus through offsets has the highest success rates compared to other methods.

Step 1:

Identify a mature cactus with enough offsets already. You can then pick out offsets that are about 2 inches long. These are healthier and stronger to withstand the new environment and thus grow faster.

Step 2:

Remove the pups from the parent plant by hand. Do this by twisting it a little from the point of connection with the parent. Break it off gently to avoid causing unnecessary tears or cuts. Alternatively, you can use a sharp knife to cut the offset from the parent plant.

Step 3:

Set the offset aside for a few days as you prepare your potting mix and container.

Step 4:

Plant the offset by inserting about a quarter of the stem into the soil and leave it in the shade for a few days. Take care not to water your new plant immediately after planting as this may increase chances of infection attack or rotting. Instead, wait for about 5-7 days to start some light watering regime.

Cutting and propagating cactus through pads

Reproducing cactus by pads is as popular as it is easy if looking to expand your collection. However, not all cactus species can be propagated using pads. Some species do not grow pads and thus propagated by other means already discussed. Follow these steps to propagate your cactus through pads:

Step 1:

Using a pair of tongs, break off a mature pad from the parent plant. Alternatively, you can snap it by hand if you have thick gloves to put on for protection against spikes. This should be a clean job for most cacti species, but if the process proves challenging, you can use a sharp knife to cut off the pad.

To propagate a cactus through its pads, carefully obtain mature pad from the parent plant.

Step 2:

Allow the pad to callous over for a few days before laying it flat on top of your potting soil. Soak the soil as you would when watering your other cactus. Do this regularly by ensuring the soil remains moist but not too dump. This helps spur root growth, and in no time, your plant will hold on to the soil and growth into a strong, healthy plant.

How to root a broken piece of cactus

As much as we can propagate most cactus varieties through cuttings when the need arises, sometimes accidents may occur, and a cactus breaks off from the mother plant.  In such a case, the best course of action would be to find a way to turn the broken piece or cactus cutting into a new plant. A cactus will root much easily when the right conditions are met. The following are some vital steps you can take to root a broken cactus.

Step 1:

Get a sharp knife and disinfect it with alcohol or soap and warm water. This should come in handy to avoid the risk and spreading diseases to the new and existing plants.

Step 2:

Carefully inspect the broken piece. If you notice any jagged or uneven part, cut it off with your knife. Jagged cuts tend to rot off easily, thus making rooting a challenge.

Step 3:

Set your piece aside for some time to heal and callous over. The time taken for this to happen will highly depend on the size and variety of your cactus. The weather conditions will also contribute to the same, and this may anywhere from a couple of days to even weeks. The piece should be kept in a bright spot but should not face direct sunlight.

Step 4:

Prepare your pot by filling it with the right potting soil for cactus. Your pot should have proper drainage holes to help drain any excess water during your watering regimes.

Step 5:

Deep your cutting in rooting hormone to help catalyze the development of roots. This step is, however, optional.

Step 6:

Plant your piece by inserting the broken, dried end into your potting mix. The piece should get in about a third into the soil. Keep the piece erect and pack some soil around to secure it. You can then place your pot in a bright area but avoid direct sunlight.

Step 7:

Do not water your new plant immediately. Give it a timeline of about 2 to 4 weeks. Once the soil is completely dry, you may start your watering regime.

Step 8:

As the roots start to form, introduce your plant to sunlight, albeit in bits. Roots should form within two to six weeks. To check for root development, try pulling the plant gently. If you feel some resistance, then it is a sign that roots are already developed. Increase the intensity of sunlight as the roots develop even further.

When not to propagate a cactus

Cacti have become popular in homes and gardens thanks to their ease of propagation.  Even for a beginner, rooting and propagating a cactus should be a walk in the park as long as you follow the basic guidelines.

This said, it is not always that you can propagate a cactus. There are certain conditions and seasons under which it may not be a good idea to cut or propagate your cactus. To increase the success of your propagation, avoid these conditions and seasons:

During a Heatwave

During a heatwave, most plants are usually stressed up and would be focusing on survival. As such, they may not be in the best condition to multiply. The plant will face many challenges to develop new roots due to the stress at this point. As such, it pays to be patient until the heatwave passes or a milder condition sets it.
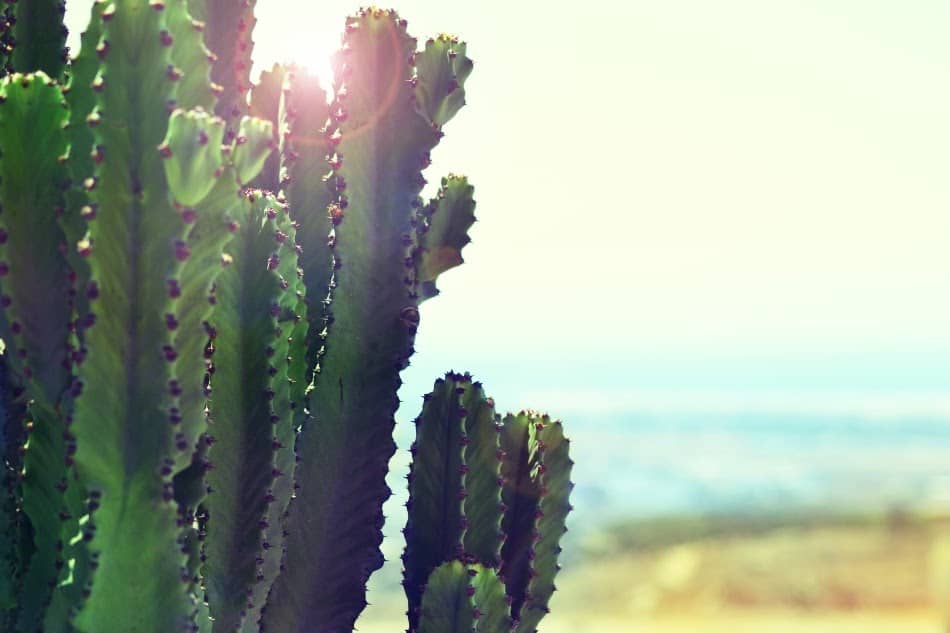
When grown outdoors, avoid propagating your cacti during a heatwave.

However, in cases where your cacti are kept indoors, the heatwave may not be too harsh compared to the outside environment. In such cases, you may consider propagating from the comfort of your room. Alternatively, you can keep your cactus in a temperature-controlled environment away from the effects of the heatwave experienced outdoors.

During freezing temperatures

During winter, cacti go dormant thanks to the frost and freezing temperatures. As such, they will not be actively growing until the conditions are right. This will not be the best time to propagate your cactus due to the slow growth experienced. With slow growth comes the risk of rot and attack by diseases.

In winter or during freezing temperatures, you should not cut, prune, or propagate your cactus plants.

Additionally, this is not the best time to cut or prune your cactus as it will face a hard time trying to grow back and thrive. This is also the reason it is not advisable to fertilize or feed your cactus in any way during the cold season.

Factors to consider when propagating a cactus

  • Always ensure that you get your cutting, pads or offsets from a healthy plant. This should help improve the success of your propagation and led to a healthy, thriving new plant.
  • Water your main plant a few days before you take out its cuttings. This will ensure that the cuttings are well fed and not flaccid. Flaccid cuttings may not root as easily, and some never do.
  • Always ensure you take out the cuttings, offsets or pads from different parts of the plant. This helps retain the shape and overall look of the parent plant.
  • Ensure your cuts are clean, devoid of any jagged parts. Slight tears on the cutting decrease the chances of the plant ever developing roots.
  • Always wear heavy hand gloves when breaking off your offsets or pads from the parent plant. This helps avoid injuries from cactus spines.

Can Cacti be propagated from seed?

Talk of cactus propagation, and what comes to mind immediately is cuttings, pads and offsets. So can cactus be grown from seeds? The fact is, as much as this may not be a popular form of propagating cactus, some varieties do well when grown from seeds.

Unlike propagation from cuttings, the success rate of using seeds for cactus is lower, and the plant may take much longer to grow and mature. Nevertheless, using seedlings is an ideal way to grow rare cacti species that may not do well with propagation from cuttings or those that do not produce pups of offsets.
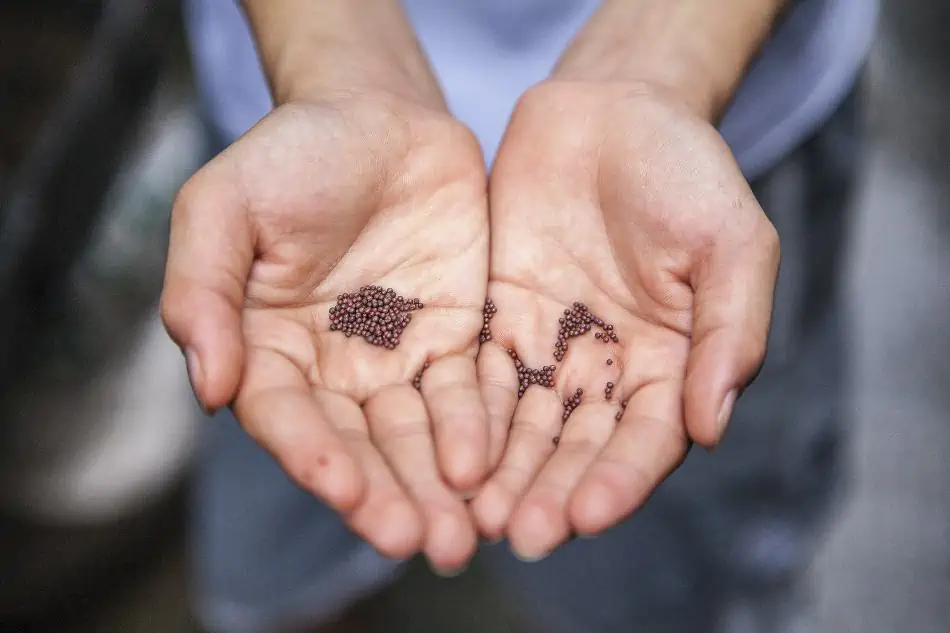
The best season to grow a cactus from seeds is early spring.

The best thing about growing cacti from seeds is that they get acquainted with the climatic conditions from day one. This helps in adaptation to the region and will thus grow much healthier.

Notably, some cacti species can produce seeds through self-pollination. These include such species as mammillaria, Echinocacti and Cereus. However, some cacti species may need some help for pollination to happen. This can be done by shaking the stamens to enable pollen to get into the pestle.

While most cacti species would flower, few end up producing seeds due to challenges in pollination.

When growing cacti through seeds, take the following into consideration:

  • Cacti seeds perform best when sown in early spring
  • Cacti seeds can be pretty tiny, and there are chances of losing a good number. To avoid this, use a white cloth or other material when working on them for better visibility.
  • The best way to find good quality cacti seeds is by buying them from certified dealers. However, you can also collect them from fruits if working on a tight budget.

Propagation of cactus cannot be possible without the right tools and expertise. It all starts with mastering the art of cutting the pieces into ready specimens for planting.  Whether you are looking to propagate your cactus through cuttings, pads or offsets, always set the piece aside to callous over before planting. This helps improve the chances, speed and rate of rooting.

The option you choose when propagating your cactus will be largely dependent on the cactus variety and its age. Ensure you have the right information about your cactus species before cutting or propagating the plant.

How to Grow a Bunny Ears Cactus?

The Bunny Ears cactus (Opuntia Microdasys) is a popular cactus species native to Mexico.  This low-maintenance succulent has grown to become a favorite for ornamental plant enthusiasts, thanks to its cute, rabbit-ear-shaped pads. If you are looking for an ideal cactus species for your desert, xeriscape or rock gardens, Bunny Ears cactus got you covered. What’s more, they also make good indoor plants and are neglect resistant, thus ideal for the busy folk or those who travel frequently. The success in growing this prickly companion, however, lies in its care. It is important to understand how best to grow and care for the cactus from infancy to a full-grown cactus.

So, how do you grow a Bunny Ears cactus? Bunny Ears cactus is mostly propagated through its pads. The pad is potted using a good cactus mix that includes 40 percent sand, 40 percent potting soil and 20 percent peat moss. The plant needs consistent moisture, low humidity and plenty of light during its growing season. Fertilization should be done every other water period, and repotting should be done every 1 or 2 years.

This article will be looking at how best you can grow and care for the Bunny Ears cactus. It will be expounding on growth factors like propagation, potting and repotting, fertilization, watering, lighting and pest control.

Basic features of the Bunny Ears cactus

  • Bunny Ears comes from the Opuntia genus that majorly contains flat cacti species. The genus is one of the most popular and widespread across the U.S.
  • The cactus grows in a shrubby form and may reach heights of 40 to 60 centimeters.
  • Bunny Ears has no defined central stem but rather bears individual segments in the form of oval-shaped pads. From these pads form additional segments that always grow in pairs.
  • The cactus stands out with its paired succulent stems that grow up to 15 centimeters long and 12 centimeters wide.
  • The cactus features some distinctive whitish-yellow prickles, otherwise called glochids. These are hair-like spines rarely seen in other cactus species. These hairs grow in clusters and are more sensitive than human hair.
  • Bunny Ears cacti have close relatives in O.Rufida cactus that features reddish-brown glochids. In fact, they are treated as the same species in some quarters.
  • When well cared for, the cacti blooms around the summer from June to July. Their flowers measures about 5 centimeters in width.
A Bunny Ears Cactus grows up to 40-60 centimeters in height and produces gorgeous flowers from June to July.

Potting and repotting

Bunny Ears cactus will do best in some well-draining sandy soil. For better results, look for a clay pot with drainage holes that help drain excess water. Fill this pot with good cacti potting soil. For potting soil, you may decide to go for the commercial, pre-packaged version or create your own soil mix at home.  

In case you decide to make your soil mix, ensure that it includes 40 percent sand, 40 percent potting soil and 20 percent peat moss. This would help improve aeration around the plant’s root system and prevent the soil from getting too soggy. Whatever the case, always ensure that the soils used do not pose any risk of water clogging as this may lead to root rot for the cactus.

To grow a healthy Bunny Ears Cactus, select a clay pot with enough drainage holes to get rid of excess water.

Bunny Ears may be slow-growing but will develop an extensive root system with time. As such, it is recommended that you repot the cactus every 1 to 2 years. The best time to do this is during the summer, just after the blooming period ends.

When repotting, always ensure that your container of choice is at least 2 to 5 centimeters larger than the previous pot. Too big a container, and you run the risk of water clogging that leads to root rot.

The Bunny Ears cactus needs close attention during the first year of its repotting as this is the most vulnerable phase. This would involve regular watering to help spur healthy root development. Such close inspection also helps ensure that no pests attack the plant at this stage.

Special care for specific seasons

Bunny care requires specific care and attention during each season.  Failure to follow the right regime for these seasons may result in your plant experiencing growth challenges and may fail to bloom. Here are some important care tips for each season:

Spring, summer and Fall

Bunny Ears is actively growing during these warmer months and would take advantage of full light and average temperatures of about 80 degrees Fahrenheit. Keep the soil moist during these seasons, but just enough to avoid excess water that may lead to root rot. You can only add water once the soil feels dry to your touch. With these in place, your prickly companion will flower in early summer with bright yellow blooms.

To grow a healthy Bunny Ears Cactus, keep the soil moist during warmer months of the year.

Winter

Bunny Ears cactus enters some semi-dormant mode during winter. As such, you may not need to do much in terms of fertilization or watering. During this period, strive to offer a controlled climate that resembles that of its natural habitat.

As the fall season comes to an end, relocate your cactus to an area with lower temperatures of about 50 degrees Fahrenheit. This should be away from any heating vents or radiators. Ensure that the plant does not experience any light. While in this location, the plant may exhibit some unusual coloring by turning light grey. However, this should not be much of a worry as this dormant state is a vital part of the plant’s growth and sustainability.

Watering

Just like any other desert plant, the Bunny Ears cactus does not need much water but just enough to improve nutrient uptake and keep the plant healthy. While in its natural habitat, Bunny Ears adopts a shallow root system to help tap on the little rainwater that comes by once in a while.

During its initial stages, extra care should be taken as the plant adapts to its new environment. Once they develop an extensive root system, watering should be done sparingly as they can tolerate long periods of dry weather. This is what makes the Bunny Ears a favorite choice for busy individuals or those that travel frequently.

However, just the right watering will help encourage blooming and improves the plant’s overall health. As a rule of thumb, water the cactus once the first inch of soil feels dry to the touch.

Since a Bunny Ears Cactus can withstand dry climate, it should be watered only when the first inch of soil is dry.

For better results when watering, you may decide to use a tray under the pot to help drain out any excess water. During the winter, you may not need to do any watering but make sure you start the watering regime as soon as the spring season starts. Between Spring and Fall, the plant is actively growing and will need enough water to stimulate nutrient uptake.

Take care not to overdo your watering as this may result in root rot or worse still, the pad tips withering out.

Propagation

So you finally have a full-grown Bunny Ears cactus and wishing that you had multiples of the same? Well, the good news is you do not need to go back to your favorite arborist or rush to buying other specimens. Instead, you can easily and conveniently propagate your cactus through its flatty pads.

The best time to propagate the Bunny Ears cactus (and any other cactus, for that matter) is during the early summer.  Once the bunny cactus is fully mature, it produces multiple healthy pads that you can easily detach from the mother plant.

However, caution should be exercised during this process as the cactus can be very clingy to the skin, thanks to its glochids. Always ensure that you wear thick gloves to avoid the risk of injuries from pricks to the skin. Alternatively, you may use a pair of tweezers to break the pads off.

Bunny Ears Cactus can be easily propagated through its pads.

During propagation, group the cacti cuttings in at least three pads. Let the cuttings callus for a few days before planting. You can then remove the baby stems before planting the pads in ideal pots with fresh cacti soil mix.

Bury the cutting about 2.5 centimeters deep and place your pot in a well-lit location. This is an ideal depth, deep enough to offer the right support and shallow enough to let roots develop without the risk of rotting.

In some cases, you may see the need to dip your pads in rooting hormone before planting.  This practice helps catalyze the propagation and rooting process.

Temperatures and lighting

Being a desert plant, Bunny Ears cactus thrives in slightly higher temperatures. It prefers temperatures that range between 21 and 37°C. During the winter season, however, the cactus prefers much cooler temperatures.

Bunny Ears cactus is known to drain any excess water just before winter kicks in. The practice helps it avoid freezing during the cold months. This explains why watering during this period can be detrimental to the health of the plant.

From late Fall, the cactus should be exposed to temperatures that range between 10 to 18°C.

Following these strict temperature specifications is vital for the plant’s survival as anything contrary could mean serious harm to the cactus’ overall health. As such, you may need to keep changing locations of the plant depending on the season to help keep it at the optimum recommended temperature ranges.

Although Bunny Ears Cactus grows healthy in sufficient lighting, you should avoid exposing the plant to direct sunlight.

The Bunny Ears is one of the cactus species that prefer sufficient lighting. This may not be much of a problem if you are growing in the garden or outdoors. However, when growing indoors, you may need to mind your positioning.

Place your cactus in a south-facing, unobstructed window but should not get in contact with direct sunlight. West-facing and East-facing windows are also viable choices to position your Bunny Ears. If natural light is hard to come by, you may see the need to use grow lights for the same.  Regardless of the season, Bunny Ears thrives best with a humidity of between 10 to 30 percent.

Fertilization

Contrary to popular opinion that desert cactus like the Bunny Ears do not require fertilizer, these prickly companions will fare much better with the right fertilization. Liquid houseplant fertilizer with an NPK ratio of 20-20-20 works best for this type of cactus.

The fertilizer should, however, be diluted to at least half of its recommended strength.  This is because Bunny Ears cactus cannot withstand a high concentration of NPK. If you are more focused on seeing the cactus bloom, you may need to use 5-10-10 fertilizer.

Whatever the case, always ensure that you fertilize the cactus during its active season, preferably during the summer. Take caution not to overdo the fertilization as this may mean an abnormally rapid growth. This stimulated growth usually leads to misshaped and weak pads. Do not fertilize newly potted Bunny Ears cactus until it develops a strong root network.

The best fertilizer for Bunny Ears Cactus is the liquid houseplant fertilizer with an NPK ratio of 20-20-20.

Proper fertilization of the Bunny Ears cactus leads to a healthy plant and promotes the likelihood of the plant flowering. A happy bunny cactus has more chances to bloom and develop healthy fruits compared to a neglected one. If you are too busy or travel frequently, create an ideal timetable as a reminder. Alternatively, you can find someone to take over when you are not around.

Pest control

Bunny Ears cactus occasionally faces attacks from several pests. These include:

Mealybugs – these create some white patches on the cactus’ pads, giving it an unappealing look.

Scale Insects – they cause a brown cab effect on the cactus’ pads

Getting rid of these pests on the Bunny Ears cactus can be tricky thanks to its glochids that easily attach to the skin. For more efficient control, use a pair of thick gloves to handle the plant. You can then dip some cotton swabs into 70% isopropyl rubbing alcohol and dab the pests. Repeat the process after a week, depending on the extent of damage to the plant.

Flowering Season

Bunny Ears cactus may flower at any time when it deems conditions right. However, it is known to start budding in late spring. Once the segment is fully formed, budding would start at the tip.  It then goes on to blossom into 2-inch wide flowers.

The Bunny Ears cactus produces creamy yellow flowers that go ahead to fade into peach as soon as they are fertilized. The flowers would later turn into some 2-inch long fruits that may vary in color ranging from red to purple. Notably, Bunny Ears cactus is a good bloomer and bloom encouragement may not be necessary.

Apart from the edible stem, the Bunny Ears cactus produces edible fruits. The fruits can be eaten raw or cooked on the BBQ. This was one of the main sources of food for natives in times gone by. Considering its prickly nature, you may need to be extra careful when harvesting the fruits. Ensure you have thick protective gear in your hands before harvesting the fruit.

FAQs on the Bunny Ears cactus

Q. Is Bunny Ears cactus poisonous to pets?

Bunny Ears stem, flowers and fruits are non-toxic and thus safe when placed around pets. However, it would be noted that the cactus has glochids that may be irritating when it comes to contact with the skin. As such, you may find it prudent to place it in positions out of reach for curious pets and children.

Q. Why is my bunny years stunted?

Bunny Ears cactus may experience student growth or poor health as a result of overwatering or under-watering. In some cases, this may lead to the plant drying out end eventually dying.

Q. Why the name Bunny Ears cactus?

If you look closely, the cactus sprouts a pair of segments at the end of each tip. These segments resemble a bunny’s ears, thus the nickname.

Q. Why is my Bunny Ears falling over?

The most common cause of bunny years falling over is overwatering. Once the soil around the cactus becomes too soggy, its roots rot and become too weak to support the plant.

Q. What causes brown patches on my Bunny Ears cactus?

Brown patches on the pads of the Bunny Ears cactus can be a result f several factors. It may be a case of pest infestation as the pests love drawing the sap from the cactus. A drop in temperatures and overwatering may also lead to brown patches.

Conclusion

With the right care, Bunny Ears cactus can be an excellent choice for any cactus enthusiast. The good thing about the Bunny Ears cactus is that it can withstand neglect. As long as they are exposed to enough sunlight and placed in a warm environment, you are good to go. Occasional fertilizing and regular watering helps keep the plant healthy and encourages blooming at the right time.

When working with Bunny Ears cactus, always ensure that you repot them once they are ripe for the same. This not only keeps it healthy but also encourages the production of tiny pads that can then be used during propagation.

Bunny Ears cactus is as captivating to grow as they are to look. It makes just the perfect addition to your indoors, thanks to its bunny appearance. The next time you come across it, you may consider trying it out for your indoors or, better still, your desert garden.

What Is The Best Fertilizer For Your Cactus?

Cacti are desert plants adapted to survive in arid and semi-arid conditions. In most cases, these areas are low on nutrients. Based on this fact, there is a classic misconception that cactus does not need any fertilizer when grown at home. Nothing could be further from the truth. As much as cactus is known to grow in areas with limited nutrients and water, it needs a little fertilizer to keep it healthier, stronger and better bloomers. However, cactus is notably selective when it comes to fertilization. There are specific characteristics that make up a good choice of fertilizer for cacti.

So, what is the best fertilizer for cacti? While a cactus does not need a specific blend of fertilizer, it requires preferably organic, low on NPK, containing humic acids and beneficial soil microbes like mycorrhizae and probiotics. It should also be slow release and higher in phosphorous than nitrogen.

This article will be looking at the best fertilizer for cacti regarding their characteristics, importance, and how best to apply. It will be looking at the various options available, application frequency, and soil compatibility.

Before we start, here is a list of our favorite and recommended Fertilizer (Here)

Importance of fertilizer on cactus

As a cacti enthusiast, you would already know that this succulent will thrive with the right temperatures, air, water, and soil, but is that all? Once in a while, you may stumble upon some talk about fertilizer.  Does your cactus need fertilizer? This may not be a simple question to answer because while research shows most cacti would survive in the barren deserts, the same cannot be said about indoor or garden cactus. You want your cactus to remain healthy, strong and glowing. This is where the importance of fertilizer comes in.

To ensure your cactus grows healthy and produces gorgeous flowers, consider using a fertilizer if needed.

A good fertilizer is the much-needed confidence booster for your plant to bloom and flower better and deal with other environmental stresses much easily. Cactus fertilizer can be administered by mixing it into the soil, top dressing, or liquid form.

Importance of NPK fertilizer on cactus

Cactus plants need a balanced blend of NPK  to help promote the growth of the plant. As such, nitrogen, potassium, and phosphorous come in handy. Nitrogen helps cactus plants grow healthier and more robust.  This means brighter colors and brighter, larger, fuller leaves. This, in turn, prolongs the plant’s life.

 Potassium, on the other hand, works best for flowering cactus as it encourages better blooms and eventually improved fruit production. Finally phosphorous helps cactus plants fight diseases and remain healthy throughout their lifetime. Notably, cactus is not affected much by diseases while in its natural habitat, but potted plant tends to be susceptible to diseases and pests.

Balancing the right amount of fertilizer for cactus

Getting the right fertilizer is one thing but understanding the right balance in terms of application is a different ball game altogether. Remember, it is not much about frequency or the amount but more about doing it right.

While over-fertilization can lead to quick growth of weak stems, under-fertilization can cause nutrition deficiencies.

Succulents are known to hold on to a good amount of dissolved nutrients. As such, the risk of over-fertilization is imminent. Too much in terms of nutrient boost and the plant will grow too quickly, thus leading to some stringy cacti getting weak on the stems. On the other hand, under-fertilization could also mean your cactus run the risk of facing nutrition deficiencies.  Based on this, it is advisable that you fully study your cacti type and determine the best way to fertilize for better growth. This may call for the services of an experienced arborist.

Why do cactus prefer organic fertilizer

As already established, a cactus needs fertilizer with lower doses of NPK. Based on this, organic fertilizer will work best because it contains lower doses of NPK. What’s more, nutrients from organic fertilizers stay much longer in the soil. This gives enough time for the fertilizer to work symbiotically with the soil to better feed the plant. Organic fertilizer also offers your cacti some beneficial compounds that can be taken up by the plant much naturally as needed by the plant.

Typically, cacti plants prefer organic fertilizers since they can easily absorb the right amount of nutrients.

The slow absorption of organic fertilizer by cacti plants means that the plant takes in just the right amounts of nutrients at a time. This prevents the plant from being overwhelmed or chocked as would usually be seen in some cases of chemical fertilizers. What’s more, organic fertilizers encourage the development of living soil microbes that help break down the plant’s nutrients for better absorption.

Importance of Humic Acid, Probiotics and Mycorrhizae in cactus fertilizers

Cactus need simple organic compounds for their nutritional needs. In this regard, humic acid comes in handy to act as chelators that break down minerals into simple organic compounds. This ensures easier availability of such compounds for the nutritional needs of your cactus. Additionally, humic acid also ensures that unwanted toxins in the soil are neutralized and do not get absorbed by the plant.

Probiotics and Mycorrhizae, on the other hand, help ensure that the soil remains ‘alive.’ Over time, it improves the soil’s nutrient content and its ability to keep plant growth for much longer. This symbiotic relationship helps keep the soil improving over time. Considering that cactus live longer, this comes in handy.

Probiotics not only benefit humans’ digestive system but also help the soil maintain the nutrient content.

However, as a word of caution, do not use fertilizer meant for lawn care on your cactus. As much as they may contain the same composition, these have high nitrogen content that can be detrimental to your cactus. The high nitrogen content speeds up vegetative growth, and this is counterproductive when applied to cactus plants.

Top 6 Best Fertilizers for Your Cacti

1.      Compost manure

Compost manure is as natural as Mother Nature can get. Compost manure from grazing animals like goats, sheep, horses, and cows have been proven to be the best fertilizer for cactus. This type of fertilizer is slow to break down and stays longer in the soil thus keeping the plant healthier and more productive for longer.

Compost manure from goats, sheep, horses, and cows is the most effective fertilizer for both outdoor and indoor cacti.

Compost manure is ideal for outdoor cactus owing to its strong lingering smell.  However, it can still work for indoor plants that do not need frequent attention with just the right mix. This fertilizer works by releasing beneficial carbon content, revitalizing the soil composition, and improving aeration for better plant growth.

2.      Dr. Earth Premium Gold Pure & Natural Fertilizer

With just the right balance of NPK, Dr. Earth Dr. Earth Premium Gold Pure & Natural Fertilizer proves to be the best option for your cactus. This is especially so in cases where you notice your plants changing color. With a concentration of 10-10-10, the fertilizer works its magic to improve the health of leaves, fight diseases, improve root growth, and encourage better blooms.

When mixing this fertilizer, practice much caution to ensure that it is not too concentrated. Too much of the same, and you run the risk of burning up the roots and eventually killing the plant. For better results, apply this fertilizer by mixing it with water during watering. One teaspoonful of the fertilizer will work with one gallon of water.

3.      Organic Worms

Are you looking into going fully organic with your cactus fertilizer? Then it may be time to get yourself some wiggly worms. Organic worms are known to release some nutrient-rich waste in the form of castings beneficial to your cactus. These worms can be bred in small containers and fed on vegetable waste.

As these earthworms eat away, they, in turn, excrete waste that helps enrich the soil around. With time, they will multiply and release enough casting to help improve the soil’s organic matter. Worms are known to release up to 60 different nutrients that include calcium, carbon, magnesium, nitrogen, and much more. You can apply worm castings by working into the soil, side dressing or top dressing.

Fully organic fertilizers usually consist of worms that promote the production of nutrient-rich waste and balance the pH in the soil.

Worm castings come in handy to help balance the soil’s pH, thus making it easier for your cacti to absorb all the much-needed nutrients. For better results, ensure that you mix your worm castings with soil during potting.

4.      Grow Better Organic Cactus & Succulent Fertilizer

Your cactus needs enough food for an extended period. As such, you need just the right slow-release fertilizer for this cause. Grow Better Organic Cactus & Succulent Fertilizer is the best choice in this case as it takes at least two months to release all its nutrients. This means a longer time for your cactus to receive enough nutrients. This keeps the cactus healthy and productive all through its growth period.

Grow Better Organic Cactus & Succulent Fertilizer works for both indoor and outdoor cactus. What’s more, it blends well with a variety of soil types. You can choose to apply by either adding to your top dressing or mixing it when making your potting soil.

5.      Miracle-Gro Succulent Plant Food

Miracle-Gro Succulent Plant Food is a liquid-based fertilizer that helps give your cacti a healthy boost. Cactus love liquid fertilizer as it seeps deep into the soil much faster to offer the much need nutrition to the thirsty roots. In cases where your cacti portray signs of being a little under the weather, Miracle-Gro Succulent Plant Food steps in to improve its nutrient uptake and offer the plant the much-needed strength.

Since the fertilizer comes concentrated, it helps offer an instant boost to weak plants and restores them to their healthy ways in record time. When using Miracle-Gro Succulent Plant Food, make sure that you read its instructions carefully as the wrong portions could be detrimental to your cactus.

 You can choose to apply the fertilizer directly to the soil or, better still, mix it with water and include it in your watering regime.  The frequency of application may vary based on the season and weather conditions but once a week is the recommended frequency to help keep the cacti vibrant.

6.      Authentic Haven Brand Manure Tea

If you prefer going organic for your fertilizer, then you may be tempted to create your own manure tea. While this may be possible, it may call for enough expertise, time and resources to make it a reality. Based on this fact, you are better off going for a tried and tested option in the name of Authentic Haven Brand Manure Tea. This cactus fertilizer has been expertly balanced to ensure that it works best for your succulents without the risk of burns to the roots.

Using manure tea as a fertilizer for your cactus will help the plant grow healthy and prevent the burns of its roots.

Preparation for this type of manure is similar to that of your regular cup of tea. Steep your manure tea into some water to help tap into the nutrients.  Let it sit in the water for more than 24 hours. The result will be some dark brown water. You can then use this solution on your plants once the soil is dry. The manure tea, just like a teabag, can be used a second time. For the second time, however, you will need to steep a while longer than the first.

The best option for manure tea comes from horse and cow manure. This is closely followed by goat and sheep manure.  However, manure from pigs and chicken may not be ideal, thanks to their high nitrogen concentration. You may opt to make your own fresh-cured manure or go for the ready-made manure tea bags.

Here is a list of our favorite and recommended Fertilizer (Here)

Best Season to apply cactus fertilizer

You may have the best fertilizer, but if you do not understand the right timing for application, this will be all in vain. When planning to fertilize your cactus, keep in mind the weather conditions and growth progress of the cactus. Usually, cacti experience slow growth during the winter, which may not be the best time to apply fertilizer.

Fertilization of cactus should be done when the plant is growing actively. Doing so will help deter toxic salts from multiplying in the soil. This is, preferably, during the summer months.  However, if you are using true organic fertilizer like compost manure, you may need to worry too much about timing as these can remain in the soil much longer and will only be sued by the plant when the need arises.

How ideal are chemical fertilizers for cactus?

While chemical or inorganic fertilizer could be an option when seeking cactus fertilizer, its application can be tricky. To start with, chemical fertilizers are made from fast-acting, unnatural elements, and procedures. This gives it the ability to feed the plant directly with high supplement concentration for rapid nutrition. While this can be advantageous to other types of plants, the same cannot be said about cactus. Being a plant adapted for arid areas with limited nutrients, cactus is not accustomed to rapid intake of nutrients. As such, inorganic fertilizer may lead to the plant getting overwhelmed and shocked.

If you have to use chemical fertilizers for cactus, it is recommended that you dilute the same to the right proportions. The dilution ratio may differ depending on the type of soil, size and type of cactus in question. As such, you may need the services of an experienced arborist to complete this feat.

Consideration when using cactus fertilizer

Cacti and succulents, in general, are specific on the type of fertilizer and soil needed to remain healthy and flourishing. However, you would also appreciate the fact that this specification may differ from species to species. For better fertilization, it is important to keep in mind the following factors in relation to soil and type of fertilizer:

Well-draining  – For success in your fertilization endeavor, it is prudent to make sure the soil in question is well-draining. When potting your cactus, ensure that the potting mix contains lighter material like gravel, sand, and such other small but hard matter. These are well suited for cactus since they are not tightly packed and thus allow room for both water and fertilizer to filter through and feed the plant in the right portions. In the case of excess water, the soil can easily drain off to avoid cases of root rot.

Balanced nutrition – since cactus requires a balanced combination of nitrogen, phosphorus, and potassium, it is crucial to ensure the fertilizer you go for adhere to the right ratios. Nitrogen is the most important element among these, and so getting fertilizer and soil with just the right amounts of nitrogen is a win for cactus growth.

Neutral pH – Soil pH is an important factor when determining the right fertilizer for your cactus. Ensure that your potting mix has a neutral pH. This should be anywhere between 6 and 8 on the pH scale.

Cactus is one of the most resilient plants that can withstand the harshest of weather. This makes them low maintenance even when grown at home. This is especially so in terms of watering and fertilization. Cactus does not need a specific blend of fertilizer but will thrive best on organic fertilizer made with low NPK. While chemical fertilizer can still be used on cactus, it is not recommended if you do not understand the right proportions, thanks to its high concentration of NPK.

Hope you enjoy this article, here is a list of our favorite and recommended Fertilizer (Here)

Is It Easy To Take Care of A Cactus Plant?

Whether you are a budding houseplant enthusiast or you have been tending them for yours, you must have heard or come across a cactus plant. Cactus may be a unique plant-based on its growth pattern, size and shape, but it is the easiest to care. When looking for that one plant to add some pomp in your space, a cactus should be on top of your list thanks to its low maintenance and ease of care.

So, Is cactus easy to take care of? Caring for a cactus depends on how well you approach factors like potting, drainage, fertilization and lighting. By choosing healthy seedlings, getting the right potting soil that easily drains water, moderate lighting and occasional fertilization with the right balance of NPK fertilizer, then caring for cactus should be easy.

This article will be looking at how easy it can be to care for a cactus by considering the right care tips.  It will delve into the dos, and don’ts when tending to cactus plants. It would then wrap up with factors that will make it super easy to care for cactus plants.

Choosing the right pots and potting soil

While in its natural habitat, cactus plants thrive best under arid conditions. Based on this, it is advisable to try as much as possible and replicate the same conditions when growing cactus at home. After choosing a healthy seedling, ensure that you get an ideal pot. A good pot for cactus should have drainage holes to help drain out excess water.

To grow a healthy cactus, select the right-sized pot and use a well-drained soil mixture, depending on the species of the plant.

Cactus also needs the right soil mix. You want to get a soil mix that does not hold much water nor drain out too fast. Cactus prefers soil with enough sand and rock to replicate their natural habitat. When it comes to soil, you may choose to go with commercial mixes or make your own soil mix at home. The type of soil mix to go for depends on your cactus variety, but as a rule of thumb, a good soil mix should have some bit of peat that helps hold moisture.

Cactus thrives best with a soil mixture that includes potting soil, pumice and coir in the ratio of 5:2:1 respectively. With this mixture, the soil will dry out evenly and give room for the plant to use up its nutrients effectively. However, you may see the need to tweak this recipe depending on the cactus variety in question.

Watering

Watering a cactus can be a tricky affair. On one hand, you know they are plants and would, obviously need water to survive. On the other hand, you are also conscious of the fact that these are desert plants adapted to survive in areas with little water. The trick here is knowing how best to balance the two. The truth is, cacti need enough water to thrive; they just happen to have a unique ability to survive longer without water.

To avoid overwatering your cacti, water them only when the soil is dry.

If you are looking to get vibrant cacti that will produce healthy blooms, you got to get your watering regime right. As a rule of thumb, always make sure that the soil is dry between your watering routines. Too much water can easily lead to root rot, and this can mean premature death of your prickly companion.

You would fare much better in sunny areas or locations with high heat conditions by watering your cactus once every week. However, when winter hits, you can cut down on watering since, at this point, the plant is dormant and won’t need much nutrient uptake. If you are not sure when to water, you may want to check on the soil moisture from time to time. Once you note that the first 2 or  3 inches of the potting soil is dry, it is time to water. Always make sure that excess water drains out from the pot. This helps prevent chances of root rot.

Lighting

Cacti are desert plants, and so it is only natural that they will prefer some adequate amounts of sunlight. However, when positioning your cactus at home, they should not be exposed to direct sunlight as this can led to burns. Based on the variety, cacti need varying amounts of light throughout the day. As such, you may see the need to keep changing their positions or simply place them in moderate light all through the day. In this case, a south-facing window will work best.

Although cacti love sunlight, too much direct light might damage their stems and leaves.

Some signs of too much light may include the plant turning brown or yellow on the side facing the sun. In case this happens, relocate the plant to a cooler location for some time and let it heal up. In cases where you cannot access the natural sunlight, then you may opt for artificial lighting in the name of grow lights. This is a special type of lighting that can replicate that of the sun and help keep your plants healthy.

Fertilization

Think of a cactus and the picture that comes to mind is a plant that can survive in arid conditions with limited nutrient supply.  With this notion, you may be tempted to think that cactus does not need any fertilizer. Nothing could be further from the truth. Cactus needs the right amounts of fertilizer just like any other plant to help it grow actively, bloom better and multiply much faster.

If your cacti start growing fresh needles or leaves, you should consider fertilizing the soil.

A good fertilizer for cactus should have the right balance of NPK (Nitrogen, Phosphorous and Potassium) where in this case, phosphorous should be higher than nitrogen. Cactus will work best with soluble or liquid fertilizer as these can be taken up easily by the plant.

Make a weekly inspection of your cactus for any signs of new growth regarding fresh needles, new leaves or a general increase in size. Any new growth noted should be a sign that the plant needs fertilizer. Otherwise, it is recommended that you fertilize your cactus at least once a year. Only apply fertilizer when the plant is actively growing and cut down the same during the winter months as the plant will be in a semi-dormant state at this point.

Success tips when caring for a cactus

Understand your specific cactus species care tips

Good lighting, the right soil, watering and fertilization are not enough to guarantees success when caring for cactus. Success in cactus care starts from making the right choice of cacti for the right conditions. Cactus will thrive better in certain conditions depending on the species. As such, you must choose a cactus species that can easily fit into your weather conditions apart from fulfilling its purpose of adding some pomp in your indoors or garden.

When buying your prickly companion, take time to determine the exact species of the plant you are buying. Your arborist should be in a position to expound more on the specific care tips for your particular choice.  On the other hand, knowing your cactus type will help you do your own research online or elsewhere in terms of how best to take care of the plant.

Look out for pests

Contrary to popular opinion, cactus is occasionally susceptible to pests.  As such, it is advisable to keep a close watch on your cactus pans for any signs of pests from time to time. Some of the common pests that attack cactus plants include mealy bugs, scale and spider mites. The earlier you note them, the better as this will give you ample time to get rid of them without much hassle. You can use several pesticides to get rid of such pests, which will depend on your cactus variety and the type of pest in question.

Avoid getting pricked

By planting cactus indoors, it can only mean one thing; constant contact from time to time. Considering that most cactus plants have pricks or spikes, these may cause bodily harm if not handled carefully. When relocating or inspecting your cactus plants, use some thick hand gloves or wrap some sheets of paper around the plant before handling them. Alternatively, you may also use moving blankets to help protect your hands from the plant’s spines.

Keep Succulents Clean

Depending on the position of your cactus indoors or out in the garden, they will pick up dust and all sorts of dirt with time.  This can be detrimental to its growth. As such, it is advisable to wipe its leaves regularly and stems with a clean cloth. This not only helps keep the plant vibrant but also improves is overall outlook and appearance.  This should be done as per need basis depending on the overall conditions of the room, but as a rule of thumb, clean your cactus whenever you are cleaning your room and tending to your garden. With a clean cactus, you can easily note any changes in terms of discoloration, dents or even pest infestation.

Top 8 Desert Plants To Grow Indoors

Bringing some plants into your house is a great way to freshen up your space. Not only that, but having indoor plants has many benefits!

The hard thing about growing plants indoors is that not everyone has a green thumb. In fact, many people find it difficult to keep indoor plants.

But that’s where desert plants come in! Due to the nature of their origin, desert plants like cacti are very hearty and can withstand even rough, indoor conditions. Once you learn about your desert plant and understand their light and water requirements, you could find yourself growing a plant that could live upwards of 50 years!

So, what are the top 8 desert plants to grow indoors? Our top eight best selection include aloe vera, lithops, old lady cactus, adenium plant, ghost plant, ponytail palm, African milk tree and the prickly pear cactus.

So, are you ready to get started growing your indoor garden? Check out the top eight desert plants to grow indoors!

1. Old Lady Cactus

The Old Lady Cactus is a great desert plant to grow indoors. Usually, it is grown as an outdoor plant but with the right care, it can thrive indoors.

The Old Lady Cactus, which is native to central Mexico, is also known as the Birthday Cake Cactus or the Old Lady Pincushion.

This spherical succulent does not like growing alone, so it does best in a pot with other similar cactuses. On average, it grows four to five inches tall and about five inches wide. If you take great care of it, it could grow as tall as 10 inches!

A old lady cactus flowering.
To help your Old Lady Cactus bloom and produce magenta flowers, make sure it gets enough sunlight and just a bit of water.

The most beautiful part of the Old Lady Cactus is its magenta flowers that look like a hero around its top. It also features thin, white spikes in dense groupings all over its surface. They may look soft, but be careful! They can be prickly!

To get your Old Lady Cactus to thrive and bloom indoors, you have to get its conditions just right. It is a very durable plant, but it needs plenty of sunlight and only a little water. And you should consider choosing a cactus mix soil because it is porous and well draining- perfect for your Old Lady Cactus.

Make sure that your Old Lady Cactus gets 4-6 hours of sunlight a day. If you don’t have a window that gets that much sun, you can use a grow light instead. And only water it when the soil is completely dry to avoid overwatering.

With the proper care, your Old Lady Cactus could live for 10 years or more!

2. Aloe Vera

Aloe Vera plants are great desert plants to grow indoors, especially in the kitchen! Aloe is not only pretty, but all of its medicinal properties can come in handy.

For starters, the gel from inside the leaves on aloe plants can be applied to burns, scrapes, and even sun burns to relieve the pain! Aloe is also used in various beauty treatments for your skin, hair, or scalp.

You can even eat aloe! It’s not uncommon for aloe to be added to smoothies as the juice has plenty of digestive benefits. You can even dry out the leaves and eat them like a chip. Aloe has plenty of uses!

A aloe vera.
When growing Aloe Vera indoors, you should allow 3-4 years for the plant to reach maturity.

Aloe Vera, which is also known as the Lily of the Desert and Plant of Immortality in Egypt, has many thick and fleshy leaves. When the plant is healthy, it is a shade of grey green or blue green.

When an aloe plant reaches maturity, they can get as big as 25 to 40 inches tall. When grown indoors, it can take about three to four years to reach maturity. Plus, it can also spread or create new, smaller plants through offsets.

Aloe vera plants can live up to 25 years with the right care. However, you learn how to propagate your aloe plant, you can see its offspring live on and on for years!

To care for your aloe plant, first make sure that it gets plenty of sunlight, about six hours a day. It needs to be in a bright spot with indirect sunlight. Full, direct sunlight could actually burn your aloe! You should also turn it regularly to avoid the leaves getting yellow on one side.

When it comes to watering your aloe plant, make sure that its soil dries completely before you water it. It will also do better in a pot that has plenty of drainage holes. Without drainage holes, the roots of your aloe plant might start to rot. Finally, aloe grows better in cactus mix soil.

Aloe is a very safe plant to grow in your home. However, if you have pets, be aware that it has been known to cause mild to moderate effects of toxicity in both cats and dogs when ingested. Side effects include vomiting and diarrhea.

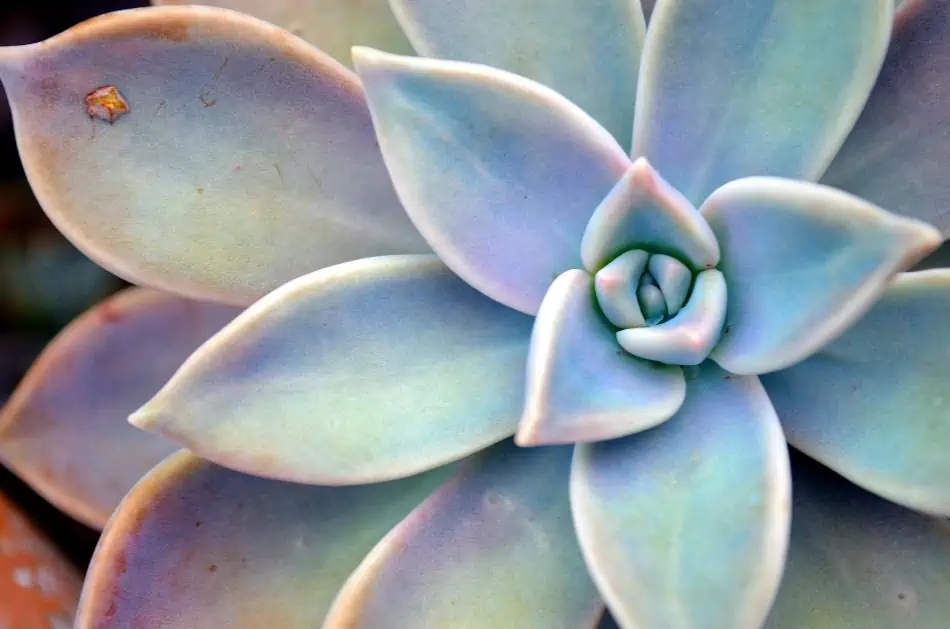
3. Ghost Plant

The Ghost Plant is one of the most common types of succulents you see and it is a great desert plant to grow indoors. In fact, the Ghost Plant is also very popular as a fake plant!

Also known as the Mother of Pearl plant, the Ghost Plant has short, fleshy leaves and is often found in a light green or pink/grey color. When full grown, they can get up to 20 inches wide and 12 inches tall.

When it comes to its lifespan, the Ghost Plant, which is part of the Jade Plant family, can live anywhere from a whopping 70 to 100 years. So if you give it the love and care it needs, you could see it live a long, long time.

A Ghost plant.
The Ghost Plant is one of the most widespread succulent species characterized by a light green or pink-greyish color.

The best part about the Ghost Plant is that it is non-toxic to both humans and pets, making it a very safe plant to have around your home!

To care for your Ghost Plant, make sure that it gets plenty of full sunlight. If full sunlight isn’t available, it can still thrive in partial sun. However, be aware that the kind of light it gets will affect its coloring.

Full sunlight will make a Ghost Plant bushier while partial sunlight can give a grey tone to their leaves.

Just like most succulents and desert plants, make sure your Ghost Plant’s soil is completely dry before you water it. You may even only end up watering it every other week. Talk about low maintenance!

And don’t forget it’s soil! Like the rest of the desert plants we have discussed, a cactus mix soil will be best for your Ghost Plant.

4. African Milk Tree

The African Milk Tree is another great desert plant that is easy to take care of. This plant that is native to Central Africa grows quite quickly and is also known as the Good Luck Plant.

It got its name from the milky latex that is right beneath its outer layer. However, be careful with this milky layer if the outer layer breaks and you become exposed to it. The milky latex layer can be a harmful irritant.

When it is full grown, the African Milk Tree can grow up to eight feet tall. However, when grown indoors, it is possible it won’t grow taller than four feet. It can also live up to 60 years with the right care!

A african milk tree.
Your African Milk Tree will only need water once a week, after the soil has had time to dry out.

The African Milk Tree has at least one large, green stalk with protruding leaves. If you have a Rubra or Royal Red variety of the African Milk Tree, you will see your plant’s leaves turn red late in the season.

When deciding where to put your African Milk Tree, choose a spot that has indirect sunlight. If you can’t completely avoid direct sunlight, make sure to keep an eye on it on days when temperatures get high as it could damage its leaves.

Your African Milk Tree will only need water once a week, after the soil has had time to dry out. Also make sure that you plant it in soil that has good drainage, such as Sandy Loam soil.

Again, be careful of coming into contact with the milky latex layer. If the plant is damaged, this layer will become exposed and can be harmful to both pets and humans if it is ingested or if it comes into contact with skin.

Side effects of coming into contact with the milky latex layer includes redness in the affected areas and swelling. If it comes into contact with your eyes, it could cause temporary blindness and in extreme cases, ingestion could cause death.

So be extra careful if you bring this plant into a home with pets or small children.

5. Prickly Pear Cactus

The Prickly Pear Cactus is what most people think of when they picture a cactus. It is also easy to grow indoors!

A fun fact about the Prickly Pear Cactus is that it grows fruit that is known as “tuna.” This fruit is high in Vitamin C and many people describe its taste as a cross between raspberries, watermelon, and bubblegum!

The pads of the Prickly Pear Cactus are also edible once its skin and spines are removed. This part of the cactus is used in tacos and salads a lot.

Since the Prickly Pear Cactus is edible, it is a safe and non-toxic plant. However, its protruding spines do raise another safety issue. Because of that, make sure it is out of the reach of small children and pets.

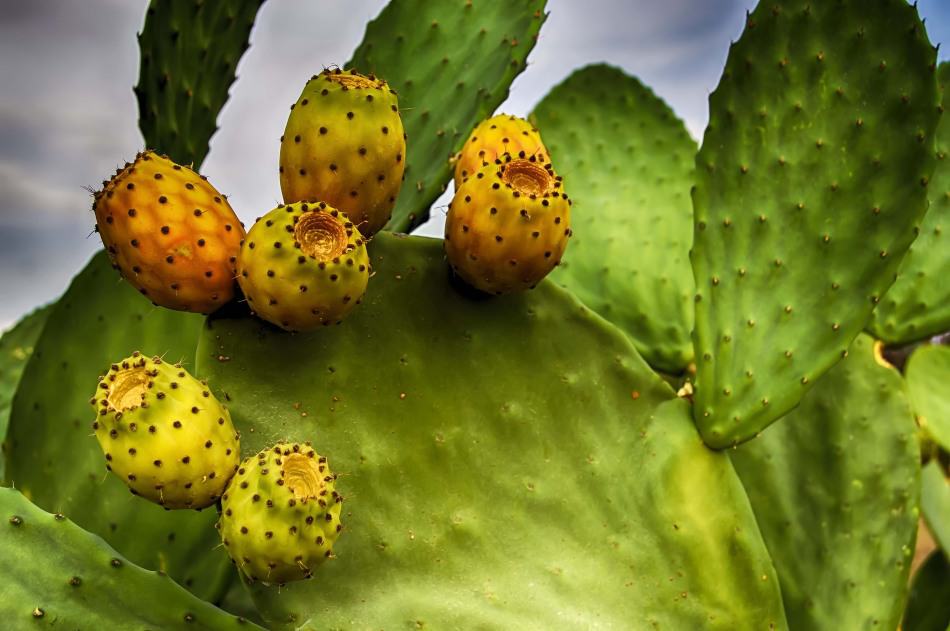
A pricly pear cactus with fruit.
The Prickly Pear Cactus is a fruit-bearing cactus species that requires about 4-6 hours of sunlight daily.

The Prickly Pear Cactus has pads that are flat, green ovals. Spikes spread across the surface of the pads that protrude outward and the “tuna” fruit grows in clusters around the tops of the pads. The “tuna” are either light red or magenta and have their own smaller clusters of spikes.

With the right care, your Prickly Pear Cactus can grow anywhere from one foot tall to 18 feet tall, and can ever live to be over 20-years-old.

Prickly Pear Cacti love to get 4 to 6 hours of sunlight a day. They are also one of the most drought resistant desert plants. In the summer, they only need water once every two weeks. For the rest of the year, they only need watering once a month.

When planting your Prickly Pear Cacti, a mix of sand and potting soil would be best.

Adenium Plant

Adenium plant is a type of flowering plant native to the deserts of Arabia and Africa. It is also known as the “Desert Rose.” The Adenium Plant is a beautiful, low-maintenance plant that can be grown both indoors and outdoors.

The Adenium plant has a thick, fleshy stem with glossy, dark green leaves. The flowers are beautiful and come in various colors, such as pink, red, white, and yellow. The Adenium Plant is also known for its poisonous sap, which can cause irritation to the skin.

Choose a spot with bright, indirect sunlight when deciding where to put your Adenium Plant. If you can’t avoid direct sunlight, make sure to keep an eye on it, as the leaves can get scorched.

Your Adenium plant will need water once a week, after the soil has had time to dry out. Also, make sure that you plant it in well-drained soil.

Since the Adenium Plant is poisonous, keeping it out of reach of children and pets is crucial. The sap can cause irritation to the skin, so be careful when handling the plant.

The Adenium plant is a beautiful, low-maintenance plant that makes a great addition to any home. Just make sure to keep it out of reach of children and pets!

Ponytail Palm

The ponytail palm is a popular houseplant because it is easy to take care of and can tolerate neglect. It is native to Mexico and gets its name from its long, curved leaves that resemble a ponytail.

This plant does best in bright, indirect sunlight but can also tolerate low-light conditions. Water your ponytail palm when the top inch of soil is dry.

Ponytail palms are poisonous to pets, so keep them out of reach. If ingested, they can cause vomiting, diarrhea, and tremors.

The ponytail palm is a beautiful, easy-to-care-for plant that makes a great addition to any home. Just make sure to keep it out of reach of children and pets!

Lithops

Lithops is perhaps the most beautiful plant on this list. It is a succulent that resembles a stone or pebble, hence its nickname, “living stones.”

Lithops are native to southern Africa and can be found in different colors, such as yellow, white, pink, and red. They do best in bright, indirect sunlight but can also tolerate low-light conditions.

Water your lithops when the top inch of soil is dry. Lithops are poisonous to pets, so keep them out of reach. If ingested, they can cause vomiting, diarrhea, and tremors.

Generally, lithops is an easy-to-care-for plant that makes a great addition to any home. However, it is essential to handle them with care because they are so delicate.

Summary

Desert plants are some of the world’s most resilient and adaptive plants. While they may thrive in hot, dry climates, many of these plants can also be grown indoors with a bit of extra care. We hope you enjoyed reading this blog post and are ready to explore your options.

Top 5 Desert cactus To Grow Indoors

Growing plants in your home can be a thrilling and satisfying experience. In fact, it is one of the best things that every plant enthusiast longs for in life. While there are many plants you can grow in your home, succulents will always stand out because they need minimal care to thrive. They also offer a wide range of exciting benefits such as improved concentration, productivity, and air purification.

So, what are the top five desert cactus to grow indoors? While there are more than 2500 cacti species, only a few stand out as great indoor plants. Opuntia, Christmas Cactus, Saguaro Cactus, Barrel Cactus, and the Old Lady Cactus are the most popular indoor cacti species.

These plants do well in average room temperatures and can still survive without exposure to lots of sunlight. Most of them are also flowering species and may surprise you with vibrant blooms, which is a bonus for plants that already thrill with their magnificent shapes and spiny textures.

In this post, we discuss these cacti species in detail and provide you with great insights into how to achieve better results.  Keep in mind that growing these succulents indoors is quite different from growing them outdoors. So, let us get started.

Saguaro Cactus

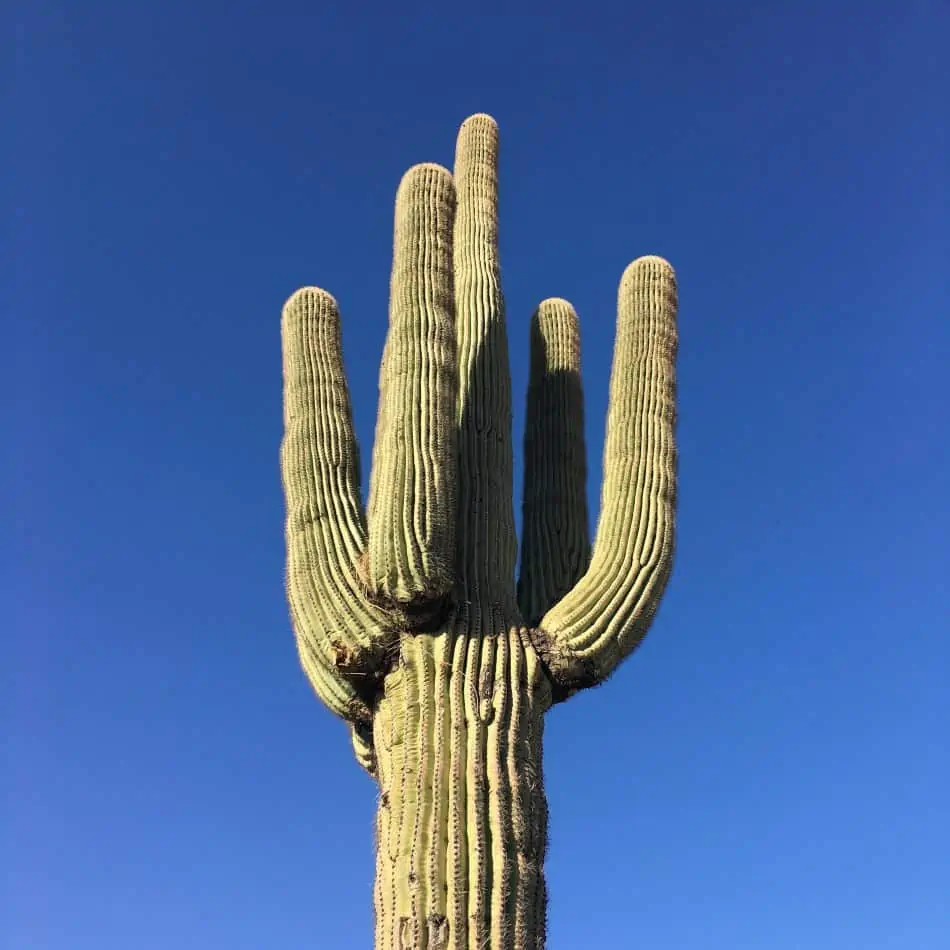
If you have ever visited the Sonoran Desert, you may never forget the astonishing sight of a 40-feet giant Saguaro cactus standing tall in the landscape. The Saguaro cactus (Carnegiea Gigantean) is an enormous and slow-growing plant that can live for up to 200 years.

A mature Saguaro Cactus.
Saguaro Cactus requires well-drained soil and relatively hot environment to grow healthy.

Its scientific name translates to “gigantic candle” because of its large size. Saguaros are barrel-shaped with external water-storing pleats.

The plant can be used as a source of food for both humans and wild animals and provides a cavity-nesting for various birds. Saguaro plants also have peripheral stems known as arms.

An adult Saguaro can weigh up to six tons or more when filled with water and requires a relatively strong internal support skeleton.

Growing Saguaro Cactus Indoors

Saguaro cactus can only thrive in well-drained soil that doesn’t hold for too long.  The plant does well when it receives low levels of water and prolonged exposure to light.

Since it is used to growing in relatively hot conditions, this plant won’t survive freezing temperatures. Make sure you bring your containerized plants indoors as soon as temperatures fall below 60oF.

Water your plant at least once every 10 to 14 days and ensure the soil dries out completely between watering sessions. Check the soil to four inches deep with your fingers just to be sure that it is completely dry.

If you feel even the slightest moisture, wait for a few more days before watering. During winter, stop watering until temperatures start rising above 60oF.

Keep your plant in a brightly lit spot but maintain low humidity. Consider taking your Saguaro outdoors during spring and summer so that it can enjoy the sunlight. Consider keeping it out for several hours a day then bring it back indoors during the night.

Saguaro Cactus Blossoms

This plant is slow to develop and maybe 35 years old or even more before it starts flowering. It mostly blooms in May to June and produces creamy white flowers that are approximately three inches across. Saguaro flowers open up at night and close during the day.

Christmas Cactus

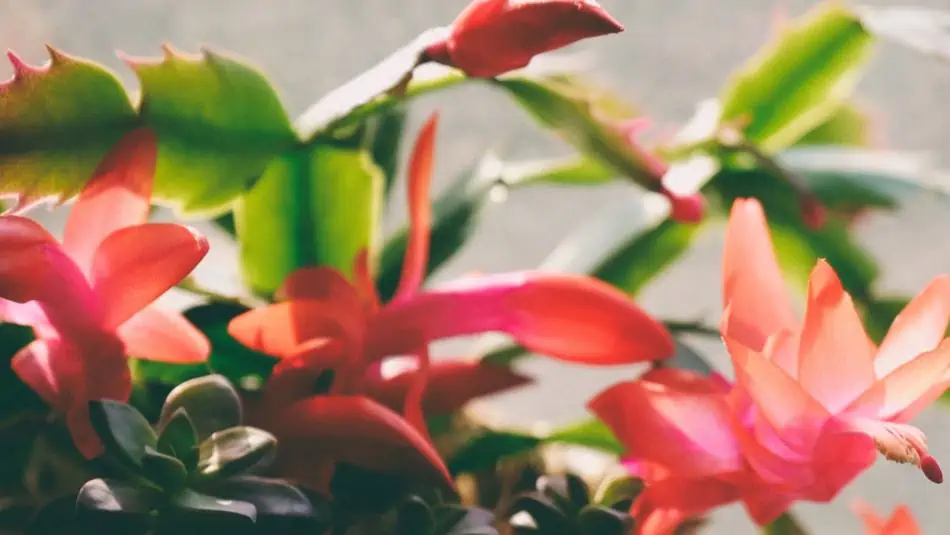
The Schlumbergera Bridgessii, commonly referred to as the Christmas Cactus, is one of the few spineless cacti species native to Brazilian tropical rainforests. The plant is characterized by its serrated green leaves and beautiful flowers.

A flowering Christmas Cactus.
Christmas Cactus can grow healthy in low-light conditions with well-draining soil.

The Christmas Cactus does well indoors in relatively moderate home conditions. The secret to getting the best out of your holiday cactus is to avoid too much watering because it can lead to irreversible root rot.

The plant can adapt to low-light environments and does well in well-draining soil that doesn’t hold water for too long.  To achieve better results, make sure you use quality potting mix rich in humus and other vital nutrients.

Maintain your indoor temperature at 65oF and keep your soil evenly moist when the plant is flowering. During summer, move it away from the brightly lit spots into more shaded areas.

Christmas Cactus Bloom

The plant starts flowering in winter just around the Christmas period hence the name Christmas Cactus. To start blooming, the plant requires exposure to extended hours of darkness at least four weeks before the flowering season kicks in.

Therefore, it is crucial to relocate your Christmas Cactus to a dark spot in early October and keep it covered for at least 12 hours. This reminds the plant that the blooming season is around the corner, and it should start preparing to form flower buds.

When flower buds start to appear, introduce it to warmer temperatures, and resume regular watering regimen.  Fertilize your plant after the flowering season.

Old Lady Cactus

The Mammillaria Hahniana, also known as the Old Lady Cactus, is characterized by white hair that covers its entire surface. This cactus is from the Cactaceae family and is native to Guanajuato State of Mexico and the dry regions of Bolivia and Argentina.

A flowering old lady cactus.
The Old Lady Cactus can still do well indoors if positioned in a room with moderate sunlight exposure.

The white hairs on its surface give the impression of an old lady’s white hair or old man’s beard. The hairs protect the plant from excessive heat and also hide the numerous amounts of yellow spines.

Growing the Old Lady Cactus Indoors

While it thrives well in an outdoor setting, the Old Lady Cactus can still do well indoors if positioned in a room with moderate sunlight exposure.

Plant the Old Lady Cactus in a fast-draining potting mix, preferably with added perlite or pumice for enhanced draining. If you are planting it in a pot, choose a container with plenty of drainage holes.

Although this plant is well-adapted to sustain excessive amounts of heat, do not be deceived because overexposure to direct sunlight can lead to severe and irreversible sunburns. Move it around in the course of the day if you are keeping it in a spot that is lit all day.

You should only water this cactus when the soil is completely dry because it only requires little water to thrive. Be careful not to overwater the plant because it can easily develop irreversible root rot.

During winter, cut back on watering because the plant is dormant and doesn’t require as much water as usual. You can stop watering altogether or only mist it once in a while.

Fertilize your Old Lady Cactus at least once in the summer with a high potassium fertilizer and consider repotting it at least once every year. Repotting should only be done during spring or early summer.

Opuntia Cactus

The prickly pear (Opuntia spp.) is one of the most popular plants in the Cactaceae family. It thrives in drought-prone areas, but it also does well indoors. The plant is characterized by flat and club-shaped pads containing many spines, hence the name prickly pear.

A prickly pear Cactus.
Prickly pear is a fruit-bearing cactus that can thrive in a well-lit place and fast-draining soil.

Most Opuntia cacti species are prized for their edible fruits commonly enjoyed as a refreshing snack in parts of Mexico and the United States. The plant blooms mid-summer, producing lovely yellow, purple and red flowers.

Growing Opuntia Cactus Indoors

As a desert cactus, the prickly pear requires maximum exposure to sunlight/artificial light to survive and thrive. Therefore, consider positioning it in a well-lit spot of your house that receives plenty of sunlight. A north-facing window works best if you live in the southern hemisphere.

However, these plants require little water to thrive. So, limit your watering to once every three or four weeks and only water when the soil is completely dry.  The most critical requirement for any plant in the Opuntia genus is a potting mix that drains fast.

Choose a potting mix that is well formulated to drain fast, and when watering your plant, simply moisten; don’t soak. If you are growing your Opuntia spp. in a pot, make sure it contains plenty of drainage holes.

Repot only when the plant outgrows its current pot and make sure you go for the right pot size. It shouldn’t be too small or too big.  Fertilize your plant twice every year to ensure healthy and quality blooms. Fertilization should be done in spring.

Barrel Cactus

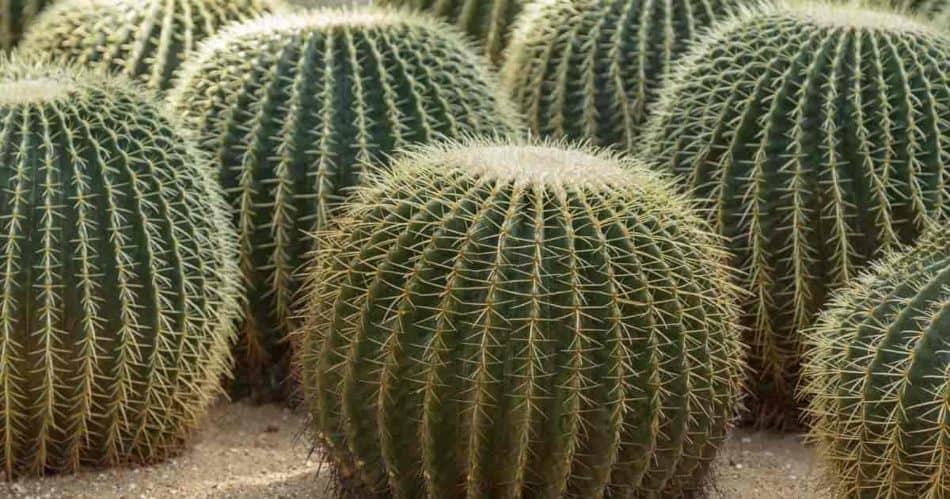
This cactus is named after its barrel/circular shape. The plant is also nicknamed the “Mother-in-law-cushion” and is mostly found in Mexico and parts of Southwestern US.  In their natural habitat, these plants live in extremely hot areas and have adapted to direct sunlight.

A golden barrel cactus.
Barrel cactus can grow in relatively low temperatures but cannot tolerate humidity.

They make perfect display plants when grown indoors since they are highly attractive.  As they grow, they tend to stretch out and assume a circular or oval shape. Just like other cacti plants, the secret to growing them indoors successfully is perfect drainage.

Growing Barrel Cactus Indoors

Barrel cactus does best in relatively sunny spots. Therefore, consider positioning it on a north-facing window. If your house doesn’t have a perfect place that receives plenty of sunlight, install artificial growth lights.

The plant can tolerate low temperatures of up to 50oF but does best without humidity.  As long as everything is kept constant, the plant should be fine in a regular household environment.

Make sure you use a well-draining potting mix and repot the plant as soon as the soil starts to break down. You can encourage drainage by adding sand or extra perlite to the soil or adding a few inches of small pebbles or gravel to the bottom of the container.

Feed your barrel cactus with a weak liquid fertilizer solution at least once during spring.  Water infrequently and ensure that the potting mix drains out completely during watering. Do not allow the plant to sit in water because the results can be catastrophic.

How Long Can a Cactus Survive Indoors?

Cactus plants are well-suited for indoor living since they require little maintenance. With proper care, cacti can survive indoors for several years and even decades.

Ensure you provide adequate light, the right soil mix, and enough water to help them thrive indoors. Also, remember not to overwater since too much water can lead to root rot.

Lastly, ensure you repot your cacti when needed and fertilize them twice a year. Typically, you should repot your indoor cacti every two or three years and fertilize them once in spring.

When repotting, pay close attention to the soil mix you use since this will determine how well your cacti survive indoors. A good quality potting mix that drains fast is essential for their healthy growth and survival.

Also, go for a pot slightly bigger than your existing one to provide enough space for the roots and top growth. Ideally, the new pot should be two to three inches larger than the previous one.

For instance, if the current pot is five inches in diameter, go for one that is seven to eight inches in diameter. This will give your cactus plenty of room to grow.

Can an Indoor Cactus Flower?

Yes, an indoor cactus can flower. While some cacti species may remain vegetative for years, others will produce flowers under the right conditions. 

Typically, these plants need plenty of light and a warm temperature to flower successfully indoors.

You must also remember to feed your cactus regularly during spring and summer to ensure healthy and quality blooms.

Consider using a balanced liquid fertilizer that is formulated for cacti and succulents. Use the solution at half strength and apply it every other month during the growing season.

How Often Should I Prune My Indoor Cactus?

It is normal for your indoor cactus to outgrow its pot and become bushy. As this happens, it will require regular pruning. Pruning helps encourage healthy growth and enhances the appearance of the plant.

To ensure vigorous growth, you should prune any overgrown parts of the cactus during springtime or summer. Use sharp pruning shears or scissors to avoid damage and cut the stems off at their base.

How Do I Treat Pests and Diseases On My Indoor Cactus?

Indoor cacti may be affected by pests and diseases, especially if they are overwatered or exposed to low temperatures. Common pest infestations include spider mites, mealybugs, aphids, and scale insects.

To treat these pests, you can use insecticidal soap or neem oil to eliminate them. Consider using a systemic insecticide formulated for cacti and succulents if the infestation is severe.

If your plant shows signs of fungal or bacterial diseases, consider discarding it because the diseases can quickly spread to other plants in your collection.

Summary

Cacti plants are a unique addition to your indoor plant collection. These plants are low-maintenance and easy to care for. Furthermore, they offer a wide range of benefits to you and your loved ones.  So, if you are ready to up your houseplant game, make sure you start with any of the cacti species mentioned above.

How to Grow a San Pedro Cactus (Echinopsis Pachanoi)

Scientifically known as the “Echinopsis Pachanoi”, a San Pedro cactus can be a great houseplant choice to liven up any space. The steps to growing it and caring for it are no more unique than the steps needed for any other plant. But following these steps will ensure that your San Pedro cactus is flourishing and healthy. 

The steps to growing a San Pedro cactus include choosing the right cactus soil mix from any local plant store and giving it the proper amount of water and sunshine. You can also propagate it to other pots or patches of land. 

While those are the basic steps to planting a San Pedro cactus, the following is a more detailed description of all the previous steps and a guide on how to maintain your San Pedro cactus. There is also a brief introduction into what you should know about the San Pedro cactus before you purchase one. 

Steps to Growing a San Pedro Cactus 

The first step to growing a San Pedro Cactus is to make sure you have the right tools. The gardening tools you’ll need include: 

  • Water 
  • Cactus potting mix 
  • A 5- or 6-inch plant pot 
  • Potting soil 
  • Trowel 
  • Gardening gloves 
  • Fertilizer 

You can get all the above gardening tools from your local gardening tools and plants supplier. 

Choosing the Right Soil and Putting it in the Pot 

Once you have your tools, the first step is to fill the pot with the right soil. The right soil for a San Pedro cactus is, first and foremost, porous that will drain easily. This is to make sure that the water won’t rot the base of the cactus. San Pedro cacti also like a dry soil since they naturally grow in drier climates. You can make a soil more porous by adding materials like: 

  • Pearlite 
  • Sand 
  • Gravel 
  • Pumice 

Adding these to an existing soil mix will help maintain a suitable soil for your cactus. You can ask any expert at your gardening supply store for a quality beginning cactus soil mix or make your own. 

Transporting the Cactus from Nursery Pot to Permanent Pot 

Once you have your soil, fill the pot you’ve chosen about halfway with it, evening it out with your trowel. You can also add a 1/4- to 1/2-inch layer of any of the prior draining materials on the bottom to assist with drainage. 

  • Dig a small hole in the center of your soil with your finger, about two to three inches in diameter. 
  • Put on gardening gloves and carefully remove the cactus from its nursery pot, placing it directly into the hole you just made. 
  • Tightly tuck and pack soil around the cactus until the roots are fully covered. 
  • Water the cactus until the soil is damp, but not sopping wet. 
A person repotting the plant.
To transport the cactus to its permanent pot, fill it halfway with soil and draining materials accordingly.

When your cactus is firmly rooted, usually after about four to six weeks, you can add fertilizer to give it some extra nutrients. Only do this once it’s rooted, not before then. When a cactus grows roots, it’s ready to take in food.

Watering and Fertilizing Your San Pedro Cactus 

It’s recommended that you water your cactus once a week. If you’re growing your cactus from a seed, it’s recommended you water it twice a week until you start to see something growing out of the soil. One method of doing is to fill a sink large enough to fit your cactus with about two inches of water. 

Let the water seep into the cactus’s soil through the holes in the plant pot and take it out once the soil is fairly damp. You can also water it the traditional way with a watering can, but water it in sections throughout the week to avoid the soil getting soggy. 

Stop watering it when it gets around to the colder months. The cactus will go dormant between the months of October and April and watering it during this time will just make it rot faster. Overwatering can give bacteria an ideal environment to grow and infect the cactus. Cold temperatures can also prevent a San Pedro cactus from being watered properly. It can keep the water from evaporating, making the soil soggy and leading to a rotting cactus .

A person watering the plant.
Typically, a San Pedro cactus needs to be watered once a week.

Fertilizer is what feeds your cactus and gives it the nutrients that water alone can’t give. For cacti, liquid fertilizers are available for you to pour into your plant pot that will help the cactus flourish. Seedlings will need a slightly diluted version of the fertilizer, but adult cacti can be given an undiluted fertilizer.  

Giving Your Cactus Plenty of Sun 

Since the San Pedro cactus is originally a desert plant, it needs plenty of pure sunshine. Start by slowly introducing your cactus to sunlight, especially if it’s a seedling. Seedlings tend to burn in direct sunlight and end up dying. 

To introduce your cactus to sunlight, place them in a position where they’ll get some shade along with the sunshine to lessen the harshness of the sun. You can also start by only introducing the cactus to morning or evening sunlight, which are less intense than the sunlight at midday. You can also put your San Pedro cactus underneath the shade of your larger plants if you have any. 

A cactus exposed to sunlight.
San Pedro cactus loves sunshine, so make sure the plant gets enough sunlight to obtain the necessary nutrients.

If you’re growing your cactus indoors, they will need more sunlight once they get accustomed to it. Placing them in a spot where there’s often sunlight, such as a window or near a porch, will help them get the nutrients they need from the sun. If your cactus is outside in the direct sunlight, make sure to keep it consistently watered since it can dry out faster. 

Propagating Your San Pedro Cactus 

Propagating your cactus means carefully cutting it up and planting those pieces as separate plants. It’s a great way to save money from buying more plants and can help your garden grow faster and be healthier. To start propagating your cactus, you’ll need: 

  • A knife 
  • A plant pot 
  • Soil 
  • A piece of cardboard or a towel 

When you have all your materials: 

  • Clean your knife with an alcohol-based sanitizer and make sure it’s dry before you cut. This will prevent the risk of spreading infections to your cacti. 
  • Decide on a piece of cactus that is healthy and flourishing, and carefully cut it to the length you desire. 
  • Once you have your cactus piece, lay it out in the sun for a day or two. Cover it with a piece of cardboard or a towel if it’s in direct sunlight so it won’t get burned. This will dry it out and make it easier for the cactus to take root in its new pot. 
A person propagating plants.
To propagate your San Pedro cactus, you can obtain healthy cuttings and plant them separately.

As the cactus dries, they can start to develop some color. These spots of color are called calluses and usually range from white to brown to black. This is a good sign, as it signifies the cactus piece is ready to be planted. As long as they calluses aren’t a moldy green or blue color, they are ready to be potted. 

The process for this step is essentially the same as potting the original cactus. The only difference is that, since the cacti are smaller, use pots that are also smaller. A diameter of about one to one and a half inches is recommended. 

Place it in a shady spot and don’t water it for about two weeks. This will allow the roots to start growing and the cactus to get used to its new home. Once it’s rooted, you can start watering it and giving it fertilizer as you would with the original cactus. 

Maintaining Your San Pedro Cactus 

Being a natural plant, the San Pedro cactus won’t always grow in a neat and perfect way. When your cactus starts looking unruly, that’s when you need to start cutting and grooming it. Keeping it looking neat and clean will help keep it healthier in the long run, as the less wild growths it has, the less chance for infection. 

To clip a cactus, all you need is a solid, good quality pair of garden shears that you can get at your local garden supply store. When cutting the cactus, make sure to cut twelve inches or more since these types of plants tend to grow much faster than on average. 

San pedro cactus on a pot exposed to sunlight.
Keeping it looking neat and clean will help keep it healthier in the long run.

Another thing you should do while maintaining your cactus is to make sure that the soil is properly draining the water. You can make sure of this by gently touching the soil. If it feels too soggy or more wet than solid, the soil isn’t draining properly. You can fix this problem by replacing the soil and putting a small layer of the porous materials listed above. 

The final thing to make sure of when maintaining your cactus is that the soil and the cactus are free of infections and pests. To do this, you can lightly spray your cactus with a pesticide killer to get rid of any possible intruders. But do this sparingly, only about once every two months, as too much of the pesticide killer can end up killing the cactus. You can also add a little bit of sulfur to the soil, and it will act as a natural pesticide. 

Things to Know About the San Pedro Cactus 

Now that you know how to plant and take care of a San Pedro cactus, there are some things you should know before you decide to purchase it or include it in your garden. 

The first thing to know about San Pedro cacti is that they grow fast and tall. Each separate stem of the cactus can grow to be six inches wide and ten to twenty feet tall. When properly taken care of, they can grow up to a foot tall within six months and continue growing by a foot per year. 

A cactus.
San Pedro is a fast-growing cactus that grows around 10-20 feet in height and features white flowers in summer.

They grow especially fast and fragrant around the summertime, sprouting white flowers that bloom at night and open the following day. Because of their fast growth spurts, you’ll want to make sure that the cactus isn’t directly below anything that will stunt its growth if it’s inside. If you’re growing it outside, then just keeping it groomed and neat should be all that’s necessary. 

The challenge for caring for a San Pedro cactus comes in when it gets an infection or an infestation. The most common causes of this include: 

  • Etiolation 
  • Desiccation 
  • Overwatering 
  • Sun Burn
  • Bugs 
  • Frost Damage 

Causes and Cures for Etiolation Growth 

Etiolation is the condition of cacti growing a pale and sickly-looking growth on top of them or on their sides due to insufficient light exposure. You could say it’s the acne of the cactus plant. The growths usually look very light green or a yellow-greenish color and have a puffy shape. They are very flimsy. 

To treat this condition, you need to put your cactus into stronger light as soon as possible. You unfortunately can’t get rid of the etiolation growth, it’s permanently stuck onto the cactus. But you can help the cactus get into better condition once you place it under more light more often. 

How to Avoid Desiccation Rot 

Desiccation is essentially what happens when a cactus gets too dry. It shrivels up and looks like a deflated beach ball with sharp spines. Even though cacti are desert plants, they can dry up faster if the weather is hotter and they don’t get enough water. While the seemingly obvious solution is to give your cactus a bunch of water at once, this actually isn’t the best option. The better option is to give your cactus a little bit of water at first and slowly progress the amount of water. Fixing the problem with this approach will help the roots grow and adapt to taking on more water, hydrating the cactus more effectively.  

What Happens When You Overwater Your Cactus 

Overwatering is exactly as it sounds, it’s when you give your cactus too much water and it creates a hotbed for bacteria and diseases to fester and grow. You can tell that your cactus is overwatered when it swells up to almost double its original size. The cactus stem will also usually become so saturated with water that it splits open in one or multiple places. The most harmful side effect of overwatering is that the cactus will start to rot. 

A cactus falling over the clay pot.
Overwatering a San Pedro cactus leads to rotting that makes the plant turn brownish and soft.

A rotting cactus will usually appear brown and feel mushy to the touch. To avoid this problem, make sure that you water your cactus in intervals rather than all at once, and keep the amount of water consistent. If this does happen, stop watering the cactus for a little while. It would also be a good idea to get it out of the overwatered pot and into a fresher, drier pot. The split parts are permanent and can’t be fixed, but that won’t prohibit the cactus from being saved and to continue to grow. 

The Effects of Sunburn Damage 

Sunburn occurs when a cactus has been too overexposed to direct sunlight. It makes the cacti look whitish around the top or on their ridges, and more severe burns make the cactus take on a dark brown look. To treat a cactus with a sunburn, get it to a shady place as soon as possible. If the cactus is already burned to a brown crisp, then the damage is irreversible. To prevent it from happening in the first place, give it full sun exposure for a short amount of time daily, increasing the length of time in the direct sun slowly over the course of a few weeks. 

A sunlight.
Although San Pedro cactus loves sun, overexposure to direct sunlight might lead to severe sunburn damage.

Bug Infestations and How They Harm Your Cactus 

Bug infestations can range from barely visible to bluntly obvious. To check your cactus for bugs, digging around in the soil a bit with a trowel or just taking a good look at it can give you a pretty good idea if there are bugs on the cactus or not. To treat bugs, you will have to physically remove as many bugs as possible from the cactus with a fingernail or some tweezers. If the infestation is of a larger scale, physically removing the plant and washing out the pot is the better option. To prevent any infestations in the future, regularly spraying the pot and the cactus with a light layer of pesticide can prevent an infestation. 

Frost Damage from Cold Temperatures 

Finally, frost damage is what occurs when plant cells that are exposed to freezing temperatures start dying, and the health of the cactus suffers as a result. This also causes the cells to rupture and the water doesn’t hold as well, drying it out. Your cactus is instantly more susceptible to this condition if you live in an area with colder temperatures. To prevent this from happening, bringing the cacti inside or covering them with a tarp can prevent the cold from directly affecting them too harshly. If the temperatures are lower, then a grow light can be a good option to look into. 

Final Thoughts

Growing and maintaining a San Pedro cactus isn’t too hard if you have the right tools. Keeping a close eye on it, making sure it gets the proper care, and taking care of problems when they arise will give the cactus a long and healthy life. 

How To Plant A Cactus?

A cactus can add a lot to your yard or home. They can add personality to every facet of your life, and there are more than 2,000 species to choose from. They’re also low maintenance, so almost anyone can grow them. But many people are intimidated by the cactus and need some help in learning to plant a cactus. 

It can be tough to plant a cactus without getting the prickly spines in your fingers. It can also be a challenge picking the right dirt for the right cactus. Cacti need bright sunlight most of the time, along with the right soil and digging the hole to the right depth.

Read below to find out exactly how to plant a cactus, pain-free. You’ll see the correct soil type to use as well as the conditions cacti need to thrive.

Indoor Cacti

Before you plant your cactus, there are some decisions you will have to make. The first decision facing you is whether you want to plant indoors or outdoors. There are pros and cons to each. Consider the below for indoor cacti.

Benefits of Indoor Cacti

Cacti need a certain type of weather to survive outside. If you don’t live in a dry, hot climate, it may be best to consider planting your cactus inside in a container.

A person holding a cactus on a pot.
Indoor cacti require low maintenance and can help you with breathing, concentrating, and relieving stress.

There are several benefits of indoor cacti, and they’re very easy to grow inside. If you have limited space or live in a cold climate, consider these benefits for growing your cactus indoors:

Benefits of owning cacti include:

  • Breathing Better – Your cactus will absorb carbon dioxide. That’s a very good thing for you since it will convert that carbon dioxide into oxygen for you to breathe
  • Increased Productivity – Cacti improve our concentration and provide a calming effect for the home
  • Healing – As well as relieving stress, some cacti, such as agave or aloe vera, have healing properties. Aloe vera treats burns and bruises. Agave can help heal cuts and burns
  • Low-maintenance – Cacti can thrive in your home. Just find a sunny window, and you can add a bit of nature to your space.

There are many different beautiful types of indoor cacti, including:

  • Christmas Cactus – A Christmas cactus will put off bright pink blooms yearly but requires more watering and a more humid climate
  • Moon Cactus – A very bright cactus, but they have very short lifespans compared to other cacti
  • Easter Cactus – Very attractive plant that blooms in early spring

Although these are just a few types of cacti that could suit your home well, there are many others to choose from.

Now that you know the benefits and a few types to choose from, it’s time to really think about your planting.

Choosing the Right Soil

If you want your cactus to live a long time and thrive, you need the right type of soil. For any type of cactus, you will need the following.:

  • Sandy
  • Porous
  • Pebbly
  • Good Drainage
  • Good Aeration

The soil will need to be able to dry quickly after being watered. Cactus roots can deteriorate quickly if left in water. 

A soil on hand,
Sandy, porous, and pebbly soil offer excellent drainage and aeration for any type of cactus.

You can get a potting mix specially made for cacti at any lawn and garden center. These mixes mimic the correct soil a cactus in the wild would normally have. If you don’t want to pick up a commercial mix, you could make your own.

Here are some great tips to have the best soil for your cactus:

  • Particle size ingredients should be 1/4 inch big for aeration
  • Needs soil with a PH of 5.5 or 6 – get a PH tester
  • Use rainwater to keep PH balanced
  • Use organic matter like peat moss or decomposed leaves
  • Water the soil before planting to allow the organic material to absorb the water
  • Add pumice to mix to improve water drainage

The correct soil mixture is critical to your overall cactus health. If you don’t get the soil right, the cactus will not survive very long. 

Choosing the Right Container

The most important issue with picking the right container is making sure it has at least one drain hole. Cactus roots don’t need to sit in water and will rot if they do so. Drainage and the right soil will take care of that problem. 

There are many different kinds of containers to choose from. Shallow containers are fine for cacti since they have very shallow roots. In fact, you should choose a container just big enough to fit the cactus.

If using a clay pot, increase the size of the drainage holes in the bottom of the pots to better the drainage of the containers.

Potting Your Cactus

Once you choose your cactus, soil, and container, it’s time to pot your cactus. Here are some tips to make sure it goes smoothly:

A person repotting the plant.
The right way to pot a cactus is to fill 1/3 of the pot with soil and then place the plant inside.
  • Get a pair of tongs or thick gardening gloves, so you don’t get pricked by the cactus spines
  • After filling the pot about 1/3 full with your soil, center cactus in the container
  • Use tongs to hold cactus while you fill in the remaining space with your potting mix
  • Leave a little space at the top of the container with water
  • Press soil gently down among the roots of the cactus
  • Shake the pot a bit to settle the soil
  • Try to place the container in a South or East facing window
  • Water your cactus

It’s not that difficult to plant a cactus but you do have to be careful to not get stuck on those cactus spines. 

Outdoor Cacti

If you prefer to plant your cactus outside, you’re going to have to choose a very sunny spot. Location will be everything to help the cactus or cacti thrive. Read below for the best ideas on planting an outdoor cacti garden.

A prickly pear cactus on a pot exposed to sunlight.
Location will be everything to help the cactus or cacti thrive.

Planting your Outdoor Garden

You will need a dry, hot climate to grow your outdoor cacti. These plants are drought tolerant and don’t need a lot of moisture. You can use cacti to enhance your landscape or you can do a garden completely out of different cacti.

You can also choose to plant your cacti in containers so you can move them inside in the winter. Just remember that some cacti grow very large and may prove impossible to get in during the winter after a certain point. If you do choose containers, try unglazed terra-cotta planters because they’re porous and can whisk away moisture.

You should make sure your cacti have sufficient space in your garden. Cacti can grow very large and some species even grow horizontally so you need to take all that into account and ensure your garden is not over-crowded. 

Before you leave the lawn and garden center, check your plant for firmness and to see how thick it is. You will want to choose a thick, firm plant. The thick flesh will let you know if it can store water for a long period of time. 

Plant selection is critical when you’re dealing with cacti. Make sure that you choose a cactus designed to grow in your region. Below are some popular types of cacti used in outdoor gardens:

  • Beavertail Cactus – A prickly pear cactus with blue-green pads, this grows wider rather than taller and has deep pink blooms
  • Golden Barrel Cactus – Can grow up to 4 feet tall and is very good in drought-tolerant areas
  • Saguaro – Can be grown indoors or outdoors but can get to a height of over 50 feet when fully grown so best to be transplanted outdoors at some point. One of the most iconic looking cacti in the world
A matured golden barrel cactus.
Golden Barrel is one of the most popular outdoor cacti species that can grow over 50 feet in height.

Depending on your region, you can choose the best cactus for your garden. Cacti can be grown in the ground or raised beds. Almost all require little water and a lot of sun. 

Picking the Right Soil

Choosing where you plant your cacti outside will be of major importance. Like real estate, it’s all about location, location, location. To make sure you have enough drainage and aeration, you may choose to use a potting mix rather than the soil found naturally in your yard. 

You can even make this potting mix at home, using only three items::

  • Potting soil
  • Coarse sand (like sandbox sand)
  • Pumice or Perlite (for good drainage)

Whatever potting mix you use, make sure your cacti has a lot of drainage. You do not want root rot on your cacti so drainage and aeration will be key.

A soil fertilizer.
To make the soil perfect for your cactus, consider adding supplements, including Pumice, Perlite, Haydite, and more.

Here’s how to figure out if you need to alter the soil in your yard for your cacti: Dig a hole. Yep, it’s that easy. Dig a hole about a foot deep and fill with water. Wait 30 minutes and check it. If water is still standing in the hole, that soil is not draining well enough and you will need to add rocks or sand to the soil to create better drainage. 

Here are some other items you could use to supplement the natural earth in your yard:

  • Japanese Hard Akadama – A clay-like material that can be combined with sand for a rich soil mixture. It retains water so don’t use too much
  • Pumice – A volcanic and porous rock that’s great for drainage. Leaves a lot of space for air
  • Perlite – This retains moisture and drains water well, making it a great fit for cacti
  • Vermiculite – Good at soil aeration and water retention
  • New Zealand Pine Bark – Can last for years and holds water
  • Haydite – Absorbs excess water and slowly releases it back into roots
  • Coco Coir – Absorbs excess water and dries out quickly. Rot-resistant
  • Sand – Excellent for drainage. Mix with potting mix for better drainage. Use construction-grade sand

Your soil mix will be critical to your growing success. Make sure you match the potting mix with the cacti, as some need more water than others. If you don’t choose the right soil mix, or work the soil to make sure it is correct for your cactus, you will not have a lot of success in growing cacti. 

After you mix your soil and put it in your hole, make sure you water the area for about an hour. You want the absorbent materials in your potting mix to absorb all the water it can so it can slowly release it back to the cactus roots after planting. 

Planting Instructions for Outdoor Cacti

You will want to plant your cactus when the roots are actively growing, preferably from late spring through summer. You will also want to pick your location, which should be in an area that gets mostly to full sun.

A gravel on sand.
To grow a healthy cactus outdoors, it is important to select the right spot and prepare the soil accordingly.

After choosing your location, here are the instructions for planting cacti in your outdoor garden:

  • Prepare the soil in your planting area
  • Dig a hole that is as deep and 1 1/2 times as wide as the root ball or stem
  • Get some tongs or thick gardening gloves to handle cactus
  • Set the cactus in the hole so that the north side of the cactus faces north. You may have to ask at the lawn and garden store which side of the cactus is north
  • Fill the area around the root ball with potting mix and pat down gently
  • Lightly water (remember you should have prepared soil previously with water)

Immediately after planting, you may want to give your cactus some shade until the roots become attached. You can use shade cloth or some type of plant near it that offers temporary shade.

After initially watering, wait at least a week to water again to give the cactus a chance to heal and take root. After that, all you need to do is weed your garden and throw out some occasional fertilizer.

That’s all there is to it. Planting a cactus is easy if you do the prep work right. Choosing the right cactus with the right location and soil is important to your overall success and will mean the difference between a thriving garden and one full of dead cacti. 

Growing Cacti From Seeds

You can grow cacti from seeds rather than an already growing plant, but it will take some time since cacti are notoriously slow-growing. Below are the items you’ll need to grow cacti from seedlings:

  • Cacti seeds
  • Small plastic pots
  • Clear plastic bag
  • Free-draining compost
  • Vermiculite
A seeds on hand.
Growing cacti from seeds will take more time than growing from cuttings.

Fill the small plastic pot with the compost and gently tamp down on the mix. Scatter cactus seeds on the top of the compost and place a small layer of vermiculite over the seeds and compost, covering completely. Leave on a warm east or south-facing windowsill and cover with a clear plastic bag. Remove the plastic bag and spray with water regularly, to keep the compost moist. In a few weeks, you’ll have your seedlings.

Remember you will have to transplant your seedlings in the following spring to a small terra-cotta pot. 

Tips for Growing the Best Cacti

Cacti are incredibly low-maintenance succulents but there are some tricks and tips to get the most out of these plants. Whether you grow inside or outside, consider the below to grow your best succulents ever:

  • Always grow in bright light, either inside or outside
  • Make sure all cacti have access to direct sunlight
  • Wait to water until the top 2 inches of soil are dry
  • Don’t underwater cacti, especially during the growing season of spring and early summer
  • Do not prune cactus
  • Using gloves coated with Nitrile will protect your hands from getting pricked by spines
  • Consider layering gloves
  • Use a soft grip
  • For most cacti, you will need at least 6 months of 70+ Fahrenheit weather
  • Do not use large pots for your cacti – they typically grow very slowly
  • If grown in a container, you only have to transplant every 3 to 4 years
  • If you use fertilizer, it should be specialized for cacti
  • There are different potting mixes for tropical cacti than there are from desert cacti – use the correct mix
  • When planting a cactus garden outside, mix in some other succulents and aloe to give a professional look
  • Adding small pebbles will also give your garden a professional look

These are simple tips and shouldn’t give you much trouble but they can make a big difference in either an indoor or outdoor garden.

The Final Word

Any type of cacti will be a great addition to your garden. They’re easy to grow and easy to maintain. The main problem cacti have is that most people either over or under-water them. 

Other than watering, the main items you’ll have to remember are the type of soil to use and the location of your cacti. Remember that cacti need full sun and little water. Watering two or three times a week for an outdoor garden and once or twice a week for an indoor cactus should be sufficient. 

Being so low-maintenance, they also make great gifts, as it can be hard for anyone to completely kill a cactus. Whichever cactus you choose for your garden, remember not to stress and just enjoy the process. Happy gardening!

How To Grow An Opuntia (Prickly Pear) Cactus

Growing an Opuntia cactus in your yard may seem a bit unfriendly at first glance. But this desert plant has recently fallen into favor with homeowners for all the right reasons. Opuntia cacti add beauty and charm to any garden.

Opuntia Cacti are almost maintenance-free plants that can thrive in most soils as long as they are well drained. The one thing a cactus cannot tolerate is the wet. Some can withstand cold temperatures; others need mild to warm conditions year-round. Let’s take a closer look at how to grow an Opuntia cacti.

Opuntia Cactus may be grown from cuttings

  • With a sharp knife, carefully remove the pad
  • Place the pad on end so it does not curl while a scab forms over the cut end
  • When cured, (2 weeks or longer) dip the pad in a Bordeaux mixture to ward of fungal infections
  • Plant the pad upright one inch deep in a half-and-half mixture of sand and soil
  • Anchor with rocks to keep the pad upright until roots form
  • Water after one month; then water only when soil is dry
A person propagating the plant.
To grow the Opuntia cactus from cuttings, carefully obtain the pads and plant them upright using the right soil mixture.

Opuntia can be grown from the seeds found inside the fruit

  • Rinse the pulp off the seed, and make sure you let it fully dry before planting it. 
  • Potting soil is fine for planting Opuntia seeds if the soil is well drained. Spring seems to be the best time for planting Opuntia seeds.
  • A seeded Opuntia takes three to four years to flower and produce fruit while an Opuntia grown from a cutting will flower and bear fruit within its first year. For this reason, it is most common to propagate the species using cuttings.
  • The Opuntia can reseed itself from just one of the pads or “leaves” that has been severed from the mother plant.
  • It is not difficult to grow an Opuntia, but it does take patience and careful attention to detail.
A cactus seeds on hand.
You can obtain the seeds from your Opuntia fruit and plant them, ideally in Spring.

To grow an Opuntia from a cut pad, you need to select a pad that is at least six months old

  • Sever it from the mother plant using a sharp knife. 
  • Place it upright so it doesn’t curl while a scab forms over the cut end. This will take at least two weeks in dry areas; longer in humid areas.
  • Once the scab has formed, dip the cut end of the pad in a Bordeaux mixture made of 3 1/3 tablespoons of copper sulfate and 10 tablespoons of dry hydrated lime in one gallon of water. This protects the pad from fungal infections.
  • Plant the pad upright one inch deep in a mixture of equal parts sand and soil. Use rocks to stabilize plant until roots form. Do not water the plant yet; this may cause root rot. As a native desert plant, the Opuntia doesn’t need much water.
  • After one month, roots should have formed, and the pad should be able to hold itself upright. At this point, it may be watered. After that, it should not be watered again until the soil is dry.
  • Place in full sunlight, if possible. 
  • A balanced fertilizer may be added monthly, if desired. For larger pads, use a fertilizer high in Nitrogen. For fruit and flowers, use a Nitrogen-free fertilizer.

Be sure that you always wear sturdy work gloves when tending your Opuntia. The tiny glochids that cover the entire surface of the plant and fruit are quite painful when touching bare skin.

Plant or Pot Works Well

It is most common to plant Opuntia cacti outdoors, especially in warm, dry climates where the soil drains well. But they may also be potted. If you choose to pot your Opuntia, be sure the pot is large enough to accommodate their gangly size.

A person repotting her plant.
Although Opuntia cacti grow better outdoors, you can also pot them using a large container.

Opuntias will need to be transferred to larger and larger pots as they continue to grow. Depending on the variety of your Opuntia, this task may require two people to stabilize the cactus for transfer to avoid breaking the plant.
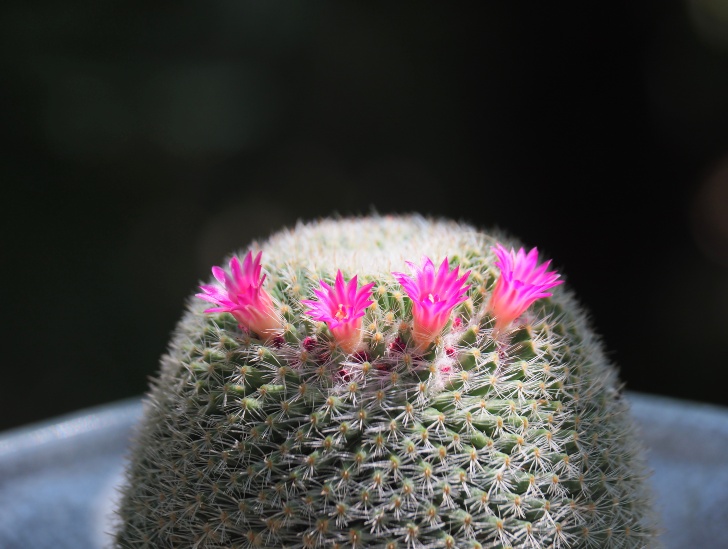
Keep It Drained

The soil your Opuntia lives in needs to be well drained. Opuntias get root rot from living in soggy soil. Watering should be restricted to about once every two weeks during the summer and about once a month in the winter.

You Can Eat Them

Opuntia pads are edible, at least, most of them are. Don’t let the bristles intimidate you; just don a good pair of work or welding gloves and harvest your cactus.

One way to escape being mauled by glochids is to grip the pad with a pair of tongs and cut it from the plant with a knife. You’ll want to choose young, tender pads for this. 

A grilled prickly pear pads
Prickly Pear pads are edible but you will need to remove all the glochids and spines thoroughly.

The best time to harvest cactus pads is midmorning to midafternoon. The acid content is lower at these times making for a more palatable taste. For a mature cactus, approximately one-third of the pads should be harvested yearly to keep the plant at optimal health.

After gathering the pads, you can scrape the bristles off with a blade under running water or burn them off over an open flame.

Prickly pear pads can be eaten:

  • Raw
  • Fried
  • Boiled
  • Sauteed
  • Made into soup
  • Added to a salad
  • Added to an omelet

Prickly Pear Cactus Fruit Is Versatile

The red fruit of an Opuntia is called 

A prickly pear cactus fruit.
Prickly Pear fruit carries tons of health benefits and can be eaten after removing all the glochids.

It is edible cooked or raw, but care must be taken to ensure that all the glochids have been removed. If ingested, glochids can cause irritation to the 

  • Lips
  • Mouth
  • Throat
  • Digestive tract
  • Stomach

To eat the fruit raw, it is commonly split in half and the insides are scooped out with a spoon or it is peeled and eaten whole. These fruits are used in a variety of ways. They can be made into

  • Syrups
  • Preserves
  • Jellies
  • Liquor
  • Herbal remedies
  • Juices
  • Smoothies
  • Pancakes
  • Desserts
  • Candy

The fruit ripens at the end of summer. Most varieties turn a deep red on the outside when fully ripe.

Cactus fruit drinks.
To eat the fruit raw, it is commonly split in half and the insides are scooped out with a spoon or it is peeled and eaten whole.

To harvest cactus fruit, use thick gloves or a towel that is folded several times. Grasp the fruit and twist. If fully, ripened, it should come off the plant with little effort.

Grow an Opuntia Almost Anywhere

The Opuntia Cactus, also known as Prickly Pear Cactus, comes in many varieties. Some grow huge, up to fifteen feet tall while others are quite miniature at just six inches tall. 

This makes them a versatile shrub that can be grown:

  • Indoors
  • In sunrooms
  • On porches
  • Outdoors
  • In gardens
  • Along property lines
  • In xeriscapes
A fruit bearing prickly pear cactus.
Prickly Pear cacti can grow almost anywhere on earth and this is want makes the plant so desirable worldwide.

They all flower, usually in the spring or early summer. Their flowers can be:

  • Red 
  • Yellow
  • Purple

Some have sharp spines, but most have glochids which are short, very fine hairs that grow all over the pads. These glochids easily detach from the pad and stick to skin, causing severe irritation. They are almost invisible and quite difficult to remove, so the use of gloves is recommended when touching an Opuntia.

Why Would You Grow an Opuntia Cactus?

For those in humid areas, it may seem a bit odd to plant a cactus in your yard. But if you have ever been to the desert, you understand how big a piece of your heart you leave behind. Something about the Old Wild West still intrigues us, and we want to bring it home with us however possible.

One way we can do that is by growing Opuntia cacti in  

  • Rock gardens
  • Yards
  • Flowerpots
  • Sunrooms

These hardy plants require little tending so if your green thumb turns plants brown, this is one species you should have good luck with. Besides that, they’re just beautiful! 

A bit intimidating because of their self-defense system, but mysterious and intriguing. They produce that arid feel of the desert. In a sense, they give us a chance to relive the Wild West days. 

Pick Your Opuntia

In all, there are about ninety different plants that are classified as Opuntia Cacti, or Prickly Pear Cacti. We will not study each one in depth here. We’ll only explore the species that most often end up adorning somebody’s rock garden or patio. 

Opuntia Microdasys

This species is known as the “bunny ears” cactus because the pad shape resembles a rabbit’s head. This cactus is relatively small, usually maxing out at around 60cm tall. This makes it the ideal species for growing indoors or in flowerpots.

The young plant is red and turns green as it grows older. When fully mature, this species will grow red or purple fruit. The fruits of the bunny ears cacti are edible, but extreme caution should be exercised when harvesting them. They are covered with almost invisible glochids.

Its flowers which bud in late spring are yellow and measure approximately two inches across. 

The Microdasys should be planted in full sun, if possible. At the most, it should be in only partial shade. A low-Nitrogen fertilizer should be used every other time it is watered. This cactus requires regular watering throughout the summer but shouldn’t be watered at all in the winter. 

This variety of Opuntia Cactus is not cold hardy. It should be kept in temperatures exceeding 45*F year-round.

Opuntia Basilaris

This Opuntia species has the “beaver tail” shape. It is a good option for growing indoors since it rarely grows more than sixty centimeters tall.

 Its gray-green or blue-green pads grow up to fourteen centimeters long and ten centimeters wide. They are fan shaped resembling a beaver’s tail. In dry summers they turn purple and wrinkle a bit but fill out again during the winter rains. 

The Basilaris has no spines, but it is loaded with glochids, so caution must be used when tending it. Its magenta-colored flowers are quite the star of the show as the plant itself is not attractive at all without them.

Native Americans used to depend heavily on the Basilaris buds as a source of food and medicine. Even the large, coarse seeds were ground up and used to make mush. 

The fruit of a Basilaris is brown gray in color and oblong in shape. It is not so readily consumed because it tends to be rather dry.

This is a low maintenance species that does well whether planted outdoors or potted indoors.

Opuntia Ficus-Indica

This is by far one of the most popular species of cacti grown literally all around the world. Most prickly pear recipes refer to this species. 

Topping out at sixteen and a half feet tall, this is one giant of a shrub. For this reason, it is not a good choice for an indoor plant, but it can successfully grow in pots. More often, this will be the cactus you find dominating a rock garden or xeriscape. 

A Opuntia Ficus-Indica with fruit.
Opuntia Ficus-Indica is the most popular Prickly Pear species that is characterized by orange-yellowish flowers and red fruits.

Its pads are thick and oblong, about two feet long and ten inches wide. The surface of the pads is waxy which causes them to reflect sunlight very well. 

From one year to two years old, the Ficus-Indica starts to produce yellow or orange-yellow flowers in the spring or early summer. Soon after, its fruit appears and turns red as it ripens, generally from August to October.

Is It Fruit or Vegetable? It’s Both!

Its red fruit is edible and so are its pads. The most popular way to eat Ficus-Indica fruit is peeled and chilled. It tastes like watermelon and contains myriad tiny seeds which are usually ingested along with the fruit, although this should be avoided in the presence of digestive issues.

These fruits contain the most Vitamin C of any fruit in the world. In fact, it has been proven that the health benefits of eating cacti comprise quite an impressive list.

The stems of the Ficus-Indica tastes much like a string bean. They are used extensively as a vegetable side dish or as a sort of stir-fry to some main dish like chicken or tacos.

 The Ficus-Indica is so popular because it’s so versatile. The pads can be eaten as vegetables and the fruit as dessert, or both can be used as medicine. The different components of the Ficus-Indica are used to make everything from dinner entrees to alcoholic beverages.

Especially in Mexico, the pads and fruits from this cactus are considered a delicacy. But food isn’t the only use of this cactus. 

Upgrade Soil with Cacti

In desert places like the Mediterranean, it is used to slow soil erosion and the shifting of sands. It also improves the quality of soil by replacing Nitrogen and organic matter into the soil.

Ficus Fills the Cows

In the US, the cattle industry has begun using the spineless variety to feed cattle on the desert ranges. Not only is it a cheap food, but its water content is so high that it reduces the need to water the animals who consume it.

Fuel Up with Ficus

Since the Ficus-Indica readily converts water into biomass, Mexico has developed a pilot plant for using the biomass form the Opuntia Ficus-Indica to produce a sort of biofuel.

This species grows very fast and is relatively maintenance free. It is extremely hardy, capable of withstanding temperatures as low as 10 F. It only needs full sun and a little water now and then.

This is one plant that gives back far more than it takes!

Opuntia Santa-Rita

The Santa-Rita grows more slowly than the Ficus-India, but it is well worth the wait. The Santa-Rita can put on a color show like no other cacti.

This variety of prickly pear produces flat pads in colors of

  • Purple
  • Pink
  • Red

The colors can change at times when influenced by climatic conditions. The depth of color in the pads increases during

The purple color fades a bit with too much water, and in warmer temperatures, the pads turn bluish-green. 

What makes this plant so interesting is the stacking of colors. The mature pads are blue-green while the young pads are purple or pink. Top that with red or yellow flowers and you have quite the painted desert show!

It needs to be watered only during the hottest summer months whenever the pads start to wrinkle or appear thinner than usual.

Its flowers can be yellow or red.

Santa-Ritas produce a small purple fruit that is edible, but you’ll have to fight with the birds for it. It seems that Santa-Rita fruit is their favorite snack.

This cactus does best when it receives six or more hours of full sun daily, preferably on a southern or western slope. With this species reaching a height and width of up to five feet, it does best when planted outside with plenty of room away from other plants.

This cactus is mostly trouble-free, and can tolerate cold temperatures, even frost with no problem.

Cacti Never Looked So Good

While they must be handled with care to avoid personal injury, Prickly Pear Cacti provides a unique and rustic feel to their surroundings. Whether indoors or out, they have a way of reminding us of simpler days, of adding rugged beauty and charm in return for so little care.

Can An Overwatered Cactus Be Saved?

Cacti are generally low-maintenance plants. Give them access to sufficient light and a minimal amount of care, and they flourish.  In fact, you can even ignore a cactus plant, but it will still thrive. But one of the easiest ways of killing a cactus plant is by overwatering.  In fact, overwatering kills these succulents much faster than underwatering. It is also the primary cause of root rot among cacti plants.

So, can an overwatered cactus be saved?  If the overwatering has already caused extensive root damage, then it might be difficult to save your dying plant. However, if you realize the problem earlier, then it is possible to help your plant bounce back with proper care. The most critical thing is to assess the damage accurately and initiate the process of saving the plant as soon as possible.

In this post, we discuss everything you need to know about overwatering cacti plants. The dangers of overwatering, the signs & symptoms, and how you can save an overwatered cactus plant.

Dangers of Overwatering a Cactus

The most common problem gardeners have to deal with when starting out with cacti plants is overwatering. But this might come with a hefty price that is so painful to pay as we had mentioned in the introduction. So, what are some of the dangers of overwatering a cactus plant?

1. Loss of color

Most cacti plants have different tones of green ranging from the lighter lime hues to the deep virid shades.

However, an overwatered cactus will mostly appear pale and dull. The discoloration usually starts slow such that you may even miss to notice any significant difference between the plant’s original and present color.

A cactus plant.
If your cactus is changing color from green to yellow, you may be overwatering it.

Over time, the green color turns to yellow due to chlorosis that occurs as a result of overwatering. Chlorosis refers to the loss of the green pigment and can lead to stunted growth and poor flowering of the plant.

Keep in mind that when there is too much water in the potting mix, the plant can no longer absorb nutrients properly. Therefore, your cactus stops flourishing because it lacks essential nutrients.

2. Soggy and droopy plant

Overwatering can also result in soggy and droopy plants due to too much moisture. Typically, if you touch your plant and notice that its stem feels soft and mushy, you should be worried.

The reason behind the softness and mushiness is that the stem cells are filled up with excessive water molecules and are now bulging outwards.

A cactus leaning down.
Excess water can make the leaves and stems of your cactus soft and soggy.

When the pressure builds up, the tissues of the plant start to swell and eventually rupture. The bursting of the tissues distorts the plant’s internal transportation structure such that it is no longer able to transport water and nutrients to other parts.

With time, different parts of the plant start drooping and falling off one by one. For large cacti species such as the Saguaro, the entire plant may topple over because it can no longer support its weight.

3. Root rot & death

When a cactus plant is exposed to excessive moisture, decomposition is bound to happen. A waterlogged soil interferes with air supply to the roots leading to root rot.

In most cases, rotting attacks the plant starting from the root tips before it starts spreading to the base. Since root rot happens below the surface, it is usually difficult to realize the damage until it is too late.

When the rot is worse, your plant becomes stunted, and sections of the stem may fall off when you touch them. It will then start to turn black, and if nothing is done to salvage the situation, the cactus will eventually die.

Signs of Overwatering

The truth is that it may be difficult to know if you are overwatering your cactus because the symptoms may be misleading. In the beginning, an overwatered cactus may show signs of health and happiness. It will flourish and even develop new growth.

However, things may not be the same underground.  As we have mentioned above, the plant’s roots start rotting when they are waterlogged. The unfortunate thing is that the roots below the surface may be suffering, yet the plant is deceiving you with a healthy and happy appearance.

But, it is still possible to catch the signs early if you observe your plant keenly. You should slow down watering when you notice any of the following symptoms:

  • Wilting: Your plant may become visibly droopy and sad looking
  • Edema: Blisters and bumps that leave permanent scars on the surface of your plant start forming
  • Squishy stems and spines
  • Yellowing: The color of your cactus starts turning from green to yellow. The change might be gradual, and it is easier to save your plant if you catch it early other than wait until the whole plant turns yellow.
  • Leaf drop: For cacti plants such as the Christmas cactus, leaves will start dropping easily even when the plant is healthy.

Saving an Overwatered Cactus

While cacti plants are among the most forgiving plants, overwatering is an exception to the rule. So, what are you supposed to do when you realize you have been overwatering your plant?

1. Re-pot with dry soil

If you are 100% sure that you have been overwatering your cactus, the best thing you can do is take the plant out of its pot and then re-pot it with dry potting mix. After re-potting, lay it out to dry for a few days before you water lightly.

A soil on the gravel.
Re-potting your overwatered cactus can help the plant revive.

During this process, be sure to check the overall status of the roots. If you discover any root rot, use a sharp and clean knife to cut away the rotted sections. Make sure you are not re-potting it with damaged tissues.

Keep in mind that if you leave any rot behind, no matter how small it might be, it will start to spread to other parts of the plant.

2. Get rid of all dying leaves and stems

If you start to notice sections of the stem or leaves falling off, then it is a clear indicator that you have been overwatering your plant. At this point, take time to get rid of all the dying stems and leaves.

If a section of the stem is rotted but the leaves/spines are still intact, consider cutting off that section even if it means doing away with the few leaves attached to it.

For your cactus plant to survive, you must cut and remove all the infected parts because the rot spreads to other areas.

3. Start watering properly

Once you have re-potted your plant and ready to go, make sure you correct the mistake you have been committing all along; stop overwatering.  Proper watering will be vital in preventing further problems. It also gives your plant a good chance of surviving.

A person watering the plant.
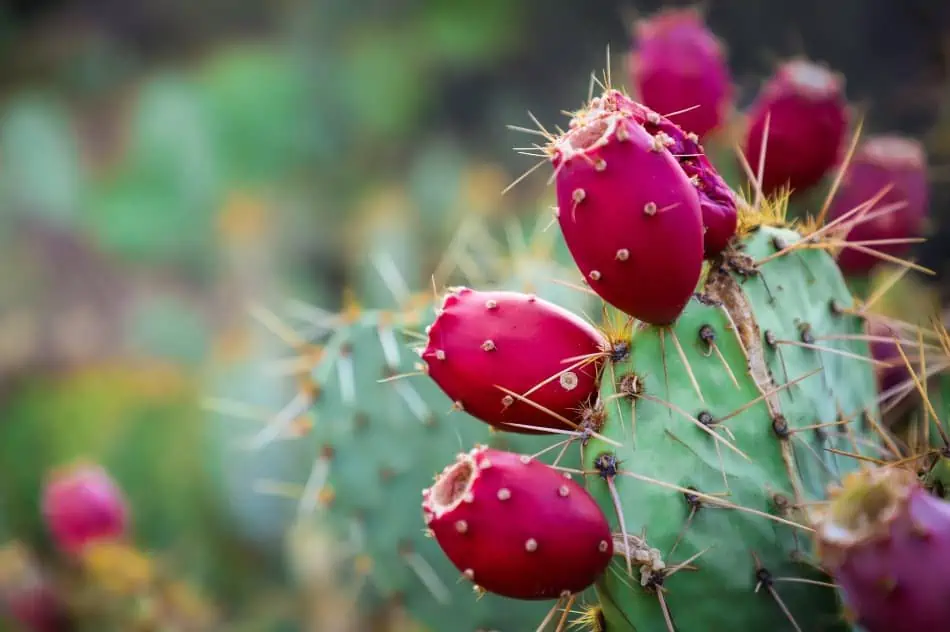
To prevent your cactus from overwatering, only water the plant when the top two inches of soil is completely dry.

Do not water your plant immediately after re-potting. Instead, wait for at least one week and make sure your first watering is light. From there, you should only be watering your plant when the top two inches of the potting mix is completely dry.

Do not water your plant from the bottom and never leave it sitting in a source of water for too long. Whatever you do, just keep in mind that it is better for your cactus plant to be dry than wet.

In fact, underwatering is not a serious issue and rarely kills cacti plants. A good rule of thumb is to water your indoor cacti once every ten days. 

How to Prevent Overwatering

The best way to make sure your cactus grows without any problems is to find out its water requirements and try as much as possible not to overwater it. While this is not an easy thing to do, especially if you are a beginner, there is a general watering rule that can help you.

Typically, you should let your potting mix dry out completely between watering sessions. This means that you should always measure the moisture level in the soil before watering your plant. You can achieve this by dipping your finger in the soil to feel the level of wetness before you water.
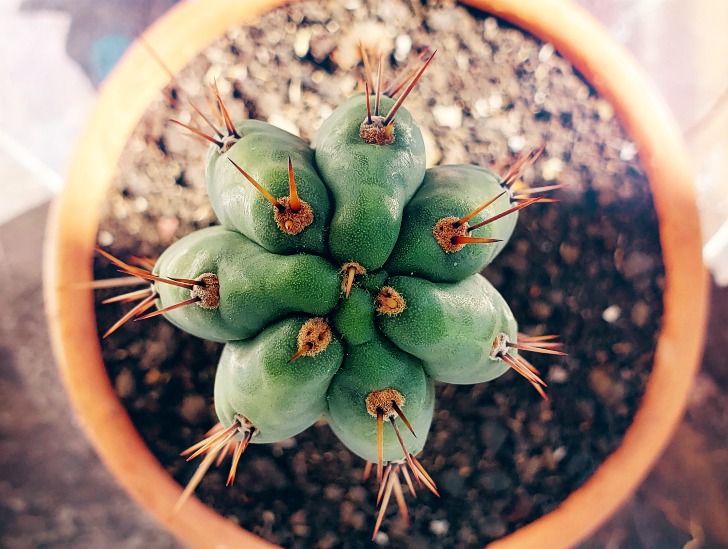
If your finger feels wet when you dip it into the potting mix, wait for a few days and test the soil moisture again before watering.

A water droplets on the cactus.
A cactus may require watering only once per month during winter.

Also, it is good to keep in mind that cacti plants require less water in the winter. In fact, a cactus may require watering only once per month during winter. Some species can even survive through the entire winter without watering.

No matter the time of the year, it is essential to ensure your potting soil is well-draining and never allow your plant to sit in standing water because the results can be catastrophic.

Final Thoughts

Proper watering is a tricky skill that you can only learn through practice. If you are just starting out, there is a high probability of overwatering your plants.

However, with time, you will start learning about the water requirements of your plant, and you will be able to tell if you are overwatering it. Don’t feel bad if you can’t crack it during the first few months because it is a learning process.
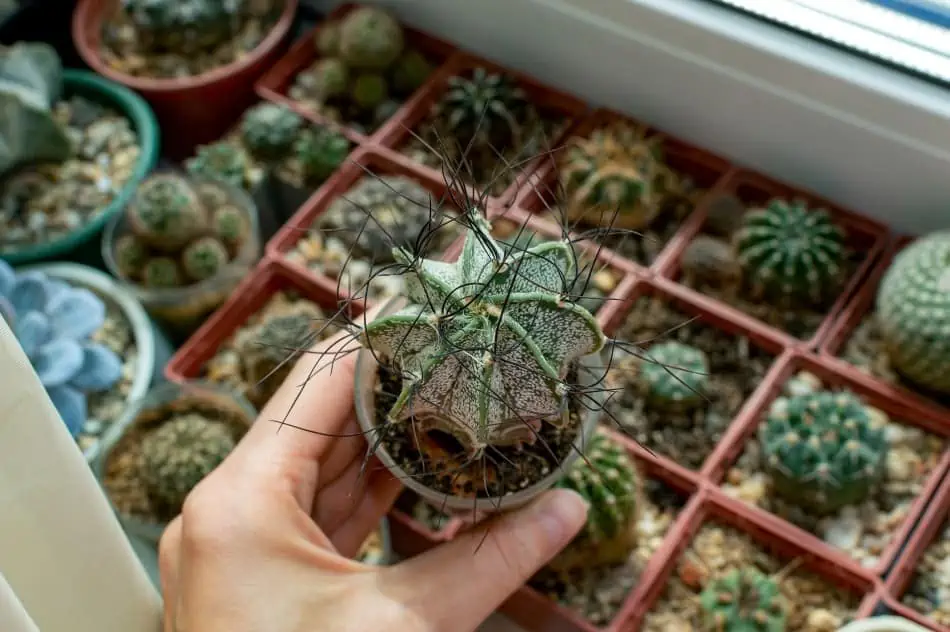
If you have ever overwatered your cacti plants and saved them, let us know what you did in the comments section below.