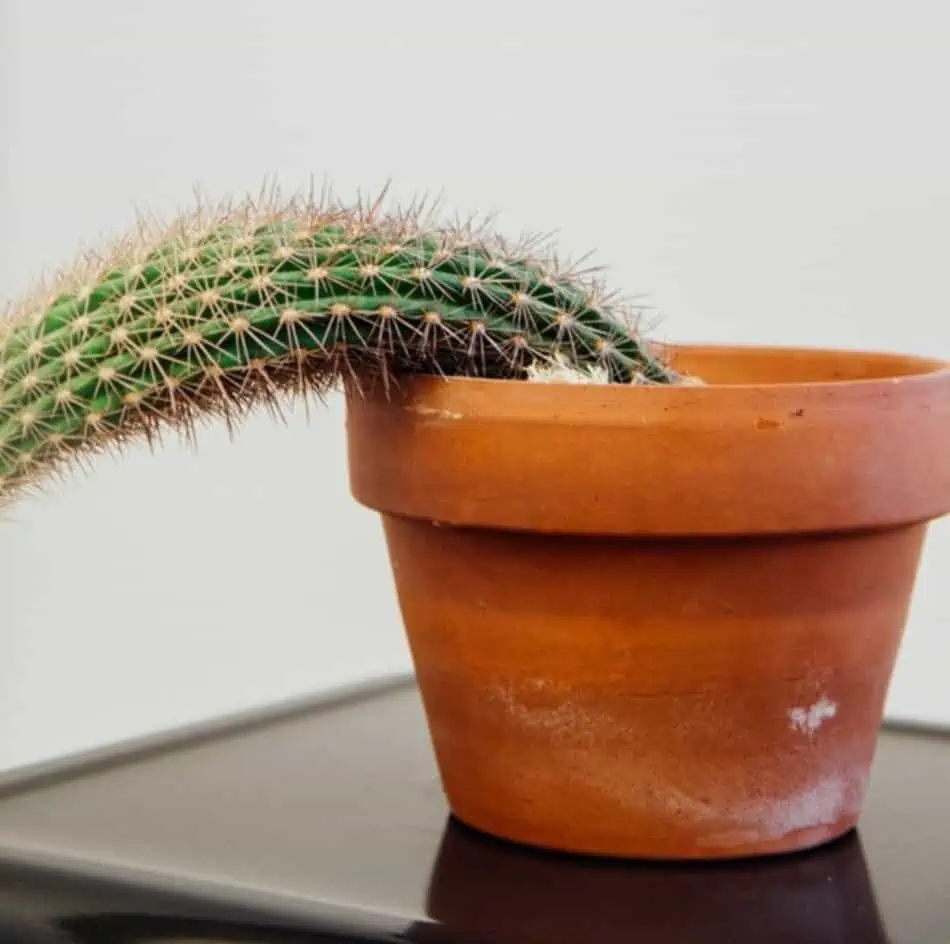
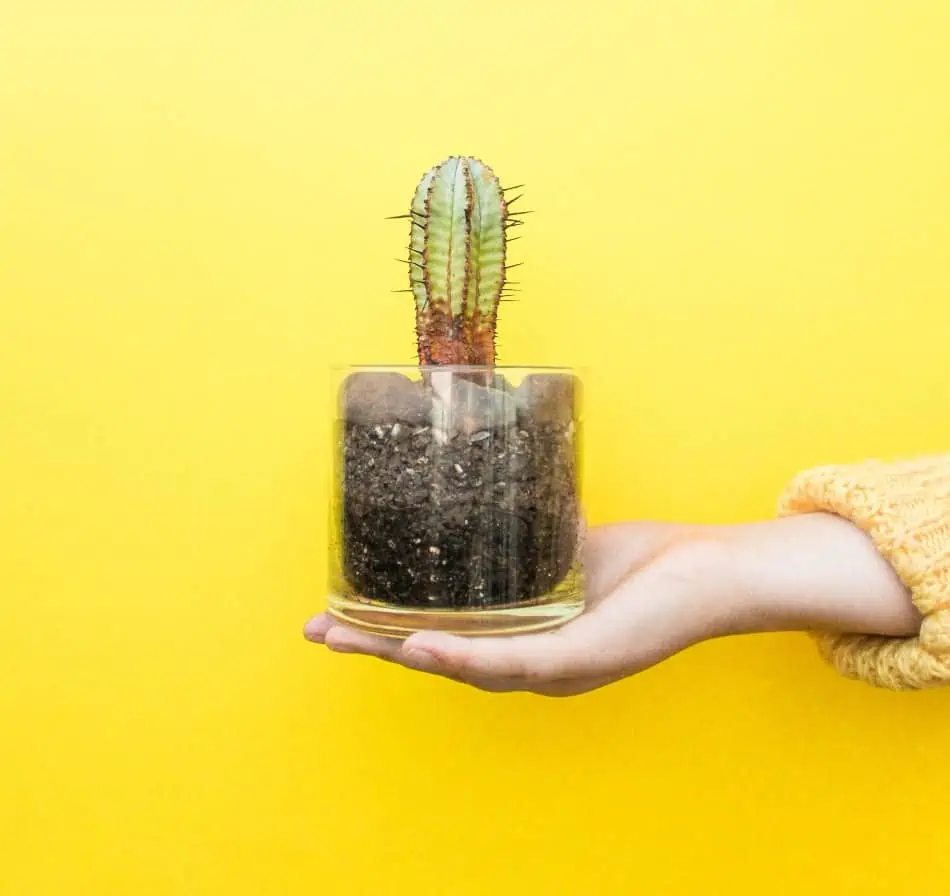
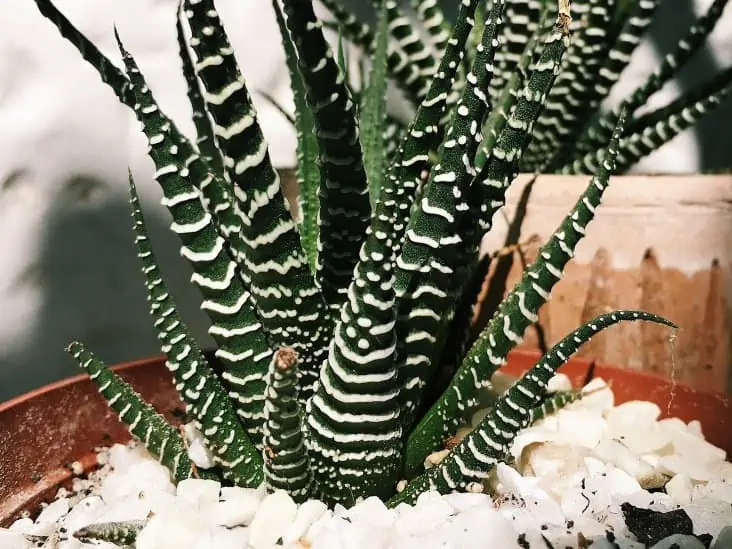
Succulents are a resilient breed of plants, so much so that you can actually plant a piece of it, and it will grow into a new plant. Regenerating something new from a decapitated limb may sound like a horror movie or the plot for Netflix’s upcoming sci-fi thriller, but it’s actually real life. Even if you cut off one of their branches, they will find a way to continue living.
Yes, you can cut off, or prune, a piece of a succulent and replant it. And with the proper living conditions, the pruned piece of succulent will take to its new home and grown into a full-fledged succulent.
Keep on reading if you’re interested in learning about pruning succulents. Once you master the process, it’s like growing multiple plants for the price of one!
Propagating a New Succulent
The process of pruning a piece of a succulent and using it to grow a new plant is called propagation. If done correctly, propagating can allow you to grow multiple succulents from a single succulent.
Performing a clean cutting is important for successful propagation. Using scissors or pruning shears will help you get the cut that you need. But you can also experiment with this process by using your hands and pinching off pieces of your succulent.
A single leaf of your succulent should be enough to propagate the plant.
Depending on what type of succulent you are working with, removing a single leaf is good enough. Whether you are utilizing shears or just your hand, aim to remove a leaf of your succulent as close to the stem as possible.
If your succulent is larger and has multiple stems or branches, you may be able to cut off the top of a certain section or an individual offshoot.
Drying Out the New Cutting
Once you’ve removed a series of leaves, stems, or offshoots, you will want to let the cuttings dry out. Depending on the amount of sunlight and heat, your cuttings will need to dry out for 1 to 3 days to scab over.
You should let the cuttings dry before you plant them.
Your cuttings should shrivel up just sightly. If the fresh cuttings do not have time to dry out, they’ll absorb too much water the first time you hydrate and drown or eventually develop root rot.
Watering the New Cutting
The cutting you pruned should be placed on top of the soil. Refrain from actually planting one end of the cutting into the soil. Once your cuttings have dried out sufficiently, it’s time to start watering them.
You should slightly water newly propagated cuttings every day.
Full-grown succulents do not need to be water every day. However, newly propagated cuttings do require a light watering every day. When the soil is dry, water the cutting. Using a spray bottle is a popular tool for watering, especially during the early stages.
Eventually, your cutting will take to its new environment and begin to set roots!
Ideal Living Conditions for Propagating Succulents
In order for your new succulent to thrive, you will want to create the ideal living conditions for it.
Above, we talked about the watering needs during the propagation process. But there are a few other things to consider moving forward.
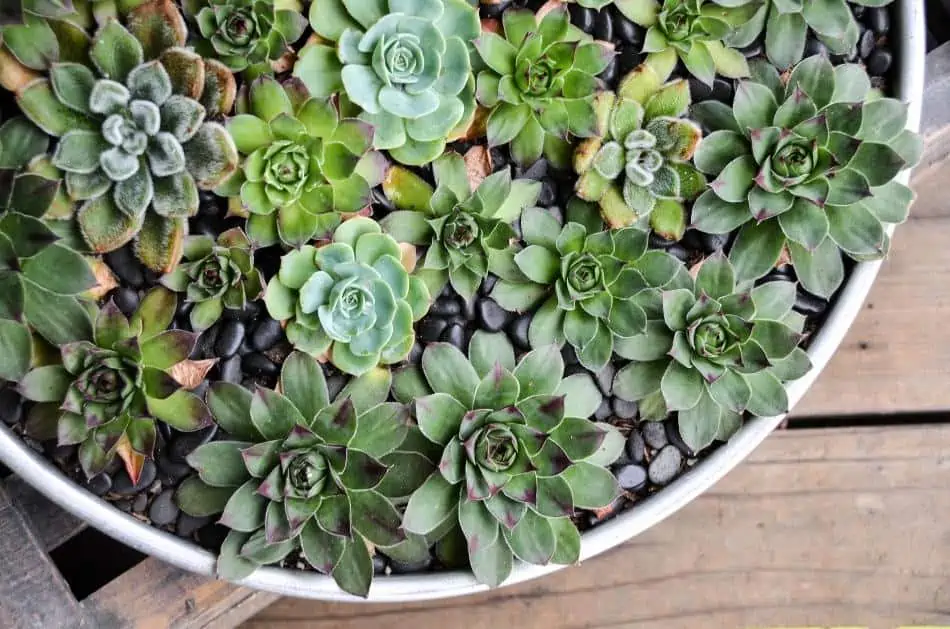
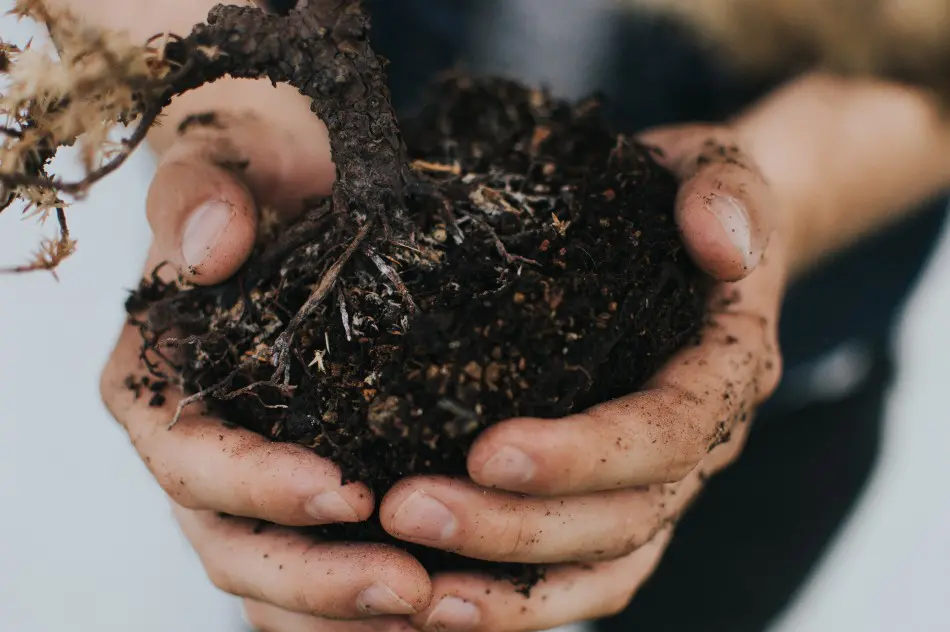
Soil type: First off, succulents require well-draining soil. Using a pre-made cactus potting mix will ensure that your growing medium is ideal for your succulent. To encourage draining, you might consider lining the bottom of your container with gravel or pebbles.
Sunlight requirements: In general, succulents enjoy a lot of sunlight. Ideally, around 6 hours of sunlight per day. However, be careful. Freshly propagated cuttings should not be placed in direct sunlight.
Watering needs: Succulents’ watering needs are considered to be pretty low maintenance. Depending on the size of your container, the soil, and your local climate, you should only be watering your succulent one time every 1 to 2 weeks.
Fertilizing: Succulents are hardy little plants that are easy to grow if you take care of their basic water, soil, and sunlight necessities. However, you may want to incorporate fertilizer to encourage faster growth.
Maintaining Your Succulents After Planting from a Cutting
Succulents are popular because they are low maintenance. For the most part, if you water them correctly and plant them in high-quality soil with plenty of indirect sunlight, they will grow happily. However, there are a few maintenance items to consider in order for your succulents to be the happiest they can be.
Although succulents are low-maintenance plants, you still need to provide water, give enough sunlight, and prune them.
Pruning your succulent is not just something you can do to propagate more succulents. In fact, pruning is also important for removing dead and dried-up leaves and encouraging new growth.
Dried-up leaves should not cause alarm. It’s just part of the life cycle. We recommend you prune your succulents sometime in the Springtime.
Cleaning your Succulents
Maintaining your succulents may also involve cleaning and dusting. Dust and other debris can build up on your succulents. This can take away from their vibrant colors, affecting their aesthetic appeal, and may even encourage pests or diseases to grow.
You can wash your succulents with a damp ramp. Or use a spray bottle to wet them before removing any dirt or dust. If your succulents are outside, you may need to remove extra debris like sticks and leaves.
Preventing & Treating Pests and Disease
No matter how well we take care of our plants, sometimes Mother Nature gets the best of us. If you grow succulents long enough, you may eventually encounter some pests or diseases on your plants.
The best thing you can do is prevent the pests and diseases from establishing themselves in the first place. There are a few simple things you can do to prevent pests and disease:
Encourage airflow: airflow is important for succulents. If indoors, avoid positioning your succulents in a closed room with little airflow.
Check your plants often: if you examine your succulents regularly, you can stay ahead of any pests or disease. If they do develop, you’ll be able to spot them before the infestation gets bad.
Wash your succulents: washing your succulents regularly with water or a diluted alcohol solution will help prevent pests and disease. You can also use neem oil for extra preventative power.
Don’t overwater:Or, underwater for that matter. These two things can’t be mentioned enough. There’s a rumor out there that succulents don’t need water- they do! But they don’t need a ton. Just a weekly misting is usually enough.
Treating Pests and Disease
If pests or diseases do take hold of your plants, you will have to start a treatment plan to get rid of the infestation. The first thing will be to separate the struggling succulent from other plants to prevent whatever it is from spreading.
Spraying the leaves with neem oil is the preferred method. If the infestation is particularly bad, then you can also soak the soil with neem oil. Using a diluted solution of rubbing alcohol and water can also kill some types of bacteria.
If the infestation is particularly bad, then you can also soak the soil with neem oil.
Depending on the problem, you may also consider using a pesticide or herbicide. If you do choose to incorporate chemicals, make sure to follow the directions. If your plant is indoors, ensure that the product is approved for indoor use.
And if you have small pets or children, using an organic and biodegradable product will keep all parties involved much safer.
Summary
Succulents are amazing plants. They are easy to grow and relatively low maintenance. Better yet, if you properly prune them, you can propagate entirely new plants from the cuttings.
Just follow the recommended guidance from above, and you’ll be propagating and growing new succulents in no time.
Succulents are a beautiful way to decorate your home or office, and with so many varieties to choose from, you might be tempted to break the bank buying them at your local garden store. If you want a more cost-effective approach to filling your life with succulents, and you are willing to put a little time and effort into the process, growing your own succulents from seed might be the right choice for you!
Before you get started on growing succulents, though, you’ll want to be sure you know the basic steps required. Understanding the supplies and environment you’ll need to be successful, and being aware of some potential pitfalls to avoid, will help ensure you end up with a satisfying experience.
Choose the Type of Succulent You Want to Grow
There are hundreds of types of succulents out there, from the very common (like aloe) to rare varieties that are too difficult to find or too expensive to purchase in mature form.
Take some time to learn about the types of succulents before choosing the one (or more than one!) that you’d like to grow. This guide from Succulents and Sunshine might be a good starting point; it has a helpful overview of 100 different types of succulents.
As you choose your succulents, you’ll, of course, want to consider how they look. But also think about how big they will be when they are mature and whether that size will be the right fit for where you plan to keep the plant long-term.
You should also look carefully at the care needs of each type of succulent, both during growth and after it is mature. If you’ll struggle to meet the plant’s needs related to watering, sunlight, and temperature, you may want to choose another variety of succulent to grow.
Don’t forget that growing succulents from seeds is a long process, so you should also look at the germination time for each succulent type. Don’t choose a plant that takes months to germinate if you’re looking for faster results!
Purchase Seeds from a Reputable Seller
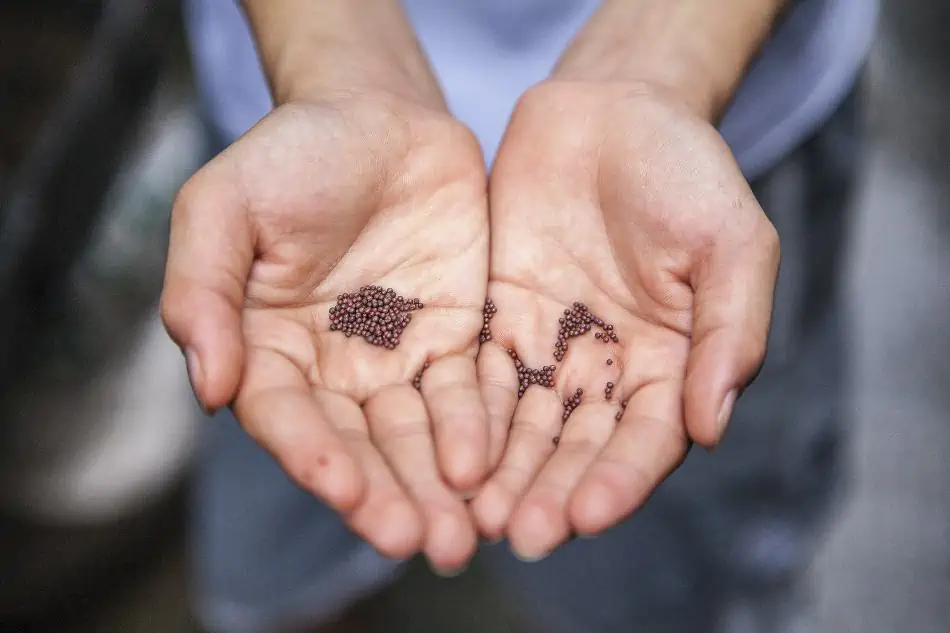
Because succulent seeds are so small, they can easily be confused with a bit of dirt or other gardening material, so it’s important to buy your seeds from a reputable seller to ensure quality. Check customer reviews before you make a purchase. Given the amount of time and effort you’re going to put into growing your succulents, you do not want to be disappointed down the road when you discover you bought fake seeds!
Gather and Prepare Your Other Supplies
In addition to your seeds, you’ll need some other supplies to grow your succulents:
A planting tray (more than one if you want to grow more than one type of succulent) – choose a shallow tray (just 3-4 inches deep) with drainage holes in the bottom
A cover for the tray, such as a plant dome or simple plastic wrap
Your chosen planting medium (sand, soil, etc.)
Prepare your supplies, including a planting tray, its cover, and suitable soil for your succulents.
One key decision you’ll need to make in growing succulents from seed is what planting medium to use and how you will prepare it. Succulents need soil that drains well to avoid the seeds being over-watered. So, you’ll want a sand-based soil mixture rather than a traditional potting soil.
You can opt to purchase a soil specifically made for growing succulents, or you can make your own soil mix combining horticultural sand and potting soil. If you want to learn more about making your own soil mixture for growing your succulents, this Better Homes & Gardens guide provides a great overview of types of potting soil and mixes.
Whatever soil you choose, be sure to sterilize the soil before use. Bake it in the oven (30 minutes at 300 degrees F) or the microwave (10 minutes), cool completely, wet the soil, and drain. Now you’re ready to plant!
Plant the Seeds
To plant your seeds, first, prepare your planting trays. Fill the trays with soil up to 1- to ½-inch from the top of the tray. Make sure the top of the soil is damp; this will allow the seeds to stick.
When dealing with tiny succulent seeds, be sure that you are planting in a sheltered area. Because they are so small, they could blow away with the slightest breeze! You may want to carefully place the seeds in the palm of your hand to make them easier to arrange in the planting tray.
It’s generally not a good idea to spill them out onto the table you’re working on, as they could get lost in any soil or other debris.
Put the seeds on the top of the soil, carefully placing each one separately and providing space between the seeds. Consider the size of the mature plants in deciding how much space to leave between seeds.
If you are using individual growing trays, just put one or two seeds in each one. If you are growing more than one type of succulent, plant them in different trays.
To grow succulents from seeds, put individual seeds on top of the soil and keep some space between the seeds.
If you need to move the seeds after placing them, use a small tool like a toothpick. Do not cover the seeds with soil. When the seeds begin to germinate, they need to find their way to light above the soil, and with seeds so small, even a little soil on top would prevent them from doing this.
After you have planted the seeds, cover the planting trays with your plant dome or with plastic wrap with some ventilation holes in it. Succulent seeds need a warm, humid environment to grow.
Some gardeners recommend direct sunlight at this stage of growth, while others suggest a warm sunny setting that is not in direct sunlight. Consult the specific care guidelines for the type of succulent you have chosen to grow and select a growing location accordingly.
Provide Daily Care for Germinating Succulents
Succulents need three key things to grow successfully: proper light, proper amount of water, and proper temperature.
After your seeds have started to germinate, you’ll want to keep your plating trays in a well-lit area but out of direct sunlight. The seeds need good airflow to keep growing, so remove the lid from the growing tray once you see seedlings.
Although you generally only need to water a mature succulent once a week, when they are growing, they need constant water. However, you also need to ensure they are not overwatered.
Daily care is essential for growing healthy succulents.
You may want to maintain water in the tray beneath the growing tray, allowing the water to be soaked up through the drainage holes. Add water daily to ensure the seedlings have all the moisture they need. Once the plants have fully established roots, you can gradually shift to watering less frequently.
Finally, most succulents should be kept at 70 degrees F when growing. You should ensure that the plants are not exposed to temperatures below 60 degrees F or above 80 degrees F. Choose your growing location based on the temperature and sunlight needs of the succulent variety you’ve chosen.
Replant the Mature Succulents
As we’ve mentioned already, growing succulents from seeds can be very rewarding, but it is not a fast process. You’ll need to provide ongoing care for your growing succulents for months before they are mature enough to replant and place them in their permanent homes.
After planting succulent seeds, it will take a couple of months for the plant to be mature enough for repotting.
Thankfully, the care needs of the plants will decline over time. They need the most attention during their first days and weeks of growth, and then less as time goes on. That said, you don’t want to try to replant too soon.
Wait until the plant is large enough that you can easily move it without damaging fragile leaves and roots. It’s best to err on the side of waiting longer rather than moving the plant too soon. Usually, you’ll be able to replant after about six months.
There are two different approaches when planting succulents. One is to purchase the leaves, called pups, from a dependable succulent dealer. You can also propagate your existing collection of succulents following a few simple steps using the succulents already sitting in your window or plant stand.
While the official term is an offset, a succulent pup is a small root that pops out at the base of the succulent mother plant. If you are looking to have more succulents growing each year, it is best to remove pups in the spring. Some succulent plant owners will tell you late summer is best. You do what works best for you and your succulents.
Propagating Your Succulent Pups
Whatever timeframe you choose, there are always correct ways and procedures that may not work out well for you when trying the first attempt to produce new succulents. When propagating succulent pups, follow these thirteen basic steps to get your new succulent to grow correctly.
Keep in mind that your succulent has been tirelessly working year-round, producing pup after pup as it grows. Most pups will be well-formed around the base as the other leaves are still in various growth stages.
Make sure your chosen pups are fleshy and well-shaped before you propagate them.
Look for pups that are not showing signs of rot or discoloration. You will want to choose fat, well-shaped leaves to remove from the base. Flat leaves or those ripped or torn will ultimately wither and rot during the process.
Before you begin to remove the leaves, there are a few tools you will need to make things easier.
Root Hormone (optional but recommended)
A transfer pot with fresh topsoil mix
It is also a good idea to wash your hands thoroughly before beginning to remove the pups. You will be handling the pups with your fingers to pull them from the mother plant’s base. You don’t want to take a chance of transferring a bacterial infection to either the succulent or the pup itself.
Removing the Pups of Your Succulent
Now that you have identified the pups you intend to use for propagation; the next step is to remove each one. Hand removal of a pup is a tedious step but crucial one, and it requires patience. Grasp the first pup and gently rock it back and forth.
It is worth mentioning that your first pup may separate from the stem easily, but it is also a strong possibility that it may provide a tenacious grip on the trunk requiring you to work it a bit. Continue rocking the pup back and forth until it finally comes off.
Your goal is to have the entire leaf come off, including the base that attaches to the stem. Without it, the pup is damaged and will not survive the transfer process. Your first attempts may not be as successful, but keep practicing. You will get the hang of it soon.
Let the Succulent Pup Dry
As with all succulent leaves, you need to remember that the leaves are full of moisture. When you pull the pups away, it creates a wet wound at its base where it is connected to the stem. Before your next step, you must let the separation wound dry.
Remember not to place the pups in any area of direct sunlight. They need to remain warm but not warmed by direct sun. Also, depending on the pup’s size and moisture content, it may take about two days to two weeks to dry.
You will know when the pup has dried sufficiently by examining the base of the succulent leaf. What you should see is a small scab covering the end. If there are still some pups that have not scabbed over, do not include them in the next step.
If you do, the results will be disappointing as the succulent leaf will rot and die in your potting mix. Considering that you have waited almost two weeks for the drying process to finish, a few more days for the final pups to dry shouldn’t be too long to wait.
Growth Hormone For Your Succulent Pups
Using Root starter or growth Hormone makes sense to give your pups a leg up when it comes to establishing a great root system. Dip the scabbed end of the pup into the growth, and then place the scabbed portion into the pot filled with fresh potting mix.
You do not have to bury the scabbed end of the pup in the soil if you don’t want to immerse your succulents in the mix immediately. Many gardeners who frequently propagate their succulents often lay them flat on the fresh potting mix.
If you chose the flat method, you should remember to arrange the pups with enough growth space for when they take root and start growing. While either way will work just as well, these two methods are merely a gardener’s preference.
Direct Sunlight and Your New Succulent Pups
During the rooting period, your pups do not need direct sunlight. Direct sunlight at this stage does more harm than good as it will result in drying out the succulent.
Avoid direct sunlight during the rooting period.
Many gardeners on their first succulent propagation attempt, have gone to the window to inspect the progress of their propagation efforts only to discover a bunch of withered and dead leaves. Yes, there will be a time to expose your succulents to sunlight to help them grow, just not at the moment.
Do Not Water Your New Pups Mist Instead
Newly propagated succulents need more water than fully grown succulents, but the last thing you want to do is drown them. You may need to mist once a week in humid environments where the soil stays moist.
Instead of watering your newly propagated succulent, mist them once a week to keep the soil moist.
It will help your pups on their journey to mist twice a week when growing in dry climates. Remember to test the soil with a fingertip to determine moisture level before you drag out your mister.
Succulent Pups Over The Next Four Weeks
Over the next four weeks, if you adhere to the basic rules of sunlight and moisture, you should begin to see the products of your efforts. Tiny little root stems will start to show curling from the base of your pup into the soil.
If you propagated your pups using the flat method, you might want to cover the roots with a light dusting of potting mix and continue misting as you have over the last four weeks.
New Succulent Pup Growth
Where there are new roots, there will eventually be a new plant. Continue misting your new plants as the new succulent begins to thrive, and you will notice that the pup used to propagate your succulents has withered and died.
Where there are new roots, there will eventually be a new plant.
You have a couple of choices at this point. You can leave the original pup where it is until it decomposes entirely, or you can remove it and discard it. Take care if you choose to remove it. You will need to apply the same care with the root system when removing the old pup as you did in the beginning.
Time for a New Propagation Transplant
Your little propagation wonder has now grown into a baby succulent and is producing pups of its own. It is time to transport it to its new home, where it can continue to thrive and multiply.
Hopefully, the final resting place you’ve chosen does not place your baby succulent in direct sunlight. At this stage of growth, your succulent still needs to stay away from the harsh heat of the sun.
Place Your Succulents in the Sun
As your succulent continues to grow, you can now move it to either your window box or plant stand where the sun filters in and your succulents get direct sunlight.
After your succulents start to grow, you should place them in a way that they get plenty of direct sunlight.
Continue to water your new succulent as you would all of your other plants until next spring or summer when it becomes time to propagate some more pups. The more you perform the propagation steps every year the more succulents you will have to display with a sense of pride.
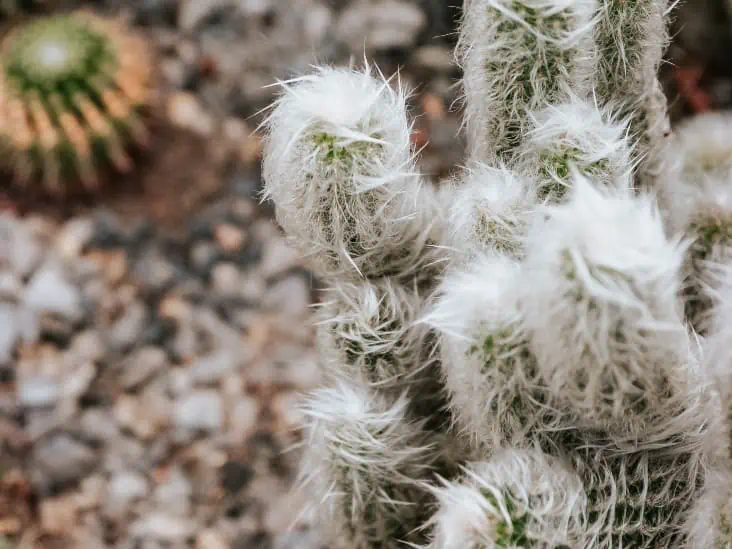
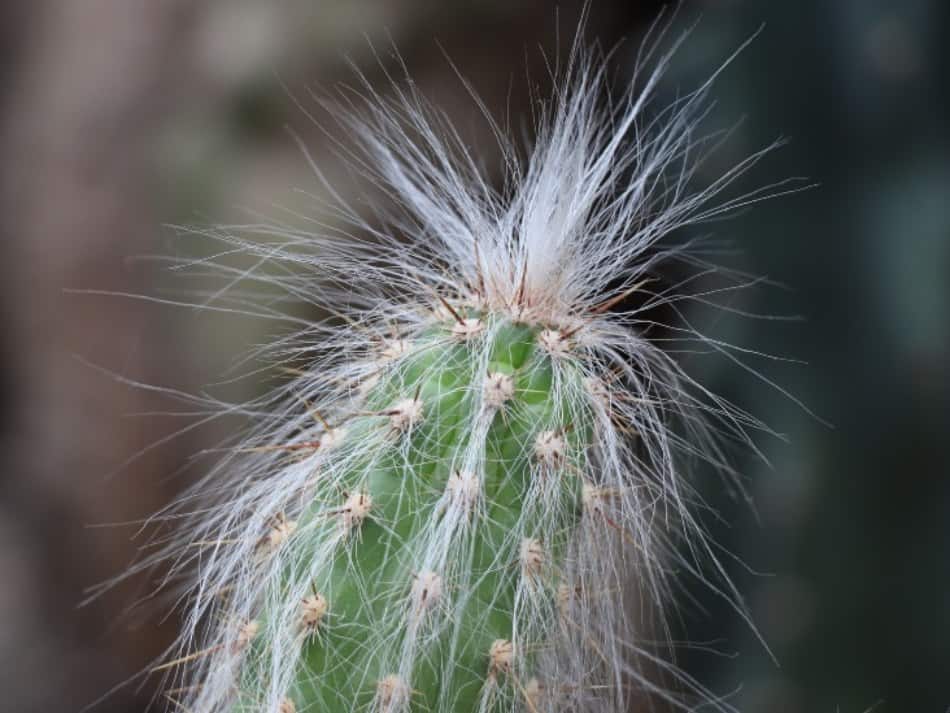
Old Man cactus, or Cephaocereus Senilis in its Botanica name, is one of the great-looking cactus plants you’ll desire to have in your garden. The plant grows long white hairs covering its entire body, making it appear like a senior citizen; hence, its name. Don’t be tempted to try candling the white hairs because the old man also protects himself with some sharp spines that can prickle your hands.
To grow old man cactus, you should try to mimic its natural habitats. This cactus is native to Mexico and grows in hot and dry climates. It can thrive both in containers and on the ground. When grown indoors, the old man has the potential to portray a lot of character and personality. Whether you grow it indoors or outdoors, make sure it receives lots of sunlight.
If you’re wondering how you can grow your old man cactus the right way and see it thrive, here is a guide for you. Read through to help you get started with your old man cactus.
Old Man Cactus Growing Needs
Old man cactus needs sunny and warmer locations to thrive. You can use a cactus mix, a blend of sand, and topsoil in a container. Make sure you get an unglazed pot so it can easily evaporate to get rid of excess moisture. Too much watering of this plant is the main cause of rot and other diseases. You should also watch out for pests which easily hide on the hairs and kill your cactus without you noticing.
Old Man cactus requires warm conditions and infrequent watering.
The plant is very heat and drought tolerant; hence, it won’t die easily under such conditions. It can make a very xeric landscape plant when it reaches its large, impressive size. But make sure you plant it away from the play area because of the sharp spines. When taking care of it, you can wear some gloves and protective eyewear. You should also understand that the plant may need some attention at its young age, but this reduces as it continues to mature.
Should You Grow Old Man Cactus Indoors or Outdoors
Old man cactus will reward you with its beauty if you add it to the collection of your indoor plants. Just make sure the temperatures are hot, and you put it near the windows where it can receive lots of sunlight.
While growing this cactus outdoors, especially at its young age, can be challenging, you can do it. Just make sure it gets the right outdoor conditions. If you’re lucky enough to mimic its natural habitats, old man cactus can grow pretty large and will likely flower easily. It will adorn your garden with its beautiful white hairs and its pretty flowers.
If you can’t mimic its natural conditions, then it’s advisable to keep it indoors where it will be easier to control the temperatures.
Growing Old Man Cactus from Seeds
Growing old man cactus from seed can take a long time before you can get something recognizable, but you’ll get the satisfaction of growing your cactus from scratch. Growing them from seed is the best solution, though you can also cut or graft. If you prefer going the seed way, you can order the seeds online or from a nursery nearby.
Growing an Old Man cactus from seeds is a relatively slow process, so you should also consider purchasing a grown cactus.
To plant the Cephalocereus Senilis seed, you should prepare a shallow tray or some good potting soil. Spread the seeds openly on the surface and spray some water using a spray bottle. Use plastic wrap to cover the soil and prevent moisture from escaping. Place your tray or pot in a warm place and make sure it gets indirect light. Make sure the soil remains moist throughout the three months until the seeds start to spout.
If you’re not patient enough to ensure the slow germination period and the slow growth, then growing cactus from seed is not your thing. Try purchasing one which has already grown instead. Make sure you understand how a healthy old man cactus should look like so you don’t end up purchasing one with root rot. Also, make sure you get one grown from a nursery and not those poached from the wild.
Old Man Cactus Fertilization and Care
The old man of Andes will really appreciate and reward you if you give it some extra care in the form of TLC. At its young age, the old man will appreciate some fertilization and a little bit more attention. Of course, this will reduce gradually as the cactus continues to grow. You need to apply the fertilizer once or two times during summer. Use all-purpose plant fertilizer with low nitrogen for your plant.
It will also need you to pay special attention to very specific environmental conditions and soil types. Make sure it receives bright light and heat as it grows. During summer, give your cactus full sun. It will appreciate a window space with southern or western exposure to receive the desired sunlight. You should ensure the topsoil in the container dries out completely before your next watering. Drench the soil completely when watering.
As your Old Man cactus grows, do not forget to give the plant enough direct sunlight during summer months.
When it’s winter, reduce watering. You can do it only once or twice throughout the season. Monitor the pot to ensure it’s completely dry before you water it next. Give it a bright, dry, and cool setting throughout the cold temperature period. It will appreciate temperatures of around 50 to 60 degrees Fahrenheit.
Your cactus may appear dormant during winter because of the unfavorable conditions. Don’t do anything to it since it will regain back its shine when winter ends. It’s also advisable to encourage dormancy at this time so it can survive the harsh winter weather.
Old Man Cactus Soil and Repotting
There’s specialty potting soil made to suit different kinds of cactus. The soil needs to have high mineral content to sustain it for a long time. You can mix cactus, potting soil, sand, and some pumice and perlite. This mixture will ensure good water drainage and proper ventilation.
Always pot your Old Man cactus in a pot which offers enough drainage to get rid of excess water.
When it comes to potting, make sure the pot enables good drainage of the soil. Drill one or more holes at the bottom of the pot to ensure this. This way, excess water will escape and leave the soil well-drained to support the cactus. Consider an unglazed pot or terracotta as they come in good sizes and capable of soaking up excess water. Don’t report your cactus often. Take at least three to five years before changing the pots so that the roots can be strong enough.
Old Man Cactus Blooms
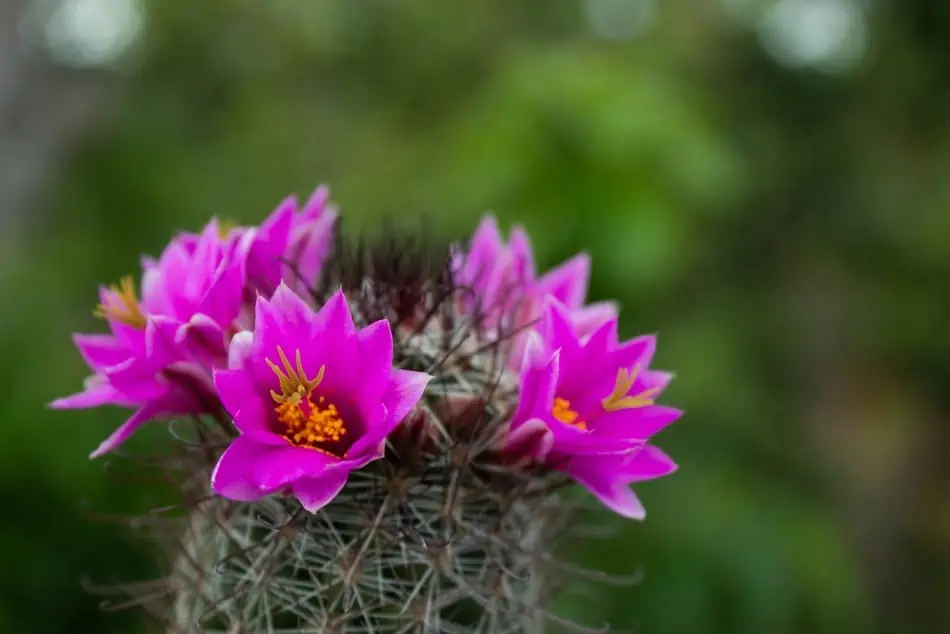
Old man cactus can also adorn your home garden with some pretty pink flowers in early spring. It produces its first flowers after 20 years of growth. The sweet flowers only open at night from the head of the cactus and close by down.
When your Old Man cactus is mature enough, it will start producing beautiful pink flowers in spring.
If you want to see the beautiful blooms, you must give your old man cactus the care it deserves. It might fail completely to produce the flowers, especially the ones that have grown indoors. You might consider fertilizing it to get the blooms. The cactus can also produce some long fruits, but this is quite rare in cultivated cactus.
Pruning Your Old Man Cactus
Once the old man cactus is grown enough and stable on the ground, it will become less demanding in terms of care. But this doesn’t mean you should neglect it. You don’t need to prune it because it grows very nicely in one straight line. Its long, soft, and white hairs act like protection from excess heat and cold. It also helps the cactus retain moisture for a very long time, even in very dry conditions. This makes the plant appear healthy and beautiful throughout the year.
Old Man Cactus Disease and Pest Attack
Like any other plant, old man cactus is prone to attack by pests and diseases. Its long, soft hair gives a very good hiding ground for several pests, so you won’t notice them until they’re done an immense distraction.
Another problem you may experience with this cactus is rots which mainly occur when you overwater your plant. The long, soft hair also attracts mildew to the plant, and this can endanger it.
One of the ways to protect your old man of Angles from these dangers is to ensure correct watering. Never give mildew a chance to attack your plant because it’ll spread very quickly and kill your precious plant.
A common pest problem with cactus is spider mite infestation or cactus mealybugs. The pests hide in the long hair. You need to check from time to time, and when you notice any signs of a problem, re-pot your cactus plant. Consider purchasing mild insecticidal soap or insecticide that will help kill mildew. You can also treat your cactus using shampoo. Keep inspecting your cactus to catch any re-infestation that can end up killing your cactus.
Why Shampoo Your Old Man Cactus
Apart from getting rid of pests that hide in the long hair, shampoo is also a perfect way to ensure your cactus stays clean and beautiful. The fuzzy white hairs capture dirt and dust over time and might not look white anymore. Mix a liquid castile soap with water to give your cactus some cleaning.
Mix unscented organic castile soap with water and use the solution to clean your Old Man cactus.
It’s important to use organic and unscented castile soap, so you don’t leave any chemicals on your plant. Make sure you carefully wash off the detergent from your cactus, so it doesn’t seep into the soil. Comb the hair upwards and allow it to dry. You’ll love the clean, neat, and new look of your old man cactus.
Old Man Cactus Offsets
Another important part you should never overlook when propagating this cactus is the offsets. Old man cactus grows in clumps, so you need to separate individual cacti, so they grow better. The process can also involve uprooting some offsets from the clumps. Make sure you use a sharp, clean knife while doing this, and wear protective gloves for yourself.
Allow the offsets you’ve uprooted to dry out in the open for some days. The clumps will have some open wounds that can get infected by bacteria and fungi if not well taken care of. The drying process allows the wounds to callous. This will protect them from infections and give them a better chance of surviving when you plant them back.
Old Man Cactus Frequently Asked Questions
Can you grow Cephaocereus Senilis where there are pets?
If you love both animals and plants, you need to find ways for both to cohabit. Luckily the old man cactus and your pets, such as cats and dogs, can cohabit comfortably in one house. The plant is not poisonous to these animals. The animals will also not move near it because of the sharp spines.
What can cause Cephalocereus Senilis to die?
When you plant your old man cactus, you always expect it to thrive and adorn your garden. But that doesn’t happen all the time as your Cephaocereus Senilis can also die instead of growing. But what can be the cause of death?
Overwatering
One of the biggest causes of death in many cactus plants is too much water than they need. Cephalocereus senilis is an easy-to-care cactus that can survive very hot temperatures with a little watering. But it only needs a fraction of water; hence, too much water will cause the roots to rot.
Overwatering your Old Man cactus will cause root rot and your plant might even die.
Infections
Fungi and bacteria can also attack your plant, and if you don’t realize it early, it will be too late to save it. If you give it too much water and fertilizer, it will develop a fungal infection known as phytophthora. The cactus will start to wilt and develop green discoloration.
Make sure the fungal doesn’t attack your plant by ensuring good drainage and following the correct fertilization method. If you don’t redeem it early enough, the infections can kill your plant.
Pest Infestation
Sometimes your plant will get attacked by all kinds of pests. The hairs act as good protection for the plant but can also harbor spider mites and mealybugs. These pests eat your cactus slowly, and you might not notice until the damage is done. Use mild insecticides on the plant from time to time to keep the pests away.
How fast does old man cactus grow?
Old man cactus is a slow-growing cactus that needs a lot of patience from your side. The seeds take time to germinate, and even after growth, the plant will not achieve much over a long period. You’ll also have to wait 10 to 20 years before you can see the old man cactus bloom. Sometimes it might never bloom, especially when planted indoors.
How big does old man cactus grow?
If you’re going to grow your old man cactus indoors, it’s natural to worry about how big it can get. Will it outgrow the pot soon? Will the indoor space accommodate it? Well, old man cactus is a slow-growing cactus that you can have indoors for a very long time without the need to take it outside. It grows up to 20 feet before flowering and can grow up to twice more height after its first blooms.
How do I make my cactus grow straight?
At times, you may notice your cactus leaning, yet you want it to grow upright. The leaning might not be disease or an unhappy cactus; hence, easy to solve. You can solve this problem by replanting the cactus in dry soil. Alternatively, you can add more soil around the base of a layer of small rocks and gravel on the topsoil.
How do I clean my old man cactus?
The hairs from the old man cactus can trap all kinds of dust and dirt, making it look brownish instead of white. You need to clean it to restore its sparkling white look. You can use water and mild detergent for this. Make sure you mixed the solution well, brush on the air and rinse well with plain water.
You can also shampoo the hairs of your old man cactus. Just make sure the shampoo or the detergent doesn’t get to the soil.
Conclusion
Cephaocereus senilis is one of the best cacti to grow if you want to adorn your garden with beautiful white hairs. Someone with zero knowledge about cacti will not even realize this is a plant once it’s grown enough.
But for you to achieve its beautiful look, you must learn how to grow and care for this cactus. Make sure the soil conditions are favorable; it receives enough sunlight and appropriate watering. You can also give it some TLC and extra attention if you want it to reward you with beautiful blooms.
It’s also important to note that your beautiful old man cactus can rot if the conditions around don’t favor its growth. Identify the things that can cause rot and death, such as too much water, infections, and fungi. When you do everything right, the old man cactus will appreciate your effort by adorning your garden with its beauty.
Growing a perfect cactus garden is easy and achievable. It feels less like of a chore compared to other garden plants since they require just a bit of general care. They require little to survive, with requirements that are easy to cater for, even for those who consider gardening tedious. Constructing a cactus garden can appear a child’s play, but it is not entirely a mindless venture. Crucial factors come into play when growing the dream cactus garden.
So, what are the basic tips for a perfect cactus garden? Going into the cactus gardening business clueless could cost you. Cacti differ significantly from your average plants. They have different biology, growth needs and grow in an almost unfathomable ecological setting. Their cultivation regime would never resemble common mesophytes. A perfect cacti garden can be achieved by;
Choosing the right cactus species to grow
An appropriate container to grow it in- size and make
Correct positioning of your cactus and using correct type of soil
Are you planning to create a cactus garden and wondering where to start? This guide will help you understand how best to create one, right from choosing an ideal species, containers, soil and positioning.
Choosing between indoor and outdoor cactus landscaping
It all boils down to the choice of the cactus species you choose to grow. This decision is influenced by where you want to grow the plant. Growing an outdoor cactus is easy; growing an indoor cactus will come with a few extra steps. If you live in a sunny, hot area, cacti will naturally thrive with much ease. Garden landscaping is less tedious and requires minimal effort. Most of the work is done for you by nature; watering the plants will not be necessary. The only task you might have to do is to nourish your cacti with cacti fertilizer at least once a year. Cactus does well grown on a hill because of the sloppy gradient that will help improve the drainage. Deeper holes will be required to make up for the lack of slope on a flat yard so that the water can drain deeper away from the shallow roots into the ground.
When planting cactus plants outdoors, you might not even need to water them. Simply use a fertilizer to nourish the soil.
There is bounty of ideas on how to pull off outdoor cacti landscaping. You can choose to grow cacti surrounded by small shrubs and flowering perennials. To achieve the desert landscape appearance, grow your cactus in a sea of crushed stone and pebble. Barrel cactus, organ pipe cactus, prickly pear, blue candle, cow’s tongue cactus, and blueberry cactus are classic species for outdoor cactus landscaping.
If you hail from a rainy and humid area- conditions that can be detrimental for the cacti growth, you may be better off growing your cactus indoors. Cacti are desert plants. As such, always ensure you provide them with adequate sunlight for better growth by placing them in an ideal position where the sun rays can easily get to the plant.
Take hints from the cactus species and its natural environment
The characteristics of your chosen cactus can offer some pointers on how to plan your cactus garden. Consider their most appealing features. For a blooming cactus, for instance, placing it in a strategic position would help flatter the plant and consequently decorate the room accordingly. Cacti flowers can bloom better with extra care. Notably, their desert-growing counterparts flower less often thanks to the unbearable, hot weather.
You should always consider natural environment and growth patterns of a cactus before planting it in indoors or outdoors.
Consider the growth pattern of your cactus. Is it a winding epiphyte? These do best as hanging cactus accentuating the room with exoticism and uniqueness. Cacti size matters a lot when choosing the location. A small cactus would most likely look presentable planted in a pot placed on a window sill or your office desk. Growing cactus requires patience and, ultimately, knowledge on the plant’s biology. Cacti are a slow-growing breed and can remain in the soil for years. For fast-paced visible growth, avoid growing cactus from seeds but instead use their shoots when propagating.
No written rules mandate that cacti should be grown in pure breed or as an assortment. The most attractive cactus gardens are grown in a variety. Provided that they have similar growth requirements, cacti can make room for one or more succulents in the pot. These pot partners must, however, have similar care and size requirements.
Location
The positioning of your cacti is vital for its growth. This is especially so for indoor plants. Pick the brightest part of the room or corridor to grow your cactus. Most cacti would thrive basking in the sun for at least 6 hours a day. Position you cactus in an easily accessible area for better attention. For instance, you can place your container by the main door to your house. Subject to your preference, you can lay out your garden bed in a circular, triangular, semicircular, or rectangular shape.
Potting style
Creating an authentic cactus garden requires that the pot you choose is aesthetically pleasing and practical. An ideal cactus pot is one with adequate root space and has at least one drainage hole. Drainage is crucial for desert plants. Remember, root rot invades plants that are potted in poorly draining pots. For ornamental purposes, choose pots that are relevant to plant size. Cacti are shallow-rooted plants made to take up the little water trickling down the soil. As such, it would be unnecessary to use a ridiculously huge pot unless the cacti being propagated is respectively huge.
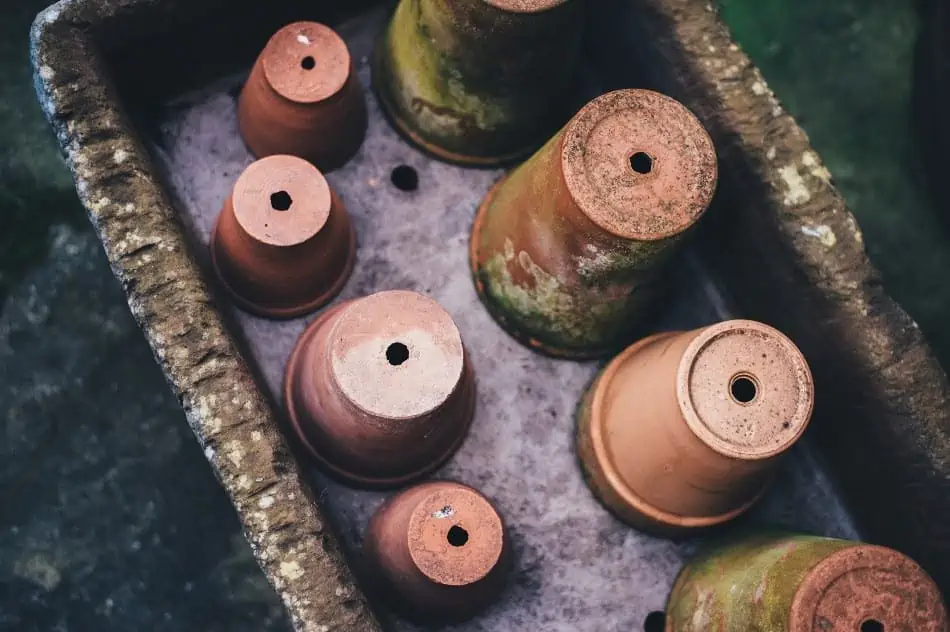
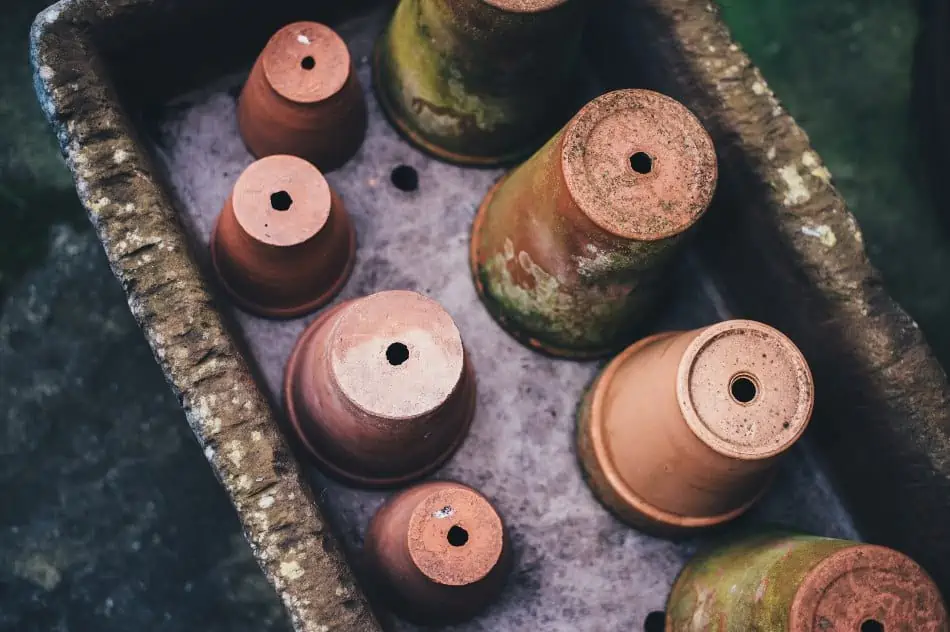
Make sure your cactus pot has a drainage hole so that excess water drains out of the soil.
Grow each shrub in their pot for large shrubs. Smaller shrubs look good potted in one container. Other cacti varieties are more appealing when grown in multiple pots and arranged together. An assortment of small cacti would look good growing from terracotta or rustic bowls. In fact, you can pruce up your garden by growing a mix of colorful perennial flowers. Dangle down rattail cactus,orchid, and Christmas cactus from hanging baskets or tyre tubes. Decorate your walls by growing tall, gigantic cacti alongside them.
Allow your creative genius to run wild when choosing your ideal pot. Container gardening thrives on your creativity and willingness for experimentation. Even in regular gardening, few species fit the mold to be grown ideally in a container, but cactus makes the list. Remember you do not have to go for commercial containers when starting out. You can make a pot out of a cup, old boots and even toy trucks. Otherwise, you may opt for a cactus terrarium. The cactus terrarium is planted in the open to keep humidity from destroying the plants. Do not forget to line their inner bases with gravel to improve drainage.
Soils
The cactus’ native habitat should inform you of the type of potting soil you require. Adhering to this information is crucial to avoid further repotting of a plant that has deteriorated in health with little to be done, far down the cactus’ growth journey. For pure desert breeds, it is advisable to capitalize on the grit, while for forest cacti, adding peat will improve the plant’s growth conditions. Peat helps to hold the soil together, while grit improves drainage and aeration. Regular soil holds too much water and is, therefore, a bad idea for cactus.
Since regular soil holds too much water, use a suitable soil mix for desert and forest cactus plants.
Cacti thrive on well-drained and properly aerated soils. Soils with high water retention are detrimental to cacti roots adapted to thrive on little to no moisture. Cacti readily absorb moisture- even from dew and moist. The excess water left in the soil once the roots have taken in enough leaves breeding grounds for fungus and bacteria that cause root rot. Water these plants in moderation; at least once a twilight, just enough to keep the peat from drying out. When dry, the soil becomes hard and absorbing moisture afterwards is taxing for cactus roots.
To avoid the hassle, you can purchase cactus potting soil or prepare some yourself from the garden. For young cactus roots, cactus potting mixes from garden centers and nurseries are a better choice as these young roots have a more challenging time getting accustomed to regular soil.
How to make you own soil mix
Would you rather prefer a DIY cactus mix recipe? You can easily do this by mixing one-third coarse sand, one-third of pumice, and one-third of regular soil. This particular soil recipe helps achieve the desired texture, drainage, aeration, and compactness for the cacti species. Before pouring in the soil mix, line the pot’s base with gravel and pebbles to improve drainage further. Making your own soil mix helps reduce the costs that would, otherwise go into purchasing the commercial option.
Outdoor gardening will require a drainage test to make sure that the grounds are ideal for the cactus. Dig up holes less than a foot deep on the ground and add water. If the water still stands after 30 minutes, add rocks and sand in the holes, which will alleviate the drainage problem. An outdoor cactus garden may require less cactus soil mix, assuming the soil outside is gritty.
Cactus is an exciting gardening option for a change. To spruce up your gardening portfolio, try the most respected plants of the desert. They require almost less of everything than your regular plants except for sunlight which Mother Nature gives for free. The easy-going, low-maintenance cacti can turn anyone into an enthusiastic garden keeper following these few simple steps. They are tried and tested methods by expert gardeners by which you can achieve that enviable dream garden. Keeping a plush out-of-this-world cactus garden is fulfilling and a source of pride.
Succulents are hardy houseplants that don’t require much water or fertilizer. As such, they are an excellent choice for gardeners of all skill levels. If you are a beginner on the succulent plant scene, you may not be aware of their care requirements and other ways to make the process simpler.
You are encouraged to continue below to learn more about how to plant succulents and how to ensure that they can stay happy and healthy.
1. Succulents Are Plants with Water-Storing Organs, Priming Them for Arid Climates
The term succulent refers to any plant that contains a thick water-storing organ that itself is called a succulent. These plants are capable of storing water in their leaves, stems, and roots. For this reason, they are primed for arid climates or for homes where they won’t have to receive constant watering.
Succulents can store enough water to grow perfectly healthy in arid climates.
They are capable of surviving in locations where other plants will croak. They won’t mind being grown in poor soil, on slopes, or in-between paving stones. Despite their reputation for being nearly indestructible, they do come with some care requirements, as outlined in sections below.
2. Succulents Need Plenty of Sunlight
Succulents need plenty of sunlight to stay healthy, as you would anticipate being a need for a plant typically grown in desert regions. Adequate sunlight is an absolute necessity, perhaps even more critical to health than water and fertilizer.
Succulents require plenty of sunlight but avoid placing them under direct sunlight.
While access to sunlight is critical, it is also possible to have too much of a good thing. Succulents should be placed in slightly shaded locations during the day so that the leaves do not wilt under intense sunlight.
3. Succulents Have a Wide Temperature Tolerance
Some Succulents do tolerate low temperatures. For example, Sempervivum is capable of tolerating temperatures as low as 30 degrees F. The wide temperature tolerance range does make sense since deserts do experience dramatic temperature swings.
Ideal Growing Temperature Range Is 70-80 Degrees
For maximum growth, you will want to ensure that succulents are where they experience daytime temperatures between 70-80 degrees F during the daytime and 50-55 degrees F during the nighttime. Occasional extreme temperature swings won’t generally kill them, but they will need to be taken indoors for wintering in locations that experience hard winters.
Allow Succulents a Chance to Be Acclimated To Temperature Swings
You can always transfer succulents from the interior of the house to an outdoor space and vice versa, but be sure to allow the plants a chance to acclimate to the new climate by slowly introducing them to their new home:
Start your succulents in an area with a temperature similar to what they have experienced outside, such as a windowsill that gets cool at night.
When bringing indoor plants outdoors, place them in a location that receives at least partial shade.
Newly planted succulents need to be kept in the shade longer than plants that have established root systems.
Add an hour or two of sunlight to the plant’s routine every day, focusing on the less-intense morning sunlight.
4. Use Containers with Drainage Holes at the Bottom
It’s easy to overwhelm succulents with too much water. When you plant in pots, you need to ensure proper drainage to prevent root decay and rotting. Fungi and bacteria also thrive in these types of environments. To prevent these familiar sources of plant damage: look for pots and containers with drainage holes at the bottom.
To get rid of excess water, succulents should always be planted in containers with a drainage hole.
If your gardening pots have no drainage holes, place coarse gravel at the bottom of the pot. This will help drainage to some extent. An example of coarse gravel would be these Outy Rocks.
5. Avoid Planting Succulents in Pots That Are Too Large
You’ll want to avoid planting succulents in pots that are excessively large for the species. This is because the plant can quickly die in an oversized container due to the root structure that the plant will grow. Every time you water the plant, the roots won’t be able to draw out all the moisture. Lingering water in the soil leads to root rot.
It is better to plant succulents in relatively small containers instead of those that are too large for them.
Don’t worry too much about giving the roots of succulents enough room for growth. These plants can comfortably adjust to the confines of the container that you decide to plant them in.
What Container Size Should You Plant Succulents In?
Houseplant containers should be matched appropriately to the size and growth requirements of the specific plant. Succulents do not often need to be transferred to larger containers:
Most succulents reach maturity at a small size.
Shallow pots are better than deep ones, as they will be able to drain faster.
Plastic and ceramic pots do not need to be watered as frequently as clay pots.
Succulents only need to be transferred to larger pots every 1-3 years.
Be Careful To Protect the Roots When Transferring Succulents to New Pots/Containers
Although they are tough, succulents are susceptible to damage during the replanting process. The roots are easy to break, requiring gentle handling when they are spread into the new dirt. Also, most succulents have shallow root systems that shouldn’t be planted too deep.
Be careful when transferring your succulent to a new container to ensure that you do not damage the roots.
Allow repotted plants a chance to adjust to the new container by leaving them out of direct sunlight for the first week. Also, avoid watering the new plants for 1-2 weeks. Houseplants typically do fine with diluted fertilizer. Adding a strong fertilizer to a repotted houseplant can promote fast growth that may lead to the plant drooping over.
6. Be Careful About Grouping Cacti with Other Succulents
Cacti and other succulent varieties do grow at different rates and come with varying watering and care requirements. You are encouraged to group plants that have similar growing characteristics as much as you can.
Otherwise, you may accidentally overwater or add too much fertilizer to any plants within the grouping. It will also help prevent faster-growing plants from overshadowing the slower and smaller plants in your garden.
7. You Can Get Succulents and Cacti to Bloom Indoors During Winter
Succulents also hold the advantage of being easy to care for in the indoor setting. All you need to do is replicate the native winter climate for these types of plants. The ideal wintering location for succulents is along the edge of the windowsill.
Succulents and cacti can bloom in winter if placedon windowsills.
What makes the windowsill such a suitable candidate is the fact that the succulents will have access to both light and cool night temperatures. In their native desert climate, these plants are used to the temperature dropping quite low at night, so your windowsill should be an accurate replication of the native climate.
8. Succulents Grow Best In Sandy Soil
These plants are best grown in well-drained sandy soil. Suitable potting mixes fall apart if they are watered and then squeezed between the hands.
You can find specialty mixes for succulents that have been found to hold up pretty well. Examples of succulent potting mixes include:
Miracle-Gro Succulent Potting Mix With Fertilized Soil
Organic Succulent and Cactus Mix, Fast-Draining Blend
Superfly Bonsai Succulent and Cactus Soil Mix
You are encouraged to further improve specialty potting mixes by adding a coarse material (but not fine sand) to the potting mix at a rate of 1 part soil to up to 4 parts of added material. Suitable coarse soils or sands include coarse building sand, agricultural pumice, perlite, and poultry grit. As you will see in the section below, there are scenarios in which you should use more potting soil than drainage material and vice versa.
9. Use a Higher Percentage of Potting Soil in Your Mix If You Water Your Plants Infrequently
A standard potting mix for succulents consists of potting soil and some added drainage material. The recommended ratio of potting soil to drainage material depends upon several factors.
Choose potting mix by considering your watering schedule, pot size and material, and the type of your succulents.
Use mostly potting soil in your growth medium if:
You do not water plants very often.
Shallow pots less than 2.25″ in diameter are being used.
Clay pots are being used.
You are planting tropical varieties of succulents.
Use mostly drainage material in your growth medium if:
You water your plants often.
Large pots are being used.
Plastic or ceramic pots are containers.
For growing sensitive plants native to arid climates
10. Succulents Only Need Fertilizer 3-4 Times During the Growing Months
Cacti only need fertilizer once or twice per year during the growing season, and other succulents require just 3-4 applications of fertilizer during the summer growing months. This is a big part of what makes succulents such great house plants: no green thumb required!
You should use a fertilizer only 3-4 times during your succulents’ growing months.
11. Use a Fertilizer That’s High in Phosphorus
When you do apply a fertilizer, be sure to use one that is higher in phosphorus than Nitrogen. Phosphorous is responsible for promoting root, stem, and flower growth, while Nitrogen adds to leaf growth.
Here’s How to Find out If Your Fertilizer Is High in Phosphorus
There are always three numbers on the labels of fertilizer bags. These numbers correspond to the proportion of each macronutrient. The first number in the ratio is the proportion of Nitrogen in the mix, the second is phosphorous, and the third is potassium.
For example, if you saw a label that read 0.5-1-1, it would be composed of:
0.5 parts Nitrogen (N)
1 part phosphorus (P)
1 part potassium (K)
There are plant foods that are specifically marketed for succulents, such as Miracle-Gro Succulent Plant Flower Food. You will also find general-purpose fertilizers with high concentrations of phosphorus, such as EZ-grow Indoor Plant Food. You need not worry too much about fertilizer with succulents, just as long as you apply it during the growing season and make sure that phosphorus delivery is emphasized.
Water One Day, Add Fertilizer the Next Day
When you do add fertilizer, do so the day after you water the succulent. It is recommended that you apply the fertilizer at 1/4th its normal strength during the growing season. Avoid fertilizing the plant entirely during the winter months. If you add fertilizer to dry soil, you can burn the plant tissue.
12. How Often Do Succulents Need To Be Watered?
Although succulents are indeed plants that thrive in arid conditions, they still need to be watered on a routine schedule. They will need to be accounted for most often during the growing season.
You should water your succulents once a week during growing months and once every 2-3 weeks during winter.
During Growing Season: Water Succulents Once Per Week
During the growing season, which occurs over the spring and summer months, you will need to water these plants at least once per week. A good rule-of-thumb is to water the plants only when you notice that the soil is dry. It is far too easy to drown succulents due to their low water demands.
This is where pots with drainage holes come in handy: you will be able to tell that it is time to stop pouring water as soon as you notice water flowing from the holes at the bottom of the container.
During Winter: Water Succulents Once Every 2-3 Weeks
You only have to water succulents once every 2-3 weeks during the winter months. The main reason for doing this is to prevent the leaves from wilting due to thirst. Since the plant is not using many resources during this time of the year, it will not be nearly as parched as it would be during the spring and summer.
Signs of Underwatering & Overwatering In Succulents: When to Take Action
There are some telltale signs of overwatering and underwatering that should be responded to with some kind of action. These events will often occur due to the container or growth medium that you are using.
Signs of Overwatering:
Unusually soft texture
Discoloration, yellowing of leaves
Browning and rotting
If the plant has reached a point where it is becoming rotted due to the soil’s over-saturation, then it is time to transfer the plant to a new growth medium. Make a new container of a dryer medium.
Signs of Underwatering:
The plant has stopped growing
Shedding of leaves
Brown spots on the leaves
If the plant appears to be under-watered, then this is a sign that you need to water the plant more frequently. If the plant is in a clay pot, you might consider transferring the plant to a ceramic or plastic pot, which will do a better job of holding water.
13. Aphids and Mealybugs Are the Most Common Pests for Succulents
Mealybugs or woolly aphids are the most prominent pests of succulents. These insects, unfortunately, have a strong appetite and are capable of wiping out even a large amount in a relatively short time. They can reproduce rapidly and develop resistance to pesticides quickly.
Populations of mealybugs have developed resistance to many of the traditional pesticides used against them. This includes insecticides based on an organophosphorus compound. There are less-invasive alternatives listed in the section below that you may find successful.
Pests Can Be Controlled Using Chemicals That Won’t Damage the Leaves
You can control pests like mealybugs and aphids using chemical solutions that won’t damage the leaves. Harsh herbicides or insecticides can do more harm than good if used in excess, so you are encouraged to use less-harmful solutions when practical.
Minimally-harmful pest control solutions that work include:
Rinsing affected areas with water
Neem oil
insecticidal soaps
Squirt bottles of rubbing alcohol, which won’t damage leaves if sprayed lightly
Mealybugs are typically introduced to a garden as hitchhikers on new plants, and on pots and tools. They are challenging to get rid of once their population takes hold, but the good news is that adult females cannot fly, and they crawl slowly. The best practice to avoid mealybugs is to regularly inspect new plants for signs of the pest on new pots and tools. If you find any live specimens, you can apply a 10-25% isopropyl alcohol spray.
14. If You Want New Plants: Consider Propagation
There are two ways that succulents reproduce new plants: either through seeds or through the process of propagation. This refers to the method of creating a clone of the parent plant via stem cuttings, leaf cuttings, and offsets.
Wait Until Offsets Grow Roots for Propagation
Offsets are tissues that are generated by some varieties of succulents. They form as leaf buds along with the root tissue of the plant.
Here’s how to tell that offsets are ready for propagation:
Gently tug on the offset. If you feel any resistance at all, this is a sign that the offset is ready to be propagated into its container.
Let Stem and Leaf Cuttings Callus before Planting
Most succulents can be propagated through stem or leaf cuttings, which will need to be given ample opportunity to heal and callus before being planted. After cutting, leave the stems and leaves on the counter to air dry for at least 4-7 days.
Find a growing stem on the mother plant and cut a section 3-4 inches long.
Remove the lowest leaves before replanting the removed stems, but leave the upper foliage intact.
For propagating leaves: remove an actively-growing leaf from the mother plant.
Use Potting Mix, Perlite, or Coarse Sand as a Growing Medium
Always be sure to use a sharp knife for propagation to ensure a clean cut. Appropriate growing mediums for the propagated materials include recommended combinations of potting mix, perlite, or coarse sand as listed before.
1 part potting mix, 1 part perlite
3 parts potting mix, 2 parts coarse sand, 1 part perlite
You can speed up the rooting process by dipping the stem or leaf in rooting hormone.
You can anticipate it taking at least 1 month for the propagated portion to grow roots. Avoid overwatering the young plants during the growing process.
15. Choosing The Right Variety: What Are The Best Succulents For Your Garden?
If you have tried growing succulents in the past and failed, there is a chance you were planting the wrong variety for your garden’s climate. There are many different varieties of succulents, so it’ll be worthwhile to learn which ones are most compatible with your growing space.
Haworthias Are the Best Succulents For Indoors & Small Spaces
Haworthias are the best succulents for your indoor garden and for crowded spaces where the supply of sunlight may be choked out by larger plants. There are many different varieties of Haworthias, from star-shaped plants to zebra plants.
Haworthia is a small succulent that grows healthy and gorgeous under subtle lighting conditions.
They tolerate subtle lighting better than most other succulents.
These plants are small and conveniently-sized.
Colors vary with shades of green, red, and brown, depending upon the species.
Leaves also vary in structure from thin to thick.
Another nice feature of Haworthias is that they offset readily, making them excellent candidates for propagation. Once you buy a batch of Haworthias for your home, you will be able to continually generate new young plants without having to visit the store for more unless, of course, you want to add more variety to your garden later on.
Echeverias and Sedums Need a Healthy Supply of Sunlight
Echeverias and Sedums are two varieties of succulents that are tailor-made for outdoor gardens and window sills. These varieties do need more sunlight than Haworthias. Many sedums and echeverias do require at least 3-4 hours per day out in the sunlight.
Sedum is an excellent candidate for a groundcover since it has a low profile.
Jade plants are houseplants that are simple to grow. They hold the great benefit of being able to live for a long time and can even grow into 5-foot tall shrubs when grown indoors. Leaf coloring varies by species and cultivar, as you’ll see round or oval jade leaves that are dark green, blue-gray, or edged in red.
They look like miniature trees with a bonsai quality, so be sure that you have enough room for them.
Plant diseases are rarely a problem, primarily if grown indoors.
They look the best if they can get at least 3-4 hours of sunlight per day.
Well-drained soil will be necessary.
Suppose these plants become too large for the interior of your home. In that case, they are not necessarily easy to transfer to a year-round outdoor setting because you will have to bring them indoors during the winter months in temperate climates. If you live in an area with a relatively mild climate year-round, you will be able to plant Jade plants outdoors.
Ponytail Palms Don’t Require Much Watering
If you don’t have much of a green thumb, then the Ponytail Palm is the plant for you. The Palm is not a true palm tree, although it certainly does an excellent job of imitating one. This plant is gaped much like a fountain and is a perfect candidate as a houseplant in temperate regions.
Ponytail Palms do not require much watering since they have a swollen trunk at their base that stores water.
When planted in the ground, it can grow to 30 feet tall.
Its size will be limited if it is grown in a container.
The evergreen leaves are long and resemble palm leaves in appearance.
Ponytail palms grow the best when they can be placed near a window, where they will receive as much light as possible. You can transfer these plants outside during the summer, but be sure to acclimate them to the full sun by moving them to a shaded area during the most intense times of sunlight. Otherwise, sunburn can occur on the leaves.
Best Succulent for Hanging Baskets: Burro’s Tail
The Burro’s Tail is a succulent that is great for hanging baskets. This plant produces trailing stems that are up to 24″ inches in length. The downside is that the leaves are delicate and can break off easily if they happen to brush against a surface or passerby. Still, these plants do hold many beneficial characteristics for the gardener searching for a unique hanging basket.
They can tolerate temperatures as low as 40 degrees F.
Prefers locations with plenty of sunlight
Pest and disease problems are limited, usually only occurring when these plants are overwatered.
It can also be grown indoors, on a windowsill with partial sun.
Burro’s Tail plants do grow small pink to red blossoms during the summer. However, this typically only occurs when they are grown outdoors in a hanging basket, where they receive full sunlight. They also produce abundant nectar, making them an excellent addition for gardeners looking to provide nectar for native bees.
Conclusion
Succulents are plants that are native to arid climates. They are equipped with particular organs that are capable of holding water. Still, you will need to water succulents at least once per week during the growing season. Change your watering routine if the plant’s condition deteriorates. This may also be a sign that you need to add the plant to dryer soil. You might even consider adding gravel to the bottom of the container to improve drainage.
Cactus rot is one f the worst nightmares you can encounter as a cactus enthusiast. Depending on the extent of the rot, this may spell the end of your cactus or a chance to save it. While cactus rot may be detrimental, there are a number of steps you can take to save it.
So, how can you save a rotting cactus plant? The best way to save a rotting cactus plant is first to determine the type and extent of the rot. In cases where the plant is rotting from the top down, the best way to save it is by pruning off the rotten sections or layers of the stem. This prevents further spread to the healthy parts of the plant. In instances where the plant is rotting from the bottom up, the best remedy would be to cut off the healthy upper part and propagate it to produce a healthy plant.
This article will be looking at practical ways to save a rotting cactus plant. It will start by looking at the causes of such rot. This will help inform the best approach to saving your cactus from imminent death. It will then look at the practical ways to save the cactus based on the root cause and extent of the damage.
Why is my cactus rotting from the top down?
Several factors may cause your cactus to rot from the top down. These may include fungal attacks, too much water or an open dent caused by animals and other environmental factors. Once the water settles on such a dent, the stem may start rotting from the inside out.
Overwatering your cactus plant might lead to rotting from the top down.
The issue of too much water is mainly caused by overwatering. You must remember that cacti plants are adapted to growing in arid and semi-arid conditions. Therefore, they are susceptible to too much moisture.
When you overwater a cactus, the potting mix becomes waterlogged, affecting the oxygen supply to the roots. Reduced oxygen supply to the roots may lead to anaerobic conditions stimulating bacteria and fungi growth.
These microorganisms may end up attacking the root tissues causing them to decay and eventually die. As the plant’s roots rot, they lose their ability to absorb and store water, which affects the entire plant.
Fungal infections and diseases are another common cause of cactus rot. The most common fungi that cause cactus rot are Fusarium spp, Pythium spp, and Phytophthora cactorum. These pathogens can attack a cactus’s root system and stem.
In some cases, they even attack the leaves causing them to turn soft/mushy and eventually rot.
Moreover, overfertilizing your cactus can also cause rot from the top down. Too much fertilizer, especially nitrogen-rich fertilizers, may cause your cactus to “burn,” leading to stem and root rot.
When this happens, you will notice brown or black patches on the leaves/stems of a cactus.
In cases where animals such as squirrels and birds cause an open dent/hole in a cactus stem, this may also lead to rot.
When the water settles on such a dent, it can easily travel into the plant leading to rot from the inside out.
In some cases, a cactus plant may start turning brown at the tip of its stem or pads. This is a condition called tip rot or stem rot. This rot usually spreads fast and eventually affects the whole plant if not attended to in time.
While some causes of stem rot may be obvious, others are not. As such, you may never get to know the exact cause of the rot, and this is not something to worry about. The good news is, no matter the kind of stem rot you may encounter, its remedy is almost universal.
How to save a cactus rotting top down
Once you notice any early signs of stem rot on your cactus, act as fast as you can. Cactus rot spreads rather fast, and you will need to prune off the affected parts to help save the plant.
If you notice any dark spots on your cactus plant, you should try to save the cactus as soon as you can.
However, it is also worth noting that some external signs of cactus rot can be deceiving. By the time you notice some small brown spots on your cactus, chances are that the damage may be worse on the inside. Nevertheless, you will need to undergo a couple of steps to effectively save your cactus from stem rot. You will need to:
Choose an appropriate pruning tool. Usually, pruning shears or a sharp knife will get the job done
Make sure your cutting tool is clean or well disinfected. This helps prevent the chances of fungus spread from plant to plant.
Remove the rotten sections gently from layer to layer. Keep doing this until all signs of rot are gone.
Ensure that the last cut is at an angle. This will avoid any changes of water settling on the wound, thus causing further damage.
Move your cactus to a dry area. The stem should not get in contact with rain or water until the wound heals up.
In cases of fungal attack, wash away the fungal spot using a disinfectant and a small brush. Do this by scrubbing away the black or yellow spots.
In other instances, you may not necessarily have to prune your stem. If the condition looks mild and reversible, place the plant in some sort of quarantine. Here, you can subject it to a mock drought. Simulate a dry environment by placing your cactus in sand, using bright heat lamps and avoid watering. These steps alone may be enough to kill destructive patches of Drescher fungus.
Taking Care of a Cactus After Pruning Due to Rot
If you are forced to prune a section of your cactus plant due to rot, you must keep a close eye on it afterward to ensure it doesn’t continue to rot. After pruning, place the plant in an area with well-draining soil and lots of light.
You can also use a fungicide spray or powder on the wound to reduce any chances of a fungal attack. If you decide to use a fungicide, ensure it is safe for cactus plants.
Lastly, do not water the plant until a callus forms around the wound. This usually takes one to two weeks, depending on the extent of rot and the size of the cactus.
How to save a cactus rotting bottom up
Apart from rotting top-down, a cactus may also rot from the roots. This is usually termed as root rot. While it may be caused by a number of factors ranging from bugs to overwatering, its remedy follows a similar path.
A cactus rotting bottom up can be a challenge to reverse. While there may be some supplements that help dry up the rotten parts and spur new root rot, the success of this technique negligible. As such, the best way to deal with the rot in cactus is cutting off the healthy part of the stem and propagating it to produce new roots and a new plant.
If your cactus is rotting bottom up, obtain the healthy part of the stem and propagate it.
For this practice, follow the following steps:
Determine the extent of the root rot and cut off the rotten section
Allow the cut stem to calluse by keeping it in a dry place for several days
Dip your cactus stem in rooting hormone to help spur root growth before repotting your cactus
Do not add any water to the soil until some new growth on the cutting develops.
By following these steps religiously, your cactus should root within a few weeks, and in no time, your plant will be up and healthy again.
How to prevent root rot in cactus
Well, instead of going through the hassle of treating root rot or saving the plant from the same, why don’t you take steps to prevent it from happening in the first place? Here are some practical steps you can take to prevent new infections after saving a plant to avoid root rot all together:
Do not plant or repot your cactus in the same soil you used for a previously affected plant. Since it is not always easy to determine the exact cause of root rot, you do not want to risk re-planting it in the same soil.
Use well-draining soil for your cactus (here are our recommended ones). Whether we are talking about the commercial or homemade mix, it is important to drain excess water effectively. One of the main causes of root rot in cactus is overwatering, and you do not want to increase the chance by using thick soil.
Use proper containers or pots that allow the draining of excess water from the soil through drainage holes. Your container should also be big enough to allow the healthy growth of roots without the risk of overcrowding and clogging.
Avoid using too much water during your watering regime. As a rule of thumb, water your cactus once you notice the upper two inches of the soil feel dry.
Is a cactus turning soft sign of rot?
A cactus stem is usually mushy. However, it may sometimes turn uncharacteristically soft. This could be an indication of poor health, and several factors can cause this. It may be a result of disease, poor cultivation practices, and improper watering regimes.
Diseases, poor cultivation techniques, and improper watering might make the cactus too soft to the touch.
In other instances, a cactus going soft may also be a sign of stem or root rot. Alternatively, the condition may be a result of a fungal or bacterial infection. This would usually attack the plant from its openings in the flesh. The process may be accelerated by warm and moist conditions. Common signs of such attacks may include sunken spots and soft areas around the pads or stem. In other instances, some oozing may be noted from the stem.
Common signs of cactus root rot
Root rot may not be noticeable in its early stages, unlike stem rot that can be physically examined in real-time. As such, it may take a keen eye to notice such signs. Usually, the signs may be noted from the condition of the stem or pads. These may include:
Discoloration – The majority of cactus stems is usually green. However, root rot may see the plant deprived of essential nutrients from the soil, thus changing its normal coloration. In this case, the plant may turn black or brown.
Shakiness – Roots act as the support for the whole plant. When root rot happens, the roots become weak and may not hold up the plant as expected. This shakiness could mean some root rot.
Mushy roots – The best way to notice signs of root rot is by carefully uprooting your cactus. If you notice signs of mushiness in the roots, chances are the roots are rotten. You may need to cut off the rotten section and repot the plant in such a case.
Foul Odor – A foul odor from the roots may also be a sign of root rot. This smell usually indicates a bacteria or fungal attack on your plant, which warrants immediate action if you are to save it.
Stem bending – Roots are critical in anchoring the plant to the ground. As such, when they become infected with root rot, it is possible that the stem bends and falls over because the entire root system has become weak.
Summary
Cactus rot is one of the main causes of death in cactus. As such, you must look out for any early signs before the damage becomes irreversible.
While the causes of cactus rot may differ from one species to another, the signs are almost always universal. Take your time to study your plant to help you notice any early signs of poor health.
Cacti are plants that take a very long time to grow. Sometimes you may think your plant is dead when it’s perfectly healthy. But there are times when the cactus is just portraying stunted growth as an indication of trouble. You may think it’s a normal slow growth when your cactus is rotting.
Root rot is one of the most common cactus problems that every gardener should look for. It’s many gardeners’ nightmare. Many things can cause your precious cactus plant to rot. One of those problems includes giving your plant too much water, especially during the cold seasons. Other causes of root rot include attacks by diseases, pests, and pathogens.
If you discover root rot issues early enough, you might be able to save your precious cactus from dying. But since the problem occurs underground, you might not see it until it affects the entire plant. Well, there are signs you can discover early enough, but there are those that you only see when the plant is already too affected. This article will look at various signs of root rot in your cactus and what you can do to save it.
1.Change in Color
Sometimes root rot in the cactus may not be visible on the root itself but the upper parts. Many cactus plants begin to change their color when they’re disturbed. If you know the natural color of your precious plant, you’ll easily identify when it starts to take a weird color.
Some color changes may be a sign of happy cactus, so you must do your research. A reddish cactus means it’s getting a good amount of sunlight. The color change is also common in an older cactus. If your cactus is old enough, you might notice some brown patches on the stem going upwards. As the cactus continues growing older, the brown patches turn gray.
Root rot might make your cactus plant change the color from green to brown or yellow.
However, if your cactus plant starts taking a brown or yellow color, it will probably have a deep rooted problem. Some cactuses may also take a darker shade or just turn black. When you notice a sudden color change on the leaves or the stem of your cactus, you might have overwatered your plant, and the roots have had enough.
You can still save a cactus from this kind of root rot, especially if you notice that the source of trouble is overwatering. Make sure you adjust your watering routine before things fall apart. You can also consider removing the discolored areas so they don’t spread all over and cover the entire plant.
2.A Bad Smell
If you uproot a healthy cactus, you’ll notice a very comforting earthly smell. This would be the smell of the soil that the cactus was sitting on and not the smell of the roots. But not always will you uproot your cactus and get greeted with that beautiful smell. A rotting cactus will not smell nice at all.
If you get some strong odor that you can’t stand instead of the early smell, you should know that there’s a problem. And that problem may not involve removing the cactus and planting somewhere else. The problem of a smelly root involved finding the virus behind the problem and killing it.
As the rot continues to spread in the plant, the smell also becomes stronger each passing day. Sometimes the root that is rotten to the extent of emitting a foul odor is already dead. There’s nothing much you can do to save it. The best solution is to throw it away, so the disease doesn’t spread to other healthy plants.
3.A Shaky Plant
A disturbed root may not be strong enough to hold the entire cactus plant. If a disease or fungi attacks your cactus, some of the roots may begin to fall off. The root may not have the strength to go deeper. Your plant will start getting weaker and shaky.
Root rot makes your cactus plant weak and it might no longer be able to stay in place.
If you try pulling off a shaky plant, it will easily come off. You won’t need to apply the slightest amount of force. The wobbliness of the plant is also characterized by loss of turgidity and firmness of the leaves and stem of the plant. Unfortunately, by the time you notice these symptoms in your plant, its roots would have been damaged beyond repair.
4.Soft Segments in the Plant
Another sign of a rotting cactus involves soft and swollen plants. You can easily break off the soft parts without applying any force. Try pulling the spine off the plant to see if it comes out without any struggle. That should be a sign of a problematic root and a dying cactus. You’ll also notice several soft spots in the flesh of the plant.
If the spines of your cactus plant come out easily, it might be experiencing root rot.
Another instance of a rotting cactus is some cockiness and discoloration around the soft spots. The center of the plant can portray some wetness and mushiness. Sometimes the softness of some parts of the plant may not be rot but a mechanical injury to the stems. But if you’re certain it’s root rot, you need to deal with it immediately. This way, you’ll stop it from spreading to the rest of the plant and killing it.
5.Severe Wilting and Drooping
A rotting cactus will start to droop and will portray stunted growth. The cactus portrays some wrinkly appearance on the leaves. The stems will appear droop. This happens because the roots become weaker and weaker every day.
The first reaction that many people undertake to save a wilting cactus is watering. But sometimes too much water can be the cause of the problem. So, if you add more water, you’ll make the situation even worse.
The best way to save the situation may involve transferring your plant to a new container and adjusting your watering schedule. Make sure you choose the right soil when you decide to re-pot your plant here are our recommended ones. And remember not to overwater. Too much water is the main cause of root rot in the cactus. Pay attention to the kind of soil you give it, and only water when you see that the soil is completely dry.
Cactus Root Rot Questions
How do healthy roots look?
One way to find out if your roots are rotting is to start by knowing how healthy roots look like. You should not mistake healthy roots for rotting ones. Healthy roots are yellowish-white with white fuzzy layers on the surface. The layers are either hair that the plants use to absorb water or mycorrhizal fungi that help the plant absorb nutrients.
If you happen to uproot a cactus with healthy roots, you’ll notice they have an earthly smell. Rotting roots emit a foul odor. Now that you know how to tell healthy roots from rotting ones, you can now understand how to better care for your plants. You’ll also know how to identify problems before they kill your plants.
Can cactus recover from root rot?
Depending on the magnitude of the rot and how early you identify it, your cactus can recover. But this will only happen if you get rid of the things that cause the rot in the first place. You should avoid overwatering if that’s what’s causing the cactus to rot. If it’s a disease, you should look for an appropriate way to eliminate the infection. You should also remove the parts that show signs of rot by doing drastic surgery.
How do you know if you’re overwatering your cactus?
Most cactus plants originated from the deserts. You have to give them desert-like conditions for them to thrive. However, many people don’t understand this and give their plants too much water than they need. You might think you’re doing your plants justice by giving them enough water when you’re just causing them more damage.
Overwatering is one of the most common causes of the root rot of a cactus plant.
An overwatered cactus may start to rot from the roots. You’ll see this in the change of color of your leaves and stem. The leaves and the stems will turn either brown or black.
One way to refuse the temptation of overwatering your plant is to grow them indoors. Once indoors, you should not water often. The best thing to do is hold water for two or more days until the soil dries out. Cactus has their own water reserve, and they won’t die even if you hold water for a week.
Summary
If you’re an experienced gardener, you must know that cacti are one of the easiest plants to care for. They don’t need much care and can survive well without too much water. But these plants are not immune to diseases and fungi attacks. They develop problems that get into the roots and cause rot.
Usually, there’s very little you can do to save rotting cactus roots. But you shouldn’t lose hope because there are also several ways to save a cactus that’s affected by root rot. One way is to cut off the rotting part, change the soil (Here are our recommended ones), or adjust your watering schedule. Another way is to destroy the plant so that the rotting doesn’t spread to nearby plants.
Succulents are notoriously hardy plants that need little water or care to grow and thrive. The Haworthia plant is a mini-succulent that may need a little bit more care and attention than you may typically need with other regular-sized succulents. This beautiful and spiny plant gives satisfaction to those looking for a challenging succulent.
Since the Haworthia plant is one of the less hardy succulent varieties, it is essential to understand the limitations and extremes that it will endure. Also, a schedule of care is vital to keep the Haworthia succulent thriving and growing larger. Read on to find out more about this beautiful succulent and how to care for it like a professional botanist.
How to Care for a Haworthia Plant
Even if you have significant experience with succulents, you must know where the succulent that you are growing comes from in the world. Information about the origins of plants is crucial for proper care. You may even change the positioning of your plant based on this knowledge.
Haworthia is one of the lowest maintenance houseplants, but the plant requires a bit more care when grown outdoors.
The Haworthia plant is from the southern hemisphere near South Africa. Knowing that the Haworthia plant is from South Africa gives you a number of different insights about what it likes and how you should care for it.
Haworthia is a notoriously easy plant to care for as a houseplant, so you shouldn’t have much trouble with it if you plan on keeping it indoors. However, things may get trickier if you plan on keeping your Haworthia plant outdoors. Make sure you read through and follow the guidelines for each of the recommendations in this list.
The Haworthia plant doesn’t require much water for thriving conditions, as succulents are known for their ability to get by on only small amounts of water. Also, the Haworthia plant gets acclimated to the hot and arid conditions in South Africa, so it gets genetically designed for handling dry conditions. This information could get used for the placement of your plant out in the sun or dry, windy conditions.
Haworthia does not require much water. You just need to water the plant 2-3 times a week.
Make sure that you give your Haworthia plant water two or three times per week. Any more and the succulent will begin molding and becoming oversaturated. Any less and the leaves may begin wilting.
Sunlight Required
As with most succulents, the Haworthia plant does best when left in direct sunlight throughout the day. However, the mini structure of the Haworthia succulent is ideal for hot conditions. Since the leaves on the Haworthia succulent are so small and compact, their stoutness can withstand direct and hot sunlight better than other succulents.
Haworthia plants can grow healthy when exposed to direct and hot sunlight.
Climate
The South African climate where the Haworthia plant is indigenous is arid, warm, and sunny. However, there are spells of humid weather. The Haworthia plant is adept at maintaining and even thriving in the typical humidity in a home, Mediterranean climates, and warmer outside.
Haworthia plant cannot grow in cold and freezing climate.
Cold, excess moisture, and freezing temperatures all affect the growth health of a Haworthia plant. In regions where the ground regularly freezes, most succulents cannot grow. The cold and freezing temperature causes the Haworthia to wilt, become discolored, and even die.
Trimming
The Haworthia plant is a mini-succulent, which means that it will not grow much more in height than about two inches. The diameter of the plant can grow a bit larger if left untrimmed. However, trimming helps to spread new rhizomes around and create a larger surface area of growth for the plant.
Although Haworthia plant does not grow tall, trimming is still essential to promote the growth of new rhizomes.
Trimming a Haworthia plant requires little skill and gets done much more quickly when you take your time and practice very carefully. Trimming and replanting pieces of Haworthia give your succulent garden a more comprehensive ground coverage and fantastic look!
The soil for your succulent plants is very important. The tiny structure of the Haworthia plant requires substrate and soil mixture because it does not like its roots getting wet for long periods.
Drainage is critical for succulents and especially tiny varieties like Haworthia. There are a few different ways to ensure your succulent plant maintains proper hydration. You don’t want to overburden with water without adequate drainage. However, too little water will result in problems like drying leaves, leaves falling off, and the entire plant’s discoloration. Ensure that there is no excess moisture from a blockage in the soil, as they can contribute to molding, wilting, or death.
Haworthia requires high-quality commercial potting soil with sufficient drainage.
You never want sand used as a substrate for your Haworthia soil mixture because it is too delicate and can get trapped in the soil’s pores. Also, if you use peat-based substrate, you may need replacement soil in a few years. However, it is good practice to replant Haworthia with new soil and substrate every two to three years.
No matter the type of substrate you add, you should use high-quality commercial potting soil. Along with potting soil, you could mix in:
Perlite: This additive to the soil is not organic. The substrate of perlite gets added to the soil for aeration and drainage. The compound itself is a volcanic rock with tiny air pockets throughout it, which have excellent surface area and space for moisture to leach out of the soil. Perlite is available at all gardening stores. (Source: Gardening Know How)
Aquarium Gravel: Usually, aquarium gravel gets made of small ground rock bits with a smooth edge from tumbling. You probably don’t want to use the aquarium gravel that has coloration added to your plant soil. This gravel is available at almost all pet stores.
Poultry Grit: There are two types of poultry or “chicken” grit made from either oyster shells or flint. The shells or flint are ground down into a sandy powder that helps with drainage in soil and won’t affect moisture. Poultry grit is found at most feed stores or agricultural supply stores. (Source: Organic Feeds)
Horticultural Pumice: A pumice is a delicate and aerated hard substance that helps with drainage. Horticultural pumice is a specially designed additive for soil that separates the dirt for better draining. This pumice substrate gets formed from volcanic processes and is eventually made into a rock by volcanic gases. This rigid foam has air pockets in it and is excellent for drainage in the soil. (Source: Acme Sand)
Containers
Succulents are healthy and hearty plants that can get grown virtually any place you like. Although they can do just fine in most places, there are favored and ideal situations and containers for succulents such as Haworthia growth.
Of all the available container materials, terracotta material is the best for holding succulents like Haworthia. Terracotta is known for its porous material and gets made from clay. The terracotta’s porous material is ideal for succulents like Haworthia because it helps release moisture well and works great for a soil system built for aeration.
Since terracotta is a porous material and offers superb drainage, this type of container is the best option for Haworthia.
Also, terracotta is better for heat regulation and won’t fluctuate with changing temperatures like porcelain. The terracotta’s ability to maintain heat exposure is excellent for succulents like Haworthia, which thrive in hot and arid conditions.
One of the most popular ways that succulents such as Haworthia are grown is in the succulent dish. The succulent dish is ideal for growing small succulents with only a small amount of quickly dried soil. The succulent dish is a beautiful addition for any yard, home, or garden because it showcases many plants at once and places them at different levels, in some cases.
Pros:
Looks great and shows off multiple succulents at once
Great for drainage and soil use
Can place as a hanging container
Good for shallow roots
Cons:
More expensive than other containers
Larger than other containers
Not ideal for deeper roots
Not suitable for mature and large succulents that weigh a lot
Small Pot
A small pot is an excellent choice for propagating a new Haworthia or growing one for several years. Succulents will only spread roots and propagate on their own if there is soil for their expansion. If there is not, their energy gets spent growing fuller and more prominent.
Pros:
Great for small and single Haworthia plants
Excellent for replanting and propagating
Nice if you don’t have much room for expansion of roots
Common Problems and Solutions When Growing Haworthia Plant
Even with the best care plan for your Haworthia plant, some problems will arise. Ensure that you know the various signs of a succulent plant in distress so that you can alleviate the distress before it kills your Haworthia plant.
Below are some of the most common problems that tiny succulents, such as the Haworthia plant, suffer. Taking on the care of Haworthia is not tricky. There are only a few symptoms that your Haworthia plant is dying or unhealthy. Once you read on and figure out these symptoms, keeping your Haworthia plant healthy at all times will get much easier for you. However, without the knowledge of the problem and identifying the symptoms, your Haworthia plant may die.
Leaves Curling
Curling leaves is a clear sign that your Haworthia plant is not receiving enough water. When a succulent like a Haworthia is under-watered, it begins to use the stored moisture in its leaves to survive. The leaves’ outer tips give up their moisture first, meaning they are the first to dry up and begin curling as though they were dying.
If the leaves are curling, another symptom that you may notice is dry potting soil or mix. The potting soil of all succulents, including your Haworthia plant, needs some moisture. The succulent plants live without a water well, but only for a short time. After Haworthia has a dry potting mix for an extended time, it causes curling leaves.
If your Haworthia plant leaves are curling, it means that the soil is too dry and the plant is not getting enough water.
When you notice the leaves curling, check the soil. If the soil is also dry, the leaves curling are most likely due to under watering. A thirsty plant is a dying plant. Ensure that you water the Haworthia plant immediately and increase your watering schedule so that the soil is a little moist at all times.
If you have consistent watering practices but still notice that the soil gets dry quickly, it may be time for a new soil mixture with less substrate. The substrate is the hard, usually porous material that helps drain the soil more quickly. If a soil mixture has too much substrate mixed in, it doesn’t retain water long enough. The plant won’t get the moisture that it needs before it gets drained away.
Yellowing Leaves
The color of your Haworthia leaves also tells you a lot about your plant’s health and the soil that it gets planted in. Yellowing leaves are a sure sign that something is wrong with your Haworthia plant and that it is dying. Don’t wait until your leaves turn fully yellow. If you notice any discoloration of yellow on the leaves of your Haworthia, take action immediately.
Even plants that have a yellow hue to the leaves will not have spotty and completely yellow leaves. If the leaves are all yellow, or some of the leaves have completely changed color, make sure that you are not overwatering your Haworthia plant.
If the leaves are yellowing, check the potting soil and ensure that the mix is not too wet. If there is standing water or the soil is very moist, the plant’s yellowing and health may get damaged from something called root rot. Haworthia gets damaged with too little or too much water. Standing water in the pot of your Haworthia plant is not good. The Haworthia plant and leaves don’t thrive in moist or submerged soil at all times.
Make sure that you spread out your watering and set an on-again-off-again watering schedule. Also, make sure there is a leach hole at the bottom of the pot for your Haworthia and if there is not one, drill one in to promote draining. Finally, if all else fails, replant your Haworthia in soil with more substrate mixed in for increased drainage.
The Leaves Keep Falling Off
Unless your Haworthia plant is tussled or knocked over, the leaves should not fall off on their own. Instead, an unhealthy Haworthia plant may lose leaves completely when stressed or in other less than-ideal-situations. If your leaves are falling off your succulent plant, it could be from one of the following conditions:
Way, Way Too Much Water
If the leaves are mushy and soft when they come off the Haworthia plant, it is probably because of overwatering. What tends to happen is that Haworthia continues to suck up the water that it is sitting in. Some leaves can’t take anymore, and instead of stopping, their connection to the plant itself becomes weakened, and it eventually falls off.
Too Much Sun
Too much sunlight and extreme heat conditions or climate contribute to leaves falling off your Haworthia plant. If your Haworthia is in direct sunlight and the leaves start looking dry, or tight and shriveled, it could be because of dehydration. Make sure your Haworthia plant gets a break indoors during long periods of extreme sun and heat.
Although Haworthia loves direct sunlight, too much light and hot conditions can make the leaves fall off.
Dropping leaves in extreme heat is a natural response and helps the succulent conserve water. You can minimize the stress on your Haworthia by bringing it inside, covering it with a damp cloth, or shading it for the hotter parts of the day. If the leaves are damaged too much, the Haworthia plant needs better shade and a break from extreme climate.
Discoloration of Leaves and Stem
The discoloration of succulents like Haworthia is usually because it is not getting enough nutrients in its soil. The leaves may turn red, yellow, or brown, and the stem can get solid brown or black.
Even though you may add nutrients in the soil when you first plant or replant your Haworthia, these nutrients may leach out of the soil with continued watering. Adding nutrients to your watering schedule is not a bad idea and should get considered every three or four months.
There are many fertilizers out there on the market which are great for succulents like Haworthia. Look for a well-balanced houseplant fertilizer or one specifically designed for cactus and succulents. Also, slow-release fertilizer is the best for succulents, since the nutrients tend to get leached out with the drainage substrate in the soil.
Some of the best Haworthia fertilizers, based on reviews and our research, are listed below. Our research includes different approaches for fertilizer both indoors and outdoors:
Osmocote Smart-Release Plant Food
Any fertilizer gets leached out of the soil. However, fertilizers like this smart-release one are great for the slow release of continued high levels of nutrients. This is an excellent fertilizer for succulents as the soil drainage tends to leach nutrients from fertilizer even more quickly than ordinary soil.
Pros:
It contains eleven nutrients that give your plants the full spectrum of nutrient balance and support.
It lasts six months for average soil and watering conditions.
Cons:
A potent formula that can burn plants and roots if used incorrectly
Cute Farms Succulent, Cacti, & Aloe Fertilizer
Some of the fertilizers on the market may be great for larger gardens, which have room for spreading granulated products. However, this liquid gel form of succulent fertilizer is ideally sold in a squeeze bottle for a continuous and easy aim and squirt application on small succulent plants.
Pros:
Easy for smaller plants with the squeeze bottle nozzle
Great for continuous and small batches of use
Can get used on aloe, cactus, and other succulents, along with Haworthia
Cons:
More expensive than other large format fertilizers
Leaches out of the soil more quickly than other slow-release fertilizers
Must get applied once a month
Miracle-Gro Indoor Plant Food
Miracle-Gro is a household name for fertilizer, and this squeeze bottle applicator is perfect for all of those house plants and succulents with small bases. The formula is mild enough for monthly use. The application is as easy as using a liquid hand soap dispenser.
Pros:
Easy for smaller plants with the squeeze bottle nozzle
Great for continuous and small batches of use
Can get used on aloe, cactus, and other succulents, along with Haworthia
Cons:
More expensive than other large format fertilizers
Leaches out of the soil more quickly than other slow-release fertilizers
Must get applied once a month
Fat Plants San Diego Premium
Why deal with adding the fertilizer yourself, when you can replant your Haworthia in soil that is blended professionally and enriched with fertilizer and nutrients? This soil and fertilizer mixture is nutrient-rich and ready for planting. By using this product, you take the guesswork out of mixing your own nutrients into the soil of your plants.
Pros:
Easy to use; you don’t have to mix the nutrients into the soil yourself.
Great and long-lasting nutrient-rich soil
Contains many nutrients that grow plants larger and stronger
Cons:
No control over the amount of fertilizer used
More difficult to get substrate drainage mixture correctly mixed for replanting
Succulents are easy plants for propagating. The process of transferring mature rhizomes from one thriving Haworthia plant to the soil for replanting has several easy steps. Once replanted, the Haworthia is an excellent ground cover and propagates reasonably well on its own.
The only thing that should get considered before attempting to propagate a Haworthia plant is where the replanting is taking place. As always, make sure you consider the climate, temperature, moisture level, and sunlight exposure before replanting and propagating Haworthia cuttings. The steps for propagating a healthy plant are useless without proper care.
To propagate Haworthia, transfer mature rhizomes from the plant to the soil.
The steps for propagating Haworthia are relatively simple and straightforward because this succulent is one of the world’s best plants at propagating on its own. Most of the leaves will get too heavy and then start growing small red roots and fall off on their own, spreading the plant’s surface area out as they fall off and set roots down.
Although they are hardy succulents that are easy for propagating, growing Haworthia from clippings requires a little bit of time and a few materials and tools. Before beginning the propagation process for Haworthia plants, you need to include the port used for replanting, a soil mixture of commercial potting soil and substrate, and a small pair of scissors.
The steps for propagating a Haworthia plant include:
Look for new roots: Typically, Haworthia likes to spread out and propagate on their own. If you have the original plant in a larger pot or the plant has leaves hanging over its side, they will naturally begin sprouting new roots. Identify these new roots that may already be showing without digging out any roots.
Snip a leaf: Identify the growth of Haworthia that you would like. The best leaf for propagating is the leaf with red roots already dangling from it. These new roots help the propagating process go more smoothly and quickly. Next, find the coarse and dried connecting point between it and other leaves and snip it from the plant. If you can’t find new roots, try snipping a leaf without roots, it will propagate once in soil independently.
Create the replant pot: Mix soil and substrate equally and pour into the new pot that gets the new clipping of Haworthia. Make sure there is not too much soil or depth for new and immature roots. Remember that terracotta pots are usually best.
Replant: Take your snipping of Haworthia and place the cut end with exposed roots down into the soil. Gently cover with soil until about half of the leaf is exposed. Water thoroughly and gently. Follow regular care steps after the initial replanting gets completed.
Although most succulents you have in your home are not known for being toxic, kids and pets should keep away. Haworthia is not known for its toxicity; however, it should not be ingested.
Pick a safe place, possibly up high, for growing your Haworthia plant. This way, pets or children cannot get access and will not accidentally ingest any leaves that might happen to fall off. When Hawothria leaves get engorged and develop secondary red roots they will begin falling off.
Haworthia has two varieties, and neither is known for its toxic qualities towards cats, dogs, or kids. However, the leaves tend to fall off freely and propagate on their own. It is better to be safe than sorry for choking small leaves or possibly toxic episodes due to ingesting Haworthia.
Haworthia succulents are among the most successful and popular plants that people grow in their homes and gardens. This beautiful plant is easy and looks great as both a young and mature succulent.
The fact that Haworthia is non-toxic for most individuals, propagates freely on its own, and grows in various climates makes it one of the best succulents that you can buy and grow. Take advantage of this excellent succulent from South Africa and add some beauty to your garden and life.
If you are a cacti enthusiast, you would already know that these desert plants are resistant even to the harshest of environmental factors. However, this does not mean that they are immune to attacks from animals, diseases and bugs. Cactus can withstand some form of neglect, but it needs proper care to remain healthy and thriving. A healthy cactus is a sign of good prospects and hope for reproduction in the future.
So, how do I know if my cactus is healthy? A healthy cactus will be evident from its physical features. A strong, succulent stem, upright leaves, evenly green outlook and strong roots stand out as some of the characteristics of a healthy cactus. A healthy cactus will hold a considerable amount of water without showing any signs of weathering and will bloom bright colored flowers each flowering season without fail.
This article will take a look at the characteristics that stand out for a healthy cactus. It will discuss ways to keep the plant healthy and how to spot any signs of poor health.
Physical characteristics of a healthy cactus
The Stem
A cactus stem, unlike other plants, is specialized for several functions. Apart from acting as the pillar for the whole plant, it also works as:
A water reservoir to help store water for the plant to be used in times of drought
Making food for the plant through photosynthesis
Based on this, a healthy cactus ought to have a strong, upright stem. In most cases, the stem will be green. The green color on the stem should be even with no sign of discoloration or rough patches.
A healthy stem enables photosynthesis that keeps the plant alive. Unlike other conventional plants, cacti take in carbon dioxide at night when the temperatures and evaporation are low in a process known as CAM photosynthesis. This carbon dioxide would then be used during the day to make oxygen and sugar.
Leaves/pads
While some cacti have little spiny leaves, others have pads or spikes to compensate for the same. A healthy cactus portrays vibrant pads with no signs of withering or leaning over. Depending on the cacti species, the pads would multiply with time, thus providing the pant with a chance to propagate into new plants. Usually, the pads may be attacked by bugs or herbivores trying to feed on them. This leads to dents and discoloration of the outer skin. However, note that as the cactus ages, discoloration may be noted in the stem or leaves, and this is normal.
Flowers
Almost all cacti have flowers. Usually, the flowers are short-lived and would appear in specific seasons. A healthy cactus blooms brightly colored flowers every season. Depending on the cacti species, a flower would have 5 to 15 petals, usually blended with the sepals. It also features a multi-loved stigma surrounded by several stamens.
If your cactus does not produce flowers every season, it might not be completely healthy.
An unhealthy cactus may skip some flowering seasons or fail to flower altogether. This may be a result of nutrient deficiency or lack of enough water. Notably, the ability of a cactus plant to bloom can be determined by its age. While some cacti may take years to mature and produce flowers, others may stop flowering after a certain age. It is, however, important to ensure that your cacti get enough sunlight and watering as desired.
Fruits
The flowering season is usually followed by an abundance of fruits and seeds, depending on your cactus species. A healthy cactus would produce juicy fruits and healthy, full-size seeds following its flowering period. Some edible cactus species like the prickly pear, barrel and dragon cactus produce juicy edible fruits. A healthy cactus would be consistent in producing fruits and seeds for a better part of its lifespan.
Spines
A healthy cactus plant features multiple erect spines all across its surface. These are meant to help protect the plant against external attacks from herbivores. The spines keep the cactus healthy by insulating it against cold or dry weather. Weak or broken spines are signs that the plant is in trouble and at risk of dying off from external attacks.
Unhealthy cactus plants have weak or broken spines.
Skin surface
A healthy cactus plant features a moist, shiny and ribbed surface. The ribbed surface is an adaptation that helps the plant expand comfortably without the risk of bursting as it absorbs more water to its reservoir. A healthy cactus also features a waxy surface that helps the plant reduce evaporation in times of drought. The waxy skin also comes in handy to help deter insects and other bugs from eating into the plant’s moist and soft interior.
Roots
Unhealthy roots in a cactus can spell disaster. The plant is commonly attacked by root rot, leading to death if it doesn’t get urgent attention. As such, it is important to understand the characteristics of healthy roots.
You wouldn’t accurately determine the health of cactus roots unless you uproot the plant. This may be done when repotting. Healthy roots are usually whitish or grey. They are moist, and some would feature vibrant hairs around them. Roots with brownish or black coloration may be a sign of poor health not only for the roots but also for the plant as a whole.
Soil
For a cactus to remain healthy, the soil’s condition must be ideal enough to ensure efficient nutrient uptake by the plant. A cactus growing on light, porous soil is a healthy cactus. Such soil guarantees just the right drainage to avoid dumpy conditions that may lead to root rot and eventual death. When planting, you may opt to make your own soil mix at home or opt for the commercial soil mix available in most arborist stores, here are our recommended ones.
The quality of the soil mix influences the healthiness of your cactus plant.
Potting container
A good sizeable potting container with drainage holes is a guarantee to have a healthy cactus. As long as the container can still comfortably hold the plant with no signs of roots outgrowing through the drainage holes, it should be an indication of a healthy cactus.
Consider repotting your cactus every year or whenever signs of roots getting overcrowded are noted for better results. A larger container gives space to the plant to grow even bigger and more vibrant.
How to keep a cactus healthy
Cacti are resistant plants, alright, but this does not mean you neglect them altogether. Cactus plants, especially those grown indoors or in gardens, require constant attention to keep them healthy and thriving.
Watering
Cacti are desert plants, but they need sufficient watering to keep them vibrant and improve their growth and reproduction rate when grown indoors. However, watering a cactus needs skill and strategy. Unlike other moisture-loving plants, cacti need some waiting period between watering to allow the plant to use up most of the water already fed. Since they store their water in their succulent stems, cacti do not need frequent watering. Only water when at least two inches of the topsoil feel dry.
Sufficient lighting
Cacti love light, and you may not be too lucky if you keep them in the dark place. Lack of light causes the plant to change color and eventually die off. When growing your cacti indoors, ensure you provide enough light. Do this by strategically positioning your plants in a west-facing or south-facing window. At least six hours of light per day is enough to keep your cacti healthy, vibrant and thriving.
However, beware not to expose new or young plants to too much light. This may scorch the outer skin and expose it to external attacks by bugs and fungal diseases.
Use proper potting soil and container
The survival of your cacti is highly dependent on the soil and container used. For better results, always ensure you use proper-sized containers with drainage holes. These will help drain excess water to avoid cases or root rot.
When planting, use the proper soil mix ideal for planting cactus (Here are our recommended ones), The soil should not be heavy as these will retain too much water. A soil mix with lighter soil will be ideal in this case.
Fertilization
Cactus may be a dessert plant where nutrients are limited, but this doesn’t mean it doesn’t need fertilizer. A properly fertilized cactus will grow and mature faster, will produce brighter and more regular blooms and will have a vibrant appearance overall.
Fertilizer promotes the growth of a healthy cactus and makes it mature even faster.
Cacti do not need a specific blend of fertilizer, but a highly diluted, all-purpose fertilizer will do the magic. Use a low nitrogen water-soluble fertilizer with a ratio of 5-10-10 or 10-10-10 for better results.
A healthy cactus is a happy cactus. As a cactus enthusiast, you not only have to get acquainted with the characteristics of a healthy cactus but also take steps to ensure that it remains so for the rest of its lifetime. With proper care and expert attention, your cactus will live to serve its purpose, whether indoors or in the garden.