8 Perfect Plant Choices for Your Open Terrarium

Small plant at an open terrarium.

Creating an open terrarium is an excellent way to add a unique style to your home or garden. Open terrariums are ideal for those who want to bring the outdoors inside but don’t have the space or budget for a full-blown greenhouse. However, choosing the right plants for an open terrarium can be tricky. That is why we are here to help you.

So, what are some of the best plants for open terrariums? Open terrariums typically contain succulents, cacti, mosses, ferns, ivy, and other low-maintenance plants that thrive in sunny yet humid environments. When selecting plants for your open terrarium, it’s important to remember that not all species will work well together; some may compete for resources like light and water, while others may not be compatible with one another due to different environmental needs. Therefore, it’s important to research each plant before adding it to your open terrarium to ensure they will all get along nicely.

This article discusses some of the most popular and best plants for open terrariums. Read on to find out everything you need to know.

What Is an Open Terrarium?

Before we dive into the best plants for open terrariums, let’s take a quick look at what an open terrarium is and why it is good for your home.

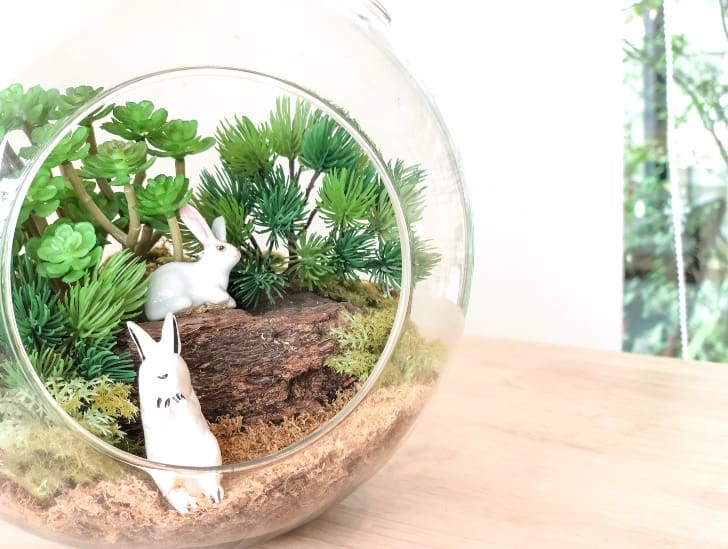
Generally, an open terrarium is a glass container with no lid or cover that can be used to display plants indoors or outdoors. Unlike closed terrariums, which are completely enclosed, open terrariums allow air to flow freely.

This makes them great for areas with low humidity and plenty of sunlight. Furthermore, plants in an open terrarium require relatively little maintenance compared to closed ones; they only need enough water and occasional pruning to keep them healthy and thriving.

A echaveria plant on a open terrarium.
The plants in open terrariums can add a layer of warmth and coziness to any room.

Having an open terrarium in your home offers a wide range of benefits. Not only do they look great, but they also help to purify the air in your home by removing pollutants like formaldehyde and benzene.

Additionally, the plants in open terrariums can add a layer of warmth and coziness to any room.

The Best Plants for Open Terrariums

Now that we know what an open terrarium is, let’s move on to the best plants for them. Each group of plants mentioned here is well-suited for open terrariums and will provide a unique touch to your home or garden.

1. Succulents

Succulents are one of the best choices for an open terrarium due to their hardy nature and ability to thrive in drier conditions. Examples of succulents that work well in open terrariums include aloe, jade plant, crassula ovate, and echeveria.

These plants don’t need much water or sunlight to thrive. They come in many shapes and sizes, so you can mix and match different kinds together within your terrarium to create interesting patterns and textures.

Succulents will thrive perfectly in the dry air of an open terrarium, so you won’t need to worry about over-watering them. That said, checking up on your succulents now and then is still important—just make sure the potting mix is completely dry before watering!

You should also consider feeding your succulents every few months with a liquid or slow-release fertilizer to ensure they stay healthy. The best time to apply fertilizer is during the active growth or flowering season.

Avoid fertilizing your succulents during the winter months since they are in a dormant period during this time.

2. Cacti

Cacti are another great choice for an open terrarium due to their hardy nature and ability to store water for long periods. Examples of cactus species that work well in open terrariums include prickly pear, barrel cactus, and star cactus.

These plants need plenty of light and warmth to thrive, so placing your terrarium in a bright spot away from any drafts or cold spots in your home is important.

Little succulent and cacti on open terrarium.
Cacti are another great choice for an open terrarium due to their hardy nature and ability to store water for long periods.

Cacti don’t need much water; simply mist the potting mix once every week or two to keep them happy. Ensure you don’t over-water your plants; only provide enough water to moisten the soil without making it soggy.

3. Ferns

Ferns make excellent additions to terrariums because they can tolerate being enclosed in glass walls with no natural air circulation.

There are many varieties of ferns available, some that thrive in low light conditions while others prefer bright light. Ferns are often used as ground cover plants because they stay small and grow horizontally rather than vertically.

Some popular fern varieties include Asplenium nidus (Birds Nest Fern), Nephrolepis exaltata (Boston Fern), Adiantum (Maidenhair Fern), and Selaginella (Clubmoss).

Taking care of ferns in an open terrarium is quite simple; all they need is regular misting and watering to keep them healthy. They don’t require a lot of sunlight, making them ideal for areas with low light conditions or those without access to direct sunlight.

If you want your ferns to thrive, ensure the potting mix is kept moist (but not soggy). For best results, apply a slow-release fertilizer to the potting soil once or twice a year.

4. Mosses and Liverworts

Mosses and liverworts are small flowering plants that don’t need much direct sunlight or water to survive. They tend to do well in damp environments like terrariums and don’t require as much care as other plant varieties.

Mosses and liverworts come in different varieties, so you can experiment with combining different types together to create interesting effects within your terrarium.

Additionally, mosses and liverworts help keep humidity levels in your terrarium stable, which is important for the health of the other plants you might have inside the terrarium.

To get the best results, add a layer of moss or liverwort to the potting soil and mist it every few days with rain or distilled water. You don’t need to apply fertilizer as these plants typically do not need added nutrients to thrive.

Some of the best mosses and liverworts for terrariums include Selaginella, Riccia Fluitans (Floating Moss), Marchantia polymorpha (Pennywort), and Pellia epiphyllum (Liverwort).

These plants are perfect for creating lush, green environments inside your open terrarium. Experiment with different varieties to create your own unique and beautiful miniature garden.

5. Ivy Plant

Ivy plant is another great option for open terrariums. It can be grown as a groundcover or allowed to climb the walls of your terrarium, creating a stunning display of curling vines and glossy green leaves.

Ivy is easy to care for; all it needs is indirect light, regular misting with distilled water, and occasional liquid fertilizer applications during the active growing season.

A ivy plant on aopen terrarium.
It can be grown as a groundcover or allowed to climb the walls of your terrarium, creating a stunning display of curling vines and glossy green leaves.

Some of the best ivy varieties for terrariums include English Ivy (Hedera helix), Algerian Ivy (Hedera canariensis), and Irish Ivy (Hedera hibernica).

These plants are perfect for creating an enchanting miniature garden with cascading vines and glossy green leaves.

6. Air Plants

Air plants have become increasingly popular in recent years due to their unique look and easy-care requirements. Unlike other kinds of plants that need soil to grow, air plants get their nutrition from the air.

They prefer bright light but can also tolerate lower light levels if necessary—just be sure to mist them regularly, so they don’t dry out.
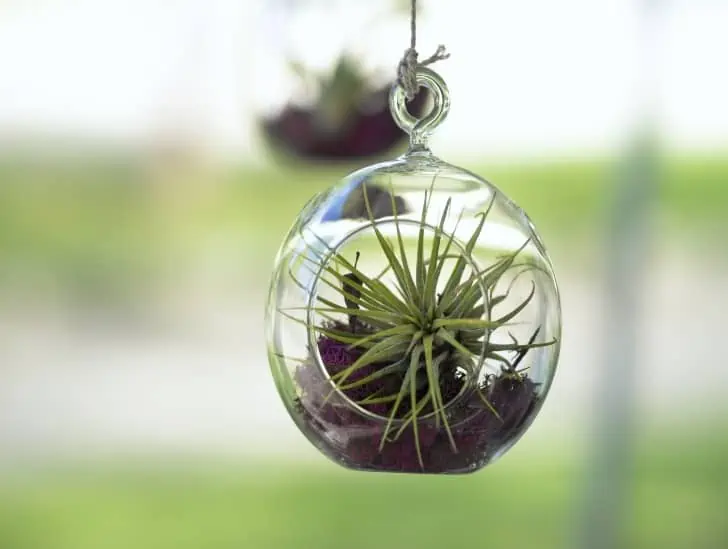
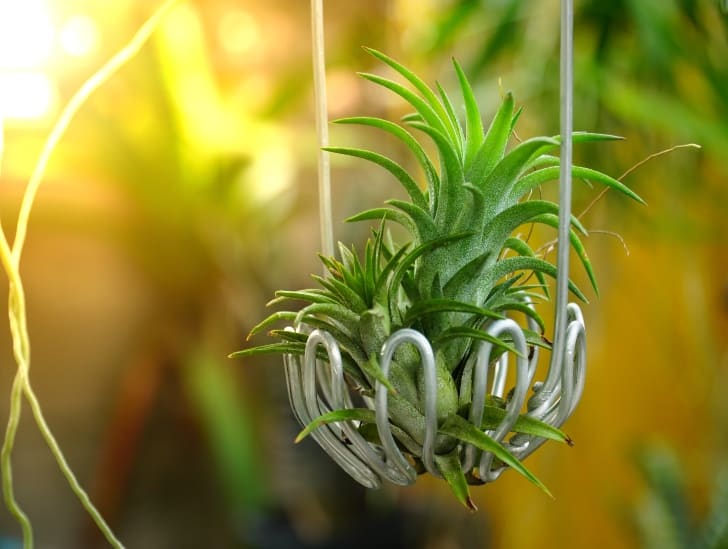
Air plant hangging on the Open terrarium.
Unlike other kinds of plants that need soil to grow, air plants get their nutrition from the air.

Air plants are great for creating a carpet in your terrarium; they come in all sorts of colors (green is the most common) and look beautiful when combined with other types of plants.

Some of the most common air plants for terrariums include Tillandsia, Xerographica, and Ionantha.

7. African Violet

The African Violet is a popular houseplant with its bright purple flowers and thick, fuzzy leaves. While African Violets typically prefer warmer temperatures and higher light levels than those found in terrariums, they can still do quite well in open terrariums if the conditions are right.

African Violets need regular watering (about once a week) and should be fertilized once a month. They prefer well-draining soil and should not be overwatered to avoid root rot.

African violet plant on a terrarium.
They prefer well-draining soil and should not be overwatered to avoid root rot.

These plants can also benefit from a little humidity, so you may consider adding a pebble tray or misting your terrarium every few days to increase the humidity level slightly.

8. Croton Plant

Lastly, the Croton plant is another great choice for open terrariums. This tropical plant is known for its bright, colorful foliage and striking shape. It is native to South and Central America but has become popular in terrariums worldwide due to its low-maintenance requirements.

Croton plants need bright, indirect light and regular misting to thrive. They also require fertilizer twice a month during the growing season.

Croton comes in various colors, including yellow, red, orange, and green. They are perfect for creating a tropical oasis in your terrarium!

To get the best out of your Croton plant, prune it regularly and give it enough humidity. Your Croton will be a beautiful addition to your terrarium with proper care!

Summary

All plants mentioned here are great choices when it comes to creating an open terrarium because they all require little attention yet add a lot of beauty to your space.

When selecting your plants for an open terrarium, remember that each type has different requirements when it comes to lighting, temperature, soil type, etc. So be sure to conduct thorough research before purchasing any of them for your project!

This will help you make informed decisions that will ensure that your open terrarium is filled with healthy plants that will last for many years.

The Best Succulents for Rapid Growth

A kalanchoe exposed to sunlight outdoors.

Succulents are some of the best houseplants right now, and it is for a good reason. They can thrive in almost any condition, require minimal care and are a great way to inject some color into your living space. There is one problem, though – they don’t always grow fast enough! However, the good news is that some of them grow quickly, so you won’t have to wait too long for them to become a beautiful addition to your home.

So, what are some of the fastest growing succulents? Some of the fastest growing succulents are aloe vera, Crassula, kalanchoe, aeonium, Sedum, and Echeveria. Others include haworthia, sempervivum, stonecrops, opuntia, and agave. While most of these will do well in partial sun, some require full sunlight or shade.

This article describes some of the fastest growing succulents, their characteristics and basic care requirements.

Average Growth Rate for Succulents

Before we dive deep into some of the fastest growing succulents, it is essential to understand that not all succulents grow at the same rate.

Generally, most succulents can take anywhere from two to five years to reach maturity and start flowering.

For instance, a saguaro cactus can take 75-100 years to reach its full size. However, some succulents, such as aloe vera, grow much faster, reaching maturity in one or two years.

Some succulents grow moderately fast, while others are slow growing. It is essential to understand the growth rate of your succulent to ensure you provide it with optimum care.

Fastest Growing Succulents

Now that you have a better understanding of the growth rate of various succulents, here are some of the fastest growing ones.

1. Aloe Vera

Aloe vera is one of the most popular succulent houseplants. It grows quickly if given sufficient sunlight and water and can reach maturity in as little as a year.

This succulent has thick stems and fleshy leaves for storing moisture. Unlike other succulents such as aeonium, aloe vera leaves don’t have sharp edges. Instead, they are well-rounded or pencil-shaped.

A aloe vera plant outdoors.
Aloe vera has thick stems and fleshy leaves for storing moisture.

When the plant is mature, it produces beautiful yellow or orange flowers.

Aloe vera can grow up to eight inches long when provided with the right growing conditions. It can tolerate relatively high temperatures quite well.

This makes it a perfect succulent for your balcony or patio, where you want some greenery but don’t want anything too delicate for survival.

There are more than 500 different aloe species, but only a few can be grown as houseplants. Aloe vera is perhaps the most common variety, but others include Aloe marlothii, Aloe aristata, and Aloe striatula.

2. Crassula

Another fast-growing succulent is the popular Crassula. It has various shapes and sizes, from rosettes to shrubs. This evergreen succulent looks excellent in hanging baskets or planted in large containers where it can spread out.

It has thick, fleshy leaves that can store moisture. The leaves may be rounded or pointed depending on the species and sometimes have a reddish hue.

Crassula grows quickly when given enough light, water, and regular pruning. If you want to speed up its growth rate, plant it in a soil rich in nutrients.

Crassula can also tolerate hot temperatures and drought, making it a great choice for those who want low-maintenance succulents.

There are more than 200 species of Crassula, with some of the most popular varieties including the Jade Plant (Crassula ovata), Crassula helmsii, and Crassula portulacea.

3. Irish Rose Plant

The Irish Rose plant is one of the most famous subtropical succulents native to the Canary Islands. The Irish Rose is a tree-like succulent that can grow fairly large depending on whether it is grown indoors or outdoors.

The succulent can survive both indoors and outdoors perfectly. The only thing it requires is access to good sunlight.

So, if you are growing it indoors, you will need to provide it with sufficient sunlight or install artificial grow lights.

Irish rose plant indoors.
The Irish Rose is a tree-like succulent that can grow fairly large depending on whether it is grown indoors or outdoors.

The Irish Rose plant grows fairly fast and blooms beautiful yellow flowers from late winter to spring. The succulent thrives in full sun during the cold months and in coastal regions.

The succulent has fleshy, rounded leaves that can store moisture in case of drought or excessive heat.

When grown indoors, the succulent will reach up to 5 feet tall. In outdoor settings, however, it can grow up to 8 feet tall and even more if given enough water and sunlight.

The Irish Rose is one of the best choices for those looking for a fast-growing succulent, as it can reach full maturity in one or two years. Its unique beauty and resilience make it an ideal houseplant for all types of gardeners.

4. Kalanchoe

Kalanchoe is another popular succulent with a fast growth rate. It has thick, fleshy leaves that are usually dark green but can sometimes have markings of different colors.

This succulent is known for its vibrant and colorful flowers, making it a great addition to any indoor or outdoor garden.

Kalanchoe is an easy-to-care-for succulent that grows quickly if given enough light, water, and regular pruning. This succulent can reach up to two feet tall when grown indoors. When planted outdoors, it can reach up to four feet tall.

5. Sedum

Have you ever visited your local grocery store and seen some succulents labelled “instant succulents?” If so, you must have come across the beautiful sedum plant because it is always among this group of succulents.

Sedums are fast-growing succulent plants with thick fleshy foliage that store moisture and can tolerate drought or hot weather well. These plants can reach up to two feet tall, depending on the species.

The foliage of Sedum is usually dark green or blue-green and sometimes has a pink or purple blush. Sedums can thrive in both full sun and partial shade, but for best results, you should give them an hour or two of direct sunlight every day.

These succulents are great for container gardens or rockery designs due to their fast-growing nature and low maintenance needs. They can be used as ground covers or hanging basket plants, making them ideal for the novice gardeners.

These succulents also come in different colors and shapes, allowing you to choose the perfect one for your garden.

6. Haworthia

Haworthia is another exciting plant on our list of fast growing succulents. Also referred to as the mother plant, haworthia produces female flowers first before producing male flowers.

The plant is native to South Africa and has fleshy leaves that are usually dark green with markings of white or yellow.

When grown indoors, haworthia grows quickly and can reach up to a foot tall in one year. Outdoors, it can easily grow up to six feet tall when given enough sunlight and water.

A haworthia plant exposed to sunlight.
Haworthia is drought-resistant and can thrive in full sun or partial shade.

Haworthia is an easy-care succulent that doesn’t require much maintenance. It is drought-resistant and can thrive in full sun or partial shade.

This succulent is ideal for rock gardens, container gardens, and hanging baskets since it does not take up much space and come in various shapes and sizes.

So, if you’re looking for a unique and easy-care succulent, haworthia is a great choice.

7. Sempervivum

If you are looking for something more tender to feel and highly attractive, you should try sempervivum. Although this succulent grows slightly more slowly than the other succulents on this list, they are great for areas with cold winters.

Sempervivum has a rosette structure that produces small star-shaped flowers during summer. They usually come in shades of pink, red and purple but can also be found in yellow and orange hues. Its leaves are usually green or grey-green with silver markings.

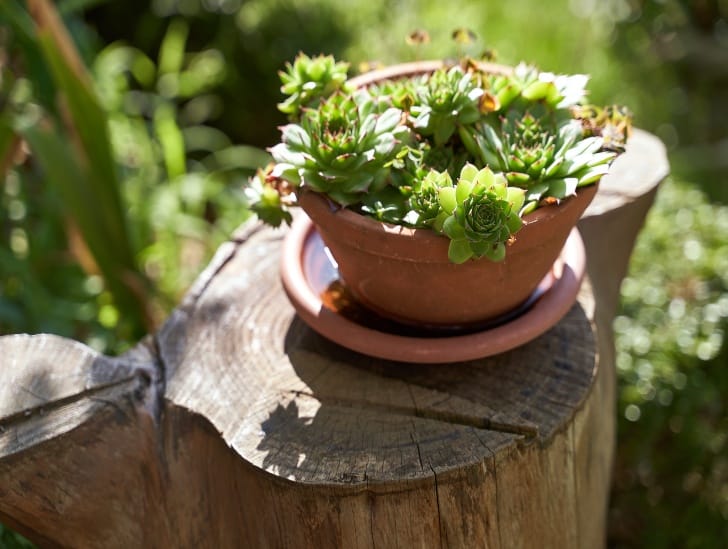
A sempervivum exposed on a sunlight on the pot.
This succulent grows slightly more slowly than the other succulents on this list, they are great for areas with cold winters.

This succulent does best in full sun and is drought-resistant. It prefers well-draining soil that holds some moisture but should not be too wet. Sempervivum will thrive in pots, rock gardens, and hanging baskets.

The succulent is easy to grow and require minimal maintenance, making it an excellent choice for novice gardeners.

8. Aeonium

Aeonium is one of the most popular succulents due to its unique rosette shape and vibrant colors. It has thick fleshy leaves that are usually green, red, yellow, or purple. The flower heads of aeonium are usually yellow, but some species can produce white and pink flowers as well.

Aeonium prefers full sun and should be watered deeply when the soil is completely dry. It’s drought-resistant and can tolerate cold temperatures better than other succulents.

Aeonium exposed to sunlight.
Aeonium is also low-maintenance and easy to care for.

This succulent is great for container gardens and rockery designs since it adds texture and color to your outdoor space.

Aeonium is also low-maintenance and easy to care for, making it an excellent choice for many gardeners.

Summary

Succulents are known for being some of the easiest plants to grow, and with the right information, you can have a thriving succulent garden in no time.

In this blog post, we’ve listed eight of the fastest growing succulents so that you can get started on your journey to becoming a succulent gardening expert.

We hope you enjoy planting these beautiful plants and watching them thrive!

The Top Air Plants for Low-Maintenance Living

Air plants are a great way to bring life and color into your home. They require minimum maintenance than other houseplants and can also be arranged uniquely to spruce up the look of any room. Whether you are new to gardening or want an easy-to-care-for houseplant, an air plant is an excellent choice. However, some air plants are relatively more suitable for beginners than others.

So, what are some of the best air plants for beginners? The most popular air plants among novice gardeners are Tillandsia xerographica, Tillandsia stricta, and the Aerangis mystacidii. Others include the Tillandsia caput-medusae, Tillandsia ionantha, Tillandsia cyanea, Tillandsia butzii, Tillandsia Streptophylla, and the smaller, compact species such as the Tillandsia funckiana. While it is relatively easy to care for these plants, you should remember that each species will require different watering and light requirements.

This blog post discusses everything you need to know about some of the best air plants for beginners. Read on to learn more.

Understanding Air Plants: A General Overview

The term “air plants” refers to a group of plants that get most of their nutrients from the air. They are not rooted in soil, but rather absorb moisture and nutrients through their leaves.

Air plants come in various shapes, sizes, and colors, some with intricate patterns on their leaves. They require little maintenance and can be placed anywhere as long as they receive enough light and humidity.

Most of these plants are native to warm, humid climates, but they can still thrive in dry environments as long as they are properly cared for. Most air plants prefer indirect sunlight and should be watered only when the leaves start to look dry.

In general, air plants need bright, indirect light; regular misting with distilled water (or rainwater if available); and occasional fertilizing with a balanced fertilizer every two weeks during the growing months.

What Makes Air Plants Ideal for Beginners?

Air plants are ideal for beginners because of their easy maintenance and hardy nature. They require minimal watering, can thrive in a range of light conditions, and only need to be fertilized occasionally.

These plants come in different shapes and sizes, making them suitable for any space. They are also highly versatile, as they can be hung from the ceiling, placed on shelves, or even mounted onto a wall.

A airplant hanging.
These plants come in different shapes and sizes, making them suitable for any space.

Furthermore, air plants don’t require a lot of soil to grow, making them ideal for gardeners who don’t have access to outdoor space or those who don’t want the mess associated with potting and re-potting plants.

What Are the Best Air Plants for Beginners?

Now that you know the basics of air plants, let’s look at some of the best air plants for beginners.

1. Tillandsia Cyanea

The Tillandsia Cyanea is an excellent option for beginner air plant growers. This species has long, thin leaves with bright purple tips and soft pink flower spikes when it blooms.

Tillandsia Cyanea is a classic air plant that doesn’t need soil to thrive. All you need to do is water your plant once every two weeks by either misting or soaking it in water for ten minutes or so.

You can also fertilize the plant lightly every month to keep it healthy and growing strong. With proper care, the plant will bloom at least once a year, producing a spectacular sight to behold.

Tillandsia Cyanea in a pot.
The Tillandsia Cyanea is an excellent option for beginner air plant growers.

The Tillandsia Cyanea is also known to be an easy air plant to propagate. All you need is a sharp pair of scissors and patience. Cut off a healthy stem, remove the lower leaves, and leave it to dry for around two days.

After that, plant the stem in moist soil or sphagnum moss and voila – you have a new Tillandsia Cyanea plant.

2. Tillandsia Ionantha

The Tillandsia Ionantha is another popular air plant for beginners. It has bright green leaves with lovely purple tips and yellow flowers when it blooms.

When it comes to maintenance, the Tillandsia Ionantha needs weekly misting or soaking in water to keep its leaves moist and healthy. It also needs to be fertilized once a month during the growing seasons.

This air plant is also easy to propagate, just like the Tillandsia Cyanea. All you need is a pair of scissors and patience, as it can take some time for the offsets (i.e., babies) to grow big enough to be transplanted.

3. Tillandsia Funckiana

The funckiana variety of air plants has stunning silver-green foliage, which forms into tight clusters when mature.

While this species requires more frequent watering than other varieties (up to twice per week), its vibrant colors make it well worth the extra effort necessary for upkeep.

A Tillandsia Funckiana.
The funckiana variety of air plants has stunning silver-green foliage.

Additionally, unlike other air plants, funckiana does not bloom; instead, it creates multiple offshoots from its stem, which can be propagated easily into new plants.

4. Ionantha Mexican

The Ionantha Mexican is an excellent choice for those who want an easy-to-care-for air plant that still looks beautiful when fully grown.

This species has small but thick green leaves that turn pinkish-red when exposed to higher levels of sunlight or slightly cooler temperatures.

It thrives in bright light but needs protection from direct sunlight during the hottest parts of the day; water this succulent once every week by giving it a quick misting with a spray bottle filled with filtered water.

This air plant should be watered less frequently during winter but should still receive some moisture.

Fertilizing the Ionantha Mexican is unnecessary, though you can give it a light application every two weeks during the active growing season (spring and summer).

Once established, this air plant is very easy to propagate and will provide you with plenty of new plants in no time.

5. Tillandsia Xerographica

If you’re looking for something more unique, Tillandsia xerographica is the perfect fit. This species is recognizable by its sprawling leaves, which have a distinct silvery hue.

While this variety requires more attention than others on this list, it’s still fairly easy to maintain as long as you keep up with misting, give it plenty of light, and keep it out of direct sunlight.

A Tillandsia Xerographica hanging on a stick.
If you’re looking for something more unique, Tillandsia xerographica is the perfect fit.

Tillandsia Xerographica is known for its unique shape, making it a great statement piece in any room. Take time to admire its intricate details, and you won’t be disappointed.

6. Tillandsia Streptophylla

Tillandsia Streptophylla is an attractive, fast-growing air plant that produces bright pink blooms each spring. Its thick leaves form a rosette shape and can grow up to 8 inches in diameter. It prefers bright light but can tolerate some shade as well.

When it comes to water and fertilizer, the Streptophylla needs to be misted or soaked at least twice per week and be given light application of fertilizer once every two weeks during its active growing season.

To propagate this air plant, remove healthy pups (offsets) from the mother plant and place them in a new container with some soil.

Once established, Tillandsia Streptophylla can be an easy and rewarding air plant to care for. Its beautiful blooms and lush foliage will undoubtedly capture your attention.

7. Tillandsia Stricta

Tillandsia stricta is great for novice gardeners as it requires minimal maintenance. This species needs plenty of light but should generally be kept out of direct sunlight to avoid scorching the leaves. It also doesn’t need to be watered or fertilized regularly.

This air plant has thin, upright leaves and small, light-colored flowers when it blooms. It also propagates easily and quickly with offsets that grow on the parent plant.

8. Tillandsia Caput Medusae

This air plant derives its name from its resemblance to the head of Medusa! Its long green leaves start out as a tight curl and unfurl as they age until they look like a mass of snakes surrounding the center of the plant.

It thrives in bright indirect light and should be watered weekly for optimal growth. The caput medusae is also very easy to propagate, with offshoots that can be transplanted into new plants.

Tillandsia Caput Medusae exposed to sunlight.
This unusual air plant is sure to draw attention wherever it is placed.

It blooms with small purple flowers that add to its already striking appearance. This unusual air plant is sure to draw attention wherever it is placed. Being a low-maintenance air plant makes it a great addition to any home or garden.

9. Tillandsia Capitata

Lastly, the Tillandsia Capitata is a striking air plant that will make an impact. Its large, curved leaves are stiff and have silver-green mottling and white tips. It prefers bright light but can tolerate some shade as well.

The Capitata should be watered at least once a week and fertilized every two weeks during its active growing season. This air plant also produces offshoots that can be transplanted into their own pot for easy propagation.

The Tillandsia Capitata makes a beautiful statement piece in any room and is sure to turn heads with its unique shape and mottling pattern.

Summary

All these air plant varieties are excellent options for beginners looking for an attractive houseplant without all the fuss that often comes with many houseplants.

They require minimal maintenance but still provide vibrant colors and exciting shapes that will help add character to your home décor.

We hope you enjoyed reading this article and are ready to try these easy-care air plants in your home. Good luck!

Plants for Closed Terrariums: Our Top Picks

Closed terrariums create a magnificent ecosystem that adds much beauty to your home. It only takes one or two closed terrariums to transform your home decor from drab to fab. You don’t need to be an expert to create a perfect closed terrarium. All you need to do is choose the right plants that thrive in relatively warm and humid conditions. It would be best if you also chose small enough plants for your terrarium that thrive in low light. The terrarium should be easy to maintain if you choose the right plants.

So, what are some of the best plants for a closed terrarium? The best plants for a closed terrarium thrive in relatively humid and warm temperatures. These plants must be well-adapted to survive in relatively low light and are generally petite, depending on the size of your terrarium. Some plants that meet these conditions include African Violets, ferns, moss, the nerve plant, Mini English Ivy, Strawberry Begonia, the Baby Tears plant, and the Mini Pixie. Others include the Moon Valley Pilea, Aluminum plant, String of Turtles, and the Creeping.

This blog post discusses some of the best plants for closed terrariums. Read on to find out everything you need to know.

What Is a Closed Terrarium?

A closed terrarium is an enclosed environment used to grow plants indoors. This type of terrarium provides a humid, warm, and controlled atmosphere, making it ideal for growing plants that cannot tolerate drastic changes in temperature or humidity levels.

The container should be sealed tightly with either glass or plastic, ensuring the right conditions are met inside the terrarium.

If you are relatively new to terrariums, you might be tempted to think that closed and open terrariums are the same. However, this is not the case.

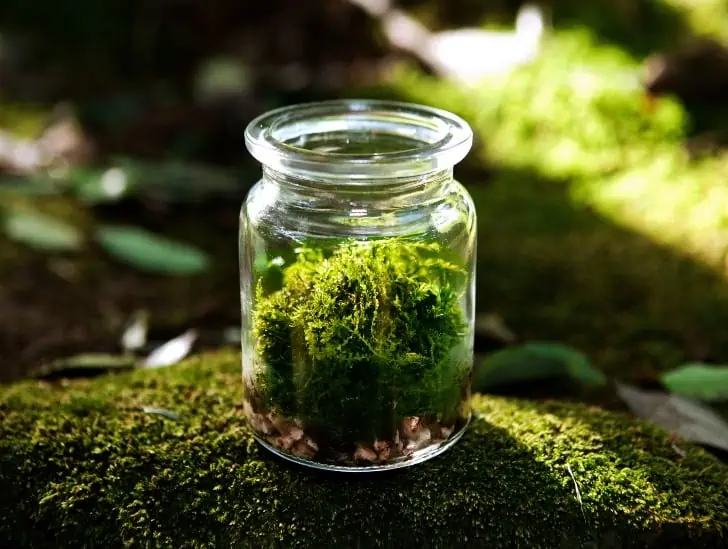
A jar transformed to a closed terrarium.
Closed terrariums are their own ecosystem.

Closed terrariums are sealed and require little maintenance compared to open terrariums, requiring more frequent watering, misting, and good airflow.

Closed terrariums are their own ecosystem. They even have their own mini water cycle. This is why plants in a closed terrarium should be kept from being watered frequently.

What Makes a Good Closed Terrarium Plant?

Closed terrariums are tropical rainforest generators where it is warm and humid. It means that plants need to be adapted to thrive in such conditions. Here are the things you should look for when choosing a closed terrarium plant:

A closed terrarium on a shelf.
Closed terrariums are tropical rainforest generators where it is warm and humid.
  • Small size – The container you use will determine the size of plants you can put inside your terrarium, so make sure to choose those that are small enough to fit.
  • Low light – Plants in a closed terrarium are exposed to minimal light, so make sure that the plants you choose can grow with little or no direct sunlight.
  • Thrive in humidity and warmth – The environment inside your terrarium should be warm and humid, so pick plants adapted to such conditions.
  • Survive with minimal airflow – Typically, a closed terrarium does not have much airflow, so make sure the plants you choose can survive with minimal air circulation.

What Are the Best Plants for a Closed Terrarium?

Now that you know what makes a good, closed terrarium plant, let us discuss some of the best plant species to consider for your terrarium:

1. Ferns

Ferns are ideally suited to life in a closed terrarium. These plants love the consistent humidity and heat that a closed terrarium environment provides and love low-light conditions.

A fern on a small closed bottle terraium.
Ferns are ideally suited to life in a closed terrarium.

With terrarium ferns ranging from miniature varieties of common houseplants to relatively compact tropical ferns, there is a lot you can choose from.

2. Mosses

One of the most popular plants for a closed terrarium is moss. Moss loves moist, humid areas and does well in an enclosed environment.

Not only do they look great, but they also provide a beautiful green carpet that enhances the look of your terrarium. Plus, some species can even filter air pollutants, making them an ideal choice for closed terrariums.

3. Friendship Plant

With its bronze veins, well-textured green leaves, and red undersides, the Friendship plant is one of the best beginner plants for anyone interested in having a closed terrarium at their home.

The Friendship plant gets its name due to its fast rooting, making it relatively easy to share with your family and friends. Given the right growing conditions, the little plant can even reward you with pale pink flowers once in a while.

It would be best to keep the potting mix moist and expose it to at least six hours of indirect sunlight daily. The plant can grow up to 12 inches tall.

The Friendship plant is an easy-care and fast-growing plant that provides your closed terrarium with an extra lush feel.

If you are looking for something more upright, combine it with the Moon Valley species. However, if you are okay with getting too leggy, pinch off its growing tips to make it more compact.

4. Nerve Plant

The Nerve plant is ideal for a closed terrarium as it can thrive in a warm, humid environment. It has long, narrow leaves, often arranged in bright green waves or fans.

You can make your nerve plant look even more appealing by adding pink or white accents to its foliage. Plus, you don’t have to worry about finding the right soil mix or light requirements as it can adapt to various conditions.

A nerve plant on a closed tarrarium.
The Nerve plant is ideal for a closed terrarium due to its bright and lively foliage.

You should water your nerve plant when the topsoil starts drying out. Ensure not to overwater, as this may cause its foliage to turn yellow and eventually drop off.

The Nerve plant is ideal for a closed terrarium due to its bright and lively foliage. The plant can grow up to 10 inches tall.

5. African Violets

African violets are small, delicate plants that thrive in humid and warm environments. They require a little sunlight but can survive quite well in the low-light conditions of a closed terrarium.

These plants also flower frequently and give out delicate purple flowers, which makes them a great addition to any terrarium.

The African Violet is relatively easy to care for and is an excellent choice if you want something that does not need maintenance or trimming. The plant will do just fine with some occasional light watering.

6. Peperomias

The Peperomia genus refers to a group of relatively small, compact plants that grow on rotting wood in their natural habitat. They can grow to about 12 inches under the right conditions. These plants are primarily found in South America’s tropical and subtropical areas.

While individual species vary in size, color patterns, and shape, most peperomia leaves are generally thick, smooth, and relatively fleshy. Like other tropical and subtropical plants, they thrive in relatively low light conditions. Most of them do well under full shade.

Some of the most popular peperomia species for closed terrariums include the Peperomia caperata, which grows to a height of about six inches; the Peperomia obtusifolia, which is a bit large but still stays under a foot, and the Peperomia argyreia that has attractive silver stripes in its leaves.

The peperomias are ideal for closed terrariums because of their low maintenance and ability to thrive in humid environments. They also provide your terrarium with an exotic look.

7. Miniature English Ivy

The miniature English Ivy, Hedera helix, is an excellent choice for a closed terrarium. It is widely appreciated for its fast growth and attractive foliage that can vary between deep greens and variegated varieties.

A hedra helix on a terrarium.
The miniature English Ivy is an excellent choice for closed terrariums due to its fast growth rate, easy maintenance, and attractive foliage.

The English Ivy does best in indirect sunlight, but it can survive even in low light conditions of a terrarium as long as the soil is kept moist. It will quickly be vining up and create a lush, green coverage of your terrarium. Just make sure to prune it regularly and keep the vines in check.

The miniature English Ivy is an excellent choice for closed terrariums due to its fast growth rate, easy maintenance, and attractive foliage that can give your terrarium an extra touch of green.

If you are okay with getting too leggy, you must pinch off its growing tips to make it more compact. It will remain alive and vibrant even after the pruning has been done.

8. Baby Tears Plant

The baby tears plant is a delightful addition to any closed terrarium. It is an evergreen plant with small, bright green foliage that looks like tiny drops of water.

These plants do best in partial shade but thrive in low light conditions as long as the soil is always kept moist. This means that you will need to water the baby tears plant often.

Baby tears are great for closed terrariums because of their size, vibrant colors, and low-maintenance requirements. They look best when planted in clusters or grouped with other small plants.

Its little leaves and delicate foliage can add character to your terrarium and make it look lusher. Plus, it is a great oxygen producer, making your terrarium healthier.

Conclusion

Closed terrariums can provide a beautiful and exciting ecosystem in your home. However, choosing the right plants that are well-adapted to survive in relatively warm and humid conditions with little or no direct sunlight is essential.

Some of the best plants for closed terrariums include Peperomia, Miniature English Ivy and the Baby Tears Plant.

All these plants can add a unique touch of beauty to your terrarium while providing you with low maintenance requirements.

So, consider all your options before choosing the right plants for your closed terrarium!

How to Create the Best Conditions for Chive Growth?

Chives are among the most popular culinary herbs, mainly used to add some taste and flavor to soups and dips. These easy-to-grow perennial herbs are unique in many ways and thrive both in a pot and garden bed. Once you have planted chives, you need to provide them with the right growing conditions to flourish. Although they are relatively hardy, repeated mistakes in the caring process can be fatal.

So, what are ideal growing conditions for active chive growth? Chives generally grow best in full sun and well-drained soil with a pH of 6.0 to 7.5. Ample moisture is essential for optimal growth and development, as the shallow roots dry out quickly during hot, dry spells or periods of drought. When thoroughly watered, chive plants can tolerate temperatures down to 0°F (-18°C). The ideal temperature range for growth is between 60 and 65°F (15–18°C). These plants may enter a dormant state and stop growing if temperatures are too cold.

This blog post discusses everything you need to know about ideal growing conditions for active chive growth. Keep reading to learn more!

About Chives

Chives are generally cool-season, cold-tolerant perennials that belong to the onion family. Most of them are native to Europe and Asia. The hollow green leaves can reach up to 8 inches in length and have a mild onion flavor.

They are usually used as a garnish or seasoning agent for soups and salads. Chives also have small edible flowers that open in springtime, adding a splash of color and taste to your meals.

However, you need to be mindful when growing chives in your home garden since they can easily take over the entire space if the flowers are allowed to develop fully and scatter seeds. To prevent self-seeding, make sure you deadhead the flowers regularly.

Chives plant near the window exposed to sunlight.
The hollow green leaves can reach up to 8 inches in length and have a mild onion flavor.

They are relatively easy to dig up and move to different parts of your garden. They also play a significant role in deterring pests from your garden.

Feel free to plant them with carrots, tomatoes, lettuce, peas, and even celery because these herbs are believed to improve the flavor and growth of nearby plants.

Ideal Soil Conditions for Chive Growth

Chives are quite a hardy herb and can tolerate regular watering, but they thrive best in soil with good drainage. Here is an extensive discussion on the ideal growing conditions for chives.

1. Soil Requirements

Chives prefer well-draining, slightly acidic soils with pH ranges between 6.0 and 7.5. It is best to add organic matter like compost or manure before planting chive seeds or transplants, as this helps in aeration and improves the nutrient-holding capacity of the soil.

Avoid planting chives in compacted or wet soils because this can lead to root rot and eventual death of the plants.

The good news is that you can easily make your own compost. To do this, collect yard waste like grass clippings, kitchen leftovers, and fallen leaves and mix them in a pile. Add some soil to the pile to activate the composting process.

A hand planting chives.
It is best to add organic matter like compost or manure before planting chive seeds or transplants.

Depending on the climate, you should have usable compost within weeks or months. Pay close attention to the moisture content during the composting process. Too much moisture can lead to clumping.

2. Light Requirements

Chives generally grow best in full sun and can tolerate partial shade, especially during summer’s hottest parts of the day. Give them six to eight hours of direct sunlight if planting chive seedlings or transplants.

Although they thrive in outdoor gardens, chives can also survive in pots indoors as long as they are placed in an area with plenty of natural light.

If you live in an area that doesn’t receive enough direct sunlight, you can use grow lights to give your chives the light they need to flourish.

3. Water Requirements

Chives need adequate moisture for optimal growth and development as shallow roots can dry quickly during hot, dry periods or drought. Water the plants regularly in summer but not too much to avoid causing root rot.

If planting chives in pots or containers, check the soil often and water as needed. You can also use mulch around the plants to help retain moisture and keep the roots cool during hot summers.

A water can beside the chives.
Water the plants regularly in summer but not too much to avoid causing root rot.

The best way to determine when to water your chives is by finger-testing. Carefully stick your finger into the soil to check if it is dry. If the first inch of soil feels dry, it’s time to water your chives.

Alternatively, use a moisture gauge to keep track of the soil moisture in your garden. This device can help you save time and water by avoiding overwatering, which can cause root rot.

You should also adjust the amount of water given to the plant depending on its size. Typically, smaller chive plants require more frequent watering than larger ones. Chives may also need additional water when the flowering season arrives and temperatures soar.

4. Temperature Requirements

Chives are cold-tolerant perennials that thrive best in temperatures ranging between 60 and 65°F (15 to 18°C). However, they can tolerate higher temperatures as long as the soil is consistently moist.

You can grow chives in USDA Plant Hardiness Zones 3-10. They generally do not survive freezing temperatures, but if you often live in an area that experiences cold weather, you can cover your plants with straw or frost cloth to protect them.

Chives turn to reddish-purple when exposed to temperatures below 40°F (4°C), but they do not suffer any long-term damage from cold temperatures.

5. Fertilizer Requirements

Generally, chives are not heavy feeders and do not require much fertilizer. However, you can give your chives an occasional boost by using a balanced slow-release fertilizer like 10-10-10 or 5-5-5 during the growing season.

You can also add compost to the soil around your chives annually. Compost helps improve the soil’s nutrient-holding capacity and provides essential nutrients like nitrogen, phosphorus, and potassium. This will help ensure that your chives have all they need to thrive.

Remember that overfertilizing can cause excessive growth and thin stalks, so it’s essential to be careful when applying fertilizer. Make sure to follow the instructions on the package carefully.

If you are growing your chives in a pot or container, you may need to adjust your fertilizer schedule depending on how often you water them. The frequency of fertilization also depends on the soil you use. Sandy soils require more frequent fertilization than clay-based soils.

It is also crucial to avoid adding fertilizer before or after a bloom cycle, as this can damage the blooms and affect their growth. Finally, wash your hands thoroughly after handling any fertilizer to avoid skin irritation.

6. Pruning Chives

There is no need to prune your chives as long as the plant is healthy and the foliage looks good. However, if the leaves become too long or look untidy, you can snip them back with scissors.

It is also important to cut off any flower heads as soon as they appear to encourage continuous growth and prevent seed production. This will also ensure that the plant’s energy is focused on growing additional foliage.

A person prunning chives.
If the leaves become too long or look untidy, you can snip them back with scissors.

The best time to prune chives is during the active growing season after the leaves have reached the desired height. Pruning the chives too late in the season can interfere with dormancy and prevent them from blooming in spring.

Be careful with the number of stalks you remove from the plant. Getting rid of too many stalks can be fatal to your plant.

Harvesting Chives

Chives are usually ready for harvesting when they reach about six inches in height or after a few weeks from planting them. You can harvest the fresh leaves by snipping them off with scissors.

The best time to harvest chives is in the morning when they are fresh and juicy. Be sure to leave enough leaves behind so the plant can regrow quickly.

Once you have harvested the chives, store them in an airtight container or refrigerate them for up to one week. Alternatively, you can dry the leaves and store them in an airtight container for later use.

Growing Chives in Pots

As mentioned earlier, chives can be grown in a pot or container if you don’t have enough space for an outdoor garden bed.

Growing chives in pots are easy, and the same rules apply here as with any other type of plant – choose a well-draining soil, water regularly, and provide adequate sunlight.

Use a fertile potting soil mix for best results, and keep the soil moist but not soggy. Water your chives once or twice a week, depending on your environment, making sure to water thoroughly and deeply each time you water them.

Chives on a pot.
If your pot is too big, you can add stakes or trellises to give the chives something to climb.

It is also important to position the pot in an area that receives at least six hours of direct sunlight daily. If your pot is too big, you can add stakes or trellises to give the chives something to climb.

Summary

Chives are a popular herb that is easy to grow and has many culinary and medicinal uses. Consider the soil conditions, light requirements, water needs, and temperature range when growing chives.

You can also fertilize your chive plants with compost or manure tea. Pruning and harvesting chives are important tasks that must be done correctly to maintain the plant’s health.

Following these tips, you can grow chives in your garden or pots on your patio.

Can Succulents Thrive in High Humidity?

You see and hear it everywhere: humidity. This is a common term used to describe weather condition and how it affects your daily life. But did you know that it can also affect your succulents? Typically, you need to control the amount of humidity your succulents are exposed to keep them healthy and thriving. Failure to do so can lead to unhealthy and stressed-out plants.

So, do succulents do well in humidity? The answer depends on the type of succulent you are growing. Cacti and other desert-dwelling succulents will not tolerate high humidity levels, while tropical succulents prefer humid environments. This is why it’s crucial to research the type of succulent you are growing before attempting to keep them in a particular environment. Strive to keep humidity levels around 40-60%, with higher levels reserved for tropical succulents and lower levels kept for desert-dwelling plants.

This article discusses everything you need to know about the level of humidity your succulents need. This will help you provide the best possible growing conditions and ensure that your plants are happy. Read on to learn more.

What Is Humidity?

Before we discuss how humidity affects your succulents, let’s first understand what it is.

Humidity refers to the amount of water vapor present in the air. It is expressed as a percentage that determines whether an environment is dry or humid.

For example, a room with 40% humidity would be moderately dry, whereas one with 80% humidity would be too humid. This is why humidity levels hit 100% when it rains.

Humidity is closely related to the environment’s dew point or the temperature at which water vapor condenses and forms dew. Generally, the higher the humidity, the closer the environment is to its dew point.

A hygrometer with a plant exposed to sunlight.
Humidity refers to the amount of water vapor present in the air.

Typically, humidity scales with air temperature. The higher the temperature, the more humid the environment will likely be and vice versa. However, some areas, such as deserts, will have low humidity despite high air temperatures.

Hot, humid weather usually leaves the air saturated with many water particles. In human beings, it means that your sweat won’t evaporate, causing almost everything to feel sticky.

In plants, the air’s moisture determines how much water the leaves can absorb.

Too much or too little humidity can be damaging to your succulents. So, it is essential to strive for balance.

Low Humidity vs. High Humidity

The air is considered dry when the relative humidity is below 40%. This means that your succulents won’t be able to absorb enough water from the environment, resulting in dehydration and stress.

Low humidity can be caused by heat from a fire or stove, extreme cold, or even an air conditioner.

On the other hand, high humidity is defined as anything above 60%. High humidity can cause succulents to overhydrate, eventually leading to root rot and other diseases. It also leads to mold and mildew growth which can lead to poor health in your plants.

A diseased plant leaf.
High humidity can cause succulents to overhydrate, eventually leading to root rot and other diseases.

It is important to note that different types of succulents have unique needs regarding humidity levels, so research your type of plant before making environmental changes.

Why Is Humidity Important to Your Succulents?

Typically, most succulent plants come from areas that don’t experience high humidity. Therefore, most of these plants prefer living in relatively dry conditions.

Since the soil and air are dry in their natural habitat, most won’t tolerate humidity for long periods.

Humidity levels play a critical role in the survival of your succulents since it helps them regulate their water intake.

When the relative humidity is low, the soil and air become dry, causing the succulent to absorb water from its surroundings to survive. This absorption usually causes the succulent leaves to droop as they try to prevent further water loss.

A freshly watered pepeomioides on a pot.
You must monitor and maintain an optimal humidity level for your succulent plants to ensure their health and well-being.

If the succulent is ignored for too long after showing signs of dehydration, it will eventually wilt or even die.

On the other hand, when the humidity is too high, your succulents will need more time to absorb moisture from their surroundings before it evaporates. This can cause them to become over-hydrated and eventually rot or die.

Therefore, you must monitor and maintain an optimal humidity level for your succulent plants to ensure their health and well-being.

What Are the Best Humidity Conditions for Succulents?

Well, many factors affect a succulent’s best humidity level. Understanding your succulent’s water requirements is important when deciding what humidity level is best.

Generally, succulents prefer a relatively lower humidity, and the ideal range falls between 20-40%. However, some succulents can tolerate higher levels of humidity (up to 50%) if the environment is well-ventilated and temperatures are kept cool.

A hygrometer on hand.
To increase the humidity around your succulent plants, consider misting them with water or placing a humidifier near them.

It would be best if you also considered planting your succulent in an area less likely to come in contact with high humidity and warm temperatures.

Finally, to increase the humidity around your succulent plants, consider misting them with water or placing a humidifier near them. But be careful not to overdo it, as this could lead to root rot or other diseases.

How to Measure the Humidity Levels for Your Succulents

The best way to measure the humidity level of your succulent plants is by using a hygrometer. This device measures the amount of water vapor in the air.

You can find a hygrometer easily online or at most home improvement stores for an affordable price. Place the hygrometer near your succulents to get an accurate reading.

Ensure you take the readings in Fahrenheit degrees because they usually work better with higher temperatures than degrees Celsius.

To ensure optimal humidity levels, regularly observe and adjust as needed. If you notice the humidity levels rising too high, you can open windows for better air circulation or use a fan to blow away excess moisture.

Are There Succulents That Can Tolerate High Humidity?

As mentioned earlier, some succulents tend to thrive in relatively high humidity. Some of the common succulents that do well in high humidity include:

  • Sedum: Some members of the sedum family come from regions with high humidity and are known to tolerate moisture reasonably well. Some of them even prefer soggy soil.
  • Kalanchoe: Although considered succulents, Kalanchoe plants are primarily compared to regular houseplants. Like other houseplants, these succulents can survive in a wide range of humidity levels thanks to their thinner leaves.
  • Aeoniums: These succulents come in varying species native to different parts of the world. Some of the species that come from the Canary Islands and Madeira are known to tolerate higher humidity levels.
  • Crassula: Some members of the Crassula family tolerate high humidity levels and even thrive in it. Examples include Crassula ovata (Jade plant) and Crassula mucosae (watch chain plant). Most of them may be sensitive about the potting mix but don’t care about the amount of moisture in the air.

Tips For Maintaining the Right Humidity Level

Here are some tips for maintaining the right amount of humidity level for your succulents at home:

1. Monitor the humidity levels regularly

Use a digital hygrometer to monitor relative humidity levels in your home and adjust the level when necessary. Consider checking the humidity levels at least once a week and adjusting accordingly.

2. Use humidity-controlling tools

Humidifiers and dehumidifiers are practical tools for controlling humidity levels. A humidifier can help if the air is too dry, while a dehumidifier can reduce humidity levels in excessively damp environments.

A humidifier beside the plant.
Humidifiers and dehumidifiers are practical tools for controlling humidity levels.

3. Avoid over-watering your plants

Over-watering your succulents can cause extensive root rot and increase your home’s humidity levels. Avoid overwatering, and make sure to water only when necessary.

Place your succulents in well-ventilated areas.

If you live in a humid climate, it’s important to place your succulents in well-ventilated areas of your home to reduce the humidity levels. If you don’t have a well-ventilated area, consider using an air fan to help circulate the air in your home during hot or humid months.

4. Choose the suitable container and potting mix

Choosing the right type of containers and potting mix for your succulents. Containers with good drainage are a must, as they provide much-needed airflow and help regulate moisture levels in the air.

5. Reduce indoor airflow

Close your windows when the humidity levels outside your home are high, as this will reduce indoor airflow and help regulate the humidity levels.

Summary

Humidity plays a critical role in the health of your succulent plants. Understanding your succulent’s water requirements is essential when deciding what humidity is best for them.

Generally, succulents prefer low humidity levels, although some species can tolerate higher humidity.

To maintain the right amount of humidity, monitor the levels regularly and adjust as needed. You can also use tools such as humidifiers or dehumidifiers to help regulate the humidity levels.

Finally, remember to choose containers with good drainage, potting mix that drains well, and to reduce the indoor airflow when possible.

With a little effort, you can keep your succulents healthy and happy even in high-humidity climates.

Terrarium Mold: How to Get Rid of It?

A open terrarium outdoor exposed to sunlight.

Terrarium mold is a fuzzy mortal enemy for many terrarium owners. It can form on the glass walls of your terrarium, on plants and soil, or even in moist crevices. While it is not usually harmful to your succulents, it does look unsightly and can cause an unpleasant smell. Furthermore, mold can attract other pests, such as cockroaches and mites, which can spread around your terrarium. To prevent the spread of mold in your terrarium, it is important to remove it straight away.

So, how do you remove mold in a terrarium? Typically, mold grows in areas that lack airflow with high humidity and moisture. Therefore, you need to reduce moisture and increase ventilation to prevent mold growth in your terrarium. You can do this by increasing air circulation within the terrarium by opening the lid or utilizing a fan. Additionally, you can add a dehumidifier to reduce the humidity levels. You should also check if the plants need additional water and ensure that the soil drains properly.

This article discusses everything you need to know about removing mold in a terrarium. Read on to learn more and keep your terrarium clean and healthy.

 What Is Mold?

Mold is a common term used to refer to many different types of fungi. It is typically found in wet, humid environments and can grow on various surfaces such as walls, windows, furniture, and other items.

Mold usually has a fuzzy or slimy appearance and can range in color from white to black or green. 

Fungi play a critical role on the planet by breaking down organic matter. However, mold can become a nuisance in a terrarium and cause your plants to die.

Molds on leaf.
Mold is a common term used to refer to many different types of fungi.

However, you must remember that mold is not always bad. Certain types of mold can be beneficial in the terrarium environment and help break down bacteria.

So, don’t always be quick to grab a flamethrower ready to pounce whenever you see mold in your terrarium. It’s best to determine the type of mold first and then decide on an appropriate course of action. 

What Causes Mold Growth in a Terrarium?

The truth is that mold is a natural phenomenon. It is everywhere. All it needs to flourish and reproduce is organic matter and the right environment.

Mold can enter your plant terrarium in different ways, including but not limited to the following.

  • Air: If you have mold in your home or wherever you decide to build your plant terrarium, there is a high chance that the mold spores in the air will find their way into your plant terrarium and germinate.
  • Soil: While some soils come sterile and packed in airtight containers, others are simply a random assortment of soil mixes or native soil taken from the wild. The latter may contain fungi spores that can germinate in the moist environment of your terrarium.
  • Plants & Mosses: Some plants are more susceptible to fungal spores than others. If you have a plant with signs of mold, it is important to inspect and clean all other plants in the terrarium to prevent the spread of mold throughout your mini ecosystem. 
  • Hardscape branches: Living woods tend to contain a lot of sugar that can’t just go away even if they are treated and bleached for several years. The sugar attracts fungi and can be the breeding ground for mold.

When it comes to terrariums, mold can grow due to high humidity levels, lack of air circulation, and excessive moisture.

This is why it’s important to ensure your plants have enough water, but not too much. You should also ensure that there is good ventilation within the terrarium by opening the lid or using a fan.

A closed terrarium.
The truth is that mold is a natural phenomenon.

Furthermore, use a dehumidifier to reduce humidity levels and prevent mold growth in your terrarium.

 How to Remove Mold in Terrarium?

The best way to remove mold from your terrarium is by increasing ventilation and decreasing moisture. Here are a few tips to get you started:

1. Increase Air Circulation

Improve the airflow inside your terrarium by opening the lid or using a fan to circulate air inside the terrarium.

Make sure your plants get enough oxygen and carbon dioxide for healthy growth. Air circulation also helps reduce humidity levels and prevent mold from growing in your terrarium.

2. Spray with Chamomile Tea

Chamomile tea is a mild organic fungicide that can help control and prevent mold growth in your terrarium.

Make a chamomile tea spray by brewing two teaspoons of dried chamomile flowers with one cup of hot water. Let it cool off before straining, then spray the mixture on plants to help them fight off mold.

While chamomile tea may not be potent enough to prevent the rapid spread of mold in your terrarium, it certainly prevents outbreaks of plants and moss.

3. Use Activated Charcoal

Activated charcoal is ground-up charcoal that has been treated with oxygen to create pores and make it more porous. 

Activated charcoal on plate.
It helps neutralize the environment and can help break down bacteria.

Sprinkle activated charcoals around the terrarium and on top of the soil medium to prevent mold growth in your terrarium. The porous nature of activated charcoal helps absorb excess moisture responsible for mold growth.

It also helps neutralize the environment and can help break down bacteria.

4. Remove Affected Plants and Quarantine Them

If the mold is only local to a few plants in your terrarium, it’s best to remove and quarantine them away from the rest of the terrarium.

This will help keep other plants safe from mold growth. After removing the affected plant, you can use a fungicide spray on the infected area and replace any dead plant material with fresh soil.

One of the most important things you should pay close attention to when removing affected plants is to avoid spreading mold spores from one plant to another.

Always use gloves and disinfect any tools you use while working in the terrarium.

5. Change The Soil

Sometimes, all the other steps mentioned above may not yield the desired results. In that case, you may need to replace the soil in your terrarium altogether.

A person putting soil at the terrarium.
It is important to thoroughly clean and disinfects the container before adding new soil.

This is especially necessary if the soil has been infected with fungal spores or there is a rapid spread of mold throughout your terrarium. It is important to thoroughly clean and disinfects the container before adding new soil.

6. Bake Your Soil

No matter where you purchase your succulent soil, there is no guarantee that it won’t contain some mold spores.

Before you use the soil in your terrarium, it’s a good idea to bake it in the oven to kill any potential fungus that might be present in the mix.

Baking your soil will help ensure that the mold stays out of your terrarium and that your plants stay healthy.

7. Reduce Humidity

Use a dehumidifier in the room where you have your plant terrarium. This will help reduce moisture levels and make it difficult for mold to grow.

It is also important to open the lid of your terrarium from time to time to allow air circulation. This will help reduce the humidity and make it difficult for mold spores to germinate and thrive in your terrarium.

8. Include Sphagnum Moss

Sphagnum moss is a natural desiccant that absorbs and retains moisture.

Including sphagnum moss in your terrarium will help absorb excess moisture responsible for mold growth. Not only does the moss help reduce humidity levels, but it also adds to the aesthetic of the terrarium.

Besides removing mold from your terrarium, sphagnum moss also helps improve the overall health of your plants by providing additional nutrition.

9. Monitor Regularly

Make sure you keep an eye on your terrarium and regularly monitor for signs of mold growth. If you spot any, take the necessary steps to remove and prevent them from returning.

Regular monitoring will help ensure your plants stay healthy and free from disease. This will also save you time and money on costly treatments if the problem is left unchecked for too long.

Can Mold Harm Your Plants?

Mold can cause damage to your plants if left unchecked. It will spread over the leaves and block off sunlight, depriving the plant of essential nutrients. It also provides an entry point for other diseases and parasites which can attack your plants.

Taking the right steps to removing mold from your terrarium will help keep your plants healthy and ensure they stay free from any damage caused by mold growth.

How Often Should I Clean My Terrarium?

Periodically clean your terrarium to remove any build-up of dirt, dust, and debris that may be contributing to the humid environment that encourages mold growth.

Also, check for signs of fungal growth and take appropriate steps to remove it as soon as possible.

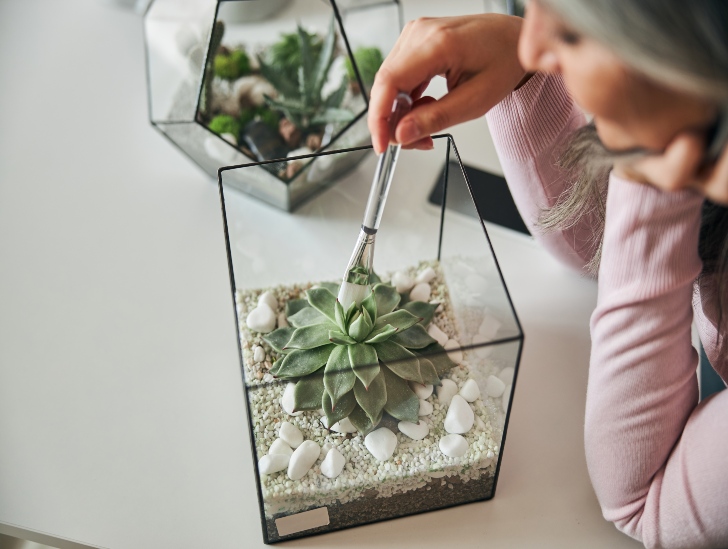
A woman brushing the plant on the terrarium.
Periodically clean your terrarium to remove any build-up of dirt, dust, and debris .

Sometimes, you may need professional help to identify the source of the problem and to take corrective measures.

Should I Use Pesticides?

Pesticides can be used as a last resort if other methods fail to remove the mold. However, it is important to note that pesticides may do more harm than good to your plants and should only be used in extreme cases. Contact an expert for advice before using pesticides or chemicals in your terrarium.

Summary

Mold growth in terrariums is a common problem that can be easily prevented with the right precautions.

Make sure to keep your terrarium clean and well-ventilated, use a dehumidifier to reduce humidity levels, and remove affected plants immediately.

You can also sprinkle activated charcoal around the terrarium and bake the soil in the oven to prevent mold from growing.

Golden Rules for Watering Golden Barrel Cactus

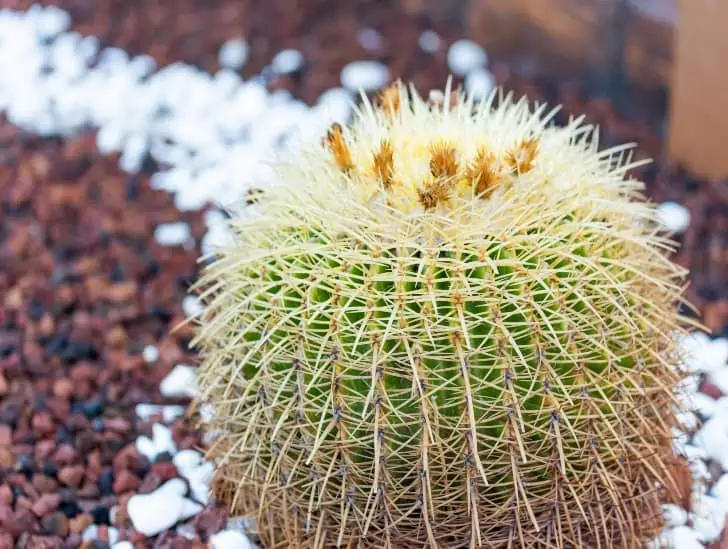
A closeup image of a golden barrel cactus.

The Golden Barrel Cactus (Echinocactus grusonii) is a beautiful and popular cactus native to Mexico. It is easily recognizable by its round shape and yellow spines. Although it is a relatively easy plant to care for, it still needs careful watering to ensure your Golden Barrel Cactus stays healthy and happy. A single mistake when watering this cactus can lead to problems such as root rot that could be fatal.

You should only water your Golden Barrel Cactus once a week or when the top inch of soil is completely dry. Be careful not to overwater your cactus because it can lead to root rot. During winter, reduce watering to about once every two weeks. Use filtered or distilled water for your cactus, and ensure that you are using well-draining soil. Water the succulent early in the morning so the leaves have time to dry off before nightfall.

This article discusses everything you need to know about watering your Golden Barrel Cactus. Read on!

Golden Barrel Cactus: General Water Requirements

Before you start watering your golden barrel cactus, it’s important to understand the plant’s general water requirements.

Golden barrel cactus native habitat is the arid regions of Mexico and thus has evolved to be quite a drought tolerant. In its natural habitat, the Golden Barrel Cactus will only receive rainwater a few times per year.

A golden barrel cactus in a white pot.
You may need to water more often in hotter weather or if the plant is growing rapidly.

The key to correctly watering your Golden Barrel Cactus is to mimic its natural habitat as closely as possible. This means that you should only water your cactus when the top inch of soil is completely dry.

Once every week is usually sufficient, but you may need to water more often in hotter weather or if the plant is growing rapidly.

During the winter months, you can reduce watering to about once every two weeks. It is important not to overwater your Golden Barrel Cactus because this can lead to root rot, a common problem with this plant.

If you think your cactus is getting too much water, check the soil to see if it is soggy or if the roots are starting to rot. If so, you will need to reduce watering and ensure that the plant gets sufficient drainage.

Golden Rules of Watering a Golden Barrel Cactus

You need to be careful not to make any mistakes when watering and caring for your golden barrel cactus. Here are some specific watering tips to keep in mind.

These golden rules will help you avoid common problems with golden barrel cactus such as root rot and ensure that your cactus stays healthy and happy.

Rule #1: Use Distilled Water or Rainwater

One of the most crucial factors to consider when watering your Golden Barrel Cactus is the type of water you use. It is best to use either distilled water or rainwater. This is because tap water often contains minerals that can build up in the soil and harm your cactus.

If you don’t have access to distilled water or rainwater, use tap water but let it sit out for 24 hours before using it. This will allow some of the minerals to dissipate.

A green barrel for rain.
It is best to use either distilled water or rainwater.

If you don’t allow the tap water to sit out for 24 hours, the minerals can build up in the soil and harm your cactus.

Rule #2: Water Early in the Morning

Another important rule to follow when watering your Golden Barrel Cactus is to do it early in the morning. This will give the water time to soak into the soil and hydrate the plant before the heat of the day sets in.

The best time to water your cactus is between 6:00am and 10:00am, so leaves have time to dry off. It also provides the succulent with enough time to absorb enough water.

If you cannot water your cactus early in the morning, do it in the evening instead. Just be sure that the leaves have time to dry off before nightfall. If they stay wet overnight, they can develop diseases or start to rot.

Rule #3: Let the Soil Dry Out Completely Between Watering Sessions

It is important to let the soil dry out completely between waterings. This will help prevent root rot, a common problem with Golden Barrel Cacti.

To check if the soil is dry, stick your finger about an inch into the pot. If it feels dry to the touch, it’s time to water your plant.

If you’re unsure whether the soil is dry, it’s better to err on the side of caution and wait another day or two before watering.

A golden barrel cactus on a rocky soil.
It is important to let the soil dry out completely between waterings.

If you are not confident in your ability to manually check for soil moisture, consider purchasing a moisture meter. These devices are specifically designed to measure the water content of soil and can be a helpful tool for keeping your cactus healthy.

A typical moisture meter is calibrated to give readings in percentages. For Golden Barrel Cactus, the ideal range is between 20% and 40%.

Rule #4: Use a Pot with Plenty of Drainage Holes

Another important rule to follow when watering your Golden Barrel Cactus is to use a pot with good drainage. This succulent does not like sitting in soggy soil, so it is important to ensure that water can drain freely from the pot.

The best type of pot to use is one with several drainage holes at the bottom. If your pot has no drainage holes, you can drill some yourself or choose a different pot.

Rule #5: Use the Right Watering Method

You can use many different watering methods for your Golden Barrel Cactus. The method you choose will depend on your plant size and the pot you are using. Remember, proper watering is one of the ways to keep your Golden Barrel Cactus healthy.

It is best to water small plants in pots without drainage holes using the “drench and drain” method. To do this, fill the pot with water and let it sit for 15 minutes. This will allow the water to soak into the soil and reach the plant’s roots.

A person watering the plant.
You can use many different watering methods for your Golden Barrel Cactus.

After 15 minutes, empty any remaining water from the pot. Be sure to do this, even if it means tipping the pot upside down and shaking it a bit. It is important that the pot drains completely so that the roots do not sit in water.

You can water larger plants in pots with drainage holes using the “soak and dry” method. To do this, water the plant until the water begins to drip out of the drainage holes.

Let the plant soak for 30 minutes to an hour, then empty any remaining water from the saucer or catch basin. Again, ensure the pot drains completely, so the roots do not sit in water.

Whichever watering method you choose, it is important to stick to a regular schedule. Watering your cactus once a week is usually sufficient, but check the soil moisture level before watering to avoid overwatering.

Rule #6: Avoid Getting Water on the Leaves

When watering your Golden Barrel Cactus, be careful not to get water on the leaves. This is because the leaves can easily rot if they stay wet for too long. Instead, focus on watering the soil around the base of the plant.

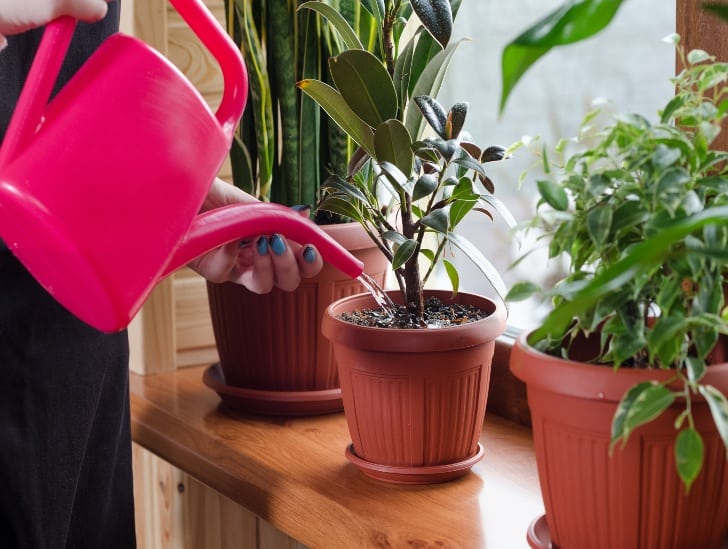
A person watering the plant using a pink water can.
Be careful not to get water on the leaves.

If you do get water on the leaves, be sure to dry them off as soon as possible. The best way to do this is to use a soft cloth or paper towel and gently pat the leaves until they are dry.

Rule #7: Water More Often During the Growing Season

During spring and summer, your Golden Barrel Cactus will be actively growing. This means that it will need more water than usual.

Generally, you should water your cactus once a week during the growing season. But as always, check the soil moisture level before watering to avoid overwatering.

This is also the right time to feed your cactus. Use a high-quality cactus fertilizer and follow the instructions on the package. Fertilizing your cactus will help it to grow strong and healthy.

Rule #8: Water Less Often During the Winter

During fall and winter, your cactus will enter a period of dormancy. This means that it will need less water than usual.

You should water your cactus once every two weeks during winter. You can even water it once per month if the weather is particularly cold.

Do not fertilize your cactus during winter because it will not be actively growing and doesn’t need extra nutrients.

Waiting to fertilize until spring helps to prevent root burn, which can happen when fertilizer is applied to dormant plants.

Summary

Watering your golden barrel cactus is one of the ways to care for your plant and ensure it grows well. No plant can survive without water, even those used to desert conditions.

Your golden barren cactus needs you to adhere to strict watering schedule so it grows well and avoid some water problems such as root rot. The above simple tips can keep your golden barrel cactus healthy and thriving for many years.

Remember to adjust the watering schedule based on the conditions in your area, and always err on the side of caution when deciding whether or not to water your plant.

With a little bit of care, your golden barrel cactus will be a beautiful addition to your home or garden for many years to come.

6 Golden Rules for Watering Your Kalanchoe

The Kalanchoe is a beautiful succulent native to Madagascar. It is a popular houseplant since it’s relatively easy to care for and does not require a lot of water or attention to thrive. However, even though the Kalanchoe is a drought-tolerant plant, it still needs to be watered regularly to stay healthy. Failure to do so can result in the plant becoming wilted, yellow, and eventually dying.

You should only water your Kalanchoe when the soil is dry. Be sure to water deeply without overdoing it. Use the bottom-up watering method to avoid getting water on the leaves. After watering, allow the excess water to drain out of the pot before putting the succulent back in its place. Also, allow the plant to dry out completely between watering sessions.  

If you adhere to strict watering, your Kalanchoe is sure to thrive. Read on to learn some basics of watering this precious plant.

Kalanchoe: General Watering Requirements

Before we dive deep into discussing the golden rules of watering a Kalanchoe Blossfeldiana plant, it is essential to understand the plant’s general watering requirements.

The Kalanchoe is a drought-tolerant succulent that can store water in its leaves. This means that it does not require as much water as other plants. However, it still needs to be watered regularly to stay healthy.

Generally, you should only water your Kalanchoe when the soil is dry. This succulent does not like to sit in wet soil. Be sure to water deeply but careful not to overdo it as this might cause other problems that might be fatal.

Indoor kalanchoe near the windor.
The Kalanchoe is a drought-tolerant succulent that can store water in its leaves.

If you are unsure whether or not the soil is dry, stick your finger about an inch into the potting mix. You don’t need to water the plant if it feels moist. If it feels dry, then it is time to water.

Some of the critical factors that determine the watering frequency of a Kalanchoe are the plant’s size, potting mix, and weather. For example, a small Kalanchoe in a fast-draining potting mix will need to be watered more often than a large Kalanchoe in a slow-draining potting mix.

Temperature also plays a role in how often you need to water a Kalanchoe. The plant will need to be watered more often in warmer weather and less often in cooler weather.

The best way to determine how often to water your Kalanchoe is to pay attention to the plant and its leaves. It’s time to water the plant if the leaves start to wilt, turn yellow, or turn brown.

Golden Rules for Watering a Kalanchoe

 Proper watering of your Kalanchoe needs you to adhere to some rules so you avoid making any fatal mistakes. To care for your kalanchoe plant with proper watering, you need to follow these rules:

1. Watering Frequency

You should only water your Kalanchoe when the soil is dry. To check if the soil is dry, stick your finger about an inch into the potting mix. It is time to water the plant if it feels dry to the touch.

If you are unsure whether or not the soil is dry, you can also check the leaves of the plant. You should also water your succulent if the leaves are wilting, turning yellow, or brown.

A person watering the kalanchoe.
It is time to water the plant if the soil feels dry to the touch.

You need to avoid overwatering your Kalanchoe. This plant does not like to sit in wet soil, and too much water can cause serious root rot issues. If you think you have overwatered your plant, allow the excess water to drain out of the pot before putting the succulent back in its place.

2. Watering Method 

When watering a Kalanchoe, be sure to water deeply but be careful not to overdo it. The best way to water this succulent is to use the bottom-up watering method.

To do this, simply place the pot in a sink or container of water and allow the plant to soak up water from the bottom.

Be sure to remove the plant from the water after a few minutes so it does not sit in wet soil for too long, as this can lead to root rot issues.

After watering, allow the excess water to drain out of the pot before putting the succulent back in its place.

Alternatively, use the soak-and-dry method. This involves watering the plant until the soil is saturated and then allowing it to dry out completely before watering again. This method is best for Kalanchoe plants placed in pots with drainage holes.

3. Reduce Watering During Winter

One of the golden rules for watering a Kalanchoe is to reduce watering during winter. This is because the plant goes dormant in winter and does not need as much water.

If you live in an area with a winter climate, you can reduce the watering frequency of your Kalanchoe to once every few weeks. Keep an eye on the plant and water it when the soil is dry.

Houseplant in the windowsill during winter.
If you live in an area with a winter climate, you can reduce the watering frequency of your Kalanchoe to once every few weeks.

The plant will generally show signs of underwatering if it is not getting enough water. These signs include wilting leaves, yellowing leaves, and brown edges on the leaves.

If you notice any of these signs, water your plant immediately.

4. Use Rainwater or Distilled Water

The type of water you use can significantly impact your plant’s health. It’s best to use rainwater or distilled water for watering as these types of water do not contain chemicals or minerals that could harm the plant.

You are advised to collect rainwater in advance and store it in a rain barrel or other container for future use.

If you don’t have access to rainwater, then you can use distilled water instead. This can be easily purchased from a grocery store or online.

If you cannot get hold of rainwater or distilled water, you can use tap water.

However, let the tap water sit out for 24 hours before using it on your plant. This will allow the chemicals in the water to dissipate and make it safe for your Kalanchoe.

5. Water Deeply

When you water your Kalanchoe, give it a good soaking. This means you should water until the water runs out of the bottom of the pot. This ensures that the plant’s roots get enough water and helps avoid problems such as root rot.

It is best to water your Kalanchoe in the morning, so the plant has time to dry out during the day. Aim for the hours between 6:00 am and 10:00 am for watering.

Watering in the evening can cause the plant to stay too wet overnight, leading to problems such as root rot.

If you cannot water during this time, water in the early afternoon. Avoid watering late in the day, as this can cause the plant to stay too wet overnight.

6. Pay Attention to the Plant

As with any plant, it is essential to pay attention to your Kalanchoe and look for signs that it is not getting enough or too much water.

If the leaves of your plant are wilting, yellowing, or turning brown, then this is a sign that it is not getting enough water. On the other hand, if the leaves are mushy or soft, then this is a sign that the plant is getting too much water.

Kalanchoe in a pot.
If the leaves are mushy or soft, then this is a sign that the plant is getting too much water.

It is crucial to act quickly if you see any of these signs, as Kalanchoes are very sensitive to changes in watering.

If you think you have overwatered your plant, allow the excess water to drain out of the pot before putting the succulent back in its place.

6. Fertilizing Kalanchoe Plants

Kalanchoe plants don’t need to be fertilized often, and too much fertilizer can actually harm the plant. It’s best to only fertilize your Kalanchoe once every two months during the growing season.

To encourage blooming, you can fertilize your Kalanchoe once a month during the blooming season. Just be sure to use a fertilizer that is low in nitrogen, as too much nitrogen can prevent flowers from forming.

Kalanchoe wrapped in a cloth.
If you see that the leaves of your Kalanchoe are yellowing or browning, this is a sign that you are over-fertilizing the plant.

When applying fertilizer, follow the instructions on the package, as different fertilizers have different application rates.

Also, water the plant before applying fertilizer, as dry soil can cause the fertilizer to burn the roots of the plant.

If you see that the leaves of your Kalanchoe are yellowing or browning, this is a sign that you are over-fertilizing the plant. Cut back on the amount of fertilizer you use, and be sure to flush the soil with water to remove any excess fertilizer.

Bottom Line

Watering a Kalanchoe is not difficult, but there are some golden rules that you should follow to ensure that your plant stays healthy.

Be sure to water only when the soil is dry, use the bottom-up watering method, and reduce watering during winter.

Also, use rainwater or distilled water for watering as these types of water do not contain chemicals or minerals that could harm the plant.

By following these simple watering tips, you will be sure to keep your Kalanchoe healthy and happy. Your plant is sure to reward you with beauty.

8 Golden Rules for Watering Monkey Tail Cactus

Monkey tail cactus hanging.

The monkey tail cactus, also known as the rat tail cactus, is a succulent native to Mexico. This cactus gets its name from its long, thin, tail-like stems that can grow up to 3 feet in length.

The monkey tail cactus is a popular plant for indoor and outdoor gardens, as it is relatively easy to care for. However, one of the most challenging aspects of caring for this plant is watering it properly. One mistake can be fatal to the plant.

The first rule of thumb when watering any cactus is too little water rather than too much. Consider watering your monkey tail cactus once every two weeks during spring and summer and once every month during fall and winter. Make sure your planting pot has plenty of drainage holes to allow excess water to drain away properly. Also, remember that the monkey tail cactus is highly sensitive to fluoride and chlorine. So, if you are using tap water to water it, let it sit out for at least 24 hours to allow these chemicals to evaporate.

If you’ve just planted Monkey Tail Cactus for the first time and wondering how to water, this article is for you. We’ll discuss everything including watering your monkey tail cactus, including how often to water it, what type of water to use, and what to do if you think you’ve overwatered your plant. Read on!

Monkey Tail Cactus: General Water Requirements

One of the ways of caring for your monkey tail cactus is to adhere to strict watering requirement. So, what are those basics that apply when it comes to watering your Money Tail Cactus?

As a general rule of thumb, you should water your monkey tail once every two weeks during spring and summer and once every month during winter. However, these are just general guidelines.

A hanging monkey tail cactus
It is always better to err on the side of too little water rather than too much.

The actual frequency with which you water your plant will depend on various factors. Some of the things that play a role include the size of your pot, the type of potting mix you’re using, and the temperature and humidity levels in your home. You should also consider whether or not your plant is receiving enough light.
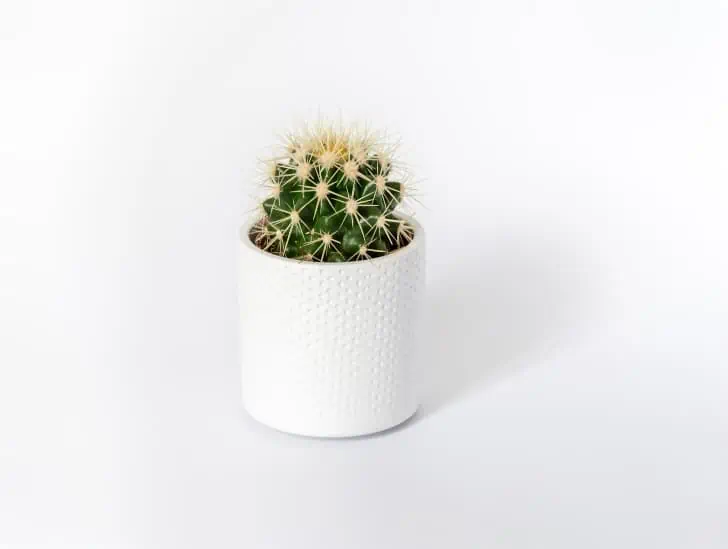
Generally, it is always better to err on the side of too little water rather than too much. Overwatering is one of the most common mistakes of caring for cacti and succulents, and it can be fatal to your plant.

So, if you’re unsure whether or not to water your monkey tail, it’s always better to wait a few extra days.

Keep in mind that it is relatively easy to revive an underwatered monkey tail cactus, but much more difficult to save an overwatered one.
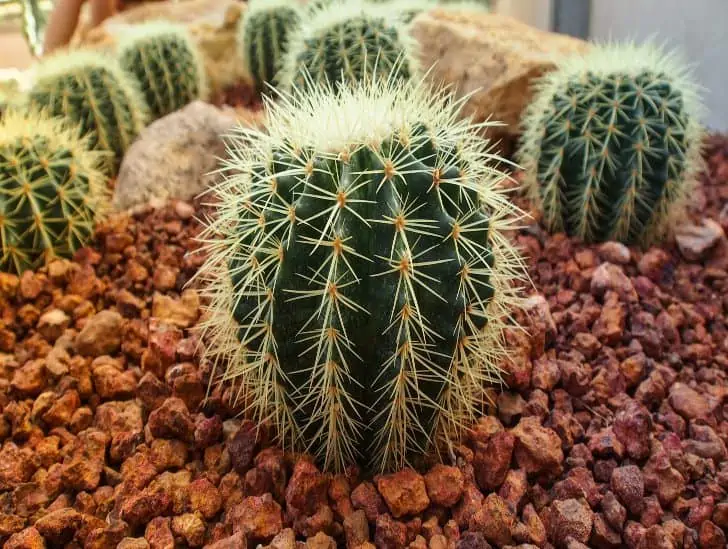
If you think you may have overwatered your plant, carefully get the plant out of the pot and check the roots. If they are mushy or have started to rot, unfortunately, you cannot do much.

Golden Rules for Watering Monkey Tail Cacti

Now that we have covered the basics of watering monkey tail cacti, let’s go over some specific tips that will make you a pro.

Rule #1: Use the Right Type of Water for Your Monkey Tail Cactus

Ideally, you should use rainwater or distilled water for your plants. This is because tap water often contains high levels of fluoride and chlorine, which can harm your cactus.

If you cannot access rainwater or distilled water, the next best option is to let your tap water sit out for at least 24 hours before using it. This will allow the chemicals to evaporate.

A green rain barrel for plants.
You should use rainwater or distilled water for your plants.

Collect as much rainwater as possible during the rainy season and store it in a clean container for future use. This will ensure you never have to worry about using tap water, which is crucial to your plant health.

Rule #2: Water Your Monkey Tail in the Morning

The best time of day to water your monkey tail is in the morning. This is because the plant will have the entire day to absorb the water and dry out before nighttime.

Always aim for the hours between 6:00am to 10:00am for the best results. When temperatures are cooler, and there is higher humidity.

Watering your cactus in the evening can increase the risk of fungal diseases, as the plant will be sitting in moisture for several hours overnight.

If you cannot water your plant during this time frame, the next best option is to water in the late afternoon, around 4:00 pm.

Rule #3: Check the Soil Before Watering

Before watering your monkey tail cactus, checking the soil is always a good idea. The easiest way to check the soil for moisture is to stick your finger about an inch into the potting mix.

If the soil is dry, it’s time to water. If the soil is still damp, wait a few more days before watering again.

Another way to check the soil is to lift the pot. A pot that is light in weight means the plant is thirsty, while a heavier pot indicates that the plant still has enough moisture.

Monkey tail in a rocky soil.
Before watering your monkey tail cactus, checking the soil is always a good idea.

You can also purchase a moisture meter, which will help you to gauge more accurately when your plant needs water. The moisture meter is usually calibrated to show the percentage of water in the soil, so all you need to do is insert it into the potting mix and read the display.

A meter that reads “dry” means it is time to water, while a reading of “moist” or “wet” means the plant is still hydrated.

Rule #4: Do Not Water on a Schedule

One of the most common mistakes of watering plants is sticking to a rigid schedule. Just because it’s been two weeks since you last watered your monkey tail cactus doesn’t mean it’s time to water again.

The watering frequency will vary depending on the time of year, the size of the pot, the type of potting mix, and the temperature and humidity levels in your home.

In general, smaller pots will need to be watered more frequently than larger pots, and pots placed in direct sunlight need to be watered more often than those in shaded areas.

During the hot summer months, your monkey tail cactus will need to be watered more frequently than during the cooler winter months.

The best way to water your plant is to check the soil before watering and only water when the soil is dry. This may mean watering once a week, or it may mean watering every few days.

The key is paying attention to your plant and water when needed, not on a schedule.

Rule #5: Avoid Getting Water on the Plant’s Foliage

When watering your monkey tail cactus, be careful not to get water on the plant’s foliage. This can cause the plant to rot.

Instead, water at the base of the plant, saturating the potting mix. If possible, use a watering can with a long spout to direct the water exactly where you want it to go.

If you get water on the plant’s foliage, remove any excess moisture with a clean, dry cloth.

Rule #6: Ensure Your Planting Pot Has Plenty of Drainage Holes

Your pot must have adequate drainage to prevent the roots of your monkey tail cactus from rotting.

If you are unsure whether your pot has enough drainage holes, add a few more. It is better to err on the side of too many holes than not enough.

Monkey tail in a pot.
If you are unsure whether your pot has enough drainage holes.

To test drainage, fill the pot with water and then empty it out after a few minutes. If the pot drains quickly, it has adequate drainage. If the water takes longer than five minutes to drain out, add a few more holes to the pot.

Rule #7: Choose the Right Watering Method

You can use different watering methods to water your monkey tail cactus, and the best method for you will depend on the size and type of pot you are using.

The easiest way to water small pots is to submerge the entire pot in a sink or basin of water. Allow the pot to soak for a few minutes, until the potting mix is saturated. Then, remove the pot from the water and allow any excess water to drain before placing it back in its spot.

For larger pots, you can use a watering can, or a garden hose fitted with a spray nozzle. Fill the pot with water, allowing it to soak until the potting mix is saturated, then remove any excess water from the saucer beneath the pot.

Rule #8: Use the Right Potting Mix

When potting or repotting your monkey tail cactus, be sure to use a potting mix designed for cacti and succulents. These mixes are usually light and airy, and they drain well.

A golden barrel cactus being repot.
Be sure to use a potting mix designed for cacti and succulents.

Do not use standard potting soil, as it will not drain properly and could cause your plant to rot.

When purchasing a potting mix, read the label and look for one specifically designed for cacti and succulents.

If you can’t find a potting mix specifically designed for cacti, you can make your own by mixing together equal parts sand, perlite, and potting soil.

Final Thoughts

Monkey tail is one of the easiest plants to care for if you do it right. Following these simple tips can keep your monkey tail cactus healthy and happy! Remember to only water when the soil is dry, and give your plant a good soaking each time you water it.

Avoid letting your plant sit in water, and empty the drip tray after each watering session. With just a little bit of care, your monkey tail cactus will thrive.