Plants for Closed Terrariums: Our Top Picks

Closed terrariums create a magnificent ecosystem that adds much beauty to your home. It only takes one or two closed terrariums to transform your home decor from drab to fab. You don’t need to be an expert to create a perfect closed terrarium. All you need to do is choose the right plants that thrive in relatively warm and humid conditions. It would be best if you also chose small enough plants for your terrarium that thrive in low light. The terrarium should be easy to maintain if you choose the right plants.

So, what are some of the best plants for a closed terrarium? The best plants for a closed terrarium thrive in relatively humid and warm temperatures. These plants must be well-adapted to survive in relatively low light and are generally petite, depending on the size of your terrarium. Some plants that meet these conditions include African Violets, ferns, moss, the nerve plant, Mini English Ivy, Strawberry Begonia, the Baby Tears plant, and the Mini Pixie. Others include the Moon Valley Pilea, Aluminum plant, String of Turtles, and the Creeping.

This blog post discusses some of the best plants for closed terrariums. Read on to find out everything you need to know.

What Is a Closed Terrarium?

A closed terrarium is an enclosed environment used to grow plants indoors. This type of terrarium provides a humid, warm, and controlled atmosphere, making it ideal for growing plants that cannot tolerate drastic changes in temperature or humidity levels.

The container should be sealed tightly with either glass or plastic, ensuring the right conditions are met inside the terrarium.

If you are relatively new to terrariums, you might be tempted to think that closed and open terrariums are the same. However, this is not the case.

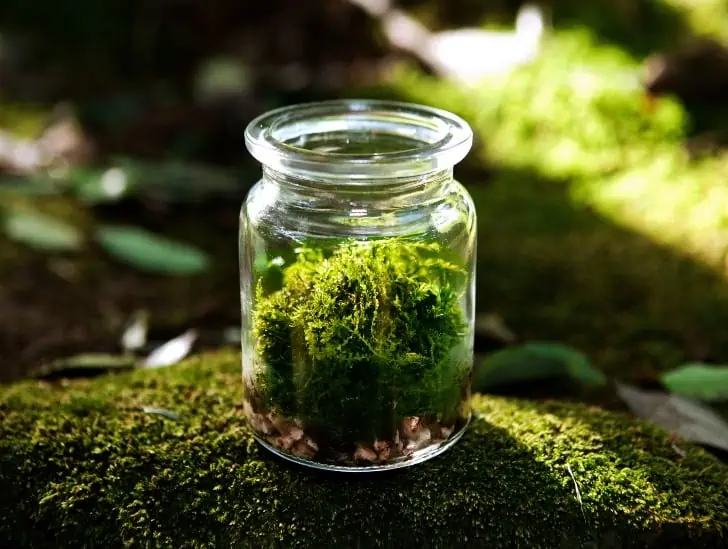
A jar transformed to a closed terrarium.
Closed terrariums are their own ecosystem.

Closed terrariums are sealed and require little maintenance compared to open terrariums, requiring more frequent watering, misting, and good airflow.

Closed terrariums are their own ecosystem. They even have their own mini water cycle. This is why plants in a closed terrarium should be kept from being watered frequently.

What Makes a Good Closed Terrarium Plant?

Closed terrariums are tropical rainforest generators where it is warm and humid. It means that plants need to be adapted to thrive in such conditions. Here are the things you should look for when choosing a closed terrarium plant:

A closed terrarium on a shelf.
Closed terrariums are tropical rainforest generators where it is warm and humid.
  • Small size – The container you use will determine the size of plants you can put inside your terrarium, so make sure to choose those that are small enough to fit.
  • Low light – Plants in a closed terrarium are exposed to minimal light, so make sure that the plants you choose can grow with little or no direct sunlight.
  • Thrive in humidity and warmth – The environment inside your terrarium should be warm and humid, so pick plants adapted to such conditions.
  • Survive with minimal airflow – Typically, a closed terrarium does not have much airflow, so make sure the plants you choose can survive with minimal air circulation.

What Are the Best Plants for a Closed Terrarium?

Now that you know what makes a good, closed terrarium plant, let us discuss some of the best plant species to consider for your terrarium:

1. Ferns

Ferns are ideally suited to life in a closed terrarium. These plants love the consistent humidity and heat that a closed terrarium environment provides and love low-light conditions.

A fern on a small closed bottle terraium.
Ferns are ideally suited to life in a closed terrarium.

With terrarium ferns ranging from miniature varieties of common houseplants to relatively compact tropical ferns, there is a lot you can choose from.

2. Mosses

One of the most popular plants for a closed terrarium is moss. Moss loves moist, humid areas and does well in an enclosed environment.

Not only do they look great, but they also provide a beautiful green carpet that enhances the look of your terrarium. Plus, some species can even filter air pollutants, making them an ideal choice for closed terrariums.

3. Friendship Plant

With its bronze veins, well-textured green leaves, and red undersides, the Friendship plant is one of the best beginner plants for anyone interested in having a closed terrarium at their home.

The Friendship plant gets its name due to its fast rooting, making it relatively easy to share with your family and friends. Given the right growing conditions, the little plant can even reward you with pale pink flowers once in a while.

It would be best to keep the potting mix moist and expose it to at least six hours of indirect sunlight daily. The plant can grow up to 12 inches tall.

The Friendship plant is an easy-care and fast-growing plant that provides your closed terrarium with an extra lush feel.

If you are looking for something more upright, combine it with the Moon Valley species. However, if you are okay with getting too leggy, pinch off its growing tips to make it more compact.

4. Nerve Plant

The Nerve plant is ideal for a closed terrarium as it can thrive in a warm, humid environment. It has long, narrow leaves, often arranged in bright green waves or fans.

You can make your nerve plant look even more appealing by adding pink or white accents to its foliage. Plus, you don’t have to worry about finding the right soil mix or light requirements as it can adapt to various conditions.

A nerve plant on a closed tarrarium.
The Nerve plant is ideal for a closed terrarium due to its bright and lively foliage.

You should water your nerve plant when the topsoil starts drying out. Ensure not to overwater, as this may cause its foliage to turn yellow and eventually drop off.

The Nerve plant is ideal for a closed terrarium due to its bright and lively foliage. The plant can grow up to 10 inches tall.

5. African Violets

African violets are small, delicate plants that thrive in humid and warm environments. They require a little sunlight but can survive quite well in the low-light conditions of a closed terrarium.

These plants also flower frequently and give out delicate purple flowers, which makes them a great addition to any terrarium.

The African Violet is relatively easy to care for and is an excellent choice if you want something that does not need maintenance or trimming. The plant will do just fine with some occasional light watering.

6. Peperomias

The Peperomia genus refers to a group of relatively small, compact plants that grow on rotting wood in their natural habitat. They can grow to about 12 inches under the right conditions. These plants are primarily found in South America’s tropical and subtropical areas.

While individual species vary in size, color patterns, and shape, most peperomia leaves are generally thick, smooth, and relatively fleshy. Like other tropical and subtropical plants, they thrive in relatively low light conditions. Most of them do well under full shade.

Some of the most popular peperomia species for closed terrariums include the Peperomia caperata, which grows to a height of about six inches; the Peperomia obtusifolia, which is a bit large but still stays under a foot, and the Peperomia argyreia that has attractive silver stripes in its leaves.

The peperomias are ideal for closed terrariums because of their low maintenance and ability to thrive in humid environments. They also provide your terrarium with an exotic look.

7. Miniature English Ivy

The miniature English Ivy, Hedera helix, is an excellent choice for a closed terrarium. It is widely appreciated for its fast growth and attractive foliage that can vary between deep greens and variegated varieties.

A hedra helix on a terrarium.
The miniature English Ivy is an excellent choice for closed terrariums due to its fast growth rate, easy maintenance, and attractive foliage.

The English Ivy does best in indirect sunlight, but it can survive even in low light conditions of a terrarium as long as the soil is kept moist. It will quickly be vining up and create a lush, green coverage of your terrarium. Just make sure to prune it regularly and keep the vines in check.

The miniature English Ivy is an excellent choice for closed terrariums due to its fast growth rate, easy maintenance, and attractive foliage that can give your terrarium an extra touch of green.

If you are okay with getting too leggy, you must pinch off its growing tips to make it more compact. It will remain alive and vibrant even after the pruning has been done.

8. Baby Tears Plant

The baby tears plant is a delightful addition to any closed terrarium. It is an evergreen plant with small, bright green foliage that looks like tiny drops of water.

These plants do best in partial shade but thrive in low light conditions as long as the soil is always kept moist. This means that you will need to water the baby tears plant often.

Baby tears are great for closed terrariums because of their size, vibrant colors, and low-maintenance requirements. They look best when planted in clusters or grouped with other small plants.

Its little leaves and delicate foliage can add character to your terrarium and make it look lusher. Plus, it is a great oxygen producer, making your terrarium healthier.

Conclusion

Closed terrariums can provide a beautiful and exciting ecosystem in your home. However, choosing the right plants that are well-adapted to survive in relatively warm and humid conditions with little or no direct sunlight is essential.

Some of the best plants for closed terrariums include Peperomia, Miniature English Ivy and the Baby Tears Plant.

All these plants can add a unique touch of beauty to your terrarium while providing you with low maintenance requirements.

So, consider all your options before choosing the right plants for your closed terrarium!
Terrarium Mold: How to Get Rid of It?

A open terrarium outdoor exposed to sunlight.

Terrarium mold is a fuzzy mortal enemy for many terrarium owners. It can form on the glass walls of your terrarium, on plants and soil, or even in moist crevices. While it is not usually harmful to your succulents, it does look unsightly and can cause an unpleasant smell. Furthermore, mold can attract other pests, such as cockroaches and mites, which can spread around your terrarium. To prevent the spread of mold in your terrarium, it is important to remove it straight away.

So, how do you remove mold in a terrarium? Typically, mold grows in areas that lack airflow with high humidity and moisture. Therefore, you need to reduce moisture and increase ventilation to prevent mold growth in your terrarium. You can do this by increasing air circulation within the terrarium by opening the lid or utilizing a fan. Additionally, you can add a dehumidifier to reduce the humidity levels. You should also check if the plants need additional water and ensure that the soil drains properly.

This article discusses everything you need to know about removing mold in a terrarium. Read on to learn more and keep your terrarium clean and healthy.

 What Is Mold?

Mold is a common term used to refer to many different types of fungi. It is typically found in wet, humid environments and can grow on various surfaces such as walls, windows, furniture, and other items.

Mold usually has a fuzzy or slimy appearance and can range in color from white to black or green. 

Fungi play a critical role on the planet by breaking down organic matter. However, mold can become a nuisance in a terrarium and cause your plants to die.

Molds on leaf.
Mold is a common term used to refer to many different types of fungi.

However, you must remember that mold is not always bad. Certain types of mold can be beneficial in the terrarium environment and help break down bacteria.

So, don’t always be quick to grab a flamethrower ready to pounce whenever you see mold in your terrarium. It’s best to determine the type of mold first and then decide on an appropriate course of action. 

What Causes Mold Growth in a Terrarium?

The truth is that mold is a natural phenomenon. It is everywhere. All it needs to flourish and reproduce is organic matter and the right environment.

Mold can enter your plant terrarium in different ways, including but not limited to the following.

  • Air: If you have mold in your home or wherever you decide to build your plant terrarium, there is a high chance that the mold spores in the air will find their way into your plant terrarium and germinate.
  • Soil: While some soils come sterile and packed in airtight containers, others are simply a random assortment of soil mixes or native soil taken from the wild. The latter may contain fungi spores that can germinate in the moist environment of your terrarium.
  • Plants & Mosses: Some plants are more susceptible to fungal spores than others. If you have a plant with signs of mold, it is important to inspect and clean all other plants in the terrarium to prevent the spread of mold throughout your mini ecosystem. 
  • Hardscape branches: Living woods tend to contain a lot of sugar that can’t just go away even if they are treated and bleached for several years. The sugar attracts fungi and can be the breeding ground for mold.

When it comes to terrariums, mold can grow due to high humidity levels, lack of air circulation, and excessive moisture.

This is why it’s important to ensure your plants have enough water, but not too much. You should also ensure that there is good ventilation within the terrarium by opening the lid or using a fan.

A closed terrarium.
The truth is that mold is a natural phenomenon.

Furthermore, use a dehumidifier to reduce humidity levels and prevent mold growth in your terrarium.

 How to Remove Mold in Terrarium?

The best way to remove mold from your terrarium is by increasing ventilation and decreasing moisture. Here are a few tips to get you started:

1. Increase Air Circulation

Improve the airflow inside your terrarium by opening the lid or using a fan to circulate air inside the terrarium.

Make sure your plants get enough oxygen and carbon dioxide for healthy growth. Air circulation also helps reduce humidity levels and prevent mold from growing in your terrarium.

2. Spray with Chamomile Tea

Chamomile tea is a mild organic fungicide that can help control and prevent mold growth in your terrarium.

Make a chamomile tea spray by brewing two teaspoons of dried chamomile flowers with one cup of hot water. Let it cool off before straining, then spray the mixture on plants to help them fight off mold.

While chamomile tea may not be potent enough to prevent the rapid spread of mold in your terrarium, it certainly prevents outbreaks of plants and moss.

3. Use Activated Charcoal

Activated charcoal is ground-up charcoal that has been treated with oxygen to create pores and make it more porous. 

Activated charcoal on plate.
It helps neutralize the environment and can help break down bacteria.

Sprinkle activated charcoals around the terrarium and on top of the soil medium to prevent mold growth in your terrarium. The porous nature of activated charcoal helps absorb excess moisture responsible for mold growth.

It also helps neutralize the environment and can help break down bacteria.

4. Remove Affected Plants and Quarantine Them

If the mold is only local to a few plants in your terrarium, it’s best to remove and quarantine them away from the rest of the terrarium.

This will help keep other plants safe from mold growth. After removing the affected plant, you can use a fungicide spray on the infected area and replace any dead plant material with fresh soil.

One of the most important things you should pay close attention to when removing affected plants is to avoid spreading mold spores from one plant to another.

Always use gloves and disinfect any tools you use while working in the terrarium.

5. Change The Soil

Sometimes, all the other steps mentioned above may not yield the desired results. In that case, you may need to replace the soil in your terrarium altogether.

A person putting soil at the terrarium.
It is important to thoroughly clean and disinfects the container before adding new soil.

This is especially necessary if the soil has been infected with fungal spores or there is a rapid spread of mold throughout your terrarium. It is important to thoroughly clean and disinfects the container before adding new soil.

6. Bake Your Soil

No matter where you purchase your succulent soil, there is no guarantee that it won’t contain some mold spores.

Before you use the soil in your terrarium, it’s a good idea to bake it in the oven to kill any potential fungus that might be present in the mix.

Baking your soil will help ensure that the mold stays out of your terrarium and that your plants stay healthy.

7. Reduce Humidity

Use a dehumidifier in the room where you have your plant terrarium. This will help reduce moisture levels and make it difficult for mold to grow.

It is also important to open the lid of your terrarium from time to time to allow air circulation. This will help reduce the humidity and make it difficult for mold spores to germinate and thrive in your terrarium.

8. Include Sphagnum Moss

Sphagnum moss is a natural desiccant that absorbs and retains moisture.

Including sphagnum moss in your terrarium will help absorb excess moisture responsible for mold growth. Not only does the moss help reduce humidity levels, but it also adds to the aesthetic of the terrarium.

Besides removing mold from your terrarium, sphagnum moss also helps improve the overall health of your plants by providing additional nutrition.

9. Monitor Regularly

Make sure you keep an eye on your terrarium and regularly monitor for signs of mold growth. If you spot any, take the necessary steps to remove and prevent them from returning.

Regular monitoring will help ensure your plants stay healthy and free from disease. This will also save you time and money on costly treatments if the problem is left unchecked for too long.

Can Mold Harm Your Plants?

Mold can cause damage to your plants if left unchecked. It will spread over the leaves and block off sunlight, depriving the plant of essential nutrients. It also provides an entry point for other diseases and parasites which can attack your plants.

Taking the right steps to removing mold from your terrarium will help keep your plants healthy and ensure they stay free from any damage caused by mold growth.

How Often Should I Clean My Terrarium?

Periodically clean your terrarium to remove any build-up of dirt, dust, and debris that may be contributing to the humid environment that encourages mold growth.

Also, check for signs of fungal growth and take appropriate steps to remove it as soon as possible.

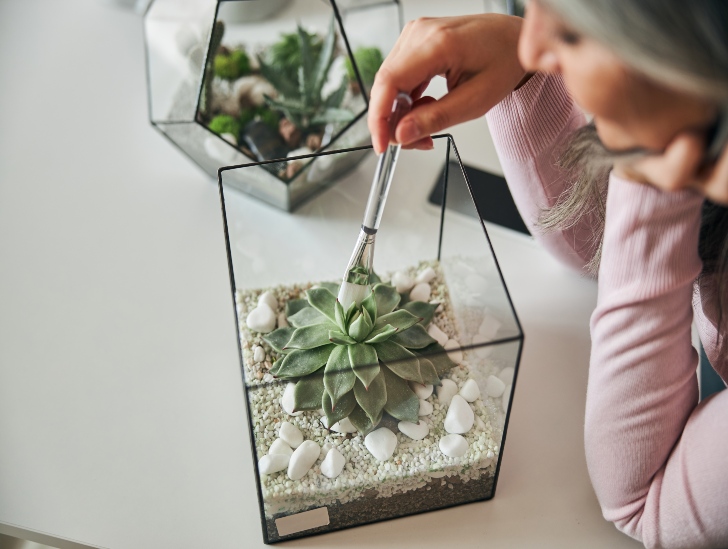
A woman brushing the plant on the terrarium.
Periodically clean your terrarium to remove any build-up of dirt, dust, and debris .

Sometimes, you may need professional help to identify the source of the problem and to take corrective measures.

Should I Use Pesticides?

Pesticides can be used as a last resort if other methods fail to remove the mold. However, it is important to note that pesticides may do more harm than good to your plants and should only be used in extreme cases. Contact an expert for advice before using pesticides or chemicals in your terrarium.

Summary

Mold growth in terrariums is a common problem that can be easily prevented with the right precautions.

Make sure to keep your terrarium clean and well-ventilated, use a dehumidifier to reduce humidity levels, and remove affected plants immediately.

You can also sprinkle activated charcoal around the terrarium and bake the soil in the oven to prevent mold from growing.

Where Is the Best Place to Buy Succulents?

Whether an experienced gardener or just starting, succulents are a great plant to add to your collection. They’re easy to care for and thrive even in neglected environments. If you want to add some succulents to your home, you have come to the right place. We fully understand how tough it can be to find quality succulents and want to make your life easier.

So, where is the best place to buy succulents? Fortunately, a few great options are available, whether you’re looking for an online nursery or a brick-and-mortar store. You can purchase succulents from Amazon, Etsy, Cactus Store, or your local nursery. If you live in a rural area, your best bet is to order online. However, if you live in an urban area, you should have no problem finding a store that sells succulents.

The most important thing is to find a seller that you trust. There are a lot of nurseries and stores that sell succulents, but not all of them are created equal. Do your research and read reviews before purchasing from any seller, whether online or in person.

This blog post discusses the best places to buy succulents in detail. We’ll review each option’s pros and cons and help you decide what is right for you. Read on to learn more.

Why Are Succulents a Great Option for Home Gardens?

Before we dive deep into discussing the best places to buy succulents, let’s first discuss why they make such a great addition to your home garden.

Succulents are an excellent option for home gardens because they’re easy to care for and can thrive in neglectful environments. If you’re looking for a low-maintenance plant, succulents are a great choice.

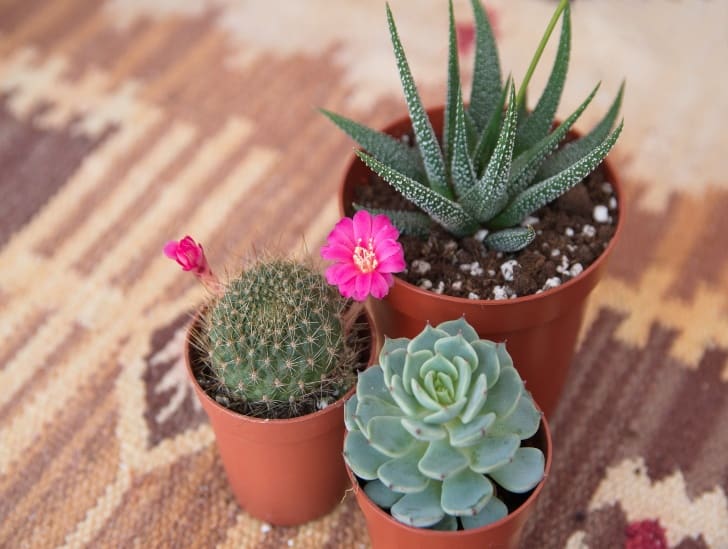
Succulent on a pot indoors.
They come in a wide range of shapes, sizes, and colors, so you can find the perfect plant for your home.

They don’t need much water or attention and can tolerate a wide range of light conditions. Whether you have a green thumb or not, succulents are a great plant to add to your collection.

In addition to being easy to care for, succulents are also versatile. They come in a wide range of shapes, sizes, and colors, so you can find the perfect plant for your home, no matter your style.

Whether you’re looking for a statement piece or a plant that will blend in with your existing décor, you’re sure to find a succulent that’s right for you.

Succulents are also relatively inexpensive. You can find basic succulents for as little as $5, and rare or exotic varieties can cost up to $100. No matter your budget, you’re sure to find the right succulent for you.

The Best Places to Buy Succulents

Now that we’ve discussed why succulents make a great addition to your home garden let’s discuss the best places to buy them.

1. Amazon

Amazon is one of the most popular places to buy succulents online. They have a massive selection of plants, including succulents, and offer competitive prices. One of the best things about Amazon is that you can find almost anything you’re looking for, including hard-to-find species.

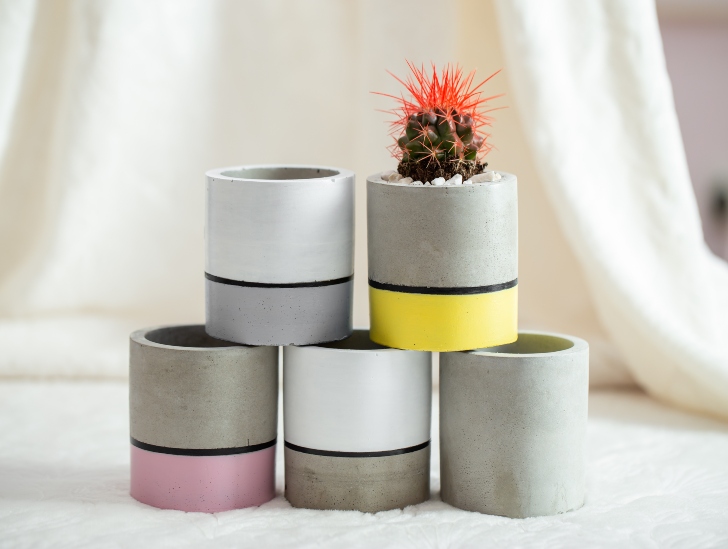
Red needle cactus in a pot.
They have a massive selection of plants, including succulents, and offer competitive prices.

However, one downside of shopping on Amazon is that you won’t be able to see the plants in person before purchasing. This can make it difficult to gauge the quality of the plant and ensure that you’re getting what you expected.

Another downside is that Amazon’s return policy can be challenging to navigate, so ensure you’re 100% certain about the plant you want before buying it.

2. Etsy

Etsy is another great option for buying succulents online. It’s a marketplace for handmade and vintage items, so you’ll support small businesses when you purchase.

Etsy is an excellent option if you’re looking for rare or hard-to-find plants. You can also find a wide range of succulent-related items, such as planters, pots, and decorations.

The downside of Etsy is that the prices can be higher than other online retailers, and the quality of the plants can vary. Do your research and read the reviews before purchasing from any seller.

3. The Sill

The Sill is an online plant store that sells potted plants, including succulents. They have a wide variety of succulents available, and they also offer plant care services.

This is an excellent option if you’re looking for high-quality succulents and want peace of mind knowing that your plants will be taken care of properly.

In fact, it is one of the best places to buy succulents online. The website is easy to navigate, and the plants are clearly labeled with care instructions.

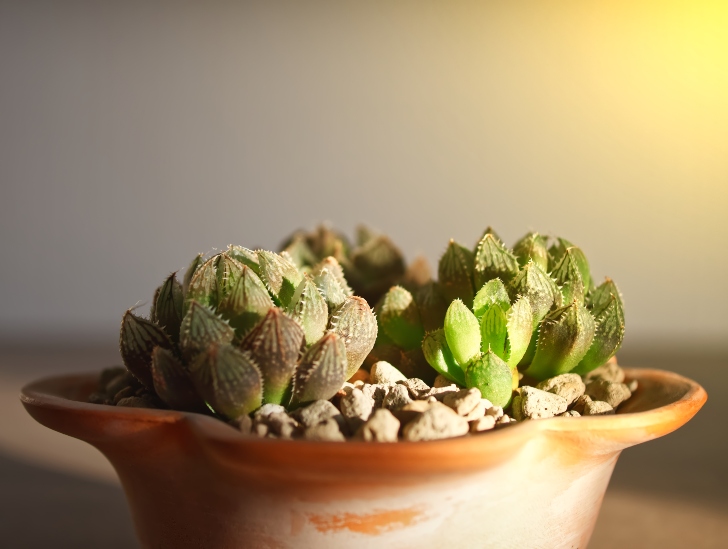
Hwothoria succulent plant.
They have a wide variety of succulents available, and they also offer plant care services.

The Sill also offers free shipping on orders over $100, so it’s a great option if you’re looking to purchase multiple plants.

However, the downside of The Sill is that their plants are on the pricier side. If you’re on a budget, you may want to look elsewhere.

4. Cactus Store

Cactus Store is an excellent option if you’re looking for a large selection of succulents. They offer a wide range of plants, including rare and hard-to-find varieties.

They also have a helpful team of customer service representatives who can answer any questions you may have about caring for your succulents.

One downside of Cactus Store is that they only have one location (in California), so shipping can take a few days (and incur additional charges). Another downside is that their plants are slightly pricier than other online retailers.

5. Local Nurseries and Plant Stores

Do you want to see the plants in person before purchasing? If so, your best bet is to head to your local nursery or plant store.

This way, you get an opportunity to inspect the plants for any damage or pests, and you can ask the staff any questions you may have about care and maintenance.

Your local nursery is also great for finding rare or hard-to-find plants. However, remember that the selection will be limited compared to online retailers.

The downside of buying from a local retailer is that you may have to pay more for the plants. But this may be the best option if you want quality over quantity.

6. Mountain Crest Gardens

Mountain Crest Gardens is an online nursery that sells cacti and other desert plants, including succulents.

They have a variety of common and rare types of cacti and other desert plants and offer plant care services.

This is an excellent option if you’re looking for rare or hard-to-find varieties of cacti and other desert plants that are not so common in many parts of the world.

7. The Succulent Source

Succulent Source is another excellent option for buying succulents online. One benefit of shopping at Succulent Source is that they offer a wide variety of rare and hard-to-find plants.

Another benefit of shopping at Succulent Source is that they offer free shipping on orders over $75. Just be sure to check the shipping policies before you place your order.   

Succulent collections on a store.
One benefit of shopping at Succulent Source is that they offer a wide variety of rare and hard-to-find plants.

However, one downside of Succulent Source is that they only ship to the United States. So, if you’re looking for succulents and live outside of the US, you’ll need to find another retailer.

Tips For Buying Succulents Online

When shopping for succulents online, it’s essential to do your research and choose a reputable retailer. Make sure to read the reviews before purchasing from any seller and be aware of the potential downsides of each option.

It’s also important to pay attention to the shipping policies, as some retailers only ship to specific locations. And finally, check the return policy if you’re unsatisfied with your purchase.

What Is the Best Time to Buy Succulents?

The best time to buy succulents is in the spring or summer. This is when most nurseries and plant stores have the best selection. However, you can usually find succulents year-round if you know where to look.

If you’re looking for rare or hard-to-find varieties, your best bet is to shop at an online nursery or plant store. This way, you’ll have a broader selection to choose from.

Ensure you research before purchasing, as some retailers may not ship to your location. And be aware of the potential downsides of each option, such as higher prices or longer shipping times.

Succulent and offsets.
You can find the perfect succulents for your home or garden with some research.

When buying succulents online, choosing a reputable retailer and paying attention to the shipping policies are crucial.

Remember to check the return policy as well, in case you’re unsatisfied with your purchase. You can find the perfect succulents for your home or garden with some research.

Can I Buy Succulents Wholesale?

Yes, you can buy succulents wholesale from some retailers. This is an excellent option if you’re looking to purchase many plants.

But remember that the price per plant will be lower when buying in bulk, so you may not get the best quality. And be sure to do your research before purchasing, as some retailers may not ship to your location.

Summary

There are many great places to buy succulents online and offline, but the options discussed above are some of the best!

Whether you’re looking for a wide selection of the best deals, one of these options is sure to have what you’re looking for at the right price. So, what are you waiting for? Start shopping for your new plants today!

How Big Does a Golden Barrel Cactus Get?

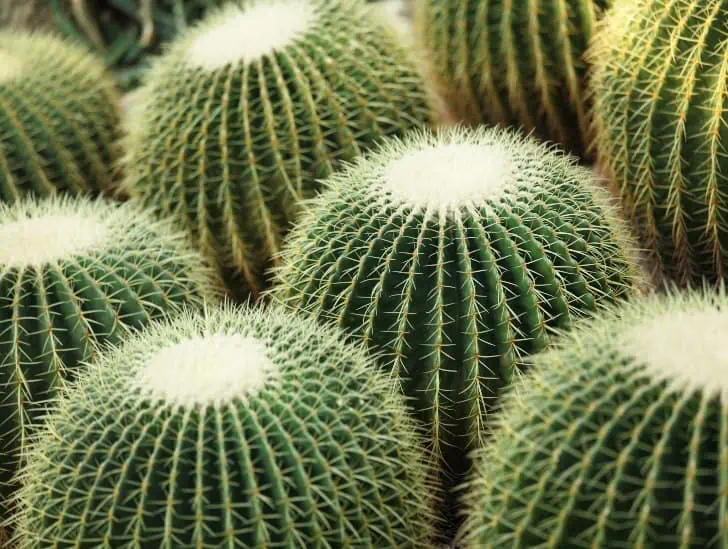
The Golden Barrel Cactus is a popular cactus species native to Mexico. It is commonly grown as a houseplant or outdoor decorative plant in warm climates. The Golden Barrel Cactus gets its name from its round, barrel-shaped body, reaching 3 feet in diameter. This cactus species is easily recognized by its yellow-gold spines covering the entire plant surface. Read on to learn more about the size, care, and uses of the Golden Barrel Cactus.

So, how big does the golden barrel cactus get? The golden barrel cactus is a relatively slow-growing succulent. In ideal conditions, it can grow up to 12 inches (30 cm) in height and width per year. However, it only grows 1-2 inches (2.5-5 cm) per year. It can take many years for a golden barrel cactus to reach its full size. The largest recorded golden barrel cactus was 6 feet (1.8 m) tall and 8 feet (2.4 m) wide.

Most golden barrel cacti will not get quite that large, however. If you are growing your cactus in a pot, it is unlikely to exceed 3-4 feet (90-120 cm) in height or width due to limited root space. Outdoors, golden barrel cacti can reach up to 6-8 feet (1.8-2.4 m) in height and width.

This article covers everything you need to know about the actual size of a golden barrel cactus, including its height, width, and how fast it grows.

We’ll also discuss critical factors that affect the size of a golden barrel cactus and how to care for one so that it reaches its full potential. Read on to learn more.

Golden Barrel Cactus Size

Golden barrel cactus is a generally slow-growing succulent. In ideal conditions, it can grow up to 12 inches (30 cm) in height and width per year. However, that is not always the case. The plant mostly grows only 1-2 inches (2.5-5 cm) per year. That means it can take many years for a golden barrel cactus to reach its full size.

The largest recorded golden barrel cactus was 6 feet (1.8 m) tall and 8 feet (2.4 m) wide. In most cases, the cactus won’t get quite that large.

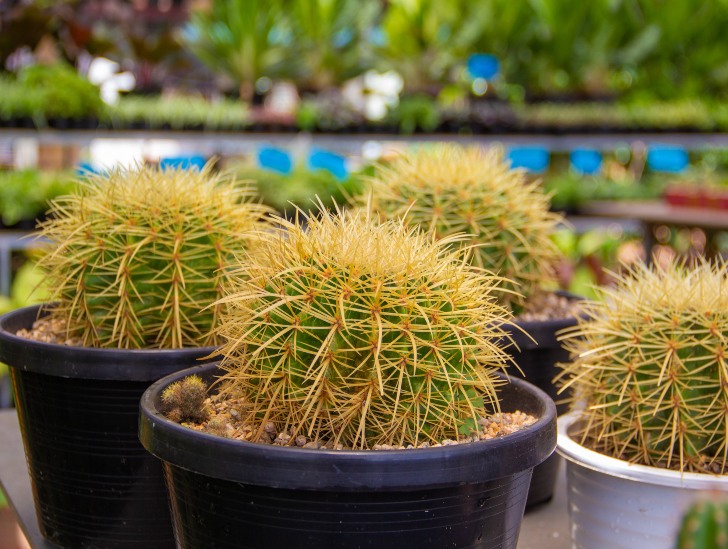
Golden barrel cactus in a black pot.
With proper care your golden barrel cactus will eventually reach its full potential.

If growing in a pot, it is unlikely to exceed 3-4 feet (90-120 cm) in height or width due to limited root space. Outdoors, the golden barrel cactus can reach up to 8 feet in height and width.

The most important thing you need to remember is that the golden barrel cactus grows slowly. Patience is critical when it comes to this plant.

Do not expect it to reach its full size overnight. With proper care, however, your golden barrel cactus will eventually reach its full potential.

What Factors Affect the Size of a Golden Barrel Cactus?

Several factors can affect the size of a golden barrel cactus. These include the following:

1. Soil Type

The type of soil you use can affect the growth rate of your golden barrel cactus. Cacti prefer sandy, well-draining soils. If soil is too dense or clay-like, it can impede the plant’s growth.

Likewise, if your soil does not drain well, this can also lead to stunted growth. For best results, use a cactus or succulent potting mix.

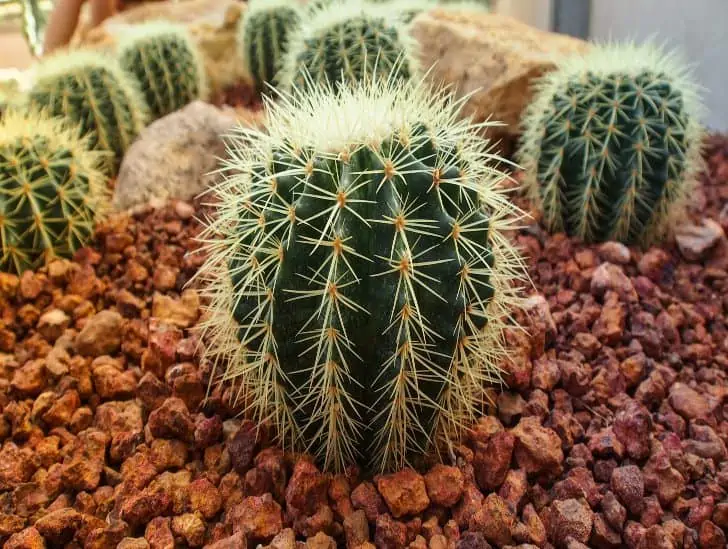
Golden barrel cactus.
The type of soil you use can affect the growth rate of your golden barrel cactus.

Ensure that the potting mix is well-ventilated to allow the roots to breathe. A good way to achieve this is to add some perlite, pumice, or grit to the potting mix. This will help improve drainage while providing the roots with enough moisture and nutrients.

2. Temperature

The temperature can also affect the size of your golden barrel cactus. Cacti are native to warm, arid climates. As such, they do not tolerate cold temperatures well. If the temperature dips below 50°F (10°C), this can damage the plant and lead to stunted growth.

It is best to grow your golden barrel cactus indoors in particularly cold regions. Doing this will protect it from the cold weather and help it to thrive.

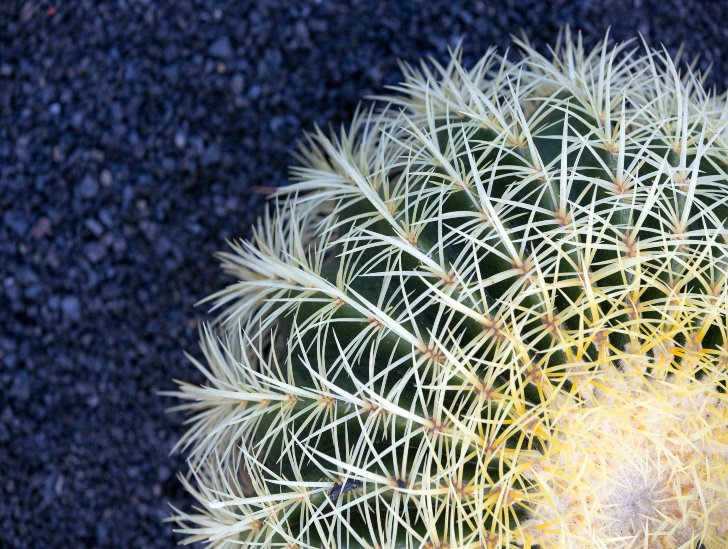
A topview of a golden barrel cactus.
Cacti are native to warm, arid climates. As such, they do not tolerate cold temperatures well.

If you live in a hot climate, ensure to provide your cactus with some shade during the hottest hours of the day. That will prevent the plant from getting too much sun and becoming stressed.

3. Pot Size

The size of the pot you use can also affect the size of your golden barrel cactus. If the pot is too small, it will restrict the plant’s root growth, leading to stunted overall growth.

If the pot is too large, the roots will have too much room to spread out. This can lead to slower growth as the roots will not be as dense. For best results, use a pot that is only slightly larger than the root ball of your plant.

4. Watering Schedule

How often you water your golden barrel cactus can also affect its size. If you water too often, the roots will become waterlogged and can begin to rot. Too much water will lead to stunted growth or even the death of your cactus.

On the other hand, if you fail to water them often enough, the plant will begin to dehydrate. Lack of water can also lead to stunted growth as the plant will not have enough moisture to support its growth.

A huge golden barrel cactus,
You may need to water less often in cooler climates or during the winter months.

Water your golden barrel cactus every 1-2 weeks, allowing the soil to dry out completely between waterings. If you live in a hot, arid climate, you may need to water more often. You may need to water less often in cooler climates or during the winter months.

5. Light Conditions

The light your golden barrel cactus receives can also affect its size. If the plant does not get enough light, it will stretch out and become leggy as it tries to reach for the light. Eventually, this may lead to stunted growth.

On the other hand, if the plant gets too much light, it can begin to scorch and turn brown. Excessive light will also lead to stunted growth as the plant cannot photosynthesize properly.

For best results, place your golden barrel cactus in an area that receives full sun to partial shade. If you live in a hot climate, provide your cactus with some afternoon shade to prevent it from getting too much direct sunlight.

6. Fertilizing Schedule

How often you fertilize your golden barrel cactus can also affect its size. If you fertilize too often, the plant can become overfed and begin to grow too quickly. Too much fertilizer can lead to weak, leggy growth more susceptible to damage.

If you do not use fertilizer often enough, the plant will not have the nutrients it needs to grow properly.

For best results, fertilize your golden barrel cactus every 2-4 weeks during the growing season. Use a balanced cactus fertilizer diluted to half-strength.

7. Humidity

Lastly, the humidity levels in your home can also affect the size of your golden barrel cactus. Cacti are native to dry, arid environments and do not tolerate high humidity well. If the humidity level in your home is too high, it can lead to fungal growth or root rot.

High humidity can damage the plant and lead to stunted growth. If you live in a humid climate, it is best to grow your golden barrel cactus in an area with good air circulation to prevent these problems.

General Golden Barrel Cactus Growth Rate

Golden Barrels are slow-growing cacti; they typically only add about 1 inch of height per year. However, they can grow a bit faster if they are given extra water and fertilizer.

Be patient if you want your Golden Barrel to reach its full potential! It will take several years to reach its mature height and width.

Golden Barrel Cactus Care

The Golden Barrel Cactus is a relatively low-maintenance plant that does not require much care. It should be planted in well-draining soil and placed in an area that receives full sun.

Water the plant deeply but infrequently, allowing the soil to dry out completely between watering sessions.

During the winter months, water even less frequently to prevent root rot. Apply fertilizer once per month during the spring and summer growing seasons.

If you live in a hot, arid climate, it is best to provide some afternoon shade to prevent the plant from getting too much direct sunlight.

A gardener repotting the golden barrel cactus.
The Golden Barrel Cactus is a relatively low-maintenance plant that does not require much care.

If you live in a humid climate, it is best to grow your Golden Barrel Cactus in an area with good air circulation to prevent problems with fungal growth or root rot.

With proper care, your Golden Barrel Cactus will thrive and provide you with years of enjoyment!

Golden Barrel Cactus Uses

The Golden Barrel Cactus makes an excellent houseplant or outdoor decorative plant. Due to its dense growth habit, it can also be used as a living fence or hedge.

This cactus species is also popular among gardeners who enjoy collecting and growing different cacti and succulents.

Summary

The Golden Barrel Cactus is a beautiful and popular plant that can grow quite large. However, its slow growth rate means it will take many years to reach its full-size potential.

Gardeners who are patient enough to wait will be rewarded with a stunning addition to their landscape!

We hope you enjoyed the Golden Barrel Cactus growth rate and care article. So, feel free to add a Golden Barrel Cactus to your collection today! Thanks for reading!

How to Propagate Pencil Cactus (Firestick Plant)

The pencil cactus (Euphorbia tirucalli) is a succulent native to Africa and parts of India. The plant gets its name from its long, thin, pencil-like stems. Pencil cactus is easy to grow and care for, making it a popular plant for indoor and outdoor gardens. If you’re looking to add a pencil cactus to your collection, propagation is a great way to do it. Fortunately, we are here to guide you through the process of propagating your very own pencil cactus.

So, how do you propagate pencil cactus? Pencil cactus can be propagated either through stem cuttings or seed germination. Stem cuttings are the most common propagation method, as they are easy to do and have a high success rate. To take a stem cutting, use a sharp knife or pair of scissors to cut a 2-3″ section from the end of a healthy stem. Remove any leaves from the cutting, then allow it to callus over for a few days before potting it in well-draining cactus soil. Water the cutting lightly and place it in a bright, sunny spot. Keep an eye on the cutting and water it when the soil begins to dry. In 4-6 weeks, you should see new growth appearing at the base of the cutting. If you’re more ambitious, you can propagate pencil cactus from seed.

This blog post discusses everything you need to know about propagating a pencil cactus. Read on to learn more.

Why Is Pencil Cactus Propagation Important?

Before we dive into the details of how to propagate pencil cactus, let’s talk about why propagation is essential.

The pencil cactus is a slow-growing plant that can take years to reach its full size. Propagation allows you to create new plants without waiting for the parent plant to produce offsets (or baby plants).

A floweing pencil cactus.
The pencil cactus is a slow-growing plant that can take years to reach its full size.

Not only does propagation save you time, but it’s also a great way to preserve the health of your existing plants. You’re not damaging the parent plant when you take cuttings from a pencil cactus. Many gardeners find that their plants benefit from removing some of their stems.

Different Ways to Propagate a Pencil Cactus

Now that you know a little about why propagation is essential, let’s talk about the different ways you can propagate pencil cactus.

As mentioned earlier, stem cuttings and seed germination are the two most common propagation methods. We’ll discuss both of these methods in more detail below.

Propagating Pencil Cactus from Stem Cuttings

Propagating pencil cactus from stem cuttings is the most common method of propagation. It’s also the most straightforward method, as there is no need to worry about germinating seeds.

To take a stem cutting, use a sharp knife or pair of scissors to cut a 2-3” section from the end of a healthy stem. Remove any leaves from the cutting, then allow it to callus over for a few days before potting it in well-draining cactus soil.

Water the cutting lightly and place it in a bright, sunny spot. Keep an eye on the cutting and water it when the soil begins to dry. In 4-6 weeks, you should see new growth appearing at the base of the cutting.

The stem cutting you obtain can be rooted in water or soil. Each method has its advantages and disadvantages, which we will discuss below.

Rooting Pencil Cactus Stem Cuttings in Water

Rooting pencil cactus stem cuttings in water is a popular method among gardeners, as it is effortless. The main advantage of this method is that it allows you to see when the roots are growing, as they will be visible in the water.

The main disadvantage of this method is that it can be tricky to transition the rooted cutting into the soil. This is because the roots that develop in water are very delicate and can easily be damaged.

If you decide to root your stem cutting in water, we recommend using a clear glass or jar. This will allow you to keep an eye on the roots and ensure they are healthy.

To root your stem cutting in water, fill your glass or jar with room-temperature water and place the cutting inside. Make sure that the bottom inch or so of the stem is submerged.

Place the glass or jar in a bright, sunny spot and check on it every few days to ensure the water level hasn’t dropped too low. When it does, add more water to keep the stem submerged.

It can take anywhere from 2-8 weeks for roots to develop. Once they do, you can transplant the cutting into the soil.

Rooting Pencil Cactus Stem Cuttings in Soil

Rooting pencil cactus stem cuttings in the soil is a bit more complex than rooting them in water, but it’s doable.

The main advantage of this method is that there is no need to transition the cutting into soil, as it will already be rooted in soil when you take it.

However, the main disadvantage of rooting your pencil cactus cutting in the soil is that it can be difficult to tell when the roots are growing, as they will be hidden beneath the ground.

A person hoolding a pencil cactus in a pot.
The main advantage of this method is that there is no need to transition the cutting into soil.

We recommend using a pot at least 6″ wide with drainage holes if you decide to root your stem cutting in soil. This will give the roots plenty of room to grow.

Fill the pot with well-draining cactus soil, then make a small hole in the center of the soil. Place the stem cutting in the hole, so the bottom inch or so is buried.

Water the soil lightly, then place the pot in a bright, sunny spot. Keep an eye on the soil and water it when it begins to dry. In 4-6 weeks, you should see new growth appearing at the base of the cutting.

Propagating Pencil Cactus from Seed

You can try propagating pencil cactus from seed if you’re more adventurous. This method’s main advantage is gratifying, as you watch the plant grow from a tiny seed into a mature cactus.

But remember that propagating pencil cactus from seed takes time and patience. It can also be challenging to get the seeds to germinate, so don’t get discouraged if it doesn’t happen on the first try.

Seeds on hand.
Propagating pencil cactus from seed takes time and patience.

To propagate pencil cactus from seed, you will need to obtain a fresh batch of seeds. You can purchase the seeds online or at a local nursery. Once you have your seeds, sow them in a well-draining cactus soil mix.

Place the pot in a bright, sunny spot and water the soil lightly. Keep an eye on the soil and water it when it begins to dry.

It can take anywhere from 2-8 weeks for the seeds to germinate. Once they do, you can transplant the seedlings into individual pots.

Propagating Pencil Cactus by Division

Besides stem cuttings and seeds, division is another popular method for propagating pencil cactus. This is an excellent option if you already have a mature pencil cactus that you want to propagate.

The main advantage of this method is that it’s easy to accomplish. The main disadvantage is that it can be challenging to find a mature pencil cactus that is big enough to divide.

If you do find a mature pencil cactus that you want to divide, the first thing you need to do is carefully remove it from its pot. Once it’s out of the pot, you can see its root system.

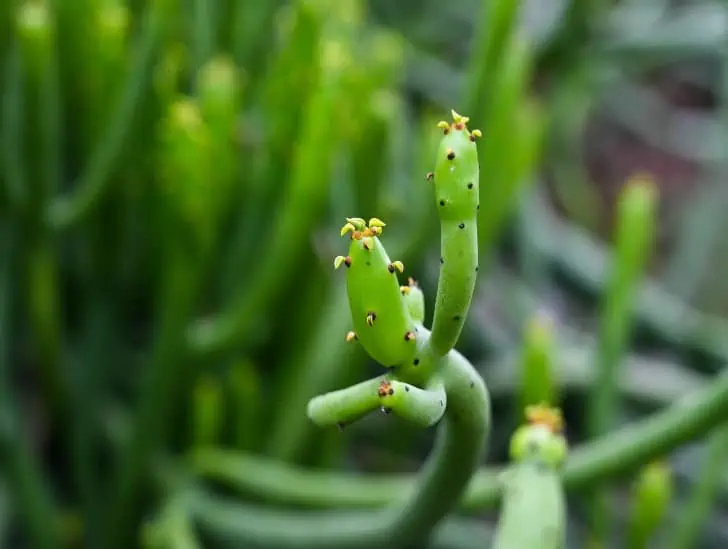
Close up image of a pencil cactus.
This is an excellent option if you already have a mature pencil cactus that you want to propagate.

Using a sharp knife, carefully divide the root ball into two or three sections. Make sure that each section has a good amount of roots attached to it.

Once you have divided the root ball, you can replant the sections in individual pots. Water the soil lightly and place the jars in a bright, sunny spot.

Keep an eye on the soil and water it when it begins to dry. In 4-6 weeks, you should see new growth appearing at the base of the plant.

Caring for a Newly Propagated Pencil Cactus

Once you have successfully propagated your pencil cactus, it’s time to start caring for it. The good news is that these plants are easy to care for and require little attention.

The most important thing to remember when caring for a newly propagated pencil cactus is not to overwater it. These plants are highly susceptible to root rot, so it’s essential to ensure the soil is always on the dry side.

Water the soil when it begins to dry out, then allow the water to drain completely before putting the pot back in its place.

Another critical thing to remember is to protect the plant from frost. These plants are native to warm, arid climates and cannot tolerate cold temperatures. Keeping your pencil cactus indoors is best if you live in an area with frosty winters.

A pencil cactus exposed to sunlight.
Close up image of a pencil cactus. This is an excellent option if you already have a mature pencil cactus that you want to propagate.

Place the pot in a bright, sunny spot and keep an eye on the soil. Water it when it begins to dry out and fertilize it once a month during the growing season. Your newly propagated pencil cactus should thrive and grow into a healthy plant with proper care.

Summary

Pencil cacti are beautiful, easy-to-care-for plants that make great houseplants or additions to any garden. And the best part about them is that they are straightforward to propagate!

With just a few simple tools and materials, you can have a new pencil cactus plant in no time. Thanks for reading, and happy gardening!

How Much Sun Do Aloe Vera Plants Need?

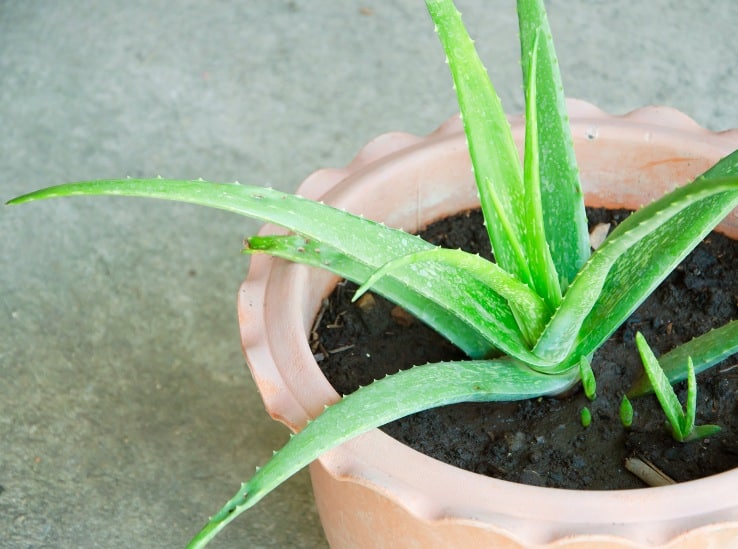
A aloe vera exposed to sunlight.

Aloe vera plant is a beautiful and easy to care for succulent, making for a great indoor companion. In addition, aloes do well in dry, winter conditions. Still, they are somewhat challenging to grow indoors because they need lots of sun every day.

Light is where most succulent gardeners fall short of the needs of their plants. It would be best to put your Aloe where it will get a minimum of six hours of sunlight daily. Without adequate, direct light, your Aloe begins to stretch towards light and loses its compact form. As a result, the plant may topple over as the stem grows weak.

Light is an essential factor when growing an aloe vera plant. Sunlight plays a crucial role in aloe vera’s long-term health and well-being, although individual plant needs vary depending on positioning, soil, and age.

Indoor Light Requirements For Aloe Vera

Aloe Vera is a trendy house plant because it looks beautiful, adds a friendly vibe to your house, and does not require as much care and water as other house plants do. However, because succulents are warm and sun-loving plants, many are afraid to grow succulents in places where the summer season isn’t that long.

You will need a location with bright and indirect sunlight. Excess direct sun can dry out the plant and turn its leaves yellow. Water your Aloe more often if your Aloe lives in an incredibly sunny area. Place the aloe vera plant in a container near a kitchen window for occasional use.

Aloe Vera plant
It would be best to put your Aloe where it will get a minimum of six hours of sunlight daily.

We recommend A western or southern window. If the sun in your brightest spot is not adequate, consider artificial lights, alone or natural light. If it’s not a sunny, hot exposure like a south or west window, you can put it in the window.

Rotating your indoor Aloe Plant plant every 2-3 months will ensure it receives light evenly on all sides and not permanently leaning towards the light source. You can still grow your succulents throughout the year even if you live in a climate with distinct seasons and the winter months are cold and dark. Bring them inside once freezing temperatures hit and use artificial lights to give your succulents the light they need.

Artificial Light Basics

You can grow aloe vera plants under artificial light if you provide the correct amount of light. You need to choose the most suitable lights and know how to use them to bring out the best of your Aloe plants.

Plants exposed to artificial lights.
You can grow aloe vera plants under artificial light.

When you choose artificial lighting for an indoor garden, you need to think about a couple of things when making the decision. And these things are:

How bright is the grow light

It would help if you considered how bright the light from the artificial lights would be because this will affect how much light the plants get and how well they will grow. For Aloes, you need lights that emit at least 2,000 lumens for each square foot of sunlight. 

What color temperature is the artificial light?

Aloes prefer bright light overshadow, so they also require a specific light in terms of the color temperature of the morning. Color temperature is the visible color that the grow lights radiate. The optimal color temperature for succulents begins at about 5,000 Kelvins, giving your succulents full-spectrum light that closely resembles sunlight.

How much energy does the grow light consume?

The more energy a light consumes, the more you have to pay for your electricity, so you don’t want to buy a bright light but chews up a lot of watts, as that will be very expensive. Instead, look for lights labeled energy-efficient for a high lumen count and low wattage.

How much heat does the grow light give off?

If they give off too much heat, you could have a problem with the room where you grow your succulents being too hot, resulting in you having to spend more money on good ventilation or a cooling system.

How high to hang the grow lights from your plant 

How high you hang your grow lights determines how much light the plants get. Therefore, it would be best to turn the plants to get the maximum sunlight without burning the plants with the heat radiating from these lights. 

Plants exposed to artificial lights.
Put the grow lights at least 6 to 8 inches away from the tips.

Put the grow lights at least 6 to 8 inches away from the tips of your aloe vera because this will reduce the chance of your grow lights burning and damaging your plants. If you realize that your lighting doesn’t give out much heat, you can place them closer to the succulents to get more intense light. A white fluorescent light will give good results. Provide artificial light for at least 14 to 16 hours per day

Outdoor Light Requirements

You can allow your indoor Aloe to experience fresh air and sunshine in the late spring and summer by moving it outdoors. However, shallow temperatures can lead to the death of your Aloe Vera. So ensure you shield your plant from temperatures of 40 degrees F or lower. 

Provide your Aloe Vera Plant with as much light as you possibly can, mostly during springtime and summer. You can keep Aloes outdoors in full sun during the summer when temperatures are above 70°F (21°C). However, bring the Aloe inside if nighttime temps threaten to drop below 60°F (16°C).

Aloe vera plant in a pot.
Most aloe vera plants can tolerate some light shade or filtered sun at midday. 

Please do not move your aloe plant from indoors to the outdoors right away; it may need some time to acclimatize to the bright light, or else it will sunburn. First, make sure it sits in partial shade for about a week before moving it to a sunnier location.

Aloe vera thrives in full sun, especially in cooler climates where fog or overcast skies are typical. Be careful that your plants get a minimum of six hours of direct sun; however, most aloe vera plants can tolerate some light shade or filtered sun at midday. 

The best outdoor areas are South- or west-facing with slight sandy soil, whether in a pot or the ground. Sunburn is a concern when moving indoor aloe vera plants to a bright, sunny location outdoors. 

If you’re growing aloe plants outdoors, place them in partial shade. The location you choose should get lots of morning sun. However, make sure you protect the plants during the afternoon as the lighting is more intense during this time. 

Direct lighting can dry them out if you don’t provide enough protection for your aloe plants. The leaves can also become scorched by the sun. Introduce the plant to outdoor conditions slowly by exposing it to sunlight for an increasing period each day throughout one to two weeks before planting or leaving it outside. Acclimatizing minimizes stress to the Aloe.

Age and Light Requirements

Older aloe vera plants can withstand direct sunlight. However, young, freshly propagated plants will not tolerate intense light levels as more senior, mature plants. Therefore, for freshly potted pups or seedlings, make sure that you use a sheer curtain when placing them where there is bright and diffuse light. 

If the plant is outdoors, place it beneath a shade cloth in the daytime and move it indoors at night. 

Avoid exposing young plants to the scorching noon sun until they are mature, at which point you can adjust the light conditions slowly over a week or so.

Signs That Your Aloe Vera Is Not Getting Enough Light

Aloe flop can occur if your plant is not getting enough sunlight and the foliage does not have the strength to grow in the fine upright form you expect. Instead, leaves will appear limp, flattened, and elongated.

Frequent low light will lead to a lack of blooming, in addition to discolored growth. Plants that experience low light develop leggy growth because they stretch toward light sources, which disfigures the plant and weak growth.

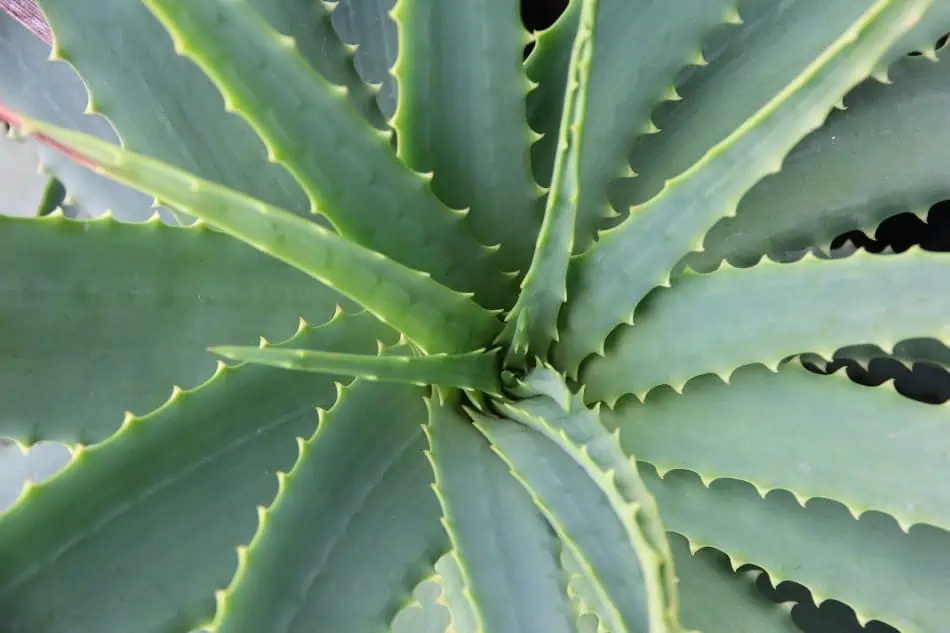
Close up image of aloe vera plant.
Lack of light will weaken your Aloe plant and cause the leaves to crease.

Aloe vera plants are grown under low light and experience root rot. Sunlight regulates the moisture in the soil by heating it. Cold and damp will increase the likelihood of root rot. Ensure you monitor the moisture level in the ground and only water when dry.

Lack of light will weaken your Aloe plant and cause the leaves to crease or bend at the base or in the middle. A leggy growth habit and pale leaves are other indications of insufficient light.

Signs of Overexposure to Sunlight

Aloe vera plants exposed to too much sun for long will not be in the best condition. Excess sun exposure happens in coastal areas or can also happen if you grow the plants against a south- or west-facing wall because light bounces off the structure. 

Despite adequate watering, signs of overexposure to sunlight include blanched leaves and midday wilting. Move your potted aloe vera plants to a location where they will receive some filtered shade at noon. Garden-grown aloes will require protection when the sun is hottest, so place a shade cloth over them or move them into a lightly shaded bed.

Bottom Line

The Aloe’s piny, gray-green foliage and showy golden-yellow flowers add beauty to your indoor and outdoor spaces. Just provide the right light to enjoy these beauties.

Madagascar Palm, Are They Ever In Need Of Direct Sunlight?

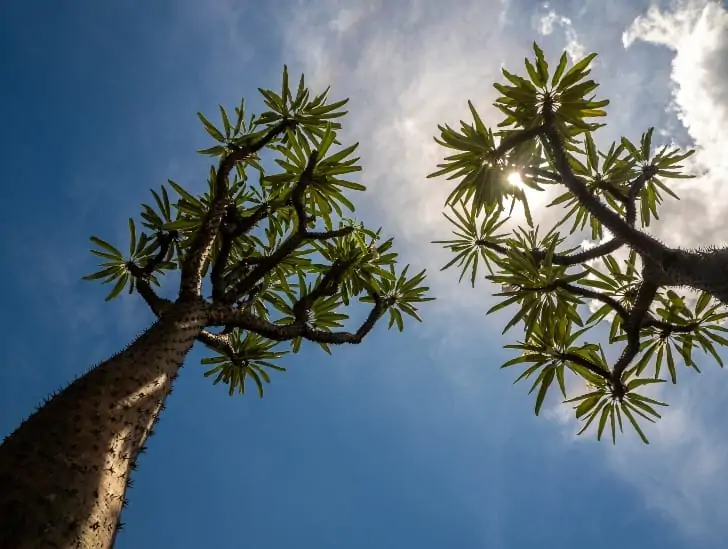
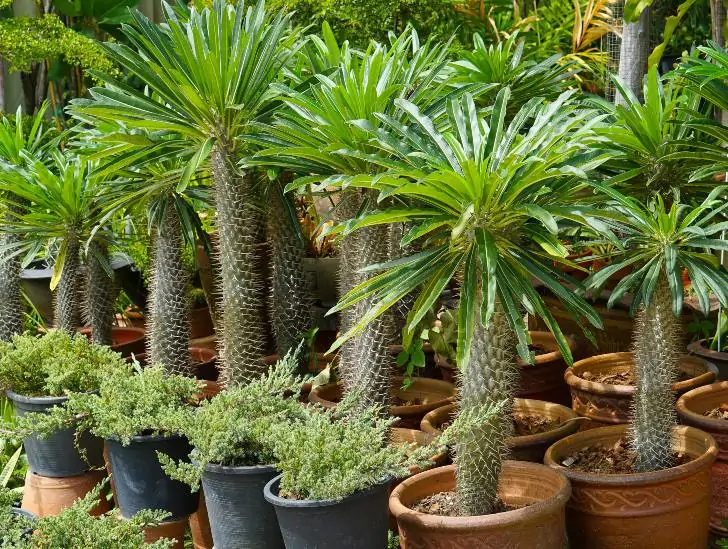
The impressive Madagascar palm is no palm but a succulent plant armed with sharp thorns and a palm-like summit. This tree that likes the sun is native to the south of Madagascar; in its natural habitat, it grows in full sun. As a result, the Madagascar palm can be grown outdoors in the mild winter zones throughout the year.

You can cultivate the succulent in a container (using a clay pot, not a plastic pot), move outdoors in summer, or cultivate exclusively as an indoor plant. Inside, please place it in full sunlight in front of a window facing south or west. Then, rotate your plant to receive equal sunlight. Otherwise, the plant is at risk of deformation as it reaches sunlight on one side.

Ensure that sunlight gets to the plant without artificial shade. As a succulent, it benefits from full sun, but it can tolerate partial shadow on the outside, as well. You can keep it in a pot to move it inside during cold spells or plant it in a sheltered place and cover it during cold nights.

The best spots for Madagascar palms are bright spots with some sun in the morning or evening. We recommend exposing yours to about two or three hours of sunlight daily for solid growth. Newly purchased specimens will need to increase their sun tolerance within the next six weeks to prevent sunburn.

Basics Of Acclimatizing Your Madagascar Plants To Direct Sunlight

While Madagascar plants prefer bright indirect light, you can acclimatize your plants to limited direct sunlight. So how can you acclimate your plant to direct light? Here are some things you can do:

● Put your plant in a bright area away from direct sunlight on the first day. It can be under a patio or a shadow tree in the courtyard. Also, you should protect the plant from too low temperatures and wind to support its survival.

Madagascar palm exposed to indirect sunlight.
You should protect the plant from too low temperatures and wind to support its survival.

● Shift the plant into full sun for only one hour on the first day. The best time to move the plant is early or at the end of the day. Watch out for the hottest noon sun. Please return it to the sheltered location after this time.

● Leave it in the protected place most of the second day, but move it in direct sunlight for just two hours. Once again, it is preferable to do so early in the morning or later on in the day.

● Keep moving the plant towards direct sunlight, increasing total sun exposure by one hour each day. Work up to as many hours in bright sunlight as recommended for Madagascar Plants, at least four to six hours.

● Next, water and nourish your plant enough outdoors. Outdoor areas generally dry the soil of indoor plants slightly more than indoor areas due to breezes and wind, so it will likely require more water. In addition, due to the increased intensity of sunlight and time, the plant will also use more nutrients, so fertilize it slightly more often.

Light Requirements For Madagascar Outdoor Plants

Madagascar palms are beautiful outdoor landscape plants and may be cultivated as hardy perennials. Choose a position that is sunny or partially shaded. The palm will do great in full, bright, indirect light, but the full direct sun is best for this plant, as light affects its growth speed.

If you have recently purchased your own Madagascar plant, you can induce it to tolerate more challenging levels of sunlight than most indoor plants. To do so, gradually add on to the number of hours in the sun over the next month. It is preferable to do so from autumn to the end of winter when the rays are weakest.

Madagascar palm in a pot.
Madagascar palm outdoors during daylight hours every time the weather is above 70 degrees F.

Every week, increase the amount of light by an hour, starting with only an hour of morning light to gain momentum. As a result, the plant will slow down chlorophyll production, reducing the risk of bleaching and sunburn.

Remember to hydrate the sample during this time and permanently stop the experiment if it shows signs of solar burn. This plant’s maximum amount of sunlight is approximately 4 hours per day.

Put your Madagascar palm outdoors during daylight hours every time the weather is above 70 degrees F. Madagascar palms need full sun to thrive. Exposure to temperatures below 30° Fahrenheit (1° Celsius) increases the risk of severe harm and death.

Bring your potted Madagascar palms indoors in the cold weather to avoid any damage. If planted outside and freezing temperatures are imminent, covering it with a tarp can help it survive.

Expose your plants to sunlight in the morning or evening to recreate their natural habitat. Plants kept in areas with too much shade quickly show growth retardation, soil mold, and root decay.

Direct sunlight keeps your Madagascar palms healthy and robust. However, they can wither if you expose them to insufficient light, especially during the day. In summer, put the Madagascar palm in a warm place, protected from the wind and sheltered from the rain.

Signs Of Overexposure To The Sun

You will observe initial signs of stress on the leaves; brown edges and yellowed halos will circulate the leaf diameter. The plant may also appear white bleached.

Cactus over exposed to the sun.
Higher sweat levels will lead to the drying up of the soil and the development of wilting.

Higher sweat levels will lead to the drying up of the soil and the development of wilting, thus becoming a serious problem that you must tackle immediately. In addition, some species wither before much water is lost to reduce sweating and dehydration rates.

Growth retardation is the final symptom to monitor. Again, due to the undesired environment, there will be a reluctance to re-grow as juvenile tissues are more susceptible to scaling than older, thicker leaves.

Remedies For Sunburn In Madagascar Palms

As mentioned above, if a plant bears overly damaged leaves and severe dehydration, the chances of survival are considerably reduced. So, let’s talk about tips that may help the recovery process for your plant.

Keep the plant clear of sunlight as early as possible. As there may still be relatively intact portions of the foliage, removing it will prevent further general damage.

If there is visible dehydration, accompanied by dry soil, this is the time to water. Rather than shock the roots by immediately soaking the ground, give it little and often the water in the next few hours. The plant’s root system can still be sensitive to chemicals and cold water, so it is crucial to drop fertilizers for a while.

A close up image of a Madagscar palm.
Keep the plant clear of sunlight as early as possible.

Trim all yellow and brown leaves attached to the plant. Keep branches that are still foldable with a green cambium (under the bark), as new nodal shoots may develop in the next few weeks.

Display a bright environment that does NOT provide direct sunlight. Moving it to a more shaded area may not be helpful mainly because the leaves contain very little chlorophyll, which means that they will not convert natural light sufficiently into stored energy. In addition, moving a plant to a new environment under different conditions will result in environmental shock, resulting in the sudden loss of leaves, delayed growth, and possible death.

Keep the soil uniformly damp and allow the top third to dry. If the leaves do not straighten after one week of saturated soil, there is little chance of survival. Keep the potted plant under a clear bag or box to lock in moisture for better transpiration speed. A well-hydrated leaf is more likely to be photosynthesized, producing more stored energy for the recovery process of the plant.

Indoor Light Requirements

In colder climates, the Madagascar palm is grown in a pot so that you may take it indoors during the colder months of the year. While they do not grow as large in containers—they will grow to about 6 feet high—they still make interesting indoor plants with beautiful tropical leaves.

Even entirely indoors, perfectly positioned in front of a south-facing window, could do the trick! Of course, you should keep the plant in places with lots of lights, whether indoor or outdoor. But it is challenging to keep it as a houseplant as they need a lot of light. Keep them close to a window that benefits from several hours of full sunlight per day if they are inside.

Madagascar palm in a white pot.
It generally requires an environment that is more illuminated than only artificial interior lighting can provide.

Ensure your plant grows in a highly illuminated area. You will need a place that gets at least 6 hours of sunshine. In addition, this plant will do well in an area that gets direct or indirect sunlight from the sun. It generally requires an environment that is more illuminated than only artificial interior lighting can provide.

If you realize that the leaves of your Madagascar palm start to bend to one side, your succulent does not receive enough light. Give your succulents a lighter and rotate your plant occasionally to fix the lean.

Bottom Line

Are you looking for an intriguing and unusual indoor plant? If yes, the Madagascar palm is an attractive choice. The Madagascar palm enjoys the sun, so you should place it in the sunniest place possible. These bold succulent ones are easy to maintain, provided you have a bright, sunny spot for them to call home.

Does Monkey Tail Succulent Need Full Sun?

The monkey tail is one of the most famous succulents in the world. The plant needs three critical things to grow and thrive: ample light, the right type of soil, and adequate water. While there are no questions about watering and the type of soil that is right for the succulent, many gardeners wonder if they should provide their monkey tail with direct or indirect sunlight. Broadly speaking, monkey tail cactus requires sufficient exposure to sunlight to thrive. But how much is sufficient and should it be full sun?

Do monkey tail cacti need full sun? The short answer is no. Full sun isn’t a mandatory requirement for growing monkey tail cactus. Generally, the succulent can use any light for photosynthesis. Even without exposure to full sun, your monkey tail will still grow and thrive as long as you expose it to some amount of light that is enough to facilitate photosynthesis. That being said, it is good to mention that a monkey tail would be happier if you exposed it to full sun.

Do you have a monkey tail in your home and don’t know whether to expose it to full sun or not? If so, then you have come to seek the answers in the right place. Read on to learn everything you need to know about monkey tail and exposure to full sun.

General Monkey Tail Light Requirements

This type of cactus is prized for its long, thin stems and interesting flowers. However, they can be quite challenging to care for, so it’s essential to understand the light requirements before bringing one into your home.

Monkey tail cacti need plenty of bright, direct light in order to thrive. Generally, it requires at least six hours of sunlight exposure for it to stay healthy. If you don’t have a spot in your home that gets that much light, you can supplement with artificial grow lights.

Monkey tail cactus in a pot and exposed to sun light.
These cacti also like it on the warm side.

These cacti are also quite sensitive to changes in light conditions, so it’s essential to be consistent with their exposure. Sudden changes, such as moving them from a bright windowsill to a darker corner of the room, can cause them to go into shock and lose their blooms.

If you don’t have a spot that gets full sun, you may need to supplement with artificial lighting. These cacti also like it on the warm side, so you may need to provide a heat source if your home is relatively cooler.

Why Is Sunlight Beneficial to the Monkey Tail?

This succulent prefers to be in full, direct sun for some reason. First, light is vital for its survival because it aids photosynthesis. During photosynthesis, the light energy absorbed by the plant is converted into chemical energy with the help of the green pigment known as chlorophyll.

Secondly, this succulent requires plenty of exposure to sunlight to help it “reveal” its true colors. This is also known as the “sun blush.”  These are basically terms used to describe the beautiful colors that the monkey tail is known for.

Monkey tail cactus closeup image.
You will know that your monkey has developed sun stress when it starts to change color.

But when the succulent is exposed to overly intense sunlight, it develops “sun stress.”  You will know that your monkey has developed sun stress when it starts to change color. The color-changing tactic helps the plant reflect some light, preventing heat damage.

The monkey tail cactus can and do survive just fine with minimal exposure to sunlight. But the catch is that your plant will just stay with the dull shade of green.

Lastly, sunlight is also helpful because it brings heat which helps dry out the potting mix. If you have been following our posts closely, you must have noticed the emphasis we put on watering succulents correctly.

Like other succulents, the monkey tail cactus doesn’t like being waterlogged. In fact, it prefers growing in highly draining soil. Sunlight plays a critical role in drying out your soil, even if the plant is positioned behind a windowsill or in a relatively cool environment.

The light from the sun is usually high in energy which speeds up the evaporation rate even if you don’t notice the temperature rising rapidly.

Why Does the Monkey Tail Require a Lot of Sunlight?

In the course of evolution, monkey tail cacti have evolved to adapt to their natural environment. Typically, the monkey tail cactus comes from relatively hot and dry areas that receive plenty of sunlight.

This is why they can survive relatively long periods of drought without any issues. They store plenty of water in their stems and leaves.

Without sufficient light, the monkey tail cactus will most probably start turning pale before it eventually dies. Therefore, it is critical to ensure that your plant isn’t positioned in a dark room of your house.

If you don’t have a nice spot in your house that receives plenty of sunlight, consider using special grow lights to provide your monkey tail cactus with the best care possible.

A monkey tail red flower.
It slides into a state of dormancy that promotes the formation of flowers the following year.

The amount of light also influences the biorhythm of your succulent. During the cold winter months, the monkey tail will automatically notice that it receives fewer hours of direct sunlight per day.

Therefore, it slides into a state of dormancy that promotes the formation of flowers the following year. You shouldn’t bother too much about your plant during this time because it is “resting.”

Can a Monkey Tail Cactus Receive Too Much Sun?

The simple answer is yes; a monkey tail cactus can receive too much sun. While these are desert plants and can tolerate high levels of sunlight, they can still be damaged by too much exposure.

The amount of sunlight a monkey tail cactus needs depends on a wide range of factors, but most types need at least four hours of direct sunlight per day to stay healthy.

If your monkey tail cactus is exposed to too much sun, it may develop sunburned patches on its surface, which can lead to dehydration and death.

If you are concerned that your cactus is receiving too much sun, there are a few things you can do.

First, try moving it to a shadier spot in your garden or house. If that is not possible, you can also try using a shade cloth to protect it from the sun.

Finally, make sure to water your cactus regularly, even if it receives a lot of sunlight. Monkey tail cactus needs water to stay healthy, regardless of how much sun it gets.

Growing Monkey Tail with Little Sunlight

As mentioned earlier, the monkey tail cactus requires at least four hours of sunlight exposure every day. But it is still possible to grow the succulent in partial shade as long as all the other aspects of growth are not interfered with at all.

The monkey tail will prefer an area that receives a few hours of bright light and some hours of partial shade. This way, the succulent can get the best of both worlds; there is enough light to facilitate photosynthesis and sufficient protection from potential sun damage.

Some types of monkey tail cactus have even evolved and developed unique features that help them survive in areas with minimal light. But for the most part, you still need to provide your monkey tail cactus with a sufficient amount of light for it to thrive.

Monkey tail cactus exposed to sunlight.
It is still possible to grow the succulent in partial shade.

Keep in mind that there is a significant difference between surviving and thriving. When the monkey tail is surviving, it will stretch its stems, trying to reach the nearest light source. This prevents your plant from reaching its true potential.

Another major drawback of inadequate sunlight is that it can make your monkey cactus succumb to root rot when combined with overwatering.

Where Do You Get the Best Sunlight?

If you are committed to growing a monkey tail cactus, you will need to know the optimal places to position your succulent for better results.

If you are trying to provide your plants with as much sunlight as possible, it is pretty simple to plant them in your outdoor garden. Choose a slightly elevated spot that has nothing around it to cast shade.

However, if you don’t have an outdoor garden but still need to have a monkey cactus in your home, cultivating it indoors is the only option you have.

In such a case, south or east-facing windowsill will be the perfect spot for your monkey tail cactus. But since you only get light from one direction, be sure to rotate your plant regularly to eliminate the risk of your plant growing in the direction of light (etiolation).

Flowering monkey tail cactus.
You can place your monkey tail near a window then you will be rewarded with beautiful blooms year after year.

Positioning your plant on a good south-facing windowsill is just as good as having it outside in your garden. The east-facing option is also good because the morning light tends to be more intense, making it better for your succulent.

Final Thoughts

All in all, it is evident that the monkey tail plant requires a lot of sunlight. If you cannot provide the succulent with enough direct sun each day, you should consider another type of plant.

However, if you live in an area where there is ample sunshine, and you can place your monkey tail near a window or door, then you will be rewarded with beautiful blooms year after year.

Nepenthes Plants: Top 5 Tips for Properly Watering

A close-up bear claw image.

Nepenthes is one of the best indoor plants for a gardener. However, a significant number of people who try their hand at cultivating nepenthes end up with a dead plant because they simply don’t know how to care for it. The truth is that nepenthes is a relatively fussy plant, and any slight mistake with watering can be costly. Watering a pitcher plant appropriately means finding the perfect balance between overwatering and underwatering.

So, what are the golden rules for watering nepenthes? Pitcher plants must be watered regularly to keep the potting mix moist. Water your plant as soon as the tray is empty and until the potting mix is completely moist. Use rainwater or distilled water and avoid tap water as much as possible. Bottom watering is highly recommended because your plant gets a chance to absorb as much moisture as possible. Always wait until your potting mix is completely dry before you water your nepenthes to avoid root rot issues.

Taking care of a nepenthes plant can be tricky, especially for beginners. One simple mistake can make you feel like you are a plant killer. But you don’t have to fear anything because we will show you the best way to maintain the moisture requirements for your plant.

Read on to find out everything you need to know about watering pitcher plants.

1. Know When to Water

A general rule of thumb that most gardeners use is to wait until the potting mix is completely dry before watering the pitcher plant. While this is an acceptable approach, you can still use some better ways to figure out when to water your pitcher plant.

Rather than waiting for the potting mix to dry out completely, study your plant over some period and establish a watering schedule to follow.

The best option for beginners is to check your plant regularly without fail.

 For instance, if you discover that you mostly water your plant after two days during the dry season, stick to that schedule and maybe water after four or five days during periods of high humidity.

The watering schedule you establish will, of course, vary depending on where you live and the general climatic conditions of the area. The best option for beginners is to check your plant regularly without fail.

Ensure that your plant’s roots are not sitting in excess water that isn’t draining out of the growing pot. Waterlogging a pitcher plant can lead to serious root rot issues that can easily kill it. In simple words, keeping your potting mix moist is crucial but don’t make it soggy or oversaturated.

2. Water the Pitchers

Sometimes, the pitchers themselves may also require watering. When you first bring your nepenthes plant home, take a peek inside the plant’s pitchers. If you notice they are entirely empty, use an eyedropper to refill each of them to about a third way with distilled or reverse osmosis water.

The primary purpose of filling the pitchers with water is to prevent them from becoming dehydrated and dying off as they struggle to fill themselves.

Make a routine to check the level of fluid inside the pitchers regularly. If you notice the fluid level is periodically low or empty, it could be a sign of underwatering or low light.

Nepenthes with a fly.
Be sure to increase the moisture levels inside the pitchers as soon as possible.

A combination of underwatering and low light can be catastrophic. So, be sure to increase the moisture levels inside the pitchers as soon as possible and provide your plant with sufficient exposure to sunlight.

If you live in an area that doesn’t receive plenty of sunlight, consider using artificial grow lights to ensure you are fulfilling your pitcher plant’s light requirements.

3. Know How to Water Your Pitcher Plant

Pitcher plants are native to Madagascar, Australia, and Southeast Asia. These species generally grow in mountain forests or low-lying jungles. So, this tells you that they thrive in humid areas. The mountain-growing pitcher plants prefer relatively cooler temperatures than the jungle-growing species.

Some species grow in dense jungles below elevations of 3,000 feet. They are known as the lowland nepenthes and prefer relatively high heat and constant, steamy humidity to thrive.

Nepenthes near the water.
Mountain-growing pitcher plants prefer relatively cooler temperatures.

So, if you are growing these plants at home, especially indoors, you need to keep in mind that they cannot tolerate dry soil at all. No matter the species you have, be sure to provide it with enough moisture and keep the roots slightly damp all the time. Damp doesn’t mean wet.

So, what is the best way to water your nepenthes to achieve this target? Well, you can use the top-bottom watering technique or the bottom watering method.

In top-bottom watering, you will need to add enough distilled water to an irrigation can and use it to water the plant from the top until excess water starts to drain out of the drainage holes at the bottom of the growing pot.

Make sure the excess water drains off well before you walk away. Avoid using clay pots because they can easily wick water and cause the potting mix to dry out relatively quickly.

The best way to water nepenthes is by using the bottom watering method by placing the growing container in a relatively shallow tray filled with distilled water; a third way the depth of the container. Don’t fill the tray more than a third of its depth.

Take your pitcher plant and immerse it in the tray. Allow it to sit in the tray of water for up to 30 minutes before you remove it. The plant would have absorbed enough water to keep it going for three to five days before you water again.

The highland species that enjoy relatively cooler temperatures can benefit greatly from ice cubes placed on top of the potting mix every night. The ice cube will melt through the night and offer the moisture that the plant loves.

4. Don’t Let the Plant Sit in Water for Too Long

Using the bottom watering method can be tricky because you may be tempted to leave the plant sitting in the water tray for too long, thinking you are helping it.

Unfortunately, pitcher plants don’t like being waterlogged. The more they are waterlogged, the more they develop root rot that can kill your plant in no time. So, you should never let the plant sit in water for more than 30 minutes.

The bottom watering method.
You should never let the plant sit in water for more than 30 minutes.

If you are tempted to let your plant sit in the tray for prolonged times, ensure you empty it first and only live about an inch of water in it. The little water you leave in the tray plays a crucial role in increasing the plant’s humidity.

5. Use the Right Type of Water

When it comes to watering pitcher plants, not all water is the same. Choosing the wrong water type can kill your plant faster than overwatering.

Don’t attempt to water your nepenthes using bottled water or tap water since it can be extremely harmful. These plants are naturally intolerant to nutrients and minerals.

For that reason, they need to be watered with water sources that contain little to no mineral substances. Rainwater, distilled water, or reverse osmosis water are the three best options. These options are highly safe because they don’t have any mineral substances.

If your area receives plenty of rainfall during winter, be sure to collect as much rainwater as possible and store it safely somewhere. When you run out of rainwater, go for distilled water.

Fortunately, distilled water can be found in almost every grocery store, and it is highly affordable. A gallon of it will go for about $1, depending on where you live.

A water.
Choosing the wrong water type can kill your plant faster than overwatering.

Reverse osmosis water is mostly sold in licensed water stores and select pharmacies. However, you need to remember that reverse osmosis water may be slightly more expensive than distilled water.

When buying distilled water, avoid any bottles that contain words such as “contains electrolytes,” “enhanced for flavor,” and “additives added for taste.” These words mean that some chemicals have been added to the water, which is not a good sign.

Why Is Rainwater the Best Option for Watering Nepenthes?

Nepenthes plants generally grow in poor acidic conditions and are highly sensitive to the water they grow in. So, any water containing a relatively high quantity of dissolved salts and minerals such as calcium and magnesium does them no good.

The mineral concentration can build up with time, causing root rot and severe decline in their overall health. The effects are quite dramatic for pitcher plants but slightly slower for other carnivorous plants.

Generally, the type of water you use must contain less than 100ppm (parts per million) of dissolved minerals and salts. Rarely will you have this type of water coming out of your tap, no matter where you live.

You can always check with your local water authority to ascertain the softness of water coming out of your tap. Sticking to rainwater, distilled water, or reverse osmosis water will do you good in the long run.

Summary

Watering nepenthes incorrectly is a catastrophic mistake that many gardeners tend to commit. Even the slightest mistake can affect the general growth of your plant and make you start questioning your gardening skills.

To avoid committing these mistakes, it is good to understand your plant’s moisture requirements to help you maintain a perfect garden. We hope you now know what you need to do in terms of watering to keep your pitcher plant happy!

How To Take Care Of Your Monkey’s Tail: Ultimate Guide

Monkey tail is one of the most popular cacti species grown in homes worldwide. The monkey tail is a beautiful cactus with long white, soft, and hair-like spines. Its stems are cylindrical and can grow up to three inches in diameter and 8.5 feet long. These plants are relatively easy to grow and require minimal care to thrive, but you have to ensure the growing conditions are right to get the best out of them.

So, how do you care for monkey tail cactus? This cactus generally prefers growing in well-draining and slightly acidic succulent soil. It requires very little water during spring and summer. You don’t need to water it during winter. Overwatering can literally kill your monkey tail. The plant can survive temperatures lower than the freezing point without any issues. In summer, ensure you provide it with at least 10 hours of bright direct sunlight and maintain the relative humidity between 40-50%. Only fertilize your monkey tail cactus once in spring, autumn, and summer using half-strength fertilizer.

Do you want to learn more about how to care for a monkey tail cactus? You came to the right place. Read on to know more about monkey tail cactus care and how you can get the best out of the succulent.

Monkey Tail Cactus – A Brief Overview

The name “monkey tail cactus” is derived from the plant’s long stems covered in relatively soft spines that resemble strands of hair. The cactus grows naturally in crevices of stones and cliffs.

A monkey tail cactus.
It is best grown as a hanging plant.

It has a relatively shallow root system that quickly absorbs water whenever it rains. Its stems are greenish-yellow and are covered with down-facing soft spines resembling white hairs.

A typical monkey tail cactus develops three to five stems that branch at the bottom of the plant. It may grow upright for several feet before the stems start drooping.

When the growing conditions are ideal, the cactus produces magnificent bright, red flowers. They usually bloom after a few days then the flowers develop into fruits.

The origin of this cactus can be traced back to Santa Cruz. Besides its natural habitat, the cactus can also be grown as a houseplant. It is best grown as a hanging plant due to its outstanding drooping stems.

How to Care for Monkey Tail Cactus

Now that you have some background information about this cactus, let us figure out some things you need to do to get the best out of it.

Generally, there are many things you need to keep in mind while caring for a monkey tail cactus. They include feeding, watering, temperature, pests, light, and so on. Here is an in-depth analysis of each.

Soil Requirements

Since the monkey tail cactus absorbs much of its moisture and nutrients from the atmosphere, it doesn’t develop a robust root system. Therefore, it doesn’t require much from the soil other than anchorage that is strong enough to support the weight of its hanging stems.

The cactus will generally thrive in well-draining and slightly acidic soil. It grows best in soil with a pH level ranging from 5.0 to 6.5. When watering your plant, you need to ensure that the pH level of the water in use is good enough to support the long-term needs of the plant.

A cactus soil.
A generic cactus soil with good drainage should be ideal for your monkey tail.

Avoid using highly alkaline water since it will slowly alter the soil pH making it an unsustainable growing medium for your plant over time.

It is also vital that the soil drains well between watering sessions. Cacti plants, in general, don’t love being waterlogged. A generic cactus soil with good drainage should be ideal for your monkey tail.

The relatively shallow root system of the plant allows it to quickly absorb any water that falls on the potting mix.

But since the roots are exposed to surface temperatures, you must take appropriate measures to protect them from extreme heat or cold by adding a layer of mulch over the potting soil to serve as an insulator.

Temperature and Humidity Requirements

The monkey tail cactus likes relatively warm temperatures, but it can withstand temperatures as low as -6oC. If you live in an area that experiences such cold temperatures, it is advisable to let your plant spend the winter inside the house.

When the plant is exposed to extremely low temperatures, don’t water it. Remember that all cacti plants survive by storing water in their stems. If the stored water freezes, it can damage the plant cells.

Monkey tail cactus on the soil.
You need to be extra careful with humidity during winter.

Don’t try to make abrupt changes to the growing environment of the monkey tail because the effects can be catastrophic. For instance, moving it from low temperatures to high temperatures or from low light to bright light abruptly can cause systemic shock from which your plant may not recover.

In an indoor setup, ensure you control the humidity levels the plant is exposed to. Generally, the humidity level must be in line with temperature, lighting, and watering levels.

During summer, the succulent will mostly utilize the moisture in the atmosphere to boost its overall growth and development.

You need to be extra careful with humidity during winter because too much humidity combined with too much water can lead to root rot issues.

Watering Requirements

Most succulents don’t need as much water as you think they do, and monkey tail cactus is no different. Sometimes, what you may think is enough ends up being too much, resulting in overwatering.

Generally, you should only water your monkey tail when the potting mix is completely dry. You also need to adapt your watering regimen to fit seasonal changes.

Feel free to water deeply in spring and summer, then allow the soil to dry out completely before watering again.

Checking the moisture of the soil for watering.
If you must water, do it sparingly and allow the soil to dry out completely before watering again.

In fall and winter, be sure to reduce the frequency of watering. It is even unlikely that you will need to water your monkey tail cactus during winter. If you must water, do it sparingly and allow the soil to dry out completely before watering again.

You should start to increase the watering frequency in spring to help kick start your plant’s metabolism for the new growing season that is about to start.

Light Requirements

All cacti are sun-loving plants and will do best under direct light conditions. So, if you are growing your monkey tail indoors, make sure you place it on the windowsill of a south-facing window.

Find the sunniest spot in your home, and your monkey tail will appreciate it. Whenever possible, move the plant outdoors during spring and summer so it can enjoy as many hours of direct sunlight as possible.

Generally, the cactus requires between 10 and 14 hours of direct sunlight to survive and thrive. So, finding a sunny spot will do you good.

Since the plant’s growth cycle is primarily determined by light levels, monkey tail cactus tends to slide into a period of dormancy during fall and winter. During this time, no growth happens, and your plant will be okay if it is kept indoors with minimal disturbance.

Fertilization

Just like watering, your monkey tail is not a huge feeder. Feel free to feed it once during spring and once during summer. This is the active growing season, and the fertilizer will provide your plant with the nutrients it requires to grow.

Monkey tail cactus in a huge pot.
Ensure the fertilizer you choose is slow-release to avoid shocking your succulent.

You can use low nitrogen or foliar feed with sufficient phosphorous to stimulate flowering and fruit development.

However, if you want your plant’s stems to be strong, use a potassium-based fertilizer. You can use liquid plant fertilizer with a ratio of 5:10:5. Ensure the fertilizer you choose is slow-release to avoid shocking your succulent.

Potting and Repotting

The monkey tail cactus doesn’t require much depth since it has a relatively shallow root system. Typically, the width of the pot to use will be determined by the number of plants you choose to have in it.

It is recommended that you report your monkey tail cactus every three years to replenish the potting mix. Don’t increase the pot size during repotting unless you intend to increase the number of plants in it.

Ensure the soil is completely dry before repotting. The new pot should also have plenty of drainage holes to avoid saturating the potting mix, leading to root rot issues.

Propagation

Monkey tail cactus is mainly propagated through cuttings and seeds. For cuttings, take a piece off the end of one of the stems, allow it to callous over then plant it in a growing container. You can also use branches or pups instead of taking cuttings.

Mist the soil after potting to stimulate root formation. New roots should start forming after approximately one month.

Seed propagation requires patience because it takes more time and skill. In fact, you need to know how to pollinate the flowers to produce seeds.

Summary

In summary, the monkey tail cactus is one of the most attractive succulents that are easy to grow at home. The plant doesn’t require a lot of attention and maintenance to thrive.

As long as you provide it with the ideal growing conditions, you will always have a happy and healthy plant.

We hope you now understand how to care for the monkey tail cactus, and you are ready to start showing it some love.