How to Make Moss for a Terrarium: Step-by-Step Guide

A terrarium

Growing moss involves more than getting your hands in the dirt. Moss is a plant that appears in different species. It is a non-vascular type known as the bryophytes, with no vessels to transport water, appearing as simple grassy mounds. They have no roots or containers to transport water, making them favorable for closed terrariums.

A terrarium is a clear, non-draining container with a small environment. Moss is an ideal ingredient in terrarium making. The two grow together perfectly. All they require is little soil, low light, and dampness. 

But how do you make a perfect mini moss terrarium at home? The solution includes preparing a layer of gravel at the bottom of a container and adding dry moss, and the layer prevents the soil from mixing with the gravel on the bottom. Next, add a few inches of soil on top of the dried moss. First, however, it is essential to differentiate and understand the different types of moss you are using. 

 This article will show you how to make the perfect moss for a terrarium at home.

Why use Moss for Terrarium?

Before picking on any moss, it is necessary to understand the many types of moss species. Most are used as ground covers in almost all types of terrariums. Moss has no roots, presenting two essential benefits you can take advantage of

  1. Moss will not compete for nutrients or water with other plants in your garden
  2. Moss can be placed anywhere in your terrarium

How to Make Moss for a Terrarium

Choose your container-making moss of terrarium begins by choosing a proper container to use. You can select a plastic jar, a glass, or a decorative container that is transparent and see-through. The size of the container depends on your preference of the height and broadness of your terrarium.
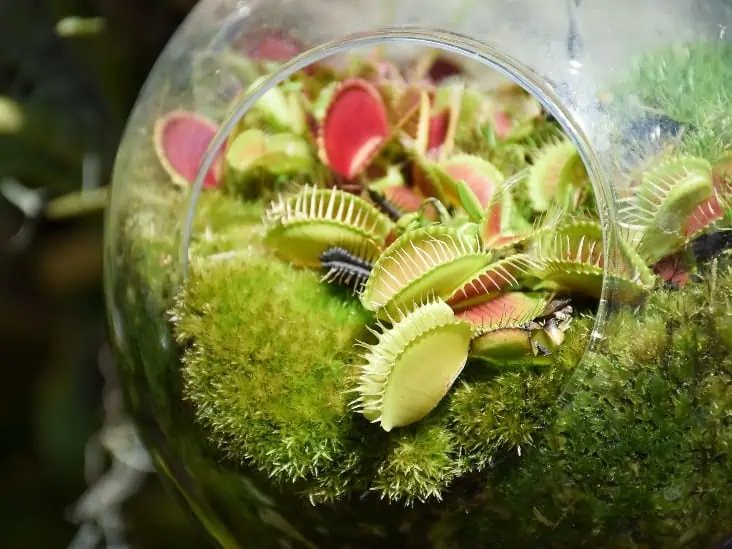
flytrap terrarium
A terrarium is a clear, non-draining container with a small environment.

If you would like your terrarium to house animals, choose a container-sized for the animal species. Large containers can hold more moss and are good masterpieces for tables and desks. The small ones are easier to clean, control humidity and keep clean.

If you plan to house animals in your terrarium, choose a glass container that does not overheat. Plastic containers can overheat, leaking chemicals into the water. Any terrarium used for animals should have a proper lid and ventilation to allow appropriate air circulation.

  1. Add gravels to your terrarium.

Gravels and pebbles make one of the essential parts of the terrarium’s foundation. Graves represent the perfect material to use in creating bottom drainage. They collect the excess water in the container’s soil layer to prevent root rot.

The gravels should be rinsed properly with water. They should be layered 1-2 inches at the bottom of the container. While adding gravels to the container, you could add color and ambiance by layering gravels of different colors. You can also swirl with other substrate choices, as long as they drain quickly.
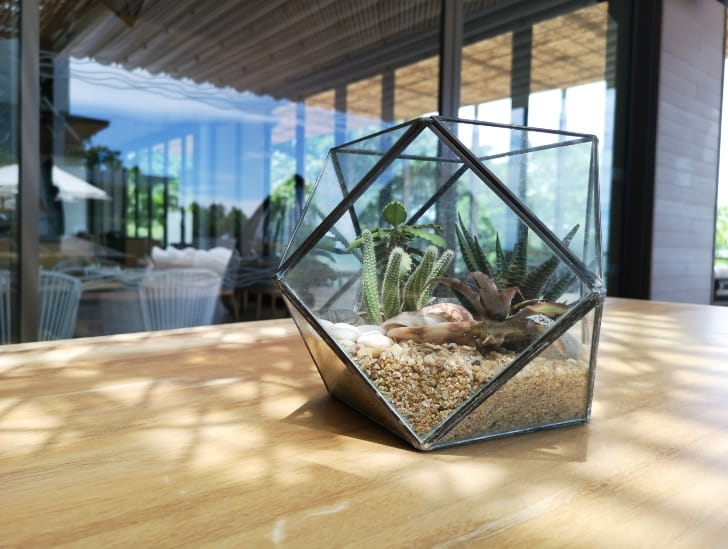
Gravels on a terrarium.
Gravels represent the perfect material to use in creating bottom drainage.

On top of the graves, add a layer of activated carbons or charcoal to absorb odor and purify excess water. Charcoals absorb harmful elements in the soil and water that can build up inside the terrarium over time, damaging your plant. The process is critical in safeguarding the plant for long periods. 

  1. Choose the type of moss you will use

Firstly, avoid using any wild plants considered illegal or restricted by authorities in your area. Consider buying them from a shop or purchase in an online store. Below are the four most common types of moss that are easy to source, and above all, legal. 

 I. Cushion moss

Cushion moss is a general term for Leucobryum glaucum. This species is green with silver-tinted leaves. When growing, it creates a puffy, pillow shape. The shape makes it a popular choice in the terrarium. In addition, it creates a hillside and shrubberies effect.

  1. Hair cup moss (Polytrichum commune)

 It is also an excellent added feature to a terrarium setup. It works perfectly with large terrariums because of their height. It grows as high as 40cm. Most importantly, the moss creates star-shaped leaves, bringing a good effect when designed appropriately.

  1. Terrestrial moss

With proper airflow, these types of moss will do better in the damp substrate. They can properly grow in any location above the aquatic line. This type of moss can also work well if you add some animals in your terrarium. 
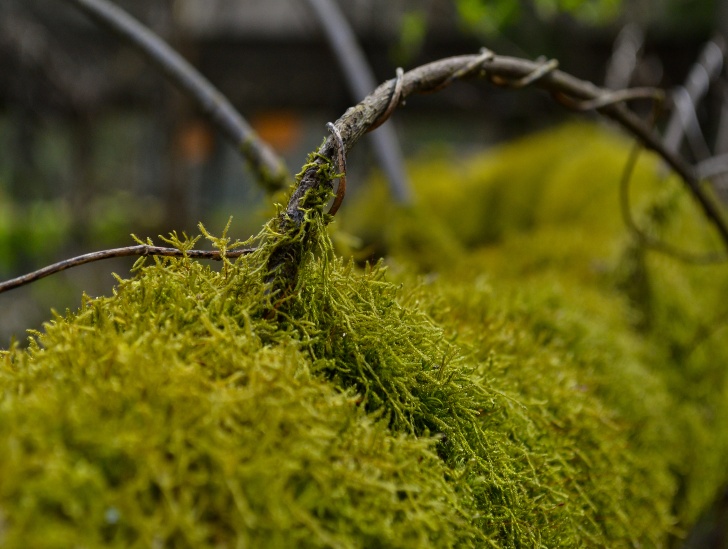
A terrestrial Moss.
They can properly grow in any location above the aquatic line.
  1. Spanish moss

The “old man’s beards,” as they are locally called, create a stringy, long strand and spooky feeling. It works for humid and forestry terrariums because it naturally grows in wet and humid environments. This type of moss will also provide your pet with the necessary comfort and shelter.

  1. Prepare your soil

Coco-coir, peat moss, or house plant soil works with most moss plants. Besides, succulents prefer a well-drained inorganic medium. You can also mix a decent amount of activated carbons into the cactus potting mix. Avoid using a potting soil mix with already-corporate fertilizer as the terrarium plants don’t necessarily require the extra fertilizer.

  1. Choose other decorations

You can check in your local stores or online store for terrarium décor. This item includes shells, rocks, plastic figurines, or other small items that can fit in your terrarium. Small scenes with figures may be good inside a container, but animals should not use moss.
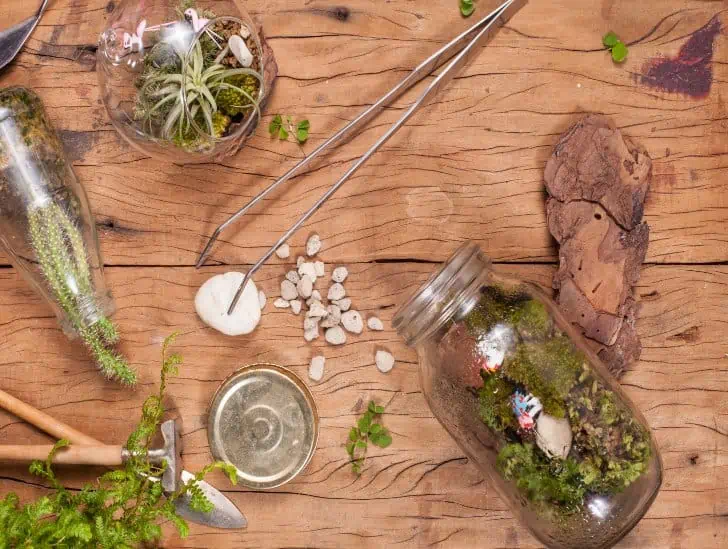
Equipment needs for terrarium.
Small scenes with figures may be good inside a container.

You can also choose tiny plants from your nursery to plant in your terrarium, along with moss. The plant used should be live plants to keep your terrarium moss oriented. These trees may include newly sprouted oak tree saplings, ferns, or colorful weeds like sprouts. The grass may not be appropriate as it becomes invasive in a moist environment.

Making the Terrarium

  1. Add substrate to your container.

In the terrarium container, add the substrate at the bottom of the container to form the base. If gravels are not available, sand, rock granules, or loose potting soil can be used. Ensure they cover a better part of the pot for proper drainage.

  1. Add moss

Moss can be used to cover the entire top of the substrate. It can be spread around and filled in the gaps with other smaller pieces of decorations. When placing the moss, it should not be layered but taped to prevent mold from growing due to lack of proper drainage.

Moss can be placed in different styles. While other colored mosses make beautiful patterns, different types of moss pull your terrarium together. Tape it to the sides or scatter it when using the Spanish moss or other hanging species.
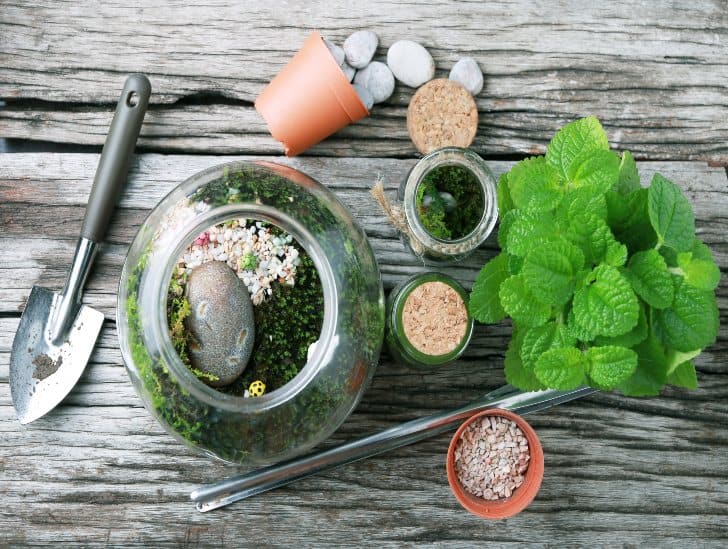
A terraium.
It can be spread around and filled in the gaps with other smaller pieces of decorations.

Adding a stick or a large rock in the middle of the terrarium then hanging the moss is also a perfect idea. When adding moss, avoid packing it too tightly. Also, ensure it does not press up against the walls of the terrarium.

  1. Add some extra décor

To make the terrarium look more sociable and fill in the gaps, you can add some extra decorations. For example, natural-looking rocks can make a great accent with green or brown moss. Others like quartz enhance bright-colored moss.

Using decors made of plastic is not recommended for a terrarium. When kept in the sun for long, plastics may meltdown, affecting the water purity. In addition, plastic décor does not look natural near-real moss or other plants for aesthetic purposes.  

Did you Want to Add some Animals to Your Terrarium?

Well, doing proper research on various animals you would like to keep is essential. Knowing the side effects of these animals and their best habitat is essential. Generally, when choosing animals, some of the most recommended animals are non-aquatic salamanders or small toads. Adding a tiny insect or frog is recommended to enhance a complete ecosystem.

Amphibians may need a small source of water. Some of the good insects you can use include harmless beetles, pillbugs, and snails. The insect will love it more when there is a cap-full of water or light with frequent misting.

 In all the animals you keep, ensure you have the means to provide care, food, and a safe environment for them. Follow the care instructions for each animal after adding them to the terrarium. Ensure you practice proper handling measures, such as washing your hands, before and after touching them or their environment.

Proper Care for a Terrarium

  • Always keep your terrarium wet. Ensure to mist your terrarium once a day with chlorine-free water.
  • Always remember to feed your plants and animals. Animals should be fed with their specific species’ diets while the plants can get some fertilizer. The fertilizer added should be in a very small amount and in liquid form.
  • The terrarium should always be placed in a rightful area. Place it in a room with proper temperatures, and in a place, it does not get direct sunlight.
  • After about nine months, you can always replace the substrate and clean the container. To allow enough air to the moss, remove the container top for two hours every week.

Bottom Line

What next if not to enjoy your terrarium? Remember that moss bouncy and verdant nature gives texture and perfect depth to any design. By reading this article, you can even decide to go a step further to offer your terrarium, different effects of rolling hills, wild grassland, or even dense jungle. With proper care, something captivating is on the make, and your neighbors will be peeping or seeking advice on how to maintain their terrarium as yours!
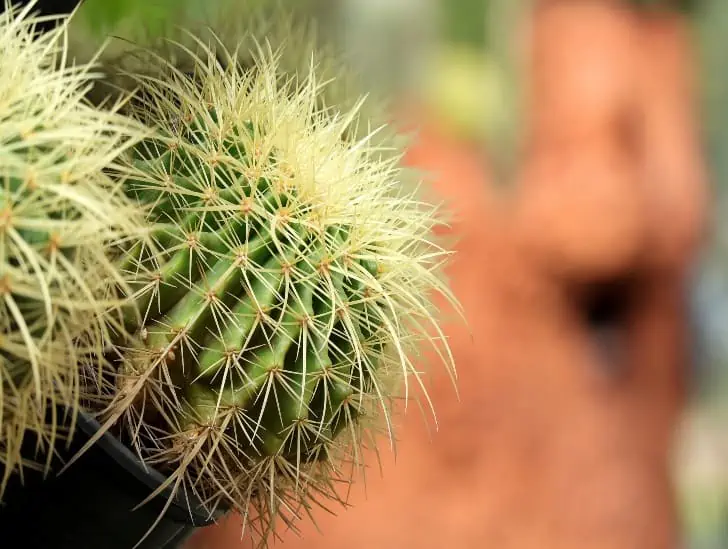
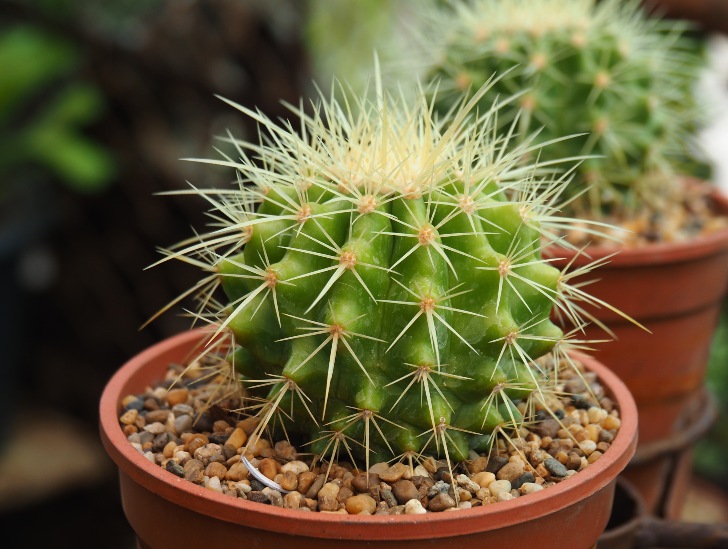
How To Keep Your Golden Barrel Cactus Fresh, Full And Healthy

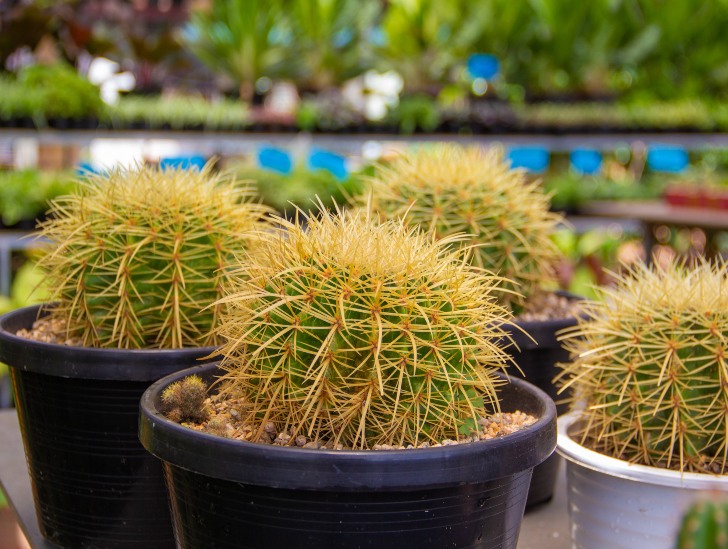
Although the golden barrel cactus is now quite rare in the wild, it is common in homes and backyard gardens across the United States and other Latin American countries. Its unique spherical appearance and dark green color make a striking ornamental accent for rock gardens and desert landscapes. This succulent can reach up to three feet in diameter and five feet in height with proper care and attention. It can also produce beautiful flowers. The golden barrel cactus offers an attractive, eco-friendly and perfect décor solution for your garden, even if you live in an area that is prone to drought.

So, how can you care for golden barrel cactus? The golden barrel cactus requires at least six hours of direct sunlight to survive and thrive. So, you need to position it on a south-facing windowsill for better results. Provide well-draining potting mix and water it at least once during the growing season (spring and summer). Ensure the soil is completely dry between watering sessions and maintain the growing temperature between 50oF and 70oF. Don’t let your golden barrel cactus sit in temperatures below 40oF during winter.

This blog post discusses everything you need to know about growing the golden barrel cactus and provides you with practical tips that will help you achieve better results. Read on to learn more.

Golden Barrel Cactus: A Quick Overview

The scientific name of the golden barrel cactus is Echinocactus grusonii. It is also known as the hedgehog cactus, barrel cactus, mother-in-law’s pillow or mother-in-law’s cushion.

The cactus is native to the Chihuahuan desert in Mexico and the surrounding southern states of the USA.

It has a distinctive spiny exterior that is an adaptation to escape from predators. These spines are harmless if they come in contact with your skin, but the branches are quite fragile and easily break off.

Golden barrel cactus can survive for decades under ideal conditions, with some specimens known to have survived for 300 years.

However, it is now an endangered species due to overcollection in the wild and vanishing habitats.

A golden barrel cactus in a bron pot.
The golden barrel cactus is also known as the hedgehog cactus, barrel cactus, mother-in-law’s pillow

Even so, these plants are common houseplants across the United States and other Latin American countries.

Golden Barrel Cactus: How to Care for It?

The golden barrel cactus generally grows best outdoors under certain conditions. However, it is also possible to grow a potted barrel cactus indoors.

Generally, the succulent will do well when you provide it with the right conditions and take care of it.

So, what can you do to ensure your golden barrel cactus is healthy and happy? Let us find out:

1. Soil Requirements

Everything starts with ensuring your barrel cactus is rooted in the right type of potting mix. Being succulent, this plant does well in well-draining soil.

You can add sand or perlite to the mixture to ensure good drainage and aeration. In this way, you won’t have problems with rotting roots.

Your golden barrel cactus needs a potting mix that provides enough nutrients while still draining excess water effectively. Ideally, a standard cactus mix will do the trick. You can also use a loam-based potting mix for success.

2. Pot Size Requirements

Your golden barrel cactus should be planted in a minimum of 16 inches deep and wide container.

But you must ensure that the entire root system is buried in the soil to avoid it drying out quickly due to exposure to air.

Golden barrel cactus in a pot.
Make sure the pot can accommodate its growth without roots getting damaged.

It is important to note that barrel cacti grow slowly. So, if you are growing it in a container, make sure the pot can accommodate its growth without roots getting damaged against the edges of the container.

3. Sunlight Requirements

The golden barrel cactus requires bright sunlight for healthy growth and flowering. To do well, it should receive six hours or more of direct sunlight per day.

If your barrel cactus isn’t getting enough light, it will have yellowish discoloration, and its spines may fall off easily. However, if you provide too much sun exposure, the plant might grow lopsided and expose delicate roots to sunburn.

Keep it on a south-facing window during the growing season, and it will be happy. However, you shouldn’t let it sit on the windowsill if you are experiencing intense sunlight or a heatwave.

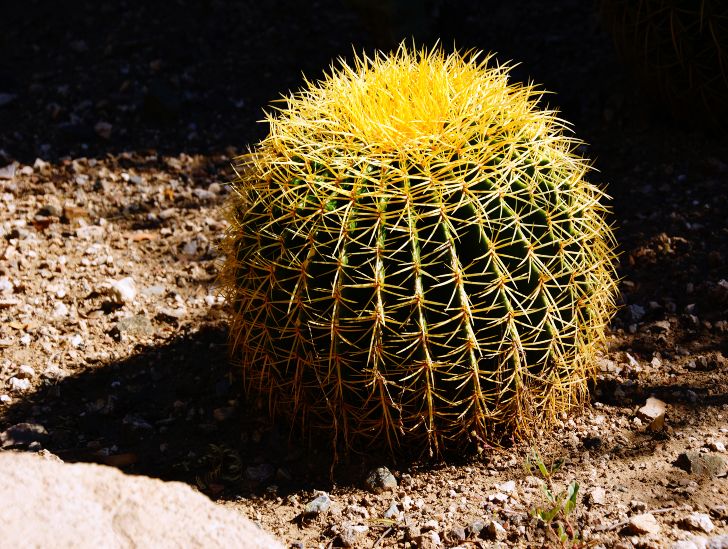
Golden Barrel cactus exposed to sunlight.
Excessive heat could scorch your plant and cause unsightly burned patches on sections of the plant.

Excessive heat could scorch your plant and cause unsightly burned patches on sections of the plant. The only way to get rid of sunburned areas is by pruning the sections.

Young golden barrel plants are particularly prone to sunburn. To protect them, ensure you keep them away from direct sunlight until they are relatively mature. Instead of exposing them to direct sunlight, ensure they receive a good amount of indirect sunlight.

4. Watering Requirements

Golden barrel cactus thrives in soils that drain well, so it does best when watered moderately. Allow the top layer of the soil to dry out between watering sessions and keep it away from other plants growing nearby to avoid water competition.

The barrel cactus doesn’t like being waterlogged. Don’t let the roots sit in excess water for too long, as soggy soil can lead to root rot and cause problems with nutrient absorption.

You should water your golden barrel cactus once or twice a week during spring and summer, but reduce the frequency to once per month in winter. This will depend on your conditions and climate, as well as the size of your pot.

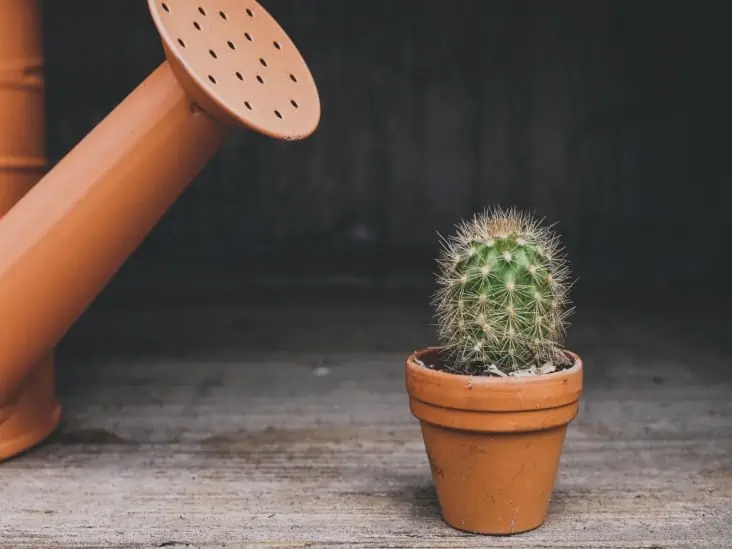
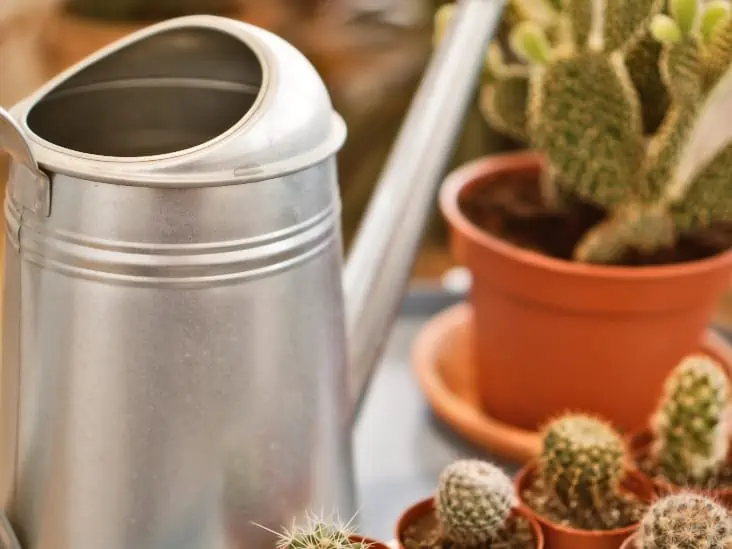
A water can and a cactus.
Allow the top layer of the soil to dry out between watering sessions.

If you can detect even a hint of yellow color at the base of the plant, it is time to water again. The golden barrel cactus thrives if roots are kept slightly moist at all times.

5. Feeding Requirements for Golden Barrel Cactus

The golden barrel cactus doesn’t require much feeding. You can fertilize it with a standard houseplant fertilizer every two to three months during spring and summer, but reduce the frequency to once per month in winter.

Default fertilizer rates should be satisfactory for this plant, so you don’t have to go overboard with the amount of fertilizer you give.

When feeding your golden barrel cactus, don’t fertilize the soil unless roots are exposed. Instead, place fertilizer in a saucer next to the pot. This will ensure enough nutrients reaches the plant’s roots while preventing root rot by keeping excess water away from them.

6. Temperature Requirements

The barrel cactus does well in temperatures between 50-90 degrees Fahrenheit. However, avoid exposing it to temperatures lower than 45 degrees in winter, or your golden barrel cactus may develop leaf drop problems.

If possible, keep your golden barrel cactus above 60 degrees Fahrenheit at all times. Temperatures below this threshold can cause significant stress, leading to a wide range of issues.

When moving your potted barrel cactus outdoors after winter, don’t do it suddenly, as this could shock the plant and cause massive stress.

Instead, gradually acclimatize it by taking it out for a couple of hours in a relatively shaded area before you transition to exposing it to full sunlight.

7. Pests & Diseases for Golden Barrel Cactus

The golden barrel cactus isn’t prone to pests and diseases. However, when infestations do occur, they can cause considerable damage to your plant’s appearance.

If you notice any powdery white substance collecting on the surface of your cactus, it could be mealybugs. Mealybugs are sap-sucking insects that cluster together in colonies on your plant.

Eradicating them requires you to remove infected parts of your plant with care. After removing mealybugs, spray the barrel cactus with insecticidal soap to prevent reinfestation.

If the cactus has dark scars on its skin instead of powdery white substances, it could have scale, which are insects similar to mealybugs. However, unlike mealybugs, scale insects are wingless and do not cluster.

Eradicating them is also more difficult as spraying your cactus with the methods used to remove mealybugs would be useless. Instead, you’ll need to use a strong insecticide.

Aphids are another common pest for golden barrel cactus, especially during summer. While aphids may not cause significant damage to your plants, they can multiply rapidly if left untreated.

Simply wipe them with a wet cotton ball soaked in alcohol to eradicate them. Make sure the infected parts of the plant are dry before you move it back indoors.

8. Propagating Golden Barrel Cactus

You can propagate your golden barrel cactus using its offsets. Just remove them from the main plant using a sharp, clean knife and allow them to dry at room temperature before planting.

A small cactus barrel.
You can propagate your golden barrel cactus using its offsets.

If you want to propagate your golden barrel cactus from seeds, it is best if they are fresh. Otherwise, sow the seeds in pots filled with soil mix and cover them up to around ½ of their depth.

Keep the soil damp and place it in a warm, brightly lit area to ensure the seeds germinate quickly. Once they do, remove all but the strongest seedling from each pot.

Summary

The golden barrel cactus is a very easy plant to grow. While it’s sensitive to significant changes in temperature, it does well if you know what you are doing.

If you do everything right, your golden barrel cactus should reward you with lots of healthy green growth and vibrant flowers.

It gets tall and lean as it grows older. Just make sure to plant it in a large enough pot and avoid positioning it near other plants as it can grow at a rapid pace.

Golden Barrel Cactus: Bloom Or No Bloom?

Golden barrel cactus blooming.

Resembling a large sewing pincushion, the golden barrel cactus offers intimidating spines across a highly ribbed, spherical body which is perfect for your desert terrarium. Although the barrel cactus may look mundane for most parts of the year, its appearance changes at certain times of the year when the blooms burst forth.

So, does barrel cactus bloom? The simple answer is “yes.”  The cactus blooms wonderfully in spring and summer. The flowers burst into life with a neon brilliance putting on a spectacular show. Its flowers are exceptional with red spines that reflect natural light in the evening when the sun is setting. When the conditions are right, these flowers get pollinated, producing relatively large fruits filled with seeds that feed different types of animals in the wilderness. Typically, the cactus starts to flower once it reaches approximately six inches wide or after about 15 years.

Do you have a barrel cactus in your home and wondering whether it will ever bloom? If so, you have come to look for information in the right place. This blog post discusses everything you need to know about the golden barrel cactus and how it blooms.

When Does the Golden Barrel Cactus Bloom?

The golden barrel cactus is one of the most popular indoor cacti species. It generally grows slowly and doesn’t bloom during its early years. In most cases, this cactus starts to produce flowers when its barrel is at least six inches wide. To achieve this width, the cactus must be at least 15 years old.

So, if you have a relatively young barrel cactus that isn’t showing any signs of flowering, you don’t need to worry a bit. When the cactus is mature enough and the conditions are right, it will start producing flowers.

The cactus mainly blooms during spring and summer – mostly between mid-April and September. In some cases, the flowering may start in May, but it rarely extends to October.

Golden barrel cactus pink flower.
When the cactus is mature enough and the conditions are right, it will start producing flowers.

During spring and summer, the long sunlight hours stimulate the cactus’ growth and reproduction. The succulent’s brightly colored flowers attract bees for cross-pollination, resulting in the formation of fruits.

The resulting fruit serves as a source of food for the local wildlife, which helps to spread the seeds throughout the area.

The cold winter and fall months are dormant periods for the golden barrel cactus. During this time, the succulent slides into dormancy, and growth stops. It is not until spring that the plant becomes active and starts to show signs of growth.

How Long Do Golden Barrel Blooms Last?

While some succulents bloom and wither within a day, most golden barrel cactus species will retain their flowers for up to six weeks. Some of the crucial factors that determine how long the flowers will last include the amount of watering it receives and the temperature of the surrounding environment.

When the flowers don’t receive sufficient watering in relatively hot temperatures, they tend to wither pretty fast.

The flowers are mostly two to three inches wide and grow in a crown near the top of the stem. Most of them generally last for one or two weeks, but if you keep the conditions right, you might enjoy the impressive show for six or even seven weeks.

Golden barrel cactus flowering.
You need to make sure that your plant is always receiving the right amount of water all the time.

Although the cactus requires minimal care to survive, dropping or wilting flowers within a few days is usually a clear sign of improper watering or sudden temperature changes.

Keep in mind that watering is a critical aspect of barrel cactus care. So, you need to make sure that your plant is always receiving the right amount of water all the time. Avoid underwatering or overwatering your plant for the best results.

The flowers remain open during the day but close at night. It means that pollination of the flowers can only happen during the day.

How Can You Get Your Golden Barrel Cactus to Bloom?

If your cactus is already more than six inches wide or 15 years old, but it isn’t showing any signs of flowering, it could be a clear sign of poor maintenance.

Luckily, there are a few things you can do to change the situation and encourage your plant to flower. They include:

1. Water Properly

Most cacti species are known for their acclimation to relatively drought conditions. These plants have developed a wide range of survival mechanisms that make them highly drought-resistant. They store plenty of water in their stems to push them through the dry season.

However, a barrel cactus grown at home may have slightly different water needs than one in the wilderness. A barrel cactus grown at home requires slightly more watering to flower. But be careful not to overwater your plant because it can lead to root rot issues.

Water can and a cactus.
Ensure you stick to the recommended watering schedule.

Keep in mind that a truly shriveled barrel cactus doesn’t have a lot of energy to initiate flowering. Even if you don’t want to be a little bit more generous with watering out of fear of overwatering, ensure you stick to the recommended watering schedule to give your plant the best chance of flowering.

Typically, a barrel cactus that retains an average amount of water from regular watering should be able to flower in spring and summer without any issues.

2. Soil Requirements

The type of potting mix you use to grow your barrel cactus can also significantly impact its flowering. Although the cactus can grow in different types of soils, ensure you stick to a well-drained and rich potting mix.

Well-draining potting mix prevents waterlogging, which is crucial to the flowering process. Fertilize your plant during the growing months with a 5-10-5 ratio mixture that will help accelerate flowering. The numbers represent the nitrogen, phosphorous, and potassium quantities in the fertilizer.

The relatively higher amount of phosphorous in the mixture promotes the formation of blooms over stem growth. Take fertilization seriously because poor soil nutrients can lead to low flower output.

Furthermore, poorly draining soils that lead to waterlogging of the roots may contribute to root rot and blossoming problems. Generally, a barrel cactus cannot survive for long in poor drainage soil conditions.

3. Light Requirements

Flowering can also be affected by too much or too little sunlight. The golden barrel cactus must be exposed to full sunlight in spring and summer to produce the gorgeous flowers that form at the crown of the stems.

Generally, blooming will be stunted if the plant doesn’t receive plenty of sunlight. The flowers formed won’t last for long either.

However, if you move your plant indoors during winter, you need to be careful with introducing it to sunlight in spring. Aim to do it gradually. You can start by exposing it to a few hours of morning sunlight and increase the number of hours of sunlight exposure slowly until it is ready for full sunlight.

Golden Barrel cactus expossed to sunlight.
You want to expose your barrel cactus to 12 hours of constant light.

If you throw your plant out hastily, it may fail to bloom as a result of the shock that it will develop. Furthermore, it may suffer from severe sunburns that don’t heal.

Ideally, you want to expose your barrel cactus to 12 hours of constant light to give it the best chance of blooming. If you can’t achieve that with natural sunlight, consider complementing it with artificial grow lights.

What Happens to Golden Cactus Blooms?

Once your golden barrel cactus has produced flowers, they start to attract insects. These insects feed on the flowers and also facilitate the process of cross-pollination. Bees are the most common pollinators.

When the flowers are cross-pollinated, they close, and seeds start to form inside the ovary of the faded flower. The process may take a couple of weeks.

Pollinated flowers will eventually turn into fruits. The golden barrel cactus fruits are usually embedded in the dense hairs on the tip of the plant. In the wilderness, squirrels usually harvest the fruits to feed on the seeds.

The fruit has a yellowish fleshy wall that turns brown when it is fully ripe. It contains black seeds that remain viable for a relatively long time.

To collect the seeds for propagation, gently pluck the fruit from the plant. Take the fruit to a work table and break them open to remove the seeds.

Leave the seeds to dry for a couple of days before propagation. Generally, the seeds require warm and moist conditions to germinate.

To obtain the best results, use a clean and shallow pot with plenty of drainage holes and a soilless potting mix to germinate the seeds. Fill half of the container with the potting mix and spread the seeds on top of it.

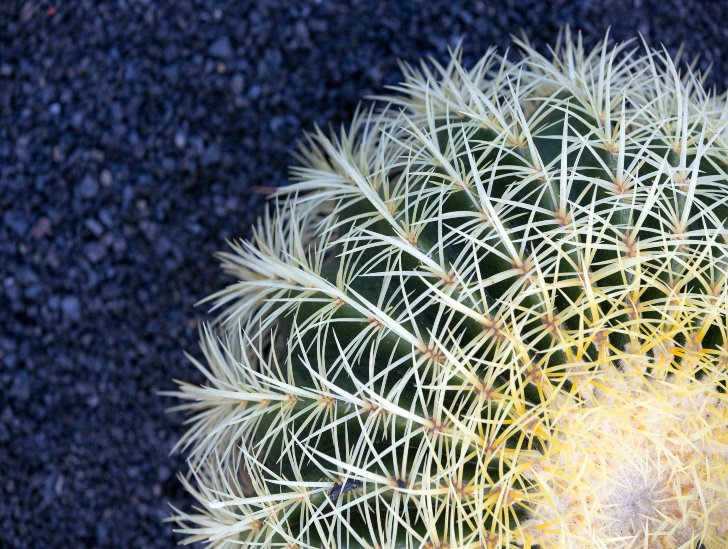
A golden barrel cactus closeup image.
The golden barrel cactus fruits are usually embedded in the dense hairs on the tip of the plant.

Water the pot from the bottom, cover it with plastic then position it in indirect sunlight. Check the potting mix regularly and ensure it stays moist. The seeds should start germinating after six or seven weeks.

Final Thoughts

Golden barrel cactus flowers are a beautiful addition to any garden, and with a little bit of care, you can get your own cactus to bloom. Make sure to water properly, give it the right soil, light conditions, and wait for the blooms to form.

With proper care, the blooms can last for up to six weeks, turning into fruits with plenty of seeds that you can propagate to expand your golden barrel cactus collection.

How Much Direct Sunlight Does A Golden Barrel Cactus Need?

The golden barrel is a fairly popular succulent for many gardeners since it is a low-maintenance plant. It doesn’t require a lot of attention to thrive and remain healthy. In most cases, all you need to do is be careful with the watering and provide plenty of sunlight exposure. But how much sunlight does it require to thrive? How can you tell if your barrel cactus receives too much or not enough light? How can you improve the lighting conditions? We cover everything you need to know.

So, does barrel cactus need direct sunlight? The quick answer is yes. Most barrel cactus species require a certain degree of direct sunlight exposure to thrive in a home environment. Keep in mind that this type of cactus is adapted to growing in arid environments with minimal shade from taller trees. Therefore, it still needs to feel the same conditions at home to thrive. In fact, growing a barrel cactus indoors can be quite challenging due to its lighting requirements.

Read on to learn everything you need to know about the barrel cactus and exposure to direct sunlight. This blog post is packed with valuable information to make you a better gardener.

How Much Light Does the Barrel Cactus Need to Survive?

This can vary greatly depending on the type of barrel cactus you have. However, a general rule of thumb is to provide your cactus with approximately six to eight hours of sunlight exposure every day.

Barrel cactus will do best with direct sunlight, but it can still survive in bright indirect sunlight. A barrel cactus that has been previously kept in a relatively dark environment need to be introduced to direct sunlight gradually to avoid sunburns.

Barrel Cactus exposed to sunlight.
Barrel cactus will do best with direct sunlight.

Keeping your barrel cactus in partial shade is not an immediate death sentence for your plant, but the results can be catastrophic if you don’t take appropriate steps to fulfill its light requirements.

In fact, some types of barrel cactus can survive in partial shade or indirect sunlight for a relatively extended period.

But prolonged exposure to shade can cause your plant to become sickly and unhealthy. Just because the cactus can survive a situation doesn’t mean it is healthy for them.

How Much Sun Does the Barrel Cactus Need Indoors?

If you like to grow your barrel cactus indoors, you should be prepared to find the brightest spot in your house and position it there. It should be on a south or east-facing windowsill.

If you live in an area that doesn’t get plenty of sunlight, you might be forced to use supplemental artificial lighting to ensure your barrel cactus receives the right amount of light it requires to thrive.

Closeup image of a Golden barrel cactus.
You need to acclimatize it when you decide to move it outdoors in spring and summer.

You need to remember that growing a barrel cactus indoors all year round can be too difficult. Typically, you want to keep your plants indoors during winter to protect them from the extreme cold and take them out in spring and summer.

If you keep your plant indoors all year round without providing it with sufficient lighting, it will most likely turn spindly and lose its coloration.

When using artificial grow lights indoors, consider purchasing a foot-candle meter or downloading a mobile app to help you measure the amount of light you are providing to your barrel cactus.

As a general rule of thumb, you can more or less maintain your barrel cactus at approximately 3,500 foot-candles or more. Anything below 1,500 foot-candles will cause your cactus massive struggles.

To achieve better results, you must maintain a high light level for more than eight hours a day.

In terms of direct sunlight indoors, your barrel cactus can handle as much as you can give it. But you will still need to acclimatize it when you decide to move it outdoors in spring and summer.

How Much Sun Does the Barrel Cactus Need Outdoors?

The best place to grow a barrel cactus is in your outdoor garden. However, things change a bit when growing your barrel cactus outdoors.

Instead of trying to squeeze your barrel cactus into the brightest spot, you need to protect it a little bit so that it doesn’t suffer from sunburn.

After all, the barrel cactus doesn’t come from full desert conditions as most of us tend to think. Sun damage can be extremely severe if you forget to acclimate your plant properly.

Golden Barrel cactus outdoors.
The best place to grow a barrel cactus is in your outdoor garden.

Ensure the cactus is located in a section of your garden that receives partial shade from other taller plants at different times of the day. Alternatively, you can grow your barrel cactus under some artificial cover that only lets in a specific amount of light.

If you don’t do anything to protect your succulent from full sunlight throughout the day, its roots may dry out too quickly, forcing you into frequent watering, which can again lead to root rot issues.

Luckily, if you are just growing the barrel cactus outdoors during spring and summer only and your area doesn’t receive intense sunlight, you don’t have to cover them.

Can a Barrel Cactus Get Too Much Sunlight?

The simple answer is yes. Like other succulents, the barrel cactus is also highly susceptible to too much sunlight. If your barrel cactus is exposed to more than six hours of direct sunlight every day, it will develop sunburn.

If your barrel cactus is getting the right amount of light, its color should be vibrant. The appearance of brown spots on sections of the plant and a washed-out color could be signs of sunburn.

When you notice these signs, you will need to provide your plant with sun protection by moving it into a slightly shady area or providing it with some light shade.

A golden barrel cactus sunburned.
Figure out its light requirement and provide what is just enough for its survival.

If you are growing your plant indoors and positioned on a windowsill, consider moving it away into a relatively cool spot. Give it a couple of days or weeks to heal before you start acclimatizing it again.

But don’t move your barrel cactus into an extremely cold area because these succulents can’t tolerate such conditions either.

Your primary objective should be to study your plant, figure out its light requirement and provide what is just enough for its survival.

How Do You Know Your Barrel Cactus is Receiving Too Much Light?

So, how do you know that your barrel cactus is receiving too much light? Well, the most obvious sign is the appearance of dark or brown spots on its surface that appear abruptly.

These spots are a clear sign of sunburn that occurs when the succulent isn’t acclimatized properly when moved from indoors to outdoors. This is a common problem in spring and summer as gardeners move their indoor plants outdoors.

The main issue is that the barrel cactus has been surviving under indirect sunlight indoors, but it is now being moved in direct sunlight outdoors. The appearance of the black/brown spots is a clear sign of a shocked plant.

Moving the cactus in a partial shade and acclimatizing it properly may solve the problem, although the spots may take some time before they disappear.

Simply move the cactus back into indirect sunlight or partial shade and introduce it to full sun gradually to allow enough time to build resistance to sunburn.

How Do You Know Your Barrel Cactus Isn’t Receiving Enough Light?

The main sign of sunlight deficiency in a barrel cactus is stunted growth and leggy appearance. When your barrel cactus is leggy, it means that it isn’t growing the way it should.

The signs of stunted growth include smaller thorns and more sideways or upwards growth than normal. This is fairly easy to note in a barrel cactus. You should also be worried if your barrel cactus starts showing noticeable signs of leaning towards the nearest light source.

If you notice these signs, move your plant to a relatively brighter spot where it can receive plenty of light.

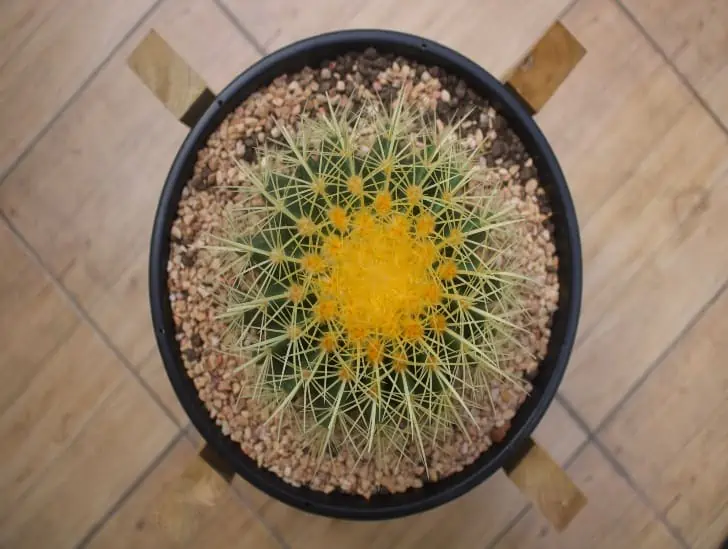
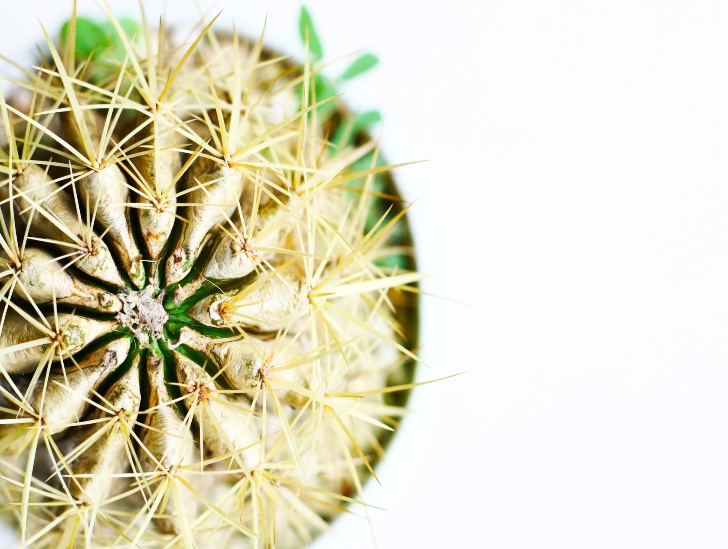
A topview of a golden barrel cactus.
If you notice these signs, move your plant to a relatively brighter spot.

However, you still need to follow the right acclimatization process. Move them into the bright light spot gradually to avoid burns.

Can You Grow the Barrel Cactus Under an Artificial Light?

All succulents can grow with artificial light. Like other succulents, the barrel cactus only uses light for photosynthesis which is a critical process to the plant’s survival.

So long as you provide your barrel cactus with the right amount of light (whether natural sunlight or artificial grow lights), they will thrive and remain healthy.

However, the barrel cactus isn’t an easy plant to cultivate under artificial grow lights because it is adapted to dry, sunny, and hot climates.

Therefore, you need to think about purchasing high-intensity lights that produce the right type of light needed for growth.

The light should be able to emit wavelengths in the range of photosynthetic active radiation (PAR). The best lights are those that emit at least 180 PAR.

Summary

Barrel cacti are a great option for anyone looking for an easy-to-care-for succulent. As long as you provide your barrel cactus with plenty of light, it will be happy and healthy. Place your barrel cactus in a sunny spot outdoors if possible, or in a bright room indoors.

If you’re not sure whether your barrel cactus is getting enough light, look for signs of distress, such as wilting spines or browning tips.

If you think your barrel cactus may be receiving too much light, move it to a shadier spot or reduce the amount of time it spends in direct sunlight.

Cholla Cactus: How Dangerous Are They?

The cholla cactus is a spiny plant found in the southwestern United States. It is often called the “jumping cactus.” Cholla cactus are not dangerous plants but can cause irritation and discomfort. We will discuss their truth and dispel some myths about this spiky succulent.

So, are Cholla Cactus Dangerous? Not really. As much as their spines can cause irritation and discomfort, this can only happen if you come into contact with them. If you do happen to get poked by one of these cacti, just make sure to clean the wound and seek medical attention if necessary. It is always best to avoid getting too close to these spiny plants to be safe. But overall, Cholla Cactus are not considered dangerous plants.

Cholla cactus are often feared because of their spines, but are they that dangerous? This blog post will explore the truth about these spiny plants. We will discuss what makes them so dangerous and how to avoid getting hurt by them. 

Fun Facts About the Cholla Cactus

  •  Cholla cactus is a spiny succulent found in the southwestern United States
  • The name “cholla” comes from the Spanish word for “thorny”
  • Cholla cactus have sharp spines that can easily detach from the plant and attach themselves to passersby
  • Cholla cactus can also produce a small, spiny, edible fruit
  • This succulent can grow up to 12 feet tall and has a thick, woody stem
  • Its fruits hang down from the stem a like chain of grapes

Potential  Dangers When Handling Cholla Cactus

Sharp spines

Cholla cactus have sharp spines that can easily detach from the plant and attach themselves to passersby. These spines can cause irritation and discomfort if you come into contact with them. Usually, the spines will detach from the plant and fall to the ground, but there is always a chance that they will stick in your skin. When this happens, it is important to clean the wound and seek medical attention if necessary.

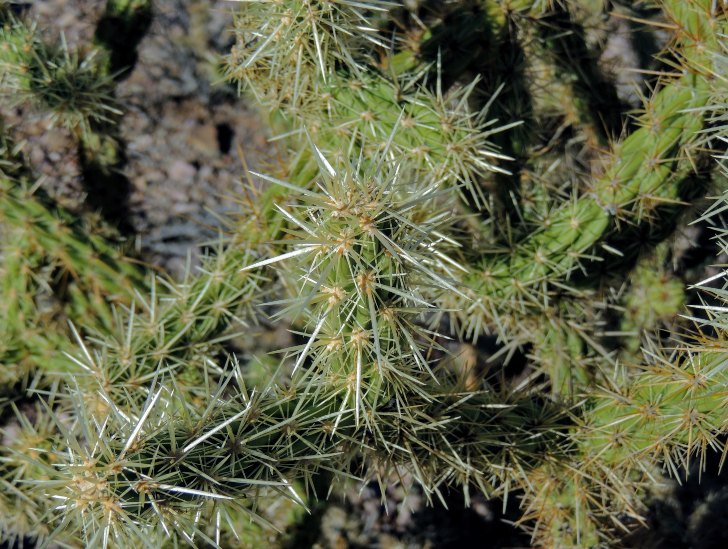
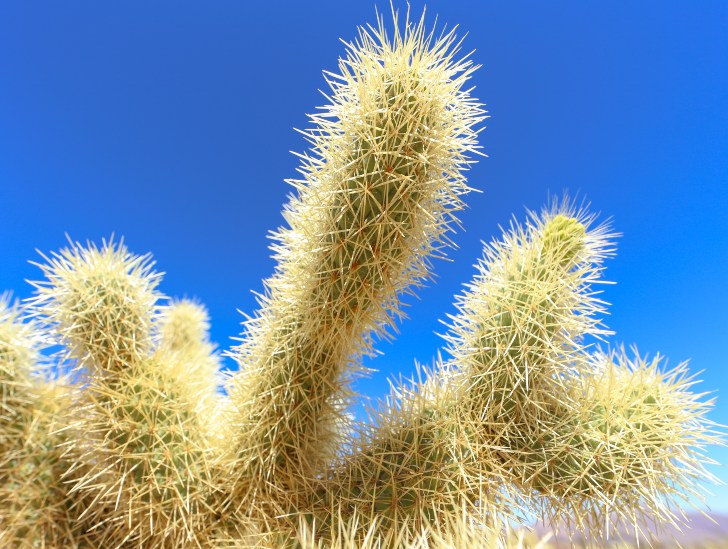
Close up image of cholla cactus with spines.
These spines can cause irritation and discomfort if you come into contact with them.

However, you can easily avoid getting hurt by these spiny plants by staying away from them. If you find yourself close to a cholla cactus, be sure to take caution and avoid getting too close.

Irritating Glochids

Cholla cactus are also known for their irritating glochids. Glochids are tiny, spiny bristles that can easily detach from the plant and attach themselves to your skin. These bristles are very difficult to remove and can cause a great deal of irritation.

Avoid cholla cactus altogether. If you come into contact with them, the best thing to do is remove them as quickly as possible. You can use a pair of tweezers or needle-nose pliers to remove the bristles. Be careful not to get poked by the spines.

Why do Cholla cactus ‘jump’ on passersby?

The cholla cactus is often referred to as the “jumping cactus” because of the way its spines can easily detach from the plant and attach themselves to passersby. This is a unique mechanism that the plant uses to spread its seeds. 

Cholla cactus.
It is a unique mechanism that the plant uses to spread its seeds. 

As soon as the plant’s spines come into contact with something, they will detach from the plant and attach themselves to the new surface. This is made possible by the plant’s sticky sap and the sharpness of its spines. It is a very effective way to spread its seeds, and the plant has evolved to take advantage of this.

Do Cholla Cactus Cause Wounds

When cholla cactus spines or glochids get in contact with the skin, the effects are majorly some irritation and discomfort. However, some extreme cases have been reported where the spines and bristles of cholla cactus have caused wounds that take weeks to heal. In some cases, medical attention is inevitable to remove the spines or bristles from the skin.

In case of serious injury from the cholla spines or glochids, the best course of action is to clean the wound and seek medical attention. Do not try to remove the spines or bristles stuck on the skin by yourself, as you might end up making the injury worse.

How to treat cholla cactus wounds at home

If you happen to get poked by a cholla cactus spine, the best way to treat the wound is to clean it and apply some antibiotic ointment. You may then cover it with a bandage to keep the area clean and protected.  If the wound starts to show signs of infection, such as redness or swelling, then you might need to seek medical attention.

The best way to prevent any injuries while dealing with cholla cacti is by wearing gloves and long sleeves when handling them. This will help to protect your skin from the spines and bristles of the plant. If you are going to be in an area where cholla cacti are present, it is always a good idea to take the necessary precautions. 

Are cholla cactus edible?

Yes, the fruits and buds of the cholla cactus are edible. They are not very palatable, but they are safe to eat. You can use the fruits and buds to make jams, jellies, and syrups.

A cholla cactus plant with fruits.
Chollas Cactus fruits can be eaten fresh or dried for long-term storage.

The best way to harvest the fruit or bud of the cholla cactus is to use a pair of scissors or clippers. Avoid getting your hands too close to the plant’s spines. Chollas Cactus fruits can be eaten fresh or dried for long-term storage.

How to harvest cholla cactus fruits and buds

  • Harvesting a cholla cactus fruit or bud can be tricky, but it is doable. The following steps will help you to harvest the fruit or bud safely and without getting injured:
  • Wear gloves and long sleeves to protect your skin from the spines.
  • Using a pair of scissors or clippers, cut the fruit or bud from the plant
  • Be sure to avoid getting your hands too close to the spines of the plant
  • Remove any spines or bristles that might be sticking to the fruit or bud
  • Wash the fruit or bud before eating it
  • For buds, you may want to hydrate them before eating them

How to care for jumping cholla cactus at home

Cholla cactus has recently gained popularity as a houseplant. This is because they are very low maintenance and easy to care for.

Propagation

Either stem cuttings or seedlings can do the propagation of the cholla cactus. The best time to propagate the cholla cactus is spring or summer. This is when the plant is most active and will grow new roots quickly.

How to propagate jumping cholla cactus

Stem Cuttings

-Take a stem cutting from an actively growing cholla cactus plant

-Cut the stem at a 45-degree angle

-Remove the leaves from the bottom of the stem

-Place the stem cutting in a pot of moist soil

-Keep the soil moist but not wet

-The stem cutting will root and grow new plants in a few weeks

Seedlings

-Collect cholla cactus seeds from a ripe fruit

-Sow the seeds in a pot of soil

-Keep the soil moist but not wet

-The seeds will germinate and grow new plants in a few weeks

Watering

Cholla cactus does not need a lot of water, but it does need regular watering. The best way to water cholla cactus is by using a gentle spray from a garden hose. Be sure to avoid getting the leaves wet as this can cause them to rot.

Water Can and cactus.
Be sure to avoid getting the leaves wet as this can cause them to rot.

Fertilization

Cholla cactus does not need a lot of fertilizer, but a little will help the plant grow healthy and strong. Fertilize cholla cactus once every month with a balanced fertilizer.

Flowering and harvesting

Jumping cholla cactus can flower at any time of the year, but they are more likely to flower during the spring or summer. The flowers will last for a few days and then will wither away. Once the flowers have died, the fruits will begin to form. The fruit of the jumping cholla cactus is edible and can be used in recipes. You can harvest both the fruit and the buds of the cholla cactus. 

Cholla cactus with flowers.
Once the flowers have died, the fruits will begin to form.

Conclusion

The jumping cholla cactus is a unique desert plant that uses ingenious methods to propagate. This plant is easy to care for and can be grown in a variety of climates. As much as it may be perceived as dangerous, jumping cholla cactus is harmless to humans if handled correctly. You can eat the fruit of this cactus and use it in You can also eat the buds be eaten, but they are best hydrated first. Cholla cactus is a great addition to any garden or landscape. 

Monkey Tail Succulent: Does It Bloom?

The monkey tail succulent is a popular houseplant known for its unique appearance. This succulent gets its name from the long, thin leaves that resemble a monkey’s tail. While this plant is easy to care for, many people wonder whether it blooms or not. This is especially so considering the succulent’s name.

So does a monkey tail bloom? Yes, it does bloom. However, it is not a very prolific bloomer and typically only flowers once or twice a year. The blooms are small and bright red or pink, and they appear on the end of the long leaves. Flowers only last a few days before turning into little fruits.

Facts about the monkey tail plant

  • Monkey tail’s origin can be traced to the Bolivian rainforest in South America.
  • They are a member of the Euphorbia family, which includes more than 2000 species of succulents and cacti.
  • The monkey tail is a dioecious plant, meaning that it produces male and female flowers on separate plants.
  • Monkey tails can live for more than 30 years if they are well cared for.
  • It features greenish-yellow stems that can reach up to 12 inches long and are covered in tiny spines.
  • The monkey tail has fleshy leaves that resemble the shape of a mouse’s tail and grow up to two or three inches long.
  • The leaves are green in color and have a bluish-purple tint that turns red when exposed to direct sunlight.
  • Its signature dropping stems are covered with small spines that help protect the plant from predators.
  • The monkey tail’s flowers are light pink or red and less than an inch in diameter at the top of its long stems.
  • They thrive best in hanging baskets or pots with well-draining soil and plenty of light when grown indoors.

Best blooming season for monkey tail cactus

Monkey tail is famed for blooming sporadically throughout the year, with its main season being spring and summer. The flowers will last for about three days before wilting and turning into a small red fruit.

However, some monkey tails can bloom in autumn or even winter with the right conditions. The flowers will be smaller in winter, but they will still offer a splash of color to your garden.

Monkey tail cactus flowering.
The flowers will last for about three days before wilting and turning into a small red fruit.

While the monkey tail is not a particularly prolific bloomer, it’s still exciting to see those bright red flowers popping up on the end of its long leaves. So if you’re looking for a succulent that blooms occasionally, the monkey tail is a great option.

How to encourage blooming for monkey tail

If you’re looking to encourage monkey tail blooming, there are several things that you can do.

Light Exposure

Monkey tails need a lot of light to bloom. If your plant isn’t getting enough sun, it may not bloom at all or even die. So make sure that the room where your monkey tail is located receives ample light during the day.

For better results, make sure it gets at least four hours of direct sunlight each day for the plant’s hormones to develop and produce flowers. You can achieve direct sunlight by placing your plant near a south-facing window with no obstructions.

Watering

Like most succulents, monkey tails don’t need watering often. In fact, overwatering can lead to root rot and death. So wait until the top inch of soil feels dry before watering your plant again.

Monkey tail cactus in a pot.
You can also place your succulent in a tray of gravel or rocks to help keep it moist.

Always ensure you’re using a pot with drainage holes to escape the excess water. You can also place your succulent in a tray of gravel or rocks to help keep it moist.

Proper watering helps encourage blooming as the plant is happy and thriving.

Temperature

Monkey tails prefer warm temperatures, daytime temperatures between 55-70F, and nighttime temps around 50-55F. They thrive best in USDA hardiness zones ten through twelve, with no frosts or freezes during winter months. If you live in a colder climate, you can grow your monkey tail succulent indoors.

Fertilizing

A balanced fertilizer, such as a 20-20-20, should be used every other month when the plant is actively growing. Foliar feeding with a liquid seaweed or kelp solution can also help boost blooming.

Considering the monkey tail plant blooms sporadically, fertilizing is unnecessary every month.

Repotting

If your monkey tail doesn’t bloom at the right season, it could result from stunted growth. By repotting your monkey tail, it will encourage growth and blooming. Make sure to repot during the summer months to avoid shocking your plant with cold temperatures while its roots are exposed.

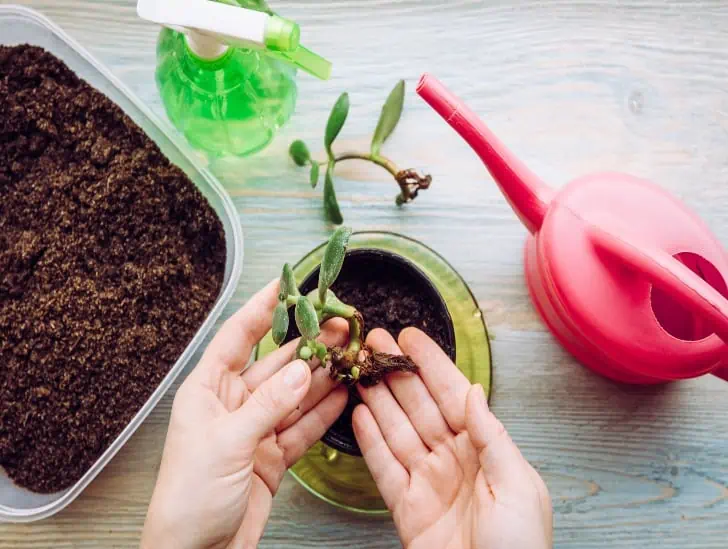
A person repotting a plant.
Make sure to repot during the summer months.

When repotting a monkey tail succulent, choose a pot two inches larger than the previous one and use well-draining soil such as cactus mix or succulent soil.

A Look at monkey tail flowers

Monkey tail’s bright red flowers are a beautiful addition to any garden. They are star-shaped and grow in clusters on the end of the succulent’s long stems. The flower features five petals and a yellow center.

You may also notice that your monkey tail has small leaves forming on the flower stems after it’s bloomed. These leaves will eventually grow into succulents of their own if you allow them to stay on your plant for a few weeks.

Monkey tail cactus flower.
They are star-shaped and grow in clusters on the end of the succulent’s long stems.

Since they do not last long, the flowers will fade to a brownish red and eventually dry out. Before then, you can let the flowers remain on your plant as they will still be beautiful.

Alternatively, monkey tail flowers can be harvested and dried in arrangements or as potpourri. The flowers will last for several months if dried correctly.

Can you touch monkey tail stems?

The monkey tail plant is known to be toxic when eaten. However, there are no reports of the succulent being poisonous if touched. However, its stem features sharp spines that can irritate.

At a glance, you may be fooled to believe the stem is soft to the touch, but it isn’t. To avoid any harmful effects, wear gloves when handling your monkey tail plant to prevent injury.

How to propagate monkey tail cactus

You can propagate your monkey tail succulent by division or seed.

To divide the plant, gently remove it from its pot and tap off some soil. You’ll notice that one side is thicker than the other. Cut through this area to produce two different plants. This method will also help bloom your plant faster.

A monkey tail in a small pot.
You can propagate your monkey tail succulent by division or seed.

If propagating by seed, place the seeds in a soil-less mix and keep moist. Once germinated, transplant into individual pots. It will usually take around four to six weeks for the monkey tail succulent to sprout.

What is the difference between monkey tail cactus and rat tail cactus?

The rat tail cactus is a close relative of the monkey tail succulent. They are both from the genus Echeveria and have very similar care requirements. However, the monkey tail stems are usually longer than the rat tail and do not branch out.

The monkey tail succulent is also known as Echeveria setosa, but its scientific name has changed over time to Aporocactus flagelliformis. Other common names include orchid cactus and rat-tail cactus due to its long stem resembling a rat’s tail.

The rat tail cactus has wider, flatter leaves that are triangular. Its stem is also less spiny and more cylindrical. The flowers on a rat tail cactus are also smaller and less showy than those on a monkey tail succulent.

Does monkey tail bloom better indoors or outdoors?

The monkey tail succulent blooms best outdoors in full sun. However, it can also be grown indoors but make sure to place it in a bright spot with lots of direct sunlight. Indoor monkey tail succulents may not flower as often as those grown outdoors.

This succulent grows best in a south-facing window that gets plenty of sun during the summer months. You may not need to water as often but make sure the soil is dry between watering.

What type of soil does monkey tail like?

The monkey tail succulent likes a well-draining soil such as cactus mix or succulent soil. Do not use regular potting soil as it will retain too much water and cause root rot.

You can also mix in some sand or perlite to help improve drainage. Proper soil also helps encourage blooming since it will promote root growth.

Final Word

The monkey tail cactus is a wonder succulent that is easy to care for and adds a touch of beauty to any room. With its long, spiny stem and showy flowers, it’s no wonder this succulent has become so popular. Just make sure you provide plenty of sun and well-draining soil, and your monkey tail will thrive.

While its flowers may not last very long, the plant itself will continue to grow and bloom for years. So, don’t worry if your monkey tail succulent doesn’t flower immediately. By following these simple blooming tips, you’ll be able to enjoy your beautiful plant for a long time.

Venus Flytrap Care – Do They Need Direct Sunlight?

The Venus flytrap, a well-known carnivorous plant, grows to 5-6 inches in diameter, with traps typically up to 1.5 inches in size. Therefore, one of the essential requirements of Venus flytraps is proper lighting.

It is famous as a potted plant in many parts of the world, but sadly most of the sold Venus flytraps have been grown or harvested from declining wild populations. As with all plants, the Venus flytrap derives its energy from the sun through photosynthesis.

Venus flytraps are expected to grow under direct sunlight for at least 6 hours a day to stay healthy and optimally receive over 10 hours of direct sunlight. Venus flytraps can also develop with artificial lighting, but light specifications must be appropriate for carnivorous plants.

Proper illumination is essential to keep a Venus flytrap healthy. In the active growing season, Venus flytraps should receive a minimum of 12 hours of light. At least 4 hours of sunlight is recommended. The more direct sunlight the plant gets, the healthier it will be.

Sunlight Requirement for Venus Flytrap

While growing, grow your fly trap outdoors in full sun. Allow 6 hours or more of direct sun for solid growth. If full sunlight is not possible, plan for a minimum of 4 hours of direct sunlight with indirect light throughout the rest of the day. Your plant won’t be as vibrant or sturdy as one grown in full sun, but you will be able to maintain its overall health.

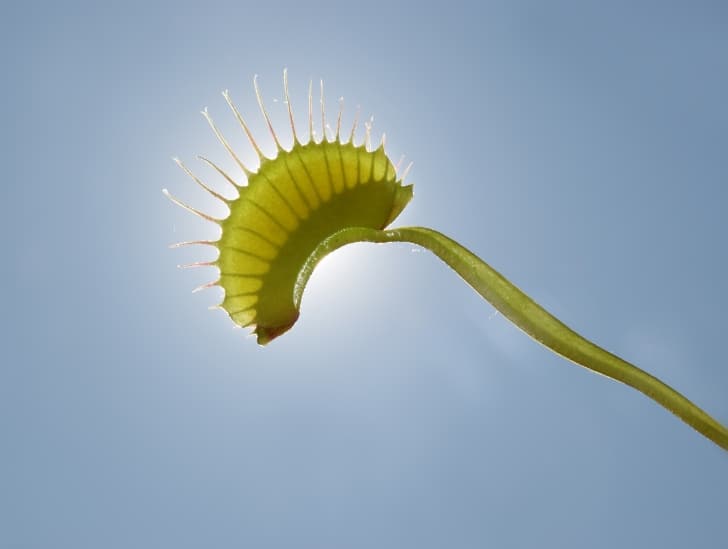
Venus flytrap and a sky.
Proper illumination is essential to keep a Venus flytrap healthy. I

Direct Sunlight Versus Indirect Sunlight

Venus flytraps may grow in a location where they receive direct sunlight for a few hours, followed by indirect sunlight for the rest of the day.

Six hours’ direct sunlight is the minimum recommended for Venus flytraps. However, Venus flytraps may survive under indirect sunlight as long as they receive a combination of direct and indirect sunlight with a minimum of 4-6 hours of direct sunlight.

Venus flytraps grow faster and seem much healthier when grown with more sun. Ideally, Venus flying traps will receive more than 10 to 12 hours of sunshine.

Venus Fly Trap Sunlight Tolerance

Venus flytraps cannot take too much sun. Therefore, extended exposure to light will only boost growth and enhance the plant—supply of 12 hours of sunshine, particularly during the growing season.

The only scenario in which Venus flytraps could suffer when exposed to a large amount of sunlight is if temperatures are aggressively elevated.

Venus Flytrap in a pot.
Extended exposure to light will only boost growth and enhance the plant

Venus flytraps can resist high summer temperatures over 90F. However, once temperatures rise above 100 F, Venus flytraps may dry up. Therefore, place the Venus flytraps in a water tray during warm summer days or partially cover them during temperature peaks.

Artificial Lights and Venus Flytraps

Venus flytraps require a lot of lighting to remain healthy, but such lighting does not require sunlight.

As a rule of thumb, Venus flying traps can stay healthy if exposed to more than 6 hours of sunlight or artificial lighting. When using artificial lights, provide long hours of light (10h ) using LEDs or fluorescent bulbs with over 1500 lumens.

Venus flytraps can be grown indoors, but providing enough lighting with fluorescent lights or LEDs is tricky. If you choose to use fluorescent lamps, keep the Venus flytrap less than 8 inches from the light to ensure that the Venus flytrap receives enough light to stay healthy. The nearer the plant gets to the light, the better.

A compact fluorescent light bulb is cost-effective when selecting a lighting installation for your Venus flytrap. Use bulbs labeled “cool white” or “cool blue” in the color temperature, which have a color temperature range of 6500-kelvin, perfect for growth.

Because artificial lighting can be less effective than sunlight, you should strive to provide light for more extended periods. Venus flytraps may also grow with sunlight and artificial lightings, such as growing them in the sills of windows or a sun porch.

Best Location Indoors for Venus Flytraps

Venus flytraps require constant and extended exposure to light all year long. Therefore, they should be strategically located. For example, if you grow your plant on a window ledge, I recommend using artificial lights to complement its growth.

Venus flytraps can grow on a windowsill as long as the windowsill receives over 6 hours of direct light. If the window sill fails to meet this requirement, use artificial lights as a supplement.

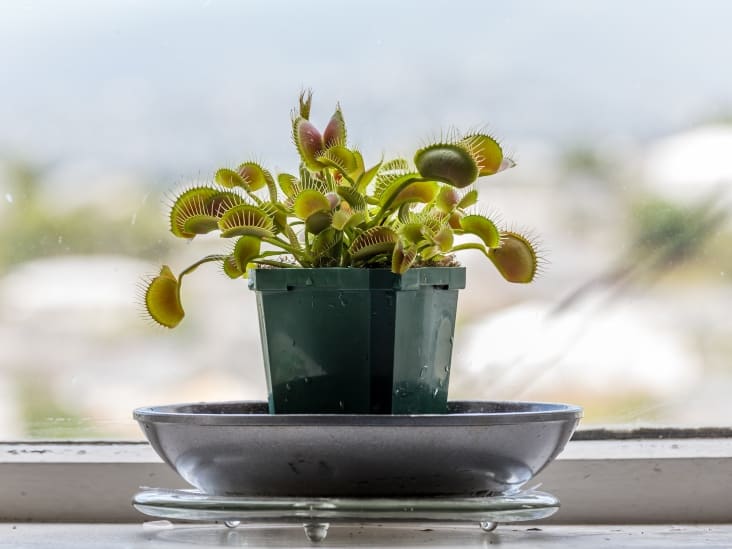
Venus flytrap near the window.
Venus flytraps can grow on a windowsill as long as the windowsill receives over 6 hours of direct light

A south-facing sunlight window is your best option. As long as the Venus flytrap receives 4 hours of direct sunlight into the window, it should thrive. A windowsill facing east or west may also work.

If you live in a basement or flat with only north-facing windows, you may need artificial lighting to help your plant grow properly. Venus dies if grown under fluorescent lights all year long with the same light every day.

Best Outdoor Location for Venus Fly Traps

The best part of growing your Venus flytraps out is that you don’t have to worry about making sure they get the proper light. Instead, they will obtain all the light they need to be healthy.

Venus flytrap in a whote pot outside.
You can put the plant into the full sun directly outside your house.

It is best to provide shelter against the noon sun in a dry and stifling climate so that Venus flytraps are not burned or dried. Again, shading fabric will work well. Similarly, a faint light through the leaves of a shade tree will provide some respite from the intense sun while providing adequate light for optimum health.

Acclimate Your Venus Flytrap

Venus flytraps that grow in sheltered or heavily controlled conditions, such as indoors under artificial lighting or in a greenhouse, will take some time to adapt to outdoor growing conditions.

Slowly bring the plant into the sunlight to keep its leaves from burning and dying. Venus flytraps from sheltered environments require gradual exposure to sunlight to prevent sunburn.

Begin by giving it an hour or two of direct sunlight during a few days. Then, raise exposure to sunlight to a few hours for a few days and continue until you can leave it in the sun all day.

Alternatively, you can put the plant into the full sun directly outside your house. All leaves burn, turn yellow or brown, and eventually darken. However, the new leaves and traps will be fully hardened by sunlight.

How to Toughen Your Venus Fly Trap

There are some ways to harden Venus flytraps. These include:

1) Place the plant in a place protected against the full sun but receiving brilliant indirect sunlight. These places include under a large tree that shades the area all day, under a shade cloth, or under a deck where a particular dappled light still gets through.

2) Place the plant outside early in the morning each day for a set period, then return the plant inside or to a more protected area. Begin with an exposure time of 30 minutes and gradually increase the exposure time for a month until the plant is outdoors in full sun throughout the day.

3) Position the plant outdoors in full sun, provided it is early enough in the growing season, and the sun is not too intense. Again, people in northern latitudes may fare with this much more easily than those in the South.

Can Venus Fly Trap Survive in Low Light Conditions

Under suitable artificial lights, Venus flytraps can live free of sunlight. Direct sunlight is ideal for Venus flytraps, but fluorescent light and LED can meet the requirements of these plants. It is advisable to provide 10 hours of artificial lighting inside.

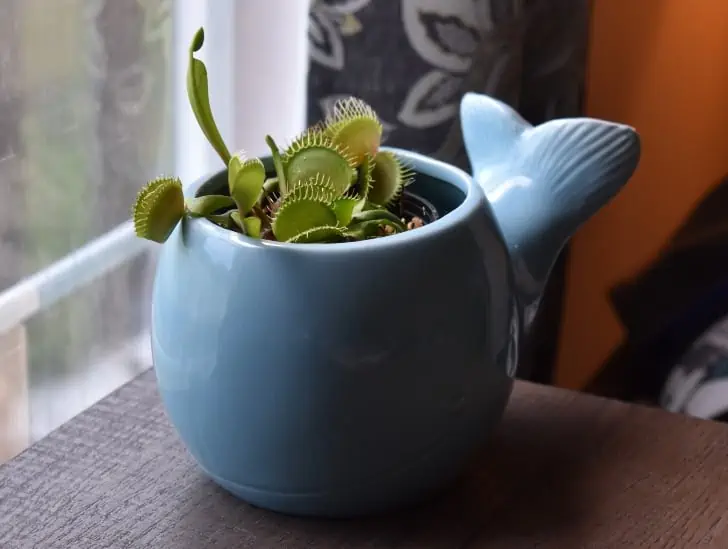
Venus flytrap in a whale pot.
Direct sunlight is ideal for Venus flytraps.

Irrespective of the climate and your living situation, you can grow healthy Venus flytraps. Artificial lights allow anyone to grow a Venus flytrap. If you can put your plants out, do so. Venus flytraps grow outdoors with ample access to water, light, and insects. However, outdoor growing is not always an option.

Signs That Your Venus Fly Trap Is Not Getting Sufficient Sunlight

Venus flytraps won’t last long if they do not have good light exposure. So these are some key signs to identify if your Venus flytrap suffers from light starvation.

Large petioles: Occasionally, Venus flytraps produce large petioles to aid photosynthesis. Broad petioles are a frequent sign of poor light exposure. However, it would be preferable to consider many different types of Venus flytrap, and some have thinner/broader leaves.

Discoloration: The healthy flying traps of Venus present vivid colors. Venus flytraps do not have bright red traps unless they have access to a large amount of lighting. When Venus flying traps suddenly lose their color, it may mean terrible growing conditions (not enough light).

Droopy: Sometimes, Venus flytraps begin to look droopy when they don’t have enough access to enough water or light.

Lack of traps: In extreme cases, Venus flytraps stop growing in their leaves with insufficient lighting. The plant does not produce traps since its principal objective is photosynthesis. However, when light exposure is corrected, the plant will regrow leaves with traps.

Bottom Line

Proper lighting is essential for the maintenance of a healthy Venus flytrap. The more direct light received by the plant, the healthier it is.

Nepenthes propagation guide: what you need to know

Nepenthes, also known as Pitcher, is an attractive carnivorous plant with an ornamental appeal while entertaining and educating about a unique nutrition method. These plants may sound exotic, but the propagation of pitchers is no more complicated than the propagation of any other plant.

There are several ways to multiply pitchers, but planting seeds or rooting cuttings is the best way to succeed and is the most common method for growers. Pitchers plants can be propagated using tissue culture, grains, or cuttings.

The ideal way to propagate pitcher plants depends on the type, but you can grow many common varieties quickly from cuttings, divided roots or rhizomes, or seeds.

Propagation Methods for Nepenthes

Plants in nature generate offspring by seed. Baby plants take a long time to grow, and fertilization is erratic. The Pitcher produces male and female flowers on distinct seedlings. The two genders look identical, and it is almost impossible to ensure that you have one of each.

In addition, plants have to flower simultaneously to enable pollen from the male to be transferred to the female flowering. Therefore, rooting cuttings is a much easier and more secure way of spreading pitcher plants.

Nepenthes Male Flower.
The Pitcher produces male and female flowers on distinct seedlings.

If you want to undertake propagation through the seed, you will require patience and luck. Cuttings, however, grow fast and are manageable even for a beginner to take up. Cuttings of mature plants with active growing stalks work better.

Propagation of Nepenthes Through Cuttings

There are various ways to remove cuttings. First, select a plant with one or two basal shoots in the vining phase. By doing so, the plant will inject energy into the base in case the main vine dies. And opt for green vines. Do not cut from the dark wooded stem.

Use a clean, sharp razor blade or scalpel for your cuts. Take three to five knots and make your cut. Check for a tall stem that actively climbs and grows, with leaves widely spaced out. Take your cutting near the tip of the branch, which is where much of the new growth will occur.  

After making your cuts, cut the lower leaf from the stem or cut it in half. You can also leave the two upper leaves and bud intact. Do not forget to cut the tendrils so that the cut does not waste energy in the production of pitchers.

Nepenthes Cuttings.
It takes at least a few weeks for your cuttings to begin growing new roots.

Position the extremity of the stem in the root medium. Choose a neutral or slightly acid medium, like sphagnum moss, 50:50 sphagnum moss, and perlite, or 50:50 coir and perlite. Place the medium in a pot and moisten it.

Do not water it to such an extent that it is soggy, or your cuttings may become moldy. Instead, push the end of the cut stalk into the potting medium deep enough to have at least one growth node below the soil surface.

Place the jar into a clear plastic bag and drill 2-3 small holes into the bag. Alternatively, you can put the pot in a small terrarium. Check the rooting area every 2-3 days to see if it is still moist.

If it feels dry, humidify with water from a spray flask. Place the plant in a bright area close to a sunny window. However, keep it out of direct sunlight, which will be too hard for new seedlings.

Repot the cuttings after you see new growth. It takes at least a few weeks for your cuttings to begin growing new roots. After about one month, try to pull your potted cutting very slowly. If there is any resistance, then new sources are starting to form.

Propagating Nepenthes by Seed

Cultivating new Nepenthes from seeds works, but it will take years for a new plant to ripen and bloom. For Nepenthes seeds to be produced, you must ensure that the female plant is pollinated with male pollen. Seeds should form within a few weeks, and you will need to sow them soon after forming.

Collect Nepenthes seeds at the beginning of fall. You can quickly start seeds of pitcher plants on a bed of sphagnum moss. As is well known, pitcher seedlings are difficult to grow from seeds. However, if your Pitcher is pollinated, it will produce little round pods in late summer or autumn. As soon as you see the pods browning, please pick them up and place them into a wrapper. Allow them to dry for one to two days, open the pods and remove the tiny seeds.

Nepenthes plant with growing seeds.
Pitcher seedlings are difficult to grow from seeds.

Don’t forget that cultivating pitchers from seeds takes more time than other methods. Store the seeds in a wrapper in your refrigerator until ready to use. When removing the seeds, let the container heat up to room temperature before removing the seeds from the shell to shield them from condensation.

Put the seeds in a plastic bag with moist sphagnum moss. Sphagnum moss should be wet but not damp. If you have no sphagnum, the peat moss works too. Sprinkle the seeds in the bag and seal them. Make sure the bag has air in it when you close it.

Alternatively, sow the seeds in a jar with a peat mixture. A blend of peat and sand works great. Distribute the seeds about 0.5 cm apart in the pot and sprinkle enough sand on top to cover them. Wrap the containers and place them under a lamp.

Place the posts inside transparent plastic bags or place them in a terrarium or under a moisture dome. Put them under a LED light instead of in the full sun. Maintain a temperature between 70 and 90 degrees F until seedlings are ready to be potted.

Propagating Through Rhizome Division

The best time to split the rhizomes is at the beginning of spring. Rhizomes are the fleshy bulb-shaped structures at the base of the plant, underneath the soil. Splitting the rhizome is the fastest and easiest way.

Gently remove the Pitcher from the old jar, making sure to clear the roots and soil as well as the leaves. If the plant is on the ground, carefully remove it. Place it on a clean surface after removing the plant from the pot, such as a table.

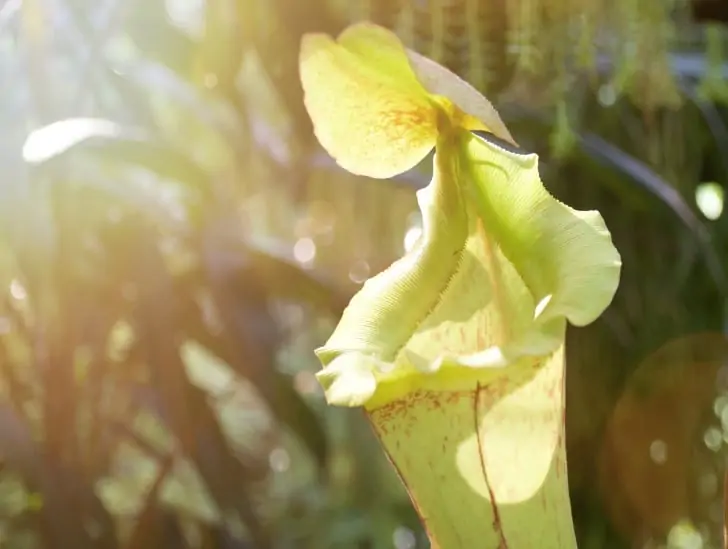
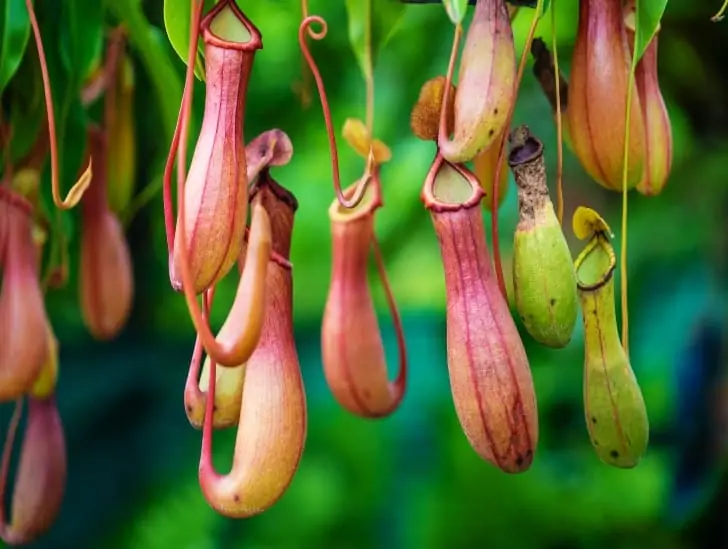
Nepenthes Hanging.
Splitting the rhizome is the fastest and easiest way.

After removing the plant from the pot, begin to gently draw the base of the plant, looking for weak spots between the rhizomes. When a soft spot is identified, press carefully to disconnect the rhizomes. Alternatively, you can use pruning shears to separate the harder rhizomes.

Thoroughly inspect divided plants for signs of decay or insect infestation. Throw away any dead or decaying plants or rhizomes to help you grow a fresh, healthy crop of pitchers. Once you have split the rhizomes, use sharp cutters to reduce the leaves.

Put the divided rhizomes back into separate pots. Fill each jar with equal blends of peat moss and perlite. Coarse sand is another alternative to perlite. Plant the rhizomes just below the ground surface, so the bases of the leaves are right on the surface. Place the pot in a sunny place and water the plant regularly to keep the ground moist.

Propagative Mediums in Nepenthes

Pitcher cuttings can be propagated in several ways and rooted in water or a soil-free environment.

Propagating Nepenthes in Water

This procedure for rooting Nepenthes cuttings is straightforward. Make cuttings, put them into the water, keep moisture high, change the water regularly and wait. Use rainwater or distilled water and immerse the end of the cut and the first growing knot in the liquid. Put the glass in a light zone where the temperatures are moderately hot. Change the water a minimum of once a week.

The stem should split within two weeks and begin to produce minute roots. Could you put them in sphagnum moss when the cuttings have six roots? Keep the cutting moderately moist.

Nepenthes in a body of water.
It is relatively easy to propagate the pitchers in water, but you must monitor the cut for signs of fungus or rot.

The plant will develop a traditional pitcher shape in six months or more. It is relatively easy to propagate the pitchers in this way, but you must monitor the cut for signs of fungus or rot. Some Nepenthes have very high success rates, while others have less. In some cases, Nepenthes will continue to develop quite well in the water, producing even pitchers capable of trapping insects.

Propagating Nepenthes Cuttings in Moss

Harvest a cutting and use rooting hormones at the end of the cut to improve the plant’s ability to send out roots.

Sphagnum Moss or a 50/50 mixture of coir and perlite creates ideal conditions when growing pitchers from cuttings. Pluck out the basal leaves and put your stem cutting in the middle.

Moisten the medium slightly, then place the container in a plastic bag. Keep the vessel in a well-lit location. It may take six months to a year to see further growth while rooting occurs. Do not disturb nor repot the plant before observing new growth.

Bottom Line

The fastest way to propagate Nepenthes is to root the individual through stem cuttings. You may also copy the parent individual by dividing the rhizomes and leaves to produce new growth. We recommend stem cuttings because they tend to be slightly faster.

9 Types Of Haworthia For The Beginning Gardener

Native to parts of South Africa, the Haworthia genus features over 70 different types of species. These plants are relatively easy to grow and care for, making them one of the most popular houseplants in different parts of the world. Generally, Haworthia requires less light than other succulents to thrive. These plants usually form a star-like rosette with inconspicuous white flowers.

So, what are some of the best types of Haworthia to grow? Since there are over 70 different types of Haworthia, choosing the right type for your home can sometimes be challenging. But don’t worry because we are here to help you. Some of the best types of Haworthia to grow include Haworthia attenuata, Haworthia Setata, Haworthia Cooperi, and Haworthia cymbiformis. Others include Haworthia Limifolia, Haworthia Truncata, Haworthia obtusa, Haworthia Coarctata, and Haworthia Concolor.

This blog post discusses some of the best types of Haworthia to grow at home and what you need to do to keep them happy and healthy. Keep reading to learn more.

Haworthia vs. Aloe vs. Agave

Before we dive deep into discussing some of the best types of Haworthia to grow at home, it is essential to understand the differences between Haworthia, Aloe, and Agave because these plants look similar. It is pretty easy to confuse one for the other.

Visually, aloe vera and agave plants look fairly similar to the human eye. They both fall into the category of succulents that form rosettes. In fact, some people believe that aloes are basically agave without weapons (they don’t have spikes and strong teeth).

Haworthia plant in a black pot.
Haworthia and aloe vera have similar-looking long stems.

However, these succulents belong to different families, and even their flowers look different. Haworthia and aloe vera have similar-looking long stems, but the leaves of Haworthia are more pointed and greener, with relatively intense white encrustations running horizontally.

Additionally, Haworthia plants have rusty tips and form tight rosettes, while aloe vera and agave have flat-leaf tips.

Sometimes, the common aloe vera plant can look different from other aloe types, such as the aloe variegate, commonly referred to as Tiger Aloe.

There is also a species within the aloe family known as Haworthia-leaved aloe, whose sharp spines usually give it a fuzzy appearance. Its spines are sharper than the usual ones.

The Haworthia-leaved aloe resembles some plants in the Haworthia family, but it doesn’t belong there. Therefore, it might cause some confusion if you are not careful.

Though slightly different in appearance, these plants are good companions because they have similar care requirements, and all of them are slow-growing succulents. Therefore, you can combine them in your succulent arrangement.

Best Types of Haworthia to Grow

So, what are some of the best types of Haworthia to grow at home? Let us find out.

1. Haworthia coarctata

Haworthia coarctata resembles a hand clenched in a fist. It has prominent, reddish leaves and claws that join to form tight clusters. It can easily turn pink in extreme cold or with sufficient light, and produces offsets quite easily.

This succulent also has white horizontal stripes on its deep green leaves. The plant is commonly referred to as Haworthiopsis Coarctata and can grow to a height o up to 30 cm.

A Haworthia coarctata
It has prominent, reddish leaves and claws that join to form tight clusters.

Haworthia Coarctata requires well-prepared cactus compost soil, minimal watering, and exposure to full sun to thrive in a home environment. The minimum temperature should be 25oF.

2. Haworthia attenuata

Haworthia attenuata is among the most popular Haworthia types that are relatively easy to grow. The clump-forming perennial succulent makes a magnificent windowsill container display with its spiky and flesh stems. Its spines/leaves have pointed edges, and white horizontal stripes adding to its fine, rich texture.

The plant produces long, tubular, white flowers. Typically, flower petals start to form on mature plants from spring to fall. Haworthia attenuata can grow to a height of up to 8cm and can spread up to 30cm.

Since its leaves are relatively stiff, the succulent can survive for a prolonged time without water, but you still need to water it regularly in summer and autumn. Allow the potting mix to dry completely between watering sessions and water sparingly in winter.

The minimum temperature should be kept above 50oF and provide sufficient exposure to light. You should also consider re-potting your Haworthia attenuata every three years in spring when root-bound.

3. Haworthia cymbiformis

Haworthia cymbiformis is a wonderful succulent plant that resembles Aloe Vera. It has distinctive flesh stems covered with pointed leaves.

Typically, the plant grows to about 2cm tall and 9 inches wide though it can grow up to 5 cm tall in some cases. The flowers are dark-red on reddish stalks.

A Haworthia cymbiformis
Haworthia cymbiformis is a wonderful succulent plant that resembles Aloe Vera.

This succulent plant is easy to grow and can be a beautiful addition to a windowsill with strong light. For strong growths, the soil should be well-drained and less acidic.

4. Haworthia Cooperi

Haworthia Cooperi is a low-growing succulent with fine leaves that form rosettes. It is among the best types of Haworthia to grow indoors and looks terrific in a hanging basket or pot display.

The plant produces pinkish flowers with white filaments from summer to autumn.

Haworthia Cooper thrives in low to medium light conditions, warm temperatures, and it is highly tolerant of drought.

For watering, allow the top of the potting mix to dry out completely between watering sessions and water sparingly.

The minimum temperature should be kept above 60oF and provide sufficient exposure to light, such as in a spot where they receive at least six hours of direct sunlight every day.

A Haworthia Cooper
It is among the best types of Haworthia to grow indoors.

This succulent spreads slowly and can grow to a height of up to 15 cm over several years.

5. Haworthia Obtusa

Haworthia obtusa is a low-growing succulent plant that stays compact and produces offsets. The plant has triangular leaves with dark green lines running along the length of each leaf. It produces flowers from August to September, which are white with pinkish stalks.

The ideal temperature range for this type of Haworthia should be 80oFand below. It needs well-drained soil and thrives in low light conditions.

Water sparingly and allow the top of the potting mix to dry out before re-watering it. The minimum temperature should be kept above 60oF and provide sufficient exposure to light, such as in a spot that receives at least three hours of direct sunlight every day.

6. Haworthia Limifolia

Haworthia Limifolia is among the easiest types of Haworthia succulents that you should consider growing. This is because of its ease in cultivation, and it is a less fussy succulent that tolerates poor, dry soil.

The plant does not require much maintenance and can survive in different conditions ranging from low light to full sun exposure.

The Haworthia Limifolia is an active grower during autumn and produces small sweetly-scented white flowers during early summer.

A Haworthia Limifolia
It is among the easiest types of Haworthia succulents.

The succulent can grow to a height of 10cm, but its spread is dependent on the number of offsets it produces.

This type of Haworthia requires regular watering and drainage in the winter months, but switch to light watering throughout spring and autumn.

7. Haworthia Marginata Variegated or Zebra Cacti

Haworthia Marginata Variegated is among the most popular types of cacti. It can easily adapt to different growing conditions and features distinctive triangular leaves with white margins.

The plant produces pinkish flowers from winter to early summer, and during the winter months, the leaves turn a reddish-brown color.

The Haworthia Marginata Variegated can spread to a height of 20cm and can survive in a minimum temperature of about 50oF.

For watering, allow the top of the potting mix to dry out completely between watering sessions and water sparingly during the dormancy season.

8. Haworthia Pygmy Variegated

Haworthia Pygmy Variegated is a low-growing succulent with variegated leaves and can make an excellent choice of a potted cacti display for your home.

The plant produces pinkish flowers from early autumn to winter. Haworthia Pygmy Variegated thrives in warm temperatures, bright light, and rich soil with good drainage.

This succulent is known for its drought resistance ability. So, you should only water it when the top of the potting mix is dry.

The minimum temperature should be kept above 10oC and provide sufficient exposure to light. This succulent spreads slowly and can grow to a height of up to 8 cm over several years.

9. Haworthia Turgida

Haworthia turgida is a small cactus with thick triangular leaves that can turn red in winter and spring, but the most notable feature is its tubular white flower during the summer months.

The Haworthia Turgida thrives in low light conditions and can grow to a height of up to 10 cm.

This succulent is known for its drought resistance, and it does not require much watering. Allow the top of the potting mix to dry out completely between watering sessions and water sparingly.

Summary

There are many types of Haworthia that you can grow in your garden. Some have a more prolific growth rate than others, and some may be better suited for certain climates or areas with less rainfall.

We’ve discussed the top 9 best types of Haworthias, based on our experience as experts in gardening and horticulture.   

Knowing which type you want before purchasing is essential as some varieties need more sunlight than others. For instance, those from South Africa require a lot of sunlight while those from Australia prefer shade.

Is a Kalanchoe Blossfeldiana an Indoor or Outdoor Plant?

Kalanchoe Blossfeldiana, commonly called the flaming Katy, is an herbaceous, widely grown houseplant. This perennial, bush evergreen succulent can grow to a height of 30cm and 45 cm in 2-5 years. Though considered ‘slow,’ these succulents are known for the long-lasting bloom heads that appear during the winter season.

Kalanchoe does not require much care when growing and can thrive well even with considerable negligence. With specific care and maintenance needs, even people without much interest in caring for plants can successfully grow them indoors and outdoors. However, ensure you understand how to maintain it based on the location to flourish more. 

 So, where best does the Kalanchoe Blossfeldiana flourish? Kalanchoe Blossfeldiana can grow indoors and outdoors, but the care is specifically based on where it grows. It produces bright light indoors and bright filtered light outdoors during the summer. Growing kalanchoe indoors or outdoors is relatively simple. However, when grown as a house plant, you have to help it along and make a few adjustments to ensure better plant growth.  

Whether indoors or outdoors, the most important thing is caring for the plant. Do you know how to care for this plant indoors and outdoors? Let us help you out.

Kalanchoe Blossfeldiana Flower Color

Unlike most succulent plants that are grown for their foliage, flaming Katy is chosen for its beautiful, long-lasting lovely flowers. These pretty succulents come in several colors depending on the plant species and variety. Kalanchoe Blossfeldiana’s s dark green leaves have scalloped edges, with flowers having four petals in most varieties. In bloom, the colors of the flowers range from white to orange to bright red. The flowers are long-lasting and tend to open gradually so that you can have a display of color for many days on end, depending on if indoors or outdoors.

Flower of Kalanchoe with different color.
These pretty succulents come in several colors depending on the plant species and variety.

This unique plant blooms for 2 to 6 months, whether indoors or outdoors. This is because each flaming Katy flower umbel contains many flowers that open one at a time, giving you months of colors. If you like flowers in your home and want to cut on the cost, plant flaming Katy and have the whole collection each day for months!

Growing Kalanchoe Indoor

Kalanchoe is extremely sensitive to freezing or cold climatic conditions. To grow indoors, ensure it is in an area with reasonable temperature, light and water for their growth. 

Kalanchoe Indoor Care

Sunlight

Growing kalanchoe indoor is simple but with the right conditions. As an indoor plant, kalanchoe grows in full sun or bright indirect light. Place your kalanchoe in a place where enough natural light from the sun reaches the plant. Put the plant at a well-lit spot to get much-needed exposure to sunlight, preferably near a window.

Kalanchoe near the window.
As an indoor plant, kalanchoe grows in full sun or bright indirect light.

When placed in a bright sunny window, don’t expose it to too much heat from the sun. It causes the leaves to burn. When the plant is kept in low light for a long time, it becomes spindly and looks weak. Maintain medium sunlight. 

Lighting

If you prefer to grow kalanchoe indoors, ensure that the plant gets a few hours of complete darkness. Kalanchoe is a short-day plant, which means it blooms, responding to long nights and short days. The long days during the summer season inhibit the formation of the flower buds in the plant.

To bloom during the winters, the plant must have at least 14 hours of continuous darkness every night, thus switching the light off in the room the plant is kept. If not able to switch off the light, keeping it in a closed cabinet helps. Flaming Katy needs to be kept under dark conditions for two months to ensure proper blooming in the next season. During these times, ensure to cut down the water supply for optimal growth.

Temperature

As a house plant, room temperature is ideal for the growth of the Kalanchoe Blossfeldiana. That generally means that if your home is comfortable for you, it is comfortable for the plant. As an indoor plant, it does well in a temperature of between 51 and 59 degrees Fahrenheit, dropping to 45 and 64 degrees F at night.

Kalanchoe plants in a pot.
If your home is comfortable for you, it is comfortable for the plant.

This drop in temperature at night ensures the flower lasts longer. However, putting the plant next to an open window at night is not good. The plant should not be exposed to below 40 degrees F, as the frost quickly kills the plant.

Watering kalanchoe

Kalanchoe growing indoors is watered differently in different seasons. Give your plant a small amount of water every week during the summer season. In the winter season, water your plants with just a splash of water fortnight. Remember, just like any other succulent, there is no guideline on the frequency of watering as it depends on your location.

Water the plant anytime it shows signs of being thirsty. You can also determine whether to water the plant if the surface of the soil or two inches below the ground dries out. Dip in your finger, and if the mud is not sticky, it’s time to water. Overwatering is a big mistake, a strategy to lose your plant for good.

Fertilization

Yes, your kalanchoe needs to be fertilized even when indoor. Apply a good dose of the fertilizer to the plant at least twice a year during the spring and the summer seasons. However, kalanchoe grows well with a small amount of fertilizer as they do not need a lot of nutrition.

The best fertilizer to use for kalanchoe Blossfeldiana is a soluble fertilizer. Only apply after mixing with water. A good dose of fertilizer at the right moment will keep your flaming Katy healthy and bloom for long. Excessive use will burn the plant, so trade carefully.

Growing Kalanchoe Outdoors

Flaming Katy care outdoor is relatively straightforward. Although they are mostly house plants, they can do well in mild or less cold winters. Plants’ ability to survive outdoors may vary from species to species, so it is essential to check if the species you want to grow can stay outdoors. If they are well provided with the following conditions correctly, kalanchoe can do well outside.

Outdoor Care for Kalanchoe Plant

Sunlight                                                                                                                                        

How much sun does kalanchoe need outdoors?

Place your flaming Katy in a bright sunny spot. The plant loves short hours of direct sunlight and long hour of indirect sunlight. Avoid areas where the plant will be exposed to intense sunlight, especially at midday.

A yellow flower kalanchoe.
The plant loves short hours of direct sunlight and long hour of indirect sunlight.

Kalanchoe plant will do well in a shady place most of the time. When the plant is exposed for too long to direct sunlight, the leaves burn. During the growing seasons, full sunlight during the morning hours will help the plant grow properly. In the morning, the sun does not produce excessive heat. 

Temperature  

Kalanchoe plant does well in tropical climates native to its origin in Madagascar. They require a warm temperature of about 51 and 59 degrees F to show optimal growth. Plant it in a shady place where it gets enough sunlight when planted outdoors.

Be careful during the nights as the plants are susceptible to cold and frost temperatures and should be protected to prevent frost damage. Moving this plant indoors or to a warmer place is better, especially during the night or cold seasons. To put it correctly, avoid extreme temperatures outside because they negatively affect the plant.

Watering

Like any other succulent, flaming Katy needs low watering even when outdoors. As they lack a proper schedule for watering. Ensure always to maintain slightly moist soil, thus watering when the soil is dry. When watering Kalanchoe, Blossfeldiana does it in the morning to absorb enough water before the sun sets in.

A person watering the plant.
Ensure always to maintain slightly moist soil, thus watering when the soil is dry.

Planting kalanchoe outside does not mean that they need more water. The soak and dry method work best with this plant. Constantly water the plant when the top inches of the soil dry out completely. Overwatering the plant will make the ground soggy. The roots become more susceptible to root rot when roots are submerged for long.

Pest and diseases

Kalanchoe Blossfeldiana grown outside is more susceptible to pests and diseases than when grown inside. These pests include aphids, spider mites nematodes which may attack the plant at any time. When kalanchoe is infested with these insects, it starts showing some signs like a honeydew on leaves, torn leaves, or leaves may begin to fade.

In humid conditions, the plant can suffer from leaf spotting and other fungal diseases due to the water remaining on the leaves. Take care of the plant outside and always be on the lookout for these signs. To avoid damaging the leaves, don’t treat an infected plant using non-toxic treatments like neem oil.

Best Soil Type and Pot Size for Kalanchoe

Depending on the available space, you can grow your plant in any size of a container. The plant does well in a terracotta container with some draining holes at the bottom. Whether developing the plant indoor or outdoor, there is no difference in the soil or pot type.

Choose a well-draining cactus soil for growing kalanchoe Blossfeldiana. If it is hard to find this soil, use some sand or perlite added to regular potting soil. This soil is good as it is fast-draining soil. The process applies to both indoor and outdoor plants. 

Bottom Line

There is not much difference between planting kalanchoe indoors or outdoors. The minor adjustments that we have talked about are to make your plant give maximum results when blooming and stay healthy. Whether indoor or outdoor, remove the spent flowers to keep the plant tidy. Temperatures, amount of heat and sunlight remain the same, whether planting indoors or outdoors.