Why Is My Cactus Going Soft? (Great Tips To Avoid That)

Cacti are relatively hardy plants that can survive for a pretty long time with minimum care and maintenance. However, it doesn’t mean that your plant doesn’t require any specialized care at all. Once in a while, you may notice problems in your plants that require urgent attention.  Drooping, yellowing, and softness are some of the common issues that you may encounter while growing these succulents.

So, why is my cactus going soft? Well, the most likely causes of this problem could range from the improper site and ambient conditions to underlying diseases and root rot. Generally, potted plants require good drainage soil to thrive. The existence of soft spots in the flesh of your plant could be a sign of root rot, disease, or simply a mechanical injury to the stems and pads. The other common causes of this problem are fungal infection and insect damage.

In this post, we discuss some of the common reasons why cacti plants go soft and possible solutions that can help you save your plant from further damage. Everything you need to know is summarized below.

Why Is My Cactus Going Soft?

As mentioned above, a wide range of issues can cause cacti plants to start developing soft spots. It could be a sign of an underlying disease or improper cultivation conditions such as poor drainage potting mix.

Generally, cacti plants tend to have relatively low moisture needs. Most of them do well in temperatures above 70oF in relatively sunny areas and require minimal supplemental nutrients. Potted plants, in particular, require good drainage holes on the growing medium and nutritious potting mix with plenty of grit.

In-ground cacti plants also have similar requirements. The soil must be of good drainage and nutritious as well.

Just like any other plant, cacti can develop diseases or get damaged. A common sign of an underlying disease or damage is the existence of soft spots on the stem of your plant. These spots may also be discolored or corky depending on the extent of the damage.

Here are some of the other common causes of this problem: 

1. Overwatering

Typically, cacti plants don’t thrive in wet and poorly drained soil. Poorly drained soils cause water to fill up air spaces between soil particles, which prevent the much-needed root aeration. The damp conditions also provide favorable conditions for fungi and harmful bacteria to multiply.

As a result, the roots of your plant start to die, and disease-causing organisms get an opportunity to move into the stem tissue causing soft spots to start developing in different parts of the stem.

If you suspect that the problem is overwatering, then you need to stop being overzealous when watering your plant. Always wait until the top two inches of the soil are dry completely before you water again. Other than creating a watering schedule, let the potting mix tell you when you need to water your succulent.
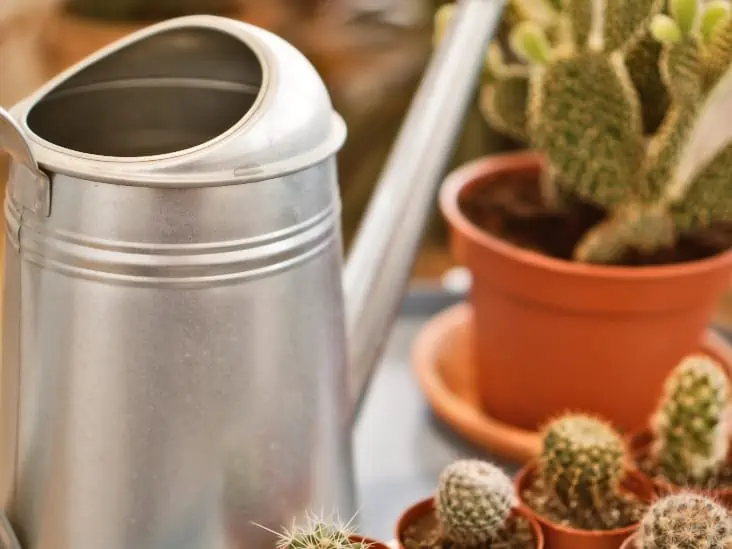
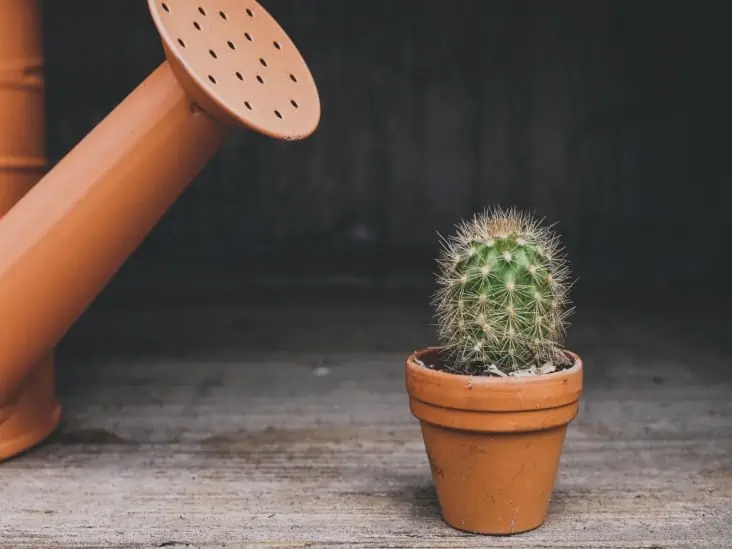
A water can with cactus plants beside.
Typically, you need to water your plant once or twice every week during summer and once every month during winter

For cactus growing in the ground, it takes much longer for the soil to dry out completely after watering. Consider using a probe to check the soil moisture before you water, again. Avoid watering your cactus if it rains.

2. Physical injury

Your pet dog knocks over your indoor potted cactus, and it gets a slight nick in its skin near the soil line, or you unknowingly injure some roots while repotting your plant. While these things might seem minute to you, they can cause extensive damage to the plant.

The injured spots serve as openings that allow pathogens to find their way into plant tissues, causing extensive damage. Unfortunately, it might take you some time before you realize the actual cause of the problem.

To avoid such issues, always take time to check your plant for any wounds. You can do this at least once every week. If you discover any wounds during your inspection, be sure to treat them immediately. 

A pot of cactus fell.
Always take time to check your plant for any wounds.

One of the best ways of treating cactus wounds is by dusting on a cleanser that contains bleach until the wounded spot has scabbed over. Try as much as possible not to bring the wounded area in direct contact with water.

It will take about one week for the cactus to form a scab, but it might take much longer if the wound is pretty large.

Don’t water your repotted cactus plant for a few days to allow for injured roots to heal. During this time, take time to check the plant for any other physical damage on its stem, especially near the base.

3. Poor soil drainage

All cacti species need well-draining soil to thrive. Heavy soils tend to retain water for a relatively long period, which might cause extensive damage to roots and allow diseases to develop.

Be sure to use a well-prepared potting mix for your potted plants. If you don’t know how to prepare your own potting mix, feel free to go for the commercial options available. Make sure the soil doesn’t allow water to stand in the container during watering.

If that is the case with your soil, consider adding perlite to it to enhance drainage. To help promote the rapid drying of the potting mix, avoid using a container that is too large for your plant. Take time to find a right-size pot that will fit your plant size.
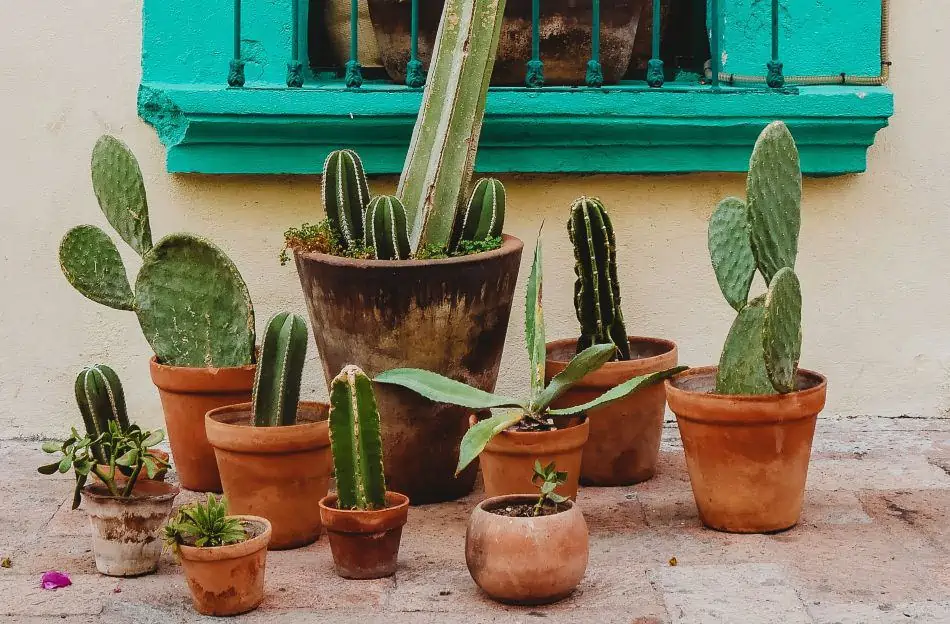
Cactus plant in a clay pot outside.
Avoid using a container that is too large for your cacti

For outdoor plants grown in the ground, take some time to thoroughly prepare the ground before you plant your cactus. Add some sand and pumice to enhance drainage and check for pests and insects.

4. Fungal and bacterial infections

In most cases, bacteria and fungus are introduced to cactus plants from openings in the flesh. The open spots might be from animal or insect activity, heavy weather such as hail, or inanimate objects.

While the injury might seem insignificant, the damage caused by bacterial and fungal infection can be extensive. Warm and moist conditions tend to accelerate the production of fungal spores, which in turn stimulate the production of harmful bacteria.

Once the fungus and bacteria start eating up your plant, you will notice the existence of soft mushy spots on the stem and near the base of the plant.

Some of the common symptoms of fungal and bacterial infection to watch for include discolored scabs, sunken spots, black dots, and round soft areas usually surrounded by fruiting bodies.

5. Insect damage

If you live in a warm region, pests and insects could be lurking in your garden. For instance, the longhorn beetle is one of the most dangerous insects since it consumes any new growth of prickly pears and some columnar cacti. This insect creates a burrow in your plant-eating up the water-storage tissue.

Furthermore, it can cause severe rot and introduce a wide range of other diseases.  The longhorn mostly concentrates near the base of the plant, causing extensive damage before it starts moving upwards.

If left unchecked, the effects of this inset may result in extensive damage to your plant.
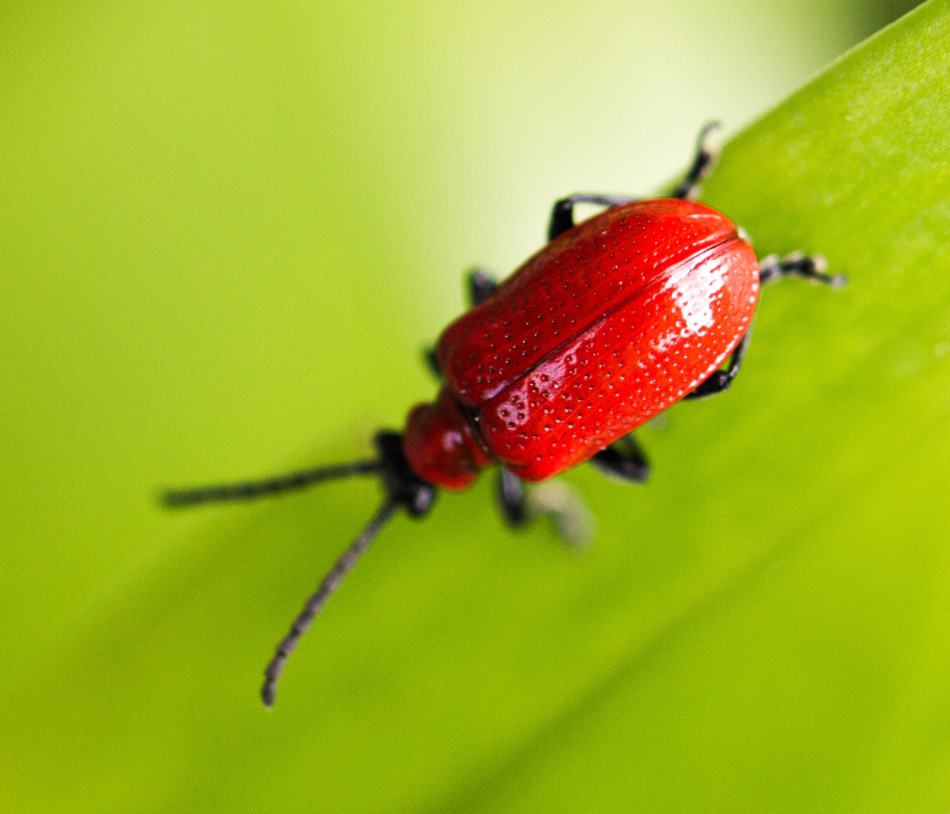
A pest on the leaf.
The longhorn beetle is one of the most dangerous insects since it consumes any new growth of prickly pears

6. Root rot

The presence of soft spots near the base of your cactus plant may be a sign of root rot. Unfortunately, root rot is a common problem that many gardeners have to deal with quite frequently.

A wide range of things can cause root rot, but the most common cause is overwatering or growing the plant in humid areas. It is good to keep in mind that root rot doesn’t heal on its own, and if you don’t act swiftly, your plant will eventually die.

Sometimes, the soft tissues could also be a sign of stem rot- not just root rot. The first signs of stem rot include the presence of dark brown, yellow, or black spots on different parts of the stem. Stem rot may occur as a result of fungal infection and usually spreads fast to other parts of the plant.

Can You Save a Rotting Cactus?

The answer to this question will depend on the extent of the rot. If the plant has rotted so severely such that its top has tipped over or has sunken in on itself, it might be relatively difficult to save it. However, if it is only showing early signs of rot, there are a couple of things you can do to save it.

The first thing you need to do is remove it from other plants and place it in quarantine that creates a false impression of drought. You can achieve this by placing it in sand, not watering it at all, and using relatively brighter lamps to supply it with the much-needed light.
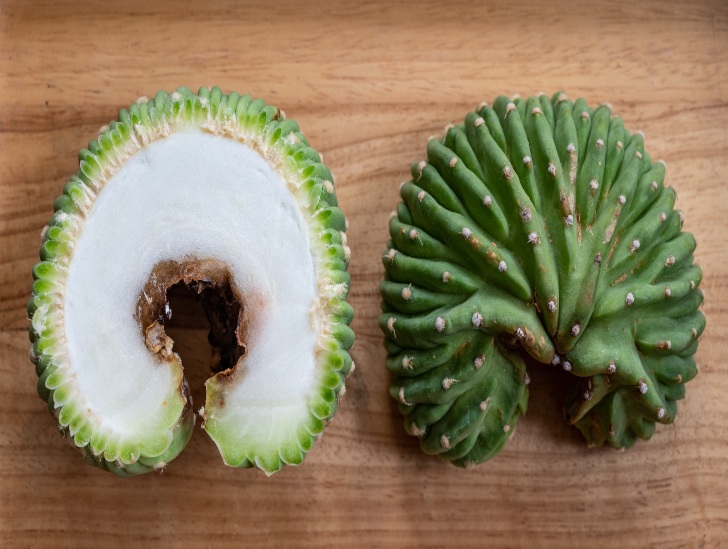
Rotten cactus cut in half.
You can also cut out the affected spots.

In most cases, this should be enough to kill the minor patches of fungi infections that are beginning to form on the surface of the plant.

If you don’t see change, try to wash away the fungal spots using q-tips or a small soft brush with soap. Carefully scrub the yellow/dark brown spots.

You can also cut out the affected spots. However, if you choose this route, you will need to cut extensively around the affected spots because some of the healthy-looking tissue may already be infected.

Summary

While cacti plants are relatively easy to grow, it doesn’t mean that you don’t need to take good care of them. Doing simple things such as watering appropriately and regular inspection of your plants for signs of pests and diseases can help you avoid so many problems.

We hope you now understand why your cactus is going soft, and you will do everything possible to save it. With a few fixes, you can get everything back on track and a gorgeous cactus plant that will make your home more beautiful!
The 4 Most Common Types Of Cactus Plants (that you can grow too)

What are the most common types of cacti? This is one of the most common questions that new gardeners tend to struggle with when deciding on the type of cactus to acquire. Sadly, for those who don’t understand much about succulents, they tend to think all cacti are the same. They only realize they were wrong when they step into a nursery to acquire their first plant. In reality, the cactus family has a wide range of different species to choose from.

So, what is the most common type of cactus?  Some of the most common types of cacti include

  1. The Golden Barrel Cactus
  2. Prickly Pear Cactus (Opuntia)
  3. Rhipsalis
  4. The Saguaro Cactus

While all of them are perfect for growing at home, the optimum growing conditions for each species tend to vary greatly. Therefore, it is always good to take time and understand the light and water requirements of each species before you make up your mind on which one you prefer to add to your indoors or home garden.

In this post, we discuss everything you need to know about each of the mentioned species.  What is unique about each one of them? Where do they grow? What are some of the features that make them unique? Read on to discover everything you need to know about these common types of cacti.

1. The Golden Barrel Cactus

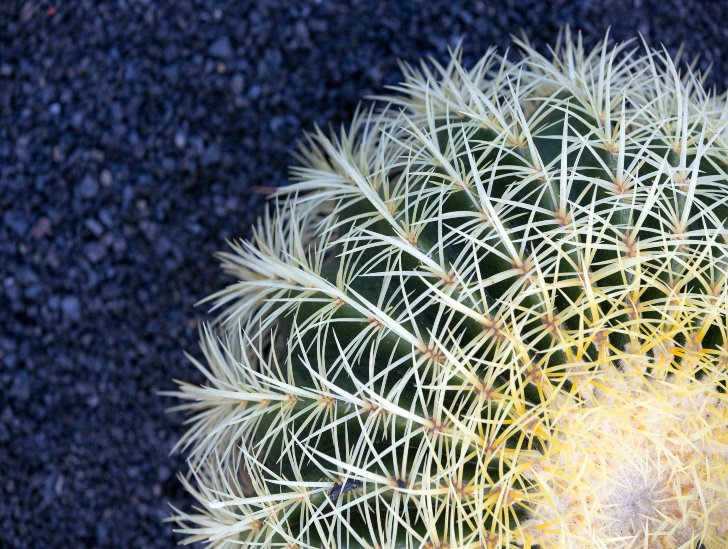
A golden barrel cactus.
The Golden Barrel Cactus

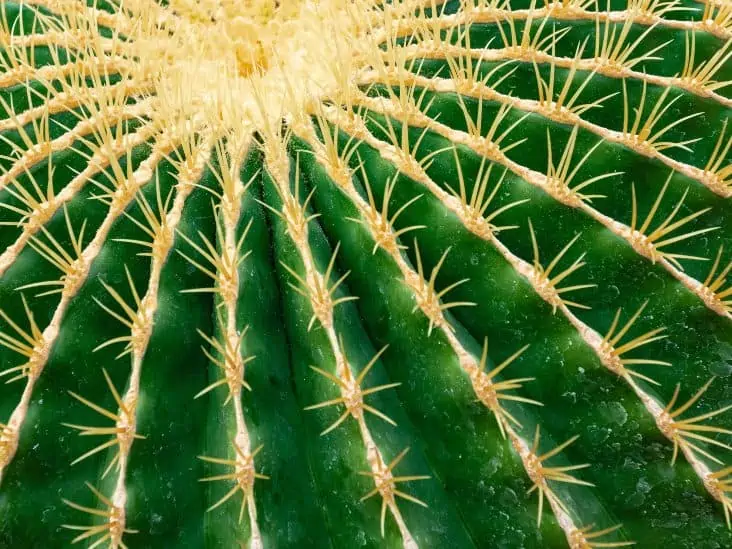
The Echinocactus grusonii, commonly referred to as the golden barrel cactus is globe-shaped and ideal for growing on patios, in conservatories, or any other type of indoor glass room. This type of cactus grows to as much as four feet tall and three feet wide much like the barrel cactus hence its name. Its crown has whitish woolen hairs at the top.

Its stem is ribbed and produces prickly yellowish spines that are quite dangerous. There is also the spineless type that is hard to find.

 This type of cactus flowers mostly in mid-summer although the flowering is rare. Most people grow the golden barrel cactus for its foliage rather than flowers. In fact, its desert look is more appealing to gardeners than the flowers.

Growing the Golden Barrel Cactus

Think carefully before you decide to grow this type of cactus, especially if you have children and pets since its spines can be quite dangerous. In some cases, wounds from its spines require antibiotics to heal.

On the light side, you can choose to use this plant as part of your home security system by positioning it under low windows as a defensive planting.

Be sure to plant it in a safe spot or container and put it out of reach for kids and pets. Don’t crowd it and make sure you leave sufficient room for new offsets.

The cactus grows fairly quick at first before slowing down after some time. Typically, it might take up to ten years for the golden barrel cactus to reach ten inches in diameter. Just like other cacti plants, golden barrel cactus require little care and attention to thrive.

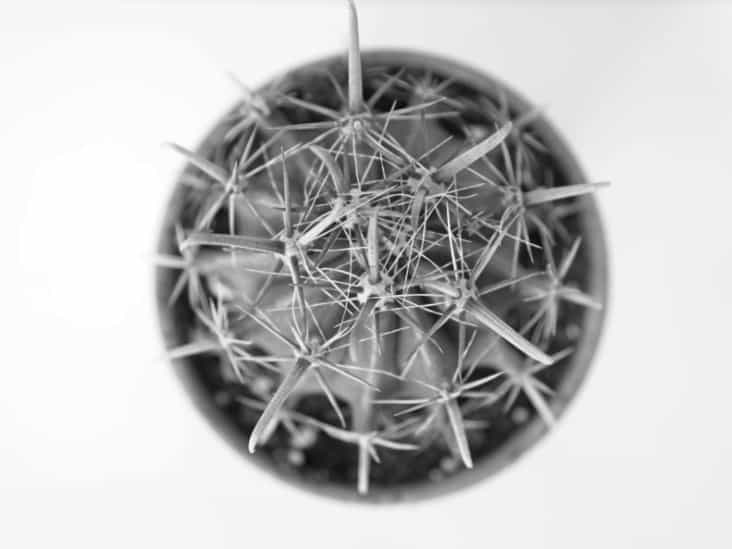
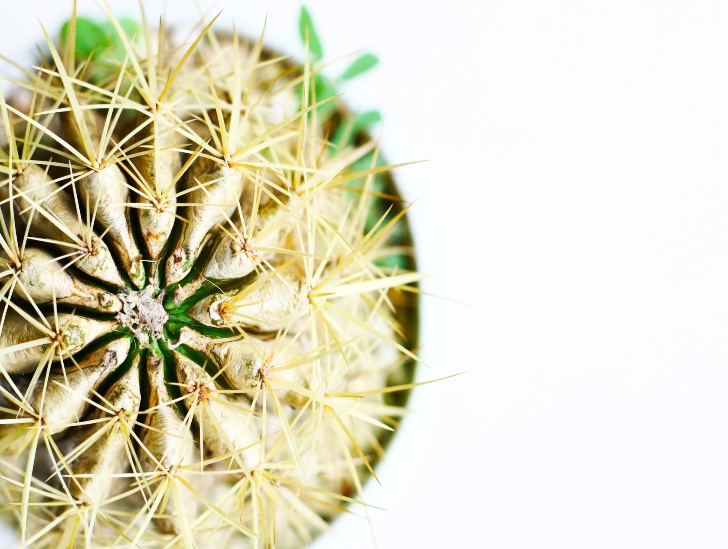
Top view of a Golden Barrel Cactus.
Be sure to plant it in a safe spot or container and put it out of reach for kids and pets.

Golden Barrel Care

The Echinocactus grusonii requires plenty of sunlight to thrive. Therefore, if you are growing it in a glass room, you may be forced to provide some shade during hot summer days to prevent sunburn. Temperatures averaging 50oF -75oF are ideal for growing but avoid anything below 40oF.

Water it sparingly from spring until fall and stop watering during winter. Overwatering this type of cacti, especially when the temperature becomes too cold, can easily lead to root rot. 

You should also ensure your potting mix drains well and fertilize the plant at least once every four weeks during summer using a high potassium fertilizer.

2. Prickly Pear Cactus (Opuntia)

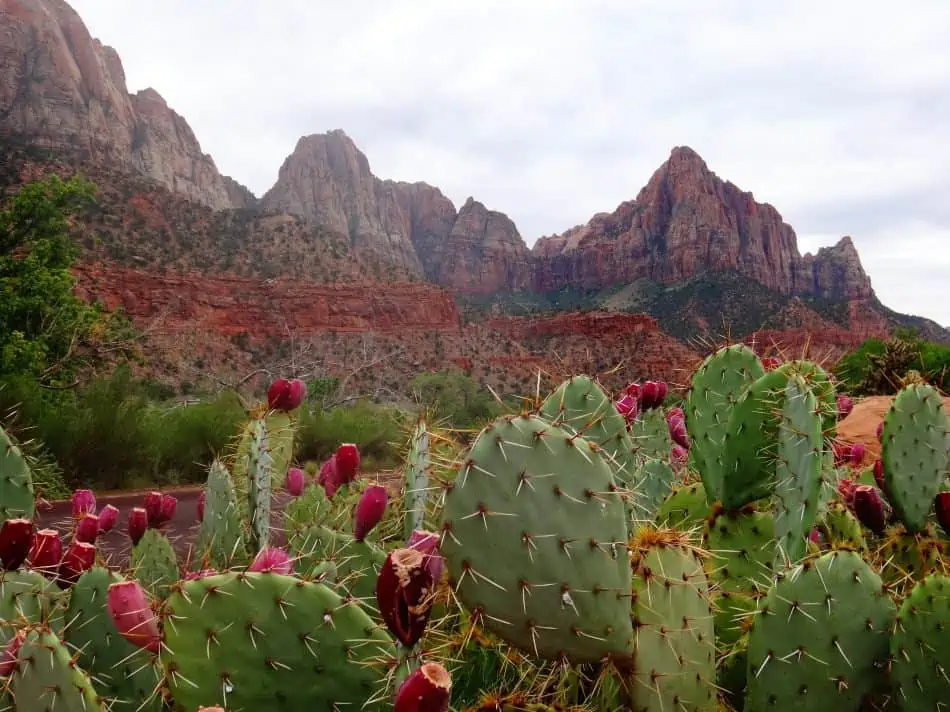
A Prickly Pear Cactus.
Prickly Pear Cactus (Opuntia)

The prickly pear cactus commonly referred to as Opuntia is a member of one of the largest cactus families.  The cactus is usually identified by its wide, flat, and branching pads. Some people call it the paddle cactus or nopal cactus.

Many varieties of this cactus have detachable spines and glochids that can cause severe allergic skin reactions. The plant is native to the Western Hemisphere in parts of North America and Mexico.  The fruits, pads, and flowers of a prickly pear cactus are edible.

With all the spines and glochids, it may be hard to understand why the Opuntia cactus is so popular until you see its beautiful flowers which blossom from the areola of thorns. 

Although it takes quite long to mature and start flowering, it is worth the wait. The flowers come dazzling in shades of orange, yellow, and red. 

Growing a Prickly Pear Cactus

You can grow the prickly pear cactus from cuttings. Wait until spring or summer to achieve better results with cuttings. If you choose to grow the plant from seeds, start in late spring for better results.

To achieve better results, make sure you grow the prickly pear in a spot that receives plenty of sunshine and has well-draining soil.

Be careful with the planting and only transplant at the same level as they are currently growing. Planting the prickly pear deeper into a container may cause severe rotting of the plant.

Keep in mind that prickly pear cacti can be relatively heavy to lift and place in a hole. Therefore, an extra pair of hands may help.

Opuntia Cactus Care

This type of cacti prefers alkaline to neutral, well-draining soil. Soil with poor drainage can cause severe plant and root rot. The prickly pear is extremely drought-resistant and doesn’t require frequent watering. In fact, avoid watering newly propagated pads for the first month. After that, only water every three or four weeks during the first year.

To encourage flowering, make sure you fertilize your young plants with a well-balanced 10-10-10 fertilizer. For relatively mature plants, consider using a 5-10-10 or even 0-10-10 water-soluble fertilizer to promote fruiting and flowering.

Luckily, prickly pear cactus is not susceptible to pests and diseases but always remember the fact that it can easily be affected by rot if grown in potting mix with poor drainage.

3. Saguaro Cactus

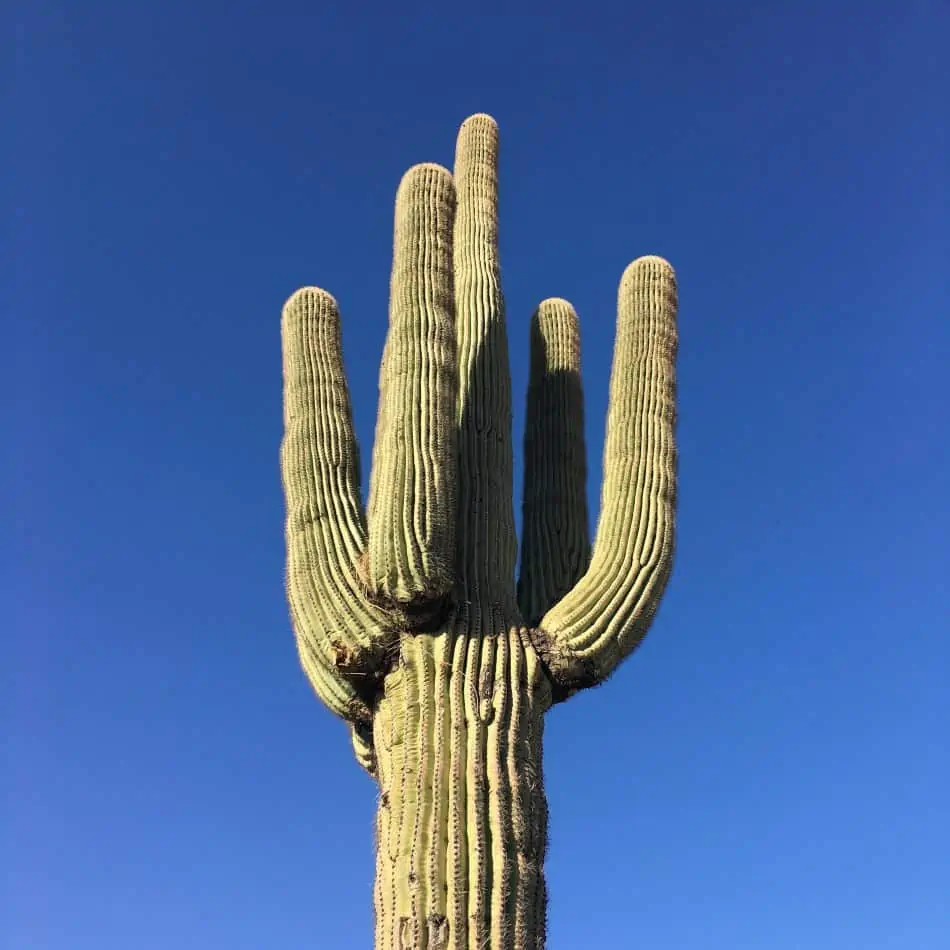
A Saguaro Cactus.
Saguaro Cactus

The Carnegiea gigantea, also known as the saguaro cactus, is one of the defining plants of the Sonoran desert. The succulent is composed of a tall, thick, columnar stem that is about 18-24 inches wide. A typical saguaro will also have several branches curving upwards distinctively.

Its skin is relatively smooth and waxy, and the stem and trunk have stout spines clustered on their ribs.

With the right conditions this giant cactus can live for up to 200 years. This cactus is a slow-growing plant that takes up to 30 years to start flowering.

A ten-year-old Saguaro might only be one or two inches tall. However, a full-grown saguaro can be up to 60 feet tall. When it is fully hydrated, the plant can weigh up to 4800 pounds.

Growing a Saguaro Cactus

The big size of this plant doesn’t mean that you cannot grow it indoors or in your home garden. In fact, the cactus is among the most common indoor cacti plants in the United States and other parts of North America.

However, to grow it successfully, you need to do everything right to help it stay healthy and thriving. The freezing point is one of the critical considerations when determining where to grow a saguaro.

Technically, if the elevation is too high, the extremely cold weather and frost can easily kill the plant. Therefore, it is crucial to ensure your plant receives plenty of sunlight. If you are growing it indoors, position it in a brightly lit spot preferably a north-facing window.

During winter, make sure you bring your saguaro indoors before temperatures drop to below 60oF. Just like the other types of cacti, the saguaro requires well-draining soil that doesn’t hold water for too long.

Saguaro Cactus Care

Although this type of cactus is extremely drought resistant and can survive for too long without water, it doesn’t mean you avoid watering it completely. Saguaro plants grow and flower better if given an adequate supply of water.

Water it moderately during the growing season (from April to mid-September) and sparingly during winter.

Fertilize it every two or three weeks during the growing season from early spring to late summer.

Another thing you need to keep in mind is that saguaro plants have a weak root system. Therefore, avoid growing them in bigger pots and don’t repot them unless it is absolutely necessary.

4. Rhipsalis Cactus

A Rhipsalis Cactus.
Rhipsalis Cactus ( Photo by David J. Stang – source: David Stang. First published at ZipcodeZoo.com, CC BY-SA 4.0 )

Rhipsalis baccifera or the mistletoe cactus is a tropical cactus native to rainforests in relatively warm regions. The plant is primarily epiphytic meaning it lives in trees. However, some varieties of this cactus are lithophytic meaning that they grow on rocks.

The cactus features a cylindrical- pendant stem that branches frequently. Rhipsalis cactus lacks spines and only has beautiful hair-like structures on their surfaces. Its flowers and fruits are relatively smaller in size and spineless.

A majority of Rhipsalis species grow in tropical zones of Brazil, but a few of them are also found in South America and the Caribbean.

Growing Rhipsalis Cactus

The mistletoe cactus is relatively easy to grow from cuttings since seeds take quite a long time and require near perfect environmental conditions to germinate. Simply take a cutting and let the severed end callus for several days. 

After that, plant the callused end of the cutting into a well-draining potting mix that has been lightly watered. Most cuttings start growing roots after two to six weeks.

Rhipsalis Cactus Care

Make sure you plant your mistletoe cactus in well-draining soil. You can make your own potting mix by combining regular garden soil with coir, gravel, orchid bark, or sphagnum to enhance drainage.

One thing you must keep in mind is that Rhipsalis is not a drought-resistant plant. Therefore, frequent watering is essential to keep the plant healthy.

However, take great care not to overwater it since it can cause weak stems and root rot. Typically, Rhipsalis cactus requires watering at least once every week.

Avoid applying fertilizer on newly potted mistletoe plant and wait for at least one year when the soil begins to become depleted of nutrients. If you must apply fertilizer to your plant, consider using a diluted half-strength fertilizer specially formulated for cacti.

Ultimate guide: how to pot (and repot) a cactus plant?

Choosing the correct pot size and potting mix are only the first steps towards growing a cactus plant at home. Once you have everything ready, you will need to do the actual potting. Luckily, potting is a relatively straightforward process that shouldn’t give you problems.

So, how do you pot a cactus?  The process of potting a cactus plant starts with finding the right pot size and potting mix. Make sure the pot and soil have good drainage. Once you have the two, add sufficient drainage material at the bottom of your pot, fill it to about one-third with your potting material and start arranging your plants in the container. Hold the plant where you would like it to stay and fill out the spaces between the cactus and the pot with your potting material.  Firm the soil and you are good to go.

Read on to find out everything you need to know about potting/repotting your cactus plant, including how to choose the right pot size, how to knock out the plant, and how to handle spiny plants.

The Potting Mix/Medium (Soil)

You will need porous soil with excellent drainage. Cacti plants prefer porous soil that doesn’t hold water/moisture for a long time. The potting mix should also be spread over a deep layer of pebbles, gravel, or broken bricks to improve porosity.

Most cacti species appreciate more organic matter in the soil since it provides sufficient nutrients for your plant. Potting soil can either be “heavy,” “light” or “organic.”

Heavy potting mix is mainly made of clay, loam, or garden soil with about one-third humus. If you prefer using heavy soil, make sure it contains about one-third perlite or sand to improve drainage.

Light soil means it is mainly made of open-textured organic material with good drainage. The soil can stay moist for relatively long periods but not wet. This type of potting mix is good for jungle cactus.

Organic soil is rich in leaf mold or any other organic matter. Mixing this type of soil with perlite or coarse builder’s sand will help improve its drainage.

A soil on the gravel.
Cacti plants prefer porous soil that doesn’t hold water/moisture for a long time

The Pot Size

The overall pot size will largely depend on the size of your plant and the nature of its roots. Generally, we recommend using a pot that is about 0.5 inches bigger than the plant. The container doesn’t need to be tall/deep because most cacti plants develop a shallow root system that doesn’t grow deep. Therefore, you will want to make sure the pot is wider and not deeper.

However, a few cacti species grow a taproot that provides the plants with strong anchorage and also absorbs moisture from deep below the surface. If you have this type of plant, make sure you go for a relatively deep/ tall pot.

For relatively younger cacti plants, feel free to start by keeping them in a garden dish. The clay trays used for bonsai are always a good start. Once the plant starts to grow bigger, consider transplanting it into a pot.

Make sure you aren’t over-potting because it can lead to root rot. If the cactus is top-heavy, make sure you put the smaller pot inside a large pot and fill the space between the two with gravel to improve drainage. This arrangement will provide your cactus with a base that is heavy enough without running the risk of root rot.

A clay pot.
We recommend using a pot that is about 0.5 inches bigger than the plant

Potting a Cactus Plant

Now that you have the right pot size and good potting mix, it is time to do the actual potting. Follow these steps to pot your plant:

1. Add gravel to your potting mix

Carefully spread a layer of gravel or small pebbles in the bottom of your pot. Top it up with some potting mix designed for your cactus. Make sure the mixture rises to about one-third of your container.

The primary reason why we are adding pebbles/gravel to the potting mix is to improve drainage and soil porosity. Keep in mind that ordinary potting mixes tend to hold too much water for long periods, which is not good for your plant.

2. Remove the cactus from the nursery pot

In most cases, you will purchase the plant when it is already potted in some kind of container.  Therefore, you will need to know how to remove it from that container. This might be the trickiest part since it requires great care.

Slip on a pair of heavy gloves to protect your hands and use a pair of tongs to ease out the cactus from the pot carefully.  If the plant clings to the nursery pot, be sure to give it a few light raps against a wall or any other hard surface or simply slide a blunt knife/fork around the inner rim.

If that doesn’t work, you may be forced to break the container altogether. Make sure you put on a protective eye gear before you smash the container.

3. Test the plant size

Once you have filled the container with gravel and potting mix to about one-third full, test the plant size to see if you are good to go. Make sure the plant isn’t too far down in the container nor too high above the top of the pot. Also, center the plant unless it is the type that likes to travel in a horizontal direction, which should be potted on the edge of the container.

A small cactus on an orange pot.
Center the plant unless it is the type that likes to travel in a horizontal direction.

4. Position the plant where you want to be in the pot

Hold the plant gently where you would like it to stay and fill all the spaces between the cactus and the container with a potting mix.

5. Firm the soil

Once your plant is in a good position, use a spoon, small trowel, or any other tool to add more potting mix while gently firming it down. Press the soil gently down, especially around the roots, and if you feel like there isn’t enough soil around the plant, feel free to add more.

However, be sure to leave sufficient space between the soil surface and the top of your container so you will have room for water.

6. First watering

Lightly water your cactus for a few minutes. From there, wait for a few days until the soil dries out completely before you water again. Remember the fact that if you overwater the plant, it may start to rot and eventually die.

A water container beside the cactus on the pot.
Lightly water your cactus, wait for a few days until the soil dries out completely before you water again

Repotting a Cactus Plant

Repotting is an inevitable exercise in the life of a cactus plant. Since your plant is always growing, it will eventually outgrow its first pot, and you will be forced to repot it in a bigger container. Typically, your cactus will require potting every 2-4 years. Here are a few things you need to know about repotting:

When do you need to repot a Cactus?

You will know it is time to repot your cactus when you start seeing roots come out of the bottom of the container. This is a sign of overgrown roots.

Although these succulents tend to enjoy small spaces and can stay in one container for several years, the sight of roots will let you know when the cactus has expanded too much and requires repotting.

As mentioned above, it will generally take you between two to four years to see signs of repotting. If you fertilize your cactus annually, repotting after every four years is appropriate, but if you do not fertilize regularly, consider repotting after every two years to help in replenishing soil fertility.

The best time to report your plant is between January and February when most plants are in active growth.

How to repot your cactus

To repot your cactus, you will need tea towels/sheets of newspaper, a blunt knife, slightly larger pot, free-draining potting mix, watering can, horticultural grit, and a fork. Follow these steps to repot your plant:

  1. Loosen up the potting mix by carefully running a blunt knife or any other suitable tool in it. Make sure you are thorough with this process to avoid damaging the plant.
  2. Carefully remove your cactus from the old pot. Be cautious to avoid coming into contact with the spines. Hard gloves or combined sheets of newspaper will help you avoid contact with the pricks. A pair of tongs can also work fine.
  3. Remove soil from the roots and make sure you have individual roots separated from each other
  4. Thoroughly check the roots for any signs of diseases or pests and treat with appropriate chemicals if need be
  5. Prune large roots
  6. Allow the cactus to dry out for up to four days to allow roots that might have been hurt enough time to heal to eliminate the risk of root rot.
  7. Follow the potting procedure described above to plant the cactus in the new pot. However, don’t water your plant immediately.  Give it up to a week after repotting before you water it. 
A top view of flowering cactus.
Typically, your cactus will require potting every 2-4 years

Final Thought

Potting and repotting are crucial parts of growing cactus at home since they ensure you maintain the ideal pot size at all times. As long as you follow the steps outlined in this guide, you can pot/repot your plant without a problem.

Thanks for reading our potting guide, and we hope you learned something new. Let us know if you have any tips or advice you feel like we didn’t share. Don’t forget to subscribe to our email list for awesome cactus gardening tips.

How Big Of A Pot Does A Cactus Need?

Choosing the right pot size for your cactus plant can be quite complicated, especially if you are still a new gardener. A container that is too small or too big can have a significant impact on the overall health of your plant. Luckily, once you figure out how pot size affects the growth of your cactus plant, it becomes relatively easier to establish the appropriate size for your plant.

So, how big of a pot does a cactus need? Generally, you should leave about a half-inch of space between the main body of your cactus and the pot’s rim. This will provide the plant with sufficient room to grow and spread. Too much space between the plant and the pot rim can prevent it from growing larger because the roots need to spread out first before the cactus starts to expand. For instance, if you acquire a three-inch cactus plant, a 3.5-inch pot will be good enough.

In this post, we discuss everything you need to know about container size for a cactus. Read on to discover more.

Cactus Root System: A Quick Overview

Before we dive deep into discussing the right pot size for your cactus plant, it is essential to understand the nature of this plant’s root system because it will have a significant impact on the container size.

Generally, cacti have a shallow root system that tends to spread out widely but less deep. They have fibrous roots that specialize in absorbing moisture from the ground surface more easily. These roots only penetrate a short distance into the soil.

For instance, a young Saguaro plant that is about 12cm high may have a root system spanning two meters in diameter and only 10cm deep. The extensive root system is one of the main factors behind the successful survival of cacti plants in deserts where there isn’t plenty of water. 

However, some species usually have a long taproot that grows deep into the ground to anchor the plant and draw out as much moisture as possible.  The taproot is supported by smaller fibrous roots that stay close to the ground surface to absorb water and moisture quickly.

If you purchase a cactus plant with a taproot, you may want a relatively deep container to allow the taproot enough space to grow. Carefully study the root structure of your preferred plant and keep it in mind when choosing the container shape and size.

Different kinds of plant picked from the ground.
Cacti have a shallow root system that tends to spread out widely but less deep

Why Is Pot Size Important?

Pot size is a critical factor to consider when growing cacti because it plays a crucial role in determining how healthy your plants will be. A container that is too small can be a detriment to your plant’s health.

If the roots of your plant become constricted due to small pot size, the plant won’t grow as fast as it should. It will also limit the overall size of your cactus at full maturity. Furthermore, small pots hold less soil which means fewer nutrients are available for the roots of the cactus to absorb.  You will experience the same issues if you grow too many plants in one pot.

While you may not be having a pot that is too small, you should also avoid containers that are too big for your plant.  It may seem like an incredible idea to provide your plant with plenty of growing space, but that could also cause a wide range of health issues. A container that is too big can even cause your plant to die.

Cactus and succulent plants in a pot.
A container that is too small can be a detriment to your plant’s health.

Keep in mind that if the container is too big, it will hold a lot of water for longer periods. Over time, the roots of your plant will start developing root rot due to overexposure to excess moisture.

Root rot is a serious problem that can easily result in the death of your plant. If you realize your pot is too big, make sure you monitor the amount of water and frequency of watering to avoid problems.

Apart from the overall size of the pot, its depth also matters. Avoid containers that are too deep or too tall because of the amount of potting mix they contain. Just like containers that are too large in diameter, those that are too deep/tall tend to retain a lot of moisture for longer periods which can result in root rot.

Although you may be looking for a container with sufficient room for the taproot, you need to keep in mind that too much room may cause other problems. Generally, these succulents prefer shallow containers that dry out faster. This way, you will have healthy and happy plants.

Determining the Right Pot Size

Many seasoned gardeners recommend using a container that is about 10% larger in diameter than the cactus plant at its widest point. For instance, if your cactus plant is approximately four inches across its widest point, consider a container that is about 4.5 -5 inches in diameter.

These measurements include both the above and below ground portions of your plant.

Cactus in the windowsill.
Avoid containers that are too deep or too tall

A good-sized pot will provide your cactus with sufficient room to grow without having too much soil or crowding the roots.

Potting multiple plants in one container

At this point, you may be wondering if it is right to have more than one plant in a single pot. Well, it is fine to plant more than one cactus in one container, but you need to be careful with the process. Make sure the plants have similar growing requirements, i.e. their water and light requirements match.

For instance, a jungle cactus may not be compatible with a desert cactus, but you can have an Echinocereus sp. in the same pot as the Mammillaria sp (desert cactus). You should also consider the growing rate of each plant before mixing them.

Slow growing plants can be potted together the same as fast-growing plants. If you end up with a mix of slow-growing and fast-growing cacti in the same pot, things won’t be good. In most cases, the fast-growing cactus will upset the balance of your composition and force you to get rid of it because it would overcrowd the slow-growing species.

When choosing your pot, make sure you consider how many plants you plan on potting in the same container. In this case, it is upon you to use your best judgment and instinct to estimate how much room each plant will require to avoid overcrowding.

Also, keep in mind that most cacti plants need a considerable amount of light to thrive. Therefore, be sure to allow sufficient room for each plant to receive enough light without blocking others.

Several kinds of cactus in one pot.
Slow growing plants can be potted together the same as fast-growing plants

Up-potting

Potting is a continuous process, and the proper pot size for your cactus will always change as the plant grows.

As it gets bigger, you will need to transplant it into a larger pot. Gardening experts recommend using a pot that is approximately one or two inches larger in diameter than the previous container.

This will allow your cactus to grow without risking its health with too much moisture or soil. 

Be careful with cuttings

When planting cacti cuttings, make sure you are using an incredibly shallow pot. Cuttings can easily be damaged if they are given too much moisture or when planted too deeply.

The relatively smaller containers that you may not use with your bigger plants will always work best when potting cuttings.

Critical Features of a Good Cactus Pot

No matter the size or shape of your container, it is crucial to ensure that it has proper drainage. A container that doesn’t allow water to drain out quickly is quite dangerous because it will expose the roots to excess moisture leading to root rot. You must also make sure you are using the right type of potting mix intended specifically for cacti plants.

It is also critical to consider the material the container is made of and how it will affect your plant. Ceramic and terracotta containers are quite popular, but they tend to heat up quickly when exposed to sunlight. This can dry out the soil pretty fast before the plant absorbs sufficient moisture.

Wooden containers usually stay cool for longer periods when exposed to sunlight but retain too much moisture in shades.  Some pots are also made of a metallic material, but they are not a good choice for long-term use because they are susceptible to rust.

Always consider where you will be keeping your plant before you decide on the type of container to purchase. The storage area will help you determine what material will be best for that location when shopping for your plant pot.

Cactus in a clay pot outside.
Always consider where you will be keeping your plant before you decide on the type of container to purchase

Final Thoughts

Pot size is a crucial factor to consider when growing cacti plants. Generally, the right pot will almost be the same size as the plant and more specifically, its roots.

When choosing your pot, it is always good to take a look at your plant roots to determine whether you will need a deep or shallow container. If your plant grows long roots, you will want a relatively deep container.

We believe you are now well equipped to purchase a new pot for your cactus. While there are lots of other things you need to consider when choosing a pot, it is still a fun part of growing cacti plants.

Let us know what you think in the comments section and subscribe to our email list for the latest cactus growing tips.

How To Water A Cactus Indoors?

Many of us tend to think that watering plants is quite easy, right?  Well, it might be, but the unfortunate thing is that you might be doing it the wrong way.  How you water your cactus plant is crucial since incorrect watering accounts for almost 90% of all cacti deaths! The good news? Once you figure out how to water your plant correctly, it is almost impossible to kill it.

So are you wondering how to water a cactus indoors?  One of the best ways of watering your indoor plants is by avoiding the spray bottle at all. With a spray bottle, you are only going to wet the top few inches of the soil which doesn’t help in any way. Instead, try as much as possible to drench your potting mix to the bottom. The best way to do this is by pouring a lot of water on the soil near the base of the plant or soaking the entire pot in a water pan for a few minutes.

In this post, we are going to teach you how to water your indoor cactus plant properly and how to make it thrive. Read on to find out everything you need to know about watering your indoor cactus.

Growing Cactus Indoor: A Quick Overview

Cacti plants usually have a unique, stark beauty and produce the most beautiful flowers in the entire plant. Fortunately, growing desert cactus in your house isn’t difficult.

Successful gardening of these hardy plants in your house requires you to stick to simple rules. Do the right thing, and you will have beautiful plants that will decorate your interior spaces throughout the year.

Some cacti species will bloom after three or four years while others may take longer. However, getting your indoor cacti bloom shouldn’t be a big issue as long as you know how to take good care of them.

A white cactus flower.
Cacti plants produce the most beautiful flowers in the entire plant

Some of the critical things you need to keep in mind while growing cactus indoors include:

  • Choose the right type of potting mix for your indoor plants. If you cannot find good soil from your local plant store, consider making your own.
  • Provide sufficient light for your plant. Keep in mind that intense light is essential for healthy cacti. Most indoor cacti species require access to bright but not direct sunlight.
  • Understand the temperature and humidity requirements of your plants. During the active growing seasons, your cacti require hot, dry temperatures.
  • Know when and how to water your plant
  • Know when to apply fertilizer and how to get rid of some of the common pests that may attack your plant

How Often Should You Water Your Indoor Cactus?

One of the easiest ways of killing your indoor cactus is by watering it incorrectly. Keep in mind that cacti plants hold water in their stems and other plant tissues. These plants make use of the stored water to survive in dry areas.

Therefore, overwatering can be catastrophic. However, they still need to be provided with sufficient water to survive the indoor environment.  The best way to determine if your plant requires watering is by checking the soil moisture content.

To do so, carefully stick your finger into your potting mix and pay close attention to how it feels. Do not just touch the surface soil but make sure you penetrate at least two inches downwards.

A small cactus plant in a pot.
Always pay close attention to how your plant appears.

If the soil feels wet, moist, or damp, do not water your plant. Wait until it dries out completely before watering. How much and when you water your indoor plant largely depends on the season.

During the active growing seasons (spring and summer), your plant requires more water. For most indoor plants, watering at least once every ten to 14 days should be enough to keep your plant happy.

During the dormancy season (winter and fall) the plant requires less water. At this time, you need to water less frequently and less thoroughly. Generally, water your plant at least once every three or four weeks.

Always pay close attention to how your plant appears. If it seems shriveled in between watering sessions, you may need to water it more. However, if you are unsure of what to do, then you will be safe if you water it lightly.

After all, under-watering cactus is better than overwatering it. Therefore, feel free to experiment a few times until you figure out what works best for your plant.

What Is the Best Time to Water Your Indoor Cactus?

The time of day you choose to water your indoor cactus will also greatly impact its health.

Ideally, you should water your plant in the evening or early morning when temperatures are low, and the evaporation rate is at its lowest. This way, more moisture will remain in the soil for longer, allowing your plant to benefit from it.

Avoid watering your plant during the middle of the day when temperatures are high. This is the time when evaporation occurs rapidly, meaning that a lot of water will be lost in the process.

Never leave standing water on top of your soil for more than an hour. The moment you pour it, work to ensure that the excess drains out of the pot. Otherwise, your plant will drown in water.

How to Water Your Indoor Cactus Correctly

You may know when to water your indoor cactus but do you know how to do it properly? The watering technique is the most crucial thing that will determine whether your plant thrives or dies.

Ask any experienced gardener, and they will tell you that watering is not just a matter of pouring water on your plant.

A water container and cactus on the pot.
The watering technique is the most crucial thing that will determine whether your plant thrives or dies

Before we discuss the right watering technique, let us start by pointing out the wrong watering technique that most of us tend to use.

Do not use a spray bottle to water your plant. You should also avoid misting.

The truth is that no matter the number of times you squeeze that trigger, you are only going to wet the top few inches of your soil. Unfortunately, there aren’t any roots there to absorb the water.

In fact, this watering technique can be quite detrimental to your cactus plant because it will be forced to start growing roots towards the soil surface other than down and out of the pot.  With time, you will end up with a weak root system that cannot support the plant for long.

To water your plant correctly, make sure you fully drench the soil to the bottom. So, how do you achieve this? Pour water on the soil near the base of the plant and make sure it is a lot of water. It shouldn’t be a trickle.

You can even consider wetting all of the soil in the pot if it is possible. This watering technique encourages the growth of a wide and healthy root system that will support your plant for many years.

Some gardeners prefer soaking the entire plant pot in a water pan for some time before taking it out. This is also another good way of ensuring that water reaches the bottom soil.

Should I Water My Indoor Cactus During Winter?

Most cacti plants are naturally dormant in winter, meaning they don’t need to be watered as much.

However, if your plant is starting to show some signs of dehydration, such as wrinkled leaves, you can water it sparingly. This can help keep the soil moist until temperatures begin to rise again.

During this time, focus on watering just enough to keep your plant from drying out completely.

You don’t want to overwater it during this time as the roots may still be too cold to absorb the moisture, and you might end up with a bunch of rotting cacti plants.

Also, ensure that the environment is warm enough for your plant before attempting to water it. Room temperatures above 65 degrees Fahrenheit are ideal for most cacti plants.

How to Water Indoor Cactus Grown in a Pot without Drainage Holes

Let us start by stating that we don’t recommend growing cactus in containers without proper drainage holes because the results can be catastrophic.

But, if you have been to plant display shows, you must have noticed the new trend. Cacti and other succulents being integrated into all kinds of cute artsy crafts. 

It is no longer surprising to find cacti plants grown in teacups, terrariums, succulent birdbaths and all types of containers.

Clay pot with holes.
We don’t recommend growing cactus in containers without proper drainage holes

Although this may seem adorable, it isn’t the best way to grow these plants.  Keep in mind that not having proper drainage puts your plant at a significantly high risk of developing root rot.  Don’t think the few pebbles at the bottom of the container will create drainage.

If you have your cactus perched in such a container, there is only one way of approaching watering. Waterless and pray that things don’t get worse.

Instead of drenching your container, simply pour a small amount of water (maybe a teaspoon full) at the base of your plant.

You should also try to stretch out the amount of time between watering sessions as much as possible.  Also, be sure to keep your container in a relatively dry place that receives lots of light. Consider a south-facing window if you are in the northern hemisphere.

While you may want to dry your soil completely before watering, the truth is that it may not be possible. So, all you have to do is establish what works in your favor and stick to it.

Should I Water My Indoor Cactus After Repotting?

Occasionally, you may need to repot your indoor cactus. Whether it is a mature plant outgrowing its pot or a young one that needs a change of soil, you should know how to handle the situation.

When you take your cactus out of its old container, there are chances that the root system will be severely damaged. This means the plant will need extra care for it to bounce back.

The rule of thumb is to let the plant rest for at least two weeks before watering it again. During this time, you can mist the soil lightly if it seems dry.

Once your cactus has settled into its new container, you can go ahead and give it a full drink of water. However, more importantly, ensure that the soil is completely dry before the next watering session.

Remember that watering your indoor cactus correctly is essential if you want it to thrive in its new pot.

Should You Use Soft Water, Hard Water or Rainwater?

Water hardiness is usually determined by the concentration of ions in the water, and it may have an impact on the overall health of your cactus.

Soft water is a term used to refer to water that has been treated with potassium or sodium to remove minerals such as magnesium and calcium. Soft water contains high amounts of sodium.

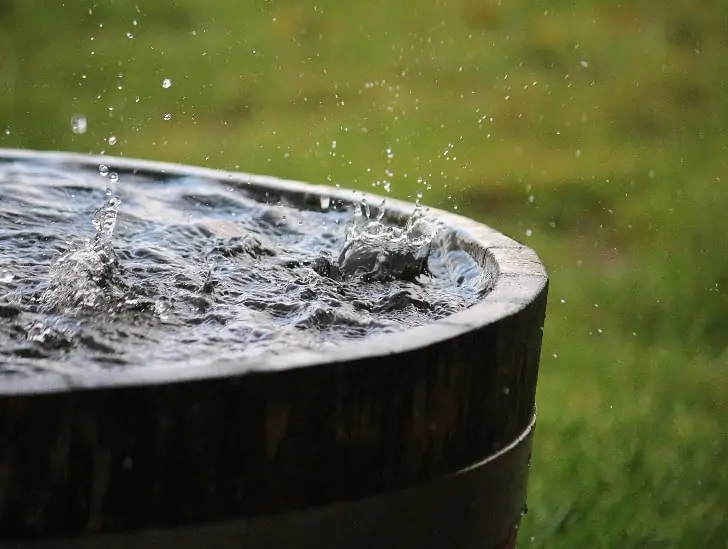
 A stored water,
Rainwater is the preferred water for cacti plants.

Hard water contains high concentrations of dissolved mineral particles such as magnesium and calcium. Rainwater in its natural state is soft water.

So, what is the right type of water to use in watering your cacti plants?

1. Hard water

In most cases, hard water will leave mineral buildup on your plant if it is used for a prolonged period. The mineral buildup may leave its mark on your plant. Fortunately, you can get rid of the stains by repotting your plant regularly (once every two years).

2. Soft water

Soft water contains relatively high concentrations of sodium which can cause harm to your cactus. The excessive amount of sodium in the water can build up on the skin of your plant resulting in stunted growth.

The high concentration of sodium may also harm your plant in the long run since it interferes with proper absorption of water and hydration.

3. Rainwater

This is the preferred water for cacti plants since it contains the right amount and balance of minerals necessary for your plant to thrive. Always try to collect as much rainwater as possible and store it properly for later use on your cactus.

Summary

Although cacti plants are hardy, they still require proper watering to thrive. Generally, the watering technique you choose to use will have a significant impact on the overall health of your plant. 

No matter how you decide to water your indoor cactus, the target is to get the soil wet from top to bottom and allow excess water to drain out of the container as quickly as possible.

The good thing is that once you master the right watering technique, it becomes pretty easy to take care of your indoor cactus plant!

Is Cactus Poisonous or Dangerous To Kids?

Disclaimer: The author is not a medical doctor or veterinarian. The information presented is purely to share our experience and for entertainment purposes. As always, check with a doctor and/or veterinarian before making any health or nutrition decisions and consult with a doctor and/or veterinarian regarding any question or problem that you have. The author and blog disclaim liability for any damage, mishap, or injury that may occur from engaging in any activities or ideas from this site.

Growing a cactus inside your house does not only beautify your indoor spaces but also gives a refreshing aura to your home.  A lot of people find it quite relaxing to see a beautiful plant such as cactus in the middle of the center table or the four corners of their living room. However, some gardeners are afraid of growing cacti in their homes since they aren’t sure if these plants are safe for their kids or not. 

So, is cactus poisonous to kids? Most cacti species are safe for both humans and animals. Their toxicity levels are quite low, but the spines and needles are quite dangerous.  The best way to know if your plant is poisonous is by determining its species. There are a few species that can potentially pose a significant danger to your kids. If you don’t know the type of cactus you own, be sure to seek immediate medical attention if your child accidentally ingests the plant.

In this post, we discuss everything you need to know about the safety of cacti plants and what you can do to keep your kids safe. We shall also highlight some of the cacti species that are poisonous.

Are Cacti Plants Poisonous To Children?

Due to the sensitivity of some cacti plants such as the Christmas cactus, they need an indoor environment to thrive.  The stems and leaves of such plants cannot be exposed to direct sunlight. However, before you take this step, you will want to be sure about the safety of the plant, especially if you have kids and pets in your home.

Research shows that plants have been one of the world’s leading poison contributing factors inside homes. A significant number of indoor plants have been found to contain substantial amounts of toxins that may be harmful to humans.

But, does it mean that all cacti plants are poisonous? No.

The good thing about most cacti species is that their toxicity level is almost zero. You don’t have to worry about the effect of the plant on your family’s health. In fact, this is one of the top reasons why a significant number of people out there prefer growing cacti indoors.

In some rare cases, infants may be sensitive to the Christmas cactus, but it doesn’t mean that it will cause any harm to them. The plant is absolutely safe for your baby, and there is nothing to worry about.

However, there are certain times when small kids may try to ingest the cactus while playing. For precautionary measures, make sure you position your plant in a slightly elevated area where your kids cannot reach easily. 

Although the plant may not contain toxic elements, it is definitely not fit for human consumption. Only the fruits of a few cacti species are edible.

A closeup image of a cactus.
The good thing about most cacti species is that their toxicity level is almost zero

Poisonous Cacti

One thing you should note is that not all cacti plants are safe. Although most of them have amazing features, some of them are also not safe at all.

By poisonous, we are not referring to the leaves and spines even though their spines are quite dangerous as well if they find their way into your skin.

Keep in mind that the spines serve as a defense mechanism to protect the plant against predators and also serve a reproductive purpose. They usually cling onto a host, and when they fall off, they start growing into new plants.

So, how are these plants poisonous? Well, some cacti plants are highly corrosive to the human skin, and when they are ingested, they may a wide range of illnesses. These are the plants you need to watch out for and, if possible, avoid them completely.

While you may have had no need to research before buying your cactus plant, the dynamics change if you have kids and pets in your home.

Take time to establish safe cacti species to grow at home and generally avoid the following species that are poisonous:

1. San Pedro Cactus (Echinopsis Pachanoi)

The San Pedro cactus is known for its beautiful flowers and spines. It mostly grows in the Andes Mountains in Argentina, Chile, Ecuador, and Bolivia. This cactus species is mainly used for healing and recreation purposes, but it contains high amounts of mescaline and other psychedelic alkaloids.

Mescaline is listed as an illegal substance in most countries since it is known to cause hallucinations when ingested.

A san pedro cactus.
San Pedro Cactus

The chemical substance can also distort one’s thought process.  Therefore, it not advisable to grow the San Pedro cactus in your home because it can cause devastating effects to your kids when they ingest it.

Some of the side effects that one can suffer from ingesting this cactus include dizziness, stomachache, nausea, vomiting, and palpitations.

2. The Peruvian Torch (Echinopsis Peruviana) Cactus

The Peruvian Torch is widely known for its relatively fast-growing nature. This cactus species grows large spines and is mostly found on the slopes of the Andes Mountains in Peru.

This plant is named after one of the famous cities in Peru. It is easy to cultivate as a home plant, but you should avoid it if you have kids or pets to protect.

A unique feature of the Peruvian Torch that makes it attractive is the gorgeous flowers that grow near the top of the stem. Its flowers open up at night and have a relatively strong fragrance.

However, ingesting this cactus can be dangerous since it is known to cause hallucinations and a wide range of disordered thoughts. You can still cultivate the Peruvian cactus as an outdoor plant, but make sure you keep it away from your children and pets.

A Echinopsis Peruviana.
Echinopsis Peruviana

3. Peyote Cactus (Lophophora Williamsii)

The Peyote cactus is one of the few spineless cacti species you will come across. While you may assume that the cactus is safe because it has no spines, the opposite is quite true. Peyote cactus is a slow-growing plant that is mostly found in the western parts of the USA and Mexico.

This plant is traditionally used to heal illnesses such as diabetes, fever, childbirth pain, skin diseases, and rheumatism since it contains mescaline.

However, the same mescaline content has psychoactive properties. When ingested, one will start feeling psychoactive, and the side effects may be adverse.

For instance, an overdose of peyote cactus can lead to a psychotic breakdown, which is quite dangerous for individuals with mental problems because it aggravates the issue.

The plant also has strong emetic effects and a bitter taste that can be nauseating hence the need to keep it away from kids. Peyote cactus is also known to cause variations in breathing, blood pressure, papillary dilation, and heart rate.

4. Canary Islands Cactus (Euphorbia Canariensis)

The Canary Islands Splurge cactus is a top choice for many gardeners because it is relatively easy to maintain and does well in well-drained soil and full sunlight. In fact, this is one of the few low-maintenance cacti plants you may come across.

It is named Canary Islands Splurge because it mostly grows in the coastal belt of the Canary Islands. It thrives in extremely cold temperatures and produces beautiful flowers along its edges.

Even though it is lovely and easy to grow, you will rarely find Euphorbia Canariensis in homesteads for obvious reasons.

The plant is highly toxic and cannot be consumed. In fact, it produces a milky sap that irritates human skin and eyes.  Handling the plant requires great care since any slight breakage will expose your skin to its milky juice, which might result in severe skin burn.

If ingested, the sap can cause cold sweats, sneezing, and even fainting.

5. The Cholla Cactus

The cholla cactus shoots like needles and is commonly found in the desert regions of the southwestern United States and northern Mexico. It grows in dense clumps with long stems that can reach heights of up to four feet tall.

The cholla cactus produces edible fruits, but its spines are highly dangerous and irritating, so you should never touch it unless you have protective clothing. To make matters worse, the spines are barbed and will break off in your skin when touched.

The cholla cactus is known to cause severe allergic reactions in humans, including hives and swelling of the face, lips, and tongue. If ingested, it can also affect your digestive system since it releases a toxin that causes intense stomach pain and vomiting.

It is also poisonous to animals. Since the spines are highly dangerous, it’s best to keep cholla cacti away from children and pets at all times, so they don’t get hurt or poisoned.​

Are Cacti Plants Poisonous to Pets

Just like kids, you need to be cautious when exposing your pets to a cactus plant. Some pets love eating plants, and you will want to be wary of the harm it can cause to your pet.

Fortunately, most cacti species are safe for your pets, but you will still need to avoid the poisonous species mentioned above. Generally, cats and dogs find plant leaves and flowers attractive. The worst can happen if your pet was to ingest a poisonous cactus.

A cactus in a pot with a ceramic dog beside.
Cats and dogs find Cactus leaves and flowers attractive.

The best thing you can do with your pet is to make sure it cannot reach the cactus plant at all. Keep everything away, and don’t hesitate to contact a veterinary officer in case your pest ingests your plant.

Precautionary Measures Recommended to Keep Your Kids Safe

Even though we have mentioned that a significant number of cacti species are safe, it is still important to take precautionary measures to keep your little ones safe. To be safe, make sure you do the following:

  • Keep all plants out of reach of young children
  • When spending time outdoors with your young ones, teach them to stay away from plants and not eat any non-food items
  • Do not assume that a plant is safe for your kids just because you think so.
  • Leave tags on all plants and other items you bring home from a plant nursery. If you don’t know the names of the items, ask an expert at the plant nursery to help you identify them and get a name tag for each item
  • Make sure your children’s caregivers know the names of all plants inside and outside your house

Can Cactus Needles Kill You?

Cactus needles are pretty dangerous because they are sharp and cover a relatively large surface area. They can easily cause puncture wounds, skin infections, and rashes in humans.

However, it is highly unlikely that cactus needles can cause death if you take proper precautionary measures and avoid touching them with bare hands.

If you are exposed to a high number of cactus needles or their toxins, then it is possible that you could experience an adverse reaction that leads to death.

You should seek immediate medical attention if you experience severe reactions such as difficulty breathing, throat swelling, dizziness, or confusion.

Is Cactus Water Poisonous?

Besides sharp needles, cactus plants also contain a type of sap called cactus water. This liquid is stored in the plant’s stem and leaves and can be toxic if ingested by humans or animals.

The water contains a toxic substance known as saponin, which can cause severe gastrointestinal issues if ingested. In extreme cases, it can also cause kidney failure or death.

Cactus water is also known to cause stomach irritation and vomiting when consumed, so it’s best to stay away from it entirely. Avoid contact with your eyes, nose, or mouth when dealing with cactus water.

If you come in contact with the liquid, wash your skin and eyes immediately with running water and seek medical attention for any poisoning symptoms.

What Is the Most Dangerous Cactus?

The most dangerous cactus is the cholla, which is native to the Southwestern United States and Northwestern Mexico. This cactus has sharp spines that are barbed and hooked, making them particularly dangerous as they can easily stick to the skin.

If you come in contact with a cholla, it’s best to use tweezers or a pair of pliers to remove the spines and seek medical attention if you experience any signs of infection.

Other dangerous cacti include the jumping cholla and some species of Euphorbia. It is essential to avoid contact with these cacti as they can cause serious injury, illness, or even death.

Final Thoughts

Although cacti plants are an incredible option for indoor plants, they are not 100% safe. Therefore, it is essential to take all necessary precautions to keep them away from your kids and pets, and anyone that can negligently ingest them. 

Before you purchase any cactus plant, conduct thorough research to establish its safety, especially if you have kids at home.

If you think there is something we have failed to discuss in our post, please let us know in the comments section below.

How Do You Know When A Cactus Needs Water?

Watering a cactus.

Cacti are relatively easy-to-grow plants that can survive for a prolonged period in drought conditions. However, it doesn’t mean that they are indestructible just because they originate from the desert. Prolonged drought can be catastrophic, and that is why you need to understand dehydration signs to look out for in your plant needs.

So, how do you know when a cactus needs water? Well, to know if your plant needs water, you need to observe its behavior carefully. Typically, if a cactus is under-watered, its body may look wrinkly and feel somehow “soft.” The spines (modified leaves) feel dry and may easily fall off. Dry leaves caused by lack of enough water are usually softer to touch than when they are adequately hydrated but don’t look soggy and translucent like overwatered leaves.

In this post, we would like to share with you some of the common signs of a dehydrated cactus plant and how often you need to water your plant for it to thrive.

How Do You Know If Your Cactus Needs Water?

If you want to know how to tell when your plant needs water, you need to understand how cacti plants are different from other plant species. The primary characteristic that makes these plants different is their ability to store water for a relatively long period.

Cacti plants have specialized stem cells that hold onto water whenever there is a downfall in the desert. This means that once you water your plant, these cells absorb water until every cell is fully hydrated.

Over time, the plant will utilize the water stored in its cells, gradually reducing the hydrostatic pressure inside the plant cells and tissues.

A water can beside the cactus,
You must learn how to tell when the hydrostatic pressure is relatively low. 

As long as the plant’s water reservoir hasn’t been exhausted, it will prefer dry, airy soil. This is the primary reason why it is highly recommended to grow cacti plants in porous potting mix.

Problems arise when you grow these plants in wet and humid areas where soils don’t dry up quickly in between watering sessions. You may also encounter problems when a drain hole in your pot blocks or if the holes are too small.

Pots designed for growing cactus must have numerous holes to facilitate quick drying of the soil after watering.

To know when to water your plant, you must learn how to tell when the hydrostatic pressure is relatively low.  So, how can you tell when the hydrostatic pressure is low? 

1. Visual change

When a cactus is fully hydrated, it will stand up to its full height and appear healthy. However, many of them start to show signs of distress when the internal hydrostatic pressure drops significantly.

For instance, some cacti species will start to fold into half then after watering, they straighten up again since the hydrostatic pressure is back to normal.

A top image of a cactus.
Cactus will start to show signs of distress when the internal hydrostatic pressure drops significantly.

Other species may show signs of wrinkles on their skin caused by reduced tissue volume. Sagging tips, drooping leaves or subtle leaning are some of the common signs of reduced internal moisture and a clear indicator that your plants require watering.

2. Physical touch

Another way you can tell whether the hydrostatic pressure of your plant has dropped is by touching it and taking note of how it feels. A fully hydrated cactus plant feels “hardy” and regains its shape quickly if you press it slightly.

If you haven’t done this before, start by watering your plant, let it rest for a few hours then press it several times to understand how it feels when it is hydrated. Let this serve as a basis for your future comparison.

When the stored water is used up, the plant tends to soften up due to significant loss of hydrostatic pressure. The plant will easily yield to your touch while in this state.

However, you should be worried if your cactus is softening unevenly since it could be a sign of invisible root rot spreading through the healthy plant tissue.

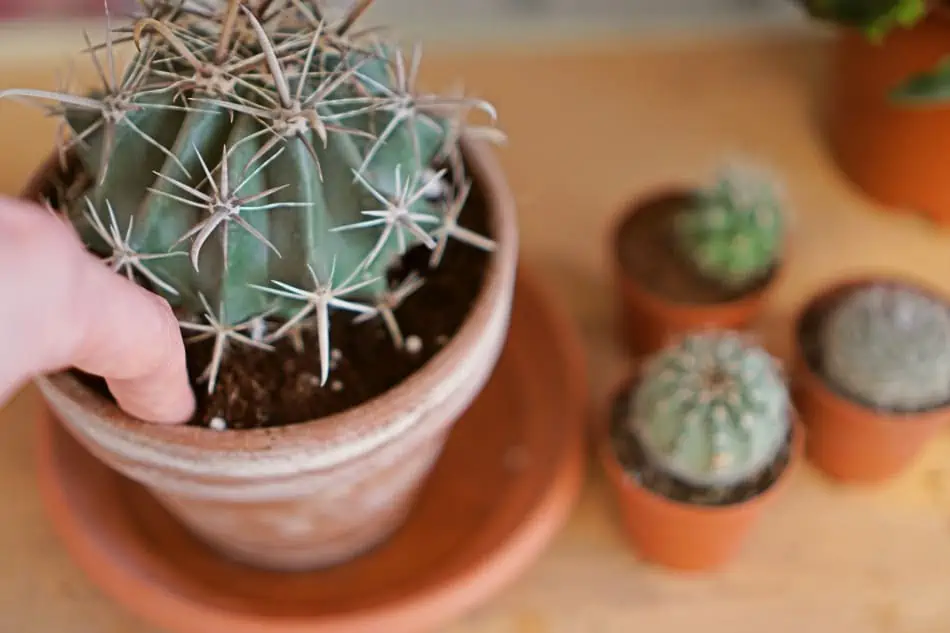
A person checking the cactus soil.
Check your cactus soil and feel whether it’s dry or not

3. Water when the soil is completely dry

The first step to keeping your cactus plant happy is ensuring that your potting mix is fast-draining and has plenty of inorganic materials. From there, you need to make sure that your soil is completely dry before you water your plant.

Fortunately, checking if your soil is dry isn’t difficult. The easiest way of checking is by sticking your finger into the container. Be sure to go down at least two inches and note how it feels.

If the soil feels wet, damp, or slightly colder than the surface, do not water your plant. Instead, give it a few more days and check again before you consider watering.

The other way of checking the level of dryness of your soil is by using a soil moisture meter. A moisture meter is a simple device that records the soil moisture content.

Be sure to go for a quality moisture meter because the cheap ones can be quite inaccurate.

4. Watering method

Did you know that your watering method can have a significant impact on your plant? Experienced gardeners agree that there are a lot of o problems caused when you water your cactus plant from top to bottom like other ordinary potent plants.

With this watering method, water travels down the edges of the soil mass and out the bottom, which leaves too little behind for actual absorption. In fact, some cacti plants develop rot right at the soil line due to this kind of watering.

A small cactus in pot with a water can at the side.
Watering method can have a significant impact on your plant.

The best way to water your cactus to ensure it stays longer before dehydration is to set the pot in a pan of water. This way, you allow the soil to absorb as much water as possible, which in turn boosts the plant’s absorption rate.

Once the moisture moves up to the surface of your potting mix, carefully take the pot out of the water pan and let it drain.

How Often Do You Need to Water Your Cactus?

One of the most dangerous things for your cacti plants is watering them incorrectly. Keep in mind that these plants hold water in their stems and tissues. They use stored water to survive for prolonged periods before they need another watering session

Too much water is deadly for your plant. In fact, it is much easier to recover from underwatering than overwatering. However, leaving your plant too dry for prolonged periods can easily cause their roots to die.

The best way to determine if it is the right time to water your plant is by examining the soil and feeling the moisture level. As mentioned earlier, don’t just touch the surface of the soil and make a decision. Dip your figure deep down the potting mix to see if it is scorched.

How much and when to water your plant will also depend on the season. During the growing season (spring and summer), when most cacti plants are active, you need to water the plants regularly and thoroughly.

For most indoor potted plants, watering at least once every ten or 14 days during the active growing season should be okay.

During the inactive season (mostly winter), you only need to water it a few times. Typically, watering your cactus at least once per month will be sufficient.

Pay close attention to how your cactus looks during this period. If it starts to appear shriveled between watering, you should consider watering it more.

Watering After Initial Planting

Once you have your plant in the right pot with a good potting mix, you need to water it properly, so it picks up. Be sure to soak the container in plenty of water and let it absorb as much after as possible. After all, the first watering after planting may be the most critical.

However, it is still important to allow the plant to drain even if you are watering it for the first time. Don’t be tempted to leave a dish under your pot or block some holes because it encourages rotting.

Watering Outdoor Cactus

Outdoor plants tend to have slightly different watering needs because they are constantly exposed to various weather conditions. As a general rule, make sure you water your outdoor plants at least once every seven or ten days during spring and summer.

Before watering, take time to feel the soil moisture and make sure the potting soil is completely dry. Water your plants thoroughly until you see excess water seeping out of the drainage holes.

Depending on the type of your container and soil, you may not always see excess water flowing out of the drainage holes.

During the inactive seasons (fall and winter) water your plant less often and lightly. Consider watering only once every three or four weeks.

The best time to water your outdoor plants is early morning. This allows it enough time to dry out during the day. Watering early morning also enables the water to penetrate through the soil quite easily, hence reaching the roots.

Cactus in a pot exposed to sunlight.
As a general rule, make sure you water your outdoor plants at least once every seven or ten days during spring and summer

Final Thoughts

The notion that cacti plants require little to no water at all to survive has caused the death of many plants due to dehydration. Although these plants are drought-resistant, it is good to keep in mind that they can easily die if you don’t provide them with sufficient water.

Do not treat your cacti like other traditional plants that depend on perpetual soil moisture to thrive.

Always remember that your plant has a unique way of speaking to you, and it will clearly show you signs when it needs some watering. All you have to do is learn how to read the signs.

How To Make A Christmas Cactus Bloom? Here are the secrets

If you are like many gardeners out there, then a Christmas cactus must be one of your favorite plants. The lovely flowering cactus is one of the few cacti species that originate from the forest.  While this is an attractive plant to have all year, its real magic is displayed when it starts to bloom. Unfortunately, getting your Christmas cactus to bloom when you want it can be quite a challenging task unless you know how to do it right.

So, how can you make a Christmas cactus bloom? Well, the secret to getting your Christmas cactus to bloom is providing it with the right temperatures and amount of light.  Christmas cacti tend to flower in a cold and relatively dark environment. To initiate the production of flower buds, make sure you expose it to at least 16 hours of darkness and eight hours of light for at least six weeks. With the right conditions, it can take up to 12 weeks for the first blooms to appear.

In this simple guide, we walk you through the simple steps you need to take to ensure you receive the best show from your Christmas cactus. The information contained here may also apply to other types of cacti as long as you tweak the schedule to accommodate for the different flowering seasons.

The Christmas Cactus: A Quick Overview of the Plant

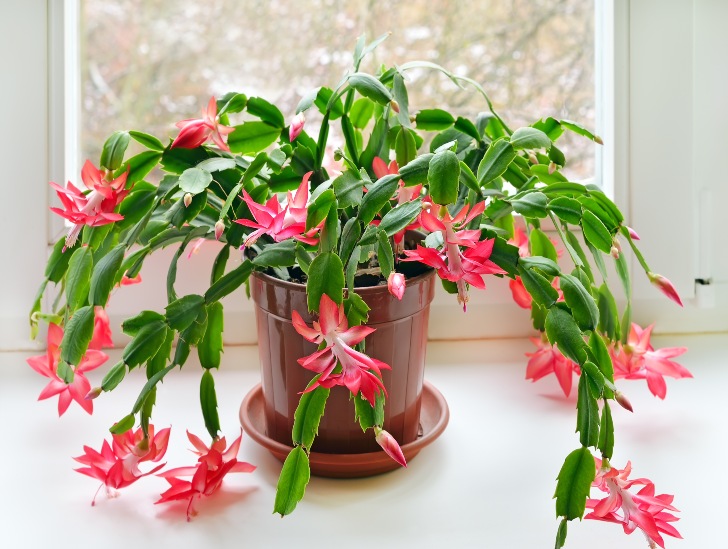
Schlumbergera bridgessii, commonly referred to as Christmas cactus, is a type of succulent that originates from the tropical rainforest of Brazil. Some people love to call it the crab cactus thanks to its leaf-shaped stem segments that feature curved pointed teeth along the edges. The Easter cactus is closely related to the Christmas cactus, but it has rounded edges on its leaf segments.

Christmas cactus is usually classified as epiphyte because it thrives above the ground in areas where tree branches meet and decomposing fallen leaves collect. Even though this plant bears the name of a cactus, the care it needs has nothing to do with the typical desert cactus. To be more specific, this plant is classified as forest cactus.

The plant grows well when it is pot bound and prefers a rich and organic potting mix. Never allow the potting mix to dry out if you want to keep it alive. Also, once you notice that it is growing bigger and bigger, you should plan how to move it up to a larger container.

Christmas cacti do well in bright, indirect light. Avoid exposing it to direct sunlight because the intense heat can easily cause sunburn to its leaf segments.

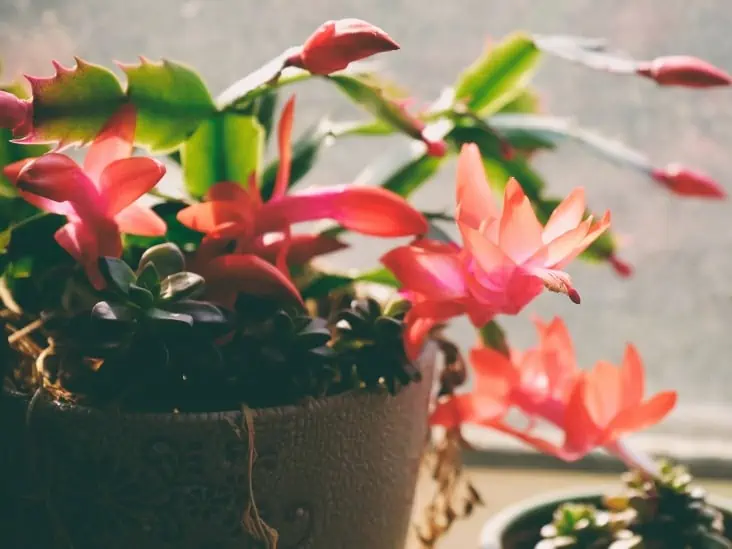
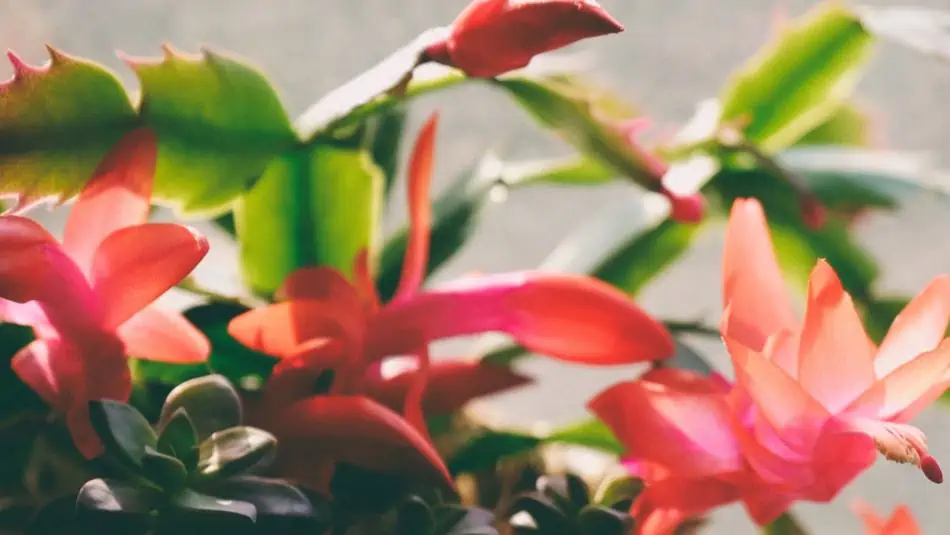
Christmas cactus flower.
Christmas cactus is usually classified as epiphyte.

How to Get Your Christmas Cactus to Bloom

The trick to getting your Christmas cactus to bloom boils down to three critical things: light, temperature, and water. Typically, the bloom season for this plant comes during fall- in the last days of October and the early days of November. This information will help you understand when you should start preparing your plant for the blooming season.  

Here are the three critical points you need to be aware of if you want to make your Christmas cactus bloom:

Reduce Watering

To encourage blooms to form, you need to start limiting the amount of water your plant receives. The only thing you need to do is to keep the topsoil moist, not waterlogged.  Water the topmost layer of your potting mix, which is approximately one inch only when it is necessary.

Keep in mind that too much water may cause the buds to fall.  You should only water the plant when the topmost soil layer (about one inch or 2.5cm) is completely dry to touch. Minimal watering will encourage the plant to enter dormancy, which is a critical stage for getting your plant to bloom.

Feed Your Cactus

Although Christmas cactus is known to survive without fertilizer, feeding your plant with slow-release or liquid fertilizer will help promote flowering. Preferably, feed your plant every two weeks from mid-summer until it stops blooming.

Use organic liquid fertilizer to ensure that the Christmas cactus takes in all the essential nutrients for healthy growth and bloom production.

Compost tea and fish emulsion are some of the best options for indoor plants like Christmas cacti.

Alternatively, use a slow-release fertilizer during the blooming season. Be sure to follow the instructions given on the packet when feeding your plant and read the labels carefully. Do not overfeed your cactus plant because it will affect its growth.

Provide Enough Lighting and Darkness

Apart from watering, you will need to ensure that your plant receives the right amount of light and darkness. To bloom, your plant requires between 12 to 14 hours of uninterrupted darkness for at least eight weeks.

This period should start from mid-September to the end of October or early November. Exposing it to some indirect bright sunlight during the day is okay, but you have to ensure that it receives at least 12 hours of absolute darkness at night.

Christmas cactus flower bud.
It will take approximately six weeks for you to start seeing the flower buds.

After this period of exposing it to intense darkness, it will take approximately six weeks for you to start seeing the flower buds. If you are growing your Christmas cactus indoors, do not turn on the lights at night even for a second because it breaks the dark cycle required.

Cool Temperature

Limiting watering and placing your cactus in a dark room isn’t all that is needed to make it bloom. You also need to keep the surrounding environment as cool as possible. Typically, you should work towards keeping the temperature to an average of about 50-55 degrees F.

This should happen every night from mid-September to the end of October. Therefore, it is critical to ensure that the location where you have stored your plant provides both the right light and temperature requirements.

"COOL" Lighting.
keep the surrounding environment as cool as possible, about 50-55 degrees F

Avoid Pruning Your Cactus

Pruning or trimming your Christmas cactus is not recommended since it will leave the plant in a weak state which won’t be able to produce blooms.

Even if you want to remove some dead parts from the stems, do so very carefully and only when necessary.

The best time to prune your Christmas cactus is after it has bloomed. This way, the plant will have enough time to recover and adjust from the pruning process before it slides into winter dormancy.

Be careful not to damage the flowers while trimming or shaping your Christmas cactus. If you do, it will reduce its bloom production and, in some cases, prevent them from showing up.

Taking Care of the Flowers on Your Christmas Cacti

If you do everything right, you can be sure to experience a magnificent floral show. But how do you take care of the flowers to enjoy the show for as long as possible? The first thing you need to do is to ensure your plant continues to receive prolonged hours of darkness and cold temperatures for between six to eight weeks.

You should also consider relocating your plant to a relatively sunny and draft-free spot. However, protect it from direct sunlight as much as possible since intense heat may cause some of the flowers to start falling off. 

Christmas cactus flowering in a pot.
Ensure your plant continues to receive prolonged hours of darkness and cold temperatures for between six to eight weeks.

Exposing the plant to brighter, indirect sunlight will encourage it to produce more flowers. Christmas cactus will also bloom better when it is pot-bound.

While watering may be slightly increased during the blooming period, the amount will vary depending on your plant’s current light conditions, humidity levels, and temperature.

The good news is that when you force a Christmas cactus to bloom by providing it with the right conditions and proper care, it may surprise you by blooming several times in a year.

Can a Christmas Cactus Bloom More Than Once in a Year?

Yes. Unlike other types of cacti species, a Christmas cactus can put on the floral display more than once a year if you provide it with proper growth and blooming conditions. For instance, positioning your plant on an east-facing window that receives abundant sunlight during the day and at least 12 hours of darkness every night can make your plant bloom again.

In essence, we are looking at the right balance between light, darkness, warmth, and coldness. The cold evening temperatures may encourage your plant to flower again, even when you least expected it.

Make sure your Christmas cactus plant receives the right amount of darkness and cool temperatures in fall so that it can bloom again in winter. While it blooms, continue to provide the right conditions as it takes long before you can start to see new flower buds sprout.

Why Won’t My Christmas Cactus Bloom?

The holiday season is here, and you have put in place the right measures to ensure you enjoy the most beautiful floral display of the season. But what happens if your Christmas cactus doesn’t bloom?  What might be the problem?

Here are some of the common reasons why your Christmas cactus isn’t blooming.

Overwatering

The sad truth is that most of us love to pamper our plants during the summer. While your Christmas cactus may love a drink or two every week throughout summer, it can still survive with less.

It might sound strange, but the truth is that these plants usually need a period of almost-drought to signal it to start preparing for winter blooming. So, if you are a lazy waterier, you might just be helping your plant to bloom.

Flower in a water can.
To encourage blooms to form, you need to start limiting the amount of water your plant receives

It is getting too much light

Staring mid-September until the end of October, your Christmas cactus requires at least 12 hours of uninterrupted darkness to bloom. Unfortunately, artificial lights in your house can easily interrupt the cycle of darkness.  The easiest way to solve this problem is to relocate your plants to a room that is not often used.

It is too warm

Christmas cacti will need a significant drop in temperature to signal the plant to start preparing for the blooming season. If you have positioned your plant on a south-facing window, which is the warmest spot in your house, try moving it to a north-facing window or near the door.

The stream of cool air that hits the plant when the door is being opened or shut should signal it to start preparing for the blooming season.

It’s malnourished

Your plant may not bloom because it is malnourished or has been given excess fertilizer.

Be sure to feed your Christmas cactus with the right amount of liquid-based nutrients every two weeks during the growing season and reduce fertilizer levels once flowering starts.

You can also consider repotting your Christmas cactus into a new soil mix. Usually, these succulents prefer to stay in their pots for several years, and they may even bloom biannually.

How Long Do Christmas Cactus Flowers Last?

The flowers on a Christmas cactus have an average lifespan of about two to three weeks, depending on how well you take care of your plant.

Generally, when the flower buds are still in their tight bud stage, they last for up to two weeks before finally blooming. Once they bloom and open fully, they’ll stay around for another week before they start to wilt.

When the flowers fade, cut them off to maintain an aesthetically pleasing look on your Christmas cactus.

This will also make the plant focus its energy on other buds that have yet to open up so that it can produce a second round of blooms until the end of winter.

Final Thoughts

Christmas cacti are prolific bloomers that can put on an unbelievable flora display as long as the conditions are right. The flowers form at the end of the leaves, and each flower can last for up to one week. 

The best way to make your Christmas cactus bloom is by reducing watering, exposure to light, and keeping it in a relatively cooler spot. The flowering period of these plants can last for up to six weeks and occurs around the Christmas period.

Do you have a Christmas cactus plant and have mastered the art of getting it to bloom? We would love to hear your experience in the comment section below.

How To Have Healthy And Gorgeous Skin Using Prickly Pear Oil

Disclaimer: The author is not a medical doctor or veterinarian. The information presented is purely to share our experience and for entertainment purposes. As always, check with a doctor and/or veterinarian before making any health or nutrition decisions and consult with a doctor and/or veterinarian regarding any question or problem that you have. The author and blog disclaim liability for any damage, mishap, or injury that may occur from engaging in any activities or ideas from this site.

Most of us want a product that “does it all” when it comes to skincare and beauty. This probably explains why you have been struggling with different skincare products. Fortunately, there is a new kid on the block that might solve all of your problems. We are talking about the prickly pear oil that is highly-moisturizing and soothing derived from a cactus plant.

How can you have healthy and gorgeous skin using prickly pear oil?  Also known as the Barbary fig seed oil, prickly pear oil is extracted from the seeds of the prickly pear plant and is enriched with fatty acids and vitamins, which are skin-friendly components that can help you achieve better results. It also contains the rare D7 Stigmasterol chemical component that plays a critical role in ensuring cellular regeneration.  Furthermore, the oil contains a powerful antioxidant, anti-aging, and anti-inflammatory properties that help to keep your skin healthy and good-looking.

In this post, we discuss some of the crucial benefits of prickly pear oil for the skin and how you can use it to have a healthy and gorgeous skin. Read on to discover the secrets of maintaining smooth and good-looking skin.

What Is Prickly Pear Oil?

Before we dive deep into our discussion, let us talk about the plant itself and how the oil is extracted. The Opuntia Ficus Indica plant belongs to the cactus family of plants and is commonly referred to as prickly pear.

Some people call it the Barbary Fig tree or the India Fig Opuntia. Native to Mexico and other parts of South America, this cactus plant can grow up to two meters high and withstands the hostile desert environment quite well. The plant also grows in the Northern parts of Africa, especially in Morocco.

Opuntia Ficus Indica is also referred to as the miracle plant due to its ability to survive long spells of drought and still produce healthy fruits that are edible. The fruit contains small black seeds from which the precious prickly pear oil is extracted.

The plant bears gorgeous, pink blossoms and fruits that are so nutritious. Pure seed oil sells for quite high prices, and it is for a good reason.

Cactus fruit.
Cactus fruits (prickly pear)

Its seeds are so tiny and pack a low concentration of oil. This makes the process of extracting oil extremely labor-intensive. For instance, approximately 800KG of prickly pear seeds need to be cold-pressed to produce about one liter of the prickly pear oil.

Everything has to be done carefully, and the extraction process has to be thorough to get the maximum amount of oil out of the seeds.

How Has the Prickly Pear Been Used Historically?

Over the years, this cactus plant has been used for many purposes. Not only has it been used for culinary purposes and healing, but it has also been used to make paint. The prickly pear’s versatility is quite extraordinary.

The Chinese use it to dress abscesses while Native Americans and Mexicans enjoy eating the fruit and making syrup out of it to treat asthma and whooping cough. In traditional Mexico, the plant was used to treat diabetes and high cholesterol. 

In recent years, prickly pear oil has become a popular ingredient for use in skincare. But that is not all. In an exciting turn of events, scientists are now considering ways to use the plant as a sustainable energy source, although research is still at the early stages.

A prickly pear cactus lime drink.
Mexicans enjoy eating the fruit and making syrup out of it to treat asthma and whooping cough.

What Are the Major Components of Prickly Pear Oil that Make It So Effective?

All vegetable oils – prickly pear is both a vegetable and a fruit- contain essential and nonessential fatty acids. When the human skin doesn’t get enough of the essential fatty acids, its outer barrier is profoundly affected, increasing the risk of developing dry and irritated skin.

Among all the beauty products you will find on the market, prickly pear oil has the highest percentage of unsaturated fatty acids. These fatty acids are essential to stimulating healthy cell production and regeneration.

A beauty products.
Among all the beauty products, prickly pear oil has the highest percentage of unsaturated fatty acids

Here are the main components of prickly pear oil and how they help your skin:

Fatty Acids

Prickly pear oil contains about 88% of non-saturated fatty acids. It also contains approximately 60.5% linoleic acid, which is Omega-6 essential fatty acids that nourish and repair the skin. This component also strengthens the skin’s outer barrier allowing it to retain moisture for longer.

Fatty acids also fight inflammation and have strong acne-reducing properties that help to keep the skin smooth and good-looking. Linoleic acid also helps in healing minor burns and cold sores. 

Polyphenols

Polyphenols boast powerful antioxidant, anti-carcinogenic, and anti-inflammatory properties that are critical in keeping the skin healthy.

They also help in fighting oxidative stress, which occurs as a result of an imbalance between free radical production and your body’s ability to defend effectively against them. These compounds also help with redness, irritation, and can treat sun damage.

Vitamin E (Tocopherols)

Prickly pear contains almost 150% more vitamin E than any other beauty product on the market. Vitamin E is found in Tocopherols – a group of eight different organic chemical compounds that are found in prickly pear.

Vitamin E acts as a free radical scavenger that stops the free radicals from causing damage, which may lead to early signs of skin aging. The compound has serious anti-inflammatory properties that help wounds heal faster.

It can also repair sun damage caused by environmental pollution or UV rays.

Phytosterols

Phytosterols are similar to cholesterol since they bind to water. This is great news to your skin because the water-binding Phytosterols help it retain moisture for longer periods making it appear strong and healthy.

The compounds also play a critical role in collagen production that helps to keep your skin young-looking and soft.

In fact, scientific studies have established that water-binding Phytosterols can reverse the effects of aging.

A skin ointment.
The oil helps to get rid of dirt from the surface of the skin while delivering deep nourishment

How Does Prickly Pear Oil Benefit Your Skin?

Let us now talk about some of the skin benefits you get from using prickly pear oil. Keep in mind that these benefits are universal and will help you, no matter the type of skin you have: 

Skin rejuvenation

Prickly pear oil packs powerful anti-aging properties that rejuvenate the skin making it appear smooth, young, and good-looking. This is partially due to the amino acid content present in the oil.

Amino acids play a critical role in stimulating collagen production, improving skin elasticity, and preventing the formation of skin lines and wrinkles.

 The oil is also rich in vitamin E and other antioxidants that help to fight free radicals in your skin, causing healing and preventing damage.

Improved skin hydration

With prickly pear skin oil, you say goodbye to dry and irritating skin and welcome a smooth and moisturized skin. Hydration is one of the most known properties of prickly pear oil. Not only does it moisturize your skin, but it does so in a unique way that makes it glow.

In addition to moisturizing your skin, the oil acts as a powerful anti-wrinkle serum that smoothens the outer skin layer, which prevents signs of skin aging from showing.

In fact, if you are looking to tackle signs of early aging before they happen, prickly pear oil is your best bet.

Ideal for any skin type

Individuals with sensitive skin usually have a hard time choosing beauty products that will serve them well. In most cases, such people are unable to use any type of oil because the effects can be devastating.

Another great benefit of prickly pear oil is that it works for almost all skin types thanks to its powerful moisturizing properties.

Flowers attached on person.
Prickly pear oil will soothe your skin and nourish it, leaving it feeling fresh and glowing

Instead of causing inflammation and that burning effect on sensitive skin, it will do the opposite- It will soothe and nourish it, leaving it feeling fresh and glowing.

Brightens dark spots

Prickly pear is also unmatched in its unique ability to brighten the skin and get rid of any dark spots. The oil packs relatively high levels of vitamin E and K and a wide range of other natural antioxidants that stimulate collagen production.   

Increased collagen production improves the overall appearance of dark spots and uneven skin pigmentation. Vitamin K also helps to lighten dark under-eye circles hence minimizing spider veins.

Skin purification

The nutrients contained in prickly pear oil combined with its gentleness make it an incredible ingredient in highly sensitive skin cleansers. The oil helps to get rid of dirt from the surface of the skin while delivering deep nourishment when used as a cleanser or an ingredient in a cleanser.

It is also an effective ingredient when it comes to promoting skin hydration, healing skin damage, fighting signs of aging, and enhancing the overall appearance of your skin.

Final Thoughts

Prickly pear oil is a perfect choice when it comes to skincare. It boasts a wide range of healthy components that will keep your skin moisturized, smooth, and good-looking.

However, when it comes to buying prickly pear oil, we recommend searching for an option that is certified as 100% organic. If you are not careful, you may end up with generic products that will only bring you more stress and frustration.

How Do I Know If My Cactus Is Dying?

Is your cactus plant changing color? Does it look unhealthy or unhappy? If so, then you should be worried because you might be staring at a dying plant. The truth is that cacti plants are hardy and will thrive with minimal care. However, just like any other living thing, they have weaknesses, and if you are not careful or don’t take action swiftly, the plant can develop diseases, which will eventually lead to death.

So, how do I know if my cactus is dying? Well, one of the easiest ways to know if you are staring at a dying cactus is checking the plant’s overall condition. Typically, a dying cactus feels shakier in its potting mix and may appear as though it wants to fall off. This is a clear sign of root rot and other underlying problems. Some plants may also change color, develop soft segments on the stem, or start producing a foul smell.

Read on to find out some of the telltale signs of a dying cactus and some of the common reasons why cactus plants die. We are here to help you grow healthy and happy plants.

Early Signs that Shouldn’t Worry You Much

Before we jump into serious signs of impending death, it is good to know some of the early signs so you can deal with the issue as early as possible.  In this section, we look at some of the signs that should make you concerned but are not actually symptoms of potential death.

Some plants change color

It is good to note that some cacti plants change color when they are stressed and unhappy. However, you need to observe the color change keenly because it may be a sign of good health.

A sunburned Golden Barrel Cactus.
If your plant is turning to yellow or brown, then you should be worried.

For instance, if you expose your plant to lots of sunlight, it may turn to reddish, which shouldn’t be a major cause of concern.  Unfortunately, if your plant is turning to yellow or brown, then you should be worried.

Corking

Another common phenomenon that gardeners mistake for a disease is corking. In most cases, corking happens naturally as the plant ages. During this stage, your plant will develop a hard, brown skin where its green outer layer used to be.

The browning usually starts from the base of the plant and gradually develops up the stem. The parts affected by corking harden and turn to light brown or brown grayish. In such a case, your cactus is only aging and not dying.

Withering

Another common sign that people mistake for death is withering. If you discover that your plant has shed some pads and some parts are drying off, then it is a sign of dehydration. In such a case, the only thing you need to do is water it.

Most cacti species react to prolonged spells of drought by preserving the younger parts and letting the older ones dry and fall off. No need to worry because this is not lethal, and your plant will soon recover as long as you water it moderately and regularly. 

Also, don’t be afraid to cut off the dried parts if you need some beauty.

Signs That Your Cactus Plant Is Possibly Dying

Some signs point to serious problems that can lead to the death of your plant. The moment you notice any of these signs, be sure to act swiftly just in case you still have some time to save your cactus.

Discoloring

In most cases, cacti plants will start to lose their natural color as a sign of stress and strain. Depending on where the actual problem is coming from, the discoloring can begin at the top end of stem segments or from the base of the plant. 

A sunburned cactus.
Cacti plants will start to lose their natural color as a sign of stress and strain.

Severe discoloration is quite dangerous, and death is guaranteed if you do not take rapid action.

Your plant become wobbly

You should be worried if your cactus has become wobbly because this is a clear sign of root rot. Keep in mind that succulents are slow-growing plants, which means that symptoms of underlying problems develop quite slowly.

By the time you notice the signs, it could mean the roots have already rotten beyond repair.

If the base of your plant has become yellow or brown, then it could mean the cactus is already in a severe state.

Root rot is, by far, one of the most common causes of cactus death. Root rot is often accompanied by a loss of firmness and turgidity of the leaves and stem of the plant.

A person holding the cactus which freshly picked from the ground.
Take it off the ground, identify all the rotten roots, and cut them off.

To try and save your plant, take it off the ground, identify all the rotten roots, and cut them off. Rotten roots will appear brown or even blackish depending on the level of rot, while healthy roots will be light in color.

Presence of soft segments around the plant

In most cases, discoloring will be accompanied by stem portions that appear soft and swollen. These parts can easily break off with minimal force. 

The easiest way to establish the presence of soft segments around your plant is by trying to pull a spine off. If it falls off easily without much struggle, you should be worried.

That alone is a sign of a dying cactus.

Fungal infection

Fungal infection is also another sign of a dying cactus plant. You can easily recognize fungal infection because it causes lacerations in the tissues of your cactus plant. The lacerations may start at the areolae or any other part of the outer tissue.

Fungal infections take different shapes and colors, but the most common are only two.

The presence of brown dents on the plant’s outer tissue rounded in most parts like half-moons is a sign of fungal infection. The appearance of white-gray spots is also another sign of fungal infection.

Fungal infection on the aerial part of the plant may not be as damaging as root rot, but they are still dangerous.

A fungal infection on a plant leaf.
Fungal infections causes lacerations in the tissues of your cactus plant.

The best way to avoid further damage as a result of such infections is by spraying your plant with a natural fungicide. Most people prefer using tea tree oil diluted in water to treat such infections.

Alternatively, you can sponge the affected areas with alcohol for as long as it takes.  However, if the infection was too severe and had already damaged part of your plant, consider chopping off the affected area and sterilize the wound.

Foul smell coming from your plant

If your cactus plant is emitting a foul smell, you should be worried because it is a bad sign. Foul smell means that a significant part of the plant is completely rotten, and there is probably nothing you can do to save it.

In other words, your plant is no longer in the dying process, but it is dead. All you can do in such a case is to dispose of the plant and obtain a new one if you still need to have a cactus plant around.

Reasons Why Your Cactus Is Dying

Now, you can tell if your cactus is dying, but your biggest worry should be; why is it dying?  It becomes easier to deal with the problem if you know the cause. Here are some of the common causes of cactus death.

Overwatering

Overwatering is by far the surest way of killing a cactus plant. While it may seem a sensible thing to do, frequent watering only causes more damage than good.

Typically, cacti plants need less love, attention, and water. Some of the common signs of overwatering include browning, root rot, and unusually plump spines. 

To avoid this problem, try not to be overzealous in your watering and follow these simple watering tips all the time.

Improper planting depth

Planting cacti too deeply inside a container can also cause death. Try to position your plant at almost the same potting mix depth it was grown at while at the nursery or previous container.

Resist the temptation of burying a significant portion of the stem into the soil. While planting or repotting your cactus, make sure all the green stem tissue remains above the soil.

When your newly planted cactus shows signs of bending, consider using a wooden to provide support instead of additional soil.

Improper soil drainage

Cacti plants need a special type of soil to thrive. Typically, these plants do well in soils that drain water quickly. If the soil holds water for too long, root rot becomes inevitable.

Luckily, it is not hard to get the right type of soil for your plant. You can make your own potting mix or go for the commercial soil mixtures, which also work fine.

Wrong pot size

Getting the wrong size of a container for your plants is another sure way of kicking off the dying process. The pot could be too small or too large.

A pot that is too small for your plant will most likely choke its roots since there is little breathing space. A larger pot, on the other hand, may retain too much water leading to root rot.

A clay pot with hole.
Getting the wrong size of a container for your plants is another sure way of kicking off the dying process

Lack of light/sun

Have you noticed unusual stretching of your cactus plants towards a light source? This might be a sign of inadequate exposure to light. The stretching is referred to as etiolation and is common among indoor plants.

Most cacti species are native to deserts and require access to intense sunlight to thrive. Therefore, if you are living in a region that receives less sunlight, you should consider supplementing the deficit with artificial lights.

Fortunately, there are lots of good grow lamps on the market designed to deliver the exact amount of lights needed by indoor cacti plants.

The Bottom Line

While it is relatively easy to grow cacti plants, you need to keep in mind that they are susceptible to death if the conditions are not right. Since they are slow-growing plants, it may take several weeks or even months before you start to notice signs of death in the plant.

To save your plant, always act swiftly whenever you notice any of the symptoms discussed above. We hope you now know about dying cacti plants and what you can do to save them.

It is now time to check around your plant and do the necessary.