The Ultimate Guide to Faster Succulent Growth

Succulents are a beautiful addition to any garden. They are low-maintenance, easy to care for and come in various shapes and sizes. However, these plants are also notoriously slow growing, which can be a bit of a bummer. In fact, some of them can take several years to reach their full potential! Fortunately, there are a few tips and tricks you can use to make your succulents grow faster.

So, how can you make succulents grow faster? The first and most important thing you need to do is know your plant. Different succulents will have different needs, and it’s essential to meet those needs to help them thrive and grow fast. Give your succulent adequate sunlight and ensure the temperature is suitable for the type of succulent you have. Your soil must be well-drained and aerated and adhere to a strict watering schedule. You can also repot your succulent to give it some fresh soil and more space. Succulents do best in containers slightly larger than their current pot size.

This blog post discusses tips and tricks to help your succulents grow faster. Read on to find out everything you need to know.

Understanding General Succulent Growth Rate

While there are wide varieties of succulents, all succulents generally have a slow growth rate. This is because most of them are adapted to living in areas with limited water and nutrients available in the soil. As a result, they typically take several years to reach their maximum potential size.

Some of the fastest-growing succulents, such as Echeveria, can grow up to 8 inches in a year, while some slow-growing succulents, such as Sempervivum, take up to 5 years to reach a maximum size of 4 inches.

A woman repotting baby succulents.
Different succulents will have different needs, and it’s essential to meet those needs to help them thrive and grow fast.

Generally speaking, small-rosette-forming species tend to grow faster than large-rosette-forming species.

Most growth occurs during spring and summer when plenty of sunlight and overall weather conditions favor active growth. During the winter, most succulents slide into a state of dormancy and significantly slow their growth.

Tips to Make Your Succulents Grow Faster

To help your succulents reach their maximum potential size faster, you need to provide them with the right growing conditions and ensure they have access to all the necessary resources required for healthy growth. Here are some tips that can help:

1. Get to Know Your Succulent

The first step is to get to know your plant. Different succulents have different needs, so you need to make sure that the environment you provide is suitable for the type of succulent you have.

If you know the exact name of your succulent, Google it for maximum size and growing conditions, and then provide the same.

If you don’t know the exact name of your succulent, don’t worry. You can still provide the right conditions based on their general needs that apply to all succulents. Alternatively, take your succulent to your local plant nursery for identification.

A small ghost plant on hand.
Make sure that the environment you provide is suitable for the type of succulent you have.

Feel free to join Facebook groups and other communities of succulent enthusiasts to get more tips and advice.

Be active and ask questions when you come across something you need help understanding. That way, you learn more about your succulent and its specific requirements.

2. Watering

The amount of water the succulent needs depends on your succulent type, size, temperature, and humidity in your growing environment.

However, it’s generally best to stick with a strict watering schedule and not overwater your plant. Too much water can cause root rot, damaging your succulent and hindering its growth.

The type of water you use can also affect your succulent’s growth rate. Use rainwater or distilled water for better results. Avoid tap water because it contains chlorine, which can harm your plant.

If you must use tap water, let it sit overnight in an open container to allow the chlorine to evaporate.

3. Give Your Succulent Enough Sunlight and the Right Temperature

Most succulents need at least six hours of direct sunlight daily to thrive, although some species may require less or more depending on the type and size. Ensure your succulent is getting enough light and its leaves aren’t turning yellow or weakening.

If you are growing it indoors, position it near a south-facing window for better results. Consider using artificial grow lights if you live in an area with a harsh climate or short days. When using artificial lights, make sure to use only high-quality lights that are specifically designed for succulents.
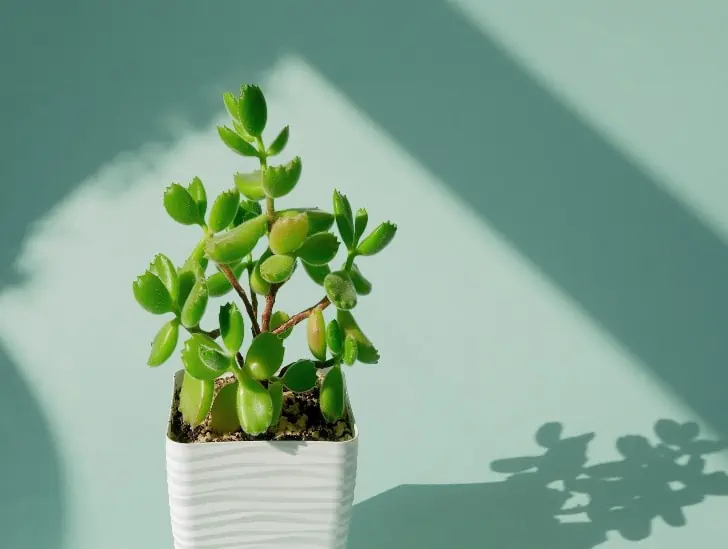
A bear claw plant exposed to sunlight.
Ensure your succulent is getting enough light and its leaves aren’t turning yellow or weakening.

Additionally, ensure your succulent is in an area with the right temperature for its growth. Most succulents need daytime temperatures between 65-75 F (18-24 C) and nighttime temperatures between 50-65 F (10-18 C).

Finally, keep an eye on your plant for signs of sunburn or dehydration, and adjust its lighting accordingly. Some common signs of sunburn include discolored patches on the leaves, shriveled leaves, and weak stems.

4. Succulents Love the Crowd, But Not Too Much Crowd

It is no secret that succulents can thrive in crowded pots. In fact, some species may even prefer living with their siblings. However, don’t overcrowd your succulent’s pot, as it can prevent the roots from getting enough air and nutrients, stunting its growth rate.

If you want to repot your succulent into a larger container without overcrowding, ensure enough space for the roots to spread and grow.

5. Use the Right Soil

Succulents thrive in well-drained, slightly acidic soil. Make sure to use a potting mix specifically designed for cacti and succulents, as this will help ensure proper drainage and air circulation.

Add a layer of sand to the top of the soil to help improve drainage, and don’t forget to add a few teaspoonfuls of slow-release fertilizer as well.

Some gardeners prefer making their soil mix, as it allows them to adjust the ingredients and create a mix tailored to their specific succulent.

Fortunately, it is relatively easy to make your soil mix. Here is a simple method you can follow:

  • Two parts perlite or coarse sand
  • 1 part peat moss
  • 1 part potting soil
  • ½ part compost

Carefully mix these ingredients, and you have potting soil perfect for your succulent.

6. Monitor Your Succulent’s Soil Regularly

Your succulent’s soil should be slightly acidic with a pH of 6.0-7.5, depending on the type of succulent you have. The best way to check your soil’s pH is to use a digital soil tester or a store-bought soil test kit.
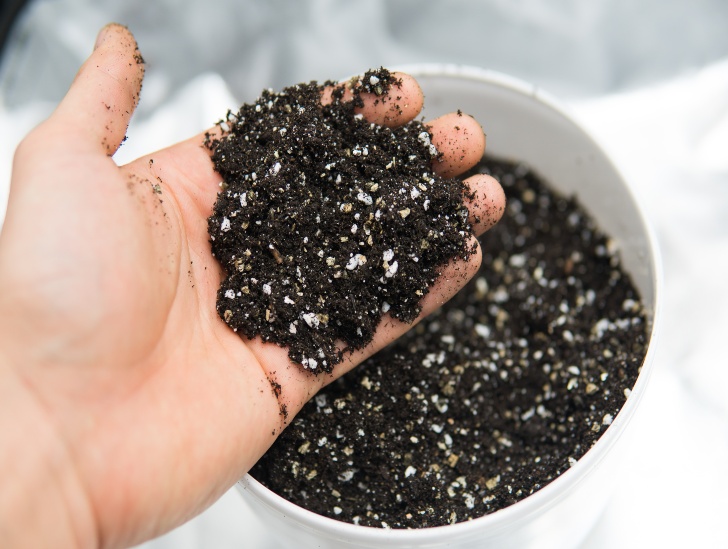
A soil with a mix of perlite.
Your succulent’s soil should be slightly acidic with a pH of 6.0-7.5, depending on the type of succulent you have.

The soil should be kept dry between waterings and should never be saturated with too much water.

If it is, your succulent may suffer from root rot caused by too much moisture in the soil. Also, ensure the pot has enough drainage holes to allow any excess water to escape.

7. Fertilize and Prune Your Succulent

Just like any other plant, regular fertilizing is vital for healthy growth. The type of fertilizer you use depends on your succulent’s needs; always use a slow-release fertilizer designed explicitly for succulents.

Remember to prune your succulent regularly to help control its size and shape. Regular pruning can even encourage a lusher growth habit.

Trim off any dead leaves or stems with a pair of sharp scissors, but never cut away more than a third of the plant at any time.

The best time to trim your succulents is after the flowering season, just before the dormancy sets in.

Avoid pruning before or during the flowering season, as pruning may reduce the number of flowers produced.

8. Regularly Separate Offsets from the Mother Plant

Most succulents produce many offsets as they grow. These offsets are also known as “pups” and can be separated from the mother plant to create new plants.

Removing offsets helps keep your succulent healthy, encourages more flowering, and allows you to share or sell your extra plants.

A offset of hawortia plant.
The best time to separate offsets is during the growing season when the pups are big enough to be removed.

Make sure each offset has roots and shoots before separating it from the mother plant.

The best time to separate offsets is during the growing season when the pups are big enough to be removed without damaging the mother plant. Cut away the pup with a sharp knife and pot it into a container.

The offset will develop roots after a few weeks and should be ready to repot into its permanent home.

9. Be Patient with Your Succulent

If you have followed all the tips above, then all that is left to do is wait for your succulent to grow and mature. Growing succulents can take a while, as they prefer slow-paced growth over rapid growth.

Sometimes, you may find that your succulent grows a lot more slowly than you expected.

Don’t worry; this is normal! Just sit back and enjoy the process; soon enough, you will have a beautiful mature succulent.

Summary

With these five tips, you’ll be able to get your succulent collection growing faster than ever before!

Remember – quality soil, adequate light exposure (but not too much!), proper watering habits, regular fertilization, and occasional pruning will help keep your plants happy and healthy while encouraging rapid growth. After a few months of following these guidelines, you should start seeing results – happy planting!

The Top Rosemary Pests and Diseases to Watch Out For

Rosemary is an incredibly popular herb, used in various dishes, tea, and even as an essential oil. But like any other plant, rosemary can suffer from pests and diseases. So, if you are growing it in your garden, it is essential to know what common pests and diseases to look out for and how to prevent them from damaging your plants.

So, what are some common rosemary pests and diseases? Rosemary is prone to various pest infestations, including aphids, whiteflies, caterpillars, mealybugs, and spider mites. Aphids are small insects that feed on the sap of the plant’s leaves.

Whiteflies are tiny white insects that swarm around the plant when disturbed. Caterpillars are the larvae of moths or butterflies that feed on rosemary leaves. Mealybugs are small, soft-bodied insects with a waxy coating on their bodies that feed on rosemary sap. Spider mites are tiny spiders that spin webs around rosemary leaves and suck out their juices. One of the most common diseases affecting rosemary is root rot.

This article discusses everything you need to know about common rosemary pests and diseases and how to prevent them. Read on to learn more.

What Is Rosemary?

Rosemary is an upright, woody perennial herb with fragrant, needle-like leaves. It is native to the Mediterranean but can also be found in other parts of the world.

It mainly grows in the sunny, dry areas of the United States and Europe. The foliage is evergreen in mild climates, with white or pink flowers blooming from spring to autumn.

The plant belongs to the family Lamiaceae and has several cultivars, most notably Arp and Golden Rain. It grows in groups of 5-10 and can grow up to two meters tall.

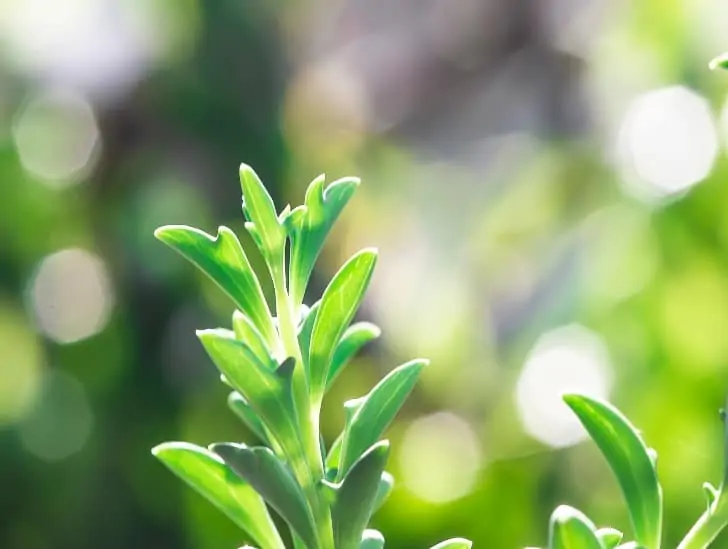
Rosemary in a pot.
Rosemary is an upright, woody perennial herb with fragrant, needle-like leaves.

Rosemary has a long history of medicinal and culinary use, and its essential oil is used for aromatherapy. Rosemary can be grown in the garden or potted indoors, making it a highly versatile herb.

Common Rosemary Pests and Diseases

Rosemary is susceptible to a variety of pests and diseases. Knowing which ones affect your plants will help you take the necessary steps to prevent them or treat any existing damage. Here are some of the common pests and diseases that affect this plant.

1. Aphids

Aphids are tiny insects that feed on rosemary sap. They are usually green, yellow, or brown.

This pest is difficult to spot with the naked eye, but its presence can be identified by a sticky substance on the leaves known as ‘honeydew’ which they excrete after feeding.

Aphids spread pretty quickly and can cause significant damage to rosemary if not treated. They can also spread diseases to other plants in the garden.

Aphids in leaf.
This pest is difficult to spot with the naked eye.

To prevent infestations, you can introduce natural predators such as ladybugs, hoverflies, and lacewings into your garden. You can also use insecticidal soap or horticultural oils to get rid of them.

2. Whiteflies

Whiteflies are a common problem in rosemary plants. These tiny white insects feed on plant juices and excrete a sticky substance known as honeydew, which can attract sooty mold.

They are difficult to spot with the naked eye, but their presence can be identified by a white powdery film on rosemary leaves, known as ‘whitefly dust.’ They also secrete a fluid that can cause the leaves to curl and become distorted.

The best way to prevent infestations is to keep an eye out for whiteflies and treat them as soon as you spot them. Insecticides containing neem oil, pyrethrum, or spinosad effectively control these pests.

Some gardeners use sticky traps to capture the adult whiteflies, but the method may only be effective if there is a large population.

3. Caterpillars

Caterpillars are the larvae of moths or butterflies that feed on rosemary leaves. They can cause significant damage to the plant and make it unsightly if not treated promptly. To prevent infestations, you should regularly inspect your plants for signs of caterpillar activity.

Some of the most common species affecting rosemary are the cabbage looper, diamondback moth, and western, yellow-striped armyworm.

The best way to get rid of caterpillars is to use insecticides containing bacillus thuringiensis or spinosad. You can also release beneficial predators such as parasitic wasps, ladybugs, and green lacewings to help control the caterpillar population.

4. Mealybugs

Mealybugs are relatively tiny insects that feed on the sap from plants. Their white, cottony coating can identify them, and they excrete a sticky substance known as honeydew.

Mealybugs can cause damage to rosemary plants if left untreated. To prevent infestations, you should inspect your plant regularly for signs of mealybugs, such as yellowing leaves or wilting.

Mealybug in a plant.
Mealybugs are relatively tiny insects that feed on the sap from plants.

To get rid of mealybugs, you can use insecticides containing neem oil, pyrethrum, or spinosad and encourage beneficial predators such as ladybugs and lacewings into your garden.

You can also spray a solution of water and dishwashing liquid directly on the affected areas to control them.

5. Spider Mites

Spider mites are tiny spider-like creatures that spin webs around rosemary leaves and suck out their juices.

They can cause yellow spots on the foliage and make it look unhealthy. To get rid of spider mites, you should regularly inspect your plants for signs of mites and spray the affected areas with a jet of water.

Insecticides containing neem oil or pyrethrum can also be used to control them. You can also introduce beneficial predators such as predatory mites, minute pirate bugs, and ladybugs into your garden to help keep spider mite populations under control.

6. Scale in Rosemary

Scale insects usually have a waxy outer shell, making them difficult to spot. They feed on the sap of rosemary plants and can cause yellowing or wilting of leaves if left untreated.

The best way to get rid of scale is to use insecticides containing bifenthrin, imidacloprid, or spinosad.

You can also introduce beneficial predators such as parasitic wasps, ladybugs, and green lacewings into your garden to help control the scale population.

Common Rosemary Diseases

Rosemary can be affected by various fungal diseases such as root and crown rot, powdery mildew, leaf spot, and rust.

Root rot is perhaps the most damaging of these diseases as it can cause the roots to become soft and blackened, eventually leading to wilting and death.

Root rot is mainly caused by overwatering. Naturally, a rosemary plant is adapted to surviving in relatively dry conditions and should only be watered when the soil is completely dry. when overwatered, the plant starts developing root rot, which can be fatal.

To prevent root rot, you should ensure your rosemary plants are planted in well-draining soil and only watered when the soil is dry.

Fungal diseases result from warm, damp conditions and can be prevented by avoiding overhead watering and ensuring your plants have plenty of air circulation.

You can apply a fungicide such as copper sulfate or mancozeb to the affected areas to reduce the spread of disease. If you spot any signs of fungal disease, remove affected leaves or branches immediately to prevent them from spreading.

Powdery mildew is another fungal disease appearing as white or greyish leaf spots.

You can prevent this by ensuring your plants have plenty of air circulation and avoiding wetting the leaves when watering. If you spot any signs of powdery mildew, remove the affected foliage immediately.

To control leaf spot and rust diseases, apply a fungicide such as mancozeb or copper sulfate to the affected areas to reduce the spread of the disease. You should also remove any affected leaves or branches immediately.

Preventing Rosemary Pests and Diseases?

The best way to prevent rosemary pests and diseases is by practicing good cultural practices such as proper watering, mulching, avoiding overcrowding of plants, weeding regularly, and removing any diseased or infested plant material.

You can also use insecticides containing neem oil or pyrethrum to help control pests and introduce beneficial predators such as ladybugs and lacewings into your garden to help control the pest populations.

A person watering the rosemary plant.
The best way to prevent rosemary pests and diseases is by practicing good cultural practices.

Also, inspect your plants regularly for signs of pests or disease and take immediate action if necessary. You can keep your rosemary looking healthy and beautiful with a little effort!

What Pests Does Rosemary Repel?

Rosemary, like other herbs, is an excellent repellent for a wide variety of pests. It is known to repel mosquitoes, flies, fleas, and other insects due to its strong scent. The leaves can be dried and crushed into a powder sprinkled around the garden to keep away insects.

Rosemary plant in a white pot.
It is known to repel mosquitoes, flies, fleas, and other insects due to its strong scent.

Rosemary oil has also been an effective repellent for various pests, including fleas, ticks, and moths. You can add the oil to soaps, shampoos, or sprays to help keep away these pesky pests.

The best way to reap the benefits of rosemary is to plant it in your garden – not only will it help deter pests, but you can also enjoy the incredible smell and flavor of its leaves!

Conclusion

Caring for rosemary plants requires vigilance to protect them from common pests and diseases like aphids, whiteflies, caterpillars, mealybugs, spider mites, powdery mildew, and root rot caused by overwatering or poor drainage in the soil.

However, with proper care including regular inspection for signs of infestation/infection, avoidance of heavy watering practices, adequate air circulation, and timely removal/treatment of pests & pathogens – you can ensure healthy growth & development of your beloved rosemary plants!

the String of Dolphins: A Comprehensive Guide

A string of dolphins is an excellent choice if you are a gardener looking for a unique and exciting hanging plant. This trailing succulent has long, slender leaves resembling dolphins swimming in the sea. The succulent is also an easy-to-care-for plant that requires minimal maintenance, making it perfect for novice gardeners. Let us look at what you need to know about the string of dolphin care.

So, what do you need to know about the string of dolphins? The evergreen succulent belongs to the Aizoon genus of plants native to the Mediterranean regions and North Africa. The succulent has attractive, long, narrow leaves that are blue-green and slightly curved like dolphins swimming in the sea. It also produces small yellow flowers that attract bees and other pollinators throughout the year.

This blog post discusses everything you need to know about the string of dolphins. First, we’ll go over the basics of care and then talk about how to cultivate your string of dolphins plant best.

Read on to learn more.

What Is a String of Dolphins?

A String of Dolphins is an evergreen succulent that belongs to the Aizoon genus. It has small, pointed leaves that resemble dolphins jumping out of the water.

It can grow up to two feet tall and three feet wide, making it ideal for use as a ground cover or as an accent plant in containers or hanging baskets. Its leaves are typically green but can be red or yellow depending on the amount of sunlight it receives. 

One great thing about this succulent is that it doesn’t require much attention. So, even busy gardeners can keep one in their outdoor spaces without worrying about it taking too much time or effort.

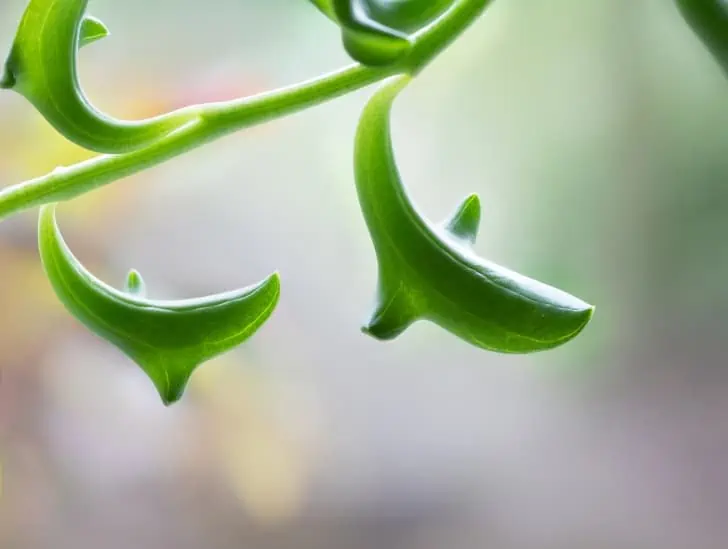
A string of dolphin.
It has small, pointed leaves that resemble dolphins jumping out of the water.

It also requires minimal watering, making it perfect for those just starting gardening or who don’t have much time to dedicate to their plants.

Additionally, the String of Dolphins is known for its ability to filter air pollutants from the atmosphere, making it an excellent choice for those who want to make their outdoor spaces healthier places to be.

It’s also worth noting that this type of succulent is relatively easy to propagate. All you need is some scissors and soil, and you should be able to propagate your new plants quickly and easily!

How to Care for a String of Dolphins?

The string of dolphins is an easy-to-care-for succulent that requires minimal maintenance. Its plump leaves retain water for a relatively long time, making it drought-tolerant and ideal for those who cannot keep up with a regular watering schedule.

Here is a quick overview of the essential factors to consider when caring for your string of dolphins:

Sunlight

The string of dolphins needs plenty of bright, indirect light. It thrives best in a location with direct morning sun and filtered afternoon sunlight. You may also want to set up a fan or misting system to help keep the air around the plant cool. Keep the succulent out of direct sunlight to avoid sunburn.

If you are growing your string of dolphins indoors, ensure that it is placed in an area with bright light but away from direct sunlight. Ideally, you should have it on a south-facing windowsill to benefit from the natural light.

If you live in an area that doesn’t receive plenty of natural sunlight, you may want to use artificial grow light to supplement the plant’s sunlight needs.

When and How to Water

The string of dolphins should be watered deeply and infrequently — about once a week or every two weeks. Over-watering can be an issue, so check the soil before watering again. During the winter months, you can reduce the watering frequency to once every two or three weeks.

The best time to water your string of dolphins is in the morning when temperatures are cooler and the leaves have had time to dry out overnight. Water deeply at the base of the plant, not directly on its leaves.

A string of dolphin with water droplets.
Over-watering can be an issue, so check the soil before watering again.

Ideally, aim for the hours between 6:00 am and 10:00 am. However, if you cannot water your plant during these hours, you can still water it late in the evening.

Use the bottom-up watering technique to avoid over-saturating the soil. Apply water slowly until it drains out of your container’s bottom and stop.

Temperature Requirements

The string of dolphins tends to thrive in temperatures ranging from 55-85°F (13-30°C). Keep in mind that the plant may go dormant during winter, so reduce watering and keep it away from cold drafts.

Note: Avoid temperatures below freezing, as this can cause damage to your string of dolphins.

A string of dolphin in a shade.
Keep in mind that the plant may go dormant during winter, so reduce watering and keep it away from cold drafts.

Soil & Pot Requirements

The string of dolphins needs well-draining soil mixed with sand or grit for better aeration. A good potting mix would be a combination of one part potting soil and two parts peat moss or coconut coir.

Fortunately, you can purchase good quality potting mix from your local garden center or online. Put the soil in a shallow planter with drainage holes; your succulent should be good.

Fertilizer

The string of dolphins does not need much fertilizer but may benefit from occasional fertilization during the growing season. If you opt to fertilize your succulent, use an all-purpose or balanced fertilizer and apply it once every two weeks.

Make sure you use a fertilizer specifically designed for succulents and cacti, as these are more likely to provide the right amount of nutrients your string of dolphins needs.

Never over-fertilize your succulent; excessive fertilizer can cause burn marks on the leaves and even kill the plant. Never fertilize your succulent in the winter months!

Pests & Diseases

The string of dolphins is relatively resistant to pests and diseases, so if you take good care of your plant, you should have few problems. Avoid overwatering or leaving water sitting in the pot for too long, as this can lead to root rot — a fungal disease that can cause severe damage to your succulent.

A string of dolphin esposed to sunlight.
Keep an eye out for mealybugs and aphids — they can be especially troublesome to this succulent.

If you notice any pests on the leaves or stems of your string of dolphins, spray them off with a hose and check for signs of damage. Keep an eye out for mealybugs and aphids — they can be especially troublesome to this succulent.

Pruning

The string of dolphins can be pruned infrequently, but you may want to trim off dead or dying leaves now and then. If any leaves are damaged beyond repair, they should be removed immediately.

Also, if you notice some stems growing too long and becoming spindly, you can prune them back to encourage new growth. Pruning your succulent is essential for maintaining its shape and keeping it healthy.

Propagating the String of Dolphins

The string of dolphins can be propagated through stem cuttings. Take a stem cutting with at least two sets of leaves and leave it to dry for several days, then place the stem in well-draining soil.

Keep the soil moist but not soggy, and provide plenty of light. With patience and care, new plants should emerge from the stem cuttings within a few weeks.

The temperature is one of the most important things you need to pay close attention to when propagating the string of dolphins. Keep the propagation container away from cold drafts and avoid exposing it to temperatures below 55°F (13°C).

Does the String of Dolphin Bloom?

Typically, this succulent only produces a few flowers. Although it is possible for it to bloom, this is usually only possible when the plant is exposed to extreme temperatures (both hot and cold).

If you see any blooms, expect small yellow or white flowers with a six-petal star shape. Unfortunately, these flowers don’t last very long, so enjoy them while you can!

How Often Should I Repot My String of Dolphin?

This succulent is a relatively slow grower, so it will not need to be repotted often. Repot the string of dolphin when the roots become overcrowded and pot bound, which usually happens every one or two years.

Make sure you use a good quality potting mix and provide plenty of drainage holes. As with other succulents, take care not to overwater it.

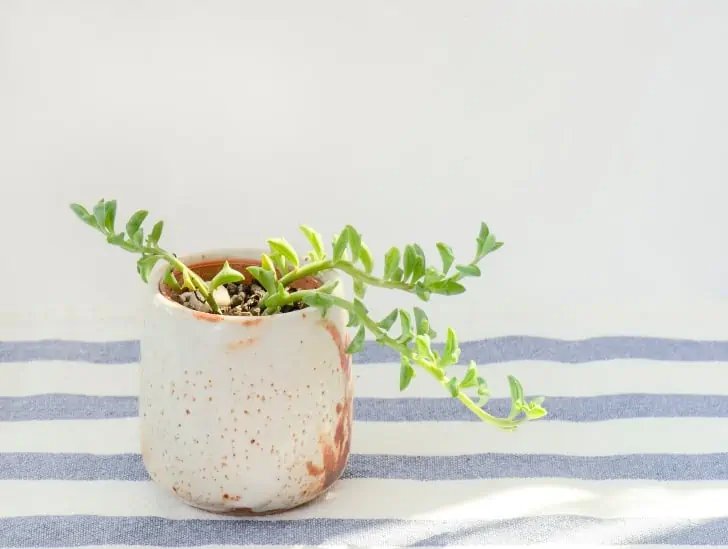
A string of dolphin in a pot.
The best time to repot your string of dolphins is in spring.

Typically, the new container should be slightly bigger than the old one, and make sure you don’t water your succulent until it has had a few days to adjust.

The best time to repot your string of dolphins is in spring. This will give the plant plenty of time to adjust and grow before cooler temperatures arrive in autumn.

Although it requires minimal care, the string of dolphins can be a tricky succulent to keep alive, especially when you repot it. Therefore, be sure to do everything correctly.

Conclusion

The string of dolphins is a unique and exciting succulent that is easy to care for as long as it gets plenty of light, water, and temperature.

With its trailing stems, this succulent makes an excellent choice for a hanging planter or a windowsill.

If you take good care of your string of dolphins, it can last for years and create a stunning display in any room.

Be sure to provide the right amount of water, light, and fertilizer during the growing season, and enjoy its unique foliage all year round!

Should You Mulch Your Succulent Garden?

Succulents are relatively hardy plants but need extra care to thrive. While most gardeners agree on the benefits of mulching in other types of planting, the consensus isn’t as clear on succulents. Some believe that mulching can trap in too much moisture and lead to root rot, while others argue that not mulching can leave succulents vulnerable to soil erosion and temperature swings.

So, should I mulch my succulent garden? Ultimately, whether you choose to mulch your succulent garden depends on several factors, including the climate in which the plants are growing and their overall health. If you live in an area with frequent temperature changes, and your succulents are in good health, mulching can help protect them from the extreme weather elements. Furthermore, mulch can keep the soil moist longer, reducing the need for frequent watering. However, if you live in an arid climate or have succulents that are struggling, it’s best to avoid mulching altogether.

This blog post discusses everything you need to know about mulching your succulent garden, so you can make the best decision for your plants.

We will cover everything from what type of mulch to use to the benefits and drawbacks of mulching. Let’s get started!

What Is Mulch?

Before we dive deep into discussing whether you should mulch your succulents, let us figure out what mulch actually is and its primary purpose in our gardens.

Mulch is a material that covers the soil to protect it from temperature changes and erosion. It also helps retain moisture in the soil, which can be especially helpful for succulents when exposed to extreme heat or dryness.

Additionally, mulch can help to ward off pests such as slugs and snails. It can also act as an insulator against weeds, providing a protective barrier between them and the plants you’re trying to grow.

Hens and chicks planted on the Mulch.
Mulch can be an effective way to protect your succulents from disease and pests as well as maintain their health.

Common types of mulch include straw, bark chips, shredded leaves, and compost. When used correctly, mulch can be an effective way to protect your succulents from disease and pests as well as maintain their health.

What Are the Advantages of Mulching Your Succulent Garden?

If you are unsure whether or not to mulch your succulent garden, it is important to weigh the advantages and disadvantages of mulching before deciding. Here are some of the benefits you should know.

1. Moisture Retention

One of the main advantages of mulching a succulent garden is moisture retention. Typically, mulch acts as a barrier between the soil and the air, helping to keep moisture in the soil longer by slowing evaporation. This helps prevent succulents from drying out during extreme heat or drought.

Mulching also prevents the soil from becoming hydrophobic. Hydrophobic soil refers to soil that has become too dry and lost its ability to soak up water. It means that water doesn’t get to your succulent’s roots even if you water your garden regularly.

Sedm planted on the mulch.
Mulch acts as a barrier between the soil and the air, helping to keep moisture in the soil longer by slowing evaporation.

Hydrophobic soil could potentially lead to dehydration of your plants and even death. While exposed soil dries up fast, mulched soil stays moist longer and prevents hydrophobia.

2. Weed Control

Using mulch in a succulent garden can help to control weeds as well. Mulch acts as an insulator between the soil and any weed seeds in the area, making it difficult for them to germinate. This helps prevent you from spending time and effort manually removing weeds.

Additionally, mulch can also provide aesthetic appeal to your succulent garden. If you’re looking for ways to spruce up the look of your outdoor space, adding mulch can be a great way to bring color and texture into the area.

3. Protection from Extreme Temperature Changes

Mulch acts as a protective layer against temperature fluctuations. It helps keep the soil cool during hot days and warm in cold temperatures, providing your plants with an optimal growing environment.

It can also help prevent physical damage to your succulent garden from extreme weather conditions such as hail and strong winds.

This is especially important for succulents that are more vulnerable to physical damage due to their delicate nature.

4. Source of Organic Food for Your Succulents

Organic mulch, such as compost, can also serve as a food source for your succulents. As the mulch decomposes, it releases vital nutrients such as nitrogen and phosphorus into the soil, providing your plants with essential nutrition.

A top view of Succulents in a pot.
Organic mulch, such as compost, can also serve as a food source for your succulents.

While many types of succulents can survive without fertilization, the organic nutrients released into the soil by decomposing mulch won’t do any harm to your plants. In fact, it makes them grow a little bit faster.

5. Helps Soil Organisms to Survive

Dried-out hydrophobic soil can be a hostile environment for soil organisms, such as earthworms and other beneficial microorganisms.

In this case, adding organic mulch to the soil can help to introduce moisture and provide shelter for these helpful creatures.

Overall, this helps create a healthy ecosystem in your succulent garden that supports bioactivity and encourages growth.

6. Reduces Soil Erosion

Mulching your succulent garden also helps to reduce soil erosion. It keeps the soil in place and prevents it from being washed away by heavy rains or winds. This can be especially beneficial for succulents planted on a slope with a greater risk of soil erosion.

Remember that soil erosion can be a major issue in areas with high rainfall, so mulching can help keep your succulent garden safe from potential damage.

Are There Disadvantages to Mulching Your Succulent Garden?

While there are many advantages to mulching your succulent garden, there are also some disadvantages you should be aware of.

The main disadvantage of mulching is that it can cause the soil to become too wet and soggy in areas with high rainfall. This can lead to root rot and fungal diseases, which can cause your succulents to weaken or even die.

Furthermore, using too much mulch can also smother the roots of your succulents. Too much mulch won’t allow for proper drainage and oxygen production, making it difficult for your succulents to survive.

It is important to use the right type of mulch in the right amount and ensure that it is not too thick or packed tightly on top of your succulent garden.

What Are the Different Types of Mulch for Succulents?

Mulch comes in varying materials and colors, so choosing the right type for your succulent garden is important. Some of the most common types of mulch for succulent gardens include:

1. Woodchip Mulch

Woodchip mulch is perhaps the most common type of mulch used in succulent gardens. It is made from coarsely shredded wood and provides good drainage, which helps prevent the soil from getting too soggy.

Plants planted on the woodchip mulch.
Woodchip mulch is perhaps the most common type of mulch used in succulent gardens.

It also breaks down slowly, so it can provide long-lasting protection for your succulents. Plus, its brown color adds an earthy texture to your garden.

2. Pine Bark Mulch

Pine bark mulch is another popular choice for succulent gardens. It is reddish-brown and consists of pieces of shredded pine bark slightly smaller than woodchip mulch.

It provides good drainage and helps keep the soil temperature stable, making it an ideal choice for succulent gardens in areas with extreme temperatures.

3. Pebbles & Stones

Pebbles are not a kind of mulch that will decompose and add nutrients to your garden soil. However, they are an excellent choice for succulent gardens because they provide good drainage and help keep the soil from becoming too moist.

Moreover, pebbles come in varying colors, sizes, and shapes, making them an attractive addition to your succulent garden.

Pebbles and stones don’t break down with time and don’t need to be reapplied over time.

But they can still be a high-maintenance option because dead leaves and exposed bits can easily destroy the aesthetic if left uncleaned.

4. Straw/Lucerne

Straw is an excellent mulch option for your succulent garden since it helps to prevent weeds from sprouting and retains moisture in the soil.

It also helps to keep the soil cool, which is beneficial for succulents that prefer cooler temperatures. Furthermore, straw has a nice light-yellow color that adds visual appeal to your garden.

However, it may not be the best option for people who live in areas that experience frequent rainfall since straw may not be able to hold up against heavy downpours.

How to Apply Mulch to Your Succulent Garden 

When applying mulch to your succulent garden, there are certain steps you should take to ensure success:

First, remove existing weeds from around each plant before applying the mulch.

Next, spread a layer of mulch between 1-2 inches deep over the area where you want to plant your succulents; this will help keep weed growth at bay and create an ideal environment for planting.

A succulent planted on the pot with mulch black stone,
Pebbles are an excellent choice for succulent gardens because they provide good drainage and help keep the soil from becoming too moist.

Finally, water lightly after applying the mulch; this will help it settle into place and begin decomposing so that it can start providing nutrients for your plants right away!

Summary

Mulching is a great way to protect and nourish your succulent garden while reducing weeding time and conserving moisture in the soil.

It can also help regulate soil temperature while adding organic matter as it decomposes over time – making it an ideal choice for those looking to get more out of their gardening experience.

How to Create the Best Conditions for Chive Growth?

Chives are among the most popular culinary herbs, mainly used to add some taste and flavor to soups and dips. These easy-to-grow perennial herbs are unique in many ways and thrive both in a pot and garden bed. Once you have planted chives, you need to provide them with the right growing conditions to flourish. Although they are relatively hardy, repeated mistakes in the caring process can be fatal.

So, what are ideal growing conditions for active chive growth? Chives generally grow best in full sun and well-drained soil with a pH of 6.0 to 7.5. Ample moisture is essential for optimal growth and development, as the shallow roots dry out quickly during hot, dry spells or periods of drought. When thoroughly watered, chive plants can tolerate temperatures down to 0°F (-18°C). The ideal temperature range for growth is between 60 and 65°F (15–18°C). These plants may enter a dormant state and stop growing if temperatures are too cold.

This blog post discusses everything you need to know about ideal growing conditions for active chive growth. Keep reading to learn more!

About Chives

Chives are generally cool-season, cold-tolerant perennials that belong to the onion family. Most of them are native to Europe and Asia. The hollow green leaves can reach up to 8 inches in length and have a mild onion flavor.

They are usually used as a garnish or seasoning agent for soups and salads. Chives also have small edible flowers that open in springtime, adding a splash of color and taste to your meals.

However, you need to be mindful when growing chives in your home garden since they can easily take over the entire space if the flowers are allowed to develop fully and scatter seeds. To prevent self-seeding, make sure you deadhead the flowers regularly.

Chives plant near the window exposed to sunlight.
The hollow green leaves can reach up to 8 inches in length and have a mild onion flavor.

They are relatively easy to dig up and move to different parts of your garden. They also play a significant role in deterring pests from your garden.

Feel free to plant them with carrots, tomatoes, lettuce, peas, and even celery because these herbs are believed to improve the flavor and growth of nearby plants.

Ideal Soil Conditions for Chive Growth

Chives are quite a hardy herb and can tolerate regular watering, but they thrive best in soil with good drainage. Here is an extensive discussion on the ideal growing conditions for chives.

1. Soil Requirements

Chives prefer well-draining, slightly acidic soils with pH ranges between 6.0 and 7.5. It is best to add organic matter like compost or manure before planting chive seeds or transplants, as this helps in aeration and improves the nutrient-holding capacity of the soil.

Avoid planting chives in compacted or wet soils because this can lead to root rot and eventual death of the plants.

The good news is that you can easily make your own compost. To do this, collect yard waste like grass clippings, kitchen leftovers, and fallen leaves and mix them in a pile. Add some soil to the pile to activate the composting process.

A hand planting chives.
It is best to add organic matter like compost or manure before planting chive seeds or transplants.

Depending on the climate, you should have usable compost within weeks or months. Pay close attention to the moisture content during the composting process. Too much moisture can lead to clumping.

2. Light Requirements

Chives generally grow best in full sun and can tolerate partial shade, especially during summer’s hottest parts of the day. Give them six to eight hours of direct sunlight if planting chive seedlings or transplants.

Although they thrive in outdoor gardens, chives can also survive in pots indoors as long as they are placed in an area with plenty of natural light.

If you live in an area that doesn’t receive enough direct sunlight, you can use grow lights to give your chives the light they need to flourish.

3. Water Requirements

Chives need adequate moisture for optimal growth and development as shallow roots can dry quickly during hot, dry periods or drought. Water the plants regularly in summer but not too much to avoid causing root rot.

If planting chives in pots or containers, check the soil often and water as needed. You can also use mulch around the plants to help retain moisture and keep the roots cool during hot summers.

A water can beside the chives.
Water the plants regularly in summer but not too much to avoid causing root rot.

The best way to determine when to water your chives is by finger-testing. Carefully stick your finger into the soil to check if it is dry. If the first inch of soil feels dry, it’s time to water your chives.

Alternatively, use a moisture gauge to keep track of the soil moisture in your garden. This device can help you save time and water by avoiding overwatering, which can cause root rot.

You should also adjust the amount of water given to the plant depending on its size. Typically, smaller chive plants require more frequent watering than larger ones. Chives may also need additional water when the flowering season arrives and temperatures soar.

4. Temperature Requirements

Chives are cold-tolerant perennials that thrive best in temperatures ranging between 60 and 65°F (15 to 18°C). However, they can tolerate higher temperatures as long as the soil is consistently moist.

You can grow chives in USDA Plant Hardiness Zones 3-10. They generally do not survive freezing temperatures, but if you often live in an area that experiences cold weather, you can cover your plants with straw or frost cloth to protect them.

Chives turn to reddish-purple when exposed to temperatures below 40°F (4°C), but they do not suffer any long-term damage from cold temperatures.

5. Fertilizer Requirements

Generally, chives are not heavy feeders and do not require much fertilizer. However, you can give your chives an occasional boost by using a balanced slow-release fertilizer like 10-10-10 or 5-5-5 during the growing season.

You can also add compost to the soil around your chives annually. Compost helps improve the soil’s nutrient-holding capacity and provides essential nutrients like nitrogen, phosphorus, and potassium. This will help ensure that your chives have all they need to thrive.

Remember that overfertilizing can cause excessive growth and thin stalks, so it’s essential to be careful when applying fertilizer. Make sure to follow the instructions on the package carefully.

If you are growing your chives in a pot or container, you may need to adjust your fertilizer schedule depending on how often you water them. The frequency of fertilization also depends on the soil you use. Sandy soils require more frequent fertilization than clay-based soils.

It is also crucial to avoid adding fertilizer before or after a bloom cycle, as this can damage the blooms and affect their growth. Finally, wash your hands thoroughly after handling any fertilizer to avoid skin irritation.

6. Pruning Chives

There is no need to prune your chives as long as the plant is healthy and the foliage looks good. However, if the leaves become too long or look untidy, you can snip them back with scissors.

It is also important to cut off any flower heads as soon as they appear to encourage continuous growth and prevent seed production. This will also ensure that the plant’s energy is focused on growing additional foliage.

A person prunning chives.
If the leaves become too long or look untidy, you can snip them back with scissors.

The best time to prune chives is during the active growing season after the leaves have reached the desired height. Pruning the chives too late in the season can interfere with dormancy and prevent them from blooming in spring.

Be careful with the number of stalks you remove from the plant. Getting rid of too many stalks can be fatal to your plant.

Harvesting Chives

Chives are usually ready for harvesting when they reach about six inches in height or after a few weeks from planting them. You can harvest the fresh leaves by snipping them off with scissors.

The best time to harvest chives is in the morning when they are fresh and juicy. Be sure to leave enough leaves behind so the plant can regrow quickly.

Once you have harvested the chives, store them in an airtight container or refrigerate them for up to one week. Alternatively, you can dry the leaves and store them in an airtight container for later use.

Growing Chives in Pots

As mentioned earlier, chives can be grown in a pot or container if you don’t have enough space for an outdoor garden bed.

Growing chives in pots are easy, and the same rules apply here as with any other type of plant – choose a well-draining soil, water regularly, and provide adequate sunlight.

Use a fertile potting soil mix for best results, and keep the soil moist but not soggy. Water your chives once or twice a week, depending on your environment, making sure to water thoroughly and deeply each time you water them.

Chives on a pot.
If your pot is too big, you can add stakes or trellises to give the chives something to climb.

It is also important to position the pot in an area that receives at least six hours of direct sunlight daily. If your pot is too big, you can add stakes or trellises to give the chives something to climb.

Summary

Chives are a popular herb that is easy to grow and has many culinary and medicinal uses. Consider the soil conditions, light requirements, water needs, and temperature range when growing chives.

You can also fertilize your chive plants with compost or manure tea. Pruning and harvesting chives are important tasks that must be done correctly to maintain the plant’s health.

Following these tips, you can grow chives in your garden or pots on your patio.

Can Succulents Thrive in High Humidity?

You see and hear it everywhere: humidity. This is a common term used to describe weather condition and how it affects your daily life. But did you know that it can also affect your succulents? Typically, you need to control the amount of humidity your succulents are exposed to keep them healthy and thriving. Failure to do so can lead to unhealthy and stressed-out plants.

So, do succulents do well in humidity? The answer depends on the type of succulent you are growing. Cacti and other desert-dwelling succulents will not tolerate high humidity levels, while tropical succulents prefer humid environments. This is why it’s crucial to research the type of succulent you are growing before attempting to keep them in a particular environment. Strive to keep humidity levels around 40-60%, with higher levels reserved for tropical succulents and lower levels kept for desert-dwelling plants.

This article discusses everything you need to know about the level of humidity your succulents need. This will help you provide the best possible growing conditions and ensure that your plants are happy. Read on to learn more.

What Is Humidity?

Before we discuss how humidity affects your succulents, let’s first understand what it is.

Humidity refers to the amount of water vapor present in the air. It is expressed as a percentage that determines whether an environment is dry or humid.

For example, a room with 40% humidity would be moderately dry, whereas one with 80% humidity would be too humid. This is why humidity levels hit 100% when it rains.

Humidity is closely related to the environment’s dew point or the temperature at which water vapor condenses and forms dew. Generally, the higher the humidity, the closer the environment is to its dew point.

A hygrometer with a plant exposed to sunlight.
Humidity refers to the amount of water vapor present in the air.

Typically, humidity scales with air temperature. The higher the temperature, the more humid the environment will likely be and vice versa. However, some areas, such as deserts, will have low humidity despite high air temperatures.

Hot, humid weather usually leaves the air saturated with many water particles. In human beings, it means that your sweat won’t evaporate, causing almost everything to feel sticky.

In plants, the air’s moisture determines how much water the leaves can absorb.

Too much or too little humidity can be damaging to your succulents. So, it is essential to strive for balance.

Low Humidity vs. High Humidity

The air is considered dry when the relative humidity is below 40%. This means that your succulents won’t be able to absorb enough water from the environment, resulting in dehydration and stress.

Low humidity can be caused by heat from a fire or stove, extreme cold, or even an air conditioner.

On the other hand, high humidity is defined as anything above 60%. High humidity can cause succulents to overhydrate, eventually leading to root rot and other diseases. It also leads to mold and mildew growth which can lead to poor health in your plants.

A diseased plant leaf.
High humidity can cause succulents to overhydrate, eventually leading to root rot and other diseases.

It is important to note that different types of succulents have unique needs regarding humidity levels, so research your type of plant before making environmental changes.

Why Is Humidity Important to Your Succulents?

Typically, most succulent plants come from areas that don’t experience high humidity. Therefore, most of these plants prefer living in relatively dry conditions.

Since the soil and air are dry in their natural habitat, most won’t tolerate humidity for long periods.

Humidity levels play a critical role in the survival of your succulents since it helps them regulate their water intake.

When the relative humidity is low, the soil and air become dry, causing the succulent to absorb water from its surroundings to survive. This absorption usually causes the succulent leaves to droop as they try to prevent further water loss.

A freshly watered pepeomioides on a pot.
You must monitor and maintain an optimal humidity level for your succulent plants to ensure their health and well-being.

If the succulent is ignored for too long after showing signs of dehydration, it will eventually wilt or even die.

On the other hand, when the humidity is too high, your succulents will need more time to absorb moisture from their surroundings before it evaporates. This can cause them to become over-hydrated and eventually rot or die.

Therefore, you must monitor and maintain an optimal humidity level for your succulent plants to ensure their health and well-being.

What Are the Best Humidity Conditions for Succulents?

Well, many factors affect a succulent’s best humidity level. Understanding your succulent’s water requirements is important when deciding what humidity level is best.

Generally, succulents prefer a relatively lower humidity, and the ideal range falls between 20-40%. However, some succulents can tolerate higher levels of humidity (up to 50%) if the environment is well-ventilated and temperatures are kept cool.

A hygrometer on hand.
To increase the humidity around your succulent plants, consider misting them with water or placing a humidifier near them.

It would be best if you also considered planting your succulent in an area less likely to come in contact with high humidity and warm temperatures.

Finally, to increase the humidity around your succulent plants, consider misting them with water or placing a humidifier near them. But be careful not to overdo it, as this could lead to root rot or other diseases.

How to Measure the Humidity Levels for Your Succulents

The best way to measure the humidity level of your succulent plants is by using a hygrometer. This device measures the amount of water vapor in the air.

You can find a hygrometer easily online or at most home improvement stores for an affordable price. Place the hygrometer near your succulents to get an accurate reading.

Ensure you take the readings in Fahrenheit degrees because they usually work better with higher temperatures than degrees Celsius.

To ensure optimal humidity levels, regularly observe and adjust as needed. If you notice the humidity levels rising too high, you can open windows for better air circulation or use a fan to blow away excess moisture.

Are There Succulents That Can Tolerate High Humidity?

As mentioned earlier, some succulents tend to thrive in relatively high humidity. Some of the common succulents that do well in high humidity include:

  • Sedum: Some members of the sedum family come from regions with high humidity and are known to tolerate moisture reasonably well. Some of them even prefer soggy soil.
  • Kalanchoe: Although considered succulents, Kalanchoe plants are primarily compared to regular houseplants. Like other houseplants, these succulents can survive in a wide range of humidity levels thanks to their thinner leaves.
  • Aeoniums: These succulents come in varying species native to different parts of the world. Some of the species that come from the Canary Islands and Madeira are known to tolerate higher humidity levels.
  • Crassula: Some members of the Crassula family tolerate high humidity levels and even thrive in it. Examples include Crassula ovata (Jade plant) and Crassula mucosae (watch chain plant). Most of them may be sensitive about the potting mix but don’t care about the amount of moisture in the air.

Tips For Maintaining the Right Humidity Level

Here are some tips for maintaining the right amount of humidity level for your succulents at home:

1. Monitor the humidity levels regularly

Use a digital hygrometer to monitor relative humidity levels in your home and adjust the level when necessary. Consider checking the humidity levels at least once a week and adjusting accordingly.

2. Use humidity-controlling tools

Humidifiers and dehumidifiers are practical tools for controlling humidity levels. A humidifier can help if the air is too dry, while a dehumidifier can reduce humidity levels in excessively damp environments.

A humidifier beside the plant.
Humidifiers and dehumidifiers are practical tools for controlling humidity levels.

3. Avoid over-watering your plants

Over-watering your succulents can cause extensive root rot and increase your home’s humidity levels. Avoid overwatering, and make sure to water only when necessary.

Place your succulents in well-ventilated areas.

If you live in a humid climate, it’s important to place your succulents in well-ventilated areas of your home to reduce the humidity levels. If you don’t have a well-ventilated area, consider using an air fan to help circulate the air in your home during hot or humid months.

4. Choose the suitable container and potting mix

Choosing the right type of containers and potting mix for your succulents. Containers with good drainage are a must, as they provide much-needed airflow and help regulate moisture levels in the air.

5. Reduce indoor airflow

Close your windows when the humidity levels outside your home are high, as this will reduce indoor airflow and help regulate the humidity levels.

Summary

Humidity plays a critical role in the health of your succulent plants. Understanding your succulent’s water requirements is essential when deciding what humidity is best for them.

Generally, succulents prefer low humidity levels, although some species can tolerate higher humidity.

To maintain the right amount of humidity, monitor the levels regularly and adjust as needed. You can also use tools such as humidifiers or dehumidifiers to help regulate the humidity levels.

Finally, remember to choose containers with good drainage, potting mix that drains well, and to reduce the indoor airflow when possible.

With a little effort, you can keep your succulents healthy and happy even in high-humidity climates.

Golden Rules for Watering Golden Barrel Cactus

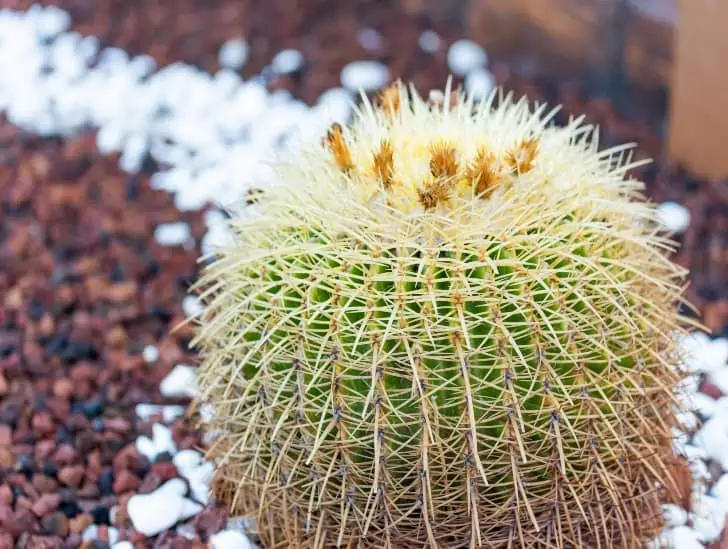
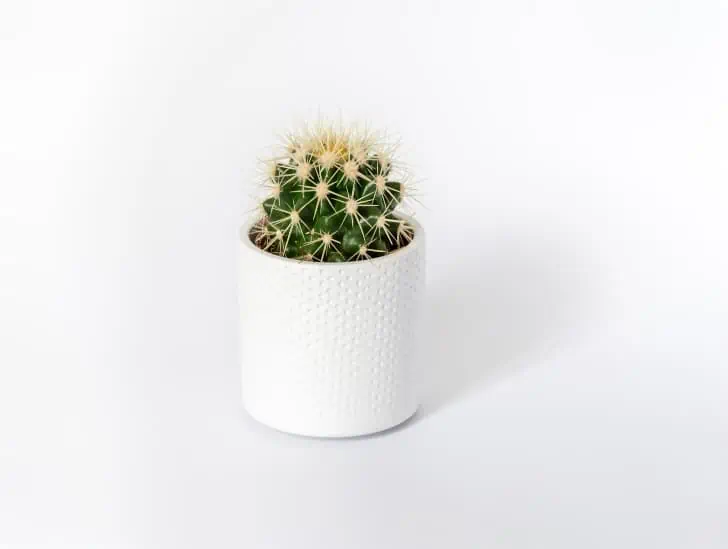
A closeup image of a golden barrel cactus.

The Golden Barrel Cactus (Echinocactus grusonii) is a beautiful and popular cactus native to Mexico. It is easily recognizable by its round shape and yellow spines. Although it is a relatively easy plant to care for, it still needs careful watering to ensure your Golden Barrel Cactus stays healthy and happy. A single mistake when watering this cactus can lead to problems such as root rot that could be fatal.

You should only water your Golden Barrel Cactus once a week or when the top inch of soil is completely dry. Be careful not to overwater your cactus because it can lead to root rot. During winter, reduce watering to about once every two weeks. Use filtered or distilled water for your cactus, and ensure that you are using well-draining soil. Water the succulent early in the morning so the leaves have time to dry off before nightfall.

This article discusses everything you need to know about watering your Golden Barrel Cactus. Read on!

Golden Barrel Cactus: General Water Requirements

Before you start watering your golden barrel cactus, it’s important to understand the plant’s general water requirements.

Golden barrel cactus native habitat is the arid regions of Mexico and thus has evolved to be quite a drought tolerant. In its natural habitat, the Golden Barrel Cactus will only receive rainwater a few times per year.

A golden barrel cactus in a white pot.
You may need to water more often in hotter weather or if the plant is growing rapidly.

The key to correctly watering your Golden Barrel Cactus is to mimic its natural habitat as closely as possible. This means that you should only water your cactus when the top inch of soil is completely dry.

Once every week is usually sufficient, but you may need to water more often in hotter weather or if the plant is growing rapidly.

During the winter months, you can reduce watering to about once every two weeks. It is important not to overwater your Golden Barrel Cactus because this can lead to root rot, a common problem with this plant.

If you think your cactus is getting too much water, check the soil to see if it is soggy or if the roots are starting to rot. If so, you will need to reduce watering and ensure that the plant gets sufficient drainage.

Golden Rules of Watering a Golden Barrel Cactus

You need to be careful not to make any mistakes when watering and caring for your golden barrel cactus. Here are some specific watering tips to keep in mind.

These golden rules will help you avoid common problems with golden barrel cactus such as root rot and ensure that your cactus stays healthy and happy.

Rule #1: Use Distilled Water or Rainwater

One of the most crucial factors to consider when watering your Golden Barrel Cactus is the type of water you use. It is best to use either distilled water or rainwater. This is because tap water often contains minerals that can build up in the soil and harm your cactus.

If you don’t have access to distilled water or rainwater, use tap water but let it sit out for 24 hours before using it. This will allow some of the minerals to dissipate.

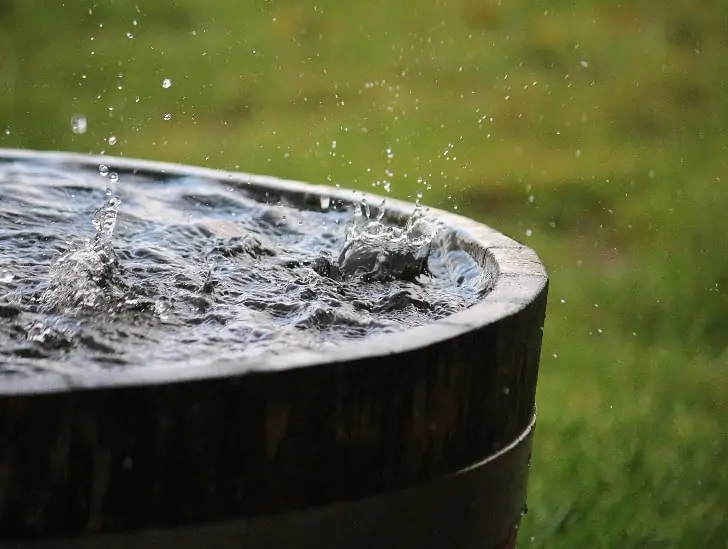
A green barrel for rain.
It is best to use either distilled water or rainwater.

If you don’t allow the tap water to sit out for 24 hours, the minerals can build up in the soil and harm your cactus.

Rule #2: Water Early in the Morning

Another important rule to follow when watering your Golden Barrel Cactus is to do it early in the morning. This will give the water time to soak into the soil and hydrate the plant before the heat of the day sets in.

The best time to water your cactus is between 6:00am and 10:00am, so leaves have time to dry off. It also provides the succulent with enough time to absorb enough water.

If you cannot water your cactus early in the morning, do it in the evening instead. Just be sure that the leaves have time to dry off before nightfall. If they stay wet overnight, they can develop diseases or start to rot.

Rule #3: Let the Soil Dry Out Completely Between Watering Sessions

It is important to let the soil dry out completely between waterings. This will help prevent root rot, a common problem with Golden Barrel Cacti.

To check if the soil is dry, stick your finger about an inch into the pot. If it feels dry to the touch, it’s time to water your plant.

If you’re unsure whether the soil is dry, it’s better to err on the side of caution and wait another day or two before watering.

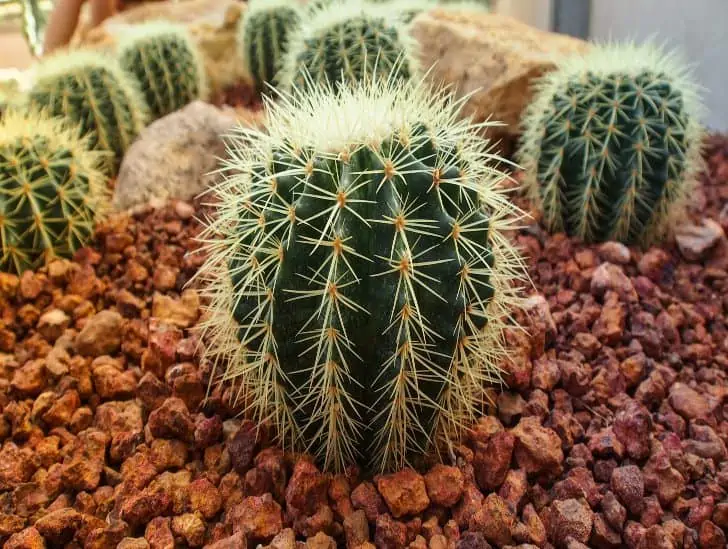
A golden barrel cactus on a rocky soil.
It is important to let the soil dry out completely between waterings.

If you are not confident in your ability to manually check for soil moisture, consider purchasing a moisture meter. These devices are specifically designed to measure the water content of soil and can be a helpful tool for keeping your cactus healthy.

A typical moisture meter is calibrated to give readings in percentages. For Golden Barrel Cactus, the ideal range is between 20% and 40%.

Rule #4: Use a Pot with Plenty of Drainage Holes

Another important rule to follow when watering your Golden Barrel Cactus is to use a pot with good drainage. This succulent does not like sitting in soggy soil, so it is important to ensure that water can drain freely from the pot.

The best type of pot to use is one with several drainage holes at the bottom. If your pot has no drainage holes, you can drill some yourself or choose a different pot.

Rule #5: Use the Right Watering Method

You can use many different watering methods for your Golden Barrel Cactus. The method you choose will depend on your plant size and the pot you are using. Remember, proper watering is one of the ways to keep your Golden Barrel Cactus healthy.

It is best to water small plants in pots without drainage holes using the “drench and drain” method. To do this, fill the pot with water and let it sit for 15 minutes. This will allow the water to soak into the soil and reach the plant’s roots.

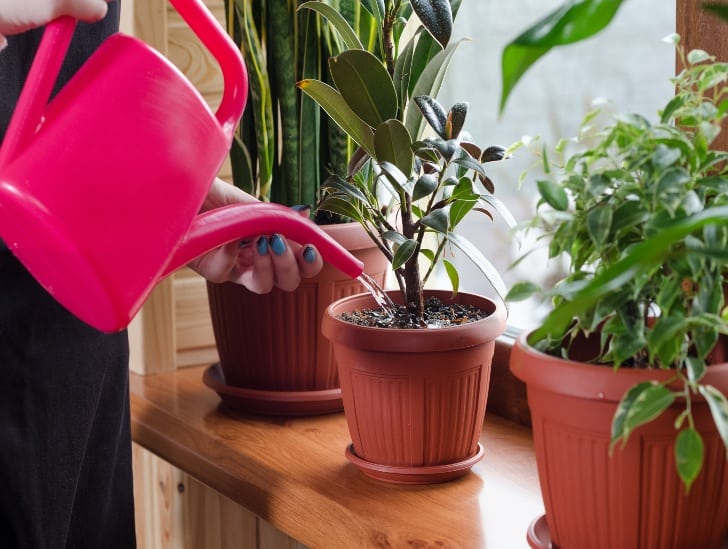
A person watering the plant.
You can use many different watering methods for your Golden Barrel Cactus.

After 15 minutes, empty any remaining water from the pot. Be sure to do this, even if it means tipping the pot upside down and shaking it a bit. It is important that the pot drains completely so that the roots do not sit in water.

You can water larger plants in pots with drainage holes using the “soak and dry” method. To do this, water the plant until the water begins to drip out of the drainage holes.

Let the plant soak for 30 minutes to an hour, then empty any remaining water from the saucer or catch basin. Again, ensure the pot drains completely, so the roots do not sit in water.

Whichever watering method you choose, it is important to stick to a regular schedule. Watering your cactus once a week is usually sufficient, but check the soil moisture level before watering to avoid overwatering.

Rule #6: Avoid Getting Water on the Leaves

When watering your Golden Barrel Cactus, be careful not to get water on the leaves. This is because the leaves can easily rot if they stay wet for too long. Instead, focus on watering the soil around the base of the plant.

A person watering the plant using a pink water can.
Be careful not to get water on the leaves.

If you do get water on the leaves, be sure to dry them off as soon as possible. The best way to do this is to use a soft cloth or paper towel and gently pat the leaves until they are dry.

Rule #7: Water More Often During the Growing Season

During spring and summer, your Golden Barrel Cactus will be actively growing. This means that it will need more water than usual.

Generally, you should water your cactus once a week during the growing season. But as always, check the soil moisture level before watering to avoid overwatering.

This is also the right time to feed your cactus. Use a high-quality cactus fertilizer and follow the instructions on the package. Fertilizing your cactus will help it to grow strong and healthy.

Rule #8: Water Less Often During the Winter

During fall and winter, your cactus will enter a period of dormancy. This means that it will need less water than usual.

You should water your cactus once every two weeks during winter. You can even water it once per month if the weather is particularly cold.

Do not fertilize your cactus during winter because it will not be actively growing and doesn’t need extra nutrients.

Waiting to fertilize until spring helps to prevent root burn, which can happen when fertilizer is applied to dormant plants.

Summary

Watering your golden barrel cactus is one of the ways to care for your plant and ensure it grows well. No plant can survive without water, even those used to desert conditions.

Your golden barren cactus needs you to adhere to strict watering schedule so it grows well and avoid some water problems such as root rot. The above simple tips can keep your golden barrel cactus healthy and thriving for many years.

Remember to adjust the watering schedule based on the conditions in your area, and always err on the side of caution when deciding whether or not to water your plant.

With a little bit of care, your golden barrel cactus will be a beautiful addition to your home or garden for many years to come.

6 Golden Rules for Watering Your Kalanchoe

The Kalanchoe is a beautiful succulent native to Madagascar. It is a popular houseplant since it’s relatively easy to care for and does not require a lot of water or attention to thrive. However, even though the Kalanchoe is a drought-tolerant plant, it still needs to be watered regularly to stay healthy. Failure to do so can result in the plant becoming wilted, yellow, and eventually dying.

You should only water your Kalanchoe when the soil is dry. Be sure to water deeply without overdoing it. Use the bottom-up watering method to avoid getting water on the leaves. After watering, allow the excess water to drain out of the pot before putting the succulent back in its place. Also, allow the plant to dry out completely between watering sessions.  

If you adhere to strict watering, your Kalanchoe is sure to thrive. Read on to learn some basics of watering this precious plant.

Kalanchoe: General Watering Requirements

Before we dive deep into discussing the golden rules of watering a Kalanchoe Blossfeldiana plant, it is essential to understand the plant’s general watering requirements.

The Kalanchoe is a drought-tolerant succulent that can store water in its leaves. This means that it does not require as much water as other plants. However, it still needs to be watered regularly to stay healthy.

Generally, you should only water your Kalanchoe when the soil is dry. This succulent does not like to sit in wet soil. Be sure to water deeply but careful not to overdo it as this might cause other problems that might be fatal.

Indoor kalanchoe near the windor.
The Kalanchoe is a drought-tolerant succulent that can store water in its leaves.

If you are unsure whether or not the soil is dry, stick your finger about an inch into the potting mix. You don’t need to water the plant if it feels moist. If it feels dry, then it is time to water.

Some of the critical factors that determine the watering frequency of a Kalanchoe are the plant’s size, potting mix, and weather. For example, a small Kalanchoe in a fast-draining potting mix will need to be watered more often than a large Kalanchoe in a slow-draining potting mix.

Temperature also plays a role in how often you need to water a Kalanchoe. The plant will need to be watered more often in warmer weather and less often in cooler weather.

The best way to determine how often to water your Kalanchoe is to pay attention to the plant and its leaves. It’s time to water the plant if the leaves start to wilt, turn yellow, or turn brown.

Golden Rules for Watering a Kalanchoe

 Proper watering of your Kalanchoe needs you to adhere to some rules so you avoid making any fatal mistakes. To care for your kalanchoe plant with proper watering, you need to follow these rules:

1. Watering Frequency

You should only water your Kalanchoe when the soil is dry. To check if the soil is dry, stick your finger about an inch into the potting mix. It is time to water the plant if it feels dry to the touch.

If you are unsure whether or not the soil is dry, you can also check the leaves of the plant. You should also water your succulent if the leaves are wilting, turning yellow, or brown.

A person watering the kalanchoe.
It is time to water the plant if the soil feels dry to the touch.

You need to avoid overwatering your Kalanchoe. This plant does not like to sit in wet soil, and too much water can cause serious root rot issues. If you think you have overwatered your plant, allow the excess water to drain out of the pot before putting the succulent back in its place.

2. Watering Method 

When watering a Kalanchoe, be sure to water deeply but be careful not to overdo it. The best way to water this succulent is to use the bottom-up watering method.

To do this, simply place the pot in a sink or container of water and allow the plant to soak up water from the bottom.

Be sure to remove the plant from the water after a few minutes so it does not sit in wet soil for too long, as this can lead to root rot issues.

After watering, allow the excess water to drain out of the pot before putting the succulent back in its place.

Alternatively, use the soak-and-dry method. This involves watering the plant until the soil is saturated and then allowing it to dry out completely before watering again. This method is best for Kalanchoe plants placed in pots with drainage holes.

3. Reduce Watering During Winter

One of the golden rules for watering a Kalanchoe is to reduce watering during winter. This is because the plant goes dormant in winter and does not need as much water.

If you live in an area with a winter climate, you can reduce the watering frequency of your Kalanchoe to once every few weeks. Keep an eye on the plant and water it when the soil is dry.

Houseplant in the windowsill during winter.
If you live in an area with a winter climate, you can reduce the watering frequency of your Kalanchoe to once every few weeks.

The plant will generally show signs of underwatering if it is not getting enough water. These signs include wilting leaves, yellowing leaves, and brown edges on the leaves.

If you notice any of these signs, water your plant immediately.

4. Use Rainwater or Distilled Water

The type of water you use can significantly impact your plant’s health. It’s best to use rainwater or distilled water for watering as these types of water do not contain chemicals or minerals that could harm the plant.

You are advised to collect rainwater in advance and store it in a rain barrel or other container for future use.

If you don’t have access to rainwater, then you can use distilled water instead. This can be easily purchased from a grocery store or online.

If you cannot get hold of rainwater or distilled water, you can use tap water.

However, let the tap water sit out for 24 hours before using it on your plant. This will allow the chemicals in the water to dissipate and make it safe for your Kalanchoe.

5. Water Deeply

When you water your Kalanchoe, give it a good soaking. This means you should water until the water runs out of the bottom of the pot. This ensures that the plant’s roots get enough water and helps avoid problems such as root rot.

It is best to water your Kalanchoe in the morning, so the plant has time to dry out during the day. Aim for the hours between 6:00 am and 10:00 am for watering.

Watering in the evening can cause the plant to stay too wet overnight, leading to problems such as root rot.

If you cannot water during this time, water in the early afternoon. Avoid watering late in the day, as this can cause the plant to stay too wet overnight.

6. Pay Attention to the Plant

As with any plant, it is essential to pay attention to your Kalanchoe and look for signs that it is not getting enough or too much water.

If the leaves of your plant are wilting, yellowing, or turning brown, then this is a sign that it is not getting enough water. On the other hand, if the leaves are mushy or soft, then this is a sign that the plant is getting too much water.

Kalanchoe in a pot.
If the leaves are mushy or soft, then this is a sign that the plant is getting too much water.

It is crucial to act quickly if you see any of these signs, as Kalanchoes are very sensitive to changes in watering.

If you think you have overwatered your plant, allow the excess water to drain out of the pot before putting the succulent back in its place.

6. Fertilizing Kalanchoe Plants

Kalanchoe plants don’t need to be fertilized often, and too much fertilizer can actually harm the plant. It’s best to only fertilize your Kalanchoe once every two months during the growing season.

To encourage blooming, you can fertilize your Kalanchoe once a month during the blooming season. Just be sure to use a fertilizer that is low in nitrogen, as too much nitrogen can prevent flowers from forming.

Kalanchoe wrapped in a cloth.
If you see that the leaves of your Kalanchoe are yellowing or browning, this is a sign that you are over-fertilizing the plant.

When applying fertilizer, follow the instructions on the package, as different fertilizers have different application rates.

Also, water the plant before applying fertilizer, as dry soil can cause the fertilizer to burn the roots of the plant.

If you see that the leaves of your Kalanchoe are yellowing or browning, this is a sign that you are over-fertilizing the plant. Cut back on the amount of fertilizer you use, and be sure to flush the soil with water to remove any excess fertilizer.

Bottom Line

Watering a Kalanchoe is not difficult, but there are some golden rules that you should follow to ensure that your plant stays healthy.

Be sure to water only when the soil is dry, use the bottom-up watering method, and reduce watering during winter.

Also, use rainwater or distilled water for watering as these types of water do not contain chemicals or minerals that could harm the plant.

By following these simple watering tips, you will be sure to keep your Kalanchoe healthy and happy. Your plant is sure to reward you with beauty.

8 Golden Rules for Watering the Venus Flytrap

The Venus flytrap is a carnivorous plant native to the subtropical wetlands of Carolina in the United States. In its natural habitat, the plant grows in nutrient-poor soil and gets a majority of its nutrient requirements from the insects it catches. Therefore, the Venus flytrap is a highly sensitive plant that requires specific watering and feeding requirements.

The most important rule is to water your Venus flytrap when the soil is completely dry. Be careful not to overwater, as this can lead to root rot. Only water the plant with distilled water, rainwater, or deionized water.

Always check the humidity level of your plant’s environment before watering. If the air is too dry, your plant will not be able to absorb enough moisture from the soil and may become dehydrated. You must also be careful not to splash water on your plant’s leaves, as this can cause fungal growth.

Interested in learning more about how to water your Venus Flytrap plant? This article has it all.

Venus Flytrap General Water Requirements

Before we dive into the details of watering and caring for your Venus flytrap, it is essential to understand the plant’s natural habitat and water requirements.

The Venus flytrap is native to the wetlands of North and South Carolina. In its natural habitat, the plant grows in nutrient-poor soil and gets a majority of its nutrient requirements from the insects it catches.

Venus flytrap
Venus flytrap (Dionaea muscipula), carnivorous plant

The plant is highly sensitive to water and light. One mistake in the watering can be fatal for the plant.

Typically, the plant thrives in moist soil with a humidity level of around 60%. In the wild, the plant gets its water from rain and local streams.

When grown at home, Venus Flytrap prefers a humid environment but can tolerate periods of dryness. If the air is too dry, your plant will not be able to absorb enough moisture from the soil and may become dehydrated.

Therefore, you need to be careful not to overwater or underwater your plant. The general rule is to water your Venus flytrap when the soil is completely dry.

Golden Rules for Watering the Venus Flytrap Plant

Now that you understand the general water requirements of the Venus flytrap, let us take a look at the golden rules for watering this sensitive plant.

1. What Type of Water Should I Use?

In its natural habitat, the plant grows in water high in minerals. However, Venus flytrap prefers distilled water, rainwater, or deionized water when grown at home. Do not use tap water as it contains chlorine and other chemicals that can harm the plant.

If you do not have access to distilled or deionized water, you can let tap water sit for 24 hours so that the chlorine has a chance to evaporate.

Water in a container.
Do not use tap water as it contains chlorine and other chemicals that can harm the plant.

However, you are highly encouraged to collect as much rainwater as possible during the rainy season and store it safely for watering your Venus flytrap plant. Rainwater is free of harmful chemicals and contains beneficial minerals for the plant.

2. How Often Should I Water?

Generally, you should water your Venus flytrap when the soil is completely dry. Be careful not to overwater, as this can lead to root rot.

It is best to check the soil moisture level every few days to get a better idea of when your plant needs watering. To do this, stick one of your fingers into the potting mix. If it feels dry to the touch, it is time to water the plant.

If you are unsure whether the soil is dry, err on the side of caution and do not water the plant. It is better to underwater your plant than overwater it.

3. Avoid Overwatering

You must avoid overwatering your Venus flytrap plant at all costs. Overwatering is the leading cause of death for Venus flytraps.

If you overwater your plant, the roots will start to rot. This will lead to a decrease in the plant’s ability to absorb nutrients and water. As a result, the leaves will turn yellow and eventually die.

A plant being overwatered.
If you overwater your plant, the roots will start to rot.

Ensure the soil is completely dry before watering your plant to avoid overwatering. In addition, it is best to use a well-draining potting mix and drain any excess water from the pot after watering.

If you think you have overwatered your plant, stop watering it immediately and let the soil dry out completely. Once the soil is dry, you can resume watering your plant according to the schedule.

4. Avoid Underwatering

While overwatering is the leading cause of death for Venus flytraps, underwatering is the second most common reason these plants die.

Underwatering can stress the plant and lead to a decrease in its ability to catch insects. In addition, the leaves will start to turn yellow and eventually die.

To avoid underwatering your plant, make sure to water it when the soil is completely dry. In addition, it is best to use a well-draining potting mix and drain any excess water from the pot after watering.

A kid watering the plant.
To avoid underwatering your plant, make sure to water it when the soil is completely dry.

If you think you have underwatered your plant, water it immediately, then resume your regular watering schedule.

5. Avoid Getting Water on the Leaves

One of the facts about Venus flytraps is that the leaves are covered in tiny hairs that are sensitive to the touch. When these hairs are triggered, the leaf will close around the item that touched it.

If water droplets fall on the leaves and trigger the hairs, the Venus flytrap will use up energy to close the leaves. Over time, this can stress the plant and lead to death.

To avoid getting water on the leaves, water the soil around the base of the plant. Do not pour water directly on the leaves or let the leaves touch the water in the pot.

If the leaves get wet, gently shake off the excess water or use a paper towel to blot them dry.

6. What Time Should I Water My Plant?

The best time to water your Venus flytrap plant is early morning. This will give the plant time to absorb the water before the hot sun evaporates it. Aim for the hours between 6 and 10 am.

In addition, watering in the morning will prevent the leaves from staying wet for too long. Wet leaves are more susceptible to fungal diseases such as powdery mildew.

If you cannot water your plant in the morning, you can water it in the evening. Just be sure to avoid watering at night, as this can promote fungal growth.

If you must water in the evening, do so early enough so that the leaves have time to dry before nightfall.

7. Use the Right Watering Method

There are different watering methods you can use for your Venus flytrap plant. The best method is to water the soil around the base of the plant using a watering can or hose with a shower head attachment.

Avoid using a sprinkler or pouring water directly on the leaves, as this can trigger the hairs and cause the plant to close its leaves. In addition, avoid using a watering can with a fine nozzle, as this can also trigger hairs. If you use a hose, keep the water pressure low to avoid damaging the leaves.

Alternatively, use the bottom watering method. To do this, fill a tray with water and place the pot in the tray. Allow the plant to soak up the water from the bottom for about 15 minutes.

After 15 minutes, remove the pot from the tray and allow any excess water to drain out. Bottom watering is a good option if you are worried about water getting on the leaves. However, be sure not to leave the pot in the water for too long, or the roots may start to rot.

8. Monitor Your Plant for Signs of Stress

Overwatering or underwatering your plant can stress it and lead to death. In addition, other factors such as heat, cold, or draughts can also stress the plant.

Monitor your plant for signs of stress, such as wilting leaves, yellowing leaves, or slow growth. If you notice any of these signs, take action to correct the problem.

For example, if your plant is wilting, water it immediately. If the leaves turn yellow, this could signify too much or too little water. Check the soil to see if it is too dry or too wet, and adjust your watering schedule accordingly.

Venus flytrap in a whale pot.
Common causes of stress include excessive heat or cold, lack of light, or poor drainage.

If you notice that your plant is not growing as quickly as it should, this could be a sign of stress. Try to identify the cause of the stress and take action to correct it.

Common causes of stress include excessive heat or cold, lack of light, or poor drainage. Once you have identified the cause, take steps to fix the problem.

Summary

Venus Flytraps can be sensitive, but it’s a rewarding plant if you learn to care for their water needs. By following these simple rules, you can ensure that your Venus flytrap stays healthy and happy.

Remember to use rainwater or distilled water only, water when the soil is dry, and fertilize sparingly, if at all.

The Golden Rules for Watering Your Crown of Thorns Plant

The Crown of Thorns plant is a beautiful flowering plant native to Madagascar. It is a popular houseplant because it is easy to care for and thrives in a wide range of climates. However, if you are thinking about adding a Crown of Thorns plant to your home, there are a few things you need to know about watering it.

Water your Crown of Thorns plant regularly, allowing the soil to dry out between watering. Be careful not to overwater your plant because it doesn’t like soggy soil. Also, ensure good drainage in the pot so that the roots do not become waterlogged. During the winter months, you can reduce watering to once every two weeks or as needed.

If you have a crown of thorns or plan on planting one, you need to learn how to water it correctly. This article discusses everything you need to know about watering a Crown of Thorns plant.

Crown of Thorns Plant: General Water Requirements

Before we dive deep into discussing the specific watering needs of a Crown of Thorns plant, it is crucial to understand the plant’s general water requirements.

The Crown of Thorns is a succulent, which means it is adapted to survive in arid conditions. In its natural habitat, the Crown of Thorns only receives rainwater sporadically. As such, it has developed the ability to store water in its leaves and stems.

Crown of thorns exposed to sunlight.
If you live in an area with high humidity, you may need to water your crown of thorns more often.

The Crown of Thorns is very tolerant of drought conditions and can survive for long periods without water. But this doesn’t mean that the plant does not need water. Watering regularly is one of the ways to take care of your crown of thorns, especially when it is actively growing.

During the growth period, water your plant once a week or as needed to keep the soil moist but not soggy. Make sure you allow the top few inches of soil to dry out between waterings.

If you live in an area with high humidity, you may need to water your crown of thorns more often. The extra humidity in the air will make it harder for the plant to lose water through evaporation, so you will need to water it more frequently to compensate.

The Golden Rules of Watering the Crown of Thorns Plant

Now that you know the general water requirements of the Crown of Thorns plant let’s discuss the golden rules of watering this beautiful succulent.

Rule #1: Watering Frequency

The first rule for watering a crown of thorns plant is to do it regularly. This plant needs to be watered at least once a week. You may need to water it more often if the weather is hot and dry or if the plant is growing vigorously.

Red crown of thorns.
Closely monitor your succulent for signs of drought stress, such as wilting leaves or stems.

During winter, the plant will enter into a semi-dormant state and need less water. You can reduce watering to once every two weeks or as required.

Closely monitor your succulent for signs of drought stress, such as wilting leaves or stems. If you see these signs, water your plant immediately.

Rule #2: Allow the Soil to Dry Out Between Waterings

The second rule of watering a crown of thorns plant is to make sure the soil has a chance to dry out between waterings.

This plant does not like soggy soil, so it is essential to let the top few inches of soil dry out before watering again.

If you water your plant too often, the roots will start to rot, which can lead to the death of the plant. Check the soil before watering, and only water your crown of thorns if the top few inches of soil are dry.

Rule #3: Be Careful Not to Overwater

While it is crucial to water your Crown of Thorns plant regularly, you also need to be careful not to overwater it. Allow the water to drain completely after each watering, and promote good drainage in the pot.

Watered crown of thorns.
If you think your plant has root rot, it is best to consult a succulent expert for advice on how to proceed.

If the soil stays too wet for too long, the roots will start to rot. This can lead to problems such as wilting leaves, yellowing leaves, and stunted growth. If you see any of these signs, stop watering your plant until the soil has dried out completely.

Root rot is a serious problem and can be difficult to fix. If you think your plant has root rot, it is best to consult a succulent expert for advice on how to proceed.

Rule #4: Use the Right Watering Technique

The best way to water a crown of thorns plant is to use the soak-and-dry method. To do this, water your plant until the soil is saturated and then allow the water to drain completely.

Do not water again until the top few inches of soil are dry. This method will help ensure your plant gets the moisture it needs without overwatering.

If you are using a watering can make sure to water slowly and evenly so that the water can soak into the soil. Do not pour all the water at once, or it will run off the pot without wetting the soil.

You can also water your plant from the bottom by placing the pot in a bowl of water and letting the plant soak for a few minutes. Once the soil is saturated, remove the pot from the water and let it drain completely before you place it back in its usual spot.

Rule #5: Check for Signs of Drought Stress

Even if you follow all of the watering rules, it is still possible to underwater or overwater your plant. That is why it is essential to check for signs of drought stress and take action if necessary.

Some signs of drought stress include wilting leaves, yellowing leaves, stunted growth, and dry, crispy leaves. If you see any of these signs, it is vital to water your plant immediately.

Once you have watered your plant, closely monitor it for any further signs of stress. If the problem persists, it is best to consult a succulent expert for advice on how to proceed.

Rule #6: Use Distilled Water or Rainwater

When watering your Crown of Thorns plant, it is best to use distilled water or rainwater. Tap water contains chemicals that can build up in the soil and eventually harm your plant.

Water on a container.
When watering your Crown of Thorns plant, it is best to use distilled water or rainwater.

If you must use tap water, allow it to sit out for 24 hours before using it. This will allow the chemicals to dissipate and make the water safe for your plant.

Continued use of tap water can eventually lead to mineral build-up in the soil, making it difficult for your plant to absorb moisture. This can lead to problems such as wilting leaves, yellowing leaves, and stunted growth.

Rule #7: Avoid Getting Water on the Leaves of Your Plant

Depending on the watering method you use, it is inevitable that some water will end up on your plant’s leaves. However, it is essential to avoid getting the leaves too wet as this can lead to problems.

If the leaves stay too wet for too long, they can start to rot. This can eventually kill your plant. Soggy leaves are more susceptible to fungal diseases, such as powdery mildew.

To avoid getting water on your plant’s leaves, water from the bottom or use a watering can with a long spout. If you get water on the leaves, dry them off as soon as possible.

Rule #8: Water Early in the Morning

Lastly, water your crown of thorns plant early in the morning between the hours of 6.00 am and 10.00 am. This will give the plant time to absorb the water before the heat of the day sets in.

Watering in the evening can also be problematic as the water on the leaves will not have time to evaporate before nightfall. This can create a humid environment ideal for fungal diseases, such as powdery mildew.

Crown of thorns exposed to morning sunlight.
This will give the plant time to absorb the water before the heat of the day sets in.

If you must water in the evening, do so early enough so that the water has time to evaporate before nightfall.

Bonus Tip: Use a Moisture Meter

If you want to take the guesswork out of watering your crown of thorns plant, it is best to use a moisture meter. This tool will help you to determine when your plant needs water and how much to give it.

To use a moisture meter, insert the probe into the soil near your plant. The meter will then give you a reading that will tell you the moisture content of the soil.

Most moisture meters have three readings: dry, moist, and wet. Use the following guidelines to water your plant accordingly:

  • If the soil is dry, water your plant.
  • If the soil is moist, do not water your plant.
  • If the soil is wet, do not water your plant and allow the excess water to drain away.

Summary

Your crown of thorns is sure to reward you with active growth and beauty if you water it. Following these simple golden rules will help keep your crown of thorns plant healthy and happy.

Remember to water it when the soil is dry, use room temperature water, avoid overwatering, and cut back on watering during winter. With proper care, your crown of thorns plant will thrive for many years!