The Ultimate Guide to Growing Sand Dollar Cactus

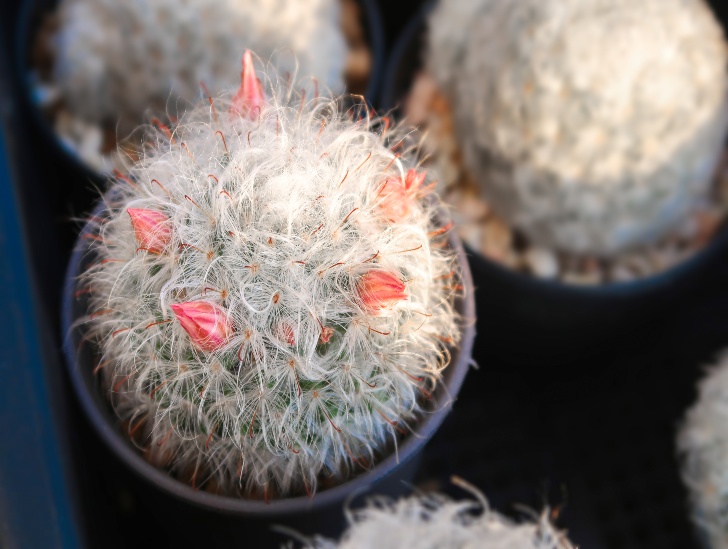
San dollar cactus blo

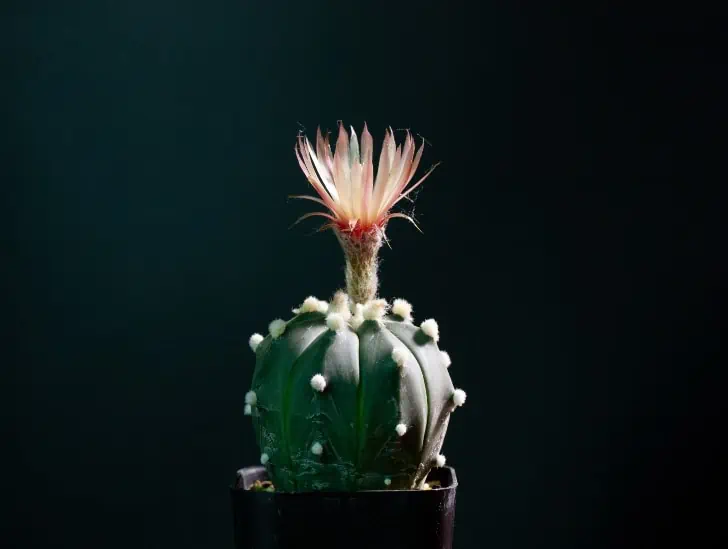
Astrophytum asterias, commonly referred to as the sand dollar cactus is a spineless cactus species native to Mexico and parts of Texas. It is a popular choice among cacti enthusiasts due to its unique and attractive shape that resembles the shape of a sand dollar. This plant has eight ribs covered in dense white fuzz and can reach up to six inches in height and eight inches wide when fully grown.

So, what do you need to know about the sand dollar cactus? The cactus belongs to family Cactaceae, subfamily cactoideae, tribe cacteae, and genus astrophytum. The cactus has a dark green stem covered with ribs and woolly areoles. Its stem can grow up to eight inches wide and six inches tall. The plant produces yellow flowers with orange-green centers and small, round fruits that are edible. The fruits are usually covered with dense wooly hairs. The sand dollar cactus thrives in USDA hardiness zones 9a to 11b. The cactus is considered easy to grow. It prefers a warm, sunny location with well-draining soil.

This blog post discusses some interesting facts about the sand dollar cactus that you should know. Read on to learn more.

Sand Dollar Cactus: Overview and Classification

As mentioned earlier, the sand dollar cactus, or Astrophytum asterias, is a spineless cactus species native to Mexico and parts of Texas. It belongs to family Cactaceae, subfamily Cactoideae, tribe Cacteae, and genus Astrophytum.

Its disc-shaped body is divided into 7-10 distinct sections known as ribs. The middle of each rib contains woolly areoles. The areoles give rise to spines and glochids, the primary means of self-defense for the sand dollar cactus.

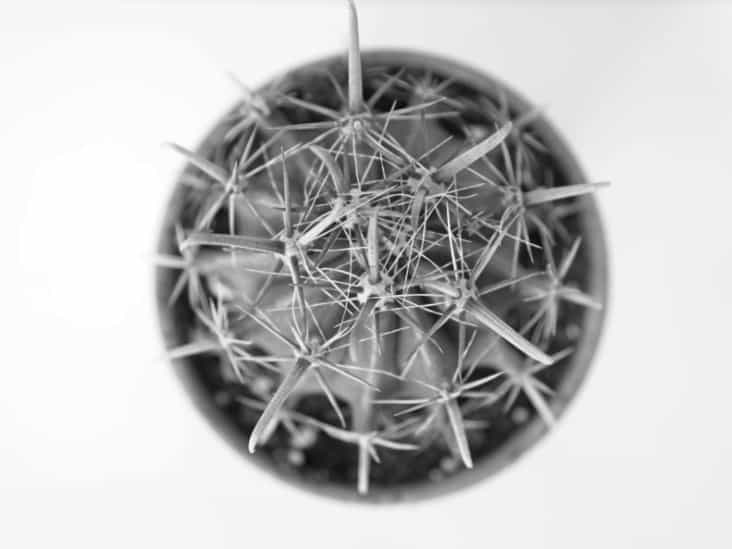
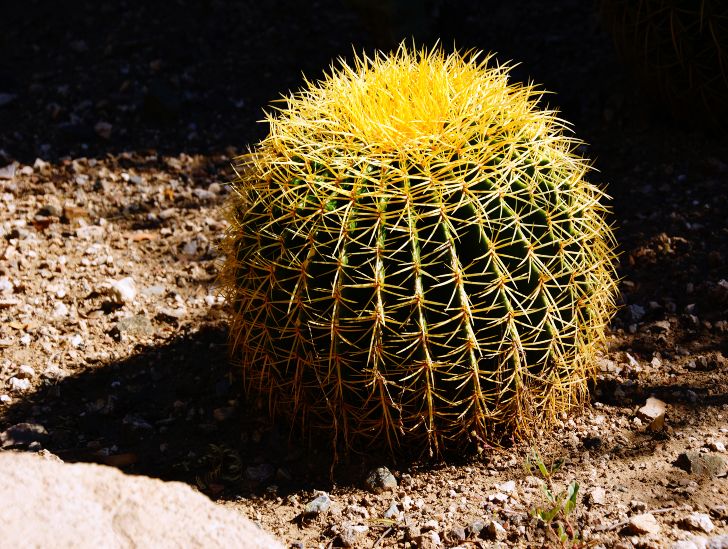
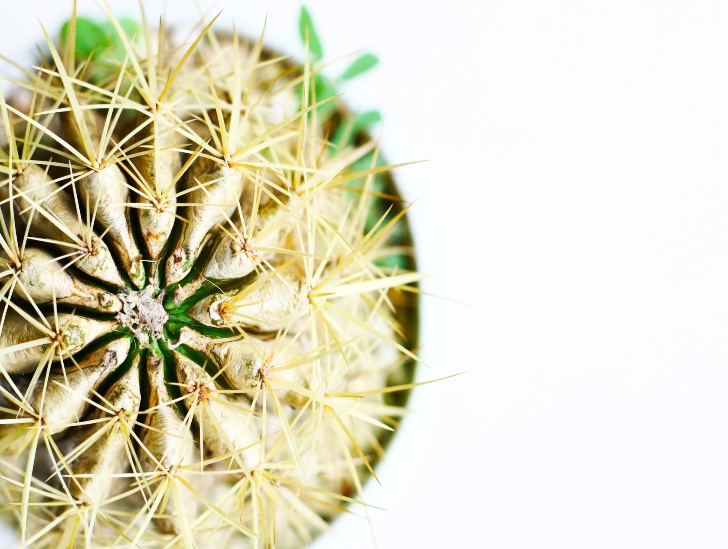
A top view of a sand dollar cactus.
The most important distinguishing feature of this cactus is its resemblance to a sand dollar.

The sand dollar cactus produces yellow flowers with orange-green centers along with small, round fruits that are edible when ripe. The green stems of this cacti are covered with dense white hairs.

Sometimes, the body may appear speckled since it is covered with white scales known as trichomes. Perhaps, the most important distinguishing feature of this cactus is its resemblance to a sand dollar.

Sand Dollar Cactus: Biology

The sand dollar cactus usually reproduces asexually through cross-pollination. The cactus reaches sexual maturity after two or three years (once they attain about three centimeters in diameter).

The cactus flowers between March and June, and fruiting occurs from late April to June. During this time, small, round fruits are produced, which are edible when ripe.

This cactus is considered a slow-growing species since it may take up to three years for it to reach its mature size of six inches tall and eight inches wide.

The succulent bears a close resemblance to Euphorbia obesa, even though the two are unrelated. In fact, Euphorbia Obesa isn’t even a cactus.

Sand Dollar Cactus: Distribution and Habitat

The cactus is native to parts of Texas in the U.S. and the states of Tamaulipas and Nuevo Leon in Mexico. They mainly occupy the parts to the east of the famous Sierra Madre Oriental Mountain ranges.

A sand dollar cactus bloom under the bright blue sky.
Most of it is associated with thorn scrub in rocky grounds that were previously flat and fertile grasslands.

Although the sand dollar cactus was previously available in abundance in this region, it has become increasingly rare due to habitat destruction.

Today, the succulent is restricted to a very small part of Starr County in Texas and a few parts in Tamaulipas. Most of it is associated with thorn scrub in rocky grounds that were previously flat and fertile grasslands.

Sand Dollar Cactus: Cultivation

This cactus has mainly been grown as a houseplant since the 1950s. It is a relatively easy-to-grow species that thrive in warm, sunny locations with well-draining soil.

It outshines other members of its genus despite its rarity. The cactus is usually propagated from seed.

Most of the young plants you will come across in nurseries are seed grown. The popularity of the cactus among gardeners and collectors has ensured that the species remains available in the market.

Furthermore, it has given rise to several cultivars. One of the most famous sand dollar cactus cultivars is the Super Kabuto.

Sand dollar fruit seeds.
Most of the young plants you will come across in nurseries are seed grown.

This plant resembles the sand dollar cactus, although it has relatively large trichomes that congregate in dense spots arranged in a highly striking and exciting pattern.

The other common cultivar is the Hoshinoko. This one has smaller and more densely packed trichomes.

It also grows faster than the regular plant, making it a handy choice for gardeners who want to see quick results.

Sand Dollar Cactus: Growth Rate

As mentioned earlier, the sand dollar cactus is a slow-growing species. It may take up to three years for the succulent to reach its mature size.

It is important to provide enough light for the plant for it to thrive properly. The cactus does not require frequent watering and can be watered only when the soil is dry.

Generally, this cactus species is not prone to disease or pests and can do well in favorable indoor conditions. With the right care, it can live for many years in your home.

Sand Dollar Cactus: Care and Maintenance

Typically, the sand dollar cactus prefers a warm, sunny location with well-draining soil. Water it moderately during spring/summer months and keep it dry during winter. The temperature should remain between 10-25 degrees Celsius to ensure proper growth.

Maintain the humidity levels at about 40-50%, as this is the optimal range for the cactus’ growth. Too much humidity can encourage fungal diseases.

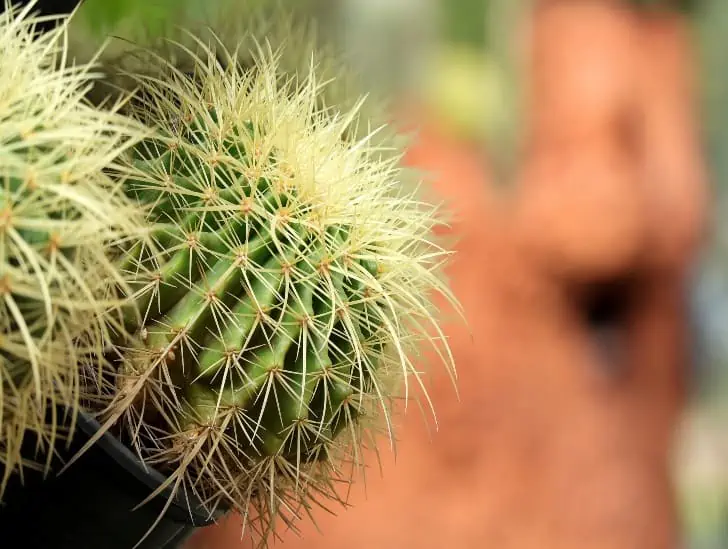
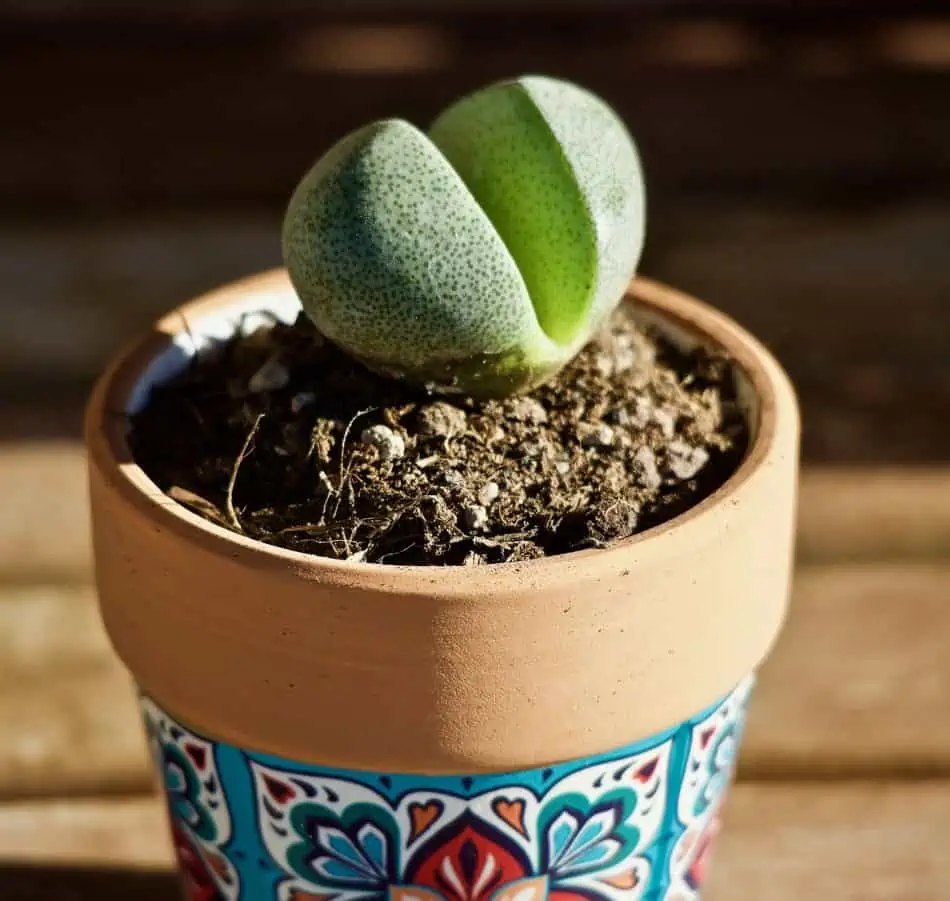
Sand dollar cactus in a pot.
It is important to use fertilizer specifically meant for cacti and succulents.

The cactus should be fed with a balanced fertilizer once every two or three months to ensure proper growth. To prevent any nutrient deficiencies, it is important to use fertilizer specifically meant for cacti and succulents.

It can also be grown outdoors, although this cactus species is mostly viewed as an indoor plant due to its slow growth rate and spectacular appearance.

Depending on its size, it is important to repot the sand dollar cactus every spring or once in two years. Don’t forget to remove dead leaves and stems before repotting.

The cactus should be pruned regularly to maintain its shape and size and promote the healthy growth of the plant. It is also important to check for pests or diseases from time to time and take appropriate action if needed.

Ensure the soil remains slightly acidic or neutral and use a fertilizer rich in potassium and nitrogen.

Finally, you must be careful when handling the cactus because its spines can cause skin irritation. When it comes to maintenance, regular pruning may be necessary depending on the state of your plant.

Sand Dollar Cactus: Flowering

This cactus usually flowers during summer or spring. The flowers are small, white, and bell-shaped with yellow stamens and light green sepals. They may be solitary or in clusters, lasting only a few days.

A sand dollar cactus flowering outdoors.
The flowers are small, white, and bell-shaped with yellow stamens and light green sepals.

Once the cactus is mature enough, it will produce many flowers before going dormant during winter. Consider leaving the flowers in place because they will eventually die on their own.

Sand Dollar Cactus: Toxicity

The sand dollar cactus is not toxic to humans or pets. However, it is important to be careful when handling the plant because its spines can cause skin irritation.

Keep it away from children and pets to prevent accidental ingestion and be sure to seek medical help in case of ingestion.

Its fruit is edible, but you need to prepare it properly before consumption. The seeds of the cactus may also be used for propagation.

To prepare the fruit, remove the spines and cut it into small pieces before cooking. The cooked fruit can be eaten as is or added to other dishes such as salads.

Sand Dollar Cactus: Propagation

The sand dollar cactus can be propagated by seed germination or stem cuttings. If propagating by seed, sow them in small pots with well-draining soil mix and cover them lightly with sand.

Keep the soil moist but not wet and place the pot in a warm location where sunlight is available. The seedlings will take about two to three weeks to germinate.

For stem cuttings, you can use a sharp knife or scissors to carefully remove the stems from the mother plant. Allow the cuttings to dry for a few days before planting them in pots filled with well-draining soil mix.

Keep the soil moist but not wet and place the pot in a warm location with plenty of indirect sunlight. The cuttings may take several weeks to root.

Sand Dollar Cactus: Conservation

The cactus is listed as an endangered species in some parts of the world and is thus protected by law.

To prevent its extinction, it is important to take measures such as propagating it sustainably, avoiding habitat destruction, and using only legal sources when buying or selling this cactus.

It is also essential to avoid over-harvesting its fruit and seeds, which can reduce its population. Taking these steps can ensure that this unique and beautiful cactus remains in our environment for many years.

Final Thoughts

The sand dollar cactus is a unique plant that adds beauty and character to any indoor or outdoor garden.

It requires minimal effort to maintain and is ideal for novice gardeners who want something easy to care for and interesting to look at.

With its slow growth rate, a striking pattern, and unusual flowers, this cactus is definitely worth adding to your collection.
Why is My Cactus Shrinking? Expert Advice

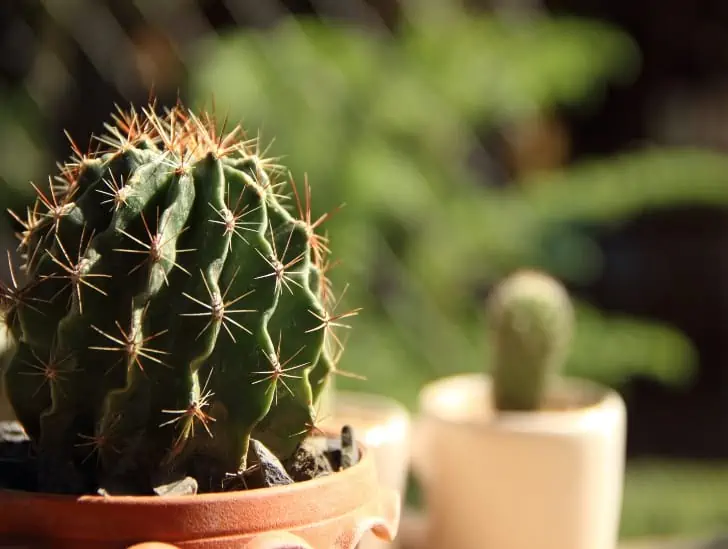
Most cacti are relatively hardy and can survive neglect to some extent. However, these succulents still require specialized care to thrive and live for many years. One of the most common issues you may encounter with your cactus is the shrinking of leaves and stems. It is important to act as quickly as possible when you notice signs of shrinking on your cactus. Failure to do so can be catastrophic.

So, why is my cactus shrinking? A cactus plant can shrink for many reasons. Common causes include overwatering during winter, rotting, too much light, aging, underwatering, and lack of air circulation. In some cases, the cactus may also be attacked by pests or suffer from fungal infections, which can cause it to shrink. Typically, you need to look for multiple signs to establish the true cause of shrinking. Just keep in mind that a cactus shrinking is not normal.

This blog post discusses everything you need to know about cactus shrinking, including reasons, signs, and tips to prevent it. Read on to learn more.

How Does Shrinking Occur?

Before diving into the reasons for cactus shrinking, let’s learn more about how it occurs.

Typically, cacti plants shrink as they lose water. The shrinking is a survival mechanism meant to help the succulent conserve its water reservoirs.

During this time, the plant feels relatively hollow or squishy. This is a major sign that your plant has begun to lose its water reserves, and something needs to be done urgently to save it.

The first signs of shrinking will appear on the oldest stems and leaves of the plant. Shrinking is a gradual process, which may be difficult to spot at first.

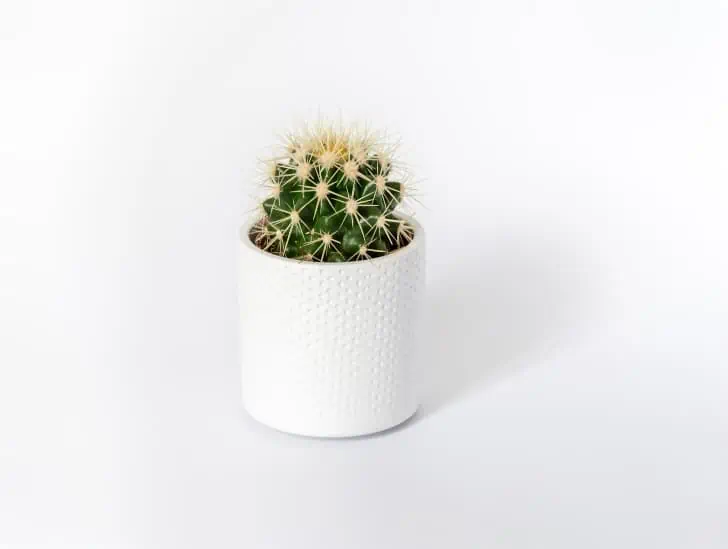
A golden barrel cactus in a white pot.
The shrinking is a survival mechanism meant to help the succulent conserve its water reservoirs.

In severe cases, you may also notice that some parts of the plant have already died. This is especially true of cacti plants that have been overwatered continuously for too long.

Why Is My Cactus Shrinking?

Now that we have an idea of how shrinking occurs, let us dive into the common causes:

Reason #1: Too Much Light

Most cacti species naturally love sunlight and being exposed to bright direct light or slightly shaded light shouldn’t harm your plant in any way. In their natural habitat, most cacti species are exposed to a lot of direct sunlight throughout the year.

However, you must remember that these succulents can adapt to a new environment relatively fast. So, if you live in an area that experiences cold winters, your cacti will most likely not appreciate the direct sunlight.

It means that if your cactus plant wasn’t getting too much light during the winter season and you suddenly exposed it to bright direct sunlight during summer, it will resist the sudden change in environmental conditions.

Signs of too much light on your cactus include burning and curling of leaves, discoloration, and shrinking. To prevent this, consider using indoor blinds or curtains to protect your cactus from direct sunlight during the hot months.

Once winter is gone, re-introduce your cactus to direct/indirect light gradually. To do this, start by placing it near a bright window and gradually moving it closer to direct sunlight as the season progresses.

Take extra precautions if you live in an area that experiences extreme seasons with very hot or cold temperatures.

Reason #2: Overwatering During Winter

This is one of the most common causes of cactus shrinking. Cacti plants store water in their stems and leaves, which helps them survive periods of drought and cold temperatures during winter. When overwatered, the plant’s roots become clogged, leading to rotting and eventual death.

Common signs of overwatering include wilting, wrinkling, discoloration, and shrinking. You can avoid overwatering your cactus during winter by ensuring the potting mix is completely dry between watering sessions.

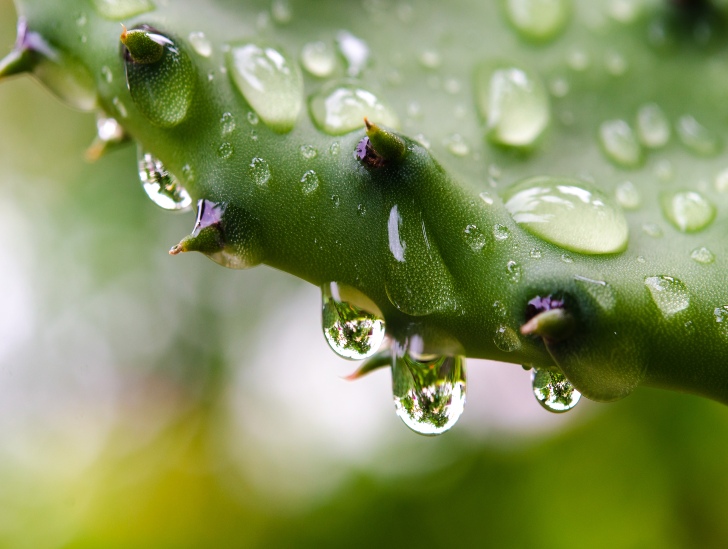
Water droplets on the cactus.
When overwatered, the plant’s roots become clogged, leading to rotting and eventual death.

During winter months, water your cactus sparingly. Generally, you only need to water your plant once a month. However, if you live in an area where temperatures drop drastically during winter, consider reducing the watering frequency even further.

Some cacti species can even survive the entire winter season without being watered. This is especially true of cacti species native to drier climates.

Reason #3: Underwatering

Unfortunately, it is not just overwatering that can cause your cactus to shrink. Sometimes, underwatering can also leave your succulent in a dehydrated and stressed state.

This occurs when you forget to water your cactus for a long time or when it is exposed to high temperatures for an extended period.

As mentioned earlier, cacti plants usually store water in their stems and leaves, giving them a plump, thick appearance.

Therefore, if you fail to water your plant for a relatively long time, there will be no water for the stems and leaves to store. Naturally, this will cause shrinking, causing your cactus plant to appear smaller.

The best way to determine if your cactus requires watering is by checking the soil for dryness. Carefully push your fingers into the potting mix and feel it. If your soil feels dry, it is time to water your plant.

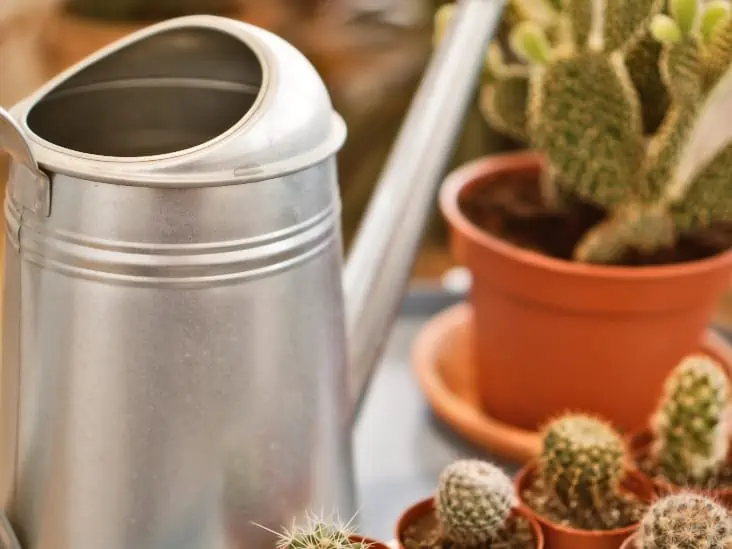
A water can besidethe cactus plants in a pot.
The best thing to do is monitor your cactus closely and only water it when the soil is completely dry.

Give your plant a thorough soaking and allow the excess water to drain away. Once you have watered, the leaves and stems will absorb water allowing your plant to return to its normal size in a couple of days.

Some cacti species still require watering, even during the dormant winter period. Therefore, it is highly recommended that you don’t stick to a strict watering schedule because it can easily lead to overwatering or underwatering.

Remember that many factors affect how often your cactus needs to be watered and how it should be watered. The best thing to do is monitor your cactus closely and only water it when the soil is completely dry.

Reason #4: Pests & Fungal Infections

Pests and fungal infections can also lead to your cactus shrinking. Common pests like mealybugs and scale feed on the sap from succulent plants, leading to shriveling of leaves over time.

This is why it’s important to regularly inspect your cactus for signs of infestation or disease.

Take immediate action if you spot any signs of pest infestation. A mild insecticidal soap or alcohol-water solution can help get rid of pests. Fungal infections can be treated using anti-fungal sprays and soil treatments.

In some cases, even after treating the infestation, you may find that your cactus still isn’t growing back to its full size.

This can be due to the damage caused by pests and fungi, which has affected the roots of your cactus plant, eventually leading to shrinking.

Unfortunately, in cases like this, you may have to discard your cactus and get a new one.

Reason #5: Rotting

The other common reason you may be staring at a shrinking cactus is rotting. If your cactus is getting too much water, too little light, or a combination of both, it can lead to the succulent rotting from the inside.

Black or brown spots on the leaves and stems of the cactus usually signal rotting. Sometimes, you may also notice a bad smell coming from the potting mix.

A dying cactus.
If the rot has spread to other parts of your cactus, you may be forced to discard it and get a new one.

The best thing to do in such cases is to remove the affected area or parts of your cactus. You can then discard the rotting material and ensure that the area around it is clean and dry.

If the rot has spread to other parts of your cactus, you may be forced to discard it and get a new one.

Reason #6: Not Enough Light

Your cactus cannot thrive without exposure to sufficient sunlight. If your plant has not been getting enough light over a long time, it will start thinning, leaning, and showing signs of elongated growth.

Without sufficient light, it cannot photosynthesize, which is the process that helps it produce energy and nutrients. As a result, your cactus will start to shrink as it slowly loses its ability to sustain itself.

To prevent this from happening, give your cactus plenty of direct sunlight (at least 4-6 hours per day). If you’re growing cacti indoors, consider installing an artificial light source such as grow lights.

Reason #7: Aging

Lastly, your cactus plant can also start shrinking as it ages. As cacti get older, they tend to lose some of their water storage capacity. It means that they struggle to store enough water to keep them hydrated.

Also, with age, the growth of your cactus may start slowing down or even stop entirely. Over time, this can lead to shrinking. Unfortunately, there isn’t much you can do about it.

A flowering old man cactus exposed to sunlight.
As cacti get older, they tend to lose some of their water storage capacity.

At this point, the best thing to do is to ensure your plant gets enough light, water, and nutrients to help it stay healthy for as long as possible. Avoid overwatering or underwatering since it can accelerate its decline.

Summary

Although cacti are low-maintenance plants that can tolerate neglect, they still require some level of care to stay healthy and flourish.

If your cactus is shrinking, it could be due to different reasons, from too much or too little water to insufficient lighting.

By troubleshooting the issue and making changes to your cacti’s care routine, you can help it return to a healthy state.

What Is the Best Time to Repot a Cactus?

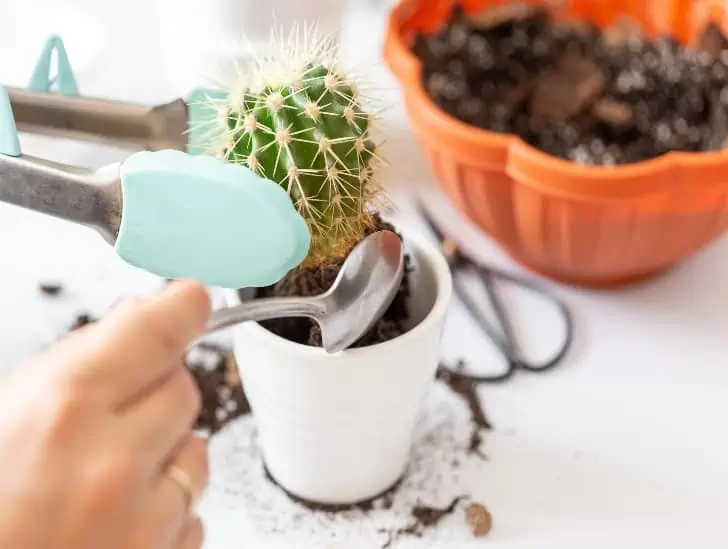
A person repotting cactus.

Cacti remain one of the best houseplants to have around. They come in various shapes, colors, and sizes. These succulents remain a perfect choice for beginners and experts alike. While these plants are generally low maintenance, they need to be repotted every once in a while. Knowing when the best time is for your cactus to be repotted can help it stay healthy and strong.

So, what is the best time to repot a cactus? The best time to repot your cactus plant is during the active growing season when it is healthy. The growing season follows the dormancy period, which is usually in springtime. When the weather starts to warm up, and your plant starts shooting out new growth, it’s time to repot. Make sure you use a well-draining container and soil for your cactus to ensure that it can thrive. It is essential to wait until the root system has filled the pot before repotting, as this can cause shock to the plant.

This blog post discusses everything you need to know about repotting a cactus plant. Read on to learn more.

Why Should I Repot My Cactus Plant and How Often Should I Repot?

It is crucial to repot your cacti plants for the same reason you need to repot your other plants: It provides them with more room to grow bigger and healthier by replenishing the nutrients in the soil.

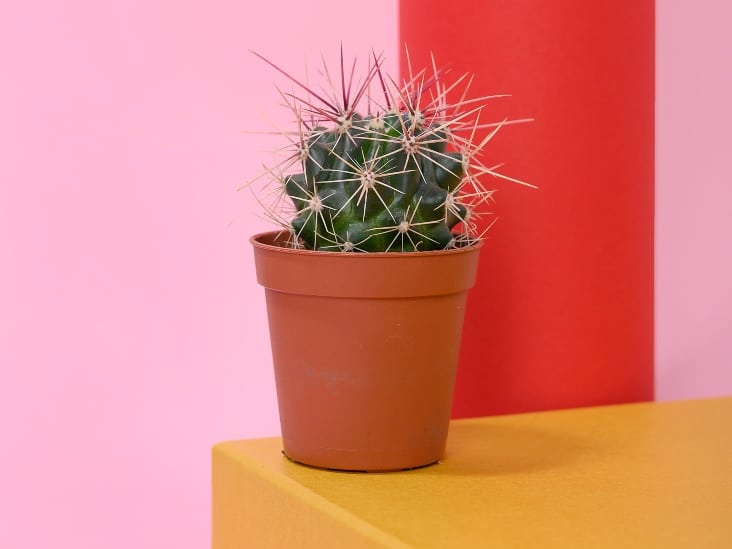
A pot with cactus fell.
If the plant is becoming root bound or has been more than three years since its last repotting.

On average, consider repotting your cactus plant every two to four years. If the plant is becoming root bound or has been more than three years since its last repotting, it is time for a new pot. This will ensure that your cactus has enough room to expand and grow.

When Should I Repot My Cactus?

Typically, the best time to repot your cactus plant is at the end of the dormancy period. This will play a critical role in minimizing stress on your cactus.

However, you must remember that the dormancy period is different for different cacti species.

While most cacti species go into dormancy during the cold winter months (between November and February), others slide into dormancy during the hot summer months (between May and August).

It is essential to know when your cactus species will go dormant so that you can plan accordingly. That way, you avoid repotting it too sooner or later.

What Should I Do Before Repotting?

There are a few things that you should do before repotting your cactus. First, inspect your plant’s roots to ensure they are healthy. If you notice any signs of rot or disease, wait before repotting.

Next, sterilize the pot you will use for repotting by washing it with a 1:4 bleach and water solution. This will help prevent any diseases from spreading to your new cactus.
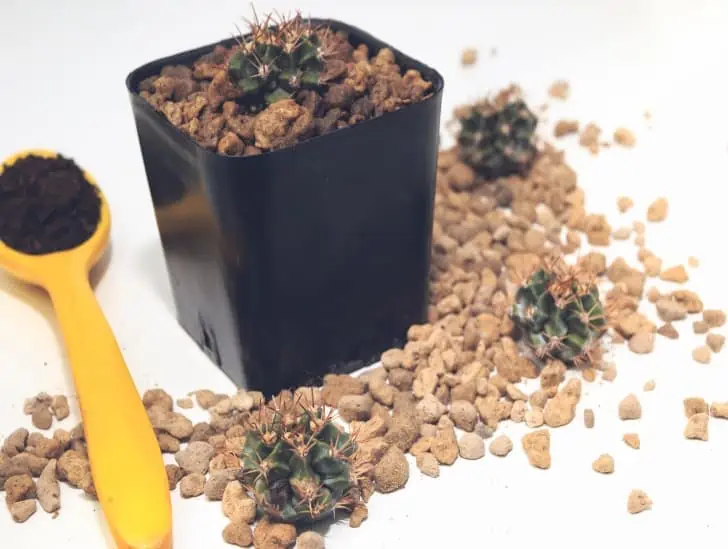
Cactus soil ane equipments.
There are a few things that you should do before repotting your cactus.

Finally, choose an appropriate soil mix for your cactus. Cacti require well-draining soil and a pot with good drainage. A combination of equal parts sphagnum peat moss, perlite, and coarse sand is popular for cactus soil.

After preparing the pot, you can move on to repotting your cactus.

What Do I Need to Repot a Cactus Plant?

You will need a few things to repot your cactus plant. These include:

  • Repotting pot with adequate drainage
  • Potting mix specific for cacti
  • A spoon or trowel
  • A pair of gloves to protect your hands
  • A sharp knife (if needed)
  • Pruning shears (optional)

Once you have all of your supplies, you can get started.

How Do I Repot a Cactus Plant?

Follow the steps outlined below to repot your cactus properly:

Step 1: Pull the Cactus Out of Its Current Pot

Start by carefully lifting the cactus from its current pot. Gently shake off any excess soil, then inspect the roots to ensure they are healthy and not root-bound.

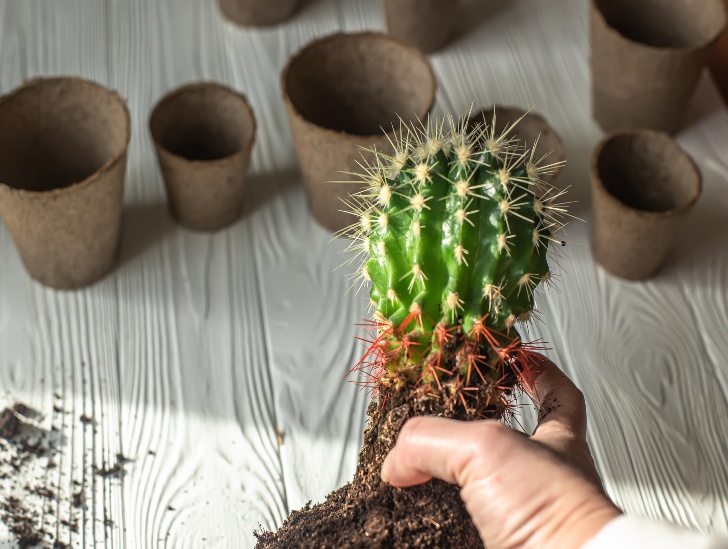
A cactus on hand.
Start by carefully lifting the cactus from its current pot.

Be careful not to damage the roots or stems of your cactus when pulling it out of its pot.

Step 2: Prune Your Cactus (Optional)

Using a pair of pruning shears, cut back any dead leaves, shoots, and even damaged areas in the plant. This will help promote healthy new growth in your cactus.

Step 3: Soak the Roots in Water

If you find any signs of root rot or disease, soak your cactus’s roots in lukewarm water to help get rid of any pests or diseases.

Step 4: Place Your Cactus into Its New Pot

Once you have finished inspecting the roots, place your cactus into its new pot and fill it with a well-drained soil mix specifically for cacti.

Gently pack the soil around the plant’s base, making sure that there are no air pockets.

Step 5: Water Your Plant

Once you have repotted your cactus, water it lightly. Be sure not to overwater, as this can cause root rot and other issues.

Once you have repotted your cactus, it is essential to monitor its growth for the first few weeks as it adjusts to its new home.

A woman watering the cactus.
Once you have repotted your cactus, water it lightly.

You may need to adjust your watering schedule if you notice any signs of stress, such as wilting or discoloration.

How Big Should the New Pot Be?

Repotting means moving your cactus from the current pot to a bigger one.

When selecting a new pot for your cactus, make sure it is at least two inches larger in diameter and one inch taller than the current pot. This ensures enough space for your plant’s root system to continue growing.

For instance, if your current pot is six inches in diameter, then you should select a new pot that is eight inches in diameter.

Also, pay close attention to the material used for the new pot. Clay pots are better at allowing air to flow around the roots, while plastic pots retain more moisture and can cause root rot if not monitored properly.

Remember to add a few drainage holes in the bottom of your new pot if you feel like it needs more holes. This ensures that excess water can drain away from the roots quickly and keep them healthy.

Remember that your chosen pot can also impact your cactus’ growth rate. A bigger pot will allow for more root and stem growth, while a smaller pot will limit it.

Should I Mulch Repotted Cactus?

Mulching mainly serves two purposes: It helps keep moisture around the plant’s roots and protects your cactus from extreme temperatures.

If you live in an area with high temperatures, adding a light layer of mulch around your newly repotted cactus will help it adjust to its new environment.

A thin layer of organic material, such as pine needles or organic bark, can help protect the roots from extreme heat and help retain moisture.

Apply only a little mulch around your cactus, sometimes leading to root rot. Keep it light and remember to remove any excessive mulch during heavy rainfall.

Should I Fertilize a Newly Repotted Cactus?

Cacti are naturally slow-growing plants that don’t need too much fertilizer to thrive. However, if you feel that your cactus is growing slowly or needs a boost of nutrients, fertilizing it can help.

Try using a low-strength liquid fertilizer every couple of weeks during the active growing season (spring and summer).

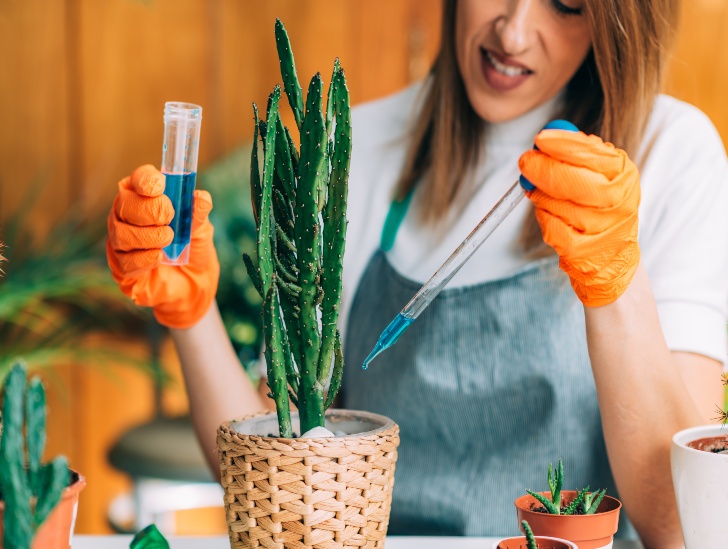
A woman applying fertilizer on the cactus.
If you feel that your cactus is growing slowly or needs a boost of nutrients, fertilizing it can help.

Avoid fertilizing any cactus during the dormant season (autumn and winter), as this can cause damage to the plant.

What Should I Do If My Newly Repotted Cactus Isn’t Thriving?

If your newly repotted cactus isn’t thriving, it could be due to several factors.

Start by checking the soil in its new pot. Ensure it is well-draining and light enough for the plant’s roots to breathe. If you think the soil isn’t ideal, you may need to repot your cactus again.

Also, ensure that the new pot you selected is large enough for your cactus and has adequate drainage holes at the bottom. If it does not, then this could be causing problems with water accumulation around the roots.

It is also essential to check your watering schedule. Overwatering can lead to root rot and other issues in cacti, so if you’ve been giving your plant too much water, then this could be causing the problem.

Finally, ensure that your cactus’s environment suits its growth needs. Cacti plants do not do well in hot and humid environments, so if this is the case for you, you may need to move your plant somewhere cooler.

If none of these things is helping, then it is best to consult a professional before trying anything else. A professional can diagnose any underlying issues with your cactus and advise reviving it.

Summary

Now that you know all there is to know about repotting cacti, it is time to get out there and do it!

Be sure to follow the steps outlined above, and remember to give your plant enough water after placing it in its new pot.

With a little effort, your cactus will take well to its new home and continue to thrive for many years.

How Much Direct Sunlight Does A Golden Barrel Cactus Need?

The golden barrel is a fairly popular succulent for many gardeners since it is a low-maintenance plant. It doesn’t require a lot of attention to thrive and remain healthy. In most cases, all you need to do is be careful with the watering and provide plenty of sunlight exposure. But how much sunlight does it require to thrive? How can you tell if your barrel cactus receives too much or not enough light? How can you improve the lighting conditions? We cover everything you need to know.

So, does barrel cactus need direct sunlight? The quick answer is yes. Most barrel cactus species require a certain degree of direct sunlight exposure to thrive in a home environment. Keep in mind that this type of cactus is adapted to growing in arid environments with minimal shade from taller trees. Therefore, it still needs to feel the same conditions at home to thrive. In fact, growing a barrel cactus indoors can be quite challenging due to its lighting requirements.

Read on to learn everything you need to know about the barrel cactus and exposure to direct sunlight. This blog post is packed with valuable information to make you a better gardener.

How Much Light Does the Barrel Cactus Need to Survive?

This can vary greatly depending on the type of barrel cactus you have. However, a general rule of thumb is to provide your cactus with approximately six to eight hours of sunlight exposure every day.

Barrel cactus will do best with direct sunlight, but it can still survive in bright indirect sunlight. A barrel cactus that has been previously kept in a relatively dark environment need to be introduced to direct sunlight gradually to avoid sunburns.

Barrel Cactus exposed to sunlight.
Barrel cactus will do best with direct sunlight.

Keeping your barrel cactus in partial shade is not an immediate death sentence for your plant, but the results can be catastrophic if you don’t take appropriate steps to fulfill its light requirements.

In fact, some types of barrel cactus can survive in partial shade or indirect sunlight for a relatively extended period.

But prolonged exposure to shade can cause your plant to become sickly and unhealthy. Just because the cactus can survive a situation doesn’t mean it is healthy for them.

How Much Sun Does the Barrel Cactus Need Indoors?

If you like to grow your barrel cactus indoors, you should be prepared to find the brightest spot in your house and position it there. It should be on a south or east-facing windowsill.

If you live in an area that doesn’t get plenty of sunlight, you might be forced to use supplemental artificial lighting to ensure your barrel cactus receives the right amount of light it requires to thrive.

Closeup image of a Golden barrel cactus.
You need to acclimatize it when you decide to move it outdoors in spring and summer.

You need to remember that growing a barrel cactus indoors all year round can be too difficult. Typically, you want to keep your plants indoors during winter to protect them from the extreme cold and take them out in spring and summer.

If you keep your plant indoors all year round without providing it with sufficient lighting, it will most likely turn spindly and lose its coloration.

When using artificial grow lights indoors, consider purchasing a foot-candle meter or downloading a mobile app to help you measure the amount of light you are providing to your barrel cactus.

As a general rule of thumb, you can more or less maintain your barrel cactus at approximately 3,500 foot-candles or more. Anything below 1,500 foot-candles will cause your cactus massive struggles.

To achieve better results, you must maintain a high light level for more than eight hours a day.

In terms of direct sunlight indoors, your barrel cactus can handle as much as you can give it. But you will still need to acclimatize it when you decide to move it outdoors in spring and summer.

How Much Sun Does the Barrel Cactus Need Outdoors?

The best place to grow a barrel cactus is in your outdoor garden. However, things change a bit when growing your barrel cactus outdoors.

Instead of trying to squeeze your barrel cactus into the brightest spot, you need to protect it a little bit so that it doesn’t suffer from sunburn.

After all, the barrel cactus doesn’t come from full desert conditions as most of us tend to think. Sun damage can be extremely severe if you forget to acclimate your plant properly.

Golden Barrel cactus outdoors.
The best place to grow a barrel cactus is in your outdoor garden.

Ensure the cactus is located in a section of your garden that receives partial shade from other taller plants at different times of the day. Alternatively, you can grow your barrel cactus under some artificial cover that only lets in a specific amount of light.

If you don’t do anything to protect your succulent from full sunlight throughout the day, its roots may dry out too quickly, forcing you into frequent watering, which can again lead to root rot issues.

Luckily, if you are just growing the barrel cactus outdoors during spring and summer only and your area doesn’t receive intense sunlight, you don’t have to cover them.

Can a Barrel Cactus Get Too Much Sunlight?

The simple answer is yes. Like other succulents, the barrel cactus is also highly susceptible to too much sunlight. If your barrel cactus is exposed to more than six hours of direct sunlight every day, it will develop sunburn.

If your barrel cactus is getting the right amount of light, its color should be vibrant. The appearance of brown spots on sections of the plant and a washed-out color could be signs of sunburn.

When you notice these signs, you will need to provide your plant with sun protection by moving it into a slightly shady area or providing it with some light shade.

A golden barrel cactus sunburned.
Figure out its light requirement and provide what is just enough for its survival.

If you are growing your plant indoors and positioned on a windowsill, consider moving it away into a relatively cool spot. Give it a couple of days or weeks to heal before you start acclimatizing it again.

But don’t move your barrel cactus into an extremely cold area because these succulents can’t tolerate such conditions either.

Your primary objective should be to study your plant, figure out its light requirement and provide what is just enough for its survival.

How Do You Know Your Barrel Cactus is Receiving Too Much Light?

So, how do you know that your barrel cactus is receiving too much light? Well, the most obvious sign is the appearance of dark or brown spots on its surface that appear abruptly.

These spots are a clear sign of sunburn that occurs when the succulent isn’t acclimatized properly when moved from indoors to outdoors. This is a common problem in spring and summer as gardeners move their indoor plants outdoors.

The main issue is that the barrel cactus has been surviving under indirect sunlight indoors, but it is now being moved in direct sunlight outdoors. The appearance of the black/brown spots is a clear sign of a shocked plant.

Moving the cactus in a partial shade and acclimatizing it properly may solve the problem, although the spots may take some time before they disappear.

Simply move the cactus back into indirect sunlight or partial shade and introduce it to full sun gradually to allow enough time to build resistance to sunburn.

How Do You Know Your Barrel Cactus Isn’t Receiving Enough Light?

The main sign of sunlight deficiency in a barrel cactus is stunted growth and leggy appearance. When your barrel cactus is leggy, it means that it isn’t growing the way it should.

The signs of stunted growth include smaller thorns and more sideways or upwards growth than normal. This is fairly easy to note in a barrel cactus. You should also be worried if your barrel cactus starts showing noticeable signs of leaning towards the nearest light source.

If you notice these signs, move your plant to a relatively brighter spot where it can receive plenty of light.

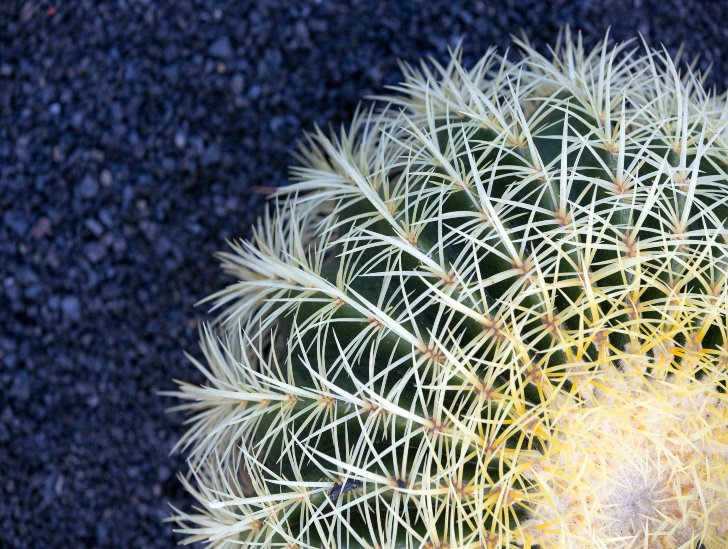
A topview of a golden barrel cactus.
If you notice these signs, move your plant to a relatively brighter spot.

However, you still need to follow the right acclimatization process. Move them into the bright light spot gradually to avoid burns.

Can You Grow the Barrel Cactus Under an Artificial Light?

All succulents can grow with artificial light. Like other succulents, the barrel cactus only uses light for photosynthesis which is a critical process to the plant’s survival.

So long as you provide your barrel cactus with the right amount of light (whether natural sunlight or artificial grow lights), they will thrive and remain healthy.

However, the barrel cactus isn’t an easy plant to cultivate under artificial grow lights because it is adapted to dry, sunny, and hot climates.

Therefore, you need to think about purchasing high-intensity lights that produce the right type of light needed for growth.

The light should be able to emit wavelengths in the range of photosynthetic active radiation (PAR). The best lights are those that emit at least 180 PAR.

Summary

Barrel cacti are a great option for anyone looking for an easy-to-care-for succulent. As long as you provide your barrel cactus with plenty of light, it will be happy and healthy. Place your barrel cactus in a sunny spot outdoors if possible, or in a bright room indoors.

If you’re not sure whether your barrel cactus is getting enough light, look for signs of distress, such as wilting spines or browning tips.

If you think your barrel cactus may be receiving too much light, move it to a shadier spot or reduce the amount of time it spends in direct sunlight.

How to Make a Beautiful Desert Terrarium?

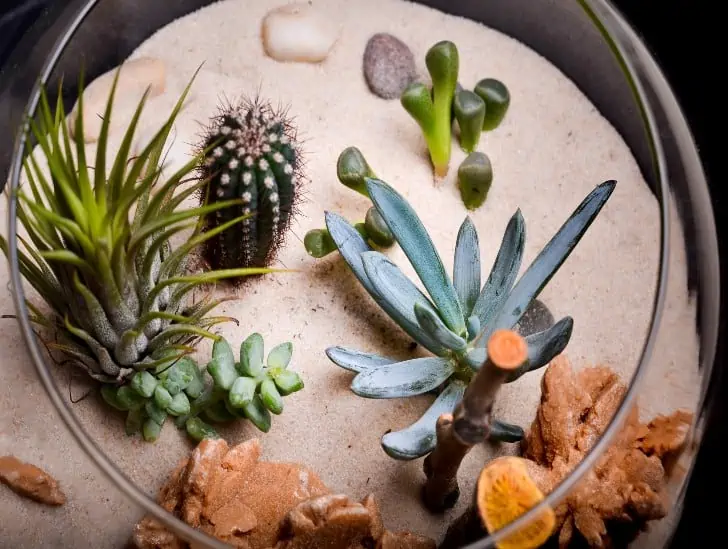
A round sand terrarium.

Indoor plants play a much bigger role in the design and feel of your interior spaces. For those without a backyard where they can create an outdoor garden, indoor plants help them stay connected to nature. If you are a big fan of succulents, nothing beats the joy and delight of having your own desert terrarium.  When done right, desert terrariums can be stunning and a great addition to your indoor space.

So, how can you make a desert terrarium?  The most important thing you need to keep in mind is that desert terrariums require a lot of bright light, a well-draining potting mix, and a good container to thrive.  For the container, you can use a transparent glass cylinder or cube. Don’t seal the top of the container to allow moisture to escape. The overall design of your terrarium can either be sparse or barren. A sparse design features only one succulent and a bit of tumbleweed, while a barren design goes all out and includes all sorts of succulents such as Echeveria, Sempervivum, and Sedum.

This guide highlights a step-by-step process you can follow to create your own desert terrarium in no time. Read on to learn more.

Why Should You Make a Desert Terrarium?

When planted and taken good care of, succulents, including cacti, can be a magnificent addition to your indoor spaces.

The open and transparent containers used in the process provide you with an incredible opportunity to create some beautiful layering and an eye-catching design.

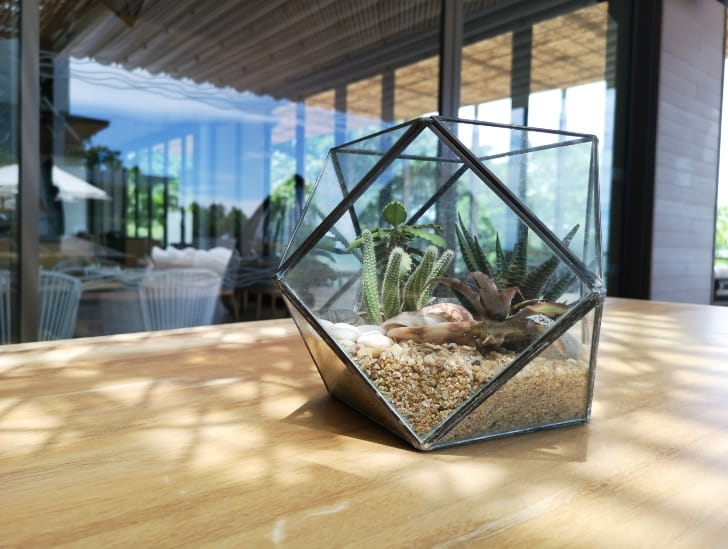
A glass Hexagon desert terrarium.
an incredible and beautiful layering and an eye-catching design.

Although handling some succulents such as cacti can be pretty troublesome, your ability to maintain an open planter is greatly enhanced by the open space.

Furthermore, there are many types of succulents you can add to your desert terrarium to give it an even more exciting edge.

How to Make Desert Terrarium

Before you start the process of making your own desert terrarium, keep in mind that most succulents appreciate a relatively dry, arid environment that mimics the desert environment.

These plants don’t need frequent watering, and the containers don’t require sealing. If you strive to do everything right, you will end up with an exciting design that will transform into a fabulous feature of your home décor.

With proper maintenance, your desert terrarium will be a source of joy for many years to come. So, let us jump straight in and find out what you need to do to accomplish the mission:

Step 1: Choosing the Right Container

Typically, cacti and other succulents are known to tolerate a little bit of neglect. It is relatively easy for one to maintain these plants, and that is partly because of the fact they require smaller containers.

We suggest you use a clear glass cylinder or cube. The container should be 4 to 6 inches tall with an opening of at least 2 to 3 inches wide.

However, there is one major issue with using a glass container; it lacks a drainage hole at the bottom. Water can easily build up, soaking the soil and causing severe root rot.

You must be creative and think outside the box to address this challenge.

First, the ideal glass container for your terrarium must be of decent depth to achieve good drainage. You must also ensure it is not enclosed because cacti plants are not big fans of humidity.

The container must be completely open because even a semi-enclosed one can still cause a damp environment.

Finally, you will have to add a layer of gravel at the bottom of your container to ensure proper drainage.

Step 2: Assembling the Materials

To make a desert terrarium, you will need a wide range of materials. They include a clear open glass bowl, at least five cacti or other succulents plants of your choice, special succulent potting mix, pebbles for drainage, decorative glass pebbles, paper towels, a small stick, and decorative sand.

A person creating a terrarium.
Be careful when buying the potting mix.

Most of these materials can be obtained from your local plant store and won’t cost a lot of money. Be careful when buying the potting mix because that is the most critical thing in your entire setup.

Step 3: Drainage Is Everything

To make a stunning desert terrarium, you need to ensure you achieve the required drainage standards.  To do this, carefully place a layer of pebbles at the bottom of your glass bowl. Make sure the pebbles are approximately 3cm deep.

The primary purpose of the pebbles is to capture excess water runoff and prevent the roots of your succulents from sitting in water for too long.  If you allow the roots to stay in water for too long, it could lead to severe root rot that will eventually kill your plant.

Step 4: The Potting Mix

Make sure you are using a potting mix that is specifically formulated for cacti and other succulents. Ideally, the mix should contain a relatively high amount of sand, loam, and grit to allow for better drainage.

A group of terrarium.
Make sure you are using a potting mix that is specifically formulated for cacti and other succulents.

Now fill your glass bowl two-thirds of the way with your preferred potting mix. Water it slightly to compress it, then top up with a little more potting mix until the level is about 2cm from the top edge of the bowl.

Some of the best potting mixes to use in a desert terrarium include:

  • Commercially produced potting mix: Many manufacturers produce good quality potting mix comprising smooth grains. This is critical in preventing compaction problems, improving drainage, and retaining water more effectively.
  • Organic potting mix: This type of potting mix is made from organic sources like manure, mosses, and other natural materials. It is important to note that organic mixes retain moisture better than commercial products as they have larger particles. 
  • Clay-based potting mix: This type of potting mix is made from clay, pumice, sand, and other natural materials. It has a high water-holding capacity and is ideal for dry climates as it drains very quickly.

Step 5: Choosing Your Hardscape Materials

Open planters provide you with the perfect opportunity to show off a sleek piece of hardscape. It may be a variegated and complex maple leaf stone or a simple chunk of driftwood. One thing to remember when choosing your hardscape material is to ensure you will not harm your succulents.

For instance, wood could end up soaking up so much moisture that it will keep your plants moist above the soil, which is not good at all.

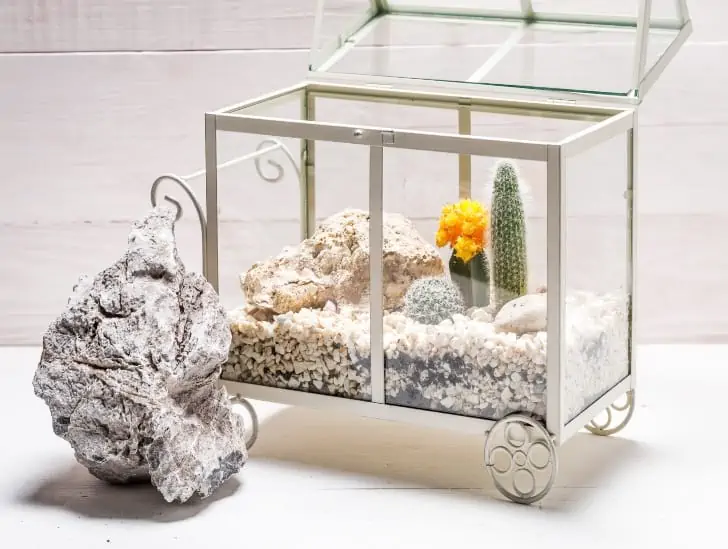
A terrarium with cactus.
Remember when choosing your hardscape material is to ensure you will not harm your succulents.

So, if you must use wood, you should consider sealing it with some sort of sealant or vanish, which can be found in any garden store or hardware.

Step 6: Get Creative

Now that you have done enough preparation and everything is in order, it is time to get creative and start creating your desert terrarium.

Carefully arrange the succulents the way you would like to display them while they are still in the pots that they came with from the plant nursery.

Everything at this stage is down to your personal preference. You can have anything from a 1-plant terrarium to a diverse arrangement of succulents.

If you want a diverse terrarium, consider adding succulents with different textures, colors, and heights. Relatively tall plants should go at the back of the terrarium, while the shorter ones should be at the front.

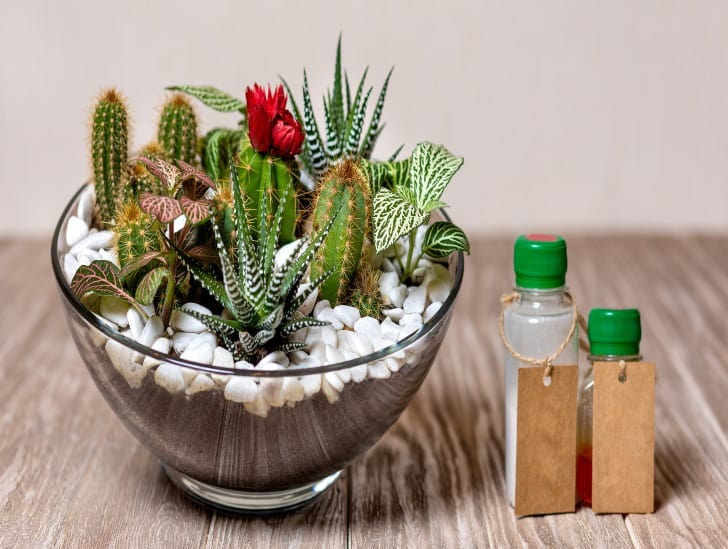
A group  cactus and plants on a glass bowl.
You can have anything from a 1-plant terrarium to a diverse arrangement of succulents.

Space the plants at least 5cm apart to avoid overcrowding.  You can alter the arrangement if you want to achieve a specific pattern. It is up to you to decide what you want.

Step 7: Plant Your Succulents

Carefully take out the first plant by turning the pot upside down and gently squeezing or tapping its bottom. Brush off the old potting mix and tease out the roots. Be cautious to avoid damaging the root ball.

If you are dealing with cacti plants, be sure to use a paper towel to hold the cacti when popping them out of the pot. Their tiny spines can easily lodge into your skin and cause injuries.

Make sizeable holes in the potting mix you had prepared earlier to mark where each plant will go. Carefully position each plant in its respective glass bowl and firm the soil around it. Repeat this step until you are done with all plants you have.

Once you are fully satisfied with your plant arrangement, clean the edge of your glass bowl using a paper towel to get rid of any soil residue.

Step 8: Add Sand

Now is the right time to add a thin layer of sand over your succulent soil. To accomplish this, gently angle the plants away from where you are spreading the sand.  Make sure you use a paper towel to avoid sustaining injuries.

Don’t worry if some of the sand gets lodged in your succulents because you can easily get rid of it using an old brush.

Step 9: Decorating

It is essential to add some vibe to your desert terrarium to make it look beautiful. To decorate it, consider adding small rocks, glass pebbles, or any other miniature decorations you have in mind.  The ultimate goal is to make it more stunning.

Step 10: Mist Your Terrarium

Since you had already watered your potting mix and compost, the final thing you need to do once you are fully satisfied that everything is in order is to mist the terrarium over the top using a spray bottle.

Your terrarium will be fully set up after the misting, and it is your time to start enjoying your hard work.

Care and Maintenance of Your Terrarium

All the above efforts will go to waste if you don’t give your new desert terrarium proper care and maintenance.

The most significant danger to your newly created desert ecosystem is overwatering.  Cacti and other succulents can still survive and thrive with minimal care. So, it is essential to understand the water requirements for the succulents in your terrarium and only water when necessary.

Typically, you should allow the potting mix to dry out completely before watering again. During watering, consider soaking the roots and allowing excess water to drain away.

Your primary objective should be to ensure that your succulents drink enough without sitting in the water for too long.

Preferably, you should use rainwater but if you don’t have rainwater, go for distilled water. Avoid using tap water unless you don’t have any other option.

Position your desert terrarium in a good spot that receives plenty of bright light because succulents love light. If you struggle to find a perfect location in your house, feel free to use grow lights set on a 12-hour cycle.

These plants can survive without fertilization but consider adding some special succulent fertilizer occasionally.

It is critical to inspect your terrarium regularly for any pests or diseases and take corrective action immediately. To enjoy your desert terrarium, pay close attention to its health.

Lastly, consider trimming the roots once they start growing outwards. Trimming can be done once or twice per year, depending on how fast the roots grow.

To trim the roots, gently remove the succulent from the potting mix and use a sharp pair of scissors to snip the damaged or excess roots. Replant your succulents following the correct procedure.

Final Thoughts

That is it about making a desert terrarium, and we hope you are now fully charged to give it a try. Follow the guidelines outlined above, and you will have a stunning desert terrarium in no time.

Ultimate Guide: How to Care for Santa Rita Cactus

A beautiful garden might not seem like an attainable goal; most plants go through the dormancy period in winter, and less growth happens during this time. However, nearly all indoor plants bloom for a few months before fading; with proper care, your plant will thrive for a few years.

The Santa Rita Cactus, commonly known as the Purple Prickly Pear, is an exception. This attractive succulent has colorful fleshy pads which turn to a deep purple in winter and soft blue-gray in warm temperatures. During the spring, large yellow flowers appear. 

Native to Mexico, this hardy plant has over 40 varieties and can attain heights of 8 feet. The slow-growing edible succulents have flat-shaped pads with spines. Most people like them because of their edibility and ornamental nature. 

In this article, we will learn more about growing and taking care of the Santa Rita Cactus. So let’s get right into it.

Growing

A desert succulent like the prickly pear can not tolerate constant moisture. Therefore, we recommend planting in containers that can meet the drainage needs of the plant. Make sure that your container, preferably a pot, has enough drainage holes at the base.

Fill your pot with a well-draining soil mix for your succulent and move it to a warm location. The bottom-most layer should be gravel for better drainage. Start by planting seeds, push them slightly inside the ground, and place them near a sunny window or under grow lights.

Propagating is much faster than sowing seeds. Transfer the prickly pears into bigger pots if the cactus gets rootbound. If you are planting to transplant the plant, wait until the cold climate is over to avoid the danger of frost and rain.

You can also purchase young plants at your local nursery and transplant them to a sunny spot with well-draining soil. Though the best time to transplant is in spring, you can transfer your plant at any time if you reside in dry areas such as Southern California.

Propagation

You can propagate your Santa Rita Cactus plant from either seeds or pads. We suggest growing from the pads as this is relatively easier and faster. Cut a couple of pads from the parent plant during warmer climates. 

Place the cut-off pads in a cool area and wait for about 1-2 weeks for the cuts to heal perfectly before planting. Then, push the cuttings about an inch dip in your container, just sufficient to hold the plant uprightly, and expect rooting within a few weeks. Do not water until you see signs of growth.

If you choose to propagate by seeds, scoop some seeds from an open ripe fruit and rinse them. Give the seeds time to dry completely and sprinkle them in a pot of moist, well-draining soil. Cover the seeds thinly with dirt or sand. Finally, cover your jar in a translucent paper wrap and position it in a sunny spot. Germination can take a few weeks to months.

Requirements for Growing your Santa Rita Cactus

Proper care of your prickly pear starts with knowing the best conditions necessary for your plant to thrive. 

Water

Prickly pears are drought tolerant and only need occasional watering. This plant, like most succulents, stores water in its jointed stems called pads. Water only when the surface appears dry. Throughout spring and summer, we recommend it once or twice weekly.

In colder periods like fall and winter, you can water your prickly pear one to two times a month. When you are watering your plant, moisten it, don’t soak it. Underwatering can cause the pads to appear wrinkled and thinner; water thoroughly if you notice these signs. On the other hand, too much water can reduce the purple pad color.

Light

A place with enough light is necessary for the prickly pear cactus to thrive. The Santa Rita Cactus is a tropical plant that thrives well when exposed to warmth. Therefore, place your plant where it can get at least six hours of direct sunlight. We recommend a west or south-facing window.

A blooming Prickly pear cactus flower.
A place with enough light is necessary for the prickly pear cactus to thrive.

Soil

Santa Rita Cactus can take poor soil conditions as long as the drainage is good. However, the plant prefers light, well-drained gravelly or sandy soil. You can get a ready-made potting mix or come up with your own. 

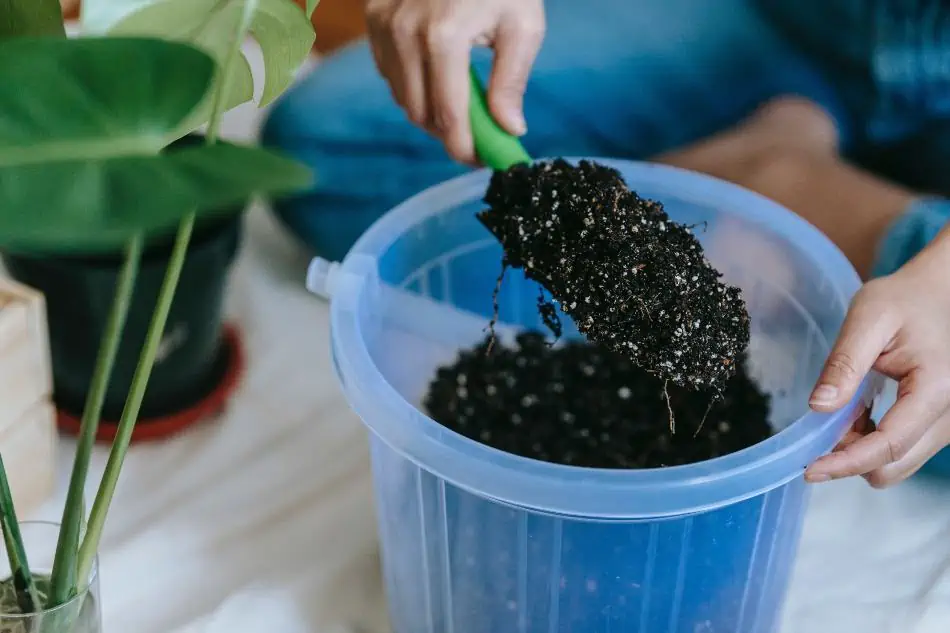
A pot with a soil and a plant.
It prefers light, well-drained gravelly or sandy soil.

To make the potting medium, mix equal parts of compost, soil, and sand or perlite. Avoid clay-rich dirt because it can lead to stagnation. You can always mix the clay with sand or peat moss for better soil structure if you have no other options. 

Temperature & Humidity

Santa Rita Cactus does well in hot and dry desert summers but can also take cold temperatures. Mild winters, hot summers, and low humidity are the ideal conditions for this succulent. 

Indoor temperatures and humidity levels are generally acceptable for prickly pear. However, the plant does not tolerate high humidity even if the temperature is optimal. Avoid artificial sources like air conditioners because they can lead to excessive temperature fluctuations.

How to Take Care of Your Prickly Pear

Taking care of your Santa Rita Cactus is more than just providing the right conditions. Though the plant is low maintenance, you have to put in some work for the best results.

Feeding

Santa Rita Cactus does not need fertilizers, but nutrients get used up faster in containers, and you might have to feed your plant. For young plants, apply fertilizers that contain equal amounts of nitrogen, phosphorus, and potash during the growing season and follow product instructions. 

High nitrogen fertilizers lead to larger pads, while low nitrogen fertilizers contribute to increased flowers and fruits. Never feed your plant in winter as there is no growth.

Pruning

Pruning is not necessary but can help to keep your plant in size and propagation. The best time to prune is during spring or late summer while the pads are still young. They get woodier as they mature and might be hard to prune later on. 

Remove the poorly formed pads that appear damaged and those that brush against each other. First, moisten the cactus to stop the micro spines from detaching from the pads. The fine spines, also known as glochids, can cause skin irritation and respiratory issues. 

To remove the pads, hold them with a pair of tongs and snap them off at the base using a sharp kitchen knife or shears dipped in rubbing alcohol. Start with light cuts and take out the small pads between the trunks first, then move on to the top parts.

Repotting 

Consider repotting your plant once the roots outgrow the pot or if the plant seems unstable in its container. The ideal time to repot is in spring. Before you repot, ensure that the soil is dry. Then, grab its base, and knock away the oil soil.

Move it to a slightly bigger pot and feel with a well-draining succulent mix. Avoid watering your plant right away; give the roots time to recombine. To figure out if your plant requires repotting, monitor the growth rate. If the plant is growing slowly, then it’s time to report it.

Fruit Thinning

Fruit thinning involves removing extra fruits and flowers for lower production and improved quality. Thinning should be done two weeks before the formation of the fruits. When you thin your plant, leave about ten fruits on each stalk.

Removing extra fruits and flowers for lower production and improved quality.

Harvesting

Prickly pears can be eaten raw or used to make juices. There are also claims of the pads being effective in the treatment of diabetes and high cholesterol. However, before harvesting the fruits, take precautions, such as wearing gloves for protection against the spines.

Go for young pads because mature pads have sharp spines and are more fibrous in texture. Hold the pad and use your other hand to cut the pad from the plant with one hand.

Santa Rita Cactus fruit
Monitor the growth rate, to figure out if your plant requires repotting.

To harvest the fruits, use thick gloves or tongs. Then, twist each fruit off to remove it. Ripe fruits are orange, red, or purple, while younger fruits are green.

Santa Rita Cactus Problems

Pests and Diseases

Santa Rita prickly pears are generally disease-free but can become infested with mealybugs or scale. Scales appear like cotton coatings on the pads, while mealybugs are white. They both suck sap from the pads. To remove the pests, use a strong stream of pressurized water. 

For more severe infestations, prune a few pads from the center of the cluster during summer when the insects are most active or use insecticidal soap. 

Sunburn

Sunburn occurs when you transfer an indoor plant to the open landscape for direct sun exposure. For example, sunburned prickly bears turn yellow. You can reduce the risk of sunburn, placing cheesecloth over new plants. 

Overwatering

Overwatering leads to root rot and scab. You can tell that your plant is getting too much water if the stems have a rust color. Do not water your Santa Rita cactus plant if the soil is still damp; wait for it to dry out completely.

Do not water your Santa Rita cactus plant if the soil is still damp; wait for it to dry out completely.

Infections

The commonly known infections include phyllosticta pad spots and charcoal spots. Phyllosticta pad spot is characterized by black lesions on the pads, while charcoal appears as a ring of raised dots. First, destroy the plant to prevent the spread of infections.

No doubt, the prickly pear is a worthy addition to your indoor plant collection if you are looking for low maintenance, ornamental and edible plants that bring out that pop of color in your home.

Ultimate Guide: How To Care For Buddhas Temple

Buddhas Temple plant

The Crassula cv, also known as the Buddha’s Temple, is native to South Africa, and this plant resembles a Buddhist temple.

This evergreen plant’s leaves are folded at the edges and densely stacked, forming a unique wonderful square-shaped column similar to a buddha’s temple. 

To have the plant and let it thrive, caring for it requires some gardening knowledge related to the plant. Taking care of a Buddha’s temple will ensure it thrives well and blooms.

What Do You Need to Plant Buddha’s Temple?

Before purchasing your buddha’s temple for planting, ensure you have the following ready in case you are planting the plant indoors and some of the items for outdoor planting:

  1. A container for planting with drainage holes about one quart in size, or a potting container made for planting succulents and cacti.
  2. Coarse sand, enough for the surface of your container to be about ¾ full (about 1 quart)
  3. Perlite, which will help maintain the soil’s excellent drainage. Mix enough perlite with coarse sand, so it makes up about 50% of what you make into a potting mix; this would equate to ½ cup (100 ml) of coarse sand and ½ cup (100 ml) of perlite.

How to Plant Buddha’s Temple Plant

There are various ways you can plant your Buddha’s temple plant. You can purchase seeds, stem/leaf cuttings, or offsets. 

Many of us are used to planting common household plants from the leaves and stem cuttings, but you can also plant buddha’s temple from seeds, amazing right? Another thing, you can plant it any time of the year.


Here are the right procedures to propagate an offset and care for your new plant buddha’s temple to sprout:

  1. Mix 2 parts coarse sand with 1 part perlite to create a potting mix for succulents and cacti. Make sure there’s plenty of drainage in the soil, and it won’t cause water retention.
  2. Fill the container ¾ full with the potting mix, make a hole deep enough to support the original plant’s roots, and fill it with water until it’s soaked through; then let stand for 15 minutes to allow excess water to drain away.
  3. Plant the succulent in its new container using the soil mix. Make sure that the succulent is placed in a pot just a bit larger than its original pot. Also, ensure that the soil level in the new pot will accommodate all of its roots.
  1. Water thoroughly, allowing the water to soak into the soil and drip out of the drainage hole.
  2. Lastly, place the potting in bright sunlight (no direct mid-day sun). Keep soil moist but not soggy or wet!

How to Propagate Buddha’s Temple Plant From Seeds

  1. Purchase your seeds and prepare your potting mix. Proceed to water the potting mix and let it drain off excess water to leave the soil moist. 
  2. Take your seeds and place them on top of the soil with a little compost to help boost the soil nutrients for growth.
  3. Well, buddha’s temple might take some time before they germinate. Therefore you ought to be patient. During this period, do not water the soil until you note sprouting. It might take four weeks before you note sprouting from your seeds.
  4. Once the plants germinate, start exposing them to sunshine and care for them until they grow and bloom.
Seeds in the palm.
It might take four weeks before you note sprouting from your seeds.

How to Propagate Buddha’s Temple Plant From Cuttings

You can make a cutting from the stems or leaves and always make the cutting at the base of the leaf. It is also possible to cut a stem part and propagate it. Here is how to plant a Buddha’s temple from a scutting.

  1. Make a cutting and let your cutting stay for three days to dry and form a callus.
  2. Prepare a potting mix, and using a pot or your garden, water it to have it moist before the planting time. Ensure the area does not receive direct sunlight during the early stages of growth.
  3. Now, go ahead and place the stem or leaf cuttings one inch into the soil upright. Lastly, wait for your buddha’s plant to form new leaves and roots before repotting them onto their new home.
A group of buddha's temple plant in one pot.
You can make a cutting from the stems or leaves and always make the cutting at the base of the leaf.

Healthy Requirements for Your Buddha’s Temple Plant

Watering

like many succulents, Buddha’s temple does not require much water when growing. However, you should water it to ensure its growth does not stagnate. Water a buddha’s temple at least once every month during winter and twice a month in spring and summer. 

In spite of needing water to grow, you should be cautious of the amount of watering necessary for Buddha’s Temple plant. Too much water in the soil will damage your plant. Plenty of water will have the soil wet, and this will result in the roots rotting.

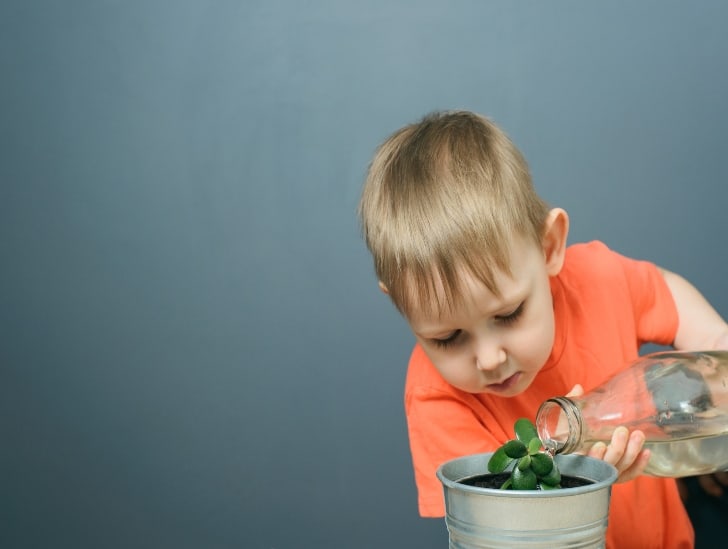
A boy watering the plant gently.
Buddha’s temple does not require much water when growing.

Before watering the plant, make sure it needs water by looking at how dry the topsoil is to avoid causing damage to the plant. 

Water the Buddha’s Temple after planting it, water at least once a week when fully grown also, you can use a humidifier always to let the soil be moist but not wet.

Sunlight

The variegated leaves of the ‘Buddha’s Temple are extremely delicate and require bright light for them to bloom and thrive. Growing this Crassula Buddha’s Temple in a garden ensures it receives plenty of sunshine. The ideal amount of light for its development is full to partial sunshine, or at least six hours a day. Therefore it is better to grow the plant outdoors.

A plant receiving a sunlight.
The ideal amount of light for its development is full to partial sunshine, or at least six hours a day.

Insufficient light or sunlight might cause the plant’s stem to weaken, and you don’t want to see your beautiful plant crumbling down after working hard to let it thrive. The plant will elongate in search of light, and in return, its stem might grow thin, making it weak.

Temperatures

The crassula Budda’s Temple thrives in a warm climate.  It may survive temperatures as low as 25°F and as high as 50°F but protect it from frost. If you reside in a chilly climate, it’s preferable to grow Buddha’s Temple indoors. The plant will thrive if given enough sunshine.

Fertilizer

You can use compost mulch to provide the plant with additional nutrients. Getting the plant to grow and thrive is something you don’t want to take a chance with.

For vital nutrients, use gardening fertilizer and ensure the fertilizer has the core nutrients:

  • Potassium
  • Phosphorus
  • Nitrogen

Follow the recommended dosage and add fertilizer to your plant every three months.

Pests

It’s susceptible to mealybugs. The Buddha’s Temple has a nice uniform structure, especially after new growth during the Spring and Summer months, and it is these leaves that make it hard to spot the pests.

Mealybugs are a problem with these plants since they have a tightly held together leaf structure, so if you get some mealybug caught in there, the only thing you can do is soak it in alcohol or dip it in alcohol and hope that they come off.

Pruning

Prune a  buddha’s temple when it has dead leaves, overgrown leaves, or to shape it. Also, you should prune the plant after blooming to help keep it healthy to thrive again. 

Discard the removed leaves to keep them away from contaminating the healthy plant. You can use them as an addition to your compost and for future use. 

Other Common Factors Affecting Buddha’s Temple to Note

Root Rot. When you overwater the plants or don’t let the potting mix dry before watering again, the plant’s roots will start rotting. To prevent root rotting, make sure the potting mix drains fast and effectively. Another thing for outdoors potted buddha’s plant, you are better off using clay pots. In case you have other pots, ensure they have good drainage.

Anchor Support. Buddha’s Temple doesn’t like going long without water. Since they’re not particularly succulent, there is so much moisture in the main stem; therefore, the plant is susceptible to decay. But the plant does not like going without water for long, which you will notice straight away. 

Once it loses water, they become difficult to support, and the rooting system is not as strong as other succulents, so you’ll need some anchor stones and bind them in place whenever they lack water, and the stem fails to support the whole plant.

Heat Sensitivity. Because they are sensitive to heat, forcing them to sit in direct sunshine all day is not a good idea. If exposed to too much sun, they will suffer burns, so keep them out of the hot sun for long periods. If you don’t provide consistent lighting, you’ll notice unevenness in how the plant grows.

Final Thoughts

Taking care of a dying buddha’s temple plant can be difficult, but why let your plant suffer? This plant requires little care, making it easier to look after and bloom. Besides, when it lacks water or sunlight, which are the core requirement for growing, it shows the signs earlier.

A buddha's temple plant.
This plant requires little care, making it easier to look after and bloom.

You can plant this evergreen plant in your garden or have it sit in your living room and brighten the space when it blooms. Note that it will reach 0.3m after ten to 20 years.

6 Amazing Facts You Didn’t Know About Desert Rose

The desert rose is a beautiful and unique plant native to the deserts of North Africa. It has many different names: Moroccan oleander, Algerian iris, Egyptian jasmine, and Arabian tulip. It got its name “Desert Rose” (a reference to its pink color) because it grows exclusively in dry regions. This succulent blooms beautiful flowers in different shades of pink and has a succulent stem that is a beauty to behold. Apart from this, there are some amazing facts about the plant you didn’t know that will surprise you.

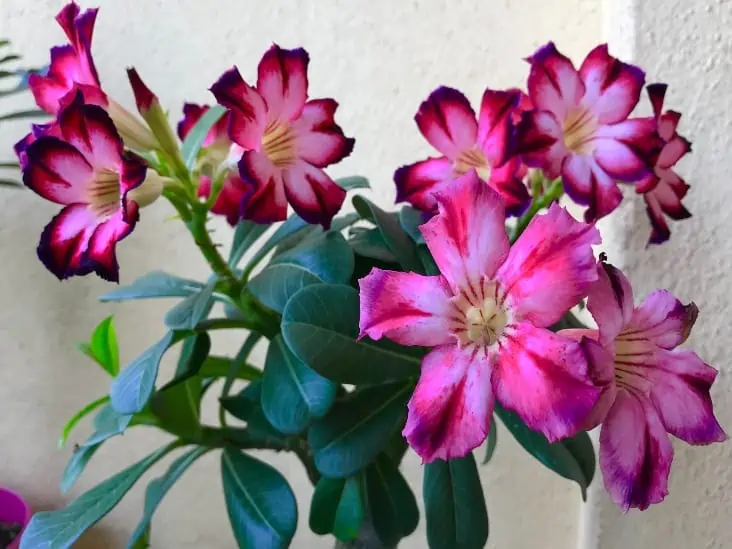
A full bloom Pink Desert Rose.
Adenium refers to one species, a succulent shrub or tree in Africa and Arabia.

So what are the amazing facts about the desert rose you didn’t know? Although the Adenium Obesum is the commonly known type of the plant, it has various other species. The plant has a medicinal value and has been used for many years in various countries to cure certain illnesses. Its sap is poisonous and can have severe effects on humans and animals. What’s more, it is used in the smudging ritual for cleansing, has a lifespan of up to five hundred years, and is traded internationally.

You probably know and admire the desert rose for its beautiful flowers, leaves, and stem. Apart from its beauty, there are various other things you need to know about the succulent. In this article, you will learn various facts about the plant you didn’t know that will amaze you.

1.     It has Medicinal Value

All the parts of the desert rose have medicinal value and are used as traditional medicine in different countries. In Oman, the stem, roots, flowers, and leaves of the plant are crushed and blended to make a mixture used to treat sexually transmitted diseases.  They also use the skin of the stem and the roots to make a lotion used in treating skin diseases and killing lice. The plant produces white latex that is used in treating septic wounds and tooth decay.

The desert rose has been used over the years in African countries to cure various diseases. In Somalia, the different parts of the plant are used in treating nose infections. The plant has toxic white latex used in killing pesticides. In Kenya, the latex is used in killing lice. Kenyans also make a powder from the plant’s stem that they then apply on livestock to kill parasites. The sap is used as an abortion agent to terminate unwanted pregnancies in humans and animals.

Traditional medicine men in Nigeria use different parts of the desert rose to cure various illnesses. This includes headache, joint and muscle pains, and various skin diseases. In the medical world, some properties of the plant are used in some drugs formulation. Research is ongoing to identify if it can cure some types of cancers. 

2.     It is Poisonous

You love the desert rose for its beautiful flowers, leaves, and stem, but did you know it has a dangerous toxins? The sap in its roots and latex in the stem contain toxins. If ingested and the toxin reaches the heart, it can cause heart failure and, in severe cases, death in humans and animals. However, in African countries, the poison is used in hunting activities. It is applied in the sharp edges of hunting arrows used in hunting large animals.

A poisonous magenta Foxglove.
A Poison to animals.

The poison kills quickly, and once shot by a poisoned arrow, an animal drops dead within two kilometers from where it was shot. The poison can be used alone or in combination with other poisonous concoctions. The skin of the stem and leaves are blended to make a mixture used in poisoning fish. The poison is mainly used for hunting purposes in Tanzania, Kenya, Cameroon, Nigeria, and Senegal. The poison is also used for criminal purposes in Senegal and Mauritania, such as poisoning people.

3.     Used in Cleansing Ritual

In various Native American homes, the smudging ritual is done to cleanse the home spiritually. It is a meditative routine done to dismiss negative energy, improve moods, and purify the home. So, what does the desert rose have to do with the smudging ritual? The plant is used during the ritual as a meditation element and to signify mind clarity. Its presence during the ritual is believed to create a calm effect and make a meditator relaxed by eliminating evil thoughts. As a person conducts the ritual, they declare their intentions focusing on the desert rose to invite positive energy in their being and home.

4.     Comes in Multiple Varieties

Most probably, you are familiar with Adenium Obesum, the most commonly known type of the desert rose. What you may not know is there are other types of the plant that most people don’t know exist. These are the Adenium oleifolium, Adenium socotranum, Adenium somalense, and Adenium swazicum. The different types have different flower colors, stem width, leaves sizes, and growth heights.  

Adenium Oleifolium

Oleifolium is commonly found in Botswana and South Africa. It features a large stem with narrow, olive-green leaves. Its flowers can either be pink, salmon, or red and are tubular-shaped.

Adenium Socotranum

The socotranum is commonly found in Socotra, between Yemen and Somalia. It is the biggest in the family, growing up to 15 feet in length and its flowers are larger than those of the other types. Its trunk grows to a diameter of eight feet. The plant has no leaves, and its flowers are pink.

A tree like Adenium.
This Adenium is more tree-like than other varieties.

Adenium Somalense

Somalense is mostly found in Eastern Africa. They have twisted branches and narrow leaves. They grow up to 12 feet in length, and their trunks are usually twisted. Their flowers are trumpet-shaped and can either be white, crimson red or pink.

Adenium Swazicum

Swazicum is the smallest of all the desert roses, growing no more than two feet in length. They are found in South Africa and Swaziland, and they have showy reddish-pink and pink flowers.

5.     It has a Long Lifespan

The desert rose has a long life span of up to 500 years. It boasts notable characteristics that enable it to live through the decades. For instance, its stem has a swollen base that keeps on swelling with the passing of years and can reach up to two meters in diameter. The stem stores essential nutrients that it keeps feeding the other parts of the plant through different weather conditions.

To identify the age of a desert rose, measure the diameter of the stem. This is a slow-growing plant, and every millimeter represents one year. It is a seasonal succulent that sheds leaves when not in season. The plant, interestingly, gets enough nutrients even when other plants start dying due to unbearable weather conditions.

6.     It is Traded Internationally

By now, you already know the various benefits of the desert rose. You are probably considering planting it in your home for a beautiful look, or medicinal value, or even for your hunting escapades. However, you are wondering where you can get the plant since you don’t live close to a desert. You need not worry as the plant is available for sale, probably in a market near you.

A Pinned world map.
Desert Rose traded internationally

The desert rose is traded globally for its various properties, but mostly for ornamental purposes. While it is popular for its medicinal and toxic nature in Africa, it is popular in the West for its aesthetic value. For both reasons, it is exported and imported in large quantities thanks to its ever increasing demand. All you need is to walk into a market near you or search the internet for where you can buy the plants in your area.

How to Grow the Desert Rose at Home Successfully

The desert rose is widely planted for its beautiful flowers, leaves, and succulent stem. Some people grow it around their compounds as a fence, and in Tanzania, it is used in marking grave positions. Its stem and branches produce wood that some people use as firewood. For whatever reason you plant it, take precautions when handling it to avoid getting into contact with its toxic sap by wearing protective clothing. When growing it, always ensure members of your household and pets are safe from its effects. 

A plant that is being taken care indoors.
Desert Rose adds character to your home

The desert rose grows well in dry areas. Ensure it gets enough sunlight and avoid giving it too much water.  Always ensure the soil is completely dry before watering and avoid pouring water directly on the plant. It can be propagated from seeds or branches and stem cuttings. The stems of plants grown from cuttings may not be as succulent as those produced from seeds.

It is no wonder that something as beautiful and hardy as the desert rose can be found in a place like this. The plant has withstood many hardships to grow where it does, but now you know how to care for one so they will continue living on. With its amazing facts, it is easy to see why so many people want a desert rose of their own. Make sure your Desert Rose gets enough water, fertilizer, sunlight and protection from pests. With these tips in mind, we hope you enjoy caring for your own little piece of the Sahara Desert at home or office.

How to make a cactus terrarium?

If you love indoor cacti and succulents, then a terrarium is the perfect way to bring them into your home. In fact, one of the most beautiful and easy terrariums you can make is a cactus terrarium. Cactus plants are easy to grow and maintain, making them a great starter plant for people who want to try their hand at gardening. Succulents are also quite simple once they have been planted in soil or sand. Terrariums also make great gifts for loved ones, so if you’re looking for DIY gift ideas, a cactus terrarium would be perfect for that special someone.

So, how do you make a cactus terrarium? It all starts with getting the right materials like ideal containers (jars, vases or glass balls), gravel, cactus soil mix, peat, moss, and finding the right cactus plants. Make your layering to allow for perfect drainage and plant your preferred cactus plant. You can then include decorations like stones, colored pebbles or marbles. Take care of your terrarium by focusing on proper lighting, watering and humidity levels.

It can be very easy to get tempted into believing that cactus can do well in any traditional terrarium. Nothing could be further from the truth. This guide will take you through modern terrarium designs and how best you can maximize the potential of your spiky companions in a terrarium.

Factors to Consider When Making Your Cactus Terrarium

Humidity

Humidity is very important when it comes to cactus and succulents. Many desert plants come from hot and dry climates, so you will need a terrarium that can mimic these conditions for your plant to thrive. If the humidity is too low in the container, then water loss through transpiration will not be sufficient enough for them to photosynthesize and stay healthy. If the humidity is too high, then fungal diseases can become an issue. Even so, too much humidity is better than not enough – provided you have the correct airflow and drainage in place to handle this excess water content.

When building a terrarium for your cacti, ensure it mimics the climate they have been adapted to.

Humidity levels will depend on your home’s climate and the size of the terrarium that you choose for your plant or plants. You may need to get a hygrometer to measure the humidity levels in your terrarium more accurately.

If you want to use a closed terrarium, then some special considerations need to be considered regarding humidity levels. The most common problem with closed terrariums is the fact that they tend to get too humid in certain conditions and not enough moisture during dry spells.

Airflow

The plants will need airflow through the container to get enough carbon dioxide for photosynthesis and expel any excess oxygen from their system. Without this, you may end up with an unhealthy plant even though there is sufficient water in the container.

Airflow is also important because it helps to remove excess humidity from the container. If you plan to use a closed terrarium, this is even more crucial as such containers can develop too much moisture and become toxic for your plants if not enough air flows through them.

Water retention

When you have your cactus terrarium completely sealed, it’s important that the soil can retain sufficient moisture for the plant or plants inside. If this isn’t possible due to limited drainage, make sure to have some pebbles atop the substrate so that water can be wicked away from the soil and absorbed by these rocks.

For better results, put a saucer under the container and add water to this instead. This way, you can be sure that your plant will get enough moisture while also ensuring that too much won’t build up in the terrarium. Remember, the pebbles will only work if they have holes for water to escape from.

Drainage

Lack of drainage can be a death sentence for your cactus plants, especially if you are using a closed terrarium where humidity levels get too high during certain periods. When choosing substrate or gravel to put in your container, make sure that it is large enough to support the plant and allow water to escape.

Without proper drainage, you can end up with a toxic terrarium that will eventually kill your cactus or succulent plants. If you are using sand as your substrate, then it’s best to mix some charcoal into this for better results. There are different types of sand available, so choose one that is more coarse in texture and has a dark color.

Proper drainage is important when growing cacti in a terrarium, especially when humidity levels are high.

Terrarium Container Options

Cactus plants can be very rewarding to grow indoors, although there are some things you need to take into account when making your cactus terrarium design. You will have better success if you choose the right container for your plant or plants, but also ensure it has proper drainage so that the soil doesn’t get waterlogged.

As there are various terrarium container options, you can easily find the perfect one for you.

Storage jars: You can use a range of different storage containers to make closed terrariums, such as large mason jars or even clean pickle jars if you want an extra challenge in making your indoor cactus garden design.

Teardrop glass for making hanging terrariums:  Teardrop glass for making hanging terrariums can be a beautiful addition to your home if you have the right kind of cactus plants.

Globe vase with metal stand: Globe vase with a metal stand is another great option if you want a creative way to showcase your cactus garden indoors.

Glass orbs for hanging terrariums: Glass orbs for hanging terrariums make a great choice if you want to create your own unique cactus garden design.

Large archway terrarium: Large archway terrarium is another creative option that lets you grow more than one type of succulent or desert plant together in the same container.

Small jewel box terrarium: Small jewel box terrarium is a great option if you want to create something small and simple for your cactus garden design.

Classic (Closed) Terrariums Vs. Modern Terrarium Designs

The classic (closed) terrariums have hitherto been the most popular type of terrarium designs. However, modern terrariums are fast catching up with their popularity. Closed-type terrariums feature a clear glass or plastic container sealed at the top to hold in moisture and encourage plant growth. While this type of terrarium makes it easier to maintain, modern designs are better suited for cacti and succulents as they do not require high humidity levels.

Modern closed-style cacti containers can be made using large jars like the ones used for pickles. These large jars allow enough space between the plants and provide sufficient air circulation to prevent rot or mold. Plus, they look great on a tabletop as well. Apart from the low humidity levels, the modern designs work best for cacti because the plants do not require a lot of light to survive. This means there is no need for the terrarium to have a transparent top that lets in more sunlight, resulting in overheating or even death due to exposure.

Suitable Terrarium Cactus Plants

Most types of cacti can be used for terrariums. However, certain species have been found to work best in these types of containers, and they include the following:   

  • Christmas cactus (Schlumbergera) – The Christmas cactus is an ideal candidate for the terrarium, thanks to its low-water requirements. It will thrive in a high humidity environment and produce beautiful blooms too. The plant is not very picky about light levels either, so you can place it on your window sill or tabletop without worrying about heat damage.
  • Hen & chicks (Echeveria) – This type of succulent plant is characterized by thick, fleshy leaves that grow in rosettes. The plant is native to Mexico and South America and does not need a lot of light or water to survive. It will even thrive when kept dry for prolonged periods, making it ideal for infrequently watered terrariums.
  • Desert rose (Adenium) – This plant is a flowering succulent that grows up to five feet tall in its natural habitat. However, when grown indoors, it can be kept much smaller and will even flower too. Desert rose needs high humidity levels to grow well, making them ideal for terrariums.
  • Jade plant (Crassula) – This type of succulent is native to South Africa and are characterized by thick, fleshy stems which store water. The plant does not require much light or water when grown indoors, making them perfect for terrariums where they can be kept in a dark corner with infrequent watering cycles.
  • Rhipsalis (Mistletoe cactus) – The Rhipsalis is a tropical cactus native to South and Central America. It does not require much light but will thrive in the high humidity environment of a terrarium.
  • Hylocereus (Night-blooming cereus) – This type of cacti is native to Central and South America. It features long, succulent stems with many spines along the whole length. The plant will grow up to a height of twelve feet when grown outdoors but can be kept much smaller in a terrarium where it does not require as much light or water as other types of plants.
The Jade Plant is one of the most popular succulents that you can grow in a terrarium.

Steps To Set Up Your Terrarium:        

Step One: Assembly of Materials

The first step towards setting up your own DIY cacti terrarium is gathering all the materials you need. For this, you will require the following:

  • An open jar or glass container –  This should be around one gallon in size and can either have a wide opening or an elongated neck. This ensures good airflow and less humidity in the terrarium environment.
  • Pea gravel – Half to one pound of pea gravel is required for the bottom layer in your cactus container and provides a gritty surface that prevents plant roots from rotting while keeping them dry enough to prevent fungus growth.
  • Sphagnum moss – This is available as a peat-free alternative that does not contain any spores of the fungus that causes sphagotricha. The inclusion of this type will help to retain moisture for longer periods without attracting fungal growth.
  • Sphagnum peat – The sphagnum peat is perfect for the top layer where you will be planting your cacti and provides a high humidity environment. It also absorbs moisture, making it great at keeping the terrarium moist without overdoing things.
  • Potting soil – you will need a good quality potting mix with equal parts of peat moss and perlite or pumice rock for the best results. Cacti grow well in fast-draining soils, so do not use regular heavy garden soil that retains moisture too long, resulting in rot.
  • Cactus or succulent plants – You can grow any type of cacti in your terrarium, but some do well when grown indoors, as already discussed. Succulents are also an option and can be chosen according to the enclosure you have chosen.

Step Two: Setting soil in the layers

The next step is mixing your soil components before filling up each layer of your terrarium appropriately.  It would help if you filled up the jar three-quarters full with pea gravel, then added a thin layer of sphagnum moss, followed by the potting soil.

When doing your gravel and soil layering, consider root aeration as cacti have relatively shallow roots.

You should set the soil in layers when creating your own terrarium.

Once you are done with your layering, moisten the soil lightly and press it down to compact it. Do not use excess water as this will make the substrate too heavy for plants to root in easily. The best way to do your layers is in three steps: gravel, moss and soil.

An alternate method with plant roots is to add a layer of pebbles at the bottom for drainage before adding your cacti plants with their root balls above this base level. Then add more sphagnum moss on top, followed by moistened potting mix or perlite for the soil layer.

Step Three: Adding Cactus & Decorations

Now that your terrarium is set up with an appropriate growing medium for the plants, it is time to add your cacti and other decorative items. You can use plastic or clay pots for this purpose as both are opaque enough that the plants do not need direct sunlight, allowing them to thrive in a terrarium environment.

If you wish to plant succulents instead of erect cacti, consider using only one type per container to avoid overcrowding.

To finish setting up your terrarium, add chosen succulents and decorative items to the container.

You can add a layer of gravel over the soil surface before planting your cacti which will help with drainage but do not use too much or risk fungal growth from excess humidity. You also need to ensure no water is trapped between layers by allowing adequate airflow and using materials like stones and gravel to prevent pooling.

Cacti look great when planted alone in a container, but you can add other items like moss or small pebbles if you wish. Just make sure that these decorative items do not interfere with the root system of your cactus by creating pools for water to form and cause rot. Remember to keep them away from the top layer, which is where you will be planting your cactus.

Caring For Your Terrarium

Planting your cacti is just the first step to your terrarium. You also need to take care of them by providing the proper condition for growth.

Watering

Unlike the tropical cactus, your terrarium cactus needs special attention, especially in terms of watering. You need to make sure that they are not overwatered or watered too often, as this can cause rot and other problems with your plants.

The best way to water a terrarium is by misting the entire surface once every week. This should be enough to keep them moist, but if you wish, you can add a little bit of water to the soil surface after misting.

Light

You also need to consider lighting requirements for your cacti plant if they are not placed outside in direct sunlight. They should get bright light, but no direct exposure as this will cause them to rot and die quickly. If you have a closed terrarium with poor ventilation, then you need to make sure that your cacti are getting enough indirect light for them to photosynthesize.

Make sure your succulents receive bright light but are not exposed to direct sunlight.

Dealing with Mold

Mold in cactus is usually caused by excess moisture in the terrarium, which can be prevented by avoiding pooling water and ensuring good airflow. You should also watch out for fungus gnats if you have a dirty container, as these can cause a lot of damage to your cacti.

Other types of mold may affect the soil surface, so it is important that you monitor this regularly and change out old substrate if necessary. It should be noted that most kinds of mold cannot grow in soil with good drainage.

Making a cactus terrarium shouldn’t be a hassle if you understand the basics of how to create the right conditions for your plants. Remember to always start with a clean container, add the right materials for your plants to grow in and ensure proper ventilation. You can mix this up by adding decorative items that don’t need much sunlight if you wish but overall, just make sure that everything is balanced out well.

What Can Kill a Cactus at Home?

Cacti are a popular houseplant for many people, but they can be difficult to take care of. They require the right amount of water and light to thrive.

Cacti plants are known to die from being overwatered or underwatered; too much sun or not enough sun; pests such as spider mites, mealybugs, and scale insects; root rot caused by poor drainage; improper potting; using the wrong type of potting mix among other reasons.

In this blog post, you will learn about some mistakes that may end up killing your cactus at home! So, let us get started.

Overwatering

One of the worst mistakes you can make when caring for a cactus is overwatering it. The roots will rot and die due to high levels of moisture being trapped in the soil.

In fact, the vast majority of cacti deaths at home occur due to overwatering since most people believe that there is nothing like too much water. However, this isn’t the case for cacti plants.

Some of the common signs of overwatering include wilting, drooping leaves and stems, brown or mushy roots.

As overwatering can kill your cactus, you should check if the soil is dry before watering the plant.

It is always a good thing to check your potting mix before watering. Ensure that it is completely dry before watering. If the soil still feels damp and cool, you should not water your plant.

Instead, leave it for a few more days and check the soil again to see if it has dried up. The most important thing is to ensure that you provide your plant with just the right amount of water it requires to survive.

Underwatering

Another common mistake many people commit is underwatering their cacti plants. This mainly occurs because people don’t think that there can be too little water for a cactus.

The reality is that these plants’ roots need moisture, and dry soil will cause them to die. Some signs of insufficient watering are wilting, drooping leaves and stems, and brown or mushy roots.

However, it is always advisable to check your potting mix before watering since overwatering can also cause the cactus plant’s roots to rot. If you notice that the soil is completely dry, then it is safe to water your plant.

Under-fertilizing

Many people believe that proper feeding does not matter for these desert plants, but it turns out that cacti plants need regular fertilization to thrive! Lack of fertilizer can cause stunted growth, leading to death.

Some common signs of under-fertilizing are a yellow or pale color on the leaves, weak stems, and poor root development. This is because cacti plants require lots of nitrogen to thrive, which can be achieved through fertilizers.

The lack of proper fertilization can lead to the formation of yellow or pale color spots on the leaves.

It is advisable to fertilize the cactus plant in late winter or early spring as a precautionary measure before planting it outdoors to ensure it has sufficient nutrients for growth.

Indoor cacti plants should be fed once a year in late winter. Outdoor cacti plants should be fertilized with organic fertilizer or compost once every three months to ensure they are getting the nutrients they need for healthy growth.

Using the Wrong Type of Soil

Cacti plants usually require a specific type of potting mix to thrive. They need soil that drains easily and does not retain too much moisture.

If the wrong type of potting mix is used, the roots will become waterlogged, leading to rot and death.

It is advisable to make sure you use a well-draining potting mix for your plant’s sake! These plants also require plenty of drainage space to grow properly.

Insufficient Light

Cacti plants need plenty of sunlight to grow properly. Ensure the type of light you expose your succulents to is high intensity and indirect natural or artificial lighting.

Many people have found out too late that their cactus has died because it was not getting adequate light.

The leaves will first turn brown and then start to droop or wither before dropping off entirely. The stems may also shrivel up, become brittle, and split open.

The cactus plant must be given sufficient sunlight (direct for some species), so it can grow properly!

If you are unsure about the type of light your cactus plant needs, it is advisable to check with a professional.

During spring, ensure you take your indoor cacti outside in the morning and bring them back indoors before sunset.

In summer, place your cacti out of direct sunlight for the most part but allow it to be sunlit indirectly or for a few hours every day not to hurt its delicate leaves.

You should also position your indoor cacti near a window with lots of natural light.

Pests and Diseases

Many pests such as mealybugs and spider mites can cause a cactus to die.

Cacti plants are also prone to various fungi, which will cause the plant’s roots to decay quickly.

It is advisable you check your cactus regularly for signs of pests or diseases to nip them early so as not to cause irreparable damage.

The most common signs of pests and diseases are the presence of tiny insects on the plant’s spines or flowers, a sudden change in its coloration-usually from green to brown, yellowing foliage, and wilted branches.

If you notice any changes with your cactus, you should consult a professional to diagnose the problem and get rid of it quickly!

Using Inappropriate Pots

Cacti plants require pots that have good drainage and are porous. This is to ensure proper drainage and aeration, which leads to healthy roots and a strong plant.

Providing the wrong type of pot for your cacti could lead to stagnant water at the base of the plant’s stem or root rot–both conditions can kill your cactus pretty quickly!

Cacti should be potted in porous containers that offer sufficient drainage.

You should also be wary of the container depth. If it is too deep for your plant, the plant will not receive sufficient amounts of light and water, which can eventually lead to its death!

Consider using a shallow pot or tray with some amendments like gravel to ensure good soil drainage.

It is important to provide the right type of pot and soil for your cacti plants to ensure their survival!

Failure to Repot

Some cacti plants grow much more quickly than expected, and they need to be repotted to accommodate their increasing size.

Failure to do this could make the plant’s roots stunted and die because of lack of space–which is why you must regularly check your cacti pots for signs of overcrowding.

If you do not repot your cacti once every 2-3 years, they will gradually die due to the lack of space.

Cacti plants should be repotted every two to three years, or when you feel that they have reached the maximum capacity of their pot!

The plant should be watered well after repotting to ensure it has enough water in its roots and new soil!

Crowding Them in One Spot

We understand that you may be tempted to keep all of your cactus plants in one place. However, this will only lead to overcrowding and the lack of adequate space for each plant!

You must give enough room between each pot so as not to crowd them, which can cause stunted growth and death due to lack of proper air circulation and water loss.

Furthermore, crowding of cacti plants in one place can cause pest infestation. Ensure that the plants are not touching each other to avoid any possible insect infestation or plant diseases.

It is advisable to space your cactus pots about a foot apart from one another, depending on their size and type of potting mix used for planting.

Failure to Prune

One thing you need to do regularly with your cacti plants is pruning them. Pruning entails removing dead leaves/spines from the bottom of the plant.

You may also want to remove any spines or prickles that are too close to your cactus’ pot, stem, and leaves. Failure to do this can cause rotting at the base of a dead leaf, leading them to die quickly! The removal of excess parts helps restore air circulation for your plant.

Cactus plants need to be pruned every few months or as needed–usually, when you see that the cactus is starting to look a little too bushy and unkempt!

It should also be noted that your cacti may require more than one type of trimming, depending on their size and shape.

Mixing Cactus and Other Plants

There is no doubt that mixing your cacti plants with other plants is just gorgeous. Unfortunately, you can only do this temporarily because different plants have different needs.

For example, cacti plants need lots of sunlight while other plants may not–which could cause the former to droop or wither. On the contrary, your cacti plants don’t require frequent watering, while other plants can’t thrive without frequent watering.

The difference in needs makes it almost impossible to grow cacti plants in the same place as other plant species and keep them happy and healthy.

Move your cactus plant away from other plants when it starts wilting or showing other signs of unhealthy growth. That way, both your cacti and the other plants will be happy

Too Much Light

Cacti plants are generally adapted to direct sunlight and need a moderate amount to stay healthy. However, too much sun can damage the plant’s epidermis or make it lose its color.

Generally, you should not expose your cactus to direct sunlight for more than six hours a day. Consider protecting it from extreme heat during hot summer days!

One of the common signs of too much light is burning spots or a yellowish hue on the leaves. The appearance of such spots is a clear sign of sunburn.

To remedy the situation, you first need to move your cactus plant away from direct sunlight.

On the other hand, a lack of sunlight can cause your cacti plants to become leggy and spindly. If you notice that your cacti appear weak, then it might not be getting enough light.

In such a case, consider moving the pot closer to a sunny window or outdoors to get adequate sunlight.

However, monitor how much light your plant receives to prevent sunburn. It’s important to find the right balance for your cactus’ light needs.

Incorrect Temperature and Humidity

Closely related to the aspect of light, incorrect temperature, and humidity levels can cause your cacti plants to die or become unhealthy.

Ideally, cacti plants thrive best in temperatures between 60°F (15°C) and 80°F (27°C).

Colder temperatures will make the plant weak and vulnerable to diseases. On the contrary, higher temperatures can cause sunburns or dehydration.

The humidity levels of your cactus’ environment also need to be monitored. Cacti plants are quite resistant to dry air but require slightly higher humidity than usually found in the average home.

If you notice that the plant is wilting too often, then it might not be getting enough humidity.

Consider misting the leaves with water or putting a humidifier close to the cactus plant to give it the moisture and hydration it needs.

Conclusion

The cactus is a tough plant, but it can still die if you don’t take proper care of it at home.

If you overwater, underwater, use the wrong type of soil or pot size, crowd them in one spot, and don’t give it enough light, it will die.