How to make a cactus terrarium?

If you love indoor cacti and succulents, then a terrarium is the perfect way to bring them into your home. In fact, one of the most beautiful and easy terrariums you can make is a cactus terrarium. Cactus plants are easy to grow and maintain, making them a great starter plant for people who want to try their hand at gardening. Succulents are also quite simple once they have been planted in soil or sand. Terrariums also make great gifts for loved ones, so if you’re looking for DIY gift ideas, a cactus terrarium would be perfect for that special someone.

So, how do you make a cactus terrarium? It all starts with getting the right materials like ideal containers (jars, vases or glass balls), gravel, cactus soil mix, peat, moss, and finding the right cactus plants. Make your layering to allow for perfect drainage and plant your preferred cactus plant. You can then include decorations like stones, colored pebbles or marbles. Take care of your terrarium by focusing on proper lighting, watering and humidity levels.

It can be very easy to get tempted into believing that cactus can do well in any traditional terrarium. Nothing could be further from the truth. This guide will take you through modern terrarium designs and how best you can maximize the potential of your spiky companions in a terrarium.

Factors to Consider When Making Your Cactus Terrarium

Humidity

Humidity is very important when it comes to cactus and succulents. Many desert plants come from hot and dry climates, so you will need a terrarium that can mimic these conditions for your plant to thrive. If the humidity is too low in the container, then water loss through transpiration will not be sufficient enough for them to photosynthesize and stay healthy. If the humidity is too high, then fungal diseases can become an issue. Even so, too much humidity is better than not enough – provided you have the correct airflow and drainage in place to handle this excess water content.

When building a terrarium for your cacti, ensure it mimics the climate they have been adapted to.

Humidity levels will depend on your home’s climate and the size of the terrarium that you choose for your plant or plants. You may need to get a hygrometer to measure the humidity levels in your terrarium more accurately.

If you want to use a closed terrarium, then some special considerations need to be considered regarding humidity levels. The most common problem with closed terrariums is the fact that they tend to get too humid in certain conditions and not enough moisture during dry spells.

Airflow

The plants will need airflow through the container to get enough carbon dioxide for photosynthesis and expel any excess oxygen from their system. Without this, you may end up with an unhealthy plant even though there is sufficient water in the container.

Airflow is also important because it helps to remove excess humidity from the container. If you plan to use a closed terrarium, this is even more crucial as such containers can develop too much moisture and become toxic for your plants if not enough air flows through them.

Water retention

When you have your cactus terrarium completely sealed, it’s important that the soil can retain sufficient moisture for the plant or plants inside. If this isn’t possible due to limited drainage, make sure to have some pebbles atop the substrate so that water can be wicked away from the soil and absorbed by these rocks.

For better results, put a saucer under the container and add water to this instead. This way, you can be sure that your plant will get enough moisture while also ensuring that too much won’t build up in the terrarium. Remember, the pebbles will only work if they have holes for water to escape from.

Drainage

Lack of drainage can be a death sentence for your cactus plants, especially if you are using a closed terrarium where humidity levels get too high during certain periods. When choosing substrate or gravel to put in your container, make sure that it is large enough to support the plant and allow water to escape.

Without proper drainage, you can end up with a toxic terrarium that will eventually kill your cactus or succulent plants. If you are using sand as your substrate, then it’s best to mix some charcoal into this for better results. There are different types of sand available, so choose one that is more coarse in texture and has a dark color.

Proper drainage is important when growing cacti in a terrarium, especially when humidity levels are high.

Terrarium Container Options

Cactus plants can be very rewarding to grow indoors, although there are some things you need to take into account when making your cactus terrarium design. You will have better success if you choose the right container for your plant or plants, but also ensure it has proper drainage so that the soil doesn’t get waterlogged.

As there are various terrarium container options, you can easily find the perfect one for you.

Storage jars: You can use a range of different storage containers to make closed terrariums, such as large mason jars or even clean pickle jars if you want an extra challenge in making your indoor cactus garden design.

Teardrop glass for making hanging terrariums:  Teardrop glass for making hanging terrariums can be a beautiful addition to your home if you have the right kind of cactus plants.

Globe vase with metal stand: Globe vase with a metal stand is another great option if you want a creative way to showcase your cactus garden indoors.

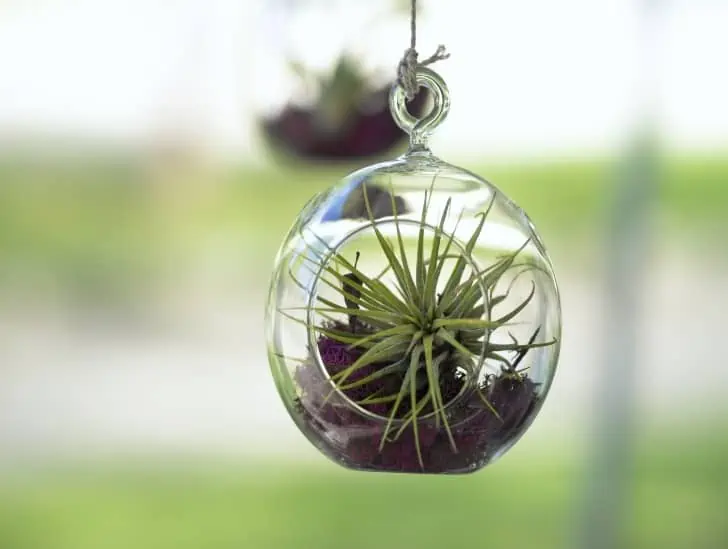
Glass orbs for hanging terrariums: Glass orbs for hanging terrariums make a great choice if you want to create your own unique cactus garden design.

Large archway terrarium: Large archway terrarium is another creative option that lets you grow more than one type of succulent or desert plant together in the same container.

Small jewel box terrarium: Small jewel box terrarium is a great option if you want to create something small and simple for your cactus garden design.

Classic (Closed) Terrariums Vs. Modern Terrarium Designs

The classic (closed) terrariums have hitherto been the most popular type of terrarium designs. However, modern terrariums are fast catching up with their popularity. Closed-type terrariums feature a clear glass or plastic container sealed at the top to hold in moisture and encourage plant growth. While this type of terrarium makes it easier to maintain, modern designs are better suited for cacti and succulents as they do not require high humidity levels.

Modern closed-style cacti containers can be made using large jars like the ones used for pickles. These large jars allow enough space between the plants and provide sufficient air circulation to prevent rot or mold. Plus, they look great on a tabletop as well. Apart from the low humidity levels, the modern designs work best for cacti because the plants do not require a lot of light to survive. This means there is no need for the terrarium to have a transparent top that lets in more sunlight, resulting in overheating or even death due to exposure.

Suitable Terrarium Cactus Plants

Most types of cacti can be used for terrariums. However, certain species have been found to work best in these types of containers, and they include the following:   

  • Christmas cactus (Schlumbergera) – The Christmas cactus is an ideal candidate for the terrarium, thanks to its low-water requirements. It will thrive in a high humidity environment and produce beautiful blooms too. The plant is not very picky about light levels either, so you can place it on your window sill or tabletop without worrying about heat damage.
  • Hen & chicks (Echeveria) – This type of succulent plant is characterized by thick, fleshy leaves that grow in rosettes. The plant is native to Mexico and South America and does not need a lot of light or water to survive. It will even thrive when kept dry for prolonged periods, making it ideal for infrequently watered terrariums.
  • Desert rose (Adenium) – This plant is a flowering succulent that grows up to five feet tall in its natural habitat. However, when grown indoors, it can be kept much smaller and will even flower too. Desert rose needs high humidity levels to grow well, making them ideal for terrariums.
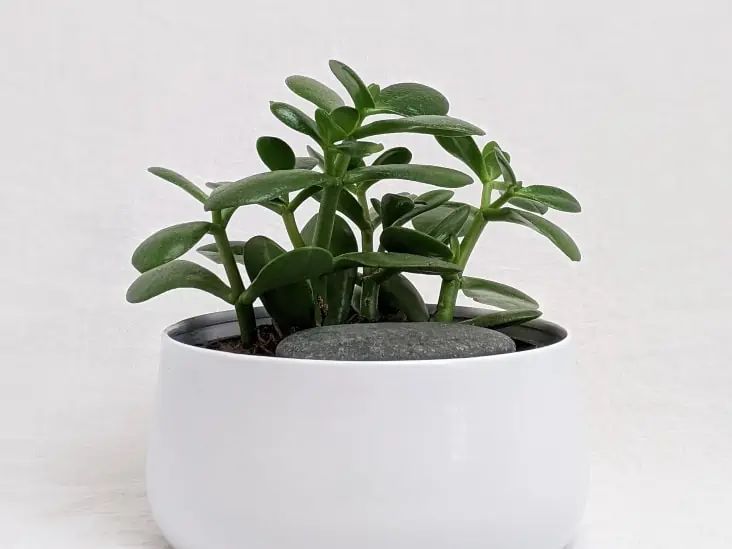
  • Jade plant (Crassula) – This type of succulent is native to South Africa and are characterized by thick, fleshy stems which store water. The plant does not require much light or water when grown indoors, making them perfect for terrariums where they can be kept in a dark corner with infrequent watering cycles.
  • Rhipsalis (Mistletoe cactus) – The Rhipsalis is a tropical cactus native to South and Central America. It does not require much light but will thrive in the high humidity environment of a terrarium.
  • Hylocereus (Night-blooming cereus) – This type of cacti is native to Central and South America. It features long, succulent stems with many spines along the whole length. The plant will grow up to a height of twelve feet when grown outdoors but can be kept much smaller in a terrarium where it does not require as much light or water as other types of plants.
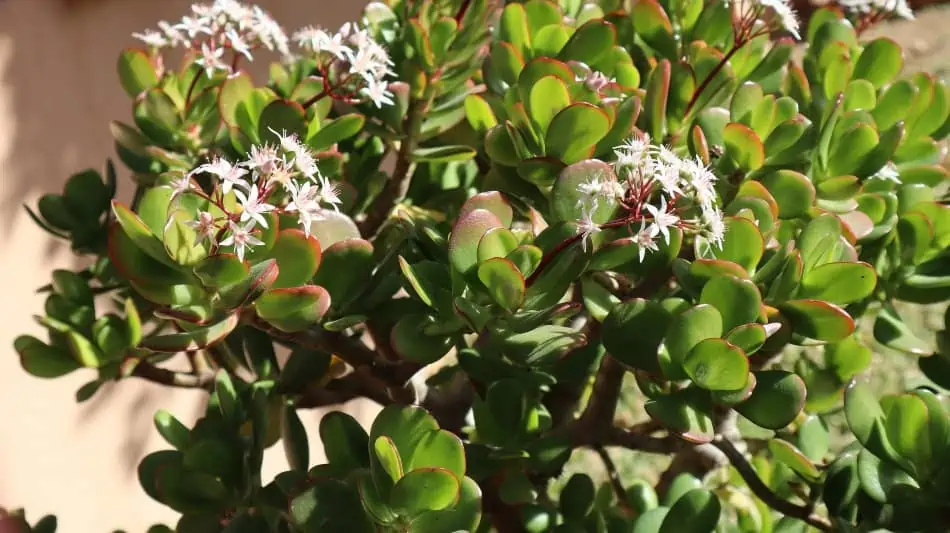
The Jade Plant is one of the most popular succulents that you can grow in a terrarium.

Steps To Set Up Your Terrarium:        

Step One: Assembly of Materials

The first step towards setting up your own DIY cacti terrarium is gathering all the materials you need. For this, you will require the following:

  • An open jar or glass container –  This should be around one gallon in size and can either have a wide opening or an elongated neck. This ensures good airflow and less humidity in the terrarium environment.
  • Pea gravel – Half to one pound of pea gravel is required for the bottom layer in your cactus container and provides a gritty surface that prevents plant roots from rotting while keeping them dry enough to prevent fungus growth.
  • Sphagnum moss – This is available as a peat-free alternative that does not contain any spores of the fungus that causes sphagotricha. The inclusion of this type will help to retain moisture for longer periods without attracting fungal growth.
  • Sphagnum peat – The sphagnum peat is perfect for the top layer where you will be planting your cacti and provides a high humidity environment. It also absorbs moisture, making it great at keeping the terrarium moist without overdoing things.
  • Potting soil – you will need a good quality potting mix with equal parts of peat moss and perlite or pumice rock for the best results. Cacti grow well in fast-draining soils, so do not use regular heavy garden soil that retains moisture too long, resulting in rot.
  • Cactus or succulent plants – You can grow any type of cacti in your terrarium, but some do well when grown indoors, as already discussed. Succulents are also an option and can be chosen according to the enclosure you have chosen.

Step Two: Setting soil in the layers

The next step is mixing your soil components before filling up each layer of your terrarium appropriately.  It would help if you filled up the jar three-quarters full with pea gravel, then added a thin layer of sphagnum moss, followed by the potting soil.

When doing your gravel and soil layering, consider root aeration as cacti have relatively shallow roots.
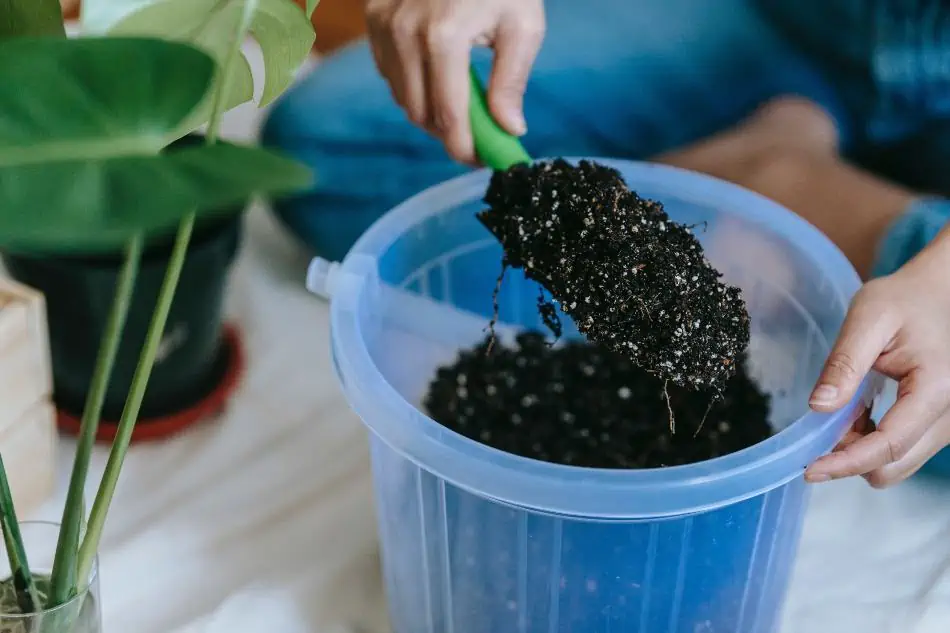
You should set the soil in layers when creating your own terrarium.

Once you are done with your layering, moisten the soil lightly and press it down to compact it. Do not use excess water as this will make the substrate too heavy for plants to root in easily. The best way to do your layers is in three steps: gravel, moss and soil.

An alternate method with plant roots is to add a layer of pebbles at the bottom for drainage before adding your cacti plants with their root balls above this base level. Then add more sphagnum moss on top, followed by moistened potting mix or perlite for the soil layer.

Step Three: Adding Cactus & Decorations

Now that your terrarium is set up with an appropriate growing medium for the plants, it is time to add your cacti and other decorative items. You can use plastic or clay pots for this purpose as both are opaque enough that the plants do not need direct sunlight, allowing them to thrive in a terrarium environment.

If you wish to plant succulents instead of erect cacti, consider using only one type per container to avoid overcrowding.

To finish setting up your terrarium, add chosen succulents and decorative items to the container.

You can add a layer of gravel over the soil surface before planting your cacti which will help with drainage but do not use too much or risk fungal growth from excess humidity. You also need to ensure no water is trapped between layers by allowing adequate airflow and using materials like stones and gravel to prevent pooling.

Cacti look great when planted alone in a container, but you can add other items like moss or small pebbles if you wish. Just make sure that these decorative items do not interfere with the root system of your cactus by creating pools for water to form and cause rot. Remember to keep them away from the top layer, which is where you will be planting your cactus.

Caring For Your Terrarium

Planting your cacti is just the first step to your terrarium. You also need to take care of them by providing the proper condition for growth.

Watering

Unlike the tropical cactus, your terrarium cactus needs special attention, especially in terms of watering. You need to make sure that they are not overwatered or watered too often, as this can cause rot and other problems with your plants.

The best way to water a terrarium is by misting the entire surface once every week. This should be enough to keep them moist, but if you wish, you can add a little bit of water to the soil surface after misting.

Light

You also need to consider lighting requirements for your cacti plant if they are not placed outside in direct sunlight. They should get bright light, but no direct exposure as this will cause them to rot and die quickly. If you have a closed terrarium with poor ventilation, then you need to make sure that your cacti are getting enough indirect light for them to photosynthesize.
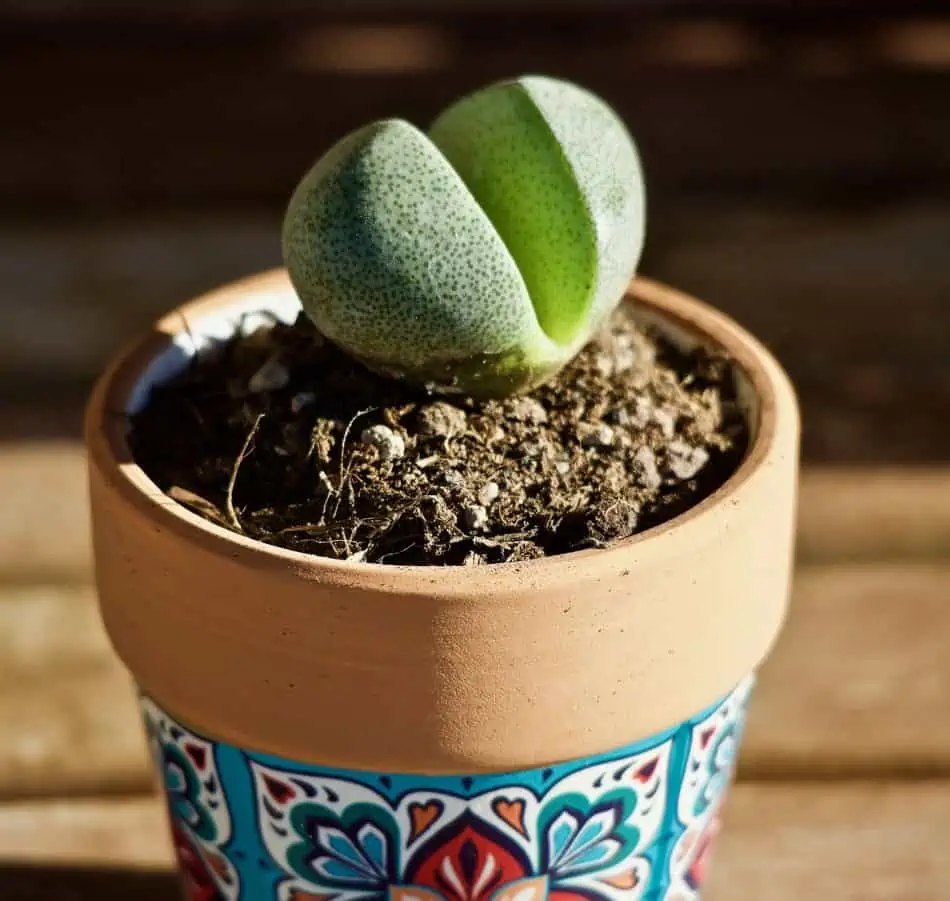
Make sure your succulents receive bright light but are not exposed to direct sunlight.

Dealing with Mold

Mold in cactus is usually caused by excess moisture in the terrarium, which can be prevented by avoiding pooling water and ensuring good airflow. You should also watch out for fungus gnats if you have a dirty container, as these can cause a lot of damage to your cacti.

Other types of mold may affect the soil surface, so it is important that you monitor this regularly and change out old substrate if necessary. It should be noted that most kinds of mold cannot grow in soil with good drainage.

Making a cactus terrarium shouldn’t be a hassle if you understand the basics of how to create the right conditions for your plants. Remember to always start with a clean container, add the right materials for your plants to grow in and ensure proper ventilation. You can mix this up by adding decorative items that don’t need much sunlight if you wish but overall, just make sure that everything is balanced out well.

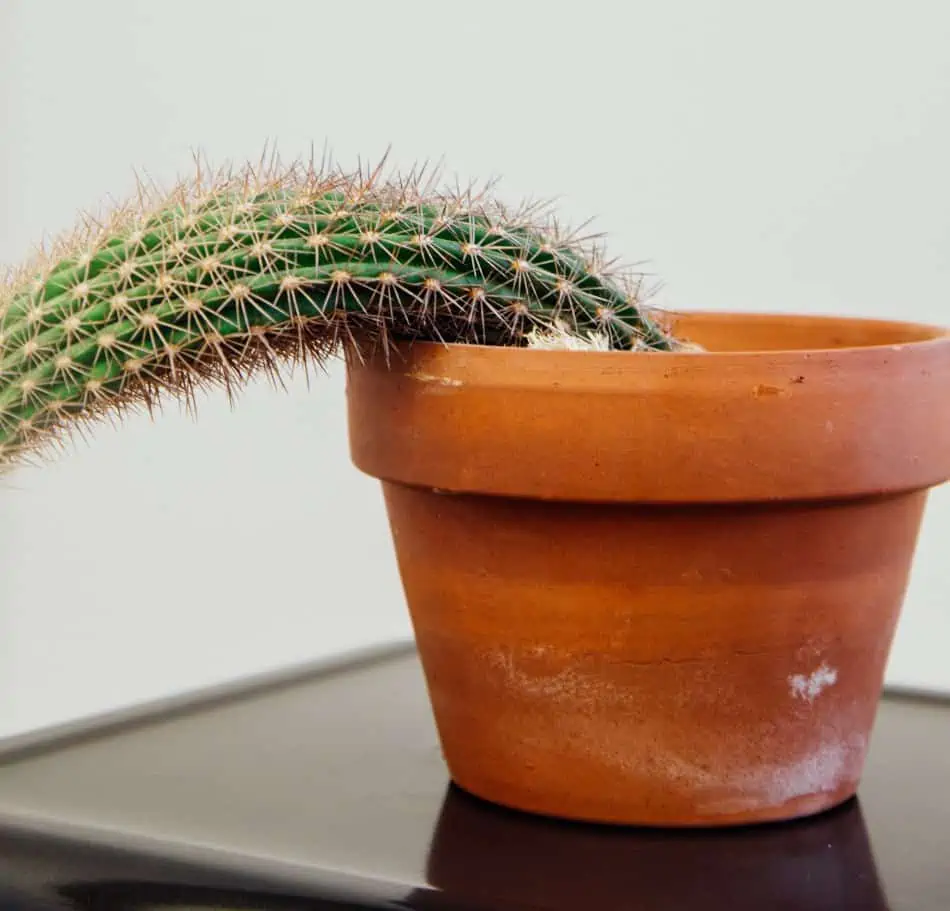
Ultimate Guide: How To Fight Cactus Diseases And Pests

Cacti are unique plants known for their drought and diseases resistance. However, this doesn’t mean these hardy succulents are immune to pests and diseases. While some cacti pests and diseases are a result of human neglect, others are natural and inevitable. As with all plants, cacti are vulnerable to insects and diseases. This is especially true if you live in a region with high humidity or have often watered houseplants. We look at the most common cactus diseases and pests and provide some natural and artificial remedies to get rid of them and keep your cactus healthy.

So how do you deal with cactus pests and diseases? For most cactus diseases like powdery mildew, mealybugs, and scale insects, simple houseplants remedies like neem oil, insecticidal soap and a good strong jet of water will do. For pests like red spider mites and aphids, insecticidal soap works well as a pesticide. For diseases like brown rot, take away the infected plant parts and sanitize your cacti with a mixture of hydrogen peroxide diluted in water. More serious problems like brown spot fungus or bacterial infections like bacterial spots will need to take more drastic measures like cutting off the diseased parts of the cactus plant.

Are you worried about cactus pests and diseases? This article should help you identify and treat common cactus diseases, pests and infestations.

Common Factors That Lead To Cactus Pests And Diseases

These causes can be classified into two main groups:

  1. Human neglect
  2. Natural factors

Human Neglect

Humans are often to blame for cactus pests and diseases. Some of the common human activities that lead to this include:

Overwatering – This is by far the most common cause of cactus disease. Cacti are desert plants, so they are very vulnerable to overwatering. Since their roots don’t store water like other plants, this often leads to root rot and fungal infections that can be fatal for your plant.

Underwatering – On the other hand, cacti are also vulnerable to underwatering. Cactus may be desert plants, but they still need water. If you suddenly stop watering your cactus, it will start dying slowly from the roots upwards.

Overwatering and underwatering are two of the most common causes of pests and diseases in cacti.

Using non-organic fertilizers – These can be another common cause of cacti diseases and pests. Fertilizer that contains heavy metals like copper or zinc is especially harmful to all plants (including cacti). Using inorganic fertilizers can eventually damage your cactus and make it more susceptible to diseases.

Overfeeding – This happens when you give your cacti too much water or fertilizer. This is often the result of overwatering, which leads to root rot and fungal infections that damage your plant’s roots

Physical injury – Cacti are prone to physical injuries because they have no protective bark or leaves. A bump can lead to infection, making them more vulnerable to pests and diseases

Natural factors

These include weather changes, soil composition, humidity levels in the air etc. Some of these natural factors are:

Temperature – Temperature fluctuations often cause stress to cacti because they originate from different geographical locations. An example is when you move your desert cactus indoors during winter seasons where temperature can drop below freezing point.

Humidity – This is another natural factor that affects cacti differently depending on the type of cactus you have. Humid climates can help certain types of cactus grow faster, while most desert plants prefer a dry environment instead to prevent fungal infections and other pests and diseases

Soil composition – The composition of the soil also affects cacti. For example, a lot of sand can hinder their ability to absorb water and nutrients from the ground. The mix of sand and other materials in your cactus soil should be carefully considered before planting.

Improper soil composition often leads to pests and diseases in cacti.

Cactus Diseases

Cactus Rot

Causes

Cactus rot comes in two common forms; root rot and stem rot. Root rot comes about when you overwater your cactus or do not allow it to dry out between waterings. Most of the time, the rot will begin in the root system and spread upwards towards the rest of the plant. This is why it’s really important that you let your cactus completely dry out before watering again. Stem rot, on the other hand, can either be a result of  bacteria or fungi. If it’s bacterial, you will notice a dark liquid ooze from the stem of your cactus. This isn’t good and needs quick treatment before you lose the entire plant. Fungal rot can also cause stems to swell up and become mushy like rotten fruit, but more often than not, it will appear as if the stem is bruising.

Root rot is typically a result of overwatering a cactus.

Symptoms

Symptoms of fungal rot include dark, sunken spots on the stem, which will turn into mushy areas. If it is bacterial, there may be a black liquid oozing from any part of your cactus; this should not be ignored and needs treatment right away before you lose the entire plant.

Treatment/Remedy

Cure the cactus disease by immediately removing any affected parts of your plant and treating it with fungicide or hydrogen peroxide. If fungal spores cause rot, you can also treat it with commercial anti-fungal sprays available at most garden stores. Mist your plants frequently to keep humidity up around them. This will help take care of both fungal and bacterial rot.

Cactus Rot Prevention

Make sure to keep the soil around your plants moist but not wet and misty them frequently – this will help prevent bacteria from forming on the plant. Always make sure there is plenty of ventilation in any enclosed place you may have a potted cactus in. It doesn’t matter whether that is in a greenhouse or inside your home.

Yellowing of a cactus

Causes 

The yellowing of a cactus is a result of improper watering and fertilizing and allowing dust to build up on the plant. Some of the most common causes include over-watering, insufficient sunlight, incorrect soil for your cactus, and too much fertilizer (especially nitrogen).

If you keep giving water to the cactus that does not need it, the roots can rot. This leads to root-bound plants and eventually yellowing leaves as well.

If your cactus is turning yellow, you may have been watering and fertilizing the plant incorrectly.

Symptoms

Yellow or white spots on your plant will be a sign of over-fertilizing. Other symptoms you should look for include shriveled-up leaves. This means too little water is available to the plant, resulting from too much sun exposure.

Treatment/Remedy

Cactus that require more water should immediately have their soil watered thoroughly until it begins seeping out from the bottom. They will also need a good amount of sunlight, so try moving them closer to a window. If your cactus is looking dry and not thriving, it may be time to give them some more fertilizer or water with plant food specifically made for cacti.

Cure yellowing of a cactus by giving the roots plenty of room to breathe. Ensure they get enough sunlight and ventilation so that their leaves can absorb enough water; and by feeding them with a cactus fertilizer.

Sunburnt Cactus

Causes

Cacti exposed to direct sunlight can be at risk of getting sunburnt. This is especially true if they are in a location where there is very little shade.

Cacti may get sunburnt when exposed to excess direct sunlight.

Symptoms

If you look at your cactus and notice that it’s losing its green color, this could result from sun damage to the leaves. The same goes for any brown spots appearing on its skin. Withered leaves may also accompany these.

Treatment/Remedy

Move your cactus to a location with more shade and mist the plant frequently. This may help keep it hydrated. If you want to give them some water rich in nutrients, try using cactus fertilizer on the soil surrounding the roots of your sunburnt cacti.

Frost damaged cactus

Causes

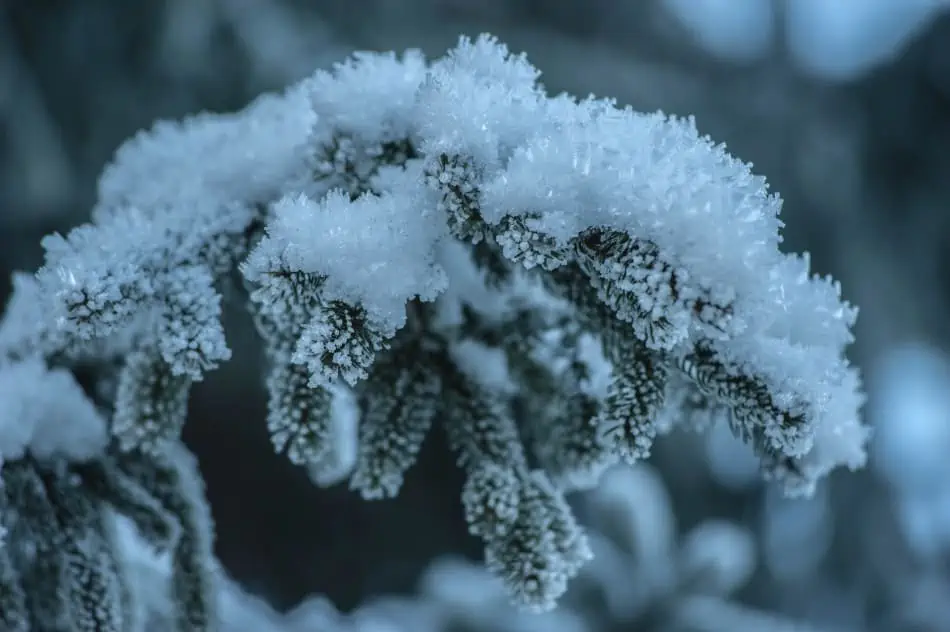
If your cactus has been exposed to frost, it could kill the plant. Other causes of damage include extremely hot conditions or severe drought. Frost damage is often found on the cactus flowers, stems, or leaves; white coloration can easily identify.

If your cactus is exposed to extremely cold temperature, it may gradually die.

Symptoms

If your plant has been exposed to freezing conditions or extreme temperatures that are either too hot or cold, you may see dry spots appearing in various areas of its body. The same goes for brown or yellow spots or patches.

Treatment/Remedy

You can help protect your cactus from frost damage by overwatering them during the winter months. This will prevent any potential freezing conditions that might happen when water freezes in cracks on their skin. It would help if you also tried to give plants with flowers some extra space between other plants, as frost can damage the cacti flowers.

Where possible, you should immediately move them to a location with warmer temperatures and try giving them some more sunlight. This will help speed up the healing process by encouraging new growth after frost exposure.

Cactus Pests

Red spider mites

Red spider mites are common pests that affect cacti. They are small parasites that can cause significant damage to your plant by weakening its tissues, which will eventually lead to yellowing leaves or shriveled growths.

How to Identify

If you notice brown speckled spots on the surface of a cactus or spider webs near these areas, it is a sign of red spider mites. Be aware that these parasites can reproduce quickly, so they must treat your plant as soon as you notice the aforementioned symptoms.

How it Affects Cacti

These pests suck out fluids from your plant’s tissues, which is how they cause damage and weaken its growth. Since their webbing can also trap dust and dirt, these parasites may prevent a cactus from receiving the water it needs.

Treatment/Remedy

Spray your plant with an insecticide spray that is specifically made for red spider mites so you can kill off any existing infestations on your cacti. You should then monitor the plant for a few weeks to ensure that all pest eggs have been destroyed.

Fungus gnats

A fungus gnat is one of the most common pests that affect cacti. This is because the pest loves moist conditions and decaying matter. These small flies will reproduce quickly in damp environments, so any rotting material or dead leaves on your cacti may attract them.

How to Identify

Look for small black insects that resemble mosquitoes hovering around the base of a plant (or in its soil). These are fungus gnats, and they will lay their eggs close to decaying matter, so they have enough food when they hatch. If you notice many tiny larvae crawling around the cactus, then this is also a sign of fungus gnats.

How it Affects Cacti

These parasites can cause damage to your plant by feeding on its roots or stems. They may even feed on any eggs that are present on its surface. Since fungus gnats reproduce quickly in moist conditions, these pests could spread to other plants if the infestation remains uncontrolled.

Treatment/Remedy

You can prevent fungus gnats from causing damage to your cacti’s roots and stems by allowing them proper drainage, so they don’t stay moist for too long. It would help if you avoided overwatering, as this could result in fungus gnats hatching and causing damage to your plant.

Snails & Slugs

Slugs and snails will feed on cacti leaves, leaving behind holes that look similar to those made by beetles or caterpillars. If you spot any snail/slug trails across the surface of a cactus, there is a chance that these pests are eating from it.

Snails may feed on cacti leaves and make the plant even more vulnerable to other parasites.

How to Identify

These parasites will leave tell-tale mucus trails on the surface of your plant, as well as damage that looks similar to those left behind by beetles or caterpillars chewing away at leaves and stems.

How it Affects Cacti

The holes created by slugs/snails can leave your plant vulnerable to other parasites, so they should be dealt with immediately if you spot them on a cactus. You will also need to keep an eye out for any eggs present in the soil surrounding your plants, so their population does not spread.

Treatment/Remedy

To prevent slugs and snails from causing damage to your cacti leaves, try trapping them in beer traps or secure copper bands around the base of a plant (or any other containers). While this will not kill these parasites off completely, it should help reduce their population if you notice them hatching on your cacti.

Root mealybugs

These pests are usually only found near the base of a cactus, where they feed off its roots and stems (which can cause serious damage to their health). You may spot white cotton-like patches growing around this region if root mealybugs have taken hold of your plant.

How to Identify

When you notice white cotton-like patches growing on the roots of a cactus, root mealybugs are likely to be present. These parasites also have whitish/yellow bodies covered by waxy filaments (which can be confusing if you’re not sure what they look like).

How it Affects Cacti

Root mealybugs feed on the roots and stems of a plant, which can cause serious damage to its health. You may also notice stunted growth or wilting leaves if their population becomes large enough.

Treatment/Remedy

To get rid of root mealybugs, you should remove the affected soil from around a cactus and replace it with new, fresh soil. If the infestation is small, you can also try mixing up some sugary water (using sugar or honey) that will attract mealybugs away from your plant.

Beetles

These pests are usually found chewing on cacti leaves, where they will leave behind tell-tale holes in the plant’s surface. If you notice these parasites crawling on a cactus, they have likely been eating from its leaves and stems.

How to Identify

Beetles are usually brown or black, with hard outer shells protecting their bodies. They also have hard chewing mouthparts that are perfect for pruning cactus leaves and stems.

How it Affects Cacti

Beetles cause damage to a plant by feeding on its leaves and stems. This can lead to stunted growth if left untreated. You may also notice leaf loss or wilting in the case of, particularly bad infestations.

Treatment/Remedy

You can kill off beetles by placing sticky traps around a cactus (or removing them manually if they are in reach). You could also try mixing up some sugary water that will attract these pests away from your plant. However, it is important to remove any dead leaves or stems where the beetles have been feeding from, as this is where they tend to lay their eggs.

Scales

You will likely find these parasites on the stem of a cactus, where they attach themselves and feed off its sap.

How to Identify

Due to their small size, scales can be difficult to spot on a cactus. You will notice that they have tiny brownish spots covering the surface of their bodies, which may appear white if you look closely enough.

How it Affects Cacti

Scales feed off the sap in a plant’s stem and leaves, causing them to become stunted in appearance. If left untreated, this can result in cactus death (with their sap-sucking mouths making it impossible for new shoots to grow).

Treatment/Remedy

You should remove any dead leaves or stems around your plant if you notice scales feeding on them. You could also try mixing up some sugary water that will attract these parasites away from your plant. However, the most effective way to get rid of scales is by applying a sticky substance (like petroleum jelly) on top of the stem so they can no longer feed off its sap.

Conclusion

Cactus are beautiful plants that help add some ambiance to your home. However, this can only be possible if you do your part to help keep them from the effects of pests and diseases. In case you are in doubt about some signs and symptoms, always consult a professional arborist. With constant monitoring and proper care, you should be able to maintain a healthy cactus garden.

How to Propagate Aloe Vera Plant?

Aloe vera plants are quirky-looking succulents that every gardener should try. These plants are particularly great for beginners since they can survive and thrive with minimum maintenance. They also play a critical role in cleaning the air and have highly regarded medicinal properties.

Furthermore, propagating these succulents is super easy. With a little bit of patience, you can quickly turn one plant into a huge collection to give to your guests, friends, and family members as gifts.

So, how do you propagate aloe vera? Propagating an aloe vera plant can be from leaf cuttings, germinating seeds, or suckers commonly referred to as pups. The easiest propagation method with the highest success rate is propagating from suckers.  If you try to propagate an aloe vera plant from a cutting placed in water, the cutting may rot before it roots. Similarly, chances of cutting rooting successfully in the potting mix are still slim. Growing the plant from a seed takes a lot of time.

This blog post discusses everything you need to know about propagating aloe vera plants and how to take care of your newly propagated plants. Read on to find out everything you need to know.

A Brief Overview of the Aloe Vera Plant

Before discussing the different propagation techniques, let us find some background information about this incredible succulent. Aloe vera plant has traditionally been used as a great source of herbal medicine.

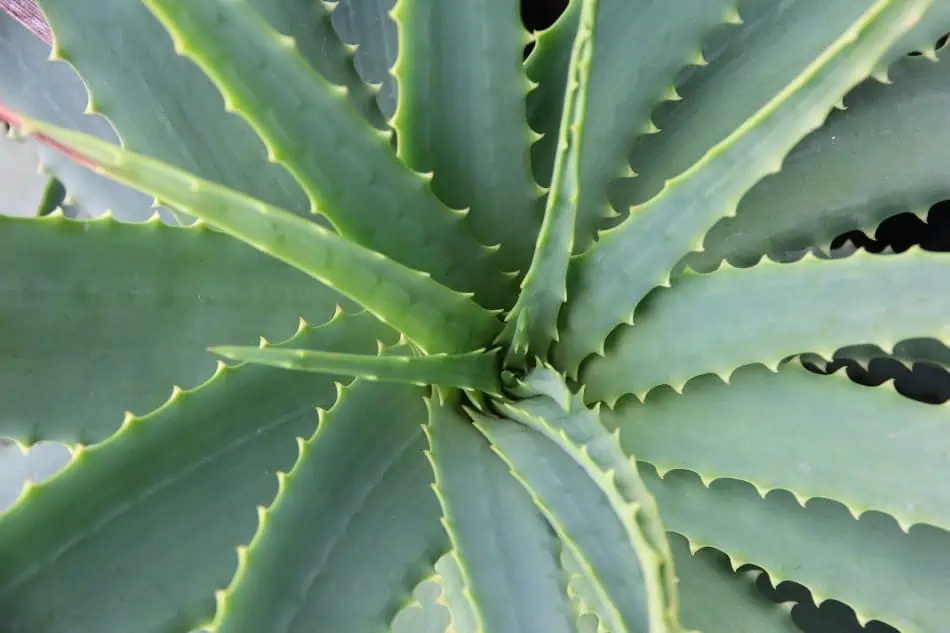
Aloe Vera is one of the most popular succulents used as an excellent source of herbal medicine.

The plant is currently attracting significant interest globally due to its bioactive chemicals extracted from the leaves.

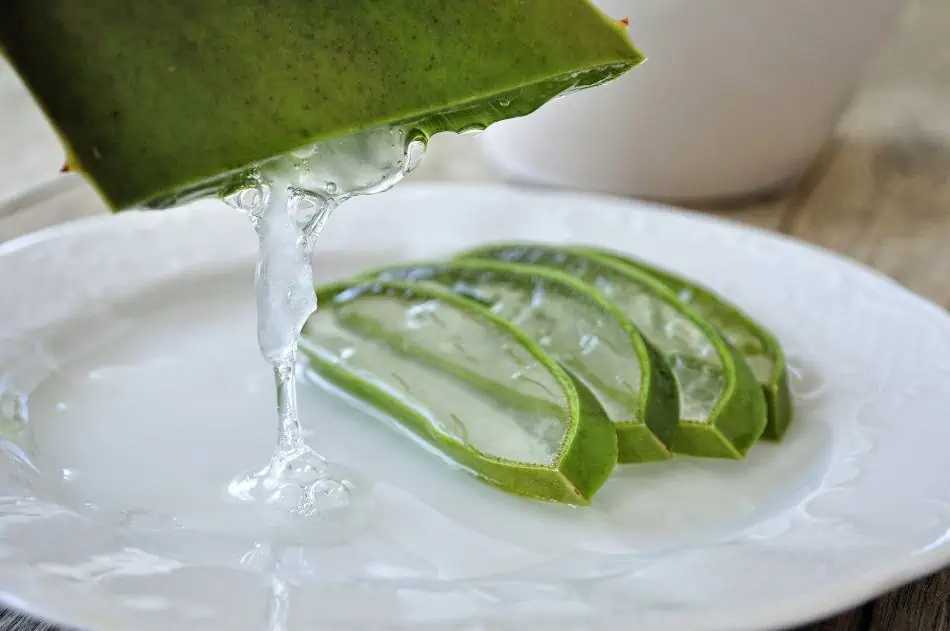
These chemicals are used in industrial preparations for food, cosmetic, and pharmaceutical products. Its leaf mesophyll, referred to as aloe gel, is also subject to industrial processing to produce derivatives.

Aloe vera is native to tropical and sub-tropical parts of Africa, but it also does well in the relatively warm climates of Europe, America, and Asia.

Aloe Vera Plant Propagation Techniques

As mentioned earlier, aloe vera plants can be propagated in three ways; propagation from suckers, leaf cuttings, or germinating seed.   Let us find out how to perform each one of them.

1. How to Propagate Aloe Vera Using Pups

Propagation using pups is the easiest and most common way to propagate an aloe vera plant. As an aloe plant matures, it starts to produce offsets or offshoots referred to as pups. These offshoots usually depend on the mother plant for water and other nutrients until it develops its own root system.

The result is a single-parent aloe vera plant growing outwards into a beautiful clump of many connected plants, each with its own fully functional root system.

As an Aloe Vera matures, it produces offsets (pups) that allow you to easily propagate the plant.

Aloe plants usually don’t produce pups until they are a few years old. Generally, the older and healthier your plant is, the better it will produce health offshoots.

To encourage your plant to produce pups, consider providing it with plenty of sunlight. You should also feed it with some succulent fertilizer during spring or early summer.

To propagate an aloe plant from pups, you simply have to divide the plant. The division can be done at any time of the year but yields better results during spring or early summer.

The Process

Before you start the process of division and potting, make sure you have the following supplies:

  • At least one healthy aloe vera plant with plenty of pups.
  • A sharp, clean knife to cut with.
  • Well draining succulent soil, preferably a succulent blend.
  • A pot or container with drainage holes.
  • A rooting hormone.
  • A trowel.

Carefully search for pups around the aloe vera plant. In most cases, they will be on the stem, while some will be hiding at the base of the parent plant. Sometimes, they may be obscured by the large leaves of the mother plant.

Take the entire plant, including pups, out of the pot and brush off as much soil as possible. If you had planted it in your home garden, use a trowel to carefully loosen the potting mix and unearth the entire plant along with the pups.

Now untangle the pups from the mother plant and if needed, use a sharp knife to cut them free. Once you have separated them from the mother plant, carefully examine them for any signs of root damage. Get rid of any unhealthy or rotten options while keeping as much of the roots as possible.

Take all pups with minimal root damage and dip the root end into a rooting hormone solution to boost new root development. The primary purpose of the rooting hormone is to help with root development.

Now repot the pups in a new, well-draining potting mix. Don’t pack down the soil tightly because the roots require some breathing space.

Put the mother plant back in the growing pot and keep it dry for a few days before watering.  You can also use this opportunity to upgrade your pot to a relatively larger one.

Watering Baby Pups

Newly propagated aloe vera pups need to be watered a little bit more to help them root efficiently. However, you need to be careful not to overwater them because they can grow rot.

Ensure you only water the pups when the soil is completely dry. Depending on the temperature, light conditions, and soil properties, you may water your newly propagated pups anywhere from once a week to once every three weeks.

The biggest trick you need to know is to water when the soil is completely dry. If you overwater, your young plant may start turning white, brown, or shriveling.  All these are signs of root rot.

2. Propagating from Leaf Cuttings

While some people have had success propagating aloe plants from leaves, you need to know that a leaf may fail to form roots. Therefore, your chances of succeeding with this propagation method are relatively slim.

Aloe leaves have a lot of moisture, and most of them will rot before they root. You can increase your chances of succeeding by going with stem cutting instead of leaf-cutting.

Aloe Vera can be propagated using healthy leaf-cuttings that are at least 3 inches long.

Find a healthy leaf at least eight centimeters long and cut it at the base using a sharp knife. Try to cut it at a downward angle towards the main plant stem.

Place the leaf in a relatively warm place and give it some time for the cut part to callous. This can take a few days to one week. Callousing will protect the wound when you finally root the cutting.

Once the cutting has been calloused, find a pot with plenty of drainage holes at the bottom. Although aloe plants love water, they don’t like sitting in it. So, you should only aim to soak the soil and let all the excess water drain away.

Now fill your pot with an excellent succulent potting mix and dampen it with water. If you don’t have any good soil at hand, you can learn how to make your own soil here. The pH level of the soil should be between 6.0 and 8.0.

Carefully stick the cut side of the leaf into the soil. Ensure approximately one-third of your leaf is in the soil. You should also consider dipping the cut end into some rooting hormone first. If you don’t have a rooting hormone, dip it in honey or cinnamon.

3. Propagating Aloe Vera from Seed

If you have been growing aloe vera plants for a while, you might have noticed some varieties that flower pretty abundantly. Typically, a well-cared aloe plant can produce dozens of flowers that put on a spectacular show.

If you are growing your aloe plants outdoors and they flower, the flowers can be pollinated to produce seeds. You will see the seeds once the flowers have faded.

While propagating aloe plants from seeds is a lengthy process, it can be a fun project if you want to try something different.

Propagating an Aloe Vera from the seeds is a relatively lengthy process compared to other techniques.

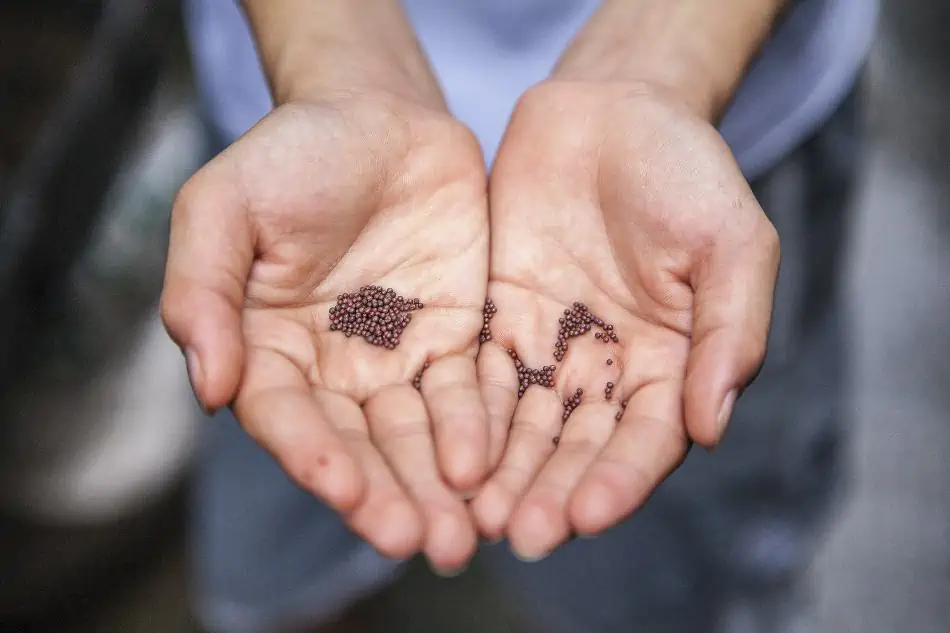
Crack the seed pods to reveal the tiny black seeds. Typically, your plant must be a few years old to produce quality seeds. Now fill your growing pot with a good potting mix and spread the seeds on top of the soil. Cover the seeds with a thin layer of potting mix.

Dampen the soil with water and position the pots in a light place without direct sunlight. The spot should also be relatively warm.

Moisten the soil daily and be patient. Sometimes, it can take several months for the seeds to start germinating. Once the seeds germinate and young aloe plants sprout out of the soil, you can switch to a normal watering schedule.

Should You Propagate Aloe Plants in Water or Soil?

Generally, aloe plants should be propagated in soil. This way, they can root faster and stand a good chance of avoiding root rot. However, if you love the general look of your indoor plants in glasses and vases, you are free to pop your aloe offshoots into one.

They can still do well when propagated in water as long as only the exposed stem is submerged. You can choose to leave the plant in the vase or glass indefinitely or transfer it into a growing container once you feel like it is the right time to do so.

How Do I Take Care of Newly Propagated Aloe Vera Plant?

Now that you have successfully propagated your aloe vera, providing the young plant with proper care is crucial to ensure it thrives.

Select a pot with good drainage when transplanting your newly propagated aloe vera. Aloe vera prefers soil that is well-draining to prevent waterlogged roots. Use a cactus or succulent-specific potting mix or create one by combining regular potting soil with sand or perlite to improve drainage.

Place the young aloe vera in a spot with bright, indirect sunlight. Aloe vera loves sunlight but can get sunburned if exposed to intense, direct sunlight for extended periods. A sunny windowsill or a well-lit room should be ideal.

Always allow the soil to dry out completely before watering your young plant. Overwatering is one of the most common mistakes in aloe care that can lead to irreversible root rot. Water your plant sparingly, once every two or three weeks.

Reduce watering frequency further during winter because the plant goes into a semi-dormant state.

Keep the temperatures between 60°F to 80°F (15°C to 27°C) and avoid exposing your young plant to temperatures below 40°F (4°C) since it is susceptible to frost damage.

Although Aloe vera is generally resistant to pests, it’s essential to watch out for common pests such as mealybugs and spider mites. If you notice any infestations, isolate the plant promptly and treat it with insecticidal soap or neem oil.

When Is the Best Time to Propagate Aloe Vera?

Aloe vera can be propagated anytime, but some seasons are better suited than others. Generally, the best time to propagate your aloe vera is during spring or summer when the plant has enough energy to concentrate on rooting a viable offshoot.

Therefore, should you wish to have high success rates with your aloe propagation project, aim to do it during the warm months.

Although you can still propagate the plant during winter, bear in mind that the cold temperatures might slow its growth and even cause frost damage if exposed to extremely low temperatures.

Final Thought

That is it about propagating aloe vera plants. We hope you found this blog post informational and you are now ready to start expanding your aloe vera plant collection without spending money.

No matter your gardening experience, feel free to try out the different propagation methods outlined above and watch these succulents fill your home in a few months.

How to Choose the Right Pot for Your Jade Plant?

The jade plant, also known as the money tree, is an all-favorite indoor plant for many people thanks to its tree-like stems and gorgeous oval stems tinged with red at the edges and tips.  The plant can grow to greater heights and survive for many years in a standard pot. But selecting the right pot for your jade plant can be pretty challenging, especially if you are a beginner.

So, how do you choose the right pot for your jade plant? The most important things you need to consider when choosing the right pot for your jade plant are size, drainage, and the material used to make the pot. Typically, you want a pot that isn’t too large or too small for your plant, has proper drainage, and is made of either clay or terracotta. Many gardeners prefer using a clay pot because it absorbs moisture pretty quickly and helps the soil dry out, making it ideal for the jade plant to thrive.

This blog post discusses everything you need to know about choosing the right pot for your jade plant.  So, let us get started.

1. Find a Pot with a Stable Base

One of the most important factors to consider when choosing the right pot for your jade plant is the base of the pot. This is because jade plants can grow to greater heights and form a beautiful bush with their leaves.

As the leaves and stems become heavier, the growing pot should be able to sustain the weight. Sometimes, the plant can grow into small trees or shrubs reaching a height of up to eight feet. If your container isn’t sturdy enough, it will most likely tip over, causing significant damage to your plant.

Jade plant on a clay pot.
You should plant your Jade Plant in a pot with a sturdy base to prevent the succulent from tipping over.

Although pruning is essential in the growing process, you shouldn’t take any chances with the base of the pot you choose. Sometimes, you might fail to prune on time and only regret when the worst has already happened. 

Furthermore, the primary goal of pruning is to promote the growth of both roots and stems. So, the wider the base of the container, the better.

2. Choose a Pot with Excellent Drainage

The most important rule of thumb when picking the right pot for your jade plant is to concentrate on good drainage. This is true whether you are were planning on positioning your potted plant inside or outside the house.  It still applies even if you plan to mix the two- inside during winter and outside during summer.

It is still true whether you choose to position your plant in indirect sunlight or direct sunlight. Without proper drainage, your jade plant is as good as dead.

While you can compromise a little bit on this rule, especially if you have a perfect pot already picked out for your plant, don’t ignore it if you are still actively looking for a growing container in the market.

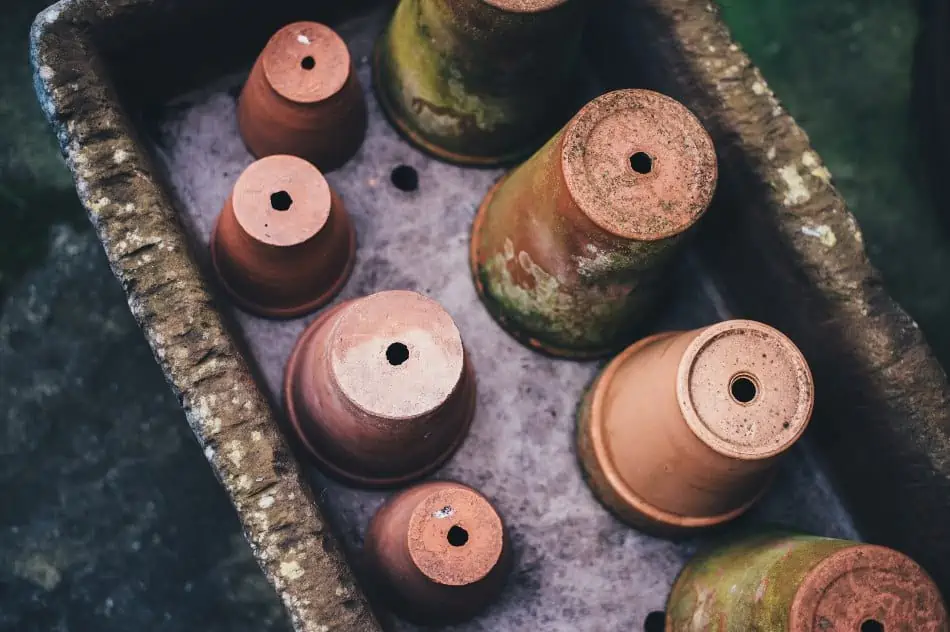
Clay pots with holes.
An ideal pot for your Jade Plant should feature sufficient drainage holes.

A container with plenty of drainage holes at the bottom will give your jade plant the best chance of surviving and thriving.

Keep in mind that root rot is common among jade plants that remain submerged in an overwatered environment. So, if the container isn’t draining out the excess water pretty fast, your plant will be in huge trouble.

Why Is Drainage So Important When Choosing a Pot for Your Jade Plant?

Well, the answer is pretty straightforward: proper drainage allows excess water to flow directly out of the container and not collect at the bottom.

If you allow water to collect at the bottom of the container, there is a high chance that your plant’s roots will begin to rot. The plant may also absorb too much water and start dying slowly.

Remember that jade plants are succulents and these plants are not used to getting too much water in their natural environment. Most of them grow in parts of the world that get low and sporadic rainfalls. There is plenty of sunlight on most days, and when it rains, it rains relatively heavily.

As a result, when you water succulents, they tend to absorb as much water as they can, and as quickly as possible, just in case it will be long before it rains again.

So, don’t be tempted into thinking that a jade plant that is no longer at the whims of nature is different. Never be tempted to water your plant frequently or not give it enough time to absorb water during watering session.

Instead, let the water soak the plant and let the excess water drain out through the drainage holes. In that case, you will be helping your plant feel like it is in its natural environment

With plenty of drainage holes at the bottom of the pot, the excess water is forced to spill out while allowing your plant to absorb as much water as it requires. This gives it enough time to use up the stored water before it requires watering again.

In simple terms, good drainage will always give you happy succulents, and the best way to achieve good drainage is by using a container with plenty of drainage holes at the bottom.

3. The Pot Size

Choosing the right pot for your jade plant goes beyond drainage and a sturdy base. It also includes finding a container that is the right size with the right features for your plant.

Jade plant in a black pot.
You want a container approximately one or two inches larger than the plant’s root ball.

Generally, jade plants have a small root system, so you should not grow them in a large pot. A large container will only increase the soil volume around the plant’s root system and hold much more moisture than your plant requires. The excess moisture will only increase the likelihood of root rot problems.

So, how large should the growing pot be? Typically, you want a container approximately one or two inches larger than the plant’s root ball. You should also ensure the pot has at least one drainage hole at the base to drain off the excess water.

4. Material

Different pots are made of different materials. You will find plant pots made of clay, terracotta, ceramic, and even plastic. So, what is the best pot material for a jade plant?

There is no good or bad material as long as the pot has plenty of drainage holes at the base. Therefore, the material you choose will most likely be out of your personal preference.

However, the two most commonly used materials are clay and terracotta. Most gardeners prefer clay because it absorbs moisture quickly, helping the potting mix dry out, which is perfect for your jade plant. The best place to position clay pots will be on your windowsills.

Jade plant exposed to sunlight.
Pots made of clay or terracotta are among the best options for planting a Jade Plant.

Unfinished terracotta also works better because it offers a second drying effect during watering since the clay wicks from the soil, creating porous spaces that allow water to evaporate pretty quickly due to the terracotta material being exposed on the outside to sun, wind, or air.

The effect is also beneficial to your plant in other ways because it allows more airflow to the roots, which minimizes the risk of soil disease and root rot. The material is also heavy, which prevents your plant from falling over.

5. Heavy vs. Light Pots

Some people always wonder whether they should go for a heavy or relatively light pot for their jade plants. Generally, you want a slightly heavy container to prevent your plant from toppling over when it reaches a certain height.

As long the pot has plenty of drainage holes, your plant will be happy, and there will be no chance of it falling over when it grows into a small tree or shrub.

If you come across a slightly lighter container that looks so good to you, you don’t want to leave it. You can still acquire it and get creative to make it a little bit heavier.

Freshly water jade plant in a white pot.
A relatively heavy pot will prevent your Jade Plant from toppling over.

For instance, if the container is made out of plastic, you can add a few small rocks made for landscaping gravel to the bottom of the container to make it heavier. The gravel will also aid in good drainage.

The weight of the stones will go a long way in helping weigh down your jade plant which can be beneficial when it comes to growing your jade in lighter containers since it can become top-heavy pretty quickly.

Making a light pot slightly heavier with landscaping stones is also helpful if you have pets that like toppling things over.  This is an excellent tip that many people don’t know which always makes them avoid light pots during potting and repotting.

Consider Pot Depth

The right size of the pot is also closely tied to its depth. Typically, Jade plants require deep pots to support their root systems properly. A wide, shallow container won’t be ideal for a jade plant since it will quickly outgrow it.

Therefore, the best thing to do is opt for a deeper pot with short sides instead of going for a wider, shallow one. This pot offers more support to your plant and encourages deeper root penetration and better drainage.

You can add some rocks to the bottom of a shallow pot to give your jade more stability when making it slightly heavier using landscaping stones, as discussed above.

This is an excellent trick that can save you from buying a new deep pot for your Jade plant. This technique will also help your jade plant grow and thrive.

There is also another reason you need a deep pot. The foliage of a jade plant usually makes it top-heavy. It means that the succulent can easily become too heavy for a shallow pot, making it unstable as it grows.

The best thing is that deep containers come with plenty of drainage holes, making them even more perfect for succulents like the jade plant.

Go for the Right Color and Texture

Now that you understand how your jade pot should be, the fun part starts. There are two approaches to choosing your pot’s color and texture based on what you feel is right for your jade.

You can either go with the classic terracotta look to let the beautiful leaves of your jade plant stand out or get creative by opting for a brightly colored pot that complements your plant and adds an interesting contrast with its deep green hues.

Remember that glazed pots are better than unglazed ones because they are more durable, and their colors will last longer.

Final thought

The journey of growing jade plants successfully usually begins with finding the right pot for your plant.

While the other activities, such as watering and feeding, may seem overwhelming and tricky, almost half of your problems will be solved if you manage to find the right pot for your plant.

That is why we have done the hard work for you.  We hope you found this guide helpful and will help you make an informed decision when shopping for the best pot for your jade plant.

What Kind of Plants Grow Well In a Terrarium?

Let’s kick start this discussion by understanding what a terrarium is and how does it operate. In short, a terrarium can be defined as a small miniature garden set up in transparent sealed jars or bottles—the plants and soil release water vapor. The vapor collects on the walls of the container and slowly runs down to the soil, essentially recycling the water. People choose terrariums for different reasons. Below are some top reasons:

  • They fit in small spaces-Individuals with small spaces that love gardens can easily set up a simple garden.
  • They are generally low maintenance. Terrariums require little care as they are self-sufficient and self-contained. Most can go for months in between watering.
  • Terrariums are attractive and can be one of the best ways of enhancing the beauty of a business or home environment.

You can purchase readymade Terrariums or come up with your own using readily available local materials. 

The Best Plants To Grow In a Terrarium

As mentioned above, terrariums operate through evaporation and condensation. The soil and the plant inside the terrarium release water in the form of vapor. The vapor then condenses on the container walls. Through this, plants can self-nourish for a long time. 

Terrariums come in different shapes and sizes. Before jumping to the best list of plants, it’s important to mention that foliage or slow-growing plants are recommended when building a terrarium. Another tip is to choose plants that will fit easily to the size and dimensions of the terrarium. 

When creating a terrarium, consider getting foliage or slow-growing plants.

Examples of plants that grow well in Terrariums include:

Nerve Plant 

Originating in the rainforests of Peru, this tropical plant is most commonly characterized by patterned leaves that are bright green, with silvery-white veins, and you can readily find varieties with white, pink, and green veins.

Additionally, ensure the soil is regularly and evenly watered for this plant to grow properly. The nerve plant can grow 3-6 inches tall and should be placed in bright indirect light. The best temperature range is 60-80 degrees Fahrenheit and high humidity between 60-90%.

When growing the Nerve Plant in a terrarium, make sure you water the soil evenly.

Polka Dot Plant

The Polka Dot Plant finds its place of origin in Madagascar. Showcasing vivid leaves with unique speckled patterning, ever so popular, this plant can be found in a wide variety of colors which makes this a statement plant for any terrarium. 

The plant enjoys bright indirect light but can do well in low-light situations. The plant requires high humidity of 60-90%, a temperature of 60-80 degrees Fahrenheit, and like the Nerve Plant, they require regular and even moisture. 

Finally, the Polka Dot Plant can grow quite tall, anywhere from 10 to 20 inches. Regular trimming might be necessary if your terrarium is limited in size.

Aluminum Plant

The Aluminum plant is native to the tropical Southeast Asian rainforests. It is often referred to as Watermelon Pilea. This plant is mainly desired for its attractive oval, slightly jagged medium green leaves that show almost iridescent white markings. This is what makes the plant beautiful.

On very rare occasions, the plant has produced tiny, off-white flowers in color and rather plain-looking. Given the proper care, the plant is capable of growing up to 12 inches.

The Aluminum Plant should be placed in dry and well-drained soil. The desirable climate conditions are a humidity of 67%, a temperature of 67 degrees Fahrenheit.

Peperomia

Peperomia plant is a slow grower and an excellent choice for a closed sealed terrarium. The plant displays a couple of common colors on its leaves. They either have green leaves or leaves that are blushed with some red.

The plant rarely produces eye-appealing flower spikes that add an excellent color scheme to the terrarium.

Placement should be in low to bright indirect light areas. The plant requires relatively little water, and it’s recommended not to over water.

As Peperomia is a slow-growing plant, it is an ideal choice for a terrarium.

African Violets 

The African Violet originates in eastern tropical Africa, in Tanzania and Kenya. The word ‘Violet’ comes from the Latin name ‘Viola.’ The plant thrives in humid conditions, making it an excellent choice for terrariums. 

The African Violets come in different colors burgundy, purple, pink, white, and even bi-colored. Additionally, these plants come in varying sizes and can accommodate different sizes of terrariums.

The plants do not do well in standing water. To avoid this, you should layer sand, moss, or gravel at the bottom of the terrarium.

African violets let you introduce some color into green terrariums, and the terrarium provides a less challenging way to grow these plants.

Growing African Violets will introduce some vibrant colors into your green terrarium.

Materials Needed For Setting Up a Terrarium 

You can easily set up your terrarium using materials found in most hardware stores. You can make a basic terrarium in less than an hour using inexpensive material. Here’s what you’ll need: 

  • Rocks and soil are used for the bottom. The rock material can be sea glass, marbles, or small crushed stones. Any of these materials encourage drainage away from the roots of your plants. For the soil, choose a sterile potting mix.
  • A glass container is preferred—select the size of container that can accommodate materials and plants. Plastic containers can also be used as substitutes for glass containers. The container should not have any holes on the bottom. A top is optional. 
  • Sheet moss or Sphagnum moss should be used. This material ensures the terrarium soil doesn’t fall into the rock layer. 
  • Paper towels to wipe down the glass in the terrarium to prevent foul odors or mold growth. 
  • Long sharp scissors are required to trim the plants and adjust the soil or rocks as needed.
  • Activated charcoal. This can be found at a nursery or pet supply store. 

Small plants are recommended when setting up your basic terrarium. Tall or wide plants require larger space inside the terrarium and may not be a good choice for a person’s first terrarium.

How to set up your terrarium

Terrariums allow you to display beautiful slow-growing plants. In most instances, the enclosed small garden is stored indoors. Start this process by picking the right plant, depending on your ecosystem. Your ecosystem can be either humid or dry.

Form a bottom layer of rocks, preferably crushed stones, to create a drainage layer. The size of the bottom of the terrarium determines the number of stones you will use. Start with about a two-inch layer or so. 

Next, use a large spoon to about ¼ to a ½-inch layer of activated charcoal. This will help drainage and help to control odors.

Next up, you’ll need to layer in some Sphagnum moss or Sheet moss. This will keep the next layer, the potting soil, from mixing in. Additionally, it adds a visual aspect to your terrarium.

Finally, add sterile potting soil on top of the moss. Ensure there is enough soil so that the roots of the plant are comfortably seated in the mix. An important word of caution, do not use a mixture that contains fertilizer. Terrarium plants do not need extra fertilizer.

Use a long scissor or bladed instrument of some kind to make a hole to accommodate the roots before gently placing your plant inside the soil. Flatten the layers to ensure the plant roots are well seated. Always space the plants to allow for growth. Never cramp your plants inside the terrarium.

There are instances where you are placing more than one plant inside your terrarium. In such situations, plant long plants first.

Tips on How to make Your Terrarium Thrive for Long

Your terrarium can thrive for a long time. But, first, understand what you have been doing wrong and familiarize yourself with tips on making it thrive. Below are common mistakes people make while managing their terrarium:

  • Dirty glass is a problem, so regularly clean your terrarium inside glass surfaces, especially if it is foggy or cloudy. A dirty or foggy glass limits the light reaching your plants. Paper towels are the recommended choice for cleaning. Avoid cleaning chemicals because they might harm your plant.
  •  Choosing the wrong plants for your terrarium is another problem to avoid. You can have either an open or closed terrarium. Therefore, choose plants that can survive on the selected terrarium. It ensures a plant thrives for a long time.   
  • Over-watering your plants is a widespread problem. Avoid direct watering. Instead, use a spray bottle. Paper towels should be used to get rid of any excess water in your terrarium. 
  • Not removing dying plants promptly. Plants inside your terrarium can become infected. Be watchful and remove them immediately before they infect other plants. A long spoon or chopsticks are recommended when uprooting a dying plant in your terrarium.
  • Allowing your plants to overgrow. Never let your plants overgrow in your glass garden. Keep your terrarium neat at all times through trimming. You can also prune the plant’s roots whenever they start overgrowing. 
  • Trying out succulents in closed terrariums. This is another common mistake people make. Succulent plants can’t survive in a closed terrarium for long. They thrive well in low moisture and high light. Unfortunately, a closed terrarium has high humidity, which makes it unfavorable for succulent plants. 
  • Over-fertilizing your terrarium. Most terrarium plants don’t require fertilizer. Fertilizer increases the growth speed of plants, and overgrown plants can’t thrive well in a terrarium. 

Be careful when selecting plants for your terrarium. First, determine if your location favors an open or closed terrarium. This will influence the types of plants to choose. Next, choose from the above list of plants that can thrive well in a terrarium. Finally, understand the requirements of a plant before making your choice. For example, some plants thrive under low light, whereas others require medium light.

Identify a perfect location to place your terrarium. It should be away from heat sources as they will kill your plants quickly. Be thoughtful and creative when setting up your terrarium, as it will give out much beauty for all to enjoy.

8 Golden Rules for Watering an Agave Plant

Agave plants don’t just look tough. They withstand most types of extreme weather, from windstorms to heatwaves; so follow rules when Watering an Agave Plant. An agave plant grows anywhere and does well, even during colder or hot temperatures. So, what is the best solution? Follow the below rules when Watering an Agave Plant.

An agave plant can grow in neglect. The 8 Rules for Watering an Agave Plant highlighted in this article will help you understand what the plant needs. An agave plant in a container requires more frequent watering than those in the ground. It is an adaptable plant, and the rules that apply in one area may not work in another. 

This article is essential as it cuts across most species of the agave plant.

1. Stop Watering an Agave Plant Frequently

Don’t put an agave plant on the same irrigation cycle as other plants on your landscape. The plant does not like frequent watering as you would do with fruits or other flowers. Agaves plants will even require little attention to thrive than the other plants.

Water the Agave plant 4-5 days for the first two months after being planted. After the plant is well established, agaves need to be watered 2-3 times a month. It varies depending on the season, as discussed later in the article. Watering them less frequently causes the water to dry out and start using the stored internal water.

After the Agave plant is well established, you should water it 2-3 times a month.

Most agave plant species adapt to arid conditions and do well at home if subjected to the same conditions. Watering the plant less frequently ensures that the plant is not overwatered.  Immersing the Agave plant in the water attracts root rot.

During watering, the plant needs plenty of water immediately, and then no water for a long time. The plant does not flourish under small sips of water. Taking in a lot of water at once then experiencing a prolonged drought makes the plant happy.

2. Maintain Watering an Agave Plant Early in the Morning

Water your Agave plant in the morning when it’s cool and the sun less intense. Morning time allows the water to run down the soil and reach the plant’s roots without loss to evaporation. Watering an Agave Plant in the morning ensures the water is available to the plant throughout the day. The plant manages the rising temperatures in the day.

Watering an Agave Plant early is preferred as the plant can dry out before the sun goes down. Watering in the afternoon makes the plant water evaporate instead of absorbing into the roots. On the other hand, soaking it in the evening may have water sitting for too long. It is a recipe for fungal growth.

Due to the low rate of evaporation in the morning, the soil can maintain moisture for a long time. It gives the plant enough time to absorb water. As the sun rises, excess water evaporates, making it a natural way of avoiding overwatering the plant.

3. Water the Plant in Soil that Dries Slowly but Drains Quickly

Planting an agave plant in a container does not only qualify the plant as a houseplant, but it is also suitable for watering. In a container, the plant needs soil that drains quickly but dries slowly. For outdoor containers, you can make a good soil mixture by taking equal parts of compost; garden soil or potting mix; and either coarse sand, pumice, or gravel. In most of the agave species, peat moss is undesirable for growing the plant.

You should plant your Agave in a potting mix that dries slowly but drains quickly.

You can use a potting mix combined with coarse sand, pumice, and gravel for indoor-grown agave. Regardless of where you plant the agave, make sure that the clown of the agave plant is above the soil line. If the clown is below the soil, watering will cause the plant to have crown rot, an infection detrimental to agave plants.

4. Never Do Overhead Watering.

Agave plants should never be watered overhead. A slow trickle of water right at the root zone can prevent the water from flashing into the leaves, which may lead to the spread of fungal spores. It will also prevent the crown rot if water pools up in the crown of the plant. When the plant is watered overhead, in extreme cases, the leaves may entirely turn gray or black and shrivel right from where they grow out of the clown. Red fungal spores may be visible near the plant’s base.

You should avoid watering your Agave plant overhead.

It is essential to regularly inspect the plant for any sign of rot, significantly if not growing in optimal conditions. If the rot is caught early, the rot can be controlled with selective pruning and fungicides treatment. If the rot is extreme, it may be necessary to dig out the whole plant, remove all the soils from the roots, prune all the decay and replant it in a new location and with new watering habits.

5. Mind the Seasons When Watering an Agave Plant

Mature agave plants are very drought tolerant. However, when watering the plant, climatic seasons are crucial to determining how to water the plant. In different seasons of the year, the plant growth rate is different, and so is the water uptake by the plant.

Agave plant growth occurs mainly during spring and fall. The plant needs to be watered thoroughly when the soil is dry. The plant should be watered sparingly about once a month during the winter climate, where growth is somehow reduced.

Watering more often during the winter season keeps the plant moist which encourages fungal root rot. During the summer season, the plant requires more water as the rate of evaporation is high. The plants at this climactic season should be often checked and watered more often to avoid drying out.  

6. Don’t Set a Watering Schedule

One of the major mistakes most gardeners make is sticking to an exact schedule for watering, so don’t do this for succulent plants like agave plants. Watering precisely on the same day every time will do more harm to the plant than good. For agave plants, don’t water when the surface of the soil is dry, but 2-inches deep in the soil is proper. Remember that you can always determine this by just dipping your finger.

Instead of setting a fixed watering schedule, water your Agave once the soil is dry.

7. How much Water is too much?

Different agave plant species want a varying amount of water. Plant size will determine the amount of water the plant requires. In lesser pots that hold less soil, soil tends to dry out faster than the soil in a bigger pot that has more soil.

If you planted your agave plant in a large pot, it will need more water than in a small pot. If the plant is more prominent, on the other hand, it will also require more water than a small plant. Plant age also determines how much is too much.

Watering a Young Agave Plant

For a young growing plant, watering it frequently is essential for growth. For this plant, do a semi-soak which involves placing the potted plant in a tray with soil and pouring water over until the tray is 1/4 of an inch of water. Allow the plant to sit in the tray for 8 hours before draining the water.

 The old plant has well adapted to the dry conditions. The plant may not require frequent watering. When Watering an Agave Plant that is young, pour the water and allow it to sink in. Repeat the process until it is drenched. Let the plant dry thoroughly before watering again. 

8. Identify Signs of UnderWatering

Agave plants will not put on too much demand on water. After leaving the plant for a long time, it will still be healthy, but the plant may show some signs that it is thirsty. Underwatering the plant will affect the absorption of minerals in the plant, which is why it needs to be taken care of.

When the plant is underwatered for long, the leaves will start to wilt. As the plants’ water storage continues to run down, the plant begins to have wrinkling and weak leaves. The more severe the deprivation, the more the plant starts to look limp and withered.

You will also notice dried-up brown leaves and dead leaves which start at the bottom of the plant. As it starts to lose its water stored water, the underside of the leaves starts to dry out. Sometimes the plant might start dropping off leaves to conserve energy and water for survival.

Leaves may look flat and feels soft when touched because they will have lost their plumpness and firmness. The best thing is that it is easy to treat an underwatered agave plant than an overwatered one. After a good watering or two, the plant will perk up.

Bottom Line

When treating water problems, the worst you can do is to panic and start Watering an Agave Plant using excessive water and too often which is wrong. If you are unsure if your plant is parched before watering, it is better to wait for an extra day because treating Underwatered is easier than overwatered plants. Agave plant water requirements are the easiest because the plant is excellent resistant and can do well in neglect.

Sansevieria Care Essential: 11 Tips for beginners

If you are new to gardening or simply looking for an easy-care houseplant, sansevieria is the perfect plant for you. These plants are some of the toughest plants you can get, and they are popular because of their adaptability to most growing conditions. You need to know about proper sansevieria care Essential. Whether you want to plant it indoors, on the balcony, or in your garden, these hardy plants can put up with almost everything.

Sansevieria plants are easy to grow, but there are a few things that you need to know as a beginner. These essential tips will help you care well for this plant to its maturity. We will discuss the 11 most fundamental Sansevieria Care Essential tips that have been proven and worked well when applied to this plant. As you keep on reading these tips, you will realize how low maintenance these plants need.

If you want to grow this plant and enjoy the flowering beauty, and quality air in your room or balcony, the following tips are a MUST DO.

1. Why Soil is a Sansevieria Care Essential

A snake plant is easy to grow because of its soil requirements. They do well in a free-draining soil mix. Always use a free-draining soil mix, because the Sansevieria plant is prone to rot if the roots are dipped for long in the water. You can grow the plant in commercial succulent soil or cactus soil.

Free-draining soil is a must for growing a healthy Snake Plant.

This commercial soil has added sand that helps in drainage. You can also decide to make your mix of soil, and the plant will still grow well. An accessible blend will require:
  1. 1 part potting mix or garden soil
  2. 1 part peat moss or coconut coir
  3. Two parts of sand or perlite

This mixture will ensure maximum water drain from the container and provide a nutritious planting medium for the plant, allowing it to glow.

2. Choose the Correct Pot.

Different pots have different looks and different functions. Example of common materials used for potting includes terracotta, plastic, ceramic or wood.

As a beginner, there is something pretty in combining this gorgeous plant with a beautiful and proper working pot. Choose a pot that has suitable drainage holes. They are prone to overwater, and they may die from root rot. A terracotta pot will work well with you.

Choose a pot considering the place you will grow the plant. If the plant is to be planted outdoor, you may need to choose a pot that will withstand adverse conditions like wind. If you want to plant it on a desk, you may need a decorative pot.   

A correct pot will only leave 2 inches of space between the pot and the plant. Not planting a snake plant in that kind of pot makes the plant susceptible to rot.

3. Proper Lighting is A Sansevieria Care Essential.

Snake plants should always get enough light. Droopy and sad-looking leaves are always the effects of lack of enough light. Snake plant prefers indirect but steady light with some direct sunlight once in a while. However, they also tend to do well in shady corners or other low-light areas of your home.

Sansevieria requires plenty of light, but you should not expose the plant to too much direct sunlight.

Too much sunlight may make the plant susceptible to leaf burn, but only in very severe cases will the leaf burn cause any long-term damage. During the winters, ensure that you protect the plant from drafty windows. Lack of light for a long time can make a plant die from chlorosis.

4. Know How to Water Your Plant

Do not water your plant so frequently. Let the soil dry before watering. To know when it’s time to water, don’t rely on the appearance of the surface of the soil. Instead, stick your finger 2 inches into the soil and feel the moisture.

When watering the snake plant, ensure that you water it at the bottom of the pot. This encourages the roots to grow downwards and reduces the splash of water to the leaves. Watering from the bottom will also stabilize the plant’s thick, tall leaves supported by strong roots.

5. Always Monitor Temperature and the Humidity Levels

Snake plant is a surviving plant that will tolerate fluctuating temperature, but not too cold or too hot. An optimum room temperature of 16-320C is most favorable for the plant. At this temperature, the plant will grow tremendously.

In cold conditions, the plant develops mushy white areas to the leaves, which may occur 1-4 weeks after exposure to cold. During the winter season, get the plant from outdoors to indoors to prevent the plant from dying.

6. Fertilizer

Snake plants do not need a lot of fertilizer. If need be, it should be done during the spring or the summer season. During the winter season, the plant is at rest; hence fertilizing should be avoided. It is also essential to ensure that the plant is not under stress during fertilizing.

You should fertilize your Snake Plant during spring or summer months.

How often to fertilize the plant, depends on several factors. When fertilizing, use a composed 10-10-10 or 20-20-20 fertilizer for proper growth. It is recommended that you apply half of the dose of the total strength to avoid over-fertilization. These factors include:

  • Size of the plant and the pot. The larger the pot or the plant, the higher the use of fertilizer.
  • The type of fertilizer used.

In a nutshell, most snake plants are fertilized after 4-6 weeks and only during the growing seasons.

7.  Pruning

Pruning is essential as it encourages new growth. To prune, use sterilized pruning shears or a sharp knife. Remove leaves at the soil line or cut off damaged mature leaves and leave the developing leaves to grow. Pruning is best done during the growing season as new leaves can grow.

Pruning the plant during the off-season may make it stressed; hence it is best done when the plant is healthy. Pruning is also done to control the height of the snake plant. To do this, cut the tall leaves carefully and leave the rest. Also, get rid of spoilt leaves.

8. Sansevieria Care Essential to Propagate a Snake Plant

You can quickly multiply your sansevieria plant for your home as a gift to share with friends because; these plants are incredible to propagate. There are two ways to propagate the plant.

a.  Propagate leaf cutting in water

Cut a healthy sansevieria plant leaf near its base. Make a notched upside-down V cut at the bottom and place it in a clean jar of water, which should be slightly above the V cut. In about 3-5 weeks, you will see roots growing from the leaf-cutting. You can transplant it into the soil or keep it growing in the water.

b.    Propagate leaf-cutting in soil as a Sansevieria Care Essential

Cut off a healthy sansevieria near its base and let the cut dry for 1-2 days. Plant the cutting in potting soil, water it regularly, and let it grow. Don’t let the soil get too dry or wet as the plant is still very young and sensitive.

9. Common Pests

The snake plant is hardy, and it is rarely infested with pests. Overwatering, high humidity, and air poor circulation are the root causes of pest infestation. Scales, gnats, spider mites, and whiteflies are the common pests attracted to this plant.

If the snake plant is already infested, the methods used depend on the severity of the infestation. You can mix alcohol with water and spray it to the plant or wipe the leaves with a solution to deter the problem. If the plant is severely infected, you should prune the infested leaves and leave the rest to grow.

10. Sansevieria Care Essential to Get Snake Plants to Bloom

Snake plant tends to flower annually when water, sun and humidity level are optimally met. During flowering, the snake plant develops creamy white, tubular flowers that look like lilies. Shifting the plant’s location from indoors to outdoors regularly can encourage blooming as the plant rarely blooms when kept indoors for long.

The coming of spring kicks the plant from its dormancy stage and spurs its growth. Its flowers are fragrant, and it blooms at night. After some time, these flowers drop on their own hence no need to cut them.

If water, sun, and humidity levels are optimal, the Snake Plant may produce flowers.

11. Don’t Overwater or Underwater the Plant.

There is nothing as dangerous as overwatering your plant. Overwatering is the fastest way to kill your plant. But because the snake plant is excellent, it will always tell by the look on its leaves. The leaves become heavy, squishy, and limp and sometimes may even fall. The leaves start to rot, therefore spread to other parts of the plant and require.
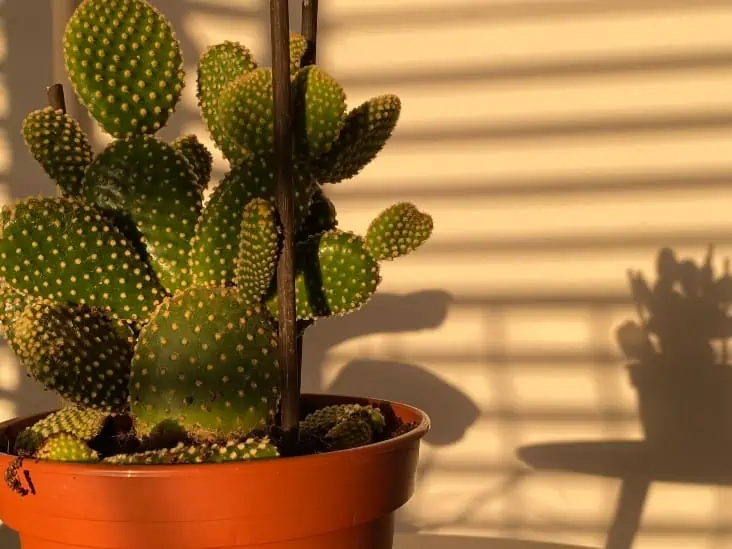
Though it is a dry plant, don’t let it go for long without water. Underwatering will show itself in the leaves. The leaves might bend over, become limp and die. The old leaves start becoming yellow, turn brown, and lastly, break.

Bottom Line

As I promised earlier, snake plants are almost comically simple to grow. You will encounter minor troubles with them, but they are plants that can thrive well even in neglect.

 All in all, watering the sansevieria plant is the most important thing. It may survive from other conditions, but not overwatering. Follow these Sansevieria Care Essential tips and be assured of a healthy snake plant in your house, office, or even outdoors.

Ultimate Guide: How to Care For Agave Plant?

An agave plant is a great addition to any garden. They are easy-to-care plants that will provide you with many years of beauty and enjoyment. However, you should know how to care for an agave plant to reach its full potential.

We will cover everything from how to plant your agave plant through the various ways you can maintain it once it’s fully grown.

You can get an agave pup or seed from a local plant store or your friend. Before planting your agave, it’s important to note that they should only be planted when they are at least 15 centimeters in height.

Also, here are some key tips to note for excellent caring of your agave plant.

Soil Type

Agave plants tolerate any soil but prefer soil that is rich in nutrients. A good mix to use for your agave plant would be a mixture of sand, potting soil, and compost, with at least 50% being organic material.

The soil should also be acidic or alkaline as agave plants prefer a pH level between six and seven. You can test your soil before planting to ensure that it is acidic or alkaline using a PH testing kit from your local gardening store.

The ideal soil for an Agave Plant should consist of sand, potting soil, and compost.

Water

It’s important not to overwater the plant when you first begin caring for it but not let it dry out. Once you have planted your agave plant, give the surrounding area a good soaking with lukewarm temperature water.

Always allow the soil to dry before watering again slowly. To test if your agave needs water, simply dig your finger into the soil to see how moist it is. If you feel that there’s moisture down below, then the chances are that your agave does not require any more watering.

Fertilizer

Once established, an agave plant will only need fertilizer once per year during its growing season, from early spring through autumn.

When applying fertilizer, use a standard fertilizer rich in potassium. Alternatively, you can use compost tea which will provide your plant with many essential nutrients and minerals.

You should fertilize your Agave every year during its growing season.

Light

A four to six hours of sunlight exposure is good for your agave, but it’s important to note that they do not like too much sunlight. 

If you live in a location where the sun shines brightly for most of the day, then make sure your agave plant is protected from harsh rays. You can either plant them under an overhang or move them into a partial shade.

Temperature and Humidity

Most agave plants can survive frost, but it’s important to note that the temperature should never drop below -15 degrees Celsius. If you are planting your agave during autumn or winter, be sure to protect it from frost using a cold frame.

Since most of us do not live in dry climates, humidity is an extremely important factor to consider when caring for an agave plant. Humidity is particularly important during the early stages of growth as this will ensure that your plant develops properly without any issues or deformities.

If you cannot provide enough humidity for your agave, it’s possible to use a humidifier indoors until spring arrives and conditions outdoors become more favorable.

Propagating Agave

Fully grown agave plants produce pups which are baby agave plants that can be removed once they become big enough. This is an inexpensive and easy method to add new plants while at the same time preventing the parent plant from becoming clogged with tiny ones.

Lastly, only remove the pups when the parent plant has started to die back or looks visibly unhealthy.

Propagating an Agave Plant from its pups is the easiest way to grow a new plant.

Step 1: You should only take a pup from the agave plant when it is at least 10 centimeters in size. You can use your finger to check the size of the pup if you’re not sure.

Step 2: Remove any leaves from beneath where you want to take the pup from.

Step 3: Gently bend down on either side where you want to take a pup and gently clasp the top portion.

Step 4: Lift both hands, which will cause a section of the plant to be completely uprooted with the pup at its base.

Step 5: Cut about an inch off from where you have removed the section of the plant that had been uprooted with a sharp knife.

This is also another way you can get new plants.

How to Grow Agave From Seed

Agaves are one of the most common succulents kept as house plants. It’s simple to grow agave from seed. You should use a seed-starting mix for a small pot with drainage holes filled halfway with it.

After that, scatter the agave seeds on top. It is important to find out whether you agave species seeds need light to germinate. If they do, do not cover the seeds. Gently moisten the soil before covering the container with plastic wrap.

When growing an Agave Plant from seeds, use a seed-starting potting mix and a container with drainage holes.

Keep the container in an area with lots of sunshine and above 20 degrees Celsius. You should have seedlings after a few weeks of sprouting and at this point, remove the plastic wrap.

Potting and Repotting Agave

Potting and repotting an agave is easy. First, find a pot that is just slightly larger than the size of the existing plant. This will make it easier to water and feed your plant while giving it room to grow.

Once you have found a pot for your plant, fill it with potting soil mix. The next step would be to take out any pups from the agave plant before you pot it up in its new home.

Now, replant any pups back into the ground in their original location while making sure they are deep enough to allow them to create roots. Lastly, move your agave to its new home to continue growing. 

Depending on the soil type, it is good to always pot and repot your agave plant after one or two years to allow room for growth.

How Much Watering and Feeding is Enough for Agave

For the first year of growth, you will want to ensure that your plant is kept moist at all times. Afterward, ensure it only gets water during dry spells, as overwatering can cause root rot or fungal infections.

Watering and Feeding Young Agave Plants

When it comes to young agave plants, the moisture level in the soil directly impacts their chance of survival. So make sure they are kept moist at all times. 

Again, when watering these seedlings during dry spells, water them sparingly as overwatering may cause root rot.

Watering and Feeding Older Agave Plants

Once agaves start flowering in late spring, you should stop feeding your plant anything until winter is over. The process of photosynthesis will use up most of the stored energy that your agave has built up. This means it will need to get fed during this period.

How to Care for Agave Plant in Pots

Agave plants in pots require more care than those that are planted in the ground. If you live in an area where it snows, make sure you protect your agave plant. You can cover it with a blanket during winter and add some mulch around its base to help insulate it from frost.

When caring for agave plants grown indoors or outdoors on patios, balconies, decks, or rooftops, always remember to consider that they do not like too much water. 

You should also avoid fertilizing the plant when it is in full sunlight. This may cause skin irritation or sunburns on your agave plant leaves.

Note the Common Problems With Agave Plant

Like any other plant, the agave plant also suffers from pests and other plant problems. Take a look at some:

Overwatering

The most common problem with agave plants is root rot which can be caused by overwatering. Always make sure its roots are kept dry, and its soil is not soggy. 

Overwatering also makes agave plant leaves turn yellow and wilt. Suppose your plant continues to wilt even after taking care of overwatering. It most likely may be suffering from root rot or fungal infections, which requires you to repot or transfer the agave in a clean potting mix.

Pests

Another common issue is the presence of mealybugs on your plant’s leaves, stems, and buds. These insects leave a sticky residue that causes infection if not carefully removed from the plant.

Whiteflies are another pest you may find on your agave plant, which will leave small yellowish spots on your plant’s leaves.

Easily Maintain Your Agave Plant

Agaves are not only easy to care for but also very rewarding once they reach maturity! When planting your agave plant, be sure to place it in a wide enough pot and deep enough for the roots if not planting it in your garden. Avoid using clay pots as they will dry out quickly and need more frequent watering. 

Keep an eye on where you live because if you have different plants together with agave, some plants can’t tolerate cold weather or hot sun exposure very well! If you’re looking for tips on how to care for an agave plant from start to finish, we’ve got what you need right here!

Does Snake Plant Require Direct Sunlight?

Snake plants are highly versatile, hardy, and indestructible, making them excellent for many gardeners. But because they are almost indestructible, it can be pretty difficult to know where to position them in your home and the kind of care to provide. One of the things that these plants are famous for is their high tolerance to darkness. But the big question is, do they require direct sunlight to survive? Let us find out.

So, does a snake plant require direct sunlight? Snake plants are highly adapted to growing in a wide range of lighting conditions. They can grow in both low light and bright direct/indirect sunlight. However, the general growth rate of your plant will vary greatly depending on the amount of light it receives. Under low lighting conditions, the snake plant tends to grow slow but thrive well under bright indirect sunlight. Be sure to watch for signs of leaf burn when you place your plant in direct sunlight.

In this blog post, we take a closer look at the snake plant lighting requirements and what you need to do to ensure your plant thrives. Read on to find out everything you need to know.

Why Is Light Important for a Snake Plant?

Light is the source of energy for all living things, including plants. The fact is that plants were never meant to be grown indoors. They are supposed to be cultivated outdoors where they can receive plenty of light.

Therefore, bringing these plants inside your house doesn’t change anything. They still need to receive plenty of light to manufacture their own food. All green plants depend on light and carbon dioxide to manufacture their own food through photosynthesis.

Just like other plants, Snake Plants require sunlight to produce their own food through photosynthesis.

The sugar produced during the process of photosynthesis acts as a great source of energy for the plant. Without adequate lighting conditions, the process of photosynthesis won’t be efficient. This will only result in stunted growth and a wide range of other problems for your snake plant.

Sunlight: The Ever-Moving Target

Plants need sunlight for photosynthesis. The availability of sufficient light can pose a seemingly insurmountable challenge for gardeners.

While you can adjust factors like soil quality, moisture levels, and pruning, the amount of sunlight remains a limiting factor.

Regardless of how careful you are, it is almost impossible to determine the amount of sunlight available to your plants.

While you do have the option to invest in artificial grow lights, these light sources designed to mimic sunlight can be both costly and complex to manage.

Sometimes, you may consider choosing houseplants based on the natural light levels within your home. But still, that doesn’t solve the light issues entirely because you never know when the climatic patterns will change.

For spaces with limited natural light, snake plants are an excellent choice.

Many plants struggle to thrive in areas with inadequate light, but snake plants flourish even in dim, neglected corners, adding a touch of greenery to such spaces.

Nevertheless, there are a few drawbacks associated with placing snake plants in areas with low light.

Some varieties of snake plants may lose their distinctive variegation if not exposed to sufficient sunlight. Additionally, snake plants will only produce flowers if exposed to bright indirect sunlight.

Direct vs. Indirect Light

Sometimes, differentiating between direct and indirect sunlight can be quite tricky, especially if you are a beginner. But you need to know how to differentiate the two to provide your snake plant with optimal light conditions.

Generally, when the light received by a plant is unfiltered and direct from the source, it is referred to as direct light. Such a type of light usually forms a distinct shadow that can easily be identified.

However, when the plant is positioned in a spot where direct light doesn’t fall on its foliage, it is referred to as indirect light. In this case, the light may be filtered through a sheer curtain or reflected through the floor or walls.

Can a Snake Plant Survive Direct Sunlight?

The truth is that a snake plant is a nearly indestructible succulent that can still thrive even if it is ignored. This makes it an excellent choice for beginners and people who don’t have much time to look after their plants.

The plant is so hardy that it can survive full-blown drought and a ton of other problems. Therefore, exposing your snake plant to direct sunlight shouldn’t be an issue at all.

These plants can survive direct sunlight, but they tend to thrive when placed in indirect sunlight. You need to keep in mind that direct sunlight makes the plant leaves susceptible to leaf burn.

Although Snake Plants can survive direct sunlight, they prefer being placed under indirect sunlight.

If your snake plant receives too much direct sunlight, it will let you know. Typically, if you start to notice your plant’s leaves turning pale, yellow, or brown, you should consider moving it away from direct sunlight.

These are signs of leaf burn that is mainly caused by heat and overexposure to direct sunlight. If your plant is turning pale, it could be a sign of overexposure to light in general, not just direct sunlight.

Even if you fail to notice the signs early and your plant develops leaf burn, don’t worry too much because these plants are hardy and will easily bounce back from any form of damage.

You should only be worried if the damage is severe because it may take some time before the plant heals. Rarely will exposure to direct sunlight kill a snake plant.

How Much Light Does a Snake Plant Require to Thrive?

Generally, a snake plant requires 8-10 hours of bright indirect sunlight daily to thrive. However, it can still tolerate up to six hours of direct sunlight every day. Ensure you position your snake plant near an east-facing window or use plenty of artificial grow lights for the best results.

A Snake Plant can tolerate up to 6 hours of direct sunlight every day.

Typically, pale leaves or other abnormal leaf colors indicate overexposure to light or light shortage.  Keep in mind that failure to provide your snake plant with sufficient light can lead to stunted growth.

Lack of enough light can also cause your plant to grow spindly since its leaves are forced to stretch fully for the light. If you notice your plant leaves overstretching, be sure to move the plant closer to the source of light.

Generally, you should avoid placing your snake plant directly on a window. While they can still do fine regardless of where you put them, snake plants usually thrive when positioned on a stand or desk just next to the window.

Can a Snake Plant Grow in Low Light?

The answer is yes, but you need to keep in mind that your plant’s growth will be much slower because it will not be producing enough sugars.

The most important thing you need to ensure is that the room isn’t completely dark because, without light, the plant won’t photosynthesize, and it will eventually die.

If you already have a snake plant in a dark room and want it to grow faster, consider moving it to a room with plenty of light for a few hours every day. This will also stop your plant leaves from overstretching in one direction in search of sunlight.

If your room doesn’t receive plenty of natural light and you don’t want to move your plants outside, consider installing artificial lights and turning them on for at least eight hours a day. Some artificial lights may not be suitable for your plant, but they are better than nothing.

While it is unnecessary, you can still purchase specialized grow lights for your snake plant to achieve the best results. With specialized grow lights, you will be 100% sure that your plant is getting enough of the right light it requires to thrive.

What Is the Perfect Spot for a Snake Plant in Your Home?

Since the snake plant is sturdy, you can keep it at almost every spot in your home. It can thrive on the cornered desk, bedroom, living room, or window sill. Your snake plant will thrive and grow into a beautiful houseplant as long as the conditions are right.

It doesn’t make a significant difference whether the spot you pick is near the window or far away from it. As long you the plant can receive plenty of light- whether artificial or natural, it will survive without any problems.

However, it doesn’t mean that your plant will grow equally when placed in different lighting conditions. Typically, the growth rate is going to vary depending on the lighting and general plant care provided.

As long as your Snake Plant receives plenty of light, there is nothing to worry about positioning it.

Any spot that is approximately four feet away from an east-facing window will do exceptionally well for your indoor snake plant.

The only thing you need to do is avoid positioning your plant at a window sill where it can get caught by the intense afternoon sunlight since the stem and leaves can get scorched under intense direct sunlight.

What If My Designated Room for Houseplants Has No Windows

You don’t have to stress yourself even if your preferred houseplant room has no windows to let in natural light. It is still possible to grow a snake plant in an enclosed room as long as you find a way to provide an alternative light source.

You can purchase amazing grow light bulbs and install them in the room. These bulbs can be fitted in any standard household bulb holder and do a great job ensuring your snake plant receives the amount of light it requires to thrive.

Let your snake plant sit under the artificial light for at least six hours a day, and you will be good to go.

If you notice your plant isn’t doing well as it should be, consider taking it out occasionally so it can get its fair share of natural sunlight.

Where there is hope, there is a way, and don’t let anything stop your ambition of growing snake plants in your home. As long as you do the right thing, you will have a beautiful snake plant blossoming in your house in no time.

5 Signs Your Snake Plant Is Not Receiving Enough Light

  1. Tall, Leggy Growth: A snake plant may exhibit elongated, stretched-out growth if it does not receive enough light. The leaves might appear tall and thin, reaching for more light as the plant tries to compensate for the lack of sunlight.
  2. Fading or Yellowing Leaves: Insufficient light can lead to the gradual yellowing of the plant’s leaves. The vibrant green color may start to fade, and the leaves might take on a more pale or washed-out appearance.
  3. Reduced Variegation: Snake plants with variegated leaves, which feature contrasting light and dark patterns, may lose their distinct coloration when light is inadequate. The variegation might become less pronounced.
  4. Slow Growth: If you notice that your snake plant is growing much slower than usual or not producing new leaves, it could be a sign of insufficient light. Without adequate light energy, the plant’s growth processes may be hindered.
  5. Leaning or Tilting: Snake plants deprived of adequate light may tend to lean or tilt towards the direction of light. This is an attempt by the plant to position itself in a way that maximizes light absorption.

Final Thought

Snake plants are sturdy and versatile plants that can do well in varying light conditions. They are really forgiving and will tolerate both direct and indirect sunlight without any problem.

However, to achieve the best results with your plant, consider providing it at least six hours of indirect bright light and limiting exposure to direct sunlight.

I hope we have answered your question regarding snake plant light requirements, and you are now ready to start growing this succulent.

How to Care For Air Plants?

An air plant hanging.

 If you’re looking for an indoor plant that requires little to no sunlight, water, or soil, air plants (Tillandsia) are perfect. Imagine a plant that you can grow and care for without dealing with soil or any form of dirt? Yes, you heard right. Air plants stand out from the rest and can be placed in different areas of your home or office. There are various ways to take good care of these interesting plants; however, it will depend on which type you want to grow and what environment they need.

So, how do you care for air plants? First, ensure that you purchase a healthy plant. Inspect the leaves and base of the plant to ensure that they are not wilting or have any damage. Once purchased, place them in an area with indirect sunlight, avoiding hot spots because this may cause browning on your plants. Place your air plant in areas with artificial lightings like lamps or ceiling lights, but make sure that the leaves are not touching any surface directly to allow for ventilation. Watch out for any bugs that may be hiding inside your air plant. Inspect it regularly to determine whether there are mites, scales or whiteflies on the leaves of your plants because this can cause damage and death if left untreated.

Caring for air plants shouldn’t be as hard as it sounds; all you need is a little love and attention. This article will detail how to care for air plants and why they are ideal for people looking to add greenery into their home or office without having to worry about maintaining the plant because they’re fuss-free.

A healthy air plant.
An indoor plant that requires little to no sunlight, water, or soil.

Lighting needs

The amount of light an air plant gets is very important. Most air plants can handle low and filtered light. Bright sunlight for extended periods may cause the leaves to turn brown, so be careful. 

What happens if an air plant doesn’t get enough light?

If your air plant does not receive enough sunlight, it may turn to dark green, indicating that algae are growing on the plants. If this happens, move the plant to a brighter space with more sunlight.

What about high-intensity lighting? 

A cactus receiving an indirect sunlight.
Bright sunlight for extended periods may cause the leaves to turn brown, so be careful. 

If you use high-intensity lighting (halogen or LED lights), ensure your air plants receive sufficient, albeit indirect, light. Insufficient lighting may lead to the plant turning brownish and will lack its vibrant greenness.

If you have high-intensity lighting that may be too hot for your air plant, you will need to find a way to diffuse it or provide shade. If you cannot do either, move the plant away from that light source or replace it with a more suitable lighting system.

Water needs

Air plants do not need to be watered often, and they can go for months without water. They absorb moisture from the air and only require watering when their leaves start looking wrinkly or limp. When you water them, make sure that it is a light misting of the plant and that all of the leaves are wet. If water sits on top of the plant, it may cause root rot and, in extreme cases, even kill your plants.

During winter months (when days get shorter), watering every two weeks or so should be fine. However, during spring/summer, you will want to water them more often.

A plant being watered often.
When you water them, make sure that it is a light misting of the plant and that all of the leaves are wet

What if an air plant is not getting enough water?

If you are unsure of the watering schedule for your air plants, test it by gently tugging on the base of a few leaves (for soiled varieties). If they come loose easily with little effort, the chances are that the plant is not getting enough water and should be watered immediately. Air plants should be misted every so often as it makes them feel fresh and clean.

Misting Frequency

If your plants are indoors, misting them every three days or so should be fine. In warm and humid areas, the plants may need more frequent misting since the air around them is not enough to sustain them.

A soil variety of air plant
Air plants should be misted every so often as it makes them feel fresh and clean.

Feeding

Air plants do not need to be fed but apply fertilizers sparingly to speed up their growth if you can. Remember, fertilizer should be used sparingly and only when necessary. When using fertilizers, make sure that the fertilizer ingredients are safe for your air plants.

How to apply fertilizers effectively and more efficiently

First, pour the fertilizer from one of the spray bottles into some distilled or purified water to dilute it.

Next, mix the fertilizer into your water and pour generously on top of your air plant while holding it upside down. This helps in ensuring that all of the roots are coated in the solution.

The best time to fertilize your air plants is when they are in full growth (spring/summer) and especially so after a watering regime.

Air Circulation

Proper ventilation is necessary for an air plant’s health because they absorb moisture from the surrounding environment. Airflow helps to dry out their leaves after misting. Besides, it prevents mold from growing on the plants.

What if there isn’t enough air circulation?

Poor air circulation could cause the plant to rot away. This may affect the plant’s health and appearance and can eventually kill your air plant in extreme cases.

The best way to increase air circulation around your plants is by using a fan in the space. You can set up a small air circulation system with a fan and a humidifier.

Temperature

The ideal temperature for air plants’ optimum growth is 50 – 95 degrees Fahrenheit or 10 – 35 degrees celsius. Most tropical plants grow in these temperatures, so they are accustomed to being around this range. Remember, exposure to extreme temperatures may wilt or discolor your plant since the heat can damage its leaves. In an area with relatively low temperatures, the plants will experience slow metabolism and grow slowly due to the low metabolism rate.

Which is the best way to regulate the temperature?

If you are looking to increase the temperature of your air plants, place them near a heat source. You can do this by positioning them atop or near a lamp to provide them with direct heat.

To improve airflow around your plants, consider using an oscillating fan. Ensure to keep the environment cool by placing the air plants in a room with an air conditioner. Alternatively, keep them on the floor where they will be more likely to stay cooler.

Humidity

An air plants’ habitat should be kept humid and warm. The humidity around the plants can be increased by misting or placing them in a room with steamy showers. You will need to mist your air plants more often during the winter months since the humidity levels in most homes are lower.

A plant besides the window.
The humidity around the plants can be increased by misting or placing them in a room with steamy showers.

What if there isn’t enough humidity?

If the humidity within your plant’s environment is too low, there are a few methods that you can use to help increase it.

The best way to increase humidity around your plants is by using an ultrasonic humidifier.  If you don’t own one, mist your plants with a spray bottle about once every three days. This will place a thin layer of water around the leaves, thus keeping them moist and healthier.

How humid is too humid?

For air plants, humidity is very important. The leaves of air plants are thin and can dry out quickly if humidity levels are too low, which will result in brown spots on the plant’s leaf tips or margins. As a rule of thumb, humidity levels should be around 70% to 80%. Anything lower or higher may cause irreversible damage. For better regulation, place your plants on a tray with moistened rocks and pebbles. This will help increase humidity while regulating temperature.

Taking care of air plants is an easy task once you learn the basics. All you need to do is understand how much light, humidity, and water they require and then keep them in that environment. If properly taken care of, air plants can easily add more greenery to your home or garden. Remember, always do your research on the specific plant you’re caring for. Since air plants come in various shapes and sizes, they may require slightly more or less light and water than others. Whenever in doubt, consult a local nursery or a trusted gardening expert.