5 Golden Rules for Watering a Snake Plant

Sansevieria, also known as the snake plant, is one of the most beautiful and drought tolerant houseplants around. The plant requires minimal care to thrive and make your indoor spaces dazzle with beauty.  Although it is drought-resistant, it doesn’t mean that the plant doesn’t require watering at all.

So, how often should you water a snake plant? Like any other succulent, you should only water your snake plant when the potting soil is completely dry to maintain its beautiful appearance. Touch and feel the soil at least once a week to see if it is completely dry. If the top one or two inches of the soil feels completely dry, then you know it is time to water. Avoid overwatering your snake plant at all costs since it could cause severe damage to the leaves.

In this blog post, we discuss everything you need to know about watering your snake plant. So, let us get started right away.

A Quick Overview of Basic Snake Plant Facts

The botanical name of the snake plant is Dracaena trifasciata. It is one of the most popular houseplants that is usually kept for its beautiful leaves.  The houseplant is famous for its upright leaves that appear gorgeous throughout the year.

The leaves stay green most of the time, although some snake plant varieties have green leaves with white or yellow edges.

The plant’s origin is in South Africa and can grow to a height of up to two feet, although some mini varieties will grow only a few inches tall.
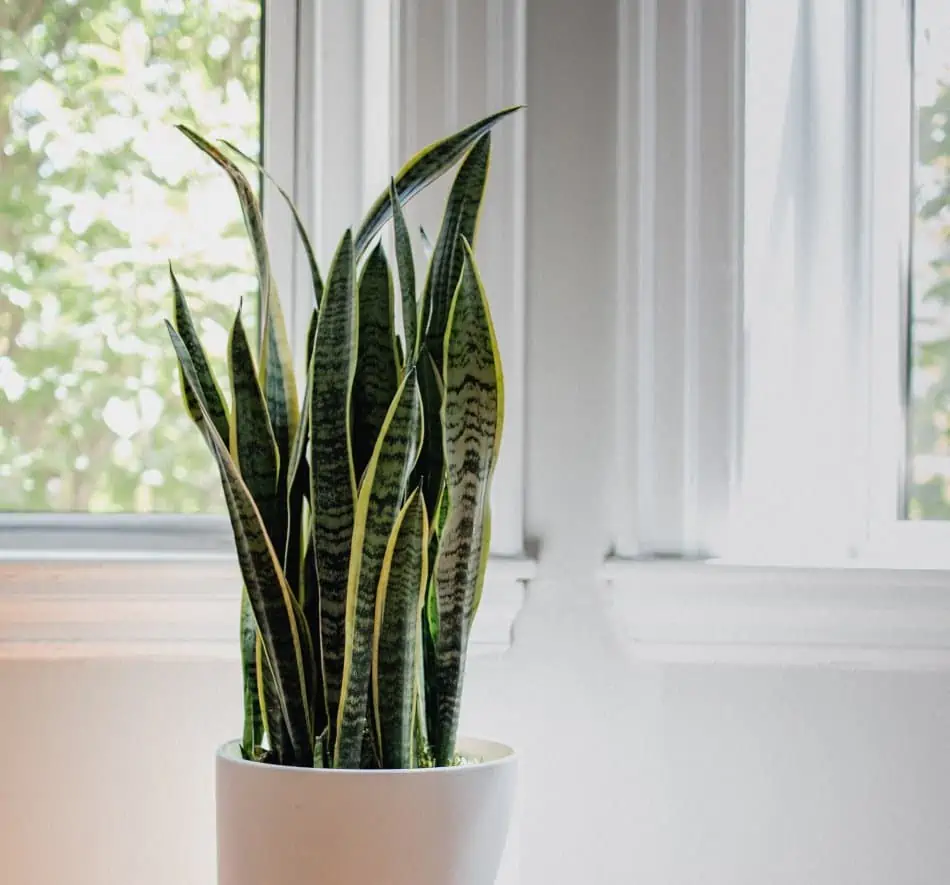
A Snake Plant is one of the most popular houseplants with gorgeous upright leaves.

The only downside of keeping a snake plant indoors is that it will rarely bloom. Only a few varieties will produce small flowers at the base of the plant for a relatively short period.  The rare flowering mostly happens when the plant is a few years old and is never consistent.

So, if you are looking for a flowery houseplant, a snake plant might not be the best option.

However, this is one of the best houseplants for beginner gardeners because it is low-maintenance. A snake plant can literally survive for many years with minimal care.

How Often Should You Water a Snake Plant?

Incorrect watering is one of the leading causes of death among snake plants. Therefore, you must ensure that you are watering your plant at the right time to avoid losing it.

You need to keep in mind that overwatering a snake plant can lead to severe root rot, while lack of water will cause the plant to lose its beautiful appearance since it will be struggling with normal growth.

In a perfect world, there would only be one simple rule that dictates how often to water a snake plant to make your life simple. Unfortunately, we don’t live in a perfect world, and you need to learn how to deal with different situations.
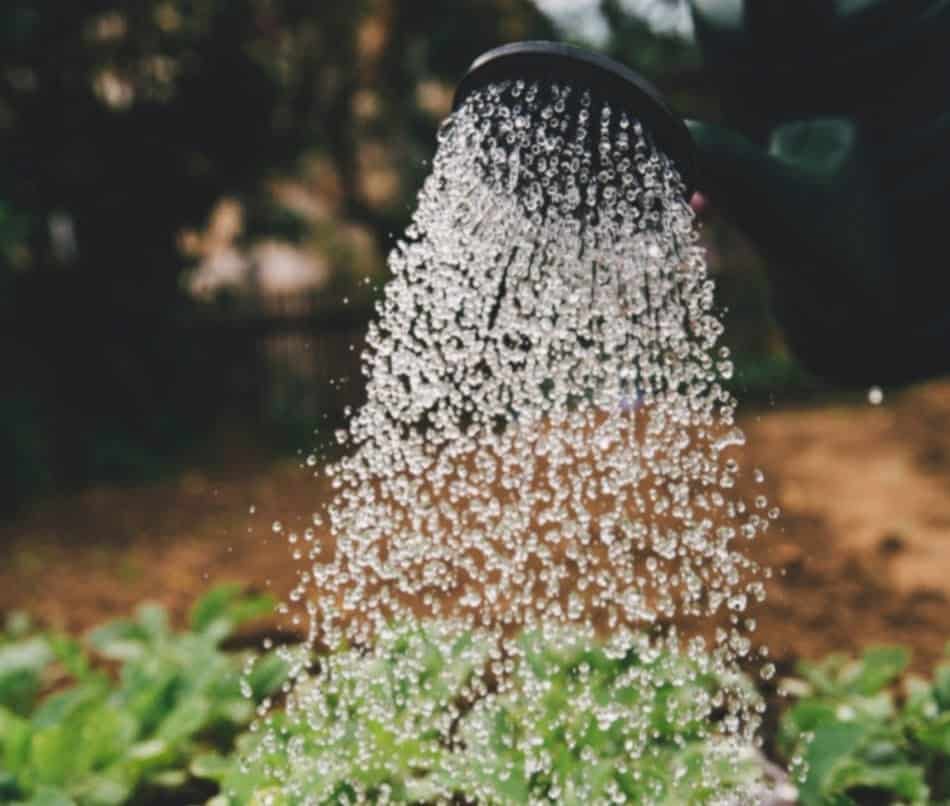
Overwatering your Snake Plant can lead to severe root rot.

Basically, several factors will determine how often you need to water your snake plant. But before we look at these factors, it is good to mention the general rule of watering a snake plant.

As mentioned earlier, you should only water your snake plant when the potting soil is completely dry. The easiest way to check if the soil is completely dry is by digging your finger into the soil up to two knuckles.

If you don’t want your fingers to get dirty, feel free to use a pencil or dipstick. Now, feel the soil carefully and see if it is dry or moist. If the soil feels completely dry, then it is time to water your snake plant.

Typically, a snake plant can go without water for up to one month but don’t be tempted to overwater it because the results will be catastrophic.

Here are some of the critical factors that determine how often you should water your snake plant:

1. Temperature

This is one of the most critical factors that determine how often you should water your snake plant. Ideally, your snake plant will be happy in the 55o-85oF temperature range. This is quite a broad spectrum which shows you how strong these plants can be.

Your snake plant will start struggling if you allow the temperature to drop below 50oF.

Generally, your plant will require frequent watering at high temperatures because the leaves will be releasing a lot of moisture, and the soil tends to dry out faster as a result of the increased evaporation rate.

2. Location of your plant

The general location of your plant inside the house will also determine how often you water the plant.

When choosing the perfect spot for your snake plant, think about what sort of lighting it requires to thrive and the general position of the central heating appliances inside your house.

Sometimes, the plant can grow taller than anticipated, forcing you to change its position. Generally, avoid positioning the plant in high-traffic areas because someone can easily knock it down.

Snake plants tolerate different light conditions, but you should avoid placing them anywhere near direct sunlight. Exposing the plant to direct sunlight will increase the risk of its leaves being sun-scorched and complicate watering.

Ideally, you should place your plant on a west or east-facing windowsill. Avoid a south-facing windowsill because that would expose it to direct sunlight.

If the plant is exposed to direct sunlight, there will be an increase in the evaporation rate, which will increase the watering frequency.

Likewise, if you keep your snake plant in a relatively shadier position, evaporation and transpiration will be relatively slower, increasing the time required between watering sessions. 

The most important thing you need to do is monitor the moisture levels carefully so you only water at the right time.

3. Seasons

Although a snake plant is primarily an indoor plant, it still responds to weather and seasons. In spring, the plant usually becomes active and begins to experience massive growth. During this time, it requires more frequent watering than the rest of the year.

By summer, it starts to slow down the sudden burst of energy experienced during spring, but it will still require regular watering because the evaporation and transpiration rate is still relatively high.

Consider the current season when thinking of how often to water your Snake Plant.

The growth rate slows down in autumn, then come winter, it stops growing, and watering will be almost unnecessary.  Although a lot of people love these plants for their long and sword-like leaves, they occasionally flower.

For them to produce flowers, they require a lot of energy which may force you to increase the watering frequency.  But you need to be extremely careful not to overwater your plant.

4. Humidity levels

Humidity and temperature are closely related. If the air surrounding your plant becomes too dry, it will begin to struggle.

Furthermore, a snake plant is a desert plant and is highly susceptible to diseases such as mold if the air is too humid. Therefore, you need to be careful with using air conditioning and central heating devices in your home because they tend to dry the air and lower humidity levels.

However, if your plant is being watered properly, it will be well-equipped to cope with fluctuating humidity levels. 

The most important thing you need to know when it comes to humidity is that the more humid the conditions around your snake plant, the less you should be watering it.

5. Type of container

The type of container your plant is planted in can also have a significant bearing on the amount of water it requires.

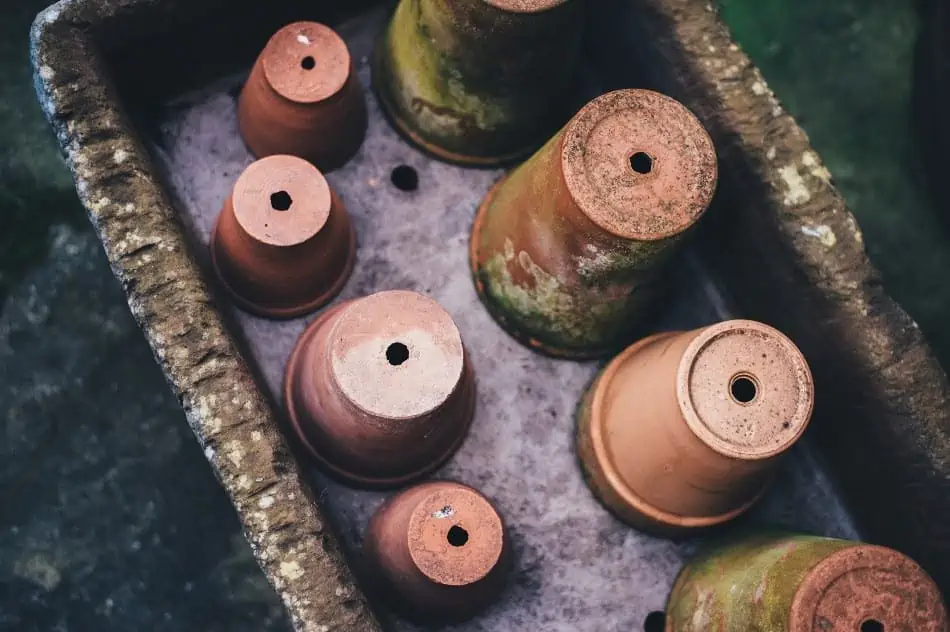
For instance, a glazed or plastic pot won’t allow water to evaporate through the sides. However, a terracotta pot is highly porous, and some of the water is lost through evaporation.

Using highly porous containers is not out of the question because they are the best option for growing indoor plants.

However, it only means that you need to be aware of the potentially increased moisture loss and test your potting mix regularly to see if your plant requires watering.

How to Water a Snake Plant

The best way to water your snake plant is to give it a relatively deep watering by soaking the potting mix. Ensure you use rain or filtered water, and always allow the topsoil to completely dry out before watering again.

Avoid using tap water because it contains chlorine that can damage the plant’s leaves. If you only have access to tap water, allow it to stand overnight so that the chlorine and other chemicals disperse.

Don’t wet the leaves, and try not to let the water pool at the center of the plant leaves because it can cause severe plant rot.

When planting or repotting your snake plant, ensure that the plant container has plenty of drainage holes at the bottom and use the highly porous potting mix to avoid waterlogging it.

When planting a Snake Plant, select a container with sufficient drainage holes.

Like other succulents, snake plants store water in their rhizomes, roots, and leaves. It means that these plants can survive even without frequent watering.

So, as long as you give your plant a deep watering, you don’t need to be worried about anything for at least two weeks.

You are free to check the potting soil’s dryness once or twice per week, but chances are the plant won’t require watering for at least two weeks.

Summary

That is it about watering a snake plant, and we believe you are now fully prepared to take care of your plant.

Snake plants are beautiful and low-maintenance. With the right watering schedule, you can be sure that your plant will stay healthy and thrive for many years.

Let us know if you have any questions or suggestions in the comments section below. 
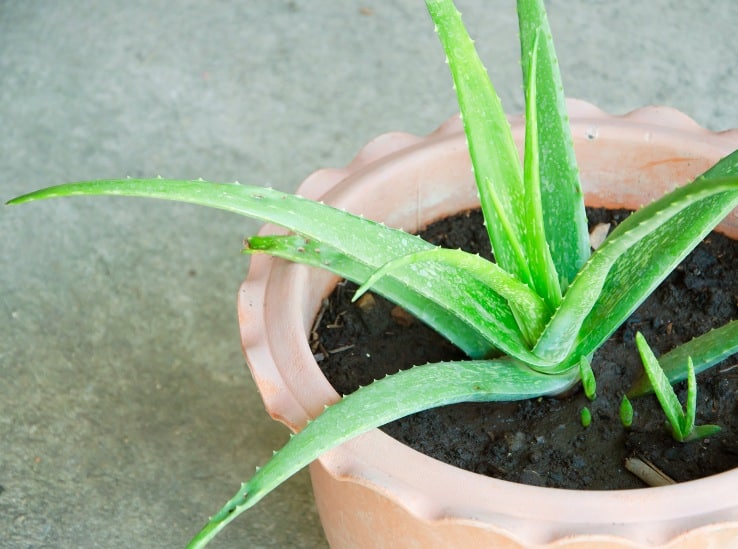
10 Easy Steps on Reviving a Dying Aloe Vera

aloe_vera_plant

Aloe Vera is a hardy plant that will not require much of your attention. Sometimes, aloe leaves may start dying which might just be its natural cycle. However, at times dying of leaves can make you lose the whole plant.

There are 10 easy steps that you can use to recover a dying Aloe Vera. But before moving on to save your Aloe plant, examine why the plant is dying. Some of the reasons might be too simple to manage, and not worth killing this “plant of immortality”.

1.    If Your Aloe Plant Looks Sunburned, Move it To a Shade

Aloe Vera does well in proper sunlight. However, the aloe plant is susceptible to much light hence should not be placed in direct sunlight for long hours. Direct sunlight tends to dry out the plant and turns its leaves from green to yellow, which might be a sign that your plant is dying.

If you realize that your plant is sunburned, you should move it to a shady area and diffuse light. If you have planted your aloe plant indoors near the window, you may consider relocating it to places with less light. With time, your aloe leaves start to turn back to their usual color.

2.    Minimize Watering if Your Plant Looks Overwatered.

The Aloe plant is known to flourish even in rough conditions. It can store water within its leaves hence does not require regular watering. Thanks for your care, but overwatering your aloe plant will lead to root rot and browning of the leaves. These are signs of a dying plant.

This occurs mainly for potted aloe plants where the pot does not have enough drainage holes. To avoid the effects, you need to ensure that you place your plant in a pot that can quickly drain the water. Also, only water the plant when it has completely dried up.

Insufficient drainage and overwatering often lead to root tot and your Aloe Vera may die.

Watering may also depend on the climates and the temperatures. During winter temperatures, water your aloe much less frequently because the plant is in a dormant phase. During summer periods, you may need to increase your watering.

3.    Replace the Potting Soil if it Lacks Nutrients

Unlike other plants, the aloe plant does not require many nutrients from the soil. However, a complete lack of nutrients in the soil may be a reason why your plant is dying. Unhealthy Aloe Vera will show pale leaves which turn light brown with time. Leaves may tend to dry up and wither even with proper watering.

To help the unhealthy Aloe plant, you may need to replace the potting soil with a better soil type to provide the essential minerals to the plant. Don’t forget that even when looking for better soil, drainage of the soil is critical. The natural process allows water to move through the soil to ensure the Aloe Vera plant benefits from all the nutrients.

4.    Drainage Holes are Vital for Every Potted Plant

In the intervals of your watering, there should be good drainage for excess water to be removed. A pot that retains water may cause the roots to rot. Watering too often and not allowing the water to drain may make the plant start dying.  

 To help a dying aloe plant rotting, you should consider using a terracotta pot ideal for the aloe plant. Terracotta pots are porous to ensure the roots are not left to sit on the water and that water can drain. The purpose is to satisfy the requirement for dryer soil conditions, for aloe plant to flourish.

5.    Expose your aloe to more sun

Planting Aloe Vera indoors may bring beauty to your house but may affect plant growth when some conditions are not met. Aloe is a plant that thrives better and becomes very healthy under the sun. If your aloe has stayed for quite a long time in a damp spot, think of taking it out to the sun.

Place the aloe plant in a sunny place for 4-6 hours of direct sunlight. Without much sunlight, your succulent plant will begin to stretch and lose its attractiveness. However, as much as it may require light, it may not appreciate sustained direct sunlight. It may topple over as the stems become weak day by day.

6.    Cut Off Healthy Remaining Leaves for Propagation.

Sometimes the health condition tends to get worse despite the many practices to care for it. The leaves progressively become discolored and show signs of withering. At this point, practices to save the plant may be rendered futile. For such a matter, the problem might be hidden under the soil. Rot root.

If your Aloe Vera is dying, consider cutting off remaining healthy leaves to propagate them later on.

       The most effective option is cutting off any healthy remain leaves of the plant for propagation. Aloe Vera can quickly propagate from leaf-cutting, which may be the only way to save it. Cutting some of the healthy leaves may also help to produce different plants at no extra cost.

       Some plants overstay for too long in the shades making the leaves too weakened to stand back again. At this point, no amount of sunlight can save them. Propagation is the only effective way to prevent such plants from dying.  

7.    Examine the Aloe leaves

Aloe is a succulent plant that stores water in its leaves, but if the plant lacks enough water, the leaves begin to droop or are become almost transparent. However, this sign can also indicate root rotting, which is due to overwatering. The most important thing is to examine when you last watered the plant.

If your Aloe Vera leaves are becoming transparent, the plant is not getting enough water.

If you realize that it has taken many days before watering, you need to water the plant to return it to its standard shape. But if you watered the plant lately, you should eliminate it from the soil and check for root rot. Aloe Vera is a talking plant that will tell you what it needs before it even dies.

8.    Tend the Root In Case of Root Rot

If your plant is turning yellow or withering even with all the conditions in place, you should examine the root rot and determine how many are well. Mushy roots are characteristics of root rot and need to be removed. If there are a lot of healthy roots and a small portion of mushy roots, you can save the plant by removing the mushy roots.

To remove the rotten roots, you should use a sharp knife to cut off the dead roots. Ensure that you cut them all to avoid more infection. If the more significant portion of the root is affected, then use the earlier method of removing the leaf for propagation.

9.    Choose a Pot, One-Third Larger than the Root System

If you plant a small aloe plant in a large pot with much soil, the excess soil will hold up more water, leading to root rot in the future. The root system of aloe Vera grows horizontally rather than vertically. Choosing a wider pot can be better because a narrow one may tip over as the plant grows.

You should always consider the size of your Aloe Vera when choosing the container for the plant.

On the other hand, choosing a too-small pot deprives the plant of enough room for the roots to grow. Due to watering, it can easily lead to root rot or a stagnant plant due to lack of growth. When the plant seems to be dying, you can check on the size of the plant and the size of the pot, and always opt to select a pot that is wide rather than a narrow or a deep pot.

10.     Remove dead leaves

Dead leaves tend to draw nutrients from other healthy portions of the plant. They also affect by infecting other parts of the plant, and slowly but surely, the plant can die. To prevent the rest of the plant from suffering, you should take a sharp knife and cut the leaf away at the base.

Cutting back of dead leaves encourages more aloe leaves to grow and helps the plant to recover. Don’t be too fast in cutting broken leaves, instead, it would help if you let them sit for few days after breaking. These will allow the leaves to develop callus, which will help harden the leaves on the outside.

Bottom Line

You can always ensure that your aloe Vera remains healthy and in good shape with all that understanding. Aloe Vera will only be attractive if it is well taken care of, and if not, you may not even want to keep it in your house. When the color turns and the leaves shrink, aloe plant loses its aesthetic.

Aloe will mostly be restored if the damage is only to a few leaves. Therefore, it is essential to examine your plant immediately after it starts showing some unhealthy characteristics. The Aloe plant keeps on recreating itself in your home, and a single plant can assure you of a never-ending aloe plant in your compound. For this reason, take good care of your Aloe Vera so that it can take care of the beauty of your compound or house and your health.   

Ultimate Guide on How to Get your Aloe Vera to Flower

Aloe Vera plants are a unique addition to your garden. The succulents grow perfectly in flowerbeds and make effective indoor plants. You have been caring for your aloe plant for some time now, and you expect it to start flowering. Hey, be patient and stop expecting much from your young plant. Aloe Vera tends to flower once it has reached its maturity stage. For a standard aloe plant, the maturity stage is achieved approximately when it is about four years.

In this article, we will focus on the ultimate guide to get your aloe Vera to flower. While some aloe plant tends to take longer to bloom even after maturity, there are steps that you can take to persuade your aloe plant. The plant expects you to take good care of it to bloom and it will not discourage you when it is ready. It will flower and glow yellow.

1.    Fertilize Your Aloe Plants

Proper fertilizing of your aloe plant can help persuade the plant to flower. Fertilizing at proper times can also be a reason for your plant to bloom. It is essential to use a well-balanced fertilizer in early spring and again in midsummer. After feeding the plant, you should water it to drain the excess salt out of the pot to prevent destroying the roots.

It is essential to take a keen look at the kind of fertilizer you are using. Using high phosphorous or superphosphate that promises blooms may damage the plant due to their high concentration. After every two years, you should transplant the plant to freshen the soil and aerate the roots.

Fertilizing your Aloe Vera at proper times will promote the flowering process.

2.    Place Your Aloe Plant Where There is Enough Sunlight.

Unexposed mature aloe plants to sunlight will result in a lack of flowering and may bring discolored growth, and withering which may weaken the plant. If the plant is planted indoors, place adult aloe plants outside if you want to witness big bright flowers. Outdoor will ensure the plant gets enough light, and wind and bee activity will pollinate the plant.

Just like any other plant, aloes’ fresh and notable stems scorch when temperatures are high. Therefore, it is essential to monitor the sunlight that is reaching your plant. The proper amount of sunlight can make the stems of the plant vigorous to hold the flowers.

3.    Schedule Your Aloe for spring

Aloe plant only flowers at particular times of the year. If you anticipate your aloe to grow, make sure that the climate is conducive to growing and blooming. Aloe Vera blooms each year, especially in the early spring. If it is of the right age, then expect it to flower.

As you wait for this time of the year to come, the best way to help your plant bloom is to ensure that it remains healthy. You should follow all the steps that ensure that your aloe is well maintained. Before spring comes, make sure that your plant is in the soil with adequate nutrients to support it and no pests and insects invading it.

If your Aloe Vera is mature enough, you should expect the plant to flower in the early spring.

4.    Pamper Your Aloe Plant

 Time to flower is here, and you can’t notice any signs from the plant, do not despair. If you are sure that the plant is of age, you need to experiment with various techniques that will pumper it. Pamper your plant by ensuring that it receives just enough of everything that it needs.

If your plant is indoors, ensure that it gets additional coaxing to trigger flowering. Ensure that the temperature is correct and that the drainage is just working right. If all these conditions can be done well, then the spiky and the vibrant yellow flowers can be seen when the time comes.  

5.    Choose a Liquid Fertilizer.

 One of the benefits of using a liquid fertilizer is that it penetrates the soil immediately after application. The plant is given fast access to nutrients which ensures rapid root growth. A potted aloe plant may require the application of this fertilizer more often than the other one.

The best fertilizer to use is the liquid 10-40-10 houseplant mixes or those explicitly designed for succulent plants. Using the liquid fertilizer as a foliar spray should be done in the proper times of the day to avoid leaf sun-scald. The best times are early morning, late afternoon or overcast days when there is little sunlight.

6.    Remove the Pups From Your Plant.

Pups are not bad, as they are a sign that your plant is healthy and can produce babies at the mother plant’s base. As the aloe plant grows, the babies may tend to clump and spread as they try to mature. It would help if you took a sharp knife and cut the connection between the plant and the pups.

Pups tend to take the energy from the mother plant, the energy that could be used for flowering. Pups also consume the nutrients that the mother plant could appropriately utilize for blooming. For these babies, allow them to dry a bit for at least 24 hours before replanting them in their new pots.

Pups usually take the energy from your Aloe Vera and the plant no longer has sufficient resources to bloom.

7.    Encourage Flowering By Watering.

When watering is done correctly, it encourages the blooming of the aloe plant. You should ensure to water the plant when the top inch of the soil is dry. Ensure that the plant has exhausted most of the water in the pot before you decide to water again.

Don’t overwater the plant to prevent it from embarking on rotting, which may discourage blooming. Adequate watering ensures that essential nutrients are transported through the plant. Enough water will also help strengthen the stem of the plant to stand upright and support the flowers.

While proper watering is essential for Aloe Vera to produce flowers, you should avoid overwatering the plant.

8.    Water the Aloe Plant from the Bottom

The Aloe plant is a hard-to-kill plant. You might have been watering the plant wrongly without even realizing it. The truth is that if you can rectify this behavior, you may end up encouraging it to flower. You have known when to water your aloe Vera, but how do you do it?

Watering Aloe Vera should be done from the bottom of the plant so that water can reach the roots properly. Watering should be done consistently until the water can pour out through the drainage. Watering the plant from the top may end up breaking the flower if it is not done slowly and carefully.

9.    Watch for Insects and Pest.

When your aloe plant is maturing, some pests and insects are ordinary fans of the plant. This pest includes the mealybugs, which are flat and brown. These pests suck on the sap from the aloe leaves, which weakens the plant and destroys a healthy flowering aloe plant.

To prevent these pests, you should use a natural, non-toxic pesticide to drive away the pests from your aloe Vera. Avoid misting your aloe Vera as it can make it rot out. If the leaves have gotten dirty or dusty, you can wipe them with a clean cloth once in a while to even remove dead bugs that can cause infection.   

10. Get Your Plant to the Garden.

If you want your aloe Vera to flower correctly, get it to the garden. The aloe plant will only flower when it senses its ideal growing condition, and it also blooms well in the indigenous garden. A mature aloe plant first produces a spike known as an inflorescence which looks spectacular in the latter summer months.

When the plant has stayed indoors for long, it’s hard to get the plant to produce the inflorescence, leave alone the flowers. However, in some places, the conditions in the house might be very favorable, and the plant may flower well.  

For Aloe, Patience is a Virtue.

The information above will help you maintain your plant as it thrives in its maturity until it starts flowers, which happens each spring. Unlike other plants, aloe takes their time before they can start flowering. You have to be patient with the process.

The most exciting thing with the aloe Vera plant is that immediately it starts flowering, you will realize that it was worth the effort. An accomplished feeling for any gardener. Aloe does not require or take much time and resources. Hence a little effort brings a significant result.

Bottom Line

Aloe Vera is found in very many species. In most species, flowers appear yellow, other species may show red flowering while others may mix the colors. For each year, the aloe plant blooms only for 2-3 months, and after that, it dries and drops off.

 For the flowers, you can sometimes decide to prune them so that they may not consume the nutrients in the soil. Cutting the flower stalk from the base will help your aloe Vera recover from some of the leaves that have dried up or browned.

With all this information in mind, we expect to see your aloe plant flowering soon. When aloe flowers, trust me, you will call your friends to come and make a compliment about your garden or your kitchen as it will be glowing yellow.

8 Golden Rules for Watering a Sansevieria Plant

Sansevieria plant is also known as the Snake plant. Snake plant is one of the easiest plants to grow as there are not many issues that you are likely to encounter. One of the exceptions, however, includes watering the plant. Improper watering of this plant is one of the most common sources of problems for many gardeners planting and nurturing the plant.

Watering this plant depends on many aspects. There are 8 golden rules that you need to master to properly water the snake plant. These rules are critical to keeping your plant in good health and for a long time. The watering schedule varies depending on the type of soil the plant is growing, the home environment, and pot size.

By following this simple rule that we will look at in-depth in this article, you will realize that watering a snake plant correctly isn’t very difficult. This article will also give you a deeper understanding of the trickiest aspect associated with managing this classic house plant. It includes knowing how often and best to water this plant. 

1.    Water the Soil and not the Leaves

The problem cuts across many houseplants. But it is particularly crucial to remember this when you grow a snake plant. When watering your snake plant, you need not spill any water to the leaves.

The most common cause of brown spots on a snake plant is a fungal infection. When there is water spill to their leaves, it makes this plant vulnerable to fungal infestation. This fungus causes brown spots on the leaves of the plant, destroying its appearance.

A snake plant near the window.
When watering your Snake Plant, avoid spilling water onto the leaves.

Spillage of water to the leaves also causes them to rot. This rot continues to grow and spreads to other parts of the leaves, and you may end up losing the whole plant.

Therefore, every time you want to water your snake plant, ensure that you only water the roots and not let water spill onto the leaves. You can achieve this by bringing the watering source near the plant’s base and allowing water to flow slowly to the roots without spilling.

2.    Know when to Water your Snake Plant

When watering a sansevieria plant, scheduling is the most effective way to determine when to water the plant. As said earlier, the schedule will vary depending on several factors like the type of soil used and the plant environment.

Before watering the plant, assess the plant and determine if at that particular moment it needs water. Some indications will help you to determine if your plant needs water or not. The easiest way is to check the potting soil.

Dip your finger some inches to the soil. If you don’t want to get dirty, you can use a stick or a pencil. If the soil is dry, maybe two inches from the topsoil, it is time to water the plant. If the soil is wet in the two inches of the soil, you can save the water to when the plant will require it.

Snake plant indoors exposed to sunlight.
The schedule will vary depending on several factors like the type of soil used and the plant environment.

If you miss out on this crucial aspect, you may end up overwatering the plant, which may lead to root rot, resulting in the death of your plant. You may also end up underwatering the plant, making it dry up.

3.    Know your Snake Plant Watering Frequency

It would help if you determined the right water frequency for your sansevieria plant. Determining this frequency, you have to consider several environmental parameters. Some of these parameters are discussed below.

Temperature

The snake plant is a tough plant that is adapted to arid conditions. Ideally, your plant will do well at a temperature of between 130C-300C. At this range, your plant is happy and thrives well.

 If the temperature starts falling below 100C, the plant is unhappy as it is too low. At this temperature, the plant does not consume much water; hence you may need to stay for more days before watering the plant.

If the temperature is too high, again, the plant is not comfortable. It takes in a lot of water at a time to sustain itself. During this time, you may increase your watering frequency as more water is lost through evaporation. 

Season

The watering of the snake plant is dependent on the season of the year.

During the spring season, your plant is awake from the dormant stage and begins to experience some growth. At this particular season, it will need more water than it would during the rest period. As a gardener, you need to react appropriately to this need.

Seasons.
The Snake Plant will require more water during warm months and less watering in winter.

Hope you’ve not forgotten that it is during the spring when your plant occasionally sends up that long stem that has sweet-smelling, cream-colored flowers at the top?

During the summer season, plant growth begins to slow down but will still need a regular water supply.  Growth slows down even further during the autumn, and when winter arrives, no change is taking place; hence watering will be almost unnecessary.

Humidity

Water requirement by the snake plant will also depend on the humidity surrounding the plant. If there is low humidity, the plant tends to take in more water. During high humidity, the plant will require less water.

It is also good to know that high humidity makes the plant susceptible to diseases and bacterial infections. You can counter this effect by taking the plant where there are other plants. When plants are in a cluster, they create their favorable microclimate.

4.    Consider the Size of the Plant.

The size of your snake plant will determine the amount of water that the plant requires. The larger the plant, the more water is needed as the uptake of water is high. Big plant has big leaves that will transpire more; hence watering should be more frequent.

On the other hand, a small plant has small leaves. Transpiration and evaporation occur slowly; hence the plant requires little water to grow.

A person holding the plant on the pot.
You should always consider the size of your Snake Plant before creating a watering schedule.

5.    Be Careful with the Amount of Water you Use

When watering your sansevieria plant, be careful about the amount of water you pour. Watering this plant could lead to overwatering or underwatering if not done appropriately.

Overwatering

Continuous overwatering will cause the leaves of the snake plant to droop. With time, you can tell an overwatered snake plant with how it looks. Overwatering destroys the leaves and the root structure of the beautiful snake plant in the following ways.

  • The leaves tend to become squishy, heavy, and limp. Within no time, the leaves may start to fall over
  • Overwatering will make the roots start rotting to make the soil around them start smelling.
  • You will notice that numerous leaves of the plant are falling over.
  • Sometimes the leaves may begin changing to yellow.

Under watering

Yes, your plant is tough, but under watering, it will not go well for long. The good thing is that your under-watered plant will always indicate, and you have to take it seriously. Some of these symptoms include:

  • Leaves may appear to have wrinkles
  • Leaves start to curl
  • The edge of the leaves becomes too dry
  • It may experience slow growth

If you start realizing these effects, it is time that you take the necessary action to revive the plant because it is dying. Remember to always check on your plant and observe if there is any change in its appearance.

6.    Type of Pot

The material used in making your pot determines the amount of water the plant will need. The type of pot will determine the loss of water by the soil. For example, a plastic pot or a glazed pot will not allow water to evaporate through its sides hence leaving the plant with water for a longer time. You will need to water the plant less frequently in this kind of pot because it does not lose water more often. 

On the other hand, using a porous pot like the terracotta will draw water away from the plant, enhancing evaporation. You will need to water more in this type of container as the plant loses water more frequently.

7.    Water Early in the Morning and Late Evening

The time that you water your plant is also essential. The two most appropriate times to water your sansevieria plant is either early in the morning or late in the evening. During these times of the day, less evaporation and transpiration occur. The plant can take in enough water to counter when the temperature rises and thrive well.

Watering the plant.
You should water your Snake Plant early in the morning or late in the evening.

8.    Allow the Soil to Dry out Between Watering.

Like most succulent plants, snake plants thrive well when the soil is left to dry out before rewatering.  During this time, the plant tends to grow new roots, searching for more water. This method, also known as the soak and dry process, helps the snake plant have a healthy root system.

Take away

Snake plant does not need frequent watering; hence you should determine the frequency of watering. Proper watering of your snake plant will save you from many other consequences, as many troubles start when the watering is not done appropriately. Never be afraid of getting dirty when you want to determine the moisture of the soil. Most of the watering rules depend on the above-mentioned factors, and you got yourself a snake plant that is the easiest plant to keep. Just get it right in the watering.

8-golden-rules-for-watering-a-jade plant

Watering A Jade Plant? No matter the type of jade plant you have, this succulent is well known for its longevity. The plant’s leaves are usually rich green. However, improper watering of a Jade plant turns the leaves yellow. Therefore, it is important to follow some rules when Watering A Jade Plant.   

These 8 simple rules for Watering A Jade Plant will guide you to do a perfect job. It’s an easy plant to sustain, and once these guides are followed to the latter, the plant will thrive even in harsh conditions. Following the rules when watering this active plant is essential.

1. Know When the Plants Need Water

The jade plant can go for long periods without water. Jade always shows signs when it is thirsty. One of the primary signs includes leaf fall, leaves fade, and brown spots appearing on the leaves. Witnessing the above signs? It is time for Watering A Jade Plant. Use the finger/skewer method to test the moisture of the water. Dip your finger in the soil a few inches and take it out after a few seconds. If the soil sticks to your finger, the soil is moist. But if the finger is dry, the plant needs water.

Make sure your Jade Plant requires water before you water the succulent.

Drying and browning of the leaf tips is another indicator that your plant needs water. These signs can also appear when the plant has been under-watered for a long time. When the leaves wilt, it means that the plant has been dehydrated for a while. 

2. Use The Right Amount of Water when Watering a Jade Plant

The blooming of your succulent plant depends on how much you water it. Variables like climate, temperature, and humidity can influence the rate at which you water the plant, but the amount of water should remain the same. When watering a jade plant, soak your plant until the water trickles out the base of the pot.

This ensures that the water thoroughly infiltrates the soil to enable the root to uptake the moisture required. Proper soaking of the plant also ensures that the roots can grow down into the soil and mature. It is good for the plant’s well-being and increases the plant’s resistance to drought.

When Watering a Jade Plant, using less water, it moistens the upper part of the soil, therefore, not reaching the roots. If this process is repeated continuously, it causes the plant leaves to wilt with brown spots. These are signs of drought stress.

3. How Often to Water Jade Plant

Jade plant has particular adaptations to growing in dry climates with infrequent rainfalls. Therefore, they prefer dry conditions and tend to be very susceptible to problems associated with overwatering. Before watering your jade plant, you need to ensure that the top two inches of the soil are dry.

You should water your Jade Plant only when the soil is dry.

Soaking the plant well and leaving the soil to dry out, replicates the plant watering conditions of its natural habitat. The conditions include sudden rain followed by a period of drought and high temperature.

 To grow a jade plant successfully in your home, you must emulate the conditions of their native environment. Jade plant watering frequency is dependent on several factors like climatic conditions of the place, humidity, size of the pot, and the type of soil.

Watering A Jade Plant during the winter

Whether the plant is indoors or outdoors, the demand for moisture can fluctuate according to the season. During the winter season, the jade plant requires less watering as the rate of water evaporation is low due to cooler temperatures.

When this season comes, you must check on the soil’s moisture through the drainage holes and adjust the watering frequency. This will ensure that the soil can dry out entirely between the bouts of watering.

If the plant is indoors, you can check if the plant is near a heat source, such as a radiator which can cause the temperatures to increase, making the soil dry out quickly.

Watering A Jade Plant during summer

During the summer season, growth in the jade plant can slow down significantly due to the high temperatures. The summer dormancy reduces the jade plants’ demand for moisture. This is a survival strategy for the plant to conserve water in their harsh native environments.

During this period of dormancy, the plant should be less watered as they are sensitive to excess moisture, which causes root rot.

At this period, the temperatures can sometimes be very high increasing the evaporation of water from the plant. This may make the leaves fade. At this point, you need to increase the frequency of watering the plant to prevent it from dying.

4. Choose Well-Drained Soils to Avoid Overwatering.

Good watering practices should be in conjunction with a well-drained soil mix to avoid root rot. Ordinary potting soil retains a lot of moisture for the drought-tolerant plant and may lead the plant to show some signs of stress. 

Potting mixes containing peats also tend to repel water when they dry out, causing water to run off the soil’s surface and preventing moisture from reaching the roots, causing drought stress.

Using a well-draining soil mix is essential for growing a healthy Jade Plant.

For the health of a jade plant, grow jades in cactus potting mix or particular succulent soils. These soils tend to mimic the specific well-draining soil, which is a characteristic of a succulent native environment.

Suitable soils will help you maintain the perfect moisture balance for jade plants and prevent the effects of overwatering to keep your jade plant healthy.

5. Water your Jade Plant in Pots with Drainage Holes

Watering your jade plant in pots with drainage holes is essential because it will not tolerate damp soil. Drainage holes allow excess water to escape from the pot. A pot with drainage holes at the base is a good way of detecting if your plant has been sufficiently watered.

Pots with drainage holes are a good way of detecting whether the soil is moist or dry so as to know whether the jade plant should be watered or not.

 A jade plant is watered in a pot without a drainage hole; it causes water to pool around the roots and causes the leaves to become yellow and translucent. These can also lead to root rot or darkening of the leaves.

6. Avoid Salty Water When Watering the Jade Plant.

If the water running out of your taps is salty, avoid it on your jade plant. When salty water is used regularly, the water evaporates from the potting soil leaving behind the salt. The root may absorb an excessive amount of salt, which moves up through the stem to the leaves, causing tip burn.

As the soil becomes more concentrated with salt, it blocks the passage of the water up the plant. The plant finds it harder and harder to take up water. Water-absorbing root tips are killed with these increasing menaces, and the plant begins to wilt and drop leaves.

 Salt can also result from the fertilizers, which dissolve in water and turn into soluble salt. After fertilizing, it is essential to water the plant correctly to wash away its salt. It is also good to leach the plant after some time to remove the excess salt.

7. Water the Roots and not the Leaves.

 The Jade plant is challenging but is susceptible to brown spots on the leaves due to fungal infections. The brown spots are curable and preventable with proper treatments. Prevent the brown spots to avoid water spills on the leaves of the jade plant. A fungal agent causes the leaves of the jade plant to develop rust-like infections that will affect the appearance of the plant and may persist if not treated early.

When watering a jade plant, ensure that the water gets into the roots of the plant only. Water should be poured out slowly to prevent spillage into the leaves. During the winter season, spilled water does not quickly evaporate from the plant. This water tries to get into the plant, making way for fungi.

8. Consider the Size of the Plant and That of the Pot

The size of the jade plants determines the amount of water required by the plant. If the plant is large, give it more water as water uptake is high, and the evaporation rate is also high due to surface area. When the plant is small, give less water because the root system is yet to mature, hence the slow water intake rate. The evaporation rate of the plant is also low due to the small surface area.

Always consider the size of your Jade Plant to determine its watering needs.

The size of the pot will determine the frequency of watering the jade plant. A big pot has more soil soaked in; hence it may stay for long with water. In such a pot, watering frequently denies the plant space to dry out. Apply water less frequently, in a more extensive pot.

In a small pot, the evaporation rate is high, and the pot can hold little water.  Watering should be done more frequently to ensure that the plant has enough of it.

Bottom Line

Setting out a schedule on how to water jade plants is not a bad idea. But note that the jade plant may require more or less watering at different times of the year. The Jade plant is a great plant with clear signs of overwatering or underwatering. Prioritize these signs, and start rectification immediately.

Jade plant is not that plant that will demand much from you; it expects you to follow the above rules.

How to Care For Air Plants?

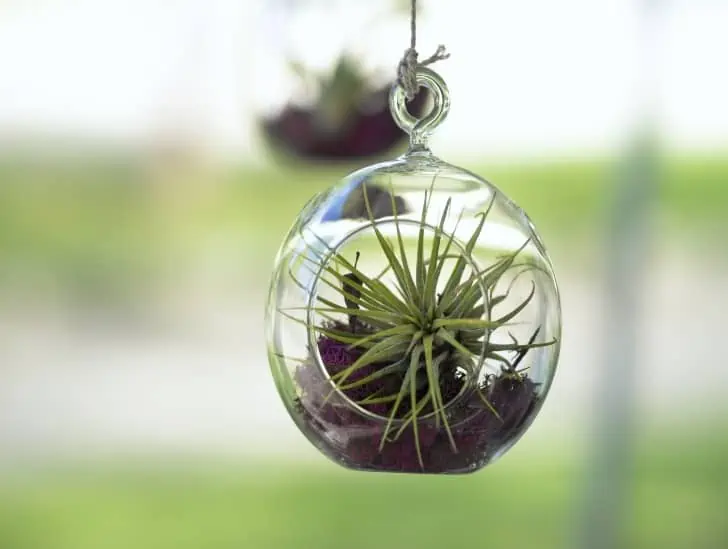
An air plant hanging.

 If you’re looking for an indoor plant that requires little to no sunlight, water, or soil, air plants (Tillandsia) are perfect. Imagine a plant that you can grow and care for without dealing with soil or any form of dirt? Yes, you heard right. Air plants stand out from the rest and can be placed in different areas of your home or office. There are various ways to take good care of these interesting plants; however, it will depend on which type you want to grow and what environment they need.

So, how do you care for air plants? First, ensure that you purchase a healthy plant. Inspect the leaves and base of the plant to ensure that they are not wilting or have any damage. Once purchased, place them in an area with indirect sunlight, avoiding hot spots because this may cause browning on your plants. Place your air plant in areas with artificial lightings like lamps or ceiling lights, but make sure that the leaves are not touching any surface directly to allow for ventilation. Watch out for any bugs that may be hiding inside your air plant. Inspect it regularly to determine whether there are mites, scales or whiteflies on the leaves of your plants because this can cause damage and death if left untreated.

Caring for air plants shouldn’t be as hard as it sounds; all you need is a little love and attention. This article will detail how to care for air plants and why they are ideal for people looking to add greenery into their home or office without having to worry about maintaining the plant because they’re fuss-free.

A healthy air plant.
An indoor plant that requires little to no sunlight, water, or soil.

Lighting needs

The amount of light an air plant gets is very important. Most air plants can handle low and filtered light. Bright sunlight for extended periods may cause the leaves to turn brown, so be careful. 

What happens if an air plant doesn’t get enough light?

If your air plant does not receive enough sunlight, it may turn to dark green, indicating that algae are growing on the plants. If this happens, move the plant to a brighter space with more sunlight.

What about high-intensity lighting? 

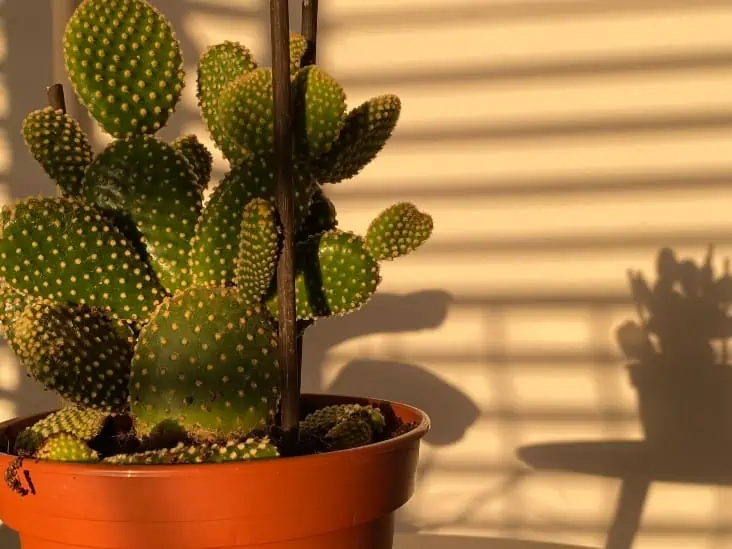
A cactus receiving an indirect sunlight.
Bright sunlight for extended periods may cause the leaves to turn brown, so be careful. 

If you use high-intensity lighting (halogen or LED lights), ensure your air plants receive sufficient, albeit indirect, light. Insufficient lighting may lead to the plant turning brownish and will lack its vibrant greenness.

If you have high-intensity lighting that may be too hot for your air plant, you will need to find a way to diffuse it or provide shade. If you cannot do either, move the plant away from that light source or replace it with a more suitable lighting system.

Water needs

Air plants do not need to be watered often, and they can go for months without water. They absorb moisture from the air and only require watering when their leaves start looking wrinkly or limp. When you water them, make sure that it is a light misting of the plant and that all of the leaves are wet. If water sits on top of the plant, it may cause root rot and, in extreme cases, even kill your plants.

During winter months (when days get shorter), watering every two weeks or so should be fine. However, during spring/summer, you will want to water them more often.

A plant being watered often.
When you water them, make sure that it is a light misting of the plant and that all of the leaves are wet

What if an air plant is not getting enough water?

If you are unsure of the watering schedule for your air plants, test it by gently tugging on the base of a few leaves (for soiled varieties). If they come loose easily with little effort, the chances are that the plant is not getting enough water and should be watered immediately. Air plants should be misted every so often as it makes them feel fresh and clean.

Misting Frequency

If your plants are indoors, misting them every three days or so should be fine. In warm and humid areas, the plants may need more frequent misting since the air around them is not enough to sustain them.

A soil variety of air plant
Air plants should be misted every so often as it makes them feel fresh and clean.

Feeding

Air plants do not need to be fed but apply fertilizers sparingly to speed up their growth if you can. Remember, fertilizer should be used sparingly and only when necessary. When using fertilizers, make sure that the fertilizer ingredients are safe for your air plants.

How to apply fertilizers effectively and more efficiently

First, pour the fertilizer from one of the spray bottles into some distilled or purified water to dilute it.

Next, mix the fertilizer into your water and pour generously on top of your air plant while holding it upside down. This helps in ensuring that all of the roots are coated in the solution.

The best time to fertilize your air plants is when they are in full growth (spring/summer) and especially so after a watering regime.

Air Circulation

Proper ventilation is necessary for an air plant’s health because they absorb moisture from the surrounding environment. Airflow helps to dry out their leaves after misting. Besides, it prevents mold from growing on the plants.

What if there isn’t enough air circulation?

Poor air circulation could cause the plant to rot away. This may affect the plant’s health and appearance and can eventually kill your air plant in extreme cases.

The best way to increase air circulation around your plants is by using a fan in the space. You can set up a small air circulation system with a fan and a humidifier.

Temperature

The ideal temperature for air plants’ optimum growth is 50 – 95 degrees Fahrenheit or 10 – 35 degrees celsius. Most tropical plants grow in these temperatures, so they are accustomed to being around this range. Remember, exposure to extreme temperatures may wilt or discolor your plant since the heat can damage its leaves. In an area with relatively low temperatures, the plants will experience slow metabolism and grow slowly due to the low metabolism rate.

Which is the best way to regulate the temperature?

If you are looking to increase the temperature of your air plants, place them near a heat source. You can do this by positioning them atop or near a lamp to provide them with direct heat.

To improve airflow around your plants, consider using an oscillating fan. Ensure to keep the environment cool by placing the air plants in a room with an air conditioner. Alternatively, keep them on the floor where they will be more likely to stay cooler.

Humidity

An air plants’ habitat should be kept humid and warm. The humidity around the plants can be increased by misting or placing them in a room with steamy showers. You will need to mist your air plants more often during the winter months since the humidity levels in most homes are lower.

A plant besides the window.
The humidity around the plants can be increased by misting or placing them in a room with steamy showers.

What if there isn’t enough humidity?

If the humidity within your plant’s environment is too low, there are a few methods that you can use to help increase it.

The best way to increase humidity around your plants is by using an ultrasonic humidifier.  If you don’t own one, mist your plants with a spray bottle about once every three days. This will place a thin layer of water around the leaves, thus keeping them moist and healthier.

How humid is too humid?

For air plants, humidity is very important. The leaves of air plants are thin and can dry out quickly if humidity levels are too low, which will result in brown spots on the plant’s leaf tips or margins. As a rule of thumb, humidity levels should be around 70% to 80%. Anything lower or higher may cause irreversible damage. For better regulation, place your plants on a tray with moistened rocks and pebbles. This will help increase humidity while regulating temperature.

Taking care of air plants is an easy task once you learn the basics. All you need to do is understand how much light, humidity, and water they require and then keep them in that environment. If properly taken care of, air plants can easily add more greenery to your home or garden. Remember, always do your research on the specific plant you’re caring for. Since air plants come in various shapes and sizes, they may require slightly more or less light and water than others. Whenever in doubt, consult a local nursery or a trusted gardening expert.

What to do if Cactus Breaks? Experts Guide

Cactus is a slow-growing succulent plant with stiff, jointed and fleshy stems covered by hard, leathery leaves. Unluckily, it is also very prickly! Cactus has long been a favorite houseplant for its attractive appearance and low-maintenance requirements. Due to its fleshy stem and brittle joints, the cactus is susceptible to breaks and dents which can be a big problem for the plant.

Such wounds can become entry points for fungal infection and cactus rot. Usually, small breaks in the cactus do not kill the plant, but its sulky appearance will definitely affect the aesthetic value of your home. If you love your prickly pets as we do, you may need to learn what to do if cactus breaks.

So, what to do if the cactus breaks? The first step is to access the extent of the damage. This will help determine whether you will reattach it back, perform grafting or planting the detached piece into a new plant. You can reattach a broken cactus by simply joining the broken parts. However, if the breakage is extensive and some of its segments are separated too far from each other, grafting or re-planting maybe your best option.

A broken cactus can be disappointing, especially if you do not know how to fix it. However, you need not worry as this article will teach you how to care for a broken cactus by taking you through a checklist on how to fix a broken cactus.

Vital Steps to Fixing a Broken Cactus

1.     Initial assessment

The first step in dealing with a broken cactus is to appreciate the fact that the stem or joint cannot be replaced back into its normal position. In most cases, there will be a crack around the break which prevents it from being re-joined properly. If you are lucky enough for your cactus to have two symmetrical halves, leave it alone or you will risk introducing more problems.

Always observe your broken cactus to check if the stem or joint can be re-attached to the plant.

2.     Cleaning the pieces

Roughly clean the area around the break by removing any unwanted dirt and debris with a soft brush. Use a mix of warm water and mild detergent to clean inside and around the wound thoroughly. It is important to remove all traces of dirt and bacteria otherwise they will proliferate to cause infection and rot. If you find that dead tissues around the wound are preventing it from closing properly, remove them carefully with a pair of sterilized scissors or tweezers.

3.     Minimize scarring

If the stem is spiny on its underside as in many species, do not try to smooth out the area by rubbing in circles or applying pressure as it will only cause more damage. Instead, cover the area with green leaf gel as it will facilitate the healing process and minimize scarring.

Smoothing out the broken area or applying too much pressure to it may cause irreversible damage.

4.     Take care of the cambium

When reattaching, always ensure the cambium is aligned. Cambium is the green layer of living tissue right below the bark. Cactus normally produces new stems from the cambium so it will be helpful to take a piece of stem from a healthy plant and use it as a replacement for the broken one. Stick the replacement onto your cactus with wood glue around the wound and hold it firmly until it dries.

5.     Avoiding infections

The main concern after successfully fixing a broken cactus is to prevent it from becoming infected as the new stem has no natural protection against pathogens. Keep your prickly friend away from windows and drafts because they attract dust, mites and other dangers for your plants. It is also advisable to keep dehumidifier near growing or flowering cacti because they are more susceptible to rot and fungal diseases when flowers are present.

Avoid placing your broken cactus near the window or draft to avoid rot and fungal diseases.

6.     Dealing with the remaining half

Sometimes, your damaged cactus may be severed in half with the tops part missing. It is possible to save a damaged cactus even if it only has one-half of the stem left. The plant will eventually grow new stems and you can detach them once they reach sufficient size. Be patient as this process may take years. With good care, your cacti have the potential to live long and be as prickly as you like.

7.     Consider grafting

Grafting is another approach to a broken cactus. This involves transferring pieces of stems or roots from other plants to the wounded area. Leave it undisturbed for a year and then you may consider repotting your cactus into a larger container so that the graft can grow freely. Your prickly pet will never be ugly again once it gets healed. The best part is, besides learning what to do if the cactus breaks, this procedure can be repeated as many times as you like without damaging the plant.

8.     Re-planting  as an option

In cases where the broken piece cannot be reattached, you can consider propagating it as a new plant. Take the detached piece and remove any unwanted parts. Place the stem in a glass filled with water and keep it out of direct sunlight.

If the broken part cannot be attached to the cactus, consider potting the detached piece to propagate it.

When new leaves appear, plant your cactus cutting into the soil-based potting mix and transfer it to bright light. Water well and watch for growth as you wait for more roots to develop. Once the new stems become sturdy enough, you can move them out to direct sunlight and enjoy your new addition to the family. Just keep an eye on it so that it does not rot or become infected as this will further affect the health of your other houseplants.

A Few Tips to Prevent Future Breakage

– Watch out for falling branches or pot lids that can snap spiny stems of the cactus. If you are worried about such risks, plant your prickly pet in a sturdy ceramic pot.

– Try to avoid repotting cactus too often or putting them in a very small container that will cause the plant to grow towards the light source and break. If you are going to pot your pet into something smaller, make sure that it is just slightly bigger than its current size so it can grow outwards.

– Use a few pieces of fine wire mesh or slotted plastic to separate cactus branches in your pot, so that they cannot rub against each other and break accidentally.

-Keep your cactus out of reach of children or animals. Many people have gotten injured after touching cacti that were grown as ornamentals or kept as pets.

– Avoid overwatering your plant and keep the soil at a suitable level of moisture for healthy growth.

– Keep an eye on any wilting leaves, yellowing or irregular colored spots to avoid infection and rot before it spreads further into the plant.

– Know beforehand how spiny your cactus is and handle them accordingly when repotting, showering or moving them around the house. If you have pets at home, remind them to keep away from prickly houseplants to avoid unnecessary accidents.

Healing Considerations When Fixing a Broken Cactus

When fixing a broken cactus, it’s important to consider how much work you want to put into fixing the plant. In some cases, it may be more aesthetically pleasing just to let a few holes in the cactus and consider it part of your decor. On the other hand, a few broken pieces of cactus can be considered parts that really show off your personality.

Whether you choose to fix a broken cactus or not, it’s important to clean the wounds and apply antibacterial cream as needed. It may be helpful to clip off any undesirable parts of the plant so that they will not die with the main stem.

After applying medications, bandaging your cactus is a good way to prevent further infection or more rot from developing. It is also helpful to spray the plant with water and make sure it keeps moist until the damaged area heals enough to support itself.

If you do have a broken cactus, ensure that its parts are reattached in a similar compost so that they can grow back together. For plants whose stems or roots cannot be reattached, you can propagate the cutting as another plant to enjoy. You can also continue enjoying your cactus with or without the extra holes in it for years to come.

Fixing a broken cactus is not the east of tasks. It takes a lot of care and attention to the plant in order for it to heal quickly. If you are easily discouraged by broken plants, try not to fix your cactus immediately. Give it at least a week before trying again.

Don’t be too hard on yourself if things don’t work out as planned because there are plenty of other ways to enjoy your cactus. As long as you are careful when handling your plants and get them checked by a professional if necessary, fixing a broken cactus is not too difficult or threatening to the health of your plant.

If anything, looking after a cactus with holes in it will give you more practice in expanding your gardening skills and make you more confident with handling other plants in the future.

How to Revive a Mushy Cactus?

Cactus rot issues are one of the scariest moments for every gardener. The plant itself is an investment in time and money, and seeing it die can be heartbreaking. But there is something you can do to save it. All you need are a few household ingredients and some time.

Believe it or not, saving a mushy cactus is possible and very easy. All you have to do is find out the cause of the mushiness, cut out the dying part, and clean off all of the dead tissue. You can also re-pot the plant in a clean pot with fresh soil. 

Your cactus gets mushy, soft, or worse, waterlogged? There are three ways you can resolve this issue without having to toss it out. Let’s explore them.

Understand the Cause

Before you begin saving your cactus from the pangs of death, you need to understand the cause or source of the problem. Usually, a cactus gets mushy because of one or more of the following reasons:

Overwatering

Overwatering is a common reason for your cactus being unable to recover. It might start as an innocent mistake when you spray the plant with too much water after not seeing it grow for some time. But once the rot sets in, there is no going back. Sometimes, the roots also rot due to excess water, and this can be dangerous because if you don’t take action right away, the plant will lose all its root hair and die slowly.

An overwatered cactus may turn mushy and its roots may start to rot.

Pests

If pests like mealybugs or scale insects have hit your cactus, then it isn’t far from being completely dead. They suck the life out of your cactus by feeding on it, and that rots the plant from behind until it is mushy all over.

Inadequate Air Circulation

Your cactus needs fresh air to live, just like all other plants do. But if there is no air circulation in your room or if you keep the plant in a place that doesn’t get any natural light, it will start to rot from inside.

If your cactus does not receive enough fresh air and sunlight, it may start to rot from the inside.

Dust

This might seem like a strange reason for your cactus turning mushy but think about it. If you have dust or dirt on the leaves of your cactus, then there is no new supply of nutrients getting in for the plant. Also, if the leaves don’t have a way to clean themselves off, the dust will prevent sunlight from reaching inside, and it will also rot your cactus over time.

How You Can Revive a Mushy Cactus

After you understand why your cactus is mushy and what you need to do, here are ways you can save it. Keep in mind that these methods only address mushy cactus symptoms and not the underlying reasons behind them.

Watch Your Watering

If you want to prevent your cactus from getting mushy again, follow this first tip; water it less often but more thoroughly. Don’t allow your cactus to get thirsty and dehydrated because that will mean danger. The plant will dry, brown, and get calloused. This is actually the opposite of how the plant reacts when you overwater it.

Avoid watering your cactus during night hours because the water won’t have enough time to dry out, and it will cause rotting. Also, be careful not to overwater your cactus because this is the main cause of rot issues. Too much water will drown the roots and cause them to rot and become mushy.

To prevent your cactus from getting mushy, water the plant less frequently but thoroughly.

Remove the Damaged Parts

If your cactus is rotting from the top, it will be very easy to cure. Cut away the mushy. If it’s rotting from the bottom, then prepare yourself for a little more work.

The most important tip here is to remove as much damaged tissue as possible and leave only healthy tissue behind. You can use tweezers for this if necessary but don’t touch what you can’t see.

You might want to start with a thick paper towel or cloth between your cactus and the tweezers. This will prevent any chance of damaging the healthy parts by mistake. Ensure you remove the rotten tissue as soon as possible because letting it stay there will only invite more rot to spread.

Re-pot the Plant

If your precious cactus plant is rotting from the bottom, you won’t be able to cut the mushy part out. In this case, your best bet will be to re-pot your cactus, preferably in a larger pot.

Usually, re-potting is carried out to grow the plant bigger and create space for the roots. But in this case, we will leave the old soil where it is and give it more space by moving up the pot.

Re-potting your cactus in a larger container will help you save the plant if it is rotting from the bottom.

There is an important difference between this and regular re-potting. With a normal re-pot, the plant’s root ball does not get disturbed. Here, you need to remove some of it to place the bottom part in a clean soil bed. Do this gently because cacti are delicate plants and can easily snap if you pull at them too hard.

After you place the bottom part in the soil bed, fill it up. You’ll have a pot that has only one part of the cactus root ball in contact with the soil. This is fine because the roots can grow freely from there, effectively filling up all the space we gave them.

If possible, put your cactus in a place where it gets some natural light during the day. This will help it grow new healthy parts more quickly after you remove the old ones.

Re-pot your plant as soon as possible because letting its root ball stay loose for too long will cause it to turn mushy again and possibly rot completely from inside.

Trim Away Dead Leaves

Over time, leaves get damaged and when they do, cut them away because they aren’t helping your cactus anymore.

If you trim away dead leaves of a mushy cactus plant, you will remove some of the dead material that might be causing the plant to rot. This should help it stay healthy for longer, but don’t expect dramatic results because you are not solving any root problems with this move.

However, it is a good idea to trim away damaged leaves, so they don’t get mushy and fall off later on while you have your plants outside when it’s warmer.

Improve Air Circulation

One of the main reasons why cacti get mushy is that they can’t breathe properly. Like all other types of plants, cacti need fresh air to stay healthy and prevent diseases like rot caused by non-breathable conditions. If you keep your cactus in a glass cabinet and there is no air getting into it, you can be sure that it’s going to get mushy.

To prevent this from happening, make sure that there are holes of some type on the sides or top part of your plant’s container. This will provide an easy way for air to enter every corner of the container and help your cactus breathe again.

Related Questions

Can a mushy cactus recover?

When a cactus starts to rot from its core, there is little you can do except remove it as soon as possible. Letting it stay will only invite more decay and possibly kill your other healthy plants when you bring them home. But if the rotting was caused by an injury or some other problem that disrupted water flow in the plant, you can try to save it. Remove the damaged part and allow fresh air inside.

Can a cactus go soft even with no issues?

Yes. Cacti are very vulnerable to temperature changes, over-watering, and other problems that can turn them mushy if you do not treat them properly. Also, some varieties of cactus grow naturally softer than others because their main defense is blending in with their surroundings, so they don’t get eaten by animals or insects.

When the cactus is in nature, this works perfectly, but when you put it inside your home or garden, a softer cactus can quickly get ruined by any small animal that touches it.

How often should I water my cactus to avoid rotting?  

Water your cactus at least once per week or when it feels dry. If you live in a hot area or leave your cactus outside during summer, you should water it at the same frequency as above with a larger amount of water at once.

Summary

Rot is a very serious problem for your cacti, and no matter how careful you are, it might still happen. When it does, don’t panic because this is not the end of the world. If the damage is limited to one or two spots near its bottom, there’s still hope.

If the rotting was caused by an animal or a mishap with the water, you could try to help your cactus recover by removing the damaged part. As long as you get rid of at least 75% of it, you should be able to restore your plant to life within a couple of months.

How To Grow Aloe Vera? The Complete Guide

Aloe Vera, is no doubt, one of the most beneficial plants you can grow at home. This is not only thanks to its aesthetical value and versatility of use but also because the plant offers unmatched medicinal properties. These can save you a trip to the doctor and at the same time.

A low-maintenance plant that requires little care or attention, Aloe Vera can be grown in almost any room of your home. You can even carry one with you while traveling in a plane or car for relief from minor burns and other skin irritations. This makes Aloe Vera an excellent subject for your first gardening project.

So how can you grow aloe Vera? It prefers full sun but can also grow indoors with artificial light and moderate water. Aloe Vera plants need soil that drains well, so it’s best to plant them in containers. It does not require much care, nor requires any special lighting or watering conditions. Just provide it with full sun exposure and water regularly.

This article will be looking at the simplest way of growing Aloe Vera at home. This is especially for those who are just starting out and do not want to spend too much on a complicated gardening project.

Interesting Facts About Aloe Vera

  • It is native to Africa and does not grow naturally in any other parts of the world.
  • It is also known by many different names such as, Aloe Barbadensis Miller, Aloe Vera Officinalis Elles, and Aloe Ferox Mill.
  • The gel from an aloe plant contains polysaccharides and high levels of enzymes that improve immune function. These compounds are also found in gums, milk and honey.
  • Aloe can live for over 200 years.
  • Although the media has been touting its many health benefits, Aloe Vera is also a powerhouse when it comes to beauty care. It is used in cosmetic products, aromatherapy as well as in household cleaners and personal care items.
  • The main components of aloe vera gel, are polysaccharides, which help increase the body’s immune function and antibodies.
  • Aloe Vera has been used by many civilizations including Egyptians, Greeks and Romans. The name came from Arab traders who brought the plant to North Africa.  The Spanish first encountered it in the 1500s, when they invaded parts of Mexico and Central America.
  • Aloe vera plants are capable of growing to six feet tall, but the average height usually ranges from one to three feet. The plant remains small if continually cut back or when grown indoors.
Aloe Vera is a gorgeous succulent that is mainly used for its medical benefits.

Aloe Vera Propagation

Aloe Vera propagation is quite easy. There are several methods that you can use to grow a new aloe vera plant and it only requires minimal care or attention.

Aloe Vera Propagation Method #1 – Branch Cutting

This is the easiest method of growing Aloe Vera at home. Take off a branch from the mature plants (between 3″ to 6″) and cut it at an angle. Some people like using this method because of the nice designs on the leaves, while others do it to bring a bit of green indoors or simply because they have too many plants already.

To propagate Aloe Vera, you can cut the branch off the plant and put it in water for a new succulent to grow.

Caring for aloe vera cutting is easy too. All you need to do is to put the tip in water and make sure that it does not dry up. After a couple of weeks, you will find out a new plant growing from the tip and eventually take over the pot.

Because this is a hardy plant, you can use this method for indoor gardening when space is an issue or even if you’re using artificial light indoors. It is also a great way to propagate a plant without having to bring in new soil and risk spreading disease.

Aloe Vera Propagation Method #2 – Stem Cuttings

You can also use this method when you want to increase the size of your aloe vera plants or simply want more of them to grow indoors. All you need is a clean, dry and sharp pair of scissors. Cut the stem at a 45-degree angle, about 3-6 inches from the plant base.

Cutting aloe vera is as easy as that! Just place it in water and make sure that it does not dry out. Within a couple of weeks, you will see new branches growing from the tip.

When propagating Aloe Vera through stem cuttings, cut the stem about 3-6 inches from the succulent base.

Aloe Vera Propagation Method #3 – Offsets

One way of increasing the size of your aloe vera plant is through offsets. This method is best if you want to grow them in pots or containers, especially if they are indoor plants. Aloe veras can also be propagated using this method and here’s how to do it:

1. Locate the stalk of the plant that grows directly from its center. The side branches should be growing out from this main stalk.

2. Cut the main stalk just below a lateral branch and place it in a small pot with sandy loam soil. Make sure that you keep the cutting about two inches above ground level.

3. Water the entire plant and place it in an area where it can get partial sunlight for about six hours a day. When you water your aloe vera, make sure that it does not overflow because its roots are sensitive to overwatering or underwatering. You should also check periodically on the cutting by removing the soil that has accumulated on top.

4. If you notice that the cutting has rooted, then it is ready to be transplanted into a bigger pot.

Aloe Vera Propagation Method #4 – Spreading Roots

Because Aloe Vera plants are succulents, they have spreading roots which can be used to propagate other plants at home. It is not only easy to do but also a great way to increase the size of your plants.

The best part about propagating aloe vera using this method is that they can grow anywhere.

Aloe Vera Propagation Method #5 – Air Layers

This is another method that you can use if your aloe veras have spreading roots or rhizomes. If you have one, then here’s what you need to do:

1. You will need a shallow container like a yogurt cup and two or three inches of sandy loam soil.

2. Hollow out the center of the aloe vera plant and put a few drops of rooting hormone into it. You also need to put a little water in it too so that the hormone will be more effective.

3. Cover the hole with plastic and push down gently until you see new roots sprouting from the sides.

4. Put the plant into a bigger container after you remove the plastic and make sure that it gets partial sunlight for five to six hours every day.

5. After about three weeks, your aloe vera will be ready for transplanting!

Aloe Vera Propagation Method #6 – Leaf Cuttings

This is the easiest and fastest way to grow aloe vera at home, but you can only use this method if your plant has leaves with new growth. Here’s how to propagate an aloe vera using this method:

1. Cut a leaf from the plant and trim one inch off of it. Make sure that the rest of the leaf does not have any brown spots.

2. Push the cut end down in a pot filled with sandy loam soil and water it well. You should also place the plant in an area where it can get partial sunlight for six hours a day.

3. Remove any loose parts on your aloe vera after one month and you will see roots growing from the stem. The plant is now ready to be transplanted into a bigger pot!

Aleo Vera Fertilization Guide

Since Aloe Vera plants are succulent in nature, they need a special kind of fertilization program. It is recommended to use a mineral-based fertilizer that does not contain nitrogen because it can cause the plant to produce soft growth, which makes them more susceptible to disease and pests.

For Aloe Vera, you should use a mineral-based fertilizer with no nitrogen in it.

Here’s how often you should give your Aloe vera the right amount of fertilizer:

• If your plants are young and growing then you need to fertilize them every week. Use 1/2 tablespoon of calcium nitrate plus one-fourth cup of Epsom salts.

In containers, use enough water so that the entire potting media is moist but not soggy. You also want to make sure that you fertilize your plants between 1/2 to 1 inch below the soil surface.

• If the plant is in a pot for more than six months then you should feed it once every three weeks by using ½ tablespoon of 10-10-10 fertilizer mixed with one-fourth cup of Epsom salts. You can mix it with water and pour it on the top of the soil.

Aloe Vera Watering Guide

Watering an Aloe Vera plant is easy and straightforward. You just have to make sure that the soil does not become too soggy or dry otherwise you might end up killing your plants.

To properly water Aloe Vera, make sure the soil is neither soggy nor dry.

Aloe Vera Watering Schedule

The frequency of watering aloe vera depends on a few factors, like:

• The size of the pot – If you are using pots that hold more than 15 gallons of soil, then you should water your plants every other day. However, if the container is smaller than 10 gallons, then you should only water it once a week.

• The light exposure – If the aloe vera plant gets too much sunlight (more than six hours) then it needs to be watered more often than if it is in a shady area.

• The weather – If you live in areas where there is not much rainfall, then you should water your plants once or twice a week. However, if it rains frequently from spring to early summer, then the plant will require less watering during this time.

The best way to know when your Aloe Vera needs water is to take a look at the soil. If it’s still wet from the last watering, then there is no need to give it more water. However, if the top of the soil feels dry to touch and doesn’t stick together easily then you should give it some water.

Transplanting/Repotting Aloe Vera

Transplanting or repotting aloe vera can be done any time of the year, as long as you follow a few simple steps.

Aloe Vera may require transplanting or repotting, so make sure you do it with extreme care.

• Make sure that your plant doesn’t have too many roots yet before transplanting – This is important because if it has too many roots then it might not survive.

• Find a pot with the same size or slightly bigger than the one your plant is currently in.

• Fill the pot with a mixture of potting soil and fine sand – The right ratio is 3:1, where potting soil makes up two-thirds of the volume and fine sand makes up one-third. It is best to use a bagged commercial potting mix rather than making your own so that you can be sure that it contains no chemicals.

• Make sure that the pot is deep enough for the roots to be covered by 1-2 inches of soil after transplanting – The plant will not grow as well if its roots are exposed. Plant it so that the top edge of the root ball is slightly below surface level.

Common medicinal properties of Aloe Vera

One of the great things about having your own aloe vera plant is that you’ll always have access to fresh aloe vera gel for medicinal purposes. You can use this wonderful substance directly from the leaf or you can make it into various products such as creams, lotions, ointments, and gels. Fortunately, there are many uses for aloe vera and its benefits include everything from treating burns, to soothing bug bites and softening dry skin.

Aloe Vera owners are lucky as they have access to fresh Aloe Vera gel that can be used for various medical purposes.

This wonder plant is considered to be a very effective medicinal herb. According to studies, aloe vera contains more than 200 biologically active compounds which can help the body fight off disease and promote good health. Some of these components include:

• Antioxidants – They reduce free radical formation in the body and neutralize harmful chemicals that are produced as part of carcinogenic metabolism.

• Polysaccharides – These are complex sugars that can help boost the immune system. They also contain anti-inflammatory and antiviral properties which makes them excellent for treating digestive problems, ulcers, colitis, and asthma.

Today, aloe vera is used to treat a wide range of conditions. It has been effective in treating everything from acne to cancer. It also helps in the digestive process and promotes a healthy cardiovascular system.

Best Aloe Vera Varieties to Grow at Home

There are many varieties of Aloe Vera plants, but only a few are the best ones that you can grow at home. Here is a list of some popular species:

Aloe Vera Varieties for Sunlight

As mentioned earlier, Aloe Vera plants require plenty of sunlight to thrive. If you live in an area with more than six hours of direct sunlight per day then you should grow these Aloe Vera varieties:

• ‘Dorothy Lael’ – This is an attractive cultivar with golden leaves that has excellent medicinal properties. It also features soft, sword-like foliage and makes a great ornamental plant in your garden.

• ‘Orange Frost’ – As its name suggests, its leaves are bright orange and it produces clusters of flowers that are a striking shade of yellow.

• ‘Zambia’ – It is native to East Africa and has long narrow red-edged green leaves. However, this species requires more sun than other Aloe Vera plants.

Aloe Vera Varieties for Shade or Partial Shade

If you live in an area with less than six hours of direct sunlight per day then the best low light Aloe Vera varieties for you are:

• ‘Baby Leaf’ – It features short compact rosettes that produce lots of new leaves. This variety is also very easy to grow and ideal for a beginner gardener.

Aloe Vera Varieties for Large Patios

These Aloe Vera varieties are very popular because they can grow up to 4 feet in height and width with ease:

• ‘Hercules’ – It features broad, deep green leaves and grows up to 9 inches wide. If you don’t mind a larger plant then this is the best variety for you.

• ‘Emerald Ripple’ – It features long, narrow green leaves and a height of up to 3 feet.

Aloe Vera can prove to be an extremely necessary plant for any succulent enthusiast, especially if you live in areas without much natural sunlight. You can grow a beautiful plant indoors or outdoors and be assured that it will thrive even under the least favorable conditions.

Since its growth and care are both straightforward, you can feel confident in your gardening attempts. Plus, aloe vera is also easy to propagate once you’ve learned how to grow it from cuttings, seeds, or even by division.

To get the best results, plant them in a sunny area with well-drained soil and plenty of room to grow. Remember that aloe vera plants are known for their exceptional drought resistance. Even after keeping it indoors, you can still expect your plant to thrive because of its ability to store water in its fleshy leaves.

Experts Guide: How to grow Euphorbia Plants?

Euphorbia is a genus of flowering plants belonging to the family Euphorbiaceae, often called spurges. It is a succulent that can grow to be a large shrub or small tree. It can also take on the form of an upright or trailing plant depending on how it’s grown and what type you decide to purchase.

These plants are native to Africa, Madagascar, and the Arabian Peninsula in southern Asia. The name is derived from Greek words meaning “well-being”. There are around 800 different species of euphorbia growing throughout the world today.

So, how do you grow Euphorbia? For better results, start with a plant that has already been growing for some time so as not to shock the roots. Euphorbias are very tolerant of cold temperatures, drought, and low-light conditions which makes them ideal plants when trying to grow indoors or outside in colder climates.

If you’re planting your euphorbia outdoors then choose an area that gets at least four hours of direct sunlight each day. For those looking to grow indoors, it’s best to place the plant near a window with lots of natural light rather than artificial light. 

Euphorbias are relatively pest-resistant plants and grow quickly which makes them an ideal addition for home gardens but they do have one major drawback. They’re poisonous to animals, humans and birds so use caution when handling this plant or any part of it at all times.

 If you’re looking for some Euphorbia growing tips, then this article is perfect for you. We’ll go over soil preparation, watering frequency, sunlight requirements, and more in-depth topics like pruning and propagating your plants.

Common characteristics and features of the Euphorbia

-Euphorbia plants are a succulent that can grow to be either large shrubs or small trees

-Euphorbias usually have spiny stems, branches, and leaves but not always which is why it’s so important to identify the species before planting

-There are around 800 different Euphorbia species in existence today with about 60 of them being native to the U.S

-Euphorbia plants are able to grow in a variety of conditions with low water needs, cold tolerant, drought-resistant, and ideal for beginners

-Many Euphoria species have leaves that can be either green or red as well as other colors which is why they’re often planted close together for their varied color combinations

-Euphorbia plants are poisonous to animals, humans, and birds

-Euphorbias grow relatively fast so they’re a good choice for home gardens but can be pruned to produce new cuttings that will then root in water or even the soil if conditions are right.

Propagation for Euphorbia plants

Euphorbia can be propagated in the following ways:

1. Cuttings

Steps:

-Take a cutting from the plant and make sure that it has at least two sets of leaves on it

-If you’re planting indoors, then place your cuttings in a glass or jar filled with water. Make sure to change out the water every few days until roots develop

-For outside plants, take your potting soil and poke a hole about an inch deep in it

-Insert your cutting and make sure that the leaves are at least one to two inches underground level. Cover up with soil and gently pat down until there are no air pockets left

-Water well before placing outdoors or bringing inside for a few weeks of growth

Note: This method is perfect for propagating new plants or cuttings but will not work for creating a mature tree

-A hardwood cutting is the best way to produce healthy and strong euphorbia trees. This method requires more time as it takes about one year before the plant can be planted outdoors

Steps:

-Take your Euphorbia branch and remove the leaves, making sure that there is at least one set of leaves on it

-Cut your branch into two-inch segments and place it in water. Make sure to change out the water every few days until roots develop

-After a few weeks you’ll notice new growth coming from where you cut off your branches which is when you can then place it in potting soil. Ensure that the cut end is at least one inch below ground level and cover up with soil

-Water well before placing outdoors or bringing inside for a few weeks of growth

Note: This method will not work on branches without leaves as they won’t be able to absorb water needed for new root development

2. Air layering

Steps:

-Take a plant cutting that is about six to eight inches long and make sure it has two or more sets of leaves on it. Cut off the bottom portion and place in water with new growth coming from where you cut off your branch for rooting purposes

-You’ll then need to take some soil from your desired location and wrap the plant cutting with it. Make sure to leave about two inches from ground level for roots

-After a few weeks new growth will come out of where you cut off your branch which is when you can then place it in potting soil, just like before. Ensure that the bottom end of your plant is at least one inch below ground level and cover up with soil

-Water well before placing outdoors or bringing inside for a few weeks of growth

Note: Air layering is the process where you don’t need to remove any leaves from your plant but still requires that it has two sets of leaves. This method also takes longer than cuttings because it’s not until after one year that you can place the plant in your garden.

3. Division

Steps:

-Identify which Euphorbia plant you want to divide and gently pull it apart with a spade or your hand. Be careful not to damage the roots while doing this as they can be easily damaged if pulled too hard

-Take some potting soil from your desired location and place it on top of the roots. Make sure that the top portion is covered by about an inch of soil

-Water well before bringing inside or placing in your garden for a few weeks to allow new roots to develop

Note: This method will only be successful if you’re dividing mature plants with at least one year’s worth of growth on them. It also takes longer than cuttings or air layering because it’s not until after one year that you can place the plant in your garden.

Watering  guide

Euphorbia plants need to be watered every week for at least an hour to ensure they don’t dry out. The watering time can be extended to every two weeks if the plants are indoors and do not receive a lot of natural light from outside. In case of drought, it is important to water the plants twice a week.

This will not only ensure that the plants stay looking healthy but it will also save your pot from cracking. Nevertheless, you may water your plant any time to notice the leaves are curling up and turning to a yellow or brown color. This means that it has been deprived of water for too long

Water your euphorbia once a week for at least an hour to prevent it from dehydrating.

If you want to make sure your plant is getting enough water, the best way to do so is by using a soil meter. Simply stick one end into the potting soil until it hits the top, then wait a few seconds and look at the readings. If they’re not within an ideal range of 80-100% you’ll need to water your plant more often or invest in a new pot with better drainage

It’s worth noting that when watering it is best to use room temperature (cold) water rather than cold. This will prevent the soil from contracting around the roots and shrinking.

Euphorbia Fertilization Guide

Euphorbia needs to be fertilized every two weeks for understory plants that are outdoors and four times a year for indoor plants. The fertilizer composition is different depending on the type of soil you are using. Understory plants will require a fertilizer that has both nitrogen and phosphorous, while indoor plants only need fertilizers with nitrogen or phosphor.

Ideally, you should fertilize your euphorbia every two weeks.

If you would like to use organic fertilizer, try using compost tea or fish emulsion diluted at half strength. This ensures that you are feeding the soil with a nutritious liquid.

For synthetic options, look into Miracle-Gro which is known to work well with this plant.

Euphorbia Light and temperature requirements

Euphorbia plants will require plenty of light and different temperature requirements depending on their location. Understory plants need at least six hours of sunlight a day, while indoor plants should be set in an area that gets three to four hours of natural or artificial light daily. In case of cold climates, make sure that your plants are stored in a place where they can get plenty of sunlight.

Euphorbia requires at least 6 hours of sunlight daily.

In terms of temperature requirements, both understory and indoor plants need to be kept at room temperature for the most part but should not exceed 75°F (24°C). If you want to keep them alive during the summer months without sun but it’s important to note that they don’t do well in humid environments. Euphorbia prefers natural light to artificial light and should not be placed in dark areas.

Euphorbia Pruning guide

Euphorbia plants grow in a wild and natural pattern that can make it difficult for gardeners to prune the plants. Do not be afraid of cutting off some branches, as this will help them to look tidy and create desired space. Pruning also helps get ideal cuttings for propagation.

Pruning your euphorbia will make the plant look much tidier.

If you’re pruning your plants for the first time, it’s best to use a sharp pair of scissors or garden shears. You can cut off any branches that look unhealthy and make sure they are at least two inches away from the plant. It is important not to leave too many stubs behind because these will grow into new shoots.

Do not prune your plants in the winter because it is important to do so when they are dormant and would prefer http://windhampharmacy.com you not to mess with them during this time. Prune during spring or fall months when they are actively growing. If you notice that some branches have grown low enough, now might be a good time to trim them off and avoid future accidents. 

Euphorbia Pests and Diseases Guide

In the event that your plant becomes infected by pests or has a disease, it is important to act quickly before they spread. Insects like aphids can cause yellow leaves, brown spots, wilting branches, stunted growth, and leaf drop while fungus diseases can cause a plant to turn brown and die.

To get rid of bugs you may use insecticide diluted with water, which should be sprayed onto the plant’s foliage one time every two weeks. To treat fungus it is best to mix up some baking soda (half cup) in a gallon of water then spray over your plant’s leaves as needed.

If you are unsure of the cause, it is best to call an expert who can help diagnose your plant’s specific problem and provide a solution for getting rid of them.

Aphids

Aphids are one type of insect that can infect plants like Euphorbia with yellow leaves and wilting branches. To get rid of these insects you will need to use insecticide diluted with water and sprayed onto the plant’s foliage every two weeks.

Fungus Disease

Fungus disease is another type of problem that can affect Euphorbias, causing them to turn brown or die if left untreated. The best way to treat this is by mixing up some baking soda in a gallon of water then spraying it onto the plant leaves as needed.

Wilting branches

Wilted Branches can be caused by aphids or fungus diseases, both of which need to be treated with insecticide diluted with water and sprayed every two weeks.

Stunted growth

Stunted Growth can be caused by aphids, fungus diseases, or dry weather. To prevent stunted growth it is recommended to use organic fertilizers that have nitrogen as well as phosphorous.

Pests that like to attack Euphorbias are mostly found on the top of the plant or in the leaf axils. If you notice this happening then it is best to use a product with Neem oil on it, which can be bought at any garden center. Alternatively, you can use the natural remedy of baking soda to get rid of them.

Importance and uses of Euphorbia

-Euphorbia plants are a beautiful centerpiece that can brighten up any space.

-The Euphorbia produces an ornamental flower called the crown of thorns, which is used for decoration purposes and in some religious ceremonies.

Euphorbia features gorgeous flowers that can be used as decorative pieces.

-Euphorbias also offer medicinal benefits to people suffering from different ailments such as asthma or arthritis by producing substances that help relieve pain, swelling, and itching.

-The Euphorbia is the national flower of Kenya, where it grows in great numbers.

Euphorbia Varieties to grow at home

1. Euphorbia cactus (crassulaceae)

Euphorbia Cacti can be planted outdoors or indoors, and are popular for their low maintenance requirements. The Euphorbia cactus has a variety of names in different languages including ”Espuela de Caballo”, which means “horse’s spur”. These plants grow in the wild in many regions of North America and Central America.

Euphorbia cacti prefer to grow in soil that has a lot of organic matter like manure, compost, or peat moss. They can be planted from seeds, cuttings or purchased as potted plants ready for planting.

2. Euphorbia pulcherrima

Euphorbia Pulchirima is a beautiful plant that comes in many colors and can even be grown indoors. They are popular for their colorful flowers which grow on the tips of tall stalks, with some varieties having multiple blossoms per stalk. These plants prefer to live outdoors because they need lots of suns, with soil that should be allowed to dry out before watering.

Euphorbia pulcherrima plants can start reproducing when they are about one year old and will need to be divided every few years for maximum growth in numbers.

Euphorbia Pulcherrima, AKA Poinsettia, is a type of euphoria that features colorful flowers and loves the sun.

3. Euphorbia erythraea

Euphorbia Erythrea grows in the wild on rocky hillsides near waterfalls. In their natural environment, these plants need to be planted in soil with a lot of organic matter like manure or compost. They can also survive in dry climates as long as they are watered regularly and given a partly sunny location.

Euphorbia Erythraea is a type of euphorbia that thrives in dry climates as long as it is watered regularly.

These plants come in many different colors and are popular for their beautiful flowers which can grow up to 12 inches tall.

Euphorbia Erythrea is a slow-growing plant that does best when it is given lots of water, fertilizers, or organic matter as well as plenty of light. It will also need to be divided every few years for maximum growth in numbers.

Conclusion

Euphorbia is one of the most notable succulents you can get for your home garden. They come in many varieties and colors, and they are easy to take care of. They originate from arid regions near the equator but have recently become popular as house plants due to their low maintenance requirements.

If you are looking for a new plant to add to your cacti garden, the Euphorbia is an excellent choice. The most popular variety of this succulent is the cactus type which can be found in many colors and are low maintenance. They grow well indoors or outdoors but prefer dry climates with lots of sunlight for best growth results.