Expert Guide: How To Grow Echeveria Plant?

Echeveria is an interesting succulent plant that you can grow in pots or in the ground. It is commonly featured in succulents gardens,terrariums, floral arrangements, and planters. Echeveria is the most common type of succulents in cultivation, but there are other types like Crassula (Crassulaceae).

Interestingly enough, echeverias have thrived under different conditions from temperate to sub-arctic climates. These succulents stand out with their rosette shape and vibrant colors.

So, how do you grow echeveria plants? If grown indoors, it would need lots of bright light and less water to avoid getting root rot. It also needs well-drained soil so make sure your pot has enough holes on the bottom for drainage. When growing it outdoors, provide shade from the hot sun during summer months but allow some sun in cold months. If they need more sun (if you have them outside), move them closer to the window but not in direct sunshine as this will cause scorching of their leaves and stunted growth.

This article will be looking at the best growing practices for echeveria plants focusing on cultivation in pots or the ground, both indoors and outdoors. It will also look at the different types of echeveria that are available and their best uses.

Common features and properties of the echeveria plant

The echeveria plant has a number of features that make it stand out. You can easily identify it in the following ways:

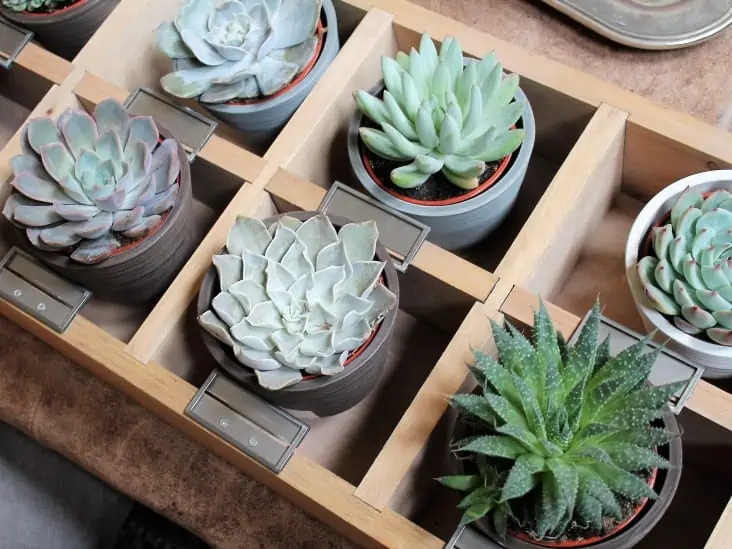
– Rosette shape with fleshy leaves that are spiny and succulent. They have a convex, symmetrical rosette around the stem.

– The color of their foliage is usually somewhere in between light green to deep red or pink, but there are also some other colors like yellow and orange available for purchase at nurseries.
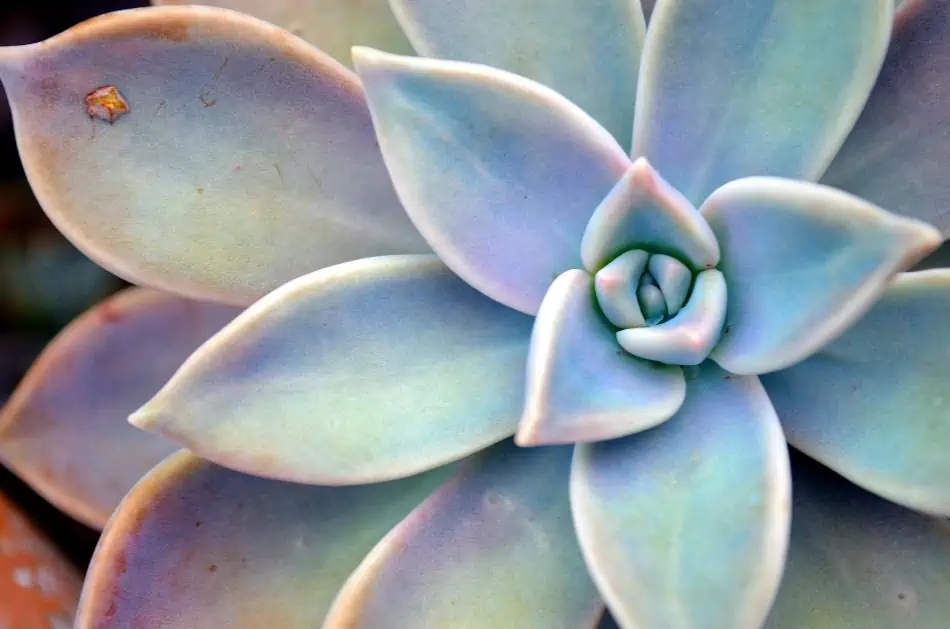
The color of echeveria leaves varies from light green to deep red or pink.

– The leaves are usually in clusters along the stem and can be flat or pointed.

– Echeverias have flowers that come out of a sheath at the base of their leaves, but these species lack showy blooms. Their colors range from red to pink to white.

– They thrive under different conditions with varying amounts of sunlight.

– Echeverias are drought tolerant and can survive long periods without water, but they need good drainage soil to reduce the risk for root rot if grown indoors or in pots.

Interesting facts about echeveria plant

Echeveria is a genus of succulent plants in the Crassulaceae family which are mainly native to Mexico. They can be found mostly in semi-arid regions and they usually grow as solitary rosettes forming large clumps or clusters, although some species form mats on rocks. Echeverias have thick leaves that store water, and they grow in a wide range of colors and sizes.
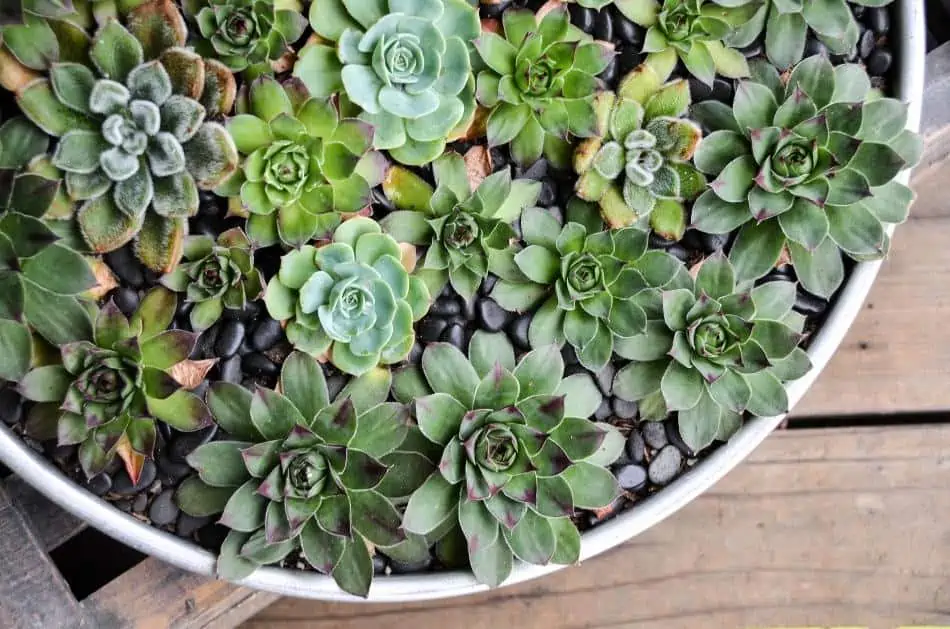
Echeveria features thick leaves that store plenty of water.

Echeveria is grown for their rosettes of thick fleshy leaves that can be shaped into attractive foliage plants or cut to create interesting containers with dramatic shapes. They have long-lasting flowers too: urns or bells which open at night but are often hidden under the foliage.

Echeverias are very easy to grow, and they will flower best in full sun or near a north-facing window. They can be grown from seed (which is usually collected from ripe fruits), cuttings, offsets of larger plants, tubers, or by dividing mature clumps.

The Echeveria plant thrives on neglect and doesn’t need frequent watering unless the pot is very small or it does not have holes for drainage. This is a great plant to grow if you want something that requires little care while still looking pretty.

Propagation of the echeveria plant

Echeveria plant can be propagated in several ways:

Leaves

This is the simplest way to propagate echeveria plants. Simply cut off a leaf and plant it in potting soil or your garden bed. Be sure that you use enough water from time to time.

The simplest way to propagate echeveria is using its leaves.

Root Cuttings

This is another simple method of propagating echeveria plants. The root cutting should be taken in March, when the plant is dormant, from a healthy echeveria. The cutting should be around eight inches long and two to three inches wide.

Division

The easiest way of propagating an echeveria (especially if it has been in your garden for some time) is by dividing it into small clumps with at least four or five miniature plants. You can do this by carefully pulling the plant up from its roots, and then dividing it into clumps with a sharp knife.

An echeveria can be propagated by dividing the plant into clumps.

Seed Germination

Most types of echeveria will not grow successfully from seed because they have developed an adaptive strategy to prevent self-fertilization. However, there are a few rare types that can be propagated from seed.

Soil and Fertilizer guide for echeveria plant

Echeveria plant does not need much soil, as they like to grow in dry conditions and therefore do not require a lot of water. For soil, it is advisable to use a potting mix that does not hold water very well, as this will allow the plant to dry out quickly.

It is important for echeveria plants to be fertilized regularly. This will help them to grow and maintain their health. This should be done on a bi-weekly or monthly basis, but it is important to remember that the echeveria plant does not need extensive fertilizing. When need is, the best way to fertilize an echeveria plant is with a diluted liquid fertilizer, which should be applied in the morning. Fertilize them with potassium-rich fertilizer and apply it every other week during springtime. When applying fertilizers to your garden, it is very important to use a sprayer that covers the whole area and not just individual plants.

Echeveria should be fertilized with a diluted liquid fertilizer bi-weekly or monthly.

Best planting season and conditions

The best time of year for planting an echeveria will vary depending on where you live. In general, it is better to wait until after frost has passed before planting. It can also depend on what type of echeveria you are planting. Some types of echeveria plants will not grow well in cold climates, such as Echeveria elegans and a few other species.

 Echeverias prefer to have their roots kept cool. When the plant is brought into your home for winter care, it should be http://www.slaterpharmacy.com/ placed at moderate temperatures. The plant should be kept at a temperature of 55-65 degrees Fahrenheit. For better results, ensure that the temperature is kept even throughout winter.

Echeveria plant watering guide

Echeveria plants should be watered when the soil is dry to a depth of at least one inch. If you have multiple echeveria plants in your garden, it is advisable not to water them all at once because this will dilute their need for water. Each plant should be watered individually, and it is advisable to water them in the morning or late evening because this will stop water from evaporating.
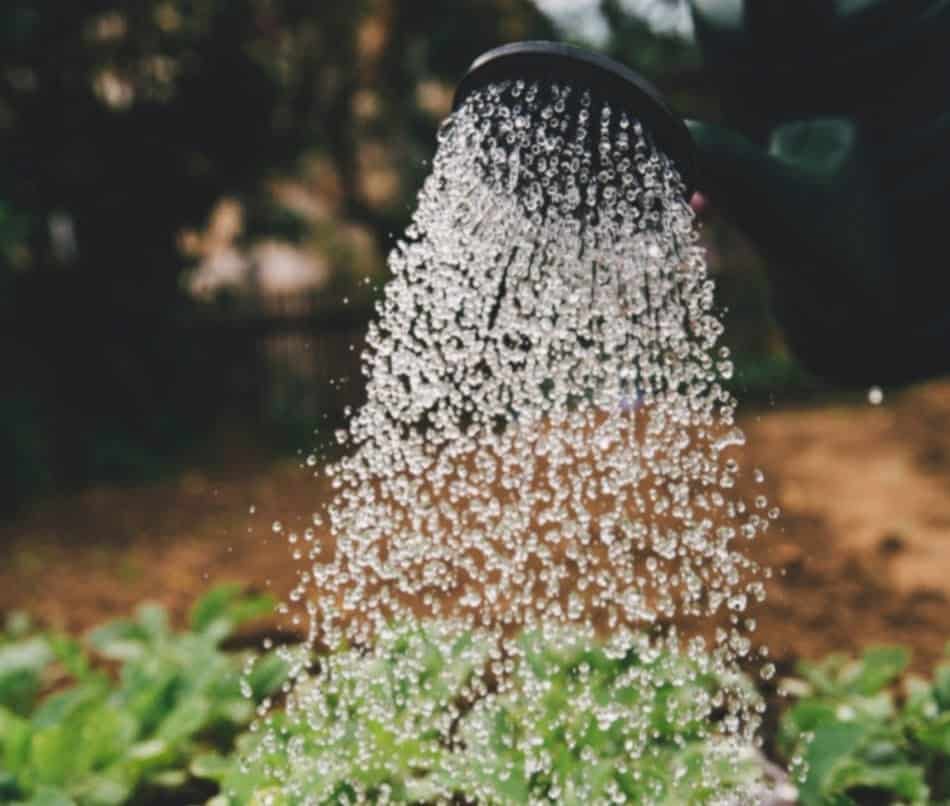
You should water your echeveria when the soil is dry.

The water requirements for echeveria plants can depend on several factors, such as the climate and soil type. In most cases, these plants prefer to be watered at least two or three times a week during periods of hot weather. If you have an indoor plant that is kept in a pot that holds water; it is advisable not to let this stay stagnant for too long.

Watering echeveria plants outside

The best time of day for watering your outdoor echeveria plant will depend on the climate and temperature, but in general, it is better to water them at dusk or during periods when temperatures are not too high. The soil should be kept moist until the following morning so that it can dry out before nighttime.

Echeveria plant pests and problems

The echeveria plant is generally not prone to any serious pest or disease, but one of the most common issues encountered with them is an infestation from aphids. These are small insects that feed on plants by sucking up their sap through a long tube, which can leave the plant wilting.

In order to stop this, it is advisable to use a spray bottle of water mixed with soapy dish detergent and then spraying around the base of your plants. The soap will clog up their little tubes and they will eventually die from starvation or dehydration. It should also be noted that aphids are more likely to infest plants that have been watered with water from a hose, so it is important not to spray your echeveria plant directly anymore.

Additionally, there are other pests such as slugs and snails which can also eat the leaves of an echeveria plant if left unchecked. If this happens you should use a natural slug killer, which is very easy to find in stores.

Common diseases, signs an cure

This succulent is hardly prone to diseases seen in other similar plants. However, occasional cases can see the plant suffer from the following conditions:

_Root rot –  This can be caused by overwatering, or the plant’s roots being in contact with water for too long. To prevent this, the plants roots should be kept cool.

_Stem rot – This is caused by a fungus or bacteria. To prevent this, ensure that you water your echeveria plant infrequently in order to avoid flooding their root system with too much water at one time. It can also help if there are several inches of air

_Leaf spot – This is a sign of infection from soft scales insects. To prevent leaf spots, use an insecticide that has been approved for succulents plants such as neem oil.

Echeveria plant harvesting guide

It’s not necessary to harvest an echeveria plant in order for it to grow and flower; only if you want a particular part of the plant or are propagating new plants through cuttings. When harvesting parts from an echeveria plant, be sure to use a sharp knife or razor blade. Do this by cutting the plant off at ground level. If you need to harvest its flowers, make sure that you are not cutting the plant in half. If there is a part of the plant which it does not require, such as if it has been damaged or attacked by pests, cut this off and discard it. Echeveria plants will flower prolifically; you can cut off the flowers at their base to stop this.

It is, however, important to know that echeveria plants may not always bloom when they are planted in certain locations. This can depend on where you live and what type of climate your region has. If this happens, a good way to get them to flower is by transplanting them into warmer soil. This will make them experience the same change in climate that occurs when they are shipped from a nursery.

Potting and repotting

This succulent plant does not need to be repotted or re-potted often. Potting and replanting an echeveria plant will usually only be necessary if you have harvested a large amount of it from the ground, for example when harvesting its flowers. Otherwise, it is advisable to leave the plant alone and replant if necessary. However, if you have to repot them, it is advisable to use a pot with drainage holes and one which has the same diameter as the original.

Echeveria does not require repotting, but you should consider transplanting if you harvest its flowers.

If you are replanting your echeveria plant in order to move it from a cooler climate (such as an indoor or outdoor container) into warmer soil; be sure not to do this during winter because they will probably not be able to survive. If you are repotting your plant outside, always wait for the soil to thaw out first. The best way to go about this is to move it during the spring or summer. This will ensure that it will have time to adjust before winter sets in.

The best way of securing an echeveria plant in its container is by using a layer of gravel on the bottom that has good drainage properties. This ensures that it does not get waterlogged and can withstand any sudden changes in temperature or weather conditions that might affect other plants.

Uses of echeveria plant

1) Echeveria plants are often used as decorative plants in gardens. This is mainly because the Echeveria plant is a flowering species of succulents that can grow to be about 15 cm tall, depending on the strain and whether or not it has been cultivated from seed or propagated by cuttings. Flowers range in color but usually have dark green leaves with pink or purple spots.

2) Echeveria plant is also known as a houseplant for those who might want to have it in their homes. As a houseplant, it helps clean the air of toxins by absorbing them.

3) Echeveria plant is often used as a ground cover in gardens, especially if they are planted with other plants. This is because they can grow to a considerable size and will also have flowers, so it is easy for them to provide an attractive display.

4) Echeveria plant is a traditional food for the people of Lima, Peru. This is because echeveria plants are easy to grow and they can be prepared in many different ways.

5) They can be used as ornaments in cakes and other foods.

Best echeveria plant varieties to grow at home

If you are looking to grow an echeveria plant at home, there are plenty of varieties that will do well in both containers and gardens.

– Echeveria Elegans: This is one of the most commonly seen species grown as an ornamental houseplant because it is easy to maintain even if planted in high light conditions or if it is too dry of a climate.

– Echeveria derenbergiana: This variety will need to be watered less often than others, so it’s perfect for those who live in more arid climates or are busy with work and don’t have the time to give plants much attention.

– Echeveria carnicina: This variety is easy to grow and can thrive in both low-light conditions or higher light.

– Echeveria lauii: This plant is one of the most vulnerable species because it needs moisture at all times, so you will need to be vigilant when looking after an echeveria carnicina.

– Echeveria peacockii: This is a species of echeveria plant that doesn’t need to be watered often, and it also takes up less space. 

– Echeveria purpusorum:  This variety will not flower as much as others but if you are looking for something small then this might be the one for you.

Conclusion

Echeveria  is an interesting plant that every succulent enthusiast needs to have in their collection. You will love the diversity in the different types of echeveria plant varieties that are available. If you decide to buy one, make sure it has a label with information about where and how it was grown so you know what type will work best for your climate. The fact that its care is so simple is one of the reasons why it has become such a popular plant. Just make sure you give it the right amount of water and repot it as needed. It will also help if you offer the right light conditions, so you may need to move it around your home if light conditions change.

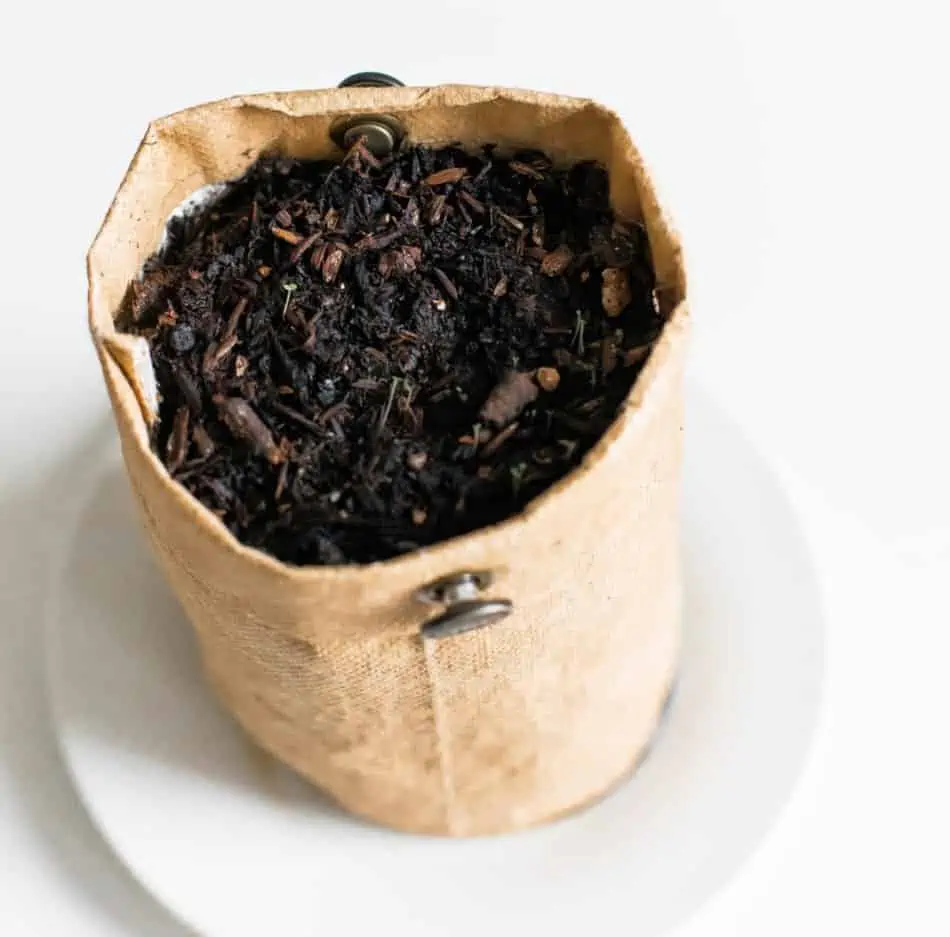
Experts Guide: How To Fertilize Succulents

Succulents are different from other plants in a lot of ways. They don’t need as much water, and they can do well in various conditions. But that doesn’t mean they don’t need fertilizer or that you don’t need to know how to fertilize your succulents.

Whether you’re new to succulents or gardening in general, you should consider how to fertilize the plants. That way, they can grow, and you can enjoy them for a long time. Read on to learn how you should take care of succulents.

What to Use as Fertilizer

Before you can learn how to fertilize succulents, you should know what to use as your fertilizer of choice. While you can use the same fertilizer as you would for other plants, that isn’t your only option.

To ensure your succulents are growing perfectly healthy, use a specific fertilizer for them.

Sometimes, you may want to use a fertilizer specifically for succulents. That way, it can work with the plants and help them grow. A more general fertilizer can work well for other plants, but you should consider investing in fertilizer specifically for your succulents.

Tea

Manure tea is a kind of fertilizer that works great for succulents. As the name suggests, it’s very similar to manure or compost. However, you don’t have to worry about the smell or mess, and you don’t have to spend time producing it.

Manure tea is a natural fertilizer and is an ideal option for those who avoid chemicals.

You can buy manure tea in tea bags that are ready for you to prepare for fertilization. That way, you can keep them in your home or garden shed. It’s a great option for beginners and advanced gardeners.

Tea is a natural fertilizer, so it’s also fantastic if you don’t want to use chemicals. Whether you or someone you live with is sensitive to chemicals, manure tea might be worth it. Then, you can live comfortably, and so can your succulents.

Commercial

If you don’t want to use manure tea, you can use a commercial granular fertilizer that you might find at a garden shop. This is a good choice if you have other plants to fertilize and you want to minimize your equipment and maximize your budget.

A granular fertilizer is great for succulents you plant in the ground. The brand doesn’t matter, but make sure you choose a fertilizer with an equal ratio of:

  • K/potassium
  • N/nitrogen
  • P/phosphorus

You can look for a fertilizer near you or online, so you can get something that meets the needs of all of your plants. But even if you only have succulents, commercial fertilizers are an excellent option.

Nothing

It may sound ridiculous to say nothing, but some succulents don’t need any special fertilizer. Before you add anything to your succulents, consider how they look now and how you want them to look in the future.

Always check the appearance of your succulents and add a fertilizer only when it is needed.

Adding fertilizer can improve the plant’s appearance, but it can change it for the worse as well. If you like how it looks right now, you might want to hold off on adding any fertilizer.

You can always add more later, but it’s hard to take it back after you put something in the soil. So think carefully about both manure tea and commercial fertilizers. Then, you can make sure one of them is the best option for you and your garden.

When to Fertilize Succulents

Next, you should know when you should add fertilizer if you decide that’s what’s best for your succulents. Regardless of the species you have, there are a couple of times where adding fertilizer is a good idea.

In the spring, you should wait until temperatures are consistently above 60℉ (15.5 ℃) during the day. That way, the environment will be warm enough for the fertilizer to support the plants as they grow.

Later in the year, you can add more fertilizer during the fall. However, you should do so before a rainstorm, so the rain can help water the plants after the fertilizer. The rain can help dilute the fertilizer, so it won’t hurt your succulents.

Ideally, you’d start with only using fertilizer once in the spring and once in the fall. However, you can add fertilizer more if you want to stimulate even more growth. Growers will fertilize their succulents throughout the year to keep them looking good.

How to Fertilize Succulents

Now, you can learn how to fertilize succulents so that you can give them the best chance at thriving. This process involves everything from providing the right growth environment to setting the right schedule for adding fertilizer.

If you’ve used fertilizer on other plants, that can help here. However, the process is a bit different with succulents. Even if you’re new to gardening overall, the steps are easy enough to learn and follow.

Here’s how you can fertilize your succulents so that they look good and are healthy.

Ensure Access to Sunlight

Your succulents should have access to sunlight for at least four to six hours each day. That sunlight should be indirect so that light gets through but not too much. However, more sunlight is better than less, so feel free to put your succulents somewhere with more light throughout the day.

Make sure you provide your succulents with plenty of sunlight after fertilizing them.

One of the problems with fertilizing succulents that don’t get enough light is irregular growth. After you add the fertilizer, the plant will start to grow fast. But it will grow in the direction toward the light.

While that can provide a unique look, it may not be the shape or appearance you want. In that case, you should make sure your succulent can either get enough light or grow a bit more slowly. If you don’t have much sunlight, consider holding off on using fertilizer.

Prepare the Fertilizer

When you decide to use manure tea, you need to spend some time preparing it. Like any other form of tea, it needs to steep in water before use. Here’s how to prepare manure tea:

  1. Take a tea bag out of the package but leave the tea in the bag.
  2. Place the tea bag in a big bucket (5 gallons).
  3. Fill the bucket with one to five gallons of water.
  4. Cover the top with a lid.
  5. Let the water and tea bag sit for two or three days.
  6. Check on the water and remove the tea bag.

If you want to make the last step easier, you can tape the string on the tea bag near the top of the bucket. That way, you won’t have to reach for it at the bottom.

When using other types of fertilizer, you won’t have as much preparation. But you should still make sure you have what you need and that you portion it out. That way, you don’t use too much fertilizer on your succulents.

Fill Your Watering Can

After your fertilizer is ready to go, you can set it aside and fill up a watering can. Consider how many succulents and plants in https://www.bernardspharmacy.com general you have to water. Of course, you can also use water directly from the hose if it’s close enough.

Then, you can add enough water to complete your plant-watering routine. While you won’t fertilize your succulents every day, you can incorporate this step into watering all of your other plants.

Water Your Succulents

Now, you can go through each of your succulents and water them. Try to add just enough water to moisten the soil but not drown the plants. This is particularly important when using manure tea.

Always water your succulents after fertilizing them to dilute the fertilizer a bit and make your plant grow even faster.

Adding water alone will keep the fertilizer from being too harsh on the succulents. Plus, it gives you an excuse to add plain water to help your plants grow. If you have plants other than succulents, you can water those now with the plain water.

Then, you can follow up the plain water with your fertilizer. If you use manure tea, you can pour some of the water from your bucket and add that. When using granular or commercial fertilizer, follow the directions and then use half of the dose to keep from “burning” the succulents.

Wait a While

After you finish watering and fertilizing your succulents, you can go about the rest of your day or week. Now, you need to decide if you want to fertilize them again the next time you water them or if you want to wait longer.

Fertilize With Each WaterWait Until the Next Season
Faster growthSlow growth
Soft plantsHard plants
Easy to rememberSave on fertilizer

Consider the pros and cons of each fertilizing schedule. If you want your succulents to get really big, adding fertilizer more often is great. However, it can be a bit too much if you keep your succulents in a terrarium or small pots.

Succulents in the ground may benefit from more fertilizer since they have room to grow. But if you live in an apartment or small house without much space, don’t be afraid to wait.

Benefits of Fertilizing Succulents

As you learn how to fertilize succulents, you may wonder why you should. Like any other plant, succulents can benefit from the nutrients in fertilizers.

Whether you have a small or big garden, you can use fertilizer to keep your plants in good shape so that they can grow. The right fertilizer can also help with the appearance of the plants, which is great if you want a visually appealing garden.

Either way, consider a few of the major benefits of fertilizing your succulents.

Promote Growth

Of course, the most apparent benefit is that you’ll notice your succulents get bigger more quickly. If you want to have a garden full of them, adding fertilizer is a no-brainer. Even if you keep them in pots, you may want to fertilize your succulents to fill out the pot.

The most evident benefit of fertilizing succulents is that the plants start growing even faster.

As you add more fertilizer, the plants can continue to grow and mature. You won’t have to wait as long for them to reach the size you want.

Whether you want to set a world record or simply enjoy the succulents from across the yard, you may want to add fertilizer each time you water the plants. Even adding it every month or so can provide more benefits than a few times a year.

Maintain Shape

Adding fertilizer can either help the shape or hurt it, but the right fertilizer and growth environment is great for your succulents. Not using enough fertilizer may keep the succulents from growing well, so they might look bad, even if they’re healthy.

Of course, you don’t want to add too much fertilizer, especially if your plants don’t get enough indirect light. But as long as they do get four or more hours of sun a day, you can add fertilizer to help your succulents keep a good shape as they grow.

Preserve Color

As your succulents grow, fertilizer can also help keep them a healthy color. While it can be cool to see changing colors, you may or may not want that. If you want to keep all of your succulents the same color, make sure you add fertilizer.

The nutrients will help keep your plants healthy, so they won’t die as easily. Sometimes with plants, changing colors signals that the plant isn’t doing well. Luckily, you can preempt that by fertilizing your succulents on a regular schedule.

Risks of Fertilizing Succulents

While there are many benefits to fertilizing succulents, doing so doesn’t come without risks. If you’re fairly happy with how your succulents look, you might not want to fertilize them and risk changing the color or size.

Fortunately, you can fertilize some of your succulents and not others. Then, you can see if you like the results and if it’s worth risking the rest of your garden.

Also, some of the risks come from using too much fertilizer. So don’t be afraid to start slow if you want to avoid the following.

Too Much Growth

Fertilizer can make your succulents grow, which may be what you want, but it might not. If you start adding fertilizer without a strategy, the plants could grow too big for their pots, or they could take up too much space on the ground.

As mentioned, when you add too much fertilizer to inside plants, they might grow in an odd shape. They’ll want to grow toward the light if they don’t get enough exposure. Sure, that could give you a cool design, but it can look odd.

Consider how much you want the succulents to grow and how fast. They can still grow if you only use fertilizer a few times a year.

Soft Plants

Soft and hard plants, in terms of a nursery, come down to personal preference. Because of that, this may be a con or a pro, depending on what you want. If you don’t want soft plants, you should avoid fertilizing your succulents too often.

Hard plants are more tough, so they can withstand more. If you want to keep your succulents outside, you might want to keep them on the tougher side. That’s even more important if your succulents will be in a garden rather than pots.

But if you don’t care as much about that, feel free to add more fertilizer. Think about how you want your plants to grow to help decide if this risk is worth taking.

How Do You Choose the Right Fertilizer?

To choose the right fertilizer for your succulents, consider what they are and where they are. For example, granular fertilizers are generally the better choice for gardens. When using granular fertilizers, make sure you spread them lightly and all over the garden, then water the plants.

If your succulents are in pots, you may want to use manure tea or another liquid. Keep the fertilizer to half of the normal dose so that you don’t overdo it. If the plants don’t grow quickly enough, you can add more each time.

Does Your Soil Matter?

Your soil can have an effect on how to fertilizer your succulents. If your soil already has a bunch of nutrients, you may not need to fertilize the plants as often. When you do fertilize them, you can use less fertilizer.

On the other hand, if the soil is pretty basic and doesn’t contain any nutrients, you may need to add more fertilizer. Or you might want to increase the frequency of using something. That way, your succulents have plenty of nutrients to thrive.

Always consider the type of your succulent soil before adding a fertilizer.

What Are Some Common Types of Succulents?

Before you start fertilizing succulents, make sure you know that the plant in question falls into that category. That way, you don’t use the wrong product on it. Here are some common types of succulents you should know.

  • Aeonium
  • Agave
  • Aloe
  • Echeveria
  • Kalanchoe
  • Opuntia
  • Senecio

You can find tons of other succulents, so this list isn’t complete. Be sure to learn how to fertilize succulents when you get any type of the plant.

Final Thoughts

Knowing how to fertilize succulents is vital, whether you plan to do it once a year or once a month. Make sure you choose the right type of fertilizer, prepare it well, and add it to your gardening routine. Then, you can see the growth that you want from your succulents.

How To Care For Cholla Cactus (Jumping Cactus)?

Having plants throughout your house or apartment can add a nice, homey touch, but most require a bit more attention. So if you find yourself constantly on the go, traditional flowers and plants might not live as long without the proper care they require. However, if you want a little piece of the southwest, having a cactus could solve your problem of wanting a plant and does not demand as much time and attention from you. 

Not many people have a cactus sitting on their windowsill or anywhere in their house for that matter, so it can add a nice touch of something different to your overall environment and ambiance. Although there are specific needs that a cholla cactus has, it is not as time consuming as most plants once things get rolling. Continue reading to learn how to properly grow and take care of your cholla cactus!

How to Properly Care for a Cholla Cactus

The key to a successful and healthy cholla cactus is making sure there is a good foundation and the basic starting requirements are met. Like most things, a good start will yield a fruitful future for your new home plant. Overall they have fairly low maintenance, and with the proper little care that they do need, you can expect to have a big, beautiful cactus.

Container and Soil

When most people plant flowers, they just want a clay pot or some type of flower bed that looks nice and is aesthetically pleasing with the rest of their landscape and interior of their home or apartment. With growing and caring for a cholla cactus however, you will want to get a container or pot that has a little more purposeful function.

As a viable container for your cactus, you will want to purchase a well draining base so any excess water leaks out. Sitting water is not good for a cactus, and will actually start to rot if it is immersed in water for too long. As can be expected for most cacti species, a little bit of water can go a long way. Once your cactus has been properly started, it will only need roughly one inch of water per month to survive and continue its process of photosynthesis.

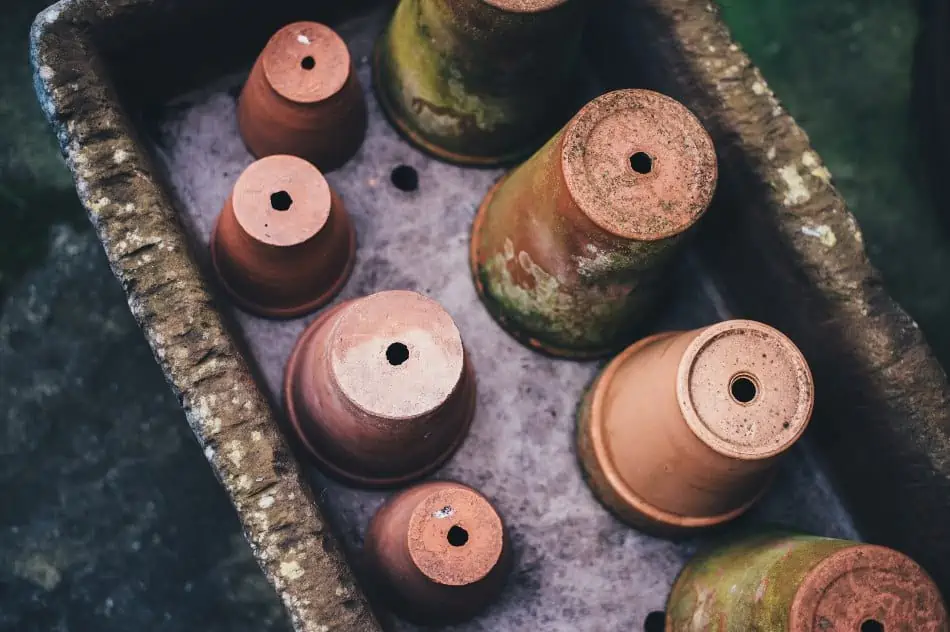
Get well-draining pots for your cholla cactus to prevent its roots from rotting.

In terms of getting the proper soil for your cactus, it is best to have a desert like and dry soil, but it would not hurt if it also contained some amount of fertilization to it as well. When first starting out, it is recommended that you loosen up about 8 inches of soil at the time of planting your cactus, and you can add extra grit and sand to increase its porosity. 

Having about 30% of the soil be sand will help reduce the chance of rot and will allow the roots to dry. Planting a cactus in a deeper and wider base of soil will ensure that the roots of the plant are surrounded and packed well.

It may seem like a daunting task to simply start planting and taking care of a cactus, but if you treat it well at the very beginning and take the time to start it properly, it will undoubtedly grow in abundance.

Sunlight and Temperature

With a cholla cactus, it is going to be best to have it in direct sunlight the majority of the time, and in a warmer climate. Your new pet cactus will not do well in a wintery climate, so make sure that if it does experience colder weather, it is a very short period of time. The coldest temperature that a cactus can survive is about 5 degrees fahrenheit (-15 degrees celsius), but it will not last in longer durations of time. 

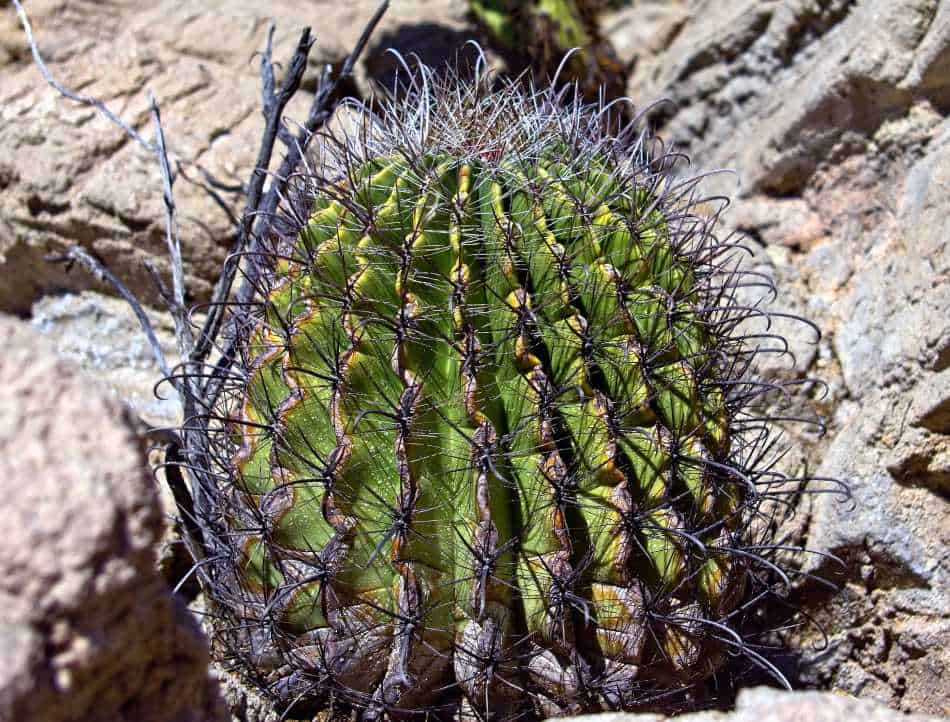
Cholla cactus loves direct sunlight and thrives in warm climates.

Indoor Sun

If becoming more of a domestic plant where it will be indoors most of the time, it is best to place your cholla cactus in southeast or south-facing windows. Doing this will ensure that your new cholla plant will receive enough sunlight to grow properly. If you do not get as much sunlight that is needed, then you can resort to artificial light as well and that will suffice just fine.

Outdoor Sun

Now, if you happen to be quite the green thumb and have a garden or landscape where you have a plethora of diverse plants, a cholla cactus might fit just nicely, particularly if you live in more of a desert-like climate.

If you plan to plant them outdoors, then you will need to place them in a spot where your cacti will receive at least 6 hours of natural sunlight per day. So if you have a larger backyard or areas around your property that offer open and direct sunlight without too much coverage, then that would be the perfect spot to plant your cactus to give it the best chance at survival.

They are relatively low maintenance, but the cholla cactus family might not seem like it. They are picky about sunlight. Too little and it will die, and if there is too much water, it will die. Other than that, they are very easy to take care of and maintain. 

Water

As mentioned before, the cholla cactus does not need a ton of water. When you first plant your cactus is probably the time that it will drink up the most, but afterwards very little is needed. If you accidentally pour too much water up front, the container fit to drain properly will take care of the excess to ensure the cactus does not rot.

Cholla cactus needs just a little bit of water to grow healthy and gorgeous.

Keep an eye on things, but each month your cholla cactus will likely need about an inch or so of water to keep it alive and well. It is funny to think about watering a cactus because we get so accustomed to the fact that they need and thrive in the desert. Even so, a cholla cactus needs a little bit of water here and there in order to keep its natural processes as a plant like photosynthesis to continue living. Since they thrive in the dry and desert climate, it is important to still try to recreate their natural habitat to ensure they grow properly.

Cactus Pruning and Trimming

So if you do not want your cactus growing to be the full 10 or more feet, you might be wondering what you can do to keep it within reasonable limits so it stays a domestic plant. It would not be very enjoyable if you added a great looking cactus to your place and then all of a sudden have to get rid of it because it got too big. Although, there could be worse things to own that can grow too big (some people have pet sharks). 

Timing

In terms of when to prune your cactus, that kind of depends on how big you want it to be or not to be. If you have the space and want it to grow a little bigger, becoming a more focal point in a given room, then you can probably let it go longer without a trim. If you are keeping it as some windowsill decor, then you will want to keep an eye on it and be sure to trim it when it starts to get too big in any regard. You do not want your new cactus falling off the windowsill.

You should trim your cholla cactus once it gets too big for the area.

With trimming and pruning, there are tools that you can use to trim and prune plants as well as your cholla cactus. Since a cactus has sharp spines and can really leave a mark, it is best to wear gloves and be very careful while treating your plant. Depending on the size of your cactus will determine the size of your tools and how aggressive you need to be with the caretaking of it. However, once you finally get started, it will become easier and not feel like much of a burden at all. In fact, it might even be meditative and soothing to do so.

Neglect goes a long way with a cholla cactus, but if you want to keep it domesticated, then you will have to take upon a little more responsibility. You probably were never thinking you would be one to prune and trim your plants, that is for movies and tv shows. But, it is a lot more common practice to keep exotic plants in a domestic setting. Doing so just takes a bit more learning and taking care of. 

Overall, the time commitment is still extremely low, and could even be a nice introduction to see if you want to get a live pet such as a dog or cat down the road.

What to Do With Pruned Off Cactus Parts

Once you cut some of the limbs and parts of your cactus, you might be wondering what to do with them. Can you just throw them in the trash? Is there a special way to dispose of cactus parts? 

With certain parts of the cactus (like the pads or offsets), they can and will become brand new plants if laid on top of good soil. This means that you will want to be wary about not just throwing away parts of the cactus randomly. If you are cutting stems and trunks, then you should let them sit for a few days so they can callus at their ends. 

You can use the pads and offsets of your cholla cactus to propagate the plant and grow new cacti.

When you are dealing with dead flower stalks and leaves, you can treat those as traditional compost. For the most part, you can throw your trimmed and pruned cactus parts in the trash, but you will want to make sure that you use multiple trash bags, and it might not be a bad idea to use the heavy duty ones as well. You do not want yourself or a family member taking the trash out and then all of a sudden getting scratched by the leftover cactus parts. 

Trimming and pruning your cactus does not take much time, and can be done fairly infrequently. Since the cholla cactus has such a long life span (30 years), you do not have to worry about cutting it down too frequently because it will grow at a much slower rate. Doing so will also take a lot less time than you might be anticipating. Invest in the proper tools and you will be able to take care of your new plant to the best of your abilities and not risk it getting too out of control.

Background of the Cholla Cactus

The cholla, or jumping, cactus is a common (part of the genus family) species of cactus that is originally found in northern Mexico and the southwestern part of the United States. The cholla cactus serves as a source of food, water and safe haven for an array of different animals. It is considered one of the largest and most beautiful species of cactus in the desert.

Life Span and Size 

An interesting fact about the cholla cactus is the fact that it is a different shape than most other cacti species. Where most cacti within the same family of species have flattened stems, the cholla will appear to have more tubular ones. The entire plant itself can take the shape and form of a shrub, tree or creeper. 

So, if you find yourself shopping for a cactus or hiking through the desert in the southwest, you can tell similar looking plants apart by looking at the size and shape of the overall plant as well as the stems.

Cholla cactus grows up to 15 feet in height and can live for around 30 years.

In terms of size, the cholla cactus has quite a vast range for how large it can grow up to, which is anywhere between 7 and 15 feet. It is also not out of the ordinary for a cholla cactus to live for as long as up to 30 years! With the proper room and care, a cholla cactus can grow to be the true size of larger trees, so you want to be careful which ones you buy and how you grow it if you plan on having one inside your house or apartment.

Unless you live by them or have been around them much before, we often do not think of a cactus growing to be so big. Even though we see them at southwestern restaurants and act as good decor, they can grow into massive plants.

Protector for Other Wildlife

The cholla cactus has been given the nickname the “jumping cactus” because of its protective nature of easily detaching from the main root of the tree and latching quickly onto an animal (whether that be wild or other humans) as a response of its defense mechanism. It does not literally just jump off, but rather detaches with the faintest and lightest of brushes against it. Since it does not have many other capabilities, that is its best chance at deterring predators.

Cholla cactus features blooms and fruits that are edible to desert wildlife.

If you happen to pick up one of these spines from a cactus, it has been recommended to use a larger tooth comb to help get them off clothes and skin. Outside of this, not only does it protect itself, but the cholla cactus can act as a safe haven for other animals such as birds. The spines are just wide enough that they can land without hurting themselves and set up camp until their predators have gone away.

The cholla cactus also blooms in the spring and summer months, providing flowers and fruits. This particular fruit is edible to desert wildlife life like bighorn sheep and deer. The cholla cactus is a surprising plant and can offer various benefits to other surrounding animals within its given region.

In Review

If you are interested in a little different type of decor, live in the southwest region, or just enjoy different plants, a cholla might be the next best thing to implement into your home or apartment. Although they can grow to be massive trees, if you take care of your cholla cactus just right, it can be a great domestic addition to your overall ambiance.

Remember the following steps to properly care for your cholla cactus: 

  • Use a container or pot that has holes so it can adequately drain any excess water
  • Plant in at least 8 inches of soil mixed with a little bit of sand 
  • Prune and trim to the size of your liking, and change out the pot if necessary
  • Place in an area that your cactus can receive at least 6 hours of direct sunlight per day
  • Hydrate your cactus with about 1 inch of water per month

Taking care of a cholla cactus does not take much work, making it easy for you to add a good looking plant to your lively collection. Having a cactus says a little something different because they are fun, have a little novelty aspect to them even, and can be just what your windowsill needs to add that little something extra to the room. 

How To Make Your Cactus Grow Faster?

Generally, cacti are known to be slow-growing, but with proper care, you could make them grow faster than they normally would.

The key to making a cactus grow fast is to give it slightly more light and water than usual. If you are lucky enough to have a greenhouse that has lots of sunlight for at least 8 hours each day, then your chances of growing a healthy and fast-growing cactus will improve tremendously. Use soft water for watering and fertilize it during the growing season. You should also allow it to go dormant during winter, allow proper air exchange, and repot your plant once in a while.

In this blog post, we shall discuss the main methods you can use to make your cactus grow faster. So, let us get started.

Why Do Cacti Plants Grow Slowly?

Before we dive deep into our discussion, it is essential to know why cactus plants generally grow slowly.

For most cacti species, growing slowly is a form of survival. Most of them are native to deserts, and in such habitats, there is not much water or food available for them.

So, to survive in the desert conditions, cacti have evolved with a method that helps them conserve water and food by growing slowly over time. This slows down their metabolism, making it difficult for animals to eat them.

They also lack true leaves and have fewer stomata, limiting their rate of sunlight and carbon dioxide absorption, making it difficult for them to manufacture a lot of food through photosynthesis.

Typically, cacti grow slowly in order to survive harsh conditions.

Typically, cacti plants prioritize survival overgrowth. So, if your cacti are growing slowly, there is nothing to worry about because you have not done anything wrong.

You just need to adapt the ways of caring for your plant to suit its needs and make it grow faster over time.

How to Make Your Cactus Grow Faster?

Now that you know why cacti grow slowly, it is crucial to know how to make yours grow faster. Here are some tips to get you started:

1. Provide Enough Sunlight during the Growth Season

Cacti naturally grow in hot and dry conditions. So, if you want your cactus to grow faster, then try providing the same conditions. You can do this by keeping it outside your house.

Most desert cacti require bright sunlight to survive. And when they are grown in dimly-lit conditions, their growth becomes slow.

So, if you want your cactus to grow faster and healthier, all you need is to keep it outside for most of the day. You can either place it on a window ledge or plant it in your garden.

However, you need to keep in mind that direct sunlight can damage the stem and pads of a cactus, causing them to wither. Thus, you have to make sure that the plant does not remain in direct sunlight for more than 4 hours.

Provide your cacti with plenty of sunlight by keeping them outdoors during warmer months.

After winter, introduce them to sunlight gradually. Do not place it in direct sunlight at first; rather, keep it under the canopy of trees.

But if you do not have space outside your house or garden, you can use artificial lights to provide the necessary amount of light for your cactus plant. In fact, this is a great way to grow cacti indoors during winter.

But bear in mind that you should not use full-spectrum lights as it is the main reason why most indoor plants look pale and unhealthy.

2. Allow Proper Air Exchange

Just like humans, cacti need oxygen to survive. But unlike us, they don’t breathe through lungs but rather through pores on their stems and spines.

These succulents hate humidity and wet soil because it causes fungal infections. Hence, they prefer to grow in hot and airy conditions.

So, if you want your cactus to grow faster than usual, make sure that the place you are keeping it has proper ventilation.  You can even use a fan for proper circulation of air around the plant.

During summer, feel free to leave your cactus outside for a few hours. But make sure that you take it inside before the sun goes down because night temperatures can be extremely low.

3. Use the Right Container

When potting a cactus plant, always choose a container that is at least three inches wider than the spherical spread of the plant’s root ball.

The idea here is to provide your plant with enough room to grow. While planting a cactus, make sure that its roots are not constricted.

Also, remember to re-pot your plant once every three years. This helps in making it grow faster because it provides room for new root growth.

It is recommended to repot your cacti once every 3 years.

A clay pot or terra cotta is always the best choice for planting cacti. You can also use plastic pots or wooden containers, but make sure they have a drainage hole at the bottom for proper drainage.

4. Plant It in Well-Draining Soil

Choosing the right potting mix/planting soil is absolutely critical to the health of your cactus.

If you pick soil that holds too much moisture, then the plant will end up rotting from the roots. So, make sure that the potting mix is well-draining.

You can check this by squeezing a small portion of it in your hand. If water comes out or if it feels soggy, then you need to change it.

A well-draining soil will also make your cactus grow faster because, under moist conditions, plants tend to develop root rot and/or stem rot.

You can use a sterilized potting mix for this purpose. But if you do not have enough time, then choose a bag of potting mix that only has organic materials.

You should also avoid using soils with compost.

5. Water Appropriately

Although cacti plants don’t love a lot of water, it doesn’t mean that they don’t need any moisture at all.

In fact, you have to water your cactus plant 2-3 times a week during summer. But remember that overwatering will only harm the plant, so you should avoid it as much as possible.

Although cacti plants do not require too much watered, they still need consistent watering to grow healthy.

Under-watering will cause your plant to wither. Therefore, the trick is finding the right balance and understanding when to water your cactus.

If you are using a potting mix with fine particles and good drainage, then the soil will dry out within 5-6 days after watering it. When this happens, think of watering your plant again.

6. Fertilize Appropriately

Although cacti plants don’t require regular fertilization, they need to be fed on a few occasions. If you want your plant to grow in spring and summer, then the best time for fertilizing would be when it starts growing (spring).

If you are using a potting mix with compost or if you have been underwatering your cactus, then it would definitely benefit from fertilizing. It will help your plant develop a sturdy root system, which is the most stable part of the plant.

Once in three years, you can use slow-release fertilizer to make your cactus grow faster and stronger. You can apply this once at the time of repotting because it lasts for an extended period.

Also, keep in mind that fertilizing a cactus plant before the beginning of fall is essential to ensure proper root growth.

7. Maintain Optimal Temperature

Cacti like moderate temperatures, so you need to keep them as close to the optimal temperature range as possible.

If the room is colder than 60 degrees Fahrenheit (15 Celsius), then you can put it by a sunny window during summer or keep it indoors under artificial lighting.

Keep in mind that cacti cannot tolerate freezing temperature, so if it is too extreme outside, move your cactus inside.

Also, if the room is hotter than 80 degrees Fahrenheit (27 Celsius), you need to keep it in a cooler area or provide artificial cooling means by putting it under a fan.

8. Use Soft Water to Water Your Cactus

Always water your cactus using soft water because it has a lower content of minerals that cacti plants are sensitive to.

If you constantly use hard water, the minerals accumulate in the soil, reaching sensitive levels that can cause root rot.

To avoid this, simply use soft water to water your cactus or change the soil every year if you use regular potting soil.

If your tap water is hard, you can use a regular filter to soften it before watering.

If you don’t have a filter, leave the water outside in an open container for at least two hours before watering. Also, you will need to repot your plant quite often if you use hard water to irrigate it.

9. Re-pot Once in a While

Repotting your plant once in a while is essential because it keeps your plant alive and promotes good health.

Consider repotting your cacti every three years. However, if you constantly use tap water for watering, you consider repotting every 12-18 months.

Once you re-pot, your plants will get new soil that helps their roots develop and grow healthy. They will also receive the fertilizer plus the necessary amount of water.

10. Allow Proper Air Exchange

Cacti need lots of air exchange to stay healthy and happy. Avoid high humidity, stagnant air, and sudden temperature fluctuations near radiators or air conditioners.

Instead, put them in bright locations where they can receive plenty of light from the sun, such as a balcony, windowsill, or even outside if it’s warm enough. Don’t trap cacti in a terrarium – they can’t survive the high humidity.

Move your cacti outdoors during summer if possible – the fresh air will help them grow! However, be aware of low nighttime temperatures; anything lower than 55°F could damage your plant.

Also, keep an eye on large temperature swings during the day – misting with hot water or watering early in the morning replicates morning dew and helps keep them comfortable. The optimum daytime temperature is between 80-86°F.

If you want to use cacti in a terrarium, make sure it’s only temporary – cacti struggle to absorb water through glass containers when there are no drainage holes or other materials like soil, rocks, or charcoal blocking their access to moisture.

11. Allow Your Cacti to Go Dormant During Winter

Cacti plants in their natural habitat usually become dormant during the summer months when water is lacking. During this time, they stop growing and focus on dealing with the extremely high temperatures and transpiration.

It’s crucial not to force your cactus to grow year-round to achieve fast growth. In fact, not allowing your cactus to go dormant during winter can lead to thinning and elongated growth.

If you are keeping a cactus at home and experience cold winters, it is essential to allow them to go through the winter dormancy period uninterrupted. This will help them avoid uneven growth and rapid depletion of essential nutrients.

Winter dormancy also helps promote flowering or budding of flowers if your cactus has started blooming.

To help your cacti experience a natural dormancy period, reduce the amount of sunlight they’re exposed to. As temperatures outside start dropping, gradually decrease how much water you give them.

However, do not stop watering your cacti completely. Doing so will result in them losing their roots and drying out, leading to stunted growth. Instead, lightly water your plants once every month or every six weeks – just check the soil before doing so.

During November all the way up until early March, make sure your cacti are kept in cool areas with temperatures ranging from 47-54 Degrees Fahrenheit.

The lower temperature range is critical since it helps prevent excessive water evaporation while promoting healthy, continued growth.

Conclusion

In conclusion, cactus plants are not as difficult to grow as they seem. They just need a little care and love. With a bit of effort and the right information, you can grow them yourself without any problems. 

 Ensure you provide your plant with enough sunlight, allow proper air exchange, and plant it in well-draining soil with the right container.

Consider watering it appropriately during the growing season and maintain optimal temperature for better results.

You can also fertilize once in a while but use soft water to avoid problems. With the right care, your cactus will grow to its full potential in no time.

How Do I Know If My Succulent Is Dying?

Taking care of a succulent is supposed to be easy. But to keep it healthy, there are a few things to know. First, how do you know if your succulent is thriving or dying?

As a general rule, common indications that a succulent is dying include:

  • Brown, mushy leaves mean the roots are rotting.
  • Pale, yellow leaves indicate that rot or infection has spread. 
  • Wrinkly, dehydrated leaves mean the roots are drying up.
  • Brown roots indicated rot or infection. 

These are some of the tell-tale signs that may indicate your succulent is not thriving. If you own one or more succulents and are concerned your plant is dying, read below for more about how to tell that your plant needs attention. 

There are Brown Spots on Succulent Leaves

The number one reason for brown spots on succulent leaves is due to over-exposure to the sun, or also known as succulent sunburn. If too much sun is the not culprit, brown spots on the leaves may stem from insect infestation or fungal rot.

Before attempting to take action to revive your plant, investigate further to find out what is causing the brown spots. 

Brown spots on a succulent is a common sign that the plant is slowly dying.

The Succulent Leaves Are Turning Black

Leaves turning black towards the top of the plant mean the plant is most likely going to die; there is no way to nurse it back to health. Overwatering is most likely the reason for the problem. 

Black leaves falling from the bottom of the plant are normal. There is no reason to be alarmed if the black leaves are at the base of the plant. Simply remove those from the pot. 

Your Succulent Has Root Rot

Some succulents are more prone to stem rot over others. However, overwatering could be the cause of the problem. If it’s not too far gone, stem rot may be fixed:

  • Remove the succulent from the pot, carefully detaching all of the rotted soil.
  • Clean the pot with a bleach-water solution and rinse well – or use a new pot.
  • Carefully trim affected roots, cutting about ½-inch above rot. Pat dry with a soft towel.
  • Replant the succulent in a new, dry soil mixture: two-parts soil, two-parts coarse sand, and one-part pumice.
Overwatering is one of the most common causes of root rot in succulents.

Do not water the plant again immediately. Monitor for a few days to a week before watering again. 

Note: If the rot has spread to the stem or leaves, it is too late to repot. 

Succulent has Droopy Leaves

Overwatering is the primary source of droopy leaves. Fixing this problem is similar to how you fix root rot: trim the bottom, repot and then rewater when ready. If you repot the plant, make sure to handle the succulent with extra care. Although considered hardy, the roots of the succulent are fragile and often do not recuperate from trauma. 

Tall, Thin and Stretched Succulent

Lankiness is a sign the succulent is not getting enough sunlight. It can indicate a severe problem. The stretched-out parts can never be fixed. The way to move forward is to nurture the new growth for optimal health. Trim the leaves at the base of the plant and take care of them well. If this does not work, it may be time to start shopping for a new succulent.

Stressed, Red Succulent Leaves

Red leaves may indicate succulent stress; like people, succulents become stressed with too little or too much light or too much or too little water. Stress does not necessarily mean the plant is going to die; it means it may need some additional tending loving care. 

Some growers will intentionally stress their succulent out for the aesthetic appearance of the red leaves. Purposely stressing a succulent out should only be done by those with a “green thumb” and expertise. 

Succulent has Damage from Trauma or Bugs

Damage to succulents may occur if the pot has been tipped over or if any type of infestation from a bug occurs. Small brown spots on the leaves indicate the plant has undergone trauma. With additional care and patience, your succulent can survive.

Tipped containers and bug infestation can damage your succulents and lead to brown spots on the leaves.

Succulent has been Overexposed to Sun

Just like us, a succulent can get sunburn with overexposure to UV rays. Too much sun to the plant and the leaves will turn dark brown. There is no sunscreen for succulents like there is for people; keeping the plant in an adequate location with the right amount of sun will help the plant. 

Care Tips to Keep Your Succulent Healthy

Overwatering, underwatering, too much sun, too little sun, and trauma; can be rather confusing on how to best care for a succulent. Since these potentially bountiful plants cannot speak to tell us they are ill, monitoring your succulent for tell-tale signs is critical. Here are some steps to care for a plant and help it flourish. 

Keep the Plant in Ample Sunlight

An established succulent needs up to six hours of sun per day. If your succulent is new, you will need to slowly acclimate the plant to the sun. Put the plant in front of the window but place the plant behind a barrier such as a light curtain or something not allowing direct sunlight. 

Rotate the Pot Often

Succulents thrive on sunshine; rotating the pot often allows for the entirety of the plant to acquire those rays. If your plant is swaying to one side, rotate the pot and watch your succulent stand straight. 

Seasonal Watering

During Winter or Fall seasons, succulent growth will stall; this is no different than us! The climate in Spring and Summer months aid in growth and rejuvenation. More water is necessary during these seasons as the plant uses more energy to revive. 

The rule of thumb to make sure your plant is not under- or over-watered is to stick your finger about an inch to an inch and a quarter of the soil. If the soil is dry, your plant needs a drink. Remember not to over water the plant; as stated above, more water less often is the key. 

Apply Water Directly to the Soil

Soaking the soil until water exits the drainage holes is an adequate dose. Some gardeners state using an ice cube or two allowing the water to slowly melt into the soil is the best approach. During Spring and Summer, the plant will need more water reaching down to the roots. Soaking the plant is optimal during its peak season.

Clean Your Succulent

No one likes to be dusty or dirty, and that includes your precious plant! When you dust your house, include your succulent. Do not use a dusting polish or chemical agent. Rather, dampen a soft cloth to polish the plant’s leaves. For those hard-to-reach spots, use a soft-tipped paintbrush dipped in water. 

Use a Pot with Good Drainage

Drenched soil leads to plant rot; make sure to use a pot with at least one draining hole and a saucer underneath. Two holes are even better. Terra Cotta pots are a good pot for beginner succulent gardeners. 

Use the Right Soil

Dirt from your yard or standard potting soil leads to an unhappy plant. Succulents require their own soil, the same soil used for Cactus and other drought-type plants. Make sure the soil you plant your succulent in contains sand, pumice, or perlite. If you decide to use regular potting soil, simply mix in some sand, pumice, or perlite. 

You should always use well-draining soil for your succulents to avoid damaging the plants.

Eliminate Bugs and Potential Trauma

Gnats love to inhibit succulents. These pesky bugs are easy to get rid of. 

Spray seventy percent alcohol directly on the leaves; this will remove the gnats. 

If your succulent is infested with bugs, make sure to move it away from your other healthy plants. Too much water can lead to mealybugs – which can also be defeated with an alcohol spray.

Beyond bugs, make sure your pot is in a location it cannot be knocked over. Such an accident can cause trauma to the plant and result in irreversible damage. 

Summer Fertilization

Fertilizing your succulent during Spring and Summer months helps the plant during its revival period. Do not over-fertilize the plant; it can cause the plant to become weak. 

How to Select a Good Soil and Fertilizer for Succulents

Although unique to standard potting soil, succulent soil and fertilizer do not necessarily need to be expensive. Here are some suggestions for soils and fertilizers. 

Soils for Succulents Need Not Be Pricey

You can find a bag of soil to cost on average around six dollars for one pot, and that includes organic soils. When selecting soil, make sure to purchase a succulent soil that drains. Consider adding perlite or pumice to help with air circulation and drainage. 

Go with a Slow-Release Fertilizer

Fertilizers also average around six dollars per container. Make sure to choose a fertilizer based on whether your plant is indoors or outdoors. Also, select a fertilizer that is slow-release. Slow-release will not over-fertilize the plant, and over time the food for the plant will result in new growth. 

Soils Infused with Fertilizer Are a Great Choice

To get the most bang for your buck, soils infused with fertilizers are a great option as well. No need to purchase two different products, the combination of succulent soil and fertilizer makes caring for your plant easy and cost-effective. 

Conclusion

Your succulent will tell you when it’s not thriving. Pay careful attention to the appearance of the leaves and be mindful of how moist the soil is. Many issues can be remedied before your plant will begin dying. Once the symptoms have become more severe, it may be too late. 

How Often To Water Christmas Cactus?

When it’s winter or springtime, the Christmas cactus becomes popular because many people use it as a gift. You can see the plants sold everywhere in flower shops and grocery stores. This hybrid cactus produces bright flowers that come with a variety of colors sure to captivate anyone. If you grow this cactus at home, you need to take good care of it for you to see it bloom during the holidays.

The best care you can ever give your Christmas cactus is appropriate watering. Unlike other cactus plants, Christmas needs more watering and proper care to live for days. They are epiphytes native to the tropical rainforests and grow on other trees instead of soil. This feature makes them completely different from other cactus in terms of moisture and nutrient needs.

So, how often should you water your Christmas cactus, and how much water do they need? We have all that covered in this article.

Check the Soil to Understand Watering Needs

The best way to understand how often to water your Christmas cactus is to check the soil. As you already know, these cacti are not like the others, and they can’t tolerate drought. Once you notice that the potting soil is dry, you should water your plants.

When watering, make sure excess water drains to the bottom of the pot. You should never allow the soil to get waterlogged. Your Christmas cactus will not appreciate long hours of sitting on top of the water. If they sit on water for many days, especially in winter, the roots will rot.

Always plant your Christmas cactus in a pot with drainage holes.

You should consider the type of potting soil you have under your plants. Check how large the potting container is as well as the sunlight and the temperature reaching your plants. If you want to get your plant to thrive, you must ensure you water whenever the soil is dry.

When to Water Your Christmas Cactus

When you have cactus in your home, you know they react differently to seasonal changes, and Christmas cactus is the same. To water your Christmas cactus the correct way, take into consideration the climate and the season. In a hot and dry climate, you need to give your plant more watering, which can be twice or three times per week.

When grown in hot and dry climate, a Christmas cactus should be watered 2-3 times a week.

If the climate is cool and humid, watering once a week can work well. You should water even less in winter and fall if you want it to bloom.  Watering will also depend on where you place your cactus. If your cactus is exposed to a lot of sunlight, the soil will dry off faster, and your plant will need much more watering. If it’s in a humid and cool place, you’ll have to water it less.

How to Water Christmas Cactus

Now that you know when to water and when not to water your Christmas cactus, it’s also vital that you know how to water it. Do you water from the top or the bottom? Well, according to gardeners, the best way to water your Christmas cactus is from the bottom and not the top. Watering from the bottom ensures that enough water gets to the roots and reaches the plant.

If you water from the top, the water will not saturate the soil. The water will trickle down from the plant, and only a small amount will reach the roots of your cactus. If you use this method, you could think that you’re watering your plant the correct way when it’s under-watered. So, for your cactus to get the much-needed water, bottom watering will be the way to go.

Don’t Over-Water or Under-Water

While Christmas cactus may need more watering than any other cactus, over-watering can become a big problem. If you over-water your cactus, it will develop fungal infection and rot. If you notice that the leaves of your cactus are dropping, those are signs of white rot. Apart from dropping leaves, a cactus that has been attacked by the white rot seems to have white spots on the leaves.

Overwatering and underwatering your Christmas cactus may lead to dropping leaves and wilting, respectively.

But the problem is not only on too much water because too little can also be a problem. Christmas cactus cannot withstand under-watering like other species. A Christmas cactus that doesn’t receive enough water will start to wilt. You’ll also realize that the flower buds of your precious cactus will start to drop. This cactus cannot tolerate dry soil.

Consider Transplanting Your Cactus

Regardless of how well you water your cactus and care for it, you might still notice that it dries out. If you notice it drying often or the flowers wilting, it’s not receiving enough water. The problem may not be the water but the container. Instead of continually watering your cactus, you’ll need to have a bigger container.

Consider repotting your Christmas cactus in a proper container with enough drainage holes and suitable soil mix.

Your Christmas cactus should have a container that drains easily. You need to have a soil mix perfectly made for your cactus and use the right pot for that. You can also combine your plain potting soil and the other with clean sand. Always remember that the size of the container matters.

Is Your Cactus Indoors or Outdoors?

The location of your cactus is one of the things you must consider when it comes to Christmas cactus watering needs. If your cactus is growing outdoors or near the window, you must understand that the temperatures here are too high and the air is dry; you’ll need to water your cactus two to three days a week.

If your cactus is growing indoors in a cool and humid environment, it will need less watering. You’ll also need less watering if your plant receives indirect light, the soil will not dry faster, and your cactus will do just fine with watering once per week.

What’s the Time of the Year?

Your watering season needs to change with the season. How you water your cactus in the hot months is not the same way you water in the cold months.  The temperatures drop in fall and winter, which means your potting soil will take longer to dry out. You won’t need to water it more often. This is also the time for your Christmas cactus to show its beauty. Watering sparingly will stimulate blooming to your cactus.

When October comes, you should stop watering your cactus all together because there will be too much water in the soil. By November, you should resume watering but remember to keep it light because the temperatures remain cool.

When you notice that your precious cactus has started blooming, you must cease watering. You should stop watering for about six weeks and allow your cactus to get enough rest from moisture.

With time, new growth will start emerging from your plant, and you must keep in mind that they’re very delicate. But the new growth means that you should resume watering your plant once a week.

Consider the Humidity around Your Cactus

Christmas cactus thrives well in environments with high humidity. If there’s not enough water in the air, the buds of your Christmas cactus will drop. If your location experiences a dry climate or your indoors have a dry climate, you should ensure you place a container filled with water next to your cactus. If you do this, your plant will get the desired humidity from the water that evaporates into the air.

Another way to increase humidity for your cactus is to put gravel on the tray and fill it with water, then put the potted plant. You can also mist your cactus with water once in a while to increase the humidity around. Another option is to place your plant near a humidifier. Or, you can move it from hot radiation or near the vents where there’s low humidity.

Additional Care Tips

Just because your cactus is receiving enough water doesn’t mean you neglect its other care needs. Many cacti need to be in bright locations and need to be fertilized.  Your cactus will only bloom and give you the benefits of a holiday cactus if you give it enough light and take good care of it.

Even though Christmas cactus love sunlight, you must ensure it doesn’t burn. You’ll identify a burning cactus when its leaves start turning yellow or brown. If this is the case, you should move it to an area with less direct sunlight.

Your cactus will also need fertilizers occasionally. However, don’t be tempted to give it more nutrients than it needs. The best time to fertilize is spring or summer. Don’t fertilize your plant when it starts to bloom or in the colder months.

Summary

Christmas cactus is a highly rewarding plant that is sure to add life to both your indoor and outdoor garden. But this only happens if you take good care of it through appropriate watering. Christmas cactus is more demanding in terms of water needs than other plants, and you must adhere to that. When watering, be careful not to under-water or overwater because that can kill your plant. We hope the information above helps you take better care of your plant.

This Is How To Propagate Christmas Cactus

Christmas cacti are those long plants with segmented leaves. The plant blooms in pretty colorful flowers around spring. They make perfect Christmas gifts when they bloom; hence, the name. Everyone loves this cactus for its vibrant look and what’s to have them in their home garden. But do you know how to propagate Christmas cactus?

Propagating Christmas cactus is easy. You can come up with a new plant by just clipping part of the already existing plant. But good timing is also vital in propagating this cactus. Usually, spring makes the perfect propagation time. You need to propagate it months before it blooms in spring or before it enters the dormancy period of winter.

But how successfully can you propagate Christmas cactus? This article has the answer to that and much more information on how to propagate Christmas cactus.

Ways to Cut Christmas Cactus

The Christmas cactus branches come in several sections that are linked together. At the bottom of the pad is where new roots grow and become a new plant. For proper propagation, you must ensure you separate the pads without damaging the bottom. If you damage the bottom in cutting, all your work will go to waste as the new plant won’t grow.

To propagate your Christmas cactus, you should separate the pads that are linked together.

To ensure you don’t damage your cactus and end up wasting your time, you need to twist the bottom pad when cutting gently. Gentle twisting will make your pad come out easily without tearing any part of the plant.

Another thing you should ensure is to take the short, Y-shaped cutting on the tip of the stem. The cutting needs to have two to three joined segments. For you to succeed, you should ensure you cut your cactus from healthy foliage. After cutting, let it dry for a few hours before transferring it to the pot for rooting. Make sure you don’t expose the stem to excessive moisture.

Rooting Christmas Cactus

Once you’ve cut your Christmas cactus and allowed it to dry, it’s now time for propagation. There are two types of rooting for the plant. You can root your Christmas cactus in water or soil. We’re going to discuss all these to see how they work.

Propagating Christmas Cactus Upright in the Soil

Rooting Christmas cactus in the soil is the best method to use if you want to succeed. If you got large cuttings on your plant, the best way to root them in the soil is upright.  Here is your step-by-step guide on rooting cactus in soil.

  • Lay your cuttings in a dry place for 1-2 days. Make sure you don’t expose them to direct sunlight. The resting period will help the pads adjust from growing shoots to growing roots. If you avoid exposing them to heat and humidity, the plants will be ready for planting in just 48 hours.
  • Place your plants into fresh potting soil. The best soil for this will be cactus and succulent mix. Make sure the soil covers the bottom pad of your plant.
  • Water your new Christmas cactus lightly and let it dry between watering. If you add too much water, the plants will rot.
  • The roots will start forming within 2-3 weeks.
  • Place your plant in a location that receives indirect sun. While the plants will need the sunlight, direct sunlight can also damage them.

Propagating Christmas Cactus on Top of Soil

The first soil propagation method is upright in the soil, while the second one is on top of the soil lying flat. This method works for smaller cuttings or if the bottom pad is slightly damaged. Here’s how this method works:

  • Let your cuttings dry in a dry place away from direct sunlight for 1-2 days.
  • After resting, place your plants on top of the soil horizontally. Make sure you’re using light soil, preferably cactus and succulent mix.
  • Make sure the two cactus pads have direct contact with the soil. The new roots will start forming from this point.
  • Keep the soil slightly moist, and expect to see some new roots by 2 to 3 weeks.
  • Be careful when using this method, as the pads laid horizontally in soil may get too wet and rot. Make sure the soil is only wet at the time of watering.
  • The actual cuttings should be dry as much as possible.

Propagating Christmas Cactus In Water

The next method to plant your Christmas cactus is in water. Many expert gardeners use this method as it’s the fastest method to get your Christmas cactus to root. But you should also know that this method involves extra labor since you’ll still need to transfer your plant to the soil once it roots. The transfer is very delicate, and you might end up destroying the new roots.

Propagating a Christmas cactus in water is the fastest method to get the plant to root.

For this method to work, you’ll need a glass jar with stones and your fresh cuttings from a healthy plant. Below is the method to use to root your Christmas cactus in water.

  • Make sure your cuttings range between three to four inches, with each having about three leaves.
  •  Leave them to dry for about two days so they form a callus and reduce the risk of rotting once you put the pads in the water.
  • Fill the bottom of your glass jar with stones or pebbles up to about two inches.
  • Add water on top of the stones.
  • Place your cuttings inside, ensuring the bottom touches water. The bigger part of your cuttings should rest on the jar. That’s above water and the stones.
  • Keep an eye on the water to ensure it doesn’t evaporate. If it does, add more water.
  • If the water doesn’t evaporate, you should consider changing it after some weeks. Keeping the water fresh all the time keeps away bacteria that might cause rotting.
  • The humidity in the jar will ensure the plant grows without rotting.

Give It Time

I know you must be eager to see your plant root and thrive into a beautiful Christmas cactus. However, you must understand that growth doesn’t happen overnight. How fast your plant roots and grows will also depend on various conditions, including climate and soil. You might do everything right, but your plant may take longer than usual if the natural conditions don’t allow it.

Your plant can take two to three weeks to root successfully. Once it roots, you’ll need to transfer it to a pot for it to start growing normally. Make sure you follow the proper transition process, so you don’t kill it. Watch out for the amount of water and sunlight you give it as this may be very strict at this time. Don’t soak it in water and avoid exposing it to too much sun.

Transferring from Water to Soil

If you root your Christmas cactus in water, you’ll need to transfer it to soil later. Start by keeping your cactus in a good location with enough warmth and indirect light. Well, you can expose it to some direct morning and evening light, but don’t allow it to get too hot.

After transferring your Christmas cactus into a pot, make sure it receives enough warmth and indirect light.

When it comes to watering, make sure you don’t overdo it.  Allow the soil to dry slightly before the next watering. But you still need to water your cuttings more than the regular Christmas cactus. As the plant grows, the watering should also reduce until you can allow the soil to dry completely. If you do it well, your plant will perfectly transition from being in the water to finally growing in soil.

Caring for Your Christmas Cactus After Propagating

If your cactus manages to reach this point, then you can pat yourself in the back for the work well done. However, you should not lower your guard at this point because the plant is still delicate and needs extra care.

To grow a healthy Christmas cactus, water the plant once the soil is dry.

Unlike other cacti, the Christmas cactus needs more watering. Once your plant is potted, you’ll need to water it regularly in summer and spring. However, this doesn’t mean that you saturate it with water, as this will cause root rot. Allow the soil to dry slightly before the next watering. You should stop watering for up to six weeks in winter and ensure you keep it on the dry side. Depending on the climate, you can also consider introducing mild fertilizer at this point.

Stay away from direct sunlight even after your plant is mature enough, as this can burn the leaves. The plant needs brighter light to produce more blooms but can still thrive in low light. The Christmas cactus enjoys high humidity, with temperatures ranging between 60 to 70 degrees.

Summary

Christmas cactus can be a very rewarding plant if you give it proper care. The blooms can brighten your home and give you perfect Christmas gifts for your friends, family, and colleagues.

However, if you propagate your plant and it doesn’t grow, don’t worry. Even expert gardeners do trial and error. Maybe, the problem may not be you or the method you used, but the plant. The best thing to do is to try again and see if it grows. Do your research on the care needs and growth conditions, so you get it right on your next trial.

How To Know When A Succulent Needs Water

You are a plant lover who wants to add a successful succulent like a cactus or aloe vera to your garden. You go to your local nursery, buy a healthy-looking succulent and bring it home. However, you might start to wonder when you are supposed to water your succulent, and how you can know when your succulent is thirsty. 

Look at a succulent’s leaves and roots to tell if it needs water. Succulents are low maintenance when it comes to care and attention. Since succulents grow in dry climates, they only need to be watered once a week during the summer and once every two to three weeks during the remaining seasons.

The number one reason succulents die is from either overwatering or underwatering the plant. Succulents can store a significant amount of water in their stems, roots, and leaves. If you overwater succulents, the plant will drown. If you underwater succulents, the plant may die of parchment. Read on to learn about the things to look for so you can know when it is time to water your succulent plant.

Look at Your Succulent’s Leaves

The texture of a succulent leaf should be smooth. When the leaves start to wrinkle or appear to be shriveling up, it is time for you to water your plant. To smooth out the wrinkles, follow these steps.

  • Add water by first placing your finger about an inch deep into the soil.
  • If the soil feels completely dry, take a water dispensing device and apply water.
  • After you have watered the soil, your leaves should return to their smooth and flawless finish.

If you water the succulent and still find that your leaves are wrinkled, you may have placed the plant in an area with too much sun. The sun’s rays may be dehydrating the plant at a faster pace than it can absorb water. If the plant is in an indoor pot, simply move it a few inches away from the window so it can receive a reduction of radiation.

If your succulent leaves are not smooth, it means that the plant requires water.

In addition to having a smooth appearance, succulent leaves should also feel firm. If you can easily bend the leaves or they look weak, it is time for you to hydrate your plant. The leaves should feel strong and difficult to bend. If the leaves are still flexible after an hour of watering the plant, you can either move the plant away from the sun or add about three tablespoons worth of water.

What To Do If You See Burn Marks on Leaves

If your plant has been in too much sunlight, you will see burn marks on the leaves and the stem. Move the plant away from the sunlight and water the plant properly.

If you see burn marks and the plant does not replenish itself after a day or two of being out of direct sunlight, you can remove the succulent from its pot and place it in a cup of water for twenty-four hours. This procedure should rehydrate the plant and resurrect your healthy, strong succulent back to life.

Look for Aerial Roots on Your Succulent

You can think of aerial roots like spuds on a potato. Aerial roots are anything that grows on the root that is not supposed to be there. They often appear as pink or white hair-like substances growing on the stem. These roots grow to absorb water from the air if they are not getting enough hydration from the soil.

If you see an aerial root on your succulent, do not panic. It is normal for this to happen and it is your plant’s way of telling you that it is thirsty. By simply adding water to the plant and making sure it is not receiving too much UV radiation, the aerial roots will disappear within a week. Here are four things you can do to get rid of the aerial roots on your succulent plant:

  • Water your succulent plant once a week during the summertime and once every two weeks during fall, winter, and spring. If you live in a warmer climate like Texas, Arizona, or Florida, follow the summer guidelines throughout the year.
  • Do not remove the aerial roots. This is the plant’s way of surviving from water in the air and they will go away on their own once they are hydrated.
  • Aerial roots are more likely to appear during the succulent’s growing season. While once a week in the summer and once every two weeks for the rest of the year is a general rule of thumb, they may require more attention during their growing season, which is typically in the warmer months.
  • When the aerial roots dissipate, continue to practice proper watering techniques. You may need to water the plant twice a week if it is in an extremely dry climate, or once every two weeks if the climate you are in has a lot of moisture. It depends on your location and the plant’s individual needs.
If you notice that your succulents have aerial roots, water the plant and protect it from UV radiation.

Furthermore, the roots on a succulent should be light in color and firm in texture. The roots should not be flexible. If you can bend the roots or they have discoloration, your plant may be suffering from root rot. This is when the roots start to decay due to dehydration or overwatering. To get rid of root rot, remove the plant from the soil.

Then, clean off the soil from the roots and place the plant in a space that is out of direct sunlight. Let the plant dry and make sure there are no rotten roots, which will be brown or black in color. Let the plant sit for five days, and then replant the succulent in a new pot of fresh soil. After two days of the plant sitting in the new soil, water the succulent.

This should cure the root rot. Make sure you keep up with proper watering practices after replanting the roots to ensure the root rot does not occur again.

Use the Correct Watering Tool 

Avoid using spray bottles to water your succulent. While spray bottles work great for other types of indoor plants, they are not well suited to water succulents. 

While spray bottles work for other houseplants, they are not suitable for watering succulents.

You need to have a more concentrated water flow for the water to penetrate the roots of the succulent and the dispersion of liquid from the spray bottle is not powerful enough to evenly distribute among the roots of the plant. Water cans are preferable since they have a consistent flow.

  • The best way to water a succulent is by using a measuring cup and pouring a cup of water over the entire plant.
  • Allow the soil to dry completely, and then pour another cup of water over the plant.

This method will activate the plant’s root system, give it time to absorb the first cup, and prepare the plant to receive hydration from the second cup.

Use the Correct Pot and Soil

You need to use a pot with a draining hole. The hole prevents the succulent from drowning or rotting. A small pot with a single draining hole will be sufficient in containing your succulent.

Using the proper pot and soil mix is key to providing sufficient drainage for your succulents.

Additionally, you need to use the right soil. Most soils are too dense and hold too much water for your succulent to thrive in. Remember, succulents have evolved to contain enough water over an extended period. They do not need the support of the soil to hold more water since their storage units do this naturally.

Choose a soil that has visible particle sizes. A gritty mix is a great soil to use since it only holds water for a short period of time and has a small absorption rate. The gritty mix also dries out quickly, making it ideal for plants that are well-suited for dry climates.

Conclusion

Succulents are low-maintenance plants that do not require a lot of time or care. They have evolved to survive on little water and can go for long periods of time without water. Overwatering your succulents can damage them. However, a succulent’s leaves and roots will alert you when it is thirsty and needs to be rehydrated.

Sources:

How To Grow A Peanut Cactus

The peanut cactus (Echinopsis chamaecereus) blossoms on the rocky Argentinian mountains, their native grounds, all year round. This species is a great choice for indoor gardening, cherished for their fuzzy, peanut-shaped stems and scarlet-orange spring and summer flowers. They are easy to care for, and their otherworldly appearance is priceless and worth any hassle. Like any other cactus, you can easily get impressive results with minimal effort.

What does it take to grow a peanut cactus? To sprout quickly, grow your peanut cactus from the parent’s stems. Harvest a young stem from the cactus stump at the tail-end of fall. Nip the fingers from the plant’s base and regrow the budding shoot in commercial cactus soil mix or a homemade potting mix of sand, peat moss, and loam in the ratio 2:1:1. Each cutting is to be planted in its pot protected from direct sunlight. Give them just the right amount of water and watch the bloom. For better results, enrich their soils with fertilizer, two-three times a year.

This article will expound in depth all the factors that go into successful propagation and care of the peanut cactus. It will delve peanut cactus’s basic traits, best conditions for growth, its varieties and hybrids, aesthetic uses, illuminate tips for cactus propagation, transplanting, watering and grooming. This will include pests and diseases that affect this species. It will also point at special care tactics that suit the plant’s seasonal needs.

Characteristics of the peanut cactus

  • They grow as a clump of stems that mimic human fingers. New stems are usually erect and plump while old ones turn woody and brown. The stems have shallow ribs coupled with six to nine ridges covered in small white bristly spines. They are a low-growing species that grow to about 15 cm tall and 30 cm wide.
  • They grow relatively fast compared to other cacti species. The numerous offsets will easily crowd a pot sooner than other cactus plants can.
  • They flower in early summer and late spring, producing oversized brightly-colored red and orange flowers – 3 inches long and 2 inches wide.
  • Its flowers are funnel-shaped with hairy floral tubes. Depending on the variety, they can either be nocturnal or diurnal. These blooming characteristics make it a desirable choice for cactus gardening.
  • They produce hairy globular fruits with mushy insides. Within the fruit are seeds that can be used to propagate the peanut cactus.
  • They are spiny and wind in a spiral manner. The spines are, however, soft and do not penetrate the skin. This makes them ideal for indoor landscaping for homes with curious kids and notorious pets.
  • They succumb easily to flooding and over-watering.
  • They do not tolerate extremely cold winters.
  • They require full to partial sunlight to get by, especially in summer. Peanut cactus requires at least 6-8 hours of sunlight a day for its survival. This cactus may, however, require some shading, particularly during spring. Under poor lighting, the stems can grow long and thin. It would be best if you aimed to strike a perfect balance for light exposure and shade to prevent scorching the stems or undernourishment.
  • The species goes through a dormancy period where they shrivel up abit and acquires a slight reddish tinge on their stems. The dormancy antecedes the flowering season. During this period which the green creeps back the stems as watering continues in spring.

Propagating peanut cactus

As much as they are flowering desert plants, peanut cacti are easily propagated using stem cuttings or offshoots from the mother plant.

Although you can grow a peanut cactus from seeds, growing the plant by propagating its offsets is a much quicker way.

Here is a step-by-step guide on its propagation:

  • Hold up the spiny offsets using tweezers and cut the stem right from the base. The offsets are easy to detach from the mother plant since they are weakly attached naturally.
  • Dip the snipped part in a growth hormone and cure using an antiseptic solution before planting it into potting mix. An antiseptic solution like cinnamon helps to keep fungal and bacterial activity at bay.
  • Before planting, allow the slit part to form a callous. The callous is a sheath that protects the plant from pathogens.
  • The cultivars are then grown in a potting mix. You may opt to purchase your cactus mix online or make your own soil mix at home.
  • Within a few weeks, your cuttings should develop roots and grow into a healthy cactus with the right care.

Peanut cactus can still be propagated using seeds. However, this is not recommended because the plant will grow at a snail’s pace when propagated compared to cuttings. Cuttings are far along the germination process, unlike seeds that have only just begun. The beauty is that it can form many offsets all at once, many times in its lifetime.

Fertilization

Applying fertilizer to a peanut cactus will cause tremendous growth spurts. However, dosing up the plant with fertilizer, all at once, is not preferred.  They would rather take it in small amounts- keeping them nourished all year long. While applying fertilizer once a year is acceptable, doing it at least twice is the regarded even better. Too much of anything can be harmful, and this also applies for plants. Excessive application of fertilizer can scorch the cactus. A good gardener would probably make a fertilizer feeding chart for better management of the fertilization schedule.

You should fertilize your peanut cactus 1-2 times a year.

Growth options and conditions

Peanut cactus can be grown as a houseplant or outdoor cactus, dictated by the area’s climate. It thrives in zones 10 through 12 of plant hardiness. These zones ranges between 30˚F to well over 45˚F in temperature. This species is known to grow outdoors in regions like California, Florida, Nevada, and Arizona. Despite this, this hardy, versatile species can grow anywhere in the world. You can grow it indoors, provided it does not miss out on adequate sunlight.

If you have decided to grow a peanut cactus indoors, make sure the plant gets enough sunlight.

Watering the peanut cactus

Peanut cacti, like other cactus species, require watering in moderation. The species is adapted to seasonal deluges or no water for days. The soak and dry method is ideal; water is added whenever the soil appears or feels dry. To test this, stick your finger in the mound of soil. Water the cactus if at least one inch of the soil feels dry.

 Water the plant from the sides rather than directly pouring water from the top. Overhead watering is wasteful and, if done in the heat of the day, can cause increasingly high rates of evaporation. Watering below ensures that the water seeps down the soil into the roots. They are best watered at dusk or dawn.This way, they get to utilize the moisture rather than losing it through evaporation.

Under-watered cacti tend to fall over thanks to the little water in their stems. Water plays a critical role in the turgidity and support of stems. Without water, its cells are flaccid, and this may cause them to droop over. It would help if you struck a fine balance in your watering regime to avoid deprivation or overabundance.

Transplanting

Repot your peat cactus every three years using damp soil with excellent drainage. Repotting is a crucial and less recurrent step that happens in the life of every potted cactus. This should be done with care to keep the roots from breakage and injury.

Cacti roots may run out of breathing space, and hence, repotting gives it room for growth. Once a peanut cactus matures, it produces a dozen offshoots and stems. This bunch of stems can be reduced to cuttings that you can pot separately to grow into mature peanut cacti.

Repotting your peanut cactus will give the plant some extra space to grow and protect it from various diseases.

Transplanting is a great hack for disease prevention. Murky and poorly-drained soils harm your cactus’ roots. This can result from overwatering or using poorly-drained soils for cactus potting. To spot an ailing cactus, be on the lookout for wilting.

A sickly peanut cactus improves drastically when potted in fresh soil. Frequently changing the soil can help kick disease to the curb.

The other reason for transplantation would be increased nutrition. In about two years, the cactus plant sitting in the same pot has chugged down any growth nutrients and the soil slowly loses its fertility. New, freshly prepared soil mix is a natural way to replenish long-lost nutrients and boost the plant’s overall health. Commercial fertilizers can still be used, but fresh home-made soil mix comes with purely natural elements that help the cacti thrive till the next repotting.

Fortunately, the peanut cactus does not require any pruning. No tipping, topping, head-tracking, or plant mutilation is unnecessary. Trimming columnar cactus might be tricky and is done when part of the plant experiences damage.

Uses of the peanut cactus

Indoor landscaping

The miniature plant displays a beautiful array of bright crimson-orange, unscented flowers during spring and summer that is such a beauty to behold. They do well when grown on hanging baskets or pots placed to flatter your window sill or office desk.

A peanut cactus can be an ideal addition to your indoor cactus garden.

Peanut cactus can be grown together in the same pot with other flowering cactus perennials sporting different shades of color. This contrast will help create a most desirable floral display. Pair the peanut cactus crimson-orange flowers with yellow flowers from ball cactus or the star cactus’ white flowers, and watch your cactus garden transform.

Outdoor landscaping

This cactus variety is an ideal species for xeriscaping. Grow your peanut cactus in a rock garden. This is a popular xeriscaping trend that you must try. Peanut cactus will get you there and fulfill your gardening fantasies. A flowering cactus is a great way to complement a regular garden. As a rule of thumb, fill up spaces and vacuums. In a garden, this can best be done using succulents like the peanut cactus.

Peanut Cactus Varieties

This plant has been immensely hybridized with other diverse species considered a subset of the same genus. Crossbreeding in cacti is advantageous as it helps introduce new desired traits such as drought tolerance that improve survival. It helps enhance already present desirable traits as well purge and dilute the least desirable qualities.

One of the peanut cactus varieties that came about as a result of crossbreeding is the yellow stemmed peanut cactus (Echinopsis chamaecereus var. lutea).This variety lacks chlorophyll and cannot survive under direct sunlight. It has been grafted with a green stemmed species (Hylocereusundatus) to enhance its chances of survival.

Peanut cactus has been extensively hybridized with members of Echinopsis species, yielding hybrids with larger showy flowers with red, orange, and magenta hues. Duotone blooms of pink and yellow and pink and red colors resulted from hybridization, creating a colorful species. The hybrids are erect and have wider stems. Other clones such asx Chamaelobivia f. cristata have fuzzy stems that resemble caterpillars.

Pests and diseases

Bug infestations

Peanut cactus is highly susceptible to cactus spider mites but can be infested with weevils, mealy bugs, whitefly and scale. Spider mites sap the plant’s juices. They manifest as small yellow or white patches that appear on the stems. To shoo them away, spray the stems with water. You can also use a miticide to mitigate infestation effectively.

For biological control, Phytoseuiluspersimilis is a potent natural predator that helps abate pest infestation. Other bug infestations can be controlled using insecticidal soaps and contact or systemic insecticides.

Black stem and root rot

This is a fungal infection caused by overwatering. The rot creeps from the plant’s base and eventually leads to poor growth, discoloration and eventually, death. Root rot is a deadly manifestation because it occurs in the roots, where you may not easily notice until it is too late. The damage caused with extensive progression may be irreparable.

Prevent your peanut cactus from overwatering to protect the plant from root rot.

Dealing with the stem and root rot

  • Use thick gloves or a newspaper, remove the cactus from the pot.
  • Observe the condition of the root and the stem. Healthy cactus roots are white in color while infected roots appear black or brown. Salvage the rest of the healthy white roots by cutting away the black-brown rotten roots.Discard the plant if all its roots are rotten.
  • Leave the cactus to dry until callouses form on the cut regions.
  • Repot the cactus using fresh cactus potting soil.

To avoid this in the future, watering sparingly will help minimize the rot.

Signs of nutrient deficiency in peanut cactus

Nutrient deficiency diagnosis for the peanut cactus can be easily done from it physical traits. For instance, stems falling over the place can be suggestive of undernourishment. Nutrient deficiency is easily overlooked since its manifestations may either resemble a pest invasion or seem like an accident. The main culprits behind stems dropping down are nutrient depletion in the soil and inadequate exposure to sunlight.

Inadequate nutrients in the soil – In some cases, cactus roots become too weak to support the plant’s frame thanks to malnutrition. To salvage this, a balanced fertilizer is highly recommended, with phosphorus in higher abundance than nitrogen in a 5-10-5 solution.

Insufficient sunlight – Cactus stems tend to droop with inadequate sunlight. Stems begging for sunlight will grow gravitating towards a window or any source of natural light.By nature, plants are phototropic – survival instinct that enables them to reach sunlight. This growth inclination towards the direction of sunlight is referred to as phototropism. With easily detachable stems like the peanut cactus, it is only a matter of time before the stem falls over. So, the next time you notice fallen stems, try and understand why it happened. It is, however, no cause for alarm; you can easily rectify the problem. All you have to do is place the pot under the light that the plant yearns.

Special treatment during winter

The peanut cactus requires that extra care during winter since they cannot tolerate these extremely cold conditions. When night temperatures drop to just about the freezing point, consider taking the plant back to the house.

Place it in a cool place for the rest of the months to come. During this season, you may not need to water the plant as it would be in its dormant stage. Make sure the cactus pot has a drainage hole to pass out the excess water.

Towards the end of winter, bring the plant to a warmer spot. This gradual change of temperature prevents the plant from experiencing heat shock – a major cause of distress in plants that can detrimentally affect its growth. Heat shock manifests as wilting.

Consider taking your peanut plant indoors in winter to protect the plant from freezing temperature.

Before the start of bloom, transplant your peanut cactus to its final home, where it will remain for the rest of the blooming season. Remember, repotting in the flowering season will sabotage the process.

For the peanut cactus, you have to work a little harder to achieve the desired floral display for the season to come. Optimizing growth conditions will likely lengthen the blooming period and yield a spectacular floral bloom. Increase watering as spring approaches. Add liquid fertilizer when watering the cacti. Liquid fertilizers are easier for plants to utilize since they are readily absorbed. Flowering lasts one to two weeks. Once the flowers start to wither, move the plant near a sunny window or outside altogether. Ensure the plant gets access to full sun after flowering.

The peanut cactus is a great cactus option for a gardening experience. They are an easy-to-grow succulent with close-to-nothing requirements that grow fast and bloom in spectacular, showy flowers you can brag about. If it isn’t for the bristly segmented pickles sprouting from the ground as a clump, the flowers that crown the plant’s apex are worth the gardening experience. It will also add to your botanical genius growing this rare and exotic species.

How To Grow A Jumping Cactus

The Sonoran desert can be beautiful to look at when cacti bloom. However, do not be deceived, some cacti species can be nasty when you get closer. One of these is the Jumping Cholla cactus. The cactus gets its name from its habit of ‘jumping’ from its parent plant to the ground or onto the skin of any animal that passes by. This is a unique adaptation that helps the cactus procreate and multiply in different locations.  Once the spine is ripe, it easily detaches from the main plant and will begin rooting once it hits the ground. The jumping cholla cactus is one of the largest cacti in the desert, rivaling the likes of the giant saguaro.

So, how do you grow the jumping cholla? Considering its natural ability to detach from the parent plant onto the ground, growing a jumping cholla should not be much of a problem. The cactus can be propagated from its stem, seeds or offsets.  It grows best under direct sunlight and the soil should be dry and well draining to avoid root rot. Once the plant is mature enough it grows some little sharp spines. Avoid pricks and injuries to the skin when handling it by wearing thick gloves. The Jumping Cholla works well when grown together due to their unique growth pattern.

Facts about the Jumping Cholla

  • The jumping cholla can live for decades in their natural habitat and even longer when grown at home.
  • Unlike most other cacti, they thrive best under direct sunlight. Since they do not need much water, they are tolerant to neglect and can be idea for those who travel frequently.
  • A mature jumping cholla will easily attach to anything that comes close. When it gets in contact with the skin, it is not toxic but can cause a painful irritation. As such, consider keeping them away from reach of children or any curious pets.
  • They are excellent complements to other indoor succulents like yucca, aloe and agave.
  • The jumping Cholla can grow to a height of up to 15 feet.
  • Their blooming season comes between April and June. Its star-shaped flowers come in warm colors like red, pink, orange and yellow-green.
  • The jumping cholla produces some green fruits after the flowering season. The fruits would hang down from the branches. These spineless fruits also have fertile fruits that can be used to propagate the cactus.

Types of Jumping Cholla

The jumping cholla is a general name usually used interchangeably in reference to the Cylindropuntia fulgida (Chain fruit cholla) and the Cylindropuntia bigelovii (Teddy bear Cholla). Both varieties feature joints that detach from the main plant and hold on to anything in the vicinity.

Cylindropuntia fulgida (Chain fruit cholla)

This jumping cactus stands out with its cylindrical jointed stems. These stems usually stand about 8 to 10 feet tall. The light green stems feature some knotty ridges. This variety blooms magenta purple flowers that grow to about 1.5 inches wide. The chain fruit cactus gets its name from the growth pattern of its fruits. Its produces its fruits persistently and its aerosols will keep churning out even more fruits, thus forming a chain of fruits.

Chain-fruit cholla cactus features stems that are 8-10 feet tall.

Cylindropuntia bigelovii (Teddy bear Cholla)

The Teddy bear Cholla features some jointed stems, 2 to 10 inches long. This stem would usually be hidden in a dense array of spines, 7 to 10 inches long. Its branches are not truly cylindrical thanks to the raised areas, hereby called tubercles.

This Jumping Cholla variety features some greenish yellow flowers about 1.5 inches wide. The flowering season is then followed by some deciduous, fleshy fruits.

Teddy bear cholla cactus comprises joint stems that are 2-10 inches long.

Propagating Jumping Cholla cactus

Jumping Cholla cactus is an easy growing plant as long as propagation is done right. You can easily propagate this cactus, either by seeds or by its cuttings.  However, while propagating by seed can be a sure way to get a pure species; this may not be the best method if you are looking to get quick results. Seeds take time to germinate, and when they do, their growth is slow.

Propagation though cutting is a popular method for the cholla cactus.  This can be done easily using is stem offshoots. These stem offshoots grow some weak points where you can easily pluck out and grow in a separate pot.

The Cholla cactus is a sensitive plant, and you do not want to gamble during propagation. Some of the notable factor to take into consideration before propagation is the temperatures, and the season. Ensure that the temperatures are at least 60°F (16°C). These are ideal temperatures that will allow successful rooting.

When taking your cuttings, always ensure that you get the specimen from healthy plants that represent the best of that species. Avoid taking cuttings with dents, blemishes, bruises or those generally looking shriveled or diseased. A healthy cutting will translate into a healthy plant that may not need much attention once it matures. All you will need to do in such case is to water once in a while and keep watch on pests and bugs.

Here is a step-by-step guide on how to propagate a Jumping Cholla:

  • Remove your chosen stem offshoot from the parent plant using a sharp and disinfected knife. Alternatively, you can simply snap it off from the joint using your hands. Always use thick gloves when handling that Cholla cactus to avoid pricks from its spines.
  • For cuts, always ensure that you cut of your offshoot in a slanted manner. This is important in helping protect the parent plant from water collecting at the cut area.
  • Dip the base of your cutting in sulphur or other common rooting compounds to improve the chances of rooting.
  • Let the cutting dry off for a few days until the base is callused. This is an important step to help avoid cases of the cutting rotting once it is planted. It is also important in helping protect you cactus from common soil-borne diseases.
  • Once the cutting is callused, get some good soil mix. You can make this at home or purchase the commercial versions. A good soil mix should contain at least 50 percent peat or compost and 50 percent pumice or perlite.
  • Get an ideal container and fill it with your soil mix. Your container should be well draining with drainage holes that help drain excess water.
  • Place your soil deep enough into the soil to avoid it tipping over. Ideally, the cutting should be covered at least 3 inches into the soil.
  • Apply some little water sparingly if the soil is too dry
  • Position your container in a bright location. This could be by the window or balcony where sunlight can easily reach.

With the right propagation, you should notice some signs of rooting within a few weeks.  A growing tip will be a good sign that roots are already developed and that the plant can now tap nutrients from the soil.

Watering the Jumping cholla cactus

The Jumping Cholla cactus may be a desert plant, but this does not mean that it needs no water. Just like any other plant, the cholla cactus needs water for better nutrient uptake and healthy growth. The only difference in this case is that it does not need much water as it can tolerate longer periods of drought. Based on this, watering should be done in moderation. Overwatering your Jumping Cholla cactus can lead to root rot, and you do not want to go this route. It is better to under-water than over-water the cactus as the latter can be detrimental to its survival.

Although Jumping Cholla is a desert cactus, you still need to offer the plant enough water to grow healthy.

For a Jumping Cholla, watering should be done regularly for the first few months as the plant gets used to the new environment. Once it settles in, watering can be done less often. During your watering regime, always ensure that the top one inch of the soil feels dry before you water it. The frequency of watering can, however, be determined by the weather conditions of the region. For instance, hotter regions may need more frequent watering compared to colder areas thanks to the high percentage of water loss through evaporation.

Light requirements

Just like any other cacti, light is an important element for the Jumping Cholla. This is especially so during the first stages of its life. As such, you may see the need to place it in an area where it can tap maximum sunlight. Such locations may include a south or southeast facing window, a conservatory or even a greenhouse in case of an outdoor garden. However, in cases where access to natural light is a challenge, you can opt for artificial sources of light in the name of grow lights.  These can replace the need for sunlight and you can purchase from any electronics store.

Jumping Cholla cactus requires 10-14 hours of light, especially during the first stage of life.

Access to light for at least 10 to 14 hours a day is recommended to the jumping cholla. This light comes in handy to help trigger chemical reactions for the plant to produce energy and food. However, since the cactus also needs to make its own food through the CAM photosynthesis, it also needs some dark periods for better development.

Fertilization 

The jumping cholla cactus may be adapted to thrive in the barren lands with little nutrients, but this does to mean it does not need some fertilizer when grown at home.  Feed your jumping cholla with a balanced granular fertilizer on a regular basis. In this case, you care better off with fertilizer specifically made for cacti and other succulents. However, you can also use water-soluble, low nitrogen fertilizer on the plant. This will help maintain a consistent flow of nutrients to the plant without compromising on the plant’s survival.

You should fertilize your Jumping Cholla cactus with a balanced granular ferilizer regularly.

Having said this, it is also important to note that too much of the fertilizer can be detrimental to the health and growth of the Jumping Cholla. Too much fertilizer can cause the plant to become weak and eventually droop over. The best fertilizer in this case would be an NPK fertilizer with a ratio of 5-10-10 or better still 10-10-10 but diluted to ¼ of its strength.

The best time to fertilize your cactus would be during your watering regime.  Here, you will dissolve one tablespoon of your soluble fertilizer in one gallon of water.

Repotting the Jumping Cholla cactus

With the right care, your Jumping Cholla will grow fast, and within no time, you will see the need to repot. Repotting is necessary for two main reasons:

  • To help get the plant some fresh, fertile soil free from diseases and pests
  • To help avoid too much crowding of the root once the container becomes too small

These two factors are aimed at ensuring your cactus remains healthy and strong all trough its lifetime. When repotting, consider the type of container to use. For hot areas, you are better using a plastic container as this helps maintain soil moisture for much longer. On the other hand, taller varieties of the cholla cactus may need clay pots as these absorb excess water thus saving the plant from root rot occasioned by over-watering.

Repotting your Jumping Cholla cactus will give the plant some fresh and fertile soil along with extra room to grow.

When repotting the jumping cholla cactus, ensure you brush off excess soil from previous container before repotting in the fresh soil. For outdoor gardens, however, you do not need to do any repotting.  All you need to do is keep monitoring through proper watering and fertilization. Once the plant achieves enough offshoots, it will be time to propagate into new plants.

Pests and diseases

The jumping cholla may be resistant to many pests and diseases but it is mostly susceptible to cochineal scale insects. You will easily notice them thanks to their sticky white appearance. These insects eat up the plant by sucking its sap, thus causing some white and brown patches. For outdoor gardens, you can easily do away with these insects by spraying it with a garden hose. For indoor gardens, however, you may see the need to use a mixture of water and alcohol. Apply these on the plant’s stem focusing on the affected areas.  Within a few days, the insects will be no more.

Another notable pest for the jumping Cholla is the cactus longhorn beetle. These are usually about one inch long and adults are shiny black with distinctive white patches on their antennae. They attack the cactus by burrowing into the stems and laying their eggs. This leads to some black rusty deposits on the stem. In extreme cases, the larvae can attack the roots causing the plant to droop over and die.

The longhorn beetle can be easily eradicated by handpicking from the stem. In cases where the population is high, chemical control can be applied.

Common diseases that can affect the jumping cholla include root rot and stem rot. This is mostly caused by poor watering by either over-watering or under-watering.

Is a Jumping Cholla cactus edible?

The Jumping cholla has edible fruits and buds. However, considering the natural appearance of the cactus, it is adapted to protect itself from predators. As such, you may need to work harder before getting something edible from the plant.

The jumping cholla produces fruits that are edible all year round. These can be eaten, either raw or boiled. In case you want to eat them raw, you can only eat the insides. However, boiling it will mean that you can eat the fruit as a whole. Usually, the larger fruit varieties are better-tasting compared to the smaller ones.

Cholla buds bloom in late April or early May. These buds are highly nutritious, low in calories and high in calcium and iron.

Whether you are harvesting its buds or fruits, it is important to note that jumping Cholla has glochids that can be dangerous to the skin. These, almost invisible spinelets can easily prick into your skin. As such, it is advisable that you brush off any traces before picking or cooking.

Jumping Cholla cactus produces fruits that you can eat either raw or cooked.

Whether you are looking to plant it for aesthetical reasons or for food, the cholla cactus is an interesting plant. As much I may be used as an indoor plant, it is best suited for an outdoor garden. This is all thanks to its ‘jumping’ tendency that can be uncomfortable around children and curious pets. When growing indoors, ensure you prune or cut off excess offshoots to prevent the plant from overgrowing. This should be the perfect opportunity to propagate and get even more plants in your garden.  This is a pretty awesome plant that can thrive even in the harshest of conditions. Just ensure they experience the right warmth, regular watering, full sunlight and pest free conditions. With the right care, these cacti can produce bright flowers that can help bring pomp and color to both your outdoor and indoor landscapes.