How To Identify Different Kinds Of Cactus Plants

The world is a jungle of cactus plants, their presence occupying almost every other continent. The Cactaceae family is most endemic in South America, Africa, and the drier parts of the Mediterranean. The cactus is a family name, which encompasses a plethora of about 2000 cacti species and 87 genera. When you next take a look at cacti species, you get to realize that they come in different forms, shapes, and sizes.

So, how can you tell apart the different species of cacti? This all boils down to the physical and internal characteristics of the the plant. To tackle this identification problem, behold is a list of traits to pay attention to while trying to make out the differences between cacti species;

  • Flowering style
  • Seeds
  • Fruits
  • Size
  • Shape
  • Spines
  • Stems
  • Geographical location

Defining the morphological differences between the different cactus species is a big deal for cactus enthusiasts and botanists. This guide has been coined to help ease your troubles by looking into the factors to look out for when differentiating the various cactus types. Whether this is for your self-gratification or vocational purposes, telling apart this deceptive species requires keen observation and understanding of botany and is definitely worth getting a medal for.

Where is the difference?

To the inexperienced, beginning to comprehend these differences can seem tedious and nearly impossible. These taxonomic differences arise from the species’ different morphological presentations. These differences inspire a conclusive comprehensive narrative on how to identify these desert species. Having a panoramic glance sweeping across the desert, you are bound to count cacti in their numbers at any given time. Cacti bear striking semblance with each other, yet they are different- probably not even in the same species. Cacti are the desert hardcores that thrive on the bare minimum. These plants are made to survive the hot inclement weather. They are leafless, which helps to keep transpiration rates at a minimum. The leaves are in fact, modified into tufts of thorn bristles and spikes. These survive as a protective mechanism to shoo away herbivores and destructive humans. Since water is such a rarity in the desert, cacti have fleshy succulent barks that act as their water storage reservoirs.

To propagate the progeny, cacti produce flashy, brightly colored flowers that attract desert pollinators. Some species of cacti are a great breed with their seeds, bearing seeds in their thousands inside the fruits. These xerophytes are shallow-rooted with tap roots that rapidly absorb the moisture before it leaks deeper into the grounds and beat evaporation. Bearing these phylogenetic characteristics in mind, differentiating cacti from other succulents is a mere stroll in the park. The arduous task is to help differentiate the species within the same family.

1.         Check out the sizes

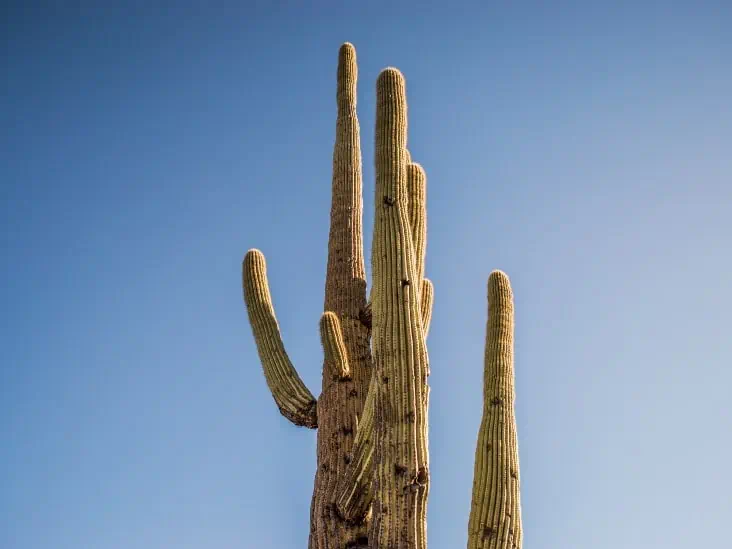
Size is an important pointer that can help to distinguish these ridiculously similar plants easily. Some are tall plants, while others remain short, spiny but aggressive on the ground. The majority of the species are shrubs, growing to about 2 m in height. Blossfeldia species, for instance  are small in stature with a maximum circumference of 12 mm. The family diversity is so imminent, keeping in mind that the tree-like 10 m tall Browningia species falls in the same group as the dwarfyBlossfeldia. The mighty saguaro tree Carnegiea cacti, the wild west’s epitome, on the other hand, towers the desert skies with gigantic heights (50 ft tall) and offers reliable shades to desert animals.

 The fact that there are tiny species doesn’t mean that their ability to survive the wild is diminished. These short, overlooked species tend to have profusely prominent features. For instance, the diminished Cleistocactus bears numerous spines and brightly colored flowers, fully optimizing protection and reproduction.

2.         You can never go wrong with the shapes

Cacti are one of the most adaptable species considering the bizarre shapes they grow in, some that you wouldn’t imagine on living plants! Their shape diversity can help illuminate the cloud of ignorance surrounding the cacti family’s deceptive and uncanny similarities.

The peculiarity in nature never ceases, even in a desert scenario. Some species undergo a spectacular metamorphosis, one that includes a change in shape as the plant matures. For example, the Geohintonia species is globular when younger, but as it progresses into older age, the plant becomes columnar.
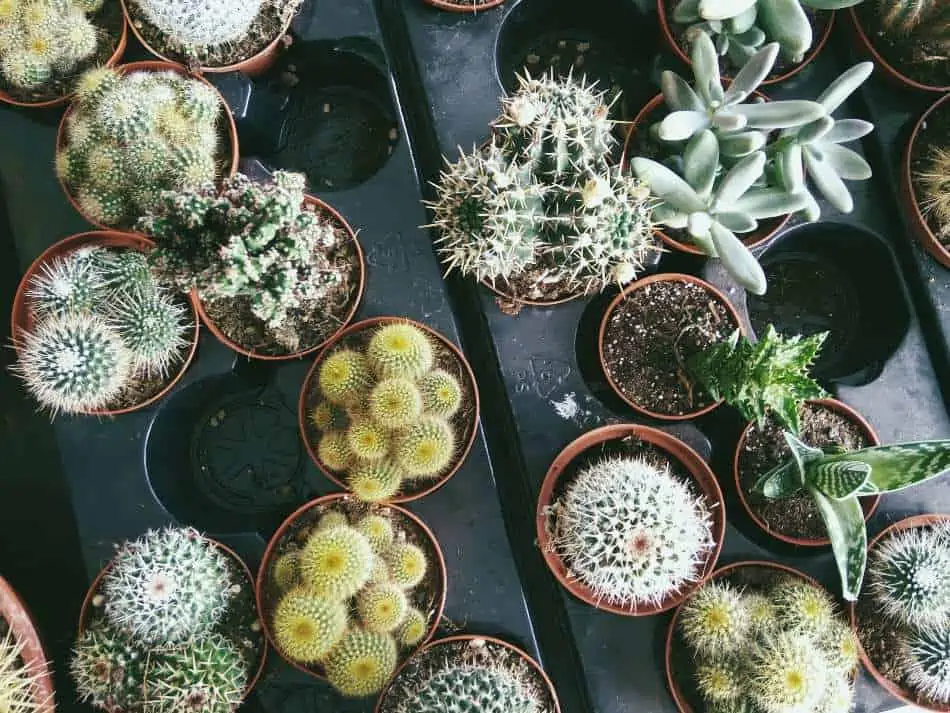
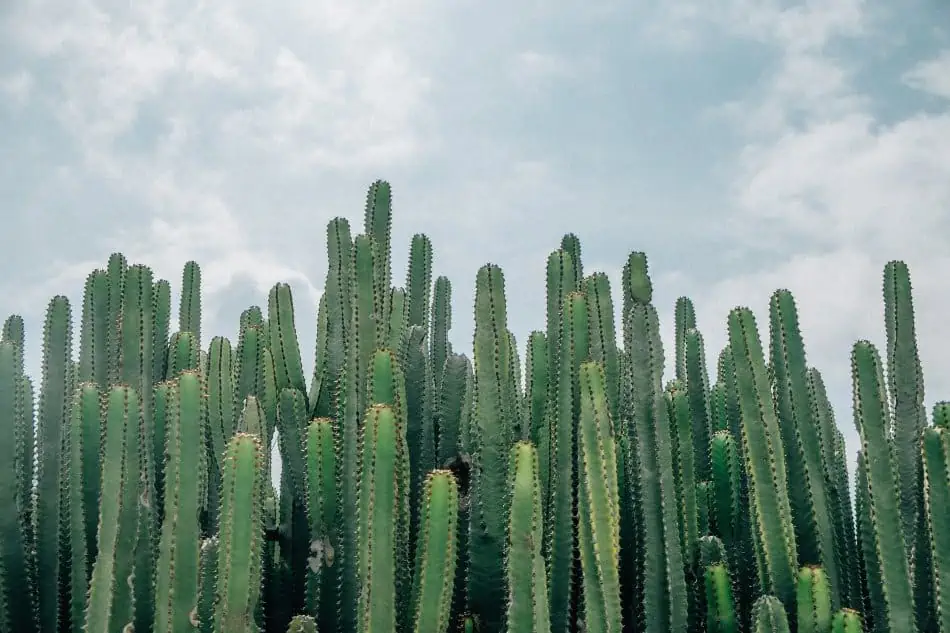
Cactus plants feature different shapes, including cylindrical, columnar, spherical, star-shaped, and others.

Most cacti species are either fleshly cylindrical trunks or stubby globular plants, or even star-shaped. While these are the most common shapes associated with cactus, a unique member of the Hylocereus species grows in a winding manner, climbing their way up tree trunks. They are epiphytes growing in moderately fair weather conditions. An even more baffling genus is the flat-like mat growing Maihuenia cactus. Its stem segments form cushions on the ground.

Then, there is the highly romanticized barrel-shaped Ferocactus species assumed to offer quick relief for a parched desert wanderer because of the barrel-shaped tank we assume has water. The Cephalocereus species, on the other hand, are large and columnar.

The other distinctive feature is its accordion-like ribbed trunk. While having these ribs is not only aesthetically pleasing, they act as water storage pockets for these plants. However, not all cacti species feature ribbed trunks. A famous player on matters ribbed trunks is the Cereus species, which stands out with its 5 to 10 properly defined ribs.

3.         What about the Leaves?

Leaves are a rarity amongst the cacti family. Seeing leaves on a cactus can help rule out almost 90% of the entire cacti family, as it is a rarely observed phenomenon. Even in cases where leaves are present, they are minor and diminished.
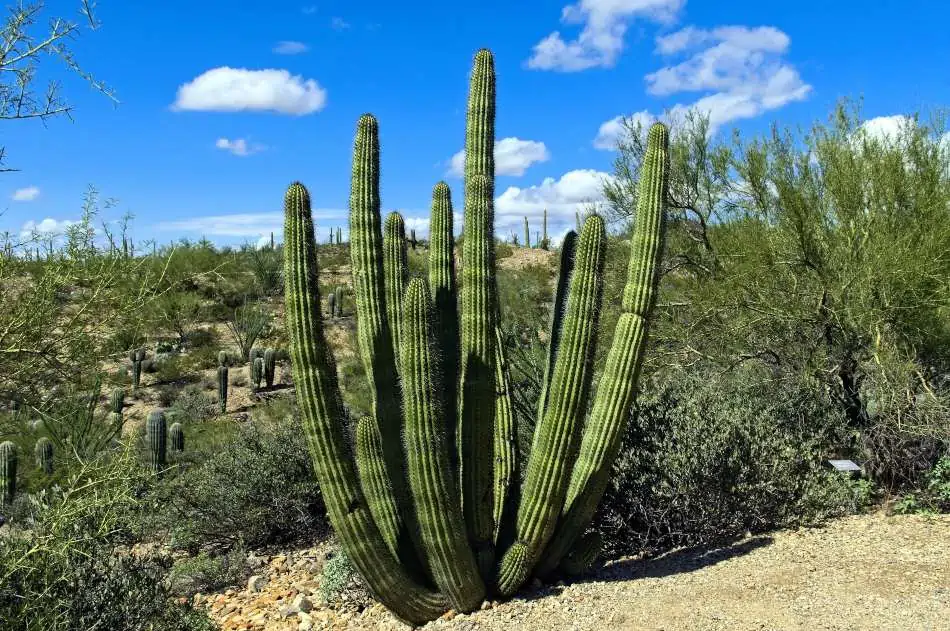
Since the majority of cacti do not feature leaves, you can easily determine the species of a plant if observing the leaves.

In fact, most of these leaves can only be spotted when there is a new growth emerging. You can easily differentiate the different cacti species by its ability to grow leaves, either at the seedking stage or when growing new sections. Still, some do not grow any irrespective of its growth stage.

4.         A look at the spines

The vicious spines protruding from their fleshy stems and even fruits is a typical characteristic of most cacti plants. While most cacti species bear this defining characteristic, others like the Ariocarpus do not spot any. If you can spot spines on them, the chances are that you have narrowed down your categorization to a given cacti.

 The spines can be thin or stout, scarce or dense, and these depend on the specific plant morphology. Some cactus types feature crooked hooks while others are straight as we know them. They can either be hair-like, pectinate, or bristle-like depending on the type of cactus in question.  Some cacti types feature spines that appear shiny owing to the waxy sheaths that coat their spine frames. Still others are rough and dry. While spines in some species grow anywhere on the plant without any precise symmetry, some more organized species sprout spines only on the ribs.
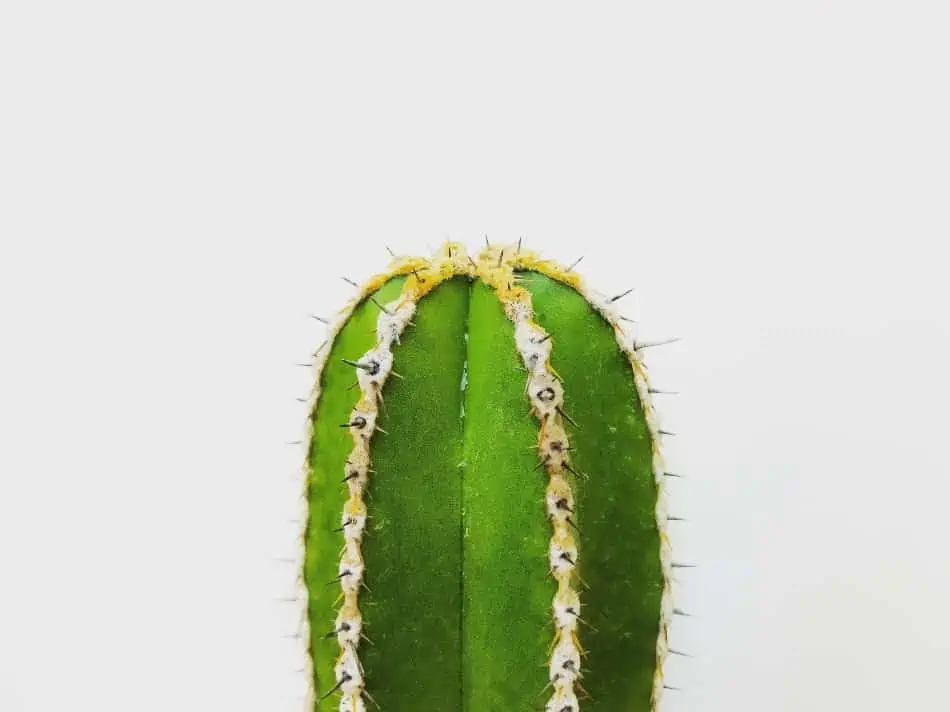
Observe cacti spines to determine the species of your plant.

Areoles are found in highly specialized branches or shoots; they are points from which spines arise on the stem. Some cactus types like Frailea features spines that are so weak and frail that they possess little to no threat against your fingertips.

A number of cactus species are blessed enough to bear colored spines. Some can even assume alternating patterns. There is also a unique tendency for younger cacti to grow numerous spines that slowly reduce in number as the plant ages.

5.         Stems can give a hint

Want to tell two cacti apart? It is probably all in the stem. The stems can either be smooth, littered with spines, ribbed, or at least have areoles emerging from them. Some areoles can be closely spaced, while others are neatly packed against each other. Areoles are the emergence points for spines. This presentation gives the impression that a plant has a jointed stem or not.

Take a look at the Tubercles when trying to tell apart some cactus species. These are warty growths that sprout on any outer part of a plant. The rounded projections arise from the cactus stem. While round tubercles are a more common feature in most cacti, triangular tubercles exist on some members of the Leuchtenbergia species.

6.         The Flowers can tell a story

Color

One of its most peculiar features about cactis  is how they flower. They bear slight semblance to angiosperms, blooming out brightly colored large flowers while others have pale colors.
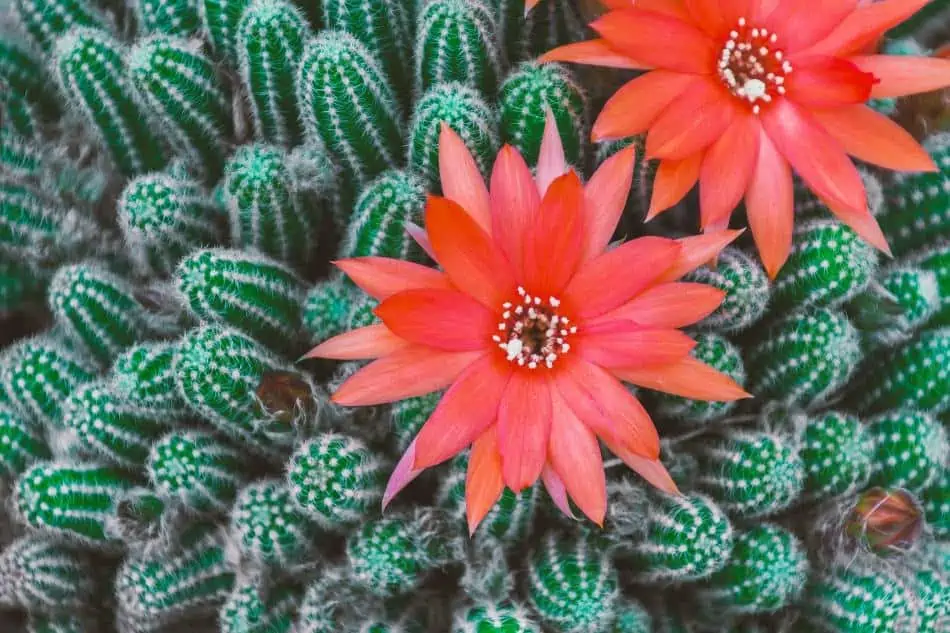
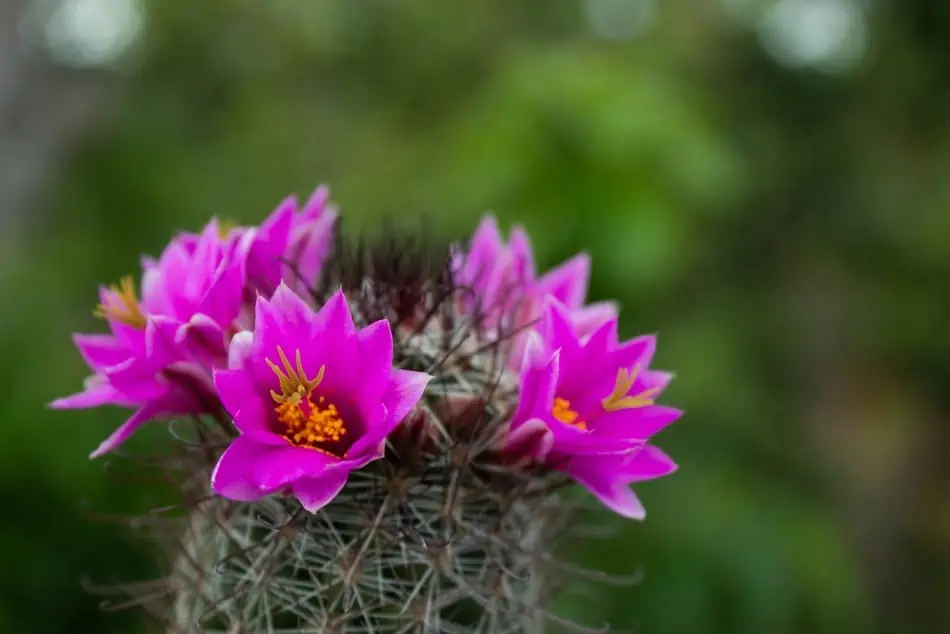
Cactus species produce flowers of different colors, allowing you to easily determine the type of your plant.

In some cacti species, flowers may fail to emerge and are hereby termed as cleistogamous. Such rare cacti species rely on self-pollination. Cacti flowers come in a variety of colors depending on the cacti type. They can range from deep hues of blue to an electric pink array of color. It is also worth noting that some cacti  flowers are duotone;  they feature two colors- one color towards the outer parts of the flower and the other towards the center.

Blooming habit

You can easily tell cacti types apart based on their blooming habits, timings and seasons. An even more spectacular trait is the nocturnal blooming characteristic associated with some of these desert cacti flowers. Most of them are night bloomers, but should they bloom in the heat of the day, they will open for only a short period. The flowers bloom at night when the transpiration rates are subdued, and daytime heat that can easily scorch these flowers to their death has subsided.

The other feature takes into consideration the aspect of time and season. Cacti have different flowering times depending on whether the plant is seasonal, annual, biannual, or perennial. In hindsight, one can differentiate a flower based on the time they blossom. They may also blossom for some given time during the day till they wither and fall off.

Position of the flower on the plant

You can tell a cactus’ species by the position of the flowers. Some tend to bloom flowers on the plant’s apex, while others have their flowers growing on the barks or stems. Other flowers like those from the Chin cactus are naked because they grow without any bristles, wool, or spines.

Fragrance and floral parts

 Some cacti flowers happen to be pleasantly fragrant while others produce flowers with pungent or strong smell. Some cacti flowers can be delicate and frail while some species boast large conspicuous flowers. The flower tubes may be either hairy or naked and least expected spiny, each unique variation giving the species a competitive edge for survival in the desert.

Flower shape

Depending on the species, the flowers can assume different shapes. These can range from cup-shaped to tube-shaped, star-shaped and funnel-shaped flowers.

7.         They just appear different from most of the plants you’ve seen before

Here is a bonus point with a lot of truth in it.This is not to say that any unfamiliar spiny plant growing along the road is cactus, but have you seen the Ariocarpus species? To a majority of people, these species will appear surreal and alien. These geophytes resemble the stones on the ground as if to mimic an actual land feature. They are quite a marvel to behold. In extreme conditions, these plants appear almost dead; they grow laterally on the ground and are firmly rooted on the ground with the help of the long tap roots that they possess.

8.         Take a look at their fruits

Color

Different types of desert cacti have fruits that are a product of successful fertilization amid climatic adversities. Each species has its own color pigmentation on the fruit and this helps to tell them apart. While most cacti fruits can be green when raw, they eventually turn into a myriad of colors when ripe and this may range from yellow to black and even red. The fruits are hardly an average presentation of the usual.
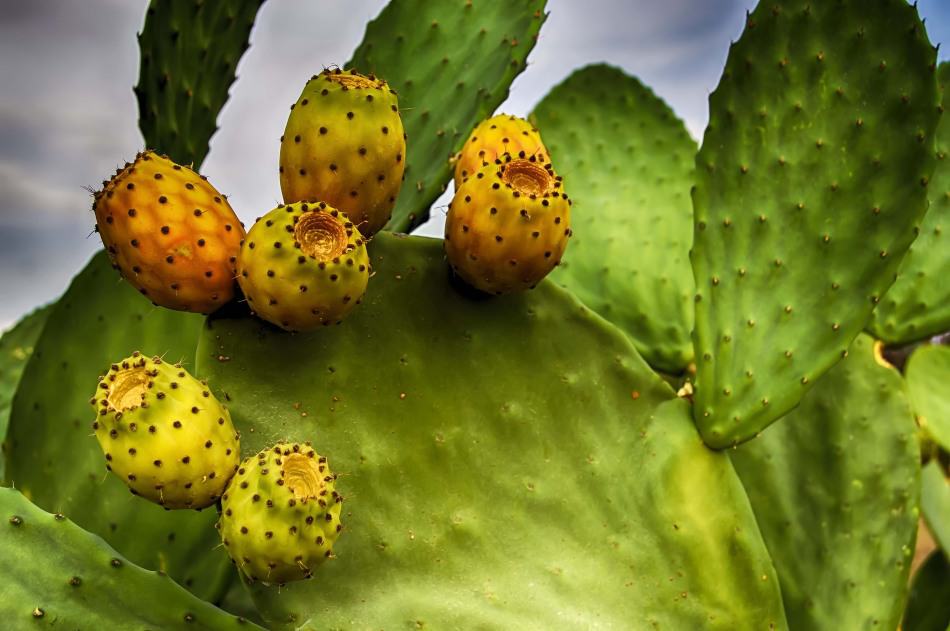
Fruit-bearing cactus species can be recognized by observing the color of the fruit.

 Shape

While some may have the familiar rounded shape, some species make their fruits a little more dramatic; for instance, the Epithelantha fruits are long erect tubes with conspicuous bright red color that you cannot to conceal. Some fruits may resemble pineapples. This happens when the plant species retains the dried parts of the flower on the apex of the elongated fruit. Then there exist other unique fruit manifestations that are club-shaped and have bracts.

Fruit skin texture

The fruits can either be smooth-skinned or have bristles pointing out from them. These glochids prevent the fruits from being easily foraged by animals and other predators. Being hard enough to keep the progeny alive through reproduction makes total sense to have some of these cacti species protect their fruits, conceived in these harsh weather.

The fruit’s insides

The physical appearance of cactus fruits can be deceiving, take a look inside. This is when you can easily differentiate one cactus fruit from another. When observing the insides, they may appear to be fleshy and juicy, while others can be dry. For species such as Harrisia, fruits can be a vital identification factor. Some species such as the Dragon fruit of the Hylocereus species bear big exotic fruits, while other species feature relatively small fruits. The truth is that much as the fruit contents may appear appealing and palatable, it is safe not to judge by the appearances.

The inside of a cactus fruit tells you more about the species of your plant.

9.         What’s to say about cactus seeds?

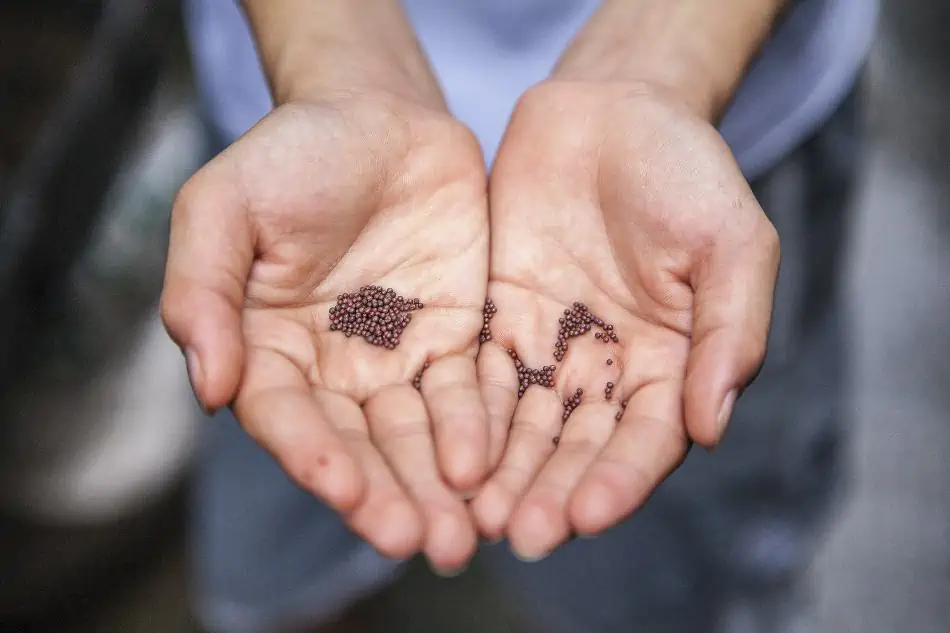
It may seem like a rather far-fetched way to bog down the differences, but it still is a significant one nonetheless. Cactus seeds can have smooth, shiny exterior or appear rough and hairy depending on the cactus type.  These seeds can either be foveolate or reticulate. As most cacti bear fruit berries, this means that fruit, if ripped open, contains countless seeds which can either appear black or brown.

10.      Are they solitary, or do they grow in a group?

Cactus growth patterns can help offer some insight into what kind of cactus species they are. Some, like the giant Saguaro cactus grow in solitude as if in isolation while others like members of the Echinocereus species tend to have their stems growing out in piles of hundreds. They grow out as a closely-knit cluster. 

One of the reasons that might explain this distribution pattern is a species’ pollination technique or characteristics. If the seeds are heavy, they will most likely drop off closest from the source, and if they are numerous and lucky enough to germinate, so will see the tufty shrub emerge.

11.      Geographical location

Sometimes the answer is right there with us. The native grounds on which these cacti grow can aid significantly in their identification. As much as these are survivors of the plant kingdom thriving in extreme conditions, they all have their geographical preferences. While some do well in the arid deserts, others thrive in cold alpine high altitude regions, and these differences are remarkable for identification. Others grow on trees that are found in wet and humid areas as epiphytes.

Geographical location can help you determine the type of a cactus, since they are native to certain areas and climates.

The current literature and studies have helped create this intensive simplistic list of characteristics that can help you tick the right boxes in your quest to identify the various cactus species. Cacti family is an excellent source of fascination and bewilderment for scientists, botanists and hobbyists alike. An even easier and practical way of reinforcing this knowledge is by making comparative characteristic analysis using familiar species. Working with what you know is a great way to learn even more. These incredible insights are bound to turn you into a great botanist, especially on matters cacti.

What Animals Depend On Cacti Plants?

Cactus plants have many benefits for both humans and animals. Some cacti have edible leaves, backs, and fruits. Others act as a source of water in arid regions; hence, helps many desert animals to survive.
Cactus plants such as prickly pear are food for various bird species, mammals, and insects. Many birds, lizards, mammals, insects, and bats rely on the flowers, fruits, and flesh of saguaro to survive in the desert. Some birds of prey and other ground animals make their nests in cactus.

There are different ways cactuses help various kinds of animals. Whether it’s for food, shelter or a source of water, cactuses are essential for many animals’ survival. Here is a list of different animals that depend on cactus and how they do so.

Camels

Camels are among the animals that depend on cactus. These animals eat Prickly Pear cactus’s pads and spines. You must be wondering how they manage to eat this cactus with sharp spines. Well, it’s all thanks to their hard palate on their mouths. They teed grind the cactus against the plate. They chew the food in a rotating manner and redistribute pressure from the cactus in the mouth. Their papillae slide the cactus needles down on their throat without poking them.

Although prickly pear cactus features sharp spines, camels are capable of eating not only the cactus pads but spines as well.

With this chewing technique, the sharp spines of prickly pear cactus don’t prickle them when they ingest. Well, you cannot deny that the sharp spines hurt the camels while eating this cactus. However, they choose to enjoy the flesh beneath these spines and endure the discomfort that comes with it. After all, they only eat a few times because they’re capable of preserving food in their body for a long time.

Desert Birds like Gila Woodpecker

For several desert birds, cactus is not only a source of food but a good shelter. These birds use the inside of the cactus plants to make themselves comfortable homes. Saguaro cactus makes a perfect host for most of these birds. These birds are the Gila woodpecker which excavates their nests on the saguaro’s pulpy flesh.

Desert birds like Gila Woodpecker typically make nests in the Saguaro cactus.

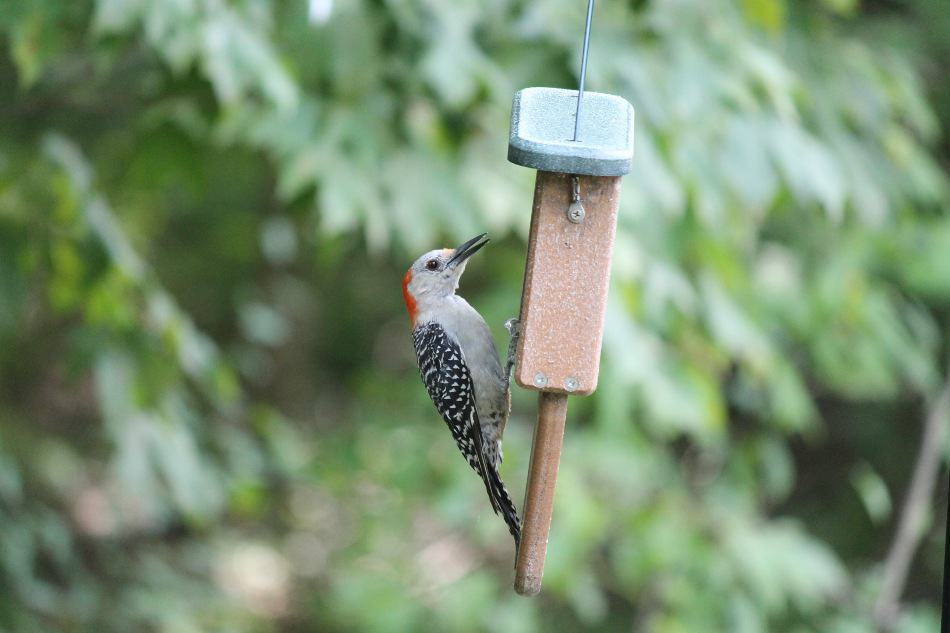
Gila woodpecker is a bird found in the Sonoran Desert. Like the name, this bird pecks the wood of the saguaro cactus tree to make its nest. You’ll identify these birds with their brown feathers and black and white marks on the wings. The makes have some red patch on top of their heads.

The good thing about these birds is that they only make holes on the outside layer of the cactus, allowing the plant to heal and continue growing normally. They only cause superficial damage that will not kill the plant. They create a pocket of scar tissue that acts as their home. Sometimes the Native Americans collect this scar tissue to use for carrying water.

Gilded Flicker Birds

Another desert bird species that dwells inside the saguaro cactus is the gilded flicker. The bird is a common one in the Sonoran desert and has a healthy population. Its wings are about 11 inches long and 19 inches wide. You’ll identify this bird with its brown and has some red and black marks. The non-dessert species of this bird not only live in cactus but also eat the fruit.

The bird hammers saguaro cactus through to the center. Their holes are so deep that above them, you can see the helpless cactus leaning over sharply. The cactus may even start drooping because the hole makes it lose its structural integrity. These birds can abandon the cavities, and elf owls, purple martins, screech owls, sparrows, and finches take over the homes.

The Western Screech Owl

This owl is another desert animal that lives inside the saguaro cactus. The owl lives in the holes abandoned by birds or make their nests in the cactus. This owl has brown and white feathers. It has a wingspan of 21 to 22 inches and large eyes. The western screech owl is a nocturnal animal. This means it comes out at night and rests in its nest during the day. It’s also a territorial animal that can attack other animals and humans. It doesn’t eat cactus. It depends on small birds, rodents, and insects for survival.

The Western Screech Owl builds a nest and lives inside the Saguaro cactus.

Bats

Bats not only use the holes left by other birds for their shelter. They also eat nectar and pollen from saguaro cactus. Bats such as the Mexican Long-tongued and Lesser long-nosed pollinate the saguaro. The bats, mammals, and other bird species eat the ripening fruits, which also act as their moisture source.

Collard Peccary

Collard peccary or javelina are also mammals that live in the desert and depend on cactus and other plants to survive.  The peccaries almost look like pigs with their sharp spears. They’re smaller in size as compared to pigs with almost invisible and tiny tails. Their small tails have some scent which they use to find their family members and mark their territory.

The animals also have sharp tusks under their snouts that they use to dig roots of the cacti to find food. They also get their water from the juicy cactus pads. They also dig up other plants to eat their roots. They’re not shy and can even visit homes in search of food in moist plants.

Harris’s Antelope Squirrels

This is another group of desert animals that eat cactus seeds and fruits to survive. You’ll see them dashing out often in search of food with their fluffy tails held at their backs. They also dig underground burrows, which are mostly under prickly pear cactus and other shrubs.

You’ll see these animals jumping on top of spiny barrel cactus to get the juicy cactus fruit for the meal of the day. The funny thing is that they’re very careful on top of the spiny cactus that they never get poked. When it’s too hot, these wonderful squirrels drop their bellies and spread their legs to cool off in shady soil when it gets too hot.

Woodrat

Most cacti plants from those prickly spines to scare away predators. These spines are everywhere, starting from the stems, leaves to the fruits. The spines force most hungry animals to stay away or risk being poked and wounded.

But this is not the same case with the white-throated woodrat. The rodent that mostly lives in the dessert is not scared of the spines. In fact, to them, these thorns seem like an invitation for a feast. It even looks like these animals will prefer cacti with thorns to the ones without.

Apart from collecting the fruits from these spiny cacti, like the prickly pear cactus, they also collect the spines to create their defense. The rodents use the cacti spines to surround their nests, so anyone who dares to pay them a visit will get a sharp welcome. This strategy has protected these rats from predators such as snakes.

Jackrabbits

This is another fun to watch desert mammal that the cacti plants help to survive. They have very long ears that help them sense danger from far away and cool their body temperatures in the hot desert climates. Their ears and short tails have black fur that got them the name jackrabbits.

Despite the name rabbits, these mammals are in the hare’s family. They move about in open and flat areas, searching for food. The animals depend on cacti, leaves, shrubs, and grass for survival. Jackrabbits eat the flesh of young saguaro to get the moisture, especially when they run out of water completely.

The Coyote

This animal is a dog-like animal that you won’t believe can eat cactus since they look more like carnivorous animals. However, they’re omnivores that eat anything from plants to other small animals. The coyote can survive on anything from fruits of cacti, mesquite beans to dead animals. The coyote survives on prickly pear cactus, especially the fruits.

They also eat all kinds of rodents, including squirrels, woodrats, and rabbits. They have a variety of food to eat, making it easy for them to survive in the desert.

Although the Coyote eats other animals, it can also survive on the prickly pear cactus and its fruits.

The Kangaroo Rat

This is another exciting animal that you’ll come across in the desert and survive on cacti plants. You’ll identify these rodents with their long tails of about 8 to 14 inches.  They also have kangaroo-like feet that give them the name. They resemble kangaroos in many ways, including using their long tails for balance and having pouches, not on the stomach.

They use the pouches to carry seeds they collect from plants like cactus to their burrows. They also eat fresh pads from different species of cactus. The rats join the long list of animals that depend on prickly pear cactus for food.

Summary

Looking at the cactus plants, especially the prickly pear cactus, you’ll think that no one will dare eat them. It seems like both animals and humans will do anything to reach the juicy fruits that these cacti produce. Cactus fruits make a good source of food, and some Native Americans use them for various culinary dishes. Now what humans can eat comfortably, animals will not spare.

But animals don’t only depend on cacti plants for food. Others use them as their homes by building nests on them. Others like the woodrat collect the spines to use as a defense against predators such as snakes. The cacti plants are indeed helpful to many desert animals.

Which Cactus Can You Drink Water From?

Sometimes, life can throw tricky situations your way, and you must learn how to deal with them. In most cases, you won’t know a survival situation until you are faced with one. There have been many reported cases of individuals getting lost or injured on a day hike in the desert.  Being stuck in the desert means that your water supply can get depleted quite fast, and you need to find means of staying hydrated. But the big question is, where do you find water in the desert? Can you drink water from a cactus? Let us find out.

So, which cactus can you drink from?  Typically, cactus is not a safe substitute for portable water. Drinking cactus water, especially on an empty stomach, can cause severe diarrhea and vomiting, leading to more dehydration.  However, in extreme situations, you can always have a few sips from the fishhook barrel cactus.  This is the only cactus that is safe to drink water from but make sure you ingest only small amounts of the water. 

In this post, we cover everything you need to know about drinking water from a cactus and whether it is safe to do so.  Without further ado, let us dive in and get started.

Is Cactus Water Safe to Drink?

You may have heard or read that you can always get water from a cactus plant if you are ever lost in a desert and become dehydrated. It sounds like a nice survival tip but is it that simple?  

The truth is that a cactus plant is not a spine-covered basin of freshwater.  Since we are talking about a desert, we can all agree that water is a big treasure and most cacti plants know how to protect their treasure from predators.

No! We are not talking about the spines in this case. We are talking about the fleshy stem of the succulent. The fleshy stem of cacti plants is usually protected by acids and alkaloids, which can be quite harmful.

In some movies, you might have watched one of the actors cut a barrel cactus, dip his/her hand into the fleshy stem and bring out a hand full of water to drink. Most of us don’t know that the fluid that comes out isn’t exactly water.

It is a noxious jelly-like fluid that is still toxic to human beings.  Remember that when you are already exhausted and dehydrated, your kidneys are weak. Therefore, if you ingest the liquid, your kidneys will be forced to work harder to break it down, which might put you in trouble.

Although cacti can store large amounts of water, the fluid is not always fresh and safe for human consumption.

Another significant problem of ingesting the fluid is that it causes severe diarrhea, vomiting and can even result in temporary paralysis.  You don’t want to experience any of these symptoms while in the middle of a desert.

But that doesn’t mean you cannot drink water from cactus completely. In extreme situations, a fishhook barrel cactus can come in handy. Many individuals have used this cactus as a source of emergency water, and only a few experienced side effects. 

The only thing you need to do is to avoid drinking the cactus water on an empty stomach.

Which Cactus Is Safe to Drink Water From?

As mentioned early, the only cactus you can drink water from is the fishhook barrel cactus.  Still, the cactus water should be ingested in small quantities and in extreme situations only. Plant experts say that the fishhook barrel cactus is the least problematic of the extensive cacti family when used as a water source in the desert.

But, there is still a slight concern about risking your health. In situations where you are extremely dehydrated, you should consider drinking small amounts of water from this cactus to soothe your thirst and hope you don’t experience the side effects.

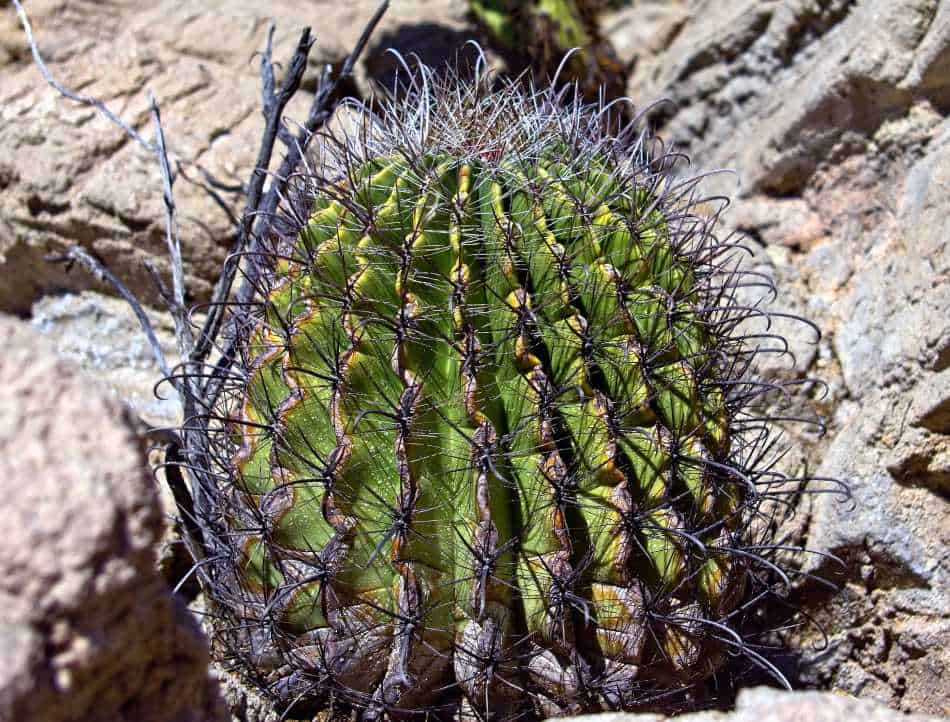
Fishhook Barrel Cactus is the only cactus plant that you can drink water from in extreme situations.

Cactus water is typically acidic and may also contain alkaloids. Like any other ingested substance, your body must digest it, which requires it to expel more energy than you would gain from the water. As such, you may experience slight body aches, joint pains, vomiting, and diarrhea after drinking the water.

In most cases, it is upon you to decide whether or not to risk depending on your situation. Will you risk dehydration or becoming sick?  You have to make the right decision that you won’t regret later.

How Do Cacti Plants Store Water?

Most people think that these succulents have long roots that grow deep into the ground in search of water.

On the contrary, cacti plants usually have a relatively shallow root system. They are only a few inches below the ground surface, and some of them even pop out of the ground. The roots might not even be vertical. In fact, almost all cacti plants usually develop a horizontal root system.

Cacti plants absorb water through their several-feet-long roots.

The roots can be several feet long and are always ready to absorb water from the light showers experienced in deserts. Whenever it rains, the roots absorb as much water as they can since they are highly specialized to absorb water pretty quickly.

When the short rain season is over, most of the roots dry and break off from the plant. This is done to help preserve the stored water in the plant. During the rainy season, the extensive root system absorbs too much water until the plant becomes more hydrated than the soil.

Is Commercial Cactus Water Still Harmful?

There is a big difference between the water you acquire from a cactus plant in its natural environment and what is sold commercially.  Commercially sold cactus water has been refined and evaluated to ensure it is safe for human consumption.

Cactus water is the latest beverage drink in the market alongside other plant-based drinks such as aloe vera juice and coconut water.

Commercially available cactus water is made by squeezing juice from the fruit of the prickly pear. That is why the commercially available cactus water is pink and not clear.

The water is naturally low in sugar and calories but rich in health-boosting nutrients and powerful antioxidants. It is often marketed to athletes since it contains a significant amount of electrolytes that aid in hydration.

There are several cactus water brands in the market, and you can still make your own using the prickly pear fruit and a few common kitchen items.

However, you still need to be cautious when drinking the commercial cactus water. Since it is manufactured from prickly pear fruit, it can have a laxative effect. It can also cause gastrointestinal problems and diarrhea in some individuals.

Some cactus water beverages also contain added sugar, and excess sugar in your diet can lead to heart disease, type 2 diabetes, and weight gain.

Can Desert Cactus Be Used to Purify Water?

Without getting off-topic, we thought this is something interesting that our readers might want to know. After all, we are still talking about cacti plants and water.

Extensive research has been conducted in regards to purifying drinking water using cactus mucilage. This is a process that is commonly practiced in Latin America using the prickly pear.

The process usually starts with boiling the cactus pads that are also edible. The liquid water gel left behind after boiling the pads will then be poured into the drinking water supply.

Within five to ten minutes, the contaminants present in the water automatically fall to the bottom of the container, and the topwater is more purified for drinking. The results can even be better if you leave the cactus mucilage in the container for at least 36 hours.

Always Be Careful When Handling Cacti Plants

When handling a cactus plant, you must be careful with the spines. The spines are a defensive mechanism that these succulents use to protect themselves from potential predators.

To avoid severe injuries and skin irritation caused by spines, handle cacti plants with extreme care.

Cacti spines can easily hook themselves onto your skin, causing severe injuries. In some cases, you will need tweezers to get rid of them. If you don’t have tweezers, you may be forced to wait for a few days before they can start coming out on their own.

During this time, you should be careful with the wound so that it doesn’t catch other infections and make things worse for you. Keep it clean and avoid touching it from time to time. You should also consider covering it with a clean piece of cloth or bandage.

Summary

When going hiking or exploring outdoors, it is always critical to carry enough water. You need to carry even more water when you are going to desert places where temperatures can easily get past 120oF.

Should you be in a desert and something happens such that you run out of water, you still need to find a way of surviving. In such desperate times, drinking cactus water might sound like a good idea.

Don’t make that mistake because the results can be catastrophic. Typically, the short relief you will experience may be followed by pain, weakness, vomiting, diarrhea, and other illness making things worse.

Your best option in such a case would be to consume the cactus fruit even though it might not be enough to end your thirst. If you must drink water, you should only consider sipping small amounts from the fishhook barrel cactus since it is the only safe cactus you can drink water from.

15 Tall Cactus Plants With Names

Cactus plants are known to be many homeowners’ favorite plants because of the statement they create. And not only that, these are plants that are easy to plant and care for and can thrive almost everywhere. They come in various personalities, with others tall, short, and others growing in clusters.

Tall cactus creates that bold and trendy look perfect for giving your home an incredible look. If you provide them with enough sunlight, you’ll be amazed at how tall your cactus plants can grow. The tallest cactus plants range from 15 feet to over 60 feet. The likes of saguaro, Mexican fence posts, and orchid cactus are among the tallest you can find at home and in the desert.

Well, if you love your plants standing tall and bold, you’re going to have to be picky with your cactus choice. Not all of them grow tall, no matter how much you care for them. Here is a list of 15 tall cactus plants with names that you should look for.

1.    Mexican Fence Post (Lemaireocereus marginatus)

Just the word fence post is enough to tell you that the Mexican fence post is a tall plant. If you start by growing this plant indoors, it will grow up to 8 feet tall. After reaching the height,  you can now move it outdoors to continue its growth without any interference. In outdoor temperatures, Mexican fence posts can grow tall and bold up 20 feet tall at maturity.

A mature Mexican Fence Post Cactus.
Mature Mexican Fence Post cactus reaches 20 feet in height if grown outdoors.

The plant grows in columnar form, producing some bright white margins that define its beauty. It would be fun to grow this plant from scratch and see it grow to maturity. You can then give yourself a part in the back for being an incredible gardener.

2.    Mexican Giant Cardon Cactus (Pachycereus pringlei)

It looks like the universe blessed Mexico with some of the tallest cactuses on the planet. The Mexican giant cardon makes one of the tallest cacti you can plant in your home garden. Thanks to its upright growth, the cactus got its name because many people use it as fence posts. This cactus can grow up to 63 feet tall and 39 inches. The unique look of this plant also makes it a perfect indoor plant. It’s a pretty easy plant to care for.

Despite being the tallest plant, it’s a slow-growing cactus and will take a long time before reaching its maturity. Just make sure you expose it to desert-like conditions, and no matter how long it takes, it won’t disappoint.

3.    Saguaro Cactus (Carnegiea gigantea)

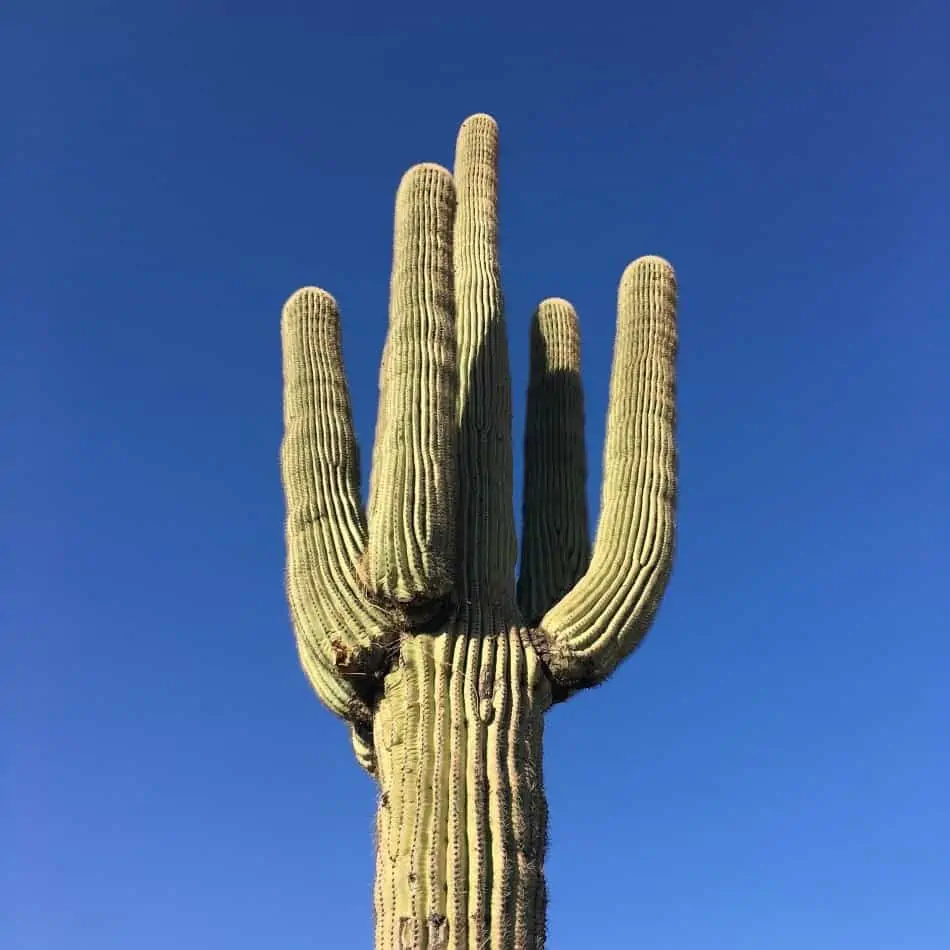
Saguaro won’t miss the list of some of the tallest cactuses in the world. See it in the desert, which is its natural habitat, and you’ll be thrilled at how tall and huge it can get. This plant works well when exposed to full sun. It takes years to reach its full maturity, say about 200 years. When it’s fully matured, the cactus can take up to 40-60 feet tall.

A huge Saguaro Cactus.
It takes around 200 years for Saguaro Cactus to reach maturity and grow up to 40-60 feet tall.

You’ll easily identify saguaro even if you see it in the desert, thanks to its classic cactus appearance. The tall central body also forms arms. It also forms some sharp hard spines that you should be careful of. Saguaro also produces some white flowers, which later turn into red edible fruits. Saguaro fruits are very fleshy and sweet.

4.    San Pedro Cactus (Echinopsis pachanoi)

San Pedro Cactus is another fairly tall cactus plant to grow at home. It’s a rather easy plant to grow indoors, and it grows so fast in mild climates. This plant is drought tolerant and is perfect for xeriscaping.  San Pedro cactus is native to Andean slopes and will do well when grown in almost the same climates. The plant grows up to 20 feet tall under favorable climates. If you’re growing it at home, make sure it gets well-drained soils and full sun.

You’ll identify San Pedro with its multi-stemmed columnar look that forms small trees with several branches. The stem color is pale green to blue-green at its young age but turns dark green when it reaches its maturity. It blooms in large white flowers that form a trumpet shape. You’ll love the beautiful flowers for their sweet fragrance. The flowers dry into fruits.

5.    Blue Myrtle Cactus (Myrtillocactus geometrizans)

Blue Myrtle cactus is a very fast-growing one that looks like a tree as it ages. The cactus can grow up to 16 feet tall. Even at maturity, this cactus still looks shrubby and as beautiful as a young plant. This cactus produces bluish-grey stems that grow in candelabra-like style. At maturity, blue myrtle cactus might produce white flowers and dark purple ones in spring.

The cactus can remain without any branches for a long time, but once it matures, you’ll start noticing several branches. Mature ones form dense green stems which grow closely together and are highly branched. It will form a crown that spreads up to 12 feet in width when it grows in its natural habitat. If you don’t want this cactus to grow too tall and huge, you can control it in a small container indoors.

6.    Old Man Cactus (Cephalocereus senilis)

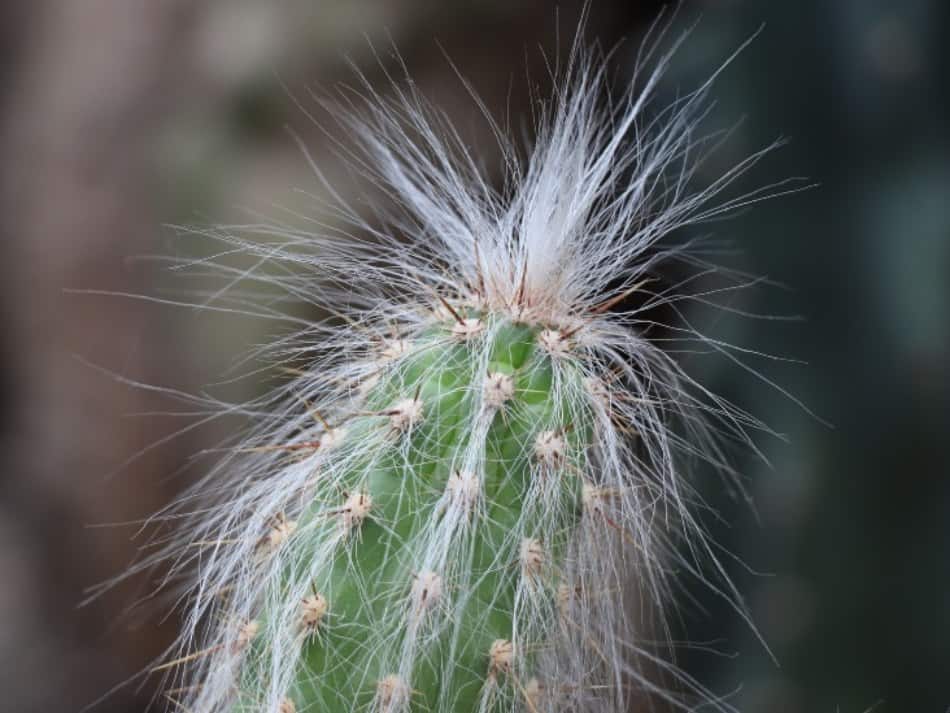
Old man cactus will not only wow you with its beauty, but its height is also mesmerizing.  The beautiful plant grows covered with silky white hair that gives it its beauty and the name. It also has other names such as Old Man of the Andes and hairy cactus, which also describe its appearance. The cactus plant does well in high altitudes and can grow to 6 feet while indoors and up to 49 feet when you take it outdoors.

A Old Man cactus with silky white hair.
The Old Man Cactus with silky white hair can reach 49 feet in height when grown outdoors.

The stems of this cactus produce beautiful blooms at night as soon as it reaches a height of 20 feet. If it gets some drought-tolerant gardens, you’ll get the old man cactus to grow in beautiful clusters that you can use to decorate the sides of your entryway. Give it lots of sunlight, and it will reward you with long and thick white hairs that cover the entire plant as it grows.

7. Armatocereus Oligogonus

This is another tall variety of tree-like cactus native to South America. The tall cactus grows up to 40 feet when mature and forms distinct features such as segmented stems. It also forms tough spines, which earned it the Latin name ‘Armed Cereus.’ Others have no spines, while others have very little. Apart from the spines, you’ll also notice this cactus with its grey to blue-looking stems.

Like other beautiful cactuses you plant at home, Armatocereus will adorn your garden with beautiful red flowers. You have to be careful when picking the flowers because they’re also armed with some sharp spines. The cactus also produces red or green fruits that have spines at first but later lose them when ripe.

8.    Organ Pipe Cactus (Stenocereus thurberi)

Organ pipe cactus is another tall cactus we can never miss on the list. After saguaro, this is the second-largest cactus grown in the U.S.  Its trunk can go up to 6 inches in diameter. It doesn’t grow into a single stem-like saguaro but will form several branches from the ground level. This tall cactus is also edible as it produces pulp jelly that can also be fermented. Native Americans have used organ pipe cactus as their food source for several years.

Organ Pipe cactus is the second-largest cactus in the US after Saguaro cactus.

Its green to the gray stem can grow up to 26 feet under favorable conditions. It also grows some brown spines that densely cover the spines. This plant falls into the category of night-blooming cactus that form pinking-red, funnel-shaped flowers. It also forms large, round fruits that are edible when ripe.

9.    Orchid Cactus (Epiphyllum hybrids or phyllotactic)

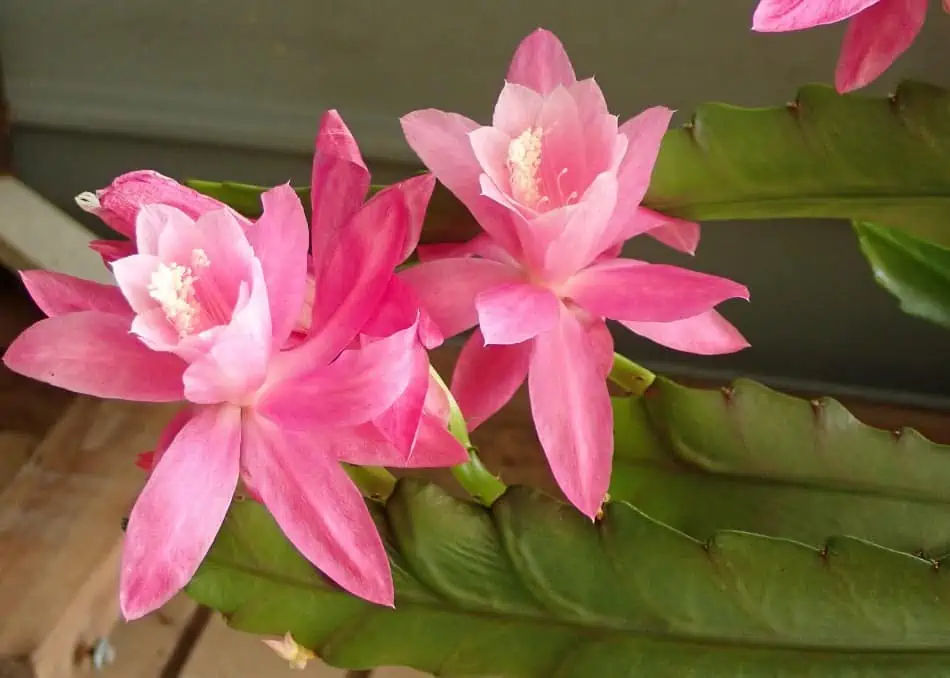
The orchid cactus is the tall plant on our list as it grows up to 30 feet in full maturity. The plant is mostly found in tropical rain forests and can still do well in different areas as long as you mimic its natural habitat. Don’t let the height scare you if you love indoor plants. Orchid cactus still makes a wonderful indoor plant that you can grow in hanging baskets until it’s too large to fit indoors.

A flowering Orchid Cactus.
Orchid Cactus is a tropical rain forest plant that produces pint, white, red, yellow, or orange flowers in late spring or summer.

Give this plant some bright light but not direct sunlight. Be prepared to see some pink, white, red, yellow, orange blooms in late spring into summer if you give it the best conditions. The plant got its name from these big, cup-shaped blooms. You’ll notice waves of blooms in mature plants that open several weeks during the plants blooming circle.

10.   Pencil Cactus (Euphorbia tirucalli)

Pencil cactus is another beautiful plant that grows up to 6 feet indoors and 30 feet outdoors. The plant is native to India and Africa. You can use pencil cactus as a houseplant and maintain its height up to the ceiling height. It grows in a slender and toothed look with foliage which is not easily noticeable. Its branches can only grow to a diameter of a pencil; hence, the name.

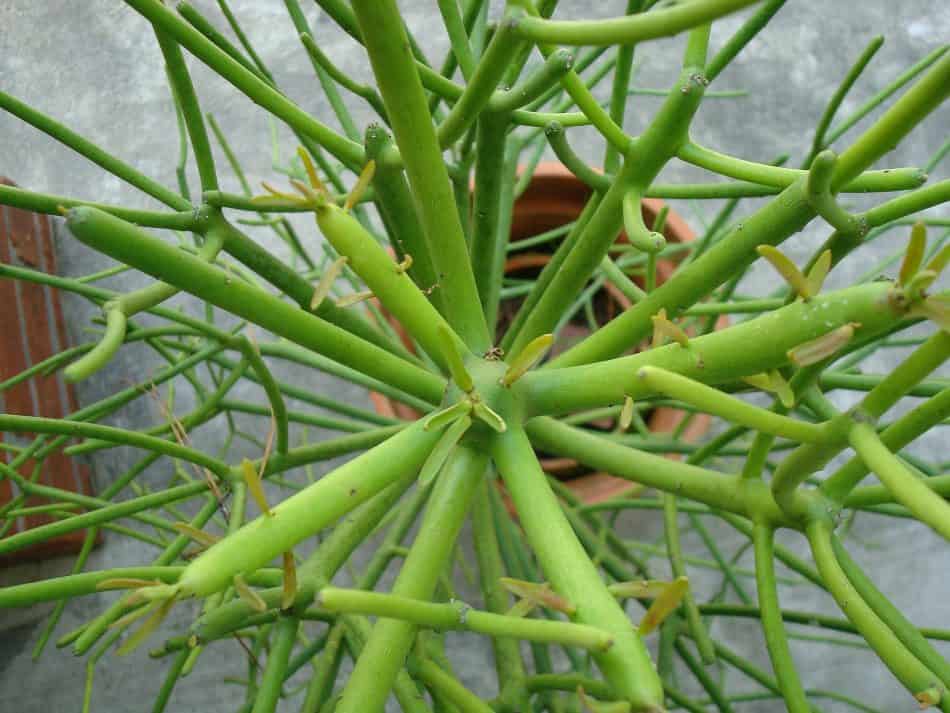
A top view of a Pencil cactus.
Native to India and Africa, Pencil Cactus can reach 30 feet in height if grown outdoors at temperatures around 25 degrees.

If you grow it at temperatures of 25 degrees, pencil cactus will be sure to reward your efforts. Another name for pencil cactus is milkbush. It got this name from its cloudy sap, which can be toxic to some people and pets. Be careful with it if you plant it indoors.

New plants have some tinged pink and tiny leaves, which will disappear with age. The plant is perfect for your home garden as it grows well with very minimal care.

11.   Eve Needle Cactus

Eve Needle is another fairly large cactus you can find in the desert. The cactus is a maintenance-free plant that you only need to give lots of sunlight, and it will be good to go. The cactus plant can grow up to 13 feet tall in its native habitat and 5 feet tall indoor environments. The cactus takes a tree-like form as it matures.

The beautiful cactus has deep green stems which can grow up to 3 inches in diameter. They grow covered in tubercles along with the upper parts of the stem.  The tubercles are sharply pointed and appear semi-cylindrical. This is where the plant derives its name from. South Americans eat the leaves of the Eve’s Needle cactus. They also produce pretty flowers which are red in color and form a cup shape. You’ll see the blooms around spring and summer.

12.  Senita Cactus

At a glance, you won’t think senita is a cactus due to its unusual shape. It grows into a smooth and silky surface, making it one of the most attractive cactus collection plants. Senita is a perfect indoor cactus, thanks to its slow growth rate. It can grow up to 6 feet tall in a container and up to 15 feet tall when you take it outdoors.

The beautiful plant forms some clumps when it branches near the base. There are some short spines in the stem. New senita grow appears in a purple tint which takes a powdery light green color as it matures. The frost tolerant plant can survive well in areas that receive long winters.

13.   Totem Pole Cactus (Pachycereus schottii Monstrosus)

Totem pole cactus takes years to reach its full potential, which is around 12 feet tall. Despite the slow growth, it’s one of the easiest cactus plants to grow. Although it’s not so many feet tall like the saguaro and the others, its upright growth qualifies it to be in this list of the tallest cactus plants. Its short trunk at the base forms tall stems with smooth skin and medium green color. It also features areolas with small bumps, which give it an appearance of many faces.

Mature totem pole cactus have hair-like sharp grey bristles on the tips of the stems. The plant doesn’t get bothered by insects and is immune to diseases. All you have to do is avoid overwatering it, and it will serve you perfectly. It grows pretty well in both indoor and outdoor environments.

14.   Candelabra Cactus (Euphorbia lactea compacta)

Candelabra cactus is a tree-like plant that grows up to 15 feet tall in its natural habitats and 10 feet in pots. It’s one of the best cacti to grow indoors, thanks to its form of growth and beauty. The beautiful tall plant is native to coastal and inland South Africa in dry and rocky habitats. The plant forms a stem with distinctive ridges with rows of the spine. It also blooms in some yellow-green flowers with vertical ribs.

Due to its form of growth, Candelabra cactus is among the best large cactus species to grow indoors.

The euphorbia family cactus has a milky sap that oozes when you cut the stem. It looks like a saguaro cactus with upright stems and branches. Its stems resemble dragon bones. They have thick, three-side branches with paired spines running down the ridges. They also have milky green lines on the three flat faces. Some branches also have some spoon-shaped leaves.

15.   Peruvian Apple Cactus (Cereus peruvianus)

Don’t associate this cactus with the Peruvian forests because of its name. Peruvian Apple cactus is native to Brazil and Uruguay. This incredible plant can grow up to 20 feet tall in the right outdoor conditions. Thanks to its size, it has also earned the nickname of hedge cactus or giant club cactus.

Don’t let the height scare you. Peruvian apple cactus can also grow pretty well indoors. But you must prepare yourself to prune it once it outgrows the container. Unlike other cacti, this plant grows very quickly and can acquire up to four feet in a single year. You should not leave it unchecked for long if it’s indoors.

If you love blooms, this cactus will not disappoint as it will adorn your garden with beautiful flowers during summer.  The stunning flowers bloom in shades of yellow, pink, and white. However, the Peruvian Apple cactus only blooms one night in a year; hence its flowers are very short-lived. If you get to fertilize it on time as it blooms, it might reward you with some fruits.

Summary

Just because a cactus plant grows tall doesn’t mean it’s only suitable for the desert. There are many tall cactus varieties that you can grow both indoors and outdoors. A good rule of thumb is to grow them indoors then take them out once they’re too tall to fit in the confines of a room. You’ll love growing them outdoors as a décor for your yard or even a fence post.

The good thing about these cactus varieties is that they’re very easy to maintain and care for. Some of them can do so well even if you don’t water and fertilize. Others grow so fast that within a short time, they’ll give you a beautiful-looking garden. Find yours in the list above and join many gardeners who’re already enjoying the beauty of cacti plants.

How to save a rotting cactus Plant?

Cactus rot is one f the worst nightmares you can encounter as a cactus enthusiast. Depending on the extent of the rot, this may spell the end of your cactus or a chance to save it. While cactus rot may be detrimental, there are a number of steps you can take to save it.

So, how can you save a rotting cactus plant? The best way to save a rotting cactus plant is first to determine the type and extent of the rot. In cases where the plant is rotting from the top down, the best way to save it is by pruning off the rotten sections or layers of the stem. This prevents further spread to the healthy parts of the plant. In instances where the plant is rotting from the bottom up, the best remedy would be to cut off the healthy upper part and propagate it to produce a healthy plant.

This article will be looking at practical ways to save a rotting cactus plant. It will start by looking at the causes of such rot. This will help inform the best approach to saving your cactus from imminent death. It will then look at the practical ways to save the cactus based on the root cause and extent of the damage.

Why is my cactus rotting from the top down?

Several factors may cause your cactus to rot from the top down. These may include fungal attacks, too much water or an open dent caused by animals and other environmental factors. Once the water settles on such a dent, the stem may start rotting from the inside out.

Overwatering your cactus plant might lead to rotting from the top down.

The issue of too much water is mainly caused by overwatering. You must remember that cacti plants are adapted to growing in arid and semi-arid conditions. Therefore, they are susceptible to too much moisture.

When you overwater a cactus, the potting mix becomes waterlogged, affecting the oxygen supply to the roots. Reduced oxygen supply to the roots may lead to anaerobic conditions stimulating bacteria and fungi growth.

These microorganisms may end up attacking the root tissues causing them to decay and eventually die. As the plant’s roots rot, they lose their ability to absorb and store water, which affects the entire plant.

Fungal infections and diseases are another common cause of cactus rot. The most common fungi that cause cactus rot are Fusarium spp, Pythium spp, and Phytophthora cactorum. These pathogens can attack a cactus’s root system and stem.

In some cases, they even attack the leaves causing them to turn soft/mushy and eventually rot.

Moreover, overfertilizing your cactus can also cause rot from the top down. Too much fertilizer, especially nitrogen-rich fertilizers, may cause your cactus to “burn,” leading to stem and root rot.

When this happens, you will notice brown or black patches on the leaves/stems of a cactus.

In cases where animals such as squirrels and birds cause an open dent/hole in a cactus stem, this may also lead to rot.

When the water settles on such a dent, it can easily travel into the plant leading to rot from the inside out.

In some cases, a cactus plant may start turning brown at the tip of its stem or pads. This is a condition called tip rot or stem rot. This rot usually spreads fast and eventually affects the whole plant if not attended to in time. 

While some causes of stem rot may be obvious, others are not. As such, you may never get to know the exact cause of the rot, and this is not something to worry about. The good news is, no matter the kind of stem rot you may encounter, its remedy is almost universal.

How to save a cactus rotting top down

Once you notice any early signs of stem rot on your cactus, act as fast as you can. Cactus rot spreads rather fast, and you will need to prune off the affected parts to help save the plant. 

If you notice any dark spots on your cactus plant, you should try to save the cactus as soon as you can.

However, it is also worth noting that some external signs of cactus rot can be deceiving. By the time you notice some small brown spots on your cactus, chances are that the damage may be worse on the inside. Nevertheless, you will need to undergo a couple of steps to effectively save your cactus from stem rot. You will need to:

  • Choose an appropriate pruning tool. Usually, pruning shears or a sharp knife will get the job done
  • Make sure your cutting tool is clean or well disinfected. This helps prevent the chances of fungus spread from plant to plant.
  • Remove the rotten sections gently from layer to layer. Keep doing this until all signs of rot are gone.
  • Ensure that the last cut is at an angle. This will avoid any changes of water settling on the wound, thus causing further damage.
  • Move your cactus to a dry area. The stem should not get in contact with rain or water until the wound heals up.
  • In cases of fungal attack, wash away the fungal spot using a disinfectant and a small brush. Do this by scrubbing away the black or yellow spots.

In other instances, you may not necessarily have to prune your stem. If the condition looks mild and reversible, place the plant in some sort of quarantine. Here, you can subject it to a mock drought. Simulate a dry environment by placing your cactus in sand, using bright heat lamps and avoid watering. These steps alone may be enough to kill destructive patches of Drescher fungus.

Taking Care of a Cactus After Pruning Due to Rot

If you are forced to prune a section of your cactus plant due to rot, you must keep a close eye on it afterward to ensure it doesn’t continue to rot. After pruning, place the plant in an area with well-draining soil and lots of light.

You can also use a fungicide spray or powder on the wound to reduce any chances of a fungal attack. If you decide to use a fungicide, ensure it is safe for cactus plants.

Lastly, do not water the plant until a callus forms around the wound. This usually takes one to two weeks, depending on the extent of rot and the size of the cactus.

How to save a cactus rotting bottom up

Apart from rotting top-down, a cactus may also rot from the roots. This is usually termed as root rot. While it may be caused by a number of factors ranging from bugs to overwatering, its remedy follows a similar path.

A cactus rotting bottom up can be a challenge to reverse. While there may be some supplements that help dry up the rotten parts and spur new root rot, the success of this technique negligible. As such, the best way to deal with the rot in cactus is cutting off the healthy part of the stem and propagating it to produce new roots and a new plant.

If your cactus is rotting bottom up, obtain the healthy part of the stem and propagate it.

For this practice, follow the following steps:

  • Determine the extent of the root rot and cut off the rotten section
  • Allow the cut stem to calluse by keeping it in a dry place for several days
  • Get some good cactus soil mix ready for propagation, here are our recommended ones.
  • Dip your cactus stem in rooting hormone to help spur root growth before repotting your cactus
  • Do not add any water to the soil until some new growth on the cutting develops.

By following these steps religiously, your cactus should root within a few weeks, and in no time, your plant will be up and healthy again.

How to prevent root rot in cactus

Well, instead of going through the hassle of treating root rot or saving the plant from the same, why don’t you take steps to prevent it from happening in the first place? Here are some practical steps you can take to prevent new infections after saving a plant to avoid root rot all together:

  • Do not plant or repot your cactus in the same soil you used for a previously affected plant. Since it is not always easy to determine the exact cause of root rot, you do not want to risk re-planting it in the same soil.
  • Use well-draining soil for your cactus (here are our recommended ones). Whether we are talking about the commercial or homemade mix, it is important to drain excess water effectively. One of the main causes of root rot in cactus is overwatering, and you do not want to increase the chance by using thick soil.
  • Use proper containers or pots that allow the draining of excess water from the soil through drainage holes. Your container should also be big enough to allow the healthy growth of roots without the risk of overcrowding and clogging.
  • Avoid using too much water during your watering regime. As a rule of thumb, water your cactus once you notice the upper two inches of the soil feel dry.

Is a cactus turning soft sign of rot?

A cactus stem is usually mushy. However, it may sometimes turn uncharacteristically soft. This could be an indication of poor health, and several factors can cause this. It may be a result of disease, poor cultivation practices, and improper watering regimes.

Diseases, poor cultivation techniques, and improper watering might make the cactus too soft to the touch.

In other instances, a cactus going soft may also be a sign of stem or root rot. Alternatively, the condition may be a result of a fungal or bacterial infection. This would usually attack the plant from its openings in the flesh. The process may be accelerated by warm and moist conditions. Common signs of such attacks may include sunken spots and soft areas around the pads or stem. In other instances, some oozing may be noted from the stem.  

Common signs of cactus root rot

Root rot may not be noticeable in its early stages, unlike stem rot that can be physically examined in real-time. As such, it may take a keen eye to notice such signs. Usually, the signs may be noted from the condition of the stem or pads. These may include:

Discoloration – The majority of cactus stems is usually green. However, root rot may see the plant deprived of essential nutrients from the soil, thus changing its normal coloration. In this case, the plant may turn black or brown.

Shakiness – Roots act as the support for the whole plant. When root rot happens, the roots become weak and may not hold up the plant as expected. This shakiness could mean some root rot.

Mushy roots – The best way to notice signs of root rot is by carefully uprooting your cactus. If you notice signs of mushiness in the roots, chances are the roots are rotten. You may need to cut off the rotten section and repot the plant in such a case. 

Foul Odor – A foul odor from the roots may also be a sign of root rot. This smell usually indicates a bacteria or fungal attack on your plant, which warrants immediate action if you are to save it.

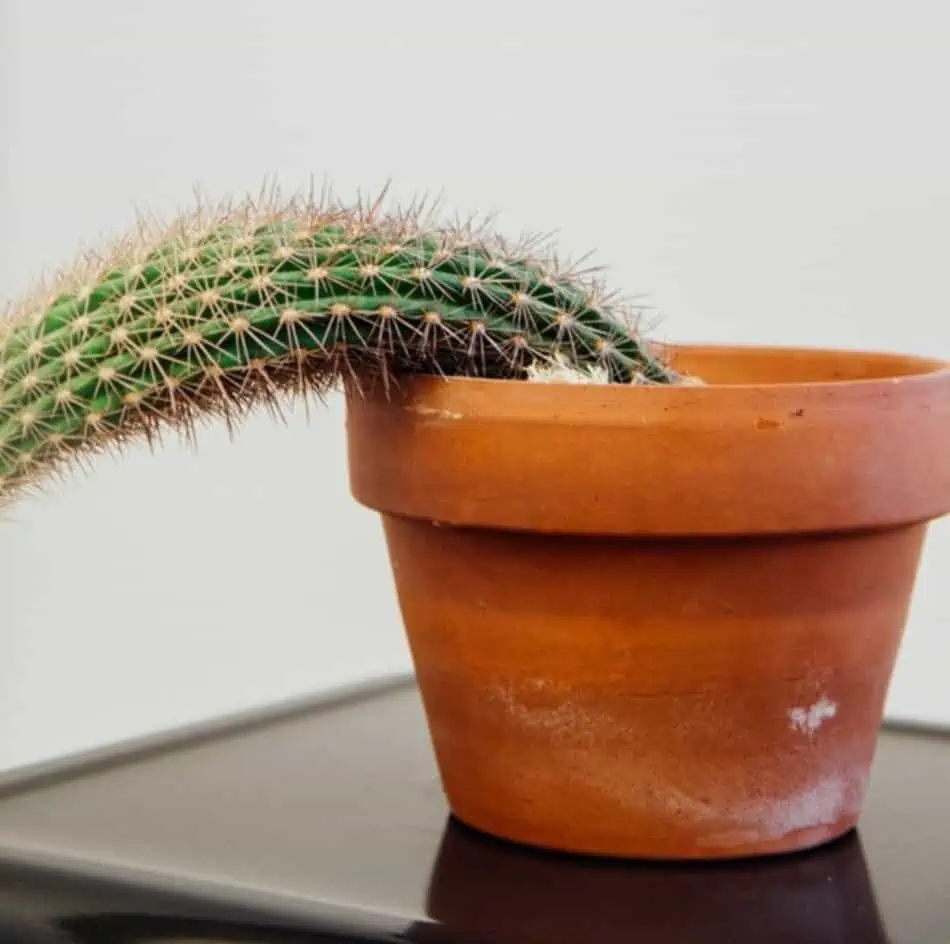
Stem bending – Roots are critical in anchoring the plant to the ground. As such, when they become infected with root rot, it is possible that the stem bends and falls over because the entire root system has become weak.

Summary

Cactus rot is one of the main causes of death in cactus. As such, you must look out for any early signs before the damage becomes irreversible.

While the causes of cactus rot may differ from one species to another, the signs are almost always universal. Take your time to study your plant to help you notice any early signs of poor health. 

How to Care for Haworthia Plant?

Succulents are notoriously hardy plants that need little water or care to grow and thrive. The Haworthia plant is a mini-succulent that may need a little bit more care and attention than you may typically need with other regular-sized succulents. This beautiful and spiny plant gives satisfaction to those looking for a challenging succulent.

Since the Haworthia plant is one of the less hardy succulent varieties, it is essential to understand the limitations and extremes that it will endure. Also, a schedule of care is vital to keep the Haworthia succulent thriving and growing larger. Read on to find out more about this beautiful succulent and how to care for it like a professional botanist. 

How to Care for a Haworthia Plant

Even if you have significant experience with succulents, you must know where the succulent that you are growing comes from in the world. Information about the origins of plants is crucial for proper care. You may even change the positioning of your plant based on this knowledge. 

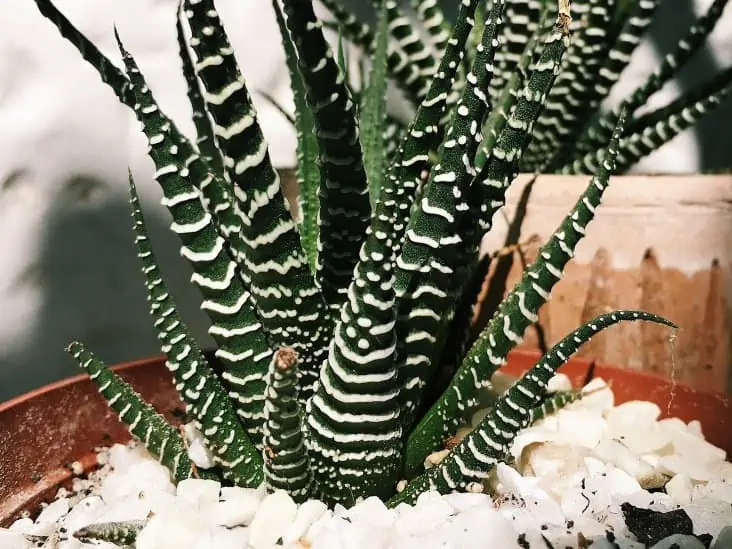
Haworthia is one of the lowest maintenance houseplants, but the plant requires a bit more care when grown outdoors.

The Haworthia plant is from the southern hemisphere near South Africa. Knowing that the Haworthia plant is from South Africa gives you a number of different insights about what it likes and how you should care for it. 

Haworthia is a notoriously easy plant to care for as a houseplant, so you shouldn’t have much trouble with it if you plan on keeping it indoors. However, things may get trickier if you plan on keeping your Haworthia plant outdoors. Make sure you read through and follow the guidelines for each of the recommendations in this list. 

(Source: The Sill)

Watering

The Haworthia plant doesn’t require much water for thriving conditions, as succulents are known for their ability to get by on only small amounts of water. Also, the Haworthia plant gets acclimated to the hot and arid conditions in South Africa, so it gets genetically designed for handling dry conditions. This information could get used for the placement of your plant out in the sun or dry, windy conditions.

Haworthia does not require much water. You just need to water the plant 2-3 times a week.

Make sure that you give your Haworthia plant water two or three times per week. Any more and the succulent will begin molding and becoming oversaturated. Any less and the leaves may begin wilting. 

Sunlight Required

As with most succulents, the Haworthia plant does best when left in direct sunlight throughout the day. However, the mini structure of the Haworthia succulent is ideal for hot conditions. Since the leaves on the Haworthia succulent are so small and compact, their stoutness can withstand direct and hot sunlight better than other succulents. 

Haworthia plants can grow healthy when exposed to direct and hot sunlight.

Climate

The South African climate where the Haworthia plant is indigenous is arid, warm, and sunny. However, there are spells of humid weather. The Haworthia plant is adept at maintaining and even thriving in the typical humidity in a home, Mediterranean climates, and warmer outside. 

Haworthia plant cannot grow in cold and freezing climate.

Cold, excess moisture, and freezing temperatures all affect the growth health of a Haworthia plant. In regions where the ground regularly freezes, most succulents cannot grow. The cold and freezing temperature causes the Haworthia to wilt, become discolored, and even die. 

Trimming

The Haworthia plant is a mini-succulent, which means that it will not grow much more in height than about two inches. The diameter of the plant can grow a bit larger if left untrimmed. However, trimming helps to spread new rhizomes around and create a larger surface area of growth for the plant. 

Although Haworthia plant does not grow tall, trimming is still essential to promote the growth of new rhizomes.

Trimming a Haworthia plant requires little skill and gets done much more quickly when you take your time and practice very carefully. Trimming and replanting pieces of Haworthia give your succulent garden a more comprehensive ground coverage and fantastic look! 

(Source: Apartment Therapy)

Soil 

The soil for your succulent plants is very important. The tiny structure of the Haworthia plant requires substrate and soil mixture because it does not like its roots getting wet for long periods. 

Drainage is critical for succulents and especially tiny varieties like Haworthia. There are a few different ways to ensure your succulent plant maintains proper hydration. You don’t want to overburden with water without adequate drainage. However, too little water will result in problems like drying leaves, leaves falling off, and the entire plant’s discoloration. Ensure that there is no excess moisture from a blockage in the soil, as they can contribute to molding, wilting, or death. 

Haworthia requires high-quality commercial potting soil with sufficient drainage.

You never want sand used as a substrate for your Haworthia soil mixture because it is too delicate and can get trapped in the soil’s pores. Also, if you use peat-based substrate, you may need replacement soil in a few years. However, it is good practice to replant Haworthia with new soil and substrate every two to three years. 

No matter the type of substrate you add, you should use high-quality commercial potting soil. Along with potting soil, you could mix in: 

  • Perlite: This additive to the soil is not organic. The substrate of perlite gets added to the soil for aeration and drainage. The compound itself is a volcanic rock with tiny air pockets throughout it, which have excellent surface area and space for moisture to leach out of the soil. Perlite is available at all gardening stores. (Source: Gardening Know How)
  • Aquarium Gravel: Usually, aquarium gravel gets made of small ground rock bits with a smooth edge from tumbling. You probably don’t want to use the aquarium gravel that has coloration added to your plant soil. This gravel is available at almost all pet stores. 
  • Poultry Grit: There are two types of poultry or “chicken” grit made from either oyster shells or flint. The shells or flint are ground down into a sandy powder that helps with drainage in soil and won’t affect moisture. Poultry grit is found at most feed stores or agricultural supply stores.  (Source: Organic Feeds)
  • Horticultural Pumice: A pumice is a delicate and aerated hard substance that helps with drainage. Horticultural pumice is a specially designed additive for soil that separates the dirt for better draining. This pumice substrate gets formed from volcanic processes and is eventually made into a rock by volcanic gases. This rigid foam has air pockets in it and is excellent for drainage in the soil. (Source: Acme Sand)

Containers

Succulents are healthy and hearty plants that can get grown virtually any place you like. Although they can do just fine in most places, there are favored and ideal situations and containers for succulents such as Haworthia growth. 

Of all the available container materials, terracotta material is the best for holding succulents like Haworthia. Terracotta is known for its porous material and gets made from clay. The terracotta’s porous material is ideal for succulents like Haworthia because it helps release moisture well and works great for a soil system built for aeration. 

Since terracotta is a porous material and offers superb drainage, this type of container is the best option for Haworthia.

Also, terracotta is better for heat regulation and won’t fluctuate with changing temperatures like porcelain. The terracotta’s ability to maintain heat exposure is excellent for succulents like Haworthia, which thrive in hot and arid conditions. 

(Source: Wisconsin Horticulture)

Succulent Dish

One of the most popular ways that succulents such as Haworthia are grown is in the succulent dish. The succulent dish is ideal for growing small succulents with only a small amount of quickly dried soil. The succulent dish is a beautiful addition for any yard, home, or garden because it showcases many plants at once and places them at different levels, in some cases. 

Pros:

  • Looks great and shows off multiple succulents at once
  • Great for drainage and soil use
  • Can place as a hanging container 
  • Good for shallow roots

Cons: 

  • More expensive than other containers
  • Larger than other containers
  • Not ideal for deeper roots 
  • Not suitable for mature and large succulents that weigh a lot

Small Pot

A small pot is an excellent choice for propagating a new Haworthia or growing one for several years. Succulents will only spread roots and propagate on their own if there is soil for their expansion. If there is not, their energy gets spent growing fuller and more prominent. 

Pros: 

  • Great for small and single Haworthia plants
  • Excellent for replanting and propagating
  • Nice if you don’t have much room for expansion of roots

Cons: 

  • Hard for growing more succulents 
  • No room for expansion of roots
  • Not ideal for sizeable mature Haworthia
  • Need to replant and re-soil occasionally

(Source: Wisconsin Horticulture)

Common Problems and Solutions When Growing Haworthia Plant

Even with the best care plan for your Haworthia plant, some problems will arise. Ensure that you know the various signs of a succulent plant in distress so that you can alleviate the distress before it kills your Haworthia plant. 

Below are some of the most common problems that tiny succulents, such as the Haworthia plant, suffer. Taking on the care of Haworthia is not tricky. There are only a few symptoms that your Haworthia plant is dying or unhealthy. Once you read on and figure out these symptoms, keeping your Haworthia plant healthy at all times will get much easier for you. However, without the knowledge of the problem and identifying the symptoms, your Haworthia plant may die. 

Leaves Curling

Curling leaves is a clear sign that your Haworthia plant is not receiving enough water. When a succulent like a Haworthia is under-watered, it begins to use the stored moisture in its leaves to survive. The leaves’ outer tips give up their moisture first, meaning they are the first to dry up and begin curling as though they were dying. 

If the leaves are curling, another symptom that you may notice is dry potting soil or mix. The potting soil of all succulents, including your Haworthia plant, needs some moisture. The succulent plants live without a water well, but only for a short time. After Haworthia has a dry potting mix for an extended time, it causes curling leaves.

If your Haworthia plant leaves are curling, it means that the soil is too dry and the plant is not getting enough water.

When you notice the leaves curling, check the soil. If the soil is also dry, the leaves curling are most likely due to under watering. A thirsty plant is a dying plant. Ensure that you water the Haworthia plant immediately and increase your watering schedule so that the soil is a little moist at all times. 

If you have consistent watering practices but still notice that the soil gets dry quickly, it may be time for a new soil mixture with less substrate. The substrate is the hard, usually porous material that helps drain the soil more quickly. If a soil mixture has too much substrate mixed in, it doesn’t retain water long enough. The plant won’t get the moisture that it needs before it gets drained away. 

Yellowing Leaves 

The color of your Haworthia leaves also tells you a lot about your plant’s health and the soil that it gets planted in. Yellowing leaves are a sure sign that something is wrong with your Haworthia plant and that it is dying. Don’t wait until your leaves turn fully yellow. If you notice any discoloration of yellow on the leaves of your Haworthia, take action immediately. 

Even plants that have a yellow hue to the leaves will not have spotty and completely yellow leaves. If the leaves are all yellow, or some of the leaves have completely changed color, make sure that you are not overwatering your Haworthia plant. 

If the leaves are yellowing, check the potting soil and ensure that the mix is not too wet. If there is standing water or the soil is very moist, the plant’s yellowing and health may get damaged from something called root rot. Haworthia gets damaged with too little or too much water. Standing water in the pot of your Haworthia plant is not good. The Haworthia plant and leaves don’t thrive in moist or submerged soil at all times. 

Make sure that you spread out your watering and set an on-again-off-again watering schedule. Also, make sure there is a leach hole at the bottom of the pot for your Haworthia and if there is not one, drill one in to promote draining. Finally, if all else fails, replant your Haworthia in soil with more substrate mixed in for increased drainage. 

The Leaves Keep Falling Off

Unless your Haworthia plant is tussled or knocked over, the leaves should not fall off on their own. Instead, an unhealthy Haworthia plant may lose leaves completely when stressed or in other less than-ideal-situations. If your leaves are falling off your succulent plant, it could be from one of the following conditions:

Way, Way Too Much Water

If the leaves are mushy and soft when they come off the Haworthia plant, it is probably because of overwatering. What tends to happen is that Haworthia continues to suck up the water that it is sitting in. Some leaves can’t take anymore, and instead of stopping, their connection to the plant itself becomes weakened, and it eventually falls off. 

Too Much Sun

Too much sunlight and extreme heat conditions or climate contribute to leaves falling off your Haworthia plant. If your Haworthia is in direct sunlight and the leaves start looking dry, or tight and shriveled, it could be because of dehydration. Make sure your Haworthia plant gets a break indoors during long periods of extreme sun and heat.

Although Haworthia loves direct sunlight, too much light and hot conditions can make the leaves fall off.

Dropping leaves in extreme heat is a natural response and helps the succulent conserve water. You can minimize the stress on your Haworthia by bringing it inside, covering it with a damp cloth, or shading it for the hotter parts of the day. If the leaves are damaged too much, the Haworthia plant needs better shade and a break from extreme climate. 

Discoloration of Leaves and Stem

The discoloration of succulents like Haworthia is usually because it is not getting enough nutrients in its soil. The leaves may turn red, yellow, or brown, and the stem can get solid brown or black. 

Even though you may add nutrients in the soil when you first plant or replant your Haworthia, these nutrients may leach out of the soil with continued watering. Adding nutrients to your watering schedule is not a bad idea and should get considered every three or four months. 

There are many fertilizers out there on the market which are great for succulents like Haworthia. Look for a well-balanced houseplant fertilizer or one specifically designed for cactus and succulents. Also, slow-release fertilizer is the best for succulents, since the nutrients tend to get leached out with the drainage substrate in the soil. 

Some of the best Haworthia fertilizers, based on reviews and our research, are listed below. Our research includes different approaches for fertilizer both indoors and outdoors: 

Osmocote Smart-Release Plant Food 

Any fertilizer gets leached out of the soil. However, fertilizers like this smart-release one are great for the slow release of continued high levels of nutrients. This is an excellent fertilizer for succulents as the soil drainage tends to leach nutrients from fertilizer even more quickly than ordinary soil. 

Pros:

  • It contains eleven nutrients that give your plants the full spectrum of nutrient balance and support. 
  • It lasts six months for average soil and watering conditions.

Cons: 

  • A potent formula that can burn plants and roots if used incorrectly

Cute Farms Succulent, Cacti, & Aloe Fertilizer 

Some of the fertilizers on the market may be great for larger gardens, which have room for spreading granulated products. However, this liquid gel form of succulent fertilizer is ideally sold in a squeeze bottle for a continuous and easy aim and squirt application on small succulent plants. 

Pros: 

  • Easy for smaller plants with the squeeze bottle nozzle
  • Great for continuous and small batches of use
  • Can get used on aloe, cactus, and other succulents, along with Haworthia

Cons: 

  • More expensive than other large format fertilizers
  • Leaches out of the soil more quickly than other slow-release fertilizers
  • Must get applied once a month

Miracle-Gro Indoor Plant Food

Miracle-Gro is a household name for fertilizer, and this squeeze bottle applicator is perfect for all of those house plants and succulents with small bases. The formula is mild enough for monthly use. The application is as easy as using a liquid hand soap dispenser. 

Pros: 

  • Easy for smaller plants with the squeeze bottle nozzle
  • Great for continuous and small batches of use
  • Can get used on aloe, cactus, and other succulents, along with Haworthia

Cons: 

  • More expensive than other large format fertilizers
  • Leaches out of the soil more quickly than other slow-release fertilizers
  • Must get applied once a month

Fat Plants San Diego Premium

Why deal with adding the fertilizer yourself, when you can replant your Haworthia in soil that is blended professionally and enriched with fertilizer and nutrients? This soil and fertilizer mixture is nutrient-rich and ready for planting. By using this product, you take the guesswork out of mixing your own nutrients into the soil of your plants. 

Pros:

  • Easy to use; you don’t have to mix the nutrients into the soil yourself.
  • Great and long-lasting nutrient-rich soil
  • Contains many nutrients that grow plants larger and stronger

Cons:

  • No control over the amount of fertilizer used
  • More difficult to get substrate drainage mixture correctly mixed for replanting

(Source: Succulent Plant Care)

How to Propagate a Haworthia Plant

Succulents are easy plants for propagating. The process of transferring mature rhizomes from one thriving Haworthia plant to the soil for replanting has several easy steps. Once replanted, the Haworthia is an excellent ground cover and propagates reasonably well on its own. 

The only thing that should get considered before attempting to propagate a Haworthia plant is where the replanting is taking place. As always, make sure you consider the climate, temperature, moisture level, and sunlight exposure before replanting and propagating Haworthia cuttings. The steps for propagating a healthy plant are useless without proper care.

To propagate Haworthia, transfer mature rhizomes from the plant to the soil.

The steps for propagating Haworthia are relatively simple and straightforward because this succulent is one of the world’s best plants at propagating on its own. Most of the leaves will get too heavy and then start growing small red roots and fall off on their own, spreading the plant’s surface area out as they fall off and set roots down. 

Although they are hardy succulents that are easy for propagating, growing Haworthia from clippings requires a little bit of time and a few materials and tools. Before beginning the propagation process for Haworthia plants, you need to include the port used for replanting, a soil mixture of commercial potting soil and substrate, and a small pair of scissors. 

The steps for propagating a Haworthia plant include: 

  1. Look for new roots: Typically, Haworthia likes to spread out and propagate on their own. If you have the original plant in a larger pot or the plant has leaves hanging over its side, they will naturally begin sprouting new roots. Identify these new roots that may already be showing without digging out any roots. 
  2. Snip a leaf: Identify the growth of Haworthia that you would like. The best leaf for propagating is the leaf with red roots already dangling from it. These new roots help the propagating process go more smoothly and quickly. Next, find the coarse and dried connecting point between it and other leaves and snip it from the plant. If you can’t find new roots, try snipping a leaf without roots, it will propagate once in soil independently. 
  3. Create the replant pot: Mix soil and substrate equally and pour into the new pot that gets the new clipping of Haworthia. Make sure there is not too much soil or depth for new and immature roots. Remember that terracotta pots are usually best.
  4. Replant: Take your snipping of Haworthia and place the cut end with exposed roots down into the soil. Gently cover with soil until about half of the leaf is exposed. Water thoroughly and gently. Follow regular care steps after the initial replanting gets completed. 

(Source: Gardening Know How)

Is Haworthia Toxic?

Although most succulents you have in your home are not known for being toxic, kids and pets should keep away. Haworthia is not known for its toxicity; however, it should not be ingested. 

Pick a safe place, possibly up high, for growing your Haworthia plant. This way, pets or children cannot get access and will not accidentally ingest any leaves that might happen to fall off. When Hawothria leaves get engorged and develop secondary red roots they will begin falling off. 

Haworthia has two varieties, and neither is known for its toxic qualities towards cats, dogs, or kids. However, the leaves tend to fall off freely and propagate on their own. It is better to be safe than sorry for choking small leaves or possibly toxic episodes due to ingesting Haworthia. 

(Source: Succulents Box)

Conclusion

Haworthia succulents are among the most successful and popular plants that people grow in their homes and gardens. This beautiful plant is easy and looks great as both a young and mature succulent. 

The fact that Haworthia is non-toxic for most individuals, propagates freely on its own, and grows in various climates makes it one of the best succulents that you can buy and grow. Take advantage of this excellent succulent from South Africa and add some beauty to your garden and life. 

How do I Know if my Cactus is Healthy?

If you are a cacti enthusiast, you would already know that these desert plants are resistant even to the harshest of environmental factors. However, this does not mean that they are immune to attacks from animals, diseases and bugs. Cactus can withstand some form of neglect, but it needs proper care to remain healthy and thriving. A healthy cactus is a sign of good prospects and hope for reproduction in the future.

So, how do I know if my cactus is healthy? A healthy cactus will be evident from its physical features.  A strong, succulent stem, upright leaves, evenly green outlook and strong roots stand out as some of the characteristics of a healthy cactus. A healthy cactus will hold a considerable amount of water without showing any signs of weathering and will bloom bright colored flowers each flowering season without fail.

This article will take a look at the characteristics that stand out for a healthy cactus. It will discuss ways to keep the plant healthy and how to spot any signs of poor health.

Physical characteristics of a healthy cactus

The Stem

A cactus stem, unlike other plants, is specialized for several functions. Apart from acting as the pillar for the whole plant, it also works as:

  • A water reservoir to help store water for the plant to be used in times of drought
  • Making food for the plant through photosynthesis

Based on this, a healthy cactus ought to have a strong, upright stem. In most cases, the stem will be green. The green color on the stem should be even with no sign of discoloration or rough patches.

A healthy stem enables photosynthesis that keeps the plant alive. Unlike other conventional plants, cacti take in carbon dioxide at night when the temperatures and evaporation are low in a process known as CAM photosynthesis. This carbon dioxide would then be used during the day to make oxygen and sugar.

Leaves/pads

While some cacti have little spiny leaves, others have pads or spikes to compensate for the same. A healthy cactus portrays vibrant pads with no signs of withering or leaning over. Depending on the cacti species, the pads would multiply with time, thus providing the pant with a chance to propagate into new plants. Usually, the pads may be attacked by bugs or herbivores trying to feed on them. This leads to dents and discoloration of the outer skin. However, note that as the cactus ages, discoloration may be noted in the stem or leaves, and this is normal.

Flowers

Almost all cacti have flowers. Usually, the flowers are short-lived and would appear in specific seasons. A healthy cactus blooms brightly colored flowers every season. Depending on the cacti species, a flower would have 5 to 15 petals, usually blended with the sepals. It also features a multi-loved stigma surrounded by several stamens.

If your cactus does not produce flowers every season, it might not be completely healthy.

An unhealthy cactus may skip some flowering seasons or fail to flower altogether. This may be a result of nutrient deficiency or lack of enough water. Notably, the ability of a cactus plant to bloom can be determined by its age. While some cacti may take years to mature and produce flowers, others may stop flowering after a certain age. It is, however, important to ensure that your cacti get enough sunlight and watering as desired.

Fruits

The flowering season is usually followed by an abundance of fruits and seeds, depending on your cactus species. A healthy cactus would produce juicy fruits and healthy, full-size seeds following its flowering period. Some edible cactus species like the prickly pear, barrel and dragon cactus produce juicy edible fruits. A healthy cactus would be consistent in producing fruits and seeds for a better part of its lifespan.

Spines

A healthy cactus plant features multiple erect spines all across its surface. These are meant to help protect the plant against external attacks from herbivores. The spines keep the cactus healthy by insulating it against cold or dry weather. Weak or broken spines are signs that the plant is in trouble and at risk of dying off from external attacks.

Unhealthy cactus plants have weak or broken spines.

Skin surface

A healthy cactus plant features a moist, shiny and ribbed surface. The ribbed surface is an adaptation that helps the plant expand comfortably without the risk of bursting as it absorbs more water to its reservoir. A healthy cactus also features a waxy surface that helps the plant reduce evaporation in times of drought. The waxy skin also comes in handy to help deter insects and other bugs from eating into the plant’s moist and soft interior.

Roots

Unhealthy roots in a cactus can spell disaster. The plant is commonly attacked by root rot, leading to death if it doesn’t get urgent attention. As such, it is important to understand the characteristics of healthy roots.

You wouldn’t accurately determine the health of cactus roots unless you uproot the plant. This may be done when repotting. Healthy roots are usually whitish or grey. They are moist, and some would feature vibrant hairs around them. Roots with brownish or black coloration may be a sign of poor health not only for the roots but also for the plant as a whole.

Soil

For a cactus to remain healthy, the soil’s condition must be ideal enough to ensure efficient nutrient uptake by the plant.  A cactus growing on light, porous soil is a healthy cactus. Such soil guarantees just the right drainage to avoid dumpy conditions that may lead to root rot and eventual death. When planting, you may opt to make your own soil mix at home or opt for the commercial soil mix available in most arborist stores, here are our recommended ones.

The quality of the soil mix influences the healthiness of your cactus plant.

Potting container

A good sizeable potting container with drainage holes is a guarantee to have a healthy cactus.  As long as the container can still comfortably hold the plant with no signs of roots outgrowing through the drainage holes, it should be an indication of a healthy cactus.

Consider repotting your cactus every year or whenever signs of roots getting overcrowded are noted for better results. A larger container gives space to the plant to grow even bigger and more vibrant.

How to keep a cactus healthy

Cacti are resistant plants, alright, but this does not mean you neglect them altogether. Cactus plants, especially those grown indoors or in gardens, require constant attention to keep them healthy and thriving.

Watering

Cacti are desert plants, but they need sufficient watering to keep them vibrant and improve their growth and reproduction rate when grown indoors. However, watering a cactus needs skill and strategy. Unlike other moisture-loving plants, cacti need some waiting period between watering to allow the plant to use up most of the water already fed. Since they store their water in their succulent stems, cacti do not need frequent watering. Only water when at least two inches of the topsoil feel dry.

Sufficient lighting

Cacti love light, and you may not be too lucky if you keep them in the dark place. Lack of light causes the plant to change color and eventually die off.  When growing your cacti indoors, ensure you provide enough light. Do this by strategically positioning your plants in a west-facing or south-facing window. At least six hours of light per day is enough to keep your cacti healthy, vibrant and thriving.

However, beware not to expose new or young plants to too much light. This may scorch the outer skin and expose it to external attacks by bugs and fungal diseases.

Use proper potting soil and container

The survival of your cacti is highly dependent on the soil and container used. For better results, always ensure you use proper-sized containers with drainage holes. These will help drain excess water to avoid cases or root rot.

When planting, use the proper soil mix ideal for planting cactus (Here are our recommended ones), The soil should not be heavy as these will retain too much water. A soil mix with lighter soil will be ideal in this case.

Fertilization

Cactus may be a dessert plant where nutrients are limited, but this doesn’t mean it doesn’t need fertilizer. A properly fertilized cactus will grow and mature faster, will produce brighter and more regular blooms and will have a vibrant appearance overall.

Fertilizer promotes the growth of a healthy cactus and makes it mature even faster.

Cacti do not need a specific blend of fertilizer, but a highly diluted, all-purpose fertilizer will do the magic. Use a low nitrogen water-soluble fertilizer with a ratio of 5-10-10 or 10-10-10 for better results.

A healthy cactus is a happy cactus. As a cactus enthusiast, you not only have to get acquainted with the characteristics of a healthy cactus but also take steps to ensure that it remains so for the rest of its lifetime. With proper care and expert attention, your cactus will live to serve its purpose, whether indoors or in the garden.

This Is How To Cut And Propagate A Cactus Easily

Cactus is undoubtedly a great addition to your indoor or outdoor garden, thanks to its unique shape, striking sizes, and colorful flowers. Having said this, you may have been prompted to ask, ‘how can I reproduce my cactus?’ Well, the answer is simple; through propagation! Propagation is one of the most effective ways to increase your collection of cacti without spending a penny. All you need to do is learn the best practices in cutting and propagating cactus.

So how do you cut and propagate a cactus? Most cacti species can be propagated through stem, leaf or offshoot cuttings. For species whose stems grown in segments like the Christmas cacti and the prickly pears, individual segments are cut off the main plant before propagation. For offshoot propagation, the sections are cut or snapped from the parent plant before being repotted in a new container.

How to cut and propagate cacti from stem cuttings

Step 1:

Take your cutting from the top of a mature cactus. Ensure you go for a mature and disease-free piece from your cactus. In the case of columnar cacti, go for the thin stem that will root faster.

When propagating cactus via stem cuttings, select mature and healthy pieces of the plant.

Step 2:

Cut off the stem just a few inches from the top. Do this using a clean cutting tool to avoid infection risk to both the propagated and parent plants. Ensure the cut is as clean as possible without any traces of dents or crushes.

Let the new cutting rest in the sun for a few days to allow the wound to form a callous.

Step 3:

Fill your pot with good potting soil ideal for cactus. This should be a light soil mix that allows proper drainage (Here are our recommended ones).

Step 4:

Once the end of your cutting dries out, stick it upright into the soil mix with the wound end facing down. You may want to dip your cutting in some rooting hormone before planting to help spur root development.

Allow the plant to develop roots before you actually plant it.

Step 5:

Lightly water the soil. Keep doing this every few days to help encourage the development of roots.

By following these steps, your cactus should root within a few weeks. However, the speed of root growth will be dependent on the cactus variety, size of the cutting and efficiency in watering. You can then introduce your new cacti to sunlight to help maintain color and shape. The roots will keep growing, but you may not experience any substantive stem growth within the first year.

How to cut and propagate cactus through crafting

What you will need:

  • The Rootstock and Scion
  • Sharp Knife
  • Electric Tape
  • Rubber bands
  • Heavy Gloves

Grafting is a process where two pieces of plants are blended to produce a stronger hybrid. Here, the top portion (scion) is grafted onto the plant with roots on the ground (rootstock). For cactus, grafting is often preferred for ornamental or colorful species like the moon cactus and the coral cactus.

To propagate ornamental or colorful cactus species like the moon cactus, you should use grafting methods.

Step 1:

Choose a healthy scion and rootstock. The two plants will need to be closely related and similar in size. The more closely related they are, the better the chances of survival and overall development into a healthy plant.

Disinfect your knife by rubbing in alcohol or simply washing with warm soapy water. This helps avoid the introduction of fungal infections and other diseases.

Step 2:

After determining that the diameters are similar, cut the two plants using a sharp knife. You can choose to do a diagonal cut or a v-shaped cut, depending on your preference. Make the cuts as perfect as possible to help create a perfect match.

Step 3:

Place your scion onto the rootstock without leaving any gaps in between. For better chances of survival, ensure that the ring in the middle of the stem, hereby called the vascular cambium, matches up. This part comes in handy to help transport nutrients from the roots to the top of the plant.

Step 4:

Secure your graft by wrapping and electric tape, rubber bands or twine around the grafted area. Keep the grafted cactus in a warm location away from direct sunlight.

Step 5:

Water your cactus cautiously to avoid water getting in contact with the grafted area. With time, the vascular cambiums will match and create a new plant.

Within a few months, the graft should merge successfully, and you can then remove the binding. As a rule of thumb, the rootstock should be a fast-growing plant, while the scion can be a slow-growing variety. Some common cacti species that can be used as scions include trichocereus and Spachianus.

Propagating through offsets/offshoots

Propagation by use of offsets or pups is another popular and effective way to reproduce cactus.  This is especially so for cactus species that produce such offsets. Some cactus species would send out mature offsets to grown on their own while in the wild. However, you can do this personally for your indoor cactus. By removing these offsets, the parent plant focuses more on its strength, health and production of even more offsets. Notably, propagation of cactus through offsets has the highest success rates compared to other methods.

Step 1:

Identify a mature cactus with enough offsets already. You can then pick out offsets that are about 2 inches long. These are healthier and stronger to withstand the new environment and thus grow faster.

Step 2:

Remove the pups from the parent plant by hand. Do this by twisting it a little from the point of connection with the parent. Break it off gently to avoid causing unnecessary tears or cuts. Alternatively, you can use a sharp knife to cut the offset from the parent plant.

Step 3:

Set the offset aside for a few days as you prepare your potting mix and container.

Step 4:

Plant the offset by inserting about a quarter of the stem into the soil and leave it in the shade for a few days. Take care not to water your new plant immediately after planting as this may increase chances of infection attack or rotting. Instead, wait for about 5-7 days to start some light watering regime.

Cutting and propagating cactus through pads

Reproducing cactus by pads is as popular as it is easy if looking to expand your collection. However, not all cactus species can be propagated using pads. Some species do not grow pads and thus propagated by other means already discussed. Follow these steps to propagate your cactus through pads:

Step 1:

Using a pair of tongs, break off a mature pad from the parent plant. Alternatively, you can snap it by hand if you have thick gloves to put on for protection against spikes. This should be a clean job for most cacti species, but if the process proves challenging, you can use a sharp knife to cut off the pad.

To propagate a cactus through its pads, carefully obtain mature pad from the parent plant.

Step 2:

Allow the pad to callous over for a few days before laying it flat on top of your potting soil. Soak the soil as you would when watering your other cactus. Do this regularly by ensuring the soil remains moist but not too dump. This helps spur root growth, and in no time, your plant will hold on to the soil and growth into a strong, healthy plant.

How to root a broken piece of cactus

As much as we can propagate most cactus varieties through cuttings when the need arises, sometimes accidents may occur, and a cactus breaks off from the mother plant.  In such a case, the best course of action would be to find a way to turn the broken piece or cactus cutting into a new plant. A cactus will root much easily when the right conditions are met. The following are some vital steps you can take to root a broken cactus.

Step 1:

Get a sharp knife and disinfect it with alcohol or soap and warm water. This should come in handy to avoid the risk and spreading diseases to the new and existing plants.

Step 2:

Carefully inspect the broken piece. If you notice any jagged or uneven part, cut it off with your knife. Jagged cuts tend to rot off easily, thus making rooting a challenge.

Step 3:

Set your piece aside for some time to heal and callous over. The time taken for this to happen will highly depend on the size and variety of your cactus. The weather conditions will also contribute to the same, and this may anywhere from a couple of days to even weeks. The piece should be kept in a bright spot but should not face direct sunlight.

Step 4:

Prepare your pot by filling it with the right potting soil for cactus. Your pot should have proper drainage holes to help drain any excess water during your watering regimes.

Step 5:

Deep your cutting in rooting hormone to help catalyze the development of roots. This step is, however, optional.

Step 6:

Plant your piece by inserting the broken, dried end into your potting mix. The piece should get in about a third into the soil. Keep the piece erect and pack some soil around to secure it. You can then place your pot in a bright area but avoid direct sunlight.

Step 7:

Do not water your new plant immediately. Give it a timeline of about 2 to 4 weeks. Once the soil is completely dry, you may start your watering regime.

Step 8:

As the roots start to form, introduce your plant to sunlight, albeit in bits. Roots should form within two to six weeks. To check for root development, try pulling the plant gently. If you feel some resistance, then it is a sign that roots are already developed. Increase the intensity of sunlight as the roots develop even further.

When not to propagate a cactus

Cacti have become popular in homes and gardens thanks to their ease of propagation.  Even for a beginner, rooting and propagating a cactus should be a walk in the park as long as you follow the basic guidelines.

This said, it is not always that you can propagate a cactus. There are certain conditions and seasons under which it may not be a good idea to cut or propagate your cactus. To increase the success of your propagation, avoid these conditions and seasons:

During a Heatwave

During a heatwave, most plants are usually stressed up and would be focusing on survival. As such, they may not be in the best condition to multiply. The plant will face many challenges to develop new roots due to the stress at this point. As such, it pays to be patient until the heatwave passes or a milder condition sets it.

When grown outdoors, avoid propagating your cacti during a heatwave.

However, in cases where your cacti are kept indoors, the heatwave may not be too harsh compared to the outside environment. In such cases, you may consider propagating from the comfort of your room. Alternatively, you can keep your cactus in a temperature-controlled environment away from the effects of the heatwave experienced outdoors.

During freezing temperatures

During winter, cacti go dormant thanks to the frost and freezing temperatures. As such, they will not be actively growing until the conditions are right. This will not be the best time to propagate your cactus due to the slow growth experienced. With slow growth comes the risk of rot and attack by diseases.

In winter or during freezing temperatures, you should not cut, prune, or propagate your cactus plants.

Additionally, this is not the best time to cut or prune your cactus as it will face a hard time trying to grow back and thrive. This is also the reason it is not advisable to fertilize or feed your cactus in any way during the cold season.

Factors to consider when propagating a cactus

  • Always ensure that you get your cutting, pads or offsets from a healthy plant. This should help improve the success of your propagation and led to a healthy, thriving new plant.
  • Water your main plant a few days before you take out its cuttings. This will ensure that the cuttings are well fed and not flaccid. Flaccid cuttings may not root as easily, and some never do.
  • Always ensure you take out the cuttings, offsets or pads from different parts of the plant. This helps retain the shape and overall look of the parent plant.
  • Ensure your cuts are clean, devoid of any jagged parts. Slight tears on the cutting decrease the chances of the plant ever developing roots.
  • Always wear heavy hand gloves when breaking off your offsets or pads from the parent plant. This helps avoid injuries from cactus spines.

Can Cacti be propagated from seed?

Talk of cactus propagation, and what comes to mind immediately is cuttings, pads and offsets. So can cactus be grown from seeds? The fact is, as much as this may not be a popular form of propagating cactus, some varieties do well when grown from seeds.

Unlike propagation from cuttings, the success rate of using seeds for cactus is lower, and the plant may take much longer to grow and mature. Nevertheless, using seedlings is an ideal way to grow rare cacti species that may not do well with propagation from cuttings or those that do not produce pups of offsets.

The best season to grow a cactus from seeds is early spring.

The best thing about growing cacti from seeds is that they get acquainted with the climatic conditions from day one. This helps in adaptation to the region and will thus grow much healthier.

Notably, some cacti species can produce seeds through self-pollination. These include such species as mammillaria, Echinocacti and Cereus. However, some cacti species may need some help for pollination to happen. This can be done by shaking the stamens to enable pollen to get into the pestle.

While most cacti species would flower, few end up producing seeds due to challenges in pollination.

When growing cacti through seeds, take the following into consideration:

  • Cacti seeds perform best when sown in early spring
  • Cacti seeds can be pretty tiny, and there are chances of losing a good number. To avoid this, use a white cloth or other material when working on them for better visibility.
  • The best way to find good quality cacti seeds is by buying them from certified dealers. However, you can also collect them from fruits if working on a tight budget.

Propagation of cactus cannot be possible without the right tools and expertise. It all starts with mastering the art of cutting the pieces into ready specimens for planting.  Whether you are looking to propagate your cactus through cuttings, pads or offsets, always set the piece aside to callous over before planting. This helps improve the chances, speed and rate of rooting.

The option you choose when propagating your cactus will be largely dependent on the cactus variety and its age. Ensure you have the right information about your cactus species before cutting or propagating the plant.

How Do You Know If A Cactus Is Rotting?

Cacti are slow-growing plants, and it can take years before you notice any signs of life. Sometimes they may stay dormant for a long time, that you even start doubting your gardening skills. Start wondering whether you’re doing the right thing. Am I watering correctly? Do they need more sunlight? Is the soil the correct type?

While sometimes your cactus might show you signs of life after years of torturing your brain, other times you’ll have to deal with the shock of your life. A rotting cactus!

Rot is a common cactus problem that can affect the roots, the crown, the tip, and the leaves. Common causes of rot in cactus include overwatering, high humidity, wound, insect infestation, among other issues. The causes of the rot may vary from one cactus to another, but the signs will look the same. Other signs may be difficult to detect, especially root rot, but others can be quite obvious.

How do you know if the cactus is rotting? The telltale signs of a rotting cactus include;

  •  Change in color
  • Softening and mugginess
  • Producing foul smell
  •  Weak roots
  • Drooping leaves
  • Black sports

Let’s have a look at the detailed description of these problems, their cause, and how far they can go to affect your precious cactus. Read through to the end as you might save your cactus from rotting before it dies.

Change in Color

While not all change in your precious cactus plant is bad, an older cactus is likely to develop some brown patches or change its color. You’ll notice such changes at the base of the stem creeping upwards. You might also notice the patches turning gray over time. There’s no cause for alarm if this is the problem.

But if you notice your entire cactus turning yellow to brown, it could be your worst fear. A rotting cactus! The specific parts that will show the color change depending on the source of the problem. Cacti don’t only rot from the roots. The rot might also start from the stem. You might notice the rot easily when it occurs on the base of the soil or the stem segments. You might also see the cactus turning brown from the top, which is no doubt a tip rot.

If your cactus is turning yellow or brown, it might be the sign that the plant is rotting.

As soon as you notice that any part of your cactus plant shows rotting signs, you need to act fast to save it. This sign of rot doesn’t mean that your cactus is dead, as you can still save it. Act quickly, so the color change doesn’t spread all over the plant and end up killing it. If it’s rotting from the tip, the simple solution might be to prune it and allow it to start growing afresh.

The Cactus Is Softening

There are many reasons why your cactus may go soft, and one of the reasons can be your dreaded fear, a rotting cactus. Your cactus may start going soft if you expose it to improper ambient conditions, too much watering or diseases attack it. You’ll likely notice soft spots in the flesh. The rotting spot may discolor and become corky with a mushy and wet center.

Overwatering might make your cactus softer, which another sign that your plant is rotting.

A potted cactus will generally require good drainage soil to stay healthy. You must also know that cactus require minimal moisture to thrive, whether indoors or outdoors. The absence of well-drained soil and too much watering can cause softness in your precious plant. Other causes of this softness may be a bacterial attack, insect damage, or physical injury.

If you notice these soft spots near the base, you’d be dealing with root rot. The first culprit to root rot is excess watering in humid conditions. A stem rot might also cause the softness of your cactus. If your cactus is rotting from the stem, the culprit might be a fungal infection. It’s not easy to save a cactus plant that’s already softening as it will start seeping liquid and falling off.

Your Cactus Smells

Cactuses don’t smell bad. In fact, some produce very sweet-scented flowers. If you can sniff some foul smell, then something is wrong. A smell is not a good sign but an indication that a huge part of your precious plant is completely rotten. Anything rotten is likely to smell.

The foul smell can sometimes be a result of a condition called Erwinia soft rot. The Erwinia bacteria attack the plant through natural openings and wounds. The rot can spread very fast in humid and wet weather. It can affect any part of the cactus, including the roots and the crown. The soft rot first appears as watering looking scabs. After some time, the plant tissues start turning brown to black. Your cactus will start emitting a foul-smelling seepage from the rotten area.

If this is the case, then you must know that the cactus is already dead. All you have to do is to dispose of. It’s also worth noting that this kind of rot can spread to other cacti and succulents in your garden. Be careful on how you handle and dispose of the dead plant to contain the spread.

Weak Cactus Roots

Once you’ve planted your cactus, you expect the roots to go deep in the soil and support the plant. But rotting can still find the roots deep inside the soil and destroy them. You’ll notice your cactus has no good roots if it appears like it wants to fall off from the pot. A plant that appears loose in the soil is stressed. There could be something serious ailing the cactus. Finding this out early enough can help save it.

If you have noticed that your cactus roots are getting weaker, the plant might be rotting because of overwatering.

If you’ve been overwatering your plant, the chances are that the roots will rot. Many cactuses need airy and well-drained soil. The potting should never be wet or waterlogged for too long because this will damage the roots. Most root rots happen in winter because the cactus might not withstand the low freezing temperatures. If you happen to water it at this time, you’ll worsen the situation causing the plant to rot.

Many desert cactuses are more exposed to root rot if grown indoors. This is because they’re used to dry conditions, which you might not maintain in your house garden. If you plant your cactus indoors and now plan to take it out, do it gradually. A sudden change in temperature conditions may affect the roots causing them to rot.

Drooping Leaves

You don’t need anyone to tell you that your cactus is stressed when you can already see the sign on the leaves. Well, you won’t notice any change in the leaves during the early stages of rotting. The only time the plant will give you an obvious sign of unhealthiness on the leaves is when the problem has already escalated. The leaves might remain vibrant and beautiful while the root is already dying.

A healthy cactus has its leaves standing strong with vigor. But when the leaves are pointed downwards or sagging, you have something to worry about. Maybe it has some disease attaching it from the roots or the stem, and you can’t see it yet. This can also be a sign of underwatering or overwatering your cactus.

Underwatered cactus showcases wrinkly appearance with droop branches, but it’s not a sign of rot. The plant is wilting and will go back to its happy self once you water it. Overwatered cactus will get soft and droopy. With time, the moisture content in the soil becomes too much for it to bear, and it begins to rot. When the rot is in its final stages, the leaves might also feel squishy and soft. At this stage, it would be too late to save your lovely cactus.

Black Spots

Black spots in your cactus are not ornaments; hence you cannot take them for granted. You’ll mostly notice these spots in saguaro and prickly pears than any other cactus, and they can be a disaster. These spots indicate a dry rot usually caused by lack of enough water, sunlight, fertilization, and high humidity. Other times, black spots form due to damage by living organisms like fungi, pests, and bacteria. All these factors slowly damage the roots of the cactus plant, causing them to rot.

Typically, cacti with black spots cannot be saved. It is better to get rid of the plant to save others from the infection.

Unfortunately, it’s not easy to cure your cactus of this rot. The best thing to do is get rid of the plant entirely to protect others from the infection. If you can only see the black spots in some parts of the cactus, cut out the damaged section. Ensure the remaining section receives sparing watering, so the problem doesn’t recur.

Bottom Line

Cactus is an easy plant to grow and take care of. But this doesn’t mean they’re immune to diseases and harsh conditions. Things that look like a good remedy for your plant, such as water, can turn out to be the biggest poison if not used well. Don’t underwater or overwater your plant.

Some cactuses are very resilient and can recover from problems no matter how severe they look. But this depends on how early you realize there’s a problem. Others won’t recover even if you identify the problem early enough. You should do all it takes to ensure your cactus is not exposed to any conditions that can cause the rotting.

How to Grow a Bunny Ears Cactus?

The Bunny Ears cactus (Opuntia Microdasys) is a popular cactus species native to Mexico.  This low-maintenance succulent has grown to become a favorite for ornamental plant enthusiasts, thanks to its cute, rabbit-ear-shaped pads. If you are looking for an ideal cactus species for your desert, xeriscape or rock gardens, Bunny Ears cactus got you covered. What’s more, they also make good indoor plants and are neglect resistant, thus ideal for the busy folk or those who travel frequently. The success in growing this prickly companion, however, lies in its care. It is important to understand how best to grow and care for the cactus from infancy to a full-grown cactus.

So, how do you grow a Bunny Ears cactus? Bunny Ears cactus is mostly propagated through its pads. The pad is potted using a good cactus mix that includes 40 percent sand, 40 percent potting soil and 20 percent peat moss. The plant needs consistent moisture, low humidity and plenty of light during its growing season. Fertilization should be done every other water period, and repotting should be done every 1 or 2 years.

This article will be looking at how best you can grow and care for the Bunny Ears cactus. It will be expounding on growth factors like propagation, potting and repotting, fertilization, watering, lighting and pest control.

Basic features of the Bunny Ears cactus

  • Bunny Ears comes from the Opuntia genus that majorly contains flat cacti species. The genus is one of the most popular and widespread across the U.S.
  • The cactus grows in a shrubby form and may reach heights of 40 to 60 centimeters.
  • Bunny Ears has no defined central stem but rather bears individual segments in the form of oval-shaped pads. From these pads form additional segments that always grow in pairs.
  • The cactus stands out with its paired succulent stems that grow up to 15 centimeters long and 12 centimeters wide.
  • The cactus features some distinctive whitish-yellow prickles, otherwise called glochids. These are hair-like spines rarely seen in other cactus species. These hairs grow in clusters and are more sensitive than human hair.
  • Bunny Ears cacti have close relatives in O.Rufida cactus that features reddish-brown glochids. In fact, they are treated as the same species in some quarters.
  • When well cared for, the cacti blooms around the summer from June to July. Their flowers measures about 5 centimeters in width.
A Bunny Ears Cactus grows up to 40-60 centimeters in height and produces gorgeous flowers from June to July.

Potting and repotting

Bunny Ears cactus will do best in some well-draining sandy soil. For better results, look for a clay pot with drainage holes that help drain excess water. Fill this pot with good cacti potting soil. For potting soil, you may decide to go for the commercial, pre-packaged version or create your own soil mix at home.  

In case you decide to make your soil mix, ensure that it includes 40 percent sand, 40 percent potting soil and 20 percent peat moss. This would help improve aeration around the plant’s root system and prevent the soil from getting too soggy. Whatever the case, always ensure that the soils used do not pose any risk of water clogging as this may lead to root rot for the cactus.

To grow a healthy Bunny Ears Cactus, select a clay pot with enough drainage holes to get rid of excess water.

Bunny Ears may be slow-growing but will develop an extensive root system with time. As such, it is recommended that you repot the cactus every 1 to 2 years. The best time to do this is during the summer, just after the blooming period ends.

When repotting, always ensure that your container of choice is at least 2 to 5 centimeters larger than the previous pot. Too big a container, and you run the risk of water clogging that leads to root rot.

The Bunny Ears cactus needs close attention during the first year of its repotting as this is the most vulnerable phase. This would involve regular watering to help spur healthy root development. Such close inspection also helps ensure that no pests attack the plant at this stage.

Special care for specific seasons

Bunny care requires specific care and attention during each season.  Failure to follow the right regime for these seasons may result in your plant experiencing growth challenges and may fail to bloom. Here are some important care tips for each season:

Spring, summer and Fall

Bunny Ears is actively growing during these warmer months and would take advantage of full light and average temperatures of about 80 degrees Fahrenheit. Keep the soil moist during these seasons, but just enough to avoid excess water that may lead to root rot. You can only add water once the soil feels dry to your touch. With these in place, your prickly companion will flower in early summer with bright yellow blooms.

To grow a healthy Bunny Ears Cactus, keep the soil moist during warmer months of the year.

Winter

Bunny Ears cactus enters some semi-dormant mode during winter. As such, you may not need to do much in terms of fertilization or watering. During this period, strive to offer a controlled climate that resembles that of its natural habitat.

As the fall season comes to an end, relocate your cactus to an area with lower temperatures of about 50 degrees Fahrenheit. This should be away from any heating vents or radiators. Ensure that the plant does not experience any light. While in this location, the plant may exhibit some unusual coloring by turning light grey. However, this should not be much of a worry as this dormant state is a vital part of the plant’s growth and sustainability.

Watering

Just like any other desert plant, the Bunny Ears cactus does not need much water but just enough to improve nutrient uptake and keep the plant healthy. While in its natural habitat, Bunny Ears adopts a shallow root system to help tap on the little rainwater that comes by once in a while.

During its initial stages, extra care should be taken as the plant adapts to its new environment. Once they develop an extensive root system, watering should be done sparingly as they can tolerate long periods of dry weather. This is what makes the Bunny Ears a favorite choice for busy individuals or those that travel frequently.

However, just the right watering will help encourage blooming and improves the plant’s overall health. As a rule of thumb, water the cactus once the first inch of soil feels dry to the touch.

Since a Bunny Ears Cactus can withstand dry climate, it should be watered only when the first inch of soil is dry.

For better results when watering, you may decide to use a tray under the pot to help drain out any excess water. During the winter, you may not need to do any watering but make sure you start the watering regime as soon as the spring season starts. Between Spring and Fall, the plant is actively growing and will need enough water to stimulate nutrient uptake.

Take care not to overdo your watering as this may result in root rot or worse still, the pad tips withering out.

Propagation

So you finally have a full-grown Bunny Ears cactus and wishing that you had multiples of the same? Well, the good news is you do not need to go back to your favorite arborist or rush to buying other specimens. Instead, you can easily and conveniently propagate your cactus through its flatty pads.

The best time to propagate the Bunny Ears cactus (and any other cactus, for that matter) is during the early summer.  Once the bunny cactus is fully mature, it produces multiple healthy pads that you can easily detach from the mother plant.

However, caution should be exercised during this process as the cactus can be very clingy to the skin, thanks to its glochids. Always ensure that you wear thick gloves to avoid the risk of injuries from pricks to the skin. Alternatively, you may use a pair of tweezers to break the pads off.

Bunny Ears Cactus can be easily propagated through its pads.

During propagation, group the cacti cuttings in at least three pads. Let the cuttings callus for a few days before planting. You can then remove the baby stems before planting the pads in ideal pots with fresh cacti soil mix.

Bury the cutting about 2.5 centimeters deep and place your pot in a well-lit location. This is an ideal depth, deep enough to offer the right support and shallow enough to let roots develop without the risk of rotting.

In some cases, you may see the need to dip your pads in rooting hormone before planting.  This practice helps catalyze the propagation and rooting process.

Temperatures and lighting

Being a desert plant, Bunny Ears cactus thrives in slightly higher temperatures. It prefers temperatures that range between 21 and 37°C. During the winter season, however, the cactus prefers much cooler temperatures.

Bunny Ears cactus is known to drain any excess water just before winter kicks in. The practice helps it avoid freezing during the cold months. This explains why watering during this period can be detrimental to the health of the plant.

From late Fall, the cactus should be exposed to temperatures that range between 10 to 18°C.

Following these strict temperature specifications is vital for the plant’s survival as anything contrary could mean serious harm to the cactus’ overall health. As such, you may need to keep changing locations of the plant depending on the season to help keep it at the optimum recommended temperature ranges.

Although Bunny Ears Cactus grows healthy in sufficient lighting, you should avoid exposing the plant to direct sunlight.

The Bunny Ears is one of the cactus species that prefer sufficient lighting. This may not be much of a problem if you are growing in the garden or outdoors. However, when growing indoors, you may need to mind your positioning.

Place your cactus in a south-facing, unobstructed window but should not get in contact with direct sunlight. West-facing and East-facing windows are also viable choices to position your Bunny Ears. If natural light is hard to come by, you may see the need to use grow lights for the same.  Regardless of the season, Bunny Ears thrives best with a humidity of between 10 to 30 percent.

Fertilization

Contrary to popular opinion that desert cactus like the Bunny Ears do not require fertilizer, these prickly companions will fare much better with the right fertilization. Liquid houseplant fertilizer with an NPK ratio of 20-20-20 works best for this type of cactus.

The fertilizer should, however, be diluted to at least half of its recommended strength.  This is because Bunny Ears cactus cannot withstand a high concentration of NPK. If you are more focused on seeing the cactus bloom, you may need to use 5-10-10 fertilizer.

Whatever the case, always ensure that you fertilize the cactus during its active season, preferably during the summer. Take caution not to overdo the fertilization as this may mean an abnormally rapid growth. This stimulated growth usually leads to misshaped and weak pads. Do not fertilize newly potted Bunny Ears cactus until it develops a strong root network.

The best fertilizer for Bunny Ears Cactus is the liquid houseplant fertilizer with an NPK ratio of 20-20-20.

Proper fertilization of the Bunny Ears cactus leads to a healthy plant and promotes the likelihood of the plant flowering. A happy bunny cactus has more chances to bloom and develop healthy fruits compared to a neglected one. If you are too busy or travel frequently, create an ideal timetable as a reminder. Alternatively, you can find someone to take over when you are not around.

Pest control

Bunny Ears cactus occasionally faces attacks from several pests. These include:

Mealybugs – these create some white patches on the cactus’ pads, giving it an unappealing look.

Scale Insects – they cause a brown cab effect on the cactus’ pads

Getting rid of these pests on the Bunny Ears cactus can be tricky thanks to its glochids that easily attach to the skin. For more efficient control, use a pair of thick gloves to handle the plant. You can then dip some cotton swabs into 70% isopropyl rubbing alcohol and dab the pests. Repeat the process after a week, depending on the extent of damage to the plant.

Flowering Season

Bunny Ears cactus may flower at any time when it deems conditions right. However, it is known to start budding in late spring. Once the segment is fully formed, budding would start at the tip.  It then goes on to blossom into 2-inch wide flowers.

The Bunny Ears cactus produces creamy yellow flowers that go ahead to fade into peach as soon as they are fertilized. The flowers would later turn into some 2-inch long fruits that may vary in color ranging from red to purple. Notably, Bunny Ears cactus is a good bloomer and bloom encouragement may not be necessary.

Apart from the edible stem, the Bunny Ears cactus produces edible fruits. The fruits can be eaten raw or cooked on the BBQ. This was one of the main sources of food for natives in times gone by. Considering its prickly nature, you may need to be extra careful when harvesting the fruits. Ensure you have thick protective gear in your hands before harvesting the fruit.

FAQs on the Bunny Ears cactus

Q. Is Bunny Ears cactus poisonous to pets?

Bunny Ears stem, flowers and fruits are non-toxic and thus safe when placed around pets. However, it would be noted that the cactus has glochids that may be irritating when it comes to contact with the skin. As such, you may find it prudent to place it in positions out of reach for curious pets and children.

Q. Why is my bunny years stunted?

Bunny Ears cactus may experience student growth or poor health as a result of overwatering or under-watering. In some cases, this may lead to the plant drying out end eventually dying.

Q. Why the name Bunny Ears cactus?

If you look closely, the cactus sprouts a pair of segments at the end of each tip. These segments resemble a bunny’s ears, thus the nickname.

Q. Why is my Bunny Ears falling over?

The most common cause of bunny years falling over is overwatering. Once the soil around the cactus becomes too soggy, its roots rot and become too weak to support the plant.

Q. What causes brown patches on my Bunny Ears cactus?

Brown patches on the pads of the Bunny Ears cactus can be a result f several factors. It may be a case of pest infestation as the pests love drawing the sap from the cactus. A drop in temperatures and overwatering may also lead to brown patches.

Conclusion

With the right care, Bunny Ears cactus can be an excellent choice for any cactus enthusiast. The good thing about the Bunny Ears cactus is that it can withstand neglect. As long as they are exposed to enough sunlight and placed in a warm environment, you are good to go. Occasional fertilizing and regular watering helps keep the plant healthy and encourages blooming at the right time.

When working with Bunny Ears cactus, always ensure that you repot them once they are ripe for the same. This not only keeps it healthy but also encourages the production of tiny pads that can then be used during propagation.

Bunny Ears cactus is as captivating to grow as they are to look. It makes just the perfect addition to your indoors, thanks to its bunny appearance. The next time you come across it, you may consider trying it out for your indoors or, better still, your desert garden.