How to Choose the Right Pot for your Aloe Vera

Away from the soil, water, and light, the other way to show that you care for your plant is to put it in a good pot. If you want a healthy aloe vera, one that will bring a beautiful touch to your house, or one that will bloom well, it all starts in the pot used. Start your wonder plant on the right foot, and that is to get a perfect pot for it.

Since Aloe needs bright sunlight and partial shade, to ensure the aloe plant grows as healthy as possible, it is advisable to grow it in a container that best suits it. This low-maintenance wonder plant needs enough sunlight, occasional watering in the right size pot to thrive. The aloe plants range in size from very small to large pots.

So how do you choose the right pot for your aloe vera plant? Know the size of the plant, pick a pot with perfect drainage, know the materials the pot is made of, the weight and porosity of the soil, and above all a large and deeper pot. The pot should be well maintained, not too heavy, and not rusty. Of course, when planting it indoors, aesthetics are important in maintaining the beauty of the house, thus the need to pick a pot with attractive colors.

Come read with me how to choose the best pot to grow an aloe plant.

What is the best pot for Aloe Plants?

It is important to let an aloe plant grow to the maximum, therefore pick a pot 3-6 inches in diameter, and 2-4 inches tall. Aloe develops best in small pots that allow proper drainage. Always use ceramic pots that have enough drainage holes to support maximum drainage and save the plant from root rot.
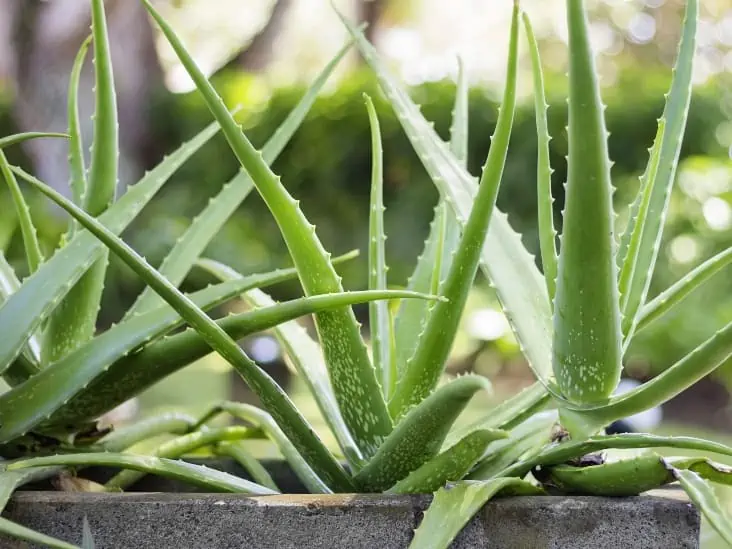
Aloe Vera plant
Aloe Vera should be planted in a small ceramic pot that offers enough drainage.

Why Does the Size of Your Pot Matter?

The size of your aloe plant matter, because in most cases, new gardeners are tempted to pick a huge pot. They believe that the plant will grow and needs space. Gauze what? That is the worst decision ever.

Choosing a large pot allows the plant’s roots to grow and spread out even before the plant grows. These create a fragile plant. A large pot will also hold a lot of water which causes overwatering, leading the plant to rot.  A lot of water in the pot tends to soak the plant’s roots, which can lead to root rot.

Choosing a smaller pot for your plant may not also be a good idea. A small pot will not give enough room for the roots, which may lead to root rot. A small pot will not be good for beauty as the roots try to find extra space out of the pot.

A good pot should be about one-third larger than the plant at the moment. These will provide about 1 or 2 inches of space on all the sides of the plant, good for aloe Vera’s growth. Such a pot also holds enough water for the plant.

Depth of the Pot

Aloe plants got a unique root system, as they grow horizontally, but remain shallow. Typically, it is an indication that a deeper, and wide pot inhibits the plant’s growth. Instead, go for a wider, but not so deep pot, to allow the roots to reach the bottom, and support water drainage, and not sit in a single place.

The best pot for an Aloe Vera should be wide but not deep as the plant has shallow roots.

A Pot that Permits Good Drainage

If you get it right in choosing a pot with good drainage, you will get it right with the plant’s growth. At the base of the pot you choose, always ensure there are numerous holes that will remove excess water from the plant.

If the pot lacks drainage holes, every time you water the plant, the soil around the plant gets wet. Damp soil will promote good conditions for the growth of bacteria and fungi. These bacteria and fungi will catalyze the process of root rot, and you may end up losing your succulent plant.

Your pots drainage should complement the well-draining gritty soil that you will use for your plant to help replicate the aerated soil condition for maximum growth of your aloe plant. In this kind of pot, gritty soil should be used to prevent the blockage of the holes by compacted soil.

Your good holed pot should also have a small tray that will hold excess water. Aloe vera is not planted to keep you stressed up. You don’t have to wipe your hose every time you water your plant. Let the small tray hold the excess water for. You should ensure that you empty the tray from time to time to prevent the pot from sitting in a pool of water.

How are Materials used to make the Pot Important

Aloe thrives in different materials, including ceramic, plastic, resin, terracotta, wood, and metal. But when picking among them, it is an opportunity to make the right choice, thus selecting the one that will give maximum results. What is the best material?
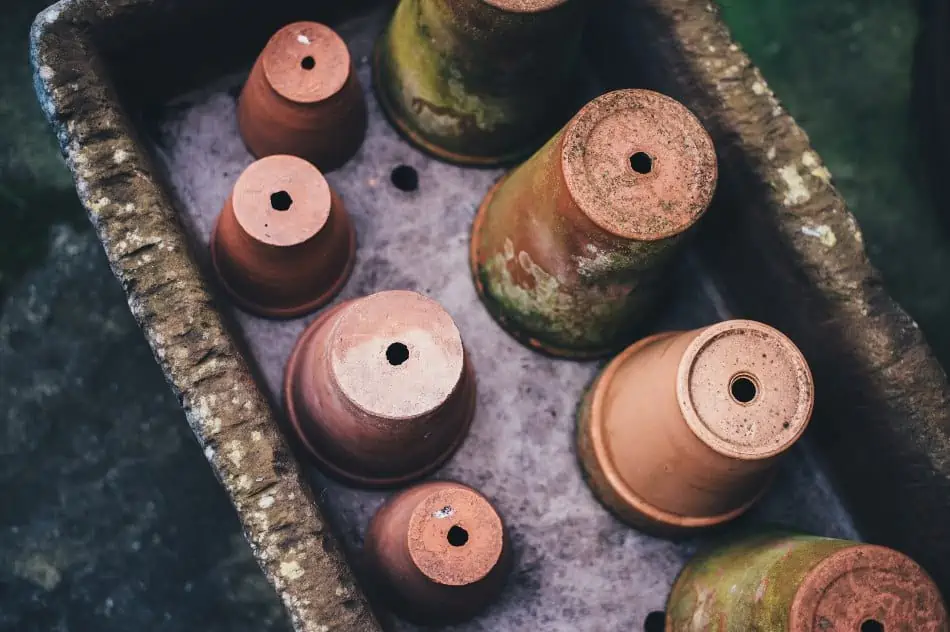
Ceramic and terracotta pots are among the best options when it comes to planting an Aloe Vera.

For the best results from your aloe vera, terracotta or ceramic is the best pot to use. Why? Maybe the following pointers will help you understand:

  • Terracotta and ceramic permit proper air exchange with the potting soil inside the pot.
  • Terracotta supports proper drainage as it pulls water away from the plant root.

However, take note that terracotta is the best when planting an aloe plant. But after it has grown and is big, and needs moving around from house to sun, terracotta becomes quite heavy. When the plant becomes large, switch it to a lightweight resin or plastic. This is because the wonder plant has a well-developed root system, and can handle the reduced air exchange and drainage well.

Go for the Wide Pot, not the Deep Pot.

Aloe vera has a unique root system. Its root system remains shallow while growing horizontally. This suggests that a deep pot than wide is not the best option for your plant. A deep pot is useless because the roots won’t go that deep.

When considering the pot, opt for a wide pot. A wide pot will ensure the proper spread of the root system and ease the water’s drainage. A wide pot will also ensure a proper supply of air to the roots of the plant. When choosing the width, ensure you take heed of the factors that we have highlighted above.

Beauty is in the eyes of the beholder. Consider the aesthetic

Let your aloe plant attract attention in the pot it will be in. Pots come in different colors and you have an option to select the one that fits your décor preferences. You may choose a pot color that stands out in contrast with the green leaves.

Other people prefer a terracotta that offers a different kind of visual appeal. There are numerous types of such pots. Pick the color that fits your style of beauty and matches your home appeal.

When making these preferences, the best pot to use is the pot that offers an easy-going aesthetic. A pot that makes movement from one room to another and from indoor to outdoor, seamless.

A Porous Pot Works best.

There are numerous reasons why you should take a porous pot. Porous containers like clay or terracotta and timber or other natural materials allow air and moisture to move through them easily. A porous pot, allows fresh air to circulate in the plant’s roots, enabling healthy growth. As this moisture evaporates out, it cools down the soil and aids them to draw excess water, avoiding root rot.

However, kindly note that porous containers dry water very fast, especially during summer, when the sun is hot. This could cause plant stress, because of underwatering. Under such conditions, ensure watering is done regularly. Unlike non-porous materials like ceramic or plastic, you need to regularly check up on the plant to ensure that it has enough water.

Consider the Weight of the Pot for Mobility

The weight of the pot will determine where to place a pot. Some pots get too heavy when they are watered and could destroy the deck of a house. Choose a pot that can be placed indoors, as well as outdoors for easy mobility.  

Use a lightweight pot when planting an Aloe Vera to easily carry the plant around when needed.

If you are a gardener that alters your garden look once in a while, ensure you use a mobile pot that will allow you to change when necessary. Again in some instances, an aloe plant may show some signs of distress or die, and to revive it. You have to move it from indoors to outdoors to get enough sunlight.

However, even in choosing a lightweight pot, the stability of the plant is also important. If the plant is kept in open ground, you will need a heavy container to prevent the succulent plant from falling and damaging. You have numerous options based on your liking, but above all prioritize the safety of the plant.

Cost and Time involved in Maintaining Your Pot.

If you want a pot that will not cost you more afterward, choose one that doesn’t need restoring from time to time. A pot made of wood may require to be treated annually with a preservative or stain to retain its appearance. Using such chemicals may increase your overall cost, not to mention the health hazards of the chemicals. Ask for the life and the maintenance requirement of the pot that you want to buy from your dealer to avoid unnecessary surprises.

Bottom Line

To help you make the right decision, examine the pros and cons of each pot material to ensure that it meets the attributes that will allow the aloe plant to grow healthy. Remember that after the plant, pot is the next thing that your friends will see. All the best as you try to get it right.

10 Perfect Snake Plant Types to Grow

One of the most popular houseplants is the snake plant, also known as Mother-in-Law’s Tongue. These plants are easy to grow and come in many varieties, making them perfect for your home or office. They come in a range of colors, sizes, and textures to suit any taste. If you have a green thumb and love the idea of having a lot of plants in your house, then this is for you. There are so many types of snake plants to grow that it’s hard to know where to start. This blog post will go over 10 different types of snake plants that should be on your list.

So, what are the 10 types of snake plants to grow? There are many types of snake plants out there – from tall varieties that grow upwards to small ones that grow downwards.

The most common of these include:

  • Kenya Hyacinth (D. Parva)
  • Cleopatra Sansevieria (D. pethera ‘Cleopatra’)
  • Blue Sansevieria (D. hanningtonii)
  • Black Gold Snake Plant (D. trifasciata ‘Black Gold’)
  • Ceylon Bowstring Hemp (D. roxburghiana).

There are over a dozen others you can opt for, depending on your area’s climatic conditions and soil type.

If you have never attempted to grow a snake plant before, this is the perfect introduction for you. This blog post will explore 10 different types of snake plants that are great for beginners. We will also discuss what makes these plants unique and offer some tips on caring for them properly.

1.    Kenya Hyacinth (D. parva)

The Kenya Hyacinth is a dwarf snake plant that grows in a rosette shape. It has dark green leaves with white stripes running down the middle of each leaf. This variety can grow up to 20 inches tall and prefers bright, indirect light. It is popular as a houseplant because it grows slowly and is easy to care for. It can also be grown in water, which makes it popular with reptile owners as well.

For best care, Kenya Hyacinth needs well-draining soil and should be watered once a week. It’s a great idea to fertilize your plant once a month. In addition, be sure to mist it with water at least once every other week.

2.    Cleopatra Sansevieria (D. pethera ‘Cleopatra’)

The Cleopatra is another popular variety of snake plant that grows upright rather than in a rosette shape. It has long, dark green leaves and will grow up to 26 inches tall.  This succulent stands out in a room due to its unique color.

The Cleopatra prefers bright, indirect light and well-draining soil. It should be watered once a week or so during the growing season and less frequently in winter months when it’s dormant. In addition, mist your plant with water at least once every other week for best results – just make sure to do so in the morning or early afternoon.

The Cleopatra Sansevieria should be watered once a week during the growing season and less frequently in winter.

3.    Black Gold Snake Plant (D. trifasciata ‘Black Gold’)

The Black Gold is a popular variety of snake plants with dark green, glossy leaves with yellow markings running down the middle of each leaf. This type can grow up to 36 inches tall and prefers bright, indirect sunlight or semi-shaded areas.

Just like most succulents, the Black Gold prefers well-draining soil and should be watered once a week or so during the growing season and less frequently in winter months when it’s dormant. Position your Black Gold near a window that will get some morning or afternoon sunlight for best results.

Just like other succulents, the Black Gold Snake Plant requires well-draining potting mix.

4.    Sansevieria Trifasciata ‘Futura Superba’

The Sansevieria trifasciata is the most common variety of snake plants and is often used in offices, waiting rooms, bathrooms, kitchens – anywhere that require a low-maintenance plant. It has long, dark green leaves with yellow banding at the top of each leaf and is known for its unique shape.

This variety of snake plant’s growth pattern is unique – it’s upright but will grow wider over time. This type can reach heights of up to 30 inches and prefers bright light or semi-shaded areas. Just like most succulents, the Sansevieria trifasciata needs well-draining soil and should be watered once a week or so during the growing season and less frequently in winter months when it’s dormant.

Sansevieria Trifascata is one of the most popular Snake Plant type.

5.    Ceylon Bowstring Hemp (D. roxburghiana)

The Ceylon bowstring hemp is a dwarf snake plant with yellow-green leaves with white banding along each side of its leaf. It can grow up to 18 inches tall and prefers bright, indirect light. This variety is often used in offices due to its unique shape and color.

Considering its short stature and drought resistance, the Ceylon bowstring hemp requires very little care. It’s a great choice for beginners because it only needs water once or twice per month during the growing season and can tolerate low light conditions.

6.    Sansevieria Trifasciata ‘Cylindrica’

The Sansevieria trifasciata ‘cylindrica’ is a snake plant that has green leaves with cream-colored stripes. There are many names for this type of snake plants, such as Tiger Tail and Cylindrical Snake Plant. The “cylindrical” name comes from its long, narrow shape; it grows up to 30 inches tall and only requires bright light conditions without direct sun.

This unique snake plant is popular for its symmetry and uniformity. It may dry quickly if it lacks enough water. Keep the soil moist but never soggy, and try to avoid overwatering this plant.

7.    Sansevieria masoniana ‘Mason congo’

The Sansevieria masoniana ‘Mason Congo’ is a rare snake plant with dark green leaves with yellow accents and white stripes along the edges. It grows to 24 inches tall and prefers low light conditions, meaning it’s great for home or office spaces.

The Sansevieria masoniana ‘Mason Congo’ may lose its variegation if it doesn’t receive enough bright light when grown at home. This snake plant is drought resistant and can survive in indoor spaces without direct sunlight, although the leaves will become yellowish-green rather than dark green.

8.    Sansevieria’ Moonshine’

The Sansevieria ‘moonshine’ is a snake plant with light green leaves with white banding along each side of its leaf and yellow-green edges. It can grow up to 20 inches tall, making it the perfect size for potted living rooms or offices.

This unique snake plant variety has low water requirements, making it perfect for people who forget to water their plants. It only needs the soil moistened once every other week and should be watered thoroughly until water drains through the pot’s holes.

9.    Blue Sansevieria (D. hanningtonii)

The Blue Sansevieria is a tall plant that has blue-grey leaves with bands of yellow running down the center. It can grow up to 36 inches tall and requires bright, indirect sunlight.

As far as snake plants go, this one does well indoors because it prefers constant warmth rather than being exposed to extreme temperature fluctuations. Keep your Blue Sansevieria in a spot where the temperature does not drop below 65 degrees Fahrenheit.

10.     Ceylon Bowstring Hemp (D. roxburghiana)

The Ceylon Bowstring Hemp is a popular houseplant that grows vertically. It has dark green leaves with purple veins and can grow up to 36 inches tall, making it one of the larger varieties out there.

This variety does well in bright light but not direct sunlight as it will scorch its leaves over time. In addition, be sure your plant is in a spot where the temperature remains between 65 and 75 degrees Fahrenheit.

If you are looking for a dwarf sansevieria, Ceylon Bowstring Hemp is the best choice.

Best snake plant growth practices

The planting and growing practices remain very similar, whichever variety you choose as you prefer the snake plant. The following tips should help you better grow and care for this unique succulent:

Snake plants do well in almost any kind of soil and offer amazing benefits, both in terms of health and aesthetics. If you’re planting a young snake plant, pick the best quality potting mix that drains easily to prevent root rot.

Sansevieria thrives with bright light but tolerates low levels of sunlight as long as it’s not direct. They can also grow slowly or stay dormant if they don’t receive enough light.

For the best results, water your snake plant once per week during the spring and summer months and less frequently in fall or winter when it’s dormant or doesn’t need as much water to survive. It should only be watered thoroughly until water runs through the bottom of its pot – do not leave standing water in its tray.

It’s best to avoid overwatering your snake plant as it can cause root rot, which will kill the plant. The soil should never be soggy or wet, and thorough draining should occur after watering. Additionally, it would help if you allowed a few drainage holes at the bottom of its pot, so water doesn’t stand in there for too long.

Sensitive to cold, the best place for your snake plant is between 65-75 degrees Fahrenheit. It can tolerate temperatures as low as 50 degrees Fahrenheit with minimal damage, but it’s better to keep it away from drafts or freezing conditions that may cause root rot.

Snake plants are also not good at tolerating high heat, making them more difficult to grow in the summer months. If you’re in a warm climate, try growing your snake plant in shaded or low light conditions to prevent it from drying out and keep its growth rate slow during this season.

Snake plants are easy-to-care-for houseplants that add interest to any space with their unique variegation of bright green leaves with yellow or white accents. They grow slowly and have low water requirements making them a perfect addition to your home or office. The snake plant type you go for will be dependent on the available space in your home, the style you’re going for, and how much attention you want to give it. Remember that all plants are unique and will grow differently depending on their climate, lighting conditions, and soil type.

Aloe Vera Care 10 Essential Tips for Beginners

Aloe vera is a plant that everyone desires to have in their home garden. This plant is not only beautiful but also serves many great benefits. It serves as a natural treatment for sunburns, skin allergies, and rashes, etc. But before you can get all these benefits at the comfort of your home, you have to learn how to care for your aloe vera plant.

Well, the good news is that the aloe vera plant isn’t too demanding in terms of care needs and is a beginner-friendly plant. The plant needs moderate watering, a perfect container, full sunlight, well-draining soil, and good feeding from time to time. You also need to protect your plant from pests and diseases that might interfere with its growth.

If you’re growing aloe vera for the first time, you need to have a deeper understanding of how to care for this precious plant. Below are more detailed tips you need to know about caring for the aloe vera plant.

1. Alow Vera Prefers Being Dry

This plant is from the family Asphodelaceae. Aloe vera loves a warm climate and hates cold weather. Thus, in northern climates, it needs a place with lots of sunlight to grow well. Avoid using overly moist soil while growing aloe in pots because this can rot root tips and lead to the development of fungus.

Aloe Vera plant
As Aloe Vera loves dry climate, it should be placed in a sunny spot.

The worst sin you can make against your aloe vera plant is overwatering. This can rot the tender roots and damage them. In addition to this, it will also make the plant grow slower. Along with maintaining the proper moisture level in your aloe vera care routine is knowing when to water it. The best time for watering these plants is early morning or after 4 pm. Water your plant when you notice that the top 2-3 inches or so of soil are dry.

2. Container Gardening Is Perfect For Aloe Vera

If you’re just planting your first aloe vera plant, you should know that this plant prefers being grown in a container. This is a sun-loving plant, and therefore, you should place it in a location where it can get plenty of sunlight. You can use a pot that has ample drainage holes to prevent root rot from occurring.

To choose a pot for your container, keep in mind that aloe vera plants grow up to 1 foot tall and about 2 feet wide. So ideally, a pot with dimensions of 18 inches (height) x 12 inches (width) is perfect for your aloe vera plant.

3. Aloe Vera Loves Sun

Aloe vera grows well in full sunlight. A minimum of six hours a day is recommended for aloe plants growing indoors. Use a room with lots of sunlight and place the plant near the window or a place to capture sunlight directly. Avoid using fluorescent lighting as your light source because this will not give out enough heat to support aloe vera growth.

Aloe Vera should receive at least 6 hours of sunlight per day.

4. Take Care of the Soil

You can use a loose, well-draining soil mix, or you can add sand to your regular potting soil to aid proper drainage and aeration. You may also consider adding perlite, peat moss, and rotted pine bark without nitrogen fertilizer. These substances will help retain water and prevent the soil from becoming too crusted.

If you live in a cold climate, make sure to use only sterilized potting mixes because the spores of certain fungi can kill your plant. If you manage to provide the perfect soil for your plant, it will grow happy and strong in your home.

5. Feeding Aloe Vera Will Benefit It

Fertilize aloe vera once every 1-2 months using an age-appropriate fertilizer. Only use 1/4 strength when it comes to fertilizing aloe vera plants growing indoors. This plant is sensitive to salts and other harmful elements, often found in fertilizer at full concentration.

Consider fertilizing your Aloe Vera every 1-2 months.

If your potting mix does not contain nutrients, you can add slow-release fertilizer granules directly to the soil once every six months. However, remember not to over-fertilize aloe vera plants. Also, avoid fertilizing during wintertime.

6. Pests and Diseases

Aloe vera is not prone to many pests or diseases, but you can occasionally see mealybugs on the stem of the plant. The sticky sap that oozes out of aloe vera can trap these insects. Use 90% rubbing alcohol to remove them from your plant.

Mealybugs can be deadly to aloe vera plants, so you should always remove these pests when they are spotted. Aloe vera can also develop powdery mildew, a fungus-like disease that appears when the plant is dried out or overwatered.

You can control this by removing dead tissues and leaves from the plant when it gets wet for too long and ensuring that the plant has enough water. You should also avoid overhead watering in cold climates when aloe vera is not growing actively.

7. If You Have Sick Plants, Separate them From the Healthy Ones

No matter how well you take care of your plants, pests and diseases can still find their way to your aloe vera plant. If you identify that one or some of your aloe vera plants are sick, you should immediately isolate them.

It’s always a good idea to separate sick plants from healthy ones. This will prevent the spread of insects, fungus, and other pests that could damage or kill your aloe vera. When you have a large group of aloe vera plants growing well together, you can transfer only the weaker ones to another location so they can later be brought back to their original group after being restored.

8. Aloe Vera Doesn’t Like Cold

If you’re going to grow your aloe vera plants outdoors, one thing you must consider is the climate in your area. Aloe doesn’t like cold weather. If your climate is too cold for aloe vera plants, make sure to plant them in a pot or container. You should also remember to bring them indoors when the temperature drops below 60 degrees Fahrenheit.

Make sure you determine the zone you live in, so you can take better care of aloe plants in your garden. Aloe veras will thrive in zones 8-11, but they will die in colder or warmer than these zones.

9. Transplanting

You can transplant your aloe vera plant when it gets too big for its pot, and it’s about two years old. You may also consider dividing the bigger plant into smaller ones and then putting them in new pots to enhance propagation.

You should repot your Aloe Vera when it is too big for the pot, typically at the age of 2.

You can also consider repotting your aloe vera when the potting soil starts to break down. You may choose to replace the potting mix every two years or so if you want to keep your aloe vera healthy and thriving.

When repotting, ensure you choose a pot 2 inches bigger in diameter and 1-2 inches deeper than the previous pot. Also, ensure the pot drains and has proper aeration.

10. Propagating

Aloe vera plant propagation is not difficult, and you can do it by simply planting a leaf cutting in potting soil or even directly into the garden if you want to start over with another plant. Aloe vera cuttings will grow roots in about two weeks’ time, but aloe vera leaf cuttings are different. They can root in about three to four weeks. You have to be patient with them because it also depends on the humidity and temperature of your environment.

To propagate aloe vera, cut the tip of aloe vera leaves and let them air-dry for one day. Make sure you keep them out of direct sunlight, so they don’t dry too fast. Fill a pot with the moist, sterilized potting mix, then place the cut end into it. You can place the leaf with its cut end up or down. Keep the pot in an area that gets lots of sunlight and let it sit for about two weeks to sprout before moving it to another location.

Aloe vera propagation is comparatively easier than other plants because it doesn’t need pollination, rooting hormones, or water stress for propagation. All you have to do is follow very simple tips.

Aloe Vera plant

Related Questions

Can you regrow aloe vera from the leaf?

You can’t regrow aloe vera from a leaf, but you can grow a new plant from an aloe vera leaf cutting. However, you should know that aloe vera leaves have a lot of water and chances of rotting when you put them in a pot. So, you should always allow an aloe vera leaf cutting to dry up for 1-2 days before planting it.

How do you cut aloe vera without killing it?

The best time to cut an aloe vera leaf is when it’s new yet mature growth. You can also cut an aloe vera leaf when it’s halfway through the plant’s cycle, but you have to be careful not to damage the sap channel for each of these leaves too much so they don’t rot.

Should you water aloe vera from the top or bottom?

You may water the aloe vera plant from the top or bottom, but it’s best to water them from the bottom. You should allow this plant to sit in its soil without any moisture for at least 2-3 weeks before watering it again.

Summary

Aloe vera is one of the best succulents you can grow in your garden, but only if you know how to take care of it. Planting aloe vera in the right soil types and providing it with the right amount of sunlight is essential for healthy growth and optimum production.

Aloe veras are one of the three leading succulents used worldwide because of their medicinal properties. So, if you take good care of it, you’ll no doubt reap great benefits from this plant.

Ultimate Guide: How to Care for A Jade Plant

Succulents have enjoyed a rise in popularity over the past few years, with Jade plants being no exception. These plants are fairly resilient and relatively easy to grow indoors and outdoors since they are long-lived.  With just a little care, they can grow to between three and six feet tall, albeit slowly.

So, how do you care for a jade plant? Jade plants are mostly grown as indoor plants but will benefit greatly from being moved outdoors during summer since they love a lot of light. The plant requires at least six hours of light every day to thrive.  You also need to ensure the potting mix you choose for your jade plant is a succulent-specific blend with good drainage. Water your plant more often during summer but reduce the watering during the cold winter months and feed it with controlled-release fertilizer at the beginning of the growing season.

In this guide, we go further into outlining the most important things you need to do to keep your Jade plant happy throughout the year.  Keep reading to learn everything you need to know.

A Brief Overview of the Jade Plant

Jade plant is a succulent that is mainly grown as a houseplant. It has fleshy, oval-shaped leaves and thick, woody stems resembling tree trunks.  The plant is native to South Africa, where it is believed to bring luck and good feng shui to its owners.

With its miniature tree-like appearance, the jade plant is mostly used as a decorative houseplant.  Since it can survive for many years, the plant is usually passed down from generation to generation.

The jade plant is well adapted to growing in relatively warm and dry conditions in most homes. However, it is still important to keep it well watered during spring and summer when it is actively growing.

The Jade Plant is one of the most popular succulents that brings luck and good feng shui.

Like other succulents, it is crucial to let the soil dry completely between watering since the plant is highly susceptible to stem and root rot.

If you live in an area that experiences a mild, dry climate throughout the year, you can grow Jade plants outdoors as landscape plants. But, you can’t do so in areas that experience extremely low temperatures during winter since these succulents are highly susceptible to cold damage.

Homeowners with pets must be careful where they position their jade plant in the house since all parts of the plant are toxic to dogs and cats.

How to Care for Jade Plants

The truth is that jade plants are generally less demanding and easy to grow. The most important thing you need to keep in mind is that these succulents are highly susceptible to too much moisture and some diseases.

Like all the other succulents, overwatering a jade plant can be fatal. That is why it is critical to keep the soil dry between watering sessions and do everything possible to avoid overwatering your plant.

Below are some of the essential jade plant care tips you need to know to keep your plant happy throughout the year.

1. Growing Area

As mentioned earlier, these plants can be grown as either indoor or outdoor plants. But you should only consider having them as outdoor plants if you live in an area with favorable climatic conditions (no snow falls or freezing temperatures during winter).

Indoor jade plants benefit greatly when moved outdoors during spring and summer. The additional sunlight during these seasons results in increased growth, color, and vigor.

Ensure you move your plant to a safe area such as your porch or patio area that receives direct sunlight, acclimating the plant slowly to prevent shock and sunburns.

Always bring it back indoors in the fall when nighttime temperatures start dropping to below 50oF.

2. Light Requirements

Jade plants are succulents and love a lot of light, especially when they are still young. So, a jade plant needs to be exposed to indirect sunlight for at least six hours to thrive. However, you need to keep your plant away from direct sun rays to prevent sunburns.

Although Jade Plant requires plenty of light, it should not be exposed to direct sunlight.

Harsh light can easily scorch young jade plants or cause the leaves of older plants to turn red. The spots are permanent unless you prune off the affected areas and allow new growth to replace them.

During fall and winter, when there is no plenty of sunlight, you should consider using artificial lights to keep your plant happy. Ideally, the best place to position your plant is on the south-facing window if you live in the northern hemisphere.

3. Water Requirements

During the active growing season (spring and summer), you should consider watering your plant more often so that the soil is moist but not wet.  As long as you use the right type of succulent soil and your container has plenty of drainage holes, it shouldn’t be difficult to keep the soil moist.

However, you need to reduce the watering frequency during winter because the plant goes into dormancy. During winter, consider watering your jade plant once or twice a month.

The best way to water your jade plant is by letting it sit in a saucer of water for a few minutes and pour off excess water from the container after a few minutes.

You can also water from the top and only stop when the water starts pouring out of the draining holes at the bottom of the growing container. That is an indication that the soil has soaked well.

Allow the soil to dry completely before you water your plant again. Always scoop the top two or three inches of the topsoil and feel it before watering your plant. If it feels moist, don’t water.

4. Soil Type

Jade plants require good drainage to thrive and overcome potential root rot.  Typically, they will do well in native soils that are sandy or rocky. For houseplants or outdoor garden plants, ensure you use a well-draining succulent potting mix.

Add an equal amount of perlite or pumice to regular soil to improve drainage and prevent excess moisture from accumulating. The soil should have a neutral or slightly acidic pH level.

Jade plants do well in sandy or rocky soil that offers sufficient drainage.

Alternatively, you can house your jade plant in a clay or terracotta vessel to help with extra moisture from the soil. Keep in mind that poor drainage will lead to root rot hence killing your plant in no time.

5. Repotting Jade Plants

These succulents don’t mind being root-bound in a relatively small growing container. In fact, keeping them root bound in a small pot will only make the plant smaller and more manageable.

Ideally, you should consider repotting your plant every two or three years to encourage growth. However, older jade plants can be repotted every four or five years.

The best time to re-pot is during spring, just before the growing season kicks off. Avoid watering your plant after repotting for at least one week, and wait for at least one month before you feed it with fertilizer to avoid burning its roots.

6. Fertilizer Requirements

Many people think that jade plants don’t require fertilizer to thrive, which isn’t the case. In fact, if you underfeed your plant during the growing season, it won’t grow as expected.

Fertilizing your Jade Plant during the growing season will help the succulent thrive.

To keep your plant healthy and happy, feed it with a controlled-release fertilizer at the start of every growth season or maintain a weekly feeding schedule using a liquid fertilizer solution.

Use a balanced 20-2-20 plant fertilizer at quarter strength on mature jade plants and fertilizer with less nitrogen on the young plants.

7. Pruning

The only time you should prune a jade plant is when you see dead/dying or shriveled branches. If that happens, simply snap off the affected branches and let new ones grow.

The good thing about these succulents is that they are highly forgiving and will always develop new growth wherever you cut them.

You can also prune if you want to get rid of sunburn spots or shape your plants to create beautiful scenery.

8. Temperature and Humidity

Jade plants will generally do well in temperatures ranging between 65oF and 70oF. But it doesn’t mean that these plants can’t handle cooler temperatures completely. During winter, they can handle temperatures of 55oF to 60oF.

Never keep a jade plant in temperatures below 50oF for a prolonged time because they are highly susceptible to cold damage.

If you start to notice white spots on your plant, it could be a sign of exposure to extremely low temperatures. Like sun damage, cold damage is permanent, and the only way of getting rid of it is through pruning.

9. Propagation

Jade plants can easily be propagated through a leaf cuttings, stem cuttings, or offsets. Stem propagation is quicker and has a relatively higher success rate.

For leaf cuttings, start by selecting a healthy leaf on your plant. Gently remove the leaf from the stem, ensuring a clean break.

Allow the leaf to callus over for a few days to prevent rot before placing the callused leaf in well-draining soil. Water sparingly until roots and new growth appear, then transplant the new plant to its new home.

Propagation through stem cutting is quite similar to propagation through leaf cuttings. Start by choosing a healthy stem and cutting it into sections, each containing several leaves.

Allow the cut ends to air dry and callus over before you plant the stem sections in well-draining soil, burying them slightly.

Water sparingly until roots develop and new growth emerges, then transplant them into individual pots.

You can also propagate jade plants through offsets. Carefully separate the offset from the main plant, ensuring it has roots attached. Plant the offset in its own pot with well-draining soil and water it lightly as you monitor its growth rate.

Consider propagating during the warm months and ensure that the leaf or stem cutting you use is healthy and disease-free.

10. Pests and Diseases

The jade plant is highly susceptible to mealybugs, aphids, spider mats, and scale insects. Mealybugs cluster on the undersides of the leaves and along the stems. They feed on the plant’s sap, causing wilting and yellowing of leaves.

You can remove them manually using a soft brush, or a cotton swab dipped in alcohol. Regularly inspect your jade plant for early signs of infestation.

Aphids feed on the sap of jade plants and can cause leaves to curl and turn yellow. The best way to deal with aphids is by spraying the affected areas with a mixture of soapy water (a few drops of dish soap in water) or using neem oil.

Spider mites usually spin fine webs and can cause stippling, yellowing, and leaf drop. Use a strong jet of water to dislodge spider mites.

Frequent misting can also help prevent infestations. If the issue persists, consider neem oil or insecticidal soap.

Common diseases that affect this succulent include root rot and powder mildew. Root rot is commonly caused by excessive watering, and symptoms include wilting, yellowing leaves, and a foul odor from the soil.

Final Thought

Caring for a jade plant is relatively simple.  Although these plants are slow-growing, they can mature into a beautiful jade tree that adds beauty to your indoor space or outdoor plant garden.  Take time to learn your plant’s needs, and everything will be fine.  

8 Golden Rules for Watering a Sansevieria Plant

Sansevieria plant is also known as the Snake plant. Snake plant is one of the easiest plants to grow as there are not many issues that you are likely to encounter. One of the exceptions, however, includes watering the plant. Improper watering of this plant is one of the most common sources of problems for many gardeners planting and nurturing the plant.

Watering this plant depends on many aspects. There are 8 golden rules that you need to master to properly water the snake plant. These rules are critical to keeping your plant in good health and for a long time. The watering schedule varies depending on the type of soil the plant is growing, the home environment, and pot size.

By following this simple rule that we will look at in-depth in this article, you will realize that watering a snake plant correctly isn’t very difficult. This article will also give you a deeper understanding of the trickiest aspect associated with managing this classic house plant. It includes knowing how often and best to water this plant. 

1.    Water the Soil and not the Leaves

The problem cuts across many houseplants. But it is particularly crucial to remember this when you grow a snake plant. When watering your snake plant, you need not spill any water to the leaves.

The most common cause of brown spots on a snake plant is a fungal infection. When there is water spill to their leaves, it makes this plant vulnerable to fungal infestation. This fungus causes brown spots on the leaves of the plant, destroying its appearance.

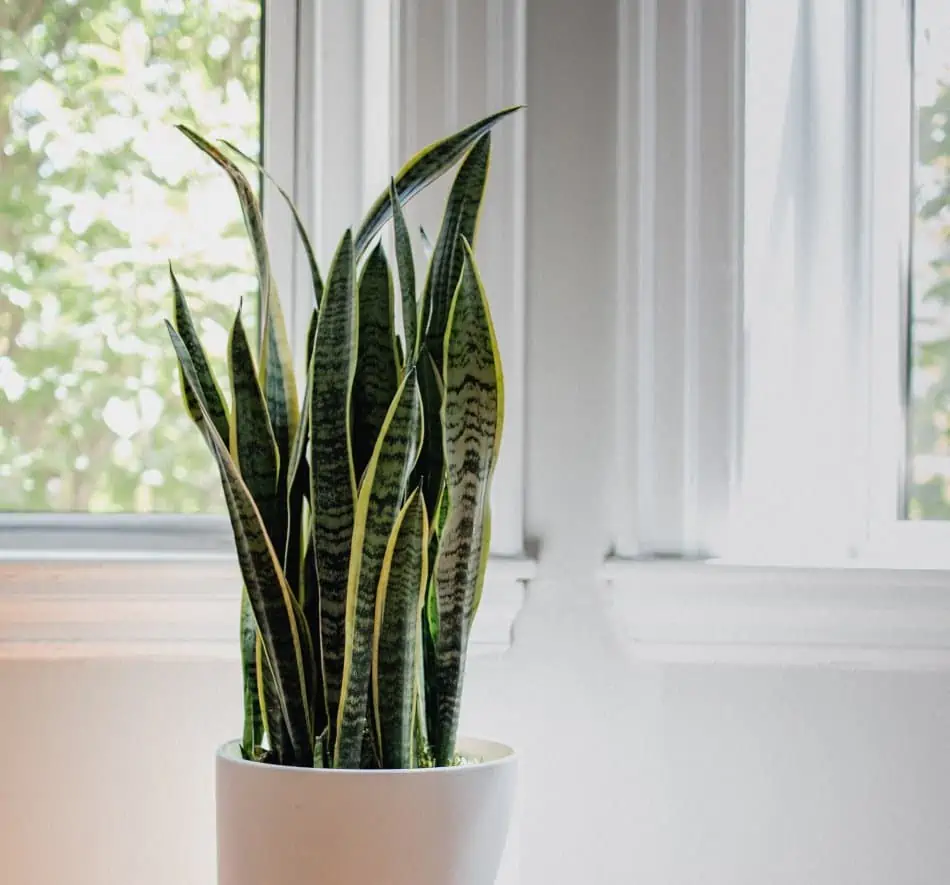
A snake plant near the window.
When watering your Snake Plant, avoid spilling water onto the leaves.

Spillage of water to the leaves also causes them to rot. This rot continues to grow and spreads to other parts of the leaves, and you may end up losing the whole plant.

Therefore, every time you want to water your snake plant, ensure that you only water the roots and not let water spill onto the leaves. You can achieve this by bringing the watering source near the plant’s base and allowing water to flow slowly to the roots without spilling.

2.    Know when to Water your Snake Plant

When watering a sansevieria plant, scheduling is the most effective way to determine when to water the plant. As said earlier, the schedule will vary depending on several factors like the type of soil used and the plant environment.

Before watering the plant, assess the plant and determine if at that particular moment it needs water. Some indications will help you to determine if your plant needs water or not. The easiest way is to check the potting soil.

Dip your finger some inches to the soil. If you don’t want to get dirty, you can use a stick or a pencil. If the soil is dry, maybe two inches from the topsoil, it is time to water the plant. If the soil is wet in the two inches of the soil, you can save the water to when the plant will require it.

Snake plant indoors exposed to sunlight.
The schedule will vary depending on several factors like the type of soil used and the plant environment.

If you miss out on this crucial aspect, you may end up overwatering the plant, which may lead to root rot, resulting in the death of your plant. You may also end up underwatering the plant, making it dry up.

3.    Know your Snake Plant Watering Frequency

It would help if you determined the right water frequency for your sansevieria plant. Determining this frequency, you have to consider several environmental parameters. Some of these parameters are discussed below.

Temperature

The snake plant is a tough plant that is adapted to arid conditions. Ideally, your plant will do well at a temperature of between 130C-300C. At this range, your plant is happy and thrives well.

 If the temperature starts falling below 100C, the plant is unhappy as it is too low. At this temperature, the plant does not consume much water; hence you may need to stay for more days before watering the plant.

If the temperature is too high, again, the plant is not comfortable. It takes in a lot of water at a time to sustain itself. During this time, you may increase your watering frequency as more water is lost through evaporation. 

Season

The watering of the snake plant is dependent on the season of the year.

During the spring season, your plant is awake from the dormant stage and begins to experience some growth. At this particular season, it will need more water than it would during the rest period. As a gardener, you need to react appropriately to this need.

Seasons.
The Snake Plant will require more water during warm months and less watering in winter.

Hope you’ve not forgotten that it is during the spring when your plant occasionally sends up that long stem that has sweet-smelling, cream-colored flowers at the top?

During the summer season, plant growth begins to slow down but will still need a regular water supply.  Growth slows down even further during the autumn, and when winter arrives, no change is taking place; hence watering will be almost unnecessary.

Humidity

Water requirement by the snake plant will also depend on the humidity surrounding the plant. If there is low humidity, the plant tends to take in more water. During high humidity, the plant will require less water.

It is also good to know that high humidity makes the plant susceptible to diseases and bacterial infections. You can counter this effect by taking the plant where there are other plants. When plants are in a cluster, they create their favorable microclimate.

4.    Consider the Size of the Plant.

The size of your snake plant will determine the amount of water that the plant requires. The larger the plant, the more water is needed as the uptake of water is high. Big plant has big leaves that will transpire more; hence watering should be more frequent.

On the other hand, a small plant has small leaves. Transpiration and evaporation occur slowly; hence the plant requires little water to grow.

A person holding the plant on the pot.
You should always consider the size of your Snake Plant before creating a watering schedule.

5.    Be Careful with the Amount of Water you Use

When watering your sansevieria plant, be careful about the amount of water you pour. Watering this plant could lead to overwatering or underwatering if not done appropriately.

Overwatering

Continuous overwatering will cause the leaves of the snake plant to droop. With time, you can tell an overwatered snake plant with how it looks. Overwatering destroys the leaves and the root structure of the beautiful snake plant in the following ways.

  • The leaves tend to become squishy, heavy, and limp. Within no time, the leaves may start to fall over
  • Overwatering will make the roots start rotting to make the soil around them start smelling.
  • You will notice that numerous leaves of the plant are falling over.
  • Sometimes the leaves may begin changing to yellow.

Under watering

Yes, your plant is tough, but under watering, it will not go well for long. The good thing is that your under-watered plant will always indicate, and you have to take it seriously. Some of these symptoms include:

  • Leaves may appear to have wrinkles
  • Leaves start to curl
  • The edge of the leaves becomes too dry
  • It may experience slow growth

If you start realizing these effects, it is time that you take the necessary action to revive the plant because it is dying. Remember to always check on your plant and observe if there is any change in its appearance.

6.    Type of Pot

The material used in making your pot determines the amount of water the plant will need. The type of pot will determine the loss of water by the soil. For example, a plastic pot or a glazed pot will not allow water to evaporate through its sides hence leaving the plant with water for a longer time. You will need to water the plant less frequently in this kind of pot because it does not lose water more often. 

On the other hand, using a porous pot like the terracotta will draw water away from the plant, enhancing evaporation. You will need to water more in this type of container as the plant loses water more frequently.

7.    Water Early in the Morning and Late Evening

The time that you water your plant is also essential. The two most appropriate times to water your sansevieria plant is either early in the morning or late in the evening. During these times of the day, less evaporation and transpiration occur. The plant can take in enough water to counter when the temperature rises and thrive well.

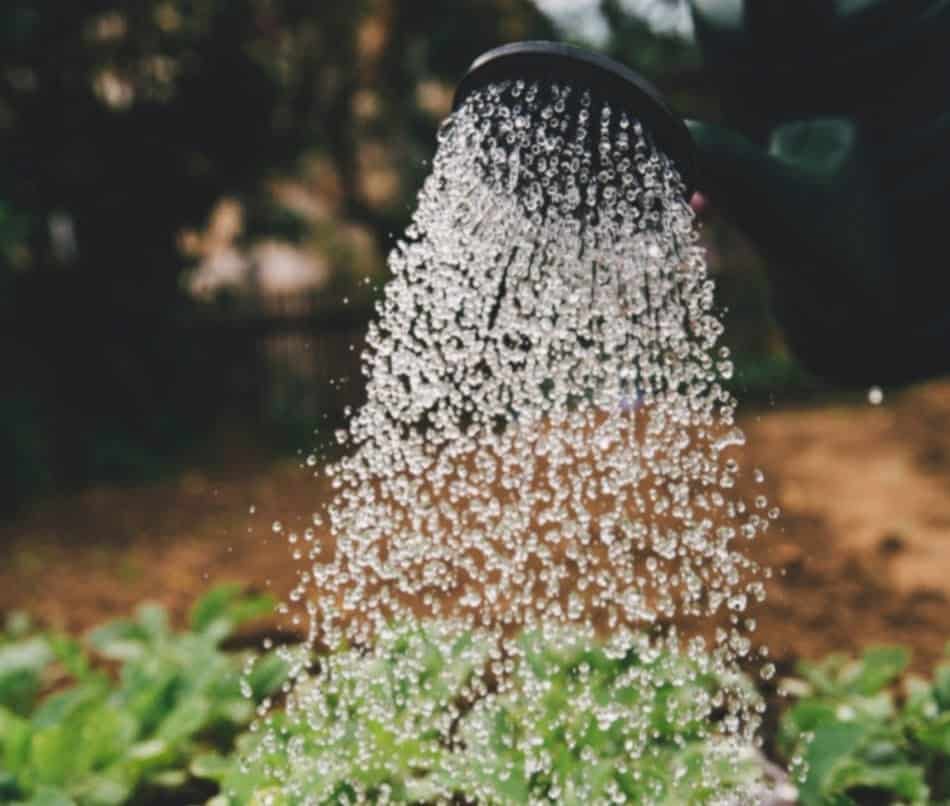
Watering the plant.
You should water your Snake Plant early in the morning or late in the evening.

8.    Allow the Soil to Dry out Between Watering.

Like most succulent plants, snake plants thrive well when the soil is left to dry out before rewatering.  During this time, the plant tends to grow new roots, searching for more water. This method, also known as the soak and dry process, helps the snake plant have a healthy root system.

Take away

Snake plant does not need frequent watering; hence you should determine the frequency of watering. Proper watering of your snake plant will save you from many other consequences, as many troubles start when the watering is not done appropriately. Never be afraid of getting dirty when you want to determine the moisture of the soil. Most of the watering rules depend on the above-mentioned factors, and you got yourself a snake plant that is the easiest plant to keep. Just get it right in the watering.

Ultimate Guide: How To Care For A Desert Rose?

Caring for a desert rose requires having an accurate knowledge of different aspects of the plant. Desert rose is a succulent plant native to Africa and Arabia. Taking care of a Desert Rose will ensure it blooms at least once a year. 

A desert rose is a small flowering succulent plant with a large bulbous stem, green foliage with red, pink, and white flowers. It has a succulent stem native to dry climates, storing water in the stem for dry seasons. The plant can help decorate your porch, garden, or interior in spring or all year round if you live in an all-year climate. 

You can enjoy its showy flowers after it has dropped its leaves in the summer to warm up the house in bright colors. 

The botanical name for the desert rose is  Adenium obesum, and it is also called  Japanese frangipani, Sabi Star, Dwarf Bottle Tree, Impala Lily, and desert azalea.

How to Plant

Adenium is a rare species of plant that you can use seeds or stem cuttings to propagate. The best way to propagate the plant is through stem cuttings. 

You have to let the stem cuttings dry out before planting, and if you see some sprouts on the stem cutting, it is ready for planting. The best time to plant is during spring or summer when there is enough light. 

However, you have to keep them filtered from the light until they begin to grow.

You can propagate a Desert Rose via seeds or stem cuttings.

What You Need to Plant a Desert Rose

  • A small plant pot
  • A rooting hormone powder
  • A healthy Desert Rose
  • Clean, sharp pruners or shears
  • A rooting medium like perlite or soil (mixture of  sand and potting soil)

Planting Procedure

  1. Select a healthy branch on the mother plant 
  2. Cut a six-inch tip cutting from the end of the branch
  3. Give the cutting time to callus by leaving it in a shade
  4. Once the stem has callused, fill the pot with a rooting medium and moisten slightly
  5. Cut the end and dip it in a rooting hormone
  6. Plant the cutting so that it is just below the soil
  7. Keep the soil moistened and in bright light while you mist the plant daily for about two months till the roots appear

Growing Conditions

From the shrub’s name, it is easy to deduce that a desert rose is native to dry and hot climates. Hot and dry climates with perennial rainfall are the plant’s optimum growing conditions. 

The ideal growing temperature for the flower is 40° F (4°C) to 90° F ( 32° C). You can grow the flower in your garden if you experience a relatively dry climate in the area.

The warm temperature needs of the ornamental garden plant make it a trendy plant in USDA zones 10 and 11. Japanese frangipani can’t withstand cold weather and may wither during winter. 

When you want to curb this shortfall, you can plant it in a pot and keep it indoors where the temperatures are ideal. The potted plant or potted bonsai can be moved outside during summer. 

If you grow the plant indoors in cold climates, get a south-facing window to let the plant have an ideal dose of sunshine. That said, you should limit the amount of sunshine received by the plant to prevent scorching of the foliage.

In warm climates, it is advisable to keep the plant outside in sunny spots during the afternoon from spring to autumn as long as there are warm nights temperatures. Desert roses are sensitive to climate changes; hence you have to acclimate the plant to sunnier conditions in spring and debug it before bringing it to winter.

Desert roses are accustomed to desert soil which is always either sandy or well-drained. Using the plants in well-drained sandy soils helps them grow faster and reduces losing some of the foliage due to soil clogging. 

If the soil is too wet, it can also promote the rotting of the plant. Also, give it a healthy amount of sunlight to help it absorb water.

Watering

All plants need water, but the amount and frequency of the watering differ greatly depending on the origin of the plant. Adeniums are very sensitive to water, and improper watering can easily kill these plants. 

The plants have adapted to the tropical desert weather that allows them to grow during the rainy season and become dormant in the dry season.

The plant is part of the succulent family that stores water in the leaves, stems, or roots. In the desert rose, the water is conserved in its bulbous stem called the caudex. A fat stem indicates that the Sabi star is healthy, while a thin one is a cause for alarm and a reason to increase moisture. You should match the watering needs of the plant to the different seasons of the year.

The watering needs of a Desert Rose depend on the season and climate.

Armed with its desert survival tricks, a desert rose is a plant that needs moderate amounts of water and should only be watered when the soil feels dry.  You can test how dry the soil is by inserting your finger in the soil. Always use a quick draining pot to reduce clogging. 

Saturate the soil until the water drips from the bottom of the pot and empty the pot drip tray after each watering

The plant should be watered in spring and summer, but the water level is reduced during autumn and winter. You can water the desert once every two to four weeks so that it can become dormant. The dormancy helps the plant flower in springtime.

Adding Fertilizer

A desert rose is a low-maintenance plant that does not need lots of fertilizer. Good fertilizer application goes a long way in ensuring that the outdoor plant will blossom well in summer and spring. 

A good regimen should be to fertilize the plant twice or thrice in spring and summer with a balanced mix of all the major nutrients. All the fertilizers used should be water-soluble.Indoor Adeniums should be fed weekly with a water-soluble fertilizer diluted to half strength. Phosphoric fertilizer and bone meal to boost the bloom. 

Using the right fertilizer for your Desert Rose will promote the formation of flowers.

Use high nitrogen granules in early spring with a slow-release in June and before November. Slow-release fertilizers are often coated with polymers that allow them to release nutrients for at least eight weeks; some fertilizers may even release nutrients for up to twelve weeks. 

The recommended usage for the fertilizer is 20-20-20 balanced nutrients containing Nitrogen, Phosphorus, and potassium.

Pruning

A desert rose has a healthy amount of foliage that can become problematic if not taken care of, sometimes becoming long and leggy over time. 

Some overstay branches may also be infected with diseases or infested by pests that simple pruning can help control. While pruning is possible all year round, a flush of new growth is susceptible to cold weather damage; hence the best time is early spring before the plants start blooming.

Pruning away long and leggy branches of a Desert Rose is essential for the succulent to thrive.

Pruning away long leggy branches encourages the growth of more flowers. The pruning procedure is quite simple:

  1. Sterilize the cutting blades before pruning them by wiping them with a 10% bleach solution or rubbing alcohol. If you cut deceased growth, then sterilize the blade between each cut. 
  2. Remove cold damaged growth whenever new growth appears in late winter or early spring. 
  3. Prune branches that cross or touch other branches avoid cutting old branches as they may have buds or blooms.

Pest Control

A desert rose is pretty hard and poisonous to humans, dogs, and cats, yet it attracts pests such as scale, mealybugs, and spider mites. 

You can use a cotton ball washed in alcohol to wash away the insects. If caterpillars have infested the plant, shear away infested leaves and freeze infested parts for a day to clean and kill caterpillars. 

Handle fungal infections by  spraying foliage with a general fungicide and pruning any unhealthy looking stems

Flowering

One of the greatest attractions to a desert rose is its colorful petals when it blooms over spring. Any healthy and mature desert azalea will bloom for several weeks in summer and spring under the right conditions. Some new and improved species may bloom all year round. 

Exercise patience while waiting for your well-tended plant to grow, as it may not bloom overnight. Desert roses may take several months before blooming.

A recently repotted plant may take time before blooming as it takes its efforts from flowering to focus on growing roots in the new pot. You can improve a potted desert rose bloom ability by giving the plant a day or half more sunshine during the warm weather. 

Water it well and ensure the soil is well-drained in the warm season and keep the plant on a dry cycle to mimic its natural conditions to maintain an excellent flowering pattern. 

Apply a good balance of fertilizer in summer and spring, emphasizing phosphorus, which may aid in flowering. Poor care and maintenance may lead to delayed or no flowering in spring and summer.

Conclusion

A desert rose is low maintenance and a beautiful plant you can have in your home or garden. 

However, ensure you repot it in a bigger pot annually or biannually and follow the maintenance tips discussed. 

Check it for pests or withering and to apply the instructions when necessary.

Ultimate Guide: How to Care for String Of Bananas?

String of bananas plant

A string of bananas is a wonder plant that any succulent enthusiast would love to have in their indoor garden. Its name may be contradictory, and you may be tempted to think it has something to do with the popular banana fruit. Far from it, this is a succulent vine plant that derives the name from its banana-shaped leaves.

This is an easy-to-care-for houseplant native to South Africa. It’s a perfect option for someone who doesn’t have a green thumb and needs something to decorate their space with minimal effort. The string of bananas will help you create a tropical vibe and give your home a much-desired ambiance.

So, how do you care for a string of bananas? A string of bananas thrives best when potted in hanging baskets. Use porous well-draining soil and ensure it gets bright but indirect light. As a succulent adapted for the warm weather, a string of bananas can comfortably handle temperatures of up to 110 degrees. Its unique growth pattern includes trailing vines, and thus, using strong to support the vines helps it thrive and extend even more.

Are you looking to grow a string of bananas but not sure where to start? This ultimate guide will help you care for a string of bananas in the best possible ways. It takes you through its growth circle and offers great insights on how to take care of it and keep this succulent vine healthy and growing strong.

Propagating String of Bananas

You can easily propagate string of bananas through its cuttings. The vines are sturdy enough to support themselves. Follow these steps when propagating string of bananas:

Cutting the vine – Cut a healthy stem from the main plant. The cutting should have at least three or four leaves on it and include some of the roots as well.

Potting medium – Use any moist potting mix to start with, such as cactus/succulent soil mix or perlite-based seedling mixes (preferred). Add 50% of perlite or pumice to your potting mix.

You should use moist soil mix when propagating the String of Bananas.

Rooting the cutting – Take a clean plastic container and fill it with enough water until about an inch of water remains at the top. Dip in half-inch deep rooting hormone powder (optional) and tap off excess on the side of the container.

Place string of bananas cutting in the water and gently push down until it’s halfway submerged. Place a container on a tray or saucer to collect runoff during watering and cover with clear plastic wrap (cling film).

Let the cuttings sit undisturbed for about two weeks before removing from water; this allows enough time for roots to form at least an inch long.

You can plant the cuttings in individual pots filled with moistened potting mix. Make sure to cover all exposed roots and keep them warm during this period.

Water Requirements

String of bananas may be succulents, but they still need enough water to avoid getting stressed. Watering frequency varies depending on how much sunlight it gets and the temperature of your room.

During spring/summer: water every two weeks when soil is dried up to your first knuckle. You can tell if a string of bananas needs water by checking for moistness in the potting medium.

During winter: water once a month when soil is dried up to your first knuckle and keep it warm (75 degrees). Temperatures below 55 degrees can cause root rot, so avoid this at all costs.

You should water the String of Bananas every two weeks in summer and once a month in winter.

Light Requirements

String of bananas thrives in bright but indirect light. Place it near east or west-facing windows to receive ample sunlight during the morning and stay out of the direct sun all day long. It can tolerate some full afternoon sun if it gets adequate water to prevent wilting. However, too much sunlight may burn the leaves.

Ensure there is enough ventilation in your room to prevent string of bananas from getting too hot. Keep it away from heat sources such as radiators and vents or fireplaces that can dry out the air around them.

The String of Bananas requires indirect sunlight as too much direct sunlight may burn its leaves.

Temperature and Humidity

String of bananas can tolerate light frost, but it’s best to keep in temperatures above 64 degrees Fahrenheit. String of bananas thrives in high humidity, so increase the ambient room temperature by grouping together with other plants or place a humidifier nearby for optimum growth. This will help prevent dry air conditions, which may cause leaves to turn yellow.

Potting and Repotting String of Bananas

String of bananas does best when potted in hanging baskets. Use porous well-draining soil and ensure it gets bright but indirect light. As a succulent adapted for the warm weather, string of bananas can comfortably handle temperatures of up to 110 degrees. Its unique structure makes it easy to identify when watered and provides a fun display.

The pots should be large enough to accommodate the string of bananas roots. Ensure there is adequate space so that water doesn’t collect at the bottom and rot the roots. For hanging baskets, be sure to use sturdy hangers that can hold the weight of string of bananas without tipping over.

Hanging baskets are the perfect choice when it comes to potting the String of Bananas.

Common Pests/Diseases

Even with proper care, pests and diseases may attack your string of bananas plant. Treating it early is key so as not to compromise its overall health. Here are some common problems you may encounter and how to treat them.

Pests

Thrips – These are tiny insects noticeable by the damage they inflict on leaves, causing yellow spots, scarring, or stippling (irregular white patterns). Apply an insecticide containing neem oil when thrips appear in large numbers. Keep it out of reach of children and pets. You can also apply Diatomaceous earth to the soil every few weeks, which will help control thrips among other insects such as spider mites and mealybugs.

Mealybugs – These are tiny white bugs that feed on plant sap, causing leaves to turn yellow or appear dry and dusty, eventually leading to leaf drop. To treat for mealybugs, uses a cotton swab dipped in alcohol or apply an insecticide containing neem oil directly onto the affected plant parts.

Mites – These are spider-like pests that appear as tiny dots on leaves and stems but do not cause any noticeable damage until they have multiplied significantly; at this point, you will notice areas of leaf yellowing and dropping as well as webbing on the leaves. To treat for mites, apply an insecticide containing neem oil directly to affected plant parts every seven days until pests disappear.

Diseases

Powdery mildews – These are fungal diseases that appear as a white powdery-like growth on leaves and stems and the soil. While powdery mildews are not usually fatal, they do weaken plant defenses, so you will need to treat them immediately before they spread or cause further damage. To treat powdery mildew, apply a fungicide containing myclobutanil directly onto affected areas of the plant every seven days until the mildew disappears.

Downy/Verticillium wilt – These are fungal diseases that cause the leaves to droop and become water-soaked. It also causes yellowing on one side of the leaf and eventually dies off entirely. To treat for downy or verticillium wilt, remove affected leaves as soon as you see the symptoms. You can then apply a fungicide containing myclobutanil directly onto affected areas of the plant.

Other Common Issues with String of Bananas

Root rot – This is common when plant roots are constantly wet, typically due to a lack of drainage in the soil. To treat for root rot, ensure your string of bananas has proper drainage and that you aren’t overwatering it or grouping together with other plants, which will add more humidity into the air.

A lack of leaves on the soil’s top – this is typically the result of overwatering or insufficient light that causes root rot, leading to an overall unhealthy plant. To treat for lack of leaves on top, water string of bananas less frequently and make sure it has adequate drainage in its pot while providing bright but indirect sunlight

Reddened leaves – This is often a result of cold drafts, low humidity, or insufficient light. To treat for reddened leaves, make sure the string of bananas is in an area with bright but indirect sunlight and keep it away from drafts. Also, ensure there’s plenty of humidity by misting the plant regularly

Failed vine cuttings – A lack of water typically causes this after planting. You can prevent it by making sure vines are well-watered after planting until they have started to take root.

Pruning & Maintenance

String of bananas plants needs pruning every few months for it to maintain its beautiful shape and lush foliage. Pruning also encourages new growth along with more flowers. It’s best to prune when the plant is young to encourage it to grow into a manageable size that fits in your home or outdoors.

The best way to prune string of bananas is to remove dead leaves and stems growing inward towards the center. This will promote growth along its outer edges where you can see new foliage emerging from.

String of Bananas Toxicity

String of Bananas is closely related to Senecio rowleyanus (String of Pearls), known to be mildly toxic to humans and animals. It is safe to use as a house plant but should be kept out of reach from pets and children because it can cause some skin irritation upon contact. In case of ingestion, contact the Poison Control Center immediately.

This easy-to-grow houseplant requires minimal effort, making it a great choice for anyone who likes low-maintenance plants in their homes or offices. Hanging string of bananas plants is great for indoors or outdoors in areas that receive at least six hours of sunlight per day.

8-golden-rules-for-watering-a-jade plant

Watering A Jade Plant? No matter the type of jade plant you have, this succulent is well known for its longevity. The plant’s leaves are usually rich green. However, improper watering of a Jade plant turns the leaves yellow. Therefore, it is important to follow some rules when Watering A Jade Plant.   

These 8 simple rules for Watering A Jade Plant will guide you to do a perfect job. It’s an easy plant to sustain, and once these guides are followed to the latter, the plant will thrive even in harsh conditions. Following the rules when watering this active plant is essential.

1. Know When the Plants Need Water

The jade plant can go for long periods without water. Jade always shows signs when it is thirsty. One of the primary signs includes leaf fall, leaves fade, and brown spots appearing on the leaves. Witnessing the above signs? It is time for Watering A Jade Plant. Use the finger/skewer method to test the moisture of the water. Dip your finger in the soil a few inches and take it out after a few seconds. If the soil sticks to your finger, the soil is moist. But if the finger is dry, the plant needs water.

Make sure your Jade Plant requires water before you water the succulent.

Drying and browning of the leaf tips is another indicator that your plant needs water. These signs can also appear when the plant has been under-watered for a long time. When the leaves wilt, it means that the plant has been dehydrated for a while. 

2. Use The Right Amount of Water when Watering a Jade Plant

The blooming of your succulent plant depends on how much you water it. Variables like climate, temperature, and humidity can influence the rate at which you water the plant, but the amount of water should remain the same. When watering a jade plant, soak your plant until the water trickles out the base of the pot.

This ensures that the water thoroughly infiltrates the soil to enable the root to uptake the moisture required. Proper soaking of the plant also ensures that the roots can grow down into the soil and mature. It is good for the plant’s well-being and increases the plant’s resistance to drought.

When Watering a Jade Plant, using less water, it moistens the upper part of the soil, therefore, not reaching the roots. If this process is repeated continuously, it causes the plant leaves to wilt with brown spots. These are signs of drought stress.

3. How Often to Water Jade Plant

Jade plant has particular adaptations to growing in dry climates with infrequent rainfalls. Therefore, they prefer dry conditions and tend to be very susceptible to problems associated with overwatering. Before watering your jade plant, you need to ensure that the top two inches of the soil are dry.

You should water your Jade Plant only when the soil is dry.

Soaking the plant well and leaving the soil to dry out, replicates the plant watering conditions of its natural habitat. The conditions include sudden rain followed by a period of drought and high temperature.

 To grow a jade plant successfully in your home, you must emulate the conditions of their native environment. Jade plant watering frequency is dependent on several factors like climatic conditions of the place, humidity, size of the pot, and the type of soil.

Watering A Jade Plant during the winter

Whether the plant is indoors or outdoors, the demand for moisture can fluctuate according to the season. During the winter season, the jade plant requires less watering as the rate of water evaporation is low due to cooler temperatures.

When this season comes, you must check on the soil’s moisture through the drainage holes and adjust the watering frequency. This will ensure that the soil can dry out entirely between the bouts of watering.

If the plant is indoors, you can check if the plant is near a heat source, such as a radiator which can cause the temperatures to increase, making the soil dry out quickly.

Watering A Jade Plant during summer

During the summer season, growth in the jade plant can slow down significantly due to the high temperatures. The summer dormancy reduces the jade plants’ demand for moisture. This is a survival strategy for the plant to conserve water in their harsh native environments.

During this period of dormancy, the plant should be less watered as they are sensitive to excess moisture, which causes root rot.

At this period, the temperatures can sometimes be very high increasing the evaporation of water from the plant. This may make the leaves fade. At this point, you need to increase the frequency of watering the plant to prevent it from dying.

4. Choose Well-Drained Soils to Avoid Overwatering.

Good watering practices should be in conjunction with a well-drained soil mix to avoid root rot. Ordinary potting soil retains a lot of moisture for the drought-tolerant plant and may lead the plant to show some signs of stress. 

Potting mixes containing peats also tend to repel water when they dry out, causing water to run off the soil’s surface and preventing moisture from reaching the roots, causing drought stress.

Using a well-draining soil mix is essential for growing a healthy Jade Plant.

For the health of a jade plant, grow jades in cactus potting mix or particular succulent soils. These soils tend to mimic the specific well-draining soil, which is a characteristic of a succulent native environment.

Suitable soils will help you maintain the perfect moisture balance for jade plants and prevent the effects of overwatering to keep your jade plant healthy.

5. Water your Jade Plant in Pots with Drainage Holes

Watering your jade plant in pots with drainage holes is essential because it will not tolerate damp soil. Drainage holes allow excess water to escape from the pot. A pot with drainage holes at the base is a good way of detecting if your plant has been sufficiently watered.

Pots with drainage holes are a good way of detecting whether the soil is moist or dry so as to know whether the jade plant should be watered or not.

 A jade plant is watered in a pot without a drainage hole; it causes water to pool around the roots and causes the leaves to become yellow and translucent. These can also lead to root rot or darkening of the leaves.

6. Avoid Salty Water When Watering the Jade Plant.

If the water running out of your taps is salty, avoid it on your jade plant. When salty water is used regularly, the water evaporates from the potting soil leaving behind the salt. The root may absorb an excessive amount of salt, which moves up through the stem to the leaves, causing tip burn.

As the soil becomes more concentrated with salt, it blocks the passage of the water up the plant. The plant finds it harder and harder to take up water. Water-absorbing root tips are killed with these increasing menaces, and the plant begins to wilt and drop leaves.

 Salt can also result from the fertilizers, which dissolve in water and turn into soluble salt. After fertilizing, it is essential to water the plant correctly to wash away its salt. It is also good to leach the plant after some time to remove the excess salt.

7. Water the Roots and not the Leaves.

 The Jade plant is challenging but is susceptible to brown spots on the leaves due to fungal infections. The brown spots are curable and preventable with proper treatments. Prevent the brown spots to avoid water spills on the leaves of the jade plant. A fungal agent causes the leaves of the jade plant to develop rust-like infections that will affect the appearance of the plant and may persist if not treated early.

When watering a jade plant, ensure that the water gets into the roots of the plant only. Water should be poured out slowly to prevent spillage into the leaves. During the winter season, spilled water does not quickly evaporate from the plant. This water tries to get into the plant, making way for fungi.

8. Consider the Size of the Plant and That of the Pot

The size of the jade plants determines the amount of water required by the plant. If the plant is large, give it more water as water uptake is high, and the evaporation rate is also high due to surface area. When the plant is small, give less water because the root system is yet to mature, hence the slow water intake rate. The evaporation rate of the plant is also low due to the small surface area.

Always consider the size of your Jade Plant to determine its watering needs.

The size of the pot will determine the frequency of watering the jade plant. A big pot has more soil soaked in; hence it may stay for long with water. In such a pot, watering frequently denies the plant space to dry out. Apply water less frequently, in a more extensive pot.

In a small pot, the evaporation rate is high, and the pot can hold little water.  Watering should be done more frequently to ensure that the plant has enough of it.

Bottom Line

Setting out a schedule on how to water jade plants is not a bad idea. But note that the jade plant may require more or less watering at different times of the year. The Jade plant is a great plant with clear signs of overwatering or underwatering. Prioritize these signs, and start rectification immediately.

Jade plant is not that plant that will demand much from you; it expects you to follow the above rules.

How To Save A Rotting Air Plant?

Air plants (Tillandsia) are truly unique types of plants. Think about it; they can survive without soil and only need humidity, air, warmth and light. Unfortunately, these plants can also die if their care requirements aren’t met. Air plants that have been neglected may start to show signs of rot or decay. The good news is that it’s easy to save an air plant that has started to go bad.

So how do you save a rotting air plant? The best way to save a rotting air plant is by practicing proper watering techniques. Get rid of the old water in your air plant’s container, then mist it with distilled water. Ensure the plant gets enough air circulation and stays out of direct sunlight for a couple of days until it shows signs of improvement. You can also place your air plant in a semi-shaded location as a temporary measure. This helps the plant’s potential for recovery.

Air plants are such a beautiful addition to any home, but it can be heartbreaking when they start to rot. If you want to save your air plant from rot, this article is for you. It will be looking at the most common causes of rot and how to fix them.

What Causes Air Plant Rot?

Overwatering

Overwatering is the main cause of rot for this houseplant. Air plants are desert-dwelling, so they don’t need much water to survive. If you’re using tap or filtered water on your air plant, make sure that it’s distilled or rainwater. Using normal drinking water will kill the plant.

Overwatering leads to the rotting process because air plants can only absorb so much water before they start to rot. This can happen even if you’re watering the plant once a week.

Overwatering is one of the most common reasons an air plant starts to rot.

Poor Airflow

If there isn’t proper airflow around your air plant, it’s going to be difficult for them to absorb water from their leaves. Poor airflow can be caused by placing your air plant in a dark, enclosed space. If you’re keeping the air plant on top of another object, then it’s blocking airflow and moisture from entering or exiting that area.

Poor airflow can also make it difficult for your houseplant to dry out after watering them. This eventually leads to rotting.

Bad Bacteria and Fungus

If your air plant is damp, it will be a breeding ground for bacteria and fungus. The humid environment that rot-inducing fungi need can easily occur in an enclosed area or if the plant becomes overwatered. This leads to slimy surfaces on the leaves of the houseplant, and white or gray fuzz can grow on the plant. If you notice this happening, then it’s time to take action.

Bad bacteria and fungus lead to rot because they break down cells of living things, eventually causing decomposition. This is why air plants that have been infected with these fungi need immediate care if you want them to survive long.

Signs Of Rot On Air Plants

While under the right conditions, air plants rarely rot, but when they do, it’s important to take action right away. If you notice any of these signs, then it may be time to save your air plant.

It looks like the leaves are wilting or curling up at the edges

If you see that some of the outermost leaves on your air plant are starting to curl inwards, it could be a sign of rot. This is because the plant cells within these leaves are decomposing, causing them to dry up and curl.

If your air plant are wilting or curling up, the succulent is probably starting to rot.

There’s brown or black spots on your air plants

If you see dark patches forming all over your houseplant, it has probably fallen victim to infection with bad bacteria or fungus. These fungi form spores that spread to other areas of the plant and can cause it to rot very quickly.

The soil smells like rotten eggs or sewage

Bad bacteria and fungus emit a strong, pungent smell that is unmistakable if you’re familiar with it. If your air plant’s soil starts to smell like this, you should take immediate action because these fungi break down the plant’s cells.

White or gray fuzz growing on the air plants

If you see white or gray mold-like growths on your air plant, it has probably fallen victim to one of these fungi that causes rot. These fuzzy patches are made up of spores, and they will continue to spread if not taken care of immediately.

Ways to Save a Rotting Air Plant

If you notice your air plant is rotting, relax; this is not the end of the world. There are several ways you can help your air plant out of this unfortunate situation, and it all starts with these simple steps:

Take Your Air Plant Outdoors For an Hour or Two

Taking your air plant outside for a few hours each day will give them some fresh air to breathe, which is often enough to save their life. This is especially true if you’ve noticed your plant has started to rot because of poor airflow. If there’s no sign of rotting, then it might take a few days before the air outside will save them from going bad.

Once you notice that your houseplant isn’t absorbing water anymore and its leaves are starting to look wrinkled or slimy, it’s time to start this process.

Remove Your Houseplant From Its Pot or Container

If your air plant is turning bad because of the potting soil you used, removing them from their container will help save them. You can accomplish this by gently pulling off any moss on top of the soil with your fingers before setting the plant aside.

Add A Little Water to Your Air Plant, But Do Not Overwater

If you notice your air plant is starting to rot because it wasn’t absorbing water properly, then the first thing that you should do is add a little bit of distilled or rainwater directly on top of its soil. After adding moisture back into this desert-dweller, wait for about an hour or two before adding any more water to the soil.

To save a rotting cactus, add just a little bit of water and avoid overwatering the succulent.

Be Careful Not To Overwater Your Air Plant Again

While it’s important that you add moisture back into your air plant, make sure not to overdo it again. It might take several days (or weeks) until the humidity around this houseplant starts to go back up again, so keep the soil moist but not soaking wet.

Use Only Distilled or Rainwater on Your Air Plant Again

Now that you’ve noticed your air plant has started to rot because of how much water they were absorbing, make sure never to use normal tap or filtered drinking water ever again. This is because water from these sources may contain chemicals, minerals and pollutants that can damage the health of your air plant.

Return Your Air Plant to Its Pot

Finally, after you’ve successfully removed the rotting parts on your houseplant leaves, start slowly adding distilled or rainwater to their soil again. After a few weeks, you can also add some moss back over the top of this desert-dwellers soil and then place it back in its usual spot inside your home or office.

For even better results, try using a spray bottle to mist the air around your plant and keep it moist all day long. Doing this will help raise humidity levels right away, which is extremely beneficial for saving an air plant that’s starting to rot due to low moisture levels in the air.

Keep Your Air Plant Clean at All Times For Better Results

The final step that you can take to help save your air plant is keeping it clean. This means you should wipe the leaves of this houseplant every day using a damp cloth or paper towel so that they won’t collect dust and other particles around your home or office space. Dust on top of their leaves will only make them rot faster, so keep them as healthy as possible by wiping them clean.

Keeping your air plant clean at all times will make it much easier to save a rotting succulent.

Stay Away From Plant Food and Other Chemicals

Do not use plant food or any other uncertified fertilizers on your air plants, as this can do more harm than good for these unique houseplants. If you notice that the leaves of your desert-dweller have started to turn brown around the edges, then you should remove them from the soil and put this houseplant away for a few days.

If your air plant isn’t absorbing water anymore or its leaves are starting to look wrinkled, it’s time to start these simple steps immediately. In case there is no sign of rotting on the leaves, then the chances are that humidity levels in their immediate environment have gone down.

To help fix this, try adding a little bit of distilled or rainwater directly on top of the soil and wait for an hour before adding more water. If your air plant is turning bad because it absorbed too much moisture from its surroundings over time, remove them from their container by gently pulling off any moss on top of the soil. Then, add a little bit of distilled or rainwater directly on top of their soil and wait for about an hour before adding more water to the container.

If you notice brown spots forming around your air plant’s leaves, then you should remove them from this houseplant entirely and put them away for a few days so that humidity levels can go back to normal.

Conclusion

Rot in air plants can be a serious problem. This is especially so if you notice brown spots forming on the leaves of this plant. If there is no sign of rotting, then the chances are that humidity levels in your home or office have gone down because it’s starting to get colder outside as winter sets in. Taking the right steps towards saving your air plant is essential. Whether it’s making sure these desert-dwellers get enough humidity levels or adding distilled or rainwater directly on top of this houseplant, you are doing their health a huge favor.

Here Are The Best Places To Put Air Plants?

Air plants (Tillandsia) have recently become a popular choice for houseplant enthusiasts, and for a good reason. These flowering perennials come in over 500 varieties, giving you a wide range for your selection. This, in addition to the vibrant colors and exotic shapes, make this succulent an ideal candidate for any indoor garden. The fact that air plants can thrive without soil, (yes heard that right) means you can come up with multiple creative ideas on where to place them at home. They can easily survive on air from their surroundings, which means you do not need to spend time regularly watering them.

So, where can you place an air plant at home? The most popular ones include the kitchen window, bathroom mirror, terrariums, natural containers, vertical gardens and wood boards. If you are looking to display it in a larger space, like the entryway or hallway, you can keep it on decorative vases and hanging baskets. Alternatively, you can keep it on a table in an office space or living room.

Positioning your air plants correctly is equally important as choosing the right place for them. This article will give you simple tips on the best positions and display them in different places at home.

Here are some of the best places to put air plants around your home:

1.     Kitchen Window

This is one place where you get ample sunlight, ensuring that this plant gets its dose for photosynthesis. The kitchen window is also one of the most overlooked areas when it comes to decoration. You can hang your air plant on an attractive holder or keep it in a cute container that you can display on top of the kitchen cabinets.

Your air plans will love the morning and afternoon sun, so make sure they get it. We suggest the kitchen window because you will be able to enjoy your plants while cooking or washing dishes.

You can put your Air Plant near your kitchen window and enjoy the view while cooking.

2.     Bathroom Mirror

 If you tend to wake up early in the morning and spend extra minutes on your makeup, then this idea might just be right for you. Placing an air plant on the mirror in your bathroom will add that extra oomph to your vanity, and it can also serve as a nice decorative piece.

Mirrors are the perfect way to brighten up your space and make them look more spacious. Instead of placing flowers or decorative items on top of these surfaces, why not go with something unique? Air plants are ideal for this purpose since they require almost no care and maintenance.

An Air Plant can be an excellent addition to your bathroom space.

3.     Vertical Garden

 If you are looking to create a vertical garden, air plants can be the perfect choice for this project. They have small root systems that easily attach themselves to various surfaces without causing any damage or mess. You can use these plants in your kitchen window sill or decorative planters to create a hanging garden.

The best thing about using air plants for a vertical garden is that you can easily change the design and composition whenever you please. Depending on your personal preference and space availability, you can use a few plants or bunch them up in cute vases.

4.     Natural Containers

 If you are looking for something more decorative, then air plants make an ideal choice for natural containers. Placing these houseplants in natural containers will help you create a symmetrical garden look. Just make sure that the container is clear and has enough breathing room for your plant to grow properly.

Keep in mind that air plants can dry out quickly, so avoid using containers with lids or any other form of cover on top of them. If you prefer using glass jars, then ensure they have enough holes or openings on the sides for air.

5.     Hanging Baskets And Vases

 If you are looking to create a hanging garden, then you can use your air plants in beautiful baskets and vases. The best thing about using these containers is that they come with convenient handles, which make them easy to carry around at home.

The best thing about using hanging baskets and vases for air plants is that you can easily move them around from room to room as needed. You don’t have to stick with one location, especially if you are looking to show off your unique plant collection.

Air Plants are ideal options when it comes to hanging baskets and vases.

6.     Decorative Vases

 If you already own a few decorative items or planters, you can use your air plants. You just need to add a few rocks or pebbles at the bottom of the vase, followed by some soil and then finally place your plant on top.

The best thing about using decorative items for air plants is that you don’t have to spend extra money buying separate containers. If you own a few vases and planters, then you can keep them on display around the house without spending extra money.

7.     Pebble Planters

Placing your air plants in pebble planters is a great way to add some color and texture to your home. You can use these containers in the bathroom, kitchen or living room as they are ideal for displaying air plants on tabletops.

The best thing about using pebble planters is that you don’t have to worry about watering them frequently. Since the soil in these planters is dry, you only need to water your plants once or twice a month.

8.     Bathroom Display

If you want to keep your air plant living indoors, then the bathroom display can be an ideal choice for this purpose. You just have to place it on a small tray and allow some sunlight inside the room.

The best thing about using this display is that these plants require very little sunlight. If placed in the right conditions, they can thrive without any issues or problems whatsoever. You can even place them near your shower area for an added decorative touch to your bathroom décor.

9.     Tabletop Terrarium

If you are looking for something with a vintage appeal, tabletop terrariums can be ideal for your air plants. Not only are these containers highly decorative, but they also come in a variety of shapes and sizes to choose from, depending upon your requirements.

The best thing about using tabletop terrariums is that you don’t need any soil or substrate at all. You just have to place a few rocks or pebbles at the bottom, followed by your air plant, and you are good to go. You can also add mosses on top of the soil if you want for added visual appeal.

If you want to set up a tabletop terrarium, make sure you add an Air Plant to it.

10.      Metal Plant Frame

Well, you may have used metal plant frames in the past for hanging floral arrangements. But did you know that these can also be used in various ways to display your air plants?

The best thing about using metal plant frames is that they come with clips on the top, making them easy to hang anywhere around the house. You don’t have to worry about drilling holes or anything else when putting these plants on display.

11.      Concrete Planter

If you are looking for some heavy-duty containers, then concrete planters can be a great choice for this purpose. You just have to choose the right kind of container depending upon your requirements and needs, followed by adding soil or substrate at the bottom and finally placing your air plant in the container.

The best thing about using concrete planters is that they are ideal for keeping outdoors, especially when you don’t need them for regular displays around your home. These can be kept on the patio or garden area without any issues, and they will last much longer than other types of containers made from different materials.

12.      Wall Mounts

Placing your air plants on top of wall mounts is a great way to add some color and texture to your home. Not only are these containers highly decorative, but they also come in various shapes and sizes, depending upon your requirements.

The best thing about using wall mounts is that you don’t need to drill holes or anything else. These ready-made planters make it much easier for you when placing your air plants on display around the house.

Final Word

Air plants are meant to bring with them a sense of calmness and peace to your home. If you are looking for something different regarding indoor décor, then placing air plants in the right kind of containers can be a great choice indeed. People generally spend extra money on patio container flowers over other types because they have an outstanding beauty about them that adds more aesthetic value to the property.

Whatever the position or container you place your air plants in, make it easy for you to take care of them regularly. Don’t forget to keep your air plants away from direct sunlight and water them regularly to make the most out of these beautiful specimens.