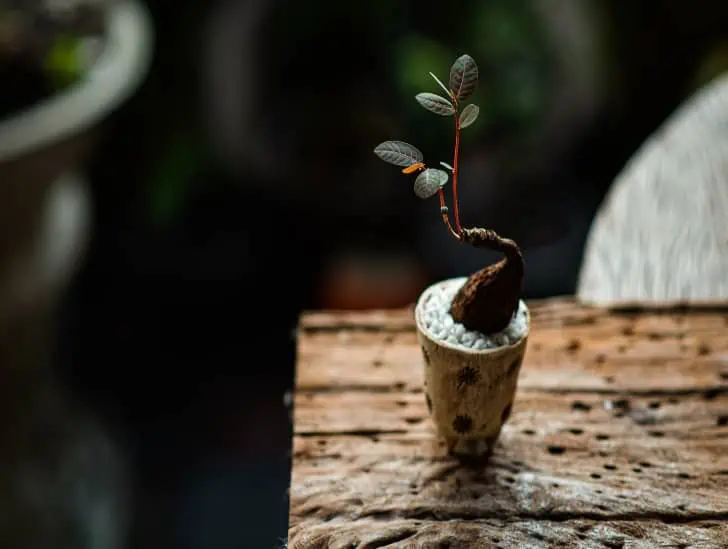
Caudex Bonsai: How to Keep Them Healthy

A litlle caudex bonsai.

Caudex bonsai is a relatively small genus of bonsai plants known for their thick and gnarled trunks. Most caudex bonsai plants are native to the Mediterranean, Africa, and Asia. These low-maintenance plants can be grown indoors or outdoors as a focal point in any garden. They can grow up to five feet tall in a regular pot. These plants have many qualities that make them an exciting addition to your plant collection. However, you must be careful with their care and provide the appropriate environment to ensure they thrive.

So, how do you care for caudex bonsai plants? First, these plants need plenty of sunlight. They should be placed in an area with lots of natural light or near a window to receive at least six hours of sunlight daily. However, direct sunlight should be avoided since it can cause severe sunburn. These plants can survive with little or no water since they are adapted to growing in desert areas. You should only water your caudex bonsai plant once a week. The plants require fertilizer to be applied steadily in relatively low dosages. Consider using water-soluble fertilizer and only apply it once a month. Caudex bonsai plants need regular pruning and trimming to maintain their shape.

This blog post discusses everything you need to know about caudex bonsai care and how to keep your plant happy. Read on to learn more.

Ideal Placement

If you live in an area with a relatively warm climate, you can grow your caudex bonsai plants outdoors throughout the year. These plants love heat and have no problem staying outdoors, even on hot afternoons.

However, if you live in a temperate climate, you should consider growing them in your backyard from spring through fall and provide them with some shade on the hottest days.

A caudex bonsai plant in a pot.
These plants love heat and have no problem staying outdoors, even on hot afternoons.

Remember that the ideal temperature for these succulents is 40 degrees Fahrenheit at night to 90 degrees Fahrenheit during the day. Anything below 40 degrees Fahrenheit can lead to irreversible damage.

Therefore, you should consider bringing them indoors when temperatures start dropping massively. But treat them for insects and other pests before you get them indoors.

Once indoors, these plants will need much light to survive the cold weather. Consider positioning them on a south-facing window where they can enjoy some sunlight.

If sunlight is insufficient, consider growing them under artificial grow lights. Don’t worry if your plant sheds leaves over the cold season. This is normal if you don’t live in a typical tropical climate.

When you take your caudex bonsai plant outdoors after winter, ensure you do it progressively, allowing the plant to adjust to the sunlight outside slowly.

That way, your plant won’t suffer sudden shock due to overexposure to intense sunlight.

Watering Requirements

Caudex bonsai plants are drought-tolerant and can survive long periods without water. But they still need some regular watering to stay healthy.

Water them every 10-14 days by allowing the soil to drain entirely between watering sessions. You may need to water them more often if you live in hot regions.

You can tell if your plant needs water when its leaves turn brown and feel crunchy.

If you live in an area with much rainfall, consider raising the pot off the ground so the excess water won’t damage your plants’ roots. Also, avoid splashing the leaves with water since it can cause rot.

A person watering the bonsai.
Avoid watering in the afternoon when the sun is at its peak.

The best time to water your caudex bonsai plants is in the morning or after work. The goal is to avoid wetting them at night since they require full sun exposure to stay healthy.

If you cannot water them early in the morning, consider watering in the evening when the evaporation rate is relatively low. Avoid watering in the afternoon when the sun is at its peak.

You must also use a suitable watering method to achieve better results.

Water at the base of the plant using a thin stream of water instead of overhead watering since it can lead to leaf-spotting and other issues.

Light and Temperature Requirements

As mentioned earlier, keeping your caudex bonsai plants outdoors all year long if you live in a tropical climate.

Otherwise, you must bring it indoors when the cold season kicks in and back outdoors during the active growing season (spring and summer).

These plants usually prefer morning sun and afternoon shade. Your plant will be okay if the nighttime temperatures don’t drop 40 degrees Fahrenheit below.

Consider positioning your plant on a south-facing window when you bring it indoors.

Avoid placing it near a chilly north-facing window because the results could be catastrophic. Position it on a west or east-facing window if you don’t have a south-facing one.

Consider using artificial grow lights if you live in an area that doesn’t receive plenty of sunlight.

However, you must be careful when choosing these lights because some emit excess light that may overheat your plants.

If you need help with this, consider consulting a professional who can recommend the proper lighting setup for your particular bonsai plant.

Doing so will help ensure that your caudex bonsai plants receive enough light during winter and stay healthy all year round.

Fertilization Requirements

Like other succulents, caudex bonsai plants don’t require much fertilization. Feeding your plants with a balanced fertilizer every three months should be enough to keep them in good shape.

A 10-10-10 fertilizer works well for these plants, but you can also use an organic fertilizer such as fish emulsion.
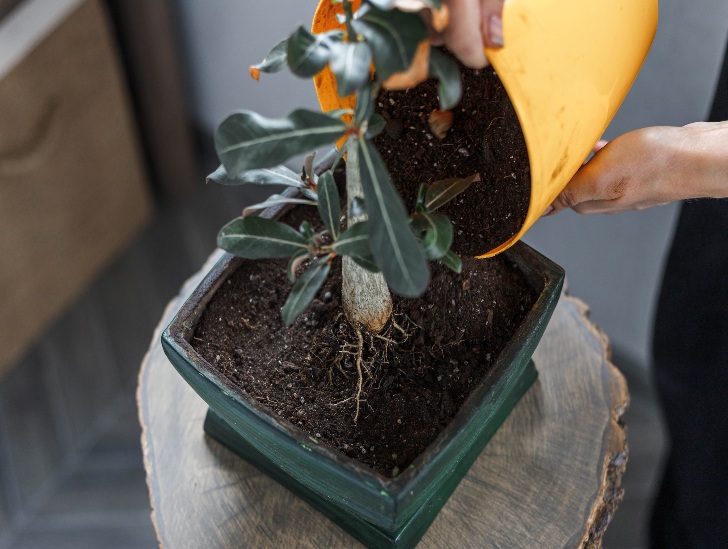
A caudex bonsai soil.
Avoid using too much fertilizer.

Dilute the solution to half the recommended strength before pouring it around the base of your plant when fertilizing.

Avoid using too much fertilizer since it can cause your plants to become over-fertilized, which is never good.

Pruning and Trimming

Caudex bonsai plants need regular pruning and trimming to maintain their shape and form. Prune every two months or so, depending on the size of your plant.

Use sharp shears or scissors when pruning since dull ones can damage the branches severely. You can also use thinning shears to reduce the size of your bonsai plant’s canopy and give it a more compact shape.

Be sure to remove the dead or spotted leaves as soon as you spot them since they can cause massive problems.

Potting and Repotting

Consider repotting your caudex bonsai plants every two or three years. The best time to repot your plant is late spring or mid-summer when the plant is actively growing.

Wait until the potting mix is completely dry before you repot your caudex bonsai plant. Gently remove it from the pot along with some soil around its roots.

A caudex bonsai repotting.
You should consider choosing a pot about two-thirds as wide as the height of your plant.

Carefully rinse the soil off the plant’s roots, then prune them. To do this, remove about one-quarter of them from the sides and bottom of the plant.

These plants tend to thrive in relatively shallow pots. So, you should consider choosing a pot about two-thirds as wide as the height of your plant.

For instance, a four-inches wide and four inches deep pot should be enough if your bonsai is six inches tall.

Once you have selected the correct pot size for repotting, fill it with a high-quality succulent soil mix. Leave about an inch or two of space between the top of the soil mix and the pot’s rim.

Finally, water your plant thoroughly after repotting it, and place it in a sunny area. Doing so will help your caudex bonsai plants thrive in their new homes.

Propagation

Most caudex bonsai plants can be propagated through seed germination or stem cuttings. Before you begin, select a healthy plant showing no disease or damage.

If you are propagating through seed germination, keep the soil moist but not soggy at all times and place the seeds in a warm area that receives plenty of sunlight.

If you are propagating through stem cuttings, look for a healthy stem and ensure it’s free of disease or pests.

Carefully snip off the stem’s top part with clean scissors, then place it in moist soil. Keep the cutting in an area with direct sunlight and wait for new leaves to grow.

Pests and Diseases

Caudex bonsai plants are generally healthy succulents that rarely suffer from pests or diseases. However, it’s still important to be vigilant and inspect your plants regularly for any signs of illness.

If you spot pests such as mealybugs or scale insects, treat them immediately with an insecticidal soap spray.

If the problem persists despite treatment, consider repotting your caudex bonsai plant and replacing the soil with a fresh mix.

It’s still important to be vigilant and inspect your plants regularly for any signs of illness.

If you notice any fungal or bacterial diseases, immediately prune out the affected areas and treat the plant with a fungicide or bactericide.

Doing so will help ensure your caudex bonsai plants remain healthy for years.

You can also use neem oil to control pests and diseases naturally. Neem oil is a natural insecticide that can be safely used on caudex bonsai plants without damaging them.

Final Thoughts

Caudex bonsai plants are an exciting and unique addition to any succulent garden. They require minimal care and attention since they’re pretty hardy.

With the proper lighting, fertilization, pruning, potting, and propagation practices, you can be sure that your caudex bonsai plants will thrive and stay healthy for many years.

Succulent Showdown: Mother of Millions vs. Mother of Thousands

Mother of millions and Mother of thousands are probably the most commonly confused succulents worldwide. The confusion is understandable since both plant names start with “Mother of” and end with different numbers. You might even think the “thousand” is the “million’s” baby because of their striking resemblance. Furthermore, both of them are grown as decorative indoor plants. However, these succulents have significant differences that can help you tell them apart.

So, what are some key differences between Mother of millions and Mother of thousands? The Mother of millions (Kalanchoe daigremontiana) is a small succulent with a rosette shape and trailing stems. Leaves are oval-shaped, gray-green in color, and have tiny hairs along the margins. When mature, this succulent produces pink flowers on upright spikes. On the other hand, the Mother of thousands (Kalanchoe tubiflora) is a relatively larger succulent with rosette-like leaves that are much thicker than those of the Mother of millions. Leaves are dense and have distinct scalloped margins. This succulent only flowers occasionally.

This blog post discusses key differences between the Mother of millions and the Mother of thousands. Read on to find out everything you need to know.

Mother of Thousands: Overview

The Mother of thousands succulent, also known as the alligator or Mexican hat plant is native to Madagascar.

This succulent is beautiful and unusual, with relatively large leaves forming baby plantlets along the edges. Interestingly, the young plants usually fall from the mother plant and take root where they land.

The Mother of thousands is a relatively rapid grower that is considered invasive. When the plantlets fall from the mother plant and take root, they can be pretty hard to eliminate since they can tolerate even the harshest weather conditions.

Mother of thousands exposed to sunlight.
The Mother of thousands is a relatively rapid grower that is considered invasive.

The leaves of this succulent tend to produce more plantlets when it feels damaged, threatened, or when death is imminent.

The mass production of plantlets is an instinctive survival mechanism to ensure the species does not become extinct.

The Mother of thousands blooms frequently and produces greenish-white flowers with purple spots. The plants can reach up to two feet tall and wide when fully grown.

Mother of Millions: Overview

The Mother of millions succulent is also native to Madagascar and belongs to the Crassulaceae family. The plant gets its common name from its ability to reproduce and spread itself rapidly by producing small plantlets along the edges of its leaves.

The leaves of this succulent are oval-shaped and gray-green. When mature, the Mother of millions produces pink flowers on upright spikes. It is a relatively small plant that can reach up to two feet tall and wide when fully grown.

Mother of million plants.
The leaves of this succulent are oval-shaped and gray-green.

The Mother of millions is drought tolerant, highly adaptable to different environments, and considered invasive.

However, the same qualities that make it a nuisance to some make it highly desirable to others. It is relatively easy to care for a Mother of millions plant and propagate it effortlessly.

Understanding the Differences Between Mother of Millions and Mother of Thousands

Now that you have a better understanding of the two succulents let’s discuss some of the key differences that set them apart:

Nomenclature

The Mother of thousands (Kalanchoe tubiflora) is also known as the alligator or Mexican hat plant. In contrast, the Mother of millions (Kalanchoe daigremontiana) is sometimes called the devil’s backbone.

The Mother of thousands is generally larger than their “cousin,” with thick leaves with distinctly scalloped margins.

On the other hand, the Mother of millions has thinner and smaller leaves with soft hairs along the edges.

Habitat & Adaptability

Both succulents are native to Madagascar, but they thrive in different environments. The Mother of thousands is adapted to dry, hot climates, while the Mother of millions prefers slightly cooler, humid climates with more moisture.

Leaf Structure

The most significant difference between the mother of millions and the Mother of thousands is their leaves’ shape.

The Mother of thousands has tear-shaped leaves that are relatively wide. These leaves grow in pairs and usually develop on the opposite sides of the stalk.

The next pair of leaves rotates at an approximately 90-degree angle allowing all leaves to get enough sunlight.

Mother of thousands exposed to sunlight.
Each leaf can have up to four plantlets. The leaves are also thin and flexible.

The leaves of a Mother of thousands plant have little ridges at the edges where young plantlets emerge. Therefore, it is not unusual to find a healthy leaf of this succulent having a complete set of young plantlets.

On the other hand, the Mother of millions plant features slender leaves that all grow in the same place along the stem (nodes).

There is nothing like what the Mother of thousands usually does regarding alternation. In this case, plantlets grow from the tips of the leaves. Each leaf can have up to four plantlets. The leaves are also thin and flexible.

Growth Habit

The Mother of thousands grows in an upright position that gets wider as it matures. The plant produces many baby plants along the edges and has relatively large leaves, making it look full and lush.

On the other hand, the Mother of millions has thin, delicate stems that usually trail downwards.

The leaves of this succulent are also relatively small, and delicate compared to the Mother of thousands. It is a fast grower and can easily fill an entire pot if left unchecked.

Appearance of Flowers

The Mother of thousands usually blooms, frequently producing beautiful pink-grey flowers in bunches, creating an incredible sight. Flowering mostly happens during spring or early summer.

Mother of millions also produces beautiful orange-red blooms on one of the stems. The flowers are usually elongated and face downwards. However, blooming only happens during winter.

Blooming mother of thousands plant.
Mother of millions also produces beautiful orange-red blooms on one of the stems.

Sometimes, the two succulents’ flowers are confused, but it is easy to tell them apart.

One thing you must keep in mind is that both plants don’t flower frequently. But when they do, the flowers are pretty stunning.

Hardiness

Although both succulents are relatively easy to maintain, the Mother of thousands is slightly hardier than the Mother of millions. It can tolerate temperatures as low as 10°C (50°F).

The Mother of millions, on the other hand, does not like temperatures below 15°C (59°F). This means that outside cultivation should be restricted to warmer climates.

Furthermore, the Mother of thousands is more drought tolerant than the Mother of millions, so it needs less water. The latter should be watered regularly to keep it healthy and green.

Propagation

Even though Mother of thousands produces stunning flowers, it doesn’t have seeds. Therefore, you cannot propagate it through seed germination. The succulents can only be propagated through the plantlets that form along the leaf edges.

A young Mother of thousands plant usually has bulbils along its leaf edges which develop into plantlets. When the plantlets shed off and fall on the ground, they rapidly grow into new plants.

On the other hand, the Mother of millions produces viable seeds during the flowering season. It means that you can propagate it through seed germination or plantlets. Natural propagation through baby plants happens in the same way as Mother of Thousands.

However, it would be best to do some things for seed germination.

First, collect fresh seeds and then store them in a paper bag in a cool place until the germination process starts. Then, soak them in warm water for 24 hours before sowing the seeds.

Finally, sow the seeds into the soil and keep them moist until germination occurs.

Workability

The Mother of thousands succulent is generally good for beginners since it is relatively easy to care for and doesn’t need too much attention. It does well in dry and moist climates as long as it has plenty of sunlight.

The Mother of millions, however, requires more attention since it tends to be a bit delicate. Therefore, extra care must be taken when watering the plant. Also, it needs proper air circulation to avoid diseases.

The succulents are also great for landscaping since they bring a unique look to the garden.

The Mother of thousands has a fuller look, while the Mother of millions is more delicate and can be used in hanging baskets or other decorative containers.

Toxicity

Both plants are toxic to dogs, cats, birds, and humans. All kalanchoes are considered toxic to pets and human beings.

They contain cardiac toxins like bufadienolide and can cause vomiting, nausea, skin irritation, and other health problems.

Therefore, always keep the plants away from your pets and children. If ingested accidentally, consult your doctor immediately for further medical advice.

Common Problems

Even though these succulents are known to be hardy, they can still succumb to certain pests and diseases. Common problems include root rot, mealybugs, aphids, scale insects, and powdery mildew.

Mother of millions planted outdoorsand exposed to minimal sunlight.
Also, avoiding overwatering and keeping them away from direct sunlight is important.

To prevent these issues, keeping the plants in an appropriate environment with proper drainage and good air circulation is essential. Also, avoiding overwatering and keeping them away from direct sunlight is important.

Final Thoughts

The differences between the Mother of millions and thousands are quite subtle. While both succulents are easy to care for, each has unique characteristics that make it stand out. Depending on your preference, you can choose whichever one appeals to you more.

Which Aloes Are Best for Your Garden?

What comes to your mind when you hear the term “aloe”? I bet you think of “aloe vera,” right? But did you know that aloe is a vast genus of succulent plants consisting of more than 500 species? These plants are known for their medicinal properties, beauty, exotic personality, and long-lasting blooms. The shape of different aloe plants is relatively similar even though there are distinguishable features in their leaf shape, flower color, and plant size.

So, what are some of the best aloes for your garden? Some of the best aloe species include aloe vera, aloe ferox, aloe aristata, aloe arborescens, and aloe marlothii. Aloe vera is the most popular of all the aloes because it has a wide range of medicinal uses and is also used in many beauty products. Aloe ferox is known as bitter or cape aloes and is native to South Africa. It has laxative properties and is often used in traditional African medicine.

This blog post thoroughly explores some of the best aloe species for your garden. Read on to find out everything you need to know.

Identifying Different Types of Aloe Plants

The aloe genus features approximately 560 different aloe species. The durability and beauty of aloe plants make them ideal for diverse climates.

The succulent can thrive in almost every location if you provide the right growing conditions. In fact, aloe is usually considered an invasive succulent species since it blooms anywhere.

While most aloe plants have relatively thick, fleshy, and pointed leaves, the exact shapes and sizes of the leaves vary based on the species.

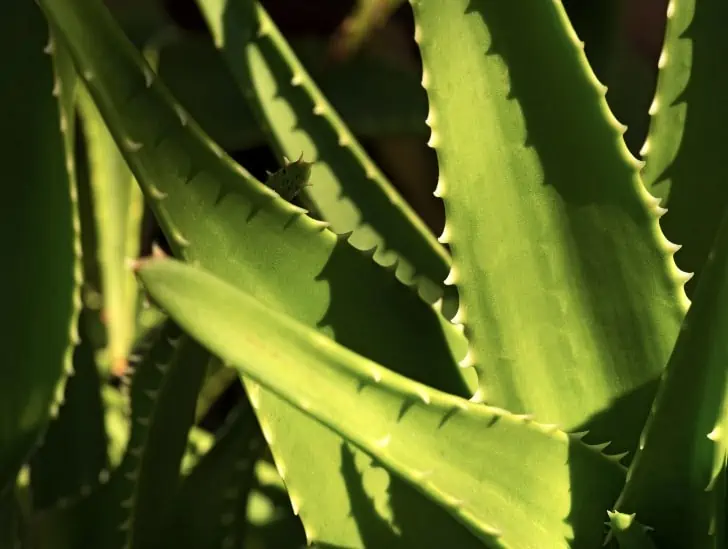
Aloe vera plant on outdoors.
Most of them have juicy flesh that is quite distinctive, depending on the aloe species.

Moreover, they come in various colors ranging from grayish-green to dark green. The plant size varies significantly, too, depending on the species.

Some species have tongue-shaped leaves arranged in a rosette, while others have leaves clustered together in a stemless form.

The leaves might have a soft and rubbery texture since they are made of rubber material. Most of them have juicy flesh that is quite distinctive, depending on the aloe species.

Which Aloes Are Best for Your Garden?

Now that you know the basics of aloe plants, let’s explore some of the best species for your garden. Here are some of our top picks to consider:

Aloe Vera

It makes sense to start with the most popular aloe species; aloe vera. We all know about aloe vera, which we must have encountered at one point.

We find it in medicines, drinks, cosmetics, and even toilet paper! It is almost everywhere, but most of us only know the image of its thick green leaves.

Aloe vera has striking features that make it stand out from the other aloe species. Its thick leaves form large “shrubs,” which look great in predominantly Mediterranean and tropical outdoor gardens.

Aloe vera exposed to sunlight.
It is suitable for indoor spaces but prefers outdoor gardens where it can grow to its full potential.

This succulent has incredibly massive blooms and can survive on rocks, slopes, and even terraces.

The color of its flowers ranges from yellow to red via orange. Some even produce flowers of two different colors on the same plant. The blooms usually last several months, especially in relatively warm and dry weather.

Aloe vera grows to about three feet tall and 100 meters wide. It can even reach up to five feet tall in some cases. It is suitable for indoor spaces but prefers outdoor gardens where it can grow to its full potential.

The succulent usually flowers in summer, but it can bloom all year round depending on the climatic conditions.

It can grow healthy and strong leaves when given sufficient nutrients. Consider using a high-quality, green plant fertilizer to achieve the best results.

Aloe Ferox

Aloe ferox is a species native to South Africa with thick grey-green leaves. Its leaves are covered in white spines, which adds an extra layer of protection and makes the plant look stunningly unique.

This aloe grows up to five feet tall and produces orange-red flowers in the winter, making it an excellent choice for gardens in all seasons.

Aloe ferox blooming.
The succulent can tolerate drought but will not thrive in waterlogged soils.

Aloe ferox also has a wide range of medicinal uses and is often used in traditional African medicine. It has laxative properties, so you should be careful when using it to treat ailments.

The aloe ferox prefers full sun and well-drained soil, with plenty of organic matter added to help retain moisture.

The succulent can tolerate drought but will not thrive in waterlogged soils, so paying attention to drainage when planting aloe ferox in your garden is essential.

Aloe Arborescens

Aloe arborescens are commonly referred to as the Krantz aloe. It is also called the candelabra aloe in some parts of the world thanks to its candelabra-shaped leaves/branches emerging from its woody trunk.

This aloe is one of the few tree-like aloe species that can grow up to two meters tall. It usually forms several pseudo trunks with small leaves that form a rosette at its end.

This aloe usually forms a stem from each leaf rosette, from which beautiful and scent-filled flowers emerge.

The Aloe arborescens are less popular than the aloe vera, but it is one of the most beautiful aloe species you will come across.

And if you keep your aloe arborescens long enough and provide it with the right growing conditions, it will produce numerous side shoots that make it relatively easy to propagate the plant.

This aloe is highly tolerant to short periods of frost and has excellent healing properties. You can apply it to your skin to alleviate itching or burning sensations.

However, medical experts warn against consuming it without proper processing since it can be toxic.

This aloe species is a great decorative addition to Mediterranean gardens and makes a beautiful bonsai.

The most common variety of the Krantz aloe is the “miller aloe,” characterized by its striking, bright orange/red flowers.

Aloe Variegata

The Aloe variegata is a rare and unusual aloe species with beautiful patterns on its pale green leaves. This succulent plant is native to South Africa and can grow up to one meter tall and wide.

Its foliage is characterized by yellowish-white stripes running from the bottom to the top of each leaf, making it look unique compared to other aloe species.

Aloe Variegata in a pot.
This succulent plant is native to South Africa and can grow up to one meter tall and wide.

The Aloe variegata is easy to grow and makes a great addition to the garden or indoors.

Its flowers are yellow-green, with each flower producing several seeds. The Aloe variegata prefers well-drained soil and full sun exposure for good growth and blooming.

It is drought-tolerant and can thrive in a wide range of soil types. The Aloe variegata is ideal for rock gardens or as an ornamental plant in containers and should be planted where it will receive plenty of natural light to help it reach its full potential.

With proper care, this aloe species can live up to 25 years and provide you with lovely, unique foliage for many years.

Spiral Aloe

The scientific name of spiral aloe is Aloe Polyphylla. The succulent is native to the mountains of Lesotho in the Southern parts of Africa and is famous for its unique rosette shape.

The leaves of the spiral aloe are thick, fleshy, and rigid, with sharp edges that form a perfect spiral pattern as the plant grows.

The colors range from light to dark green depending on how much light exposure it gets and can sometimes have a reddish hue on the edges.

The succulents usually resemble short Roman swords and are slightly curved with thick leaves. The flowers form on their long stems, usually orange, red, or yellow.

The spiral aloe is easy to care for if it receives enough light and water. It also needs well-drained soil so that it doesn’t suffer from root rot. It can tolerate some frost but cannot withstand temperatures below 20 degrees Fahrenheit.

If you’re looking for a great aloe to add to your collection, then the spiral aloe is a great choice. With its unique shape and striking colors, this aloe species will undoubtedly be a conversation starter in any garden.

Aloe Aristata

The aloe aristata is also known as the guinea-fowl aloe or lace aloe. The plant is distinctly spherical and has tightly packed leaves that form an almost flat top. The aloe aristata is native to South Africa and can grow up to 30 cm tall.

Its foliage resembles a lattice of tight ropes, hence the name lace aloe. It’s also characterized by white spots on its dark green leaves.

Aloe Aristata in a pot.
It is well-suited for container planting or as an ornamental addition to your garden.

This plant produces small yellow flowers in the summer and likes full sun exposure to reach its full potential.

The aloe aristata is well-suited for container planting or as an ornamental addition to your garden. It needs a well-draining potting mix and can tolerate short periods of drought.

Unfortunately, lace aloe is highly toxic and has no health benefits. Therefore, you must keep it away from children and pets.

Summary

Aloes are a great addition to every garden. From the ever-popular aloe vera to spiral aloe, there’s undoubtedly one out there that is perfect for your space.

As with any garden addition, research and ensure each plant will thrive in your climate before purchasing.

With the right plan and patience, you’ll have a beautiful array of aloe plants blooming in your garden.

What Is the Best Water pH for Succulents?

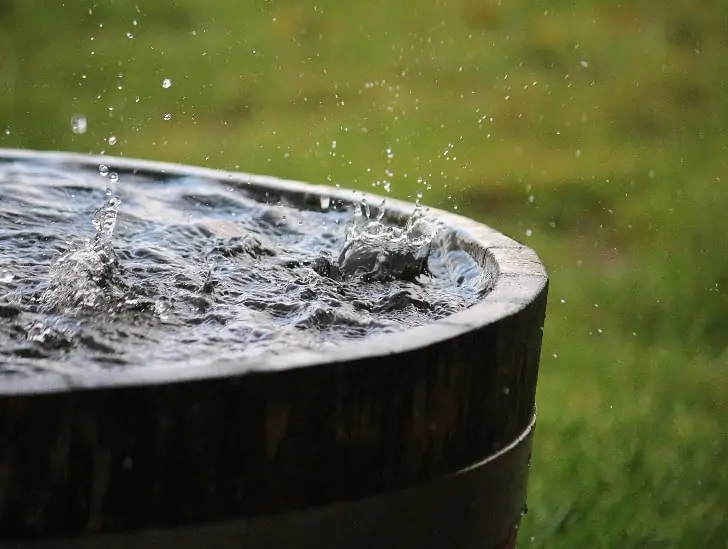
Succulent rain water.

Succulents are loved for their hardy nature and ease of care. While they tolerate diverse conditions, proper watering is essential to their survival. The easiest way to kill a succulent is failure to water it properly. Watering goes beyond correct timing and watering method. You also need to pay attention to the water’s pH level. Using the wrong type of water may cause problems.

So, what is the best water pH for succulents? The ideal water pH for succulents is between 5.5 and 7.5 on the pH scale. Anywhere within this range will ensure your plant has access to the essential nutrients needed to survive and thrive. It’s important to note that different types of succulents may have specific preferences for pH levels. For example, cacti prefer slightly more acidic water, while other succulent varieties are happy with water pH closer to neutral. Consider using distilled or rainwater when watering your succulents since it is usually close to the ideal pH range. If you are using tap water, you should test the pH first to ensure it is within the desired range.

This blog post discusses everything you need to know about the ideal water pH for succulents. Read on to learn more.

Understanding Water pH Levels

Before we dive into the ideal pH range for succulent plants, let’s first understand what pH levels are and why they’re essential.

The pH level of water is a measure of its acidity or alkalinity on a scale of 1 to 14. A value of 7 indicates neutral pH; lower figures indicate increasing acidity, while higher figures indicate increasing alkalinity.

Understanding pH levels is crucial because overly acidic or alkaline water can cause plant issues.

Too acidic water can leach essential nutrients from the soil and prevent their uptake by the roots, while too alkaline water may contain toxic salts to the plant.

Keeping the pH level within the ideal range ensures that your succulent has access to all the essential nutrients it needs while avoiding potential issues caused by incorrect water pH levels.

How To Test Water pH

Testing the pH level of your water is a simple process and can be done in two ways: with test strips or a pH testing meter.

Test strips are the quickest and least expensive way to test water pH levels, but they are less accurate than a digital tester.

pH meters are more precise and can accurately read the water’s pH level. However, they can be costly and require calibration so test strips may be a better option for the average gardener.

A water Ph stick checker.
Testing the pH level of your water is a simple process.

Once you have tested and recorded your water’s pH level, you can adjust it as needed. To increase alkalinity, add baking soda to the water.

For acidity, use white vinegar or lemon juice. Remember to test the water again after making adjustments to ensure it is within the ideal range for succulents.

What Is the Best Water pH for Succulents?

The best water pH for most succulents is anything between 5.5 and 6.6. The pH figures within this range are classified as “slightly acidic.“

A alkaline ionized water.
Urban water usually tends to be slightly alkaline, with a pH above 7.

Since Water pH is critical in nutrient uptake, you must ensure that your succulents get the right amount of essential nutrients.

Keeping the water pH level within this range will ensure your plants get all the nutrients they need to stay healthy and thrive.

Residential and urban water usually tends to be slightly alkaline, with a pH above 7.

It means you must modify it slightly before watering your succulents. The best way to acidify the water is by adding two tablespoons of vinegar per gallon.

However, rainwater is naturally slightly acidic, making it the best option for watering succulents.

Some essential minerals that can be accessed in slightly acidic water and soil include phosphorus, sulfur, magnesium, manganese, iron, and calcium.

Can I Use Slightly Alkaline Water on My Succulents?

Alkaline water usually has higher pH levels (more than seven on the pH scale). Many people believe that drinking alkaline water is suitable for their health even though no research has confirmed it.

However, just because alkaline water is considered beneficial to humans doesn’t mean it is also helpful to plants.

Alkaline water helps increase soil alkalinity; hence, few plants can survive and thrive in such conditions. Only plants that love alkaline soil instead of slightly acidic soil will thrive under such conditions.

A person watering a bonsai.
It is not ideal to use alkaline water on succulent plants.

Some alkaline soil-loving plants include barberry, calendula, lavender, and clematis. However, succulents don’t love such soil. Instead, they love slightly acidic pH, with the sweet spot being 6.

If you start and keep using alkaline water on your succulents, the soil will slowly turn alkaline, affecting your plants’ growth. Therefore, it is not ideal to use alkaline water on succulent plants.

How Does Alkaline Water Affect Succulents?

Some of the common side effects of prolonged use of alkaline water on succulent plants include:

  • The soil will slowly turn alkaline: All succulent plants can only thrive in slightly acidic conditions. While most are highly adaptive, they may struggle to grow under alkaline conditions. A succulent growing in alkaline conditions is more susceptible to death than one growing in slightly acidic conditions.
  • Nutrient deficiencies: Alkaline water makes it difficult for succulents to absorb elements such as iron, magnesium, and zinc from the soil. As a result, these minerals will not be available to the plants, and they will slowly start showing signs of nutrient deficiencies.
  • Root development is affected: Roots are the most critical organs of every plant. They help anchor the plant and absorb water, oxygen, and nutrients. However, the development of succulent roots is significantly affected when grown in alkaline conditions. The roots become weak and unable to perform their functions well.
  • Affected plant growth: In general, alkaline water retards plant growth. Not only will your succulents grow at a slower rate, but they will also be stunted.
  • Pest and disease problems: Since alkaline water retards plant growth, it makes them susceptible to pests and diseases. Pests and diseases attack weak and slow-growing plants more readily.

What Should I Do If I Have Been Watering My Succulent and Have No Idea If the Water Is Alkaline or Acidic?

The best way to determine if you have been watering your succulents with acidic or alkaline water is to check the soil pH.

Take a small shovel and carefully dig one or two inches of potting mix. Use the sample with a pH meter or soil tester kit to test for the pH level.

A soil ph meter
The best way to determine if you have been watering your succulents with acidic or alkaline water is to check the soil pH.

If the readings are between 5 and 6, the water is slightly acidic, while readings of 7 and above indicate that the water you have been using is alkaline.

If it’s alkaline, stop using it immediately and find an alternative water source for your succulent plants.

What Is the Best Type of Water for Succulent Plants?

Rainwater is absolutely the best type of water to use. It is naturally acidic, allowing plant roots to absorb essential nutrients better and faster.

It also helps the soil release essential micronutrients such as copper, iron, and manganese, critical to plant growth.

The process also helps remove unwanted toxins and chemicals from the soil, essential to plant growth.

The only disadvantage of rainwater is that it is only sometimes available. You must collect and store enough of it during the rainy season for use at a later time. However, harvesting rainwater is prohibited in some states.

Water container with water.
You must collect and store enough of it during the rainy season for use at a later time.

So, what can you do if you don’t have rainwater? The next best water is distilled water, free from toxic chemicals and additives such as fluoride and chlorine. Distilled water is also slightly acidic, making it ideal for succulent plants.

Lastly, if you can’t get rainwater or distilled water, use bottled spring water as a last resort. Spring water has the proper pH balance and contains essential nutrients to help your succulents grow healthy.

However, it’s essential to check the label of the water before using it to ensure that it doesn’t contain any added chemicals or minerals.

Avoid tap water since it contains high levels of chlorine and other chemicals that can be toxic to succulent plants. It also has a neutral pH balance which can disturb the soil acidity needed for healthy growth.

The Bottom Line

The water pH is just as important as the timing and method of watering your succulents. The ideal water pH for succulents is between 5.5 and 7.5 on the pH scale.

Test the water using test strips or a digital tester to ensure you don’t over-alkalize the soil. Rainwater is the best type of water for succulent plants, but if that’s unavailable, then distilled or bottled spring water will also work.

Avoid tap water since it contains too many unsafe chemicals for your succulents. With a suitable water pH and proper care, your succulents will flourish.

Happy gardening!

Succulent SOS: How to Bring Your Plant Back to Health

Nothing feels worse than going to check up on your beloved succulent plant only to discover that it is dying. The feeling is even more painful if the plant seemed fine the last time you checked it. Unfortunately, it can take a couple of days or weeks for succulent plants to show signs of stress which could easily lead to death. If you catch the decline in time, there is still hope for your succulent plant if you act quickly.

So, how can you revive a succulent plant? The first thing you need to do is establish the cause of the decline. Are the leaves getting mushy? Is it getting too much or too little sunlight? Is it overwatered or underwatered? Knowing why the succulent is dying will help you take steps to revive it. Once you have identified the cause, you can rejuvenate your succulent plant. For example, if your succulent gets too much sunlight, move it to a spot with more shade. If it’s being overwatered, repot the plant in dry soil and stop watering until completely dry. If it looks limp or lifeless, give it deep watering, and it will be fine.

This blog post discusses the different ways of reviving a dying succulent plant. Read on to find out everything you need to know.

Reasons Your Succulent May Be Dying and How to Revive It

The first step to reviving a dying succulent plant is figuring out what is ailing the plant.

Typically, succulent plants die when forced to live in conditions significantly contrary to the conditions in their natural habitats.

A minuature succulent.
If overwatering continues, parts of the succulent such as the stem and leaves will turn black or brown.

To save a dying succulent, you must try to recreate the conditions found in its native environment. Here are some of the most common reasons succulents die and how you can revive your plant:

1. Overwatering

One of the most common causes of succulent death is overwatering. Succulents are drought-loving plants that prefer less water compared to other houseplants.

If you put your succulents on the same watering schedule as your other non-succulent houseplants, your succulents will likely be getting excessive water.

Besides too much water, overwatering can also be due to poor soil quality and using a pot without enough drainage holes.

If the potting mix doesn’t drain well and fast enough, you risk your succulents sitting in water for too long which can lead to root rot.

The type of pot you use plays a critical role in ensuring that your succulent plants won’t get overwatered. It promotes air circulation that helps the soil to dry faster.

Succulent plants with densely packed or compacted roots may also suffer from overwatering issues because the dense roots may block the container’s drainage holes, causing an excessive buildup of unwanted moisture in the soil.

Watering a plant.
If overwatering continues, parts of the succulent such as the stem and leaves will turn black or brown.

Some early signs of overwatering are discoloration and a massive change in the leaf’s form. The plant’s leaves may turn pale or yellow from the bottom.

The next thing that happens is that the leaves will start dropping quickly. A slight sway or touch will get them off the plant.

If overwatering continues, parts of the succulent such as the stem and leaves will turn black or brown. Unfortunately, you may not be able to save your succulent if it reaches this point.

Change of color only begins if your succulent is rotting or has developed a severe fungal disease caused by too much water.

How to Revive an Overwatered Succulent

The best way to revive an overwatered succulent is to remove it from the growing container and let its leaves and roots dry. However, it would be best if you remembered that not all overwatered succulents could be revived.

Carefully remove your succulent from the growing container and shake off any excess soil. Rinse off the roots with tepid water and remove all the debris.

Please leave it in a warm and dry place for at least 4 to 6 hours to recover from the shock of being moved.

Once dried, put your succulent in fresh potting mix and repot it. Ensure the pot has enough drainage holes so that excess water will drain out effectively.

Reduce watering frequency to once a month during winter and twice a month in summer during recovery. After about two months, you can resume your regular watering schedule for succulent plants.

2. Underwatering

Since most cacti species are drought-tolerant, many gardeners mistakenly believe that they don’t need to water them.

However, even the hardest succulents need some water during their growth cycle. Otherwise, they will start wilting and slowly wither away until they die entirely if you don’t water them.

Knowing the difference between a healthy look and an unhealthy one is essential since it can help determine when your plants need more water.

An underwatered succulent usually looks dry and shriveled. The leaves of your plants may also start turning yellow or brown as an indication that they need to be watered.

How to Revive an Underwatered Succulent

To revive an underwatered succulent, water it deeply and let the excess water drain completely. Wait to water your plant again until the soil is dry to prevent overwatering.

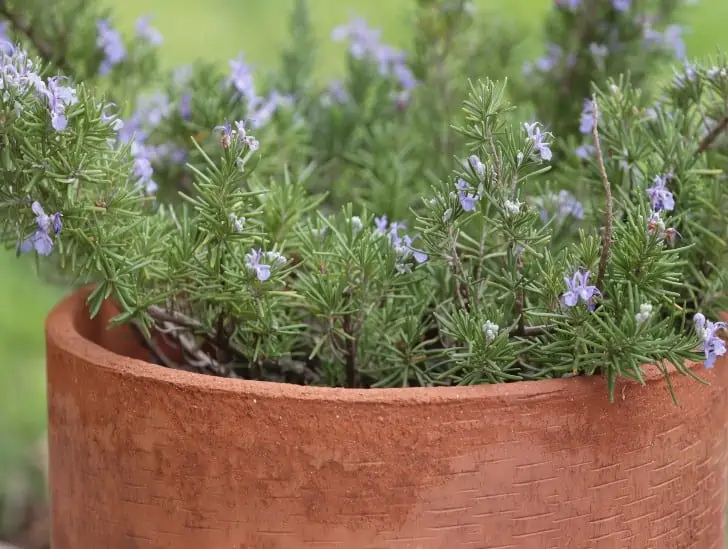
A person watering a rosemary in a pot,
Many gardeners mistakenly believe that they don’t need to water them.

Consider soaking the roots of your succulent in water for about 20 minutes before planting it in fresh potting mix. This will help rehydrate the plant and give it a fresh start.

Once you’ve repotted your succulent, water it once every one to two weeks depending on the season.

Ensure the soil is thoroughly wet or soaked before draining the excess water. You can also mist your plants occasionally to help them retain moisture if needed.

Resume the regular watering schedule based on the plant’s requirements once it shows signs of revival.

3. Too Much Sunlight

Succulents exposed to too much sunlight may also suffer and eventually die. Too much direct sunlight can cause the leaves of succulents to burn, leading to water loss and dehydration, ultimately killing the plant.

The symptoms of a succulent getting too much Sun include yellow patches on the leaves, discoloration, and wrinkled or brittle leaves.

How to Revive a Succulent That Has Been Exposed to Too Much Sunlight

If your succulent has been exposed to too much sunlight, you can move it to a shadier spot with indirect light. Also, ensure the plant does not get direct sunlight for more than 4 hours daily.

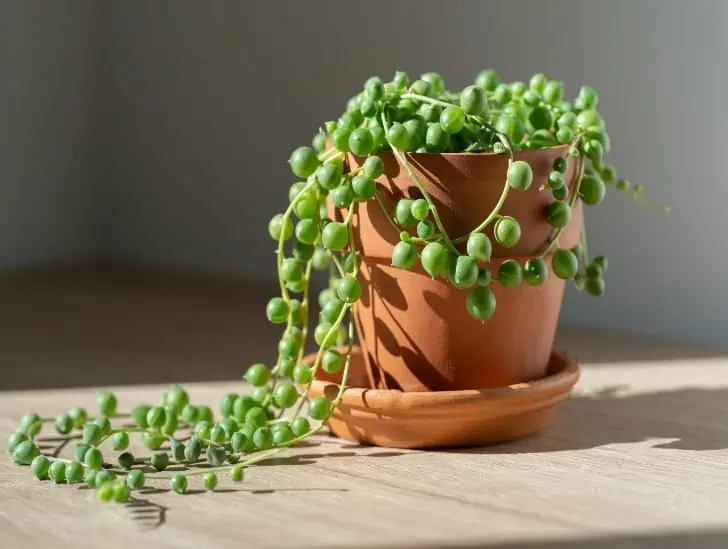
String of pearls in a pot exposed to sunlight.
Succulents exposed to too much sunlight may also suffer and eventually die.

You can also wrap your succulent in a wet cloth or newspaper to protect it from the Sun and to help retain moisture.

Water your plant only when the soil is completely dry so you don’t risk overwatering it. You may need to reduce watering frequency during the recovery period.

Once your succulent has recovered, you can move it back to a spot with more sunlight and follow its regular watering requirements. Ensure it only gets exposed to four hours of direct sunlight per day.

4. Pest Problems

Some succulents are prone to pest problems. Common pests that may attack your succulent plant include fungus gnats, mealybugs, scale, and spider mites.

Mealybug on a plant.
Mealybugs are the most common succulent pest.

These pests usually feed on the sap of your succulent and can weaken it, leading to death in extreme cases.

The symptoms of pest infestation include discoloration, wilting, and yellowing of leaves. The pests may leave a sticky substance behind, which indicates that you have a problem.

Mealybugs are the most common succulent pest that usually appears as tiny, cottony pests on your plant.

Depending on the species, they are brown, gray, or white. Mealybugs produce a sticky substance that may attract ants to your plant.

Spider mats usually create a web-like structure on your succulent. They feed on your plant leaves, leaving behind yellow or white speckles called stippling.

Scales are small grey or brown oval-shaped bugs attached to your plant’s leaves and stem. They feed on the sap of your succulent, leading to discoloration or wilting.

How to Revive Your Succulent from Pest Problems

The best way to get rid of pests attacking your succulent is by using natural pest control methods such as neem oil, rubbing alcohol, or insecticidal soap sprays.

You should also inspect the plant regularly and remove any visible pests with a cotton swab dipped in rubbing alcohol.

Moreover, you should ensure your succulents are not overcrowded and receive enough air circulation.

You can also try adding some companion plants to help attract beneficial insects, such as ladybugs or predatory mites which prey on pests.

Lastly, ensure that the soil of your succulent has good drainage and is not too moist so that you don’t risk mold formation or mildew. This can attract more pests and make it difficult for your succulent to recover.

Summary

Succulents are some of the hardiest plants but still require care and attention to keep them alive and healthy.

Pay close attention to your succulent’s needs and ensure it is not getting too much or too little sunlight, water, or space.

Furthermore, inspect your succulent for pests regularly and take steps to eliminate them.

With some patience and care, your succulent should be able to recover from any issues before long!

Discover the Benefits of Bonsai for Your Garden

Bonsai on hand.

Bonsai plants have gained massive popularity recently. “bonsai” is Japanese, meaning “a plant in a container or vessel.” These plants are delightful to have in your house since they add a whimsical element to the indoor spaces where they are displayed. And even though cultivating these plants usually requires a lot of time and dedication, many people still enjoy investing in them. In fact, it has become so popular that there is an entire bonsai culture with conventions and gatherings. So, what makes these plants so popular in different parts of the world? Let us find out.

What are bonsai good for? Bonsai plants generally bring much peace and calm into your life, making it almost impossible to get frustrated or agitated around them. They are known to be great stress relievers and will make you patient since they require proper care to thrive. They give you a massive chance to learn life’s most important lesson – working hard and being patient. Bonsai trees also purify the air, maintain humidity, and promote healthy living.

This blog post highlights some benefits of bonsai plants in your home. Read on to find out everything you need to know.

What Are Bonsai Trees

Let us first understand what bonsai trees are before we discuss some of the benefits that they offer. Bonsai is a unique art discovered many years ago in Japan and China.

However, the authentic bonsai culture is mostly associated with Japan. The practice is known as “penzai” or “penjing” in China.

Penjing is a Chinese term for potted plants that form a beautiful scenery and landscape. Penjing is a symbol of prestige and pride in China.

A healthy bonsai tree.
Bonsai is a unique art discovered many years ago in Japan and China.

Even though Penjing was originally practiced in China, it grabbed the attention of the Japanese and became an essential Japanese art for many years.

The Japanese adopted bonsai art in the 12th century, and it became a significant part of their culture.

The term “bonsai” refers to a small presentation of a tree in Japanese culture. Unlike the Chinese art “Penzai,” which is mainly reserved for the elite, bonsai is a practice that can be done by anyone who has the patience and dedication to do it.

Recently, bonsai trees have gained immense popularity worldwide, and numerous people enjoy cultivating these plants indoors. They offer several benefits, such as stress reduction and air purification.

What Makes Bonsai Trees Different?

The truth is that bonsai is an ancient living art. It is unique and different from the traditional houseplants culture.

The atmosphere required for bonsai trees to survive and thrive is created and controlled 24/7.

You can create bonsai trees by finding a way to control the growth of certain trees by applying several techniques. These techniques include root pruning, wiring, and heavy crown pruning.
Unlike other houseplants, bonsai trees require constant effort and maintenance to maintain their miniature status.

These trees are slow growers, but their seeds are similar to regular trees. It is only that they are forced to remain small.

While bonsai trees are no different from conventional houseplants, they have been miniaturized by heavy pruning and restricting their roots.

A person watering a bonsai.
It is unique and different from the traditional houseplants culture.

Therefore, any woody or perennial tree capable of producing normal branches can be trained into a bonsai. However, some tree species are naturally bonsai.

Their relatively small leaves and needle-like structures make them a great option for creating a bonsai scenery and landscape.

Nearly all plant trees can be converted into beautiful bonsai trees, but the most recommended species include boxwood, maple, juniper, and ficus.

Bonsai trees are unique and appear beautiful because they combine human art and nature.

Every bonsai tree created represents the skill and art of patient humans willing to channel their inner creativity into making small trees with unique and stunning shapes.

What Are Bonsai Good For?

The beauty and elegance of having a small tree in your house are massive. Here are some reasons why more and more people opt for this miniature landscape art:

1. Air Purification

The truth is that all plants are a gift from nature to us. Plants produce their food through photosynthesis, consuming carbon dioxide and giving out oxygen.

The air we breathe may contain harmful toxins that can’t be seen. However, plants are known to eliminate a massive number of toxins present in the air.

Therefore, keeping bonsai plants indoors can help purify the air and maintain a healthy environment.

A mini caudex bonsai outdoor.
Plants are known to eliminate a massive number of toxins present in the air.

Furthermore, keeping these plants in offices or living spaces is critical in reducing volatile organic compounds, also known as toxins. The presence of toxins in the air can damage your internal body organs.

One of the most common and dangerous toxins in the air is formaldehyde in rugs, grocery bags, smoke, and even new furniture.

Bonsai plants are known to reduce formaldehyde’s presence in the air, making them an essential part of all indoor settings.

2. Stress Reduction

Every person experiences stress in their life due to various reasons. Fortunately, bonsai trees can help reduce stress levels by creating an aesthetically pleasing ambiance.

They are known to be very calming for the eyes and mind as they bring tranquility and peace.

Studies have shown that simply looking at bonsai trees can significantly change the mental state of individuals suffering from stress.

They are known to reduce stress levels, lower blood pressure, ease muscle tension and contribute to relaxation.

It is important to note that these plants do not help cure any form of mental illness but help reduce stress.

3. Maintains Humidity

Air humidity refers to the amount of water vapor present in the air. Generally, high humidity levels are beneficial for our body since it helps in keeping the skin and hair nourished.

Bonsai tree in the windowsill exposed to sunlight.
The more bonsai trees you keep indoors, the higher the relative humidity.

It also provides a suitable environment for other indoor plants.

Bonsai trees come with well-structured tiny leaves that help maintain the humidity in closed environments like offices or homes. The more bonsai trees you keep indoors, the higher the relative humidity.

Furthermore, people suffering from respiratory ailments like asthma can benefit greatly from bonsai trees as they must ensure their environment has a higher humidity level to avoid further complications.

4. General Well-being

Staying close to nature makes a person happy. While caring for your bonsai plants, you will naturally feel good because you dedicate your time, care, and love to the plants. And you get what you provide.

As your plant grows and forms beautiful scenery, you will naturally fall in love with your passion and effort.

In fact, a full-grown bonsai plant teaches you never to give up in life. Instead, you should always be open to new lessons and experiences. Bonsai trees will lead you to make a healthy relationship with every situation you face in life.

Every time you examine and remove a damaged part of your bonsai plant, you learn how to let go of negative thoughts and traits that may be dragging you down.

5. Decoration

Are you looking to add life and vibrancy to your home’s indoor area? Bonsai trees are a perfect choice as they can act as an excellent décor piece. They come in various shapes, sizes, and colors, making them versatile.

You can customize the bonsai tree’s shapes and positions per your home’s environment. All you need to do is learn the basics of bonsai gardening, buy a plant suited to your needs, and get creative with it.

6. Breeds Patience

Every bonsai tree is a result of hard work and patience. Typically, bonsai trees have a relatively long lifespan but will only thrive if you constantly take good care of them.

Bonsai trees require constant pruning, fertilization, and watering to thrive. You must invest much time and effort in every bonsai plant to get the best results. Whether you buy or grow the plant yourself, you need much patience.

It takes time for bonsai trees to grow compared to other houseplants. These plants will teach you patience and hard work. Plus, caring for them will harness a sense of spirit within you.

Remember that good things take time; having a beautiful bonsai landscape should be your long-term goal.

To achieve this, you need daily proactive and patience. So, keep doing what you do, and the results will eventually come.

7. Bonsai Trees Make You Creative

Lastly, bonsai trees open up a world of possibilities for creativity. You can experiment with various ideas and creative techniques to form different shapes, sizes, and styles.

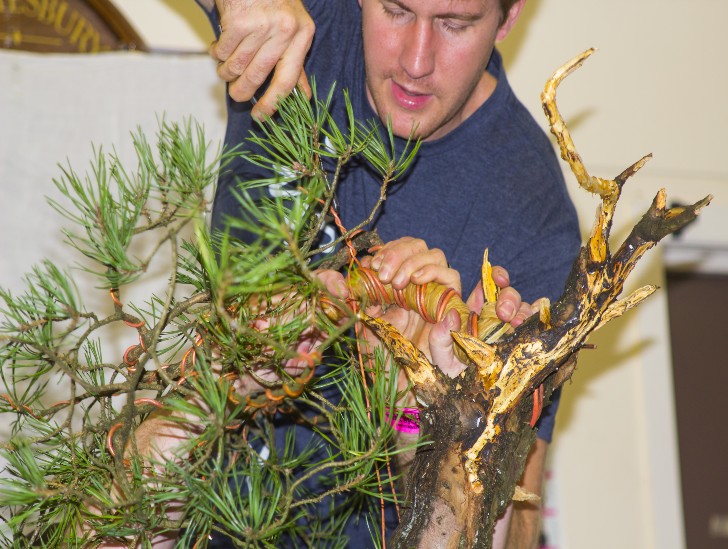
A man pruning a bonsai tree.
The more you practice, the better you become.

This allows you to use your imagination and skills to find the right shape or design suitable for a specific tree species. The more you practice, the better you become.

So, start exploring the wonderful world of bonsai gardening and unleash your creativity. You can even find thousands of ideas on the internet with amazing images to inspire and motivate you.

Final Thoughts

Bonsai trees are a combination of human art and natural beauty. Keeping these plants indoors offers many advantages, including air purification, stress reduction, and general well-being.

Bonsai trees can be a great choice for those looking for an aesthetic way to bring nature to their homes.

However, it is important to remember that bonsai plants require careful and regular maintenance. Keeping the plant healthy requires patience and dedication, but the rewards are worth it!

Terrarium Succulent Care: Signs of Over/Underwatering

A person spraying water to a Open Terrarium.

Creating a succulent terrarium is a great way to bring the beauty of nature indoors. However, it’s important to remember that succulents are very sensitive to water and must be watered appropriately to thrive. While most succulent terrarium ecosystems operate on a fine balance, you must remember that too much or too little water can have dire consequences. Too much water can accelerate mold growth, while too little water can cause your plants to become dry and brittle. Fortunately, some common signs can indicate whether your succulents are being overwatered or underwatered.

So, what are some common signs of overwatering and underwatering in a succulent terrarium? Signs of overwatering include yellowing of leaves that eventually fall off, mushy stems and leaves, foul odor from the soil, soaking wet substrate, mold growth, and plant rot. On the other hand, signs of underwatering include dry and crispy leaves, dry soil, shrinking or shriveled plants, and stunted growth.

This blog post outlines the common signs of overwatering and underwatering succulents in a terrarium to help keep your plants healthy and thriving. Read on to learn more.

How Often Should I Water My Succulent Terrarium?

Before we dive into the signs of overwatering and underwatering in a succulent terrarium, it is crucial to know how often you should water your plants.

Generally, most succulents must be watered about once a week during the active growing season – from spring through fall. They may need to be watered even less frequently during winter.

A person watering the plant in the terrarium.
Monitor your terrarium plants carefully ensuring they are not drying out too quickly.

To avoid overwatering and underwatering your succulents, it’s important to check the soil before watering. Stick your finger into the soil; if it feels dry to touch, it is ready for the water.

Another critical factor determining how often to water your succulent terrarium is the type of plants you have.

Everything depends on the succulent species since some are more tolerant to drought and can go for weeks without water.

Other species, however, may require frequent watering – especially during the summer months.

Note that succulents in terrariums tend to dry out faster than those planted in the ground because they don’t have access to moisture from the ground.

Therefore, monitoring your terrarium plants carefully ensures they are not drying out too quickly.

The proper watering technique involves spraying water to the sides of the plants and on the substrate. Avoid pouring water directly on your succulents because it may cause irreversible damage.

Remember that the time you choose to water your terrarium is also essential. Avoid watering your succulents late in the evening because the lack of sunlight will make it hard for them to dry off quickly, and this can lead to mold growth or root rot.

Signs of an Overwatered Terrarium

Now that you know how often to water your succulent terrarium, let’s talk about the signs of overwatering.

1. Mold Growth

Mold is a fungus that grows in areas with much moisture and plenty of organic material to digest. Mold on its own is not harmful to your plants but more of a nuisance to the beauty of your terrarium.

However, it could indicate bigger problems you must deal with as soon as possible.

If you start noticing signs of mold growth in your terrarium, it could mean you are overwatering your succulents.

The mold growth issue may also arise if you need a proper drainage layer in your terrarium that helps water drain away from your substrate.

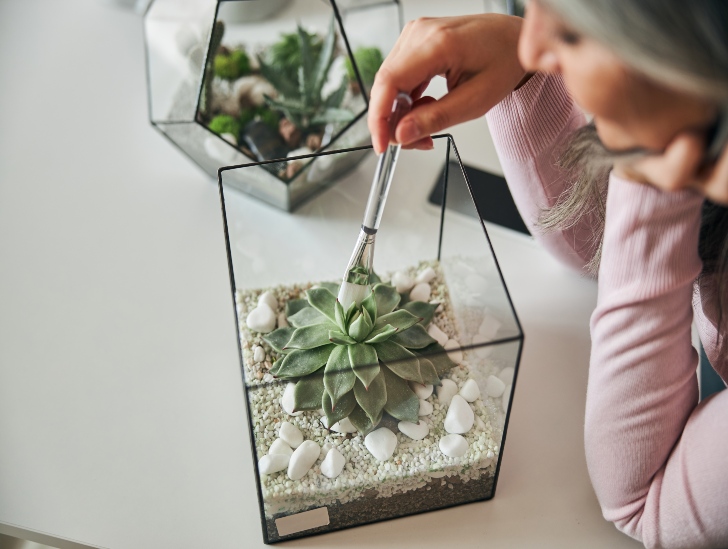
A woman brushing the plant in the terrarium.
Mold on its own is not harmful to your plants but more of a nuisance to the beauty of your terrarium.

Ideally, you should address the issue of mold growth as fast as possible before it spreads to other parts of the terrarium and create a bigger mess that will be hard to deal with.

To deal with the issue of mold growth, consider reducing the water levels in your succulent terrarium. Once the water levels stabilize, the mold should start to die on its own.

If it doesn’t work, spray some fungicide around your succulent terrarium to suffocate and kill the mold.

Building your terrarium with a drainage layer that allows it to drain away from the soil is one of the best preventive measures to stop mold growth.

2. Unpleasant Odors

If your succulent terrarium produces an odd smell that you don’t like, it could be a sign that it is being overwatered.

The smell is usually caused by bacteria and fungi growing in the moist soil of a terrarium, which can be very unpleasant.

To eliminate the unpleasant odors from your succulent terrarium, consider reducing the water levels and allowing the soil to dry out.

Add activated charcoal or perlite to your terrarium to help absorb any excess moisture.

Once you have better control over how much you are watering your plants, the smell should reduce significantly.

3. Yellowing Leaves

Yellow leaves are among the most common signs of overwatering in a succulent terrarium. Leaving your plants soaking in water for too long can cause their roots to rot and ultimately lead to their death.

A dry yellow leaf.
Yellow leaves are among the most common signs of overwatering.

If you notice yellowing leaves on your succulent terrarium plants, it’s important to stop watering them and allow the soil to dry out as soon as possible.

You should also move your succulents to a slightly drier environment and ensure you are not placing them too close together, which can cause moisture levels to increase.

4. Plant Rot

Rotting roots and stems is another sign of overwatering. Rotting roots will appear brown or black depending on the extent of the damage.

If you notice any signs of rotting in your succulent terrarium plants, it’s important to stop watering them and let the soil dry out as much as possible.

If the roots are still salvageable, try repotting them in a fresh potting mix and give them some extra light and air circulation to help them heal.

Signs of an Underwatered Succulent Terrarium

Like overwatering, underwatering can also have a detrimental effect on your succulent terrarium. Here are some signs of underwatering that you should look out for:

1. Dry Soil

One of the most obvious signs of an underwatered terrarium is dry soil in the container and around the plants. If you notice that the soil in your terrarium is dry, it’s time to add more water.

Remember that most succulent terrariums house tropical plants that require soil with relatively high water retention but excellent drainage. So, your terrarium soil should never be dry if you want to achieve good results.

The simplest way of testing for soil dryness is dipping your finger into the soil and feeling it.

A nerve plant in a closed terrarium.
If you notice that the soil in your terrarium is dry, it’s time to add more water.

If the soil feels dry to the touch, consider watering your succulents. The primary objective is to keep the soil moist but not soggy.

Check the condensation levels against the glass to avoid getting your fingers dirty.

A relatively moist substrate will clearly show beads of condensation around the glass, which means your terrarium is healthy and well-watered.

If there is no condensation or very little moisture, consider adding water to your succulent terrarium immediately.

Alternatively, purchase a moisture meter from a garden center and check the soil moisture levels with it.

This is one of the most accurate and easiest ways of determining whether your succulent terrarium needs watering.

2. Wilting Leaves

Another sign of an underwatered succulent terrarium is wilting leaves. When a plant doesn’t get enough water, the leaves start to sag and look lifeless.

If you notice this happening in your terrarium, it’s time to water your succulents.

The leaves may also become crispy and dry if the plants don’t receive enough moisture in good time. This is particularly common in succulents with large, fleshy leaves, such as Haworthias or Crassulas.

However, it’s important to note that the wilted leaves could also be caused by other factors, such as too much direct sunlight or a lack of nutrients, so you should always check for any additional signs of underwatering before adding more water to your terrarium.

3. No Visible Condensation

It is more than just the soil level that should show condensation. Typically, a closed succulent terrarium with an adequate water cycle should display condensation on the glass.

If you can’t see condensation forming on the upper parts of your terrarium, it is a sign that your succulent plants are not getting enough water.

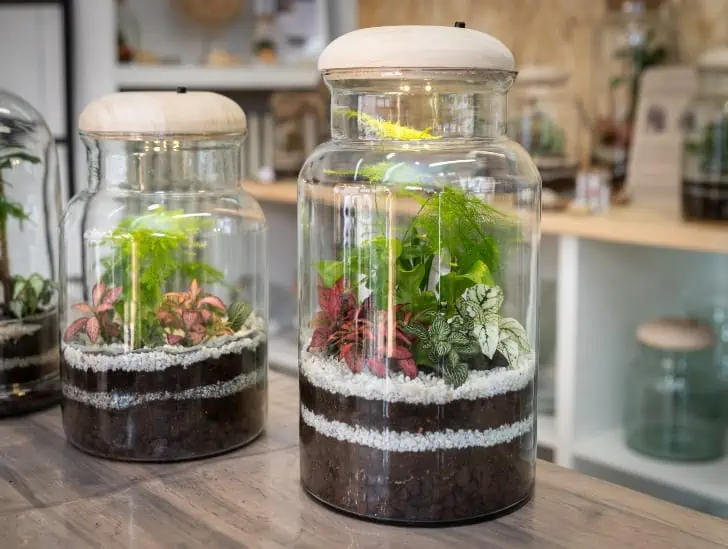
A two closed terrarium.
A closed succulent terrarium with an adequate water cycle should display condensation on the glass.

Consider adding more water to prevent dehydration and wilting of leaves in your terrarium.

4. Stunted Growth

Finally, underwatered succulent terrariums can also show signs of stunted growth. When plants don’t get enough water, they won’t grow or thrive as well as they should.

If your succulents are not growing at the normal rate, your terrarium probably has an insufficient water supply. Consider adding more water to help them grow and thrive better.

Final Thoughts

With the right level of care and attention, you can easily avoid the issue of overwatering or underwatering in your succulent terrarium. Watch out for the signs we mentioned above, and be sure to address any problems as soon as they arise.

Mastering Hardy Succulents: Your Complete Guide

A succulent in a snow.

Growing succulents as houseplants are fast becoming a trendy thing among gardeners worldwide. Many people love these plants because they are easy to care for and thrive in different environments. They are also known to be very hardy plants, surviving in extreme temperatures and drought-like conditions. Many succulent species are considered the tough cookies of the plant world!

But what are hardy succulents, and what do you need to know about them? The term hardy succulent is mainly used to refer to succulent species that can survive in freezing temperatures. They are also referred to as cold-hardy succulents. Many of these succulents require less water than typical plants because they store much water in their stems. Hardy succulents come in a variety of shapes, sizes, and colors. Most are zone 4 and 5 succulents ranging from small and compact to long-stemmed types. There are many different species to choose from, but you must fully understand your region’s climate to make an informed decision.

This blog post discusses everything you need to know about hardy succulents. Read on to learn more.

Understanding the Optimal Growth Conditions for Most Succulents

The term “hardy succulents” relates to the hardiness zone in which they grow best. Most succulents, including cacti, tolerate temperatures ranging from 32 to 104 Degrees Fahrenheit.

For optimal growth, though, many species do better when exposed to sunny locations and drier climates. As such, they tend to thrive in regions with mild winters and relatively hot summers.

Aeonium exposed to sunlight.
Many species do better when exposed to sunny locations and drier climates.

It’s important to note that some succulents don’t require full sun and can survive in the shade, but they will still need light for photosynthesis.

And it is not just about the amount of light received. Most succulents hate being exposed to freezing temperatures since they are highly susceptible to frost damage. You should move them indoors if temperatures drop below freezing point.

On the contrary, cold-hardy succulents have adapted to survive in very cold environments and can tolerate temperatures as low as 0 degrees Fahrenheit.

These plants are perfect for gardeners who live in colder climates and still want to enjoy the benefits of having a succulent collection.

What Makes a Succulent “Hardy?”

Surprisingly, some succulents can survive in temperatures below freezing. However, it is essential to differentiate between regular and hardy succulents.

Regular succulents cannot withstand long periods of extreme cold weather and will likely die if exposed for too long.

On the other hand, cold-hardy succulents have adapted to survive in cold climates and are considered hardy.

They have adapted mechanisms that enable them to survive extreme temperatures and are generally much more challenging than regular succulents.

A echeveria in a windowsill exposed to sunlight,
It is essential to differentiate between regular and hardy succulents.

One of the most common adaptations is that some species produce thick, waxy coatings on their leaves to prevent water loss due to evaporation. This helps reduce the risk of freezing damage in cold climates.

They also store more water in their leaves and stems than other succulent varieties. This allows them to survive extended drought periods or extreme temperatures with little maintenance.

Do We Have “Soft” Succulents

By now, you must be wondering if we also have “soft” succulents. The simple answer is yes. While hard succulents are well adapted to surviving in cold environments, soft succulents are more sensitive to frost and can easily suffer severe damage.

These plants are adapted to relatively warm temperatures and can’t tolerate anything below 40 degrees Fahrenheit.

When temperatures drop below freezing, they don’t have appropriate mechanisms to deal with the extreme cold.

The water stored in their cells starts to freeze when temperatures are relatively low, leading to irreversible damage.

If you don’t take appropriate measures to bring the succulent indoors before things worsen, its leaves will turn brown and get mushy/soft.

Sometimes, you can save frost-damaged succulents by pruning the saggy brown parts and moving them to a relatively warm location.

However, some succulents sustain extensive damage within a relatively short period making it hard to save them.

That is why it is critical to keep a close eye on your succulent during winter and protect it from extremely cold temperatures as soon as you notice signs of stress.

Tips For Growing Hardy Succulents

If you live in a colder climate and want to incorporate hardy succulents into your garden, you should keep a few tips in mind.

The most important thing is to choose the suitable species for your region. Cold-hardy succulents come in various shapes and sizes, giving you plenty of options.

You can use a cloche or plastic covering to keep your succulent safe during winter or cold nights.

A blue spruce with snow.
Cold-hardy succulents come in various shapes and sizes, giving you plenty of options.

This will help insulate the plants and create a warm environment to survive frost damage. You can also bring the plants indoors to protect them from freezing temperatures.

Finally, remember that hardy succulents will still require proper maintenance and care. They need adequate sunlight and water during their growing season.

Fertilizing your succulent at least once a month will help it stay healthy and strong throughout the year.

Water Requirements for Hardy Succulents

One of the reasons succulents are popular houseplants is their low water requirements.

Most hardy succulents need less frequent watering than other plants and can survive drought-like conditions.

However, they still need some water to survive and thrive. When succulents actively grow and produce new leaves during summer, you should water them every 10-14 days.

When the plants aren’t actively growing in winter or other cold months, you can reduce the watering frequency to once a month or even less.

Sunlight Is Still Key

Being hardy doesn’t mean that these succulents don’t need sunlight. Like any other plant, hardy succulents also require adequate sunlight to stay healthy and strong.

Most of these plants prefer bright, indirect light throughout the day. If you are growing your succulent outdoors, ensure it gets at least 4-6 hours of direct sunlight daily.

If that isn’t possible, you can use artificial grow lights to supplement the sunlight your succulent is receiving.

Consider using high-quality artificial lights such as LED lights or fluorescent bulbs for better results.

Keep the light source at least 12 inches away from the succulent to avoid burning its leaves and flowers.

Can Hardy Succulents Survive in Hot Climates?

Given that these succulents are well adapted to cold climates, many assume they cannot survive in hot environments. This isn’t the case.

Most hardy succulents can tolerate high temperatures for short periods and cope well if the other growth conditions are right.

A sedum exposed to sunlight.
Protecting them from strong winds is advisable.

However, if you live in a hot climate and want to grow these plants without, ensure they have access to plenty of shade, especially during summer.

Protecting them from strong winds is advisable since they can cause excessive drying out and damage their delicate leaves.

Keep in mind that these plants require more frequent watering during summer than they do during winter.

Common Hardy Succulents

Depending on your region’s climate and preferences, you can choose from different types of hardy succulents. Here are some of the most popular ones:

1. Sempervivum (Hens and Chicks)

These low-maintenance succulents look great in rock gardens or containers. They come in various shapes, sizes, and colors and can tolerate freezing temperatures. Many people love to use them in winter decorations.

2. Echeveria

These gorgeous succulents are rosette-like and come in various colors, including pink, purple, red, and orange. They can tolerate cold temperatures but need some protection in very cold environments.

3. Aeonium

These succulents are perfect for those looking for a showy yet low-maintenance plant. Aeoniums come in various shapes and sizes and can tolerate cold and hot temperatures. Their flowers are usually yellow or orange and can attract pollinators to your garden.

4. Sedums

Sedums are popular hardy succulents that can tolerate both cold and hot temperatures. They are low-maintenance, drought-tolerant plants in various colors, such as pink, purple, and yellow. They have an upright growth habit and look great in rock gardens or containers.

5. Red Yucca

Red Yucca is another popular hardy succulent that can tolerate cold temperatures. It produces colorful foliage and blooms long-lasting flowers throughout the year. It is a great choice for an evergreen plant with minimal care requirements.

A red yucca flower.
Protecting them from strong winds is advisable.

PS: The best way to choose a hardy succulent is by starting with the frost-tolerant cacti you already know. Take time to research the plants before you buy them to be sure they will survive in your region. That way, you won’t end up with a plant that doesn’t match the weather conditions of your area.

Final Thoughts

Overall, hardy succulents are low-maintenance plants that can survive in a wide range of climates with minimal care.

Although they require less protection from frost than other succulent varieties, they still need to be cared for and maintained to thrive like other houseplants.

Follow the simple tips outlined above to ensure your hardy succulents stay healthy and strong throughout the year.

Remember that proper watering and fertilizing are essential for their growth and development.

Mastering Outdoor Bonsai Care: The Complete Guide

A outdoor bonsai exposed to sunlight.

Bonsai is a Japanese term that translates to “planted in a container.” This is why many people believe that these trees must be kept indoors to thrive. However, this is false because only a few trees can survive indoors. Most of the exciting bonsai trees are grown outdoors. Common Bonsai trees such as Juniper, Maple, Pine, and Mulberry are all outdoor trees. Remember that outdoor Bonsai trees need special care to grow and thrive.

So, what are some of the care requirements for outdoor Bonsai trees? Everything starts with where you choose to position your trees. Generally, ensure you place your outdoor Bonsai trees in a bright and well-lit spot. Consider providing some afternoon shade if you live in an area that experiences scorching summers. Monitor your trees closely and only water when necessary. Avoid watering them on a routine. Outdoor Bonsai trees can endure relatively high temperatures and cold weather if they are taken care of properly. To maintain healthy and beautiful outdoor bonsai trees, fertilizer is essential. Use any general-purpose fertilizer to keep your trees healthy and adequately nourished. Lastly, outdoor Bonsai are vulnerable to pests and insect infestations. To prevent this, use an organic pest control solution to keep pests away from your bonsai trees.

This blog post discusses everything you need to know about outdoor Bonsai tree care requirements. Read on to learn more.

Understanding the Dangers of the Seasons on Outdoor Bonsai Trees

Before we discuss how to care for your outdoor bonsai trees, it is critical to understand the risks that different seasons pose to your miniature trees.

We are not trying to discourage you from keeping your bonsai trees outdoors. We only want you to be aware of these risks so you can take the necessary steps to protect your precious trees.

Bonsai on hand.
It is critical to understand the risks that different seasons pose to your miniature trees.

Here is an overview of how different seasons affect outdoor bonsai trees:

  • Spring: The frost is quickly vanishing, and new buds are quickly forming. If you moved your bonsai trees indoors during winter, don’t be so quick to bring them out. They may not be ready for a quick transition and may develop shock. Also, be mindful of the rise in harmful insects and pests during this time.
  • Summer: The sun could burn and dehydrate your outdoor bonsai trees during summer. Be sure to provide enough shade and water to prevent this from happening. Arid areas also experience low humidity during this time, which can devastate some bonsai tree species.
  • Autumn: Most bonsai trees are resistant to cold temperatures; however, it is still essential to consider their health during this season. Ensure they receive adequate sunlight while avoiding extreme cold temperatures.
  • Winter: If you live in an area with extremely cold temperatures, don’t leave your bonsai trees outside during this time. Move them indoors to an environment that is neither too hot nor too cold. Be aware of low humidity levels and provide enough moisture to prevent dehydration and loss of leaves.

Caring for Outdoor Bonsai Trees: The Steps

Now that you understand the dangers of the seasons let us look at how to care for your outdoor bonsai trees:

1. Positioning

Bonsai trees usually slide into dormancy during the winter season. These plants need cold temperatures during this time.

It means you cannot take your bonsai trees indoors when the weather changes because they need a dormant period for proper growth.

Start preparing your bonsai trees for winter dormancy around Thanksgiving Day. You can accomplish the preparation in several ways.

One way is to bury your trees in the ground without the pot and mulch them up to the first branch. Ensure you choose a good location fully protected from strong winds but not rain and snow.

Bonsai tree in the windowsill exposed to sunlight.
A balcony, porch, or patio are good locations for your trees.

You can also prepare your outdoor bonsai trees for dormancy by placing them in an unheated garage. Remember that your trees don’t need light during the dormancy period, which lasts three months.

During the warm months, keep your bonsai trees outdoors in a spot with plenty of morning sunlight and good afternoon shade. A balcony, porch, or patio are good locations for your trees.

Consider placing your trees on a table or bench at eye level for a beautiful display.

You can also bring them indoors occasionally to display during special occasions but only leave the trees indoors for a short period since the indoor conditions don’t favor their growth.

2. Watering Outdoor Bonsai Trees

Pay attention to your outdoor bonsai trees when watering because the outcome can be catastrophic. Consider watering your trees when the soil appears dry but never allow the soil to become completely dry.

If your trees need frequent watering, consider using a self-watering pot to reduce the time and effort to provide adequate moisture to your bonsai trees.

You can also opt for soil additives like akadama or pumice, which help improve drainage.

A person watering a bonsai.
Pay attention to your outdoor bonsai trees when watering.

Remember to mist the foliage and branches of your trees regularly. This helps to maintain the humidity levels around the tree, which is highly beneficial for its health.

3. Fertilizing Outdoor Bonsai Trees

You have to fertilize your outdoor bonsai trees regularly if you want them to remain healthy.

Find a good fertilizer that is made explicitly for bonsai trees. Never use a fertilizer with high nitrogen content because it can potentially burn your plants.

You can fertilize your bonsai trees during their growing season or provide them with slow-release fertilizers, which are convenient and less time-consuming.

4. Trimming

Trimming is essential in keeping the stature of your bonsai trees and enabling new growth to a safe point. The best time to trim your bonsai trees outdoors is during the active growing season from spring through summer.

You can use specialized tools like pruning shears, scissors, tweezers, and knob cutters for trimming the branches and leaves of your outdoor bonsai trees.

When trimming, ensure that your pruners remain sharp and clean to avoid damaging the tree.

Avoid pruning everything because it can affect your plant negatively. Some foliage should be left behind to sustain the health of your bonsai tree.

A person trimming a bonsai.
When trimming, ensure that your pruners remain sharp and clean to avoid damaging the tree.

Tropical and sub-tropical tree species used in bonsai cultivation usually require periodic pruning to maintain their size and shape. Also, prune the roots of your trees to ensure they keep the pot growing.

5. Insects and Pests Treatment

When caring for outdoor bonsai trees, watch out for pests and diseases. Common bonsai pests include aphids, mites, scales, mealybugs, etc. can cause severe damage to your trees if not correctly treated.

You can use organic insecticides or pesticides to eliminate such insects and pests from your outdoor bonsai trees.

 Ensure you follow the safety instructions while using these products and always wear protective gear like gloves, respirator, and eye protection.

You can also attract beneficial insects to your bonsai trees by planting certain plants around them, like chrysanthemums and dandelions, which will help control pest infestations naturally.

6. Repotting

You should consider repotting your bonsai trees every three or four years when their root system fills the current pot.

The primary reason for repotting your bonsai tree is to supply it with fresh soil and encourage new root growth.

The best time to repot your bonsai tree is early spring before the growing season begins. Use lightweight, well-draining soil mix for better results and ensure you don’t damage the roots during repotting.

Examine the root system of your bonsai tree every year to determine if it is root-bound. In most cases, the repotting process is relatively easy.

Carefully remove the tree from its current pot and lightly trim the roots to reduce their mass and volume. Place the tree in its new pot and use stakes to position it correctly if necessary.

Fill the pot with fresh soil, ensuring all the roots are covered with enough soil. Press down gently to remove air pockets and thoroughly water your bonsai tree.

7. Training

You need to understand that there is nothing like “bonsai trees.” Bonsai is a form of art, and the plants used are just regular trees trained to grow in a certain way.

Training your bonsai tree is integral to its maintenance as it helps maintain its shape. You can use wiring techniques like trunk wrapping, branch bending, etc., to train your bonsai trees into desired shapes.

A man training bonsai.
Training your bonsai tree is integral to its maintenance as it helps maintain its shape.

You can use natural techniques like pruning and trimming to shape outdoor bonsai trees. Ensure you use the proper technique while training your bonsai tree, as inappropriate training can lead to severe damage.

Wiring should be done carefully because it is unnecessary for all plant species, and improper wiring can harm the tree.

Always use an appropriate size of wire and keep it on for a short period since it can damage the bark and restrict the growth of your bonsai trees.

Final Thoughts

Caring for an outdoor bonsai tree is easy if you understand your trees’ needs.

Provide adequate water, humidity, and fertilizer during their growing season and protect them from severe winter weather when they enter dormancy.

Trim regularly for the desired shape and size, repot every few years, and train them to maintain their shape.

Is Your Rosemary Plant Dying? Here’s Why

A rosemary plant.

Rosemary is an evergreen, tender herb mostly found in relatively warm and sunny climates. The plant thrives both indoors and outdoors as long as the growing conditions are right. Unfortunately, Rosemary plants are prone to some diseases and pests that can lead to death. So, if you discover your plant dying, there can be a list of potential causes you need to examine to save it.

So, what are some of the common causes of rosemary plant dying? The most common cause of Rosemary plant death is underwatering or overwatering. Although these plants require consistent watering to thrive, too much or too little water can be just as deadly. Ensure the potting mix is not overly saturated for long periods, and the soil is allowed to dry out between watering sessions. Other causes of rosemary plant dying include inadequate light, the soil being too acidic, extreme winter, high humidity, over-fertilization/lack of fertilization, excessive pruning, and nutrient imbalance.

This blog post discusses the common causes of rosemary plant dying and what you can do to protect it from premature death. Read on to learn more.

Reason #1: Lack of Enough Sunlight

As mentioned above, rosemary prefers warm and sunny climates to thrive. The herb is native to the Mediterranean region that receives lots of direct sunlight and heat. Therefore, the herb is generally heat-tolerant and can survive in full sun.

Rosemary requires 10-12 hours of direct sunlight daily, but it can still survive with eight to six hours of full sun. If you have the herb in your outdoor garden, ensure other plants do not cover it. It must be positioned in an open spot that receives plenty of full sun every day.

Rosemary exposed to sunlight in a pot.
Rosemary requires 10-12 hours of direct sunlight daily.

If you grow the herb outdoors and prefer bringing it indoors for winter, ensure you provide it with at least six hours of strong light daily. Taking it from 10-12 hours of direct sunlight to four or five hours of indirect, low light can be catastrophic.

If you must bring the herb indoors for winter, help it adjust or acclimate to its new environment. The process must be gradual and done over a few weeks. Otherwise, your Rosemary plant may die.

Place it near a south-facing window, or use grow lights to ensure it receives adequate light for its growth and survival.

If you notice your plant has started to yellow, wilt, and drop leaves, it is an indication of inadequate sunlight. Move it closer to the window or add more artificial lighting.

Reason #2: Overwatering

Overwatering your rosemary plant can lead to irreversible damage. The rosemary plant is naturally drought-resistant and prefers dryer conditions to thrive. Too much watering usually creates damp conditions, promoting root rot. This can, in turn, lead to death.

The herb requires infrequent watering to stay healthy and produce strong and unique aromatic leaves.

Young rosemary plants may still survive with frequent watering, but everything changes when they mature.

Watering a rosemary in a pot.
Rosemary pots tend to dry out quickly since the plant prefers full sun.

Mature rosemary plants in temperate climates don’t need any form of additional watering since they can attain all their moisture requirements from rainfall, even during the dry summer months.

Rosemary pots tend to dry out quickly since the plant prefers full sun. Therefore, watering once every two weeks is appropriate during spring and summer. If you water your rosemary more than twice a month, you are most likely overwatering it.

If the plant is watered frequently, the soil stays moist/saturated with water, interfering with the roots’ ability to perform their functions.

This will eventually lead to root rot and other fungal diseases. If your rosemary turns black or brown, it could be signs of root rot or fungal infection. You must act quickly to save your plant from imminent death.

The best way to prevent overwatering is to check the soil before you water. A moisture meter or your finger can help determine if it needs more water.

If the top inch of the soil feels dry, then add some water. Otherwise, hold off until after a couple of days when you can check again.

Reason #3: Pests and Diseases

Although rosemary plant is known to be somehow resistant to pests and diseases, it can still fall victim to certain common pests and fungi.

The most notorious rosemary pest is the whitefly. This small insect is usually found on the underside of rosemary leaves, causing significant damage as a result of its feeding activities.

The whitefly feeds on plant sap using its piercing mouthpart leading to the yellowing and wilting of the leaves. It may also spread plant diseases such as tomato spotted wilt virus and other viral infections.

A closeup image of a rosemary beetle.
it can still fall victim to certain common pests and fungi.

Rosemary plants are also prone to root rot, fungal infections, and other types of disease. High humidity levels (overwatering) or too much shade can provide favorable conditions for fungus and bacterial growth, leading to diseases.

If you notice your rosemary has wilted leaves, black spots on its stems, or yellowing of the leaves, it could be a sign of  a disease.

To prevent pests and diseases from attacking your rosemary plants, ensure that you maintain good hygiene practices around.

Furthermore, avoid overwatering, use sterile potting soil, and move them away from overly wet areas. You may also need to apply a fungicide or insecticide to prevent further damage if the above measures don’t work.

Reason #4: Extreme Winter

Rosemary is a typical Mediterranean herb that thrives in relatively sunny locations. This plant is cold-tolerant since it belongs to the hardiness zone of 8-11. Anything below freezing temperatures can be catastrophic.

However, some varieties of this herb, such as the Madeline Hill and “Arp,” are quite hardy and can survive in low temperatures. In fact, these two varieties can survive in temperatures of up to -5 Degrees Fahrenheit.

Rosemary outdoors covered with snow.
This plant is cold-tolerant since it belongs to the hardiness zone of 8-11.

If you live in a location where temperatures drop significantly during winter, you must ensure that your rosemary plant is protected from frost and snow. Consider bringing them indoors or to a warmer spot like the basement or garage.

The plant will become dry and brittle if you ignore it during winter and turn yellow or brown. The early signs of winter neglect will only kill a few branches. However, further neglect will completely kill the roots and the entire plant.

If you have planted your rosemary outdoors, in-ground making it impossible to move them indoors during winter, ensure you provide enough shelter that helps them avoid harsh winter winds.

If you discover signs of frost damage on your plant, quickly cut off the damaged stems and leaves and provide more protection.

Avoid pruning your rosemary during winter when there is still a risk of frost damage. The pruned areas will become susceptible to frost damage.

Pruning should be done in spring or summer when the weather is warm enough to stimulate new, healthy growth.

Consider mulching in fall with about three inches of mulch added on top of the soil.

Reason #5: The Soil Is Too Acidic

Rosemary grows in mildly acidic soil with a soil pH of between 6 and 7.5. If the soil is too acidic, it will limit essential nutrients from being available to your plant. This can lead to stunted growth, yellowing of leaves, and in some cases, death.

If you are not sure about the exact pH of your preferred soil, go for the typical garden soil that is mostly pH neutral or slightly acidic. This will provide your plant with the balance it needs to thrive.

You may also consider adding organic matter and compost to improve soil fertility. If you have been using chemical fertilizers, switch to natural fertilizers.

Organic fertilizers will ensure that your soil is adequately aerated and nutrients are available in adequate amounts.

Test your soil to know the exact pH level and make the necessary adjustments. Organic mulch can also help maintain a more neutral pH by decreasing acidity levels in the soil.

Reason #6: Excessive Pruning

While you can harvest your rosemary anytime during the active growing season, be careful not to overdo it.

Rosemary plants respond to pruning by producing more foliage and branches, which means you will get a bushy plant. But if you over-prune it, the plant won’t produce enough new growth, and its overall health will be affected.

When pruning rosemary, always use clean scissors and make sure to avoid cutting more than one-third of the plant’s foliage. Prune away dead and damaged stems and any overly long branches.

Prune only in spring or summer when the weather is warm enough for new growth. Doing so will ensure that your rosemary has enough time to recover before winter.

Reason #7: Overcrowding

Lastly, a rosemary plant may also die due to insufficient space between the plants. This is especially true for outdoor rosemary plants.

Overcrowding prevents optimal airflow to the plant leading to relatively slow water evaporation at the bottom of the plant, which is a recipe for fungal infections and root rot.

rosemary flowering in a pot.
A rosemary plant may also die due to insufficient space between the plants.

Therefore, ensuring your rosemary plants are spaced out nicely is always good to allow enough air and sunlight to reach each plant.

Final Thought

Rosemary is a hardy, fragrant herb that grows well both indoors and outdoors. However, if you are having trouble growing it, there could be several causes to examine. From too much or too little water to acidic soil or frost damage.

Keeping an eye out for these common issues and making the necessary changes to your growing condition can help you successfully grow a healthy rosemary plant.