9 Golden Rules For Watering Aeonium?

Aeonium is a fleshy succulent native to North America and the Canary Islands. Aeoniums have circular arranged glossy, waxy leaves that vary in height from a centimeter to a meter.

They may bloom in early spring or late winter with tiny flowers; however, people love them because of their distinctive foliage, which comes in hues of purple-black, green, or variegated in red, yellow, or white.

Are you wondering how you should water your Aeonium? Well, this is a low-maintenance plant that may thrive on neglect. Letting the soil dry out between watering will make it strong and its colors more vibrant.

But, you should note that watering this plant depends on many factors such as the environment, soil type, plant age, and many more we are going to discuss in detail. Master these golden rules to water your Aeonium and let your plant grow in good health, making your home beautiful.

How Often To Water Aeonium

Aeonium can go for long without water; however, too much water is dangerous to its growth. When watering the plant, ensure you don’t overwater it. Apply the soak and dry method for watering.

Before watering the plant, dip your finger two inches into the soil to determine whether it is dry. Only after this, you may proceed and water it. Usually, you will find yourself watering it once a week. Too much water will result to root rot and killing your plant!

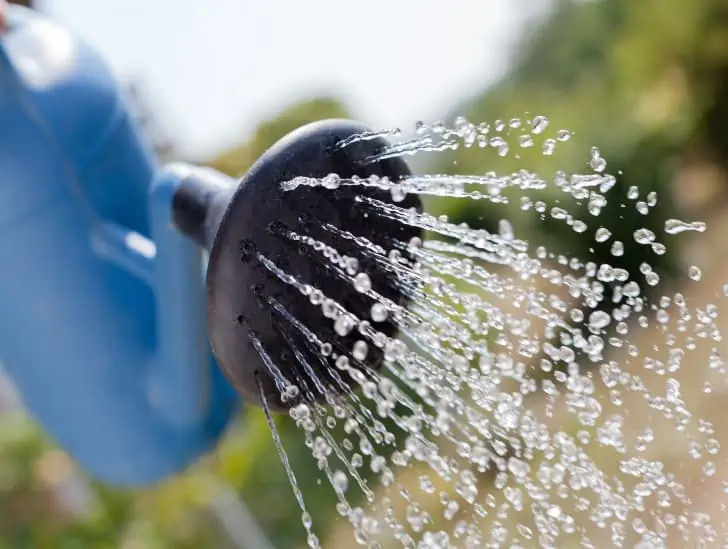
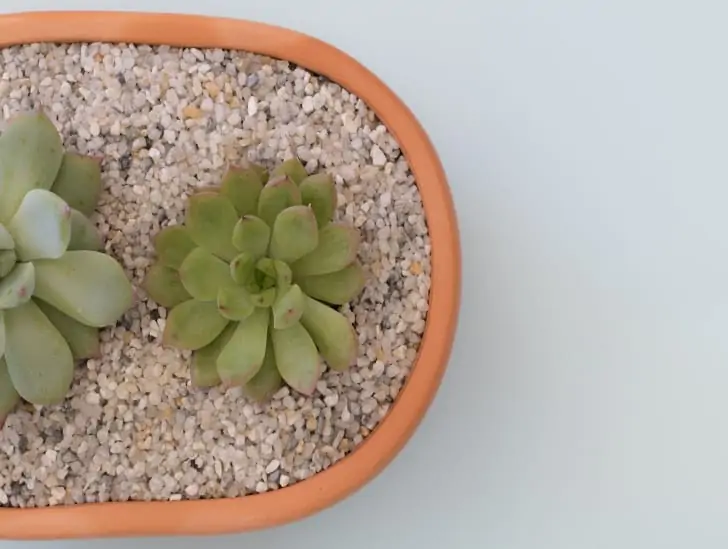
Aeonium with water droplets.
When watering the plant, ensure you don’t overwater it.

On an outdoor Aeonium, also dip your finger into the ground to determine the moisture content of the soil.

The plant grows in coastal environments; hence it prefers more moisture content than other succulents. It can stay for a while without water, but it will not thrive.

But how do you know how often you should water your Aeonium?

Watering During Summer

During the summer months, Aeonium tends to go into its dormancy period. This period reduces watering the plant as they rarely thrive and tend to shade off more leaves.

In the summer, watering them once a month will be okay. If you grow it outside and it receives occasional rain in this period, then you will less frequently water it or not at all.

Watering During Winter

In the winter, you can water your Aeonium once a week. But before this, always check whether the soil is dry before watering again unless they suffer root rot.

Choose a Well Draining Soil

Aeonium is native to the Canary Islands; as such, they like more moisture. To offer almost similar conditions, plant them in a less porous soil blend than the usual soil mix for other succulents.

Blend less succulent soil with some bit of potting soil to have that perfect blend of less porous soil that holds just a little more moisture.

A side view of a Kiwi Aeonium.
Plant them in a less porous soil blend than the usual soil mix for other succulents.

To get the right soil type, add one part of potting soil to two parts of succulent soil. After soaking the soil, it will drain a little slower, keeping Aeonium moist, unlike the regular succulent soil.

Use a Pot With Draining Hole

Watering the Aeonium plant in a pot without drainage holes will retain water and keep the soil damp. The result, root rot, killing your beautiful succulent after some time. Drainage holes help let water sip out after soaking the soil.

Furthermore, the drainage holes let you know if you have properly watered your plant. After watering, if you spot water draining out, then the soil is well soaked. 

Aeonium in white pot.
Watering the Aeonium plant in a pot without drainage holes will retain water and keep the soil damp.

Using the drainage holes, you will know whether to add more water or stop watering.

Water the Plant Base and Not Leaves

If you are growing your Aeonium plant indoors when watering, aim for the base of the plant. There is reduced airflow indoors, unlike outside. If you notice brown spots on the plant, this is usually because of watering the leaves.

Moisture accumulation on the leaves leads to a fungal attack that later brings about brown spots on the plant. The coloration may impact the appearance of your Aeonium when left unattended.

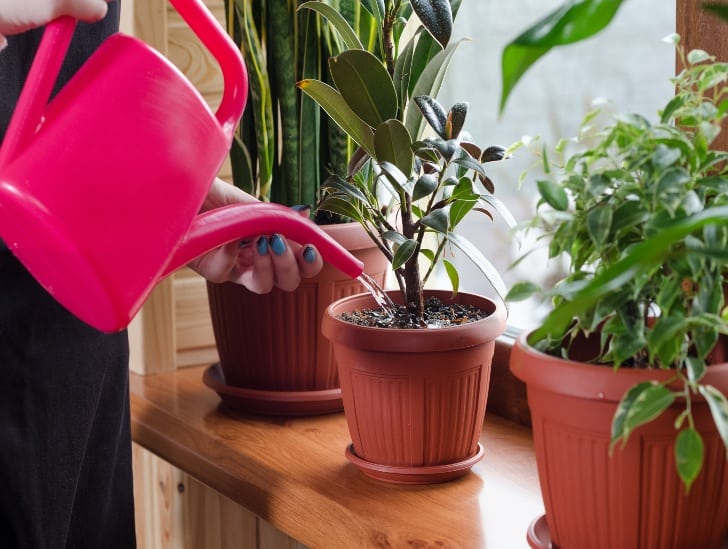
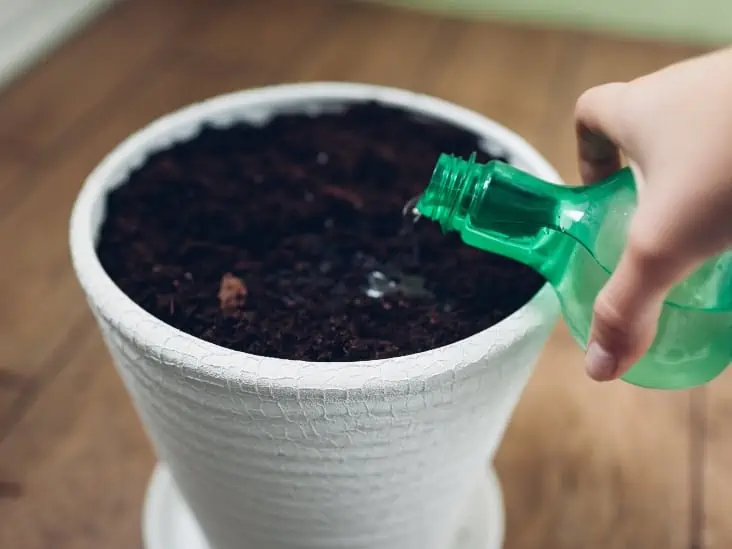
A person watering the soil of the plant.
When watering, aim for the base of the plant.

The problem is treatable, but you should avoid it and let your plant remain healthy.

The brown spots are more like rust in appearance and may affect plant growth if not treated earlier. But the best way is to avoid watering the leaves or bottom water your Aeonium.

For outdoor Aeoniums, there is more airflow, and even after rains, the moisture content on the leaves will dry out fast.

Ensure that water only goes to the roots and doesn’t spill on the leaves when watering.

Pot Size

The pot size will affect how many times you water your Aeonium plants. A small pot will hold less soil; therefore, the moisture content will evaporate faster, leading to frequent watering. 

If you have a grown Aeonium plant is in a small pot, water it twice a week during winter and twice a month in the summer.

In contrast, a bigger pot will hold more soil capable of retaining much of its moisture content. In addition, there is less evaporation from a big pot. 

Red Aeonium in a pot.
The pot size will affect how many times you water your Aeonium plants.

Water a grown Aeonium plant in a big pot once a week in winter and spring. During summer, you may water it once a month.

Use a Spray Bottle When Propagating Aeonium

Aeonium plants have fragile stems and leaves which can easily fall off when exposed to strong external forces. You can easily break the plant when you accidentally drop something on it.

When propagating Aeonium offshoots, use a spray bottle to water them gently. Remember, their stems are very fragile, and you don’t want to use a watering can; you can damage them. 

Furthermore, during this time, keep the soil moist almost all the time. If you let the soil dry, your Aeonium offshoots will die.

Be Keen On the Plant’s Indicators

Aeoniums, like other plants, have their indicators, and you should not ignore them. The plant will start to change when underwatering it and when overwatering. Here are the potential indicators to look out for from your plant.

Underwatering

Your Aeonium may survive with water, but underwatering may have adverse effects on it and finally lead to death. Here are some signs you might be underwatering your Aeonium plant:

  • Fast drying and falling off of lower leaves on the rosette. Lower leaves dropping might also happen during the dormancy period but water your plant when it occurs during its thriving season.
  • Shriveled leaves. When the water storage on the leaves and stem runs low, the leaves will start shriveling.
  • Flat and soft leaves. Your Aeonium plant’s leaves will lose their plumpness and firmness. The leaves will feel more like they have been deflated.

Overwatering

Overwatering Aeonium damages its stem and root system. Here are some notable indicators you will note:

  • The leaves will start being squishy and limb. Over time they will form dark spots around the edges to signify rotting and, lastly, falling off.
  • Leaves discoloring to yellow and have a mushy feeling.
  • All leaves dropping once the stem starts rotting
  • Rotting roots. The soil will be overly damp, causing the roots to start rotting.

When in doubt of your plant’s indicators, stop watering them. It is easy to save an Aeonium plant from underwatering than from overwatering.

Always be keen on your plant and if you note any changes, act to it depending on the above signs.

Growing Environment

Aeonimium prefers a high humid environment as this also affects how much you should water it. If the surrounding is less humid, the plant will take in more water. If in a high humid area, it will take less water.

Also, high humid environments make the plant more susceptible to infections like the previously mentioned brown spotting on leaves. To avoid this, plant your Aeonium with other plants or grow plenty of them together to create their microclimate.

Season

Watering Aeonium is dependant on the season. The best time to grow these plants are in spring or autumn. During this time, the plants thrive well, making it the best time to water them. They will need more water at this point in their growth, unlike during winter and summer.

The plant will start growing dormant in summer, needing less water. As the owner, you react well to these times of the year when watering.

Also, note that Aeonium blooms start forming on mature rosettes in late winter to spring. At this point, the plant will need more water. Ensure you don’t starve it of water and let it flourish. After the plant blooms, it dies.

Take Away

Aeonium plants do not need much water. It is a low-maintenance houseplant, but you should not starve it of moisture. Following a good watering routine will help your plant thrive and avoid complications.

If you find it hard to keep track or check the soil’s dryness to water it, you can create a record always to follow to prevent overwatering. As a bonus, you already have all the vital indicators to look out for before watering.

Water properly your Aeonium and see it thrive to bloom. The secret lies in watering.
Ultimate Guide: How to Care for Adenium Plant

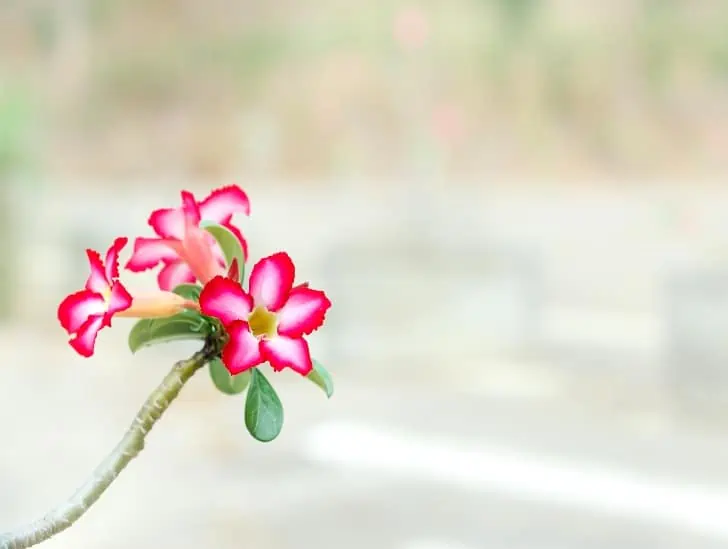
A desert rose flower stem.

Do you like dramatically gorgeous flowering succulents that are relatively easy to maintain? If so, you need to try out the Adenium Obesum, commonly referred to as the Desert Rose plant. The succulent is native to Sub-Saharan Africa, where it is grown as ornamental. It is an evergreen plant adapted to resisting sweltering weather conditions. The succulent can grow to a height of up to three meters and produce tabular flowers approximately 2-5 cm long. The flowers are multicolored, making them even more beautiful.

So, how do you care for the Adenium Obesum plant? For best results, you should grow the plant in potting soil with good drainage and only water it during spring or summer when it is actively growing. During winter, keep the potting mix moist since the plant slides into a period of dormancy. Keep the plant in bright light for at least six hours a day and fertilize only once per month with half-strength 20-20-20 fertilizer. Don’t feed it during the cold winter months.

The desert rose plant makes an excellent indoor/outdoor plant if you take good care of it. This blog post discusses everything you need to know about growing and taking care of Adenium Obesum. Read on to learn more.

Adenium Obesum: Why Is It Not a Rose?

While many people refer to it as a rose, the truth is that Adenium Obesum is not a rose flower but a deciduous succulent plant. It has been nicknamed the desert rose flower because of its multi-color flowers that never fail to appear during the flowering season.

There are many variations of this succulent, and most of them grow freely throughout northeastern and eastern Africa. Some scientists believe that the main species (Adenium Obesum) is divided into at least five subspecies that vary in appearance.

A desert rose flower.
The truth is that Adenium Obesum is not a rose flower but a deciduous succulent plant.

The succulent’s blooming period is relatively lengthy, and it can still bloom during the cold winter months if you keep it in a relatively warm spot and provide it with sufficient lighting.

Its flowers are trumpet-shaped and vary in size and color depending on the care and environment. Typically, the flowers are approximately two inches long and come in different colors, including red, pink, and white.

Unlike a true rose flower plant, the Adenium Obesum is highly drought resistant because it stores a lot of water in its thick roots and fat base trunk. In its native areas, rains only come during summer; it is totally dry during the winter months.

These succulents make excellent potted plants and even outdoor plants grown in the ground, depending on the amount of sunlight, soil conditions, and water you provide.

Depending on the amount of care you provide, the succulent can grow into a relatively short plump tree or a tall leggy plant.

Adenium Plant Care Tips

There are up to five different varieties of the Adenium plant, but all of them are native to arid and semi-arid climates. They also tend to adapt well to the semi-tropical and tropical climate.

These succulents will typically survive in almost any setting as long as there is plenty of sunlight and well-draining soil.

Here are some of the critical requirements you need to pay close attention to if you want to keep your Adenium plant happy and healthy.

1. Soil Preference

The key to keeping your desert rose plant happy is to ensure you give it a good potting mix with enough drainage. A standard succulent soil with crushed granite or pumice to provide plenty of room for the water to drain will do.

A desert rose directly planted on the ground.
A standard succulent soil with crushed granite or pumice to provide plenty of room for the water to drain will do.

You can also add layers of gravel above and below the potting mix to prevent root rot. You can either prepare your own succulent soil at home or purchase already prepared soil from your local plant store.

2. Watering Requirements

The amount of soil moisture is a critical consideration when it comes to growing an Adenium plant. These plants have developed unique features that allow them to thrive with less water. They can also tolerate a relatively high amount of moisture without suffering damage.

As a general rule, be sure to let the soil dry completely before watering your plant. When the soil is completely dry, saturate the potting mix and let the excess water drain away before putting the plant back to its spot.

A freshly watered desert rose.
They can also tolerate a relatively high amount of moisture without suffering damage.

Don’t water Adenium when it is in its period of dormancy because it can result in root rot issues. During winter, only keep the soil moist (not wet). If you are unsure about the level of moistness required, err on the dry side because it is easier to revive an underwatered Adenium than an overwatered one.

When spring or summer kicks in and new growth is visible on your plant, consider increasing the watering frequency slightly. Increased watering and fertilization will stimulate new growth and blooming.

The desert rose plant usually sheds its leaves when it isn’t receiving the right amount of water required to sustain its needs. Although the sight of a defoliated Adenium isn’t so good, the process doesn’t harm your plant in any way.

When you notice signs of leaf shading, all you need to do is start watering your plant frequently, and everything will be back to normal in no time. Always keep in mind that when your plant is exposed to slightly higher temperatures and full sunlight, it requires frequent watering.

3. Light Requirements

The desert rose plant is a sun-loving succulent. It thrives in desert settings and will bloom beautifully when exposed to as much light as possible. Don’t be afraid to expose your plant to direct sunlight because it cannot suffer sunburns like other succulents.

In fact, if you keep your plant in the shade, it will most likely become leggy and weak-stemmed. Exposure to full bright sunlight stimulates blossom production. The plant usually takes a break during the hottest and coldest months of the season, resulting in two flowering seasons a year.

Desert rose outdoor.
It thrives in desert settings and will bloom beautifully when exposed to as much light as possible.

The first flowering season starts early spring if the amount of light is right. From there, your plant should bloom steadily until mid-summer.

At this point, your plant will cease blooming for approximately six to eight weeks, only to resume in the early autumn months for the second blooming season. When temperatures start to drop, make sure you prune your plant and take it indoors to avoid frost damage.

If you are using artificial grow lights inside the house, ensure you leave them on for at least 12 hours a day. That will ensure your plant absorbs the required amount of light.

4. Temperature and Humidity

It is highly recommended you keep your plant in warm temperatures at all times. Ensure the temperature never falls to below 50oF. To achieve better results, maintain the temperature between 65oF and 90oF.

If you have planted your Adenium plant outdoors, you may be forced to cover it during the cold winter months. Otherwise, it won’t survive the frost damage. Humidity isn’t crucial to the succulent because it is accustomed to a relatively dry and hot climate.

5. Fertilization

Adenium plants should only be fertilized when actively growing during spring and summer. Use a half-strength fertilizer with a slightly higher amount of phosphorous to aid in flower formation.

Keep in mind that there is a critical balance between too much fertilizer and too little fertilizer because these succulents are highly sensitive to extreme amounts of fertilizer salts in the potting mix.

One of the common signs that you are applying an excessive amount of fertilizer to your plant is the browning of leaf edges.

Keep in mind that when you are watering your plant, the succulent soil will ensure excess water drains away immediately. Therefore, there is a minimum amount of water circulating through the soil to dilute the fertilizer salts.

Continued application of excess fertilizer can lead to a high buildup of toxic elements in the soil, which isn’t good for your plant.

6. Pruning

You should only prune your desert rose plant when it is necessary. Pruning must be done strictly in spring. To form a tree, shorten the side branches by 1/3 of their length. To form a bush, you need to go a little bit down.

The formation of a tree or bush can take some time, but if you do everything right, the results will be quite impressive.

A desert rose on the pot.
You should only prune your desert rose plant when it is necessary.

Desert rose plant pruning can be intimidating since not everyone knows how to do it right. To be on the safe side, use a pair of sharp scissors for pruning.

You can also use sterilized shears because they limit the possibility of spreading disease from one branch to another. Just make sure you use sharp blades to acquire clean cuts.

Don’t throw away the cuttings from pruning. Instead, use them to start new plants so that you can have lots of new plants. The only thing you need to know is how to transplant them.

Summary

Adenium plant is a widely loved succulent because it has attractive shapes and blooms for a prolonged time. It is also drought-resistant and can thrive with minimal care.

We hope you have learned a few tricks to keep your plant happy. As long as you provide your plant with the right conditions, you will surely come to love it as your best friend.

Does String Of Hearts Require Direct Sunlight?

The String of Hearts, scientifically known as (Ceropegia woodii) is a creeping succulent-like plant native to Southern Africa. Boasting delicate heart-shaped foliage and slender vines which can reach up to 12′ long in its natural environment, this plant has earned many nicknames, such as Rosary Vine and Sweetheart Vine.

The String of Hearts plants thrive well in heat and bright light, but do not prefer direct sunlight to scorch the leaves. The String of hearts will not survive in low light, and bright indirect light can lead to more variegation on the leaves. Enough light helps the String of hearts plant maintain its deep green color.

They might be challenging to care for; however, once you get the hang of it, String of Hearts Succulent is one of the most tolerant houseplants. Though the String of Hearts plant prefers to have some bright sun throughout the day, it will do fine in bright, indirect light, as well.

When grown in direct sunlight, the plant’s leaves will be dark green with variegated silver markings. Your String of Hearts should do fine in indirect light though the leaves will be a lighter green with no variegation. The loss of variegation is permanent, and the variegation will not return even if the plant is moved to better light.

How To Estimate The Amount of Light In Your Space

Light is one of the most determinant factors for your String of Hearts growth and is most commonly the cause for dying plants when misused. Assessing the proper lighting for your String of hearts is not easy. 

String of heart outside.
Light is most commonly the cause for dying plants when misused.

Our ability to judge light levels can be deceiving because the human eye automatically compensates for brightness. Indoor lights complicate the issue further because what appears bright” might not be.

You can use three methods to assess light in your home or office—an eye test, using an app, or a Light Meter. 

Estimating Light Using Your Eyes

A shadow test is a simple method to check what light level your Rosary Vine is getting. Here’s how you can do it: Pick a spot in your house where you’re considering placing your plant.

  1. Go to the place where you put your String of Hearts
  2. Hold up a piece of paper to the light source. Please do this at the brightest time of the day (we recommend midday).
  3. Place your free hand above your piece of paper.

If you see crisp, well-defined, and stark contrast shadows, your String of hearts is getting bright light. A soft shadow shows medium light. A faint or unclear outline of the shadow means your plant is getting a low light level.

Estimating Light Using Apps

If you’re debating on the best place to put your new String of Hearts, you can use the Light Meter on your iPhone, which has a function for measuring foot candles. Many light meter apps measure in LUX, quickly translated to foot candles using conversion rates.

Estimation Using the Light Meter

A light meter is an excellent and reliable way to measure light. Light meter apps offer much-needed help to utilize plant grow lights at their best efficiency. As our eyes cannot gauge lighting conditions correctly, a light meter is used to measure the amount of light your String of Hearts plants receives.

A light meter.
Light meter offer much-needed help to utilize plant grow lights at their best efficiency.

Best Location For String of Hearts

The String of Hearts is an adaptable houseplant for lighting conditions. It will tolerate some low light conditions as well as pretty bright spots. However, avoid gloomy, low light conditions and intense sun-drenched south-facing windows. You’ll get the best-looking leaves and reasonable amounts of growth from having it in a bright location with just some ray of sunlight hitting the developing stems.

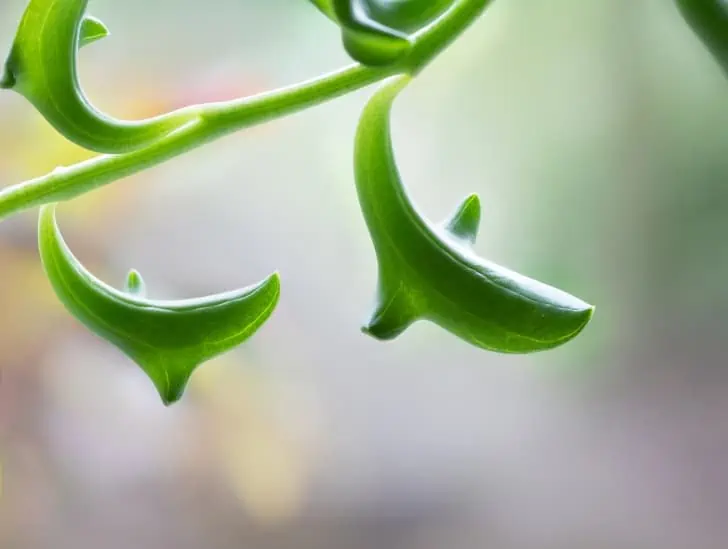
String of heart leaf.
The best place to position your String of Hearts is where it can receive plenty of bright indirect light.

The best place to position your String of Hearts is where it can receive plenty of bright indirect light. Small doses of direct sun are good, however too much direct sun can scorch the leaves. This plant isn’t recommended for lower-light environments. A few feet removed from a southern or western-facing window is ideal, or directly in a northern or eastern-facing window will also suffice.

Types of Indoor Plant Lighting

Let us look at the primary types of indoor plant light.

  1. Bright Light: Bright light refers to sunny south or west-facing window that gets direct light all day. Be careful when moving such plants too close to a window because they can not handle the cold drafts.
  2. Indirect Light: Indirect light is found in east-facing windows or interiors of rooms that receive full light from southern or western windows. 
  3. Low Light: Rooms with north-facing or partially shaded windows are regarded as low-light situations.

Indoor Location

Too much sun will burn the foliage of String of Hearts and is characterized by: brown leaves, dry leaf edges, and stunted growth. Lack of exposure, on the other hand, causes issues like discoloration.

Place your String of Hearts near the brightest window possible (South or West-facing windows are highly recommended). Maintain a temperature range of between 80 and 85 degrees Fahrenheit. During winter, we recommend 60 degrees Fahrenheit.

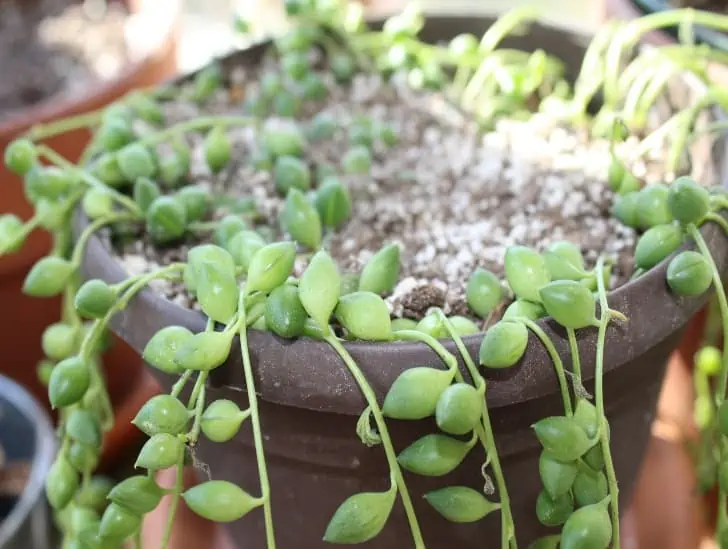
String of hearts in a pot
Place your String of Hearts near the brightest window possible.

Please give it a very bright light with no direct sun. Make sure you don’t let the foliage rest directly on windowpanes if you’ve got this plant in a windowsill. Too much heat in the summer and cold during winter can hurt the leaves.

The Rosary Vines need to be placed in the brightest area of your home or office. North-facing windows (in the northern hemisphere)are not ideal since they will not get any direct sun. The best spots for your succulents to flourish the most indoors are explained below. 

Southern Window

A Southern facing window receives bright sun all day and is excellent for succulents that love full sun. We do not recommend scorching light for your String of Hearts. If you suspect that the light your plants are getting is too much, move it to the side or a few inches away from the window to get medium light level.

East Facing Window

In this spot, your Rosary Vine will benefit from the morning sun, where the rays are not quite as strong, which is often suitable for plants that need moderate or morning sunlight only. A west window is also acceptable, but make sure it isn’t up against the hot glass.

Outdoor Location

Since there are no barriers present outdoors, lighting outside has a brighter condition, even in the darkest shade than the brightest space inside your home. If you want to grow yours outdoors, make sure to put it in a spot where this plant can get at least 3 to 4 hours of bright, indirect sunlight and some shade in the afternoon.

The String of Hearts can grow outdoors as a sprawling ground cover, in rock gardens, or cascading down walls. This sprawling succulent can do well during the summer months or even all year round in USDA zones ten and above or where the temperature is consistently maintained at 60 degrees Fahrenheit or warmer. 

String of hearts outdoor.
They can grow outdoors as a sprawling ground cover, in rock gardens, or cascading down walls.

Remember to gradually acclimate your String of Hearts first to stronger light when moving this plant from indoors to outdoors during the summer to prevent sun damage. Alternatively, you can grow this succulent in a pot or container where you can easily carry it indoors when the temperature starts dropping for protection. The best place to put the plant is in a bright, shaded area.

Signs that Your String of Hearts is not Getting Enough Light

You can tell that your Rosary Vine is not getting enough light by observing its leaves. If you see that the leaves are starting to become pale in color and, at the same time, wider apart than they typically should, then transfer the plant to a brighter spot to supplement its lighting needs. 

If you don’t give it enough light, what happens is that there will be more space between the leaves, and this will make your plant look more spindly. When “String of Hearts” receives adequate sunlight, the leaves will be darker. The lesser the light it receives, the lighter the leaves appear.

Rotate the plant occasionally for a balanced amount of sunlight and even color.

When To Use Grow Lights

Although String of Hearts can tolerate low light levels, providing lighter and brighter conditions will make them flourish more and look attractive in the long run. If you live where light is not enough and consistent, usage of grow lights are highly recommended, especially if;

  • Your house is dim.  
  • You want to grow in the winter months.
  • Your Rosary Vine appears stretchy.

Bottom Line

If you are looking for an easy-to-care-for, unique, and attractive houseplant, then you can’t go wrong with the String of heart plants. Sunlight is excellent for String of Hearts plants, but direct sunlight is something that they can not tolerate.

Please place them in a suitable environment to happily grow all year round. Positioning your String of hearts plant somewhere that it will receive bright but dappled, filtered sunlight will see the best growth and flower production results.

Does String of Bananas Need Direct Sunlight

The string of bananas is native to Southern Africa and has glossy, banana-shaped leaves that grow on long, hanging tendrils. The string of bananas typically sold potted in planters is perfect for growing in a hanging basket indoors or a garden as ground cover.

Generally, we recommend medium or partial sun exposure to partial shade. If you keep this plant indoors, place it in a spot with bright but indirect light. Outdoors, however, the String of Bananas should be kept out of direct sunlight. Partially shaded areas are optimal.

The string of bananas leaves, stems and roots are full of water and can burn in the full hot sun. If they survive, the leaves will be thin and discolored, and the plants most likely won’t reach their optimum size. Give these trailing succulents as much light as you can indoors, preferably medium to high exposure. 

The Best Location For Your String of Bananas

Whether you keep your String of Bananas plants indoors or outdoors, they will do well in a spot that receives direct light in the early part of the day and the late afternoon. Being out of direct sunlight during the hottest part of the day is usually best. 

Close up image of string of bananas.
They do well in a spot that receives direct light in the early part of the day.

The string of bananas can be grown outdoors in succulent gardens, but they are not frost-tolerant, so they require regions that experience warm weather year-round. The string of bananas is suitable for growing outdoors in the warm climates of USDA plant hardiness zones 10 through 12. 

However, if you reside in a cooler area, you can grow a string of bananas indoors. We recommend a location that receives at least six hours of sunlight throughout the day. The string of bananas does well under grow lights as well if needed.

Growing String of Bananas indoors has many advantages, which we will look at below:

  • Regulate growth

If you have little space or want a small plant, growing your String of Bananas indoors can help control growth by slowing down the plant’s growth. Due to lighting and other factors, plants grown indoors grow slower than those outdoors. Keeping your plants indoors in small pots or containers can also be a cost-effective way to save space and help control growth, limiting your need to repot every so often.

  • Protected from elements

The string of Bananas is not cold-hardy and will not tolerate even a mild frost. These succulents will not survive outdoors when the temperature drops below freezing during the winter months. Make sure you protect the String of Bananas from freezing. Having them indoors saves you the trouble of moving them indoors during the winter.

  • Visual Pleasure

Having your string of bananas plants around you can improve the appearance of the place and affect your mood and happiness. The string of Bananas plants makes beautiful ornamental plants that can liven up a room or add to your home’s decor.

  • Protection from animals 

Aside from pests invading your String of Bananas plant, you do not have to worry about little critters munching on your plant’s leaves or, in some cases, deer eating your plants. Keeping them indoors protects them from being trampled on, damaged, or eaten by furry creatures.

  • Pest Control

The string of Bananas plants can also suffer from pests infestation but are more protected from outdoor elements that naturally harbor these pests or insects. An infected plant or soil medium may introduce pests to your indoor plant. Generally, healthy plants kept indoors are less susceptible to common pests or insects that invade plants.

Indoor Light Needs

If you keep your string of Bananas indoors, provide as much light as possible. In general, String of Bananas needs approximately 5-6 hours of sunlight per day to thrive. The plants require high light when growing indoors. If you’re in an environment with less sun, you will need more light. If you do not receive adequate light indoors or have poor lighting, consider supplementing it with artificial light.  

A string of bananas hanging.
The plants require high light when growing indoors.

Grow Lights come in handy if you have long, dark winters or if your area does not receive enough sunlight. You may occasionally put your plant outside and let it enjoy the natural sun. Scattered leaves signify that your plant is not getting enough light, and if the leaves have brown tips, it’s getting too much direct sun.

Indoor Plant Location and Sunlight

Place the string of bananas near a sunny window indoors where there’s a long exposure to bright light. If it’s not getting light from all sides, you’ll have to rotate it every 3-6 months, so it does. 

A sunny southern window works if you live in the Northern hemisphere. Keep the potted string of bananas plants a few feet away from the window in a south-facing room. If kept next to the window, direct sunlight can cause the fleshy leaves to burn, particularly in summer. A Northern exposure window will suit this plant well if you live in the Southern hemisphere.

String of bananas in a clay pot.
Place the string of bananas near a sunny window indoors where there’s a long exposure to bright light.

An east-facing window is also good. This sunny location provides plenty of light but avoids the intense midday sun. Windows that don’t have any direct sunlight won’t be ideal. Though much slower, your plant will still grow, and the resulting growth may be weak. The leaves will also be thinner and smaller.

Outdoor Sunlight Needs

The string of Bananas plants do well with lots of bright sunlight; however, they also require protection from sweltering heat or direct sun. They do well in bright but partially shaded areas or planters shaded by other taller plants.

The plants tolerate bright morning sun and afternoon shade instead of the more intense afternoon heat. Direct sunlight will burn the leaves. The string of bananas can handle temperatures up to 110 degrees.

It’s best to bring the plant indoors when the temperature falls to 50°F (10 °C) and below. Also, if you reside where it gets below 30 degrees Fahrenheit outside, move your plant indoors for the winter. Once autumn kicks in, be sure to include an hour or two of direct light each day to get it through the dormancy period, lasting until the following spring.

You can grow a string of bananas plant outdoors year-round in mild climates. Grow a string of bananas outdoors in areas that receive morning sun, shelter from the midday sun, and bright, indirect light the rest of the day.

It is a summer annual in more excellent areas, making a perfect “spiller” in a low-water container combination. Choose a spot in bright shade in hot, inland areas, like under a tree canopy or porch. Inadequate light is the death of this easy-care succulent.

Acclimatizing String of Bananas to Outdoor Conditions

You can hang your string of bananas outdoors during summer. Please put them in a hanging basket in full to partial sun. The long trailing vines and banana-shaped leafy foliage add greenery to patios, deck areas, and balconies.

Before moving the plant outdoors or increasing the amount of sunlight it receives, it is better to acclimate the plant to prevent sunburn. Slowly increase the plant’s amount of light to get it adapted to the more intense light to help prevent sunburn or sun damage.

String of banana in outside exposed to sunlight.
Place the string of bananas near a sunny window indoors where there’s a long exposure to bright light.

Keep in mind that even when you have already acclimatized the plant to the sun, you still need to provide sun protection or shade during a heatwave or intense heat. We recommend sunshades because the sun can scorch the plants if left unprotected.

Signs of Too Much or Too Little Light In Your String Of Bananas

The string of Bananas can turn brown because of sun damage. If your String of Banana leaves turns brown and appears shriveled and dry, the plant is most likely suffering from excess sun exposure. 

Move to a shaded location or provide sun protection against intense light or full sun.

Sun-damaged brown spots are usually permanent and do not go away. It would help if you waited for the plant to produce new green growth, and the plant will eventually shed old leaves and get rid of the brown spots. 

You can also trim them off, and the plant will re-grow new stems. Do not grow your string of bananas in total shade. The branches tend to get leggy as they “stretch” to look for more light—the stretching results in long vines with meager foliage and thin banana leaves. 

String of bananas.
You can also trim them off, and the plant will re-grow new stems.

If your string of bananas plant does not get enough light, it will become leggy, and the banana-shaped leaves will become significantly more spaced out along the stem. This look is often considered less visually appealing. When your String of Bananas plants does not receive adequate light, they become weak, distorted, and discolored. 

Bottom Line

The string of Bananas plants is excellent for creating vertical greenery in your home and requires bright, indirect sunlight. They sit nicely on shelves, windowsills, or suspended from the ceiling. Plus, they grow well in low-light conditions as long as they get high humidity and regular watering. They are excellent as bedroom plants or shower plants where light tends to be limited.
Golden Rules For Watering String Of Dolphins

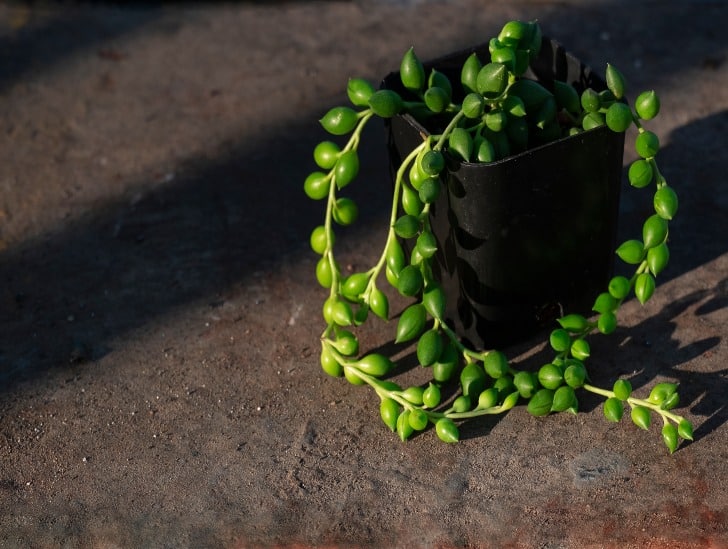
A string of dolphin freshly watered and exposed to sunlight.

String of dolphins is a beautiful, yet delicate plant. As a houseplant enthusiast, you want to do your best to help the plant thrive. This will help it achieve those beachy vibes and lush green leaves. This easy-to-grow succulent requires some basic guidelines for watering. As such, it is important to be familiar with the golden rules for watering string of dolphins.
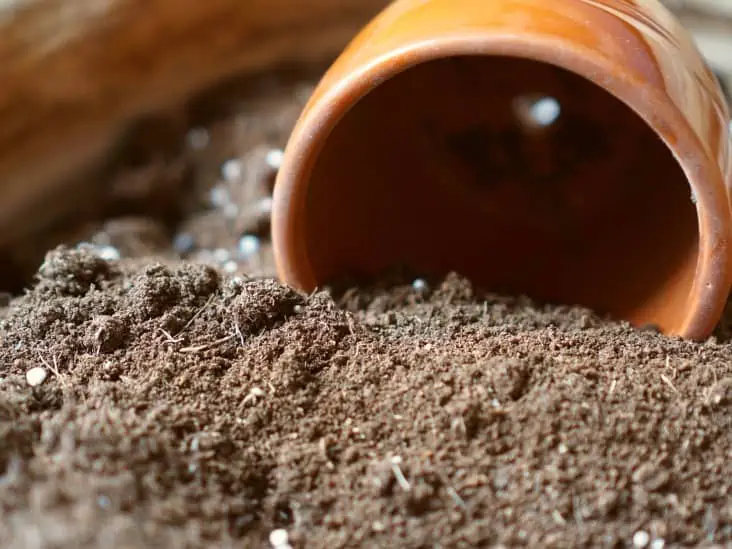
So, what are the golden rules for watering string of dolphins? A good rule for watering string of dolphins is giving it just enough so that the top third or half inch layer stays moist, but not wet. In other words, you want the top layer of soil to be damp, but not muddy. Check the soil every few days and water again if it feels dry to the touch. Ensure the plant has a drainage planter or saucer under it to help prevent root rot.

String of dolphins coins its name from its resemblance to a string of dolphins swimming through the water. It’s also important to keep in mind that this succulent doesn’t tolerate high humidity levels well, so avoid placing it near any steamy areas such as around the shower. String of dolphins plant care means maintaining proper watering and light levels to keep it healthy and thriving indoors. Here are some 10 golden rules to keep in mind when watering the string of dolphins.

1.     Use room-temperature water

When watering string of dolphins, use room-temperature water. This will help avoid shocking the plant. The best time to water is in the morning, so give your plant a drink before you head out for the day. Room temperature water also helps prevent string of dolphins from developing leaf spots.

2.     String of dolphins prefer a moist, but not wet, soil

In addition to watering string of dolphins with room-temperature water and making sure the top layer is damp to the touch, make sure you are using soil that allows for good drainage. String of dolphin plants thrive in a moist, but not wet, soil as wet soil can lead to root rot.

String of Dolphins in a small pot.
Making sure the top layer is damp to the touch and also make sure you are using soil that allows for good drainage.

3.     Water when the top third or half-inch layer of soil feels dry to the touch

A good rule for watering string of dolphins is giving it just enough so that the top third or half inch layer stays moist, but not wet. In other words, you want the top layer of soil to be damp, but not muddy. Check the soil every few days and water again if it feels dry to the touch.

Another rule of thumb is to give just enough water so that the plant doesn’t wilt. Overwatering can be just as harmful as under watering, so make sure you are giving string of dolphins just enough water to keep it happy.

4.     Ensure your pot has drainage holes

String of dolphin plants will suffer if left in standing water, so make sure the plant is sitting in a well-draining planter. Ensure there are drainage holes at the bottom and use saucers that allow for good drainage as well.

5.     Water in the morning for best results

Morning is typically the best time to water plants, so try and water string of dolphins before you head out for the day. This will help prevent wilting and give your plant a chance to absorb the moisture throughout the day.

Mornings also offer the benefit of cooler temperatures, which can be helpful for sensitive plants like string of dolphins.

6.     Use a watering can with a long spout for plants on higher shelves

If you have string of dolphin plants on high shelves, use a watering can with a long spout to avoid having to move the plant every time you water it. This will help ensure you don’t accidentally knock the plant off of your shelf. Remember to water the plant from the top and avoid getting the leaves wet.

A person watering a plant using a watering can.
Use a watering can with a long spout to avoid having to move the plant every time you water it.

7.     Use a misting bottle for plants with delicate leaves

If your string of dolphin plants has delicate leaves, use a misting bottle to water them instead of using a watering can. This will help prevent the leaves from getting wet and wilting. It also helps to mist the leaves in the morning before the sun comes out.

8.     Water in small doses to avoid runoff

When watering, try and water in small doses to avoid runoff. This will help prevent the soil from washing away and will help the plant absorb more of the moisture. Your soil mix should also help with this, so make sure you are using a good quality soil mix.

9.     Provide ample light

String of dolphin plants need ample light to thrive. To help your plant get enough light, place it in a spot where it will get plenty of natural light or use artificial grow lights. A lack of light can cause the plant to become leggy and unhealthy, so be sure you are providing the string of dolphins with enough light.

A string of dolphin with sunlight.
Help your plant get enough light, place it in a spot where it will get plenty of natural light.

Enough lighting means your watering is complemented and regulated with photosynthesis.

Common string of dolphins problems caused by overwatering or underwatering

Common string of dolphins is an easy to care succulent but overwatering or underwatering it can result in a number of problems that include:

Root rot – Root rot is a result of overwatering and can cause the plant to die. Symptoms include brown or black spots on the stem and leaves and the plant will feel soft and mushy.

Wilting – Wilting is a sign of underwatering and is often accompanied by droopy leaves. It starts at the tips and moves down the plant towards the stem. It’s greyish in color and can spread quickly if it isn’t remedied early.

Stunted growth – String of dolphins that aren’t getting enough water will stop growing but when they get too much it will result in stunted growth with long, skinny stems and small leaves.

Leggy growth – This can be caused by a lack of light, overwatering, or underwatering. Leggy growth is characterized by tall, spindly stems and leaves.

If you are experiencing any of these problems with your string of dolphins, try and remedy the situation by watering correctly. If that doesn’t work, it might be time to re-pot the plant. Potting can help by providing better drainage and more space for soil to grow in, which will encourage the string of dolphins to root down into the soil.

What determines your watering schedule for string of dolphins?

While you can easily follow watering recommendations, it is also important to note that watering schedules cannot be universal. It depends on a number of factors as discussed below:

Climatic conditions

Different regions of the world will have different climatic conditions, which will in turn affect how often you need to water your string of dolphins. For example, if you live in a hot and dry climate, you will need to water more often than if you live in a humid and cool climate.

Soil conditions

The type of soil you are using will also affect how often you need to water your string of dolphins. Soils that are heavy and retain a lot of water will need to be watered less often than soils that are light and drain well.

Container size

The size of the container you are using also affects how often you need to water your string of dolphins. Larger containers will need to be watered less often than smaller containers.

Plant size

Usually, the larger the plant, the more water it will need. So if you have a large string of dolphins, you will need to water it more often than if you have a small string of dolphins.

Hanging String of Dolphin
The larger the plant, the more water it will need.

Lighting conditions

The amount of light your plant is getting has a big impact on how often you need to water it. String of dolphins that are getting a lot of light will need to be watered less often than those that are receiving less light.

Can string of dolphins propagate in water?

No, string of dolphins cannot propagate in water. To propagate a string of dolphins, you will need to remove the offset or plantlets that are growing off the main plant and then replant them in soil. This is a process that can be started as early as within 30 days of the offset forming.

Do string of dolphins need to be re-potted?

String of dolphins do not need to be re-potted often but you will need to do so if your plant is root bound or the soil has become too compacted and drainage is poor. You will also need to re-pot if the plant is growing in a pot that is too large or too small for it. When you do re-pot, be sure to use a soil mix that is specifically for cacti and succulents.

A string of dolphin.
You need to re-pot if the plant is growing in a pot that is too large or too small for it.

Conclusion

Watering your string of dolphins is an important part of keeping the plant healthy and looking its best. By following these golden rules, you can be sure to provide your plant with just the right amount of water and keep it looking happy and healthy.

As you may have noticed, there is no one-size-fits-all answer when it comes to watering string of dolphins. The best way to determine how often you need to water your plant is to observe it and make notes about how often you need to water it in order to keep it healthy.

 If you’re not sure, it’s always better to water too little than too much. Overwatering can be very harmful to plants and is one of the most common causes of plant death.

9 Golden Rules For Watering A String Of Hearts

If you have or thinking about growing the string of hearts plant, then you would want to prioritize its watering. Although the string of hearts plant does not need a lot of water, it will require sufficient soil moisture for optimal growth. Watering a string of hearts plant is a simple task and you should not have to spend much time on it. However, if your soil is dry or the pot does not have drainage holes then you will need to monitor the amount of water that goes into this planter accordingly.

So what are the golden rules for watering a string of hearts? The rule of thumb is to check the soil moisture of a string of hearts plant once a week. If it is dry, then you will want to water this planter just enough for the top two inches or so of soil to become moist and soft. You definitely don’t want the string of heart’s potting mix wet either because too much water can cause root rot. During hot summer days, it might be necessary to water the string of hearts plant more frequently. If you’re unsure about how much water your string of hearts needs, check the soil moisture regularly and adjust your watering schedule accordingly.

Many houseplant enthusiasts don’t know that watering a string of hearts is even possible and if they do, they often think it’s too difficult to accomplish. This article will teach you how to water your string of hearts with minimal effort and time input.

 Here are 9 golden rules for watering a string of hearts:

1.     Check the soil moisture once a week

Checking the soil moisture of a string of hearts plant once a week is the best way to know if it needs water. If you have been checking your planter and notice that its soil has dried out, then it’s time to give this string of heart potting mix some moisture by watering it accordingly.

A string of heart in a pot.
Checking the soil moisture of a string of hearts plant once a week is the best way to know if it needs water.

However, if the string of hearts soil is wet, then refrain from watering it as this can lead to root rot. Water just enough so that the top two inches or so of soil become moist and soft. When you water a string of hearts plant, make sure you only give it enough water so that the top couple inches of its potting mix.

2.     Do not over-water or underwater

Just like any other houseplant, a string of hearts plant needs the right balance between soil moisture and drainage. If you have a pot without holes or one with poor drainage, then it is important to water this planter accordingly because too much water can lead to root rot.

 However, if your potted heart’s mix does not drain properly despite having draining holes, then you will want to water it less often. This is because the potting mix can only absorb so much water at a time and if there’s too much, it will overflow and go down the drainage holes.

A string of plant in a white pot.
A string of hearts plant needs the right balance between soil moisture and drainage.

Watering a string of hearts plant every day or not watering it for weeks are both bad ideas. Overwatering or underwatering your string of hearts plant will lead to browning or curling of its leaves, respectively.

3.     Choose the right soil mix

A good potting mix is very important for watering a string of heart houseplant because it regulates water uptake and drainage. If you have one with poor drainage like peat moss-based mixes, then your planter may become waterlogged and the string of hearts might rot.

 A good mix to use for a string of heart plant is one that has 50% potting soil, 25% perlite, and 25% vermiculite. This will help your planter absorb just the right amount of moisture so you don’t have to worry about over or underwatering.

4.     Use the right tool for watering

When it comes to choosing a pot, you want one with good drainage. In this case, the best tool to use for watering your string of heart’s potted mix is a bulb planter because it allows you to water the soil gently and thoroughly. A hose or some other tools can also be used, but make sure that they are clean so you don’t transfer any diseases from one plant pot to another.

 If your string of heart plant has grown roots that reach the bottom of the pot, then you will want to use a watering can or hose with a gentle spray attachment to water it. This is because if you use a watering can with a sprinkler head, you might accidentally wash away all the soil from around the plant’s roots.

5.     Don’t leave standing water in the planter

Water a string of heart plant’s potting mix just enough so that the top two inches or so becomes moist. This is because standing water can cause root rot and leaves to brown, especially if you have a pot without drainage holes. A good rule of thumb for watering this type of houseplant is checking it every day after morning time. If it’s dry, give the mix some more water.

The best time of day to water a string of heart plant is in the morning because this will allow excess moisture to evaporate during hot weather while at night when humidity levels are higher and temperatures lower. This means that you may not have to water your string of hearts plant as often.

Continue watering a string of heart potting mix every day or checking it every other day so that the top couple inches becomes moist but avoid letting the soil become saturated or wet. Doing this will help regulate moisture levels, avoid root rot, and keep your string of hearts healthy and green.

6.     Water the plant from the top

When watering a string of hearts, it’s best to water it from the top. This is because when you water from the bottom, all of the soil will become wet and this can lead to root rot. If your pot has a saucer, make sure to empty it after each time you water so that it doesn’t overflow.

A top view of string of plants.
It’s best to water it from the top, because when you water from the bottom, all of the soil will become wet and this can lead to root rot.

By watering from the top, you can help ensure that your string of heart’s potting mix gets all the moisture it needs. This will help keep your plant healthy and looking beautiful.

7.     Water at room temperature

It’s best to water your string of hearts plant with room-temperature water. This is because cold water can shock the roots and cause them to die. If you’re using a watering can, make sure to let the water flow for a few seconds before spraying it on the potting mix so that it isn’t too cold when it hits the plant.

The best way to get room temperature water is to fill a container with water and let it sit out overnight so that the temperature has a chance to adjust. You can also heat water in the microwave for a couple of minutes to ensure that it’s warm when you use it.

A string of hearts in a room.
It’s best to water your string of hearts plant with room-temperature water.

If your plant is outside, then make sure to water early enough so that the soil has time to dry out before nightfall. This will help prevent root rot and provide your string of hearts with plenty of sunlight throughout its day cycle.

8.     Use a bulb planter to water your plants

The string of hearts loves a bulb planter when it comes to watering. This is because bulb planters allow you to water the soil gently and thoroughly without injuring your plant or exposing it to too much moisture. You can also use a hose, but make sure that it’s clean so you don’t transfer any diseases from one pot of plants to another.
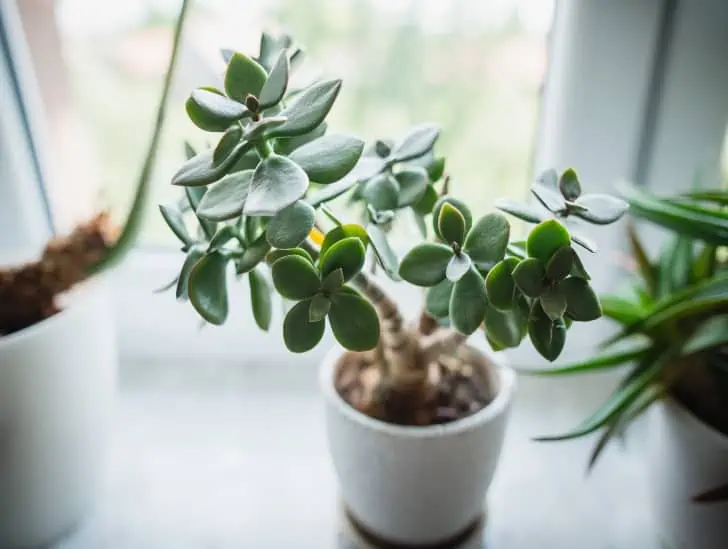
When using a bulb planter, make sure to water until you’ve emptied half of the container or so. This is because bulb planters only hold about two cups of soil. As such they don’t allow for much drainage as compared to watering cans. Conventional watering cans can hold anywhere from 32 ounces up to one gallon depending on their size.

9.     Access to sunlight is paramount

Once you’ve finished watering, it’s best to give your string of hearts plant some time in direct sunlight. This will help it to dry out quickly and prevent any potential diseases that can occur when plants are wet for extended periods of time.

A man touching the string of hearts.
It’s best to give your string of hearts plant some time in direct sunlight.

Make sure that your plant is in a sunny spot where it will get at least six hours of sunlight per day. If you don’t have a spot like this, then consider using a grow light to give your string of hearts the light it needs.

Conclusion

Watering a strong of hearts should not be as complicated as some people make it out to be. You can’t go wrong with following these steps to ensure that your plant is healthy and beautiful. If you are looking to keep your string of hearts looking it’s best, then proper watering is one of the most important things that you can do. As a rule of thumb, make sure to water your plant every day or every other day and use room-temperature water.  Really, it can’t get any easier than just watering from the top using either a bulb planter or pouring in some water.

How to Easily Propagate String of Pearls?

A string of Pearls, also known as Senecio rowleyanus, is an intriguing houseplant that is easy to propagate and care for. One of the reasons why this plant propagates easily is its relatively shallow and fast-growing root system. In fact, it is one of the few succulents known for propagating themselves.  The plant is also popular for its cinnamon-scented flowers that add immense beauty to your indoor spaces. A string of pearls is truly a perfect plant for new gardeners and those who don’t have much time to dedicate to plant care.

But, how can you propagate a string of pearls plant? This succulent is mainly propagated through stem cuttings. Regular pruning is one of the best ways of obtaining cuttings that you can propagate into new plants. Once you have acquired healthy stem cuttings, you can root them in soil or water.  Rooting in soil requires a specially prepared potting mix with good drainage properties. To propagate in water, you need stem cuttings at least three inches long. Strip off the leaves from the rear end and dip them in a growing container full of distilled water.

This blog post discusses everything you need to know about propagating string of pearls. Read on to learn more about how you can grow your plant collection.

Some Info Before We Begin

A string of pearls is best propagated through stem cuttings. This method is fast, relatively easy, and uses pruned stems. Stem cuttings are also a great way to fix leggy string of pearls plants by propagating new plants from the etiolated stems.

String of Pearls in the mug.
Summer is the growing season for most succulents because of the warm weather.

While some people go for the seed germination option, you need to remember that the process can be lengthy, and good results aren’t guaranteed. Sometimes, seeds fail to germinate completely.

The best time of the year to propagate a string of pearls plant is during spring or summer. This is the growing season for most succulents because of the warm weather.  Any stem cuttings you propagate during this time will have a lot of growing to do before winter dormancy kicks in.

The string of pearls propagation method also works perfectly for string of hearts and string of bananas plants. In fact, these plants can even share the same container during the propagation process.

Another critical thing you need to know is that, unlike other “string” plants, the string of Pearls is highly toxic. If you ingest it by accident, it can cause vomiting, nausea, and skin irritation. Therefore, it is recommended to wear gloves when propagating the plant.

The toxicity effects are worse on dogs and cats. So, don’t let your pets anywhere near the plant. Always keep it in a safe room away from your kids and pets.

Propagating String of Pearls through Stem Cuttings

To propagate a string of pearls plant through stem cuttings, you will need the following materials:

  • A pair of sharp scissors or clippers.
  • A misting bottle for watering.
  • Well-draining succulent soil.
  • A small growing pot with drainage holes.
  • A mature string of pearls plant with healthy stems.
  • Rooting hormone.
  • A glass/cup.

Preparing the Cuttings

Ensure the stem cuttings you take are healthy and at least three inches long. Each pearl contains some water and nutrients that will be crucial in sustaining the cutting while it develops a root system.

As such, your cuttings should have at least three pearls, not counting the ones that you will remove while sticking the cutting into the soil or dipping it in water. If you spot some parts of the stem that are already growing roots, be sure to start with those ones.

Carefully clip the stem using a clean and sharp pair of scissors or clippers. Try as much as possible to get a clean cut. Unless you want to do water rooting, allow the cutting to dry out before proceeding.

Allowing the cutting some time to dry keeps out bacteria and prevents rotting. Since the stem of this plant is so tiny, it can take a couple of hours or a day to dry and callous over.

String of pearls in a pot.
Ensure you keep the stem cutting away from direct sunlight to prevent severe sunburn.

While the stem cutting is drying, fill the small growing pot with potting mix. You may dip the stem cutting into the rooting hormone if you want before planting it. There is no need for a rooting hormone if you are doing water propagation.

In most cases, the string of pearls develops roots so easily that there is no need for a rooting hormone.

Rooting the Stem Cuttings

For rooting the stem cuttings, you have three options. You can lay it on the surface of your potting mix, dip it in the soil, or root it in water. Each method is simple and has its own benefits and drawbacks.  Let us discuss each one of them below:

1. Lay the cuttings on soil

In this method, you will be required to lay your stem cuttings flat on soil after they callous over. Let the cutting touch the soil. The cutting will shoot out roots from anywhere it touches the soil.

Ensure you use the well-draining potting mix to achieve better results. If the stem cutting you obtained already has roots on it, position it such that the roots are digging into the soil.

Sometimes, you may need to use something to hold the cutting in place. Feel free to use paper clips cut in half to hold the cutting down.

Mist the potting mix every few days to keep the cutting hydrated. Once the cutting has developed roots, stop misting and switch to proper watering. However, decrease the frequency of watering to once a week depending on the humidity of your area.

Typically, it takes approximately two weeks for the cutting to develop new roots. However, if you used stem cutting that had already developed roots, it will take less time for the plant to be fully established and ready for a new pot.

Ensure you keep the stem cutting away from direct sunlight to prevent severe sunburn.

2. Stick cuttings in soil

To propagate your plant through this method, ensure your cutting is at least two inches long. Give the cutting some time for the cut end to dry and callous over before you stick the cut end into the soil.

Feel free to remove a few pearls from the cut end of the stem to make it relatively easier to stick it into the potting mix.

Make sure the potting mix you use is well-draining. To achieve good drainage, you can use a combination of regular cactus soil and perlite in the ratio of 1:1. You can also add some coarse sand to the mixture to improve drainage.

A pot and a soil.
You can use a combination of regular cactus soil and perlite in the ratio of 1:1.

Once you have planted the cutting, mist it and wait for it to develop into new growth. It takes approximately two weeks for the roots to develop. Once the cutting has developed a root system, it will take two or three weeks before new growth starts to shoot at the top of the plant.

Keep the newly planted stem cuttings away from direct sunlight to prevent sunburn. As soon as you notice new growth on the upper part of the stem cutting, switch from regular misting to proper watering. Maintain the watering frequency to only once every week.

Be sure to wear gloves throughout the process because the string of pearls plant is highly toxic. Furthermore, don’t allow your children or pets anywhere near the propagation area because they can bite the plant.

3. Water propagation

For water propagation, carefully remove a few pearls off one end of the stem cutting and place that part of the cutting in a vase with water. You don’t need to do anything else for the cutting to root. For better results, consider using distilled water.

New roots will start to form after two to three weeks. You should see a lot of roots after approximately four weeks. This is the right time to shift the cutting from water into a well-draining potting mix.

A water propagation of a string plant.
Consider using distilled water for water propagation for a better results.

For the first few days, mist the soil to give the cutting some time to adapt to the new environment. From there, switch to regular watering but be careful not to overwater your newly propagated plant. Water it once or twice a week in less humid areas.

Propagation through Seed germination

If you feel lucky and want to try your hand at propagating this plant from seeds, then you can give it a try but don’t expect much success.

To propagate from seeds, you need to find a way of pollinating the flower. Pollinated flowers open their heads into a fluffy ball ready to be blown away by wind. The ones that have not been pollinated still look fluffy but won’t open up.

A flower of a string type plant.
To propagate from seeds, you need to find a way of pollinating the flower.

If you collect seeds from the unopened flower heads, they won’t germinate. You can plant the seeds right into a potting mix but remember to water them daily. The germination period for seeds can be anything from a few weeks to three months.

The seeds tend to germinate better during spring or summer. If you buy string of pearls seeds, ensure you get them from a reputable seed shop.

Final Thought

That is it about propagating string of pearls plants. We hope you enjoyed reading this post and you are now ready to start multiplying your plant collection. Follow the steps outlined above, and you will have a huge collection of this amazing succulent in no time.

Does Jade Plant Need Direct Sunlight?

Jade plants are interesting succulent plants that are easy to maintain and have fleshy leaves and woody stems similar to small tree trunks. The hardy houseplants are also known as friendship trees or money plants, and they thrive in dry and sunny environments. In their native South Africa, where summers are stifling and the ground very dry, they may reach a height of 10 feet.

Like all other succulent plants, Jade plants need direct sunlight to grow. If your plant does not get the right amount of sun, photosynthesis will cease, and the plant will not grow. They may also become leggy or droopy if light conditions are poor.

These attractive succulents flower in winter, producing star-shaped blooms. Once you know the growing conditions of the natural habitat of the jade plant, you can replicate this environment in your house or office. The proper amount of sunlight will help your jade plant grow. The site is vital, mainly when growing your Money Plant indoors.

The Best Jade Plant Location

Direct sunlight is not appropriate for most indoor plants because it results in the burning of leaves. However, the Jade Plant is an exception and does well with direct sunlight. If you have a mature jade plant, place it in direct sunlight for at least 4 hours. For a young plant, use a bright but indirect light. However, Jade varieties with variegated leaves do not prefer the direct sun and thrive in shining and indirect sunlight.

Jade plant on the window.
The best location for your Money Plant is next to a sunny window facing west or south.

The best location for your Money Plant is next to a sunny window facing west or south. If you can’t get a bright spot, or if it’s cloudy, place your plant near an artificial light source. If you choose fluorescent lighting, select one with two bulbs. Label a bulb for use and use it to deliver a full spectrum of light for your plant. The second bulb should be a cool white bulb. The disadvantage of using artificial growth lights is that the leaves appear light green.

Indoor Plant Location

Here are the top indoor plant sites for your Jade Houseplant.

  1. Sunny Patio

A perfect location for your Jade Plant would be a Patio or Balcony adjoining your room. This option is great if you are looking for robust growth in your Money Plant. These places are great because your plant will get the proper sunlight all day long. The optimal exposure time is four to five hours in these conditions.

Jade plant on a black pot.
perfect location for your Jade Plant would be a Patio or Balcony adjoining your room.
  1. Near a Sunny Window

A window where your jade plant can obtain tons of natural light is ideal for regular growing. The rooms with south-facing windows are fantastic locations and west-facing windows. A window facing east may also work because of the direct sunlight in the morning and the late afternoon sun, which is not too intense.

  1. In a Room with Partial Sunlight

If you have no space next to a window, you can put it where it can get a few hours of indirect sunlight throughout the day. Ideally, the direct sun is vital, but if the room is lit correctly and receives natural light, the plant should be fine, although the growth is not as vigorous.

  1. Shaded Location in your Room

A shaded location is not the best choice and only applies if you can’t get direct sunlight into your home. Opt for a well-lit room during daylight hours. Even though it will survive, it will grow at a slower pace.

A plant in a shaded area of the room.
A shaded location is not the best choice and only applies if you can’t get direct sunlight into your home.

Outdoor Plant Location

You can place them on patios for outdoor plants but move them indoors once autumn and winter are in place to protect them from freezing. The best outdoor location can receive direct sunlight in the morning but is shielded from the constant afternoon sun. If you stay in a warm environment and keep your plant outside, pick a place with some shade when the sun is hottest to keep your plant from cooking.

Maintain indoor temperatures of 64 to 74 degrees Fahrenheit for best results. They appreciate cool nighttime temperatures up to 55 degrees Fahrenheit. Airflow from cooling and heating systems can also cause temperature variations. The amount of sunlight required varies depending on the season. Let’s examine the different light needs of the jade plant depending on the season.

The Direction of Sunlight.

The sun’s direction for the Jade plant is critical in deciding the best spot. You must know the direction of your house facing to settle in the appropriate position for your jade plant. We recommend a south-facing window but consider the various approaches and pros and cons.

● North Facing

A north-facing window receives a little light, but the light is barely enough for the optimum growth of your jade plant.

● East Facing

The eastward windows receive enough sun in the morning and a few hours of the late afternoon sun, which is not intense.

● West Facing

A West Facing window receives an intense afternoon sun that can be harsh for the leaves of your jade plant. To limit intensity, you can use simple curtains.

  • South Facing

South-facing windows receive a sufficient amount of light during the day, making them ideal for your jade plant.

Jade Plant Seasonal Light Requirements

Winter Sunlight Requirements

The Jade Plant does not require round-the-clock bright light during winter. However, a bit of light is necessary if you want your plant to survive in winter. Sunlight also prevents your plant from becoming soft in the cold.

Because there is less sun in winter, make sure your plant gets some sun by moving it closer to a window during the rare sunny winter days. We do not recommend an east-facing window during this period because the light could be insufficient.

A plant near the window.
Make sure your plant gets some sun by moving it closer to a window.

However, place your jade plant away from a cold window, as that can be bad for your plant. You can protect your Money Plant against cold windows and draughts by putting a curtain on your window or pulling the shade.

If your jade plant is outdoors and your surroundings have winter temperatures that may be as low as 45F or less, move your plant indoors until spring. However, if temperatures don’t go down regularly, you can leave your plants outside as long as you protect them from freezing. To shield your plants from frost, you can put them on a covered terrace, tie the Christmas lights on the plant or cover your plant with a rag.

Springtime Sunlight Needs

Be careful about rays in the spring, especially if you have placed your plant near a window facing west or south. The delicate new leaves unfold in the spring and can quickly burn, so move the plant slightly away from your window or use transparent curtains. However, established jade plants thrive on sunlight.

To measure whether you give your money, plant the necessary amount of light, put your hand on the window when the sun is brightest. If the light is too much and burns your hand, it may be too hot for your Jade plant. Turn your house plants each week for better sun exposure on your leaves.

Sunlight Consistency

Jade plants can adapt to different lighting conditions. However, sudden temperature variations can put your plant’s growth at risk. Frequent shifting can stress out your Jade plant. If you want healthy plants, you should be consistent.

If you suddenly increase the light, your plant may end up with brown patches and burnt leaves, ultimately affecting your plant’s growth. We suggest placing your jade plant in an area with appropriate indirect light and sufficient direct light.

Jade plant near the window with sunlight.
Frequent shifting can stress out your Jade plant.

To move your jade plant, do it one step at a time. If your plant is used to sift a light, slowly move it to a brighter place to give it the time to adjust to its new environment. You may first place your plant in a shaded area. Shift it to a sunny location where it can get direct sunlight for some time and gradually increase sunlight over time; this should take you about two weeks.

Signs That Your Jade Plant Is Getting Inadequate Sunlight

Jade plants are versatile and can survive under diverse lighting conditions. However, your jade plant will not flourish in low-light conditions. How can you tell that your Money Plant is not getting enough light?

  1. Yellow leaves

Yellow leaves are an obvious sign of low light in Money Plants due to a lack of nutrients. You can move your plant to an illuminated point if you notice yellowing.

  1. Pointy Leaves

A jade plant that points towards the light source is most likely suffering from poor lighting. Also, if the leaves are thin and floppy, please increase the quantity of light that your money plant gets.

  1. Slow Growth

Slow growth demonstrates that your plant does not have enough energy to grow due to low light. Thin stems also indicate insufficient sunlight.

If you suspect that your jade plant does not get enough sunlight, you can use artificial growing lights or turn the plant to bring light in all directions.

Conclusion

The jade plant cannot survive in the absence of sunlight. If you want to have a compact and complete Money plant, you must provide sufficient light. Direct sunlight will allow for vigorous growth. On the other hand, indirect sunlight may work but not deliver an optimal growth rate.

Does Ice Plant Need Direct Sunlight?

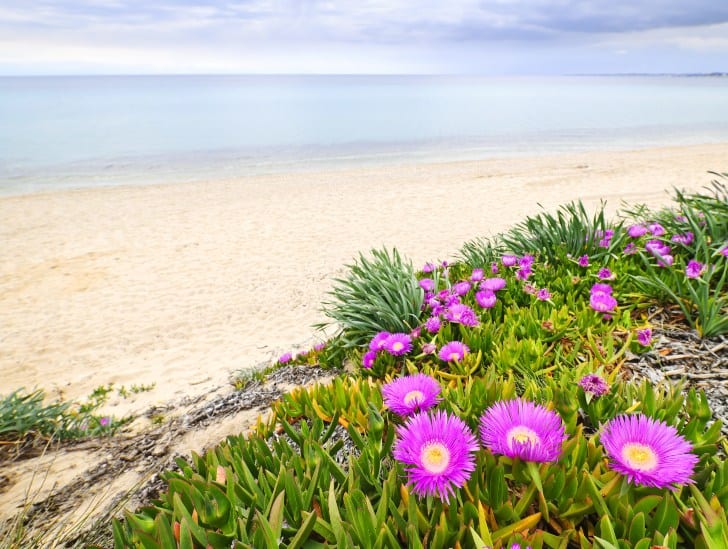
A purple ice plant flower exposed to sunlight.

Plants typically require daily exposure to sunlight to survive and thrive. Ice plants get their name from the tiny, reflective hairs that look like ice crystals. They are trailing perennials in warm temperatures with vibrant flowers. These sun-loving succulents need at least six hours of direct sunshine per day but can withstand partial shade even if they don’t bloom as much.

The leaves are fleshy and bear the appearance of succulent plants. Commonly known as the frost plant, there are many reasons that this common indoor plant is a favorite. Ice plants are packed with vitamins and minerals and have been touted to treat digestive issues; the juice can also treat infections when applied topically. The fruits may be eaten whole or preserved and used for making jam.

Ice plants thrive in warm regions, so if you add the plant to your collection, be sure to provide similar conditions to native African habitats. The right amount of sunlight is essential for the healthy growth of your ice plants, especially if you want your plants to bloom.

Almost always, when you buy your ice plant, you will find the sunlight requirements on the label or the seed package. While tags are a great way to determine the best lighting conditions for your plant, more research will help to keep your plant healthy. In your research, you may encounter some sun exposure terms that may be confusing. Let’s look at the various terminologies to help you decide what works best for your ice plant.

Different Types of Sunlight Exposure

Figuring out how much light your home or yard receives can be difficult. You can use gadgets to measure sun exposure, although they may not be accurate. Observe the planting area for two weeks to determine the average trend. Once you know how much light the site gets, it is easier to match the requirements of the plant tags.

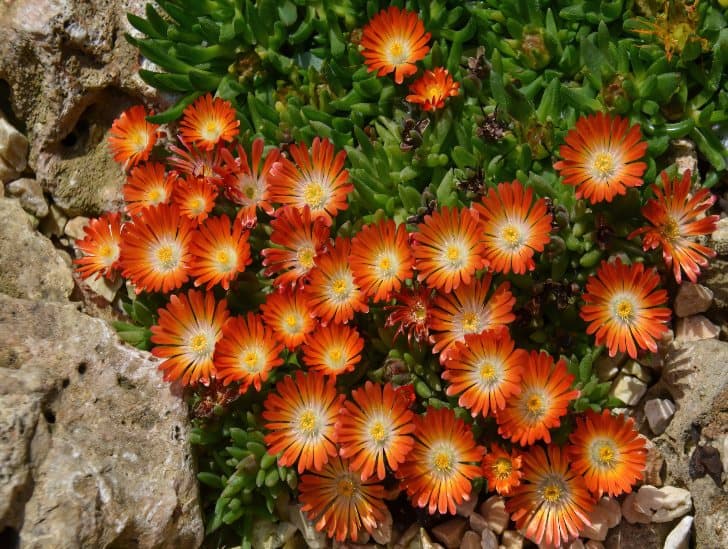
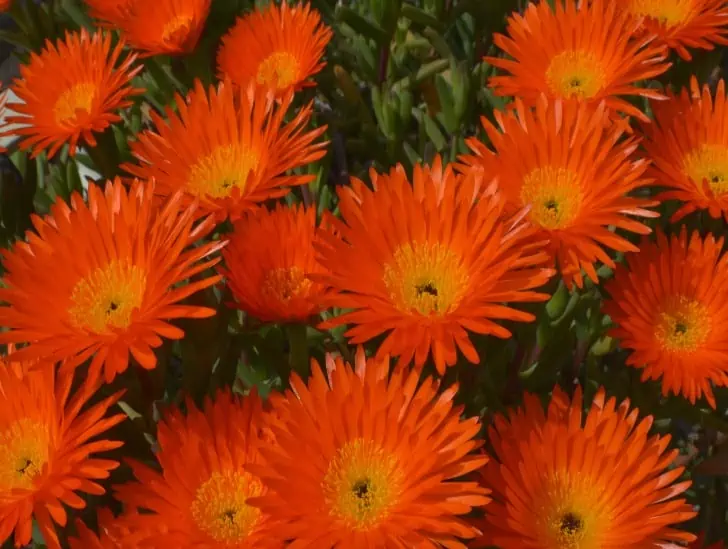
Orange Flower Ice Plant.
Once you know how much light the site gets, it is easier to match the requirements of the plant tags.

Ice plants can do well in different ranges of sun exposure, so you have more flexibility in determining the location. However, they prefer direct sunlight for better development but may tolerate partial sunlight.

Full Sun

A full sun location gets between six to eight hours of direct sunshine between 10 am and 4 pm. Full sun is not easy to achieve because ice plants require full sun to bloom, but young plants cannot take the intense heat that comes with such sun.

The best way to place growing ice plants is to get much sunlight in the morning or try late in the afternoon. Plants will grow well if they get between six and eight hours of direct sunlight.

Orange flower Ice plant on the rocky soil.
Plants will grow well if they get between six and eight hours of direct sunlight.

The more established ice plants can thrive in more hours of direct sunlight because they grow well in dry climates. You can use a mulch to maintain soil humidity and keep it cool. As a perennial, the ice plant needs full sunlight as long as you consider the water needs.

Partial Sun

Partial sun refers to exposure to between four and six hours of direct sun per day, mainly during cold morning hours. Although these plants require some hours of sun to bloom and fruit, they do not need all day in the sun.

Ice plants may grow in partial sunshine but more slowly and may not bloom. If you come across a plant labeled partially shaded or do not enjoy the blooming of the ice plant, place it where it is obstructed by the direct afternoon sun.

Full Shade

Not many plants can thrive without sunlight. The ice plant is not one of those. Plants that need shade can survive with only four hours of direct sun, especially in the morning or late afternoon.

Sunlight Requirements

Most people think that houseplants do not need too much sunlight. Ice plants differ because they enjoy full sunlight. Although they can do pretty well in partial shade, they appreciate the full sun. We recommend about 6-8 hours of direct sun. If your plants lack sunlight, they will become leggy and grow less.

The Best Location for the Ice Plant in Your Home

The ice plant growth guide or guidelines recommend a sunny spot that will get at least six hours of direct sunlight.

Indoor Light Requirements

The perfect spot for your indoor ice plant should be the brightest spot available in your home. Consistency is vital; the site should receive adequate light throughout the day. You can put your plant near a window facing eastward. The southern and western ones are equally good. To find the best position, you may need to move the plant more than once.

Yellow flower ice plant in pot.
The perfect spot for your indoor ice plant should be the brightest spot available in your home.

Ice plants do not tolerate poor light for long. If you cannot obtain enough natural light in your home, you can use artificial cultivation lamps. Grow lamps complement light requirements, especially in winter.

Choosing the Best Grow Light for Your Ice Plant

Intensity

Ice plants need a specific amount of sunlight so that photosynthesis takes place. The light requirements are pretty high, so get lights that emit at least 2,000 lumens per square foot.

Colour

Indoor ice plants grow well under bulbs as natural sunlight in terms of spectrum. The optimal color temperature must be at least 5000 kelvin.

Energy Usage

Both LEDs and fluorescent lamps produce a whole spectrum of light. However, fluorescent lights have more energy consumption, while LED lights last longer and use less power.

Indoor Light Terminologies

Bright

Bright interior illumination means no obstacle between the plant and the window. Obstructions include blinds, curtains, and curtains. They may also obstruct outside the window, such as trees or bushes.

Bright light means that you have to place your plant in a sunny place, probably to the south or west-facing windows with bright and direct sunlight all day.

Filtered

Filtered light, also referred to as indirect light, is partially dimmed and slightly shaded. As we have already seen, ice plants can also grow under filtered light, but they will not reach optimal growth.

Plants that need filtering light must be exposed to sunlight for a few hours, preferably in the morning or late afternoon: South-facing and east-facing windows better capture filtered sunlight. The good thing about the filtered sun is that your plants will get enough sun without being over-exposed.

Shaded

Dim Light refers to zero direct and low sunlight. The light which enters through the window is obstructed by curtains, furniture, or even outdoors by trees or buildings. Plants in need of shaded areas probably have high water requirements.

Outdoor Sunlight Requirements

Ice seedlings, when cultivated outdoors, prefer light shade to full sun. They do better in zones with much sunlight. When your ice plant is exposed to much sun, it will reach its best coloring. If you move it into a shaded area, it will look pale.

Ice plant along the sea.
When your ice plant is exposed to much sun, it will reach its best coloring.

Consider gradually raising the amount of sun until your plant is used to direct sunlight. Pay close attention to younger and smaller plants as they may be damaged by sunlight when exposed to intense heat.

Signs That Your Ice Plant Is Getting Enough Light

You can see that your Ice Plant gets plenty of light if it grows well. However, if the leaves are burned or the flowers appear thin, the plant’s location is probably not the best. You can also relocate or rotate your plant if you suspect that the place is not perfect.

Ice plants that do not get enough sunlight will also be lengthened because they stretch to get more light, which causes weak stems and lean growth. Furthermore, the plants will be pale and dull.

Can Ice Plants Get Too Much Sun?

Ice plants are found in vital areas and tolerate drought. Although the plant loves the sun, younger or newly propagated ones are a little difficult. In addition, if your ice plants are accustomed to growing indoors, they may get sunburned when they are moved outdoors for the first time. We suggest that you slowly acclimate your ice plant to direct sunlight if you want it to survive.

Sunburns can result in permanent scarring of your ice plant. To protect your plant from sunburn, begin by slowly conditioning your ice plant to intense light before total sun exposure. First, give your plant a partial shade and gradually expose it to more sun until it is fully acclimatized to the heat.

Orange Ice plant flower.
You can see that your Ice Plant gets plenty of light if it grows well.

The morning sun is less intense and is a great place to start as you work your way to the brutal afternoon sun. Alternately, shade your plant over the first exposure. When you slowly increase exposure to the sun, you protect your ice plant from sudden impact and leaf damage.

Conclusion

Ice plants bear colorful flowers like daisies. If you want to take in the beauty of these flowers all year long, give your money plant enough direct sunlight. However, if you want to control the growth of your ice plant and don’t mind the minimum flowers, you can go for partial shade.

 9 Golden Rules for Watering an Ice Plant

A ice plant blooming.

If you are looking for a beautiful plant to fill your garden with, an ice plant is a good one. These drought-resistant flowers will not just add a bright splash color to your garden but also help cover the drier parts of your land. Caring for ice plant care is easy, just that you have to learn how. The most crucial factor to consider when caring for an ice plant is watering.

This article will discuss the 9 golden rules to follow when watering an Ice plant to keep it healthy. Read and learn about the best way to water this pretty plant. Like other succulent plants, they will not need much care if you get it right during watering. So let’s get into the details of these golden rules.

During Dry Conditions, Water the Plant Deeply

An arid condition exists when the soil receives little water, quickly drains. The condition makes the soil surrounding the ice plant dry up to a depth of 12 inches. Therefore, water the ice plant intensely every seven to nine days. But do this based on the current conditions, whether it is raining or the climate is dry.

When the conditions are dry, water the soil to a depth of at least 7 inches. It ensures the plant’s root ball is completely soaked in water. Doing this prevents situations where the plant dries because it lacks moisture. Lack of water causes the leaves to start withering.

Before seven to nine days of watering are complete, if wilting is observed, it is any indication, the plant still needs more water. Even so, ensure you avoid overwatering. Excess water will block the plant’s root system from getting air, leading to root rot.

Do not Water the Plant Before a Freeze

Water in the plant cells gives it hardiness to sustain and cushion itself from the damaging effects of the freezing night. Thorough soaking of the ice plant during the day before a chilly night should provide enough moisture to prevent the plant from damaging because of a frost. Water your ice plant early in the day to give it enough time to absorb the moisture. Watering early also increases the ability of the plant to retain heat from the sun.

A woman watering the plant in the morning.
Watering early also increases the ability of the plant to retain heat from the sun.

 When an ice plant is wet during the freezing period, the influx of water could cause the plant to freeze and die. Sprinkling water on the foliage of the ice plant before a freezing night can lead to frost spots forming on the leaves. The effect will damage the lovely appearance of the plant, and it could kill it. In everything, you do not overdo it. 

The “Soak and Dry” Method is Best for Ice Plants

Ice plants provide their water hence do not like much moisture. The soak and dry method will not just keep your plant happy, but it is the best method to use for succulents. The technique involves saturating the soil with water. Then wait until the soil mix dries almost completely before watering again.

While practicing the “soak and dry” method, maintain a watchful eye on the condition of the ice plant. Letting the plant dry out entirely for too long may prove impossible to revive it. This plant’s soak and dry method work well because it caters to their nature, ensuring they adapt accordingly. 

One of the common mistakes that people make is adding a small amount of moisture frequently by watering when the plant does not need water. Unfortunately, this introduces other conditions not suitable for the plant. Remember, it is a succulent plant. The soak and dry method allow you to water the plant thoroughly and leave it to dry before the next watering.

Consider the Environment of the Plant Before Watering

The environment where your ice plant is planted determines the soil’s moisture level. When it is grown in a place that receives a lot of lighting, the watering frequency may be higher than low light. An ice plant near a window or a heater dries out faster than other locations.

A cactus on a desert.
When it is grown in a place that receives a lot of lighting, the watering frequency may be higher than low light.

To ensure that you don’t overwater or underwater the plant, take a keen look at the behavior of your plant in its environment. You may dip your finger into the soil to determine the soil’s moisture. The plant will show you some signs of overwatered or underwatered from time to time. For an overwatered ice plant:

  • The leaves are soft and mushy
  • The leaves turn black due to fungal disease from too much overwatering
  • Leaves start to shrink while others start to drop

Signs for underwatered ice plants include

  • Wrinkly and shriveled leaves
  • The leaves start turning dry on the edge
  • During flowering, the plant fails to flower entirely.

How often the underwatered plants show these signs determines how often the plant needs water. However, the best condition to grow the ice plant outdoors is full sun and soil with good drainage.

Water the Plant More During the Growing Period

Ice plants are in full growing mode between spring and fall. During this time, water is likely to evaporate more quickly due to the increased temperatures. Therefore, it is good to increase the amount of water and the frequency of watering the plant. The watering frequency may increase once per week during the growing season. 

If you have planted your ice plant outside, watering is frequent during the warm months. The seasoned guidelines may not apply to other areas. Therefore, keeping a close eye on the soil is essential.

Soil Used is an Essential Factor

Soil type used is an essential factor in proper drainage. It determines the amount of moisture the soil retains for the plant. Regular potting soil may not be the best option with ice plants. This is because Ice plants prefer soil that retains less moisture.

A soil being watered.
Regular potting soil may not be the best option with ice plants.

The best soil type where an ice plant flourishes is a mixture of potting soil with sand or perlite. Sandy soil drains the water avoiding standing waters. On the other hand, poor soil will cause the ice plant to die when kept in standing waters for long.

Bottom Watering is the Best

Whether watering from the top or the bottom, it helps to quench your plant thirst. With ice plants or other succulents, bottom watering is the best option. The method isn’t just for typical foliage houseplant but also a better way to make your ice plant receive the right amount of water.

Top watering of the plant is an easy method. But enough water does not reach the plant’s roots. As a result, water remains on the leaves during top watering, causing rot. In addition, the water creates rust on the foliage, destroying both the vegetation and the plant’s health.

Top watering of the plant is an easy method, but enough water does not reach the plant’s roots.

Bottom watering ensures all the soil gets water absorbed deeper into the root caps. This allows the plant to grow and thrive well. When watering the ice plant at the bottom, place the watering jar near the bottom to prevent water from splashing. Then, water the plant slowly until water drains from the drainage holes.

Cut Down on Watering During the Winter Period

How often an ice plant needs to be watered depends on many factors, especially the seasons. The soil dries out faster during the summer. During the winter season, the soil does not dry out fast, as the plant is in a dormant state, and giving the plant more water means overwatering. There is not much evaporation during the winter season, and water stays logged on the roots of the ice plant. 

Watering the plant depends on many factors, especially the seasons.

The water causes a root rot or fungal infection, destroying the whole plant. To prevent overwatering during this period, give your succulent a drink early in the morning. It ensures the water evaporates during the day. However, minimize the amount of water you give the plant during morning hours because not much evaporation occurs during the day.

Don’t Use Ice Cubes

Some gardeners use ice cubes to water their houseplants. Don’t do this with ice plants or other succulents. Though this method seems better, dispensing a small amount of water slowly is a sure way to kill the plant.

Succulents like ice plants are native plants in the desert. Using ice cubes to the water, the plant freezes the roots, shocking the plant. Unlike the belief that using ice cubes to water a plant is similar to using a controlled soaking method, the plant dies because of excessive cold.

Bottom Line

From location to location, watering can be a process of trial and error, unique in different places. Nonetheless, your ice plant will need water to survive. So always remember to follow the above rules and tips in mind, to maintain a healthy and hydrated ice plant perfect for your landscape.

 A succulent remains a unique plant whose maintenance entails moderate watering. While keeping and observing these watering rules, keep watch of other factors. Water moderately, and be assured of a blooming Ice plant.