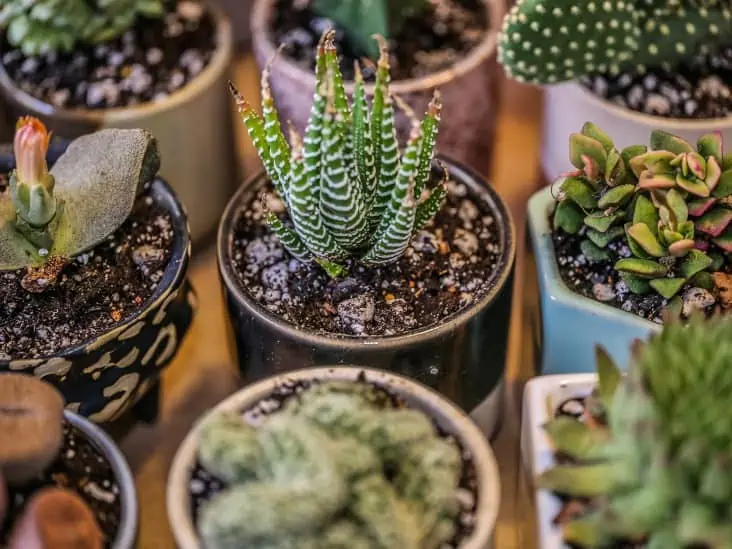
How I Propagate Haworthia To Make More Plants

Haworthia is a simple, easy-to-grow succulent. Commonly called “polka dot” or “zebra” plants, these houseplants are one of those succulent plants that would do well both indoors and out. Initially, they are slow to grow, but they can multiply and produce small offsets when established.

It can be costly to purchase enough succulent plants to fill your entire garden, so propagating is a cost-effective way to have a large garden. There are three tried and tested ways to propagate haworthia: seeds, offset division, or leaf cuttings. However, starting new haworthia plants using these methods can give gardeners all the plants they want at little cost.

The seeds can be bought online or harvested from your plants if you are fortunate to have a haworthia in bloom. The offset division requires a plant that sends lateral sprouts. Only a healthy plant is needed to start a new haworthia.

The ideal soil mixture to start new worthies is the same no matter the method. Use a premixed sachet cactus soil or create yours by combining a ratio of 2/3 of sand, crushed lava rock, or perlite to 1/3 of potting earth. Avoid using municipal water with chlorine during watering. Instead, use distilled water or a freshwater source.

Propagation of Haworthoia from Seed


Haworthia seeds should be grown in warm, semi-damp soil. Once the seed germinates, you should limit your watering habits as much as possible.

The cultivation of haworthia from seeds is often extremely time-consuming and can take weeks or even months to sprout. Before planting, soak the seeds to soften the skin. Use lukewarm water, not warm, and allow the seeds to soak for about 30 minutes.

Seeds on hand.
Haworthia seeds should be grown in warm, semi-damp soil.

After harvest, the seeds must be relatively new and not more than six months old. The more recently you have collected them, the more active the seeds are, and the quicker you progress. In addition, seeds under one month old will have a greater chance of survival during planting.

Get rid of any debris and dried fruit shells for good seed growth. If not removed, they will grow with the seeds that can lead to fungi, spreading among the seeds and killing them.

Fill one or more small jars with the cactus mix and put some seeds in each pot. Dust the seeds with a light layer of sand or gravel to lightly cover them. Keep the soil moist.

Seal the jars in a plastic purse or transparent container. Place the container where it will get indirect light and maintain room temperature. Monitor the level of humidity within the sealed container. If it is too dry, give it a drizzle.

The Seeds will not grow when the soil is too dry or damp. To overcome this problem, you must use a mist bottle. Spray the water on the sprout’s earth and keep the surface very wet, but the ground dries if possible.

If the algae starts to grow, open the bag or container and leave to dry. Once it sprouts, do not transplant immediately since the root system develops slowly. Instead, please keep them in a sealed container until an elaborate root system develops.

Benefits of seed propagation


● Seed propagation is the most efficient natural method of propagating in many plants.
● Propagating seeds increases the likelihood of genetic variation.
● It ensures that the plant remains viable for an extended period.
● Seeds are pretty inexpensive, and you can store them for a lengthy time.
● Seed germination poses a low risk of disease transmission to a new plant.

Propagating Haworthia by offsets


Most Haworthia species generate small clones of the mother plant known as offsets. A convenient time to spread the haworthia is when it has overrun its container.

Haworthia propagation by offsets has a high success rate and is relatively straightforward than other propagation methods. This approach is also cost-effective. The best time to remove offset sprouts is during repotting in spring or autumn.

A offset of Haworthia in a pot.
Haworthia propagation by offsets has a high success rate.

Soak the blades of your tools in a domestic cleaner or other disinfectants to avoid the spread of disease. Wear protective equipment, including gloves and goggles, as well.

Find pups that look big enough for removal. Try getting some roots when you are pulling out the offsets. You can remove a root-free pup, but you will be far more successful with those who have roots already growing. Take care to remove the offset as closely as possible to the mother plant.

Roots-free pups will eventually take root, but those with existing roots are more likely to survive independently. Similarly, the bigger ones are stronger than, the smaller ones and are more likely to survive.

A offset in a white pot.
Propagation by offset division is the easiest and quickest method of growing a new haworthia.

At times, you can separate the pups by gently twisting the pup out of the parent plant. However, we recommend removing the entire plant from the pot before separating the pups to allow you to view the roots.

Use a clean knife or blade to take out the pup. Separate the baby plant carefully from its parent plant by inserting the knife’s edge between the mother plant and the offshoot. Slowly remove the offshoot from the parent plant and cut the root that connects it.


Allow the pup to dry for about a day or more to ensure the cut or open areas are dry and sealed or calluses. Keep in a dry place clear of direct sunlight. Optional: Dip the pup in the rooting hormone before planting. Rooting hormones can help accelerate this process, in particular for root-free pups.

Haworthia plant with its offset.
You can separate the pups by gently twisting the pup out of the parent pl

You can plant the pup. Once dry, you can produce the pup by itself. Make a well-draining potting mixture and plant the offset in the soil. Loosely wrap the earth around the plant until it is secure.
Pups require a bit more humidity than adult plants. Spray the soil lightly every couple of days or when the soil is dry.

Once the plant is more established and rooted, stop misting and irrigate more deeply. You can reduce watering to approximately weekly or less. Protect new plants from direct sun when initially planted in their pot to avoid damage caused by sunlight. Then, progressively increase sunlight and sun exposure depending on the plant’s needs as it matures.

How to remove offsets from Haworthia parent plant


● Check for root offsets around the base of the mother zebra plant. Carefully scrape the soil around the bottom of the branches and seek small, pale, or white pink roots.
● Place the blade of a gardening knife in the ground halfway between the original plant and the rooted offspring. Then, slide the blade across the ground to separate the root.
● Cut a 2-inch radius into the soil around the base of the rooted branch using the tip of your gardening knife. Excavate along the radial line to a depth of 5 inches with a small portable spade.
● Place the pocket spade blade at an angle below the rooted branch. Carefully detach from the ground and remove. Fill the hole left by the offshoots to protect the parent plant’s roots.

Propagating Haworthia from leaf cuttings


Haworthia can spread by leaf cuttings like many other succulent plants. However, leaf cuttings are more successful in circular and thicker haworthias. But be careful because this plant is difficult to get the entire leaf without pulling the tip of the leaf.

Ensure that the whole leaf end is removed and intact for this process to work. Then, you can either propagate the entire plant at once or cut the inner stalk as they separate all the leaves or use a small precision knife.

Leaf cuttings propagation.
Leaf cuttings are more successful in circular and thicker haworthias.

Multiplication by cutting leaves requires you to cut a healthy young leaf of haworthia plant with a sharp and sterilized knife. Therefore, the best time to use this method of haworthia propagation is at the end of the dormancy period or early in the growing season.

Choose a new healthy leaf because older leaves near the base of the plant do not root as well as young leaves. Then, with a sharp blade, cut the leaf. Do not use scissors, which may cause damage to fleshy leaves. After extracting the leaf, dip the edge into the rooting hormone if available. Rooting hormone powder may help accelerate the propagation of your haworthia plant.

Let the leaf dry for several days till the cut edge heals or forms a crust. Then, gently plant the leaf into a pot with water using the cactus mixture. Position the potted leaf where it gets indirect light. Keep the soil damp but not soaked. The leaf will need several weeks to establish an adequate root system.

When watering your cuttings, use a spray bottle, but be careful not to knock down the cutting as this may break the roots trying to grow. You should have a rooted cutting ready to go in a larger pot in a month or so.

Bottom Line


Depending on what is at your disposal with your Haworthia plants, you can choose one of three ways to spread your plant. They’re equally effective, and sometimes it’s just a personal preference.

Propagation by offset division is the easiest and quickest method of growing a new haworthia. It is best to propagate this succulent actively growing, so new plants may have enough time to develop before their dormant period.

7 Ways To Watering Euphorbia Correctly

The idea that all succulents grow in dry areas is not quite correct. While a majority of them grow in areas where water may not be available throughout the year, they still receive a reasonable amount of water from underground sources to keep them hydrated. Furthermore, the water requirements of these plants vary from species to species. In fact, during the growing season, many succulents may need as much water as ordinary plants.

So, what are some of the golden rules for watering euphorbia? The most critical euphorbia watering rule you need to know is to only water your plant when the potting mix is completely dry. Watering at the wrong time can be catastrophic to your plant. Reduce watering during winter since the plant is in a period of dormancy. During this time, only give it enough water to prevent wilting. The best time to water your euphorbia during summer is evening. Watering early in the morning before the heat is also acceptable and may even be better during the cold winter months.

This article discusses some of the critical rules you need to know when it comes to watering euphorbia. Read on to find out everything you need to know.

1. Know When Your Euphorbia Needs Water

Generally, your plant will need watering when the potting mix is completely dry. If you don’t water on time, your plant will start showing signs of underwatering such as wilting.

So, it is always good to check the soil regularly and water your plant whenever you feel like the soil is dry. But don’t be quick with watering. You need to check the soil status a few times to ensure that it is completely dry.

Euphorbias have developed efficient water storage mechanisms and can still survive without water for a couple of days or weeks. It is always good to wait until your plant starts to show signs of wilting before you water it during winter.

Your primary objective should be to avoid overwatering your plant at all costs. The best way to know if the soil is completely dry is by sticking your finger into it for about an inch deep. If the soil feels damp or moist, don’t water.

Keep in mind that if you have grown your euphorbia in containers or pots, you need to water them approximately once or twice per week.

2. Watering Frequency

You need to study your plant and understand it to figure out the watering frequency. Sometimes, you may need to water it once or twice during summer or two or three times per week.

Other growing conditions such as temperature, light, and humidity will play a crucial role in determining how often you should water your euphorbia.

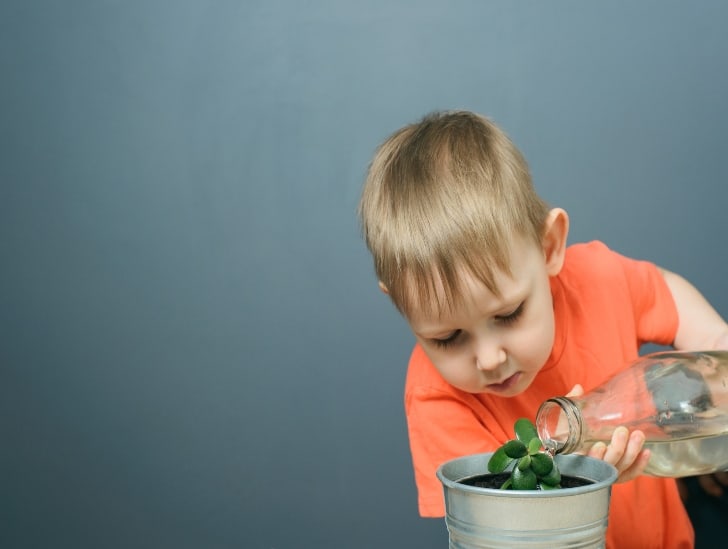
A boy watering the plant.
You need to study your plant and understand it to figure out the watering frequency.

Ideally, you need to ensure your potting mix is completely dry between watering sessions. Furthermore, you need to check whether the excess water is moving through the drainage holes as expected.

If the excess water is settling at the bottom of the pot/container instead of draining out, you could be staring at a much bigger problem. Waterlogged euphorbia is highly susceptible to a wide range of issues, including root rot.s

If you have grown your euphorbia outdoors, you need to suspend watering them during winter, given that they receive plenty of water from the winter rainfall. For indoor plants, only water them when they start showing signs of wilting.

Don’t worry so much if you don’t water your plant on time because they can survive for up to two months without water. In fact, it is relatively easy to deal with underwatering than overwatering.

3. How Much Water Should You Give Euphorbia?

It is not just about knowing when to water your plant. You also need to know how much water is right for it. This is something that many gardeners struggle with all the time.

The general rule is that if you have made the soil moist, you have done your job right. However, you need to check whether there is any water retained at the bottom of the growing container before walking away.

A woman watering the soil of the plant.
If you have made the soil moist, you have done your job right.

If you have grown your euphorbia in containers without drainage holes, watch out for signs of watering faults. Ideally, you should water your euphorbia with an amount of water equal to half of the soil amount.

For instance, if you have two cups of succulent soil in the growing container, water them with one cup of water. In case you accidentally pour so much water on your plant, use paper towels or a rag to remove some of it.

4. Know How to Water

There are many different ways of watering succulents. However, always water euphorbia from the top or bottom to achieve the best results.

Watering from the bottom allows your plant to absorb water slowly until it is thoroughly soaked up. To water from the bottom, carefully place the plant in a shallow dish or tray filled with water and immerse it for about two or three inches.

Let the plant rest in the tray of water for a couple of minutes before you take it out. The best way to know that your plant has absorbed enough water is by checking the top layer of the potting mix. If it has become moist, take the plant out.

A woman watering the plant carefully
Water your plant until water starts to come out of the drainage holes at the bottom of the container.

Watering from the top also works, but it isn’t recommended. To water from the top, you will need to use a watering can. Ensure you are watering the base of the plant to avoid direct contact of water with the leaves of the plant.

Water your plant until water starts to come out of the drainage holes at the bottom of the container. That is a clear indication that the plant has received plenty of water.

Avoid using spray bottles because you will only be spraying water on your plant’s leaves. You should only use a spray bottle when you are propagating baby plants. In adult euphorbia plants, the roots absorb water, not the leaves.

5. Know How to Water Euphorbia without Drainage

Succulents, in general, need good drainage soil and growing pots with plenty of drainage holes because they don’t like being waterlogged.

As such, if you use the right potting mix and go for a container with plenty of drainage holes, you won’t encounter a lot of challenges when watering your euphorbia.

If your container doesn’t have plenty of drainage holes, it can lead to severe root rot. Saving a succulent from root rot isn’t an easy task.

However, expert gardeners will always want to go for the fancy containers even if they don’t have drainage holes because they know how to handle these plants.

So, if you are an expert gardener and are fully convinced you can grow euphorbia in a container without drainage holes, there are a few things you need to do to keep your plant happy.

Euphorbia near the window.
Position the plant closer to a window sill that receives plenty of sunlight so that the excess moisture is lost through evaporation

If you want to go with a container without drainage holes, you need to ensure the potting mix has excellent drainage. That will have a significant impact on your plant’s overall health and spur vigorous growth.

Additionally, position the plant closer to a window sill that receives plenty of sunlight so that the excess moisture is lost through evaporation. Keep in mind that excess water has nowhere to go, and if you fail to provide the right conditions for evaporation, your plant will develop root rot.

You can also be tactful with how you add soil to the container. Including substances such as pumice would be great since it aids drainage.

No matter what you do, ensure you provide optimal conditions for maximum evaporation and good aeration. When you water euphorbia grown in containers without drainage holes, it is mandatory to measure the water level.

6. Use the Right Type of Water

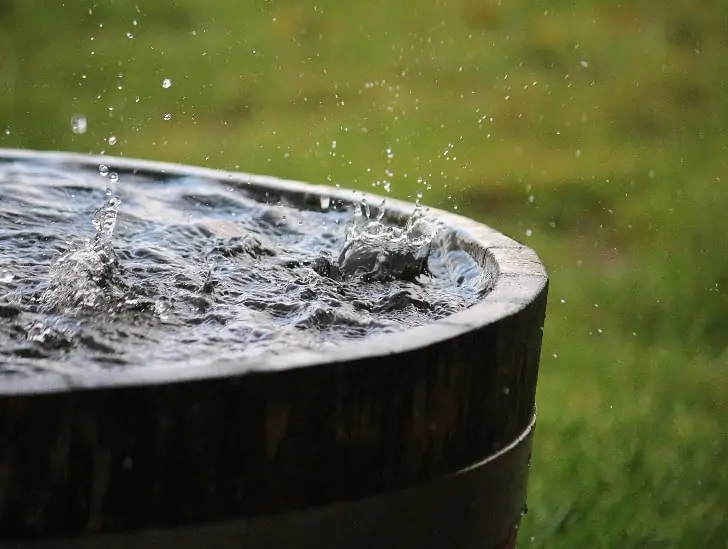
The best type of water to use for watering euphorbia is rainwater or distilled water because it doesn’t contain many impurities. You can always collect enough rainwater during winter and store it safely for use throughout the year.

If you cannot access rainwater throughout the year, consider using distilled water. Avoid tap water at all costs because it contains a lot of minerals such as calcium and magnesium that may build up in your potting mix or appear on the leaves of your plant as white dots.

A water.
The best type of water to use for watering euphorbia is rainwater or distilled water.

If you have no other option apart from tap water, collect it in an open tray and let it stay undisturbed overnight. The minerals will collect at the bottom of the water tray. Carefully transfer the water to another container leaving out the bottom layer, and use it to water your euphorbia.

7. Know the Best Time to Water

The best time to water your plant varies depending on the season. During the warm season, you should water it in the evening so that it can take up as much water as possible without competing with evaporation. During the cold winter months, early morning watering is acceptable.

Summary

As we wrap up this piece, we trust you now know how to water your euphorbia, and you are ready to start practicing what you have read. Always ensure you have the right tools to accomplish the mission. As long as you water your euphorbia plant appropriately, it will stay happy and healthy for many years.

Growing Euphorbia: How I Propagated My Euphorbia

Euphorbia, also known as Spurge, are easy-to-grow perennials. They may be indoor plants or part of your backyard. Euphorbia develops slowly but is not hard to take care of once mature.

If you plan to grow Euphorbia in your home or garden, find out how to propagate Euphorbia now to increase your chances of success. Euphorbia is one of the largest species of succulent plants in the world, with roughly 7,500 species.

You can propagate Spurge through offsets, seeds, or cuttings. The simplest and fastest way is with cuttings. If you have successful Spurge in your garden, you may want to consider taking cuttings and spreading them. Before taking cuttings, there are a few basic things you should note that are listed below:

Safety

Wear gloves to propagate Euphorbia. Remember to wear eye protection to prevent the plant’s toxic white latex sap from getting in contact with your eyes. Manipulate the plant and its cuttings with several layers of newsprint.

A kid wearig a gloves.
Remember to wear eye protection to prevent the plant’s toxic white latex sap from getting in contact with your eyes.

The Ideal Time to Get Cuttings

Cuttings are preferable in spring before the flower buds emerge, but summer is also favorable. However, cuttings done in fall or winter have little time to root, and cuttings should therefore only be used in emergencies to save plants suffering from root rot.

How Should You Get the Cuttings?

To cut, cut the stem of a mature Euphorbia plant. First, cut a healthy, spotless stem from your Euphorbia plant about 5 to 7 inches long. Then, use a clean razor blade or sharpened knife to reduce the scars on the parent plant.

Control of Sap Flow

Keep the cut-off tip under cold running water to contain the flow of white sap. Sprinkle the mother plant with cold water till the juice stops oozing. Short exposure to a candle flame or match may also inhibit the flow.

Dry Your Cutting

One of the main cultivation tips for Euphorbia is to let the cutting dry a few days before planting. Drying enables the sap to form a callus on the cut end and prevents decay. Place the cut on a paper towel in a warm, dry place with good air circulation to thoroughly dry for 3 to 7 days. Leave it out of direct sunlight.

Propagation Medium for Euphorbia

Use a well-drained medium such as perlite, a commercial cactus blend, or a 1:1 mix of sand and peat moss. Apply ½” coarse gravel to the medium surface to keep the cut upright.

Care For Euphorbia Following Propagation

Place the cutting in a hot, well-lit area away from direct sunlight. Keep the temperature between 65 and 75 degrees Fahrenheit. Your Euphorbia should take root about two months from now, while you should notice new growth.

Transplantation of Newly Propagated Euphorbia

Once the cuttings are rooted, you can transplant them into a large container. The propagated Euphorbia plant will require further care until it settles into its new home. Water carefully to evenly moisten the soil surface when dry to the touch during the growth season.

Plant Being transferred.
Once the cuttings are rooted, you can transplant them into a large container.

Let the Euphorbia dry out between waterings and not water more than once a week. Water slightly during the winter to barely moisten the soil’s surface is dried, but not more than once every other week. Do not water to the point that the ground is soggy or wet.

Sunlight Requirements

Place the succulent in a warm sunny spot where it will receive at least six hours of full sun each day. You can place it in a dry and airy room on a sunny windowsill or in a sunny place outside in the lush garden. The plant grows best at temperatures greater than 55 degrees F. Don’t let it freeze.

A plant being exposed to the sun.
You can place it in a dry and airy room on a sunny windowsill or in a sunny place outside in the lush garden.

Propagation by Stem Cuttings

The spread of Euphorbias from cuttings is the easiest and fastest method for many species and reshapes an old plant. Collect cuttings from the plant in the spring before the flower buds appear.

Avoid taking euphorbia cuttings in autumn or winter because they will not have time to develop an adequate root system. In addition, the milky sap that comes out of Euphorbia is irritating to the skin. Wear gardening gloves thick enough to prevent spurge thorns from sticking to your skin.

Take cuttings with a sharp and clean knife. Remove multiple leaves from the underside of each cutting. Next, remove a 3-inch piece from the end of a spurge stalk with a sharp knife. Place the severed tip of the stem in a container of lukewarm water until the milky sap stops flowing. Remove the cutting from the water and let it dry for 3-4 days.

Immerse the injured tip of the cutting in a rooting hormone that contains a fungicide. Ensure the tip is well covered, and be careful not to breathe in the rooting hormone. Next, stick the lower end of each cutting in a pot filled with potting mixture and water. Cuttings should take root in 2 weeks.

Take cuttings of branched species at the point of branching. Single plants can be decapitated to encourage the production of lateral shoots, which can then be removed and rooted. Spurge leaves with large leaves should be removed with a knife just above the cut.

Place an even mixture of peat moss, coarse sand, and perlite into a small pot. The blend should be well-draining. Place the lower third of the stem in the soil mixture. Firmly stamp the soil around it to keep the cut in place and remove the air pockets.

Rooting may take longer than expected, but you can accelerate it by increasing the soil temperature to approximately 77 Fahrenheit using a thermostatically controlled heating mat. Avoid direct sunlight. If unrooted cuttings become dehydrated, you can save them by dipping them in water at room temperature until they swell again and replant them.

Add a little water to moisten the soil. Check the cut every day and add enough water to moisten the soil. Place the freshly planted cutting in a bright and cozy place in your house. The root system will grow over the next 20-30 days.

Propagation by Leaf Cuttings

Propagate Euphorbia using cuttings in spring. Ensure you wear gloves to protect yourself against sap. Delicately extract the leaves from the plants and place them in stone wool cubes, placed on coarse sand on a shelf.

Placing them in rock wool cubes will enhance the chances of euphorbia survival. Next, dip the leaves in a powder of rooting hormone to encourage growth and the development of new roots.

Euphorbia plant.
Delicately extract the leaves from the plants.

Place your rock wool with spurges on a tray lined with thick, damp sand. Cover the plant with a plastic cap to help increase the moisture your Euphorbia will need. The roots of your euphorbia plants should begin to grow in about a month.

Do not place leafy spurge cuttings under the sun. Hormonal rooting powder and fungicide help in this process. The plants will be mature enough at the end of 40 days, and you can pot them at this point.

Propagation by Seed

Another way of propagating your Euphorbia is through the propagation of seeds. The likelihood of success when propagating from seeds is lower than when you grow them from cuttings. The germination phase may take about 3-6 months during propagation from seeds, so please be patient in the process. While Euphorbia may be grown from seeds, they may be difficult to germinate.

Plant Seeds.
The likelihood of success when propagating from seeds is lower than when you grow them from cuttings.

Collect the seeds and soak them for 12 hours, change the water and then soak them for a further 12 hours. Let the seeds dry out naturally. Sow the seeds in an area that is well-drained, sandy, and sunny. Sow the seeds in an even mixture of coarse sand and commercial seed crop mix in the spring. Gently cover each seed with soil, rinse and wait it out.

Sprouting takes 2-6 months in cold weather, but heat can happen in 1-2 weeks. Press each seed . 9 cm into the ground, at a fair distance from each other. Gently irrigate and leave soil moist. Seed-borne transmission of Euphorbia can take up to two years before growth occurs.

Propagating Through Offsets

Offsets are an easy and efficient way to spread Euphorbia plants as long as healthy plants are available for cuttings. To propagate Euphorbia with offsets, find an offset that grows well. Then, cut approximately 2 inches below offset with pruners or clippers.

Give the offset time to be insensitive for another few days before insertion into the soil. The offsets will take root within approximately six weeks under appropriate conditions. Once they are rooted, you can transplant them into their original pot or move them to larger pots if required. To summarize propagation by offsets, proceed as follows:

● Let the plant expand and divide naturally.

● Be careful when detaching the offset from the mother plant to avoid damaging the roots or stems.

● Let the new offset dry at least one day before planting its roots and shoots pointing downwards in well-drained soil.

● Water sparingly until the grafts are rooted, at which time they can be transplanted outdoors or in jars.

Bottom Line

Euphorbia plants offer an excellent array of colors with their bracts of flowers. In addition, Euphorbia is easy to spread and maintain, making it an ideal choice for any gardener. Under the right conditions, you can quickly cultivate and spread Euphorbia in your garden.

Does Crassula Ovata Need Direct Sunlight

Crassula Ovata is known by various names: the jade plant, lucky plant, friendship, and money plant. Most people believe it brings good luck and good fortune to those who possess it. This plant is immeasurably popular as an indoor plant, but in some growing areas, this plant can even be used as a lovely landscape plant.

Crassula Ovata plants are renowned for their thick, fleshy, glossy, and smooth leaves that grow in opposite pairs. A critical aspect of the care and maintenance of jade plants is the amount of sun they get. It is best to replicate the warm and dry conditions indoors that jade plants originate from as close as possible for your plant to thrive. 

They need full sunlight to keep growing happily. Your jade plant will have beautiful red margins if it receives sufficient sunshine.

If the plants lack full sun, they can become retarded and leggy. In addition, the plant will struggle to produce food for the entire system. Consequently, the plant will not show any signs of growing. It won’t survive too long.

While mature plants can withstand direct sunlight, young plants must be kept in bright and indirect sunlight. Jade plants may tolerate reduced light levels. Variegated varieties of jade plants can grow very successfully in much less light, particularly if your room has a bright indirect light. Jade plants can be good indoors as well as outside.

Indoor Light Requirements

If kept inside, make sure the jade plant gets the appropriate sunlight. Indoor or shaded jade plants retain dark green, emerald, or dark green coloration. You will know how they develop if they do not receive sufficient sunlight.

They will begin to stretch towards the sun and become long and leggy, a process known as etiolation when they do not receive enough sunlight. Leggy Jade plants may be susceptible to damage if they fall or fail to support their branches. If stretching occurs, you should move your jade plant to a brighter location or consider using growth lights to provide adequate light.

Jade plant near the Window.
Make sure the jade plant gets the appropriate sunlight.

Kitchens and offices with south-facing windows are usually good places with just enough light, like the west-facing windows. You can also place your plants in an area that receives indirect light throughout the day or direct sunshine for six hours daily.

In general, jade plants, like most succulent plants, require at least 5-6 hours a day of sunlight to thrive properly. Therefore, give established jade plants a minimum of four hours of daily daylight. If you have a new plant, find a place where the sunshine is bright but indirect.

Place the jade plants in a sunny area, like a bright ledge of a south-facing window. While some houseplants find leaves burned in direct sunlight, jade plants can tolerate natural light.

However, if they are kept near the window that receives intense sun, especially in the afternoon, the leaves may have sunburns (brown spots) until they are acclimated to harsh sunlight.

To prevent this, gradually increase the amount of bright sunlight it receives. Jade plants may survive if you grow them where they only get a small amount of bright light, but they will not bloom. In addition, like most other tropical plants, jade plants hate the cold, so keep them clear of windows and doors. Finally, give your jade plant a quarter turn each week or thus expose all sides in sunlight for equal growth.

A Jade plant in the table.
Jade plants may survive if you grow them where they only get a small amount of bright light.

Prickly plants with few leaves require more sunlight. If your space is not receiving a large amount of natural light, place your jade plant under a growing light instead. It will overcome the deficiency of sunlight. Use the growth lights occasionally if you do not have a south-facing window; even if you have other windows with sunlight exposure, it will benefit the growth.

Recommended Indoor Spots

Finding the right place in your home for your jade plant may be a daunting task, from low-light areas to bright spots. Below we share some recommendations for positioning your Jade plant in your home.

Patio or Balcony Area

You may place your jade plant on a terrace or balcony adjacent to the room as it will receive sufficient sunlight throughout the day. It’s not a typical indoor setting, but it will be perfect for the plant.

Near a Window

You can also put your jade plant close to the window; this is the perfect spot, especially if you want to grow this plant in your living room or bedroom. Try placing it near a sunny window to get enough natural light throughout the day.

Crassula Ovata near the window.
Try placing it near a sunny window.

Partial Sunlight

If you don’t have a place to keep your Jade plant near a window, put it where it can get at least a couple of hours of indirect sunlight in the day. The plant should do well in a room well illuminated by natural light. It may not exhibit robust growth, but it will continue to grow steadily.

Shaded Place

The jade plant is capable of surviving in the shade. However, in poor light conditions, you may not see the optimum growth rate for the plant. If you are not getting enough sunlight in your home, you should find a room that usually seems well lit during the day. While it may not deliver the best results in terms of growth, it is expected to grow at a slow pace.

Outdoor Sunlight Requirements

Give your jade plant some time to get used to being outside for a few days before moving it to a more sunny area, as the sunlight is more intense. Jade plants prefer much sunlight, but direct sunlight, particularly the fierce afternoon sun, can burn the plant’s leaves. You will notice sunburned patches on the leaves (brown patches) when this occurs. To avoid this happening, you can move the plant to a place where it receives a lot of bright morning sun versus afternoon sun.

They can be placed outdoors in courtyards, but they need to be brought indoors in the fall and winter to avoid freezing. They are capable of withstanding cold temperatures just above the freezing point. A great outdoor location is direct sunlight in the morning with protection from the harsh afternoon sun.

Jade plant outdoors.
Jade plants prefer much sunlight, but direct sunlight, particularly the fierce afternoon sun.

The morning sun is less intense than the afternoon sun and is popular with most succulent plants. If you cannot move the plant and receive full afternoon sun, try to provide some shade until it gets accustomed to the intense sun. You can try to place it next to a larger plant to offer a bit of shade. A tree or furniture like a table or chair beside the plant may also provide shade.

Slowly increase sunlight to avoid sun damage. Once acclimatized to the full sun, it should be able to endure the intense heat of the afternoon. But even an acclimated mature jade plant can still suffer sunburn during a heatwave or when the temperature becomes intensely warm during the summer.

Jade plants exposed to the afternoon sun will have a reddish tinge on their leaves, particularly their edges. It is usually harmless to the plant when this happens, and the plant usually recovers smoothly. Sunburned leaves eventually fall off when new leaves sprout. However, too much sunlight may burn immature young plants.

Getting Your Jade Plant to Adapt to Outdoor Sun

Although jade plants are usually tough, a sudden increase in lighting can burn their leaves and produce unpleasant brown spots. Even though it does not affect the health of a mature specimen, it may jeopardize the growth of a young plant. 

Therefore, whether growing your jade plant outdoors or indoors, a plant accustomed to attenuating lighting conditions should be moved gradually to a brighter place to allow the plant to adapt to the light changes. Jade plants used to full sun for part of the day can endure higher daytime temperatures.

How Can You Tell That Your Jade Plant Is Not Getting Enough Sunlight?

If your jade plant does not receive enough sunshine, it will cease to grow and begin to drop its leaves. Therefore, keep your plant in a brighter or sunnier area. Furthermore, if your plant loses leaves in winter, it is likely not getting enough light.

Jade plant near the window.
Put your plant within a few centimeters of the window so that it gets enough light.

Put your plant within a few centimeters of the window so that it gets enough light. However, you should know that winter air currents can harm your jade plant. Therefore, if your window is windy or cold, use an artificial light source to shed more light on your plant.

Bottom Line

The jade plant thrives with a lot of light. So while the plants require bright light, they should not be exposed to too much direct sun. If you can supply a few hours of sun a day, you’re going to have a happy plant.

Most Crassula Ovata plants need shadow in the warmest part of the summer but need bright light to achieve their most vibrant color. Therefore, having an adequate amount of sunlight can assist your jade plant thrive.

Does Agave Need Direct Sunlight?

Agave is a broad genus of succulent plants forming rosettes. They flourish in sunny places, shade, and full sun. The species of Agave vary greatly, some are dwarf species, and others are enormous plants up to 10 feet in height. They can be grown in the soil for appealing and exciting scenery.

Agave plants prefer a full sun location, which means at least 6 hours of direct sunlight most of the time. However, they can tolerate some shade. The warmer the climate is, the more shade they can take. Most agaves are tolerant of intense sunlight and heat and are highly resistant to plants.

Such plants require complete light to partial shade. If you choose to grow Agave inside, select a sunny window with as much sunshine as possible. Plants that grow in low luminous conditions become stretchy. They love the outdoors from spring to autumn. Excessive direct sunlight when you have not acclimatized the plants can cause sunburn.

Agave Plants and Bright Light

Very few indoor plants should have direct sunlight. Bright light, in this case, refers only to indirect light, as the natural sun frequently burns the leaves of indoor plants. A too hot and dry zone encourages spider mites and causes rapid discoloration of the flowers.

A Nordic exposure does not provide enough light for plants with high light requirements. Therefore, these plants should be located directly in front of an east-facing window, less than 1-3 feet from a west-facing window and less than 5 feet from a south-facing window.

Sunlight and Placement

Agave plants need very bright sunlight all year round. You may need to move your Agave to different places around your home or office because the seasons change to keep these areas very bright.

Agave with water droplets and sunlight.
Agave plants like to come out when hot and grow better under the sun

Agave plants like to come out when hot and grow better under the sun. Therefore, they should have at least half a day of direct light. If they do not have enough, you will find that they are beginning to droop.

The majority of agaves prefer full sun over partial shade. However, variegated agaves prefer partial shade because it intensifies coloring. Place your agaves where they cannot be a hazard to passers-by or animals with their sharp spines.

Agaves can grow outdoors in full sun or indoors with natural daylight. If you consider an indoor plant agave, don’t forget to bring it out in the full sun every two days. Indoor agaves will require more attention in the winter, and we suggest that they be placed directly under a window.

Indoor Light Requirements

Agave makes a great indoor plant when you can provide a warm setting with plenty of good sunlight. Indoors, your plant will want bright light for a minimum of six hours each day. Be sure to put it where it receives the morning light. The kitchen and veranda are frequently popular for people to place plants as they grow.

A sunny south-facing window or balcony will be an excellent place for your little agave plant. You can also put the Agave in a well-lit lounge. A well-illuminated place accompanied by the morning or evening sun is crucial for its health. During the coldest months (under eight °C / 46°F at night), bring the plant indoors and place it in a well-lit, sunny place.

Agave in a pot.
Be sure to put it where it receives the morning light.

When cultivated indoors, be sure to place it where it can get bright, direct light daily, as a window facing west. If you do not provide enough light for your agave plant, it may begin to stretch and distort. So think about getting artificial light to complement it with sufficient sunlight.

Please keep it in a west-facing window and top it off with artificial light when needed. Let your plants soak up the warm weather and the sun in summer. Be sure to make a careful transition to avoid stress. Be careful to avoid areas with heavy draught. Location is everything

Acclimatizing Agave To Bright Light

If you move your agave plant outdoors, move into full sunlight a progressive. It would help if you acclimated your Agave to bright light levels. Similarly, when you bring it inside in the fall, allow it to get used to lower light levels slowly. 

The newly planted succulent plants can burn in direct sunlight, so you may need to progressively introduce them to total sun exposure or provide shade with a transparent curtain.

If you keep the plant in partial shade and move it to a full sun position, do it gradually. Increase the direct sunlight hours that it gets during a few weeks. If suddenly moved to a different lighting position, the plant might go into shock and lose its leaves.

Outdoor Light Needs

Agaves are native to the desert but beware of placing them under the desert sun. In nature, many agaves grow next to shrub oaks or other larger plants that shelter them during the hottest parts of the day.

Would you please put where they can get at least 6 hours of very bright sunlight per day to keep them healthy all year long? Agaves can also withstand light shade exposure for a few hours, particularly in the warmest part of the day.

Agave plant.
Agaves are native to the desert but beware of placing them under the desert sun.

Ensure that you provide partial shade for smaller and younger agaves, whereas more giant and older agaves will be more tolerant to several hours of direct sunlight. The root system of agaves is extensive and profound. It helps them look for water on a large scale, but it also means it’s harder to transplant large plants.

Many agaves need protection from the intense summer sun, particularly the southern Mexican agaves. A good example is an agave attenuata. Purchase a bit of shading fabric from your local garden and cover it during heat waves. The most critical moment to protect your agaves from the sun is in the first heatwave of the season so that they get used to the changing conditions and toughen.

The plants require at least eight hours of sun per day. If your area has constant daytime temperatures of 80°F or higher and more than 60°F at night, you may want to provide shade for young plants.

Planting in the vicinity of a tree with sparse foliage, such as a palm tree, will provide adequate sunlight and enough shade. As agaves mature, they can generally tolerate the more direct sun, but they are always sensitive to insolation when there is harsh sun and elevated temperatures.

Agave Seasonal Light Requirements

Give Agaves as much light as possible all year long. Moving your agave plant outside for the summer can be great if protected from rain. It can stand high temperatures and about 5 hours of direct sunshine each day.

It also prefers bright light during the winter months. However, it is not tolerant of cold temperatures, so bring it back before night temperatures fall to 50°F/10°C. The plant must receive the maximum amount of light during the winter months. Ensure to bring them indoors when temperatures begin to drop below 50°F (10°C), especially in winter, to protect them from freezing.

Agave Sunlight Tolerance

End of summer, that’s when hard succulents shine. Giant agaves endure the summer heat. Their sculptural shapes, similar to fountains, confer a sculptural aspect to any landscape and contrast magnificently with ornaments with fine texture. They also make suitable fire barriers and security fences.

Agave in desert.
Giant agaves endure the summer heat.

Except for a few soft, variegated varieties, agaves want sunshine – the better in all climates except the desert. Most are hardy in the medium to high F-20s, and some go much lower.

Signs of Too Much Sun

Agave plants prefer warmer temperatures and manage pretty well in extreme temperatures. However, rare instances like heat waves can adversely affect your plant. If they begin to get too much sunshine, the leaves will burn. You may notice white or light spots on the luscious leaves. 

Although Agave is known for its ability to survive drought, there are still cases where your plant may experience excessive direct sunshine. You can easily say if you see that some of the leaves are beginning to fall off. 

In that case, think of some shade for your plant. Instead, try moving your plant into an area with less heat, direct sunlight and wait for new leaves to sprout. You can remove the damaged leaves if few but this is unnecessary.

Agave plant exposed to too much sunlight.
You can easily say that it experience excessive direct sunshine if you see that some of the leaves are beginning to fall off. 

In some instances, the leaves dry out and turn black. The black will begin on the external edges of the leaves and will be dry and crispy. The damage will not heal, but it will persist until the leaf dies completely and new leaves form.

If your Agave is in the shade but is still experiencing scorching temperatures, you may notice a golden/yellow color starting to appear. This is because the succulent doesn’t turn completely white like it would with sunburn; instead, the colors tend to look warmer or more yellow than usual.

Signs of Too Little Light

A pale center and deformed growth are indicative of a lack of light. Agave plants that do not have enough sunshine will grow very slowly or not at all, and the leaves will become pale. Without sufficient light, Agave is not capable of producing chlorophyll and photosynthesis. Chlorophyll deficiency makes it yellow.

If you suspect that your Agave is not getting enough light, you should move it to a place with plenty of sunlight. Generally, the best site is on a window facing south or west.

Bottom Line

Easy to grow and eye-catching Agaves add personality to any garden or home. If you want an uncomplicated but attractive centerpiece, Agave is one of our best choices. Agave plants prefer a place with full sunlight but may tolerate some shade.

Ultimate Guide: How to Easily care for aeonium

A aeonium.

Aeonium is a genus that comprises around 35 plants belonging to the family Crassulaceae, including Echeveria plants. The popular landscape plants are well known for their rosettes of fleshy green foliage.

These succulent plants hail from the Canary Islands, Madeira, and Morocco. In contrast to most succulent plants, such as agave and aloe, aeoniums are not resistant to drought because of their shallow root systems. In addition, Aeoniums usually are monocarpic, meaning that they die after flowering.

The roundish leaves of rosette structures are so perfect that they are sometimes confused with artificial plants. The signature rosettes may be solid or variegated in white, yellow, red, and green. Small star-shaped flowers grow in clusters from the center of the rosettes, but they are not especially conspicuous.

Aeoniums can be grown in the garden anytime. However, these plants grow relatively slowly, and it can take up to five years before they produce the small clusters of flowers in the center of the rosettes. Most aeoniums are monocarpic, which means the mother plant dies after flowering, but the small ones (shoots) will continue to produce more projections, too.

Varieties of Aeonium Plants

Among the most popular types of Aeonium plants are:

● Green pinwheel (Aeonium decorum)

The green wheel can reach up to two feet tall, recognizable by its thick, dark green rosettes that reach four inches in diameter. The leaves are frequently variegated on the edges and get about two inches in length—the plant blooms in late spring and summer, with small white or pink star-shaped flowers.

● Tree houseleek (Aeonium arboreum)

It is characterized by thick, waxy rosettes of leaves that form at the top of stems that reach 3 feet high in containers or 6 feet tall in a garden. From the end of winter to early spring, the leek forms yellow flowers and grows in vessels or rocky gardens. Once it blooms, the rosettes die.

● Black rose (Aeonium arboreum ‘Zwartkop’)

The black rose has tufts of brown stems that hold terminal rosettes that vary in color from dark purple to black and reach up to 8 inches in diameter—the plant blooms in summer, forming star-shaped yellow flowers in conical bouquets.

● Copper pinwheel (Aeonium ‘Sunburst’)

Also known as the copper pinwheel, this branched Aeonium has large variegated fleshy rosettes that can be up to 16 inches in diameter. The green leaves have yellow variegations, with coppery points that give the plant its name. The copper pinwheel is monocarpic so that after its white star-shaped blossoms, the plant dies.

A aeonium sunurst
The green leaves have yellow variegations, with coppery points that give the plant its name.

How to grow and look after aeoniums

If planted in an appropriate environment, aeoniums require minimal maintenance.

Light Requirements for Aeoniums

Aeonium plants generally grow in hot weather with plenty of direct sun semi-shade. Therefore, during hot summers, we recommend partial shade.

If you keep your Aeonium arboreum plants indoors, then you should place them next to the brightest window in your home.

A plant near the window.
You should place them next to the brightest window in your home if you keep your plant Indoors.

Outdoors, these plants prefer partial shade to full sun, especially during the summer months where the sun beats them. They do better with bright but indirect sunlight, so give them a little shade to keep them from burning in the scorching sun.

Container

Select a pot with adequate draining. Aeonium plants grow in vessels as they require less soil. If you are planting in a container or pot, choose one with drainage holes, which help prevent root rot due to stagnant water.

Aeonium plant in a pot.
Aeonium plants grow in vessels as they require less soil.

Soil

Although most succulent plants do well when planted with a cactus blend, Aeonium plants need more moisture. Therefore, use some potting mixture and modify it with perlite. A sandy potting mix or a regular potting mix modified with perlite is preferable to a specific blend for succulent plants and cacti because aeoniums require some moisture. 

Fertilizer

Feed your Aeoniums throughout the growing season with a balanced, semi-strong fertilizer monthly. Fertilize your plant throughout the growing season. Do not fertilize your Aeonium while it is still dormant in summer.

Water

Aeonium plants need more water than the majority of succulent plants. In winter, water the plant when the top 2 cm of soil is dry. Test the soil moisture by pressing your finger into the ground, a thumb or two, and water if your fingertip is dry. Excess moisture or allowing them to sit in the damp soil will cause root rot.

Aeonium with water droplets.
Excess moisture or allowing them to sit in the damp soil will cause root rot.

Do not water too much because too much humidity can cause root rot. In summer, Aeonium does not need to be watered because it is dormant during those months. 

Temperature

Aeonium arboreum plants usually dislike cold temperatures. They can survive for short periods at 25 degrees, but they cannot deal with extended wintering freezes. Therefore, if you live in a freezing area and it snows a lot, bring your Aeonium arboreum plants for the winter.

Although plants can grow all year long, animals often go dormant during the summer months and do not need to be watered except by extreme heat. So don’t worry if their leaves begin to curl during the summer months – it’s a mechanism to prevent excessive water loss.

Pruning

You do not have to trim aeoniums for size or shape because they naturally remain tidy and trim. Instead, cut the flat leaves or spindle stems at the base with scissors or sharp shears. Before pruning aeoniums, dip your pruning tools in a powerful household sanitizer for five minutes and rinse them thoroughly. 

The fallen leaves and other garden debris sometimes find their way between the curved and close Aeonium leaves. Instead of picking it up by hand, use a compressed air canister to remove any residue.

Steps for Aeonium propagation.

As with most succulent plants, aeoniums are easy to propagate from cuttings in spring.

Even stem fragments that fall from the plant can easily take root in the surrounding soil. Use these steps to cultivate new Aeonium plants from cuttings:

● First, use a sterile knife to cut a piece of stem with a leaf rosette attached. Then, using a clean, sharp tool, cut a younger stalk with a rosette of leaves.

● Let the severed end dry for several days by putting it in a shaded area. Then, place the cutting on its side and place it in a dry, warm, shady spot for approximately three days to allow the cut end to heal.

● Place the severed end of your succulent cut in regular potting soil modified with perlite so that it stands up. Ensure the cutting gets bright and indirect light and give it a light spray once a week.

● Gently water the new plant until it takes root, then let the top two inches of potting soil dry between waterings. Once the plant has established solid roots, let the top 2 inches of the soil dry before watering. Repot into an enormous container if necessary.

Potting and repotting Aeonium.

Aeoniums are perfect for container growing as they need such little soil. Containers also give you a glimpse of their unique features so you can have greater control over their growing conditions.

Plant being transferred.
Use a regular potting mix rather than a succulent/quickly draining cactus mix.

Select a container with a drainage hole to prevent standing water and root decay. To help maintain the required humidity levels, use a regular potting mix rather than a succulent/quickly draining cactus mix. When growing aeoniums in containers, repot them every two or three years with fresh potting soil.

Common issues with Aeonium.

This succulent can be challenging to maintain because some of its normal behavior can make you believe that the plant is dying. Below are some tips for taking care of aeoniums.

Pests

Aeoniums attract aphids, mealybugs, mites, and typical mealybugs, as well as ants. Use a water spray or mild insecticide soap to treat the plant to eliminate these insects.

Browning Leaves

The sun will scorch the leaves if the plant receives too much sunlight. You may remove the burnt leaves or wait until they drop naturally. Then, shift the plant to a slightly less sunny location.

Plant Leaves Falling Off

Naturally, the leaves at the bottom of the rosette are lost. The rosette may also close slightly. Although the plant appears to be dying, it is probably in dormancy. Dormancy happens during the summer and is the wrong time to harvest cuttings from the stem.

In extreme heat, their leaves curve to avoid excessive loss of water. You can see the subtle difference if the plant is stressed or not if the rosette closes or coils simultaneously with the leaves. If so, give the plant some water and see if the rosettes open a bit and unravel.

Dying Parent Branch

If you have an Aeonium branched with the main parent plant that bloomed, the branch will seem to die. You can save the plant by using a sharp and clean tool to trim the head where the rosette and flowers have already bloomed. 

Bottom Line

Adding this beautiful succulent to your garden sounds exciting, but remember that the plant needs proper care for healthy growth. Then, following the advice mentioned above, you can take care of your Aeoniums and watch them grow up happy and healthy.

Does Mother of Thousands Plant Need Direct Sunlight?

Kalanchoe is such a beautiful house plant. Everyone that appreciates plants will love to have it in their garden and in house. However, if you already have one of these plants, you’ll want to know how best to care for it so that it can thrive for many years to come. Mother of Thousands or “kalanchoe” as commonly known, has grown in popularity due to their beautiful colors when they bloom.

During blooming in the winter season, kalanchoe blooms in a diverse range of shapes, sizes, and colors. They can produce attractive pink, salmon, yellow, red, white, and violet-colored blooms. At every stage of their life cycle, the Mother of Thousands needs to be adequately cared for to grow and thrive well.

Does the mother of thousand need direct sunlight? Mother of thousand prefers a minimum of 5-6 hours of direct sunlight per day, although indirect sunlight works best in hotter climates. You must keep your kalanchoe in a spot that receives full to partial light. Long exposure of the plant to direct sunlight causes sunburn which destroys the appearance of this lovely plant.

Importance of Direct Sunlight to Kalanchoe Plant

From their natural habitats, kalanchoe grows in places they receive whole sun for the part of the day. If not direct sunlight, the plant needs bright indirect sunlight. While you may want to keep them in every corner of your house, it is good to know that the plant needs plenty of sun to remain healthy.

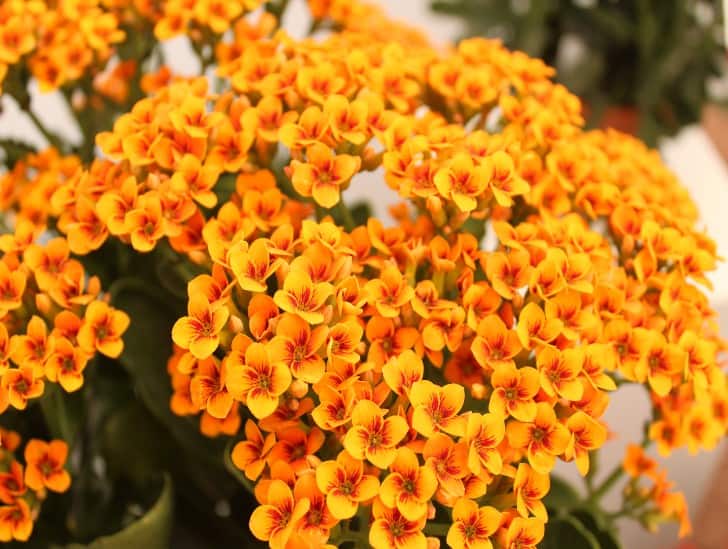
A flower of kalanchoe.
Kalanchoe grows in places they receive whole sun for the part of the day.

The only way to have a healthy stem, to grow and hold the plant well, it will need sunlight. For photosynthesis to occur, the plant will need to spend a better part of its day in the sun. This photosynthesis is a process that releases energy that the plant needs to grow. Without this energy, your plant will be under stress.

How Much Light Does Kalanchoe Need?

1.    Light requirement for indoor kalanchoe

Kalanchoe can make a good houseplant under proper conditions. If you are growing mother of thousands indoors years around, they will do well if placed where they are getting adequate exposure to natural sunlight. Therefore, they should be placed in a sunny location like a window facing east. But the light should not be available all through, as it may kill the plant.

Placing kalanchoe in a window means receiving the proper sunlight for their healthy growth. Besides water, adequate lighting is the primary requirement for growing a healthy succulent indoor. If your home does not have a place where the plant receives the lighting from the sun, you can use artificial supplemental like the artificial grow light.

Kalanchoe can make a good houseplant under proper conditions.

When placing the plant on a window, ensure the plant is not exposed to direct light for too long. Also, ensure that the plant leaves do not touch the windowpane, leading to leaf burn. During the night hours, don’t keep the plant in an open window because they don’t like frosts.

Artificial light fairly works well for kalanchoe, in areas where natural lighting is unavailable. You can place your mother of thousands under incandescent bulbs or fluorescent tubes to acquire light. The plant should not be kept too close to the bulb. The heat generated by the bulb could burn the succulent leaves.

2.     Light Requirements for Outdoor Kalanchoe

Growing the plant outdoor can be a good place because there is adequate sunlight. However, the plant will grow well in a sunny location with partial sunlight. If you have planted this succulent outside, it needs about 4-6 hours of daylight to thrive properly.

An outdoor kalanchoe needs regular checking. Due to the much sunlight and heat, the dry conditions of the plant attract pests.  Especially the spiders who like the warm environment. Do not expose your plant for long in the sun because it can lead to sunburn.

Mother of Thousands with sunlight.
If you have planted this succulent outside, it needs about 4-6 hours of daylight to thrive properly.

Outdoors, kalanchoe can do well in shades like under the tree. This ensures it receives partial sunlight, and avoid leaf burning. In cooler climates, make sure to move your indoor plant outside from time to time or after the winter. This is necessary to acquire the much-needed sunlight.

Is Your Kalanchoe getting too Much Sun?

While we know that kalanchoe is sun-loving like most succulents, their need for  light is nuanced as they don’t thrive well under total sun exposure and extreme temperatures. When your Kalanchoe plant receives too much light, it will show negative signs of burning. The solution is to take it to the shade. Some of these signs include

  • Stress due to excessive sunlight will trigger the rosettes of the succulent to close up tightly. Too much sun will make the succulent use a defense mechanism to protect its leaves from receiving the much sun.
  • Leaves begin to change their color to yellow or show some brown patches, which often start at the edge of the leaf as it progresses to the other part of the leaf.
  • If the sunlight exposure continues, the plant will start showing signs of impending sunburn damage as it becomes dark and discolored. At this stage, it is irreversible to correct the mistake.

Is my Mother of Thousand getting Enough Sun?

The easiest way to identify if your mother of thousand is receiving enough sun is to check on the color of the leaves. In proper light intensity, the kalanchoe leaves are dark green, thick and waxy. When the plant is not getting enough sunlight, the leaves have a much lighter color in the center or at its tip. When you notice this condition, move the plant to the sunlight.  

A Mother of thousands.
In proper light intensity, the kalanchoe leaves are dark green, thick and waxy.

Another sign that your mother of thousands is not getting enough light is that the plant will start to grow super-fast. The plant will start getting taller, and you will notice more space between the leaves, a process referred to as stretching. The plant tends to stretch itself more to get enough sunlight. These change the proportion of the plant, and it will weaken the plant. To ensure that the plant grows in a balanced manner, move the plant where it gets enough sunlight both sides.

How to Move a Kalanchoe from an Indoor to the Outdoor Environment

When the mother of thousand has stayed indoors for long, immediate exposure of the plant to the outdoor environment is harmful. The plant leaves have not adapted to the outside climate. They may be shocked by the sudden change in the setting. The leaves may start experiencing sunburn due to sudden exposure to bright light.

Therefore, gradually exposing the plant to sunlight is necessary to get accustomed to the new environment. To do this, first put the plant in a shady location where they get filtered sunlight. Once the succulent adjusts to this new environment, gradually move it to the full sun. Next, check the water levels appropriately, as it enjoys plenty sun.

What are the Sunlight Requirements for Blooming?

Mother of thousands is in a plant group referred to as short-day plants. These plants need longer nights and shorter days to induce the blooming process. After blooming has occurred, during the winter season, don’t discard them. You can trick the plant into blooming again. And light is part of it.

A mother of thousands plant.
These plants need longer nights and shorter days to induce the blooming process.

Mother of thousand has specific requirements that must be met if blooming should occur again. The plant has different light needs during normal and bloom-inducing periods. During the blooming period, the plant is light sensitive as it does not require much. Once the mother of thousands is done with blooming, it must receive a cycle of light and darkness to develop the flower buds and bloom again. Put the plant in darkness for long and let it just get a little light.

How to Make the Mother of Thousand Survive Adverse Heat

During the summer season, outdoor succulents tend to suffer from excessive heat from the sun. To protect them even during this damaging period; you can do the following

Find a shade for your kalanchoe

Heat is one thing, but the plant is at risk if this heat is accompanied by direct exposure to the sun. In this season, find a shade for your plant to stay. When in the shade, ensure checking on the soil to ensure that it has the right amount of water for the plant.

Avoid repotting

The plant is trying hard to adjust to adverse temperatures. Repotting the mother of thousands during this period will only stress the plant. Let the plant stay in its original pot until this period is over.

Be watchful on the water levels.

When there is heat, the rate of evaporation is a bit high. During this period, ensure to check on the water levels of the plant constantly. Though they are drought-tolerant, give them water when they need it.

Take Away

When you bring your mother of thousands home, ensure that you have already located a spot for the plant to get maximum light. Plenty of sunshine and proper watering of the plant keeps your succulent happy and thriving.  However, do not overdo it. Alternate the plant to direct and indirect sunlight for maximum results.

Golden Rules for Watering Mother of Thousands

Mother of thousands ‘kalanchoe’ is a unique and undemanding houseplant with tiny platelets that grow along the edges of the leaves. It is a tolerant and low-maintenance plant native in the subtropical regions of Madagascar. The plant takes about two to five years to mature, and it got its name from the baby plantlets that grow along the edges of its leaves.

When grown, Mother of thousands has small dangling, pinkish-gray flowers that bloom at the start of warmer seasons. Kalanchoe is a hardy, drought-tolerant plant and can handle intense heat. However, unlike many succulents, Mother of thousands will do better when it receives regular and gradual watering, especially during growing seasons.

The plant will need water once every few weeks and stay without any water for about the same time. This article will discuss the 5 golden rules for watering the Mother of thousands and maintaining its health. Before watering, ensure the following factors are right to get maximum results from the watering process. 

  • There is plenty of bright light, ranging from 4-6 hours of indirect sunlight. Insufficient light will stress the plant and slow down its growth.
  • Requires temperatures that are far above freezing. Kalanchoes have a low resistance to frost and die if exposed to it.
  • Fertilize the plant to grow appropriately and fast.

When watering, consider the following:

Know When to Water the Plant

There is no fixed schedule on how to water Kalanchoe. Mother of thousands is succulent, which means they store water on their leaves, roots, and stems. While learning how often to water these plants, remember that they originate from arid climates where rainfall is rare.

Mother of thousands in a clay pot.
Mother of thousands is succulent, which means they store water on their leaves, roots, and stems.

While factors determine how often to water the plant, the basic rule will always remain. Water only when the soil in the growing container is bone dry. If the soil is not crumbly or dirty dirt, don’t water the plant. You can also insert your finger 2 inches into the ground to see if it needs water.

Know-How to Water Your Plant

Succulents like Kalanchoe are not watered the same way as other plants. Since Mothers of thousands are native in arid areas where they don’t get enough rainfall, when it rains, it pours. So it would help if you imitated the desert rain, which tends to come from the sky in sheets, by drenching it when watering. Pour water at the bottom of your Kalanchoe slowly, and don’t stop until the water comes out of the drain holes at the bottom.

Mother of thousands does better with periodic long, endless drinks that soak the soil entirely to the bottom than timid watering that wets the topsoil only. When watering, ensure that you water at the base to prevent water from splashing to your plant’s leaves, stem, and branches. These will prevent the fungal disease from infecting the plant. The leaves are most vulnerable because they will start rotting. 

Orange flower of Mother of Thousands plant with sunlight.
Insufficient light will stress the plant and slow down its growth.

 When applying overhead irrigation, make sure to do it in the morning because the plant has enough time to dry out in the sun. When done in the evening, it will help cool the plant, but this could cause fungal infections. This is dangerous, especially during winter, when the plant is exposed to frost. 

There is a Difference in How you Water Kalanchoe Indoor and Outdoor.

Indoor and outdoor Kalanchoes are watered differently. Different temperatures in the plant environment determine the soil moisture, and this is based on whether the plant is indoors or outdoors. Therefore, water amounts and watering methods vary based on the plant environment. Below is how you water them.

Watering indoor Mother of thousands

Indoor Kalanchoe tends to retain water longer than outdoor ones. If you realize the soil is dry, you can leave the plant for one more day then water it. You can leave the plant for even three days during the winter season before you embark on watering, as moisture levels are high.

Indoor succulents will require a pot with a hole in the bottom to remove the excess water. Avoid watering the plant frequently because the evaporation rate is slow. In addition, watering the plant frequently will make the soil dump, leading to root rot.

A small Mother of Thousands plant in a orange pot.
Indoor succulents will require a pot with a hole in the bottom to remove the excess water.

When it comes to misting, exclude the succulents that are planted indoors. The water may not dry out because of the low lights and temperatures. In addition, misting will lead to a fungal infection. If you spill water on the plant’s leaves, no worries; wipe it out with a towel.

Watering Outdoor Kalanchoes

Keep the soil moderately moist for the outdoor Kalanchoes. Remember to water the plant when the top 1 inch of the soil has dried out. For outdoor succulents, water the plant more often during the summer season to help the plant cope with the high temperatures. Watering your outdoor Kalanchoes will require less water during the winter season due to the high humidity in the soil.  

Avoid waterlogging and stagnation.

The biggest mistake that can happen to your plant is overwatering. Three reasons will mainly cause overwatering

Lack of proper soil drainage

The soil used to plant Mother of thousands should have a high draining capability. Due to the increased ability of the plant to absorb quickly, the remaining excess water should be removed from the pot to prevent soaking of the leaves. Proper soil is made-up of cactus soil or succulent soil. You can make your mix that will include

  1. Two parts sand
  2. Two parts gardening soil
  3. 1 part perlite or pumice

The purpose of adding the pumice or perlite is to help in the soil’s aeration and drainage quality.

Lack of drainage holes at the bottom of the container no matter the container you use, it must have a drainage hole at the bottom of the pot. The drainage holes remove excess water from the pot when enough water is taken. The lack of these holes makes the excess water stay in the plant’s root cap area, which leads to root rot.

Mother of thousands plantlets in a pot.
One of the proper pots to use is the terracotta pot which is a breathing pot.

Even if the soil is good, if there are no drainage holes at the bottom of the container, there will still be stagnation. One of the proper pots to use is the terracotta pot which is a breathing pot and will ensure that it drains all the excess water.

Frequent watering

Frequent watering, especially during the winter season, will lead to overwatering. As a result, Kalanchoes’ need for water during this season is less. The temperatures are low; hence the evaporation rate is also slow as the plant is in its dormancy stage, which means there is little growing.

If you can solve these three causes, you will have your plant for long because you have managed to eliminate root rot. However, if your plant has already been infested by root rot, do the following: 

  • Remove the plant from the soil
  • Cut the affected area of the plant to remain with the healthy part
  • Replant the healthy part in new soil 
  1. Use the Correct Type of Water for your Kalanchoe.

Any water you use will work, but to what extent? The type of water you use for your Kalanchoe determines how well and healthy your plant will be. When you use soft water with high sodium ratios, it can destroy the plant. This sodium tends to build up in the soil, destroying the process of the root tapping in the air from the soil.

Tap water, on the other hand, contains calcium and magnesium components. However, using this water for a long time will leave marks on the plant, and their buildup on the soil will destroy both the plant’s appearance and health. You can correct this issue by boiling the water overnight, leaving it cool, and watering in the morning. 

Mother of thousands on the ground.
Rainwater is easily absorbed by the root of the plant.

Rainwater is the best and preferred water to use on your Mother of thousands. Rainwater comprises the right and the best minerals for this plant. Rainwater is also easily absorbed by the root of the plant. You can store the water for later use when it rains.

How to Remove Build-up of Minerals

If there is a buildup of unwanted minerals in your plant, you can find a solution to remove them. You can decide to repot the plant and reduce the buildup. You can also use a tablespoon of vinegar and some distilled water. Mix the water and the distilled water, and using a cotton ball, wipe all the visible stains on your plant.

Bottom Line

In any season of the year, proper watering of the plant will significantly help the plant. Watering the plant properly will keep the Mother of thousands actively growing during the summer and spring seasons and prepare them for blooming. 

Before you go ahead and purchase this succulent, ensure you have prepared the right pot and right soil for the plant. While maintaining the watering rules, don’t forget the other conditions that enhance the proper health of the plant.

Is a Kalanchoe Blossfeldiana an Indoor or Outdoor Plant?

Kalanchoe Blossfeldiana, commonly called the flaming Katy, is an herbaceous, widely grown houseplant. This perennial, bush evergreen succulent can grow to a height of 30cm and 45 cm in 2-5 years. Though considered ‘slow,’ these succulents are known for the long-lasting bloom heads that appear during the winter season.

Kalanchoe does not require much care when growing and can thrive well even with considerable negligence. With specific care and maintenance needs, even people without much interest in caring for plants can successfully grow them indoors and outdoors. However, ensure you understand how to maintain it based on the location to flourish more. 

 So, where best does the Kalanchoe Blossfeldiana flourish? Kalanchoe Blossfeldiana can grow indoors and outdoors, but the care is specifically based on where it grows. It produces bright light indoors and bright filtered light outdoors during the summer. Growing kalanchoe indoors or outdoors is relatively simple. However, when grown as a house plant, you have to help it along and make a few adjustments to ensure better plant growth.  

Whether indoors or outdoors, the most important thing is caring for the plant. Do you know how to care for this plant indoors and outdoors? Let us help you out.

Kalanchoe Blossfeldiana Flower Color

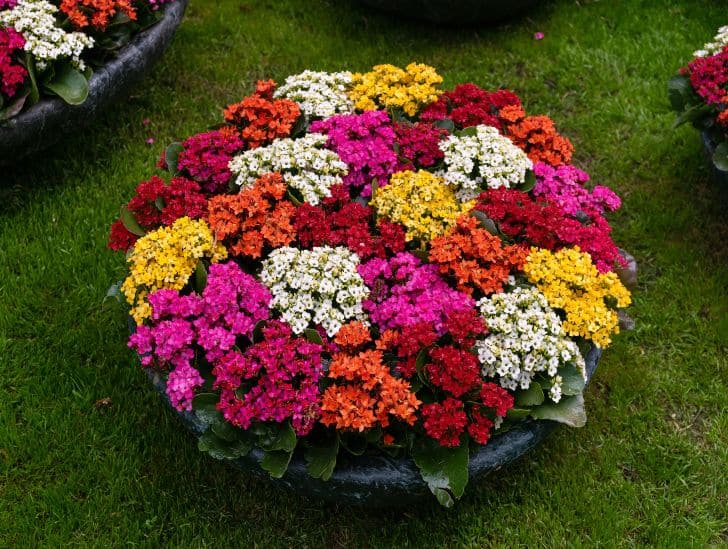
Unlike most succulent plants that are grown for their foliage, flaming Katy is chosen for its beautiful, long-lasting lovely flowers. These pretty succulents come in several colors depending on the plant species and variety. Kalanchoe Blossfeldiana’s s dark green leaves have scalloped edges, with flowers having four petals in most varieties. In bloom, the colors of the flowers range from white to orange to bright red. The flowers are long-lasting and tend to open gradually so that you can have a display of color for many days on end, depending on if indoors or outdoors.

Flower of Kalanchoe with different color.
These pretty succulents come in several colors depending on the plant species and variety.

This unique plant blooms for 2 to 6 months, whether indoors or outdoors. This is because each flaming Katy flower umbel contains many flowers that open one at a time, giving you months of colors. If you like flowers in your home and want to cut on the cost, plant flaming Katy and have the whole collection each day for months!

Growing Kalanchoe Indoor

Kalanchoe is extremely sensitive to freezing or cold climatic conditions. To grow indoors, ensure it is in an area with reasonable temperature, light and water for their growth. 

Kalanchoe Indoor Care

Sunlight

Growing kalanchoe indoor is simple but with the right conditions. As an indoor plant, kalanchoe grows in full sun or bright indirect light. Place your kalanchoe in a place where enough natural light from the sun reaches the plant. Put the plant at a well-lit spot to get much-needed exposure to sunlight, preferably near a window.

Kalanchoe near the window.
As an indoor plant, kalanchoe grows in full sun or bright indirect light.

When placed in a bright sunny window, don’t expose it to too much heat from the sun. It causes the leaves to burn. When the plant is kept in low light for a long time, it becomes spindly and looks weak. Maintain medium sunlight. 

Lighting

If you prefer to grow kalanchoe indoors, ensure that the plant gets a few hours of complete darkness. Kalanchoe is a short-day plant, which means it blooms, responding to long nights and short days. The long days during the summer season inhibit the formation of the flower buds in the plant.

To bloom during the winters, the plant must have at least 14 hours of continuous darkness every night, thus switching the light off in the room the plant is kept. If not able to switch off the light, keeping it in a closed cabinet helps. Flaming Katy needs to be kept under dark conditions for two months to ensure proper blooming in the next season. During these times, ensure to cut down the water supply for optimal growth.

Temperature

As a house plant, room temperature is ideal for the growth of the Kalanchoe Blossfeldiana. That generally means that if your home is comfortable for you, it is comfortable for the plant. As an indoor plant, it does well in a temperature of between 51 and 59 degrees Fahrenheit, dropping to 45 and 64 degrees F at night.

Kalanchoe plants in a pot.
If your home is comfortable for you, it is comfortable for the plant.

This drop in temperature at night ensures the flower lasts longer. However, putting the plant next to an open window at night is not good. The plant should not be exposed to below 40 degrees F, as the frost quickly kills the plant.

Watering kalanchoe

Kalanchoe growing indoors is watered differently in different seasons. Give your plant a small amount of water every week during the summer season. In the winter season, water your plants with just a splash of water fortnight. Remember, just like any other succulent, there is no guideline on the frequency of watering as it depends on your location.

Water the plant anytime it shows signs of being thirsty. You can also determine whether to water the plant if the surface of the soil or two inches below the ground dries out. Dip in your finger, and if the mud is not sticky, it’s time to water. Overwatering is a big mistake, a strategy to lose your plant for good.

Fertilization

Yes, your kalanchoe needs to be fertilized even when indoor. Apply a good dose of the fertilizer to the plant at least twice a year during the spring and the summer seasons. However, kalanchoe grows well with a small amount of fertilizer as they do not need a lot of nutrition.

The best fertilizer to use for kalanchoe Blossfeldiana is a soluble fertilizer. Only apply after mixing with water. A good dose of fertilizer at the right moment will keep your flaming Katy healthy and bloom for long. Excessive use will burn the plant, so trade carefully.

Growing Kalanchoe Outdoors

Flaming Katy care outdoor is relatively straightforward. Although they are mostly house plants, they can do well in mild or less cold winters. Plants’ ability to survive outdoors may vary from species to species, so it is essential to check if the species you want to grow can stay outdoors. If they are well provided with the following conditions correctly, kalanchoe can do well outside.

Outdoor Care for Kalanchoe Plant

Sunlight                                                                                                                                        

How much sun does kalanchoe need outdoors?

Place your flaming Katy in a bright sunny spot. The plant loves short hours of direct sunlight and long hour of indirect sunlight. Avoid areas where the plant will be exposed to intense sunlight, especially at midday.

A yellow flower kalanchoe.
The plant loves short hours of direct sunlight and long hour of indirect sunlight.

Kalanchoe plant will do well in a shady place most of the time. When the plant is exposed for too long to direct sunlight, the leaves burn. During the growing seasons, full sunlight during the morning hours will help the plant grow properly. In the morning, the sun does not produce excessive heat. 

Temperature  

Kalanchoe plant does well in tropical climates native to its origin in Madagascar. They require a warm temperature of about 51 and 59 degrees F to show optimal growth. Plant it in a shady place where it gets enough sunlight when planted outdoors.

Be careful during the nights as the plants are susceptible to cold and frost temperatures and should be protected to prevent frost damage. Moving this plant indoors or to a warmer place is better, especially during the night or cold seasons. To put it correctly, avoid extreme temperatures outside because they negatively affect the plant.

Watering

Like any other succulent, flaming Katy needs low watering even when outdoors. As they lack a proper schedule for watering. Ensure always to maintain slightly moist soil, thus watering when the soil is dry. When watering Kalanchoe, Blossfeldiana does it in the morning to absorb enough water before the sun sets in.

A person watering the plant.
Ensure always to maintain slightly moist soil, thus watering when the soil is dry.

Planting kalanchoe outside does not mean that they need more water. The soak and dry method work best with this plant. Constantly water the plant when the top inches of the soil dry out completely. Overwatering the plant will make the ground soggy. The roots become more susceptible to root rot when roots are submerged for long.

Pest and diseases

Kalanchoe Blossfeldiana grown outside is more susceptible to pests and diseases than when grown inside. These pests include aphids, spider mites nematodes which may attack the plant at any time. When kalanchoe is infested with these insects, it starts showing some signs like a honeydew on leaves, torn leaves, or leaves may begin to fade.

In humid conditions, the plant can suffer from leaf spotting and other fungal diseases due to the water remaining on the leaves. Take care of the plant outside and always be on the lookout for these signs. To avoid damaging the leaves, don’t treat an infected plant using non-toxic treatments like neem oil.

Best Soil Type and Pot Size for Kalanchoe

Depending on the available space, you can grow your plant in any size of a container. The plant does well in a terracotta container with some draining holes at the bottom. Whether developing the plant indoor or outdoor, there is no difference in the soil or pot type.

Choose a well-draining cactus soil for growing kalanchoe Blossfeldiana. If it is hard to find this soil, use some sand or perlite added to regular potting soil. This soil is good as it is fast-draining soil. The process applies to both indoor and outdoor plants. 

Bottom Line

There is not much difference between planting kalanchoe indoors or outdoors. The minor adjustments that we have talked about are to make your plant give maximum results when blooming and stay healthy. Whether indoor or outdoor, remove the spent flowers to keep the plant tidy. Temperatures, amount of heat and sunlight remain the same, whether planting indoors or outdoors. 

This Is How to Make A Good Succulent Arrangement

Do you love succulents and have plenty of them at home? Or are you planning to have a collection of these sun-loving plants, but you have no idea how to arrange them? Are you looking for creative ideas and inspirations to display and arrange your succulents to add more life to your home? If you answered “yes” to any of these questions, then you are in the right place. Sometimes, arranging succulents at home can be a challenging task to accomplish, especially if you don’t have experience.

So, how can you make a good succulent arrangement? The first thing you need to do is choose the type of arrangement ideal for you. Succulent arrangements are divided into three broad categories: Whole plant arrangements using unique pots or shelves, temporary projects for special occasions that mostly use thicker-leaved succulents, and arrangement of succulents by texture, color, size, height, etc. You should also remember the rule of three when arranging your succulents and freshen up your pots frequently to maintain a good look.

This blog post provides you with essential tips you need to know to make an excellent succulent arrangement. Read on to find out everything you need to know.

Understanding the Different Types of Succulent Arrangements

Before you start making succulent arrangements, keep in mind that overcrowding is terrible for these plants. Overcrowded succulents lack the right nutrients and space they need to thrive. They are also easily attacked by a wide range of pests and diseases.

Therefore, no matter what you do, you need to avoid overcrowding your succulents as much as possible. If you are preparing an arrangement in a growing container that won’t last long, be sure to use succulent cuttings or plugs.

In such a case, your project will last for around a few days to weeks, and using whole succulents isn’t practical at all. Generally, succulent arrangement types can be divided into three categories, namely:

  • Whole plant arrangement mainly uses large pots and unique shelving to create amazing patterns.
  • Temporary arrangement for special occasions. This is where you are encouraged to use thicker-leaved succulents.
  • Arrangement of succulents by size, height, color, and texture.

When choosing the containers to use in your arrangement, ensure they have plenty of drainage holes to prevent root rot. If there is no enough space for the potting mix in the arrangement container, go ahead and plant your succulents without it.

However, make sure you use some sphagnum moss and protect the roots of your plants from direct sunlight exposure. You may also be required to fertilize the plants regularly due to a lack of potting mix.

Succulent Arrangement Tips

It only takes a couple of minutes to get your containers ready (with or without potting mix). Once you are through with that task, you need to get down at work and start arranging your succulents. Here are some tips to get you started.

1. Consider Colors

One of the best things about succulents is that they come in a wide range of colors. This makes it fun to arrange them based on some of the common colors and patterns. Be creative and think about arrangement patterns that show off certain color schemes.

Some succulents are monochromatic (they only have one primary color), while others have shades of different colors. So, assess what you have got and see the color scheme you can develop.

A different colors of lithops.
For succulents with shades of different colors, look for groupings with analogous color shades next to each other on the standard color wheel.

If you decide to create a monochromatic arrangement, ensure you use different shapes and textures to add interest to your arrangement.

For succulents with shades of different colors, look for groupings with analogous color shades next to each other on the standard color wheel. For instance, you could use orange, yellow, and green together or go for green, blue, and purple.

If you love relatively conserved colors, then your arrangement should focus on blues, purples, and greens. However, if you are looking for a brighter arrangement, yellows, oranges, and reds can be eye-catching.

2. Think about Shape

And it is not just about the color. You also have to think about the shape of your plants if you want to come up with a nice arrangement.

Look for a mix of succulents that grow tall and those that grow low. Keep in mind that some will creep or spill over to the sides of your pot, and you must figure out how to manage them.

Different kinds of succulent.
Some succulents are round, while others are spiky.

Some succulents are round, while others are spiky. Others are delicate, while others are chunkier. To achieve better results, try to highlight a mix of different shapes and textures in your arrangement pots.

3. You Are Better Off with a Plant Stand or Ladder

If you are struggling to come up with a good arrangement for your succulents, go for a plant stand or ladder. The stand offers you an incredible way to showcase your succulent collection in their own pots and without much struggle.

A typical plant stand will have multiple shelves allowing you to arrange your plants according to their height. In fact, this is one of the best ways of arranging your succulents without the need for extra tools.

Succulent plants on a shelf.
A typical plant stand will have multiple shelves allowing you to arrange your plants according to their height.

A plant ladder is also a great way to keep your succulents off the floor, especially if you have installed floor heating that may interfere with the general health of your plants.

There are many different types of plant ladders to choose from. Some can be mounted on the wall, while others don’t need mounting at all. The ladder will have shelves forming a specific pattern. Be sure to choose the perfect shape for your arrangement when shopping for the ladder.

4. Remember the Rule of Three

For some strange reason, the human mind and eye like odd numbers than even numbers, and it really likes three and its multiples.

Most succulent plants are quite bold and sculptural, so having just one plant in a pot works perfectly fine. That way, the shape and color of the succulent are showcased quite incredibly.

But did you know that adding two more succulents in the same pot can help you achieve a highly balanced and dynamic appearance? But don’t have two succulents in a pot because they will look as if they are competing against each other.

Similarly, three different colors in the same growing pot always look better than one or two colors. Just make sure the colors you choose to use in one pot are close to each other on the color wheel.

Odd numbers always seem to work better than even numbers. Three is better than two, and five is better than four. So, try it out today and see if you will like the end product.

5. The Pot Size Matters

Sometimes, it can be difficult to tell what pot size you need for a particular arrangement. Generally, you should aim to leave at least a half-inch of space between your succulents and the rim of the pot. This space will provide your succulents with more room to grow.

But you must be careful because too much space can also hinder your succulents from growing. If the space is too big, the roots tend to spread out much faster and become larger before the succulent has time to catch up.

Different kinds of succulent in a small pot.
It can be difficult to tell what pot size you need for a particular arrangement.

Therefore, it is always good to maintain a 0.5-inch space between the plant and the rim of the container. For instance, consider getting a 2.5-inch growing pot if you have a two-inch plant.

A single tight arrangement always looks awesome as soon as it is completed. Place your succulents into the growing container with their nursery pots to get the right idea of spacing. This provides you with the freedom to move the succulents around until you are fully satisfied with the arrangement.

6. Thriller, Filler, Spiller

If you are still struggling with succulent arrangements, then the thriller-filler-spiller arrangement formula may come in handy.

The formula is one of the most widely suggested guidelines for succulent arrangement since it is so simple but results in great arrangement results.

Basically, a thriller is a succulent that is large, tall, spiky, or highly different from the other succulents you have in your arrangement. The thriller must always stand out as the first thing people notice when looking at your design and arrangement.

Different kinds of succulent in a different small pot.
It can be difficult to tell what pot size you need for a particular arrangement.

The filler succulents make the bulk of the arrangement and occupy the most space. However, the term thriller doesn’t necessarily mean dull succulents.

Typically, you want to choose good fillers that will complement your thriller nicely while still providing some form of excitement.

Lastly, spiller succulents are usually hanging over the edge of the pot. The best spillers are usually trailing succulents such as the String of Hearts and the String of Bananas. Spillers can also be longer succulents such as Sedum Burrito.

Whatever kind of spiller you choose for your arrangement, just ensure they cover the edge of your growing pot somehow. That simple modification can make a great difference to the longevity of your overall arrangement.

Summary

If you are considering brightening up your indoor and outdoor space by adding some fabulous plants, you can’t go wrong with succulents. The sun-loving plants are easy to care for and slow-growing, ideal for your interior spaces.

You can also arrange them in different patterns to achieve a fantastic appearance. We hope you have learned a few tips, and you are now ready to start arranging your succulent collection to form great patterns!