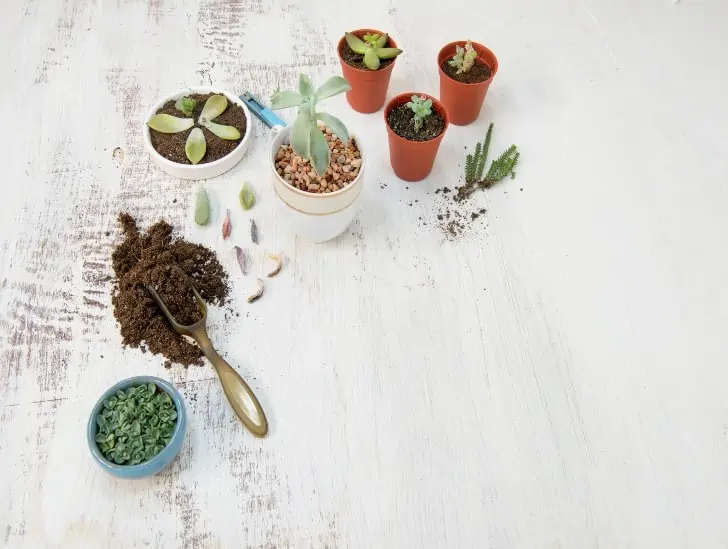
How to Propagate Hens and Chicks Plants

Hens and chicks(sempervivum) are remarkably capable of producing young offshoots (chicks) and adapting to change. As a result, the propagation of hens and chicks is not complex. All you need to do is get to know your plant so you can tell where to cut and when to spread.

Like most succulent plants, hens and chicks are easily propagated. The stalks and leaves store up the water to retain the cuttings until they root. The plants have a rosette, and the floral stems rise close to the center of the rosette.

Growth is short and clustering or higher with ramified expansion. Propagate low-growth types by separating and rooting tiny seedlings, called offsets, which form around the mother plant.

The Ideal Time to Propagate Hens and Chicks Plants

The best time to spread these succulents is when they start to exceed their container or outer space. Chicks are smaller clones of the mother rosette (hen) and readily split apart. When the stolon linking the mother and the offset has leaves and is still healthy, the hen still feeds the chick, so it is not quite the time to separate them.
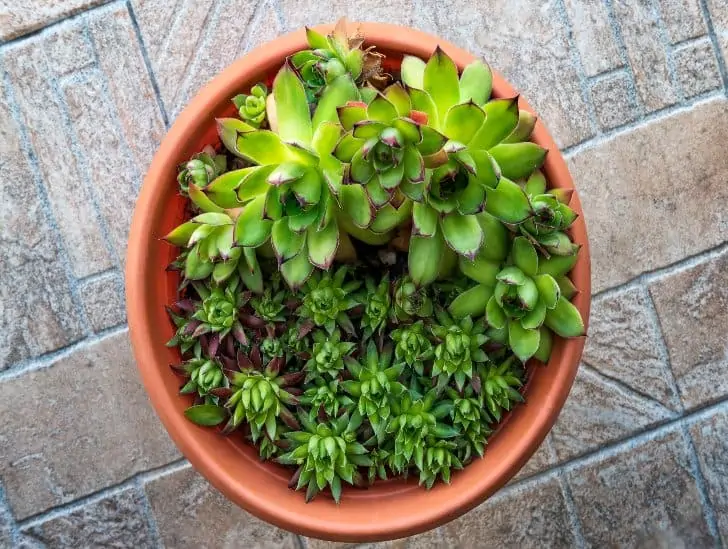
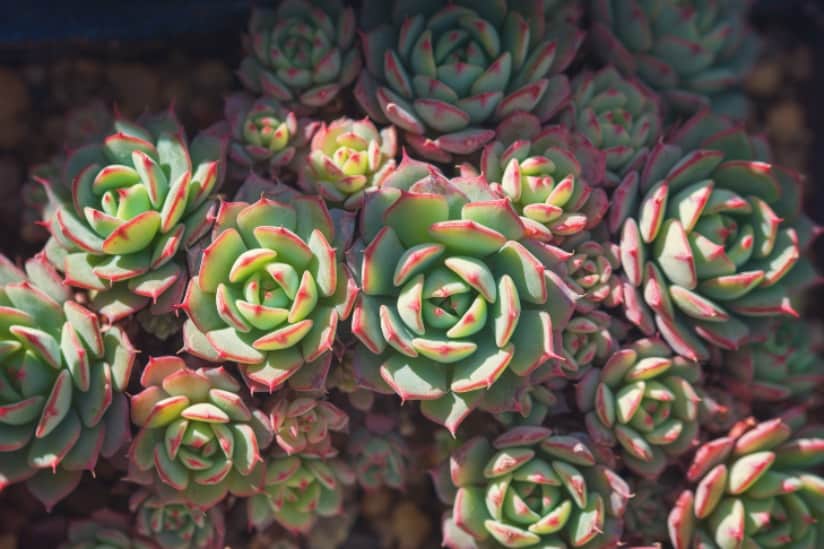
A close up image of Rosettes.
The best time to spread these succulents is when they start to exceed their container or outer space.

Ideally, the plants will grow together until the chick pulls out its roots and the stolon begins to dry out. Then you know they’re ready for transplantation. However, if you break some chicks early, plant them, and they will probably grow without a problem.

The plant’s division helps it adapt to its space and remain healthy. The best time of year to split a succulent-like sempervivum is in the summer before it enters a period of heavier fall growth.

Selecting Rosettes

The offsets that are the chicks produced by the mother plant begin as tiny nubs within their mother’s leaves. These small buds are then spread from the parent plant on stems known as stolons. One of the attractive benefits of sempervivum succulent plants is that a plant can produce a lot of offsets.

According to the variety of hen and chick and the space available for the plant, it can grow a very long stem for its offsets in a propagation effort. The offset will develop from a typical rosette-like bud.

One of the attractive benefits of sempervivum succulent plants is that a plant can produce a lot of offsets.

You will be most successful in propagating sempervivum cuttings if you take rosettes that have already formed some roots rather than younger chicks. The simplest way to know for sure is to remove the plant from the pot and shake part of the soil to expose the roots. It helps you select the best branches to cut off.

How to Take Cuttings

A sharp and clean knife is the most convenient way to cut a small rosette for propagation. Cut across the edge of the rosette, cutting where it connects to the mother plant. Place the rosette cutting in a dry, sheltered place for a few days to allow it to form a callus. The cuttings may receive light but not direct sunshine.

How to Divide the Offsets

The offsets can be separated effortlessly from the hen plant. Break the stem connecting both plants, wiggle the chick plant, and transplant it to a new home.

Potting your Hens and Chicks Cuttings

Grab a small plastic container, about 3 inches around, and fill it with a granular potting mixture made for succulents. Add a thin coat of fine-grain only on top of the substrate. Possible gritty materials to use are construction sand, small gravel, or chicken grit.

A Potting Mix.
Fill it with a granular potting mixture made for succulents.

The regular potting mix works very well too. You can add a bit extra perlite for improved drainage and compost for additional nutrients if you like. Place the calloused tip of the cut in the fine grain at the top of the jar. Press gently so that the end reaches the main mixing layer.

Propagation Methods

While hens and chicks can be grown from seeds, splitting or propagating offsets from a complete and healthy mother plant is more convenient.

How to Grow Hens and Chicks from Seed

You can grow hens and chicks from seeds and divide the chicks. They need light to sprout, and you should keep them humid but not damp. Seeds are expected to germinate in 3 weeks. At this stage, you may add thin gravel and mulch. 

Plant Seeds.
You can grow hens and chicks from seeds and divide the chicks.

Propagating Through Offsets

Check the mother plant for offsets to be removed. Gently pull the plant out to examine the balances that have already cultivated some of their roots. Alternatively, skip this step and select a healthy offset on the outer edge of the vessel.

Propagate hens and chicks offset in the spring. Once seedlings reach a width of 1 to 2 inches, they are ready to spread. Gently pull it out of the parent plant for an offset with already established roots. For a root-free offshoot, use your clippers to remove the offset, cutting the stem as close as possible to the mother plant without damaging it.

Plant the rooted offsets in a small vessel with succulent soil. For an offshoot with no roots, let the cuttings dry for a few days. Place on the surface of a small container filled with dry and succulent soil.

Lay the plantlet, base down, in a pot filled with a cactus and a succulent potting mixture. The jar should be just a bit wider than the offset and should have drain holes. Put the pot into a bright indirect light and wait for the offshoot to root.

When new roots develop, the seedling is resistant to movement when you push it. Water the rooted plant regularly until the water runs out of the drain holes. Let the soil dry halfway between watering the pot.

Propagating Through Cuttings

For hens and chicks branching out, collect stem cuttings in the spring. Wipe a pair of sharp pruners with a cloth dampened with rubbing alcohol. Cut the stem so that there are 1 to 2 inches of stem below the top of the leaves.

Extend the cut to the side in the shade for about a week for the cut end to heal. Next, dip the apex of the stem into a 2-inch pot filled with cactus and succulent potting mixture or equal portions of peat and perlite. Again, be sure to use a container with drain holes. No watering is required until the roots form.

Propagating Through Unbranched Plants

Like some large hybrid cultivars, you can cut the entire leaf rosette for hens and chicks that are not branching, leaving a bare stem. Leave 1 to 2 inches of stalk underneath the lower leaves.

Use an empty pot more miniature than the diameter of the rosette and place the head on the border of the vessel. After a few weeks, the roots begin to germinate from the stem. Plant the rooted stem in a pot that is about as broad as the head of the leaves, using the cactus and succulent potting mixture. There should be drainage holes in the container.

Propagating By Leaves

Though the spread of hens and chicks from leaves is possible, please do not get your hopes too high as it is pretty unpredictable. Propagation from one leaf has a small success rate, although starting a new hen and chick plant is possible.

Detach a fully grown mature leaf from the parent plant by removing it from the stem. You can use a sharp blade that has been soaked in rubbing alcohol. Try propagating your plant during spring when you have a few healthy leaves already formed. 

A leaf propagation
Propagation from one leaf has a small success rate.

Ensure that the leaf has the base that ties it to the stem. If the plant has a flower stalk, you can root the leaves of the flower shoot. Let the leaves dry and heal over a few days. Place the leaf in a shallow pot filled with one half wet peat and one-half perlite. Use a container that has a drain hole.

Incline the leaf at an angle so that a tiny portion is in contact with the ground. Shade the container and drizzle the potting mixture from time to time to keep it slightly damp. The roots germinate from the base of the leaves, and then a new miniature plant forms over the roots in approximately 40-50 days.

The old leaf eventually becomes dry and may be removed. Place the container in a place where it will obtain a constant indirect light and water the ground enough to keep it moist but not soggy.

How to Care for a Propagated Hens and Chicks Plant

When your cuttings are in their new home, they are ready to recover and begin to produce roots. Place the jar in a bright place with good airflow. If you can, keep the temperature around the bottom of the pot close to 70 degrees.

Do not enclose the cup in a bag or container that retains moisture, as it may cause decay of your succulent. In a matter of weeks, your cut is expected to have roots. When they look large enough, you can place the new plant in its permanent pot or the soil.

Bottom Line

The hen and chick plant is one of nature’s most efficient plants and easily propagated. They are easy to maintain and can thrive indoors or outdoors, making them a perfect plant for just about anyone.

Ultimate Guide: How To Care For Ghost Plant?

Ghost Plant is a unique ornamental houseplant. Furthermore, it is one of the most popular succulents easily available from gardening centers and stores as it is easy to grow and care for. Even novices may grow them. 

They can survive anything from long periods without water to damaged stems and cold temperatures. If you’re searching for a forgiving succulent that won’t mind a little neglect now and then, Ghost Plant is an excellent option.

If you are looking at growing a Ghost Plant, here is detailed information on how to propagate, important conditions, and care tips for your Ghost plant to thrive.

Sunlight

Ghost plant enjoys full exposure to sunlight. You should let it stay in bright light for at least six hours a day. Its most distinctive feature is its translucent pink leaves, which result from exposure to full light. 

On the other hand, the Ghost plant can tolerate light shade, which turns the leaves to a grey, blue color.

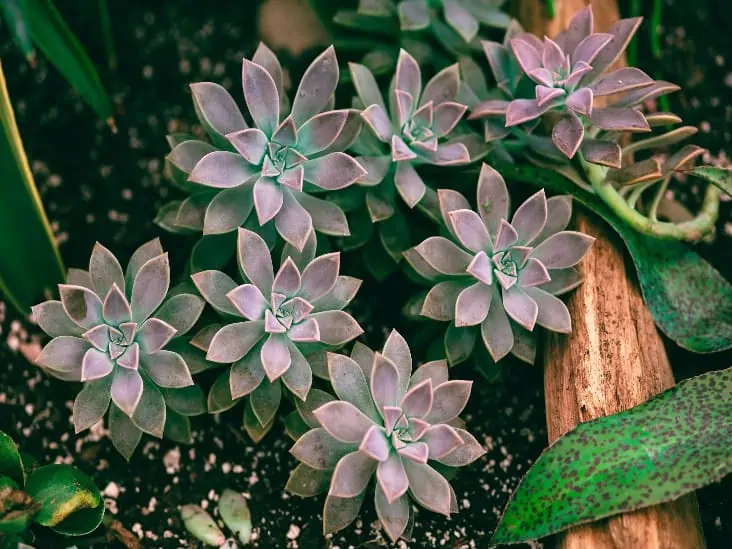
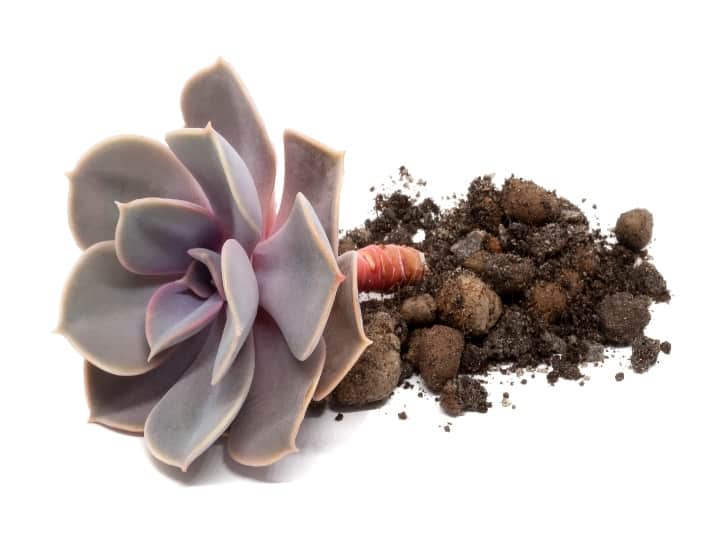
A ghost plant with a back light.
It is relatively a hardy succulent when it comes to temperature fluctuation.

For indoors lighting, locate the most lit location, or one with or receiving a lot of light. An east-facing window is ideal. West and south-facing windows may also work well, but you’ll have to relocate the plant multiple times to get the ideal position.

If your Ghost plant does not receive enough light, it will start changing to a pale gray color and lose its luster.

If it doesn’t get enough light soon, it will start stretching out and elongating towards a bright light. Move the plant to a more direct light source when you notice this happening.

Soil

The Ghost plant’s soil (like other succulents) needs to be well well-draining.

The ideal combination of light, porous potting soil, and up to 50% gravel, sand, or perlite will give your Ghost plant a conducive environment for growth. Or use this soil mix that combines coarse sand, cactus mix, and perlite in a 1:1:1 ratio. 

A ghost plant was planted in a rocky soil with sunlight.
he Ghost plant’s soil needs to be well well-draining.

The type of potting mix you create will also let you avoid many common problems that arise from overwatering.

Watering

When caring for Ghost plants, water is the most important element.

Water your Ghost plant once a week during the active growing season in winter and spring. Come winter; you should only water it once or twice every two to three weeks to prevent overwatering.

Wait till the soil is completely dry to a depth of one inch and water it once the soil is dry. You can check this out using your index finger.

Water the soil around the plant’s base in the morning or late evening. Pouring water directly onto the leaves might scorch on a hot, sunny day damaging the plant. In addition, dripping water on the leaves in a humid environment might cause fungal infections to your plant.

Fertilizer

Outdoor Ghost plants rarely require soil supplements when grown in the garden, but you can still add nutrients to both plants if grown outdoors or indoors. 

Those grown indoors may require a feeding supplement after depleting the existing nutrients in the pot.

The secret to growing a healthy Ghost plant is to feed it while it is actively developing in the summer and spring.

In the spring and summer(growing season), you can use a balanced succulent fertilizer at half strength, and you can use it once every month or two. Fertilizer mixes made specifically for succulents and cacti are also appropriate.

Temperature

Ghost plants do well in temperatures between 60 to 80°F.

The Ghost plant is relatively a hardy succulent when it comes to temperature fluctuation, and the good thing, it will thrive in your house at room temperature.

A plant terrarium.
It is relatively a hardy succulent when it comes to temperature fluctuation.

In their native Mexico, they flourish in hot, dry regions and survive low temperatures in mountainous regions. They can tolerate low temperatures of upto 10°F.

Humidity

Ghost plants do well in environments with below 50% of humidity level.

Avoid rooms in your home that become too humid or are full of moisture, such as the kitchen or bathroom, where steam may accumulate. These areas usually have high humidity levels and may damage your plant.

The Ghost plant thrives in an arid climate and may be placed on a window to receive plenty of sunshine and good airflow, recreating its natural habitat.

Pruning

Ghost plant offshoots new rosette pups on the healthy stems that may get leggy with time. These leggy offshoots, depending on the aesthetic you’re looking for, maybe charm or make the plant look scraggly. 

Young ghost plant in a small pot.
Prune the offshoots as they grow long and re-pot the pups.

To maintain your plant, prune the offshoots as they grow long and re-pot the pups, share with friends or create compost with them. Always use clean, sterilized pruning sears to prune your plant. 

Potting

Ghost plants don’t require regular repotting. If the plant has outgrown its container, you should switch it to a larger one in the spring.

It’s also a good time to prune the older growth and propagate.

Pro Tip: If given an ideal pot with enough space and all the right growing conditions, Ghost plants can grow to reach 12′ tall and trail 3 feet.

Propagating Ghost Plants

It’s good to propagate Ghost plants during the growing season (spring and summer) since they will root more quickly this period hence a greater chance of survival than in the winter months.

Ghost plant leaf propagation
You can propagate Ghost plants with individual leaf from or stem.

You can propagate Ghost plants with:

  • Individual leaf from a rosette or stem
  • Cuttings from excessive growth or older plants
  • Seeds

Use a clean, sterile pair of scissors or sterile knife to make your cuttings. If plucking a leaf, ensure you pluck the entire leaf from the stem. If you let any part remain on the stem, you might not achieve a new growth from the leaf.

How To Propagate Ghost Plant from Stem Cuttings:

  1. Let the stem cutting dry for a day or two. Let the cut ends dry and seal or callous. It’s better to obtain cuttings from healthy-looking, plump-leafed Ghost plants than dehydrated or stressed ones.
  2. You can dip your cutting into a rooting hormone if you wish to speed up the process.
  3. Stick the cuttings in a well-draining potting mix once they’ve dried and healed.
  4. Place in a well-ventilated place and away from direct sunlight. Every few days, or when the soil feels dry, water it.

After about two weeks, you’ll begin to see new roots develop.

After four to six weeks, the cuttings should be firmly rooted, and new growth will start developing from the stem sides or the top.

When the succulent is well-rooted, reduce the amount of misting and water it once a week at most. As the plant grows older, expose it to more light.

How To Propagate Ghost Plant from Leaves:

  1. Gently twist off a leaf from the stem. Always get a healthy leaf; in addition, it is wise to have several leaves as not every leaf will grow.
  2. Again, you can dip the cut ends into a rooting hormone to enhance rooting. This process is optional, but you can do it if you are looking at fast success.
  3. Allow the leaves to dry for a day or two. Keep it in a dry place away from direct sunlight.
  4. Prepare a well-draining potting soil. Take the leaves and lay them flat on the soil surface, barely covering them, or insert the cut ends in the soil.

In about two weeks, the leaves will begin producing roots. In a few more weeks, you will notice new seedlings growing. The process might take anything from a few weeks to several months.

Pro Tip: It takes longer to grow Ghost plants from leaves than from a whole stem. Stem cuttings also have a higher success rate; therefore, note these details when propagating.

How To Propagate Ghost Plant from Seeds:

Lastly, you can start Ghost plants from seeds, which is the best approach if you are looking at covering a large area of your garden or have many seedlings for potting. 

You can collect the little seeds that develop after the blooms have died or purchase them from gardening stores.

Plant the seeds in a swell draining potting mix on a tray and barely cover with soil. Water with a plant mister to prevent washing away the seeds.

Place your tray in bright light at 70°F, and you will see new sprouts in three to four weeks.

Common Pests and Diseases

Remove dead leaves from the base of your Ghost plant as it develops. Decaying foliage is home to mealybugs, which are bugs that spread bacterial infections causing decaying of your plant.

You can treat mealybugs on a Ghost plant y smothering the pests away with horticultural oil or with a dab of isopropyl alcohol.

In Conclusion

Ghost plants are one-of-a-kind plants with interesting foliage, and when grown in the proper conditions, their changing hues make them ideal focal points in any space. They’re really simple to maintain and look beautiful as greenery decorations for your home or workplace.

Does Echeveria Need Direct Sunlight?

Echeveria exposed to sunlight.

What comes to your mind when you think of Echeveria? You will most likely envision a hardy desert plant that requires intense bright sunlight to survive. While most succulents thrive in relatively warmer climatic conditions, they still need protection from blasting sunlight and extremely high temperatures. Echeveria, like other succulents, is mostly from the semi-desert environment, which receives plenty of rainfall and moderate sunlight.

So, does Echeveria need direct sunlight? The simple answer is “no.” There are over 150 different types of Echeveria species, and most of them can tolerate full sunlight, but it doesn’t mean they are happy. Typically, Echeveria requires approximately four to six hours of bright but indirect sunlight to thrive. Keep them out of direct sunlight to avoid causing sunburns on the plant’s leaves. You should also remember that the plant’s age and size will determine its light requirements. When moving them outdoors after winter, be sure to slowly acclimatize them to direct sunlight to keep them alive.

This blog post discusses everything you need to know about Echeveria’s light requirements and how to keep your plant happy in different light conditions. Keep reading to learn more. 

How Many Hours of Sunlight Does Echeveria Need?

Generally, Echeveria requires four to six hours of sunlight exposure to keep it happy. This succulent loves being in a bright and sunny spot.

Echeveria plants that don’t receive enough sunlight tend to exhibit various problems such as etiolation and elongation.

A plant experiencing etiolation tends to stretch in the direction of light. So, if you discover your Echeveria is stretching towards the direction of light, it means your plant isn’t receiving enough light.

An Echeveria plant exposed to sunlight.
Echeveria requires approximately four to six hours of bright but indirect sunlight to thrive.

Etiolation leads to weak stems, multicolored leaves, and stunted growth. The plant will also lose its vibrant pigmentation and become pale or revert to a relatively dull green color.

However, an Echeveria plant that receives plenty of sunlight will demonstrate its true beauty by showcasing the full range of its vibrant colors and blooming maximally.

Since your Echeveria requires at least four hours of bright light to thrive, consider keeping it near a south-facing window if you have grown it indoors. If you have a relatively sunny room, be sure to keep it there.

Rotate your plant several times a day keep its leaves even. If you allow one side to receive too much light than the other, you may start to notice etiolation on the side that doesn’t receive enough sunlight.

An echeveria plant exposed to sunlight near the window.
Consider keeping it near a south-facing window if you have grown it indoors.

If your region doesn’t receive plenty of natural sunlight, don’t be afraid to use artificial grow lights to keep your plant happy. Keep the lights on for at least eight hours a day before switching them off to allow your plant to rest.

Does Echeveria Need Direct Sunlight or Full Sun to Thrive?

Generally, succulents tend to thrive with a lot of sunlight exposure. Echeveria is no different, but it still requires proper protection from direct sunlight or intense heat.  Too much sunlight can cause severe damage to your plant, leading to permanent scarring.

The plant can literally fry to death when left in full sunlight for prolonged hours without proper protection in extreme conditions.

To prevent sunburn and scarring, ensure you slowly introduce your Echeveria to sunlight before full exposure. You can achieve this by giving it partial shade at the beginning and gradually increasing the number of hours you expose the plant to direct sunlight until it is fully acclimatized to the heat.

For better results, start by exposing your plant to the morning sun and slowly work your way to the intense afternoon sun. Alternatively, put the plant under shade when first exposing it to direct sunlight. From there, increase the exposure gradually to prevent damaging the plant foliage.

Newly propagated Echeveria is more susceptible to sunburn, but mature plants can withstand the intense heat for some time before they start showing signs of damage.  Indoor Echeveria plants are also more vulnerable to sunburn and damage.

Small Echeveria plant.
Newly propagated Echeveria is more susceptible to sunburn.

When it is time to move the plants outdoors, do it gradually so that they get plenty of time to be accustomed to the intense heat. Newly propagated plants must stay strictly under shade. A simple mistake and you lose them.

What Is the Best Temperature for Echeveria?

Unlike other succulents, Echeveria can survive pretty well in quite a wide range of temperatures. Most Echeveria species will thrive in a relatively warm and dry climate. These plants prefer about ten degrees Celsius difference between the day and night temperatures.

During winter, the plant will be happy in cool conditions of about 15 degrees Celsius during the day and five degrees Celsius during the night.

During summer, these succulents tend to enjoy relatively higher temperatures. But it is always good to maintain the temperature at approximately 30 degrees Celsius. Anything beyond that becomes dangerous and can cause severe damage to your plant.

Other than sunburn, you need to keep in mind that most plants shut down and stop respiring when temperatures are too high. They will only allow their stomata to open and breathe again when the temperature drops.

Echeveria plants have developed various strategies, such as a waxy coating on the leaves to prevent too much water loss. So, exposing the plant to extremely high temperatures can interfere with its survival mechanism.

Can Echeveria Get Too Much Sunlight?

The simple answer here is “yes.” Even though Echeveria is a succulent, it doesn’t mean that it can withstand any amount of sun exposure. When the sun exposure is too much, your plant will start showing signs of damage and sunburn.

Keep in mind that sunburn usually happens gradually. The first sign of sunburn is the existence of brown spots on some sections of your plant leaves. When recognized earlier, sunburn can be remedied to avoid further damage to the plant.

The only thing you need to do is move your Echeveria to a relatively shadier area or position it next to taller plants for protection from direct sunlight.

Sunburned Echeveria plant.
The first sign of sunburn is the existence of brown spots on some sections of your plant leaves.

If you leave the plant unattended even after noticing signs of sunburn, some Echeveria species will toughen up and survive, but others will eventually succumb. If you don’t want to take any chances with your plant, be sure to provide it with sufficient protection from direct sunlight.

What Can You Do to Keep Your Echeveria Alive During Prolonged Heat Waves?

With the climate changing, weather extremes are becoming normal. During winter, the cold will be extreme, and the heat will also be extreme during summer.

If you live in an area that experienced prolonged heat waves, you must be worried about your Echeveria. While extremely high temperatures that last for days or weeks can be extremely challenging for plants that love a lot of moisture, they can also affect succulents such as Echeveria.

The prolonged heatwaves can be damaging to your Echeveria, making it almost impossible for the plant to bounce back from the stress and damage.

Apart from providing your plant with shade, be sure to provide sufficient humidity. Although Echeveria doesn’t like sitting in water for prolonged hours or being overwatered, you need to find ways of keeping it hydrated amid prolonged heatwaves.

Failing to water your plant during periods of prolonged heatwaves can be catastrophic. Some hardier and more mature Echeveria species can sustain the heatwave, but the fragile species won’t survive.

Check your potting mix moisture regularly to feel if it is dry. If the soil feels any dry, water your plant and give it a few days before checking again.

While watering, keep adding water to the growing container until it starts to seep out from the bottom of the container. Generally, you should water your Echeveria every five or six days during a heatwave.

Does Sunlight Exposure Affect Flowering?

You need to keep in mind that the blooming cycle in Echeveria is somehow unstoppable unless you deny your plant essential nutrients. But as long as your Echeveria has the right conditions, it will always flower.

Just ensure the plant receives enough light (length and intensity), a well-draining potting mix, and enough watering. 

In this case, enough light exposure doesn’t mean exposure to full sun. You still need to protect it from the intense heat so that flowers don’t wither and fall off.

Echeveria plants.
As long as your Echeveria has the right conditions, it will always flower.

Echeveria usually starts flowering at the end of summer, although some species will flower during spring.

The blooms last a few weeks and open in quick succession. Some flowers may pollinate and produce seeds that you can use to start new plants.  You can also propagate new plants from the stalks of the flowers.

Final Thoughts

Growing Echeveria can be so fulfilling because of the potential benefits that you will enjoy along the way. However, you need to learn how to take care of your plant to keep it happy.

Although these plants are succulents and have adapted to growing in relatively hot climatic conditions, they don’t love being exposed to full sun. Exposure to full direct sunlight can result in irreversible damage and even death.

Keep your Echeveria in a spot that receives plenty of bright but indirect sunlight, and it will remain healthy. If you must take it outdoors during summer, introduce it to the sunlight gradually.

Does Desert Rose Need Direct Sunlight?

Adesert rose seedlings outdoors.

Direct sunlight can be harsh on many popular indoor plants, many of which have evolved to prefer filtered and indirect sunlight from the ground of the tropical forest. However, the desert rose is happy to immerse itself in these intense rays!

Being native to Africa, it does exceptionally well in full sun. It may also survive with sunlight only in the morning or afternoon; however, it might not bloom as vigorously and vividly. But in warm conditions, such as in a greenhouse, the plant can stay active and bloom all year long.

For a desert rose plant indoors, position it near a window to get at least 6-8 hours of sun per day. South-facing windows can be a blessing but also a challenge. On one side, all this natural light is perfect for creating an inviting atmosphere in your home. But, be sure to rotate the container every few days; otherwise, the plant could lean toward sunlight on one side. 

Sunlight for Different Growth Stages

Desert Rose’s light requirements vary at every step. Let’s see how to give the right light at each developmental stage.

Desert Rose Seedlings

Freshly planted desert rose plants and fresh cuttings will require a great deal of extra attention if grown outdoors. They should be eased into the heat over time. If left too long in sweltering weather, they may burn and die quickly. Do not bring your desert rose plants into the sun in the first seven to ten days. Semi sun or partial shade is good for the seedlings.

A young desert rose.
Freshly planted desert rose plants should be eased into the heat over time.

One Month Old

When your plants are approximately one month old, gradually increase the sunlight to avoid burning the leaves. The best temperature range for your desert rose plant is 95F Maximal by day and 73F by night. In this range, the plants will sprout well.

Gradual Adjustment to Full Sun

Newly planted desert roses will need additional shade or protection to keep them calm as they begin to take root in the soil. However, when their roots are better established, they will be more likely to endure high temperatures. General steps include:

  1. Begin the plants outside, where they will be in the shade throughout the day for 4-7 days.
  2. Move to a partly sunny spot (about 4 hours of sunlight in the morning and light shade the rest of the day); give 4-7 extra days to adapt.
  3. Evaluate color change and gradually move plants to a more or less sunny location as required.

Bright light combined with high temperatures can be harsh. If you progressively introduce your desert rose in direct sunlight, it will tolerate full sunlight for most of the day. Alternatively, add a little shade fabric to protect against direct sunlight. While the outdoor temperature is consistently above 90, the desert rose plant area is much colder from the shade canvas.

In the absence of direct sunlight on plants, the leaves do not become as hot and are unlikely to burn or show signs of excessive heat. Another great option is to place your plants in an area that gets bright shade for most of the day. 

Ideally, they will be in a place with an hour or two of morning sunlight but then shady the rest of the day. Because temperatures are usually higher in the afternoon, direct sunlight can be a problem during this period. However, the morning sun is cooler and less likely to provoke sunburn.

One Month to One Year

The desert roses at this time are more robust and more ready to go outdoors or for more sun. Approximately six to eight hours of sunlight will be excellent for their growth.

One Year Old

The bigger the desert rose plant, the less likely it will be affected by hot weather. A large plant is much more robust, has a deeper root system, and has probably had time to adjust to warmer temperatures. 

A top view of desert rose.
Freshly planted desert rose plants should be eased into the heat over time.

Mature desert rose plants may experience sunburn (especially if they go from shade to sunlight), but this is not expected. Setting the desert roses in full sun at this stage will significantly assist their growth and flower formation.

Sunlight and Seasons

Although the bright sun stimulates flower production, the desert rose plant takes a break in the hottest and wettest months of the growing season. The result is two flowering seasons. The flowers will begin to bloom at the beginning of spring. With a good amount of light, your plant should bloom regularly until mid-summer.

At this point, flowering will stop for 6-8 weeks, only to start again at the beginning of the autumn months. When the weather gets cold (55 degrees Fahrenheit or less constantly), bring it into the house.

In a highly luminous and warm environment like a greenhouse, the desert rose plant can remain active throughout the winter. If you bring your plant into your home for the winter, it will probably stay in a semi-dormant condition until spring comes. In the meantime, store it in a warm room with indirect light.

Signs of Too Much Sun

It is not long before desert rose plants start to show if they are stressed by too much heat or direct sunlight. When your plant gets the right amount of sunshine, it will often “redden” or change color. 

Suppose they begin to get too much sunlight, although the leaves will burn. You may note white or pale spots on succulent leaves. Though the damages may be hard to reverse, you can try moving your plant to a place with less warmth, direct sunlight and expect new leaves to grow. If just one or two leaves are damaged, you may remove them, but this is unnecessary.

A dry leaf of a desert rose.
Once they begin to absorb too much sunlight, the leaves will burn and you may note white or pale spots on succulent leaves.

In some instances, the leaves dry out and blacken. Black begins on the outer edges of the leaves and will become dry and crispy. These will not heal but remain until the leaf dies completely and new leaves are formed. 

If the desert rose plant is in the shade but still experiences hot temperatures, you can notice a golden/yellow color starting to appear. The plant does not become entirely white with sunburns; instead, the colors tend to be hotter than usual. It usually disappears, or the rose desert plant will revert to its original color if moved into a cooler environment.

The Relationship Between Direct Sunlight and Desert Rose Plant

The correct amount of sunshine directly affects the color of the Desert Rose. Sunlight is a very influential factor as far as the color of your plant is concerned. Moderate, mild stress can lead to beautiful shades. However, if the lighting conditions are out of their preferred light range for an extended period, your plant will eventually die.

Most light issues can be resolved if detected early, but the initial signs of too much and too little light can be subtle. Desert Rose plants can recover entirely from most light problems if given 1-2 weeks to gradually pass into the proper amount of light. Solving light issues is as simple as relocating your plant. 

The key to a successful changeover of light conditions is time. Whether they show signs of too little or too much light, desert rose plants can regain bright colors if given 1-2 weeks to gradually shift to the right amount of light. The more significant the change in light levels, the longer your plant will need to transition.

The Best Location for Your Desert Rose Plant

You will be saved from unending troubleshooting when putting the desert rose plant in the right place. We recommend that you reference the recommended lighting conditions indicated on the label of your plant.

Indoor Light Requirements

Desert Rose plants may be difficult to care for indoors due to their lighting needs. Because our windows don’t have nearly the same light intensity as a plant outside, many succulent plants end up tense and struggling to survive.

When it comes to direct sunlight indoors, your desert rose plants can pretty much handle as much as you provide. You might have to acclimate if you have grown the plant in a weaker light before, but it will significantly enjoy the sun.

A desert rose in a clay pot.
Your plant will prosper when you place it in the brightest place.

When growing indoors, consider where your plants are located in your home. Your plant will prosper when you place it in the brightest place. Find a location that will give your plants sufficient light and constant light.

The plant should be near sunny, possibly windows facing south or west with bright and direct light throughout the day. The desert rose plant loves bright light, so a southern window display provides enough sunlight for it to bloom.

If your home lighting situation is not ideal, there are still ways to improve those conditions and help your plants get the best possible light for optimum growth. The immediate solution is artificial light.

Manufactured lights can supplement natural sunlight or be your plants’ only light source. If you use grow lamps all year for your desert rose plants, you may have to increase the light and duration during summer. Likewise, decrease the light and length during the winter months.

Outdoor Location

If you grow your desert rose plants outside, things change a little. Instead of putting your plants in the brightest place possible, you probably need to protect them a little. After all, most of them do not originate in complete desert conditions, and the excessive sun can permanently damage them.

Desert Rose outdoor.
Instead of putting your plants in the brightest place possible, you probably need to protect them a little.

Damage mainly occurs if you fail to acclimatize your plants properly. Desert Roses grow in full sun with no cover, though they may thirst quickly. In the garden, choose a sunny place that has some protection against the midday sun, as this can burn the leaves.

Bottom Line

The desert rose blooms well in the desert landscapes and will bloom wonderfully with full sun. They can also do well with the morning sun or light afternoon sun but cannot bloom as heavy. These plants may survive if kept in the shade but become leggy and weakly stalked.

11 Golden Rules For Watering An Air Plant

A air plant soaking method.

Air plants are a great way to bring the beauty of nature indoors. They require very little maintenance and can be an attractive addition to your desk or bookshelf. But all plants need water and air plants are no different. Watering your air plant is a topic that has caused some debate, but we’ve figured out the formula for success and want to share it with you.

So what are the golden rules for watering an air plant? Do not give it too much water at ago because air plants have very full and thick leaves. These leaves hold water, just like a sponge. If you give an air plant too much water at one time, it will take up all of the moisture and sink down into the base. When this happens, the plant is unable to absorb any more water until its leaves dry out a bit. The location also matters when you water your air plants. Cooler temperatures (around 60 to 65 degrees Fahrenheit) will slow the process of water absorption, which means you should increase the dry time.

Watering air plants should not be complicated if you understand how they work. We take a look at 11 golden rules for watering an air plant:

1.     Mind The Varieties

When watering air plants, be aware that different species of Air Plants have different requirements when it comes to humidity levels, light exposure, temperature ranges etc. Make sure you research how best to take care of your specific plant before getting started. For instance, some air plants do well with a little misting every day, while others prefer to be dunked in water once a week.

Top view of different air plants.
When watering air plants, be aware that different species of Air Plants.

2.     Location Matters

When it comes to watering your air plant, where you place it is just as important as how much water you give it. Make sure your Air Plant is in an area with good air circulation, and avoid placing it in direct sunlight or near heat sources.

Location also matters when it comes to humidity levels. Air plants that are kept in a high humidity environment (such as the bathroom) will not need to be watered as often as those that are kept in a low humidity environment.

3.     Amount Is Key

How much water you give your Air Plant depends on a number of factors, including the type of plant, its location, and the climate where you live. But as a general rule, you should aim to water your air plant regularly, but not too often. If it’s kept in a high humidity environment, you may need to water once every 2-3 weeks.

Air plant being mist.
How much water you give your Air Plant depends on a number of factors.

However, if it’s an Air Plant that prefers drier climates, aim to water at least once per week. Because there are no roots involved with air plants, they will not absorb too much water and the excess can simply run off.

4.  Use Filtered or Room-Temperature Water

When watering your air plant, it’s important to use filtered or room-temperature water. Tap water can contain chlorine and other chemicals that can be harmful to your plants. On the other hand, hot water can cause the leaves of your air plant to wilt.

Room temperature water is also important because cold water can shock the plant’s system and cause it to lose its leaves. You do not want to give your air plant a cold shower. When using tap water, let it sit for 24 hours prior to using so that the chlorine can evaporate.

5.     Follow a Strict Watering Schedule

Watering should happen once every 1-2 weeks depending on the climate where you live (more often in warmer climates). Don’t let the roots dry out. When in doubt, underwater rather than overwater.

6.     Use a Watering Can

When watering your air plant, be sure to use a watering can with a fine nozzle. This will help you to avoid getting water on the leaves of your plant, which can cause them to rot. Remember, there are no roots involved, so you don’t want to soak the plant.

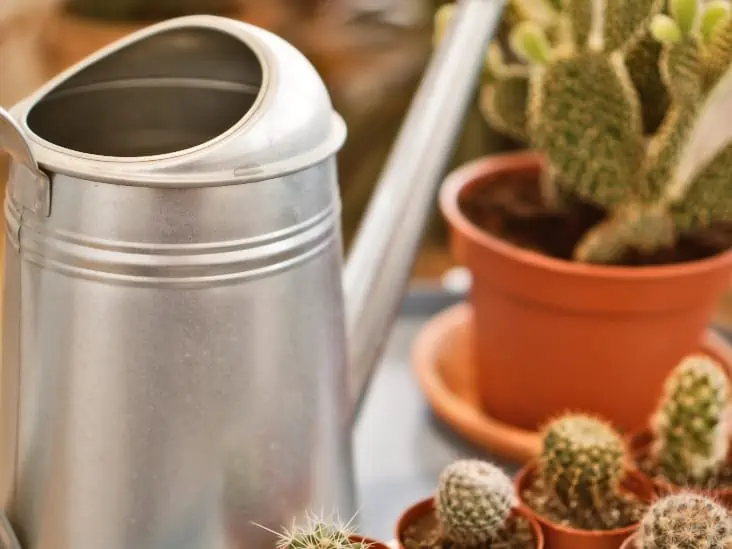
A watering can.
Be sure to use a watering can with a fine nozzle, because this will help you to avoid getting water on the leaves of your plant.

7.     Water at the Base of The Plant.

When watering your air plant, avoid getting water on or near the leaves themselves; while they do not absorb much water and can easily dry back out, water tends to stay and cause rot if it sits on a leaf for too long. Instead, water at the base of the plant near the roots.

8.     Be Patient

It may take a little while for you to find the right watering schedule for your air plant. Experimentation is key, but once you find a rhythm that works for both you and your air plant, be sure to stick to it so your plant can thrive.

If you are traveling, place your Air Plant in an air-tight container with a damp paper towel to keep it moist. This will help to keep it from drying out while you’re away.

9.     Avoid Overwatering

Overwatering is the greatest sin you can commit against your air plant. Remember, they don’t have roots to absorb water and will quickly drown if you give them too much. When in doubt, underwater rather than overwater.

A plant being watered.
Overwatering is the greatest sin you can commit against your plant.

To avoid overwatering (be especially careful in the summer months), put your Air Plant into a bowl or saucer of water for 30 seconds. The surface of the roots should be moist, but not soaking wet. Then remove it from the bowl and within 5-10 minutes place it back in its original position where it can continue to dry out and breathe.

10. Keep the Moss Moist At All Times

If you’re using moss for your air plant, make sure to keep it moist at all times. The moss should never be allowed to dry out. However, it also should not be sitting in water for too long. If air cannot infiltrate the container holding the moss (which is recommended), the roots of your air plant will remain wet and eventually rot.

To rehydrate dried out sphagnum moss, place in water for 30 seconds and then spread the moss back over the air plant roots with your fingers. It is important to keep the moss moist at all times.

11.  Timing is Key

Before watering your air plant, wait until the tillandsia feels light before watering. They should never feel heavy or soggy. Remember that air plants absorb water into their leaves, so they will feel light after watering even though they may still be wet inside. A gentle shake should cause any excess water to fall off (if it does not, you might actually be watering your plant too much). If the air plant is severely dehydrated it may take up to 24 hours for it to absorb the water you just gave it.

Watering the Air Plant Using the Soaking Method

The soaking method is one of the most effective ways to get water into the interior of your air plant. It involves placing your plant into a container with just enough water to cover its leaves and then letting it sit in that water for 30 seconds-5 minutes. When using this method, follow these steps:

Watering Air plant using soaking method.
This method is one of the most effective ways to get water into the interior of your air plant.

-Remove your air plant from its pot and place it in a container that is just deep enough to cover the leaves

-Fill a bowl or saucer with water and place the container with your air plant in it

-Wait for 30 seconds to 5 minutes, then remove your air plant from the water

-If excess water does not fall from the plant, gently shake it out

-Place your air plant back in its original position to continue to dry

If using this method, try not to leave your plant sitting in water for too long. This is because the roots of your air plant do not absorb water and can easily rot if they are left submerged for too long. Remember to use a container that is deep enough to submerge the entire plant, but shallow enough that the roots can still dry out quickly.

Air Plants That Do Not Need Soaking

While soaking is a good method to water most air plant varieties, there are a few that do not need it. These plants should be watered using the misting method (described below) every other day rather than daily. These varieties include:

-Bromeliads

-Spanish moss

-Orchids

-Pincushion cacti

Misting Your Air Plant

If your air plant does not need to be soaked, you can water them by misting. The easiest way to do this would be to use a spray bottle filled with water.

Simply put your air plant in the sink and spray it daily until it is moist (do not soak). Mist these plants about 1-2 times per day for 30 seconds at a time. If you are worried about over-watering, simply let the plant air dry in between showers.

Remember that it does not take much water to moisten an air plant. Don’t feel like you need to fill a bowl with water every time you want to mist your plants – just wait until they are completely dry and mist them for a few seconds.

Aerating Your Air Plants Between Soakings

In general, air plants only need to be soaked once or twice a week. You don’t have to let them dry out completely in between waterings, but you also shouldn’t leave them soaking for more than a few days at a time either. To aerate the roots between waterings, leave your plant on a windowsill or some other warm, sunny location out of direct sunlight.

If you live in a humid climate, it is even more important to give your plants periods of aeration between soakings. This will help them dry out properly so they don’t rot from being overly moist.

Conclusion

With just a little bit of TLC, your air plant can bring the beauty of nature indoors and add some life to your décor. Follow these simple golden rules for watering an air plant and you’re sure to have a happy, healthy plant on your hands.

Air plants are unique in that they don’t require soil to grow, but still need water. Since these plants thrive on air and direct sunlight, it’s important to learn how to take care of them properly so they stay healthy.

How to Easily propagate Aeonium Plant?

Aeoniums are small shrub-like or tree-like plants consisting of long, branched and short, stubby, and unbranched species. The hardy succulents are best known for their conspicuous rosettes, which grow from a single stem. 

The leaf rosettes which branch at the ends look like giant flowers. Aeoniums reproduce by branching out and forming offsets from a solitary flower head. Unlike most succulents which thrive during summer, aeoniums do best in winter or spring. 

Hot and dry climates activate dormancy in Aeoniums characterized by curled and droopy leaves. For this reason, propagation of Aeoniums is most effective when done while the plant is actively growing, usually in autumn. If you take cuttings in summer while the Aeoniums are dormant, they will not root.

Ways of Propagating Aeonium

Before you get started, you will need:

  • Pruning Shears
  • Plastic Wrap
  • Containers
  • Rubbing Alcohol
  • Perlite
  • Potting Mix recommended for Cacti and Succulents
  • Plastic Tray

There are various methods of propagating Aeonium, which we will discuss in detail below:

Seed Propagation of Aeonium

Seed propagation is only applicable for unbranched species. Aeonium blooms develop slowly and start as a swelling on the leaves. After some time, flower stalks emerge from the apex of the swelling leading to bountiful flowers. Though the tiny daisy-like flowers are breathtaking, most Aeonium plants die shortly after blooming.

After the Aeonium blooms, collect the seeds and leave them in a paper bag to dry. Next, fill a shallow plastic tray with a root blend containing a good succulent soil mix. You can either buy a ready-made blend or come up with your own using two parts coarse sand and one part pumice.

Seeds on hand.
Seed propagation is only applicable for unbranched species.

Place your seeds on the mix and scatter them evenly. Cover the seeds with more potting mix and water the tray completely. Move the pot to a bright but shaded area and cover it with plastic wrap. The plastic wrap will help keep the potting mix wet until germination occurs. Once germination begins, get rid of the plastic wrap.

When the seedlings have reached about half an inch in width, transfer each seedling to its nursery pot. The best pot size would be at least two inches. As the plant continues growing, transfer it to the next container size. Maintain the soil level to avoid burying the plant.

Propagation of Aeonium Through Stem Cuttings

First, sterilize the pruning shears by immersing in rubbing alcohol. Next, figure out the size of the stem cutting you would like. For tree-like Aeoniums, cut at least 5 inches. But for smaller shrub-like varieties, you can take at most a half-inch cuttings. The piece of the stem should contain the leaf rosette. 

Place the stem cutting in a shaded place for a few days to allow the wound to heal. Depending on how thick the succulent is, you can give the cutting between three to seven days. When you allow the cut to heal, it helps prevent rot and stops the cutting from excessive water consumption.

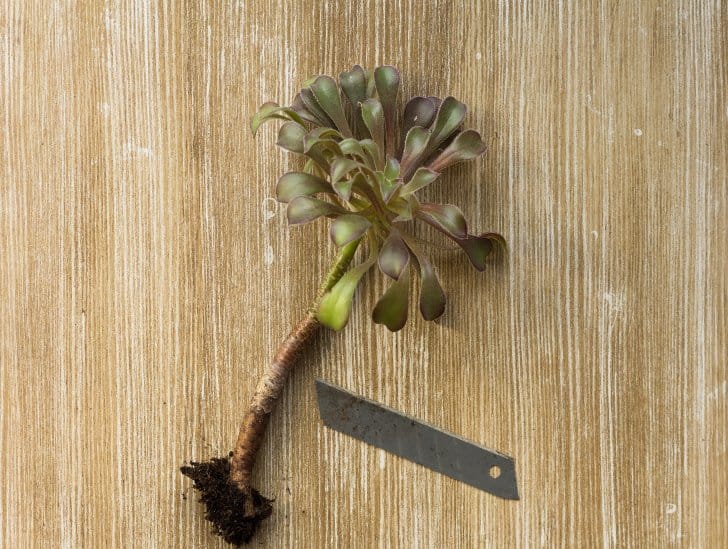
A stem of a plant with soil.
The piece of the stem should contain the leaf rosette. 

Once your cuttings have been calloused over, fill a clean container with cacti and succulent mix plus perlite. Blend the mixture well and slightly moisten it. Remember to use a container with draining holes at the base; the pot should be large enough to accommodate the cutting. Plant the cutting in the rooting medium and sink it just enough to hold the cutting uprightly.

Move the container to a bright spot where the cutting can get indirect light. Slightly water your cutting at least once every week. Once your Aeonium develops roots, water it thoroughly and ensure the soil surface is completely dry before watering again.

Propagation of Aeoniums by Division

Propagation by division involves cutting through the root of the Aeonium, usually when the plant has become too large for its pot. If the plant is not too big, use the usual cutting method. First, pull out the Aeonium to take a division from it. To remove the plant, tip the container on one side and smack the base using your hand to release it. Once released, shake the dirt off.

Select a branch that goes right into the root. Start the division at the intersection of the stem and root. Do not cut the entire root, just the part aligned with the stem. Use a sterilized cutting tool to avoid spreading any infection in the plant membranes. You can sterilize your knife or shear by boiling or dipping in alcohol. Allow the cutting tool to dry before using it. 

Aeonium out of the pot with a cutting tool.
Do not cut the entire root, just the part aligned with the stem.

Once you decide on the division point, cut down the crux of the plant, ensuring that the cut is straight. Now you have two: the Mother plant and the propagate. Repot the original plant and stick your Aeonium cutting in a potting soil specifically for succulents. 

The succulent blend should be very well-drained. You can also opt to dip the cutting in rooting hormone first, then put it in the soil blend. Rooting hormone is not necessary but can help speed up growth. Monitor your Aeonium regularly and ensure that you provide its environmental requirements for the best results.

Propagating Aeoniums Through Leaves

Propagation of Aeoniums using leaves is a tried and tested method but can take a long time to mature. For greater chances of success, use thick leaves. To get started, take a whole leaf-cutting inclusive of the node.

Twist off the leaves gently using your fingers. Allow the leaf cuttings to dry for a few days. Next, place the leaf in your preferred medium, either water or potting soil blend. Move your container to a sunny spot and wait for the roots to grow.

Beheading Propagation of Aeoniums

Beheading of Aeoniums involves cutting the long or small head off. After cutting the head, please leave it dry in a cool area. You can either put it in soil or water and wait for rooting. If you use soil as a medium, ensure that the stem is covered with some soil. 

Ensure you provide adequate and scattered lighting and water the plant once the top inch of the soil is dry. Later on, the plants take root, and the leaves take on a shiny appearance. You can now transfer the plants into their pots.

The Best Propagation Mediums for Aeonium

Aeoniums, like all other succulents, are hardy plants. They can survive without soil and even grow on rocks and peat moss. However, once the plants have rooted, they outgrow their containers and should be transferred to a more suitable medium, preferably a succulent potting mix.

Soil

The type of soil you use for your succulents will determine how much water is retained. When selecting a potting mix, go for one that can drain well because Aeoniums require well-draining soil. Choose porous soil so that it can completely dry out.

An ideal succulent soil considers simple root development by taking brisk air and water exchange into account. Succulent mixes are rich in the natural matter and inorganic elements. Inorganic materials include pumice and perlite, which promote soil aeration. Materials like coarse sand and gravel control the potting medium’s water. 

Different succulent plants propagated on a soil medium.
The type of soil you use for your succulents will determine how much water is retained.

You can buy readily available succulent potting mixes which contain peat moss, perlite and compost. We do not recommend regular potting soil because it contains too much organic matter, retaining moisture. Equal parts of a cactus potting mix blended with perlite for enhanced drainage. However, adding perlite or pumice can make the potting soil more porous. 

To make your potting mix, you will need:

  • Succulent Mix
  • Perlite
  • Peat Moss 
  • Coarse Sand
  • Ground Fir Bark

If you use the above ingredients, there are three blend options.

  1. Mix equal parts of potting mix and perlite. Blend until the texture is coarse and falls apart when squeezed. If it forms a lump, please add more perlite.
  2. Mix potting soil with one perlite and gravel(2:1). To test if the blend is well combined, wet the soil and feel the texture. An excellent mix should feel rough.
  3. Combine peat moss and ground fir bark equally to create the base potting blend. Mix two parts of the base potting blend with coarse sand.

The soil pH should be slightly acidic with a range of around 5.5 to 7.0. You can add horticultural lime if the soil is too acidic or white vinegar if too alkaline.
Water

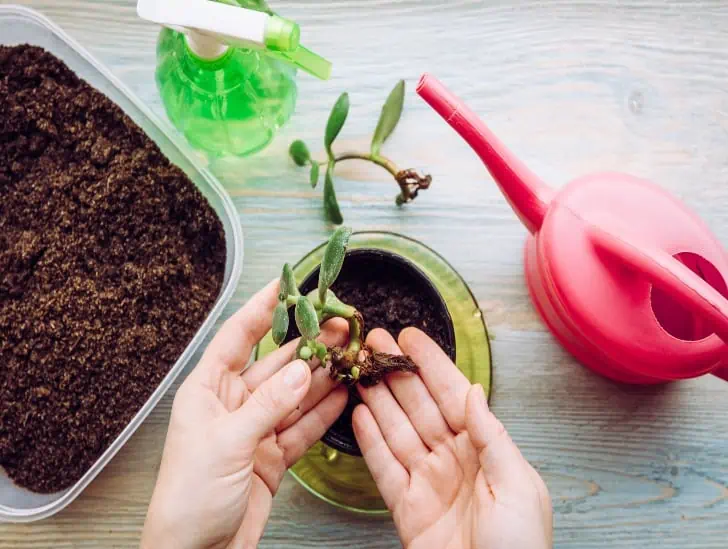
Aeoniums can be successfully propagated in water. Some people argue that water propagation is easier than soil propagation. Firstly, take your cuttings and let them dry for some days. The cuttings could be healthy leaves or leggy stem cuttings. Fill translucent jars with water and cover with clear plastic. Prick a hole at the centre of the plastic. 

You can use plain tap water, purified drinking water or distilled water. Make sure that your cutting tip is in direct contact with the water. Leave the cuttings in a sunny spot for a few weeks and change the water if it has a murky appearance.

Sanseveria plant water propagation.
Aeoniums can be successfully propagated in water. The cuttings could be healthy leaves or leggy stem cuttings.

Aeoniums take very long to root in water; you might have to wait for at least six weeks. Even then, the roots will be minimal. You can transfer the rooted cuttings to the soil but dry them first. 

Conclusion

Propagation outcome depends on the environment. If you want to multiply your succulents, Aeoniums will not give you a hard time because they are easy plants with unique qualities.

Ultimate Guide: How to Care for Madagascar Palm

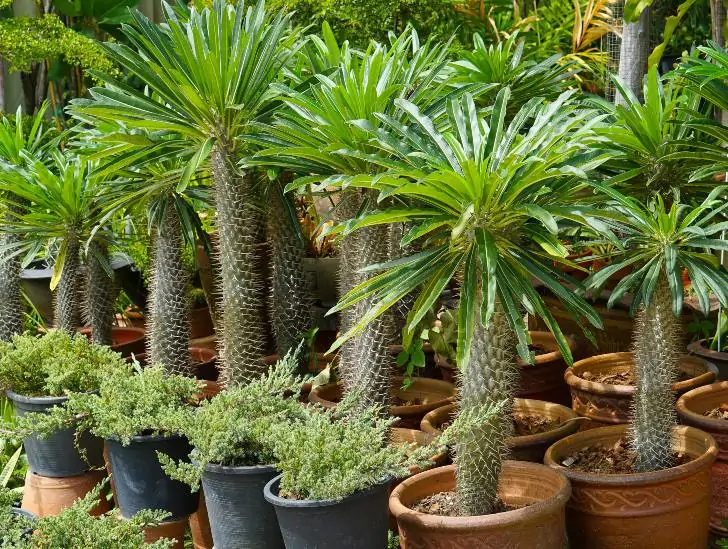
Native to Southern parts of Madagascar, the Madagascar palm is a member of the succulent family and not a “palm” tree as its name suggests. Madagascar palm is adapted to surviving in relatively warmer areas as an outdoor plant and cooler regions as an indoor plant. It grows to about six feet indoors and up to 16 feet outdoors. Its trunk is covered with thick spines that appear as shiny thorns. Madagascar palm is a low-maintenance succulent that can be an incredible addition to your home.

So, how do you care for Madagascar palm? To keep your Madagascar palm happy, have it on the dry side and only water it when the potting mix is completely dry. Like other succulents, you need to ensure the soil you use is highly porous and well-draining. For fertilizer, only feed your plant with a balanced houseplant fertilizer at the beginning of spring or summer. If possible, grow your plant in full light and relatively warm temperatures to achieve the best results. For indoor plants, position them on a west or south-facing window.

Are you planning to add Madagascar palm to your plant collection? If so, read on to find out what you need to do to keep your plant healthy and happy.

Basic Facts about the Madagascar Palm

The scientific name of Madagascar palm is Pancypodium lamerei, and it belongs to the Apocynaceae family. The succulent has a very distinct appearance, with its trunk filled with spines. It can grow to a height of up to 16 feet and 2 feet wide when provided with the right growing conditions.

When the time comes, this succulent tree will bloom throughout summer, putting on a spectacular show. Its flowers are usually white and quite large.

If you are growing the succulent indoors, position it near a west or south-facing window where it can get maximum light exposure. However, you need to remember that the plant can become tall with time. So, ensure you provide it with enough space to develop correctly. 

Madagascar Palm white flower.
Its flowers are usually white and quite large.

When planting them outdoors, it is recommended to plant them in a group but ensure they are well spaced. You should also ensure you plant them in areas far away from children since they are poisonous. Ensure no other high-maintenance plants are growing next to the Madagascar palm.

How to Care for the Madagascar Palm

Now that you have some background information about the Madagascar palm, let us highlight some things you need to do as part of the daily routine care to keep your plant happy.

1. Watering Needs

The Madagascar palm doesn’t require frequent watering because it is adapted to surviving in a relatively warmer climate. The plant is highly resistant to climatic changes and harsh weather conditions. In fact, they love the heat.

If you live in an area that experiences extreme winters, you don’t need to water your plant as often during the cold months; otherwise, you will cause root rot which is more dangerous than underwatering.

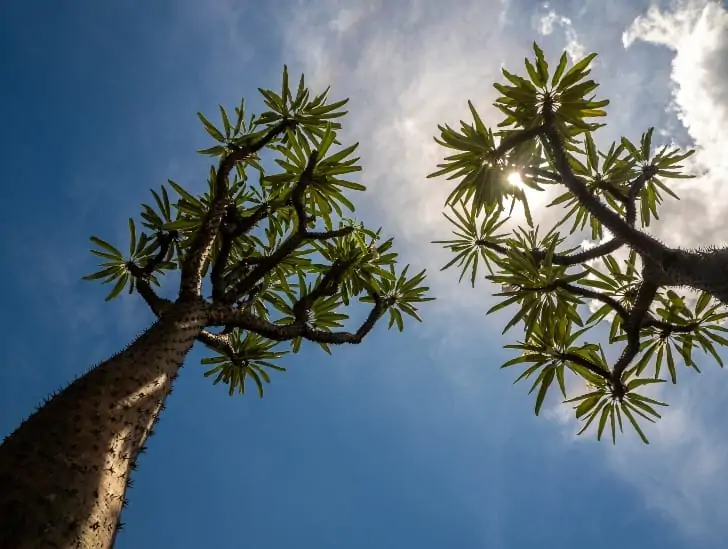
Full grown, Madagascar palm.
It grows to about six feet indoors and up to 16 feet outdoors.

Before watering a Madagascar palm, ensure the potting mix is completely dry. So, it is crucial to ensure you have a well-draining potting mix that allows water to drain out of the growing pot without damaging the plant roots.

Water your plant thoroughly during the hot summer months but stop watering completely when the leaves fall off.  When leaves fall, it means that the plant has enough water storage in its stem, and it is only looking for a way of minimizing water loss through transpiration.

In fact, one of the biggest threats to the overall health of your Madagascar palm is overwatering because it may result in root rot. It is easy to think that your plant requires watering when its trunk still contains plenty of it.

One of the physical signs of overwatering is breakage. If a long spindly trunk of your plant suddenly snaps in half and tips over, it could be a sign of overwatering. This may also happen if you keep your plant in a spot with too much cold and not enough light.

2. Growing Location

Since the Madagascar palm is a sun-loving plant, it can take the full sun without any issues. The succulent is highly drought-resistant and ideal for xeriscaping in warm climates. So, if you are growing it indoors, choose a spot that receives plenty of bright light (whether natural or artificial).

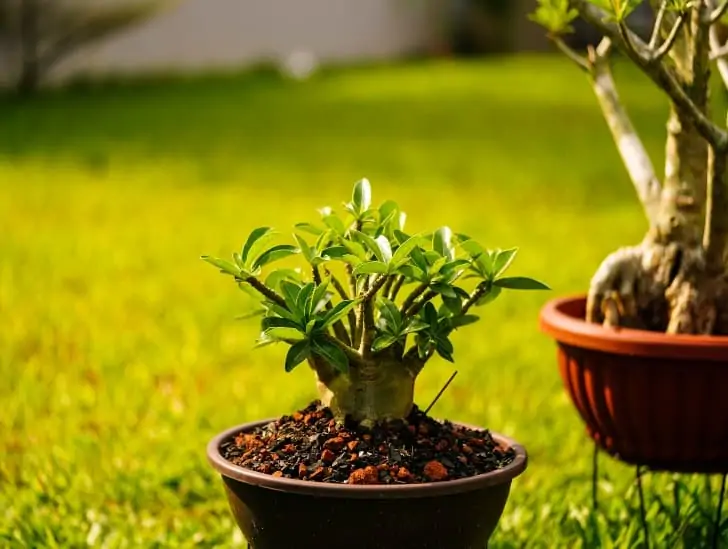
Small Madagascar Palm plant.
It can take the full sun without any issues.

If you are growing it outdoors, ensure it is far away from tall plants that may provide unnecessary shade. Keep your plant slightly moist so that it doesn’t shed its leaves. The succulent will only shed its leaves when it is too dry. Make use of a humidity tray to keep the humidity levels high.Humidity trays are shallow trays filled with small stones and water at the bottom. Ensure the water in the tray doesn’t reach the bottom of the bonsai pot. As the water evaporates, it creates a relatively moist environment that keeps your plant moist.

3. Soil Requirements

The succulent can adapt relatively well in porous soils with good soil-drainage properties. It can grow in the conventional sandy soil of old dunes near the ocean or sea, in schist, limestone, and so on.  For better results, plant it in cactus compost but maintain a mildly acidic to a mildly alkaline pH of between 6.0 and 7.7.    

For potting, go for clay pots with plenty of drainage holes over plastic pots to keep the succulent on the dry side. The pot size should be slightly larger than the root ball of your Madagascar palm. 

4. Temperature and Light Requirements

Madagascar palm is a sun-loving succulent. So, it prefers a relatively warmer and bright-lit location. When positioning your plant indoors, place it on a west or south-facing window where it can receive lots of full sunlight.

If you live in an area that doesn’t receive plenty of natural sunlight, consider using artificial grow lights to keep your plant happy. If you are using artificial grow lights, keep them on for at least 16 hours a day and let the plant rest in total darkness for the remaining eight hours.

Plant Exposed to a sunlight.
It prefers a relatively warmer and bright-lit location.

Indoor Madagascar palm plants should also be kept near a heating vent or register to ensure it stays warm during the cold winter months. During winter, make sure the temperature doesn’t fall below 55oF.

If you maintain relatively warm temperatures and keep your plant moist, it will never shade its leaves.  The leaves add beauty and serenity to your indoor spaces.

5. Fertilizer

Feed your Madagascar palm with a general-purpose liquid houseplant fertilizer at the beginning of spring. The fertilizer must be diluted to half-strength. You can also use low nitrogen liquid fertilizer but you will be forced to feed your plant every four to five weeks.

Whether you are growing your plants indoors or outdoors, don’t fertilize it in winter or fall because it is a period of dormancy and doesn’t require nutrients. You should only start watering and feeding it when you spot new growth.

With proper watering and fertilization, a Madagascar palm succulent will grow approximately 12 inches per year.

6. Disease and Pest Control

Extremely cold weather can affect a Madagascar palm quite significantly. Your plant may rot and put on a soft, mushy, and withered appearance. If you notice such signs, remove the damaged part and let your plant rest easy.

This succulent is also prone to mealybug infestation. These insects feed on the leaves of the plant. When you notice appearance of black spots on the leaves, it could be a sign of mealybug infestation.

Mealybug on the leaf.
These insects feed on the leaves of the plant.

To deal with the infestation, simply pull off the affected leaves and you are good to go. In some cases, there might be an infestation of white fly larvae or mites that attach themselves at the base of the plant. This can easily be cleared out with insecticides and fungicides in the form of systemic poisons, soapy rinses, and gentle sprays.

7. Pruning

Pruning is not an essential task for a Madagascar palm. The plant will shed its leaves naturally to preserve the absorbed water. Shedding of leaves mostly happens during the hot summer months, but you can stop it by keeping your plant moist.

While the plant typically grows on a single trunk, sometimes it will branch out after blooming or if the main stem is injured.

To maintain a relatively small size plant or induce branching, consider pruning the tree with a lot of care. Snap portions of its top with a sterile knife or pair of scissors to prevent infection. Monitor it closely after pruning to see if it shows any signs of infection for you to act quickly.

Summary

The Madagascar palm is one of the best succulents to have at home. The plant does well both indoors and outdoors. It can be placed around other succulents growing in full sunlight, and it will still thrive with minimal care.

The most important thing you need to do is ensure you provide your plant with the right conditions for it to stay healthy and happy. So, if you have decided to add the Madagascar palm to your plant collection, your time is now!

How To Easily Propagate Crassula Ovata?

When you think of succulents, the first thing that probably comes to mind is a cactus. But did you know that there are other types of succulent plants? Crassula ovata, also known as Jade Plant or Friendship Tree, is a popular type of succulent plant that has been used in gardens for centuries.

Crassula ovata is easy to propagate succulent, and this is seen as it tends to get weedy outside its natural habitat when left unattended. This blog post will explore why to propagate the Jade plant and propagate Crassula ovata.

If you have been into the world of succulents and don’t know which one may work for you, we suggest you try this excellent plant. Well, it might require low maintenance like almost every other succulent, but here is why you should consider propagating Crassula ovata:

Why Plant Crassula ovata?

1. Cleans Air Quality

Introducing a Jade plant in your home helps purify the air. Indoor air can be polluted as much as the outside air. Proper ventilation is usually the best case to clean indoor air, but this is usually not the case. 

If you have been suffering from exhaustion, weakness, or insomnia due to Volatile Organic Compounds (VOC) that comes from paints, moth repellents, and wood preservatives, planting Crassula ovata indoors helps curb these problems.

2. CO2 Absorption at Night

Jade plant conducts Crassulacean Acid Metabolism (CAM) process. The plant absorbs CO2 at night and helps reduce the amounts of CO2 in the house.

3. Raises Humidity Level

The surrounding dry air is likely to affect your health and beauty. You can opt for humidifiers, but this means increased bills. The Jade plant helps increase indoor humidity levels during the CAM process.

Jade plant near the window.
There are two rooting methods that you may want for your Crassula ovata before planting.

Finally, you know the benefits of growing Crassula ovata indoors as it helps you live healthy and wealthy, in addition to decorating your home. But how do you propagate it?

How to Propagate Crassula ovata

Propagating Crassula ovata is mainly from cuttings, either leaf or stem cutting. While getting a leaf-cutting is more straightforward, they take much time before becoming a Jade plant.

Items Necessary for Propagation

  • A pair of scissors or sharp knife
  • Rooting hormone liquid or powder
  • Suitable soil (a succulent soil or cactus mix)
  • A pot or container with drainage holes
  • Working space
  • Where to lay cuttings to dry, paper towel or dry surface

Crassula ovata Propagation from Stem Cuttings

  1. Cut as near to a node as possible using your sterile knife. Nodes are sections of the stem where new leaves and stems develop. Make the incision four to five inches long.
  2. Prune off leaves at the bottom of your cutting. The lower part of the cutting is used as the anchor when planting.
  1. Place the cutting on a paper towel or dry surface to dry. Let the cutting dry for two to four days, or until the leaves and stem cut form a callous.
  2. Apply the rooting hormone, either liquid or powder, at the bottom inch of the cutting. For powder rooting hormone, you may need to moisten the stem first for the powder to stick.
A jade plant being transferred on a new pot.
There are two rooting methods that you may want for your Crassula ovata before planting.

Now your stem cutting is ready for planting; however, there are two rooting methods that you may want for your Crassula ovata before planting. Here is how to root Crassula ovata:

Rooting Crassula ovata in Soil

You can directly plant your Jade plant stem cutting in the soil. Succulents are pretty tenacious, so this method almost always works. The only disadvantage is that you won’t be able to monitor your cutting’s development until new leaf growth begins to appear.

  • Get your container or pot with drainage holes. A standard plastic nursery planter also may do the work.
  • Fill the pot with well-draining soil or succulent mix. Crassula ovata isn’t picky about soil; hence you may use any kind of potting soil plus a decent handful of perlite for better drainage.
  • Water the soil just enough to make it moist. Don’t let the soil be too wet.
  • Use a stick or finger to dig a small hole in the soil. It just needs to be deep enough for the stem cutting to stand up.
  • Move the pot into a shade, let your cuttings receive bright indirect light, and water them every few days once the soil is dry.

Pro Tip: Once the stem cuttings start drooping, it’s the time most of them are growing roots. You don’t need to worry. They will grow new leaves and look healthy and fresh.

A person cutting a stem of a crassula ovata plant.
Once the stem cuttings start drooping, it’s the time most of them are growing roots.

Rooting Crassula ovata in Water

Rooting Crassula ovata in water for propagation is a favorite for many since it’s often easier and faster. And perhaps even more importantly, you get to see the roots growing in real-time!

To root in water, immediately the calloused part has healed, pop it into a vase or glass of water. Now move the glass or vase with the cutting into bright, indirect sunlight and a well-ventilated location.

The only thing you’ll be doing is changing the water once or twice a week. Immediately you note the roots, move your Jade plant into a new home for planting. Remember not to leave it for long in water once the plant has grown roots, lest they start rotting.

Crassula ovata Propagation from Leaves

To propagate Crassula ovata from leaves, simply pluck off leaves entirely from a stem. Identify healthy leaves and pluck. The leaves are even very easy to grow.

Once you have plucked the leaves, let them form callous for at least two days or until the node area has dried.

Prepare a potting mix. You can use ordinary soil with 50% coarse sand or perlite to enhance water sipping into the soil. Porous soil lets water sip through and helps maintain wetness but is not soggy. Soggy soil causes bacterial infection to Crassula roots hence roots rotting.

A close up image of Crassula ovata.
A Jade plant in your home helps purify the air.

Once the cut area has dried up, apply some rooting hormone to encourage fast rooting.

Rooting Crassula ovata Leaves on Water

Rooting leaf cuttings in water might seem impossible, but you may use toothpicks or mesh to suspend the leaves in a vase of water or glass. Ensure only the calloused areas are in contact with water.

Again, you will have to change the water every week to prevent the rotting of the leaves. Once you note rooting, you can repot baby Jade plants into a new pot for growing. 

Pro Tip: It may take a while for leaf cuttings to develop into a Jade plant. It takes time before they form stems.

Rooting Crassula ovata Leaf Cuttings in Soil 

The easiest way to root Crassula ovata is by soil. All you need to do is place them on the well-draining soil and make sure the calloused area touches the soil. That’s it! Amazing right?

Leaves are an excellent resource for getting new Jade plants. The best part about leaves is that you may put many of them in the same container to improve your chances of success. The resulting plants will be tiny at first, and once grown, transplant them into separate containers.

Crasula ovata on hand.
The easiest way to root Crassula ovata is by soil.

When you’ve repotted all of your leaves into new pots, move them into bright, indirect light and spray them every few days to keep the soil gently wet.

You may transition to a regular succulent watering schedule after the roots, and young plants become apparent.

Tricks and Tips to Grow Crassula ovata

  • Crassula ovata is a succulent; hence it retains most of its moisture in its stems and leaves. This trait makes the Jade plant very delicate to water supply. Too little water is just as bad as too much water.
  • The plant’s root development appears to be aided by periods of drought. The roots expand in all directions and clamp the plant securely to the soil in search of moisture. This also keeps the plant from falling over or prevents becoming ‘top-heavy.’ Furthermore, in these times, the soil dries up between waterings.
  • Many people can tell when their Jade plant needs water just by the appearance of its leaves after having it for a while. If the leaves aren’t as plump and cheerful as usual, it’s time to water them.
  • Jade takes a long time to grow, so be patient and allow it to develop.
  • A clay container is the best choice. Clay, rather than plastic, will assist in evaporating moisture and help dry the soil, preventing it from being soggy.
  • This plant thrives in a south-facing window with lots of natural light and at least four hours of direct sunshine. Do not introduce your baby Jade plant to the sun immediately. Start by slowly moving it into a bright spot before introducing it to direct sunlight. Let it gradually adjust.

Final Thoughts

You can propagate Crassula ovata from leaf or stem cuttings. Using leaves will take time as they’ll have to grow to form strong stems for new branches. Unlike stem cutting, branches will start growing from the primary cutting.

We hope you find the above different propagation tips helpful, and you are now free to plant Crassula ovata and watch them grow to fill your garden. 

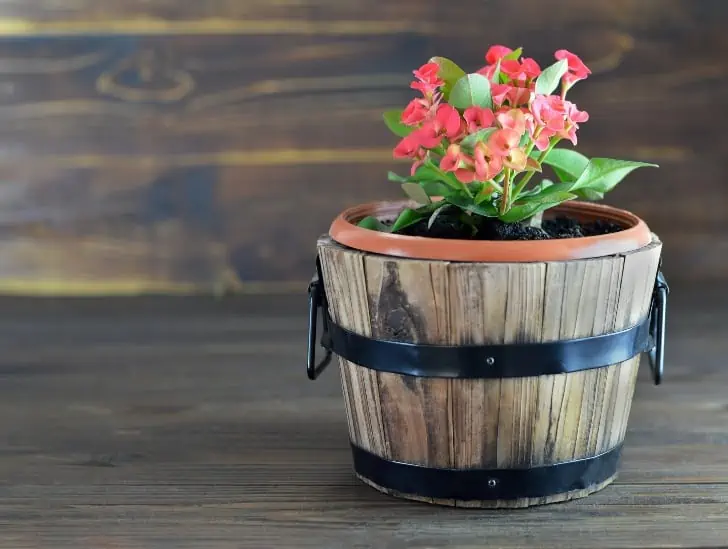
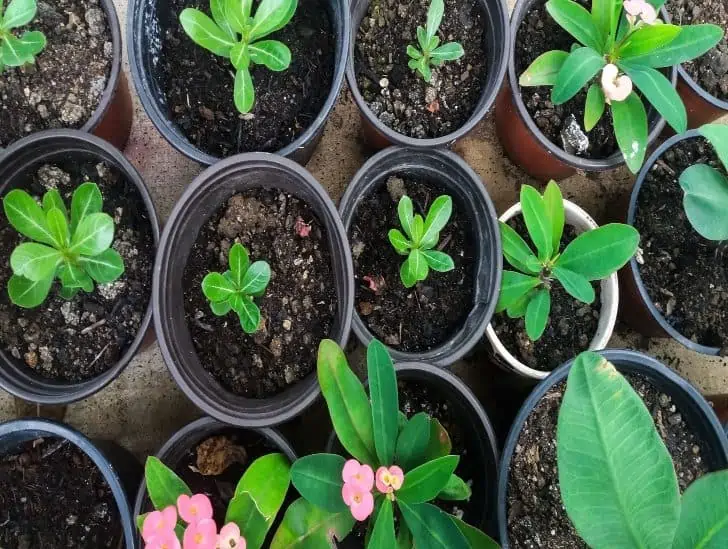
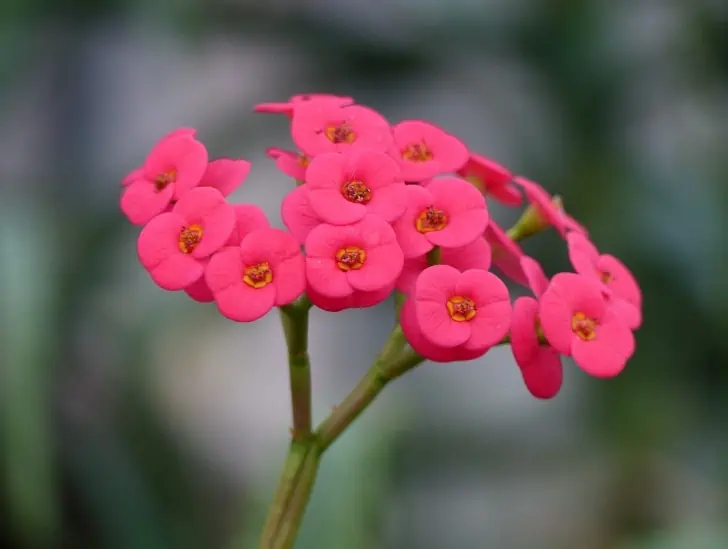
How to Propagate Crown of Thorns Plant?

Crown of Thorns, also known as Christ thorn or the Christ plant, is an ideal succulent to add to your plant collection since it is a great decoration for Easter and Christmas. You can easily create a beautiful view by arranging small pots of the Christ plant cuttings on tabletops, at place settings, or across mantels. You can even give a young crown of thorn plant as a gift to your friends and relatives. Fortunately, it is relatively easy to propagate crown of thorns plants to help you achieve all the above.

So, how do you propagate the crown of thorns plant? The simple answer is through cuttings and seeds. The most common propagation method is through cuttings, but you can still collect seeds of the plant after the flowering season and sow them. If you want to propagate through cuttings, ensure you water your plant at least one day before taking the cuttings. This will ensure the cuttings have enough water stored, which is crucial for rooting. For seeds, make sure you sow them at the surface of the well-draining potting mix and cover the container with plastic. The seeds germinate within two or three weeks.

This blog post discusses everything you need to know about propagating crown of thorns plant. Read on to learn more on how you can expand your crown of thorns plant collection.

When Is the Best Time to Propagate Crown of Thorns Plant?

Crown of thorns plant cuttings and even seeds require relatively warm conditions and bright indirect light to root or germinate. Therefore, an ideal time to carry out propagation is during spring or early summer.

A beautiful bunch of flowers on a pot.
An ideal time to carry out propagation is during spring or early summer.

Avoid taking cuttings in fall or winter because the cuttings won’t have enough time to root and develop new growth before extreme cold sets in and disrupts everything.  Propagating crown of thorns plant in fall or winter will most likely produce unhealthy and short-lived plants.

Propagating Crown of Thorns through Cuttings

The most common method of propagating a crown of thorns plant is through cuttings. The process is relatively easy to accomplish, but you must be careful because this succulent has plenty of sharp spines and a slightly toxic sap.

A girl wearing a gloves.
The process is very easy to accomplish, but you must be careful since it has plenty of sharp spines and a slightly toxic sap.

Once you have taken the cuttings, let the sap dry completely before placing them in a growing medium. It can take up to 24 hours for the sap to dry out completely.

Follow the steps outlined below to propagate a crown of thorns plant through cuttings:

1. Taking the Cuttings

To take cuttings from a mature crown of thorns plant, you will need a sharp razor blade, knife, or bypass pruner. Carefully lift one side of your plant and lop off short pieces of growth.

Ensure the cut pieces are relatively short. They should be anywhere between three to six inches long with only the tail end leaves in place.

Consider taking your cuttings when the newest growth is still available, preferably in spring or early summer. Be sure to take more cuttings than what you need in case some of them fail to root.

Before taking cuttings, ensure you prepare for the plant’s resistance. Between its sharp spines and toxic sap, the plant will try to put up a fight when it senses that it is in danger.

However, preparation minimizes the risk of injury to the plant and yourself. Wear gloves to protect your fingers from the sharp spines and sap. You should also clean the knife or razor blade you intend to use with alcohol to sterilize it.

If the sap comes in contact with your skin, wash it off with warm, soapy water as soon as possible. To harden the sap and prevent it from running, place the cuttings in cold water and also spray down the plant from which they were taken with water.

2. Preparing the Growing Medium

A good medium for growing shrubs such as the crown of thorns plant must consist of equal parts of peat moss and either perlite or sand. You can also use equal parts of bark and peat moss to prepare your potting mix.

Ensure the soil is well-draining. Like other succulents, the crown of thorns plant doesn’t like being waterlogged. A growing medium with poor drainage may lead to severe rot, preventing the cuttings from rooting.

You also need to ensure that the growing tray or pot has plenty of drainage holes at the bottom. This is to allow excess water to drain away as soon as possible. Whatever medium you choose to use in your propagation, ensure it is moist but not wet.

3. Rooting and Transplanting the Cuttings

Once the sap on the cuttings has dried, and the growing medium is ready, take the cuttings and plant them in the soil. Only a small part of the cutting should go into the soil (approximately one inch).

Water lightly and expose the cuttings to plenty of bright indirect light. If you can’t find a good spot in your house that receives plenty of indirect sunlight, use artificial growing lights.

Crown of thorns, soil, and shovel top view,
Take the cuttings and plant them in the soil.

The cuttings will start to sprout into new plants in three to six weeks. This is the perfect time to transplant them if that was your aim.

If the cuttings are relatively small, consider transplanting them into a soil-less potting mix. However, feel free to use regular succulent soil if they are reasonably big.

4. Rooting in Water

Besides growing medium, you can also root your crown of thorns plant cuttings in water. Simply take the dry cuttings and place them in a relatively tall, narrow glass with approximately one inch of water in the bottom.

Keep the cutting in bright but indirect sunlight, and the roots will start to form in one or two weeks. Once the roots form, carefully transfer the cuttings into a special soil mixture specially designed for succulent plants.

5. Taking Care of the Cuttings

The truth is that crown of thorns cuttings require little attention once they have been potted. All you have to do is set the potted cutting in a warm and dry spot where temperatures stay above 70oF. Do everything possible to protect your cutting from direct sunlight.

A crown of thorns plant in a pot.
Consider using a propagation mat to warm your growing container.

Consider using a propagation mat to warm your growing container or pot if your home is in a relatively cold place.

Drizzle water around the base of the cuttings whenever the potting mix feels completely dry in the top inch but be careful not to waterlog the soil.

As long as you do everything right, you should start seeing new growth sprout on the cuttings within one or two weeks.

Essential Tips for Taking Crown of Thorns Cuttings

Follow the simple tips outlined below if you want to increase your chances of successfully propagating the crown of thorns plant from cuttings:

  • Always use a sharp and clean cutting tool that has been sterilized using alcohol or a solution of nine parts water and one part bleach.
  • Take cuttings early in the morning.
  • Take cuttings from new growth.
  • Take cuttings from a healthy, disease-free crown of thorns plant.
  • Always cut on the diagonal.
  • To encourage rooting, dip the cut end of the cutting in root-forming hormone powder before planting.
  • Take more cuttings than you need because some may fail to root. If all of them root, you can always give the new plants away as gifts.

Propagation through Seed Germination

Another way to propagate the crown of thorns plant is through seed germination. You can pollinate flowers yourself to form seeds or purchase them from your local plant store. To pollinate the crown of thorns flowers, carefully transfer pollen from one flower to another using a fine paintbrush.

If done correctly, the plant flowers will turn into a capsule. Wait until the capsule ripens, remove it from the plant, and split it over a paper sheet to collect the seeds.

Don’t store the seeds for a prolonged time because they may fail to germinate. In fact, you should consider sowing the seeds immediately after collection.

Red crown of thorns flowers.
You can pollinate flowers yourself to form seeds.

Sprinkle the seeds on a well-draining potting mix, cover them with a light layer of sand and keep everything moist. To help with germination, cover up the growing tray or pot with plastic and place it in a greenhouse where it can access bright but indirect sunlight.

If you don’t have a greenhouse and can’t find a good spot in your house, feel free to use artificial grow lights. Maintain the temperature at around 65oF and 75oF.

The seeds will typically germinate within one to three weeks. You should only remove the cover when the seeds have fully germinated. Be sure to maintain a moist surface even after you remove the cover.

Give the seedlings one or two weeks before you start transplanting them outdoors. The extra time allows the young seedlings to develop a more robust root system and leaves that will play a critical role in their survival once they are transplanted.

Can I Propagate Crown of Thorns by Division?

Yes, you can propagate the Crown of Thorns plant by division, although the success rate may be too low for your liking.

The process is relatively simple and straightforward. Gently remove offsets or young shoots from the mother plant and re-plant them elsewhere. To get the best results, consider propagating in spring when temperatures are warm and light conditions are favorable for growth.

Be sure to divide the succulent into several parts since a single shoot will take longer to establish its root system and form new leaves. The younger shoots are more successful when propagated by division than mature clumps.

You should also use a potting mix suitable for succulents or cacti and lightly water the young shoots. Keep the soil moist but not too wet.

Monitor your crown of thorns for pests and diseases and address any problems spotted immediately. With proper care and maintenance, your pups should start showing signs of growth within two to three weeks after being planted.

It may take several months before the young plants are fully established and start producing flowers. Be patient and keep providing the proper care to enjoy your success.

Should I Bleach Cutting Tools When Propagating Crown of Thorns?

Yes, you can use bleach to disinfect the cutting tools when propagating the crown of thorns.

Mix a small amount of bleach in a cup of water and sterilize your blade before taking cuttings from the mother plant. This simple step helps prevent any potential infection or disease from spreading and infecting your succulent.

Rinse your tools with clean water after disinfection and dry them thoroughly before storing them for subsequent use.

How Long Does It Take for Crown of Thorns to Flower?

The flowering period varies depending on the species. Most varieties of this succulent start blooming in late spring or early summer and continue until fall. Some types may even flower through winter in warm climates.

Generally, it takes about one year after planting your cuttings for them to flower. However, the wait can be longer if you propagate mature plants or the conditions aren’t ideal for growth.

Provide your crown of thorns with enough sunlight and water regularly to encourage blooms. With proper care, you should be able to enjoy its colorful flowers in no time.

Summary

Crown of thorns is one of the most beautiful succulents that are easy to care for and propagate. Learning how to propagate crown of thorns provides you with an opportunity to start multiplying your plant collection.

We hope you have learned valuable tips to kickstart your crown of thorns propagation journey. We wish you all the best in your propagation journey.

How to Easily Propagate String of Dolphins?

With its signature kind of foliage, the String of dolphins is undeniably a lovely plant, making it a perfect plant in your garden. Propagating the String of dolphins is a cost-effective and straightforward way to grow your garden collection. Whether a beginner or an expert, multiplying the strings is a short and fantastic method. Though it is easy to propagate this succulent, it requires some skills to do it better. 

How do you propagate a String of dolphins? You take a stem or a leaf cutting from a healthy and well-established plant, set it aside for days until it forms callous, then plant it in a pot. Reading the article will help you decide which form of propagation will best suit you and how to go about each of them. Most importantly, I will take you through two standard propagation to reproduce a string of dolphins.

Why Should You Know How to Propagate the String of Dolphins?

Firstly, the String of dolphins is propagated to salvage the plant when it is failing or dying. When the mother plant has some parts damaged or it is drying up due to age, propagation is an easier method than buying a new plant and starting all over again. Secondly, most gardeners propagate the strings of dolphins because it is an enjoyable and straightforward practice. It is a delightful plant at home, and propagation can create more of them in a home. 

A string of dolphin hangging.
It is a delightful plant at home, and propagation can create more of them in a home. 

The plant is drought tolerant and can thrive well in little water. Proper propagation may only be done on healthy parts of the plant. If propagation is the only way to salvage a failing string of dolphins, act before it is late. Propagation to create a collection is best when it aligns with the growing seasons of the plant.

The two methods to propagate the String of dolphin succulent includes

  1. Taking a leaf cutting from the plant.
  2. Taking a stem cutting from the plant.

Taking a Leaf Cutting From the Plant

Firstly, the process involves using a sharp and sterilized knife to remove a healthy leaf from the bottom side of the plant. While cutting, ensure that you remove the entire leaf without damaging it or leaving some sapping stuck on the stem of the mother plant. Once the leave is out, place it in a clean place for two to three days to allow the wound to heal. Then, put it in a cool place where it does not receive direct sunlight. 

A string of dolphin stem.
A string of dolphins will do well in arid and well-draining soil.

After some time, the leaf will make a “callus,” indicating that it is ready for the next step. After callus formation, prepare a good and clean pot with a proper soil mix. Like other succulents, a string of dolphins will do well in arid and well-draining soil. Commercially available succulents are suitable, but you can also make your mix.

For a homemade mix, combine

  • 2 Parts potting soil
  • 1 part pumice or perlite
  • 1 part sand

When the soil is ready, place the prepared leaf on top without burying it. To moisten the ground, use a sprayer bottle to spray the leaves with water. Do not keep the pot under direct sunlight, but ensure it accesses enough light to provide the propagated String of dolphins is warm and moist. The leaves will begin to sprout after three to four weeks. Next, they will start developing small roots. 

The presence of roots does not signify time to transplant the succulent. It may take a couple of months before the plant is big enough for transplant. Therefore, waiting as the plant develops strong roots before transplant is essential. Hurrying the plant with weak roots kills it permanently. 

Propagating by Cutting the Stem of the Strings of Dolphins

These can be done in two different processes.

  • Stem cutting and propagating in water
  • Stem cutting and propagating in soil

Stem Cutting Propagation in Water

Propagating plants in water is an easy way to make new plants. All you need is a sterile cutting object, a big glass jar, and a healthy selection of your String of dolphin’s plant. The steps below will guide you on how to propagate the succulent.

A plant being propagated in water.
Plant propagation is an easy way to propagate your plant.
  • Take a suitable strand off your String of dolphins of around 4 inches of length. Cut the stem cleanly and carefully with your scissors or knife. If the mother plant has some low-bearing foliage near the bottom, remove them to prevent rotting.
  • Immediately, place the cut strand in a glass or jar filled with rain or distilled water. Tap water contains chemicals like chlorine and fluoride that affect the cutting progress.
  • Place the jar in a place it receives proper lighting but away from direct sunlight. A west-facing window can work better.
  • For proper growth and formation of the root system of the String of dolphins, replace the jar’s water in a week to replenish nutrients and oxygen.
  • After a few weeks, long tendrils-like roots should start developing. This means that it is time to transfer it to a well-draining soil and in a proper container.

Stem propagation in water is enjoyable as you will see the roots develop. In addition, this method reduces the chances of bacteria/fungal infection than the soil method.

A string of dolphin a pot with sunlight.
Stem propagation in water is enjoyable as you will see the roots develop.

Stem Cutting Propagation in Soil

The soil method can also propagate the stings of dolphins’ plants. However, this process is more successful when the succulent starts its active growth period. The period could either be before the dormant stage (end of the winter months) or the growing stage (during the spring period). The succulent has a high chance of surviving the propagation stage and maturing during these growth periods. 

 For this process to be successful, the following guidelines should be followed.

  • Make a correct cut using a sterilized knife of the spring of dolphins with enough branches. Choose a relatively short stem as this ensures it grows actively, increasing chances of success.
  • When cutting the stem, hold it at the brick of the bottom to have a clean cut. If the stem is damaged when cutting, replace it with another one immediately.
  • Place the cutting in a clean place to allow the cut to heal and develop a callus. These may take two days to form.
  • Place the cutting in a container with already prepared proper soil mix as explained above.
  • If possible, you can help the growth of the roots by dipping the end of the cutting in a rooting hormone to promote new and accelerated root growth.
  • Keep the container in a bright space with direct sunlight and only water if the soil is arid. When watering it at this delicate stage, remember that overwatering will cause the plant to rot, while underwatering reduces chances of survival.

Propagating by using soil can adequately secure the cutting and strengthening of the roots. This method also reduces the stress of transplanting the plant after it has already developed. However, when the plant is still young, always ensure to check on the condition of the plant as they are more susceptible to fungus and bacterial infections. Soil should contain sandy and perlite to promote good drainage and proper aeration of the roots.

The Commonly Associated Problem when Propagating

One of the significant troubles when propagating the strings of dolphins is the root rot. It may occur in any process of propagation. However, in soil propagation, overwatering is the primary cause of the root rot as water clumps in the root area, suffocating the roots.

Root rot can happen when transferring the plant into a new pot in water propagation. It is also essential to give the cutting enough time to heal before placing it in soil. Soiling a leaf cut with a fresh wound will expose the plant to disease and fungal infections.

Best Care when Propagating

The right amount of water

A grown string of dolphins can survive long without water. You need to water correctly to ensure that your propagating plant has the best chances of survival during propagation, especially during the early days. Overwatering the String of dolphins during propagation will submerge the leaves to water, and they will start rotting before they even fully develop. The best watering condition for the plant is to ensure it remains moist.

A string of pearls that has been watered.
You need to water correctly to ensure that your propagating plant has the best chances of survival.

The right temperature 

A string of dolphins makes an excellent indoor plant due to its ability to tolerate medium temperature and thrive well in it. The right temperature of around 23oC is appropriate during propagation to nurture the plant.

Indirect but bright light

The amount of light the plant will be exposed to effects the plant’s health. Though a well-developed plant can manage direct sunlight, the plant is vulnerable to dehydration and scorching during propagation. To manage proper lighting for the plant to succeed, a bright space with indirect light will work better. This lighting is essential as it provides the plant with a good growth pattern and strengthens its transportation system.

Bottom Line

With the above-detailed guidelines on how to propagate the String of dolphins, it’s time to try propagating the strings of dolphins and ensure you have quite a few in your garden. The guidelines could help you create more of these lovely succulents with only one plant and spread them to another part of your home or even bless a neighbor. Propagation will not just save you money, but it is an enjoyable practice worth your time, as the results are pretty fulfilling.