Sansevieria Care Tips and How To Grow Sansevieria Indoors

If you are new to gardening or simply looking for an easy-care houseplant, sansevieria is the perfect plant for you. These plants are some of the toughest plants you can get, and they are popular because of their adaptability to most growing conditions. Whether you want to plant it indoors, on the balcony, or in your garden, these hardy plants can put up with almost everything.

Sansevieria plants are easy to grow, but there are a few things that you need to know as a beginner. These essential tips will help you care well for this plant to its maturity. We will discuss the 11 most fundamental tips that have been proven and worked well when applied to this plant. As you keep on reading these tips, you will realize how low maintenance these plants need.

If you grow to want to grow this plant and enjoy the flowering beauty, and quality air in your room or balcony, the following tips are a MUST DO.

1.    Soil

A snake plant is easy to grow because of its soil requirements. They do well in a free-draining soil mix. Always use a free-draining soil mix, because the Sansevieria plant is prone to rot if the roots are dipped for long in the water. You can grow the plant in commercial succulent soil or cactus soil.

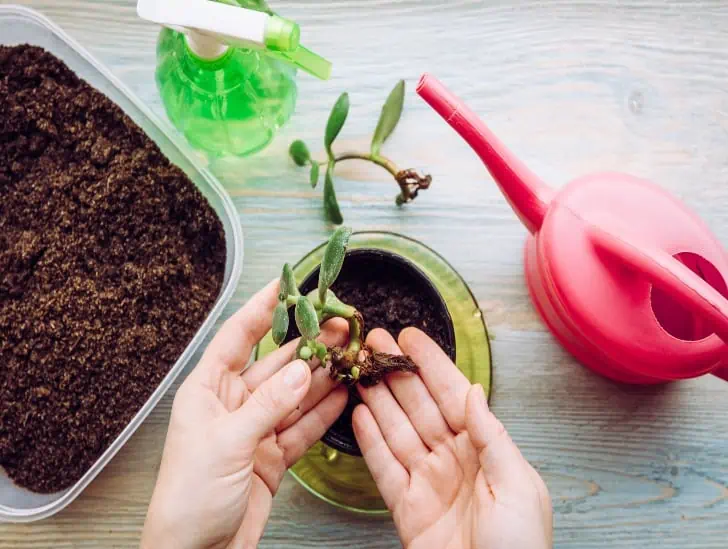
A top view of soil propagation of Snake plant.
You can grow the plant in commercial succulent soil or cactus soil.

This commercial soil has added sand that helps in drainage. You can also decide to make your mix of soil, and the plant will still grow well. An accessible blend will require

  1. 1 part potting mix or garden soil
  2. 1 part peat moss or coconut coir
  3. Two parts of sand or perlite

This mixture will ensure maximum water drain from the container and provide a nutritious planting medium for the plant, allowing it to glow.

2.    Choose the Correct Pot.

Different pots have different looks and different functions. Example of common materials used for potting includes terracotta, plastic, ceramic, or wood.

As a beginner, there is something pretty in combining this gorgeous plant with a beautiful and proper working pot. Choose a pot that has suitable drainage holes. They are prone to overwater, and they may die from root rot. A terracotta pot will work well with you.

Choose a pot considering the place you will grow the plant. If the plant is to be planted outdoor, you may need to choose a pot that will withstand adverse conditions like wind. If you want to plant it on a desk, you may need a decorative pot.   

A correct pot will only leave 2 inches of space between the pot and the plant. Not planting a snake plant in that kind of pot makes the plant susceptible to rot.

3.    Proper Lighting is Essential

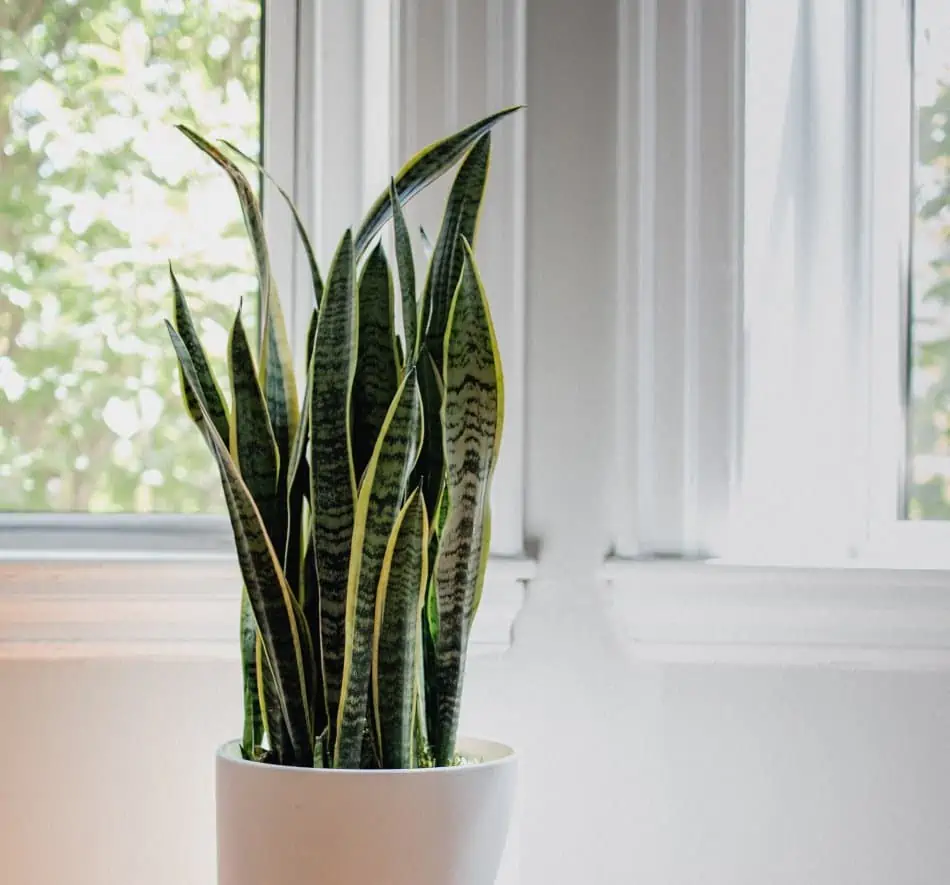
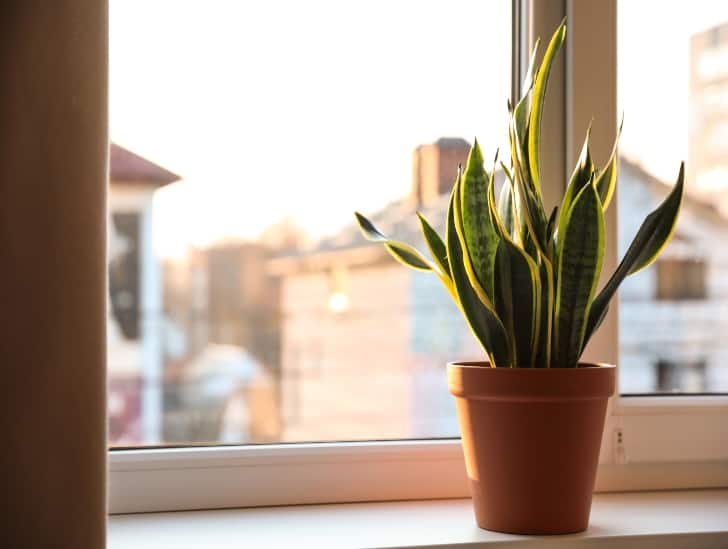
Snake plants should always get enough light. Droopy and sad-looking leaves are always the effects of lack of enough light. Snake plant prefers indirect but steady light with some direct sunlight once in a while. However, they also tend to do well in shady corners or other low-light areas of your home.
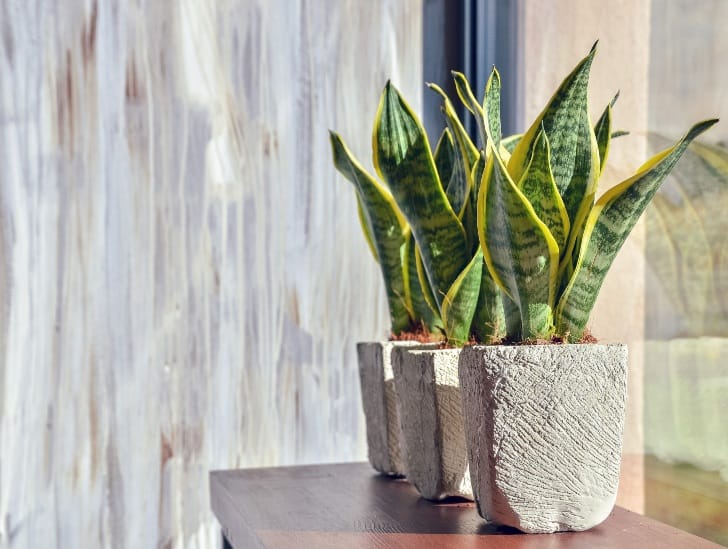
A snake plant in a gray pot.
Snake plant prefers indirect but steady light with some direct sunlight once in a while.

Too much sunlight may make the plant susceptible to leaf burn, but only in very severe cases will the leaf burn causing any long-term damage. During the winters, ensure that you protect the plant from drafty windows. Lack of light for a long time can make a plant die from chlorosis.

4.    Know How to Water Your Plant

Do not water your plant so frequently. Let the soil dry before watering. To know when it’s time to water, don’t rely on the appearance of the surface of the soil. Instead, stick your finger 2 inches into the soil and feel the moisture.

When watering the snake plant, ensure that you water it at the bottom of the pot. This encourages the roots to grow downwards and reduces the splash of water to the leaves. Watering from the bottom will also stabilize the plant’s thick, tall leaves supported by strong roots.

5.    Always Monitor Temperature and the Humidity Levels

Snake plant is a surviving plant that will tolerate fluctuating temperature, but not too cold or too hot. An optimum room temperature of 16-320C is most favorable for the plant. At this temperature, the plant will grow tremendously.

A decorative snake plant on the table.
An optimum room temperature of 16-320C is most favorable for the plant.

In cold conditions, the plant develops mushy white areas to the leaves, which may occur 1-4 weeks after exposure to cold. During the winter season, get the plant from outdoors to indoors to prevent the plant from dying.

6.     Fertilizer

Snake plants do not need a lot of fertilizer. If need be, it should be done during the spring or the summer season. During the winter season, the plant is at rest; hence fertilizing should be avoided. It is also essential to ensure that the plant is not under stress during fertilizing.

 How often to fertilize the plant, depends on several factors. When fertilizing, use a composed 10-10-10 or 20-20-20 fertilizer for proper growth. It is recommended that you apply half of the dose of the total strength to avoid over-fertilization. These factors include:

  • Size of the plant and the pot. The larger the pot or the plant, the higher the use of fertilizer.
  • The type of fertilizer used.

In a nutshell, most snake plants are fertilized after 4-6 weeks and only during the growing seasons.

7.  Pruning

Pruning is essential as it encourages new growth. To prune, use sterilized pruning shears or a sharp knife. Remove leaves at the soil line or cut off damaged mature leaves and leave the developing leaves to grow. Pruning is best done during the growing season as new leaves can grow.

Pruning the plant during the off-season may make it stressed; hence it is best done when the plant is healthy. Pruning is also done to control the height of the snake plant. To do this, cut the tall leaves carefully and leave the rest. Also, get rid of spoilt leaves.

8.  Propagating a Snake Plant

You can quickly multiply your sansevieria plant for your home as a gift to share with friends because; these plants are incredible to propagate. There are two ways to propagate the plant.

Propagate leaf cutting in water

Cut a healthy sansevieria plant leaf near its base. Make a notched upside-down V cut at the bottom and place it in a clean jar of water, which should be slightly above the V cut. In about 3-5 weeks, you will see roots growing from the leaf-cutting. You can transplant it into the soil or keep it growing in the water.

Propagate leaf-cutting in soil

Cut off a healthy sansevieria near its base and let the cut dry for 1-2 days. Plant the cutting in potting soil, water it regularly, and let it grow. Don’t let the soil get too dry or wet as the plant is still very young and sensitive.

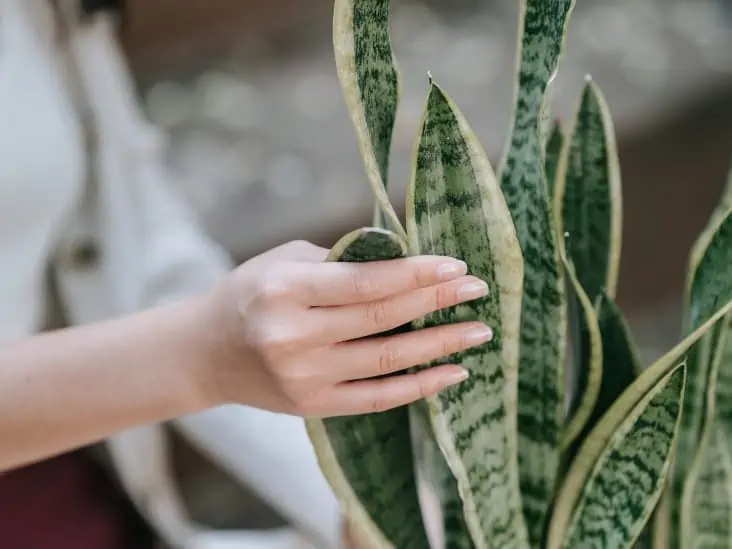
A hand holding a young snake plant in a pot
Choose a pot considering the place you will grow the plant.

9.  Common Pests

The snake plant is hardy, and it is rarely infested with pests. Overwatering, high humidity, and air poor circulation are the root causes of pest infestation. Scales, gnats, spider mites, and whiteflies are the common pests attracted to this plant.

If the snake plant is already infested, the methods used depend on the severity of the infestation. You can mix alcohol with water and spray it to the plant or wipe the leaves with a solution to deter the problem. If the plant is severely infected, you should prune the infested leaves and leave the rest to grow.

10.  How to Get Snake Plants to Bloom

Snake plant tends to flower annually when water, sun, and humidity level are optimally met. During flowering, the snake plant develops creamy white, tubular flowers that look like lilies. Shifting the plant’s location from indoors to outdoors regularly can encourage blooming as the plant rarely blooms when kept indoors for long.

Three snake plant in a white pot.
Shifting the plant’s location from indoors to outdoors regularly can encourage blooming.

The coming of spring kicks the plant from its dormancy stage and spurs its growth. Its flowers are fragrant, and it blooms at night. After some time, these flowers drop on their own hence no need to cut them.

11.  Don’t Overwater or Underwater the Plant.

There is nothing as dangerous as overwatering your plant. Overwatering is the fastest way to kill your plant. But because the snake plant is excellent, it will always tell by the look on its leaves. The leaves become heavy, squishy, and limp and sometimes may even fall. The leaves start to rot, therefore spread to other parts of the plant.

Though it is a dry plant, don’t let it go for long without water. Underwatering will show itself in the leaves. The leaves might bend over, become limp and die. The old leaves start becoming yellow, turn brown, and lastly, break.

Bottom Line

As I promised earlier, snake plants are almost comically simple to grow. You will encounter minor troubles with them, but they are plants that can thrive well even in neglect.

 All in all, watering the sansevieria plant is the most important thing. It may survive from other conditions, but not overwatering. Follow these simple tips and be assured of a healthy snake plant in your house, office, or even outdoors.

9 Types Of Haworthia For The Beginning Gardener

Native to parts of South Africa, the Haworthia genus features over 70 different types of species. These plants are relatively easy to grow and care for, making them one of the most popular houseplants in different parts of the world. Generally, Haworthia requires less light than other succulents to thrive. These plants usually form a star-like rosette with inconspicuous white flowers.

So, what are some of the best types of Haworthia to grow? Since there are over 70 different types of Haworthia, choosing the right type for your home can sometimes be challenging. But don’t worry because we are here to help you. Some of the best types of Haworthia to grow include Haworthia attenuata, Haworthia Setata, Haworthia Cooperi, and Haworthia cymbiformis. Others include Haworthia Limifolia, Haworthia Truncata, Haworthia obtusa, Haworthia Coarctata, and Haworthia Concolor.

This blog post discusses some of the best types of Haworthia to grow at home and what you need to do to keep them happy and healthy. Keep reading to learn more.

Haworthia vs. Aloe vs. Agave

Before we dive deep into discussing some of the best types of Haworthia to grow at home, it is essential to understand the differences between Haworthia, Aloe, and Agave because these plants look similar. It is pretty easy to confuse one for the other.

Visually, aloe vera and agave plants look fairly similar to the human eye. They both fall into the category of succulents that form rosettes. In fact, some people believe that aloes are basically agave without weapons (they don’t have spikes and strong teeth).

Haworthia plant in a black pot.
Haworthia and aloe vera have similar-looking long stems.

However, these succulents belong to different families, and even their flowers look different. Haworthia and aloe vera have similar-looking long stems, but the leaves of Haworthia are more pointed and greener, with relatively intense white encrustations running horizontally.

Additionally, Haworthia plants have rusty tips and form tight rosettes, while aloe vera and agave have flat-leaf tips.

Sometimes, the common aloe vera plant can look different from other aloe types, such as the aloe variegate, commonly referred to as Tiger Aloe.

There is also a species within the aloe family known as Haworthia-leaved aloe, whose sharp spines usually give it a fuzzy appearance. Its spines are sharper than the usual ones.

The Haworthia-leaved aloe resembles some plants in the Haworthia family, but it doesn’t belong there. Therefore, it might cause some confusion if you are not careful.

Though slightly different in appearance, these plants are good companions because they have similar care requirements, and all of them are slow-growing succulents. Therefore, you can combine them in your succulent arrangement.

Best Types of Haworthia to Grow

So, what are some of the best types of Haworthia to grow at home? Let us find out.

1. Haworthia coarctata

Haworthia coarctata resembles a hand clenched in a fist. It has prominent, reddish leaves and claws that join to form tight clusters. It can easily turn pink in extreme cold or with sufficient light, and produces offsets quite easily.

This succulent also has white horizontal stripes on its deep green leaves. The plant is commonly referred to as Haworthiopsis Coarctata and can grow to a height o up to 30 cm.

A Haworthia coarctata
It has prominent, reddish leaves and claws that join to form tight clusters.

Haworthia Coarctata requires well-prepared cactus compost soil, minimal watering, and exposure to full sun to thrive in a home environment. The minimum temperature should be 25oF.

2. Haworthia attenuata

Haworthia attenuata is among the most popular Haworthia types that are relatively easy to grow. The clump-forming perennial succulent makes a magnificent windowsill container display with its spiky and flesh stems. Its spines/leaves have pointed edges, and white horizontal stripes adding to its fine, rich texture.

The plant produces long, tubular, white flowers. Typically, flower petals start to form on mature plants from spring to fall. Haworthia attenuata can grow to a height of up to 8cm and can spread up to 30cm.

Since its leaves are relatively stiff, the succulent can survive for a prolonged time without water, but you still need to water it regularly in summer and autumn. Allow the potting mix to dry completely between watering sessions and water sparingly in winter.

The minimum temperature should be kept above 50oF and provide sufficient exposure to light. You should also consider re-potting your Haworthia attenuata every three years in spring when root-bound.

3. Haworthia cymbiformis

Haworthia cymbiformis is a wonderful succulent plant that resembles Aloe Vera. It has distinctive flesh stems covered with pointed leaves.

Typically, the plant grows to about 2cm tall and 9 inches wide though it can grow up to 5 cm tall in some cases. The flowers are dark-red on reddish stalks.

A Haworthia cymbiformis
Haworthia cymbiformis is a wonderful succulent plant that resembles Aloe Vera.

This succulent plant is easy to grow and can be a beautiful addition to a windowsill with strong light. For strong growths, the soil should be well-drained and less acidic.

4. Haworthia Cooperi

Haworthia Cooperi is a low-growing succulent with fine leaves that form rosettes. It is among the best types of Haworthia to grow indoors and looks terrific in a hanging basket or pot display.

The plant produces pinkish flowers with white filaments from summer to autumn.

Haworthia Cooper thrives in low to medium light conditions, warm temperatures, and it is highly tolerant of drought.

For watering, allow the top of the potting mix to dry out completely between watering sessions and water sparingly.

The minimum temperature should be kept above 60oF and provide sufficient exposure to light, such as in a spot where they receive at least six hours of direct sunlight every day.

A Haworthia Cooper
It is among the best types of Haworthia to grow indoors.

This succulent spreads slowly and can grow to a height of up to 15 cm over several years.

5. Haworthia Obtusa

Haworthia obtusa is a low-growing succulent plant that stays compact and produces offsets. The plant has triangular leaves with dark green lines running along the length of each leaf. It produces flowers from August to September, which are white with pinkish stalks.

The ideal temperature range for this type of Haworthia should be 80oFand below. It needs well-drained soil and thrives in low light conditions.

Water sparingly and allow the top of the potting mix to dry out before re-watering it. The minimum temperature should be kept above 60oF and provide sufficient exposure to light, such as in a spot that receives at least three hours of direct sunlight every day.

6. Haworthia Limifolia

Haworthia Limifolia is among the easiest types of Haworthia succulents that you should consider growing. This is because of its ease in cultivation, and it is a less fussy succulent that tolerates poor, dry soil.

The plant does not require much maintenance and can survive in different conditions ranging from low light to full sun exposure.

The Haworthia Limifolia is an active grower during autumn and produces small sweetly-scented white flowers during early summer.

A Haworthia Limifolia
It is among the easiest types of Haworthia succulents.

The succulent can grow to a height of 10cm, but its spread is dependent on the number of offsets it produces.

This type of Haworthia requires regular watering and drainage in the winter months, but switch to light watering throughout spring and autumn.

7. Haworthia Marginata Variegated or Zebra Cacti

Haworthia Marginata Variegated is among the most popular types of cacti. It can easily adapt to different growing conditions and features distinctive triangular leaves with white margins.

The plant produces pinkish flowers from winter to early summer, and during the winter months, the leaves turn a reddish-brown color.

The Haworthia Marginata Variegated can spread to a height of 20cm and can survive in a minimum temperature of about 50oF.

For watering, allow the top of the potting mix to dry out completely between watering sessions and water sparingly during the dormancy season.

8. Haworthia Pygmy Variegated

Haworthia Pygmy Variegated is a low-growing succulent with variegated leaves and can make an excellent choice of a potted cacti display for your home.

The plant produces pinkish flowers from early autumn to winter. Haworthia Pygmy Variegated thrives in warm temperatures, bright light, and rich soil with good drainage.

This succulent is known for its drought resistance ability. So, you should only water it when the top of the potting mix is dry.

The minimum temperature should be kept above 10oC and provide sufficient exposure to light. This succulent spreads slowly and can grow to a height of up to 8 cm over several years.

9. Haworthia Turgida

Haworthia turgida is a small cactus with thick triangular leaves that can turn red in winter and spring, but the most notable feature is its tubular white flower during the summer months.

The Haworthia Turgida thrives in low light conditions and can grow to a height of up to 10 cm.

This succulent is known for its drought resistance, and it does not require much watering. Allow the top of the potting mix to dry out completely between watering sessions and water sparingly.

Summary

There are many types of Haworthia that you can grow in your garden. Some have a more prolific growth rate than others, and some may be better suited for certain climates or areas with less rainfall.

We’ve discussed the top 9 best types of Haworthias, based on our experience as experts in gardening and horticulture.   

Knowing which type you want before purchasing is essential as some varieties need more sunlight than others. For instance, those from South Africa require a lot of sunlight while those from Australia prefer shade.

Growing Euphorbia: How I Propagated My Euphorbia

Euphorbia, also known as Spurge, are easy-to-grow perennials. They may be indoor plants or part of your backyard. Euphorbia develops slowly but is not hard to take care of once mature.

If you plan to grow Euphorbia in your home or garden, find out how to propagate Euphorbia now to increase your chances of success. Euphorbia is one of the largest species of succulent plants in the world, with roughly 7,500 species.

You can propagate Spurge through offsets, seeds, or cuttings. The simplest and fastest way is with cuttings. If you have successful Spurge in your garden, you may want to consider taking cuttings and spreading them. Before taking cuttings, there are a few basic things you should note that are listed below:

Safety

Wear gloves to propagate Euphorbia. Remember to wear eye protection to prevent the plant’s toxic white latex sap from getting in contact with your eyes. Manipulate the plant and its cuttings with several layers of newsprint.

A kid wearig a gloves.
Remember to wear eye protection to prevent the plant’s toxic white latex sap from getting in contact with your eyes.

The Ideal Time to Get Cuttings

Cuttings are preferable in spring before the flower buds emerge, but summer is also favorable. However, cuttings done in fall or winter have little time to root, and cuttings should therefore only be used in emergencies to save plants suffering from root rot.

How Should You Get the Cuttings?

To cut, cut the stem of a mature Euphorbia plant. First, cut a healthy, spotless stem from your Euphorbia plant about 5 to 7 inches long. Then, use a clean razor blade or sharpened knife to reduce the scars on the parent plant.

Control of Sap Flow

Keep the cut-off tip under cold running water to contain the flow of white sap. Sprinkle the mother plant with cold water till the juice stops oozing. Short exposure to a candle flame or match may also inhibit the flow.

Dry Your Cutting

One of the main cultivation tips for Euphorbia is to let the cutting dry a few days before planting. Drying enables the sap to form a callus on the cut end and prevents decay. Place the cut on a paper towel in a warm, dry place with good air circulation to thoroughly dry for 3 to 7 days. Leave it out of direct sunlight.

Propagation Medium for Euphorbia

Use a well-drained medium such as perlite, a commercial cactus blend, or a 1:1 mix of sand and peat moss. Apply ½” coarse gravel to the medium surface to keep the cut upright.

Care For Euphorbia Following Propagation

Place the cutting in a hot, well-lit area away from direct sunlight. Keep the temperature between 65 and 75 degrees Fahrenheit. Your Euphorbia should take root about two months from now, while you should notice new growth.

Transplantation of Newly Propagated Euphorbia

Once the cuttings are rooted, you can transplant them into a large container. The propagated Euphorbia plant will require further care until it settles into its new home. Water carefully to evenly moisten the soil surface when dry to the touch during the growth season.

Plant Being transferred.
Once the cuttings are rooted, you can transplant them into a large container.

Let the Euphorbia dry out between waterings and not water more than once a week. Water slightly during the winter to barely moisten the soil’s surface is dried, but not more than once every other week. Do not water to the point that the ground is soggy or wet.

Sunlight Requirements

Place the succulent in a warm sunny spot where it will receive at least six hours of full sun each day. You can place it in a dry and airy room on a sunny windowsill or in a sunny place outside in the lush garden. The plant grows best at temperatures greater than 55 degrees F. Don’t let it freeze.

A plant being exposed to the sun.
You can place it in a dry and airy room on a sunny windowsill or in a sunny place outside in the lush garden.

Propagation by Stem Cuttings

The spread of Euphorbias from cuttings is the easiest and fastest method for many species and reshapes an old plant. Collect cuttings from the plant in the spring before the flower buds appear.

Avoid taking euphorbia cuttings in autumn or winter because they will not have time to develop an adequate root system. In addition, the milky sap that comes out of Euphorbia is irritating to the skin. Wear gardening gloves thick enough to prevent spurge thorns from sticking to your skin.

Take cuttings with a sharp and clean knife. Remove multiple leaves from the underside of each cutting. Next, remove a 3-inch piece from the end of a spurge stalk with a sharp knife. Place the severed tip of the stem in a container of lukewarm water until the milky sap stops flowing. Remove the cutting from the water and let it dry for 3-4 days.

Immerse the injured tip of the cutting in a rooting hormone that contains a fungicide. Ensure the tip is well covered, and be careful not to breathe in the rooting hormone. Next, stick the lower end of each cutting in a pot filled with potting mixture and water. Cuttings should take root in 2 weeks.

Take cuttings of branched species at the point of branching. Single plants can be decapitated to encourage the production of lateral shoots, which can then be removed and rooted. Spurge leaves with large leaves should be removed with a knife just above the cut.

Place an even mixture of peat moss, coarse sand, and perlite into a small pot. The blend should be well-draining. Place the lower third of the stem in the soil mixture. Firmly stamp the soil around it to keep the cut in place and remove the air pockets.

Rooting may take longer than expected, but you can accelerate it by increasing the soil temperature to approximately 77 Fahrenheit using a thermostatically controlled heating mat. Avoid direct sunlight. If unrooted cuttings become dehydrated, you can save them by dipping them in water at room temperature until they swell again and replant them.

Add a little water to moisten the soil. Check the cut every day and add enough water to moisten the soil. Place the freshly planted cutting in a bright and cozy place in your house. The root system will grow over the next 20-30 days.

Propagation by Leaf Cuttings

Propagate Euphorbia using cuttings in spring. Ensure you wear gloves to protect yourself against sap. Delicately extract the leaves from the plants and place them in stone wool cubes, placed on coarse sand on a shelf.

Placing them in rock wool cubes will enhance the chances of euphorbia survival. Next, dip the leaves in a powder of rooting hormone to encourage growth and the development of new roots.

Euphorbia plant.
Delicately extract the leaves from the plants.

Place your rock wool with spurges on a tray lined with thick, damp sand. Cover the plant with a plastic cap to help increase the moisture your Euphorbia will need. The roots of your euphorbia plants should begin to grow in about a month.

Do not place leafy spurge cuttings under the sun. Hormonal rooting powder and fungicide help in this process. The plants will be mature enough at the end of 40 days, and you can pot them at this point.

Propagation by Seed

Another way of propagating your Euphorbia is through the propagation of seeds. The likelihood of success when propagating from seeds is lower than when you grow them from cuttings. The germination phase may take about 3-6 months during propagation from seeds, so please be patient in the process. While Euphorbia may be grown from seeds, they may be difficult to germinate.

Plant Seeds.
The likelihood of success when propagating from seeds is lower than when you grow them from cuttings.

Collect the seeds and soak them for 12 hours, change the water and then soak them for a further 12 hours. Let the seeds dry out naturally. Sow the seeds in an area that is well-drained, sandy, and sunny. Sow the seeds in an even mixture of coarse sand and commercial seed crop mix in the spring. Gently cover each seed with soil, rinse and wait it out.

Sprouting takes 2-6 months in cold weather, but heat can happen in 1-2 weeks. Press each seed . 9 cm into the ground, at a fair distance from each other. Gently irrigate and leave soil moist. Seed-borne transmission of Euphorbia can take up to two years before growth occurs.

Propagating Through Offsets

Offsets are an easy and efficient way to spread Euphorbia plants as long as healthy plants are available for cuttings. To propagate Euphorbia with offsets, find an offset that grows well. Then, cut approximately 2 inches below offset with pruners or clippers.

Give the offset time to be insensitive for another few days before insertion into the soil. The offsets will take root within approximately six weeks under appropriate conditions. Once they are rooted, you can transplant them into their original pot or move them to larger pots if required. To summarize propagation by offsets, proceed as follows:

● Let the plant expand and divide naturally.

● Be careful when detaching the offset from the mother plant to avoid damaging the roots or stems.

● Let the new offset dry at least one day before planting its roots and shoots pointing downwards in well-drained soil.

● Water sparingly until the grafts are rooted, at which time they can be transplanted outdoors or in jars.

Bottom Line

Euphorbia plants offer an excellent array of colors with their bracts of flowers. In addition, Euphorbia is easy to spread and maintain, making it an ideal choice for any gardener. Under the right conditions, you can quickly cultivate and spread Euphorbia in your garden.

6 Golden Rules for Watering String of Pearls

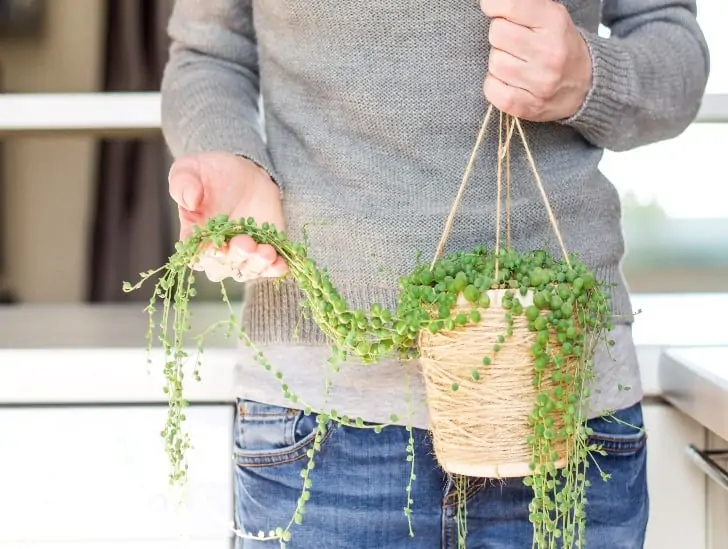
A man holding a string of pearls.

Almost every gardener desires to have a string of pearls on their succulent collection. However, owning this stunning plant requires the right watering habits to keep it alive. Getting the watering right is crucial to its survival because the plant is highly susceptible to root rot caused by slow draining soils and overwatering.

So, what are some of the golden rules of watering a string of pearls plant? The most important thing you need to keep in mind is that string of pearls plants are drought resistant and should only be watered when the potting mix around the roots has dried completely.  Typically, you should water your plant once every two weeks. Use the right watering method and the right water type all the time. Consider watering your string of pearls plant early in the morning or at night when the plant is dormant.

This article discusses everything you need to know about watering a string of pearls plant. Read on to learn everything you need to know.

1. Understand How Often You Need to Water String of Pearls Plants

Like other succulents, a string of pearls plant has a wide range of special adaptations that help them to grow in desert environments. Their leaves are shaped like “pearls” to maximize each leaf’s amount of water storage and limit the overall surface area for water loss.

Since these plants are adapted to growing in hot and dry conditions, they are highly susceptible to overwatering. To grow a string of pearls successfully, it is crucial to replicate the watering conditions of their native desert environment by giving them what is just enough for their survival.

You should only water your string of pearls when the soil is completely dry. Typically it takes at least 14 days for the potting mix to dry out completely.

Generally, the time it takes for the potting mix to dry out completely varies depending on a wide range of factors. These factors include:

  • The overall size of the growing pot or hanging basket.
  • Humidity and temperature of where you live.
  • Rate of drainage of the growing soil.
  • Whether the string of pearls is in an air current from your indoor air conditioning or near a source of heat.

The best way to establish if it is the right time to water your plant is to feel the potting mix at the bottom end of the growing container to determine whether it is completely dry or moist.

Potted String of pearls.
These plants are adapted to growing in hot and dry conditions, which means they are highly susceptible to overwatering.

If the soil feels moist, give your plant another day or two before you water.  If it feels scorched, it is the perfect time to water your string of pearls.

This strategy ensures you mimic the moisture conditions that the string of pearls is adapted to while in the desert. It eliminates the risk of overwatering your plant by ensuring only enough access to moisture throughout the year.

Strings of pearl usually go into a state of dormancy in summer to cope with the extremely high temperatures. It means that the plant has less demand for water during this period, and it is at an increased risk of developing root rot in case of overwatering.

During summer, water your pearl of strings once every three weeks. One of the indications that your plant requires watering is the shriveling of leaves when dehydrated. So, if your pearls remain green but start to show signs of wilting, be sure to water your plant.

2. Know-How to Tell If You Are Overwatering

Typically, if you water your string of pearls more than once a week, you are most probably overdoing it, even if you live in an arid area.

Some of the common signs of overwatering include your plant turning yellow or translucent. If you notice any of these two signs, scale back on watering and allow your potting mix to dry out properly so that your plant can recover.

A leaf turns into yellow.
Some of the common signs of overwatering include your plant turning yellow or translucent.

Remember that a string of pearls is highly sensitive to overwatering, particularly during summer dormancy. While underwatering can easily be resolved, dealing with issues arising due to overwatering can be quite tricky.

3. Figure Out the Right Way to Water a String of Pearls

The best way to water your string of pearls is to use the soak and dry watering method. You can only use the soak and dry watering method when the soil is completely dry.

The method entails watering your plant deeply until excess water starts coming out of the drainage holes. Once you have plenty of water coming out of the drainage holes, empty the saucer from the drained water.

The soak and dry watering method work pretty well all year-round. However, in summer, be careful not to overwater your plant because it is a state of dormancy. Wait until the soil is completely dry and leaves start to look like deflated balloons before you water again.

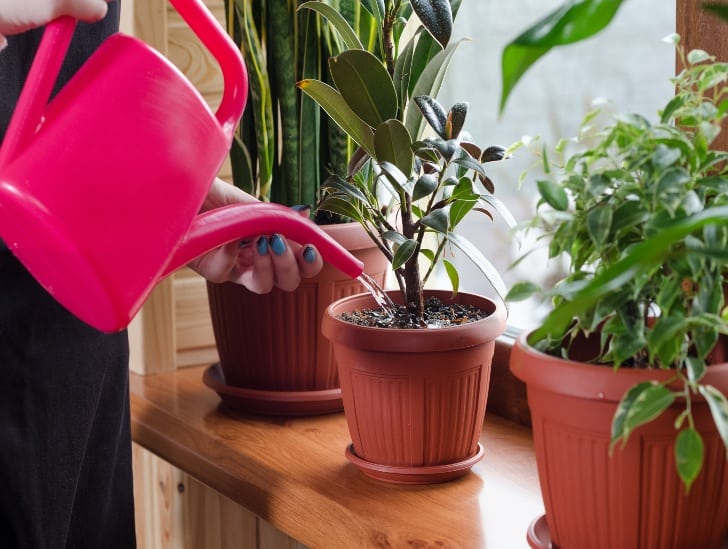
A person watering the plant.
The method entails watering your plant deeply until excess water starts coming out of the drainage holes.

Since this succulent is highly prone to root rot caused by overwatering, be careful with the watering frequency and how you water your plant. Don’t be worried if you underwater because the plant can always recover from a little drought without any issues.

Remember that there is less frequent rainfall in deserts, where the pearl of strings grows naturally. But when it rains, it usually rains abundantly. So, the soak and dry watering method tries to mimic the natural habitat of the succulent.

While following the soak and dry method is great, keep in mind that it won’t work if your plant is in a pot without plenty of drainage holes. The primary purpose of the drainage holes is to allow the excess water to drain.

Also, ensure you use the right succulent potting mix for your string of pearls. Succulent soil is usually porous enough to allow the excess water to drain well.

4. Use the Right Water Type

Rainwater is always the best option for watering succulents and other plants. You can always collect as much rainwater as possible during the rainy season and store it well so you can use it throughout the year.

If you cannot access rainwater throughout the year, the next best option is distilled water. Purely distilled water doesn’t contain a lot of chemicals, and it should be good for your string of pearls.

A freshly watered string of pearls
Rainwater is always the best option for watering succulents and other plants.

However, avoid using tap water because it contains a lot of treated chemicals that can build up in the succulent soil over time, causing severe damage to your plant.

Salt buildup in the soil usually makes essential nutrients unavailable for the plant to absorb, resulting in stunted growth. If tap water is your only option, ensure you treat it thoroughly before use.

The easiest way to treat tap water is by putting it in an open container and allowing it to sit still overnight. This allows some of the chemicals to dissipate, making it less harmful.

5. Understand How to Water Your String of Pearls If It Is Planted in a Pot without Drainage Holes

First, we don’t recommend planting a string of pearls in a pot without plenty of drainage holes since the odds of failure are higher than the odds of success.

However, some gardeners may still want to experiment with things and see how it goes. So they will still plant their string of pearls in a container with no drainage holes.

If that is the case, the primary purpose of watering should be to give your succulent just the right amount of water to keep it alive. Any slight mistake and you will be left with a dead plant due to extensive root rot.

The only way to find the right amount of water to accomplish this mission is through trial and error.

In most cases, you should only provide your plant with water equivalent to half the soil volume. For instance, if the potting mix fills X container, provide your pearl of strings with water that only fills half of the X container.

If the above method seems difficult to master, lift your plant regularly and feel its weight. If the plant is no longer getting lighter, it means the water has dried out completely, and you can water it. 

6. Know How to Water an Overly Dried Out String of Pearls Plant

If the pearls of your plant are shriveled, it means the plant is far too dry. This can happen when you are away from home or become too busy to water it on time.

Don’t be hard on yourself when this happens because you can always revive your plant in no time. Learning to tend succulents is a process, and strange things can still happen no matter how much you learn.

Hanging string of pearls
If the pearls of your plant are shriveled, it means the plant is far too dry.

A shriveled string of pearls needs time to rehydrate. To accomplish this, take your plant and put it in a watering bowl on a relatively flat surface. Carefully place the succulent in the bowl. Water it liberally and soak it thoroughly while ensuring the water only remains in the bottom of the bowl.

Let the plant sit in the water bowl for a couple of hours before taking it out. That is it, and your string of pearls doesn’t require any more special attention.

Summary

The string of pearls is a good starting plant for beginners because it can survive with little care.  However, the most crucial aspect of its care you need to master is how to water your plant correctly.

We hope you now have all the watering tips you need to know to keep your plant happy. With the right watering schedule, your plant will blossom and add beauty to your indoor and outdoor spaces.

11 Amazing Facts You Didn’t Know About Air Plants

Top view of different air plants.

Air plants (Tillandsia) are fascinating and one of the most popular houseplants. But did you know that they can survive in a variety of conditions? If you are new to air plants or have been growing them for years, there is always something new to learn. These unique plants are perfect for indoor gardening, and they are low-maintenance. Here we will share ten amazing facts that you did not know about air plants.

So, what are some of the amazing facts about the air plant? You probably already know that air plants can survive with soil, but did you know that air plants can be grown upside-down? Air plants have been known for their ability to purify the air around them by removing toxins such as formaldehyde from the furniture. They can change color and even release oxygen at night.

 There are so many different types of air plants, and they can be found in such a variety of colors that it is hard not to want one. We will share 11 facts about these little wonders that most people don’t know in this post post.

1.     They can grow without soil

While most plants depend on soil for their nutrients, air plants can grow without soil. Air plants absorb moisture and nutrients from the atmosphere through their leaves as well as humidity in the environment around them. This feat is possible thanks to the natural structure of their roots. Air plants are more than happy to absorb nutrients from sea sponges, driftwood pieces, and even some rocks.

2.     They use CAM photosynthesis

Air plants use a special type of photosynthesis called crassulacean acid metabolism (CAM). CAM photosynthesis is a process where the plant only opens its stomata at night when temperatures are lower, allowing for more efficient water usage.

Most plants use C-CAM, which means they open their stomata both day and night. Most succulents, including air plants, use P-CAM or PEPC (Phosphoenolpyruvate Carboxylase), which means they only open their stomata during the night. This allows air plants to get more oxygen at night.

3.     Grows in a variety of climate

While most plants are very particular about the conditions they need to grow, air plants do not have special requirements for temperature or humidity. Air plants can grow in different climates, such as humid rainforest habitats and even in desert-like conditions.

Air plant in a glass terrarium outside.
Growing air plants is very easy, and they can be found just about anywhere throughout the world.

Some notable places to find air plants include South Africa, Australia and Mexico. However, air plants can also survive in various climates such as the Mediterranean, Europe and Central America. This means that growing air plants is very easy, and they can be found just about anywhere throughout the world.


4.     Air plants grow offsets (pups) after blooming

If you have ever bought an air plant, then there is a good chance it had already started growing pups or “offsets,” as they are more commonly called. This makes them incredibly easy to propagate since all you have to do is allow the pups to grow and then cut them off. This way, as long as one plant survives, then there will always be more plants.

Air plant plantlets hanging.
You can cut them off and place them in various areas of your home or office where they can thrive on their own.

This feature also allows air plants to be incredibly useful for those trying to fill up a large space quickly. All you need is one plant, and as soon as it starts growing pups, you can cut them off and place them in various areas of your home or office where they can thrive on their own.

5.     Air Plants are Closely Related to Pineapples

You might not think so at first glance, but air plants belong in a family of pineapple. The bromeliad family includes both air plants and pineapples. They look so different because of how each plant uses the bromeliads in its unique way.

The pineapple plant absorbs water through its leaves while air plants absorb moisture from humidity in the environment around them rather than drinking it up as a normal plant would do.

6.     Air plants are not toxic to pets or children

One of the great features of air plants is that they are completely safe for humans and animals. Air plants contain no known toxins, so there is nothing to worry about when your little ones play with them or even chew on their leaves. This makes them a great option if you have any children or pets interested in the plants around your home.

Since air plants absorb water and nutrients from the surrounding environment rather than drinking it up like other types of plants, they eliminate any need to worry about toxic fertilizer entering their system.

7.     Air Plants can Change Colors

Air plants change color depending on the type of environment that they are in. If you have an air plant at home, then there is a chance that it might begin turning into slightly different colors over time as conditions around them change. They can be found growing with many different colors, including orange, pink and even light green or yellow tints.

An air plant with a wood.
They can be found growing with many different colors, including orange, pink and even light green or yellow tints.

The reason why they can change colors so easily has to do with how air plants use photosynthesis in their leaves and petals. As these parts absorb sunlight, they begin transforming it into energy that the plant itself will use. This process can lead to changes in the color of certain parts depending on how much exposure they have had.

8.     They Blossom Near the End of their Life

 One of the biggest signs that an air plant is about to die is when it begins blooming. Once this process starts, most plants will begin getting smaller and eventually die off completely

Air plant pink flower.
Air plants only bloom in their final stages.

Air plants only bloom in their final stages, so if you see them opening up, there is a chance that they are not going to live for much longer. However, if they are healthy, then you might be able to save them by moving their container into a shadier area of your home or office.

9.     Air Plants are epiphytes and can also be lithophytes

When air plants grow in the wild, they tend to do so on trees or other large pieces of non-living things. However, if you wanted to recreate the same effect at home, you could place them between stones or other pieces of material.

As long as the air plant receives some sunlight and has access to moisture, it will continue growing just fine no matter what surface underneath it. This feat is also one of the reasons why air plants are great for those who want to keep a low-maintenance plant around their home.

10. Air Plants can Give ANYONE a “Green Thumb”

Do you dread growing houseplants just because you believe you do not have a green thumb? Well, an air plant will prove you wrong as they are incredibly easy to grow and maintain. You do not need to water them or fertilize them at all, and they will continue growing just fine in any home.

One of the reasons air plants are so easy is that they do not need much light to survive. As long as you put it in a place where it can receive some indirect sunlight, that should be enough for your plant to grow happily.

A person holding an air plant with a drizzle of water.
Place it where it can receive some indirect sunlight, that should be enough for your plant to grow happily.

All you need is one air plant and a glass container with some water in it for the plant to absorb from. Then, place your air plants next to any window where they will receive sunlight every day and watch them thrive on their own over time.

11. A Failing Air plant can be Easily Revived

Unlike most other plants, an air plant that is starting to die does not need to be thrown away completely. If you begin noticing that your plant is wilting or turning brown, try placing your dying air plant inside another container of water and then place that container inside a larger bowl or jar. Make sure to cover up the opening at the top.   This will allow your plant to drink from all of the extra humidity in there instead.

You can do this process for about ten days and if you notice it working, try moving your growing air plants to a smaller container with some soil in it. This way, they can begin growing new roots, and once they are large enough, you should be able to separate them into their air plant containers!

Conclusion

Air plants are not just tiny plants that you can use to decorate your home or office. They have some incredible properties that make them stand out from other plants. These amazing facts will help you learn more about what makes these plants so different and why they are growing in popularity.

Many people who start growing air plants find it hard to stop since there is nothing more satisfying than receiving pups of your own after the original plant begins dying off. Once you have one plant, it is very common for people to want more of them all over their homes. These plants may seem like an unlikely gift for anyone, but there is no denying that having one around your home or office will help bring more color and life to the room.

14 Amazing Facts You Didn’t Know About Agave

The Agave plant is a slow-growing succulent that has broad leaves with spiky tips. Although it’s referred to as the “Century Plant,” this species can only live to a maximum of three decades. The Agave Genus features numerous varieties, with the larger species achieving up to ten feet in height and breadth. Numerous other small-sized Agave species feature spineless soft leaves. Hardier varieties of the Agave plant have bluish-green leaves, while those in warmer climates feature greyish-green leaves. Others might have golden or white markings, which enhances their beauty.

So what makes the Agave plant unique and extraordinary? Unlike most garden plants, Agaves are raised for their attractive foliage and not for their flowers. Agave plants manufacture Tequila, can be used as natural sweeteners, and carry symbolic meaning. Surprisingly, these drought-resistant plants that grow from a basal rosette are not Cactus and have a monocarpic lifecycle. They also reproduce asexually and take up to a decade to reach full maturity. Their spiny leaves offer an excellent defense mechanism.

Agave plants can form a unique addition to your home or garden. In this post, we take a look at some of the most amazing facts you dint know about the Agave plant, its benefits, reproduction, and why you should make it part and parcel of your home garden.

Agave is Used for Manufacturing Tequila and Mezcal Spirits

Natively, you will find Agave plants in South America and Mexico. Their sweet sap can be tapped from their stems and used to make Aquamiel. This substance is then fermented into Tequila, or Mezcal spirits loved by many people who constantly imbibe liquor for fun or special events. It can also be distilled into alcohol or used to manufacture baking ingredients.

A tequila shot with lime and sea salt.
The substance from the Agave plants fermented into Tequila, or Mezcal spirits loved by many people.

Blue Agave Reproduces Asexually

The agave plant has conventional sexual parts, including seeds and flowers. However, reproduction through these methods takes a long time. For this reason, most people consider asexual reproduction as an ideal method to reproduce Agave plants faster. When the parent plant begins flowering, it produces saplings, natively known in Mexico as Hijuelas, after 4-6 years of growth. These saplings are then removed and transferred and propagated into newer Agave plants.

Agave Plants Make Excellent Sugar Substitutes

The Agave plants are also known to make excellent sugar substitutes for cooking recipes, such as syrups, candies, and cream toppings. Their saps produce a sweet taste with great flavors without the need for additional calories or fats. Medically, Agave is an excellent option for people who have diabetes who must keep their blood sugar levels to the minimum while enjoying occasional treats.

A Liquid sweetener.
The Agave plants are also known to make excellent sugar substitutes for cooking recipes.

Blue Agave Plants are Cultivated by Hand

Agaves are typically cultivated by hand, and the only motorized part of their growth involves transportation to the growing field. When harvesting time arrives, farmers remove the leaves using specialized tools known as Jima. The Agave core, or Pina in Spanish, means pineapple since it resembles the popular pineapple fruit you know and love. The Pinas can weigh up to 90 kilograms when fully grown.

Agave Plants are not Cactus.

The Agave plant features numerous species. Contrary to popular belief, Agave plants do not fall in the cactus family. While both are succulents, with some featuring spines on their leaves, their similarity ends there. Another plant that closely resembles Agave is the Aloe Vera. However, these two are far from relatives. We could, however, say Agaves are closely related to the lily plants.

A healthy aloe Vera plant
A plant that closely resembles Agave is the Aloe Vera.

Blue Agave Tequila has Numerous Beneficial Uses

Past research and studies have revealed that blue Agave tequila can be used in many beneficial ways, including:

  • Boosting proper bone development and health.
  •  Boosting digestion when taken before or after meals.
  • Controlling blood sugar levels and assists in weight loss.
  • Curbing insomnia; it can calm your nerves, relax your body and mind.
  • Numbing bodily pain because it dilates blood vessels to facilitate proper blood flow.
  • Highly concentrated Tequila is used as a disinfectant or cleaning agent.

Agave Plants Grow from a Basal Rosette

The Agave plant is a monocot genus from the Asparagaceae family. You probably didn’t know that it grows from a basal rosette, with most species featuring linear leaves. Additionally, its blooming head usually grows from the rosette with either dioecious or hermaphroditic flower featuring a set of male or female parts necessary for reproduction.

Agave Plants Can Take Up to a Decade to Mature

The Agave plant is a drought-resistant plant that can thrive in desert conditions. But did you know that it takes up to a decade for the Agave plant to reach full maturity? That is the time it requires to start flowering and produce fruit. Most people will confuse an Agave plant as a member of the cactus family since it produces spines on its leaves growing from the base. People harvest these plants for sap, but they offer numerous benefits than just ingredients for drinks after maturing.

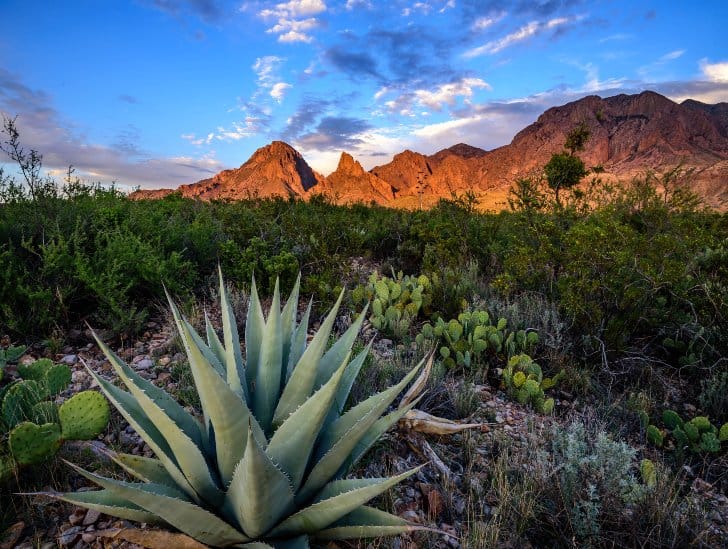
An agave cactus.
The Agave plant is a drought-resistant plant that can thrive in desert conditions.

Roots and Flowers Produced by Agave Plants Carry Symbolic Meanings

The Agave plant is one of the many plants that carry more profound symbolic meanings to the Mexicans. Blooms on the top of stalks on this plant symbolize love and fidelity. Its roots, on the other hand, symbolize a stable marriage. Flowers from this plant can be used for decorative purposes during specific occasions, including weddings, anniversaries, or birthdays. Also, people use them during solemn events like funerals.

Aztec Warriors Used the Agave Plant to Extract Sap

Did you know that warriors from the Aztec tribe used the Agave plant to extract sap to make Aguamiel (honey water)? They then fermented this substance into pulque, which typically was an alcoholic drink. Both warriors and the general population loved this beverage long before the Spanish conquest. Native people used poles with sharp edges to cut down Agave leaves. They then scaped out the sap and mixed it with various other juices to make Aguamiel.

Agave Plants Store Water in the “Caudex” of Their Stems

The Agave plants can flourish well in drought conditions since they store water in their stems. These come in handy when propagating newer roots and shoots. The caudex is the central section of their stems that is responsible for water storage. This water is usually stored as sap and moves from the roots to the leaves. Once it reaches the leaves, it aids in photosynthesis, a process that keeps the plant alive. Thanks to its thicker fleshy leaves, it can collect and store more water than any other succulents. This may need to take a little longer time before watering an agave.

The majority of Agave Species Have a Monocarpic Life Cycle

Most Agave species are monocarpic. That means that they die as soon as they have flowered. Their life cycles begin with a shoot, which emerges from the middle of the rosette. This shoot develops gradually for two to four years before forming a stalk that flowers to produce many seeds. After flowering and seed production, its life ends, but not before sending out offsets that continue growing to preserve its lineage.

Frost is Lethal to All Agave Species

Did you know that frost can damage Agave plants? When subjected to frost or extreme cold, the plant’s leaves turn brown from their primary color. Ultimately, this causes the plant to die, especially during winter before new offsets emerge in spring. Usually, frost impacts the Agave plant’s root system, affecting its ability to recover and thrive after the summer rains arrive. Technically, freezing temperatures can destroy an Agave plant when exposed for an extended period.

Agave’s Spiny Leaves Offer Protection from Predators

Most Agave varieties have spiny leaves, which are necessary for protecting them from predators. They have sharp pity edges that pierce through the skin of predators. This makes it difficult for animals to devour them. Such a defense mechanism deters animals like deer, rodents, and coyotes from eating the plant.

A close up of agave plant with spiny leaves.
They have sharp pity edges that pierce through the skin of predators.

Conclusion

There is so much you can learn about the Agave plant. This unique succulent features more than 200 varieties. Besides being a unique addition to your garden plants, it has numerous advantages. It’s drought-tolerant and perennial, making it a great addition to an arid garden. Remember, you only require one Agave plant to achieve a stunning sculptural focal point in your space or garden.

 When grouped, these plants offer more excellent textural contrast in your garden. When paired with ornamental grasses, their rough edges can be softened. Additionally, smaller species of this plant can be ideal for your outdoor or indoor space. The uniqueness of the Agave makes it a great addition to your assortment of garden plants.

This is How to Propagate String of Hearts

The String of Hearts, also known as the “Rosary Vine,” boasts sprawling vines that can quickly become uncontrollable. Propagation lets you handle vines that have grown too long because you can shorten them and create new plants.

The possible results of propagation are new, individual plants or a complete parent plant. Regular String of Hearts has a high success rate in propagation; however, variegations might be difficult.

In this guide, we will explore multiple ways to propagate the Rosary Vine. First, choose the one that is most convenient for you. Then, let’s cut to it.

Methods of Propagation

There are several ways you can propagate your String of Hearts. Let’s examine four ways to do it efficiently.

Propagating Strings of Heart Through Tubers

Aerial tubers are small round growths, similar to potatoes, which you can use to produce new vines.

Find the biggest tuber on your plant that should be the size of a nail. You can either press the tuber in the soil still attached to the original plant or remove it from the main vine. Leaving the tuber on the vine has the highest success rate because it becomes rooted and begins to germinate.

If you decide to grow the tubers from the mother plant, partially bury the tubers. Once the roots are formed, remove the tuber from the original plant.

If you choose to entirely remove the tuber, ensure it has leaves left on it. You can separate the tubers and plant them in various pots or remove the root system, break the root ball, and plant fresh soil.

A String of heart plant in a small pot.
Keep the soil a little moist by spraying it daily.

Keep the soil a little moist by spraying it daily. The tuber is expected to take root within a few weeks. Vines can take a while to germinate because a robust root system is critical for plant growth. Move the pot to a bright window and give it time to grow.

Propagating Using the Butterfly Method

The butterfly method is one of the most efficient propagation methods and involves cutting the nodes that come out of the foliage. It maximizes the amount of plant material available. While you may have to make an effort, this technique is worth it since the cuttings will produce vines and get a fuller plant.

Most methods of propagation lead to different offspring of the mother plant. However, when you use the butterfly method, your variegated vines succeed in maintaining their distinctive characteristics.

A hand holding a pot with a string of heart.
When you use the butterfly method, your variegated vines succeed in maintaining their distinctive characteristics.

First of all, do butterfly cuttings. Find out where pairs of leaves meet the vine and cut on both sides. Take as many cuttings as you like, and make sure you snip at least ⅓ inches per side. Then, place the cuttings straight into the soil or use sphagnum moss.

Propagating Through Seeds

The String of Hearts has odd-looking flowers which resemble flamingo heads. If they are pollinated, seed pods develop. Please wait until the seed pods open themselves and the seeds start falling off. Then, gather the seeds and plant them in damp soil.

We recommend the use of a unique potting mix for germination. Keep in a bright spot. You’ll notice growth a few weeks down the road. Indoor Rosary Vines do not bloom readily, so if you wish to try this method, buy seeds from nurseries or online.

Leaf Propagation of String of Hearts

Propagating the Rosary from one leaf is a fun method that requires a lot of patience. However, the success rate for this method is low. Your leaf may produce roots but not survive long after that.

Select a healthy leaf for successful propagation. Begin by placing one leaf directly into the soil or your preferred environment. Maintain a high humidity level, but keep the leaf dry to prevent it from rotting. Roots should develop within a few weeks, but new growth can take longer.

Propagation Mediums

Let’s talk about the various propagation mediums and how we can make the best of them.

Propagating Strings of Heart In Water

Water propagation is a fun and easy way to propagate your String of hearts. The best part of this method is that you can keep up with the progress of the rooting process. To get started, you’re going to need:

● A tiny vase

● Clean scissors

● Water

Cut the vine segments you would like to root and place them in a vase filled with water. The cuttings need to be a few centimeters long. If you need a fuller plant, get more cuttings. Be sure to have one or several submerged nodes because the roots emerge from the nodes.

String heart water propagation.
Once the vines have grown, you can leave them in the vase or put them in a pot.

To avoid the decay of the leaves and keep your water cool:

  1. Tear off the leaves that will be immersed.
  2. Change the water every week; you can change it more often if it starts to turn cloudy.
  3. Move the vase to a warm place with lots of bright yet indirect light.

The roots are going to appear within a few weeks. Once the vines have grown, you can leave them in the vase or put them in a pot. If you decide to pot your plants, use well-draining soil.

Propagating Rosary Vine In Soil

Propagation in the soil is perfect if you would like to shorten long and scraggly vines or your plant to attain a fuller look in the same container. There are several ways you can propagate your String of Hearts using soil.

  • Stick the Cuttings Into the Soil

Cut off the vines. Ensure that the vines have some leaves or at least some nodes for the leaves or roots to develop. Plant the vines in the soil and be careful to let the soil cover the nodes. You may want to add rooting hormone to stimulate root growth.

A string of heart in a plastic pot.
Propagation in the soil is perfect if you would like to shorten long and scraggly vines.

Spray parts that have contact with the soil with water once a day to promote rooting. The new growth should be visible within several weeks. Use a standard cactus soil mix or combine the soil and perlite into two equal portions for a quick-draining mix. Water your plant carefully and keep the soil lightly moist.

Choose a pot with drainage holes at the bottom because stagnant water may lead to root rot. We recommend terra cotta planters because they improve the evaporation of water through the absorbent sides. You can also add activated charcoal to soak up excess water, especially if your pot has no drain holes.

  • Lay the Cuttings on the Soil

Take your cuttings and place them in a horizontal position on the ground. Check to see if they are in direct contact with the soil. Use paper clips to hold cuttings in place and maintain contact with the soil.

If you use this method, increase the moisture to allow the roots to grow; otherwise, the cuttings will dry up. You can increase the humidity by grouping plants and placing them in wet areas such as bathrooms. You can also utilize humidifiers.

  • Use Strands to Propagate in the Same Pot

This method is practical and could be time-consuming. Before you begin, ensure that the soil is damp. Then, take the hanging vineyards, wrap them around the surface soil, and secure them with paper clips or hairpins.

A string of heart plant on a white pot.
Choose a pot with drainage holes at the bottom because stagnant water may lead to root rot.

Make sure you don’t cut the strands. Keep the plant moist through the rooting process by placing it in a sealed, clear plastic bag. You can also spray the soil frequently using a spray bottle. Keep the bag out of direct sunlight to prevent overheating.

Open the bag every two or three days to remove excess air or humidity. Once your plant is rooted, move the pot to a sunny place where it can get a few hours of direct sunlight. The roots will eventually form, leading to a fuller plant.

Sphagnum Moss Method

Propagation in sphagnum moss is relatively rapid, and growth has been observed in as little as a week. You may use strands, cuttings, or the butterfly method. Use a transparent container or any container, provided it has a fine foil or cover. 

If not, put the sphagnum moss in a small plastic jar and place it in a transparent ziplock bag. Add dry sphagnum moss to a bowl and soak in hot water for about five minutes. Remove the moss and squeeze out any excess water.

Place the moist sphagnum moss on a tray. Carefully place cuttings or strands on the moss, ensuring that the nodes are in direct contact with the moss and that the leaves rest on the surface. 

Place a transparent lid on top of the container and move it to a bright place. Open the vessel from time to time to allow fresh air to enter. Avoid the direct sun since it may kill your plants due to excessive heat. Once the roots are approximately one inch long, transfer your plant into the soil.

Additional Tips

● Heat accelerates the propagation; use a heating mat to expedite the process.

● Once your cuttings start to produce vines, dispose of plastic bags.

● Keep it wet if you want the rooting to happen.

● Then, propagate your String of Hearts during the springtime growing season.

Bottom Line

The propagation of the Rosary vine is manageable, and with a bit of creativity, you can also find other ways to multiply this vine.

Ultimate Guide: How to Care for Ice Plant

If you are looking for one of the most vibrant succulents to fill your garden or indoor spaces, then you should try Ice plants. Native to South Africa, these heat-loving succulents tend to draw much attention in the landscape thanks to their attractive daisy-like flowers that come in shades of yellow, cream, pink, red, or purple, depending on the plant’s variety. Furthermore, Ice plants are relatively hardy and can survive on some degree of neglect.

So, how do you care for an Ice plant? Since the plant isn’t fussy, you don’t have to do much to keep it happy. Give your Ice plant full sun for at least six hours per day. Like other flowering plants, Ice plants won’t bloom well in shaded areas. Plant it in a growing pot slightly wider than the root ball and water it only when the potting mix is completely dry. Be careful with your watering because it doesn’t like to stay in moist soil. The plant prefers sandy and well-draining potting mix.

In this guide, we discuss everything you need to know about caring for your Ice plant. Read on to learn how to keep your plant healthy and happy.

A Quick Overview of the Ice Plant

The name “Ice plant” is an umbrella term that refers to several plant species. These plant species are mostly grown in urban gardens and spread quite rapidly under the right growing conditions. Sometimes, it can spread so rapidly, invading unwanted spaces.

The plant has more than ten cultivars, all of which are unique and gorgeous in their own way. The most prominent one is the Cooper that produces unique purplish-pink blooms. This succulent can grow year-round depending on the temperature and climate.

Light is essential to its growth which means growing it indoors can be challenging if you don’t have an indoor spot that receives plenty of direct sunlight. The most common pests that attack Ice Plants are Mealybugs and Aphids.

A Purple Ice plant.
These heat-loving succulents tend to draw much attention in the landscape thanks to their attractive daisy-like flowers.

These pests usually feed on the plant, causing severe damage. You can treat light infestations by spraying the affected areas with water. However, for heavy infestation, consider replacing the entire plant instead of chemical treatment.

Despite their name, Ice plants are highly sensitive to cold and prefer hot temperatures with minimal humidity. High levels of humidity can cause the stem and roots of the plant to rot.

How Do You Take Care of Ice Plants?

Now that you have a clear overview of these plants, let us figure out the specific tasks you need to accomplish to make your plant happy and healthy.

1. Site and Potting Mix

These plants usually require exposure to direct sunlight to thrive. Failure to provide them with a sufficient amount of sunlight, the blooms won’t open. So, if you are growing them indoors, you need to find a spot that receives plenty of bright, direct sunlight for at least six hours a day.

Ice plant along the sea shore.
These plants usually require exposure to direct sunlight to thrive.

That means a west-facing window will be the perfect spot for your indoor Ice Plants. If you are growing them outdoors in your plant or flower garden, find a suitable location that receives sunlight throughout the day. Avoid shaded spots or those that only receive partial sunlight.

For potting mix, ensure you use light, well-drained soil that doesn’t hold water for too long. If you are using growing pots, make sure the potting soil used is of high quality and combined with a sufficient amount of pellets or coarse sand to provide adequate drainage.

Space outdoor Ice plants at least 13 to 20 inches apart to allow sufficient room for growth. Plants grown indoors should be as far apart as possible.

2. Watering

Ice Plants are drought-tolerant succulents and only require minimal watering to thrive. Before you come up with your watering schedule, assess the amount of rainfall your area receives and consider watering your outdoor plants only once or twice per month if your area receives plenty of rain.

A gardener holding a water can.
You should water more frequently if you live in a relatively dry area that only receives sporadic rainfall.

However, you should water more frequently if you live in a relatively dry area that only receives sporadic rainfall.

Cease any watering as fall approaches and allow your ground-grown Ice plants to dry out. This will help protect them when the hard frost hits during the cold winter months. If you don’t give your plant sufficient time to prepare to enter into winter dormancy, it may succumb to winter temperatures.

3. Temperature and Humidity

Ice Plants are well adapted to surviving in relatively warm temperatures where winter front isn’t a significant danger. If you live in an area where winter temperatures drop below 36oF, you should consider growing your Ice Plants indoors to prevent cold damage.

Typically, your plant will do well in temperatures that range between 50oF and 75oF. Some of the varieties can comfortably withstand higher temperatures. An Ice plant will only tolerate lower temperatures for a short period.

Always check the hardiness range of any Ice plant you wish to grow as a perennial to avoid surprises. If you live in a snowy region, consider winter mulching your Ice plants to prevent damage.

4. Fertilizer

Ice plants will survive with minimal fertilization. You will be surprised to learn that these plants are prolific bloomers and will still produce beautiful flowers even if you fail to fertilize them at all.

Upon planting, it is highly recommended you mix a small portion of well-decomposed compost with your regular soil and add some slow-release organic fertilizer before you plant it into the ground.

However, if you are growing your plants in growing pots, you may be required to feed them regularly. Use half-strength fertilizer to feed your Ice Plant during the spring and summer months.

Never feed the plant during fall since it needs to wither a little bit to protect itself from the harsh winter ahead. Weak growth or lack of flowering can be signs that you need to feed your Ice plant.

5. Propagating Ice Plants

One of the most amazing things about these plants is that they propagate easily, especially when exposed to large amounts of direct sunlight. If you want to multiply your Ice plant, you can do so via cuttings, division, or seedlings.

The easiest way to propagate Ice plants is through seedlings. Simply take your Ice plant seed and bed it in a rich composite potting mix with good drainage.

An Ice plant leaf.
These plants is that they propagate easily, especially when exposed to large amounts of direct sunlight.

You don’t even need to cover it. Only press it slightly against the potting mix so that it doesn’t get blown away by wind.  From there, water it lightly and expose it to lots of direct sunlight so that it begins germinating.

Ice plant cuttings work almost the same way as other succulent cuttings. Select a healthy cutting and allow it to heal slightly before you replant it. You can propagate Ice plants from cuttings any time of the year, but we highly recommend against doing it during winter.

The best time to propagate from cuttings would be during summer or spring, when the plant is actively growing. Let your plant rest easy during winter.

Furthermore, you can also propagate by the division method. This is the best propagation method if you intend to plant your ice plant in growing pots. To propagate by division, take out the main plant and slowly split the roots until they form two separate plants.

Repot each of the plants in separate pots and make sure you are using a well-draining potting mix.  Water slightly and allow them to sit in a spot where they can receive plenty of direct sunlight throughout the day.

6. Pruning

Since Ice plants are heavy bloomers, you need to prune them regularly to ensure they don’t invade other spaces.

As your plant starts to awaken in mid-spring and prepare for blooming, inspect it for any winter-damaged or dried-up foliage. If you spot any winter-damaged or dried-up foliage, prune them from the plant.

7. Special Care

Ice plants grown indoors need repotting at least once every year. Consider repotting it in early spring, before new growth starts to sprout. Since Ice plants enter dormancy during winter, it is always good to report before the growing season ends.

A plants being transferred.
Consider repotting it in early spring, before new growth starts to sprout.

Your outdoor Ice plants will benefit greatly from regular mulching, especially if you live in an area where winter temperatures drop to below 50oF.

Consider applying a two to four-inch layer of mulch to the soil layer surrounding your plant and remove the mulch when temperatures start to rise in spring and summer.

8. Pests and Diseases

Mealybugs and aphids can be a nuisance to ice plants. To prevent infestation, observe your plant regularly and take appropriate measures as soon as you spot the pests.

You can also use insecticidal soap or spray neem oil on the affected area for treatment. If your plants are exposed to cold temperatures for too long, they could be susceptible to rot and frost damage.

If you notice wilting or discoloration of the leaves, cut down on the watering and check if your plants are exposed to wet soil for too long.

Ensure you also give them ample space for growth and provide sufficient light for healthy growth.

Common Ice Plant Problems

When grown in proper conditions, the Ice plant is generally non-problematic. The succulent will thrive with minimal care. However, a non-conducive environment can result in a wide range of growth issues. Some of the common Ice plant problems include:

1. Yellow leaves

Yellow leaves on an ice plant is a common sign of overwatering. This plant is highly sensitive to excess water and will die if you don’t take prompt action to correct the problem.

Allow the potting mix to dry completely between watering sessions. Never water your ice plant without checking for the level of soil dryness. Only water when you are fully convinced that the soil is dry.

Also, ensure that the potting mix drains well to avoid this problem. Soggy soil can also lead to yellow leaves and irreversible root rot.

2. Leggy stems

Ice plant is a trailing succulent and tends to grow tall and lanky with age if not provided with enough sunlight. If your ice plant is growing leggy, it might be because it isn’t receiving enough light.

Upon noticing this problem, move your Ice plant closer to a south or east-facing window to take advantage of the natural sunlight or consider investing in artificial grow lights. Regular pruning will also help to keep your ice plant bushy and encourage new growth.

3. Failure to produce flowers

If your ice plant fails to produce flowers, it is likely due to several reasons. Poor soil quality, lack of fertilizer, and inadequate sunlight can all cause this issue.

Ensure you use a nutrient-rich potting mix for your plant and feed them regularly with half-strength fertilizer during spring and summer.

Also, ensure your ice plant receives at least six hours of direct sunlight daily. Invest in artificial grow lights with the correct spectrum and intensity if you are growing ice plants indoors.

Summary

Ice Plants can grow everywhere and at any time of the year as long as you provide them with adequate sunlight, water, and the right soil. These plants are relatively easy to acquire, care for, and propagate.

In fact, you don’t need to be an expert to take care of Ice Plants, but you really need to be mindful of their needs. While they can thrive anywhere, take time to identify the perfect spot in your house or garden that receives plenty of sunlight to achieve better results.

With proper care, your plant will reward your effort with fast growth and beautiful blossoms that can cover the entire of your interior patio garden or backyard plant garden.

Ultimate Guide: How To Care For A Bear’s Claw’s Plant

A bear claw plant exposed to sunlight.

If you are the type of person who loves to spend time outdoors, then the odds are that you have come across a bear’s paw (Bear’s claw) plant at some point. This is a beautiful flower plant with many interesting features, and it’s worth taking the time to learn how to care for this plant so it can grow in your garden. Whether you are looking to replenish your home garden or add a new plant, you will be happy that you took the time to learn how to care for this particular flower.

So, what are the best care conditions for a bear’s paw plant? For excellent results, you will want to plant the bear’s claws in well-draining soil, rich humus. Ensure that the pot has good drainage holes, as this plant does not like to sit in wet soil. You will also want to place this flower near a window that receives full sun or partial shade each day. New bear’s claw plants need to receive at least six hours of sunlight per day during their first three months, but after that, you can move them to a more shaded location if you wish. Bear’s claws prefer soil on the acidic side, with a ph level of about five.

With its deep green leaves and red, spiky flowers, the bear’s paw plant is one of the most popular plants to grow indoors. This article will walk you through all of the steps needed to take care of this plant, ensuring it thrives.

A small succulent plant.
This is a beautiful flower plant with many interesting features.

Quick Facts About The Bear’s Paw

The Bear’s Paw (Cotyledon Tomentosa) is native to South Africa, but today it is found in most parts of the world.

Here are some quick facts about this succulent plant:

– The leaves resemble a bear’s paws. They grow up to eight inches long, and their tips curl inward like claws;

– It has red flowers with yellow spiky centers;

– This is a perennial plant, and it can even bloom in the winter;

– The leaves grow during spring. They remain green through summer, turn red or yellow in the autumn season and then drop off when temperatures start to get colder;

This indoor plant needs lots of light (at least six hours per day), but it will eventually grow too large for space.

– The flowers are between two and three inches long.

 How to care for a bears claws plant

So, now that you know a little bit more about this plant, how can you care for it?

A plant in the Cup
They remain green through summer, turn red or yellow in the autumn season and then drop off when temperatures start to get colder

Propagation

The best way to propagate a bear’s claw is by taking cuttings. This can be done in the springtime when new leaves start to appear at the ends of branches. When you take your cutting, ensure that it contains three or four-leaf nodes and each segment has some roots attached. Plant this section immediately after you have taken it from the parent plant, ensuring that the ends of each segment are covered with soil.

It is also possible to propagate a bear’s claw by breaking off one of its branches and placing it in another pot full of moistened sand or peat moss. The branch will sprout roots if you keep the soil slightly dampish at all times. If you choose this method, make sure that the container where you place the branch has good drainage.

Potting and Repotting

When choosing a pot for your bear’s claw plant, consider its size now and how much it’s likely to grow in the future. Ensure that there are holes at the bottom of any new pot so that excess water can drain away; you do not want your plant to sit in wet soil, or it will get root rot. After choosing the right pot, fill it with well-draining soil before placing your bear’s claw inside and adding more soil if needed.

Although this flower is very easygoing when it comes to temperatures (it can survive in average room temperatures), it needs to be repotted every year. This ensures that the roots get enough oxygen and nutrients so that they can continue to grow. If you have a bear’s claw plant in an especially large pot, it might need repotting every couple of years instead.

Watering

Bear’s claws do not like wet soil for too long at once; this leads to rotting roots, which, in turn, leads to root rot. Water your plant when the soil is dry, and then allow it to drain before watering again. You can water bear’s claw plants using either a spray bottle or by placing them in a saucer full of warm water for about an hour once every couple of weeks if you wish, but make sure that any excess moisture drains away after the hour has passed.

You can water your bear’s paw by misting. This is done by taking a spray bottle, filling it with water, and then spraying your plant’s leaves. This is very effective when using warm or room temperature water on this type of flower because heating the water will damage the roots.

Light Needs

The bear’s claw likes lots of light; however, too much direct sunlight can damage the leaves. Aim for a spot that gets at least six hours of sunlight per day, and make sure to rotate your plant every now and then so that it does not burn in one place only.

A cactus receiving an indirect Sunlight.
too much direct sunlight can damage the leaves

Common Problems

Although generally a drought and disease resistant plant, the Bear’s Paw Plant has a few problems that you should be aware of if you want to ensure the healthiest possible plant. Such issues include:

Root rot

 This is an issue that occurs when your plant’s roots sit in water for too long; this can lead to rotting and wilting. To avoid this, make sure to keep the soil slightly dampish and water your plant with room temperature or warm water only.

Leaf burn

This can happen when you place your bear’s claw in direct sunlight for too long; it will cause the leaves of your plant to turn brown at their edges, wither and eventually fall off. To avoid this problem, ensure that the plant gets enough sunlight but avoid placing it in a spot with direct rays.

A Snake plant leaf
Ensure that the plant gets enough sunlight but avoid placing it in a spot with direct rays.

Fungal diseases

 These include powdery mildew and root rot which can both be avoided if you water your bear’s claw properly. If you have gotten one of those problems, remove any affected leaves or branches to prevent them from spreading.

Toxic sap

The sap found on its stems (and sometimes leaves) can be a skin irritant. This is especially true for children.

Toxins in the soil

The toxins produced by this plant while growing can be found also on its dead leaves and stems. These are dangerous to kids, pets or other animals that may eat them accidentally. To avoid this danger, always position the plant away from places where you can find animals or kids playing.

A scattered soil with the pot.
The toxins produced by this plant while growing can be found also on its dead leaves and stems.

Sunburned leaves

 Too much sunlight exposure on the bear’s claw flower may cause its leaves to turn yellow and even fall off. To avoid this problem, always position your plant in a spot that gets enough but not too much sunlight. Also, rotate it every now and then to avoid burning its leaves.

Weak stems

 This plant needs support since it has weak stems that may break easily due to their weight or the wind. The ideal support for this type of flower is a metal pole with some plastic mesh around it, like chicken wire.

Bear’s paw is also susceptible to pests that include:

Thrips

 These are small, thin and dark bugs that may attack your bear’s paw. To avoid these problems, make sure your bear’s claw is not overcrowded in its pot (this causes an increase in humidity), do not place it too close to your other plants and remove any affected leaves as soon as you spot them.

Aphids

 Aphids attack the plant’s new growth and secrete a sticky substance called honeydew that can attract ants. To prevent this, always use insecticidal soap or neem oil to get rid of these tiny insects.

Scale

 Scale is another common pest for plants with leaves such as bear’s claw; they appear on stems and underneath flower petals. To get rid of them, you should use a cotton swab soaked in alcohol to remove the insects and their eggs.

Mealybugs

 These are small white fluffy bugs that infest your plant’s stem or leaves. Excretions from this type of insect can weaken your bear claw, so make sure not to let it multiply for too long. To get rid of them, you can use the same method as for aphids or neem oil.

Growing and caring for the bear’s paw can be an uphill task that requires a lot of patience and care. However, with the right information, your plant will grow healthy and strong to provide you with many years of pleasure. If you believe this is the plant for your home garden, these tips should help you grow a bear’s paw successfully. Give your indoors that special touch with a bear’s paw plant.

5 Golden Rules for Watering a Snake Plant

Sansevieria, also known as the snake plant, is one of the most beautiful and drought tolerant houseplants around. The plant requires minimal care to thrive and make your indoor spaces dazzle with beauty.  Although it is drought-resistant, it doesn’t mean that the plant doesn’t require watering at all.

So, how often should you water a snake plant? Like any other succulent, you should only water your snake plant when the potting soil is completely dry to maintain its beautiful appearance. Touch and feel the soil at least once a week to see if it is completely dry. If the top one or two inches of the soil feels completely dry, then you know it is time to water. Avoid overwatering your snake plant at all costs since it could cause severe damage to the leaves.

In this blog post, we discuss everything you need to know about watering your snake plant. So, let us get started right away.

A Quick Overview of Basic Snake Plant Facts

The botanical name of the snake plant is Dracaena trifasciata. It is one of the most popular houseplants that is usually kept for its beautiful leaves.  The houseplant is famous for its upright leaves that appear gorgeous throughout the year.

The leaves stay green most of the time, although some snake plant varieties have green leaves with white or yellow edges.

The plant’s origin is in South Africa and can grow to a height of up to two feet, although some mini varieties will grow only a few inches tall.

A Snake Plant is one of the most popular houseplants with gorgeous upright leaves.

The only downside of keeping a snake plant indoors is that it will rarely bloom. Only a few varieties will produce small flowers at the base of the plant for a relatively short period.  The rare flowering mostly happens when the plant is a few years old and is never consistent.

So, if you are looking for a flowery houseplant, a snake plant might not be the best option.

However, this is one of the best houseplants for beginner gardeners because it is low-maintenance. A snake plant can literally survive for many years with minimal care.

How Often Should You Water a Snake Plant?

Incorrect watering is one of the leading causes of death among snake plants. Therefore, you must ensure that you are watering your plant at the right time to avoid losing it.

You need to keep in mind that overwatering a snake plant can lead to severe root rot, while lack of water will cause the plant to lose its beautiful appearance since it will be struggling with normal growth.

In a perfect world, there would only be one simple rule that dictates how often to water a snake plant to make your life simple. Unfortunately, we don’t live in a perfect world, and you need to learn how to deal with different situations.

Overwatering your Snake Plant can lead to severe root rot.

Basically, several factors will determine how often you need to water your snake plant. But before we look at these factors, it is good to mention the general rule of watering a snake plant.

As mentioned earlier, you should only water your snake plant when the potting soil is completely dry. The easiest way to check if the soil is completely dry is by digging your finger into the soil up to two knuckles.

If you don’t want your fingers to get dirty, feel free to use a pencil or dipstick. Now, feel the soil carefully and see if it is dry or moist. If the soil feels completely dry, then it is time to water your snake plant.

Typically, a snake plant can go without water for up to one month but don’t be tempted to overwater it because the results will be catastrophic.

Here are some of the critical factors that determine how often you should water your snake plant:

1. Temperature

This is one of the most critical factors that determine how often you should water your snake plant. Ideally, your snake plant will be happy in the 55o-85oF temperature range. This is quite a broad spectrum which shows you how strong these plants can be.

Your snake plant will start struggling if you allow the temperature to drop below 50oF.

Generally, your plant will require frequent watering at high temperatures because the leaves will be releasing a lot of moisture, and the soil tends to dry out faster as a result of the increased evaporation rate.

2. Location of your plant

The general location of your plant inside the house will also determine how often you water the plant.

When choosing the perfect spot for your snake plant, think about what sort of lighting it requires to thrive and the general position of the central heating appliances inside your house.

Sometimes, the plant can grow taller than anticipated, forcing you to change its position. Generally, avoid positioning the plant in high-traffic areas because someone can easily knock it down.

Snake plants tolerate different light conditions, but you should avoid placing them anywhere near direct sunlight. Exposing the plant to direct sunlight will increase the risk of its leaves being sun-scorched and complicate watering.

Ideally, you should place your plant on a west or east-facing windowsill. Avoid a south-facing windowsill because that would expose it to direct sunlight.

If the plant is exposed to direct sunlight, there will be an increase in the evaporation rate, which will increase the watering frequency.

Likewise, if you keep your snake plant in a relatively shadier position, evaporation and transpiration will be relatively slower, increasing the time required between watering sessions. 

The most important thing you need to do is monitor the moisture levels carefully so you only water at the right time.

3. Seasons

Although a snake plant is primarily an indoor plant, it still responds to weather and seasons. In spring, the plant usually becomes active and begins to experience massive growth. During this time, it requires more frequent watering than the rest of the year.

By summer, it starts to slow down the sudden burst of energy experienced during spring, but it will still require regular watering because the evaporation and transpiration rate is still relatively high.

Consider the current season when thinking of how often to water your Snake Plant.

The growth rate slows down in autumn, then come winter, it stops growing, and watering will be almost unnecessary.  Although a lot of people love these plants for their long and sword-like leaves, they occasionally flower.

For them to produce flowers, they require a lot of energy which may force you to increase the watering frequency.  But you need to be extremely careful not to overwater your plant.

4. Humidity levels

Humidity and temperature are closely related. If the air surrounding your plant becomes too dry, it will begin to struggle.

Furthermore, a snake plant is a desert plant and is highly susceptible to diseases such as mold if the air is too humid. Therefore, you need to be careful with using air conditioning and central heating devices in your home because they tend to dry the air and lower humidity levels.

However, if your plant is being watered properly, it will be well-equipped to cope with fluctuating humidity levels. 

The most important thing you need to know when it comes to humidity is that the more humid the conditions around your snake plant, the less you should be watering it.

5. Type of container

The type of container your plant is planted in can also have a significant bearing on the amount of water it requires.

For instance, a glazed or plastic pot won’t allow water to evaporate through the sides. However, a terracotta pot is highly porous, and some of the water is lost through evaporation.

Using highly porous containers is not out of the question because they are the best option for growing indoor plants.

However, it only means that you need to be aware of the potentially increased moisture loss and test your potting mix regularly to see if your plant requires watering.

How to Water a Snake Plant

The best way to water your snake plant is to give it a relatively deep watering by soaking the potting mix. Ensure you use rain or filtered water, and always allow the topsoil to completely dry out before watering again.

Avoid using tap water because it contains chlorine that can damage the plant’s leaves. If you only have access to tap water, allow it to stand overnight so that the chlorine and other chemicals disperse.

Don’t wet the leaves, and try not to let the water pool at the center of the plant leaves because it can cause severe plant rot.

When planting or repotting your snake plant, ensure that the plant container has plenty of drainage holes at the bottom and use the highly porous potting mix to avoid waterlogging it.

When planting a Snake Plant, select a container with sufficient drainage holes.

Like other succulents, snake plants store water in their rhizomes, roots, and leaves. It means that these plants can survive even without frequent watering.

So, as long as you give your plant a deep watering, you don’t need to be worried about anything for at least two weeks.

You are free to check the potting soil’s dryness once or twice per week, but chances are the plant won’t require watering for at least two weeks.

Summary

That is it about watering a snake plant, and we believe you are now fully prepared to take care of your plant.

Snake plants are beautiful and low-maintenance. With the right watering schedule, you can be sure that your plant will stay healthy and thrive for many years.
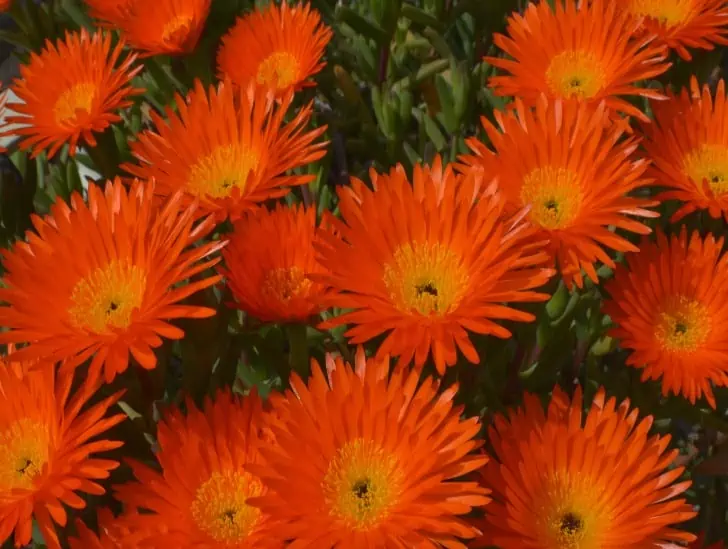
Let us know if you have any questions or suggestions in the comments section below.