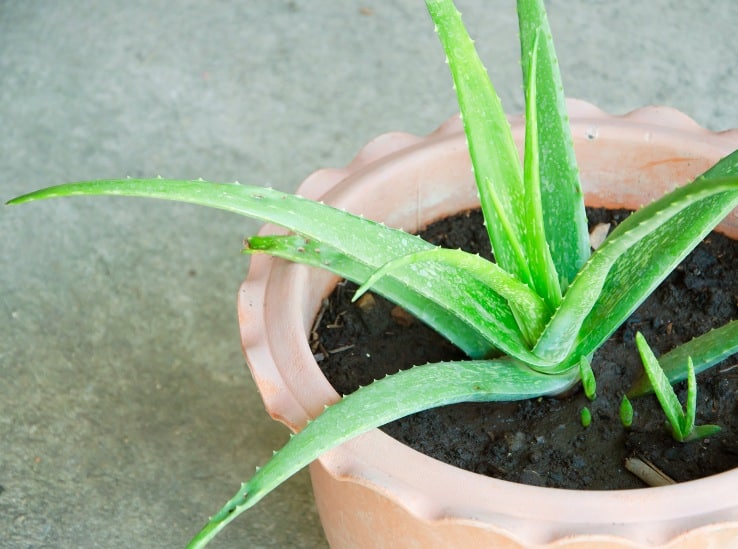
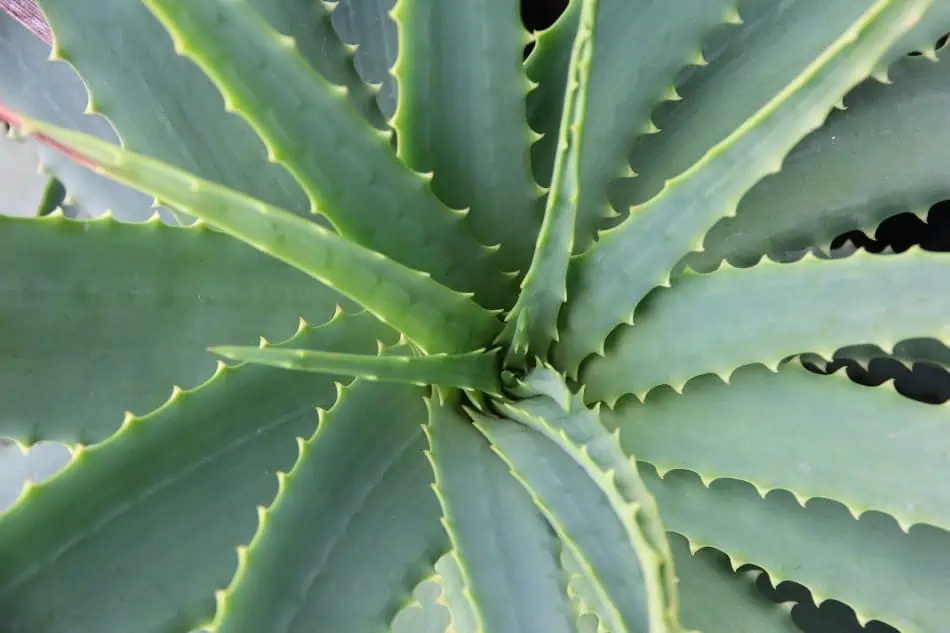
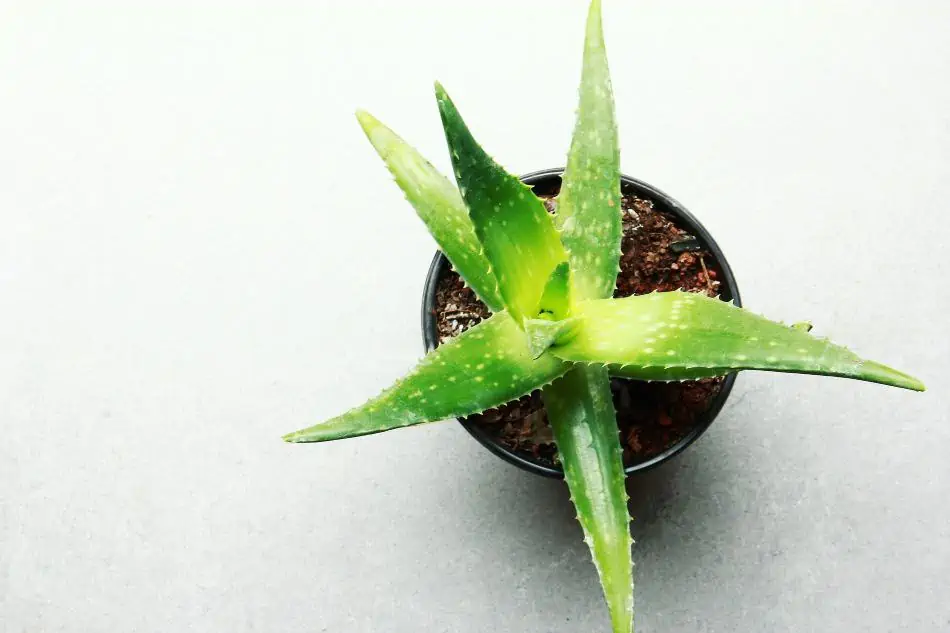
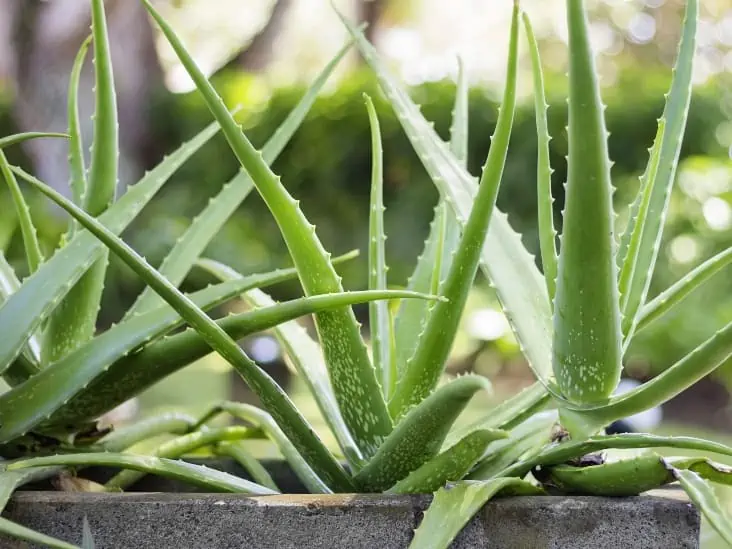
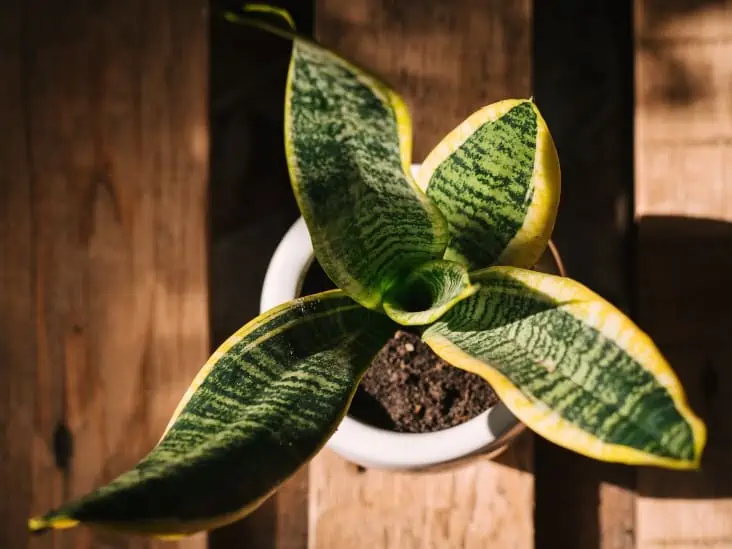
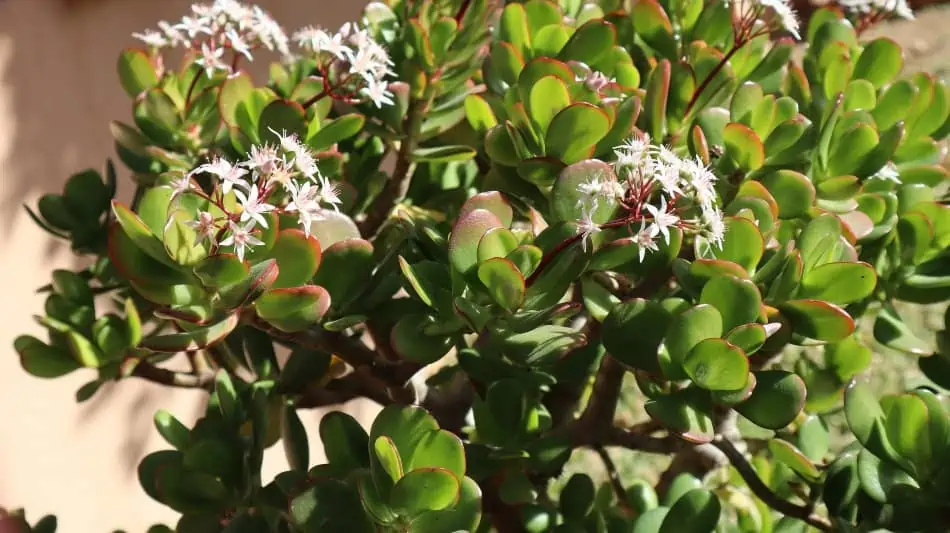
Aloe Vera is a hardy plant that will not require much of your attention. Sometimes, aloe leaves may start dying which might just be its natural cycle. However, at times dying of leaves can make you lose the whole plant.
There are 10 easy steps that you can use to recover a dying Aloe Vera. But before moving on to save your Aloe plant, examine why the plant is dying. Some of the reasons might be too simple to manage, and not worth killing this “plant of immortality”.
1. If Your Aloe Plant Looks Sunburned, Move it To a Shade
Aloe Vera does well in proper sunlight. However, the aloe plant is susceptible to much light hence should not be placed in direct sunlight for long hours. Direct sunlight tends to dry out the plant and turns its leaves from green to yellow, which might be a sign that your plant is dying.
If you realize that your plant is sunburned, you should move it to a shady area and diffuse light. If you have planted your aloe plant indoors near the window, you may consider relocating it to places with less light. With time, your aloe leaves start to turn back to their usual color.
2. Minimize Watering if Your Plant Looks Overwatered.
The Aloe plant is known to flourish even in rough conditions. It can store water within its leaves hence does not require regular watering. Thanks for your care, but overwatering your aloe plant will lead to root rot and browning of the leaves. These are signs of a dying plant.
This occurs mainly for potted aloe plants where the pot does not have enough drainage holes. To avoid the effects, you need to ensure that you place your plant in a pot that can quickly drain the water. Also, only water the plant when it has completely dried up.
Insufficient drainage and overwatering often lead to root tot and your Aloe Vera may die.
Watering may also depend on the climates and the temperatures. During winter temperatures, water your aloe much less frequently because the plant is in a dormant phase. During summer periods, you may need to increase your watering.
3. Replace the Potting Soil if it Lacks Nutrients
Unlike other plants, the aloe plant does not require many nutrients from the soil. However, a complete lack of nutrients in the soil may be a reason why your plant is dying. Unhealthy Aloe Vera will show pale leaves which turn light brown with time. Leaves may tend to dry up and wither even with proper watering.
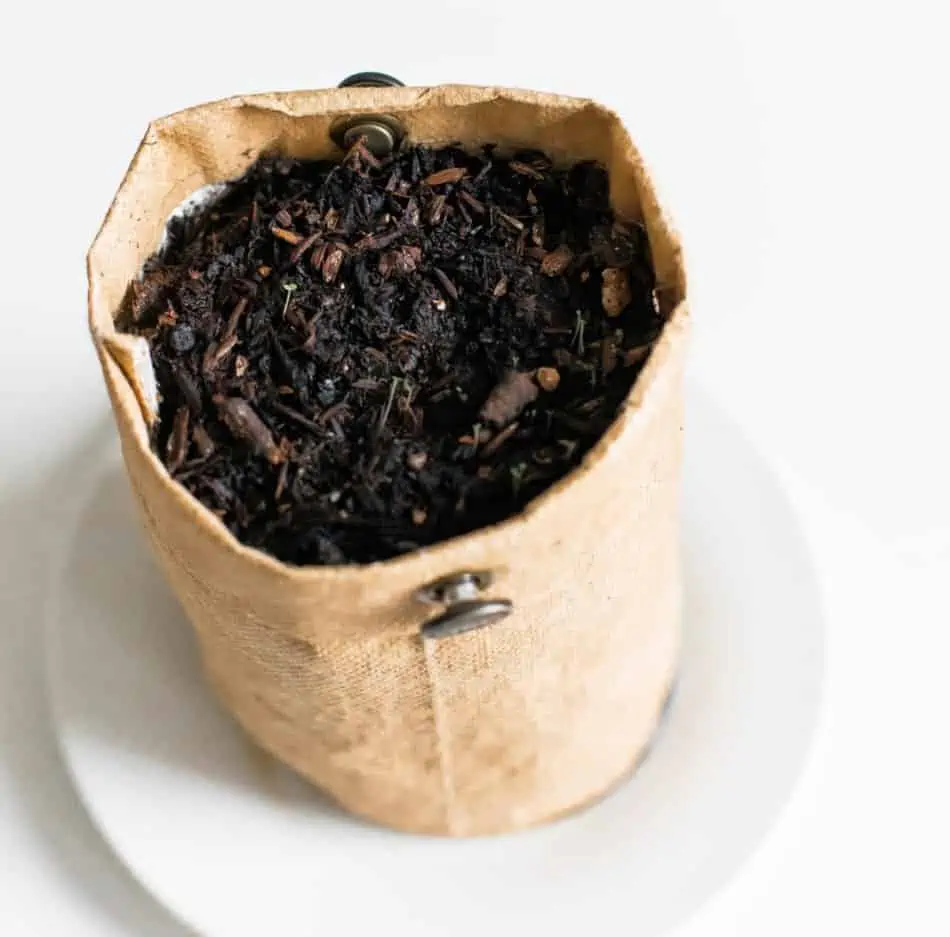
To help the unhealthy Aloe plant, you may need to replace the potting soil with a better soil type to provide the essential minerals to the plant. Don’t forget that even when looking for better soil, drainage of the soil is critical. The natural process allows water to move through the soil to ensure the Aloe Vera plant benefits from all the nutrients.
4. Drainage Holes are Vital for Every Potted Plant
In the intervals of your watering, there should be good drainage for excess water to be removed. A pot that retains water may cause the roots to rot. Watering too often and not allowing the water to drain may make the plant start dying.
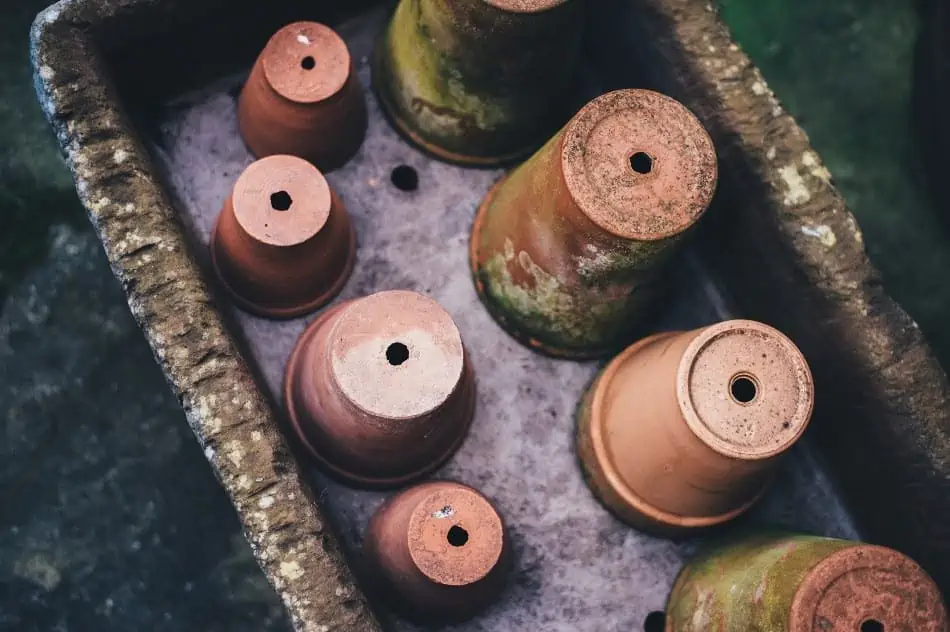
To help a dying aloe plant rotting, you should consider using a terracotta pot ideal for the aloe plant. Terracotta pots are porous to ensure the roots are not left to sit on the water and that water can drain. The purpose is to satisfy the requirement for dryer soil conditions, for aloe plant to flourish.
5. Expose your aloe to more sun
Planting Aloe Vera indoors may bring beauty to your house but may affect plant growth when some conditions are not met. Aloe is a plant that thrives better and becomes very healthy under the sun. If your aloe has stayed for quite a long time in a damp spot, think of taking it out to the sun.
Place the aloe plant in a sunny place for 4-6 hours of direct sunlight. Without much sunlight, your succulent plant will begin to stretch and lose its attractiveness. However, as much as it may require light, it may not appreciate sustained direct sunlight. It may topple over as the stems become weak day by day.
6. Cut Off Healthy Remaining Leaves for Propagation.
Sometimes the health condition tends to get worse despite the many practices to care for it. The leaves progressively become discolored and show signs of withering. At this point, practices to save the plant may be rendered futile. For such a matter, the problem might be hidden under the soil. Rot root.
If your Aloe Vera is dying, consider cutting off remaining healthy leaves to propagate them later on.
The most effective option is cutting off any healthy remain leaves of the plant for propagation. Aloe Vera can quickly propagate from leaf-cutting, which may be the only way to save it. Cutting some of the healthy leaves may also help to produce different plants at no extra cost.
Some plants overstay for too long in the shades making the leaves too weakened to stand back again. At this point, no amount of sunlight can save them. Propagation is the only effective way to prevent such plants from dying.
7. Examine the Aloe leaves
Aloe is a succulent plant that stores water in its leaves, but if the plant lacks enough water, the leaves begin to droop or are become almost transparent. However, this sign can also indicate root rotting, which is due to overwatering. The most important thing is to examine when you last watered the plant.
If your Aloe Vera leaves are becoming transparent, the plant is not getting enough water.
If you realize that it has taken many days before watering, you need to water the plant to return it to its standard shape. But if you watered the plant lately, you should eliminate it from the soil and check for root rot. Aloe Vera is a talking plant that will tell you what it needs before it even dies.
8. Tend the Root In Case of Root Rot
If your plant is turning yellow or withering even with all the conditions in place, you should examine the root rot and determine how many are well. Mushy roots are characteristics of root rot and need to be removed. If there are a lot of healthy roots and a small portion of mushy roots, you can save the plant by removing the mushy roots.
To remove the rotten roots, you should use a sharp knife to cut off the dead roots. Ensure that you cut them all to avoid more infection. If the more significant portion of the root is affected, then use the earlier method of removing the leaf for propagation.
9. Choose a Pot, One-Third Larger than the Root System
If you plant a small aloe plant in a large pot with much soil, the excess soil will hold up more water, leading to root rot in the future. The root system of aloe Vera grows horizontally rather than vertically. Choosing a wider pot can be better because a narrow one may tip over as the plant grows.
You should always consider the size of your Aloe Vera when choosing the container for the plant.
On the other hand, choosing a too-small pot deprives the plant of enough room for the roots to grow. Due to watering, it can easily lead to root rot or a stagnant plant due to lack of growth. When the plant seems to be dying, you can check on the size of the plant and the size of the pot, and always opt to select a pot that is wide rather than a narrow or a deep pot.
10. Remove dead leaves
Dead leaves tend to draw nutrients from other healthy portions of the plant. They also affect by infecting other parts of the plant, and slowly but surely, the plant can die. To prevent the rest of the plant from suffering, you should take a sharp knife and cut the leaf away at the base.
Cutting back of dead leaves encourages more aloe leaves to grow and helps the plant to recover. Don’t be too fast in cutting broken leaves, instead, it would help if you let them sit for few days after breaking. These will allow the leaves to develop callus, which will help harden the leaves on the outside.
Bottom Line
You can always ensure that your aloe Vera remains healthy and in good shape with all that understanding. Aloe Vera will only be attractive if it is well taken care of, and if not, you may not even want to keep it in your house. When the color turns and the leaves shrink, aloe plant loses its aesthetic.
Aloe will mostly be restored if the damage is only to a few leaves. Therefore, it is essential to examine your plant immediately after it starts showing some unhealthy characteristics. The Aloe plant keeps on recreating itself in your home, and a single plant can assure you of a never-ending aloe plant in your compound. For this reason, take good care of your Aloe Vera so that it can take care of the beauty of your compound or house and your health.
Aloe Vera plants are a unique addition to your garden. The succulents grow perfectly in flowerbeds and make effective indoor plants. You have been caring for your aloe plant for some time now, and you expect it to start flowering. Hey, be patient and stop expecting much from your young plant. Aloe Vera tends to flower once it has reached its maturity stage. For a standard aloe plant, the maturity stage is achieved approximately when it is about four years.
In this article, we will focus on the ultimate guide to get your aloe Vera to flower. While some aloe plant tends to take longer to bloom even after maturity, there are steps that you can take to persuade your aloe plant. The plant expects you to take good care of it to bloom and it will not discourage you when it is ready. It will flower and glow yellow.
1. Fertilize Your Aloe Plants
Proper fertilizing of your aloe plant can help persuade the plant to flower. Fertilizing at proper times can also be a reason for your plant to bloom. It is essential to use a well-balanced fertilizer in early spring and again in midsummer. After feeding the plant, you should water it to drain the excess salt out of the pot to prevent destroying the roots.
It is essential to take a keen look at the kind of fertilizer you are using. Using high phosphorous or superphosphate that promises blooms may damage the plant due to their high concentration. After every two years, you should transplant the plant to freshen the soil and aerate the roots.
Fertilizing your Aloe Vera at proper times will promote the flowering process.
2. Place Your Aloe Plant Where There is Enough Sunlight.
Unexposed mature aloe plants to sunlight will result in a lack of flowering and may bring discolored growth, and withering which may weaken the plant. If the plant is planted indoors, place adult aloe plants outside if you want to witness big bright flowers. Outdoor will ensure the plant gets enough light, and wind and bee activity will pollinate the plant.
Just like any other plant, aloes’ fresh and notable stems scorch when temperatures are high. Therefore, it is essential to monitor the sunlight that is reaching your plant. The proper amount of sunlight can make the stems of the plant vigorous to hold the flowers.
3. Schedule Your Aloe for spring
Aloe plant only flowers at particular times of the year. If you anticipate your aloe to grow, make sure that the climate is conducive to growing and blooming. Aloe Vera blooms each year, especially in the early spring. If it is of the right age, then expect it to flower.
As you wait for this time of the year to come, the best way to help your plant bloom is to ensure that it remains healthy. You should follow all the steps that ensure that your aloe is well maintained. Before spring comes, make sure that your plant is in the soil with adequate nutrients to support it and no pests and insects invading it.
If your Aloe Vera is mature enough, you should expect the plant to flower in the early spring.
4. Pamper Your Aloe Plant
Time to flower is here, and you can’t notice any signs from the plant, do not despair. If you are sure that the plant is of age, you need to experiment with various techniques that will pumper it. Pamper your plant by ensuring that it receives just enough of everything that it needs.
If your plant is indoors, ensure that it gets additional coaxing to trigger flowering. Ensure that the temperature is correct and that the drainage is just working right. If all these conditions can be done well, then the spiky and the vibrant yellow flowers can be seen when the time comes.
5. Choose a Liquid Fertilizer.
One of the benefits of using a liquid fertilizer is that it penetrates the soil immediately after application. The plant is given fast access to nutrients which ensures rapid root growth. A potted aloe plant may require the application of this fertilizer more often than the other one.
The best fertilizer to use is the liquid 10-40-10 houseplant mixes or those explicitly designed for succulent plants. Using the liquid fertilizer as a foliar spray should be done in the proper times of the day to avoid leaf sun-scald. The best times are early morning, late afternoon or overcast days when there is little sunlight.
6. Remove the Pups From Your Plant.
Pups are not bad, as they are a sign that your plant is healthy and can produce babies at the mother plant’s base. As the aloe plant grows, the babies may tend to clump and spread as they try to mature. It would help if you took a sharp knife and cut the connection between the plant and the pups.
Pups tend to take the energy from the mother plant, the energy that could be used for flowering. Pups also consume the nutrients that the mother plant could appropriately utilize for blooming. For these babies, allow them to dry a bit for at least 24 hours before replanting them in their new pots.
Pups usually take the energy from your Aloe Vera and the plant no longer has sufficient resources to bloom.
7. Encourage Flowering By Watering.
When watering is done correctly, it encourages the blooming of the aloe plant. You should ensure to water the plant when the top inch of the soil is dry. Ensure that the plant has exhausted most of the water in the pot before you decide to water again.
Don’t overwater the plant to prevent it from embarking on rotting, which may discourage blooming. Adequate watering ensures that essential nutrients are transported through the plant. Enough water will also help strengthen the stem of the plant to stand upright and support the flowers.
While proper watering is essential for Aloe Vera to produce flowers, you should avoid overwatering the plant.
8. Water the Aloe Plant from the Bottom
The Aloe plant is a hard-to-kill plant. You might have been watering the plant wrongly without even realizing it. The truth is that if you can rectify this behavior, you may end up encouraging it to flower. You have known when to water your aloe Vera, but how do you do it?
Watering Aloe Vera should be done from the bottom of the plant so that water can reach the roots properly. Watering should be done consistently until the water can pour out through the drainage. Watering the plant from the top may end up breaking the flower if it is not done slowly and carefully.
9. Watch for Insects and Pest.
When your aloe plant is maturing, some pests and insects are ordinary fans of the plant. This pest includes the mealybugs, which are flat and brown. These pests suck on the sap from the aloe leaves, which weakens the plant and destroys a healthy flowering aloe plant.
To prevent these pests, you should use a natural, non-toxic pesticide to drive away the pests from your aloe Vera. Avoid misting your aloe Vera as it can make it rot out. If the leaves have gotten dirty or dusty, you can wipe them with a clean cloth once in a while to even remove dead bugs that can cause infection.
10. Get Your Plant to the Garden.
If you want your aloe Vera to flower correctly, get it to the garden. The aloe plant will only flower when it senses its ideal growing condition, and it also blooms well in the indigenous garden. A mature aloe plant first produces a spike known as an inflorescence which looks spectacular in the latter summer months.
When the plant has stayed indoors for long, it’s hard to get the plant to produce the inflorescence, leave alone the flowers. However, in some places, the conditions in the house might be very favorable, and the plant may flower well.
For Aloe, Patience is a Virtue.
The information above will help you maintain your plant as it thrives in its maturity until it starts flowers, which happens each spring. Unlike other plants, aloe takes their time before they can start flowering. You have to be patient with the process.
The most exciting thing with the aloe Vera plant is that immediately it starts flowering, you will realize that it was worth the effort. An accomplished feeling for any gardener. Aloe does not require or take much time and resources. Hence a little effort brings a significant result.
Bottom Line
Aloe Vera is found in very many species. In most species, flowers appear yellow, other species may show red flowering while others may mix the colors. For each year, the aloe plant blooms only for 2-3 months, and after that, it dries and drops off.
For the flowers, you can sometimes decide to prune them so that they may not consume the nutrients in the soil. Cutting the flower stalk from the base will help your aloe Vera recover from some of the leaves that have dried up or browned.
With all this information in mind, we expect to see your aloe plant flowering soon. When aloe flowers, trust me, you will call your friends to come and make a compliment about your garden or your kitchen as it will be glowing yellow.
The Aloe plant has hundreds of species, and each species has many varieties to choose from and grow. With all the varieties, you need to select one suited to your area and one that will match your outdoor features. An appropriate choice of aloe plant to grow indoors or in an outside garden will allow you to completely recreate your compound or your garden into a magnificent place.
Below, we will discuss the 10 best types of Aloe Vera that you can consider growing outdoors. This article will help you choose the plant based on its color, kind of soil, and the conditions that it can best fit in. It will also help you decide to relocate some aloe plants from your house to an outdoor state if the succulent plant grows to blossom.
1. Aloe Nobilis
If you are looking for an aloe plant with numerous personalities, aloe Nobilis is your perfect choice. It has large yellow thorns and rose-tilted leaves. These medium-sized rosettes produce reddish-orange bud thwarts when exposed to light. If you have a combined dish garden with other juicy specimens, this golden-toothed aloe looks handsome.
During the summer season, tubular flowers appear, which often reach 2’ feet tall. They add a mix of colors to your garden. It is intolerant to frost, and it is suited for outdoor growth in the USDA hardiness zones 9b to 10b.
Aloe Nobilis is often referred to as a Golden Toothed Aloe due to its large yellow thorns on rose-tilted leaves.
2. Mountain Aloe
It is also known as aloe Marlothii. The leaves of this aloe plant have a wide base narrowing to a sharp point and can reach 5 feet. These leaves have reddish-brown spikes along the ends and sometimes on the surface of the plant leaves. The old leaves are retained after they dry to form a ‘petticoat’ along the stalk.
It makes an excellent outdoor plant as it makes a beautiful display in sunny borders and is perfect for attracting nectar-feeding birds. The immortal plant is well grown in well-drained soil and full sun. This variety is known for its hardness as it can go for months without even watering.
It is disease-free and deer resistant, making it proper for the outside environment. When planted outdoors, the variety is great for beds and borders, rocky, Mediterranean, and succulent gardens. It is also ideal as an accent in a sunny border or decorative container.
3. Aloe Barbadensis Miller
It is one of the most known aloes Vera, due to its numerous health benefits. This variety can easily be identified by looking at the difference between the pup and a matured aloe. Aloe barbadensis miller species have multiple white spots when still pups, but it disappears as the plant grows.
Unlike many aloes, they appear green or grey-green. As the plant grows, the leaves become thicker and more solid. At the edge of the leaves, there are small white teeth or spikes, and its spike can grow up to 35 inches tall.
Barbadensis Miller is an adaptable plant and thrives well in a warm, dry climate. The plant is believed to be sensitive to cold. Hence the plant grows perfectly when planted outdoor during summer.
Aloe Barbadensis Miller is characterized by grey-green leaves.
4. Aloe Crosby’s Prolific
It is a dwarf plant that grows to about 45 cm and has elongated leaves and translucent projections. This variety grows orange-red flowers, and its leaves turn out red when exposed to the sun, ideal for landscape design. The plant is suited for containers and beds.
Aloe Crosby is a prolific plant that loves sun or partial shade hence does well when grown outdoors. It is not a cold-hardy plant; hence it does not handle cold well. Aloe Crosby should be planted in an area that receives six hours of sunlight a day. The bright orange flower attracts birds and insects, agents of pollination.
5. Aloe Rubroviolacea
The Arabian aloe is tolerant to drought and harsh conditions. It is an outstanding plant with blue-green leaves and reddish teeth bordering it. The leaves of this species turn purple when in full sun, intensified to violet-red in winter, creating a magnificent view. Since they are suited to arid conditions, this plant can thrive well outdoors because it requires little care and is disease-free.
When planted outdoors, Aloe Rubroviolacea grows perfect in well-drained soil in full sun. It thrives best when planted in beds and borders, a rock garden, and an ideal accent plant on a sunny wall. The flower produces nectars that attract birds and bees, encouraging pollination.
6. Aloe Aristata
Aloe Aristata is also known as the touch plant. It has fleshy, soft-spined dark green leaves which have white bumps. As weather changes, this variety tends to change color, with orange-red flowers growing on the long stem. These low-growing, bunching rosettes make an excellent and effective ground cover.
Aloe Aristata is short and stemless but very attractive. It grows slowly and succulently, reaching about 12 inches in height. It is an evergreen perennial that grows in knit, lovely rosettes. The plant is resilient and easy to grow in almost all weather and growing conditions.
Aloe Aristata features fleshy dark green leaves with soft white spines.
The Aloe plant has triangular leaves with white spikes and fine cilia, which is the primary identifier of the family. The torch aloe plant is hardier than other aloes’ in the same group. It thrives well inadequate sunlight, making outdoor planting the best option.
It is known as the ‘succulent city’ plant, as it loves warmth and, when grown outside with enough sun, it thrives. Unlike others, it thrives well in autumn and summer and not winter. Therefore, avoid planting this species in extremely cold conditions.
7. Malagasy Tree Aloe
The Malagasy species is a free disease plant native to Madagascar. It is a huge aloe with the ability to grow up to a height of 12 feet and a width of 5 feet. It has fresh leaves with white teeth and turns dark green to a vibrant deep red color when in full sun.
The plant grows quickly in well-drained soil, with enough sun and light shadow. As it matures, it produces attractive red flowers that stand out and are focal to a garden. It is deer resistant, and the flower has nectar which attracts birds and bees, supporting pollination. The beautiful large aloe flourishes in beds, rock, succulent, and Mediterranean gardens. It is ideal as an accent in a sunny border and decorative container.
Malagasy Tree Aloe is a succulent that grows up to 12 feet in height and 5 feed in width.
8. Red aloe (aloe Cameron)
Red aloe is a beautiful Rhodesian native with a similar shape as the aloe arborescens. It is a distinguishable species by its deep red and copper tones display when it withholds enough water. However, its leaves retain a bright color in lower light settings or excessive irrigation.
Aloe Cameronii does well in rock gardens, cactus garden, and succulent but has brittle leaves which can be easily broken hence should be planted accordingly. During drought days or sunny weather, its leaves turn to a colorful, and beautiful coppery red, but become bright apple-green when overwatered. In a succulent garden, this aloe makes an excellent specimen planting and provides a striking color, attracted to nectar-seeking birds.
9. Aloe Hereroensic
Referred to as a sand aloe, both its leaves and the flowers have unique features. The leaves are ornamented with fine lines, and flowers consist of orange-red tubular with a high, green, protruding center that appears like corn. The leaves are decorated with H-shaped white spots that are set in transverse bands on the lower surface.
The sand aloe gets up to 2 feet high and does best in well-drained and alkaline soil. This plant looks good in Mediterranean gardens and rock gardens. In sunny border and decorative containers, this plant makes a drastic focal point. It is a disease-free and deer-resistant plant, with flower-producing nectar attractive to the birds and the bees.
10. Snake Aloe
Snake Aloe plant, is one of the eye-catching aloes that gets a foot wide and have long stunning light skin leaves. The leaves have reddish-brown teeth on the edges. It takes a bit longer to mature, where others take four years, it takes 5 to 6 years to fully mature.
It is a perfect plant to grow in dry or semi-arid areas, and it makes a unique and focal point for anyone’s orchard. It is quickly grown in sandy and gravelly, well-drained soil in full or light shade. Snake aloe is one of the stress-free plants that can take care of itself as they are well adapted to arid environments.
Bottom Line
You cannot grow aloe outside its recommended zones except when it is in a container. Growing aloe plants in a container outdoors will help in bringing them indoor when freeze threatens. It is also good to know that not all conditions can support the outdoor growing of aloe. This moisture-rich plant thrives well in warm region zones, while indoor can be the best in other areas.
Due to the harsh conditions outside, it is good to check on your plant regularly to ensure all the requirements. Aloe plants will tend to thrive better in good irrigation and proper observation to prevent them from pests. Some aloes are dangerous to some animals, and they should be protected from outdoor plants.
Aloe Vera is a plant that has been used in traditional medicine for centuries. It’s known to have anti-inflammatory, healing, and skin rejuvenating properties. It contains powerful antioxidants and healing properties, making it great for living a healthy lifestyle. Despite its popularity, however, not many people know some amazing facts about aloe vera. This wonder plant has some other amazing facts that you may not know.
So what are some of the amazing facts about aloe vera? Being succulent, aloe vera is made up of 99 percent water and comes in well over 400 species. Despite exhibiting similar physical properties, aloe vera is not a cactus as many would want to believe. You can easily drink aloe vera for medicinal purposes, but it is also used in Japan as a food product in yogurt.
Aloe vera is a plant that has been used for centuries as an herbal remedy. It contains powerful antioxidants and healing properties, making it great for living a healthy lifestyle. In this blog post, we’ll explore 15 amazing facts about aloe vera.
1. It consists of 99% water
Aloe vera is mostly water. The plant consists of 99% water, making it extremely hydrating for your skin. Aloe vera also helps lock in moisture to the deepest layers of your skin, keeping you out of trouble during dry seasons or harsh winds. It is an excellent addition to any skincare regimen because it’s so effective without being too harsh on the skin.
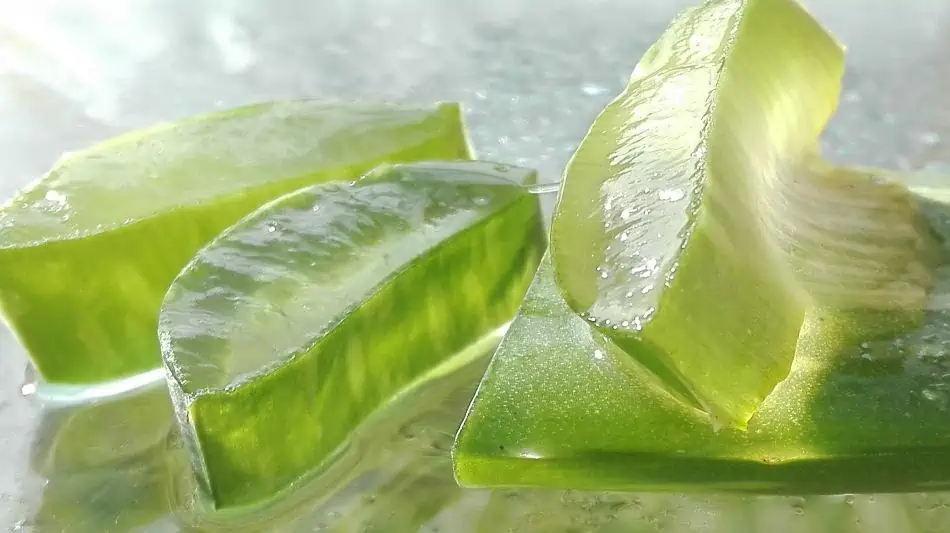
Since Aloe Vera consists of 99% water, the gel-like substance is extremely hydrating for your skin.
2. There are more than 400 species
Aloe vera is found in two distinct forms: aloe vera and barbata. Although they both come from the same plant, these two types of plants have some slight differences that make them unique for their respective uses. Aloe vera has a slightly sweeter taste, while barbata has a bitter taste. Barbata is also known to help with respiratory problems like asthma and bronchitis.
Apart from these two primary forms, aloe vera comes in multiple species. The most common of these include Barbadensis, Aspera, Capricornica, and Cylindrical. This wide variety of species makes it easier for people to pick out the right aloe vera plant that suits their needs best.
3. People eat it in yogurt in Japan
While most people use aloe vera for its healing benefits on the skin or speed up recovery from a sunburn, it’s also been used as a food product throughout history. The Japanese enjoy aloe vera in their yogurt, making it a healthy and fun snack for people of all ages.
The Japanese aren’t the only ones who enjoy aloe vera as a food product. It has also been used in some South American countries, like Mexico and Peru. The people of these cultures use it to make jams that are great for breakfast or afternoon snacks.
While Aloe Vera is popular due to its health benefits, the Japanese enjoy it as a food product.
4. Cleopatra was a super fan
One of the most well-known women throughout history, Cleopatra, was known for her incredible beauty and charming personality. She used aloe vera to keep her skin healthy and glowing during all of the festivities that she had to attend as a queen.
She also considered it a necessity for any woman who wanted to be beautiful. It’s relatively easy for people today to find products with aloe vera as a key ingredient and even easier to grow the plant in their garden.
5. Contains cooling properties similar to menthol
Most people think of aloe vera as only suitable for healing skin, but it also has some unique features that make it ideal for those with respiratory problems or chronic pain. Aloe vera contains cooling properties that are similar to menthol, giving it an interesting and effective property.
Aloe vera also helps people with allergies because of its anti-inflammatory nature. It’s excellent for reducing the swelling caused by hay fever or dermatitis, making it a wonderful addition to any medicine cabinet.
6. It’s not a cactus
One of the biggest misconceptions about aloe vera is that it’s a cactus. Despite growing in dry and desert-like conditions, aloe vera isn’t related to any cactus plant. This confusion probably stems from its appearance, as many types of succulents look similar because they have fleshy leaves and similar formations.
Instead, aloe vera is related to other lily-type plants that produce flowers and fruit. It doesn’t need the harsh conditions of a desert to grow, but it does thrive when planted outdoors because of its ability to store water for long periods.
Although Aloe Vera grows in dry and desert-like conditions, this plant is not a cactus.
7. It contains more than 200 nutrients
One of the best things about aloe vera is its incredible nutritional value. It’s packed with more than 200 nutrients that help to keep your body healthy and strong, as well as reduce inflammation throughout your skin or respiratory system.
Aloe vera has some of the highest levels of antioxidants found in any plant on earth. This makes it an excellent addition to any meal because it contains the nutrients needed to keep your body healthy and strong.
8. You can drink it
Aloe vera juice has become a popular beverage throughout the world, but did you know that aloe vera gel is also safe for human consumption? While its slimy consistency may turn some people off, they should realize that it’s also full of nutrients and antioxidants to help their bodies stay healthy.
Its high levels of electrolytes make aloe vera gel a great choice for athletes who need an energy boost after a long workout or people with chronic fatigue syndrome because it helps them feel better throughout the day. It can even be used topically by those who have sensitive skin to help reduce the redness and irritation that comes with various dermatological conditions.
9. Produces two substances, gel and latex
Besides its nutritional value, aloe vera is also known for producing a number of unique compounds throughout its life cycle. The first one it produces is called “gel,” which helps protect the plant from predators and harsh weather conditions.
After reaching a certain age, aloe vera will also produce “latex,” which functions as another form of self-defense against people who try to eat or harm the plant in some way. However, it can be used for medicinal purposes because of its ability to reduce inflammation caused by injury or illness.
Aloe Vera produces gel and latex that can be used for medicinal purposes.
10. It’s an adaptogen
One of the fascinating things about aloe vera is its ability to change form depending on the needs of your body. It acts as what biologists call “an adaptogen,” meaning that it can help reduce inflammation and promote feelings of calmness throughout your respiratory or immune system.
This makes aloe vera a great choice for people suffering from chronic pain, allergies, or inflammation because it helps them feel better throughout the day. Some studies have even shown that aloe vera can help reduce anxiety and depression by producing certain compounds in your brain that promote feelings of happiness and relaxation.
11. Aloe Vera is an evergreen succulent and perennial plant
Aloe Vera leaves have three main components. The outer green skin, a latex layer, and a mesophyll layer, carrying the gel. The gel is 99% made of water and other essential minerals, hormones, enzymes, and amino acids.
The plant survives in areas with low rainfall, making it perfect for indoor and garden planting. It is stemless, growing from 60-100 cm, and spreads by offsets. The leaves are thick, fleshy, and green, but some have white dots on the upper and lower stem areas. The flowers make Aloe Vera a beautiful plant, producing long stalks up to 90cm long, with every flower having a loose yellow tabular corolla.
Aloe Vera is a stemless evergreen succulent that grows from 60 to 100cm.
The light green ‘skin’ color in the stalks hides the huge ‘meat’ inside the leaves and an edible natural gel. When the plant matures, the Aloe Vera gel extracted has over 70 nutrients and numerous active compounds. It is rich in amino acids and vitamins, making the succulent plant a unique indoor plant.
12. It is an ideal plant to grow indoors
All you need is a pot to grow Aloe Vera indoors. When planting indoors, a terracotta pot is an ideal place to grow it, as long as it is porous and aerated to allow air circulation in the soil. The plant is made up of water, susceptible to frosting in cold conditions, making indoors an ideal place to grow it.
If you are looking for an indoor succulent, Aloe Vera could be the right choice.
Aloe Vera is the right choice if you intend to have a plant that will not stress you or take much of your time to care for you. It is easy to grow as a houseplant and care for whether inside or outside the house. All you need for Aloe Vera to flourish is enough light from both sides, regular watering only when the plant is dry, and well aerated and drained soil.
Pruning Aloe Vera is simple and ensures the older leaves ate thicker. Most homes and apartments provide the best temperatures of about 13 to 27oC. It is easier to propagate the plant by taking a thriving aloe plant with numerous pups and relocating the taller one to another pot.
13. Harvesting Aloe Vera is Enjoyable
What is the most important and enjoyable part of the process if not harvesting the aloe Vera when it matures? Harvesting Aloe Vera is an amazing task done by anyone in the house by following the below process:
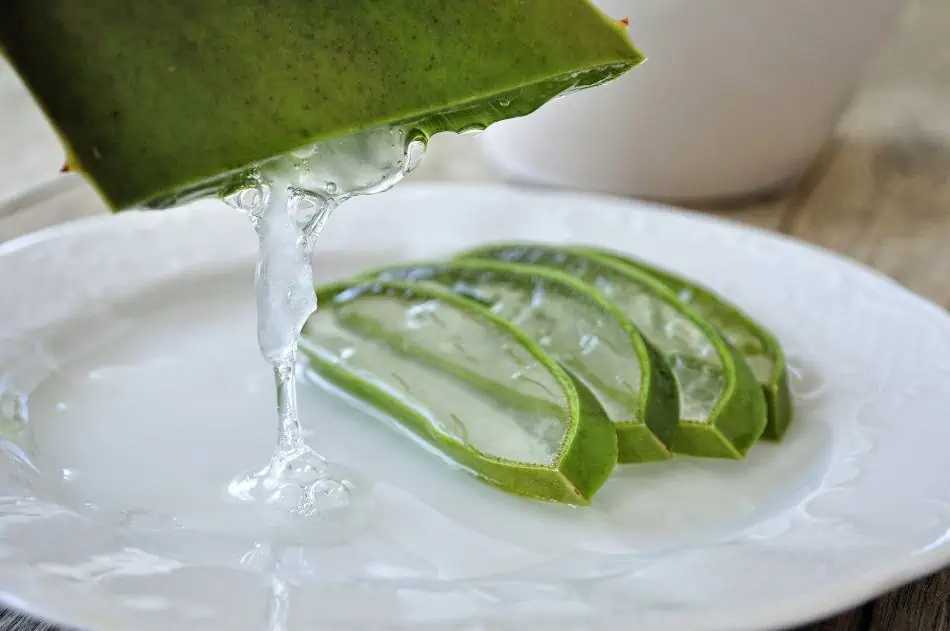
Choose a thick and mature leaf from the aloe plant and cut the base using a sharp knife.
Cut the leaf’s lengthwise to reveal the thick clean gel inside.
Squeeze the gel from the leaf in a clean bowl
You may scoop the gel with a spoon to get it out completely
Since you may not use the whole gel at once, you can store it in an airtight container or a refrigerator for some time
Make it a daily routine to have Aloe Vera in the house for emergencies and daily use.
You should always choose a thick and mature leaf from your Aloe Vera when harvesting the plant.
14. Aloe Vera has Numerous Health Benefits
The truth is that you can only get the full benefits of Aloe Vera by using the natural Aloe Vera gel. Products purported to contain Aloe Vera gel may contain other ingredients not favorable to your skin. A natural aloe Vera plant from your house and compound may have the following benefits.
The natural Aloe Vera gel from your house has plenty of health benefits.
Aloe Vera can help improve dental health
When used as a mouthwash, Aloe Vera can help to improve dental health. It is due to its anti-plaque and anti-gingivitis properties. Recent research has shown that Aloe Vera is a potential antibacterial agent effective in fighting bacteria and prevent periodontal diseases.
Aloe Vera is an ingredient in different types of toothpaste and mouthwashes. Using the product or drinking aloe Vera juice could treat gum diseases caused by inflammation. The Aloe Vera juice keeps the gum healthy. You can gargle the liquid in the mouth first before swallowing.
It can help lower blood pressure
Aloe Vera is not just a typical plant because it can help you cut medical expenses by a significant percentage. Taking two tablespoons of aloe Vera juice every day can reduce blood sugar among patients with Type 2 diabetes. It is good to know that using Aloe Vera to manage diabetes conditions requires a doctor’s prescription, especially for those patients already on diabetes medication.
It can help reduce menstrual pains
Aloe Vera provides instant relief to menstrual cycle pains. Drinking Aloe Vera juice with honey twice or thrice a day helps ease the heavy blood flow. Also, drinking the juice regularly supports normal blood flow in every monthly cycle.
Aloe Vera treats burns
Applying Aloe Vera several times a day can help relieve the pain and hasten the healing process in sunburn or any other mild burn. Due to its moisturizing, cooling, and soothing effects, Aloe Vera can heal burns. Aloe Vera has shown better results when treating superficial and partial thickness burns than other creams and is more affordable.
Improves digestive health
Consuming Aloe Vera juice can go a long way in benefiting your gastral tract and help in soothing and cures stomach illnesses. Aloe Vera has shown significant benefits in inhibiting the growth of some of the bacteria found in the digestive tract, causing ulcers. However, Aloe Vera has many species; therefore, you have to ensure you have the right one before using it, as some are not good for consumption.
Clears acne on the face
Squeezing fresh aloe juice in your hand and applying it on the face helps clear acne because of the antibacterial property that helps control bacteria causing acne. It may not clear the scars but will go a long way to reduce the size of your pores, thus preventing pimples or acne growth in the future. Isn’t it amazing sleeping with a pimpled face and waking up with healthy and refreshed skin?
Fights aging of the skin
Aloe Vera gel contains numerous antioxidants that include vitamin C, E, and beta-carotene that improve skin’s natural insistence and keep it hydrated. In aging people, aloe Vera gel makes the wrinkles less noticeable because of the collagen that allows the skin to retain moisture. Collagen not only reduces the wrinkles but also tightens the skin, improving its elasticity.
Aloe Vera Preserves fruits
Aloe Vera gel is moist, preventing bacterial infections from permeating the products and prolonging the shelf life of fruits and vegetables. It reduces respiration while maintaining the quality features, such as color and flavor. It has antifungal and antibacterial properties that act as a defensive barrier against the microbial contamination of the products.
Aloe Vera prevents Oxidative Stress
Aloe Vera gel is rich in vitamins that help the inappropriate functioning of the body. Some of the vitamins include B12, B1, B2, B6, Vitamin A, vitamin E, and vitamin C, which ensures the body’s defensive mechanism, remains strong and can fight oxidative stress. The plant is a natural air purifier reducing anxiety and stress by ensuring the availability of fresh air to breathe.
Aloe Vera reduces dandruff
Aloe Vera has impressive enzymatic elements that break down dead skin cells, making it the best property to treat dandruff. Doctors link dandruff to a fat-eating fungus living on the scalp. Aloe Vera kills the fungus because the antifungal properties alkalize the head surface, countering the proactive fungal environment and preventing further growth and buildup.
15. Aloe Vera “plant of immortality.”
In ancient Egypt, Aloe Vera was referred to as ‘plant of immortality, used by the nationals during burial rituals. Cleopatra added the plant in her beauty products for her body and face, as she believed it added long life. The plant itself can survive over 100 years, even in the wildest environment.
How to grow Aloe Vera Indoors
Aloe Vera is known as “the plant of immortality” since it is believed to be the oldest plant on earth. It is a natural first aid kit, this making it a necessary ingredient in your home garden. If you are looking to plant aloe vera in your indoor garden, the following tips should help you get started:
Aloe vera is a drought-tolerant plant that requires good sunlight and warm temperatures to thrive. It will not do well in humid conditions, so it should be grown under bright filtered light indoors. Therefore, the best place for growing aloe vera is on a window sill or any other area where it can get at least five or six hours of sunlight a day.
Aloe Vera thrives on being over-watered, though it should never be left to sit in water as this will cause the roots to rot and eventually kill the plant. The soil for aloe vera needs to drain well, so that excess water does not settle at the bottom of the pot. The pot should have good drainage holes, and the soil for aloe vera needs to be allowed to dry out between watering.
Aloe Vera can grow pretty quickly, so it will require frequent repotting as you may need larger pots every year or two. It is best to use a well-draining cactus mix when planting Aloe Vera, and a good rule is to only use pots with at least one-fourth inch of space between the soil and rim. This will ensure that there is enough room for water drainage, preventing root rot from occurring.
Aloe vera plants can be propagated by division or leaf cuttings which should be taken in spring once the plant is at least a year old. Be sure to use a sterile blade when taking cuttings, and dust the area with powdered rooting hormone before planting in pots of moist cactus mix.
Aloe vera is termed as a wonder pant for a good reason. Considering its unique features, medicinal properties, and rich history, this plant stands out as a must-have in your home garden.
With the above facts, you are better informed on the plant’s history, propagation, and ideal growing conditions. Thanks to its impressive health benefits and easy maintenance, Aloe vera will continue to be a popular house plant for years to come.
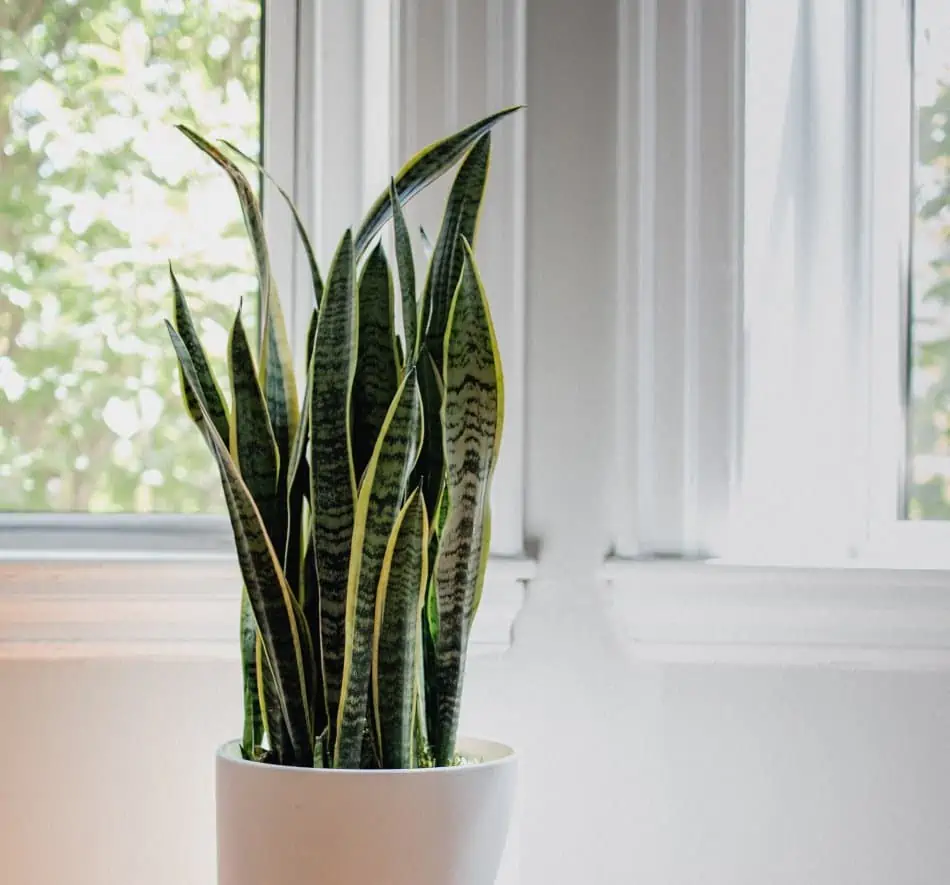
The snake plant is a low-maintenance houseplant that can be used as an alternative to traditional plants. It’s also known as Mother-in-Law’s Tongue, and for good reason: it has long, slender leaves that resemble the tongue of a snake!
And though this plant might not look like much at first glance, it packs some pretty cool benefits. For those looking to purchase or grow their own Snake Plant (Sansevieria trifasciata), we have 7 essential tips to help you grow the plant as a beginner.
So, what are the essential growing tips for snake plants as a beginner? Becoming an expert at snake plant growth and care starts with picking the right varieties. Ensure you have done proper propagation, drainage, and placing it under natural low light.
Look out for common pests like mealybugs and aphids while ensuring proper watering to avoid root rot. Picking suitable indoor varieties based on your region’s temperate zone is also helpful.
Looking to plant the sake plant at home for the first time but not sure what to expect? This article will help you get started with Snake Plant (Sansevieria trifasciata) care and propagation.
1. Picking Ideal Snake Plants For Indoors
Snake plants can be grown outdoors, but they thrive best indoors. If you’re looking to grow snake plants indoors, pick up a low-light requirement variety that you can place in your living room. Growing snake plants indoors requires high humidity and good air circulation, so find a spot near a window or vent.
As a rule of thumb, the larger the leaf, the higher the light requirement it has. This means that a plant with large leaves will thrive in brighter rooms while smaller-leafed varieties can survive in darker spaces.
Snake Plants with larger leaves require a brighter environment to thrive.
When positioning your snake plant indoors, consider possible contact with children or pets. Ensure the plant is out of reach, especially with children and pets to avoid the risk of poisoning. You should also avoid placing your snake plant next to a radiator as the heat will dry out its soil and scorch its leaves.
A common snake plant variety can grow in low-light and bright light conditions, making it a good choice for beginners who are unsure about the amount of sunlight their living spaces have to offer. These plants do best in rooms that get medium or indirect sunlight exposure, but they will also survive in shades.
2. Best Propagating Practices for Snake Plant
Once you have your ideal indoor snake plants, it’s essential to propagate them before they become overcrowded in their pot. One of the best ways is to divide up an overgrown clump into several separate plants by cutting through its roots with a sharp knife. This will help ensure that each new snake plant has its own space to grow big and strong.
Alternatively, you can propagate snake plants by using leaf cuttings. Here, you simply take a leaf from an existing plant and place it in a moist, soilless potting mix. Make sure the bottom of the cutting is touching the soil. Roots will grow along their underside, providing you with new snake plants to love!
To propagate a Snake Plant, either divide up an overgrown clump or use leaf cuttings instead.
3. Troubleshooting Snake Plants
Snake plant care for beginners also extends to looking after its unique traits, such as its ability to store water within its leaves and roots. Overwatering is one of the main reasons your snake plant will die over time, so make sure to keep the soil moist but not wet.
If you notice your snake plant is not doing well as expected, check for root rot or fungal damage signs. These can be identified by black, dried-up leaves falling off the plant and/or mushy roots covered with dark brown spots.
If you notice any issues like these, it’s time to take action! For example, if there is a problem with its drainage system, repot the plant with fresh soil in a larger pot. If too much water is surrounding its roots, simply take out some of the excesses and let it dry up before re-watering.
4. Pot Drainage
Another important factor in snake plant care is ensuring that your pot has proper drainage, which will prevent root rot or fungal diseases from taking hold of your new friend. Any good quality potting mix should have enough aeration for roots to breathe properly, so it’s important to avoid those that contain peat moss.
Additionally, it is best to repot your snake plant into a pot with several drainage holes at the bottom so water can drain out properly and not sit around its roots for too long. Unlike most other succulents, the snake plant can store water in its roots, so it can survive for several days without water. This means that you will want to avoid having wet soil sitting around the plant’s root system at all times.
As Snake Plants store water in their roots, it is essential to plant them in containers with several drainage holes.
5. Light Requirements
Snake plants are low-light requirement varieties that make them perfect houseplants for a variety of homes, from apartments to dorm rooms. For best results, avoid extreme light levels such as those found in direct sunlight. Instead, place your snake plant near a window where it will receive bright but indirect light throughout the day.
Snake plants can tolerate prolonged shade but will do best under filtered, strong light. For starters, any spot that allows your snake plant to receive bright, indirect sunlight for about six hours a day should suffice.
If you have a naturally low-light home or apartment with minimal windows and no direct light source, try placing it by an artificial grow light on the lowest setting instead. Snake plants prefer warm temperatures between 70°F (21°C) and 80°F (27°C), but they can survive in temperatures as low as 40°F (40°).
6. Dealing With Pests and Diseases
Since snake plants are known for their durable leaves, they’re often used as natural insect repellent. However, this doesn’t mean that pests won’t try to get inside your snake plant at some point or another. If you notice any bugs on your new plant, use a cotton swab or an old toothbrush to gently remove them from its leaves.
Nutritious soil and proper watering will protect your Snake Plant from pests and diseases.
Your snake plant should be safe in terms of diseases and other problems as long as you keep it healthy with nutritious soil and proper watering practices. Unfortunately, snake plants are not immune to fungal infections or common houseplant bugs like spider mites, aphids and mealybugs.
These can be identified by their webs or by seeing them carried around your plant. If these are spotted, use insecticidal soap to kill off the insects. If you do notice any signs of disease, such as black spots or leaf drop-off, promptly take action to remove the affected leaves and roots.
7. Popular Snake Plant Varieties
Not all snake plants are created equal. Each of these has their own unique features that make them perfect for different homes. Among some of the most popular options for growing as indoor plants include:
Common snake plant (Dracaena trifasciata) – This is often considered a classic option for those looking to grow as indoor plants. These have long, narrow green leaves that are serrated and connected by multiple stems.
Bird’s nest snake plant (Dracaena trifasciati ‘Hahnii’) – This snake plant type features short dark-green leaves with a white stripe down the center.
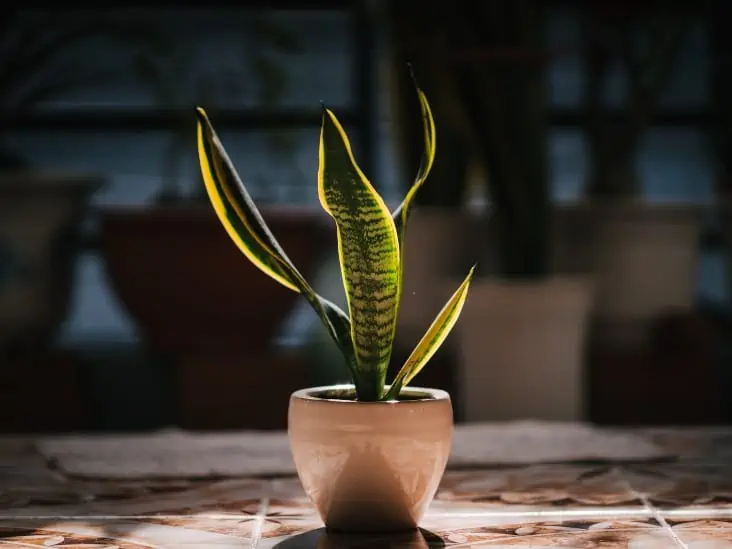
Variegated snake plant (Dracaena trifasciata ‘Laurentii’) – This type is noted for its unique foliage which features short dark-green leaves with a yellow or cream-colored striping from top to bottom of each leaf.
Cylindrical snake plant (Dracaena cylindrica) – This type stands out with bright-green leaves that are narrow and tall, often growing up to eight feet in height.
Moonshine snake plant (Dracaena trifasciata’ Moonshine’) – This snake plant’s foliage features short dark-green leaves with a yellow striping from top to bottom of each leaf.
Most snake plant varieties thrive in soil that has a pH range of around five to seven, so it’s important to test the acidity levels in your potting mix before planting. While most varieties prefer moist but well-draining soils with minimal water retention capacity, they also like their roots and crowns to be slightly on the dry side. Pick a medium that provides the snake plant with just enough moisture for its needs without letting it get soggy and wet.
Conclusion
The snake plant can be a great addition to your indoor garden. However, this can only be possible if you have the right snake plant care information. This unique succulent houseplant stands out with its grassy leaves and is known for thriving in low-light conditions.
As a beginner, you may want to focus more on getting it right the first time as this will determine how best you will fair for subsequent care planting regimes. With these tips, you should have a better idea of how to care for your snake plant even if you are new to this.
The snake plant is one of the hardiest succulents you can grow at home. These plants can survive the harshest conditions and are not too demanding in terms of care needs. However, snake plants are not immune to problems and can die from common household hazards.
But before they die, you need to identify the signs of dying and try to revive your plant. Some of the signs of a dying snake plant include:
Browning leaves
Yellowing leaves
White spots
Curling leaves
Drooping leaves
Wilting leaves and dying stems
Mushy roots
Leggy growth
This article outlines some of the signs of a dying snake plant, its causes, and what you can do to revive your precious plant. Read through to learn more!
Leaves Turning Brown on Snake Plant
The most common problem with snake plants is brown spots. At first, these spots are tiny and look like dust particles on the surface of the leaf. If left unattended, these little specks can turn into big dark brown or black dead patches.
If you notice tiny brown spots, it’s a sign that your snake plant is already dying from the root up. Brown spots are actually a result of a fungal infection caused by overwatering and poor air circulation.
If you have been overwatering your Snake Plant, it may develop a fungal infection.
So, if your snake plant has dark brown patches, it is most likely caused by overwatering. Snake plant needs to be watered thoroughly but can tolerate periods of prolonged dryness. If you water your snake plant too often, the leaves will be deprived of the chance to dry out completely between watering.
Underwatering your plants can also cause the leaves to turn brown on your snake plant. The problem gets worse in a low humidity environment because there’s less moisture in the air for the leaves to absorb. Remember, snake plant leaves can rot and die if they’re not allowed to dry out completely but can also die if they’re too dry.
Dead Stems on Snake Plant
You might also notice that some of your snake plant stems or leaves are wilting and dying. These signs are usually caused by overwatering, but it is not always the case.
Some snake plants are more vulnerable to over-watering than others. Of course, the natural environment of a specific species can affect how much water it needs.
If some of your Snake Plant stems or leaves are wilting, it is a sign that your plant is dying.
For example, Sansevieria trifasciata requires less watering because it is originally from East Africa and Madagascar arid regions. On the other hand, Sansevieria cylindrical seems to be more resilient to overwatering because it is originally from swampy regions in South Africa.
As a rule of thumb, snake plants should be watered thoroughly but allow the soil to dry out completely between waterings. Do not wait for the leaves to wilt or droop before watering your plant. While some plants can take weeks without water, snake plants should be watered at least once a week.
Yellow Leaves on Snake Plant
If your snake plant leaves are turning yellow or pale, it can mean that you’re not watering them enough. The yellowing process usually starts with the lower leaves because they have less access to water. So if all of your plant leaves are turning yellow, it is an obvious sign that you need to water them more often.
Underwatering is one of the most common reasons your Snake Plant is turning yellow.
Too much direct sun can also burn the leaves and turn them yellow or pale. If you’re growing a snake plant in a small space without enough sunlight, move it to a brighter area where it can get at least 4 hours of unfiltered sunlight.
The leaves of your snake plant can also turn yellow if you overfertilize them. Do not apply a complete palm fertilizer to your snake plant. Apply a weak solution of high nitrogen plant food or use a balanced 20-20-20 fertilizer diluted to one-fourth concentration once every six weeks during the growing season.
Leaves Curling
Your snake plant leaves may curl inwards or appear wrinkled. This is usually caused by low humidity. Remember, snake plants are originally from arid regions in East Africa and Madagascar.
It’s easy to combat dry conditions by simply spraying the leaves with water every other day or setting your plant on a tray filled with pebbles and water. Keep in mind that you should leave the plant there for at least an hour before bringing it back to its base.
The leaves may also curl due to direct exposure to heat sources. If your snake plant is placed near an air conditioner or water heater, the temperature can drop drastically at night. This sudden change of temperature can cause the leaves to become wrinkled.
Also, remember that snake plants are cold-sensitive, so it’s best to place them near a window that does not get direct sunlight.
Droopy Leaves
Snake plant leaves may also droop if the roots are being over-watered. If you notice your snake plant leaves hanging low, it means there is too much water in the soil. In this case, remove the container from the drainage tray and let the soil dry out completely.
Snake plants that are exposed to cold drafts may also droop their leaves. Make sure all windows and doors are closed properly, especially during the winter months.
If the roots of your Snake Plant have been overwatered, the leaves may turn droopy.
White Spots on Snake Plant
The underside of your snake plant leaves also tend to develop white spots. This is usually caused by cold drafts, prolonged exposure to water, and an abrupt temperature change.
If you notice that the undersides of your snake plant leaves are developing white spots, move it away from drafty areas and ensure that the soil has completely dried out before watering it again.
As for the white spots caused by prolonged contact with water, ensure that you wipe off any excess water or debris surrounding your plant’s base. You can also change the location of your snake plant to avoid direct exposure to water.
The last reason why white spots may appear on your snake plant leaves is because of temperature changes. When the temperature suddenly drops below 10°C, your leaves may develop white spots. Avoid exposing your snake plant to sudden drafts by properly closing all windows and doors or moving it away from drafty areas.
Mushy Roots
Snake plant roots may also turn mushy if they are constantly wet. If you notice that your snake plant’s roots are decaying, you should stop watering it immediately.
To prevent the mushy feeling on your snake plants’ root system, ensure that the soil has dried out completely before re-watering it again. Also, avoid overwatering your plant to prevent any more root rot problems.
Snake Plant Is Showing Leggy Growth
If you find young leaves sprouting from the soil, this means that your snake plant is entering a new growth phase. Leggy growth usually occurs during spring and summertime when your snake plants need to grow new leaves.
By allowing your snake plants to enter a new growth phase, you ensure that they have a strong root system for next year’s blooms. When your snake plants are done growing new leaves, they will stop producing new growth and return to their usual routine.
Leggy growth may also occur if your snake plant has not received enough sunlight throughout the year. Remember that snake plants require at least 4 hours of direct sunlight per day for optimum bloom production. If your snake plant has not received enough sunlight, it may produce long stems to reach the nearest window.
You should avoid overfertilizing your snake plant to prevent unwanted growth that may cause them to die eventually. Never fertilize your plant during the winter period, as this might cause stunted growth. Overfertilization may cause leaf burn, the plant to develop tips, and show leggy growth.
Related Questions
Should I cut off dying leaves from a snake plant?
You need to cut off the dying leaves from your snake plant as soon as possible to prevent the problem from spreading. You should do this if you notice that the problem has covered 50% of the leaf. You should trim snake plant leaves using sharp and clean scissors. Make sure that you cut the leaves one inch above the point where it meets the stem.
How does a healthy snake plant look like?
A healthy snake plant is characterized by a stout stem with lush, dark green leaves. The leaves are either broad or narrow and tend to coil at the tips. Healthy snake plants produce white flowers during the summer months.
How often should I water my snake plant?
You should water your snake plant once every two weeks or when the soil feels dry up to your first knuckle. Remember not to overwater your snake plant because this can cause root rot problems. You should also avoid underwatering as this can cause your snake plant to droop.
Summary
While most snake plant issues occur due to watering problems, others may be environmental issues, pests, or diseases. If you notice that your plant is showing signs of dying leaves, mushy roots or white spots, then you may be watering it too much or too little. If the problem continues, it might be time to move your snake plant to a location with less sunlight and more humidity.
You should also watch out for other problems such as pests and diseases and save your plant before it dies. Remember, identifying the problem early enough and finding a solution will save you from the heartbreak of losing your precious plant after investing too much time in it.
The snake plant is a popular tropical plant known for its versatility. The plant features tall leaves and different color variations.
This easy-to-grow plant is known for its ability to clean the air and adapt well in many conditions. Although it can tolerate low light, the best place for your snake plant is a bright location with indirect sunlight. The more sun, the better the leaves appear. But, no matter what kind of location you place the snake plant in; it will be a welcome addition to any room.
The snake plant is one of the best succulent plants you can have, thanks to its beauty and the many benefits indoors. If you want to find out more about this wonderful plant, keep reading.
Snake Plant Facts
1.Snake Plant Has Many Names
The scientific name of the snake plant is Sansevieria Trifasciata because it belongs to the Sansevieria family. The plant also has a nickname; Devil’s Tongue or Mother-in-Law’s Tongue.
Other names of snake plants include Bowstring Hemp, Ribbon Plant, Snake Palm, Bow Tie Plant, Friendship Tree, Goldband Sansevieria, Silver Queen, and Life plant. This succulent indeed boasts of amazing titles.
Snake Plant, also referred to as Sansevieria Trifasciata, has plenty of nicknames.
2.Snake Plant is Native to Africa
The origin of the snake plant is the tropical regions of Africa, Madagascar, and some parts of Asia. The plant makes an important part of African culture where it’s deemed a symbol of good luck and fertility.
Others believe that the plant provides spiritual protection and is used to cast out evil spirits. It’s also a symbol of the African gods, such as the god of war.
For the Chinese, this plant also has many meanings. It’s seen as a symbol of heroism, and the snake is one of their favorite creatures. They also see the plant as a sign that good fortune will come soon. The plant is also associated with good feng shui as you can use it as bedroom decor.
3.Snake Plant Is Not Cactus
SansevieriaTrifasciata is not a cactus; however, it does belong to the succulent family. Many people tend to confuse it with a cactus due to its appearance. The leaves of the plant are thick and fleshy, which makes it resemble a cactus. In fact, the snake plant has the same structure as aloe vera, jade plant, and agave plants. The plant also has care requirements that almost resemble those of cacti.
While the Snake Plant belongs to the succulent family, it is not a cactus.
4.Snake Plant Can Easily Adapt To Different Environments
The snake plant is very versatile and easy to take care of. It can grow in different environments. You will probably give it too much water if you place it in a humid atmosphere. However, a dry environment might not be suitable for your plant.
The snake plant will be happy growing in a room with little sunlight, but you can also place it indirect light. However, make sure to do this gradually as too much sun is not good for your plant. But if you place the plant in dim conditions, it might form brown spots on the leaves.
5.Snake Plant Can Remove Toxins and Improve Air Quality
One of the most interesting facts about this plant is that it can remove toxins from the air we breathe. It also absorbs carbon dioxide and releases oxygen at night. This attribute is an excellent benefit for those who sleep with their windows closed. This allows you to create clean air for your bedroom. Its air purification quality has earned the plant a perfect place in the bedroom.
6.Snake Plant Is a Busy Little Plant
The snake plant is considered a busy plant because it regulates the transpiration rate. The plant can regulate these processes to grow in hot and dry conditions. However, this also makes the snake plant adaptable. So if you place your snake plant in a humid environment, it will still have the same success as if it were in a dry area.
7.Snake Plant Is Easy To Care For
The Sansevieria Trifasciata is an excellent houseplant for beginners, thanks to its easy care. If you’re starting with indoor plants, the Sansevieria will be a perfect choice. It’s easy to care for and adapt to different environments, making it one of the easiest houseplants to grow.
The snake plant is an easy-to-grow houseplant that only requires a few basic care tips. You need to place your plant in indirect sunlight and water it once every two weeks. This plant is not too demanding when it comes to caring needs and is a perfect plant for those who have a busy lifestyle or those just starting their gardening journey.
Snake Plant is a low-maintenance houseplant, making it an ideal plant for beginners and busy people.
8.Snake Plant Is Popular All Over the World
The snake plant is extremely popular everywhere around the world. This succulent plant is widespread in America, Europe, and Asia. It’s found in most nurseries and retail stores across the globe.
The reason behind its popularity must be due to its adaptability and easy care. When cared for properly, the snake plant will be able to retain its strong appearance. The plant requires little attention and makes an interesting addition to any living space or office.
9.Snake Plant Makes a Good Gift
The snake plant is also popular because it’s the ideal “thank you” gift after someone has had a baby. If you know someone who just recently gave birth, this is an excellent houseplant to give them as a gift. It’s also great for newlyweds. So the next time you’re planning on giving someone a housewarming gift or want to treat yourself, get your own snake plant.
10.Snake Plant Is Related to the Agave and Aloe Plants
The snake plant is related to two popular succulent plants: aloe vera and agave. This means that if you have experience growing either the aloe or agave plant, you will find it very easy to grow a snake plant because of their similarities. They all require similar water needs and temperature requirements which makes caring for the snake plant very easy.
Snake Plant, Agave, and Aloe Vera have similar water needs and temperature requirements.
11.Snake Plants Prefer Being Dry
Since these plants are native to drylands, they do not like wet feet. Make sure to remove excess water from the pot and place it in a dry area. An easy way to tell if your snake plant needs watering is by touching the soil – if it’s moist, do not water it.
The snake plant prefers its soil to be completely dry before you start watering it again. The plants are capable of storing water and can survive long periods of drought. Overwatering these plants can cause root rot.
12.Be Careful With the Leaves
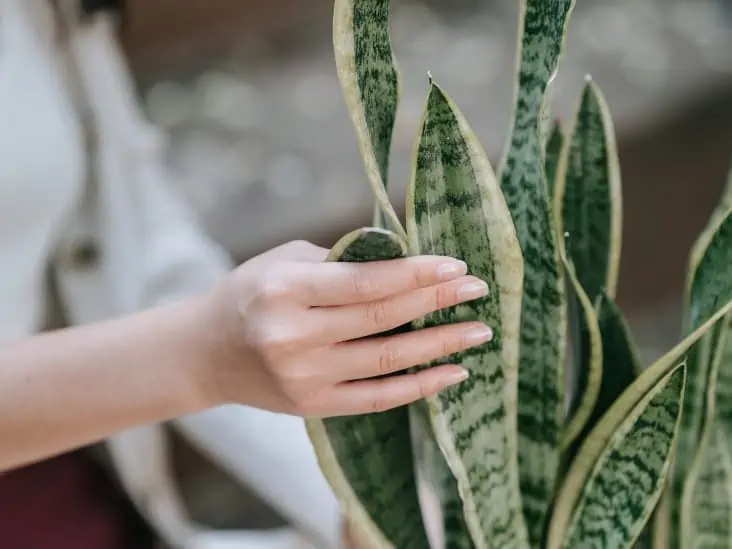
It’s important to use caution when handling snake plants. You do not want to get cut or scratched because the leaves and edges of the plant are sharp and will cause a nasty cut that you don’t want.
13.Snake Plant Flowers
Did you know that the Sansevieria Trifasciata is also known to produce beautiful flowers? This happens in June and July, allowing for an interesting treat for your eyes when you spot flower buds on your plant. The snake plant will grow small white flowers that closely resemble aloe blooms.
14.It Repels Mosquitoes and Pests
The snake plant is a popular decoration for bathrooms and kitchens because it repels mosquitoes and other insects. This makes the Sansevieria Trifasciata an excellent choice as an indoor plant if you live in areas where you’re exposed to these pesky insects.
15.The Plants are Not Pet Friendly
If you have cats and dogs in your home, you should learn to keep them from your precious snake plants. The plants are toxic to your pets, so keep them out of their reach. The snake plant can cause pet poisoning if ingested or chewed on by an animal. It’s best not to have this plant anywhere near places where your precious pets can roam freely.
Frequently Asked Questions about Snake Plants
Why is the plant called snake plant?
There are multiple explanations for this. One account tells of the plant’s ability to kill a snake if it touches one. Another story suggests that it’s because the leaves are shaped like snakes, making them look slithery. Yet another version says that the name is due to the sharpness of the leaves, which can cut you easily if you’re not careful.
Can the plant cause skin irritation?
Yes, if you get cut or scratched by a snake plant leaf, you can develop a rash on your skin. The leaves of these plants are sharp and can injure you easily if you’re not careful.
What color flowers will the plant produce?
The snake plant will produce pink or white flowers that resemble aloes. These blooms are usually spotted in June and July.
Summary
If you’re looking for a new houseplant to buy, consider adding one of the majestic Sansevieria to your living space or office. This award-winning plant will surely bring life to any room it’s added in and is considered one of the best plants you can keep indoors.
They are easy to care for, are adaptive, and have a long list of benefits that you’ll enjoy. If you’re a beginner in indoor gardening and looking for the best plants to start with, you can’t go wrong with the Sansevieria Trifasciata.
You probably want more snake plants in your home because they are easy to grow and require little maintenance to thrive. In fact, a snake plant can survive on its own as long as you water it appropriately. Unlike other plants, you don’t have to go out and purchase new snake plants because it is relatively easy to propagate new plants from cuttings, leaves, and rhizomes.
So, can you cut off a piece of snake plant and plant it? The simple answer is “yes.” Propagating a snake plant from a cutting is relatively simple, and rooting the cutting in water is almost foolproof. All you need to do is treat the cutoff part and root it in water or soil. Other than cuttings, you can also propagate a snake plant by division or from a rhizome. As long as you follow the correct procedure, you will have more snake plants in no time.
This blog post discusses everything you need to know about propagating snake plants, including how to propagate cuttings in soil and water. So, let us get started right away.
Why Do You Need to Propagate a Snake Plant?
There are many reasons why you would want to propagate a snake plant. First, you may be looking to reuse a damaged leaf or stem with sunburn marks. When exposed to direct sunlight, these plants tend to suffer sunburns. So, instead of cutting off the sunburn sections and throwing them away, you can turn them into new plants.
Instead of throwing away your damaged Snake Plant, consider propagating it to grow a new one.
Sometimes, you may want to propagate your snake plant because you have accidentally overwatered it, and now it is showing clear signs of root rot. If the root rot hasn’t spread too much, you can still save your plant. Unfortunately, many gardeners only notice the signs of root rot when it is too late.
You may also choose to cut off a section of your snake plant and propagate it because you just want to adjust the overall look of your existing plant a bit by removing some sections. You can even propagate prune leaves into new plants.
How Long Does It Take to Propagate a Snake Plant?
From our many years of experience, it usually takes between one and three months to propagate a snake plant. However, rooting your snake plant cutting in water might take some time. Some people choose to root their cutting in LECA over water to avoid rot on cuttings.
The cutting may also take a while to root in the soil. It may be almost the same time, but rooting in the soil might seem like a little longer because you can’t see anything happening.
You can always see the roots sprouting in water, especially if you are using a transparent container. Seeing the progress physically is motivating.
Propagating a Snake Plant takes somewhere between one and three months.
Propagating a snake plant from the division is pretty quick. All you have to do is cut off the baby plants from the mother plants at the rhizome and transfer them to new pots.
One thing you must keep in mind is that snake plants are generally slow growers. Therefore, you will be forced to wait for some time before the plant is mature enough to handle division.
You should also be wary of the time of the year you conduct propagation. Typically, propagation takes much longer in winter. The process is faster during spring or summer when the growing conditions are right. So, this is the best time to propagate your snake plant.
Different Ways of Propagating Snake Plant
Now that you understand why it is essential to propagate a snake plant and how long it takes, let us highlight the different ways of doing it right.
1. Propagating Snake Plants in Water
One of the easiest ways of propagating a snake plant is rooting the cutting in clean water. This is the best way to grow broken or bend parts into new plants. It is also an excellent way to turn the extra leaves into new plants instead of throwing them away.
To root your cuttings in the water, you will require a sharp pair of scissors or knife, water, a heavy glass/vase, and rooting hormone, which is optional.
Using the knife or scissors, carefully cut off the leaf you want to propagate. Ensure the cutting is done near the soil and is as clean and sharp as possible. You can dip the cutting into a rooting hormone if you like.
Now place the bottom of the leaf into a vase containing water. Ensure the leaf is covered halfway. If the leaf is too large, cut it into sections and root each section differently.
It is critical to keep the cut leaf in the same orientation it was when it was in the soil. Keep in mind that snake plant leaves are highly polar and will only develop roots if the edge of the leaf closest to the potting mix is put in the water.
If you interchange the orientation, the leaf won’t grow roots. You can always go for a V-shape cutting for the best results.
2. Rooting Snake Plant Cuttings in LECA
Sometimes, rooting snake plant cuttings in water can be problematic. This is because snake plant cuttings are prone to rot when exposed to water for an extended period.
This is why many people choose to root the cuttings in LECA (Lightweight Expanded Clay Aggregate) or vermiculite and perlite instead of water.
LECA is an excellent medium to use for snake plants. It doesn’t promote rot, and you can easily monitor the progress of the cutting.
To root your cuttings in LECA, you will need an empty pot, a prepared mix of LECA, perlite, and vermiculite, and, obviously, a snake plant cutting.
Fill the pot with the prepared mix and position it near a window or light. Gently insert the cutting into the pot and make sure that it is in an upright position. Water regularly to keep the LECA moist but not wet.
You’ll need to wait for some time before seeing any signs of growth, but once the leaves appear, you’re good to go.
3. Propagating Snake Plant Cuttings in Soil
If you don’t want to propagate the cutting in water, you can do it in soil. The first thing you need to do is carefully cut off the section of a healthy leaf near the base of the plant.
Let the cutting dry and heal for one or two days, then plant it in a clean potting mix. Water it well and let the excess water drain completely. Don’t let the potting mix get too dry or wet because the cuttings can easily rot in soggy soil.
Check on your soil once every two weeks and only water when the topsoil is completely dry. Just like rooting in water, the cutting will take some time to root and grow into new plants. However, rooting in soil takes a little bit longer compared to rooting in water.
4. Propagating from Rhizome Division
If you are looking to propagate a snake plant easily, you can split the rhizomes and root them as new plants.Rhizomes are the underground parts of a snake plant that look like pieces of ginger or thick roots.
Carefully pull your plant out of the container and use a pair of sharp shears or serrated knife to cut the mass of roots and soil in half. Each half will have at least three rhizomes and should be healthy.
Once you are done with the separation, put each new plant in the soil and water it properly until the water drains out through the bottom of the container.
Keep in mind that with the rhizome division method, you can’t propagate the rhizomes in water because it isn’t necessary. You should only consider propagating a snake plant cutting in water when there are no roots yet.
5. Propagating Snake Plants Using Offsets
Another way of propagating snake plants is by using offsets. These parts of the mother plant grow separately from it and need to be cut off and placed into their own pot.
Offsets are easily identified because they have distinct root systems. To propagate them, you will need a sharp knife/scissors, potting mix, and an empty pot for transplanting.
Using the scissors or knife, gently cut off the offsets from the mother plant and separate them from the rhizome.
Place these offsets into an empty pot filled with the potting mix. Water and keep the plant in a warm and bright location away from direct sunlight.
It is essential to be careful while cutting off offsets as they are prone to rot once exposed to water or sunlight.
6. Seed Germination
You can also propagate snake plants from seed if you are patient and do everything right. Snake plants usually produce flowers during spring or summer. These flowers can be pollinated to produce seeds.
You can collect the seeds and try your luck germinating them into seedlings.
To germinate the seeds, fill a container with potting mix and lightly press down each seed into the soil. Cover the entire container with plastic wrap and place it in a warm spot away from direct sunlight.
Check the soil every couple of days to ensure it is moist but not wet. In a few months, you should start seeing the seedlings emerge from the soil.
Once they have grown into young plants, transfer them to larger pots filled with fresh potting mix and keep watering regularly until they are established enough to be moved outdoors.
What Are Some of the Common Snake Plant Propagation Problems?
Even though propagating snake plants is almost foolproof, some things may still not go according to plan.
One of the common problems you will most likely encounter is your cutting failing to root on time. It happens most of the time because not every piece of cutting is the same. Some cuttings might not root as well as others.
Sometimes, the cutting from a Snake Plant does not root on time.
In most cases, the solution to delayed rooting is just to give your cutting more time. As long as your cutting isn’t showing signs of rotting and you keep the water fresh, roots will soon start to appear.
To speed up the healing process and prevent a wide range of other issues that may arise, consider adding ground cinnamon to the ends of your cutting before you start the propagation process.
Caring for a Snake Plant after Propagation
For post-propagation care, the most important thing you need to do is find the right lighting for your plant. In fact, this can be the only difference between a stagnant and growing snake plant.
Although snake plants are one of the few low-light tolerant succulents, it doesn’t mean that this is the ideal environment for them. These plants generally thrive in a relatively sunny environment and can even bloom if you are lucky.
After propagating your Snake Plant, place it in a sunny area for it to thrive or even bloom.
So, you need to find a good spot inside your house where you will position the propagated plant. Ensure the spot receives plenty of natural light but don’t expose your young plant to direct sunlight to avoid causing sunburns.
If you are propagating the cutting in soil, make sure the soil is well-draining and has plenty of organic nutrients. This will help your plant to root faster and stay healthy.
Summary
Now that you know the different ways to propagate a snake plant and how to take care of propagated plants, it is time to fill your home with new plants for free.
The most important thing to remember is that different propagation methods require different maintenance routines. For instance, if you use rhizome division or rooting a cutting, it is critical to use the right potting mix and a container with plenty of drainage holes to prevent root rot.
To keep your snake plants healthy for many years, you should consider repotting them every two to three years. This is also the best time to propagate them.
Did you know that the jade plant is also called the money plant or lucky plant? It is a succulent plant with white or pink flowers, native to South Africa and Mozambique. Many people plant jade plants in their homes and offices, and it is believed to bring luck. There are so many reasons why many people want this tree near them.
This article will look at some of the amazing facts that you didn’t know about the jade plant and why you should consider growing it in your home or office. It is also good to know that jade plants have a miniature tree-like appearance that makes them appealing for decorating a house. They have a long life span and grow up to three feet long.
1. It is Easy to Care for Jade Plants.
One of the most reasons why people plant jade plant is their ease when it comes to caring. From the time you grow it to the time it will mature, there is little effort required from you. The most important factors to consider when growing are water, temperature, and light.
Watering a jade plant
Watering jade plant depends on the season; is it winter or summer. During the summer season, it requires little water, and even less water during the winter season. The plant is susceptible to overwatering, especially during the colder season, as it causes root rot.
The Jade Plant requires minimal watering in summer and even less water in colder months.
As a succulent plant, do not let your jade plant dry out completely. Jade plant requires water at different intervals hence do not water the plant on a schedule. Instead, water the plant when the topsoil seems dry. Leave spot or leave fall is caused by inadequate water or excess of it.
Light
Jade plant requires at least four hours of direct sunlight each day. It should be placed in bright, indirect sunlight if the plant is young because direct sunlight can damage the growing leaves. For well-established jade plant, it can adequately handle direct sunlight.
If the plant is planted indoors, place the jade plant in a south-facing window. It is a typically perfect spot with enough light. Do not let the leaves touch the windowpane, because it could cause sunburn.
Proper temperature
Jade plants are not frost-tolerant hence cannot tolerate the cold. They tend to grow best at room temperature, such as 650 to 740 F. During the winter season; when the temperature drops significantly, it’s good to find a warmer place for your plant.
2. Jade Plant has Significant Benefits.
The Jade plant is one of the plants willing to pay back your effort through numerous benefits. Its color will encourage you to have the plant at home, but its benefit will do much more. Some of the scientifically proven benefits of the jade plant include
Improves quality of indoor air
Indoor is where you spend most of your time at night. Scientists have proven that indoor air can be polluted and dangerous, just like outdoor air. Lack of proper air can lead to sick syndromes such as headache, dizziness, or nausea.
To clean up indoor air, you can choose to use ventilators, but the jade plant cuts on all costs related to the maintenance of ventilators. Jade plants improve the quality of the air by purifying it and emitting clean oxygen gas for you.
Jade elevates the level of humidity.
The summer season causes dry air in the house. Additionally, the winter season lowers indoor humidity due to the addition of radiators. If you want to improve the level of humidity in your indoor air plant, a jade plant is a perfect solution.
Low humidity indoors is not only bad for your health but also your beauty. Low humidity causes dry skin, an itchy throat, and flaky lips. The evapotranspiration caused by the jade plant during the dark times increases relative humidity.
The Jade plant is a medicinal plant.
In Chinese culture, the jade plant is not just a beautiful plant but a medicinal one too. Extract from its leaves are used to treat wounds, stomach upsets, and warts
Jade is a Chinese traditional medicine mentioned as a diabetes remedy
Jade plant is also believed to open the energy flow in the body, uplifting, positive vibes
Drinking tea made from jade plant mellows out the diabetes symptoms
Its juice is also believed to cure skin warts
In Chinese culture, Jade Plant is a natural remedy for diabetes.
It adds a touch of beauty.
Jade plant has green colored leaves that are usually tear-shaped, wedge-shaped, or oval-shaped. For some species, the leaves come with red blushing around the edges, which can match nicely in your office or home. The leaves are well placed in a thick and woody stem.
Jade plant is a beautiful plant that matches well in every type of home interior due to its stubby look. During the late winter season, it greets you with beautiful white and pink flowers. Jade is a plant that will always count on to make a difference in your home.
3. The Jade Plant is a Perfect Plant for Novice Gardeners
The Jade plant is a plant for everyone. It grows well in the homes of those who can care for it correctly. It favors even the novice gardener and grows well too. It spruces up the interiors and the landscape without much maintenance.
The Jade plant is an excellent example of a flowering succulent that will not shy away when its time comes. It blooms during the winter giving white and light pink flowers which are start shaped. Jade plant easily adapts well to numerous conditions and can do well in the low-light area too!
4. The Jade plant is a ‘Feng Shui’ plant.
Apart from the beauty and the medicinal value, jade is a well-known Feng-Shui plant. It is a plant popularly known to attract good luck where it is planted. The presence of a plant in the house is considered to give off Chi, which is known as positive energy.
Most cultures especially in Asia believe that the jade plant is a good luck charm that attracts and activates financial energy. Being an evergreen tree, the jade plant is also a symbol of consistency hence will attract positive energy.
If you are looking for a Feng-Shui Plant, the Jade Plant could be a perfect choice.
Here are some of the ways it will bring positivity.
Placing it at the door of your business or office to bring growth
Place the plant in the southeast window of your home to bring wealth to your home
If it is placed in the eastern section, it is believed to boost the health and happiness of family
All these believes are what makes the plant to be known as the money tree. I hope you will try the plant at home and prove it.
5. The Jade plant is a friendship plant.
The Jade plant is a fantastic tree to give as a wedding favor or housewarming gift. It is again referred to as the friendship tree because it is effortless to share with friends. If you want to share it with your friends, all you have to do is cut a few leaves and give them out.
A small cut from a jade plant can bring up a whole new plant still with less maintenance. Giving out a jade plant is considered as passing on the favor to others. So, consider planting jade not only for your benefit but also for others. Don’t forget to give a jade to those you love.
6. The Jade plant is an enduring plant.
If you like a tree that will save both your money and your time, jade is the best. It can endure and survive in almost all conditions. They are known to survive in strong winds and even droughts. Jade plant quickly adjusts to the atmospheres around them.
The Jade Plant is one of the most popular houseplants as it can survive in almost all conditions.
Because it has a slow growth rate, jade plant will not give you the stress of changing the pot often. It will take a long time before it demands to be repotted in a bigger pot. It will also not need frequent pruning and fertilizing as well.
The Jade plant is a perennial plant with an average life span of about two years, though some live longer. This plant will not just endure for a short time; it will endure for long. Jade can stay in neglect for days.
Bottom Line
Bringing the jade plant into your house is bringing an ornament that will positively impact most of the areas of your life. If planted in round foliage, shinning in deep shape, the jade plant looks appealing. There are many types of jade plants, and you can choose the one most favorable to you. But in all of them comfort and beauty has well been blended with good luck.
If you don’t believe in luck, I guess you don’t like dry lips translated to humidity by the jade plant. The truth is that jade plant has all the reasons why you should have it in your place. If your body tends to irritate with such plants, well, stay a little far and purified air will meet. With all that, it’s time to go jade.
An Aloe vera is likely to die, because of rot, which has been linked to fungus growth. This succulent plant suffers from different root rots caused by negligence, wrong soil type, unmatching environment, and in some cases combination of all these factors. When the immortal plant turns dark brown, has mushy root tips, and lower leaves, take time to save your garden.
So, how do you save a rotting aloe vera? You need to take fast and definite steps: immediately remove the aloe from its pot, repot the aloe vera to a better pot, and prepare appropriate soil. Always follow the right replanting process and a correct watering schedule.
Aloe plants are easy to maintain, but this depends on whether it is planted indoors or outdoors, regardless of the place, maintaining loose soil will save a rotting aloe. Show your love for your plant by taking care and inspecting it regularly.
In this post, we will enumerate steps to follow of how to save a rotting aloe vera. Read on to learn one or more valuable lessons of the things you need to do to save the plant.
How do you realize the aloe plant is rotting?
You can learn of plant rot if you start seeing some brown, water-soaked spots on the leaves, soft, oozy leaves that are drying up. For rot to be observable in the leaves, much damage has occurred in the roots. Immediate action is required, and you need to act fast to salvage the situation.
If you see brown spots on your Aloe Vera or the leaves are getting soft, the plant may be rotting.
Removing the Aloe From its Pot is Critical
Immediately, remove the plant from the pot, brush off as much dust as you can from the root, and remove all the dark or dark brown roots because they are already infected or dead.
Take a thorough observation of the center of the plant. If it is still healthy, remove all the black or brown section on the bottom. If the crown is severely damaged, it’s too late to save the plant; start a new plant again using any green or plump section of the plant.
Repotting will offer a new lease of life to the Aloe Vera
After you have done all the corrections in the plant, it requires a new environment. You can undoubtedly clean the old pot and plant it there, but you don’t want to take such chances. Planting the aloe in the same pot could lead to the development of the same fungus. I mean the same infection.
Repotting an Aloe Vera with root rot is one of the best ways to savethe plant.
Ensure that the pot you want to place the plant meets all the qualifications. The pot should be big enough to hold the aloe in place and free up the roots. The pot chosen should be made of a porous material that allows the excess water to drain more quickly.
The size of the aloe plant should determine the kind of pot used. The pot should be one-third more significant than the aloe plant. If the pot is too big, the soil will soak more water than required. The pot chosen should have good drainage. It should not hold water for such a long time, soaking the roots.
Consider the Soil you want to Use
When replanting your aloe, make consideration of the soil you want to use. Aloe does best in soil that drains quickly but always has some proper moisture retention. The best medium for the aloe plant is made from a proper mixture of sand and soil.
When repotting your rotting Aloe Vera, make sure you gat sandy soil that offers proper drainage.
When the aloe plant is dying, change the soil before replanting. Sandy soil is suitable for drainage but again retains little water for your plant to absorb before the container completely drains. It can be mixed with some inorganic materials for improved drainage and nutrients necessary for the plant’s growth.
It is good to know that you should not use potting soils that are added with fertilizer. Most succulent plants, including aloe vera, respond poorly to too much fertilizer because their nutrition requirement is low. You can mix one part sterile soil with one part sterile sand and add some stones.
Know how to Replant Your Aloe
Proper replanting of the aloe plant is one way of saving it from rot. Immediately you remove the rotten roots, disinfect the remaining roots with a charcoal, fungicide solution or potassium to prevent further infection. Leave the plant for a day so that the roots can dry up.
When the plant is ready for planting, don’t forget the depth that the plant had. Bury it in the same depth that it had in the previous pot to stop the root and the moisture troubles. An aloe vera with a green and healthy crown can be replanted right away but in a new pot and new soil.
If the crown is already damaged, the best you can do is taking a green section and start a new plant. The section to be used should be at least a ½ inch from the last rot section. Let the wanted part scrub for a night before replanting. When planting, plant the cutting at least 1 inch below the soil’s surface to enable them to root and draw water from the soil.
Set a Better Watering Schedule
Here, you don’t want to repeat the same mistake that could lead to root rot again. If the above details are in place, it’s time to be careful with the watering. Before watering, ensure that the moisture level is 1 to 2 inches below the topsoil.
To prevent your Aloe Vera from developing root rot once again, set a better watering schedule.
Watering the plant is dependent on the weather conditions. It may take you longer to water the plant during the winter and more frequent during the summer. When the plant is young, it will need more water than an older plant which have already adapted to drier conditions.
Aloe plants should only be watered if the soil is dry. You should water deeply until the pot starts draining some water with the holes at the bottom. This is because succulent plants are known to take in a lot of water at one time.
Understand the Surrounding of the Plant
Whether it is indoor or outdoor, make sure you know how the surrounding of your plant looks like. Ensure that your replanted aloe has the right lighting and proper temperature to grow. Though they require some proper light to grow, avoid direct sunlight.
Light is good, but direct sunlight can burn the leaves of the plant. If the aloe plant is planted indoors, prevent the leaves from touching the windowpane, which is dangerous for the plant. The plant should be in a place that receives maximum lighting but away from the windowpane, intensifying the sun.
During the winter season, you can move the indoor aloe plant outside to receive some light but take it in at night when the temperature drops. You can also complement the plant with artificial lighting in the house.
During summer, you can let your plant absorb some sun but for some hours to strengthen the leaves. When the plant is in a windowpane, ensure that you rotate the plant to get the light on all of its sides.
Always Ensure the Soil is Loose.
The soil structure of the aloe plant should be maintained. Watering is important. But when going to water the plant, ensures that the density of the soil is good too. Even with a container that drains water well, compacted soil holds more water than loose soil.
The soil density should be strong enough to maintain the plant’s growth but not so tight to prevent good drainage. This problem can be solved by removing some soil from the pot and adding some loose soil. Adding some small stones can also help to loosen the soil.
However, if the plant has stayed for too long in one pot soil, you may decide to repot the plant to a completely different soil. Getting proper soil density will prevent water from clogging in the container and ensure that air moves freely in the roots of the plant.
Inspect the Plant Regularly
Keeping a close eye on the plant is essential. You should regularly check on the plant’s leaves if they are developing some spots or if the root system is healthy. Ensure that any minor symptom from the plant is dealt with immediately.
After replanting your aloe, ensure that the plant is experiencing better conditions and that it is healthy. You should also check on the possible insects and pests that tend to affect the aloe plant’s leaves.
One of the easiest ways of inspecting the roots is by smelling them. Healthy roots have a typical root smell. If the roots are rotting, they will have foul solid and pungent smell. Roots that have been affected tend to feel soft and seem like they are water-soaked.
Bottom Line
Prevention is better than cure. Before rotting occurs, you can take good practices to ensure that the plant grows into a healthy plant. Before purchasing the plant or bringing it home for planting, ensure you have read on the appropriate conditions of growing aloe plants.
When doing corrections on your plant like trimming some parts, you should use gloves because the sap produced may irritate some people’s skin. If all this is successful and the plant has matured, know how to make your plant flower in its proper season.