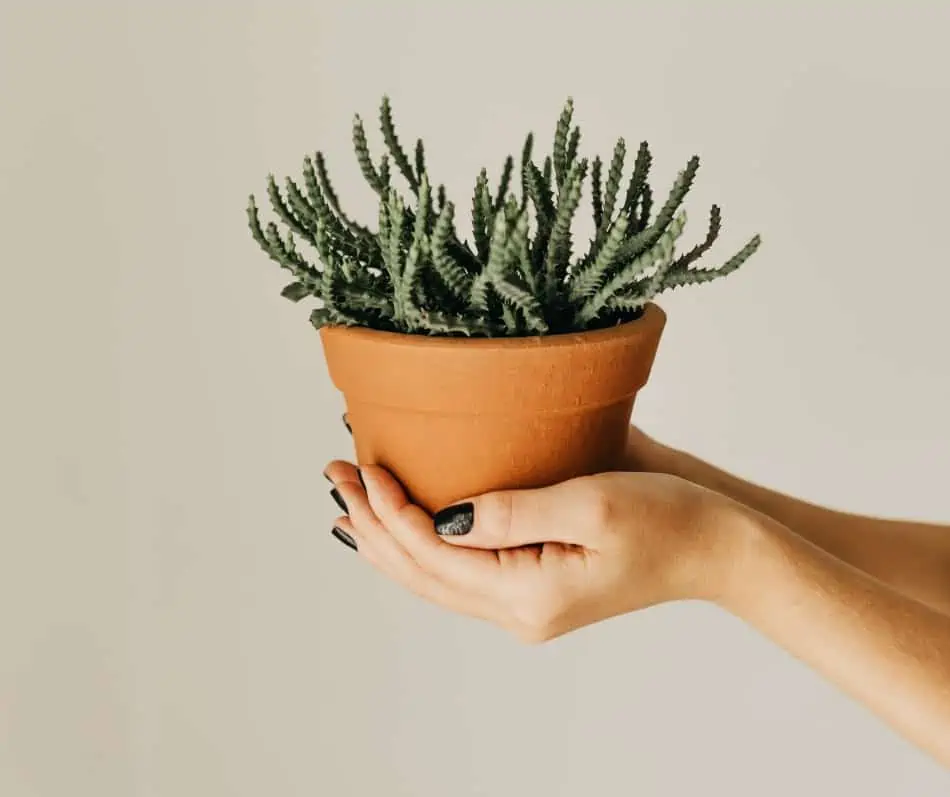
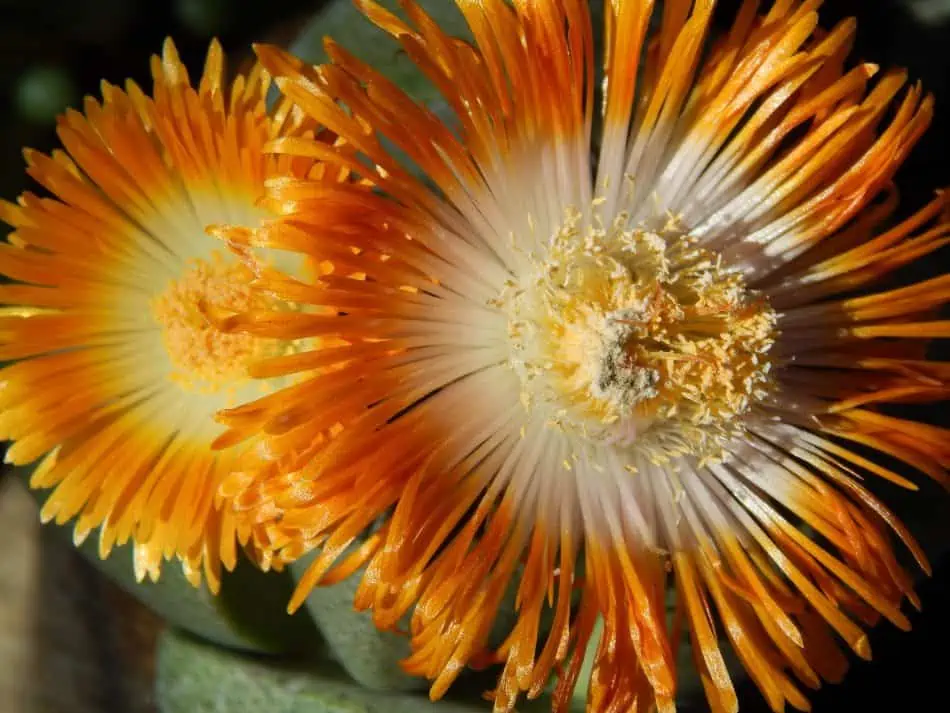
A dying succulent doesn’t have to be the end. Succulents are hardy, and even one that is dying can usually be saved. There are various techniques to saving this low-maintenance plant. The key is to identify what is wrong with the succulent and restore its good health.
Just because succulents are low maintenance does not mean they still can not have issues. If you notice your succulent is showing signs of dying, there is no need to fear. Succulents are resilient plants and can almost always be revived. Read on to find out how you can save your succulent with these six easy steps.
1. Identifying a Dying Succulent
There are few tell-tale signs that your succulent may be starting to die off. Thankfully, they are straightforward problems to identify.
Look for brown or decaying leaves.
Look for mushy, soggy, or almost transparent leaves.
If the leaves fall off the plant with the slightest touch.
Check the stem; sometimes, the leaves will look okay even though the stem is rotting.
Overwatering is going to be the most common cause of these types of symptoms. Your succulent is closer to a desert cactus than it is to a desert flower.
That being said, sunspots or sunburns on your leaves may be a sign that your succulent is getting too much sun, or is being underwatered. If your succulent is getting direct sunlight, it may be necessary to relocate it inside. A simple pain of glass may be enough to shelter your succulent from harmful rays.
2. Prune Your Dying Succulent
Before you do any moving or re-potting of your succulents, you will need to trim and remove any and all leaves that have gone bad. Again, look for any leaves that are discolored or have lost their durability. Succulent leaves should feel pretty solid and can usually handle a little roughing up and not fall off.
3. Digging Out Your succulent
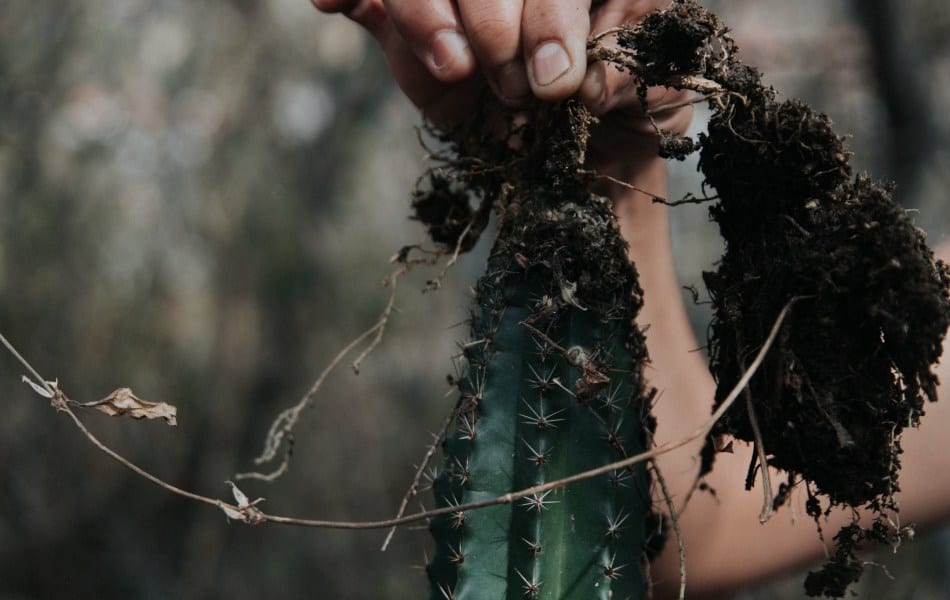
You will want to be as gentle as possible, but it is time to dig out or cut your succulents. If your succulent has a sturdy-looking stem, but the leaves are dying and breaking off, you are going to want to dig it out. Be sure to protect as much of the roots as possible. If the leaves are dying, the roots should come out easy enough.
Make sure you protect the roots when digging out a dying succulent.
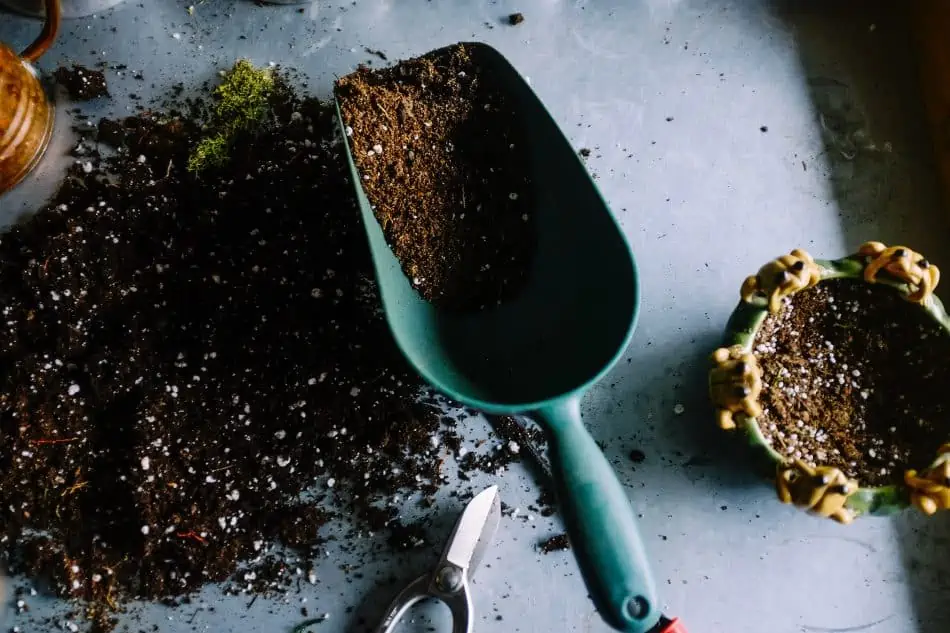
Gently work a small shovel or spade around your succulent until you can easily remove it from its current pot. At this point, it is essential to clear the roots of all dirt fragments. You want clean, robust roots for the next step. Succulents planted in the ground outside will need this same step if their leaves have gone bad.
4. Cutting Your Succulent
If the leaves on your succulent seem to be healthy, but the stem looks rotten, then it is better to snip the plant. Follow the stem up past any rot until you find a nice healthy-looking spot and give it a snip. This is a good time for extra pruning. Take an extra close look at your stem to make sure all the dead leaves and rot are gone.
5. Leave Her Out to Dry
Whether you snipped or dug out your succulent, you will need to find a place for it to dry out. Preferably indoors on mesh or a strainer. You are going to want to let your plant dry out completely. This should only take two to three days.
After a few days, touch the roots yourself to make sure they are dried out. This is important again because overwatering is the most common reason for succulents to die off. Thoroughly dried out roots will reattach to dry soil easier.
6. Time to Re-pot and Care for Your “New” Succulent!
Once your snipped or uprooted succulent is dried out, it is time to re-pot. It is best to select a small temporary pot filled with completely dry soil to replant your succulent. You will leave the succulent in this temporary pot for around a month or until you can feel strong roots growing.
Use a small temporary container when repotting your dying succulent.
You are going to want to find a dry place in your house with no access to sunlight while your succulent nurses itself back to life. A counter with no access to sunlight should be a fine place to put your plant.
When the roots are solid, you can feel free to relocate your succulent to the garden or the windowsill or back in the large pot with all the others. Just be sure not to overwater.
How to Prevent your Succulent from Dying
If you can prevent your succulent from dying in the first place, you won’t need to worry about bringing it back. Keeping your succulent from dying can be done in a few ways:
Using a moister meter to make sure the succulent doesn’t dry out
Not overwatering the succulent
Make sure the soil is nutrient rich
Give you succulent enough space to grow
Keep the succulents warm
Purchase a Moisture Meter
This a crucial step, get yourself a moisture meter. You can purchase a moisture meter for five to fifteen dollars. Moisture issues will be live or die for your succulent, allowing your life to be made easy with a moisture meter.
You are going to want to check multiple spots in your pot in the future. Several plants in the same pot can register different levels. You only want your meter to register one to three. As long as there is moisture present, you should be fine not to underwater.
Overwatering Your Succulent
A common mistake people make when caring for succulents is overwatering. Succulents are part of the cactus family and don’t need much water to live. Make sure the soil is damp and never looks like mud after watering. Don’t use a mister. Succulents are desert plants and misting will change the humidity level around them.
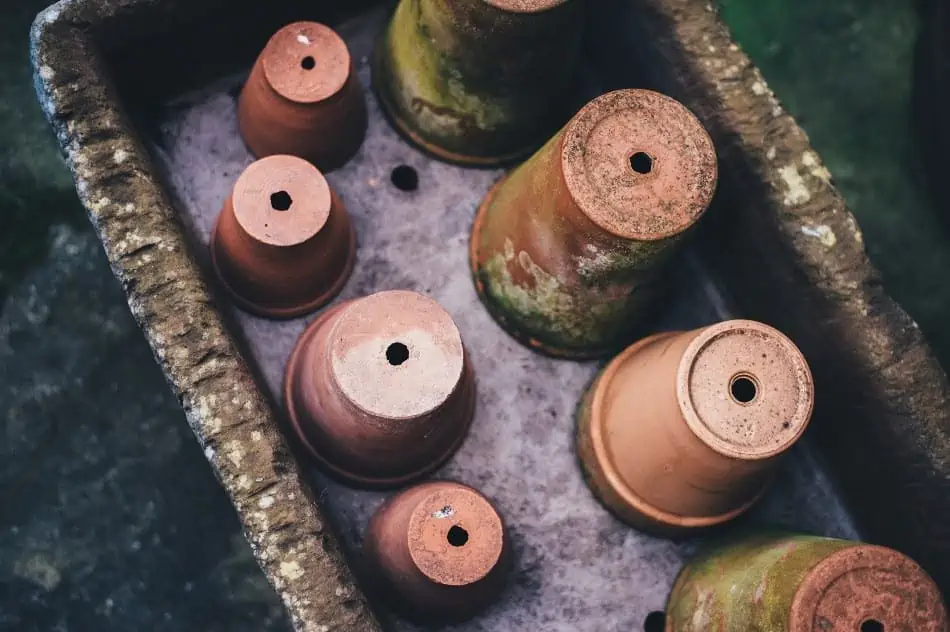
Overwatering can also result from improper drainage. Make sure your succulent is in a container with multiple holes on the bottom.
Overwatering is one of the most common reasons why a succulent is dying.
Indoor succulents will require even less watering than outdoor. As a general rule do not water your succulent until the soil feels one hundred percent dry. Fourteen to twenty-one days is a good number to keep in mind. Especially if your succulent is in a place with little to no sun.
Outdoor succulents should be watered one to two times a week. Being outside they will have more direct sunlight and need to be watered more frequently then indoor succulants. If you’re in a climate that experiances a winter, only water one or twice during that season because the succulents go dormant in cold weather.
Succulents Need Properly Mixed Soil
It is highly recomnded that you use potting soil for indoor plants only and that you add sand to the soil before planting. Coarse sand is your bet best for proper drainage. This will help ensure no overwatering. Keep in mind that certain potting soil will have added nutrients in them that can harm or burn Succulent roots. This another reason sand needs to be added.
Always use a soil mix that offers proper drainage for your succulents.
The proper ratio if using regular potting soil is two parts coarse sand, two parts potting soil, and one nd a half cups of perlit or pumice. When planting directly into the ground, use a similar mixture to add as top soil before planting your succulent.
Use a Big Enough Container
Just because succulents can be small doesn’t mean you should cram several of them into a small pot. Each succulent should have several inches around them. Space allows the succulents to keep growing without getting into each other’s way or deprive them of nutrients in the soil.
Keep Your Succulents Warm
Succulents need to be kept warm year-round. Outdoor locations or areas of your home prone to drafts are not a good place to keep your succulent. Any location of your home with consistently warm temperatures is ideal.
Conclusion
Thanks to the hardness and versatility of succulent plants, they can most likely be saved and salvaged. It requires a few steps but nothing too complicated. Once your succulent is entirely replanted, use your moisture meter to ensure your plant will have a long, happy life. In the meantime, go save that plant!
Succulents are a fun, laidback plant for that requires only a little watering here and there, including during the winter months. Not only are they hardy and require little maintenance, but they can also be a whimsical and beautiful addition to any office desk or windowsill.
Succulents thrive during the warmer months of the year, but what about during those chilly winter months? Read on to find out how to water succulents in winter, what to avoid, and the steps you can take to keep your succulents thriving and healthy even when it’s chilly out.
Bring Your Succulents Inside for the Winter
We are talking about watering, but first, it must be stated that succulents are not going to thrive in frigid conditions. Anything below 40 degrees Fahrenheit will likely damage or even kill your succulents. So, if you anticipate temperatures dropping below 40 degrees in winter, it’s best to set your succulents up indoors.
Properly preparing and weatherizing your succulents will guarantee that they don’t die in suboptimal temperatures. Make sure to keep your succulents in a warm (but not overly hot) room with plenty of sunlight.
Keep your succulents indoors during cold winter months to prevent them from dying.
Check them for bugs and infections, tidy them up, and get them ready for their new indoor winter life. Transfer them to the appropriate indoor pots if necessary.
Also, note that succulents, like most plants, go “dormant” in winter. This means that they are preserving energy and not actively growing or really doing much at all during the cold winter months. Dormant plants require less active maintenance and actually make a passive approach to daily care better for their long-term success.
Prepare Your Succulents for Successful Watering
Making sure your succulents have optimal conditions for watering will help ensure they have a successful winter season. A pot that allows adequate drainage will be crucial to not overwatering and allow the unneeded and possibly damaging moisture to pass through the soil and not pool at the roots.
The appropriate soil that allows for quality nutrients but doesn’t retain water will be ideal for your succulent, but the best soil will be dependent on the actual species of succulents and can vary from plant to plant.
Make sure your succulents are potted in well-draining soils with sufficient nutrients for the plants to grow healthy.
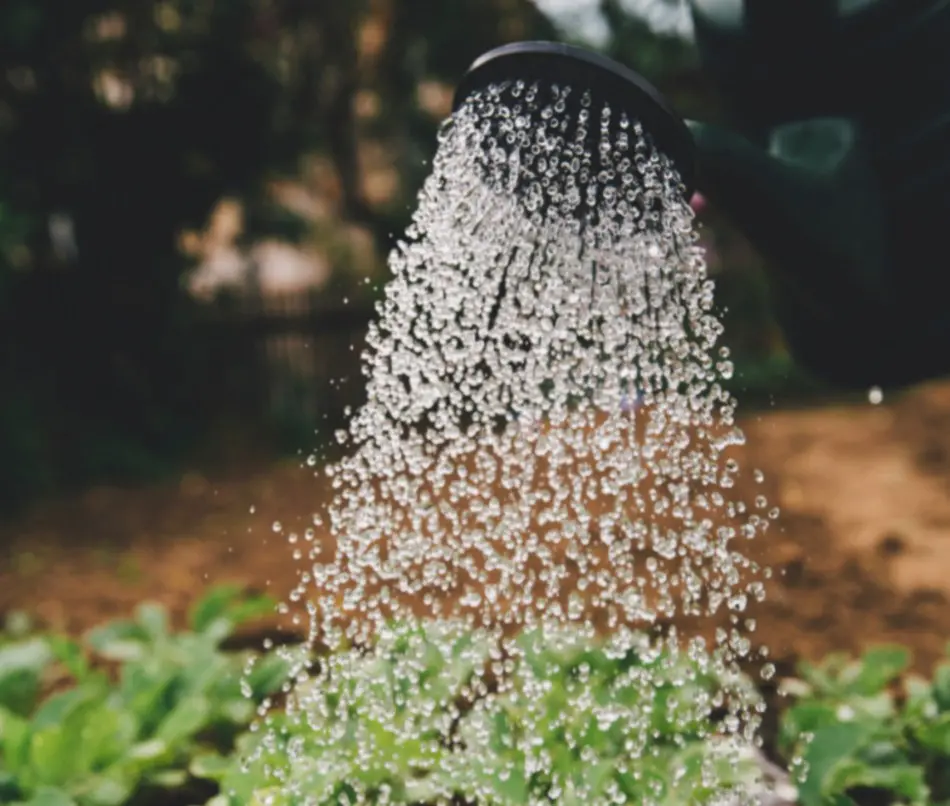
Water your succulents at the root, not on the leaves. Standing water on the leaves can cause damage or decay, so make sure the water goes directly into the soil. Using a mister or spray bottle can actually do more harm than good, and experts recommend a watering can that will allow the water to bypass the leaves and goes straight into the roots.
Water Your Succulents When Their Dirt Becomes Dry
One of the nice features of most succulents is that they are actually quite low-key and require a lot less maintenance than the average house plant. Succulents should not be watered until their dirt is dry to the touch and not until then.
Always check if the soil is dry before watering your succulents.
Succulents retain water inside their leaves, meaning while you may feel like you aren’t watering your little plant enough, your succulent is actually holding onto a lot more water than it may seem. Overwatering is one of the leading causes of succulents becoming infected or dying, so be mindful of how much water you’re giving them and how often.
Water Succulents Less in the Winter
We’ve discussed that succulents shouldn’t be watered when the dirt is wet, but how often will you actually be watering your plants? While each plant and species is different, the average succulent will not require watering more than once a month, possibly even once every other month.
This contrasts significantly with the once-a-week watering required during summer for most succulent species.
That being said, time is not the best indicator of whether or not you should plant your succulents. The soil is really going to be your best guide, so checking the dirt of your succulents for moisture will be the most consistent and reliable indicator of watering needs. If the dirt is still wet, wait a few days or even another week or so to check again before watering.
Don’t Overwater or Underwater Your Succulents
Unlike most traditional plants that require more frequent watering, succulents will develop rot or mold if overwatered. Many people worry about their standard houseplants going dry as it can be damaging or even fatal, but this is not the case for succulents.
Succulents thrive in dry, arid conditions with minimal water, so don’t worry about waiting several weeks between watering, particularly in winter.
Signs of overwatering include:
Leaves that fall off
Soft leaves
Discolored or semitransparent leaves
Yellowing leaves
Black spots
Additionally, underwatering can be damaging as well to succulents. While succulents require infrequent watering, not watering them at all or forgetting for too long will cause them to wither away. Making sure to check your succulents regularly, even throughout the winter months, will ensure that they are getting adequate hydration.
Signs of Underwatering Include:
Shriveled leaves
Dried leaves/roots
Crunchy leaves
Browning/discoloration
It’s much better to underwater than overwater when it comes to succulents, even in winter. Succulents have ways to protect themselves during long periods of minimal water, but they are very susceptible to a whole host of infections and problems related to too much water.
It is easier to revive a succulent that has received too little water, but too much water might be a death sentence for this plant species.
Provide Proper Drainage
If your succulent is in a pot that doesn’t have drainage holes, consider repotting it for the winter months. While some pots drain just fine outside, they might not be so efficient with draining and the indoor air. Draining is key for succulents during the winter months.
Succulents should be potted in containers with sufficient drainage holes for the plants to get rid of excess moisture.
When you repot your succulent for the winter months, again make sure you use soil that’s meant for these plants. This will also help with ensuring they’re draining properly.
Allowing roots to get soaked without airing out invites all kinds of problems, including root rot and bugs. Ew!
Add Humidity in Particularly Dry Climates
If you live in an area that has very dry winter air, then use a humidifier or even keep your succulent in the bathroom. These are both efficient ways to add moisture to the air and keep your succulent from drying out. You can also try a pebble tray under your pot for another source of humidity.
Know Your Succulent Species for Optimal Care
“Succulent” is a broad term covering a wide and diverse range of plant species, but each succulent, and each succulent variety, is different. Knowing what species your succulents are will allow you to provide the optimal care, soil, and watering schedule.
For example, the succulent species String-of-Pearls is known by succulent enthusiasts to be a great winter plant because they are so low maintenance, particularly in winter. This plant thrives in colder conditions and isn’t prone to the same problems as more temperamental plants.
Finding a species of succulents that is capable of thriving in your climate will likely help you attain gardening success with minimal effort. Consult your local nursery if you are unable to identify your species of succulents or for further suggestions about what kind of succulents would be most successful in your home.
A Special Note on Cactus Care
Cacti and traditional succulents are often confused due to their similar look and comparable drought resistant, but cacti are a somewhat distinctive species and require a slightly different approach to certain aspects of their care.
However, the winter watering schedule should remain the same for cacti as it is for other succulents. Cacti should not be watered until the soil is dry. Just like regular succulents, cacti are susceptible to overwatering, and too much water can damage these hardy little plants.
Learning succulents’ needs is vital to their care, especially how much light they need. There are quite a few types of succulents out there, and they come from just about all over the world. The amount of light a succulent needs to thrive depends on the kind of succulent.
Succulents can not grow in shaded areas without any light. With the right lightning regiment, succulents can thrive indoors and outdoors. Allowing succulents a mixture of natural and artificial light for 14 – 16 hours a day is optimal.
These unique plants are about as low maintenance as they come, but they have specific needs and care. Don’t worry. We cover them all here. Just keep reading to make sure you’re able to provide your succulents with the proper amount of light.
Good Lighting Makes a Difference
Like a lot of plants, succulents need light. Even though these tough little plants can take a lot. As well as do without a lot, light is a must. They can only survive a short while in the shade or with no light at all. Without a good source of the proper light, succulents’ health will start to deteriorate.
Although some succulents require less light than others, light is still a must for them to grow healthy.
Knowing what to look for, and addressing it promptly, can save your plant. Here are some things to look out for to determine if your succulent is getting the right amount of light:
• Color changes that are not common to your type of succulents. Commonly white or yellow
• Any part of the plant that shows decay
• Lengthening limbs, or leaves that seem to be stretching
• Thinning petals, not the normally lush, curved edges
These plants have adapted to sometimes very harsh environments. Often they will begin lengthening or stretching towards a light source if possible. This can be because it isn’t getting enough light or any at all. They essentially try to save themselves by reaching towards the light.
Succulents and plants, in general, need light to produce chlorophyll. Chlorophyll is needed to continue the photosynthesis cycle that converts energy for the plant to live and function. Without being able to complete this function, succulents will eventually perish.
Luckily, they usually show signs before it gets that far if you are paying attention. Their resilience is pretty remarkable. So don’t give up on them too quickly. If you see any of these signs, there is still hope.
Make Sure You’re Providing the Right Kind of Light
Natural light is obviously the go-to for plants, if available. But of course, sometimes it can be too much of a good thing. Succulents can be found in areas that have pretty extreme light exposure and droughts. That doesn’t mean that is how they should be cared for.
While natural light is the best option for your succulents, you can also expose them to artificial light.
If you plan on providing natural light indoors, around 6 hours is a good amount for most succulents. This can be a bit more complicated since you can’t control how strong the sun’s rays will be. Direct harsh rays can cause damage to succulents over time.
This can lead to brittle, flakey petals and even rot. Having a well-managed schedule of a little sunlight is important. But also adding artificial light from a simple LED light with a white fluorescent bulb can make a world of difference for the health of your succulents.
Type of Light
Time
Natural Light Only
6 – 8 Hours
Artificial Light Only
14 – 16 Hours
Both Natural and Artificial Light (Depending on how harsh the sun is)
4 Hours Natural Light10-12 Hours Artificial Light
This lighting schedule is a good base of time and how to care for your succulents. Watching how the succulents react per your schedule, you can figure out the best options:
How Mother Nature Affects Succulents’ Lighting Needs
Mother Nature is incredible yet unpredictable and uncontrollable. This can make depending on natural light for your succulents a little difficult. Some days may give more light, and others may leave succulents wanting more.
Adapt Your Succulents to Lighting in a New Environment
Whether a succulent is transitioning from indoor space or even another outdoor environment, it is best to help them get used to their new digs. Easing them into their new environment is a safe way to give this beauty a good chance to get their bearings.
Planting succulents and walking away isn’t the best choice. Try bringing your succulents to where they will eventually be planted over some time. You can do this by gradually exposing the succulents to the new environment.
Here are a few tips on adapting your succulents:
• Keep succulents in a portable container, like a pot.
• Have a place ready to transport your succulents back to that that isn’t in direct light.
Depending on your climate and daylight hours, starting off with a slow and steady pace is best. Try a few hours the first day and build from that. Always taking temperature and weather into consideration. Scorching your succulents and it being bogged down with rain are major things to avoid.
Bring the succulents out of the sun after each round of exposure. Not to inside temperatures, just a place still outdoors, yet away from rain and too much sun.
This allows the succulents to adjust to the lighting and temperatures by slowly introducing the succulents to the elements, helping them adapt at a safer pace. They are such hardy plants; adapting is what they do. It is just much better to do so in a healthier way, given a chance.
Getting to Know Your Succulents to Provide the Right Light
Contrary to popular belief, succulents are not meant to fry in the desert sun. They are capable of withstanding drought-like conditions, including sunlight, but these aren’t ideal growth conditions, especially for those meant to grow indoors. This doesn’t mean toss your succulents on the hood of your vehicle in the Texas sun. What it does mean is these cuties can endure a lot. Here, we are going to make sure they don’t have to.
Get to know your succulent type and species to provide them with proper light exposure.
Succulents Come from Areas with All Different Kinds of Light
Succulents are so adaptable that they are found nearly everywhere globally, except for a few places like Antarctica and some of the nearly uninhabitable deserts on earth. Wait, they don’t necessarily thrive in the desert? Exactly! Leaving succulents to fend for themselves in these conditions switches them into survival mode, and we want to encourage them to actually thrive.
Here are some interesting and possibly surprising places you can find succulents.
• Africa
• Central America
• The European Alps
Where is a Good Place to Put Succulents for Optimal Lighting?
While it might seem like a succulent is a great way to brighten up a dark corner in your bedroom or a windowless basement, it’ll end with a dead plant. Here are some good places to keep a succulent in your home to make sure they get just the right amount of light:
Show them off by placing your succulents on a balcony or porch.
The perfect place to have a chat with your plant, the kitchen window.
Add simple spa-like elegance to your bathroom out your succulents on full display in your bathroom window
Setting Up Artificial Light for Your Succulents
The lighting setup doesn’t have to be overly complicated for these fairly self-sufficient plants. A full-on greenhouse in your apartment isn’t a requirement. LED or fluorescent bulbs are a good choice for either the main lighting source or in rotation with natural sunlight.
If you have decided to expose your succulents to artificial lights, consider using LED or fluorescent bulbs.
Make sure to check the dimensions of any lighting setup you plan on using. You want to be sure it will fit properly and safely in the space you have planned for your succulents. Also, keep in mind the lights need to be kept at least 6-12 inches from the succulents to give the right amount of light without scorching them. These are some great options to get your succulents all set up and thriving.
A Plus LED Grow Lights 16000Lux Full Spectrum Sunlights
Yadoker LED Growing Light Full Spectrum For Indoor Plants
LikeSun LED 1000w Grow Lamp for Indoor Plants
Final Thoughts
Succulents are such incredible plants, forgiving and resilient in ways that amaze them. After bringing a little light to learning how much light succulents need, we can conclude with just a little love and the right amount of light, caring for succulents will be well worth it.
Spring and summer are the time of year when the green thumb in all of us tends to awaken, and we spend a great deal of time choosing the flowers that will accent our properties and the insides of our homes. Succulents are often chosen to grow indoors with limited sunlight, so most people assume that they can grow in the shade when planted outside. But can they really survive in the shade?
Only certain succulent varieties can grow in the shade successfully, such as aloe vera and jade plants. Although most succulents can tolerate low light conditions, they still require light to survive, and plants that need more than 8 hours of light a day will thrive better outside of the shade than in it.
So, how much sunlight is enough for succulents? And how much shade is too much? We’ll discuss these questions and more below so you can ensure your plant stays healthy and happy throughout its lifetime.
Can Succulents Grow in the Shade?
As mentioned above, only certain succulents can grow in the shade effectively, though they will still require some light to survive. Various species of succulents require different amounts of light. For example, some species require 10-14 hours of light per day, while others may only need half of that to grow.
Although most succulents require plenty of sunlight, some varieties can tolerate low-light conditions.
Natural sunlight is the best way to keep a succulent happy and healthy. However, exposure to too much sun and your succulent could get sunburned; that’s why some shade is also necessary for succulents.
But too little sun could also inhibit growth. With that said, as a general rule of thumb, it is safer to keep most succulents out of the shade than in it, though there are varieties of shade-tolerant plants available that you can grow in the shade.
The Christmas Cactus can bloom several times a year. If you take proper care of these, you can see flowers with multiple colors such as red, yellow, and white.
8 hours of indirect light
Echeveria Painted Lady
This gorgeous smaller succulent has red leaf tips, with blooms that are a colorful yellow-orange every spring.
6 hours
Panda Plant
If you are looking for a cactus that won’t require much in regard to keeping alive, this is the one for you. Their leaves are made to hold large amounts of water, so they can survive for a few weeks if you forget to water them.
6 hours
Aloe Vera
Another easy cactus to grow for beginners, this plant also has excellent medicinal values for topical skin issues.
6 hours
Jade Plant
This is another excellent choice for someone just starting to grow cactus. They are easy to maintain and do not require the same amount of water and light that some other species do.
4 hours
Flaming Katy
If brightening up your room or patio is what you are trying to do, then the Flaming Katy is a perfect choice. It requires little maintenance and adds a distinctive flavor to wherever you decide to place it.
4 hours of bright sunlight
Burro’s Tail
Another beautiful species of cactus, the Burro’s Tail only requires watering once per month if it is being grown indoors and every few weeks if it is outdoors.
4 hours of morning sunlight
The Jade plant is a low-maintenance succulent that does not require too much sunlight or watering.
Can You Use Artificial Light for Succulents in the Shade?
With succulents, you have the option of using natural sunlight or artificial light, depending on where you plan on keeping your plant and how much light it needs during the day. Although artificial light is more common for indoor succulents, if you plan on leaving your succulent planted outside in the shade, artificial light will be necessary—especially if your yard naturally doesn’t receive enough light as it is.
Depending on where you have decided to grow your succulents, you can use natural or artificial light.
With that said, you’ll need to be mindful of the type of succulent you choose, how much sunlight it needs, and where you keep it. Again, if you have enough natural sunlight that comes through the shaded area of your yard, then you can keep your succulent in that direct or offset light. On the other hand, if the shaded area in your yard does not have the light needed for your plant, consider artificial lighting.
Artificial Lighting
Although succulents will survive even with lower light, a lack of sufficient light can also kill a succulent. With that said, if there is no light available even when outside, youwill want to keep succulents under artificial light for at least 4-6 hours every day. This applies to all types of indoor lighting and sunlight, as well as incandescent, fluorescent, CFL Bulb, and LED lights. If it is a small, potted succulent, you may need to bring it indoors to provide it with enough artificial light.
LED and fluorescent bulbs are the best options if you want to expose your succulents to artificial light.
Tips for Growing Succulents in the Shade
If you do decide to plant or keep your succulent in a shaded area of your yard, the following are a few tips to keep in mind:
If the area is heavily shaded by a tree, consider pruning some of its branches so some natural light can seep through.
If an awning covers the growing area, consider raising a potted succulent so you can move it into the sunlight as needed or set up an artificial light station.
To increase the likelihood that a bed of low-light succulents survives, consider mixing container-grown succulents with in-ground ones.
Because your succulent will have limited access to sunlight, the water you give it will not evaporate as quickly as a plant in direct sunlight. With that said, only water half as much as you would if the succulent was in direct sunlight. Remember that too much water is worse for a succulent than too little; too much water will cause its leaves to wilt and die.
If you’re unsure when it’s time to water, stick your finger about two inches into the plant’s soil. If it is dry, it’s time to water.
It is also essential to ensure you’re using porous soil that drains easily so water can evaporate when the succulent is exposed to light. To help with drainage, add in a little coarse sand and compost. This will help with keeping the succulent and its soil at the proper saturation level.
Conclusion
In summary, succulents can survive in the shade as long as you’re able to still provide them with the light they need. Each species will require a different amount of sunlight and water to survive, so be sure to research the succulent you want to raise first before deciding to keep it in the shade.
Generally speaking, if you want to raise a succulent in a shaded part of your yard successfully, you’ll want to opt for a shade-tolerant plant variety, such as the holiday cactus, aloe vera, jade plant, or hoya. These plants are built to survive low-light conditions and can thrive as long as they still get access to some levels of light throughout the day.
Has your succulent been growing like crazy? What should you do if you notice signs of distress in your succulents? Being a plant parent is hard, interesting, and fun all in one, and that’s why I’m here.
There are nearly a dozen things that could go wrong with your innocent little plant! Before you start feeling overwhelmed, here are nine signs that you need to cut your succulent.
1. You Noticed Some of Your Succulent’s Leaves Are Dying
So you noticed some of your succulent leaves are either looking discolored or wilted. There’s no need to panic, as this is a fairly easy fix.
This could have happened for different reasons, including:
Overexposure to sunlight
Not enough water
Bugs!
Trying to narrow down the cause of the deaths can help make sure your plant stays healthy in the future. Maybe it needs to be moved to a shadier area or watered more often!
Removing dead succulent leaves is key to growing a healthy plant.
Regardless of the reason, if your plant’s leaves are dead, it is best to cut off the dead leaves. It’s important to remember that a few dying leaves are totally natural and expected with any succulent. Over time, some of the leaves die, and others will regrow and replace them. This is why if you notice some dead leaves, it’s totally okay to snip them off!
2. Your Succulent is Under Attack from Root Rot
Have you taken a look at your succulent’s roots lately? Maybe you noticed they look a bit darker than normal. That’s definitely not good.
The typical reasoning for root rot is overwatering. You may not have even noticed you were doing it, and in that case, it may not be too late! If you catch root rot early, you can attempt transferring your plant into a new pot with fresh and dry soil.
If your succulent roots are rotting, you should consider transferring the plant into another pot.
It’s important that you clean off any old and moist soil from the roots during the transfer as well. This will give your succulent the best fighting chance.
Lucky for you, even if you didn’t catch it early, there is still hope! It is now time to behead your succulents and remove the rotted roots. Plant the “head” part of the plant in a fresh pot, and be careful with the water!
3. One of Your Succulent’s Stems Broke
If one of your succulent stems broke, it’s not the end of the world. Try figuring out the cause of the issue. Stems do just break off, and there is nothing that could have been done about it. Sometimes Mother Nature is involved, and oftentimes gravity plays a big part.
If you have a stem depressingly drooping off of your succulent, cut that thing off! The coolest thing about a succulent is replanting it! If the stem is still alive, you will be able to replant it with some water and dirt. Slowly, roots will regrow over time. How cool is that?
4. Your Succulent Got Way Too Big
Often, succulents are used as decorative pieces on the interior of your home or on desktops. So what do I do if my succulent gets too big?
It will help to realize why the succulent grew too big as well. Is it in direct sunlight? Try moving it to a different spot, as too much sunlight or water could do this to the plant. If indoors, the plant may be moving and stretching itself out as well.
If your succulent has grown too big, cut the plant and propagate the clippings to grow new succulents.
If your succulent has gotten too big over time, it is no worry at all to chop it back a bit. After pruning to your liking, you can even collect the clippings and regrow them into a whole new plant, given time! So don’t worry about it. Cut that plant, and make sure to save those leaves and clippings!
5. Your Succulent is Physically Damaged
Physical damage can come from several different factors, the biggest being… Bugs! If your succulent is getting physically damaged, it must be either from:
The wind
Wildlife
Pests
Human interaction
Pests are the biggest contributor to physical damage on this list. Melee Bugs, Spider Mites, and Fungus Gnats are pests popularly attributed to a succulent plant. Mice, Voles, and Squirrels have also been known to go for these plants when in an outdoor setting as well.
If pests are on your succulent, try repotting it with fresh dirt and moving it to a different location. Spraying Vinegar, Bleach and Mint have all been said to work on solving these issues. Lucky for you, a broken stem is not the worst thing that could have happened.
6. Your Plant is Stressed, and so Are You
Is your plant stressed out? Stress comes in different shapes and sizes, as we all know, but there is no need for you to be stressed as you have come to the right place! Plants getting stressed are common and natural and often easily fixable.
Stress can come from different sources for a plant, but most often, elevated stress has to do with the temperature of the plant. Make sure your succulent remains at an ideal temperature of 60-80 degrees Fahrenheit. Cold temperatures have been known to stress all sorts of plant life out, which is why it is important to keep it its ideal temperature.
Stress can also come from the environment. Messing with your succulent too much can be harmful. Too much touching and cutting and unnecessary bending will put additional stress on your plant.
Stop messing with your succulents too much and make sure it stays in that temperature range, and your plant will be calm and relaxed.
7. Your Succulent is Elongated
Succulent’s being elongated is actually quite common. As most are kept indoors, they will yearn for light and try to stretch out to find some. This gives you an elongated and awkwardly tall succulent plant.
You may have also noticed:
Lighter colored leaves
Smaller leaves than normal forming on the plant
The extra spacing between the leaves
Bending of the plant
These are sure signs that your succulent is elongated. As natural as it is for a plant to bend and look for a light source, not all of us are in love with how that appears.
It’s absolutely okay to chop the head right off your elongated succulent. Behead the plant and start another one. Chop it down to a size of your choice and try to move the plant to an area where it can receive some more light, to avoid it happening again.
8. Your Succulent Grew an Antenna and Looks Like an Alien
Are you staring at your succulent, wondering where in the world that long antenna-looking thing came from? You are definitely not alone. The antenna comes about for the same reasons as your plant being elongated. All it means is your plant has been working extra hard to try to reach sunlight.
Plants, even indoor ones, need sunlight to survive. Without sunlight in a room, your succulent will bend and twist and reach as far as it can, attempting to get some bit of sunlight. Cut that antenna off, and yes, even that part will regrow a new plant too!
9. You Want a Free Succulent
If you want a free succulent, and you already have one (or knows someone who does), then you’re in luck! Beheading a succulent is totally natural, just like discussed earlier. The thing is, there doesn’t have to be anything wrong with the plant to behead it!
Cutting your succulent enables you to propagate the plant and have a new baby succulent for free.
Maybe you just want a second succulent, or maybe you wish to give one to a friend. Maybe you’re growing an army of succulent plants and want thousands! Either way, all you need to do is behead your succulent. Beheading it or cutting off branches/leaves and placing them in fresh soil and water will result in a new baby succulent!
Whether you need to or want to, cutting your succulent is almost never the end of its life. Watching a succulent regrow many times over is a beautiful thing to watch, and the best part about the plant.
Succulents are adapted to arid climates and require little water. Somehow you find you’ve overwatered yours, now what?!
Succulents do not require very much water to survive. But when a succulent is overwatered, it can still be saved. There are several advised methods for drying out an overwatered plant.
Continuing, we’ll cover some tips for drying out that soggy succulent. We will also go over some indicators for identifying an overwatered plant and advice for preventing overwatering.
How Do You Treat an Overwatered Succulent?
When your succulent is showing signs that it has had too much water, there are commonly used techniques for drying it out and preventing further damage or death to the plant.
Change the Soil
This is pretty straightforward. Instead of waiting for the soil to dry and the plant sitting in it, soaking up more water. Just remove the plant and replace its soil with some fresh, dry soil. If you are going to pull the plant out of its pot anyway, it might be a good idea to try the following technique listed.
If you have noticed that your succulent soil is too wet, change it as soon as possible to protect your plant from dying.
Remove succulent from its soil and lay it out to dry
If you have removed your plant from its pot, it may not be a bad idea to leave it out for a short while. Don’t worry; it can survive several days out of a pot. The roots will dry a bit, and this will also allow the succulent to process some of the excess water it is holding. After you carefully dig them up, brush them off a bit and lay your plants out. Do not put them in direct sunlight. Once the excess water has dried up, you can repot them.
Keep out of direct sunlight.
Too much direct sunlight will put stress on the plant. Although it may seem counterintuitive, putting the succulent in the sunniest part of your house won’t help the plant dry out in a good way. In addition to the plant having excess water to deal with, it will have to deal with processing intense sunlight. However, Plenty of indirect daylight is always good.
Protect your succulent from prolonged exposure to direct sunlight to prevent it from stressing.
Signs You Have Overwatered Your Succulent
Because these plants thrive in dry conditions, as you would find in a desert, they have a very distinct look. This can make it easier to identify overwatering; in fact, the first two of these signs can be as easy as asking, “does this look like something that grows or belongs in a desert?”
Overwatering succulents leads to excessively wet soil, bloated leaves, and rotting.
Soil is Too Wet
The first thing to look at is your soil. Your solid should be very dry. If you probe the soil with a chopstick or finger and it is coming back wet or muddy, that is not ideal. Mud is not a common thing to find in the desert, and your succulent did not evolve to thrive in the mud.
Leaves Appear to be Bloated With Water
As with other desert dwelling organisms, succulents are great at storing water to survive long periods without hydration. They are so efficient at storing water that they will soak up and hold onto too much. This will be indicated by 2 signs in their leaves:
The plant’s leaves will begin to change color. Sometimes it will be an unnatural color change. Sometimes it will look as if their natural color was being diluted by excess water. Think of a green water balloon that becomes less green as it is filled and expands.
The plant’s leaves will feel softer than usual and somewhat spongy.
These signs can show from a mistake as innocent as the plant being left out in the rain. Consistent overwatering or a long period without correcting the issue can lead to a more severe problem.
The Succulent is Rotting
Rotting is another, probably the most severe, indicator of overwatering the succulent. This will happen from repeated overwatering or excess water sitting in the pot for too long. Rotting will be evident if it is above the soil. In the same way, an apple gets discolored, shriveled and maybe even somewhat gooey. Rotting will also cause the plant’s leaves to fall out at some point. It will kill your plant if left untreated.
How to Prevent Overwatering a Succulent
We’ll start with the type of pot you use since that is the foundation of your succulent’s growth. Only use pots with drain holes and soil that drains easily. By preventing water from pooling at the bottom of the pot we already eliminate a large risk of overwatering and especially root rot.
Creating a proper watering schedule and using adequate pots for your succulents will protect them from overwatering.
As for soil, these plants excel in sandier mediums, potting soil can be mixed with pumice or perlite, or you can buy special premixed cactus soils, but your standard run-of-the-mill dirt won’t do, unless maybe you live in the desert.
Re-evaluate your watering schedule and be more methodical with your watering. Don’t “guesstimate” or eyeball it, especially don’t put it in the sink with the faucet on and get distracted. It is much easier and more practical to know, for example, that “this plant requires X amount of water every X number of weeks during X season.” Also, remember, this plant thrives in the desert. If the soil is even a little bit damp, the succulent doesn’t need any more water.
Signs of Rotting in Succulents
As mentioned previously, overwatering can lead to a succulent rotting. There are multiple parts of your succulent that can rot. Each part of the plant will show different signs of rot. Typically the rotting works its way up the plant, starting from the roots.
The roots of the plant are generally where rotting will start. If you discover rotting early enough, you will find it here and it will be indicated by the roots being abnormally black and unhealthy looking.
If the rotting progresses it will begin to move up the stem from the roots. The stem of the succulent will start to become discolored and the plant will begin to look saggy or “melting.”
As the rotting moves up the stem, it will also begin to diverge into the leaves. Again, this will show through dark discoloration and the leaves will begin to look like they’re losing their constitution or turning into a soft mass.
Can You Save a Rotting Succulent?
Rotting in your succulent makes it harder to salvage than an overwatered succulent. That’s why it is important to catch an overwatering early. However, if your plant is showing signs of rot, it can still be saved. Depending on which part of the plant is rotting, there are several methods for rescue.
How to Treat Root Rot
In the early stages of root rot you may be able to dry the roots out just the same as if you had overwatered. Remove the plant from the soil and lay it out to dry for a couple of days. It may also be possible to prune rotten parts from the roots to prevent spread.
How to Treat Rotting Stem and Leaves
If the stem is rotting, the situation begins to get a little dire. The plant’s best chance of recovery is for you to clip it from the rot down. That clipping will include any or all parts of the:
Leaves
Stem
Roots
Find the part that is not yet affected by rotting and take that off of the rest of the succulent. After this, the process basically turns into cloning a new plant.
Saving your Succulent
Succulents are great for beginning gardeners or just as casual house plants. They are very hardy and are well adapted to harsh conditions. If you find that yours has been overwatered, just remember it isn’t necessarily the end of the plant. The succulent can recover as long as you take some simple steps to help dry it out and prevent overwatering in the future.
Since plants cannot talk, it is not easy to understand their physiology. Succulent falling over is undoubtedly unhealthy for a succulent and the cause behind this troublesome behavior requires some attention. A proper environment is necessary for the succulent to grow and have healthy leaves and roots.
A succulent falling over could be attributed to a few causes. These causes include water level, light level, energy issues, temperature levels, and chemical damage.
Continue reading to figure out the problem with your succulent. Once the root cause is realized, it is easy to restore the health of the plant. So if you notice that the succulent is falling over, do not sulk and continue on to diagnose the reason.
Diagnose Your Succulents Ailment
Since there are several reasons your succulent could be falling over, you will need to determine the true cause. Assess these points to figure out the reason for the succulent falling over:
Is the soil damp or compacted?
Is the soil prepared for the succulents?
Are there any holes in the pots?
Are the leaves shedding from above or below the plant?
Is it normal shedding or abnormal?
Assessing and diagnosing can help in fixing the problem with the succulent. Assessing the soil dampness can give an idea about the watering and light needs. Assessing the direction of the succulent damage can enlighten you about its energy needs.
Looking at the position of the succulent damage can clue you in about temperature and light needs. If the plant is damaged abnormally, you might find that your succulent has suffered some type of chemical damage.
Optimal Water Exposure for the Succulent
When your succulent is not watered properly, it can become damaged and fall over. The proper way to water is to wait until the solid is almost dry and the leaves look a bit wrinkled. Water thoroughly after that until you can see water coming out of the drainage holes.
Make sure you use a pot with drainage holes and water your succulents properly to prevent them from falling over.
It is important to use pots with drainage holes when growing succulents. Watering too frequently and watering in high amounts can swell their leaves and, consequently, cause harm.
If the damage has occurred already, check if the stem is bad too. If so, cut off the rotted area and keep the healthy portion of the plant in a dry area. For a week, do not water the plant and the plant should revive to its original condition.
Overwatering
Overwatering can seriously damage the succulent to the point of total plant death. The extra water swells up the cell walls leading to plant death and it is the number one cause of succulent death.
Water only when the soil appears dry to touch, which would be about once every week or so.
Do not water your succulents unless the soil is dry to touch.
Underwatering
An underwatered succulent can be diagnosed by its soft and wrinkled leaves. Leaves will appear weak and wilted, but a change in color is not seen like seen in overwatered leaves.
If leaves do not fall off from touching, the plant can still be brought to its original condition. If the damage is too severe, the plant will die and no amount of watering the plant would help at this point.
As long as the succulent was not severely underwatered, salvage it by:
Increasing the watering frequency slowly to revive the plant.
Only making gradual changes as drastic changes can hurt the plant.
Watering from the bottom as not to exert too much pressure.
These fixes will likely perk your succulent back up so it is no longer leaning over.
Optimal Sunlight Exposure for the Succulent
If succulents are not exposed to enough light, they can turn yellow and straggly as they reach for a light source. As they reach, they will fall over and stay that way. If the lighting is not fixed then the new leaves will grow smaller. Succulents need lots of sun all year long and can die if kept in no light for a long time.
As succulents require plenty of sunlight, make sure you place them in a well-lit area.
To fix this issue, gradually expose the succulent to sunlight or artificial light. Start with three hours daily and slowly increase it up to six hours of sunlight or 12 hours of artificial light per day. Overexposure to sunlight can give sunburn and so it is necessary to find the proper level.
Optimal Temperature for the Succulent
If a succulent is new and has not acclimated, exposure to hot temperatures from outside can damage it. Even though most succulents grow in naturally harsh habitats, too much heat is not healthy. If succulents are exposed to extended periods of heat, they can become damaged when stressed by drought or heat. Thus, keeping succulents in the shade when temperatures rise will be beneficial.
If the succulent looks fallen over or wilted, either place a shade cloth over it or move it to a shaded region. Keeping the plant in a den or a patio with some form of shading can help in controlling the heat. Under a roof or inside a shielded net can also be appropriate.
If your succulent starts to fall over or wilt, place it in a shaded area.
Just like too much heat, most succulents cannot bear the extreme cold. If exposed to freezing temperatures for too long, the cells inside their leaves can freeze. If your succulent has frozen in the winter, its leaves will feel mushy and look either brown or black.
During winter times, make the following changes:
Move the plant to an enclosed location that does not vary in temperature too much.
Relocating from outdoors to a garage is a good choice, however from outdoors to completely indoors is too much of a change.
Do not water the succulent at all if you need to keep your succulent outdoors during winter.
Watering can freeze the soil causing damage to the roots, thus eliminating any chance of survival. The plant should be kept dry only.
Optimal Energy for the Succulent
If your succulent is leaned over, you may also notice that the leaves at the bottom of the plant appear brown mainly due to being covered by leaves higher up. Before shedding the leaves, plants take as much energy as possible from them.
This is not a reason to be alarmed if it only happens occasionally as this is a natural phenomenon. This is completely normal and can be overlooked, however, if it is of concern then simply pick out the brown leaves slowly.
Chemical Damage Causing Succulent to Fall Over
Using chemicals without properly following package directions can harm the plant. Likewise, too much fertilizer can also be harmful and stunt growth. Improper use can damage the root and cause the succulent leaves to discolor. Eventually, the plant could burn or fall over.
Most over-fertilized plants can be fixed by removing any fertilizer from the plant and soil that can be seen.
Allow some water to run through the roots to wash the remaining fertilizer.
Then, remove the damaged foliage and do not give any fertilizer for about a month.
Lack of nutrients can make leaves turn yellow. Overwatering can wash away necessary nutrients often found in potting soil. You will have to add back these nutrients through the use of fertilizer or through replanting your succulent in a new pot of soil.
Keeping succulents in the shade when temperatures rise will be beneficial.
You should only use well-balanced fertilizer on your succulents that is designed specifically for cacti or succulents. Succulents do not actually require much fertilizer, so you do not have to use a great deal. When using fertilizer with succulents, dilute the recommended amount by half.
Conclusion
A succulent can be salvaged through proper care and maintenance. Do not let the fallen succulent leaves scare you as they can regenerate. First diagnose the cause of the succulent tipping over to make the appropriate changes in levels of water, light, temperature, or chemicals. Next, figure out which one of the above problems caused your succulent to fall over and make adjustments over time that are not sudden.
Succulent plants can be found everywhere and are extremely popular houseplants. One reason for this is that they are easy to take care of. They are a plant that doesn’t need much care to thrive and for novice houseplant owners, they are an excellent plant to start with. However, it is important to water them correctly to make sure they are healthy.
If you think you are overwatering your succulents, read on. We have five classic signs of overwatering that you should look for, what you can do to revive your plant after overwatering, and the correct method for watering succulents. Follow our tips and you should have a happy and healthy succulent.
What Happens when a Succulent is Overwatered
The internal structure of a succulent is made up of, just like every other living creature, a series of cells Succulents are native to dry climates and as such, they developed specialized cells that store water in the roots, leaves, and stem. During periods of low rain and drought, the plant can rely on these cells to provide the water that it needs to survive.
An overwatered succulent can be characterized by swollen cells as the plant has absorbed excess water.
As the plant uses the water in these cells, they are replenished by water in the ground. Since these plants have evolved to survive in dry climates, they use the water in the cells slowly, refilling whenever there is water in the soil to absorb. The cells are similar to water balloons and can expand significantly.
Succulents are used to an environment when waterings are rare. If you overwater your plant, it absorbs too much water. This causes the cells to swell up so much that they burst which damages the cell structure and can lead to rotting leaves and roots. It is important to monitor your plant for signs of overwatering.
Look at the Leaves for Signs of Overwatering
Like most plants, the first signs of overwatering are shown in the leaves. The leaves are where the photosynthesis process occurs. This is when the plant uses sunlight, water, and carbon dioxide to create energy, which it uses to grow. The leaves hold the cell-filled water, which combined with sunlight and absorbed carbon dioxide creates glucose.
If you overwater your succulents, the leaves will quickly show signs of burst water cells. If you are not sure if you are overwatering, keep an eye on the leaves.
The Leaves are Mushy
When the cells burst inside the leaves, it damages the internal structure. This results in soft and mushy leaves. A succulent that is not overwatered will have sturdy leaves that are firm to touch. The damaged leaves will also start to take on a translucent appearance.
Leaves Become Shriveled and Wrinkled
Another physical change your succulent will make if it is overwatered is leaves that are shriveled and wrinkled. Similar to when your fingertips become wrinkled in the bath; this is because the cells cannot absorb any more water. Shriveled leaves can also be a sign of underwatering, but in this case, the leaves will also be rubbery.
The Leaves Turn Black
When the succulent’s cells burst, they are no longer usable and the leaf is effectively dead. Like all plant matter, the dead leaves will start to rot and turn black. This process usually starts from the center of the plant. The rot will work its way up the stem and affect all the leaves. At this point, the succulent is probably past repair.
Some Plants have Burst and Split Leaves
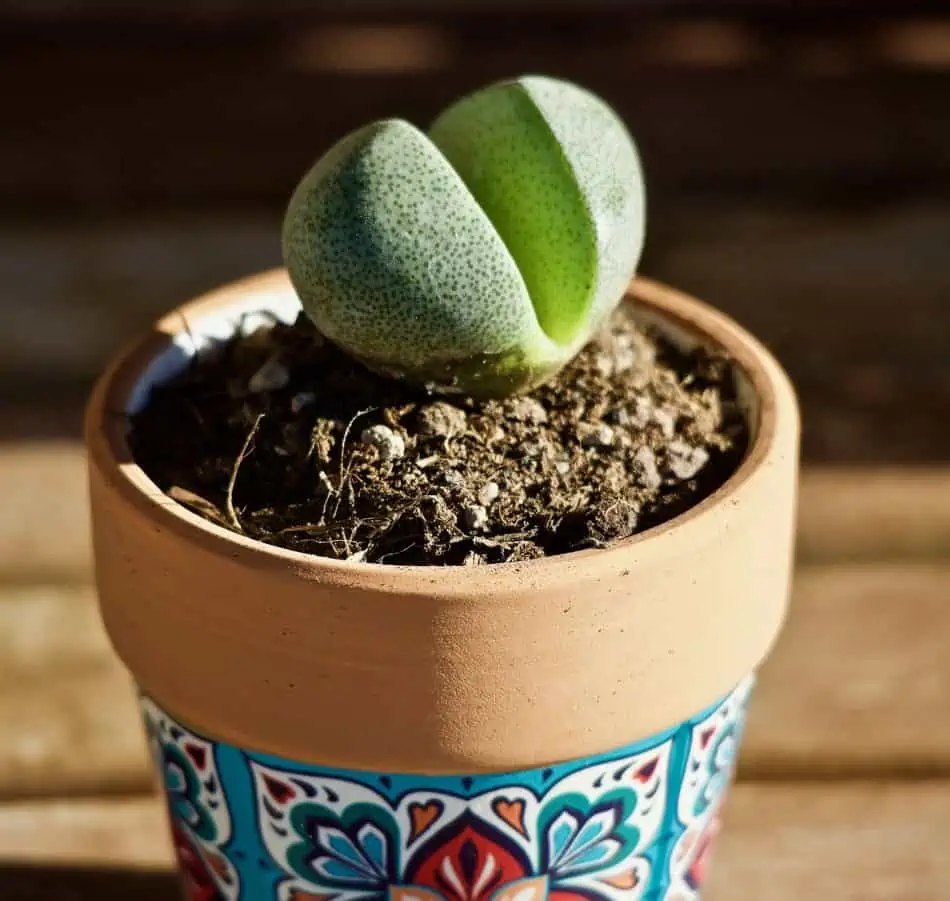
While most succulents will have spongy leaves, some succulents will react to overwatering by bursting or splitting their leaves open. This is most likely to happen to succulents with plump leaves, like ice plants and lithops.
The Plant is Dropping Leaves
Another obvious sign of overwatering is when your succulent drops its leaves. They can drop on their own or from the slightest movement or touch. If a plant is underwatered, the plant will drop shriveled, brown leaves from the bottom of the plant. It is easy to tell the difference between the two scenarios.
How To Bring Your Succulent Back from Overwatering
Unlike under-watering, it can be hard to return a succulent to health after overwatering. This is because the internal structure of the plant is damaged. The burst cells will not be able to repair themselves. The easiest way to repair your succulent is to take leaves and cuttings to propagate a new plant.
To do this, you need to find out what plant you have. Some plants can propagate from cuttings while others will from leaves. To take a leaf, twist it off the stem. Make sure it is a clean twist and is either at the stem or with a little of the stem attached. To take a cutting, cut a piece off the succulent above the leaf on the stem.
If you have overwatered your succulent, you should consider propagating a new plant.
You will either plant the cutting in fresh soil or lay the leaves on top. In about two to three weeks, you will see new rosettes forming and you will have a new succulent to plant. Make sure to water it carefully and it should last a long time.
Prevent Overwatering in the First Place
To avoid the trouble of having to propagate a new succulent from your overwatered one, you should avoid overwatering to begin with. It is important to remember that these plants have evolved to live in dry climates and do not need much water to thrive. Unlike tropical plants, a little water can go a long way for succulents.
Water Your Succulent Infrequently
Succulents should only be watered when the soil is completely dried out. Depending on the humidity of your home, your succulents will probably need watering every 14 to 21 days. If you feel like this is too often, then you can adjust your watering schedule. Keep an eye for signs of underwatering, like brown or rubbery leaves and water then.
Water your succulents every 2-3 weeks, after the soil is completely dry.
Soak and Dry Your Succulent
The best way to water your succulent is to use the soak and dry method. This is when you soak the soil thoroughly and let it dry completely between waterings. When the soil is dry, the succulent will develop a strong root system that will help it absorb and store more water during the next soak cycle. Don’t use a spray bottle between waterings as that will hinder root development.
Use the Right Soil and Pot
For the soak and dry method to work efficiently, you want the soil to dry out relatively quickly, within two or three days. Having a pot with a drainage hole and well-draining soil will let the water pass through the pot quickly. There are special potting mixes for succulents that are great for creating the right soil environment for your succulents.
By using the soil and pot that offer adequate drainage, you will protect your succulents from overwatering.
Succulents live their best lives under benign neglect. It is better to underwater them than to overwater them since they can recover from too little water. When it comes to watering, you should always lean on the side of less frequent waterings than the other way around. These are desert plants, after all, and are designed to survive periods of drought.
Proper Care Leads To Happy Plants
The signs of overwatering are easy to spot, but unfortunately, your succulent may be past repair when you do notice them. Water your succulents less often and keep an eye on the leaves to know the health of your plant. Remember, it is always better to underwater than to overwater. Treat your succulent properly and it will thrive.
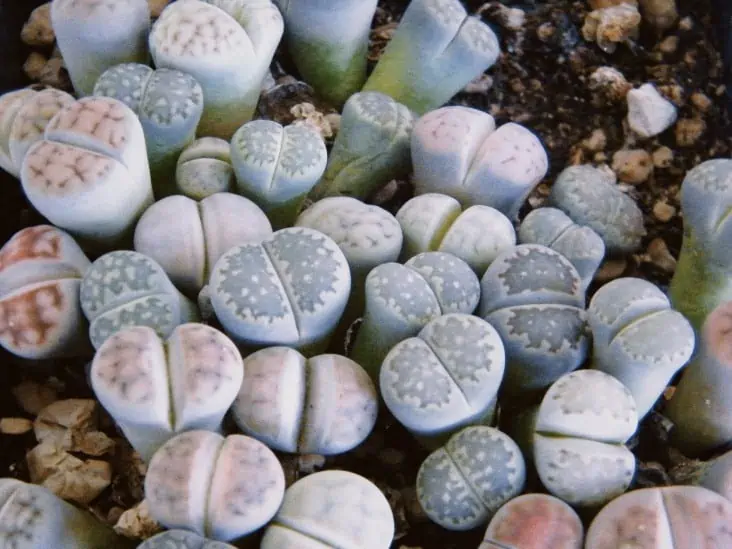
The world is full of beautiful, marvelous animals and plants with remarkable survival adaptations. Lithops are plants that remind us all about the wonders of nature. This amazing plant camouflages itself to look like colored stones. Because of this, Lithops are known as “living stones.”
The Lithops’ fascinating nature has made it a popular house plant. Thankfully these small, beautiful plants are easy to take care of with a few guiding tips. These beautiful, stone-like plants require only a few things to keep in mind for them to live a long and healthy life. Read on to learn more on how to grow and take care of Lithops.
Growing and Caring Tips for Lithops
Once you have your Lithops settled in your home, you will want to ensure they live long and healthy lives. Since Lithops live natively in areas outside of southern Africa, proper care instructions are different from other native plants.
Below are the necessary steps for providing Lithops with the care they need to thrive:
Choosing the correct container material
Choosing the correct container size
Making the appropriate soil mix
Watering sufficiently
Providing enough sunlight
Monitoring temperature
Minimizing fertilizer
Trying specific composting
Checking the soil’s pH levels before planting
Learning proper care is important, and following the guidelines below will help your Lithops live strong, healthy lives.
Choose the Correct Container and Size
Determining your container is the first step to properly taking care of your Lithops. The container should be large enough for the plant to grow and live in for its entire life.
A container at least 10% larger than the plant will give them plenty of room.
A pot too large or deep will run the risk of retaining too much water. Lithops require very dry conditions, so this could destroy your plant.
Too much space will make the succulent appear awkward for its big surroundings.
To grow Lithops, select a container that is 10% larger than the plant itself.
If you are making an arrangement of succulents, make sure all of the plants in the arrangement come from a similar climate. Also, give them plenty of room to grow and live together. Transition the plants quickly from their holding trays or temporary homes to the one container as quickly and carefully as possible.
Determine the Correct Pot for Your Lithops
Picking the correct type of pot for your Lithops to live in can help ensure a healthy and long life for your plant. The material the pot is made of should mimic the environment the Lithops is native to, which is well-drained and breathable.
When choosing a pot, the most important thing is the drainage hole. The pot must have a way to move water out of the pot to keep the soil from becoming overly wet, which can quickly rot and kill your Lithops. If you fall in love with a particular pot that does not have a drainage hole, look into making your own drainage hole.
Ceramic and terracotta pots are two of the best pot material options for Lithops.
The best pot materials for Lithops are below.
Ceramic
Terracotta
Ceramic or terracotta pots are great options for your Lithops because they are breathable and drain well. A variety of ceramic pots, glazed or unglazed, are readily available at most gardening stores.
Ceramic pots absorb sunlight to warm the plants during the day and cool off well at night. However, ceramic pots can absorb so much heat from sunlight that they can burn plants. Be sure to keep an eye on how much sun your Lithops are getting so it does not overheat.
Pot Materials to Avoid
Below are some pot materials that will not work very well for Lithops.
Metal: Metal can rust over time, which can hurt the plant’s health.
Wood: Wood containers are unique and stay cool at night and warm during the day, but can also retain water, so be aware of wet soil or rotting.
Glas: Glass is a beautiful option to display Lithops, but glass pots are breakable and lack drainage. Glass is also not breathable.
Certain plastic pots
Plastic can be a good option since it is lightweight and durable if you choose your pot carefully. Plastic is not as breathable as ceramic or terracotta, but if you have a drainage hole, it should allow water to properly work its way through the soil.
Choose the Correct Soil Mix
As discussed earlier, Lithops need an easily drainable environment to thrive. Lithops are native to soil conditions that are hot, dry, and airy, so the best way to take care of your Lithops is to prepare soil that mimics these conditions.
Make sure the soil for your Lithops is rocky and sandy for the plants to grow healthy.
Lithops like rocky, sandy soil, typical of southern Africa. Pre-mixed succulent soil products mixed with small pebbles are the easiest way to get started. These are available at most local nurseries, especially if you live in hotter, drier climates, where succulents grow well outside. Some pre-mixed succulent potting soil, also good for Lithops include:
Superfly Bonsai Succulent Mix
Hoffman Organic Cactus Succulent Soil
Succulent Cult Soil Mix
You can also make your own soil. To make good potting soil for Lithops, mix together standard potting soil with a ground-up rocky material such as ground or fine sand, shale, pebbles, ceramic, or grit. Perlite is also a good choice.
Lithops grow in soil that is not nutritious, so avoid soils with an abundance of added nutrients, fertilizer, or even organic materials. These types of soils can be loaded with nutritional components and take longer to dry out. Honestly, Lithops do not need a lot of soil for healthy living since Lithops grow in rocky areas with little nutrient soil.
Water Lithops Appropriately
Two critical factors in caring for Lithops are fast-draining soil and good air movement. Soil should not dry out completely, especially for more than three days. Doing so can cause the root hairs to die off, and the plant will not be able to take in any more water.
Water intake for Lithops varies by the season. The overall watering conventions by season are as follows:
Never overwater your Lithops and ensure that the soil is not bone dry.
In the winter, it is okay to cut back watering, as the Lithop will drink moisture from the old leaves. During the winter, to keep root hairs alive, water less often. If you bring your Lithops in for the winter to live under indoor lights, taper down your watering and monitor the drainage.
In springtime, increase watering for new leaves to take over while the old leaves begin to dry out. Growing will stop during the hotter months of summer, and you can taper off watering, but remember not to let the soil dry out. Pick up watering again in late summer or fall.
Ensure the Correct Amount of Sunlight
Lithops require full sunlight. When Lithops get at least five or more hours of direct sunlight, the colors of the plant begin to really show off.
However, this does not mean that Lithops need direct heat. Excessive heat will burn your Lithops plant, so monitor the temperature and move the Lithops inside if the temperature is too hot for too long.
Make sure your Lithops get plenty of sunlight, especially if you are growing them indoors.
If you are displaying your Lithops inside, or if you live in an area with less daylight, there are ways you can compensate for giving your plants the sunlight they need
Rotate the plant regularly, so the entire plant receives sunlight. This will help the plant not strain for sunlight and help develop its stunning colors all around the plant.
Provide the plant with artificial light to make up for the lack of natural sunlight.
Because Lithops are native to a warm, dry climate, this direct sunlight is necessary for the plants to survive and thrive.
Provide the Right Temperature
Lithops love warm, dry weather. You can leave Lithop plants outside throughout the year if you live in an area where the temperature does not drop lower than 40 to 50 degrees Fahrenheit.
These plants thrive in warmer temperatures but not overly hot areas. Too much heat can burn and kill the plant.
Carefully monitor the outside temperature, and move your Lithops to the shade if the temperature reaches over 90 degrees Fahrenheit.
Also, consider monitoring your Lithops more if you live in an area that experiences quick changes in temperatures.
Many areas can receive snow in late spring or a spike in heat in the middle of winter. If you live in these types of climates, closely monitor the plants and change their living areas to keep up with the climate.
Do Not Use Conventional Fertilizer
The nutrients found in most fertilizers are not suitable for Lithops since their native soils contain little nutrients. Most potting soils already contain some type of organic materials, so if you use regular potting soil, be sure to mix in more permeable components. These can include:
Pumice
Sand
Grit
Manure tea is an excellent fertilizer for Lithops since it can remove harmful pathogens.
If you feel like you need or want to add fertilizer for extra care, you may consider a milder conditioner such as manure tea. Manure tea is an organic fertilizer composed of livestock manure. The manure is cured to remove potentially harmful pathogens and then placed in teabags.
Manure tea is like drinking tea for plants. The tea is steeped in water for a few days and used as your watering solution for the Lithops.
Use Compost Materials Sparingly
If you are planting Lithop seeds, it is okay to add compost to the top layer of soil. Just be sure to keep in mind that compost is not necessary for healthy Lithop growth.
Top the soil with rocks to simulate the Lithop native living conditions. The compost nutrients will eventually seep through the pot to feed your Lithop plant.
Compost should not hurt the plant in small amounts, but large amounts of compost could provide too many nutrients and keep the soil from drying.
As with fertilizer, there are ways to utilize compost. You have to be sure you are using this resource in a way that your Lithops will still thrive.
Maintain Proper pH Levels
Most gardeners test the pH level of the soil and see this as an important step before planting. The level of pH indicates the acidity level of the soil. A pH level of 7 is a neutral level, and most plants do well in a range between 5 and ½ to 7. Most succulents, including Lithops, prefer a more acidic soil around a pH level of 6.
Lithops prefer growing in a sightly acidic soil with a pH of around 6.
If you want to test the pH level of your potting soil before planting, you can purchase test strips at your local nursery. If the soil needs more acidity, add a water solution made of one tablespoon of white vinegar to every five gallons of water. A high level of alkaline is not healthy for your Lithop, so it is helpful to know the pH level of your soil.
There are different kinds of pH testers to choose from:
Electronic meters
pH test strips
Chemical colored dyes that can help you monitor the pH level after it rains if your Lithops plant lives outside.
Rainfall or fertilizers in the potting mix can increase soil acidity, so you will want to check your soil’s pH periodically to ensure it is in the safe zone for your Lithops.
Lithops Are Not High Maintenance
Besides monitoring the soil moisture, if a Lithop is doing well in its living conditions, you can, for the most part, leave it alone. Required maintenance is low and includes the following tasks.
Routinely checking the Lithops soil for the appropriate moisture level
Periodically checking pH
Rotating the plant for sufficient sunlight
Lithops are low-maintenance plants that require proper watering, slightly acidic pH, and sufficient sunlight.
You will notice the shedding and growing of their new leaves seasonally. This is the plant’s natural process. Pruning is not needed. To make the Lithop plant look better, you can gently remove the thin shedding layer of the dead leaf. Waiting until this part falls off naturally works well too.
Most Lithops varieties are not prone to disease since they grow in dry sandy soil that does not invite fungus development. Lithops are vulnerable to damage or rotting if they are overwatered. Monitoring the soil’s moisture level and making sure the plant is well-drained is key to keeping them disease-free.
Special Instructions for Lithops Living Outside
If you live in a warm, dry climate and decide it is suitable for Lithops to live outside, monitor the plant’s temperature, sunlight, and rain levels.
A Lithops plant should not be left in temperatures cooler than 40 degrees or hotter than 90 degrees Fahrenheit for long periods of time.
Your plant should receive steady sunlight each day. When the days shorten, the minimum sun exposure should be four to five hours. Rotate the plant regularly for even sun exposure if needed.
Monitor the rain levels. Too much rain can easily leave a Lithop to rot or change the acidity level of the soil.
Even though warm, dry climates mimic the Lithops natural environment, the plant still requires monitoring.
Tips for Caring for Lithops Indoors
Lithops that live indoors are easy to maintain. All you need to remember is to keep your plant watered regularly, ensure the plant is well-drained, and your plant receives plenty of sunlight exposure. Ignoring the Lithops occasionally may be okay for a short time, but you will want to check in on your plant from time to time.
Keep your Lithop watered in small amounts regularly, but do not over-water the plant. Soil should be well-drained but not overly dry.
Rotate your Lithop plant regularly if it does not receive sun exposure equally over the plant.
Lithops are not poisonous, so even though pets and children will probably not find the plant attractive to eat, it will be okay if an accident occurs.
Just like with outdoor Lithops, your indoor Lithops will need direct sunlight, so be sure to keep indoor Lithops in a window that receives plenty of sun.
Steps to Take If Your Lithop Is Not Looking Well
If signals appear that your Lithops is not feeling well, more than likely, it has been overwatered. Retaining too much water is the number one reason a Lithop does not survive. Too much water causes the Lithop to rot quickly. If you move the plant, carefully remove the plant and soil and quickly transition it to a new pot.
It is normal each year for the Lithop leaves to die and make room for new leaf growth. Lithops are typically weak plants with frail roots. If you move your sick Lithop to a new pot, make sure to do it quickly and with care.
Lithops are generally considered weak plants, but with the right conditions and correct care, they can live long and healthy lives. Some other common issues with Lithops include:
Wrinkling of the leaves, which indicates they need more water. Watering the plant will quickly fix this problem.
If you notice your Lithops is twisting upwards instead of lying flat, it probably indicates the plant is struggling for sunlight. Simply move the plant to an area that receives more sunlight.
If there is an accident that causes scrapes to the leaves, the scrape scars can not be removed. The Lithops will eventually grow new leaves during its growing season to replace the scarred leaves.
If you have several types of succulents in one pot, it is possible that one of the plants gets sick, but the others are healthy. Here, you will need to carefully separate them. Sometimes, the plants’ roots get entangled. If this happens, it is very difficult and dangerous for your plant to untangle them. You may be stuck with a dying arrangement.
Protect Lithops from Insects and Pests
Thankfully, Lithops are not very attractive to most insects and pests because they do not offer a lot of nutrition. The most common insect that bothers Lithops is the spider mite.
Spider mites tend to live inside the middle section between the leaves or hide behind old leaves. Spider mites leave white spots on the plant’s surface. An all-natural pesticide, if applied in a small mist, usually fixes the issue.
Another good characteristic of Lithops is that they provide little nutritional value for most insects, so they generally will not be looking to attack your Lithops. If they become infested, here is a list of the other common pests that may be causing you issues.
Thrips: These pests leave dark scars on new leaves. A mild insecticidal soap should kill most thrips.
Scale insects/Mealybugs: Remove these by scraping them off the leaves with a gentle hand tool.
Aphids: Insecticidal soap should remove aphids.
Snails and slugs: Attract snails and slugs away from Lithops with snail bait or other moving, more appealing plants close by.
Root-knot nematodes: These pests are microscopic and live near the plant’s roots. As long as your soil is mainly dry and drained well, these pests should not last.
Mice: The leaves of the Lithops sometimes attract mice. To keep mice from eating the leaves, you can lightly cover the Lithops with breathable mesh or metal caging or use mouse traps.
Infestations are rare and usually do not last long. When they do occur, they can be easily handled with natural pesticides, insecticides, and traps.
Divide Lithops to Grow More
You can divide your Lithops to grow more. However, you will need to wait a few years until you have grown clusters.
Once you have clusters, delicately remove the Lithops from the pot and cut through the roots.
Each division should have a root you can reliably replant.
Plant each in its own pot, leaving room for the root to take hold.
To grow more Lithops, consider delicately removing a division from the cluster.
If you decide to replant your Lithops to grow clusters, or you just need a larger space, remove and replant the Lithops quickly and carefully. Go back and follow the initial steps, such as choosing the right container and size.
Once planted, place rocks and gravel on the soil surface to mimic the plant’s native living conditions. If you choose to divide Lithops, it is a good idea to keep replanting to no more than once every three to four years.
Prepare for Lithops to Live Long Lives
Even though Lithops are generally weak plants, they can live up to 40 or 50 years. If their living conditions are set correctly, and they are tended to frequently, Lithops should live long lives.
Several years after planting, Lithops begin to create two pairs of leaves, which then develop into clusters. These clusters can be cut to plant new Lithops, as stated above.
Lithops Blooming Patterns
Most Lithops bloom in late fall or early winter, but some varieties bloom in spring or early summer.
In a Lithops older than three years, you will typically see one flower that looks like a daisy growing from the inside of the two.
When this happens, watch the flower bloom in the morning for sunlight and pollination, and close up at night.
Some Lithops bloom in late fall or early winter while others produce flowers in spring or early summer.
Lithops go dormant in the winter and summer. The leaves begin to die, and new leaves form. You will know the plant is growing again when the new leaves begin to appear from the middle section between the old leaves.
After the new leaves emerge, the old leaves begin to die and wither. Once the leaves are very thin, they will fall off, or you can carefully remove them to keep them looking fresh and beautiful.
Choose from Many Common Lithop Varieties
If you live in a warmer climate, local nurseries should have plenty of Lithops plants for you to purchase. If you live in cooler areas where product selection is slim, there are plenty of online websites that sell and ship Lithops.
Though the Lithop is only a recently popular plant, there are still over 37 species of Lithops and about 145 varieties to choose from. It is not helpful to list in detail all of the varieties, but below are several types usually found at local nurseries:
Lithops aucampiae
Lithops dorotheae
Lithops hookeri
Lithops karasmontana, “Karas Mountains Living Stone”
Lithops lesliei, “Lesliei Living Stone”
Lithops ruschiorum
Lithops viridis, “Green-Rock Plant”
Unfortunately, there are reports of fake Lithop seeds sold online. The product pictures have vividly colored Lithop plants, indicating they are enhanced photos. Be sure to check for reliable sellers with positive reviews who are available by phone to talk through the specific conditions and colors of the plants and seeds you intend to purchase.
Plant Seeds or Buy Fully-Grown Lithops
If you want a quick home décor option, young, already growing Lithops are available and will immediately give you a stunning live plant for your home. If you are up for creating your own arrangement, seeds take longer to grow, but you will have the satisfaction of seeing them grow from the ground up.
The best time to plant is in fall or spring.
Your seeds will need sunlight, water, and time to grow.
It takes around twelve to eighteen months for seeds to germinate.
Be careful when opening the seed packets because the seeds are very small and look like dust.
If plants are more your style, the main things you need to consider when purchasing Lithops are the dimensions of the arrangement you are interested in and your personal preference on appearance. Talk to the nursery staff about the specific condition of the particular plant before you buy it.
If you choose to buy Lithops online, most websites will show the particular plant or arrangement, so you know the general appearance before purchasing. Contact the seller directly to learn more about how old the plants are, their specific condition, and shipping time and conditions. Make sure you are purchasing from a reputable seller.
Succulents are both exotic and eye-catching. They have become popular in offices, rocky gardens, and homes for a good reason. You may have heard the myth that to grow them, one needs a green thumb. Perhaps that is true, but then it depends on how you interpret it. If you have been gifted a succulent and worry about caring for it or have seen neighbors nicely display theirs on the windowsill and want to own one, it may be time to learn how to grow and care for the same. With succulents, recreating their wild habitat in your garden or house is the first step. For one, they are drought-smart and thus almost super easy to look after as long as you get the basic requirements for each plant right.
So how do you care for succulent plants indoors and outdoors? Succulents are drought resistant and you may not need to do much to keep them alive. As long as they have been properly propagated, watered sparingly and given the right amounts of NPK fertilizer, you should be good to go. Succulents thrive in a good mix of well, draining soil and needs moderate lighting and fairly warm temperatures.
The article will look at the various factors that come in handy when caring for succulents indoors and outdoors. It will look at the importance of each of these factors and how best to achieve success while at it.
1. Light needs
You may wonder whether succulents do better indoors or outdoors. Since their natural habitat is out in the open, they will do well outdoors in full light. However, they can also thrive indoors as long as they can access sunlight for a couple of hours a day. That said, hardy succulents can thrive in just about any climate, as long as you repot them at the right time. Succulents have an antifreeze mechanism that makes them go dormant as soon as temperatures plunge. Some succulents known to tolerate the full sun include Cacti, Agave, Jade Plant, and Aeoniums.
If you repot your succulents at the right time, they can grow healthy in literally every climate.
When growing succulents indoors, go for those that tolerate low-light. The Snake plant, Ponytail, Mistletoe cactus, and Aloe vera are examples of such succulents. Nevertheless, indoor succulents can be placed outdoors whenever the weather permits, while outdoor ones can be shielded from the full sun to avoid direct contact with sunlight.
2. Temperature
You may be tempted to assume that because succulents grow in the hot wild, all of them tolerate extreme heat during the summer. Nothing could be further from the truth. Admittedly, a succulent like the cactus grows in the desert, but that isn’t the case with all succulents. Most succulents prefer temperatures of between 60 to 90 degrees Fahrenheit; anything more and both leaves and roots get damaged permanently. Some of the succulents that tolerate extreme heat include Whale’s tongue agave, Black rose, Pachyphytum fittkaui, and Blue Senecio.
Temperatures below 60 and above 90 degrees Fahrenheit can damage the succulent roots.
Sometimes, when the weather plummets to below zero, very few succulents will survive. Among the few hardy succulent that can survive such extremes include Thompson’s yucca, Parry’s agave, Hardy serum, and Hardy opuntia. As such, growing them in moveable pots is the wisest thing to do.
3. Propagation
When it comes to succulents, propagation is an easier and inexpensive way of acquiring new plants from what you already have. The fact that you can grow a new plant from a parent plant is the greatest feeling for a gardener.
You can propagate and grow new succulents by rooting their leaves, stems, offsets, or seeds.
Depending on the species, succulents can be propagated by leaf, stem, offset cuttings and seeds. Propagating by leaf or offset cutting is the most popular as it takes only about two weeks to root. The longest method to propagate is using seeds as it can take between 3 weeks to 12 months for the plant to germinate, depending on the succulent species.
Rooting in soil vs rooting in water
Whereas propagating via a soil medium is the easiest way to encourage rooting, this method can sometimes lead to pathogens and fungus attacking the cuttings, which eventually causes the succulent to rot. To avoid this, you may consider using water as a rooting medium. Some gardeners find it problematic rooting their succulents using the soil and would rather opt to use water. However, not all succulents take to rooting in water. Some common succulents that easily root in water include Jades, Sempervivums, and Echeverias.
Water rooting steps
1. Cut a stem or a leaf and allow it to callus
2. Place the stem or leaf in distilled, purified or plain tap water
Let the end of the leaf or stem touch the water or be just above the water.
3. Place it outside in a bright area but out of direct sunlight.
4. Once rooted, remove the cuttings and let them dry before planting in the soil.
4. Watering
Unless you have been living under a rock, you must have heard the saying that too much of anything is poisonous. Unfortunately, this saying appears to be ignored by many beginner gardeners. For whatever reason, you may forget that these plants are native to dry areas and thus have a love-hate relationship with water. Too much or too little of the same can be detrimental to the growth and overall health of the plant. So, how frequently should you water my indoor and outdoor succulent plants?
To answer that question, we need to take a keen interest in how succulents use water. For the stems, leaves, and roots to grow and to bloom, succulents will use water. However, their tissues, leaves, and stems have water storage capacities for their survival. So, whenever we talk of watering succulents, the rule of thumb has always been; ‘less is more’. Generally, it would help if you watered a succulent only when about one inch of the soil feels dry.
You should only water your succulents when the top of the soil feels dry.
We can talk of sticking to a watering schedule, but considering the different factors, including species, light and temperature needs, it’s not practical to have a one-size-fits-all watering timetable.
Talking of watering, how will you determine whether you are overwatering or underwatering your indoor or outdoor succulents? Most succulent gardeners get overwhelmed when striking a balance between an underwatered and an overwatered succulent. Let’s take a look at the telltale signs:
Overwatered succulent
An overwatered succulent will appear as follows:
a. The leaves will be soft, mushy, and squishy when touched.
b. The color of the leaves will appear lighter than normal, almost translucent.
c. Leaves fall off easily and may appear blackish from the center of the plant.
To rescue an overwatered succulent is easy. First, gently remove it from the container or soil. You can then take away excess soil from the roots and remove any dead or rotten roots and leaves. Air it outside to dry but away from direct sunlight for up to 3 days. Finally, you can either plant it in a new container or move it to a new location in the garden.
Underwatered succulent
Succulents generally thrive on neglect, but some species cannot withstand an extreme water shortage in the roots. Underwatering may happen either because you are neglectful or have a busy schedule. An underwatered succulent plant will appear as follows:
1. The growth will be too slow for a succulent.
2. The leaves lose their firmness and become brownish with dry edges.
3. Dry leaves will be seen from the bottom of the plant, going up.
4. The leaves may wilt off and eventually dry up
An underwatered plant, however, is not a lost cause. To save it, you use water generously. Assuming it has been starved of water for a long time, pour water on the base of the plant until you notice some come out of the drainage holes. Otherwise, if the condition is not that dire, you may rejuvenate the underwatered succulent by misting or spraying the foliage with water. The plant should recover away from direct wind or sunshine.
5. Fertilizing
Just because succulents are hardy plants growing out in the wild doesn’t mean that they don’t need fertilizing. Succulents need fertilizer for better, faster growth. Fertilizer also comes in handy to help the plant bloom and produce brighter, larger flowers at the right season.
Among the most favored fertilizers by succulent growers are manure tea, fish emulsion, and balanced fertilizers. You may use it depending on the succulent species for industrial fertilizers, but there is a word of caution. These need to have the right balance of NPK where phosphorous is higher than nitrogen. Usually, you will need to dilute the fertilizer in half before use. After all, you don’t want to burn your beautiful succulents while trying to boost them.
Manure tea, fish emulsion, and balanced fertilizers are among the best options for succulents.
Authentic Haven Brand Manure Tea
This is a cup of tea made specifically for your plants, so don’t be tempted to take a sip. It comes balanced from the factory. Insert the teabag in 1 to 5 gallons of water depending on your succulent species and let it stay for 24 hours. It will turn brownish. Once you are done steeping, pour the brownish water in a container and generously water your plant.
What if you don’t want to purchase a commercial teabag? Well, making your own is as simple as it can get.
How to make manure tea at home
For this purpose, use manure from a goat, cow or poultry but not a carnivore as their stool contains harmful pathogens.
1. Fill a bucket two-thirds way up
2. Add your manure so that it fills the bucket
3. Stir it twice in that day and let it sit there for forty-eight hours
4. Once the solid has settled, pour the, now brownish, liquid into a different bucket.
Make sure you dilute it to the color of weak tea before applying it to your succulents.
GrowBetter Organic Cactus and Succulent Fertilizer
The beauty of this fertilizer is that it’s odorless. What’s more, quite a number of succulents can benefit from its use. Notably, Yucca, Saguaros, Aloe, and Dragon fruit are just a few of such succulents. This slow-release fertilizer will leave your succulents well-nourished for up to two months per every application. It leaves the roots healthy and is ideal for both indoor and outdoor succulents. They have been hailed for making the leaves fuller and leading to large, bright blooms
Dr Earth Premium Gold Pure & Natural Fertilizer
If your succulents have ever had the problem with leaves turning pale or yellow, it means they lack nitrogen. This fertilizer has balanced amounts of potassium, phosphorus, and nitrogen that will solve the problem. The potassium will help keep diseases at bay, while the phosphorus will give your plant healthy roots and help flowers bloom.
One teaspoon of this fertilizer mixed with a gallon of water is all that you need.
Miracle-Gro Succulent Plant Food
This succulent fertilizer comes in liquid form, so it’s easier to seep into the soil and get absorbed by the roots. It can be used with popular succulents, all cacti, Jade, and Aloe. You can either apply it to the soil directly or mix it with water every fortnight.
Organic worms
Worms eat dead leaves, roots, and grass and, thereafter, release castings. The castings are full of phosphorus, nitrogen, potassium, and calcium that help boost your succulents’ overall health. If that isn’t enough, they improve soil structure which helps in water infiltration. With that in mind, how do you attract worms into your garden?
Once you leave your garden undisturbed, with compost manure and enough mulch around your succulents, worms will find a haven. You may then pick a few worms and place them in your planters for them to naturally fertilize the soil.
6. Containers or Planters
When planting succulent at home, containers and planters come in handy. These decorative containers in different shapes, colors, and sizes add to the overall ambience of your garden and home. In gardening, containers are pots and planters, terms that are used interchangeably. When it comes to containers, they can go anywhere, whether it is a flight of stairs, window sills, or even walkways. That said, how do you choose the correct planter?
When selecting a container for your succulents, pay attention to drainage holes, its design, and the material it is made of.
A good planter should be of good drainage, design, and material. Let’s consider each in detail.
1. Drainage
A pot without proper drainage will cause water clogging and eventually lead to the rotting of succulent roots. As such, a container with holes at the bottom is highly recommended. So, no matter how beautiful a container looks, if it doesn’t have perforations, your succulent will be as good as dead on arrival.
2. Design
The design matters a lot to you as much as it does to the succulent in your pot. For one, an attractive container adds to the decor of your home and garden. Notably, different designs are fit for different succulents based on their size and growth pattern. While spillers, for example, would do well on hanging planters, low-growing succulents won’t look good in tall pots but rather in short ones. On the same note, Aloe, which grows upright, fits perfectly in a tall container.
3. Material
Go for pots with breathable material when growing succulents. These will allow for much-needed aeration of your plants. The much-praised ceramic and terracotta-made pots are a few examples. If you are neglectful, busy or travel a lot, using plastic materials is recommended because the water doesn’t easily evaporate from the container. Still, on the material, consider its weight. Will you be able to move them on a whim when need be? For example, when the weather has suddenly changed, and you want to protect your plants from the elements; you should be in a position to relocate your succulent much easily.
7. Soil
Soil is a vital component in the growth of a succulent and any plant for that matter. It is paramount as all succulents will eventually end up in the soil. So, how does it affect the growth of your succulent, and how can you ensure you get it right for your indoor and outdoor succulents to thrive?
Whether you are planting your succulents indoors or outdoors, make sure the soil is well draining.
As a gardener, you probably use conventional potting soil for your plants. This is readily available, and you might be tempted to use it when planting succulents. The problem here is that the conventional potting soil is made to hold water; a feat that can be detrimental to the survival of your succulent.
In this regard, you need good draining soil whether you are planting your succulent in a garden or container. So, what constitutes a good soil mix? Most gardeners prefer coarse sand placed on top of the potting soil. While this can help drain water, the soil is meant to do more than just draining water. They need to support the plant physically, hold moisture and nutrients.
To achieve that, you may consider making your succulent soil mix at home.
How to prepare the right succulent potting soil
You will need garden soil, coarse sand, and perlite. The perlite is meant to aerate the soil and also helps in drainage, just like the coarse sand.
To achieve the desired results, mix the sand, soil, and perlite in the ratio of 3:3:1, which translates to 3 cups of sand, 3 cups of soil, and 1 cup of perlite. With that mixture, you need not worry about your succulents rotting because of poorly drained soils.
From the above, it is clear that succulents need care even with the fact that in their natural habitat, they flourish on neglect. However, caring for succulent plants doesn’t mean spending lots of cash, you may consider using the simple, home-grown strategies to reduce the costs involved drastically. It may be a challenge the first time, but once you get the drift, it becomes a walk in the park henceforth. Give your succulents the right care, and you will reap strong, healthy and brighter plants, both in your outdoor garden and indoors.