Can A Cactus Die Without Sunlight?

The answer to whether cacti can die or survive without sunlight is either a yes or no. Some Cacti species can survive for short periods without sunlight. However, others need full sun and will not survive if you keep them in the dark place.

Because cacti plants have their natural habitats in the desert, they’re used to the harsh sunlight and will not survive if you deny them the light. Many species need exposure to lots of sunlight to grow well and even produce flowers. Some require at least four hours of direct sunlight to flourish. Others are known to need very low amounts of light to survive, but they still won’t survive with zero light. Not giving your cacti enough sunlight exposes them to infections and prevents them from blooming.

If you’re wondering about the light requirements of cacti and how you should expose various species to sunlight, this article is for you. Here is a comprehensive guide on cactus and its light requirements.

How Does Sunlight Help a Cactus Plant?

Sunlight is crucial in aiding plants to make their own food through photosynthesis. During photosynthesis, plants transform various chemicals into vital nutrients essential for growth.

This chemical conversion process serves as the nutritional foundation for the plant’s growth and flowering.

Whether you’re considering acquiring a Christmas cactus, prickly pear cactus, Easter cactus, or any desert cacti of your choice, it is crucial to ensure that your plant receives adequate sunlight.

Although succulent plants vary in shape and size, they require full or direct sunlight for at least six to eight hours per day to thrive.

If you cannot provide enough natural light indoors, consider investing in an artificial lighting system that will help your plants get the necessary amount of daily light exposure.

How Much Light do Cactus Need?

The light that your cactus needs to thrive is measured in duration since you cannot quantify light. Instead of asking how much light, you should ask the duration of the light that your plant needs.

Cacti need around 10-14 hours of sunlight each day. Well, this doesn’t include the cacti that love the shade because those will burn if exposed to light for that period.
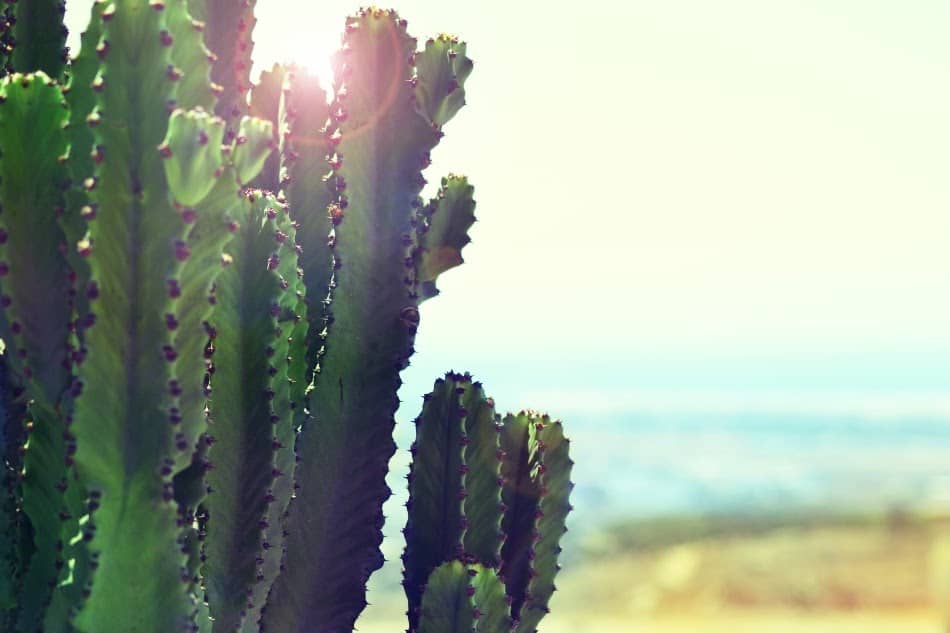
Most cacti need 10-14 hours of sunlight daily.

Many cacti plants have devised techniques to help them get the amount of light they need.

Others have taken distinct shapes that help them minimize their exposure to the sun. Some types elongate their branches and tend to grow towards the direction of the sun.

Other cacti feature highly modified leaves that help them minimize evaporation as a result of sun exposure. Make sure such plants only get four to five hours of sunlight every day.

How Do You Know the Amount of Sunlight that Your Cacti Need?

Since you’re going to grow different species of cacti, it will be hard to know which one needs what amount of light. Well, most species love light exposure and will do pretty well under intense heat.

But too much of it can cause damage to even the hardiest plant out there. Cacti also suffer from sunburn damage which can cause scars or even kill them.

Don’t subject your precious plants to full sun exposure right away. The best cause of action is positioning your cactus under partial shade and slowly exposing them to more sun until they get used to it.

Consider getting them out in the morning sun, which is less intense, then gradually introduce them to the hotter afternoon sunlight.

You can also consider placing your young cacti under the shade of other plants before exposing them to direct sunlight.

Gradual exposure is vital to avoid sunburn and permanent scarring due to the intense heat.

Consider placing younger cacti in shade to protect them from direct sunlight.

Cactus plants that love shade are more susceptible to sunburn and scaring. Such cacti include Easter cactus and Mistletoe Cactus.

However, cacti plants come in blue, grey, and red plants highly covered with spines love direct sunlight exposure.

Cacti that are used to growing indoors will also suffer sunburn and damage when moved outdoors, where they’ll suddenly get sunlight exposure.

Whatever the plant you plan to move to more light, make sure you do it gradually, so you don’t stress your precious plants.

Don’t expose newly propagated cacti to the sun as they can also suffer damage. Allow them to mature and become strong enough to deal with the intense heat.

Monitor your plants carefully and find out which one will do well under direct sun and which one needs shade.

Do Cactus Need Bright and Direct Light?

Some cacti need bright and direct light, while others don’t.  Others prefer bright but indirect light. This means you shouldn’t expose them to full sun. Some hate direct light and can kill them if exposed.
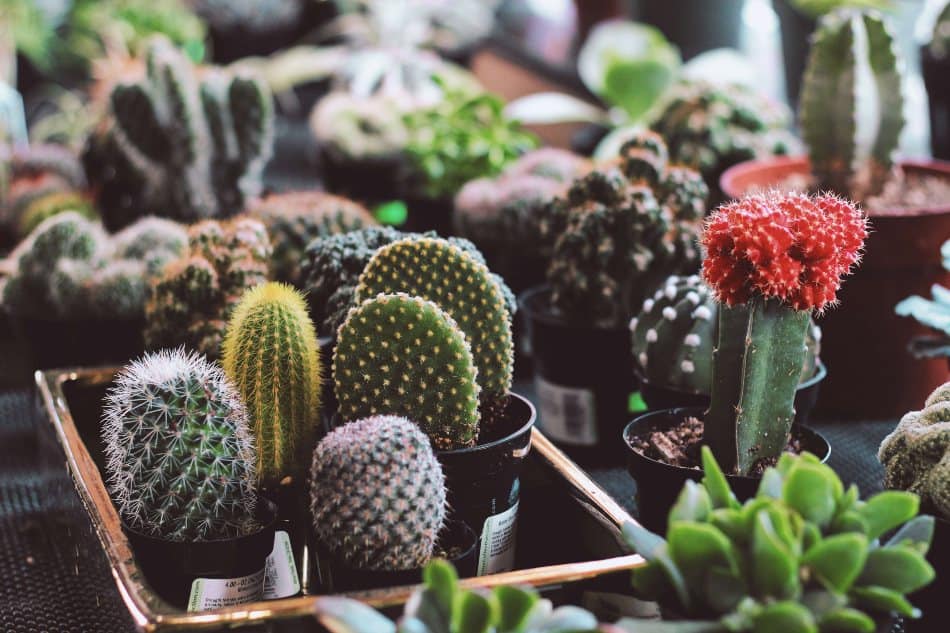
While some cacti require bright and direct sunlight, others thrive under bright but indirect sunlight.

Rhipsalis, which falls under epiphytic cacti, cannot survive under bright and direct sunlight. They prefer shade and will do well under other trees or indoors.

Other species need bright light but can also do well with the part sun. Good examples of such include barrel-shaped cacti, chin cacti, and Mammillaria cactus genus.

Those cactus species prefer bright and direct sunlight but sometimes need to go without too much light. If you treat them for infections or repotting, make sure you shade them from direct sunlight.

Others also need time to transition for winter hence bright light will not do them any good.

Should You Give Your Cacti Artificial Light or Sunlight?

When it comes to cactus light requirements, both sunlight and artificial light do great work. But there are times when sunlight will do better than artificial light and vice versa. Let’s see how the two sources of light work.

Cactus Sunlight Needs

Natural light is usually the easiest to give you cactus plants because it’s easily available.

You don’t have to do anything to control this light apart from just placing your cactus on the windowsill. Your cactus will know how to harness this energy and use it for various chemical reactions.

Most cactus plants were naturally made to benefit from sunlight, and they’ll appreciate it if you generously expose them to it.

The plants have different adaptations that allow them to absorb only the light they need and protect themselves from excess heat.

Exposing such plants to direct sunlight will not hurt them because they know how to adapt.

Maximizing Sunlight for Indoor Cacti

There are plenty of indoor cacti that still need natural light to survive. You should put such plants on windowsills so they can harness the sunlight that they need.

The best way to ensure your cactus receives maximum sunlight; position them on the south-facing windowsill. This is where the sun heats most, and your cactus will receive maximum hours of sunlight.

But if you want your cacti to http://theshoalspharmacy.com/ receive the strongest sunlight, which doesn’t last too long, place them on the east-facing windows. This is where you’ll get the strong morning sun which weakens as the day progresses.

If your sunlight prefers partial shade, the north and west-facing window sills will do them justice.

Artificial Lights for Cactus

When there is no sunlight getting to your cactus, you’ll need artificial light to keep it going. This light is also important for the plants that can’t access the space on the windowsill.

If you live in places that experience strong winter, you might want to transfer your plants indoors, and that means offering them artificial light.

When propagating your cactus, they’ll also need artificial light. Direct sunlight from the sun can be too hot for them. They need low-intensity sunlight.

Unlike sunlight, artificial lights are not free of charge, and you must invest in them. Make sure you find the right bulb for your plants and pay for electricity bills. Well, you should not panic because the bulbs don’t consume too much energy and the costs are generally low.

When choosing your bulbs, don’t go for those that get too hot or emit very little light. Usually, fluorescent bulbs or LED grow lights will do you good. Avoid incandescent bulbs or mercury vapor.

75w of grow lights is enough for an area of 5-10 square feet of growing area. Fluorescent bulbs cover a wider area.

How Does Dormancy Affect Light Requirements?

Like many plants, cacti go through a period of dormancy. The dormant period usually occurs during winter when temperatures drop below freezing. This phase is characterized by a slow growth rate and decreased light requirements.

Cacti will require less light during this time than during the active growing season.

When exposed to too much light during dormancy, these plants can become sunburned or stressed, resulting in slowed growth or death.

Therefore, adjusting the amount of light your cactus receives during its dormant period is important.

Consider maintaining cool temperature and less light exposure during this time. Once spring arrives, gradually increase the plant’s exposure to sunlight to encourage healthy growth and flowering.

How Does Light Affect Flowering in Cacti Plants?

Light plays a pivotal role in influencing the flowering of cacti plants. The timing, duration, and intensity of light exposure directly impact the flowering process in these plants.

Short-day cacti typically require longer nights and shorter days to initiate flowering, while long-day cacti require shorter nights and longer days.

The changing light patterns of different seasons trigger the plants to bloom at specific times.

Protecting Your Cactus from Heatwaves

Cactus species react differently to weather changes, and excess heat might damage others while some may survive.

Either way, you need to ensure your cacti don’t suffer the excess heat, especially if you stay in areas that receive extreme heatwaves.

Heatwaves mostly happen in summer, last many weeks, and can kill plants. You need to tend to your plants in several ways to avoid this. Here’s how to do it.

Although cacti love sun, you still need to protect them from excess heat and sunlight.

Give Your Plants Some Shade

If you think that your region will suffer heatwaves in the coming weeks, you need to prepare for it.

You need to find some shelter for your young and fragile plants that might not tolerate the extreme weather.

If you have outdoor cactus, find them the shadier spots in the garden. For those species that do well indoors, take them inside to avoid heat.

You might not be able to move the tall and mature cacti, but don’t forget to check on them often. Buy shade clothes for those cactus plants in the bed.

Don’t Repot

This will not be the best time to repot your plants because the heat will burn them right away.

Even mature plants will undergo stress when you repot, and if you add intense heat to that, they won’t survive.

Wait for the heatwave to subside, and the temperatures dropped before you can repot.

Don’t Fertilize

While fertilizers are perfect for the growth of plants, not all the time is fertilization time. The best way to fertilize in spring, when many of them will be growing actively.

During a heatwave, your plants will be merely struggling to survive and will not grow. If you introduce new nutrients, you’ll only cause more damage than even that of a heatwave.

Summary

Cacti plants love light and will do well in areas that receive direct sunlight. Others don’t need direct light but will still need some form of light to survive.

Denying your precious plants the much-needed light will only mean destroying them.

Direct sunlight or heatwave is likely to cause sunburns or even kill your plants. So, whether you choose to give your plants sunlight or artificial light, make sure you do it carefully. Too much or too little light both cause damage to cactus plants.
How to Get Rid of Cactus Fungus?

Cacti are beautiful plants that make great additions to any home. However, they can be susceptible to various fungal infections that may kill them or significantly reduce their growth. 

While most people know how important it is to water cactus properly and keep the plant from getting too much sun, sometimes these steps aren’t enough to prevent an infection. You also need to be aware of the signs that indicate a fungal infection, such as black spots, discoloration, decay, etc.  

You should also know how to get rid of the cactus fungus if you discover it, such as transplanting and removing the infected parts. In extreme cases, you may need to use fungicides to get rid of fungi from your plants, and you should know the right type to use.

This article provides all the information you need about safe and effective ways for dealing with fungus on your cactus. It starts by explaining how to identify these fungi before you proceed to get rid of them. Let’s get started!

Cacti Fungus Symptoms

Before you learn how to eliminate fungi from your cacti, it’s important to be familiar with a few of them first. Knowing how these cacti look will help you get rid of them before they cause severe damage to your precious plants. Here are some common fungi infections and how they look.

Stem Rot

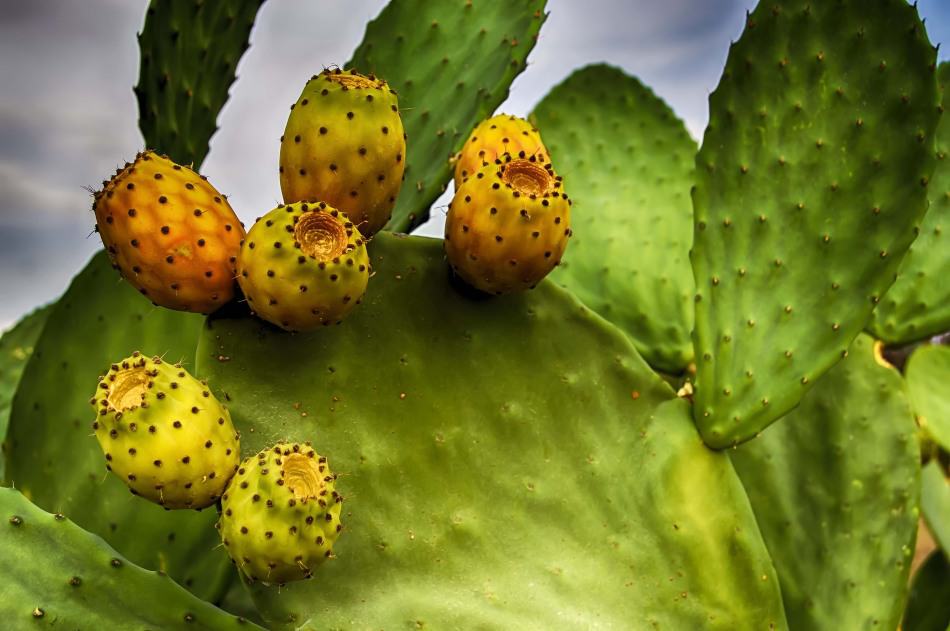
One of the more common fungal infections is corky stem rot, which most often infects prickly pears. This particular fungal infection produces dry, light-colored patches on the plant’s stem, which expand in time. These sections look discolored and may eventually cave in.

Stem rotting is especially common in prickly pear cacti.

Black Rot

This fungal infection is a type of canker disease that affects many different cacti species, including barrel-shaped cactus varieties. This fungal infection makes it difficult for the plant to grow any higher, which is why it’s called black rot. It causes large sections of cactus skin to become eroded and look coated in a black substance.

Soft Rot

Soft rot is a fungal infection that affects the area of the cactus between its spines. It often starts as a small, white spot that quickly spreads into an extensive area of decay. The infected flesh eventually turns brown and crumbles away to expose the main part of the plant underneath.

Cotton Root Rot

This kind of fungal infection affects the cacti’s roots. It usually appears as a thin layer of mold growing on the soil surrounding the plant, and it can eventually spread to infect other parts of the plant if left untreated for too long. If your cactus has a cotton root rot infection, you’ll notice its new growth is weaker, and the plant’s overall health seems to be declining.

Cotton rot is a fungal infection that attacks the roots of a cactus.

Stem Tip Blight

Another type of cacti fungus is called stem tip blight, which attacks one of the plant’s lower sections. It starts by causing damage to the structure of the plant and eventually rots it completely, especially when the infection spreads into other parts of the cactus.

Soil-based Fungi

The last type of fungus is soil-based, affecting different plants, including agave and aloe. They tend to grow in the soil around the plant (and not on its surface). It can be more difficult to notice, especially if you let your plants go unwatered for some time.

The main symptoms of a fungal infection are spots or patches that look discolored and have a slightly sunken appearance. If you see these marks on your cacti, you should carefully inspect the part of the plant they’re on to ensure that it isn’t just a different type of discoloration. Also, look at any other parts of the cactus to make sure other spots aren’t present, which would indicate a fungal infection.

How to Get Rid of Cactus Fungus

As previously mentioned, you may treat cacti fungal infections in different ways. Here are some ways to do so:

Use an Insecticide

If you notice that your cactus has a number of small insects crawling over it, then try spraying the plant with an insecticide to get rid of them. They can also help prevent more pests from infesting your cactus in the future.

Remove the Plant from Its Environment

Fungal infections often appear when the plant’s growing conditions aren’t ideal. One of the easiest ways to get rid of these types of infections is to change your cactus’s environment, so it doesn’t suffer from them anymore. For example, if your cactus has developed a fungal infection because you let its soil go dry for too long, then try watering more regularly instead. The same goes for other types of cactus fungus.

Remove the Infected Part

If your plant has a large fungal infection, you might need to get rid of the infected part entirely and be careful not to spread it into other parts of the plant. There are a few different ways to do so, including pruning or sharpening your cactus to remove the discolored area.

You can also use a sharp tool like a knife or razor blade to carefully scrape away the damaged sections of skin and expose the healthy part beneath. This is sometimes enough to get rid of all signs of fungal infection.

Use Fungicides

Fungicides are also a popular way to get rid of the cactus fungus, and there are many available for purchase. One of the most common types of fungicides is the Bordeaux mixture, which you can find at your local gardening store. Apply fungicide directly to the affected areas of your cactus to get rid of the spores and stop them from spreading any further.

Clean Your Pots

You can clean your plant pots specifically to prevent cactus fungus growth. Cleaning the leaves or soil in your pot regularly will help prevent fungal infection or remove small signs of these types of problems already present. This is especially important if you’re using a pot designed for cacti since these pots tend to hold onto moisture and could encourage fungal growth.

Always ensure the pots are clean before planting your cacti.

Avoid Placing the Cactus in Direct Sunlight

Finally, keeping your cactus in direct sunlight can also cause it to develop fungal infections. If you notice the plant beginning to decline in health or its surface is developing discolored or sunken spots, move it. It’s a good idea to move your plant into filtered light or shade until the condition clears up.

How to Prevent Fungi Infection

Cactus fungal infections often occur when the cactus is in a state of decline and can no longer fight off pests and pathogens. By taking care of your plant, however, you can avoid this problem.

To keep your cactus healthy, plant it in the correct soil. The soil should be coarse enough to allow good drainage but not compacted either. You should also avoid overwatering your plant.

Make sure your cactus soil offers enough drainage for the succulent to get rid of excess water.

Spend a few minutes each week or two to inspect the cactus for any signs of pests that are commonly attracted to these plants, like fungus gnats. If you notice any pests, then try removing them manually using an insecticidal soap or a pesticide.

https://www.viagrageneric.org/how-much-does-it-cost-for-one-viagra-pill/

Keep your cactus away from direct sunlight, especially if it’s suffering from a fungal infection. The plant will be able to fight off the fungus easier and quicker in more indirect light as opposed to direct sun.

Related Questions

How can I tell if my cactus has fungus growing on it?

If you notice that some plant parts look discolored or sunken in, then it might have a fungal infection. Other signs indicate the presence of fungus gnats, like small black flies flying around your cactus.

Can fungi infections kill my cactus?

The above types of infections can cause irreparable damage to your cactus. However, it should be fine as long as you quickly take care of the problem and don’t allow it to spread. Your plant might lose a few leaves or suffer from discolored areas on its surface, though, which would make it look unsightly.

How do I get rid of a fungus gnat infestation?

Try keeping your cactus plant in indirect sunlight and remove any affected soil or potting material the next time you water it. You might save small plants with a fungicide if necessary, but this is unlikely to work on large cacti. If all else fails, you can also try pruning your cactus and removing the affected parts.

How much water should I give my cacti?

Cacti, like other plants, require enough water but don’t like to be overwatered. Too much water can cause root rot in larger varieties. You’ll need to let the soil dry out slightly before watering it again and avoid watering heavily on the leaves.

Summary

The best way to prevent these types of diseases from harming your cacti is to keep an eye on their overall health. You should be sure that your plants get enough water; they’re getting the amount of sunlight they need and that no insects are bothering them. A lot can affect a cactus’s health, so maintaining it properly can help prevent fungal infections from developing as well.

Being able to identify different types of cactus fungus can help you get rid of them before they do too much damage and take the plant’s health down with them. We hope this article helped you learn how to identify a fungal infection and what you can do to prevent it from spreading.

This is Why Your Cactus Doesn’t Bloom

Cacti are exotic plants that brighten every home they’re planted in with their abundance and flamboyant flowers. Many gardeners plant cactus to enjoy their beautiful and sweet-smelling flowers. However, sometimes these striking plants may fail to bloom after many years of having them in your garden. But why won’t cacti bloom?

When your home cacti aren’t blooming, the issues can be lighting, watering, temperature, or soil. Another reason could be your cactus isn’t mature enough to bloom. Some cacti species take up to 50 years before you can see their first blooms. Others might be too old to continue blooming regardless of the care you give them.

So, if you’re wondering why your precious cactus isn’t blooming, this article may provide you with the answer. Here are the reasons your cactus isn’t blooming and what you can do about it.

Weak Root System

Many cacti species like to be root bound, and re-potting them without careful consideration can interfere with their growth. If you must re-pot your cactus, do it early enough, so you don’t interfere with its growth. Cacti with weak and unhealthy root systems will not flower. If you re-pot, your cactus will take time before their roots can strengthen in the soil, and until this happens, they won’t bloom.

Cacti with weak root systems should be repotted and they will still need some time to bloom.

When repotting, choose a container that’s large enough. It should be bigger than the current pot so it can comfortably accommodate the plant’s needs. Don’t forget to fill the new pot with good quality potting soil that will encourage flowering.

When planning to re-pot your cactus, don’t do it while the plant is still blooming or about to bloom. It’s essential to wait for the plant to finish blooming before transferring to another container.

Rest Period

Before cacti start flowering, they need a rest period. Know the types you have at home and their bloom periods, so you understand when they need to rest. When in their natural habitats, most cacti rest in hot summers. Such species mainly flower in autumn.

If you live in areas that experience cold winters, allow your cactus to rest during this period. The rest period is very crucial for cactus flowering. This is when they develop buds that become visible around 30 to 50 days before they can flower. If you deny them the rest, your cacti may have a difficult time blooming.

You’re Overwatering

One grave mistake that most cactus growers make is to give their plants too much water. While many cactus species love to drink once a week or twice, they can survive long periods without water, even in summer. These plants need a period of almost drought so they can be ready to start blooming.

Don’t worry; your cactus won’t die if you forget to water them for a month or so. The plants have various ways of storing water which they use during drought periods. However, don’t forget to water completely because the stored water can still run out.

Instead of overwatering your cacti, give the plants a period of drought for them to start flowering.

Like other plants, cacti still need water to thrive, though they have strict watering requirements.  There are periods when your plant will need constant watering and times when you need to water sparingly. If you want to see the beautiful blooms, you need to understand those seasons to water and withhold watering.

Too Young or Too Old

One of the common reasons why your cactus won’t bloom is because it’s not yet time. Many cactus species are not able to produce flowers for many decades. You should understand the type you have at home, so you know how long you’re going to wait. Some varieties may go for 50 to 100 years before producing their first blooms.

If your main aim for planting cacti is to see the blooms, you should choose ready-flowering indoor cactus types. The types that are likely to bloom fast enough are Parodia, Notocactus, Mammillaria, and Gymnocalycium.

If your cactus was already blooming, then it stops; the reason might be it reached its full maturity stage. An old cactus may not flower as often as it used to. Some stop blooming altogether. But you can still consider giving them special care to encourage blooming.

Your Cactus Is Not Healthy

Flowering means your cactus is healthy and happy. Cacti only bloom when you take good care of them and provide them with habitable conditions. At times, your plants might be experiencing several health conditions that discourage their blooming.

Root rots that are not yet visible or fungi attack can stop your plant from blooming. Sometimes your plants may not http://armodexperiment.com/ show any signs of distress; hence you might not realize they have health issues. Plants that are attacked by pests may also fail to bloom. Ensure you treat your cactus and get rid of all the pests attacking it so it has no trouble blooming.

No Fresh Air

Indoor cacti still need enough light and fresh air, especially during their active growing period. You can try leaving your plants outside to get fresh air until around October. The lower temperatures harden off plants and prepare them to flower. If your plants are too warm after summer, they might become too sensitive, and this will interfere with their blooming.

Not Enough Light

Your cactus needs plenty of light to bloom. You must ensure it receives plenty of light throughout the year. Even in winter, you should still ensure you place your cactus in the brightest locations of the house.

As cacti love sunlight, ensure your plant receives plenty of light during the day.

How you position your cactus towards the light will matter a lot when it comes to its flowering. Positioning is especially vital for indoor cactus placed on the windowsill. Ensure it gets enough light by positioning it properly. Consider turning your cactus from time to time, so it gets consistent light throughout its body. However, don’t turn your cactus too often, as too much movement might prevent it from flowering.

Don’t forget that some cacti species can’t stand intense heat from the sun. But they still need the light to thrive. You should ensure they get the required sunlight. You should protect them from sun damage by filtering the light. You can also consider using grow light, so your indoor plants get the needed light.

Using Wrong Fertilizers

It’s good to give your cactus a little bit of extra care by adding fertilizers. However, you must be careful when choosing your fertilizer type because a little too much or the wrong type can prevent your plant from blooming. Many fertilizer types are not suitable for cactus. Some can make the plants grow at a very fast pace and cause bacteria accumulation in the soil.

Using a fertilizer with wrong nutrient content will prevent your cacti from blooming.

Don’t give your cactus fertilizers that have high nitrogen content. Avoid manure as well. If you must give them fertilizers, consider those with high potash content. Don’t fertilize your cactus when you’ve just re-potted them. Don’t overfeed your cactus because this will interfere with their blooming.

FAQ

What can I do to make a cactus flower?

One of the things you can do to facilitate the flowering of your cactus is to give it enough water and light. Your cactus should get enough sunlight during its growth period and move it to a cooler place during dormancy.  Make sure your cactus is healthy and growing for it to flower. If your cactus is not growing, it means it’s unhealthy, and it definitely won’t flower.

When do cacti flower?

The flowering period for your cacti depends on the species. Some cacti may flower in late spring or summer. Others like holiday cacti flowers in winter. Regardless of the blooming period, don’t expect your cacti to bloom until it’s mature enough. Find out the type you have and give it the care it needs to blossom.

Do all cacti bloom?

Cacti are categorized under flowering plants, which mean all of them are capable of blooming. The only thing that makes a difference when blooming is the age and care you give your plant. You must find out the blooming requirements of the cacti species you have so you understand how to make them bloom.

What are the conditions that encourage blooming?

Cacti grow in containers in the USDA zone. All they need is proper care, and they’ll reward you with great blossoms. Make sure your cacti get at least four hours of sunlight, mostly morning hours. Water regularly during the growing seasons and allow the soil to dry between watering. Fertilize monthly, especially during spring growth towards the end of summer. Decrease watering in the winter dormancy period and ensure the temperatures remain at 50s.

Summary

Now that you know why your Christmas cactus is not blooming and what you can do about it, you must want to try it right away. But before you get too excited, remember that the reason why your cacti won’t flower might be because you’re the one who’s so impatient. You can’t just plant your cactus and expect to get results right away. As long as they’re growing, give your plants time, and they’ll bloom when the season is right.

14 Amazing Facts You Didn’t Know About Succulents

Succulents are some of the most popular house plants. Not only can they be adorable, but they are also extremely hardy. So what is it about these stunning plants that is making them fly off the garden section shelves?

These spectacular little plants are not only easy to care for, but they are also pretty cool looking! Whether you are looking to spruce up your office, or start your own home garden, there is a lot to learn about succulents. Keep reading to learn about 14 amazing facts you didn’t know about succulents that will surprise you and make you want to grab a few for yourself!

1. Succulents Come in a Variety of Colors 

Succulents come in all shapes and sizes and colors. Not only can you find beautiful greens and flowering plants, but you can also find purple, pink and so many other colors! Whatever your home decor, there is a succulent that can brighten up any room. 

Because there are so many species and subspecies, it can be hard to narrow down exactly what you may want. Do you want a tall plant with bright green leaves? Or a short and stout plant with a purple hue? You can have them both and still have a succulent plant!

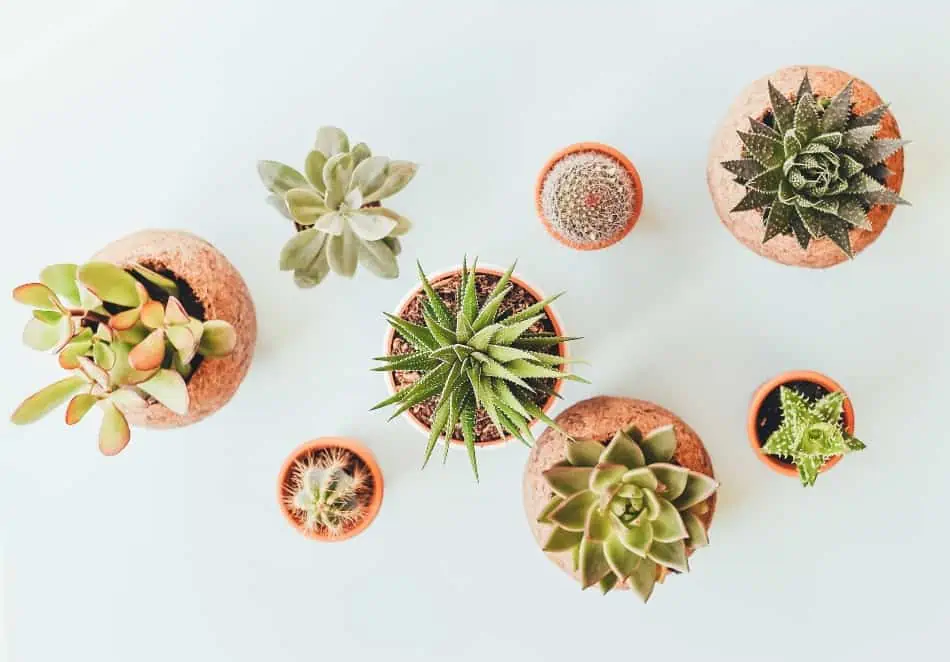
Succulents come in numerous colors, ranging from light green to vibrant pink and red.

Here are some succulent colors that are very popular and easy to find: 

  • Red
  • Green
  • Light Purple
  • Maroon
  • Pink Hues
  • Blue-green

Succulents can also change color based on a few different factors. The amount of sunlight the plants get can fade or change the color. Over- and under- watering can be a contributing factor as well. 

Temperature change can also impact the color of your plants. All of these factors together means that if you move your plant to a different place in your home or office, you could potentially change the color of your succulent.

2. Cacti and Aloe Are Succulents!

All cacti and aloe plants are considered succulents. That means that all 2,000 species of cactus are succulents and all 20 different aloe species. So when you put your aloe vera on your sunburns, you are using a succulent to help you heal.

Because cactus species are succulents, it is no surprise to learn that most species of succulents are generally found in dry, arid climates. So wherever you imagine cactus growing in the world, you are actually thinking about succulents.

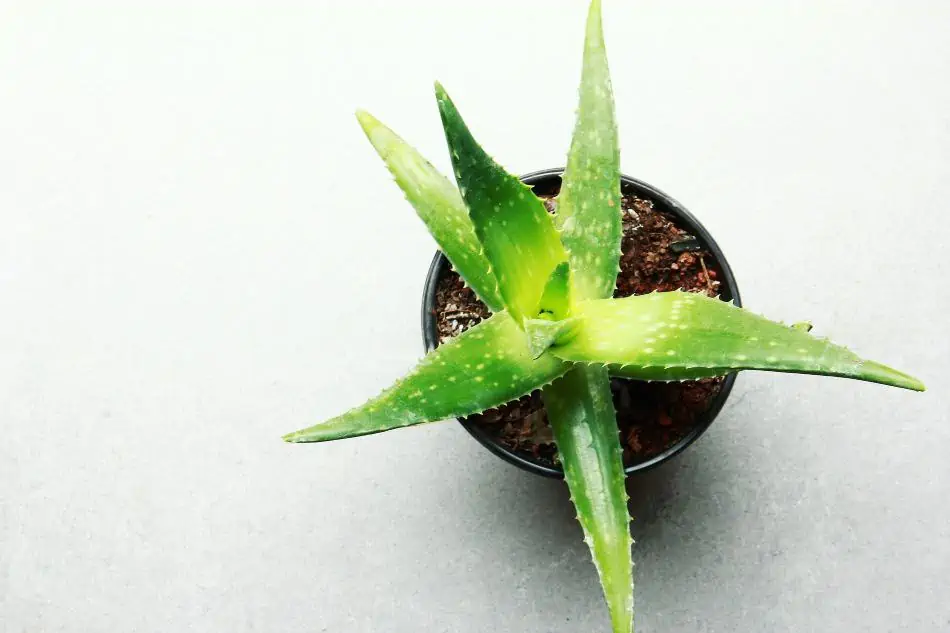
Aloe Vera is one of the most popular succulents with plenty of health benefits.

The leaf size and stem size of your succulent plays a huge role in how much you will need to water it. The bodies of cacti are the stems. So however large your cactus is determines how much water it will need.

The diversity of succulents alone is astounding. You could have a small cactus on your desk, or grow a garden that looks other worldly! 

3. Named for Their Leaves

Succulents are named because their wide leaves are filled to the brim with sap. Stemming from the Latin word “Succus”, or “Sucus” (pronounced Sou-Kus), succulent leaves are filled with sap and water. 

The stems of most succulent plants are also incredibly thick. This allows for water storage. Allowing for most succulent species to be drought resistant. Not to mention easy to care for if you are new to having plants in your home.

The leaf size on your succulent plant is also an indication of the altitude that your succulent is native to! Meaning if it has smaller leaves, it probably is native to a higher altitude. The leaves also determine how much water your succulent can store over time. It really is no wonder these fascinating plants are named for their leaves. 

4. You Can Propagate Succulents

Succulents are great for beginner plant owners because they have simple care instructions and are extremely robust. You can also propagate most varieties of succulents as well! 

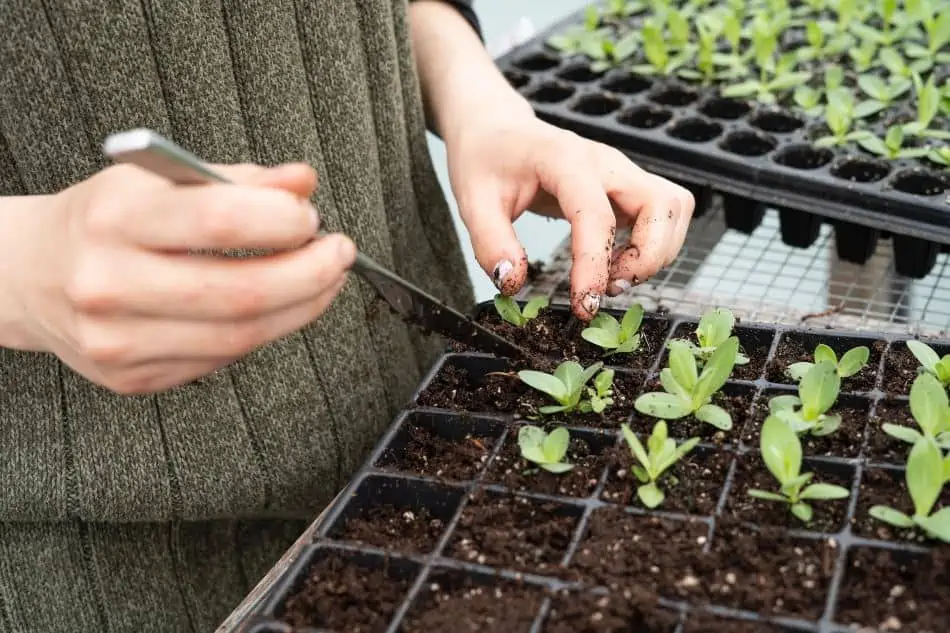
Propagation is when you can breed a new plant from the stem or root of the “parent” plant. This means that if you buy one succulent plant that can be propagated, you can easily end up with many, many new plants.

You can easily propagate succulents and grow a number of new plants.
How to Propagate Succulents

Some succulents can be propagated through leaves. Some varieties you have to use a stem. However, it is quite http://online-pharmacy.org/ simple to propagate most species of succulent. 

Here are the basic steps on how to propagate your succulent: 

  • Gently remove the leaf from the bottom of the leaf, right where it meets the stem
  • If you are using a stem, or cutting, cut on the stem just above a leaf
  • Let the leaf dry out for a few days
  • Wait until you see it start to have a small protective layer. Some gardeners call this a “scab”
  • Place your leaf on top of soil
  • You can also choose to put the base of the cutting or leave into the soil a small bit
  • Water your cutting everyday
  • Patiently await your new succulent to grow! You should start to see results of growth after two weeks 

It is that easy to go from one succulent to a few. It is always best to seek the advice of a professional when working with plants, or testing out your green thumb. Be certain you know what you are doing before you start taking leaves off of your succulents. But you can have a full garden of succulents after only buying one. 

5. Succulents Are Pest-Resistant 

There are not a lot of pests that like succulents. That means that no matter where you are trying to grow them, it is highly unlikely you will have to deal with bugs. Though overwatering can lead to fungus gnats, or aphids, most varieties of succulents are pest resistant.

It also makes a big difference on whether you are growing your succulent inside or outside. Though some pests are found outside no matter what, it is very rare for succulents to have an infestation. 

This makes caring for succulents just that much simpler. Imagine never having to do a fungal gnat treatment, or having to air out and replant your succulent! If you have a green thumb, and you have a lot of houseplants, you know how tedious that can be. 

6. UV Ray Protection

Taking a closer look at your succulents will reveal a white film coating the leaves. This waxy, chalky substance found on most species of succulent is called farina. It evenly covers the leaves of your succulent plant to help protect it from harsh sunlight.

As most succulents are native to harder, warmer climates, it is amazing that they are able to produce such intricate protections! So that means that they not only have some sun protection, but they also have animal protection as well. 

Farina is also a hydrophobic layer for your succulents. That means that it helps repel excess water from the plant. Therefore, it protects against all of the following: 

  • Harmful UV rays from the sun
  • Excess water in the leaves and soil
  • Harmful insects
  • Harmful bacteria
  • Microorganisms that could kill your succulent

This protective layer on succulents protects them from all these external forces they may encounter in their environment, making them resilient and durable. 

7. Succulents Love to Spin!

Because they love the sun, it is important for your succulent to stay in the right light! However, you also need to move your plant around. Regularly spinning your succulent will mean even coloring throughout all of its leaves. 

All you have to do is rotate your succulent every month or so in the same light. This can mean spinning it a few inches to the left or right once a month. Making a complete circle every few months.

Regularly spinning your succulent will enable the plant to receive plenty of sunlight throughout the day.

Succulents also lean towards the sun, as most plants do. So spinning them in place will help them to grow straighter and stand taller. It will also help for even growth throughout the spring and summer months. 

8. A Little Water, a Long Way

Many people love succulents because they are not temperamental plants. One of the biggest draws is that these beautiful plants do not require a lot of water. They can survive for longer periods of time on less water, making them great houseplants for people who are always on the go. 

Succulents require more water during the growing seasons. Meaning you should water them about once a week during the spring and summer months. It also means that you can water them as little as once a month during the dormant season! 

Succulents grown in your home actually require a special kind of soil. This means you cannot just plant them in regular potting soil. Try not to use a spray on the leaves as you can take off some of the natural protectants like the farina! 

9. Succulents Can Grow on Jewelry and More!

Succulents are so diverse in size and hardiness, which allows them to grow on jewelry. That means you can wear your plants as an accessory such as a ring, necklace, or other piece of jewelry. 

In the last few years, it has become an incredibly popular thing for plant lovers to use succulents on bracelets. You can also put succulents on tiny necklaces, earrings and even hair pieces. Succulent jewelry is great for a big event that you want to remember for a long time to come! 

After a week or two of rocking your succulent on your wrist, you will simply detach it and plant it into a new pot. Meaning your special jewels can become a staple of your home for years to come.

There are also lots of different ways that creative green thumbs have found to utilize their succulents. Here are other ways people are using tiny succulents throughout their personal spaces: 

  • Magnets: There are tons of DIY tutorials out there right now showing you how to put your succulents in tiny, magnet pot holders. This makes it easy to have a garden on your fridge, on your microwave and even on your cubicle.
  • Gift Wrapping: Plant a tiny succulent in a small plate and you can use it as a bow on your next gift. Two gifts in one! 
  • Wall Decor: Planting succulents on wall planters, hanging wall planters and even around picture frames. It is also very popular to create massive wall fixtures filled to the brim with indoor plants. 

With how durable these stunning plants are, it is no wonder you can use them on jewels and as accents. Be certain to only purchase this type of jewel from an artist who includes proper care instructions. Get creative with your space, your plants and now your accessories.

10. Seasonal Treatments Are Needed

Succulents require seasonal treatments and care for them to thrive. This means mimicking their natural habitats as closely as possible. Simply add more water during growth periods. 

The different ways you treat your succulents throughout the year are important. In order to take proper care of your plant, you will need to know how and when to change your routine. 

Always consider the season and climate to take proper care of your succulents.

Spring and Summer

Plants love the spring and summer. Be certain to add a bit more water to your succulent during the summer months as it will be growing more. However, make sure to check the soil with your finger to be certain that there is not excess water. Your soil should still be dry between waterings. 

Fertilizing the soil is also a great idea for the spring and summer seasons. As this is the time when your succulents will grow the most, it is important that they are getting vital nutrients. You can find high-quality fertilizers at your local gardening store. You can also choose to create your own compost as well.

Autumn/Winter

Succulents, like most greenery, will “rest” in the autumn and winter months. This allows them to retain energy for growth in more comfortable times of year. When there is more sun and more warmth. You will need to water your succulents less frequently during these colder months. 

No matter what time of year, it is good to pay attention to how your succulent is responding to the sunlight and your watering schedule. But it is best to take a little extra care during the summer and spring months. 

11. Succulents Help Make Scientific Breakthroughs

The study of sturdy, drought-resistant plants like succulents have led to significant scientific breakthroughs. Scientists are studying how some plants are able to survive in more extreme weather conditions. Succulents can easily tolerate drought and could potentially lead to newer, more hardy crops. 

The information and research could lead to deserts potentially being farmed. It could also mean new strains of crops that could survive in even the harshest climates on the planet! Universities all over the world are finding how they can learn from these amazing plants.

12. Succulents Come in a Variety of Textures

There are so many varieties of succulents that you could actually have a choice of textures. From cacti with sharp needles, to soft and squishy leaves, succulents have so many shapes and forms. 

You can find small, rubbery, round leaves. You could choose super tall and skinny “vines”. Or you could even find succulents that flow over the tops of pots like a waterfall. Whatever kind of texture you are looking for in your home, you can find it in a succulent. 

Succulents come in a variety of textures, including sharp spines and squishy leaves.

13. Succulents Live in Both Warm and Cold Climates

Succulents can survive in all sorts of climates. From incredibly hot, dry weather, to cold tundras. The many species of succulents are so diverse that they can be found all over the world. 

Succulents can be found in all the following environments: 

  • Africa
  • Central America
  • European Alps
  • South America
  • South Africa

They can even be found in humid jungle environments. They are incredibly impressive and adaptive. Because they are able to grow in more extreme climates, it is no wonder they are easy to grow in the comfort of your home. 

This also means that it may not matter where you live. If you want to grow a succulent garden outside, you probably can! Though it is best to find some locally grown, or locally native succulents that will thrive in your yard. 

14. Succulents Provide Many Benefits

There are some fascinating benefits to having succulents in your home. Not only can you use things like aloe vera on your skin, but there are also interesting health benefits just from the plants being in your home. 

Succulents are constantly creating oxygen. Most house plants can not produce oxygen at night when there is no photosynthesis, but succulents do. They continue to add clean oxygen into your home all day long.

Plants also evaporate water into the air. Adding humidity into your home. The added humidity can sometimes be helpful with certain health conditions. Aloe vera also has antibacterial properties that can be helpful towards healing wounds.

Succulents add a colorful and relaxing touch to your home or workspace.

Succulents also add life and color to your home and workspace. Making it feel more alive and visually pleasing. Seeing these incredible plants can help to create a more calming environment and be a positive influence on your mental health. 

Whether you want to start with some easy house plants, or you are just curious about succulents, these facts can definitely help you grow your own succulent garden. Find the texture, color and variety that works best for you. There are many types of succulents to choose from.

Here Is Why your Christmas Cactus Doesn’t Bloom

Cacti are unique plants, and they flower too. In fact, there is nothing more beautiful and mesmerizing about springtime than seeing your succulent Bloom. While flowering may not be the primary goal for most gardeners, it is still something you can’t afford to ignore, especially if you have a Christmas cactus. But sometimes, your Christmas cactus may fail to bloom for various reasons.

So, why is my Christmas cactus not blooming? If your Christmas cactus plant isn’t blooming, it may be due to temperature, light, soil, or watering issues. For your cactus to bloom, it requires an almost perfect balance between temperature, lighting, and care. If you overwater, provide too much light, wrong temperature, or repot at the wrong time, then it can be challenging to get your cactus to bloom.

This blog post discusses some of the reasons why your cactus may fail to bloom. So, let us get started.

When Does the Christmas Cactus Bloom?

Before we discuss some of the reasons why your succulent isn’t blooming, it is good to understand when the plant typically blooms. Sometimes, you may be stressed over your Christmas cactus failing to bloom when it is not the flowering season.

Unlike the desert cacti, the Christmas cactus is native to tropical rainforests and requires regular watering and proper care to remain healthy in preparation for blooming. Flowers usually form at the end of the stems. Therefore, the more stems your plant has, the more flowers it will produce.

Typically, these cacti bloom around the Christmas period hence the name Christmas cactus.  However, it is good to note that the term “Christmas cactus” has become generic to three different types of cacti in the same family.

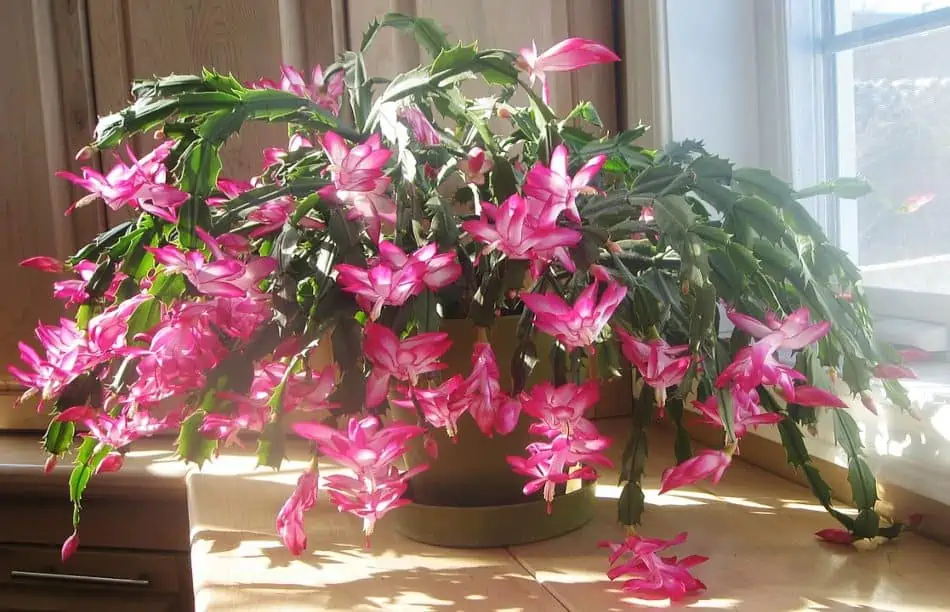
As the name suggests, Christmas cacti flower around the Christmas period.

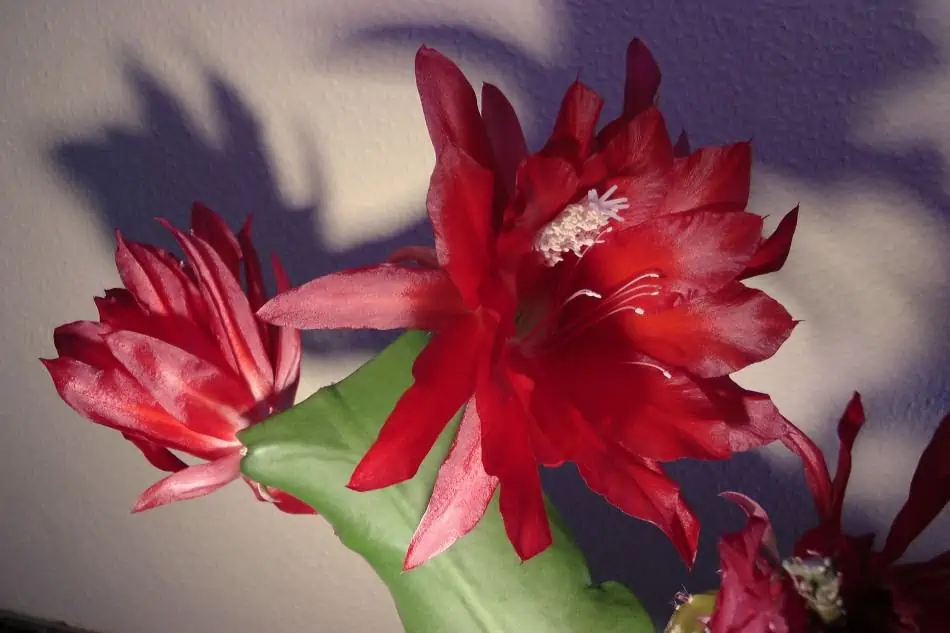
What most people think of as “Christmas Cactus” may be a Thanksgiving cactus, Easter cactus, or the actual Christmas cactus.

The difference between the three is actually the time of blooming. Is it blooming in November, December, or late/early spring? That will always tell you the type of holiday cactus you have in your home.

A true Christmas cactus will always bloom around Christmas time.

Why Is My Christmas Cactus Not Blooming?

Now that you know when your Christmas cactus should be blooming, you should be worried if you don’t see the flowers at the right time. Here are some of the top reasons why your cactus may fail to bloom:

1. Overwatering

One of the top reasons why your cactus may fail to bloom is overwatering. Although a Christmas cactus requires frequent watering during the other times of the year, it requires less water right before the blooming season.

Like any other cacti species, overwatering your Christmas cactus will encourage bugs and may even cause root rot, preventing your plant from blooming.

Generally, water your Christmas cactus only when the top inch of the potting mix is completely dry. It is quite difficult to advise you on the exact number of times you should water your plant because living conditions and your area’s climate need to be considered.

Overwatering your Christmas cactus will lead to root rot, preventing the plant from flowering.

If you grow your cactus outdoors in a relatively hot and dry environment, then you should consider watering it every three to four days. However, if your cactus grows indoors in a relatively cool room, it may only require watering once every week.

However, you must water much less from October to force your cactus to bloom. During this time, you can even get away with completely dry soil and watering just once per month.  You can start http://getzonedup.com/ watering regularly again after the flowers have bloomed.

2. Too Much Light

Another reason why your Christmas cactus may fail to bloom is because you are exposing it to too much light. While desert cacti love a lot of sunlight and should get at least four hours of direct sunlight every day, a Christmas cactus is a tropical plant native to the tropical rainforest and doesn’t need direct sunlight to thrive.

In fact, exposing a Christmas cactus to too much light can result in stunted growth and sunburn on the leaves. If you start to notice your Christmas cactus turning purple and wilting, then it could be a sign of too much light.

If you are growing the cactus indoors, it is recommended you place it on a north-facing window. To encourage blooming, you have to ensure that your succulent gets at least 12 hours of total darkness every day.

Keep in mind that artificial lighting can easily break the cycle. Therefore, the best way to avoid this is by placing your Christmas cactus in a room that inst used in the evening.

You should start preparing your Christmas cactus for blooming in late September and early October. Ensure the plant is positioned in a dark room where it can receive at least 12 hours of total darkness, and you will start to notice new buds after three or four weeks.

When the buds start to form, you should consider moving your plant to a nice display area but make sure it still receives plenty of darkness.

3. Wrong Temperature

What is the first thing that hits your mind when you visualize a cactus? A thorny plant that has adapted to the hot desert temperatures, right?  Well, this may be correct most of the time, but not all the time.

While most cacti species require a lot of direct sunlight to survive and thrive, the Christmas cactus requires a significant drop in temperature for it to bloom. Therefore, the right time to move it to a relatively cooler area is late September or early October.

If you have your Christmas cactus in a south-facing window, try to move it to a north-facing window where it is more likely to receive less light.

This will allow the flower buds to set in quite nicely and strongly. The ideal temperature is around 55oF. Sometimes, you may notice buds start dropping off if the plant is exposed to temperatures beyond 90oF.

However, you should be careful not to expose your Christmas cactus to frost and extremely cold weather. Keep in mind that you are dealing with a tropical plant, and it will only do best in relatively warm temperatures and moderate moisture levels.

4. Repotting at the Wrong Time

Your Christmas cactus may also fail to bloom because you repotted it at the wrong time.  Tropical cacti love to be root-bound, and you should only think about repotting when your plant is at least three years old.

After that, you have to wait until the roots start growing through the drainage holes in your plant container to repot.

Only repot your Christmas cactus is the plant is at least 3 years old.

Typically, a Christmas cactus will comfortably bloom in the same pot for several years. So, don’t rush to repot your plant thinking that you will help it to bloom. On the contrary, this will only cause damage and make you miss the spectacular view of your succulent when it is blooming.

If you must repot your plant, you should consider doing so after the blooming season is over and the flowers have wilted.

When repotting, there are many things to consider, from pot size, timing, and soil type. But the most important thing you need to remember is that if your cactus is still too young, you don’t need to think about repotting at all.

5. It Is Not a Christmas Cactus

Lastly, your Christmas cactus may fail to bloom because it is not a Christmas cactus after all. If you have done everything right and you still can’t see the blooms during the flowering season, then you may be having something different that looks like a Christmas cactus.

As mentioned earlier, there are actually two other variations of the holiday cactus that look similar to the Christmas cactus; Easter cactus and Thanksgiving cactus.

Your “Christmas cactus” may actually be an Easter cactus and this is why the succulent is not producing flowers around the Christmas period.

Besides the time of blooming, the other difference between the three can be found in the shape of their leaves. If your plant is a true Christmas cactus, then it should have tear-dropped or scalloped leaves.

The Easter cactus has leaves with rounded edges, while the Thanksgiving cactus usually has pointed or claw-shaped projections on its leaves.  Take time to inspect your plant’s leaves, and it can help you understand if it is a true Christmas cactus or not.

6. Overfertilization

Like most succulents, your Christmas cactus thrives with a little help in the nutritional department.

You should feed it with a balanced liquid fertilizer every month or two, especially during the active growing season.

Consider using a balance of 20-20-20 fertilizer for your plant and ensure the cactus is not exposed to too high concentrations. Otherwise, you will end up burning the roots, preventing bloom formation.

However, feeding your Christmas cactus too much can prevent blooming. You’re mistaken if you think giving your plant more nutrients will make it bloom better.

Generally, avoid fertilizing your Christmas cactus during winter when you should be lowering the water and fertilizer intake.

If you think you have overfed your cactus, flush out the excess nutrients with a few extra watering sessions. This should help get rid of the harmful salts and encourage blooming.

You should stop applying fertilizer to your Christmas cactus during the blooming season (from October to December). This will allow it to focus on flowering instead of producing new leaves and stems.

7. Root Rot and Stem Rot

Stem and root rot are fungi infections that affect your plant’s health and can prevent it from blooming.

Root rot is caused by overwatering, while stem rot is usually caused by too much humidity or high temperatures.

If you think your cactus has root or stem rot, you should immediately reduce watering and check for signs of black spots on the stems or roots.

You can also replant it in a new pot with cactus-friendly soil and make sure the drainage is optimal.

Be aware that treating root and stem rot can take several weeks, and you should be patient if your Christmas cactus doesn’t bloom during the season.

8. Bud Drop

Bud drop occurs when the plant produces buds, but instead of flowering, the buds drop off. It is normal for a Christmas cactus to drop some buds as it is a normal part of the growth process.

However, excessive bud drop can indicate an underlying issue with your plant that needs to be addressed.

There are several reasons why Christmas cacti experience bud drop, ranging from drought stress and low temperatures to disruption in its dark period.

To help prevent this problem, ensure you provide the right lighting, water, and fertilizer.

You should also ensure your Christmas cactus is planted in quality potting soil that drains quickly and is not too dense.

Furthermore, keep the temperature consistently above 55 degrees Fahrenheit (12°C) to prevent bud drop.

Finally, water your cactus only when the soil is dry and expose it to 12 hours of darkness daily.

Will My Christmas Cactus Die After Flowering?

The short answer is “no.” Although some succulents are monocarpic, meaning they die after they flower, Christmas cacti don’t fall into that category.

Typically, a Christmas cactus will bloom and go into dormancy a few weeks after the flowering season is over. It means that the plant has developed survival mechanisms that help it to bloom without any issues.

Unlike regular flowering succulents, monocarpic succulents usually go for many years without flowering.

By the time they flower, they will have produced sufficient offshoots that can be replanted as new plants before the mother plant blooms and dies.

Summary

The Christmas cactus is a beautiful plant to have in your home since it can be grown indoors or outdoors. With the right care and attention, you can help your plant bloom quite magnificently during the holiday season.

However, if your plant fails to bloom, it could be due to overwatering, too much light, wrong temperature, or you could have repotted it at the wrong time. 

Find out what you may have done inappropriately; correct the mistake, and your Christmas cactus will be ready to shoot the blooms when the next flowering season arrives.

Succulents Vs. Cacti: What’s The Difference?

Cacti and succulents are closely related, though they’re not the same thing as some people believe. It’s scientifically incorrect to use the word succulents and cacti interchangeably. Well, some cacti plants are part of succulents. However, not all cacti are succulents, and many succulents are not cacti?

So, what’s the difference between cacti and succulents? According to botanists, all cacti are succulents, but not all succulents are cacti.  Some succulents are often mistaken for cacti because they have spines. However, most of these succulents still have characteristics that disqualify them from being called cacti. One of the distinguishing factors between succulents and cactus is the areoles. Any succulent that doesn’t have the areoles is not cacti.

Do you want to learn other differences that separate cacti from succulents so you can easily distinguish them? Let’s have a look at all that in this article.

What Are Succulents?

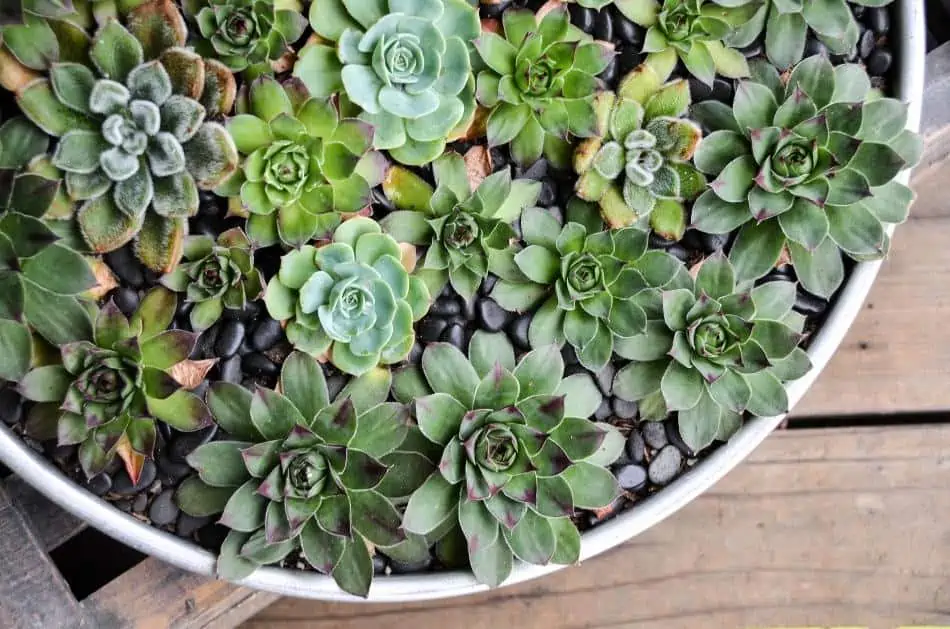
Succulents have unique adaptability characteristics such as storing water on their leaves, stems, and roots. These plants are available in up to 60 different families. The common ones include cacti, sedum, aloe, sempervivum, and haworthia.

So, it’s obvious most succulents don’t belong to the same plant family. They have different visual, genetic, and geographical characteristics. But all of them form a single family called succulents.

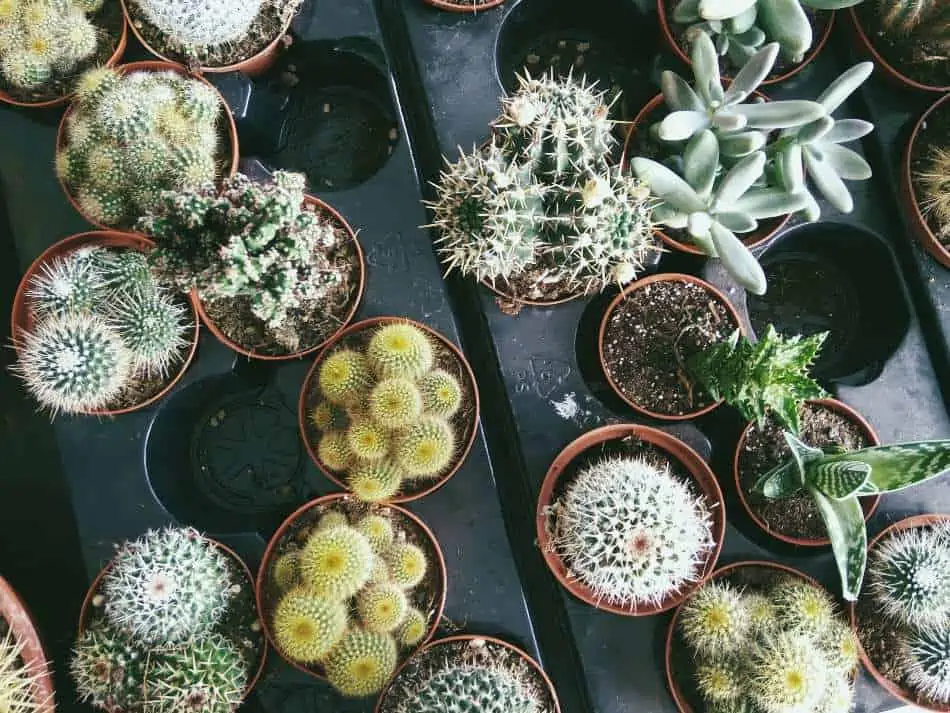
Some of the most common succulents are cacti, aloe, and haworthia.

What Are Cacti?

Cacti display the characteristics of succulents, including water storage characteristics like shallow roots, fleshy stems, and waxy leaves. For this reason, botanists believe that all cacti are succulents, although some still dispute this fact.

They are a family of plants that form a collection of plants known as succulents. Cacti come in different shapes and sizes, ranging from short, thin, round, branched, etc. However, not all cacti are succulents.  Some are pretty different from succulents due to a variety of reasons.

Although cacti are considered succulents, some botanists dispute this fact.

Cacti Have Areoles

For a succulent to be considered cacti, it must display the presence of areoles, which all cacti display. The areolas are small, round, and cushioned flesh where the plant’s leaves, spines, hair, and flowers grow. Some giant cacti plants like saguaro have branches that grow from the areoles.

The areoles have successfully managed to separate cactus from other plants because others don’t have them. This has made it easy to distinguish cacti from other plants because all cacti have this feature. But this is not the only thing that will distinguish cacti from succulents.

Cacti Don’t Have Leaves

Apart from the areoles, another physical characteristic that differentiates the two is the presence of leaves. The majority of cacti plants don’t have leaves. This is because the presence of leaves makes these plants lose a lot of moisture that they can’t afford to lose, given the conditions they grow in. Cacti grow in environments that experience too much sun and with very rare rainfall. If it rains, they collect as much water as possible, which they store for future use.

Having leaves will make water storage hard because most of the moisture escapes through the opening on the surface of the leaves called the stomata. The absence of the traditional leaves makes it easy for the plants to survive in the harsh desert.

So, while most cacti don’t have leaves, the majority of succulents do have them. The leaves of succulents are thick and have a gel-like substance inside. The name succulent originated from the term succulentus. This term means full of juice. The juice makes these plants survive the tough seasons without precipitation. They won’t wither away as other plants do.

The leaves of succulents also have a surface texture that has evolved in a way that prevents quick water loss. Their textures range from shiny, waxy surfaces, spines and hairs.

Cacti and Succulents Similarities

Since many people confuse succulents and cacti, it’s worth looking at how the two plants are related first. It’s true that some cacti and succulents look very identical and share similar characteristics. Both showcase the presence of spines and cylindrical shapes. For instance, euphorbia and cacti look alike but are not the same genus.

Although euphoria and cacti look pretty similar, they are not the same genus.

Why the similarity? The answer to this question lies in the term convergent evolution. This is an evolutionary process that makes certain animals and plants look the same. This usually happens to plants that live in environments with similar conditions. They might not originate from the same place, but since the conditions are similar, they’ll still display similar traits.

Cacti originate from the deserts of America. There are also quite a number of succulents that originate from different deserts across the globe. This means some succulents have faced the same environmental conditions as that of cacti. They have endured tough weather conditions like intense heat, lack of water, strong winds, and attacks by predators.

Due to all these hardships, such plants develop similar adaptations to cope and survive. Such adaptations include cylindrical shapes that enable them to store water and spines that protect them from predators.

These plants develop similar adaptations that make it difficult to distinguish one from the other. But if you’re keen enough and determined to distinguish the two, you’ll pick out a few things that differentiate them.

Cacti Lookalikes

There are plants that have been greatly confused for cacti. These plants are some of the succulents that look exactly like cacti and share similar characteristics. A good example is Euphorbia Horrida. This plant is a succulent that is not a cactus but looks exactly like one.

This plant has spiky thorns and bumps, which makes it tricky to differentiate it from cacti. The plant evolved to withstand the African climate, which is warm and dry. These conditions have made this succulent look and behave exactly like most cacti species that grow under similar conditions.

Cactus vs. Succulents: FAQ

Where are succulents from?

Succulents grow all over the world as long as they get their natural habitats. The plants have a wide range of habitats and mostly adapt to environments that other plants may find uninhabitable. Most of them grow in dry areas, semi-deserts, and deserts. Others are found in rainforests and mountainous regions.

These plants adapt to conditions that are too harsh for other plants to survive. They survive in high temperatures http://hotcanadianpharmacy.com with little to no rainfall. The plants are highly adaptable and hardy. There are other succulent types that grow in the coastal areas and dry lakes. These areas have extreme levels of dissolved minerals that are detrimental to other plants.

Why do you need to distinguish cactus from succulents?

If you’re a gardener or aspiring to be one, knowing different plants and their characteristics is important. Knowing the difference between cactus and succulents will help you when buying your seedlings. You’ll avoid getting tricked into buying the type of plant you didn’t intend to buy.

Being aware of the differences between cacti and succulents allows you to take proper care of your plants.

Knowing the difference between the two will also help you when it comes to blooming. Cacti flowers are flamboyant and lavishly beautiful. They come in a variety of impressive colors that make them worth everyone’s attention. If you’re going to buy cactus, you’ll hope it blooms. You don’t want the feeling of waiting for your cactus to bloom only to realize it’s not going to because it’s not a cactus plant.

Can you plant cacti and succulents together?

How you pot your cacti and succulents will determine whether you’ll succeed or not. Well, both plants adapt to dry environments and can survive long periods without moisture. Both of them require similar potting soils and need bright light.

However, you must understand that cacti still need less watering than most succulents. You must keep this in mind if you need to plant them together. Please make sure your cactus doesn’t receive more water than it needs, and succulents don’t get less water than it needs for its growth.

Summary

Now that you understand the similarities and differences between cacti and succulents, you can make your choice. Decide whether you prefer introducing cacti or succulents to your garden. You can also plant them both. What’s important is that you know how to take care of them without confusing one’s care needs for the other.

Remember that cacti are succulents, but not all succulents are cacti. Most cacti and succulents look the same, but only cacti have areolas, which differentiate them from other plants. Their care needs are also the same, but there’s a difference in water and sunlight requirements. With all these in mind, you can confidently become a cacti and succulent gardener.

How Do You Water Succulents From The Bottom?

Plants are a great hobby to have in your home. It is not only a soothing hobby to be interested in, it also has been proven to make your home a better place. For beginners, succulents are the best choice and watering from the bottom is one of the best methods to use for them.

Watering your plant from the bottom up can be a simple process but there are a lot of things to consider when you are using this method. You will want to know the best route that will keep your plant healthy and avoid root rot.

You will be surprised how effective watering from the bottom up can be and it will take little to no time from your day. All you need is a few things and you can begin this process.

How To Water Succulents From The Bottom

If your succulent still resides within the thin plastic pot, this is good. This will be easier for you to water the succulent from the bottom up. If your plant is in a regular pot, check to see if there is a hole at the bottom. You will need to have a way for the water to access the roots that isn’t via the top.

What You Will Need

Once you have your succulent in a pot where water can access from the bottom up, you are good to go to begin the process. Here are a few things you may need to complete this process:

  • Wide tub or basin or container to set the pots in.
  • A towel
  • Water
  • Timer of some sort

Gather all these things and your plants. Once you have done this, you can begin the process of watering your precious succulents.

Watering succulents from the bottom can be as easy as pie when you have all the materials prepared.

Steps To Watering Your Succulent

You have everything gathered, now it is time for you to nourish your little greens of life. Here is what you need to do.

  • If you haven’t already, remove the inner pot from your decorative pot.
  • Lay a towel out.
  • Grab the basin and fill it with water, about two inches deep (just enough to cover the base of the pots).
  • Set your succulents into the basin.
  • Let the succulents soak up the water for about 15 minutes (larger pots and plants may need a little more time).
  • Check the topsoil to see if it is moist. If it is, you can remove the plant from the water basin.
  • Pull the plant from the water and set it on the towel to dry.
  • Let the plant dry for about 5 minutes.
  • Place succulents back into the decorative pot.
  • Make sure your succulents have enough sunlight.
If the top of the soil is already moist, you can remove the succulent from the water basin.

This is an easy process, and you don’t have to keep an eye on the plants. There is an alternative to this method if you would like to not worry about air drying and placing the succulents back into their original pots.

Alternative Method

For this, you will need to have an inner lined pot that has holes to give water access to your succulent roots and soil. Then you will need a larger pot that can house your plant along with the inner lining.

Fill the bottom of the larger pot with about an inch of water. You don’t want to add too much water as it could overwater your succulent. Succulents don’t need a lot of water like other plants because they house water within their leaves.

Place the inner pot and plant into the larger one, and the roots will soak up the water as time continues forward. You won’t need to water your plant for a while with this method, and it will prevent root rot.

You can also water your succulents from the bottom if your succulent containers have drainage holes.

Try not to waterlog your succulents, though. They need fast-draining soil and shouldn’t sit in water for long periods. Just give enough water that doesn’t soak the entirety of the roots. This is how you can get root rot.

When Should You Use This Method

You don’t necessarily need a reason to use this method. This method is great for ensuring all the soil has water and not just the top layer, but there are moments where this method works best for a plant.

Here is when you should use this method over watering from the top:

  • When the plant is root-bound.
  • When the soil is extremely dry.
  • When the soil becomes hydrophobic.
  • To avoid damaging farina.
  • To prevent bacteria from growing on the leaves.
  • To prevent fungus from growing on the leaves.

How Often Should You Water Succulents

Succulents aren’t like other plants because they can last longer without water compared to other plants. To decide when you should water your plants, you have to consider the size of the pot.

If the pot your succulent is in is larger than the plant itself, you won’t have to water it as often. If the pot is a little smaller, you will need to water it more often. Also, take into consideration how much soil is in http://www.canadianpharmacy365.net the inner lining. The less the soil, the more frequently you have to water.

The size of the pot should be considered when determining how often to water the succulents.

You also need to take the environment into play as well. In a dryer atmosphere like the West Coast, you will need to water the plants more often, while in a more humid environment, you don’t have to water as often.

You should water these plants for about 1 to 2 weeks. A good rule of thumb is to put your finger into the soil. If the soil has moisture, your succulent is still all right, but you should probably water it if there is no moisture.

Why Water From The Bottom Up

Watering from the bottom up can help with many aspects of the plant. Here are the many reasons this method benefits  your plant:

  • Helps build stronger roots.
  • Prevents fungus and bacteria growth on the soil’s surface.
  • Avoids damaging the plant.
  • Reduces the chances of root rot.
  • More efficient watering.

If you have trouble with the amount of water to give your succulents, this process is a great way to feed them. You will find that it is more efficient with less chance of negative outcomes.

Signs Of Overwatering

Succulents can easily be overwatered. Often a rookie mistake with succulents is overwatering the plants. There are many signs you can look out for, like the following:

  • Wilting leaves
  • Discolored leaves
  • Leaves may become translucent, soft, and squishy.
  • Leaves are falling off.
  • Shrunken, shriveled plant.

If you notice a change in your plant’s leaves and color for the worse, then you may be overwatering your plant. Check the roots for any signs of root rot. If there is root rot, you will need to cut the diseased roots to further damage your plant.

Signs Of A Healthy Succulent

Your plant will always tell you when it needs something. When your plant is naturally thriving, it will show you this. Here are some signs to look for when your plant is doing well:

  • Papery brown leaves (it just needs thinning).
  • The color is vibrant.
  • Leaves aren’t drooping or becoming squishy.
  • Your plant is getting too big for its pot.

Pay close attention to your plant. It will tell you when it needs water and when it has too much water. If your plant is changing in any way, it is trying to tell you something.

Outro

Succulents are a wonderful plant to damage your plant further due to their easy nature and little to no upkeep. Watering them from the bottom up is a great way to make taking care of them even simpler. There are many benefits to this process, and you won’t want to go back to the traditional method.

How To Repot Succulents? The Complete Guide

Repotting succulents can seem like it may be a difficult task, but it does not have to be. At some point, your succulents will need to be repotted. You may notice, over time, that the soil needs to be replaced or that the succulent itself has outgrown its current pot. 

The process is simple, but you need to understand when to begin repotting your succulents. Once you know when and why you should repot them, you will be able to repot them effortlessly. Read on to discover how to repot succulents and why it is important for promoting the health and longevity of succulents.

Gather Your Materials

When repotting your succulent, there will be a few items you need on hand before you can begin. You will need the following items:

  • The succulent you wish to repot. If you are propagating your succulent, you will need the flower or part of the succulent you wish to repot. 
  • A new pot. The new pot should be larger than the previous one. It should also have good drainage, so avoid glass pots. Moreover, try to get a pot that is at least two inches wider than the succulent. This will provide enough room for the roots. 
  • A small gardener’s shovel. You will need a small shovel, also known as a trowel, to take the succulent out of one pot and into the other. It can also be used to fill the new pot with fresh soil. 
  • New soil for the new pot. You will need nutrient-rich soil designed specifically for succulents or cacti. You can buy this type of soil in most home garden shops. 
  • Water. You will need to water the plant before you repot it, so make sure you have some water beforehand. 
  • Decorative stones (optional). This is purely optional, but you may decide to add some decorative stones to the top of the soil, which can add a nice aesthetic to the new pot. 
To repot a succulent, gather basic materials and tools, such as a pot, shovel, soil, water, and decorative stones.

Collect your materials and set them aside. It is important to water your succulent before repotting it, not afterward. However, you do not want to overwater it, either. You want just enough water to fill the plant up without making the soil too bogged down. The idea is to give the succulent the strength to take root in the new soil. 

You do not want to water directly after repotting. The roots need to take hold in the new pot, and excessive water can destroy the roots and ruin your succulents. 

Now, once you have watered the plant and let it rest for a little, it is time to repot the succulent. 

Know When to Repot Your Succulent

A succulent is a delicate houseplant that does not require a lot of attention to keep alive. It is one of the reasons why many people want to have them. Many succulents can be left alone for weeks and still be healthy and growing. 

Besides occasional watering, some maintenance should be done with your succulents. As with all plants that are placed within a pot, it will eventually outgrow it.

You will need to repot your succulent if the plant outgrows the pot.

It is important to keep in mind the best time to repot your succulents. Consider the following when deciding if it is the right time to repot. 

  • 12-18 months for most succulents. For most succulents, a good range to aim for is one to one and a half years. So, your succulent will most likely be okay if it has been in its current pot for under this amount of time. However, if it has been in the pot longer than 18 months, then it is time to repot. 
  • No more than 2 weeks for a new succulent. A new succulent that you buy in the store will need to be repotted quickly. You should never wait more than two weeks to do this. The reason is that the pots they come in are often flimsy and too small. The succulent will quickly outgrow these pots. 
  • Repot just before dormancy. Most succulents have a dormant period, either summer or winter. The best time to repot a succulent is just before the dormant period begins. For example, if your succulent becomes dormant in winter, you should repot it in late autumn. 

You may find that your succulent needs to be repotted well before 18 months. Moreover, you may also find that your succulents can survive in the same pot for longer than 18 months. This is why it is important to monitor the condition of your succulents to know the best time to repot them.  

Monitor Your Succulents

Before you can gather your materials, you need to make sure your succulent needs to be repotted. You need to know the signs of a succulent that needs to be repotted. 

How long a succulent has been in a pot is just one factor that goes into when it should be repotted. There are a multitude of reasons why you may need to repot your succulents before the period is over. 

Although succulents do not require much attention, you still need to monitor them to determine whether they need repotting.

You must monitor your succulents throughout the year. While succulents do not need much attention, they still do need some attention. If you are not sure whether your succulent needs to be repotted, consider some of the following reasons.

  • The soil is old
  • The soil dries too quickly
  • The succulent is not absorbing the water
  • The succulent outgrows the pot
  • You need to propagate the succulent
  • The succulent is new
  • You are not sure the last time you repotted the succulent

Understanding why each of these reasons can lead to having to repot your succulents is crucial. This way you will know exactly when to begin the process. If you wait too long, you can cause damage to your succulents. 

The Soil Is Old

Whether you used some fertilizer or not, the soil for a succulent will need to be replaced at a certain point. The succulent will want fresh soil to help get the nutrients it needs. 

Now, this does not mean that every time your succulents need new soil you have to repot. You can simply add some new soil or fertilizer to its existing pot. However, there will come a point when you must change all the soil. To do this, you must repot the entire succulent. 

Fresh soil allows succulents to absorb more nutrients, making them grow healthier.

You can fill the entire new pot with new, fresh soil, and you may also decide to fill it with some succulent fertilizer. However, be sure that the soil you are using in the new pot is specifically for succulents, and do not use sand. 

The Soil Dries Too Quickly

Many of the reasons to repot a succulent revolve around the soil. When you water your succulent, it should take anywhere from one to two weeks to dry completely. Once it is dry, you must water it again. But what happens if it is drying up too quickly?

If you are not used to succulents, you may not notice how quickly the soil is drying up. However, you need to monitor this. If the soil is drying up in under a week (or even just a few hours), it may be a sign that you need to repot your succulent. 

When the soil drains too quickly, it means that the root system is probably outgrowing the inside of the pot. When there are too many roots, the succulent uses up more water than you are used to. A pot can only hold so much water, so you will need a larger pot when you replant it. 

The Succulent is Not Absorbing the Water

If, when you water the succulent, you discover that the water is not being absorbed, this can also be a sign that the root system is too big for the current pot. It is also a sign that the pot is too small. 

If you have noticed that your succulent does not absorb enough water, it may be because the pot is too small.

When you water succulents, you want the soil in the pot to be completely saturated. However, this does not mean that the water should be pooling on top of the pot. Additionally, the soil itself should dry out in a week or two, and if it is not drying out then it means your succulent has outgrown its current pot. 

The Succulent Outgrows the Pot

A succulent can outgrow its pot in several ways that you can see. Of course, as mentioned, the root system outgrowing the soil can be difficult to tell unless you pay attention to how the water is being absorbed (or not being absorbed, sometimes). Consider the following signs that your succulent is outgrowing its pot. 

  • The roots are protruding from the drainage holes. When the roots begin to show themselves, you will know it is time to repot. If the roots begin to stick out of the drainage holes in the pot, it means that there is no longer adequate space for the root system to grow. 
  • The roots are resting atop the soil. The roots, when they have nowhere to go, can grow upward and begin resting on top of the soil. This is a sign your succulent has completely outgrown its pot. 
  • The succulent does not look healthy anymore. If you are taking care of your succulent properly (i.e. watering at proper intervals, providing adequate light and water), but it is looking sickly, it is a sign that you need to repot the succulent. The soil has lost its nutrients and will need to be replaced with fresh soil. Repotting will revitalize your succulents. 
  • The succulent is in danger of falling over. Succulents can grow very large, and if it is getting so large it is in danger of falling over, it means the pot it resides in is too small to provide an adequate base for the plant. 
  • The succulent is not growing anymore. You will notice that your succulent is growing when the pot is the proper size and the soil has the proper nutrients. When a succulent outgrows its pot and needs new soil, it may stop growing. When you notice your plant not getting any bigger, it may be time to replant. 

Due to the low maintenance required for a succulent, it is easy to forget that it is a living, growing organism. Therefore, it will grow and get bigger, which means it will outgrow its pot. Remember, the two main reasons for repotting are that the succulent has outgrown the pot and that the soil needs to be replenished. 

The Succulent is New

When you buy a new succulent, it is most likely going to come in a small, plastic pot. As with most plants you buy, you do not want to keep it in the pot it came in. The biggest reason is that the pot is too small. Additionally, it is usually flimsy and cannot handle the demands of the succulent. 

Once you have bought a new succulent, you need to repot it as soon as you can—preferably in under two weeks. You should never wait longer than two weeks, however. 

You Are Not Sure the Last Time You Repotted

Many folks decide to get succulents because they do not require a lot of work to keep alive. Many succulents can be forgotten for short periods and still turn out okay. 

However, over time, this can negatively impact the succulent. If you have never repotted the succulent, and have had it over a year, or you cannot remember when you last repotted your succulent, it is probably time to repot. 

You do not want to take the risk and go too long without repotting your succulent because you may lose the succulent in the process. 

Fill the New Pot With Fresh Soil

You need to follow a few basic steps to repot your succulent, but they are easy. When followed, you will have nothing to worry about. 

When it is time to begin the physical process of repotting your succulent, you need to fill the new pot with fresh soil. Consider the following aspects of filling the pot. 

Once you have filled the new pot with new soil, you will be ready to remove the succulent from its old pot. 

Gently Remove the Succulent

Next, you need to remove the succulent from its current pot. You want to be careful when you do this step because a succulent is delicate. You do not want to accidentally break the succulent or damage its roots. 

For this step, you will need the trowel. You will dig around the root system to remove it. Follow these steps to successfully remove the succulent from its pot:

  • Take the trowel and gently dig around the base of the succulent
  • Make sure not to dig too close to the stem
  • Dig deep enough to get under the bottom of the root system

If you do this step correctly, the entire succulent should wiggle free from the old soil and easily come out of the pot.

Remove the Excess Dirt Off the Roots

Once the succulent and its root system are free from the old pot, it is time to shake the excess dirt off the roots. When you remove a plant from its soil, you will notice the roots are caked with dirt. 

You do not want this excess soil to mix with the new, nutrient-rich soil. Before moving the succulent to its new pot, be sure to get rid of the excess dirt. There are a few methods you can use to remove the dirt. 

  • Gently shake the succulent and the root system
  • Using the trowel, gently tap the excess dirt, which will cause it to fall off
  • Use your hand to brush away the excess dirt
Remove the excess dirt from the succulent roots so that the old soil is not mixed with the fresh one.

The most important thing to remember is that you must be gentle when you remove the dirt. You do not need to vigorously shake the succulent to remove the excess dirt. Moreover, you do not need to remove every last particle of dirt. The last thing you want is to damage the succulent with violent shaking or hard brushing. 

Dig a Hole in the New Soil

The next step involves the trowel and the new pot that is filled with the new soil. Before you can place the succulent in its new home, you must dig a proper hole for it. Consider these aspects of the succulent’s new hole before you begin digging.

  • Make the hole shallow
  • Make the hole wide enough for the entire root system
  • Use the excess dirt from the hole to help secure the succulent later 

Remember, the hole does not need to be very large. You do not want to dig a hole that is too big or one that is too small. As long as it will comfortably fit the root system, you will be fine. 

Place the Succulent in the New Hole

Once you have dug the new hole with the proper dimensions, it is time to transfer the succulent. There are a few things to keep in mind when doing this step to avoid any mishaps with the succulent. 

  • Gently place the succulent in the hole
  • Fill the hole with your hands and pat down 
  • Make sure the leaves of the succulent do not touch the soil

You do not want the succulent to touch the soil. When you water the succulent, you do not want the leaves to get wet or it could lead to mold.

After digging the hole in the fresh soil, gently place the succulent into the new pot.

Once you have successfully transplanted your succulent into its new pot, you may add the decorative stones to the top. However, be sure to allow enough space between the rocks so that when you water the succulent, the water can reach the soil underneath. 

If you find that the succulent is latched onto the old pot because the roots have taken hold, you may have to break the old pot. Moreover, you may have to cut a few roots to get the succulent free. This likely will not happen, but if it does, do not worry. 

This is How To Make Your Own Succulent Soil

While there are commercially made succulent soils out there it is much cheaper to make it on your own, especially if you need it in bulk. Making your own succulent soil also gives you more control over things like providing drainage, which may or may not be more necessary in your area.

This is one of the easier things you can do to improve the health of your succulents. By using the right materials in the right ratios you will have fantastic, quick-draining soil to pot your succulents. Read on to learn how you can make your own succulent soil.

Decide on Your Recipe

You will need to decide on a specific succulent soil recipe to follow before you get started. Although most succulents benefit from a simple recipe, researching the specific needs of your plant will give you a better chance at keeping it alive.

These recipes use three different parts to accomplish these basic succulent needs:

  • Nutrients
  • Drainability
  • Aeration

Without balancing these elements your succulent will easily succumb to issues like root rot or excessive nitrogen.

Consider the species and specific needs of your succulent to make the perfect soil for it.

The Generic Succulent Soil Recipe

The generic recipe for succulent soil involves:

  • 2 parts sand
  • 2 parts potting soil
  • 1 part aeration

If you are not sure what specific needs your succulent has (or if it has any special needs) you should be able to get away with this. The sand will prevent the mix from compacting, working with your aeration material to keep the soil dry.

Potting soil is essential to providing key nutrients for your succulent plant.

For Desert Aesthetics

As long as your plant can get away with it, you can use pumice on its own to fit in with a dirt-free, desert look.

Pumice is a volcanic material that is capable of holding both moisture and nutrients, but its clunky size and shape will provide enough aeration for your plant.

If you do decide to use pumice on its own you will need to water more frequently.

If you use pumice as your succulent soil, you will need to water your plant more frequently.

For Succulent Babies

Because babies need a bit of a boost to get started we suggest a succulent soil mix containing:

  • 1 part soil
  • 1 part sand
  • 1 part coconut coir

This will provide increased nutrients that help your offset take root and grow gloriously.

Baby succulents require more nutrients, so consider adding 1/3 coconut coir to the soil mix.

For Cactus or Hardier Succulent Types

If you are working with cactus or another hardy succulent type then your recipe should be a bit sand heavy. This usually looks like:

  • 2 parts sand
  • 1 part soil
  • 1 part aeration

The sand will be an important part of avoiding overwatering any plants that seem to abhor water.

Add sand to your cactus soil mix to prevent the soil from getting too soggy.

Can You Modify Succulent Soil Recipes?

Not only can you modify succulent soil recipes, but it is recommended.

When you start out you should pick a specific recipe to keep things simple. As your plant grows you will take note of any issues it has. These will tell you how to modify the recipe in the future.

For overwatering, you should add more aeration. You might even want to change your aeration material.

On the other hand, a plant that needs more water will require less aeration. This is a common issue when planting succulents outdoors or in climates that are both dry and hot. Watering more often is not always a convenient solution.

Another common issue you will see is excessive nitrogen. This either means you are using too much potting soil, or the potting soil you are using is too rich.

If this is a problem you can cut back on the garden soil content of your succulent soil mix or look for an option that has lower nitrogen levels. If you are fertilizing your soil you may want to look into what your fertilizer or compost contain, or just skip the succulents.

Gather Your Materials

Once you have decided on a recipe that will be most beneficial to your succulent soil you need to gather all the materials you will need. Taking the time to make sure you have all these items will prevent you from needing to run to the store to complete your task or skipping out on essential items.

There is no true one size fits all solution. You can use the bare bones of the recipe as a guideline, but depending on your location and what is available to you you may prefer one material over another.

Start with what you already have available to you then look at specific materials to fit your situation.

Basic Tools and Materials

When you are mixing any type of soil you will want items to:

  • Protect your hands
  • Measure your materials
  • Break up the soil
  • Mix everything in

When you protect your hands, you will find that the rest of the steps are simple and relaxing.

Prepare basic tools and materials to easily make your own soil mix for succulents.

Garden Gloves

To protect your hands, skin, and nails we suggest using a quality pair of gloves when mixing your soil.

Look for ones that go well past your wrist to prevent the soil from getting into the gloves. They should also fit well, be flexible enough that you can move freely, and thick enough to protect from sticks, rocks, and wood chips.

Measuring Cup

All out recipes are written using a parts system, so you do not need to measure specific units (unless you want to).

Pick something that is sized well that can help you measure out the parts of your soil mix. Choosing a cup, bowl, or bin that is too small can result in unnecessary extra work, but choosing one too large may not be effective for the amount of soil you need.

Trowel

A garden trowel is not necessary if you have loose materials, but it can definitely speed things up.

If you have soil that is tightly packed or you want to limit the strain on your hands then having a sturdy trowel will be essential.

Something to Mix Your Soil In

Having a designated container for mixing your soil in will help you keep the area clean. A potting tray will give you ample room to work in, and it works well for immediate transfer while you are working outside.

If you are making succulent soil in bulk or you plan on storing any portion of it you can also mix it in that container, whether it is a bucket or a large storage bin.

Nutritional Materials

While succulents do not need as many nutrients as other plants, you will still need to include proper material to provide some. You will have better luck with colorful varieties when they are well fed.

For the most part, you can use whatever you already have, but make sure it is still fresh and sterile. Avoid heavy soils or potting mixes that contain vermiculite. This will retain too much moisture for your succulents.

Gardening Soil

The most common source of nutrients for succulent soil comes in your everyday gardening soil.

You do not need to purchase a special succulent or cactus soil; that is what you are making right now. Just choose something that will be easy to work with and fits in your budget.

Coconut Coir

Coconut coir is made up of the shredded husks of coconuts. While it should still be used in conjunction with gardening soil, coconut coir boosts nutrients, making it a great choice for nurseries or rescued succulents.

It can be difficult to find in stores but check out garden centers and home improvement stores. While it is easy to find online, you may not get a great deal on shipping.

Pumice

As mentioned before, pumice has enough nutritional value that you can use it on its own to root succulents.

Just make sure you keep any plants in the pumice hydrated. There is not much water retention going on here, so you will need to gauge how often everything needs to be watered.

Drainable Fillers

Adding material that will resist compaction and take up space without soaking up moisture is essential to the root health of your succulents.

Because anything that soaks up moisture can lead to root rot, pests, and fungal diseases, diluting the mix with any one of these drainable fillers is essential to ward off potential problems.

Coarse Sand

The most common filler you are going to find is coarse sand. This needs to be the chunkier kind, not sand you would usually find in your yard or at the beach. Even play sand is too fine to avoid compaction.

This should work for you because it will be easy to obtain, whether you need to go to your local garden center or order it online. Make sure to opt for a bit more for cacti.

Turface

Turface both holds moisture and allows for drainage, so it may be a better choice for thirstier succulents.

It is mostly known as a soil conditioner, but its ability to improve aeration and increase oxygen makes it a fantastic choice for succulent soil.

Poultry Grit

Poultry grit is really just crushed oyster shells, but there is a reason this works well for succulent soil.

Succulents benefit from the increased Calcium, and the oyster shells work great at regulating the pH of the soil. If you struggle with acidity in your soils then using poultry grit will be a useful tool.

Aeration Materials

Your aeration materials have one job: promoting aeration and drainage.

While these options also have other benefits, they do this job well. If you already have one on hand or you want multiple benefits you can mix your aeration materials.

Pumice

As we have already discussed, pumice is great for holding both nutrients and moisture, but it is also quick to let that moisture get away.

Its rocky appearance and resistance to compaction make it a great choice for aerating your succulent soil. Because it does hold on to some moisture, it can be a great booster for dry areas without risking root rot.

Perlite

If you have seen little white balls of styrofoam in your regular potting mix then you already know what perlite looks like. It is actually volcanic glass that is heated at such a high temperature that it puffs up.

This lightweight aeration material will allow root growth with minimal obstructions. Just be careful when working with it that it does not fly away.

Coconut Coir

While it is nutrient-rich, coconut coir is also great at facilitating the movement of moisture through your succulent soil. It is a bit too stringy to be considered for filler material, but the sizable shreds are effective at increasing the drainage of your mix.

If you decide to use coconut coir as part of your mixture we still suggest you use pumice or perlite to aerate your soil.

Measure Everything Out

Once you have gathered the materials you need you can begin to measure them out using the recipes we have listed or a modified one of your own creation.

We explain the measurements in the soil recipes using a part system, so you just need to use your measuring cup, bowl, or bucket as a unit.

Using the generic succulent soil recipe as an example, you will measure out:

  • 2 scoops of coarse sand
  • 2 scoops of gardening soil
  • 1 scoop of perlite.

If you want to double this recipe you can use 4 scoops of sand, 4 scoops of soil, and 2 scoops of perlite.

You can also split the parts to add variety to your succulent soil. Instead of using only perlite, you can mix half a scoop of perlite with half a scoop of pumice to accomplish one whole scoop of aeration material.

This is not baking; you will not see much penalization if your scoops are not precise. Just do your best to keep the ratios as close as you can.

How Much Succulent Soil Do You Need?

The amount of soil you need to mix depends on the space you are working in, whether that is in an outside garden bed or filling containers for your plants.

If you are planting succulents outside you will need to make sure you mix enough to give them a few inches of depth to root into. If you lay the mix too shallow they can root into your regular ground, which may be too dense to prevent root rot or overwatering.

In this case, you should add a layer of aerating material before putting down your succulent soil. You can also add landscaping cloth underneath to block the roots, but you will need to be mindful of how much you water your plants.

The soil amount depends on where and how you are planting your succulents, outdoors or indoors.

If you are working in a pot you need to make sure the pot will be large enough to give your succulent 3 to 8 inches to root into, and you should have enough soil mixture to fill it to that depth.

Overall your pot should be at least 4 inches deep and ½ inch larger than the base of the plant. Spreading or trailing plants need a pot 1 inch larger than the one they are coming out of.

Mix It All Together

Before you start mixing all your materials together you should add the gardening soil to your container and slightly moisten it. This will help your other materials grab on, and it will prevent any dust from coming up into your face.

Add in your filler material next, whether it is sand, turface, or poultry grip. You can use the trowel if you need to, but you might find your hands would easier to tear things up and manipulate the material.

Once you are satisfied with that mixture you can add in your aeration materials. Again, mix using your hands or a garden tool.

You will know that you are done mixing when the succulent soil has a uniform appearance. There should not be any parts that stand out as being mostly one material. Address these unmixed areas as you find them until you reach your desired end result.

Properly Store Your Succulent Soil

When you buy succulent soil from the store it will usually come in a resealable bag to keep everything fresh and bug-free, but you do not get that option when making your own succulent soil.

Use an airtight container to properly store the excess amount of succulent soil after preparing the mix.

If you are making succulent soil in a large batch or you know you will end up with more than you need then you will need to find an airtight container. This will prevent the nutrients in the garden soil from oxidizing, but it will also keep bugs out of your mixture.

The cheapest and most effective option is buying an airtight lid for a bucket. Five-gallon buckets can be found for free almost anywhere, but your local home improvement store probably has them stacked at every aisle. The lid will make the container easier to open, and it improves airtightness.

How Long Can Homemade Succulent Soil Be Stored?

Like most soils, you can store your homemade succulent soil for a year or two before tossing it out.

You may still need to rejuvenate it by mixing it with a fresher batch, but when stored correctly it can last you a length of time.

Which Succulent Is Best To Grow Indoor With Low Light?

One of the reasons why people love to grow succulents is because they can be very easy to care for. These plants can thrive indoors and, unlike other plants, will not need constant attention. Not all succulents are the same, however. Some need more light than others, and if you do not have a lot of light, you may wonder which is the best one.

Several succulents grow well in low light. The best succulent to grow indoors with low light is the “snake plant,” which is also known as the “mother-in-law’s tongue.” These succulents are commonly referred to as “indestructible,” and do very well in low light. 

When choosing a succulent to grow indoors with low light, you need to consider several factors before choosing one. Moreover, understanding how to properly care for an indoor succulent is important, too. Read on to discover all you need to know about which succulent is best to grow indoors with low light. 

Succulents That Do Well Indoors

While the snake plant may be the best option when choosing an indoor succulent that only needs low light, there are many others that you may find are what you are looking for. A common factor between these succulents is their propensity to need minimal water and little to no direct sunlight. 

Snake plant, aloe vera, holiday cacti, and haworthia are among the best succulents to grow under low light conditions.

The best succulents will be ones that thrive in the environment you provide them. Perhaps you live in an apartment with few windows, or maybe you have a room in your house that does not get much sunlight. You will want to consider some of these succulents to decorate the room. 

  • Aloe vera. Aloe vera is a popular succulent that can grow in low light. There are several varieties, so you will want to pick one that will fit your available space. Additionally, aloe vera succulents grow well in colder temperatures (down to 40 degrees Fahrenheit), so they are a good option if you live in a colder climate. 
  • Holiday cacti. Holiday cacti is a group of succulents named after holidays that thrive in low light. They will bloom in shady areas better than in areas with direct light. Unlike some other succulents, they do require more water than usual. Moreover, they prefer warmer temperatures and humidity. 
  • Flaming Katy. The Flaming Katy succulent is one of the most popular succulents for a few reasons. It does not require much light, though occasional bright light will help it bloom better, and it has beautiful flowers that bloom at its top. They do not require much water. They work well as centerpieces or a nice piece of decor. 
  • Mistletoe cactus. This succulent looks best when planted in a hanging pot, which is where it gets its name from as it droops over the side. It likes humidity, so placing it in the bathroom may be a good option. It does not need an abundance of light, though some morning light is good to have. 
  • Tiger aloe. Tiger aloe is a variation of the aloe succulent. This variety can survive quite well under low-light conditions, and they can thrive under artificial lighting if necessary. Additionally, its watering needs, like others, are relatively sparse. 
  • String of bananas. The name of this succulent perfectly describes its aesthetic. The leaves look like little bananas, but these leaves are toxic, so be careful. Nevertheless, this succulent works best as a hanging succulent and can withstand low light conditions, though brighter conditions are used. 
  • Candle plant. The candle plant is an interesting-looking succulent. It is narrow and grows upward. It is a highly toxic succulent, but that should not deter you from trying this one in your home. The candle plant works very well in low light, so if you have not much light, this one can work for you. 
  • Zebra wart. This succulent is aesthetically very interesting. It grows in twisting columns that point upward. It is also non-toxic, so you do not have to worry about that. Moreover, they grow well in low light. 

These are just a handful of succulents that will grow well indoors with low light. Others will also grow well. However, many of them do require some more direct light for at least a part of the day. Sometimes this is not possible if you do not have many windows or your home does not receive much direct sunlight. 

What Does “Low Light” Mean?

When looking for a succulent that does well in low light, you may begin wondering what exactly “low light” means. It can be a vague term, but it is a term that is crucial to understand if you want your succulent to thrive. 

Most importantly, low light does not indicate the total absence of light. Rather, it refers specifically to direct sunlight. For example, if a succulent can grow in low light, it means it can grow without direct sunlight. Consider the following criteria for low light areas.

  • No direct sunlight, such as a north-facing window.
  • Bright light for a fraction of the day. 
  • Shady areas that receive soft light instead of bright light. 
You can always use artificial lighting when growing succulents in shady areas.

Shady areas and areas that only receive bright light for a few hours a day are considered low light conditions. Remember, succulents still need light to grow. If an area is very dark or shady, the succulent will suffer as a result. 

Also, some succulents can grow with artificial lighting, which is useful if you have shady light but not bright light. It depends on which type of succulent you choose for your space. Nevertheless, as long as your environment is not overly dark, you will be able to have a low-light succulent. 

Why the Snake Plant is Perfect for Low Light

While succulents such as the aloe vera, Flaming Katy, and others are great for growing indoors in low light, the one that is perfect for most scenarios is the snake plant. The snake plant can withstand most conditions that come with an indoor environment. Moreover, it will match most interior designs because of its green and yellow-tinged leaves. 

The snake plant is great for low light because it does not need any direct sunlight to thrive. While others need at least a little bit of direct sunlight, the snake plant is different. Of course, if you provide a little bit of direct sunlight, it will help its growth. It will not, however, hinder its growth if it never receives direct sunlight. 

Snake plant is a succulent that can grow perfectly fine indoors even in shady areas.

Consider the following elements that make the snake plant a perfect succulent for your home.

  • No direct sunlight. Snake plants do not need any direct sunlight, as mentioned. So, if your home or apartment is in a shady area or does not have much sunlight, these indoor succulents are perfect for your light conditions. 
  • East-facing window is the best location. If you have an east-facing window, this is the best place to put your snake plant. An east-facing window will provide some brighter light briefly in the morning, and it will provide low light for the remainder of the day. This is the best combination for the snake plant. 
  • Minimal watering. Snake plants use very little water. You will only have to water it once every two weeks. Its roots can become waterlogged and rot, so it is important to make sure the water dries up before watering again.
  • Avoid cold temperatures. Snake plants do best in warmer temperatures, though they can survive down to about 40 degrees Fahrenheit. When you keep them indoors, this will not be an issue. 
  • Easy to propagate. If you want more snake plants, you can easily propagate the snake plant. This means you are essentially splitting the plant to make new plants that are identical to the original. 

A snake plant, when exposed to too much light, can easily burn. You will notice discolored spots on its leaves. You will also notice that the edges will begin to burn and turn brown. This is why low light is so important for these delicate succulents. 

Caring for an Indoor Succulent

Succulents require different care than your other houseplants. If you are not used to caring for a succulent, it may be a little confusing at first. However, once you understand the basics of caring for an indoor succulent, it will be easy. 

It is important to remember that, generally, succulents that have bright and varied colors will need more sunlight than more aesthetically basic succulents. Green succulents usually work best indoors because they require far less sunlight. 

You will want an indoor succulent that thrives in low-light environments if your home is located in a shady neighborhood, or you do not have many windows to let abundant sunshine in. 

Since succulents are not like other houseplants, they require special care when grown indoors.

There are several elements you need to consider when taking care of an indoor succulent. Pay attention to the following tips:

  • Place your succulent near a window. 
  • Use well-drained pots. 
  • Rotate the plant for optimal light.
  • Do not overwater your succulent. 
  • Monitor the air temperature. 

Each of these elements, when performed properly, will help preserve your succulent. Many succulents can last for a long time when taken care of properly. Many succulents die because of improper care. Remember, their needs are different from the plants you may be used to. 

Place Your Succulent Near a Window

While you may be getting your succulent because it can survive in low-light conditions, this does not mean you can ignore its lighting needs. Remember, low light just refers to indirect sunlight. 

Therefore, you must place your succulent near a window. When you place your succulent near a window, regardless of how much light is coming through, it will grow better and healthier than if left completely in the shade away from the window. 

Always place your succulents near the window so that they receive enough sunlight throughout the day.

Remember, most succulents need at least some brighter light during the day. The best sun for them to receive is the morning sun. The sunshine in the morning is not as strong as the sunlight in the afternoon. This will help your succulent. If the light is too strong, it will burn the succulent, leaving it discolored. 

Moreover, if you do not have ample light coming from a window, you can always install a grow light in your home. This will allow you to have your succulent anywhere you wish within the home. 

Now, all this does not mean you cannot have your succulent away from a window. You may place your succulent anywhere you wish as long as some indirect sunlight is reaching it. However, near a window is where it will thrive the best. Succulents are resilient plants and can handle most conditions you place them in. 

Use Well-Drained Pots

Succulents do not need a lot of water, and if it is planted in a pot or container that cannot be drained then it will suffer. For example, you will want to avoid glass containers. Glass containers have several downsides when it comes to succulents, such as:

  • Glass containers do not drain water. 
  • Glass containers keep the soil wet and soggy, which can rot the root system.
  • Glass containers limit airflow to the succulent, which is needed for a healthy root and leaf system. 
Plant your succulents in pots that offer enough drainage to prevent soil from getting too wet or soggy.

The root system of a succulent is very delicate, and when the soil remains wet the roots will rot. This is why having a well-drained pot is crucial to the health of your succulents. 

You want a pot that can drain the water well. Succulents do not need a lot of water to survive, but they do need water from time to time. However, an important part of watering a succulent is letting all of the soil dry out before watering again. A poorly drained pot will not allow this to happen. 

Rotate the Succulent

Returning to the light requirements of a succulent, it is important to rotate your succulent at least once or twice a week to keep it healthy. Consider the following reasons for rotating your succulent:

  • Even coverage of light. Oftentimes, the light source is only going to be coming from a single direction. If you have a succulent in a window then the light will be continuously hitting just one part of the plant. You want the entire plant to get sunlight. 
  • Stretching will be avoided. When a succulent needs lights, it will begin to stretch toward the light source. So, if part of the plant is not getting the light, it will begin this process. However, this stretching is not good for the plant, and it will cause the plant to lose any vibrant colors it may have. 
  • Burning will be avoided. Likewise, if one part of the succulent gets too much sunlight, it will burn. The leaves can shrivel and die, and the color of the succulent can change from a healthy green to an unhealthy yellow and brown. Rotating the plant will prevent this from happening. 

So, while many indoor succulents can survive with low light, it is still important to rotate them and to provide them with enough light to help them grow strong. Rotating the plant is the best way to keep your plant healthy. 

Do Not Overwater Your Succulent

One of the most important aspects of caring for a succulent is its water intake. Many plants you have in your home require constant watering, especially during the summer months. 

A succulent, however, does not need nearly the same amount of water. For many succulents, you only need to water succulents once a week. Sometimes, you can stretch it to once every two weeks. 

Moreover, it is important not to overwater your succulents. You must make sure that the entire pot and soil are dry before watering again. If you water before this occurs, you could potentially ruin your succulents. Most succulents will die if you overwater them. 

To avoid overwatering, water your succulents once the soil is completely dry.

It is also important to remember not to water the succulent itself. Rather, put the water directly onto the soil to completely saturate it. If the leaves of the succulent get wet it could turn to mold, so be sure to avoid that. 

Since the soil needs to be completely saturated for proper watering, the presence of drainage holes is important. Remember, a well-drained pot will allow for a proper watering schedule. 

Monitor the Air Temperature

Most succulents cannot survive in very cold temperatures. Succulents are used in arid climates, so if you live in a very cold environment, it is important to monitor the air temperature. For most succulents, anything above 40 degrees Fahrenheit should be okay for them to survive. 

However, succulents will grow better in warmer temperatures between 70 and 90 degrees Fahrenheit. You should consider hanging a thermometer in the room so you can monitor how hot or cool it is. 

Additionally, if the weather gets too hot, it can harm the succulent. For most, however, this should not be an issue. Regardless, when you keep a succulent indoors, the temperature will be regulated for the most part, especially in the winter months when you have your heating system on anyway. 

Conclusion

The succulent that is best to grow indoors with low light is going to the snake plant. It is because it can withstand a lot of low light, and it has been described as “indestructible,” so if you accidentally forget about it for a while, it should be fine. 

However, many succulents can be grown indoors with low light. Consider the aesthetics of your room when making your decision. Moreover, taking the proper steps to take care of your succulent will help maintain its health for a long time.