Ultimate Guide: How To Care For Buddhas Temple

Buddhas Temple plant

The Crassula cv, also known as the Buddha’s Temple, is native to South Africa, and this plant resembles a Buddhist temple.

This evergreen plant’s leaves are folded at the edges and densely stacked, forming a unique wonderful square-shaped column similar to a buddha’s temple. 

To have the plant and let it thrive, caring for it requires some gardening knowledge related to the plant. Taking care of a Buddha’s temple will ensure it thrives well and blooms.

What Do You Need to Plant Buddha’s Temple?

Before purchasing your buddha’s temple for planting, ensure you have the following ready in case you are planting the plant indoors and some of the items for outdoor planting:

  1. A container for planting with drainage holes about one quart in size, or a potting container made for planting succulents and cacti.
  2. Coarse sand, enough for the surface of your container to be about ¾ full (about 1 quart)
  3. Perlite, which will help maintain the soil’s excellent drainage. Mix enough perlite with coarse sand, so it makes up about 50% of what you make into a potting mix; this would equate to ½ cup (100 ml) of coarse sand and ½ cup (100 ml) of perlite.

How to Plant Buddha’s Temple Plant

There are various ways you can plant your Buddha’s temple plant. You can purchase seeds, stem/leaf cuttings, or offsets. 

Many of us are used to planting common household plants from the leaves and stem cuttings, but you can also plant buddha’s temple from seeds, amazing right? Another thing, you can plant it any time of the year.


Here are the right procedures to propagate an offset and care for your new plant buddha’s temple to sprout:

  1. Mix 2 parts coarse sand with 1 part perlite to create a potting mix for succulents and cacti. Make sure there’s plenty of drainage in the soil, and it won’t cause water retention.
  2. Fill the container ¾ full with the potting mix, make a hole deep enough to support the original plant’s roots, and fill it with water until it’s soaked through; then let stand for 15 minutes to allow excess water to drain away.
  3. Plant the succulent in its new container using the soil mix. Make sure that the succulent is placed in a pot just a bit larger than its original pot. Also, ensure that the soil level in the new pot will accommodate all of its roots.
  1. Water thoroughly, allowing the water to soak into the soil and drip out of the drainage hole.
  2. Lastly, place the potting in bright sunlight (no direct mid-day sun). Keep soil moist but not soggy or wet!

How to Propagate Buddha’s Temple Plant From Seeds

  1. Purchase your seeds and prepare your potting mix. Proceed to water the potting mix and let it drain off excess water to leave the soil moist. 
  2. Take your seeds and place them on top of the soil with a little compost to help boost the soil nutrients for growth.
  3. Well, buddha’s temple might take some time before they germinate. Therefore you ought to be patient. During this period, do not water the soil until you note sprouting. It might take four weeks before you note sprouting from your seeds.
  4. Once the plants germinate, start exposing them to sunshine and care for them until they grow and bloom.
Seeds in the palm.
It might take four weeks before you note sprouting from your seeds.

How to Propagate Buddha’s Temple Plant From Cuttings

You can make a cutting from the stems or leaves and always make the cutting at the base of the leaf. It is also possible to cut a stem part and propagate it. Here is how to plant a Buddha’s temple from a scutting.

  1. Make a cutting and let your cutting stay for three days to dry and form a callus.
  2. Prepare a potting mix, and using a pot or your garden, water it to have it moist before the planting time. Ensure the area does not receive direct sunlight during the early stages of growth.
  3. Now, go ahead and place the stem or leaf cuttings one inch into the soil upright. Lastly, wait for your buddha’s plant to form new leaves and roots before repotting them onto their new home.
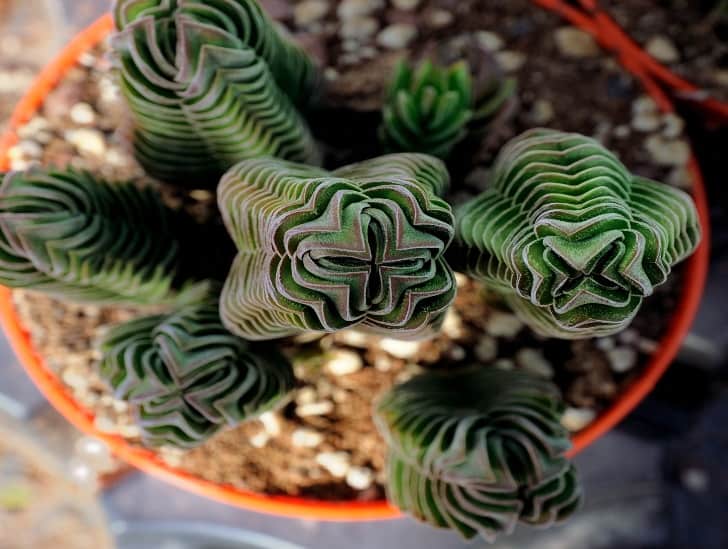
A group of buddha's temple plant in one pot.
You can make a cutting from the stems or leaves and always make the cutting at the base of the leaf.

Healthy Requirements for Your Buddha’s Temple Plant

Watering

like many succulents, Buddha’s temple does not require much water when growing. However, you should water it to ensure its growth does not stagnate. Water a buddha’s temple at least once every month during winter and twice a month in spring and summer. 

In spite of needing water to grow, you should be cautious of the amount of watering necessary for Buddha’s Temple plant. Too much water in the soil will damage your plant. Plenty of water will have the soil wet, and this will result in the roots rotting.
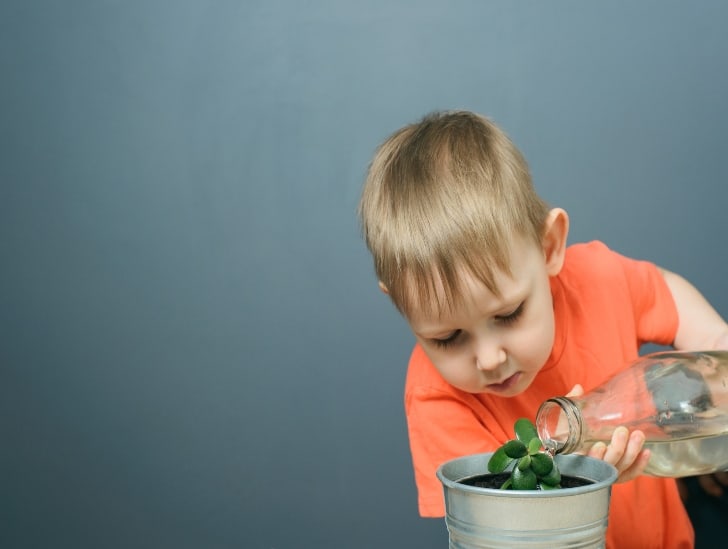
A boy watering the plant gently.
Buddha’s temple does not require much water when growing.

Before watering the plant, make sure it needs water by looking at how dry the topsoil is to avoid causing damage to the plant. 

Water the Buddha’s Temple after planting it, water at least once a week when fully grown also, you can use a humidifier always to let the soil be moist but not wet.

Sunlight

The variegated leaves of the ‘Buddha’s Temple are extremely delicate and require bright light for them to bloom and thrive. Growing this Crassula Buddha’s Temple in a garden ensures it receives plenty of sunshine. The ideal amount of light for its development is full to partial sunshine, or at least six hours a day. Therefore it is better to grow the plant outdoors.

A plant receiving a sunlight.
The ideal amount of light for its development is full to partial sunshine, or at least six hours a day.

Insufficient light or sunlight might cause the plant’s stem to weaken, and you don’t want to see your beautiful plant crumbling down after working hard to let it thrive. The plant will elongate in search of light, and in return, its stem might grow thin, making it weak.

Temperatures

The crassula Budda’s Temple thrives in a warm climate.  It may survive temperatures as low as 25°F and as high as 50°F but protect it from frost. If you reside in a chilly climate, it’s preferable to grow Buddha’s Temple indoors. The plant will thrive if given enough sunshine.

Fertilizer

You can use compost mulch to provide the plant with additional nutrients. Getting the plant to grow and thrive is something you don’t want to take a chance with.

For vital nutrients, use gardening fertilizer and ensure the fertilizer has the core nutrients:

  • Potassium
  • Phosphorus
  • Nitrogen

Follow the recommended dosage and add fertilizer to your plant every three months.

Pests

It’s susceptible to mealybugs. The Buddha’s Temple has a nice uniform structure, especially after new growth during the Spring and Summer months, and it is these leaves that make it hard to spot the pests.

Mealybugs are a problem with these plants since they have a tightly held together leaf structure, so if you get some mealybug caught in there, the only thing you can do is soak it in alcohol or dip it in alcohol and hope that they come off.

Pruning

Prune a  buddha’s temple when it has dead leaves, overgrown leaves, or to shape it. Also, you should prune the plant after blooming to help keep it healthy to thrive again. 

Discard the removed leaves to keep them away from contaminating the healthy plant. You can use them as an addition to your compost and for future use. 

Other Common Factors Affecting Buddha’s Temple to Note

Root Rot. When you overwater the plants or don’t let the potting mix dry before watering again, the plant’s roots will start rotting. To prevent root rotting, make sure the potting mix drains fast and effectively. Another thing for outdoors potted buddha’s plant, you are better off using clay pots. In case you have other pots, ensure they have good drainage.

Anchor Support. Buddha’s Temple doesn’t like going long without water. Since they’re not particularly succulent, there is so much moisture in the main stem; therefore, the plant is susceptible to decay. But the plant does not like going without water for long, which you will notice straight away. 

Once it loses water, they become difficult to support, and the rooting system is not as strong as other succulents, so you’ll need some anchor stones and bind them in place whenever they lack water, and the stem fails to support the whole plant.

Heat Sensitivity. Because they are sensitive to heat, forcing them to sit in direct sunshine all day is not a good idea. If exposed to too much sun, they will suffer burns, so keep them out of the hot sun for long periods. If you don’t provide consistent lighting, you’ll notice unevenness in how the plant grows.

Final Thoughts

Taking care of a dying buddha’s temple plant can be difficult, but why let your plant suffer? This plant requires little care, making it easier to look after and bloom. Besides, when it lacks water or sunlight, which are the core requirement for growing, it shows the signs earlier.

A buddha's temple plant.
This plant requires little care, making it easier to look after and bloom.

You can plant this evergreen plant in your garden or have it sit in your living room and brighten the space when it blooms. Note that it will reach 0.3m after ten to 20 years.
Ultimate Guide: How to Care For String of Dolphins

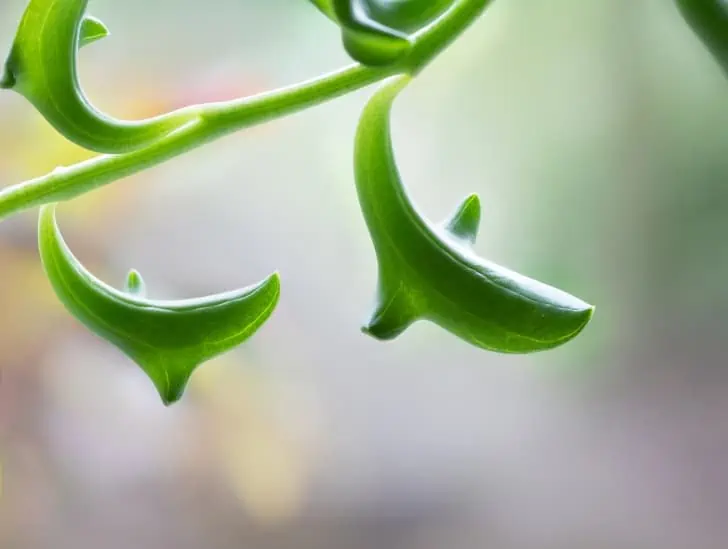
The String of Dolphins, commonly known as the Dolphin Plant, is a unique species of string succulents that resembles a group of leaping dolphins. The fleshy leaves, which look like dolphins, turn translucent under low light conditions. 

The petals form lovely clusters of delicate blooms with a cinnamon fragrance. In the wild, these creepers can get as long as 3 feet. When grown indoors, the tendrils cascade down in a dramatic display of greenery. This rare variety is not easy to find but is easy to keep happy. Read on for the basics of Dolphin Plant care.

Growth And Care

Generally, succulents are low-maintenance plants, including the Dolphin plant. Below are some factors worth considering for String of Dolphins to flourish:

The Planting Process

Getting your plant from scratch can be challenging. There is no assurance your Dolphin Succulent seeds will sprout when you grow them. Some seedlings may not even have the dolphin shape, so most people prefer cuttings or grown plants.

To plant the seeds:

  1. Please put them in a container with a great soil mix.
  2. Wrap the container and leave a few holes for aeration.
  3. Regularly water your seeds and wait for the seedlings to sprout.
  4. After sprouting, move the seedlings to an enormous container.

Light Requirements

Dolphin plants need plenty of indirect sunlight but can also tolerate low amounts of light because of the leaf windows. We suggest placing your pot next to a sunny south-facing window. Make sure your plant gets no less than six hours of morning sunlight daily. 

You can also use artificial sources to give additional light during low-light periods like winter. Shady locations increase the risk of root rot because of a lack of adequate light.

How Much Water Do Dolphin Strings Need?

String dolphins have fleshy leaves that can hold water for a long time, so they do not need regular watering. However, unlike most succulent plants, Dolphin Strings require slightly more watering.

Use the Soak and Dry method; give the plants a good soak of water up to the point of water running out the pot’s drainage hole. Wait until the soil is dried before watering again to prevent root rot. Water once every week from spring to early fall when active growth occurs and less frequently during the cooler winter and fall months. 

Underwatering is characterized by dry and flattened leaves, while squishy yellow leaves point

to more than enough water. Adjust your watering plan to suit your plant’s needs depending on the specific area conditions.

Temperature and Humidity

Dolphin plants do well in standard home temperatures and humidity levels. In contrast to other succulents, String of Dolphins can take cooler temperatures as low as 4 degrees Celsius during winter. Temperatures below this will destroy the plant because it is a soft succulent and cannot withstand a hard frost. During the growing season, we recommend about 72 degrees Fahrenheit. 

Soil and Drainage

Use a container that has drainage holes because the String of Dolphins can rot when overwatered. We recommend clay pots because they are porous and allow air and moisture to penetrate. The best soil/medium for the Dolphin Plant is a well-draining one.

String of dolphin in the pot.
Clay pot are porous and allow air and moisture to penetrate.

Commercially available soil mixes are available, but you can also come up with your succulent mix. Look out for soil mixes with excellent drainage and a good pH balance. To create your medium, mix two parts potting soil,1 part perlite and 1 part sand.

Pruning For Improved Growth

Prune dying leaves, or plant debris to encourage better growth. Use a clean kitchen knife or pruning shears to avoid diseases. Make clean incisions because too much damage will slow down growth and negatively affect your plant’s health. Do not cut through infected tissue as this will likely spread diseases.

Fertilizer

Feed your String of Dolphins lightly early in the spring when the plant is actively growing to encourage plant growth and blooming. If you over-fertilize the plant, the leaves will lose their dolphin shape. We recommend an organic fertilizer like worm compost. Limit your feeding to only once or twice a year.

Potting and Repotting

The string of Dolphins plants grow slow and, as such, do not require frequent repotting. However, Repotting creates more space to grow and enables you to remove any infection from the roots. 

Report this trailing succulent once every few years to replenish its potting medium and increase container size by a few inches, roughly 1-2. The plant is okay with being slightly root bound because this encourages bloom. 

A hanging string of dolphin.
The plant is okay with being slightly root bound because this encourages bloom. 

To start, you will need water, gloves, a slightly larger new pot, and a well-drained potting mix. Repot your plant in these easy steps:

  • Remove the Dolphin Plant gently from its original pot; you can do this by tilting the pot and lightly tapping the base and sides.
  • Using your fingers, loosen the roots. If the roots are very thick, snap off a little from the root ball.
  • Layer your new pot. Start with grit at the base for better drainage and fill the next layer with soil mix.
  • Transfer your root ball to the new pot and add more soil around the boundaries.
  • Shake the pot so that the potting medium fills the spaces between the roots and soil.

Water the soil first before transplanting to prevent the plant from experiencing a shock. When you are transplanting your Dolphin plant, lookout for any signs of decay. In case of any rot, prune the roots; pruning will decrease the chances of disease transmission and encourage growth.

Propagating

You can propagate your Dolphin plant from stem cuttings. To start, select a healthy stem with lots of leaves, preferably at least 2-3 nodes, for high chances of success. The nodes are points where new roots will emerge. 

Next, delicately cut beneath a leaf using a sharp kitchen knife or a pair of scissors. Pluck out the bottom leaves to lay bare the stem and let it dry for a few days. If you are propagating your stem cuttings in water, pluck the leaves from the bottom node to prevent the leaves from rotting.

A branch of plant being cut.
You can propagate your Dolphin plant from stem cuttings.

Once the cut ends have hardened, stick it on the soil and water it. Place the plant in areas with indirect light and adjust the light levels slowly over the next couple of weeks. Water the cutting once more after confirming that the topsoil is relatively dry. Once the roots form, add more water and don’t let the soil dry out completely.

How to Get String of Dolphins to Bloom

A mature String of Dolphins plant develops clusters of white flowers in the spring to early summer. The quality of flowers will largely depend on the care you gave your plant during the previous dormancy period. You can encourage blooming by trying out these easy hacks:

A freshly bloom flower.
The quality of flowers will largely depend on the care you gave your plant during the previous dormancy period.
  • Reduce temperatures to about 59 Fahrenheit from late autumn to early spring
  • Water your Dolphin Plant only when the soil is dried
  • Exposing your plant to 2-3 hrs of direct sun from late autumn to early spring for good dormancy.
  • Keep your plant slightly root-bound.

Pests and Diseases

The most common problematic pests for the Sting of Dolphins are spider mites and mealybugs. You can bring the infestation under control with early detection and treatment. Always treat any infestation with urgency. 

Spider mites spin webs beneath the leaves, and mealybugs resemble white cotton. Neem oil is effective against spider mites; the pungent smell repels the pests and is safe to use. You can also try spraying with cold water. To remove mealybugs, rub the leaves with cotton swabs soaked in alcohol. For larger infestations, spray the plants with 70% alcohol or isopropyl solution.

A woman touching the plants leafs.
Spider mites spin webs beneath the leaves, and mealybugs resemble white cotton.

Dolphin Plants diseases are mostly fungal issues caused by overwatering. To avoid these diseases, let the water dry out completely in between irrigation, use a well-draining medium, and plant in a pot with drainage holes to release excess water.

Why does my String of dolphins keep dying?

There are five reasons why your String of dolphins is dying:

  1. You are using a soil mix that is not porous and does not offer good drainage.
  2. Pest invasion
  3. You are overwatering your plant, which could lead to root rot
  4. You are not giving your plant enough water, and it is dehydrated.
  5. You are using a pot that is too big, leading to overhydration.

Is String of dolphins toxic to pets?

Unfortunately, String of dolphins is toxic to your furry friends. Keep the plant in a place that is not easily accessible to children as it can be mildly harmful to humans. Symptoms of poisoning include abdominal cramps, vomiting, skin irritation, and in more severe cases, liver failure.

Why do the leaves of my String of dolphins appear flat?

Your leaves are flat because your plant is not getting adequate light. Move the plant to a brighter location.

Bottom Line

Once you get a hold of these rare succulents, there’s no going back. The basics shared here are enough to get you going. With some love and care, these cuties will spruce up your living space.

Ultimate Guide: How To Care For Sansevieria Plant

The Sansevieria plant is a tough and resilient houseplant that can survive in low light conditions. This hardy plant can grow from 4 to 6 feet tall with leaves up to 3 inches wide. The Sansevieria has long been popular as an indoor plant because of its ability to thrive without much care or attention. In fact, it’s so easy to care for that it is often given as a gift during the winter holidays. With just basic care every few weeks, this lovely perennial will provide years of enjoyment and satisfaction. We take a look at how to care for Sansevieria plant.

How do you care for sansevierias? For the plant to thrive, you need to use a well-draining succulent soil mix. Sansevieria does not like wet soil, so avoid overwatering. It can adapt to light changes so you can put it anywhere there is light. To accelerate growth, it is best to put it where there is ample sunlight until it reaches four inches. During winter, you might need to put your sansevieria in a warm room then bring it out when it gets warmer.

According to NASA’s Clean Air Study, sansevieria is one of the few plants that can be used to remove toxins from the air naturally. This guide will help you understand everything you need to care for the plant keep it healthy longer.

 Sansevieria Plant Varieties

Sansevierias are native to Southern Asia and Africa but can be found in most parts of the world. The five types of sansevierias have their unique features listed below:

  • Dracaena trifasciata “Hahnii” – Also called bird’s nest snake plant, it only grows to six inches and the leaves look like a bird’s nest.
  • Dracaena trifasciata “Laurentii”  – Its margins have a creamy yellow color. This type has to be divided when propagated.
  • Dracaena trifasciata “Twisted Sister”  – Its leaves are twisted and have horizontal stripes with yellow edges. This type grows up to 14 inches tall.
  • Dracaena pearsoniiis – Commonly known as rhino grass, it grows to 12 inches tall and its leaves are succulent and tinted red.
  • Dracaena trifasciata “Bantel’s Sensation – This variety grows up to three feet tall and its narrow leaves have white vertical stripes.

How to Care for Your Sansevieria Plant

Sansevieria is easy to care for. All you need to do is follow the simple instructions listed below and you are good to go.

Light

Sansevierias are highly adaptable and can thrive in different kinds of light. It prefers bright or medium indirect light but can grow well under low lights and direct sunlight.

Water

Only water your plant when the soil is completely dry. Water until you see the liquid flowing down the drainage hole and ensure that no water remains in the saucer.

A plant being watered.
Have specific times for watering and not wait until the plant is too dry.

Temperature

The plant thrives in warmer temperatures ranging between 55-85 degrees. Avoid keeping the plant under temperatures of under 50 degrees.

Humidity

Sansevierias grow well in dry environments so there is no need to increase the humidity levels.

Food

Use liquid fertilizer to feed the plant at least once every six months. You can also use mild cactus fertilizer that you dilute to half strength. Do not fertilize the plant during winter.

A woman giving a fertilizer to the plant.
Do not fertilize the plant during winter.

Planting and repotting

The best time to plant and repot sansevieria is during spring. When potting sansevierias, ensure that you use a durable pot as weak pots can break due to the strong roots. The plant is a slow grower and rarely needs to be repotted. If exposed to ample sunshine, it might experience a growth spurt that makes it necessary to repot.

Toxicity

Sansevieria is toxic to humans and pets. Ingesting the plant can irritate the mouth and stomach and, can lead to vomiting.

Soil

Sansevierias prefer well-draining soils as they are succulent plants. You can use cactus potting soil to plant it.

A plant being transferred.
The plant is a slow grower and rarely needs to be repotted.

Pruning

When pruning sansevierias, ensure you use sterile scissors, shears, or knives. Remove the leaves at the soil line as well as any mature or damaged leaves to encourage the growth of new leaves. Control the height of the plant by pruning the tallest leaves.

Pruning is best done during the growing season; spring. When done during the off-season, the plant can get stressed, and this can affect its health.

Common issues with sansevieria

Although largely believed to be a resistant plant, sansevieria are also susceptible to pests and diseases. These may range from the leaves curling to the plant turning yellow or root rot.

Here is why it happens and how to prevent it.

Blades curling on your sansevieria

Sansevieria can go for weeks without being watered, and it is common to put too much water. When the plant is overwatered, the leaves fold. However, they curl when the plant is left dry for too long. The plant also droops and can start turning brown. You can prevent the plant from being completely dry by ensuring that you water it when you notice it is 50% dry.

If you find your plant was dry for too long, give it a soak, and here is how you do it:

  • Put your plant in the tub or sink and fill it with water. The water should be 3-4” high.
  • Let your plant soak up the water through the drainage hole for about 45 minutes.
  • Feel the top part of the soil and see if the water has reached the top 2 or 3 inches. If not, you can lightly water to speed up saturation.
  • When the soil is damp, drain the sink and let the plant rest while it continues draining. Afterward, place the plant on the saucer and put it in its original spot.

Sansevieria turning yellow

There are different reasons why your plant might be turning yellow including the following:

Moisture

Proper soil moisture is important when it comes to the care of sansevierias. The main reason the leaves turn yellow is the plant being overwatered. Sansevierias do not need too much water to thrive as the roots can rot and die. To prevent this, ensure the plant drains well and avoid using too much water.

Watering consistency

You can stress the plant by inconsistency in your watering, and this can lead to the plant developing yellow leaves. To prevent this, have specific times for watering and not wait until the plant is too dry.

Pests

When sansevieria becomes weak, it is likely to get infested with insects. Spider mites can drain moisture from the plant, making it turn yellow. These and other bugs are commonly found in house plants and can spread to the leaves and blades of the plant. The pests can make your plant suffer from serious nutrient deficiency that accelerates the yellowing.

Stinky soil

If you notice a rotting smell from your plant, it likely has root rot. Root rot occurs when the roots are exposed to a lot of water. You can avoid it by ensuring that the soil is well-drained at all times.

Droopy or falling leaves

When sansevierias are healthy, the leaves are erect and grow upwards. The plant will appear droopy if there is too much water or the light is not enough. To prevent this from happening, you can reduce the watering frequency, change the soil to one that drains better, and put the plant in a location with better lighting.

A sansevierias being given with enough sunlight.
The leaves are erect and grow upwards when the it is healthy.

Care during winter

Sansevierias can die when exposed to low temperatures (under 50 degrees) for too long. During winter, you can bring the plant indoors and keep it in a warm place. It is best to keep the soil on the drier side as the plant goes into a state of dormancy. Water the plant every six weeks or when you notice the soil is more than 50% dry.

How to grow snake plants using seeds

While it is faster and easier to propagate sansevieria plants, they can also be grown using seeds. However, the seeds have low germination, and it takes between three and six weeks for a seedling to sprout.

A healthy Sansevieria Plant.
The Sansevieria plant has been a favorite of indoor gardeners for many years.

To grow snake plants using seeds, fill a three-inch pot with potting mix or seed starting soil. Sprinkle the snake plant seeds on the soil and put them in a warm and sunny place. Cover the pot with plastic wrap to retain humidity and warmth. Once a seedling sprouts, you can remove the wrap and ensure the soil remains moist and not wet. You can report the plant once it is about four inches tall.

Final Thoughts on Sansevieria

It is no surprise that this resilient succulent has remained popular for so long. Thanks to its unique and exotic appearance, the Sansevieria plant has been a favorite of indoor gardeners for many years. You do not need to be a green thumb to grow this houseplant, but you may need to learn how to care for Sansevieria plant as a beginner. The above tips and tricks will help you to do just that. Get the most out of your Sansevieria plant by following these foolproof guidelines for how to care for the Sansevieria.

How to Make a Venus Flytrap Terrarium?

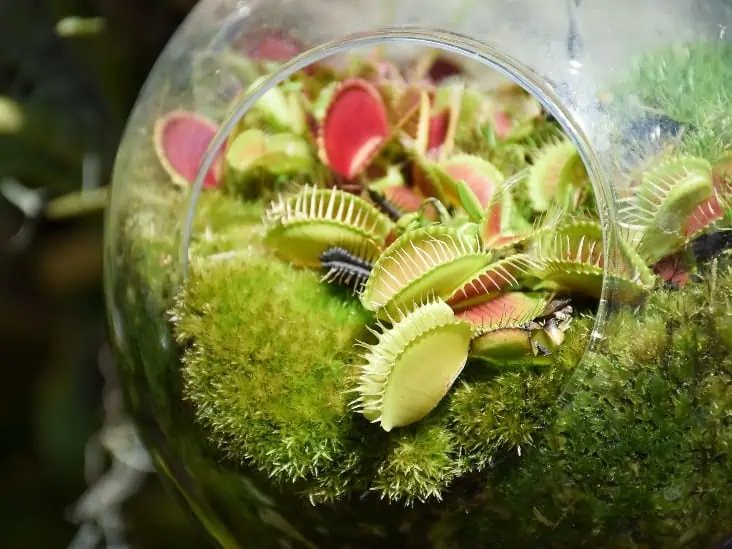
flytrap terrarium

Venus flytraps are a fascinating species. Originating in North and South Carolina, this carnivorous plant is one of nature’s greatest marvels. The Venus flytrap can grow up to 5 inches in diameter and thrives in moist and acidic soil. Each plant ordinarily has around six stems with pivoted leaves.

The edges of the leaves are fixed with “teeth,” and the leaves fit together like a clamshell. They form a trap when the leaves snap shut, snaring their prey, primarily insects. 

The popularity of this particular plant in the United States and Europe is relatively high. No wonder more and more people are opting to keep a venus flytrap terrarium. If you have been considering getting a venus flytrap and are unsure where to start, we hope you will be more informed and ready to make that decision by the end of this article. In this read, you will learn more about venus flytrap varieties, where to buy, how to set up and take care of your terrarium. So let’s get right into it. 

Step by step guide to setting up your terrarium

The terrarium will determine the container you choose you would like to build and the size. You can go for large bowls, glass containers, or fish tanks. The glass jars should have a stable base and glass lids. Avoid plastic containers and metal lids as they tend to cause overheating.

The best terrarium is an open terrarium as fly traps require a lot of sunlight and good airflow. You can gather all your supplies, which may include: Sphagnum moss, perlite, activated carbon, soil, pebbles, distilled water, and your chosen fly trap plant.

An open terarrium
The best terrarium is an open terrarium as fly traps require a lot of sunlight and good airflow

  Also, you need a sieve, tablespoon, and paper towels. You can easily set up your terrarium by following these three steps:

Step 1: Soil / Moss Mix

Venus flytraps require good soil to survive; however, they rarely grow in areas with good soil. Excessively nutritious soil can cause your plants to develop issues as they mostly absorb nutrients from insects. Since flytraps thrive in poor soil formation, you will need to come up with as close as possible to their natural habitats. 

A sack of soil.
They rarely grow in areas with good soil.

There are various soil recipe suggestions for Venus Flytraps. We recommend nutrient-free materials that will not cause health threats to the plants, such as Sphagnum moss, Silica sand, perlite, and Sphagnum peat moss. You can mix these materials in this ratio: 50% perlite + 50% sphagnum mix; alternatively, you can improve the sphagnum moss. The materials can be sourced individually in local stores or online; if you feel that this would be too much work, you can buy premade soil mix.

Step 2: Layering

After coming up with the ideal soil mix, the next step is layering in these easy steps. 

Layer 1: Carbon

You can maintain the cleanliness of your terrarium by using activated carbon as it destroys odors and helps remove toxins. Scoop up about a tablespoon of activated carbon and rinse using a sieve. Run your carbon thoroughly under water to remove excess carbon dust. Pour it into your glass jar once clean.

To avoid rot caused by waterlogging, you can use glass pebbles as your base. Artificial grass is recommended as natural pebbles can ooze slowly into the water with contaminants like calcium leading to the death of the plants. In case you prefer soil, add a tablespoon on top of the carbon. Please note that the soil and carbon should not be mixed.

Layer 2: Moss Mix

Take a small amount of your moss mix, preferably a pinch. Moisten with distilled water; alternatively, you can use aquarium dechlorinator drops to a mud-like consistency. Add a few drops to your tap water for instant de-chlorination. Pick out any unwanted debris in your moss. Place the moss on top of your carbon layer. Remember, the layers must be kept separate; do not mix or use fertilizer. Do not press, instead leave it compact and fluffy.

Setting up an Terrarium.
Avoid plastic containers and metal lids as they tend to cause overheating.

In case you go for pebbles, you can use a thin layer of long-fiber sphagnum moss to soak up the standing water in the pebbles. The layer between the pebbles and the soil prevents the shredded moss and perlite from falling into the rock layer. Next, you can add the moss mix comprising the 50/50 mix of sphagnum moss and perlite.

Always use distilled/ dechlorinated/ reverse osmosis water and never use fertilizer.

Step 2:Setting Up

Most plants in local garden stores come either bare root or loosely packed. If the plant is not bare root, carefully remove the pots to get the roots free. On the other hand, suppose they come in plastic starter cups; you can gently remove the plant. 

How do you transfer the plant? Hold it near the base, twisting it backward and forwards up until the plant becomes free. Avoid tugging or pulling abruptly as this might damage the plant. Do not disturb the roots in case a clump of moss comes up with the plant. You don’t have to work with entirely fresh moss; reuse the material that the flytrap came in.

Next, delicately place the plant and ensure that the base is firmly supported by the moss but not stuffed or squeezed. Add a glass lid but remove once a week for free oxygen exchange. Add whatever you wish to at this point, for example, accent plants and decorations. When done, that is it! Your Venus flytrap terrarium is all set.

Venus Flytrap Varieties

Though the venus flytrap has only one species, “Dionaea muscipula,” horticulturists have come up with different varieties of the flytrap based on special features. The distinguishing characteristics of these varieties are mainly color and leaf forms. There are many venus flytrap cultivars, but we’ll explore a few based on color, trap mutations, and trap sizes:

Venus flytrap has only one species, “Dionaea muscipula,” horticulturists have come up with different varieties of the flytrap based on special features.

Color

Red Dragon

Popularly known as ‘Akai Ryu,’ ‘Red Dragon’ is a perfectly captivating cultivar of Dionaea, which has sparked interest repeatedly. This variety can reach an enormous size in summer and is characterized by a deep dark maroon color if grown in bright light but turns green in poor light.

Green Dragon

The Green Dragon is a vigorous grower which can produce huge traps. A mutation of the Red Dragon Venus Flytrap, this cultivar can be distinguished from the former by its bright green trap edges with red leaves or reddish-purple trap interior. 

Justina Davis

Justina Davis is an all-green plant. This feature makes Justina Davis stand out from other flytrap varieties as it does not develop red coloration. This beauty is an upright grower with slender stalks. One of the hardiest flytraps ever grown as it can survive freezing temperatures.

Trap Mutations

Trap mutations result from tissue culture mishaps, which may result in the inability to catch prey. The mutants are loved and loathed in equal measure.

Fused Tooth

The fused tooth variety can get very large. Though the young plants look normal, mature plants form with teeth and fuse to look like bear traps with irregularly merged spines. The webbed teeth appear in the summer.

Red Piranha

The trap edges are jagged and have short-fused triangular teeth, which resemble the fierce piranhas. The marginal spines are similar to the ‘Dentate Traps’ variety. They are highly sought after due to their deep red coloration.

Cupped Trap

This unusual cultivar produces small traps which are fused toward one side to form a striking cup shape. During the development process, the trap spines are coiled longer resulting in oddly cupped tips. However, this does not affect its insect-catching ability.

Trap sizes

Petite Dragon

The Petite Dragon is a distinctly small cultivar that can only attain a maximum of 17mm in size. In mature plants, the flower stalk splits into two stalks. This small carnivorous plant has swiveling traps and four to seven leaves, which form underground trunks.

B52

This is one of the most prevalent cultivars. The plants clump and produce large traps. The massive traps can get as long as 2 inches. This famous cultivar exhibits vigorous growth; no wonder it’s one of the top contenders for the most extensive traps in the world.

Where to Buy

You can get a Venus Flytrap plant for as low as $10, and the purchase can be more economical if you buy more than one. Assuming that you’re simply beginning, you can find essential species at your neighborhood garden store. They are placed near the register in tiny plastic pots as a spur of the moment purchase items. Hardware and grocery stores like Walmart are also good options.

Before you buy the plant, ensure that it is in good condition by looking out for discoloration. If you are looking for larger varieties, the best place would be specialty nurseries. However, mature plants and particular types are more costly. Therefore, when buying, you can opt for seedlings, young venus flytraps, mature plants, or flytraps inside terrariums. Should you go for the terrarium option, we recommend buying one that is not entirely sealed to enable the plant to attain maximum growth.

flytrap terrarium
They form a trap when the leaves snap shut, snaring their prey, primarily insects. 

Online garden supply retailers can be great options with many selections from all over the world. Still, you must be cautious as some can arrive in poor condition or be entirely different from what you ordered. Amazon has a large selection of venus flytraps and related supplies. When buying online, the best thing to do is seek reviews for reputable online suppliers to avoid getting scammed. Once you have identified and bought your desired variety and supplies, the next step is to set up your terrarium.

Caring for your Venus Flytrap Terrarium

Venus flytraps live in their natural habitat for years, but most are short-lived in cultivation because of improper care. So first, understand what your plant needs to provide the best environment. Venus flytraps thrive in humid, acidic soil with plenty of sunshine. If you would like your plant to flourish as in its native setting, please follow the essential tips below:

Soil

As earlier discussed in this article, we saw that Venus flytraps do well with nutrient-free soils, which is why the first thing you need to do is to choose the best growing medium. Avoid garden/regular potting soil. Instead, go for peat moss and perlite mix or long fiber sphagnum. You can mix equally or opt for two parts to one. Never add compost, lime, or fertilizer to the soil, as these will kill your plant.

Light Levels

The best light for Venus flytraps is bright but not direct. Avoid too much direct sunlight, especially in summer, as the leaves will become crispy due to this. Your plant will require at least 6 hours of direct sunlight. In the growing season, you can place the plant under artificial lights for 10-12 hours every day and keep the flytraps 4-7 inches away from the fluorescent lights.

A plant receiving an indirect sunlight
Avoid too much direct sunlight, especially in summer, as the leaves will become crispy due to this.

Artificial full-spectrum lighting makes terrarium growing relatively simple though natural sunlight provides the strongest UV light. If your plants get less than the required light, they will be vulnerable to diseases and weak in addition to slow growth. You can tell that your plants are not getting adequate light if the leaves appear long and thin or if the trap’s inside is not pink.

Watering

Keep the terrarium moist at all times; never allow it to dry out completely. Water your plants daily during the hottest parts of summer to avoid elevated soil temperatures. Never water your plants using tap water; instead, use distilled or rainwater. 

Plants being watered
Water your plants daily during the hottest parts of summer to avoid elevated soil temperatures.

Alkaline water has chlorine, or dissolved minerals will kill the plants. To water your flytraps, you can set the pot’s base in a saucer of water once every few days. To steer clear away from the risk of rot due to overwatering, don’t drown the plant’s crown.

Repotting

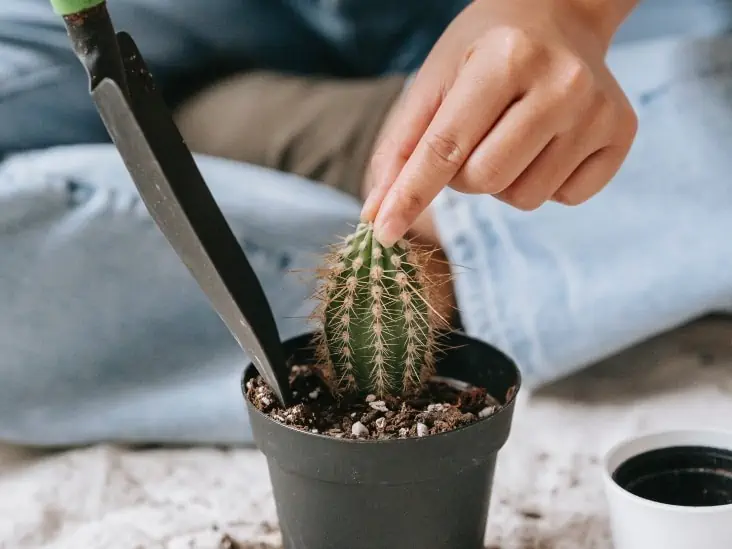
The act of transferring a plant from one pot to another, usually a large one, gives the plant room to grow. Repot big plants every year; for smaller plants, you can repot once every two years. Make sure that you change the medium every time you repot your plant. The best time is early in the spring or late in the winter. If you choose to report at any other time, do not tamper with the roots. Instead, use a tall pot that can allow for long roots when repotting. With enough space to grow, your fly traps will grow faster and be more robust. Large pots also protect your plants during the winter.

Repotting a Cactus.
The act of transferring a plant from one pot to another, usually a large one, gives the plant room to grow.

Dormancy Care

Venus flytrap plants become dormant during autumn because of low temperatures and shorter days. The leaves darken and die, and the plants stop growing. Don’t worry about dormancy since your plant is just resting, not dead. The period lasts for about three or four months. Do not throw away your plant; instead, find alternative ways of caring for it.

During the dormancy period, place your plant in an excellent location. Though the plant will not require much light in this state, place it near a window. Keep the plant humid at all times during winter dormancy. Be careful not to let the terrarium freeze as this may lead to glass breaking and the plants dying. You can prevent your plant from freezing by covering it with black plastic. The best temp is 35 to 50°F. Once spring arrives, you can move your plants back to your living space and increase warmth and light. Clip off any dead leaves hanging on to your plant for new leaves and flower buds to sprout.

Feeding

The flytraps’ main diet is insects. Its main tools are a net for trapping insects and terrarium tweezers to feed the bug to your plant. Trigger hairs inside the plant trigger the trap to close if the insect’s movement is in quick succession, so you can only feed your plant on alive prey. 

A fly being fed on the Venus fly trap.
The flytraps’ main diet is insects.

Release the flies into the container. The insects should not be more than a third of the trap size. Once the trap is closed, digestive enzymes are produced, and the plants absorb the nutrients in the insect. Feed your plants only two bugs at most per month. Never feed the flytrap during winter dormancy. Also, don’t feed your plant any other kind of meat.

Conclusion

There are contrasting opinions on whether growing venus flytraps in a terrarium is a good idea. Those of a different opinion suggest that poor drainage in the terrariums and overheating will lead to the death of the flytraps. However, with a little bit more care and application of the tips shared in this article, there is no reason your flytrap should not thrive in your terrarium. So, what are you waiting for? Grow Venus flytraps today.

4 Golden Rules For Watering A Desert Rose

Adenium obesum, commonly known as desert rose, is a stunning slow-growing plant that requires little attention. Its succulent trunk, pink flowers, and delicate leaves make it an ideal bonsai plant. It is native to the Middle East and Africa but can be found in stores worldwide for home gardening. The Desert Rose has it all. Gorgeous blooms in the early spring, vivid red berries in summer, and masses of festive blossoms at winter’s peak.

So, what are the rules for watering a desert rose? Well, desert rose plant has varying water requirements depending on the temperature and season. For example, in late spring, keep the soil moist but not saturated. In colder months, reduce the watering cycles and only water once a month or so.

Improper watering is one of the leading causes of desert rose withering and death.  As such, it is important to learn how to properly water desert rose plants so that they can thrive and continue blooming. Following a few simple guidelines makes these flowers easy to grow, and the rewards are enormous. Read on to get golden tips on how to water desert roses.

1.   Know when to water a desert rose

Desert roses do not require much water to survive in their native environments. However, to grow them in a domestic setting, water them skillfully to achieve the desired level of growth and flowering.

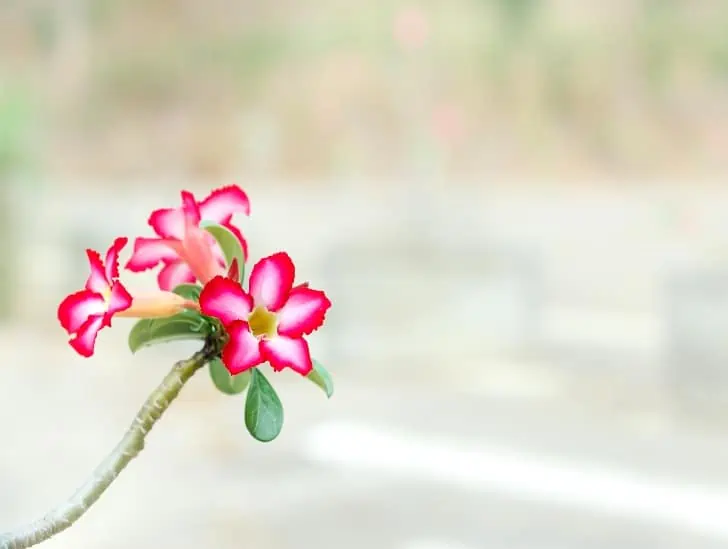
A pink desert rose.
To grow them in a domestic setting, water them skillfully to achieve the desired level of growth and flowering.

Always ensure you have the right lighting requirements when watering a desert rose.

These plants are accustomed to desert conditions. This means you need to get them as much light as possible. Lighting in itself does not influence when you need to water the plant, but if you place it outside where it gets more direct sunlight, the soil might dry more quickly, thus requiring more frequent watering.

Does soil affect when to water?

Desert roses need dry, rough, well-drained desert soil to survive. As a result, soil doesn’t influence when you need water unless you use poorly draining soil. In such a case, you’ll need to water less often, but you’ll still run the risk of drowning the roots in the wet soil.

2.   Mind your water quantity and frequency

As its name suggests, the desert rose is a desert plant that requires very little water to grow and flower. However, when grown at home, it requires varying water requirements in different seasons.

In general, desert roses need to be kept in moist but never soggy soil. If the roots are exposed to too much moisture, they will rot, effectively killing the plant. This makes the soil with good drainage all the more important.

To keep the soil moist, water regularly but take care not to overdoing it. For example, in summer, you can water it once every 10 days or whenever it looks parched. On the other hand, in winter, you only have to water it once a month or so since the plant is dormant at this point in time.

A desert rose with water droplets.
The desert rose is a desert plant that requires very little water to grow and flower.

As a golden watering rule, use the soak and dry method. Dig up the top few inches of the soil to check if it’s dry. If that’s the case, you can water the plant.

Another tip you can use is to check the plant’s caudex. If your plant is well hydrated, the trunk should be swollen, proportionally to the size of your plant.

Watering desert rose from a can

During the plant’s active growth season, use the soak and dry method to check if the soil is dry. Whenever that’s the case, place the pot in a plastic saucer and water it slowly using a can from the bottom up.

Once the soil has absorbed it and looks moist, it’s enough to last several days. In extreme drought conditions, water plants in the same landscape deeply. You can do this by slow dripping them for several hours during the cooler parts of the day.

3.   Avoid under-watering or over-watering a desert rose

Since desert rose is a drought-resistant plant, under-watering it might not take as much toll on it as it would on other plants. Under-watering is only an issue when the plant is in its active growth period. Still, the plant is likely to take a long time to die from under-watering.

However, if you notice leaf loss or the trunk is proportionally thinner than expected, it’s an indicator of under-watering.

Unlike under-watering, over-watering is a major issue for desert roses. In fact, an over-watered desert rose will rot much faster than other succulent plants.

Desert rose roots are sensitive to too much moisture. Once they are drowned in water, they rot and eventually kill the plant.

Always ensure that the soil is not flooded at any point. The best way to do this is to use little amounts of water to irrigate the plant at a time.

Immediately you notice that the soil is soggy, reduce the amount of water and watering frequency. You can then move the plant to a more sunny location where it will use up the water quickly.

4.   Watering desert rose seeds needs extra caution

When propagating desert rose from seeds, soak them for a day before planting them. You can then plant them in moist but non-soggy soil for a week to 10 days.

A young desert rose.
Desert roses don’t need to be irrigated with a special type of water.

Keep the soil moist by watering it whenever it looks dry. However, remember not to over-water; else, you run the risk of drowning the growing roots.

Desert roses don’t need to be irrigated with a special type of water. Almost any type of non-toxic water will work just fine.

Other ways to take care of a desert rose

Apart from watering, you can do a few other things to ensure your desert rose is growing healthy.

Lighting

Being a desert plant, a desert rose appreciates as much sunlight as it can get. So, if you decide to pot it in your house, choose a spot that receives at least 5 to 6 hours of sunlight every day.

Desert rose with a sky background.
A desert rose appreciates as much sunlight as it can get.

For better results outdoors, pick a spot where taller plants will not shadow it. Nevertheless, ensure that it’s shaded from the harsh high noon sun. When the plant is exposed to the extreme afternoon sunlight in hot areas, its leaves could get scorched.

Soil

Like most other desert plants, desert roses require well-draining soil to grow healthy. Gravelly or sandy cactus soil with an acidic PH should be just fine to grow desert plants. The PH should ideally be around 6.0.

Fertilization

Although fertilizer is not a requirement to grow desert roses, it adds nutrients to the plant and makes it healthier, potentially producing more vibrant flowers. If you are looking to grow desert rose as a decor plant, fertilization is highly recommended.

Feed your adenium obesum with diluted liquid fertilizer (diluted by half) at least once a month during its active growth period.

Temperature

Keep your desert rose in warm temperatures between 65 and 95 degrees Fahrenheit at all times. If the plant is exposed to temperatures below 50 degrees for too long, it withers and eventually dies.

A desert rose.
A desert rose doesn’t do well in a frosty area.

If you live in a frosty area, don’t plant a desert rose outside. It will most likely die from prolonged exposure to frost.

A desert rose doesn’t do well in a frosty area and you may need to avoid it in case you live in such areas.

Humidity

Humidity is not a significant concern for this plant as it is accustomed to hot and dry climates. However, if you live in an overly humid area, enhance the soil’s drainage, especially during the plant’s dormant months.

Pruning

Prune a desert rose whenever it looks necessary. However, avoid pruning it in late fall as this may induce new growth in the plant, making it sensitive to cold weather.

Repotting a desert rose

Repot a desert rise whenever the need arises. As a rule of thumb, repot your plant whenever the roots fill the container. This may happen once a year every year.

Whenever you repot a desert rose, ensure the soil is parched.  Clear all the old soil from the roots before planting it in a new one. Remember to wear gardening gloves throughout.

To Wrap It Up

The desert rose is a great plant. It looks beautiful and requires very little maintenance. Its watering regime is simple as long as you follow the steps listed in this guide. The beauty of a desert rose is enough to encourage any plant lover. You will be rewarded for your efforts and be the envy of your friends and family if you take pride in a desert rose. In case of any doubts about its watering or general care, always consult a garden expert. Watering a desert rose is no rocket science and with the right amount of care, it will thrive for years to come.

How Long Can a Plant Live In a Terrarium?

Let’s face it, we all want a vibrant, long-lasting terrarium. The good news is your terrarium, when done right, can live for a very long period. But, on the other hand, it can also die down after a few weeks. At first, a terrarium looks excellent, but the health of your plants can quickly deteriorate if the conditions are just not right.

For your terrarium to thrive indefinitely, it is essential to set up your terrarium correctly and select the right plants. So just how long can terrariums live, and how do we make them last? Let’s delve right into it. 

Houseplants can generally live a long time with proper care. However, there is no sure way to determine how long a plant should live. Most plants live in one growing season. However, some houseplants can live for decades or even centuries. For instance, the oldest documented houseplant is the Eastern Cape giant cycad over 240 years old! 

Interestingly, most household plants die due to external factors and not because they are mature or old. If you want to know if your terrarium can last that long you are in the right place, we will discuss how to prolong your terrarium’s lifespan and the most durable houseplants.

The lifespan of a Terrarium

Most plants do not have a fixed lifespan. Instead, plant mortality is dependent on external factors such as water, light, nutrition, and temperature. Therefore, the lifespan of a terrarium depends on the care you give it and the environment.

example of terrarium inside a container
When taking care of a terrarium, you must find the perfect container for it to thrive

A terrarium’s duration is hard to gauge because it is an ecosystem. Precipitation from the plants and soil evaporates due to the high temperatures in the sealed glass container. The vapor condenses on the walls and back to the soil and plants. Since the system is autonomous, longevity is not based on a single plant but on its ability to support itself. 

If the right conditions are met, your terrarium can last up to 10 years or more. Theoretically speaking, a well-balanced terrarium in optimal conditions can last indefinitely. However, the average terrarium lasts anywhere from four months to approximately two years. If you would like your terrarium to survive, you might want to avoid the common mistakes below.

Factors That Can Undermine the Lifespan of Your Terrarium

Keeping indoor plants alive and healthy can be pretty difficult. Terrariums are the most convenient option for adding a touch of green to your home because they require minimal care. They are also easy to set up. However, the fact that they do not need much attention should not make you miss the below five factors that can significantly reduce the lifespan of your terrarium:

Poor Container Choice

There are two types of containers: open and closed. Most plants thrive in open terrariums. You should use the kind of plant you are considering as a guide for container choice. For example, air plants require proper air exchange and are best suited for open containers. Same as succulents, which do well with optimum ventilation, low humidity, and fast-draining soils. On the flip side, plants such as ferns, mosses, and lichens thrive in closed terrariums. Select a suitable glass container that your hand can comfortably fit through and consider the plant type when singling out the best option. 

three plants with no pot
Choosing the wrong container for your terrarium can cause your terrarium to wilt

Overwatering

Most terrarium plants do not require a lot of watering. However, one of the most common reasons for dying out of terrariums is overwatering. This is because terrariums do not have drainage holes, making the plants susceptible to mold growth and plant rot. Discolored leaves and brown roots are among the signs you have to watch out for in submerged plants. Also, a rotting plant feels exceptionally soft and crumbly.

On the other hand, underwatering can also affect your plants negatively. Lack of adequate moisture will eventually cause your plants to die. To figure out if your plants are not getting enough water, look out for falling, dry or yellow leaves. 

Wrong Choice of Plants

Choose plants that do not have a growth spurt. It would be best if you went for slow-growing plants to avoid plant rot. When plants get too long/big, they touch the terrarium sides and trap water, ultimately leading to rot. Leggy plants also suffer from a lack of adequate sunlight. If you notice that your plants are getting too big, trim them a little and place your terrarium in bright but indirect light for all parts to get sufficient sunlight. You can also prune the roots to keep the plants small.

different types of indoor plants
Know your plants well especially how they grow so that it is much easier to maintain

Overfertilization

Healthy plants require a fertilizer that is low in nitrogen and high in potassium. Most terrarium plants don’t need fertilizers. However, you can add fertilizers once every two months. Too much fertilizing of plants leads to faster growth, and this can cause the plants to outgrow your terrarium. Additionally, you can also use direct plant sprays to aid in plant growth. Signs of over-fertilization include slow or minimal growth, yellowing of leaves, and blackened roots.

Lack of Adequate Light

Terrarium plants require bright but indirect light. Different plants require different amounts of light. For instance, succulents need lots of bright light, but mosses can survive on minimal amounts of light. Light-deprived plants usually have discolored leaves and experience wilting. While adequate lighting is ideal, extreme light/heat is destructive. You should avoid direct unfiltered light as it can cause your terrarium plants to start dying.

Durable Houseplants for Your Terrarium

The lifespan of a houseplant is not dependent on the species. Below are examples of plants known for their long lifespan:

Cacti 

The cactus is one of the most recognizable succulent plants. They only require water once every couple of weeks and tons of sunshine. The lifespan increases when grown outdoors. The average life of a Christmas cactus is between 20 and 30 years.

Table Palms

Table Palms are a part of the Arecaceae family, known for living for 80-100+ years. If you desire that tropical feel in your home, this would be your best bet. This evergreen plant does not require much sunshine.

Spider Plant

The spider plant is a hanging plant that can survive for decades. They thrive best in indirect light but can be prone to rot. To increase longevity, avoid overwatering the plant.

Succulents

One of the most trouble-free to care for houseplants. Fleshy and can go weeks on end without water. The lifespan varies but can be anywhere between six years to a couple of decades.

three succulents perfect for indoors
Types of succulent for your terrarium

Cycads

Cycads can be grown outdoors or indoors. As earlier mentioned in this article, one of the oldest recorded indoor plants is the cycad which can thrive for centuries. Relatively easy to take care of as watering is only required twice a week.

ZZ Plant

The Zanzibar Gem is indestructible. While this may seem an exaggeration, indoor plants can go for long periods without water. In addition, the ZZ plant is low maintenance and can handle low lighting.

Bird of Paradise

The Bird of Paradise is not mainly known for its looks. Originating from South Africa, the best part about this plant is the mesmerizing flowers which can take up to 20 years to grow.

How to Make Your Terrarium Last

You’ve picked out the recommended long-lasting plants and avoided all the factors that could lead to drying out of your plants. But how do you make your terrarium last? The following secrets could be critical to a long-lasting terrarium.

  • Regulate Water Levels: Most people struggle figuring out the right amount of water for their terrariums. The amount of water required depends on the type of plant as well as a terrarium. To tell if your plants are getting optimum water is to feel the substrate; ideally, it should feel moist but not dry or soggy. Another good sign is the sighting of slight condensation, particularly in the mornings and evenings in your container.
aloe vera plant being watered
Make sure to do some research before watering you plant.
  • Get Rid of Dead Plant Parts: Dead plants don’t you are doing everything wrong. Permanently remove any plants that show signs of browning. This makes your terrarium to look vibrant. When you do away with the dead plants, the risk of diseases or rot to the healthy plants is minimized. Just grab a pair of tweezers, and take out the dead plants.
  • Clean the Container: Cycles of evaporation and condensation over time lead to the deposit of trace minerals on the walls of your container. The deposit ultimately leads to a cloudy appearance on your container. Plants require sunlight for photosynthesis, and the hazy appearance will hinder optimum light from reaching your plants. To clean off the deposit, grab a towel, preferably a microfibre towel, and wipe swiftly on the inside.

The Bottom Line

Good terrarium maintenance coupled with in-depth research on the best plants and factors to consider can prolong the life of your terrarium. If everything else fails, try again, and you will see just how far your terrarium could go.

How Do You Revive a Dying Air Plant: 10 Easy Steps

Air plants are one of the fascinating types of plants on the planet. Unlike other plants, Tillandsia is epiphytic, which means it does not need soil to thrive. This makes them a versatile addition to your indoor or outdoor space. 

However, just because they don’t require soil doesn’t imply they don’t need some attention. Air plants collect nutrients and moisture from the air using trichomes. Trichomes are modified hairs present on the leaf to help absorb nutrients and water.

If you see that your plant is not thriving or dying, it is high time you pay attention to it and revive it.

How Can I Tell My Air Plant Is Dying?

Sometimes, the leaves will turn brown and start to fall off. If you can’t get your air plant to green up after a few days of care, it probably needs more effort to revive it.

1) Smaller leaves: The size of the leaves might be smaller than usual because there isn’t enough food to create substantial growth.

2) Dying Leaves: Leaves may go limp and die altogether if they’re not getting enough water.

3) Browning / Dryness: Brown leaves mean that it’s been too dry or lacks enough light for too long in general; if your air plant has been potting-bound for a while, this could be due to excessive crowding or root damage from fertilizer burn when planting.

dried leaves resulting from not having enough light
Always make sure to give your plant some sunlight to avoid drying the leaves

Dead areas on the leaf edges may appear if the air plant has been in a very humid environment for an extended time. 

Mold and fungus can or may begin to grow on your plant or soil surface. The leaves are not only brown but also shriveled up.

4) Over-watering: If you’re overwatering your plant, then it’s not getting the proper amount of airflow. This usually occurs when your plant is kept in a very humid environment for an extended period.

5) Under-watering: If you don’t water your air plant enough, then it may begin to shrivel up and die. This typically happens if the soil dries out completely before the next watering.

10 Easy Steps to Revive a Dying Air Plant

Tillandsia is a low-maintenance plant. Although, if your air plant portrays dying signs or looks unhealthy, this might indicate they need extra attention to revive it. 

Fortunately, air plant resuscitation is not difficult. Trimming off the dead leaves or branches and immersing the plant in water are just a few of the many fast solutions.

Now let’s dig into ten easy gardening tricks to revive your plant.

Dunking

Is your air plant leaves turning brown or wilting because of lack of water? If this is the case, watering or immersing your air plant in water is the first easy fix to revive the air plant.

If you have less time, you can immerse the plant in water for six to eight hours, or you might as well leave it overnight. Putting it in water will give it enough time to acquire enough moisture to sustain it.

plant getting immersed in water
One of the common ways to revive your plant is to immerse them in water

Always use lukewarm water to offer the plant a gentle bath. You can use spring, rain, or swamp water for additional nutrients. Tap water might have chlorine that may affect the plant’s growth.

Another thing you can do to revive it is mist it when you realize it is drooping. Misting air plants between immersions can assist prevent dehydration in hot weather, but it does not provide enough moisture alone, so you should not rely on misting alone.

Air Dry Your Air Plant

Air plant leaves turning black or brown is a sign of rot. If you constantly water your plant and do not air dry it properly, water retention will cause plant rot.

After watering your plant, ensure a proper air dry. Before returning the plant to its pot, you can add a paper towel to absorb all the remaining water in the pot.

Air Circulation

Like everybody else, air plants also need good air circulation. Poor or no air circulation can kill your beautiful air plant. An open-air display or pot is a brilliant idea for your air plant to grow and thrive well. 

An enclosed vessel encourages stagnant conditions, and this will end disastrously for your plant. Air circulation will help maintain a stable air temperature and prevent water from building up on the leaves. Place your air plants away from heating and cooling vents.

Humidify Your Plant

Air plants are used to high humidity levels; tropical rainforest conditions. You can revive your plant if it grows in a less humid environment by increasing the humidity levels. 

The right level of indoor humidity for an air plant is 50-90%. You can use a  humidifier to increase the humidity levels.

Another way to increase the humidity is by spraying water on the air plant in a misting method. This should be done in an open room with good airflow, so it does not promote mold/fungus growth that comes after soaking air plants.

watering plants using misting method
Use the misting method to increase the humidity level around your plant.

Cut Brown Leaves

Overwatering or underwatering Tillandsia might cause browning of the leaves. When the plant has a lot of water in it, the leaves or branches are constantly wet, and this might lead to fungal infections. Fungal infections damage the plant cell; hence browning or plant rotting.

If you spot such a problem on your plant, you can start by cutting off the brown dead leaves and branches to revive your plant. Be careful not to harm the plant when removing dead leaves.

Cutting off the brown or black leaves and stems will ensure there’s no spread of infection to healthy parts. 

Provide Some Sunshine

The three essential items for air plants are air, water, and light. Because of a lack of sunlight, your air plants may be dying.

Indoor air plants thrive in bright filtered and indirect light, about 3-5 feet from the window. The small amount of direct sunshine will also be excellent; ideally, it should be morning sun. 

Don’t let your plants sunburn or get dehydrated if they are subjected to too much light for extended periods.

Artificial lighting is also a fantastic option, but place the plants near the light source and switch off the lights at night. This will aid in the air plant retaining enough moisture.

Add Additional Nutrients

Like any other plant, air plants also need nutrients. The most common misconception about air plants is that they get all of their needs from the atmosphere. You can add fertilizer to your plant once or twice a month when watering to help it thrive.

healthy leaves in an orange pot
Try using fertilizer to help your plant thrive more.

Feed your air plants with a solution of air plant fertilizer. Always follow the recommended amounts to give your plant.

You can use an air plant or bromeliad mix. If you cannot find any air plant fertilizer, you are better off using any liquid houseplant fertilizer with a 1/4 strength.

Eradicate Pests

The presence of pests is a rare and frequently overlooked reason for the death of your air plants and other indoor plants. When watering, it is the right time to check and pay attention to the pest.

If you find a web-like substance on your plants, you’re dealing with a mealybug. These pests produce a waxy covering to shield themselves and then consume the plant’s sap.

The procedure for eradicating these pests is straightforward. To begin, isolate the plants from one another. Next, clean the plants with a mild liquid dish soap and water solution. 

Use a cotton swab soaked in rubbing alcohol to clean out all of the nooks and crannies. Keep an eye on the plant for a while and return the plant to others after you’ve eradicated all of the pests.

Temperature

Air plants thrive well in temperatures of 50 to 90 degrees Fahrenheit. It might be difficult to revive if you expose your air plant to extremely cold or scorching temperatures. Extreme heat may cause the air plant to dry out and die.

Note that the drier and hotter the air, the more you will have to water your air plant. This should not come as a surprise, and these subtropical and tropical plants will die under freezing conditions.

Have New Home for Your Plant

Some air plants require periodic repotting. You can do this by removing the plant from its pot and just replanting it in a different pot, or you can free-pot the plant.

Free-potting is where you push the roots down into the soil or marbles so they are buried. This will enable them to grow more freely and be healthier.

preparing to repot the plant
Repotting allows you to provide fresh soil for your plant to grow more.

Another thing, you should strive to imitate its natural habitat for it to grow and thrive. If you notice your plant is dying, maybe it might be because of the pot. You can always use wood materials or any other material that portrays their natural environment.

Bottom Line 

Finally, after learning how to revive your air plants, apply the principle that prevention is preferable to cure. And since no lesson goes unlearned, if your plants are beyond reviving, make a note of everything here as a life lesson learned for future reference and continue looking after the remaining ones. 

Ultimate Guide: How To Care For Sedum (Stonecrop) Plant

Sedum is a herbaceous perennial succulent found in many parts of the world and also thrives indoors Sedum is a plant that has an abundance of green or red flowers. It can be grown to cover even the most barren areas in your garden, but it requires little care to survive. The Sedum plant needs very little water and can endure many different conditions to support its growth.

What is the necessary care for your Sedum plant? The plant’s succulent leaves, stem, and roots enable it to restore water, so you only water it regularly when newly planted. Once established, you water it sparingly. You will want to keep your plant healthy by ensuring it gets enough sunlight and fertilizer. Mulching ensures it retains water and gets nutrients when pruning and trimming are necessary to give it a standard growth height.

Sedums give your home a beautiful look, but you must give them proper care to achieve that look. If you are ready to take on the challenge of indoor gardening then this article will help you understand what it takes to care of the sedum plant.

Basic Requirements for a Healthy Stonecrop

Sunlight

Sedums grow well in dry and hot regions. That does not mean they can’t thrive in your garden if you do not live in such areas. All you need is to ensure your plant is exposed to full sunlight and gets at least 6 hours of sunlight each day. Getting enough sunlight helps sedums attain their best colors. The species that grow taller require more sunlight than those that stay on the ground.

succulent getting sunlight
At least 6 hours of sunlight each day is needed for a plant like a sedum

Lack of sunlight causes the plant’s stem to flop over. The stem develops soft foliage, grows tall and thin as it attempts to grow in the direction of available sunlight.  As such, your plant will find it challenging to remain erect at the flowering stage because the thin stem will be weighed down.

Watering

Like most plants, sedums require water to survive despite their ability to store water longer. Giving your plant water at regular intervals keeps it healthy and blooming. However, take care of the amount of water you provide to avoid overwatering.

woman watering her plant in a cup
You must feel the soil of your sedum plant to determine if it needs watering or not

Before watering your sedum, identify when it needs it by feeling if the soil is completely dry using your fingers. If the top layer of the soil feels dry, it is time to water your plant. Lack of enough water makes the leaves lose their plump look and become droopy and wilted. In extreme cases, the leaves start dying out and falling.

So how often should you water your sedum? When you first plant it, ensure you water the plant every day. In summer, give the plant water every 7 to 10 days and every 2 to 3 weeks in winter.

Mulching

Sedums need mulch for two reasons; to retain water and to keep away weeds. Some sedum plants clump together, and if not mulched, weeds can grow and compete for nutrients with your plant. After planting your sedum, make sure you add compost up to 1 inch in thickness. Mulch your plant at least once per year to keep them thriving and producing flowers.

various types of plants surrounded by rocks
Perform the mulching method on your plant at least once a year to allow it to thrive more and produce more flowers

Take note, however, that too much mulch can cause your plant to rot. Mulching material should be placed a distance from the base of the plant to prevent that. Remember gravel mulching is usually advisable because it allows easy water passage, reduces rotting risks, and makes your garden attractive.

Staking

While creeping sedum varieties can thrive without staking, the clumping types can become floppy due to a lack of enough sunlight and nutrients. As your clumping sedum plant approaches the flowering stage, keep it erect by wrapping twine or a wire around it.

 Avoid tying the plant too tightly to prevent the wire from cutting through and injuring it. If you have the clumping types, you should consider planting them close by to ensure they support each other.

Pruning and Trimming

Sedum plants have beautiful flowers from the time they start budding to when they bloom fully. You can either choose to trim clumping sedums immediately after they bloom or let the flowers dry on the plant for fall colors. You can prune them at the onset of summer to prevent them from growing too tall. Some gardeners pinch them off at the growth point to give the plant a bushier look. However, doing that delays the plant’s flowering process. In spring, pruning is only necessary if the plant’s growth extends to unwanted areas; pruning at that time can cause your plant to rot.

Fertilizer

Sedums are generally low-maintenance plants and need just a little fertilizer. Sometimes, the 1-inch layer of compost mulch you put on the base of the plant may provide enough nutrients. This said you don’t want to take chances with your plant. Feed it with enough nutrients to get that strong and beautiful look. One month after planting, give the plant some fertilizer and ensure you keep feeding it after every three months. Ensure the fertilizer you use has equal amounts of potassium, nitrogen, and phosphorus.

basic gardening tools used
Even though these plants need just a little fertilizer, it’s still best to feed them enough to keep them strong and thriving

Propagating Sedum Plants

To propagate sedum:

  • Take cuttings from healthy new growth. You can use fresh or dried cuttings.
  • Use sharp pruners to remove about 1/3 of the stem below the node where you want to make the cutting. Cut off the lower portion of the stem just above a bud that has formed.
  • Fill a shallow tray with moistened peat moss.
  • Place the cuttings in the tray so that the nodes are facing down.
  • Cover the cuttings with plastic wrap. Allow the cuttings to remain undisturbed for one week.
  • After seven days, gently lift the plastic wrap and place the cuttings into individual pots filled with potting soil. The cuttings will root within three months.
  • You can also divide mature plants. Gently remove the roots from the parent plant. Fill a container with moistened peat moss. Plant the divided plants in their containers.

Pest and Diseases Associated with Sedum

Pests

The most common sedum-associated pests include aphids, spider mites, whiteflies, leafhoppers, thrips, mealybugs, slugs, snails, caterpillars, and ants.

  • Aphids cause stunted growth and yellowing leaves. Aphid infestation should be treated immediately with insecticidal soap.
  • Spider Mites cause web-like patterns on the undersides of the leaves. These tiny creatures suck the juices from the leaves, causing the wilting and eventual death of the plant. Apply a mixture of water and dishwashing liquid directly onto the affected areas. Repeat once per week until the problem clears up.
  • Whiteflies cause small, whitish spots on the underside of the leaves. Remove any infected leaves and destroy them. Spray the entire plant with insecticidal soap.
  • Leafhoppers cause small brown spots on the undersides of the leaves. Destroy all damaged leaves and spray the entire plant with insecticidal soap.
  • Thrips cause smudged, light green patches on the undersides of the leaves. Thrips can also attack the stems and buds. Destroy any infested leaves and spray the entire plant with insecticidal soap.
  • Mealybugs cause soft, sticky honeydew excretions on the undersides of the leaves. Mealybug infestation should be treated immediately with insecticidal soap.
  • Slugs and Snails eat the tender young shoots of the plant. To deter these pests, cover the base of the plant with an inch layer of mulch.
  • Caterpillars eat the foliage of the plant. To discourage this pest, keep your garden clean by removing fallen leaves regularly.
  • Ants damage the leaves of the plant by eating the sap. Keep ant activity under control by covering the base of the plant with an inch layer of mulch.
sample of a leafhopper
Sample of leafhopper found in succulents like sedums

Diseases

Sedums are susceptible to many diseases, including mildews, rusts, blights, and various viruses.

Mildews cause dark, fuzzy patches on the undersides of the leaves. Mildew infection should be treated immediately with fungicide.

Rusts cause reddish or orange spots on the undersides of the leaves. Rust is caused by fungi that live in the soil and infect the plant through wounds or injury. Rust can be prevented by keeping the soil well maintained and avoiding injury to the plant.

Blights cause blackened areas on the undersides of the leaves. It is caused by bacteria that enter through cuts or injuries. Remove and destroy infected leaves and spray the entire plant with a fungicide.

Viruses cause deformed leaves and stunted growth. Virus infections should be controlled by spraying the plant with insecticidal soap.

Looking for low-maintenance succulents to grow in your garden? Why not give the sedum a try. They not only give your garden a beautiful look but are easy to maintain and care for. They retain water in their leaves, roots, and stems, making them able to resist drought. Although they grow well in hot and dry areas, with proper care, they can bloom well in your garden no matter the weather conditions.

The 10 Best Aloe Vera Types, to Grow Outdoors

Aloe Vera plant

The Aloe plant has hundreds of species, and each species has many varieties to choose from and grow. With all the varieties, you need to select one suited to your area and one that will match your outdoor features. An appropriate choice of aloe plant to grow indoors or in an outside garden will allow you to completely recreate your compound or your garden into a magnificent place. 

Below, we will discuss the 10 best types of Aloe Vera that you can consider growing outdoors. This article will help you choose the plant based on its color, kind of soil, and the conditions that it can best fit in. It will also help you decide to relocate some aloe plants from your house to an outdoor state if the succulent plant grows to blossom.        

1.     Aloe Nobilis

If you are looking for an aloe plant with numerous personalities, aloe Nobilis is your perfect choice. It has large yellow thorns and rose-tilted leaves. These medium-sized rosettes produce reddish-orange bud thwarts when exposed to light. If you have a combined dish garden with other juicy specimens, this golden-toothed aloe looks handsome. 

During the summer season, tubular flowers appear, which often reach 2’ feet tall. They add a mix of colors to your garden. It is intolerant to frost, and it is suited for outdoor growth in the USDA hardiness zones 9b to 10b. 

Aloe Nobilis is often referred to as a Golden Toothed Aloe due to its large yellow thorns on rose-tilted leaves.

2.     Mountain Aloe

 It is also known as aloe Marlothii. The leaves of this aloe plant have a wide base narrowing to a sharp point and can reach 5 feet. These leaves have reddish-brown spikes along the ends and sometimes on the surface of the plant leaves. The old leaves are retained after they dry to form a ‘petticoat’ along the stalk. 

 It makes an excellent outdoor plant as it makes a beautiful display in sunny borders and is perfect for attracting nectar-feeding birds. The immortal plant is well grown in well-drained soil and full sun. This variety is known for its hardness as it can go for months without even watering.

 It is disease-free and deer resistant, making it proper for the outside environment. When planted outdoors, the variety is great for beds and borders, rocky, Mediterranean, and succulent gardens. It is also ideal as an accent in a sunny border or decorative container.

3.    Aloe Barbadensis Miller

 It is one of the most known aloes Vera, due to its numerous health benefits. This variety can easily be identified by looking at the difference between the pup and a matured aloe. Aloe barbadensis miller species have multiple white spots when still pups, but it disappears as the plant grows. 

Unlike many aloes, they appear green or grey-green. As the plant grows, the leaves become thicker and more solid. At the edge of the leaves, there are small white teeth or spikes, and its spike can grow up to 35 inches tall. 

Barbadensis Miller is an adaptable plant and thrives well in a warm, dry climate. The plant is believed to be sensitive to cold. Hence the plant grows perfectly when planted outdoor during summer. 

Aloe Barbadensis Miller is characterized by grey-green leaves.

4.    Aloe Crosby’s Prolific

It is a dwarf plant that grows to about 45 cm and has elongated leaves and translucent projections. This variety grows orange-red flowers, and its leaves turn out red when exposed to the sun, ideal for landscape design. The plant is suited for containers and beds.

Aloe Crosby is a prolific plant that loves sun or partial shade hence does well when grown outdoors. It is not a cold-hardy plant; hence it does not handle cold well. Aloe Crosby should be planted in an area that receives six hours of sunlight a day. The bright orange flower attracts birds and insects, agents of pollination.

5.     Aloe Rubroviolacea

The Arabian aloe is tolerant to drought and harsh conditions. It is an outstanding plant with blue-green leaves and reddish teeth bordering it. The leaves of this species turn purple when in full sun, intensified to violet-red in winter, creating a magnificent view. Since they are suited to arid conditions, this plant can thrive well outdoors because it requires little care and is disease-free. 

When planted outdoors, Aloe Rubroviolacea grows perfect in well-drained soil in full sun. It thrives best when planted in beds and borders, a rock garden, and an ideal accent plant on a sunny wall. The flower produces nectars that attract birds and bees, encouraging pollination. 

6.     Aloe Aristata

Aloe Aristata is also known as the touch plant. It has fleshy, soft-spined dark green leaves which have white bumps. As weather changes, this variety tends to change color, with orange-red flowers growing on the long stem. These low-growing, bunching rosettes make an excellent and effective ground cover.

Aloe Aristata is short and stemless but very attractive. It grows slowly and succulently, reaching about 12 inches in height. It is an evergreen perennial that grows in knit, lovely rosettes. The plant is resilient and easy to grow in almost all weather and growing conditions.

Aloe Vera plant
Aloe Aristata features fleshy dark green leaves with soft white spines.

The Aloe plant has triangular leaves with white spikes and fine cilia, which is the primary identifier of the family. The torch aloe plant is hardier than other aloes’ in the same group. It thrives well inadequate sunlight, making outdoor planting the best option.

It is known as the ‘succulent city’ plant, as it loves warmth and, when grown outside with enough sun, it thrives. Unlike others, it thrives well in autumn and summer and not winter. Therefore, avoid planting this species in extremely cold conditions.

7.    Malagasy Tree Aloe

The Malagasy species is a free disease plant native to Madagascar. It is a huge aloe with the ability to grow up to a height of 12 feet and a width of 5 feet. It has fresh leaves with white teeth and turns dark green to a vibrant deep red color when in full sun.

 The plant grows quickly in well-drained soil, with enough sun and light shadow. As it matures, it produces attractive red flowers that stand out and are focal to a garden. It is deer resistant, and the flower has nectar which attracts birds and bees, supporting pollination. The beautiful large aloe flourishes in beds, rock, succulent, and Mediterranean gardens. It is ideal as an accent in a sunny border and decorative container. 

Malagasy Tree Aloe is a succulent that grows up to 12 feet in height and 5 feed in width.

8.    Red aloe (aloe Cameron)

Red aloe is a beautiful Rhodesian native with a similar shape as the aloe arborescens. It is a distinguishable species by its deep red and copper tones display when it withholds enough water. However, its leaves retain a bright color in lower light settings or excessive irrigation. 

Aloe Cameronii does well in rock gardens, cactus garden, and succulent but has brittle leaves which can be easily broken hence should be planted accordingly. During drought days or sunny weather, its leaves turn to a colorful, and beautiful coppery red, but become bright apple-green when overwatered. In a succulent garden, this aloe makes an excellent specimen planting and provides a striking color, attracted to nectar-seeking birds. 

9.    Aloe Hereroensic

Referred to as a sand aloe, both its leaves and the flowers have unique features. The leaves are ornamented with fine lines, and flowers consist of orange-red tubular with a high, green, protruding center that appears like corn. The leaves are decorated with H-shaped white spots that are set in transverse bands on the lower surface. 

The sand aloe gets up to 2 feet high and does best in well-drained and alkaline soil. This plant looks good in Mediterranean gardens and rock gardens. In sunny border and decorative containers, this plant makes a drastic focal point. It is a disease-free and deer-resistant plant, with flower-producing nectar attractive to the birds and the bees. 

 10.  Snake Aloe

 Snake Aloe plant,  is one of the eye-catching aloes that gets a foot wide and have long stunning light skin leaves. The leaves have reddish-brown teeth on the edges. It takes a bit longer to mature, where others take four years, it takes 5 to 6 years to fully mature. 

 It is a perfect plant to grow in dry or semi-arid areas, and it makes a unique and focal point for anyone’s orchard. It is quickly grown in sandy and gravelly, well-drained soil in full or light shade. Snake aloe is one of the stress-free plants that can take care of itself as they are well adapted to arid environments.

Bottom Line

 You cannot grow aloe outside its recommended zones except when it is in a container. Growing aloe plants in a container outdoors will help in bringing them indoor when freeze threatens. It is also good to know that not all conditions can support the outdoor growing of aloe. This moisture-rich plant thrives well in warm region zones, while indoor can be the best in other areas. 

 Due to the harsh conditions outside, it is good to check on your plant regularly to ensure all the requirements. Aloe plants will tend to thrive better in good irrigation and proper observation to prevent them from pests. Some aloes are dangerous to some animals, and they should be protected from outdoor plants. 

Can You Cut Off a Piece of Snake Plant and Plant It?

You probably want more snake plants in your home because they are easy to grow and require little maintenance to thrive. In fact, a snake plant can survive on its own as long as you water it appropriately. Unlike other plants, you don’t have to go out and purchase new snake plants because it is relatively easy to propagate new plants from cuttings, leaves, and rhizomes.

So, can you cut off a piece of snake plant and plant it? The simple answer is “yes.” Propagating a snake plant from a cutting is relatively simple, and rooting the cutting in water is almost foolproof.  All you need to do is treat the cutoff part and root it in water or soil. Other than cuttings, you can also propagate a snake plant by division or from a rhizome. As long as you follow the correct procedure, you will have more snake plants in no time.

This blog post discusses everything you need to know about propagating snake plants, including how to propagate cuttings in soil and water. So, let us get started right away.

Why Do You Need to Propagate a Snake Plant?

There are many reasons why you would want to propagate a snake plant. First, you may be looking to reuse a damaged leaf or stem with sunburn marks. When exposed to direct sunlight, these plants tend to suffer sunburns. So, instead of cutting off the sunburn sections and throwing them away, you can turn them into new plants.

Instead of throwing away your damaged Snake Plant, consider propagating it to grow a new one.

Sometimes, you may want to propagate your snake plant because you have accidentally overwatered it, and now it is showing clear signs of root rot. If the root rot hasn’t spread too much, you can still save your plant. Unfortunately, many gardeners only notice the signs of root rot when it is too late.

You may also choose to cut off a section of your snake plant and propagate it because you just want to adjust the overall look of your existing plant a bit by removing some sections. You can even propagate prune leaves into new plants.

How Long Does It Take to Propagate a Snake Plant?

From our many years of experience, it usually takes between one and three months to propagate a snake plant. However, rooting your snake plant cutting in water might take some time. Some people choose to root their cutting in LECA over water to avoid rot on cuttings.

The cutting may also take a while to root in the soil. It may be almost the same time, but rooting in the soil might seem like a little longer because you can’t see anything happening.

You can always see the roots sprouting in water, especially if you are using a transparent container. Seeing the progress physically is motivating.

Propagating a Snake Plant takes somewhere between one and three months.

Propagating a snake plant from the division is pretty quick. All you have to do is cut off the baby plants from the mother plants at the rhizome and transfer them to new pots.

One thing you must keep in mind is that snake plants are generally slow growers. Therefore, you will be forced to wait for some time before the plant is mature enough to handle division.

You should also be wary of the time of the year you conduct propagation. Typically, propagation takes much longer in winter. The process is faster during spring or summer when the growing conditions are right. So, this is the best time to propagate your snake plant.

Different Ways of Propagating Snake Plant

Now that you understand why it is essential to propagate a snake plant and how long it takes, let us highlight the different ways of doing it right.

1. Propagating Snake Plants in Water

One of the easiest ways of propagating a snake plant is rooting the cutting in clean water. This is the best way to grow broken or bend parts into new plants. It is also an excellent way to turn the extra leaves into new plants instead of throwing them away.

To root your cuttings in the water, you will require a sharp pair of scissors or knife, water, a heavy glass/vase, and rooting hormone, which is optional.

Using the knife or scissors, carefully cut off the leaf you want to propagate. Ensure the cutting is done near the soil and is as clean and sharp as possible. You can dip the cutting into a rooting hormone if you like.

Now place the bottom of the leaf into a vase containing water. Ensure the leaf is covered halfway. If the leaf is too large, cut it into sections and root each section differently.

It is critical to keep the cut leaf in the same orientation it was when it was in the soil. Keep in mind that snake plant leaves are highly polar and will only develop roots if the edge of the leaf closest to the potting mix is put in the water.

If you interchange the orientation, the leaf won’t grow roots.  You can always go for a V-shape cutting for the best results.

2. Rooting Snake Plant Cuttings in LECA

Sometimes, rooting snake plant cuttings in water can be problematic. This is because snake plant cuttings are prone to rot when exposed to water for an extended period.

This is why many people choose to root the cuttings in LECA (Lightweight Expanded Clay Aggregate) or vermiculite and perlite instead of water.

LECA is an excellent medium to use for snake plants. It doesn’t promote rot, and you can easily monitor the progress of the cutting.

To root your cuttings in LECA, you will need an empty pot, a prepared mix of LECA, perlite, and vermiculite, and, obviously, a snake plant cutting.

Fill the pot with the prepared mix and position it near a window or light. Gently insert the cutting into the pot and make sure that it is in an upright position. Water regularly to keep the LECA moist but not wet.

You’ll need to wait for some time before seeing any signs of growth, but once the leaves appear, you’re good to go.

3. Propagating Snake Plant Cuttings in Soil

If you don’t want to propagate the cutting in water, you can do it in soil. The first thing you need to do is carefully cut off the section of a healthy leaf near the base of the plant.

Let the cutting dry and heal for one or two days, then plant it in a clean potting mix. Water it well and let the excess water drain completely. Don’t let the potting mix get too dry or wet because the cuttings can easily rot in soggy soil.

Check on your soil once every two weeks and only water when the topsoil is completely dry. Just like rooting in water, the cutting will take some time to root and grow into new plants. However, rooting in soil takes a little bit longer compared to rooting in water.

4. Propagating from Rhizome Division

If you are looking to propagate a snake plant easily, you can split the rhizomes and root them as new plants. Rhizomes are the underground parts of a snake plant that look like pieces of ginger or thick roots.

Carefully pull your plant out of the container and use a pair of sharp shears or serrated knife to cut the mass of roots and soil in half. Each half will have at least three rhizomes and should be healthy.

Once you are done with the separation, put each new plant in the soil and water it properly until the water drains out through the bottom of the container.

Keep in mind that with the rhizome division method, you can’t propagate the rhizomes in water because it isn’t necessary. You should only consider propagating a snake plant cutting in water when there are no roots yet.

5. Propagating Snake Plants Using Offsets

Another way of propagating snake plants is by using offsets. These parts of the mother plant grow separately from it and need to be cut off and placed into their own pot.

Offsets are easily identified because they have distinct root systems. To propagate them, you will need a sharp knife/scissors, potting mix, and an empty pot for transplanting.

Using the scissors or knife, gently cut off the offsets from the mother plant and separate them from the rhizome.

Place these offsets into an empty pot filled with the potting mix. Water and keep the plant in a warm and bright location away from direct sunlight.

It is essential to be careful while cutting off offsets as they are prone to rot once exposed to water or sunlight.

6. Seed Germination

You can also propagate snake plants from seed if you are patient and do everything right. Snake plants usually produce flowers during spring or summer. These flowers can be pollinated to produce seeds.

You can collect the seeds and try your luck germinating them into seedlings.

To germinate the seeds, fill a container with potting mix and lightly press down each seed into the soil. Cover the entire container with plastic wrap and place it in a warm spot away from direct sunlight.

Check the soil every couple of days to ensure it is moist but not wet. In a few months, you should start seeing the seedlings emerge from the soil.

Once they have grown into young plants, transfer them to larger pots filled with fresh potting mix and keep watering regularly until they are established enough to be moved outdoors.

What Are Some of the Common Snake Plant Propagation Problems?

Even though propagating snake plants is almost foolproof, some things may still not go according to plan.

One of the common problems you will most likely encounter is your cutting failing to root on time. It happens most of the time because not every piece of cutting is the same. Some cuttings might not root as well as others.

Sometimes, the cutting from a Snake Plant does not root on time.

In most cases, the solution to delayed rooting is just to give your cutting more time.  As long as your cutting isn’t showing signs of rotting and you keep the water fresh, roots will soon start to appear.

To speed up the healing process and prevent a wide range of other issues that may arise, consider adding ground cinnamon to the ends of your cutting before you start the propagation process.

Caring for a Snake Plant after Propagation

For post-propagation care, the most important thing you need to do is find the right lighting for your plant. In fact, this can be the only difference between a stagnant and growing snake plant.

Although snake plants are one of the few low-light tolerant succulents, it doesn’t mean that this is the ideal environment for them. These plants generally thrive in a relatively sunny environment and can even bloom if you are lucky.

After propagating your Snake Plant, place it in a sunny area for it to thrive or even bloom.

So, you need to find a good spot inside your house where you will position the propagated plant. Ensure the spot receives plenty of natural light but don’t expose your young plant to direct sunlight to avoid causing sunburns.

If you are propagating the cutting in soil, make sure the soil is well-draining and has plenty of organic nutrients. This will help your plant to root faster and stay healthy.

Summary

Now that you know the different ways to propagate a snake plant and how to take care of propagated plants, it is time to fill your home with new plants for free.

The most important thing to remember is that different propagation methods require different maintenance routines. For instance, if you use rhizome division or rooting a cutting, it is critical to use the right potting mix and a container with plenty of drainage holes to prevent root rot.

To keep your snake plants healthy for many years, you should consider repotting them every two to three years. This is also the best time to propagate them.