How Big Does a Golden Barrel Cactus Get?

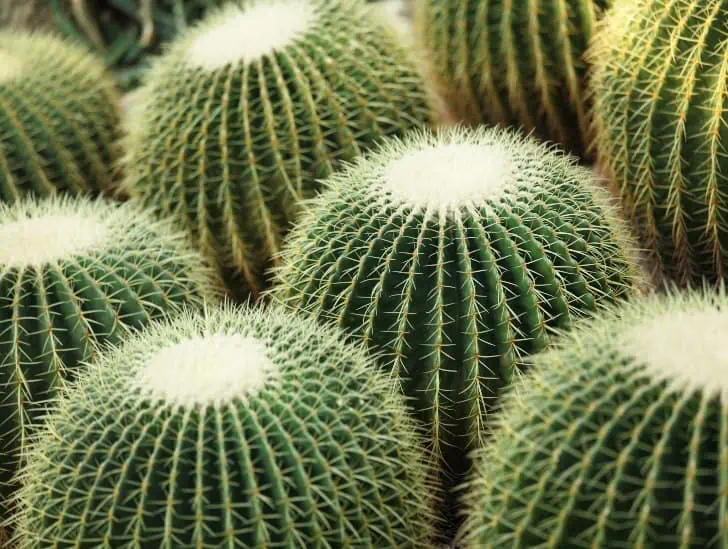
The Golden Barrel Cactus is a popular cactus species native to Mexico. It is commonly grown as a houseplant or outdoor decorative plant in warm climates. The Golden Barrel Cactus gets its name from its round, barrel-shaped body, reaching 3 feet in diameter. This cactus species is easily recognized by its yellow-gold spines covering the entire plant surface. Read on to learn more about the size, care, and uses of the Golden Barrel Cactus.

So, how big does the golden barrel cactus get? The golden barrel cactus is a relatively slow-growing succulent. In ideal conditions, it can grow up to 12 inches (30 cm) in height and width per year. However, it only grows 1-2 inches (2.5-5 cm) per year. It can take many years for a golden barrel cactus to reach its full size. The largest recorded golden barrel cactus was 6 feet (1.8 m) tall and 8 feet (2.4 m) wide.

Most golden barrel cacti will not get quite that large, however. If you are growing your cactus in a pot, it is unlikely to exceed 3-4 feet (90-120 cm) in height or width due to limited root space. Outdoors, golden barrel cacti can reach up to 6-8 feet (1.8-2.4 m) in height and width.

This article covers everything you need to know about the actual size of a golden barrel cactus, including its height, width, and how fast it grows.

We’ll also discuss critical factors that affect the size of a golden barrel cactus and how to care for one so that it reaches its full potential. Read on to learn more.

Golden Barrel Cactus Size

Golden barrel cactus is a generally slow-growing succulent. In ideal conditions, it can grow up to 12 inches (30 cm) in height and width per year. However, that is not always the case. The plant mostly grows only 1-2 inches (2.5-5 cm) per year. That means it can take many years for a golden barrel cactus to reach its full size.

The largest recorded golden barrel cactus was 6 feet (1.8 m) tall and 8 feet (2.4 m) wide. In most cases, the cactus won’t get quite that large.
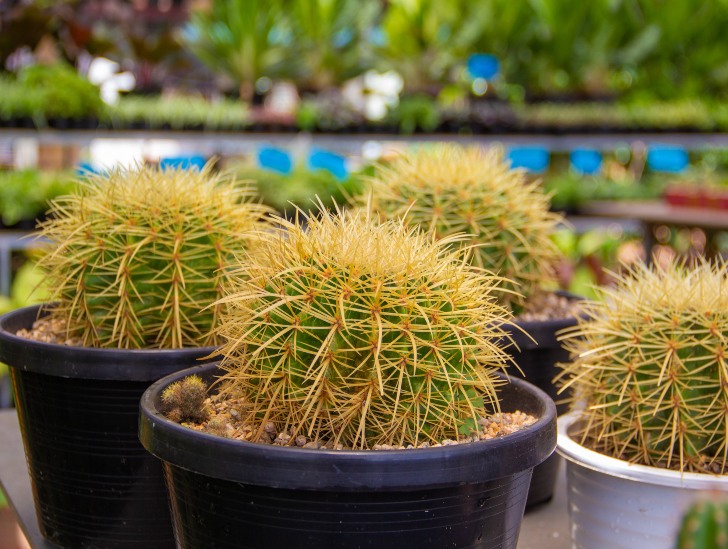
Golden barrel cactus in a black pot.
With proper care your golden barrel cactus will eventually reach its full potential.

If growing in a pot, it is unlikely to exceed 3-4 feet (90-120 cm) in height or width due to limited root space. Outdoors, the golden barrel cactus can reach up to 8 feet in height and width.

The most important thing you need to remember is that the golden barrel cactus grows slowly. Patience is critical when it comes to this plant.

Do not expect it to reach its full size overnight. With proper care, however, your golden barrel cactus will eventually reach its full potential.

What Factors Affect the Size of a Golden Barrel Cactus?

Several factors can affect the size of a golden barrel cactus. These include the following:

1. Soil Type

The type of soil you use can affect the growth rate of your golden barrel cactus. Cacti prefer sandy, well-draining soils. If soil is too dense or clay-like, it can impede the plant’s growth.

Likewise, if your soil does not drain well, this can also lead to stunted growth. For best results, use a cactus or succulent potting mix.
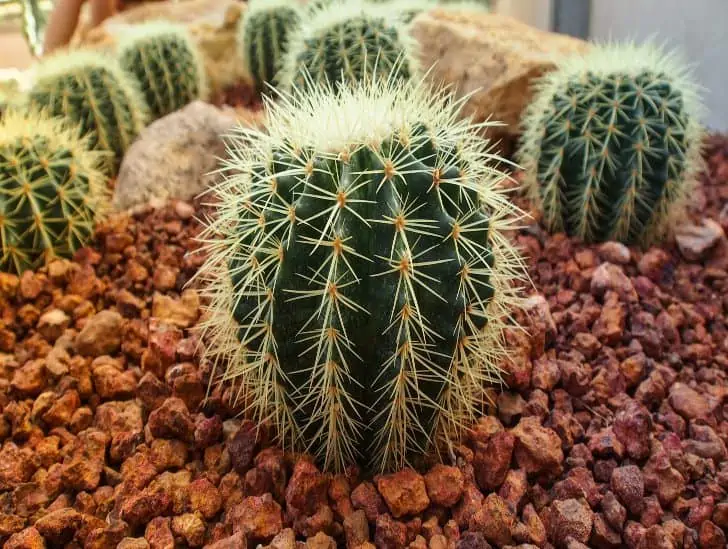
Golden barrel cactus.
The type of soil you use can affect the growth rate of your golden barrel cactus.

Ensure that the potting mix is well-ventilated to allow the roots to breathe. A good way to achieve this is to add some perlite, pumice, or grit to the potting mix. This will help improve drainage while providing the roots with enough moisture and nutrients.

2. Temperature

The temperature can also affect the size of your golden barrel cactus. Cacti are native to warm, arid climates. As such, they do not tolerate cold temperatures well. If the temperature dips below 50°F (10°C), this can damage the plant and lead to stunted growth.

It is best to grow your golden barrel cactus indoors in particularly cold regions. Doing this will protect it from the cold weather and help it to thrive.
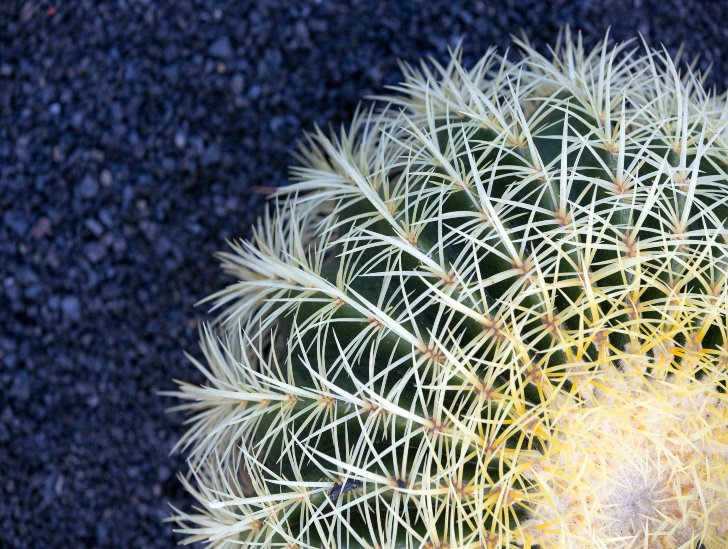
A topview of a golden barrel cactus.
Cacti are native to warm, arid climates. As such, they do not tolerate cold temperatures well.

If you live in a hot climate, ensure to provide your cactus with some shade during the hottest hours of the day. That will prevent the plant from getting too much sun and becoming stressed.

3. Pot Size

The size of the pot you use can also affect the size of your golden barrel cactus. If the pot is too small, it will restrict the plant’s root growth, leading to stunted overall growth.

If the pot is too large, the roots will have too much room to spread out. This can lead to slower growth as the roots will not be as dense. For best results, use a pot that is only slightly larger than the root ball of your plant.

4. Watering Schedule

How often you water your golden barrel cactus can also affect its size. If you water too often, the roots will become waterlogged and can begin to rot. Too much water will lead to stunted growth or even the death of your cactus.

On the other hand, if you fail to water them often enough, the plant will begin to dehydrate. Lack of water can also lead to stunted growth as the plant will not have enough moisture to support its growth.

A huge golden barrel cactus,
You may need to water less often in cooler climates or during the winter months.

Water your golden barrel cactus every 1-2 weeks, allowing the soil to dry out completely between waterings. If you live in a hot, arid climate, you may need to water more often. You may need to water less often in cooler climates or during the winter months.

5. Light Conditions

The light your golden barrel cactus receives can also affect its size. If the plant does not get enough light, it will stretch out and become leggy as it tries to reach for the light. Eventually, this may lead to stunted growth.

On the other hand, if the plant gets too much light, it can begin to scorch and turn brown. Excessive light will also lead to stunted growth as the plant cannot photosynthesize properly.

For best results, place your golden barrel cactus in an area that receives full sun to partial shade. If you live in a hot climate, provide your cactus with some afternoon shade to prevent it from getting too much direct sunlight.

6. Fertilizing Schedule

How often you fertilize your golden barrel cactus can also affect its size. If you fertilize too often, the plant can become overfed and begin to grow too quickly. Too much fertilizer can lead to weak, leggy growth more susceptible to damage.

If you do not use fertilizer often enough, the plant will not have the nutrients it needs to grow properly.

For best results, fertilize your golden barrel cactus every 2-4 weeks during the growing season. Use a balanced cactus fertilizer diluted to half-strength.

7. Humidity

Lastly, the humidity levels in your home can also affect the size of your golden barrel cactus. Cacti are native to dry, arid environments and do not tolerate high humidity well. If the humidity level in your home is too high, it can lead to fungal growth or root rot.

High humidity can damage the plant and lead to stunted growth. If you live in a humid climate, it is best to grow your golden barrel cactus in an area with good air circulation to prevent these problems.

General Golden Barrel Cactus Growth Rate

Golden Barrels are slow-growing cacti; they typically only add about 1 inch of height per year. However, they can grow a bit faster if they are given extra water and fertilizer.

Be patient if you want your Golden Barrel to reach its full potential! It will take several years to reach its mature height and width.

Golden Barrel Cactus Care

The Golden Barrel Cactus is a relatively low-maintenance plant that does not require much care. It should be planted in well-draining soil and placed in an area that receives full sun.

Water the plant deeply but infrequently, allowing the soil to dry out completely between watering sessions.

During the winter months, water even less frequently to prevent root rot. Apply fertilizer once per month during the spring and summer growing seasons.

If you live in a hot, arid climate, it is best to provide some afternoon shade to prevent the plant from getting too much direct sunlight.

A gardener repotting the golden barrel cactus.
The Golden Barrel Cactus is a relatively low-maintenance plant that does not require much care.

If you live in a humid climate, it is best to grow your Golden Barrel Cactus in an area with good air circulation to prevent problems with fungal growth or root rot.

With proper care, your Golden Barrel Cactus will thrive and provide you with years of enjoyment!

Golden Barrel Cactus Uses

The Golden Barrel Cactus makes an excellent houseplant or outdoor decorative plant. Due to its dense growth habit, it can also be used as a living fence or hedge.

This cactus species is also popular among gardeners who enjoy collecting and growing different cacti and succulents.

Summary

The Golden Barrel Cactus is a beautiful and popular plant that can grow quite large. However, its slow growth rate means it will take many years to reach its full-size potential.

Gardeners who are patient enough to wait will be rewarded with a stunning addition to their landscape!

We hope you enjoyed the Golden Barrel Cactus growth rate and care article. So, feel free to add a Golden Barrel Cactus to your collection today! Thanks for reading!

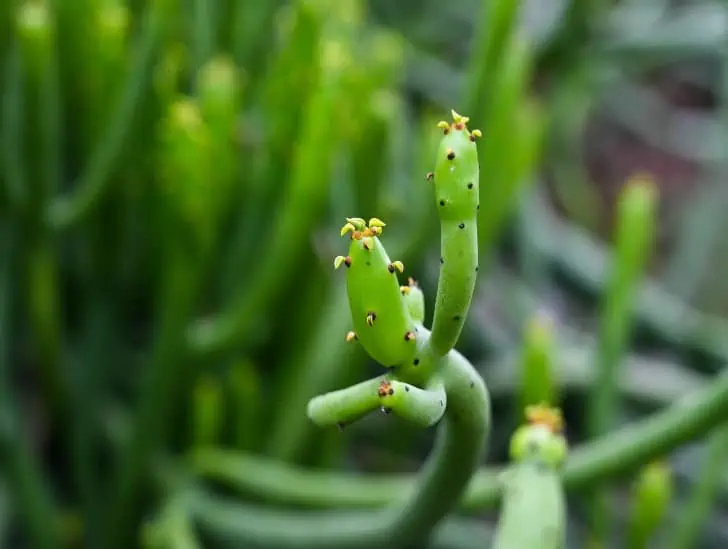
How to Propagate Pencil Cactus (Firestick Plant)

The pencil cactus (Euphorbia tirucalli) is a succulent native to Africa and parts of India. The plant gets its name from its long, thin, pencil-like stems. Pencil cactus is easy to grow and care for, making it a popular plant for indoor and outdoor gardens. If you’re looking to add a pencil cactus to your collection, propagation is a great way to do it. Fortunately, we are here to guide you through the process of propagating your very own pencil cactus.

So, how do you propagate pencil cactus? Pencil cactus can be propagated either through stem cuttings or seed germination. Stem cuttings are the most common propagation method, as they are easy to do and have a high success rate. To take a stem cutting, use a sharp knife or pair of scissors to cut a 2-3″ section from the end of a healthy stem. Remove any leaves from the cutting, then allow it to callus over for a few days before potting it in well-draining cactus soil. Water the cutting lightly and place it in a bright, sunny spot. Keep an eye on the cutting and water it when the soil begins to dry. In 4-6 weeks, you should see new growth appearing at the base of the cutting. If you’re more ambitious, you can propagate pencil cactus from seed.

This blog post discusses everything you need to know about propagating a pencil cactus. Read on to learn more.

Why Is Pencil Cactus Propagation Important?

Before we dive into the details of how to propagate pencil cactus, let’s talk about why propagation is essential.

The pencil cactus is a slow-growing plant that can take years to reach its full size. Propagation allows you to create new plants without waiting for the parent plant to produce offsets (or baby plants).

A floweing pencil cactus.
The pencil cactus is a slow-growing plant that can take years to reach its full size.

Not only does propagation save you time, but it’s also a great way to preserve the health of your existing plants. You’re not damaging the parent plant when you take cuttings from a pencil cactus. Many gardeners find that their plants benefit from removing some of their stems.

Different Ways to Propagate a Pencil Cactus

Now that you know a little about why propagation is essential, let’s talk about the different ways you can propagate pencil cactus.

As mentioned earlier, stem cuttings and seed germination are the two most common propagation methods. We’ll discuss both of these methods in more detail below.

Propagating Pencil Cactus from Stem Cuttings

Propagating pencil cactus from stem cuttings is the most common method of propagation. It’s also the most straightforward method, as there is no need to worry about germinating seeds.

To take a stem cutting, use a sharp knife or pair of scissors to cut a 2-3” section from the end of a healthy stem. Remove any leaves from the cutting, then allow it to callus over for a few days before potting it in well-draining cactus soil.

Water the cutting lightly and place it in a bright, sunny spot. Keep an eye on the cutting and water it when the soil begins to dry. In 4-6 weeks, you should see new growth appearing at the base of the cutting.

The stem cutting you obtain can be rooted in water or soil. Each method has its advantages and disadvantages, which we will discuss below.

Rooting Pencil Cactus Stem Cuttings in Water

Rooting pencil cactus stem cuttings in water is a popular method among gardeners, as it is effortless. The main advantage of this method is that it allows you to see when the roots are growing, as they will be visible in the water.

The main disadvantage of this method is that it can be tricky to transition the rooted cutting into the soil. This is because the roots that develop in water are very delicate and can easily be damaged.

If you decide to root your stem cutting in water, we recommend using a clear glass or jar. This will allow you to keep an eye on the roots and ensure they are healthy.

To root your stem cutting in water, fill your glass or jar with room-temperature water and place the cutting inside. Make sure that the bottom inch or so of the stem is submerged.

Place the glass or jar in a bright, sunny spot and check on it every few days to ensure the water level hasn’t dropped too low. When it does, add more water to keep the stem submerged.

It can take anywhere from 2-8 weeks for roots to develop. Once they do, you can transplant the cutting into the soil.

Rooting Pencil Cactus Stem Cuttings in Soil

Rooting pencil cactus stem cuttings in the soil is a bit more complex than rooting them in water, but it’s doable.

The main advantage of this method is that there is no need to transition the cutting into soil, as it will already be rooted in soil when you take it.

However, the main disadvantage of rooting your pencil cactus cutting in the soil is that it can be difficult to tell when the roots are growing, as they will be hidden beneath the ground.

A person hoolding a pencil cactus in a pot.
The main advantage of this method is that there is no need to transition the cutting into soil.

We recommend using a pot at least 6″ wide with drainage holes if you decide to root your stem cutting in soil. This will give the roots plenty of room to grow.

Fill the pot with well-draining cactus soil, then make a small hole in the center of the soil. Place the stem cutting in the hole, so the bottom inch or so is buried.

Water the soil lightly, then place the pot in a bright, sunny spot. Keep an eye on the soil and water it when it begins to dry. In 4-6 weeks, you should see new growth appearing at the base of the cutting.

Propagating Pencil Cactus from Seed

You can try propagating pencil cactus from seed if you’re more adventurous. This method’s main advantage is gratifying, as you watch the plant grow from a tiny seed into a mature cactus.

But remember that propagating pencil cactus from seed takes time and patience. It can also be challenging to get the seeds to germinate, so don’t get discouraged if it doesn’t happen on the first try.

Seeds on hand.
Propagating pencil cactus from seed takes time and patience.

To propagate pencil cactus from seed, you will need to obtain a fresh batch of seeds. You can purchase the seeds online or at a local nursery. Once you have your seeds, sow them in a well-draining cactus soil mix.

Place the pot in a bright, sunny spot and water the soil lightly. Keep an eye on the soil and water it when it begins to dry.

It can take anywhere from 2-8 weeks for the seeds to germinate. Once they do, you can transplant the seedlings into individual pots.

Propagating Pencil Cactus by Division

Besides stem cuttings and seeds, division is another popular method for propagating pencil cactus. This is an excellent option if you already have a mature pencil cactus that you want to propagate.

The main advantage of this method is that it’s easy to accomplish. The main disadvantage is that it can be challenging to find a mature pencil cactus that is big enough to divide.

If you do find a mature pencil cactus that you want to divide, the first thing you need to do is carefully remove it from its pot. Once it’s out of the pot, you can see its root system.

Close up image of a pencil cactus.
This is an excellent option if you already have a mature pencil cactus that you want to propagate.

Using a sharp knife, carefully divide the root ball into two or three sections. Make sure that each section has a good amount of roots attached to it.

Once you have divided the root ball, you can replant the sections in individual pots. Water the soil lightly and place the jars in a bright, sunny spot.

Keep an eye on the soil and water it when it begins to dry. In 4-6 weeks, you should see new growth appearing at the base of the plant.

Caring for a Newly Propagated Pencil Cactus

Once you have successfully propagated your pencil cactus, it’s time to start caring for it. The good news is that these plants are easy to care for and require little attention.

The most important thing to remember when caring for a newly propagated pencil cactus is not to overwater it. These plants are highly susceptible to root rot, so it’s essential to ensure the soil is always on the dry side.

Water the soil when it begins to dry out, then allow the water to drain completely before putting the pot back in its place.

Another critical thing to remember is to protect the plant from frost. These plants are native to warm, arid climates and cannot tolerate cold temperatures. Keeping your pencil cactus indoors is best if you live in an area with frosty winters.

A pencil cactus exposed to sunlight.
Close up image of a pencil cactus. This is an excellent option if you already have a mature pencil cactus that you want to propagate.

Place the pot in a bright, sunny spot and keep an eye on the soil. Water it when it begins to dry out and fertilize it once a month during the growing season. Your newly propagated pencil cactus should thrive and grow into a healthy plant with proper care.

Summary

Pencil cacti are beautiful, easy-to-care-for plants that make great houseplants or additions to any garden. And the best part about them is that they are straightforward to propagate!

With just a few simple tools and materials, you can have a new pencil cactus plant in no time. Thanks for reading, and happy gardening!
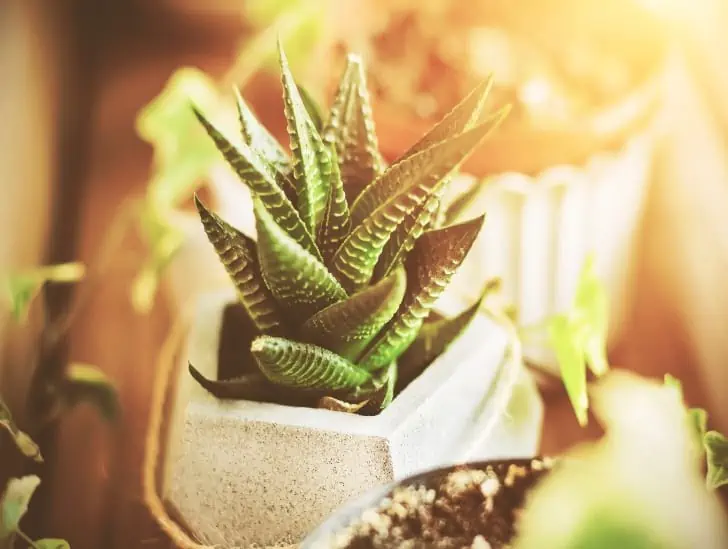
9 Best Types of Euphorbia to Grow

If you’re looking for a unique and interesting plant to add to your garden, look no further than the Euphorbia! Also known as spurge, this diverse group of plants comes in all shapes and sizes and can add a touch of whimsy to any garden. They are not only beautiful but also easy to care for.
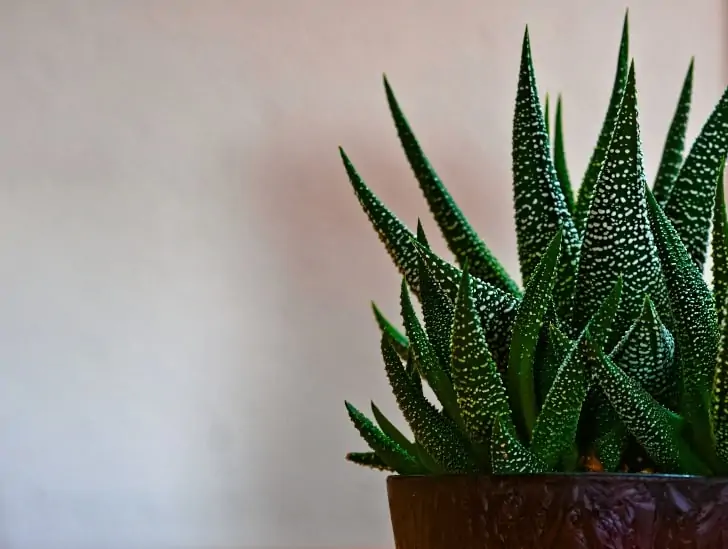
So, what are the different types of euphorbias to grow in your garden? Some of the most common types of euphorbias include euphorbia amygdaloides, or wood spurge; euphorbia characias, or Mediterranean spurge; euphorbia dulcis, or sweet splurge, and euphorbia myrsinites, or donkey tail spurge. Others include more unusual varieties such as Euphorbia x martini and Euphorbia lathyris.

Each plant has unique features that make it stand out from the rest. For example, wood spurge is a low-growing plant that is perfect for covering the ground in shady areas of the garden. On the other hand, Mediterranean spurge is a taller plant that produces beautiful yellow flowers.

This blog post discusses common types of euphorbias to grow in your garden. Read on to find out everything you need to know.

What Makes Euphorbia a Great Plant for Your Garden

Contrary to popular belief that all succulents are cacti, not all cacti are succulents. In fact, there is only one family of plants classified as succulent and cactus, the Euphorbiaceae Family, which contains over 7,500 members, including the genus Euphorbia.

The vast majority of euphorbias are not cacti, but they are often confused as such because of their similarities. Both plants are adapted to arid climates and have thickened, fleshy leaves or stem that store water. They both produce flowers, but Euphorbias produce a much wider variety of flower shapes, colors, and sizes.

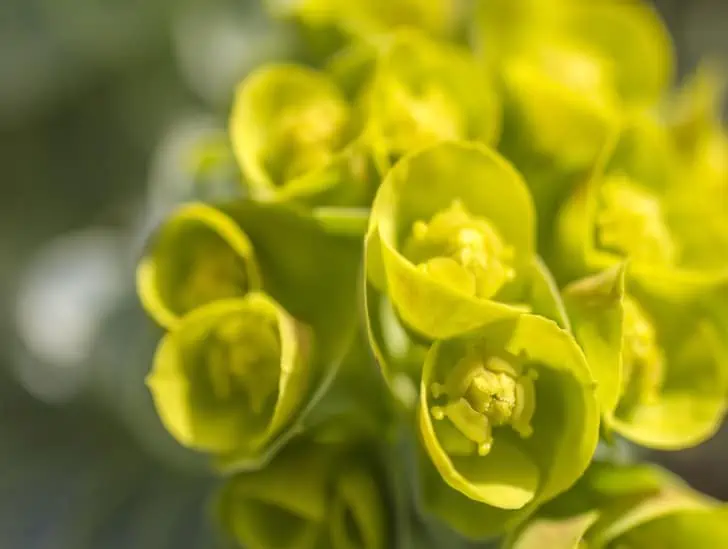
A blooming Euphorbia.
There is only one family of plants classified as succulent and cactus, the Euphorbiaceae Family

Euphorbias are native to every continent except Antarctica and can be found in various habitats, from deserts to rainforests. There are both annual and perennial varieties and succulent and non-succulent types. In other words, there is a type of Euphorbia for every garden!

Here are some reasons why Euphorbia makes an excellent plant for your garden. They are:

  • Easy to care for and require very little maintenance.
  • Drought-tolerant and can thrive in areas with little water.
  • Heat-tolerant and can withstand high temperatures.
  • Adaptable and can grow in a wide variety of climates and habitats.
  • Available in a wide range of colors, shapes, and sizes.

What Are the Different Types of Euphorbias to Grow in Your Garden?

Now that you know a little bit more about Euphorbia and why it makes an excellent plant for your garden, let’s look at some of the different types you can grow.

1. Euphorbia amygdaloides

Euphorbia amygdaloides, also known as wood spurge, is a low-growing succulent that is perfect for covering the ground in shady areas of the garden. It has dark green leaves with purple veins and small, yellow flowers that bloom in the spring.

This Euphorbia is native to Europe and Asia and can grow up to 18 inches tall. The plant is easy to care for and requires very little maintenance. Typically, it thrives in moist, well-drained soils and does not require much water.

A close up image of Euphorbia amygdaloides.
It has dark green leaves with purple veins and small, yellow flowers that bloom in the spring.

It is best for USDA hardiness zones 4-8 and relatively rich tones. The Euphorbia amygdaloides will self-seed happily in the right conditions making it an excellent ground cover for those difficult-to-fill shady spots in your garden.

It looks excellent when planted with other shade-loving plants such as hostas, ferns, and impatiens.

2. Euphorbia characias

Euphorbia characias, also known as Mediterranean spurge, is a tall, evergreen succulent that produces beautiful yellow flowers. It is native to Europe and Asia and typically grows up to 3 feet tall.

This Euphorbia is easy to care for and requires very little maintenance. It thrives in well-drained soils and does not require much water. It is best for USDA hardiness zones 8-10.

The Euphorbia characias is an excellent choice for gardens that receive much sun. It looks gorgeous when planted in mass as a border or accent plant. It also makes a perfect cut flower for bouquets and arrangements.

3. Euphorbia x martini

This hybrid euphorbia has characteristic deep green leaves with creamy yellow margins. It’s a compact plant that grows about 12 inches tall and wide, making it perfect for small gardens or planting in containers.

Euphorbia x martini is also relatively low-maintenance, requiring little more than occasional watering and fertilizing. It is best for USDA hardiness zones 9-11 and an excellent choice for gardeners looking for a splash of color.

It looks beautiful when planted in mass as an accent plant or border. It also makes a great cut flower for bouquets and arrangements.

Euphorbia x martini is native to Europe and Asia and typically blooms in the spring. Its blooms are small and yellow and last for several weeks.

4. Euphorbia Lactea

The Euphorbia lactea is a succulent plant that originates from India. It has thick, fleshy leaves arranged in a rosette shape. The leaves are shades of green, with some varieties having white or cream-colored stripes running through them.

The Euphorbia lactea grows best in full sun to partial shade and well-drained soil. It is tolerant of drought and heat, making it an ideal choice for gardens in hot, dry climates.

This type of Euphorbia typically blooms in the spring or summer. Its flowers are small and yellow and last for several weeks.

The Euphorbia lactea is an excellent choice for gardeners looking for a succulent that is easy to care for and provides beautiful color and interest to the garden.

5. Euphorbia myrsinites

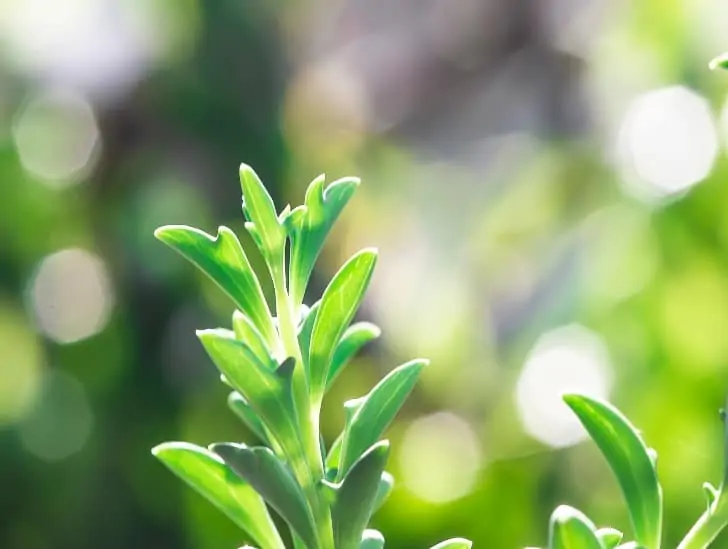
Euphorbia myrsinites, also known as donkey tail spurge or myrtle spurge, is a low-growing succulent that produces long, cascading stems covered in blue-green leaves. It is native to Europe and Asia and typically grows up to 12 inches tall.

This Euphorbia is easy to care for and requires very little maintenance. It thrives in well-drained soils and does not require much water. It is best for USDA hardiness zones 4-8.

A close up image of euphorbia myrsinites.
Euphorbia myrsinites, also known as donkey tail spurge or myrtle spurge.

The Euphorbia myrsinites is an excellent choice for gardens that receive enough sunlight. It looks stunning when planted in mass as a border or accent plant. It also makes a great cut flower for bouquets and arrangements.

Euphorbia myrsinites is also known to be deer resistant, making it a good choice for gardeners who live in areas where deer are a problem.

6. Euphorbia Milii

The Euphorbia milii, also known as the crown of thorns or Christ plant, is a shrub that originates from Madagascar. It gets its name from the sharp thorns that line its stems. The Euphorbia milii has small, oval-shaped leaves that are deep green.

The flowers are small and yellow and grow in clusters at the tips of the stems. The Euphorbia milii grows best in full sun to partial shade and well-drained soil. It is tolerant of drought and heat, making it an ideal choice for gardens in hot, dry climates.

7. Euphorbia cyparissias

Euphorbia cyparissias, also known as cypress spurge, is a low-growing succulent that produces long, cascading stems covered in blue-green leaves. It is native to Europe and Asia and typically grows up to 12 inches tall.

This type of Euphorbia is easy to care for and requires very little maintenance. It thrives in well-drained soils and does not require much water. It is best for USDA hardiness zones 4-8.

A close up image of euphorbia cyparissias.
It makes a great cut flower for bouquets and arrangements.

The Euphorbia cyparissias is an excellent choice for gardens that receive much sun. It looks gorgeous when planted in mass as a border or accent plant. It also makes a great cut flower for bouquets and arrangements.

Euphorbia cyparissias is also known to be deer resistant, making it a good choice for gardeners who live in areas where deer are a problem.

8. Euphorbia Marginata

One of the most popular types of euphorbias is the Euphorbia marginata, also known as snow on the mountain. This perennial plant is native to the mountainous regions of Europe, Asia, and North America.

It’s easily recognizable by its white margins and small, round leaves. The Euphorbia marginata is a low-maintenance plant that’s perfect for beginner gardeners. It thrives in well-drained soils and prefers full sun to partial shade.

The Euphorbia marginata is an excellent choice for gardens that receive adequate sun. It looks lovely when planted in mass as a border or accent plant. It also makes a great cut flower for bouquets and arrangements.

9. Euphorbia Tirucalli

The Euphorbia tirucalli, also known as the pencil cactus or milk bush, is a succulent that originates from Africa. It gets its name from its thin, pencil-like stems that can grow up to 20 feet long. The Euphorbia tirucalli has small, oval-shaped leaves that are deep green.

A flowering pencil cactus.
It is tolerant of drought and heat, making it an ideal choice for gardens in hot, dry climates.

The flowers are small and yellow and grow in clusters at the tips of the stems. The Euphorbia tirucalli grows best in full sun to partial shade and well-drained soil. It is tolerant of drought and heat, making it an ideal choice for gardens in hot, dry climates.

Summary

As you can see, there are many different types of euphorbias to choose from. Whether you’re looking for a low-maintenance plant or something that will add height and interest to your garden, there’s sure to be a type of Euphorbia that’s right for you. So why not add one (or more!) of these unique plants to your garden today?

How Much Direct Sunlight Does An Air Plant Need?

A air plant exposed to sunlight.

Air plants, also called tillandsia, prefer a bright but indirect, filtered light. They are a part of the Bromeliaceae or Bromeliad species and have been labeled Epiphytes, as they do not need soil to grow. They thrive well in warmer subtropical climates, which gives you an idea of the best sunlight conditions.

 A little direct light may be beneficial and bring out more color in your plants. Too much sunlight will deplete the moisture in your plants and make them burn and eventually die if they are left in the sun for too long. A great deal of natural light encourages flowering. If kept in low light conditions, they may survive, but they will not grow very fast or flower.

Key Factors That Influence How Much Light Your Air Plant Requires

Three primary factors affect the amount of light your air plant can handle.

Species

● Xeric species are desert air plants that can resist much more sunlight. They generally have short silver hairs covering their leaves, protecting them against direct sunlight. Xeric species are the ideal option if you prefer a place that receives direct sun.

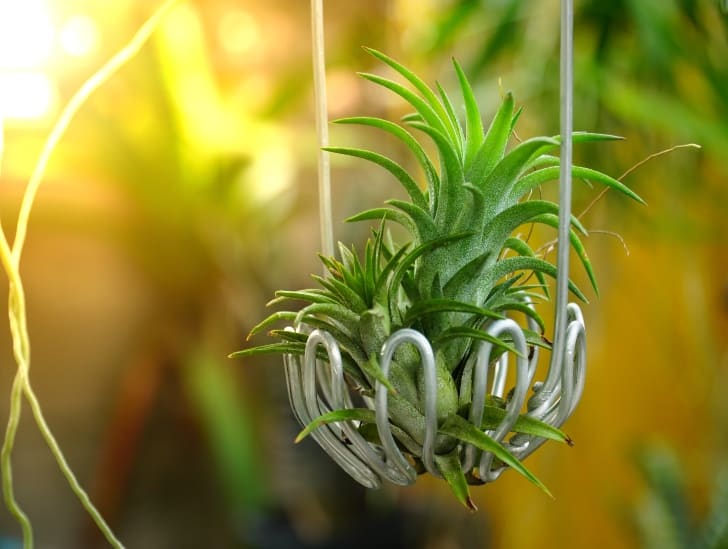
Airplant hanging.
They grow better under filtered light.

● Mesic forest air plants, however, receive only the sunlight that has been filtered through a tropical canopy. As a result, mesic-air plants tend to have smooth, broad leaves that trap as much sunlight as possible. As a result, they grow better under filtered light.

Humidity

Humidity in your environment may also dictate how much natural light air plants can manage. If your air plants live in a damper environment, they will be able to withstand a little more sunlight since they will not dry out so quickly.

When temperatures are warmer and conditions drier, your air plants are more prone to sunburn. However, if temperatures or moderate humidity are high and your air plants stay well-watered, they will be far more resistant to direct sunlight.

If you put your air plant where it will receive a lot of light, you should plan for misting more frequently – twice a week or even a day. A sunny bathroom is an excellent choice for an air plant because the humidity of your shower will take care of most plant misting for you.

Season

When determining how much light your air plant can absorb, keep seasonal changes in mind. Beware of direct sunlight and intense summer sun, magnified by windows, terrarium glass, etc. Move your air plant terrarium to a different window or farther from a light source in the summertime months.

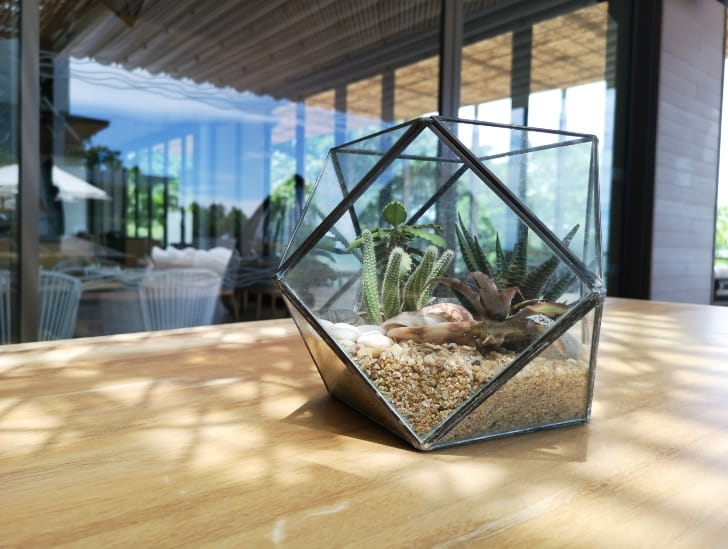
A glass hexagonal terrarium.
Move your air plant terrarium to a different window or farther from a light source in the summertime months.

In the growing season (April to October), plants in the air thrive under sunlight but can be burned if exposed to strong direct sunlight. However, they are happy under more direct sunlight for the rest of the year.

Outdoor Sunlight Requirements

Keep your plants away from direct sunlight. Remember, in nature, many species of air plants like to grow up in the sheltered canopy and shaded trees. However, they will do their best if you can place them in a bright place away from the sun’s rays.

Please make sure they are in an area that the sun will not directly strike for more than an hour a day or where they are entirely shaded from the direct sunlight. Beneath a tree or on your porch or Lanai should work just fine.

Air plant on outdoor.
They will do their best if you can place them in a bright place away from the sun’s rays.

Some Tillandsia may take more sun than others according to the species of the plant and its environment. If your plant has more slender, wispier leaves, it probably won’t do too well in full sun. Thicker and fuller leaves may better retain moisture so that this kind of air plant may better tolerate some direct sunlight for parts of the day.

If you live in a state of the south or desert areas where the sun is extreme, you need to be very careful with the exposure of your air plants to direct sunlight. Be especially careful in the regions that lack moisture, like the desert, because your plants will damage and wither from direct sunlight even faster.

Tillandsias love spending the summer outside, but make sure you put them in place with filtered sunlight. Direct sunlight in the hot summer months can “fry” them. And be sure to bring the plants indoors before the first autumn frost.

Indoor Light Requirements

Air plants are small in size, making them perfect options to decorate small spaces and apartments. If you keep them inside, we recommend keeping them next to the windows. However, windows must be shaded, either from a tree or any other type of protection against the direct sun.

Filtered light, or perhaps only the mild morning sun, is perfect for your indoor air plants because they are inclined to get a little “fried” in direct sunlight. Pay particular attention when planting in a terrarium, as light amplification may burn your plants.

As air plants benefit from indirect sunlight, their ideal location is to receive many hours of soft morning light and bright light throughout the day. A window facing eastward is acceptable. If you place them at the south or west window, be sure to maintain a certain distance to avoid direct exposure to the sun for their optimal growth. For example, putting one to three feet from a window facing east or west or one or two feet from an artificial light source.

A Airplant in glass terrarium.
Windows must be shaded, either from a tree or any other type of protection against the direct sun.

Rooms with windows facing north also work well, as long as the plant is located near the window, and the window is not blocked by trees or a complex of neighboring apartments. Western daylight tends to arrive late in the day and can be very hot and intense. If you keep them appropriately watered, they can tolerate warm, more direct sunlight and more prolonged exposure. Avoid poorly illuminated areas.

Exceptions

Air plants have silvery or whitish reflections, some of which are more visible on the underside of the leaf. The radiance is very visible; on others, not that much. The silver luster or fuzz is known as trichomes.

The silver appearance of any Tillandsia is due to the high density of trichomes, which means that it is adaptable to dry conditions and can reflect sunlight. Conversely, plants that look greener (mesic tillandsias) have fewer trichomes, are adapted to shade, and require more frequent watering.

The air plants of the silver-leaf variety can withstand more direct sunlight. These air plants usually have thicker and fuller leaves. Some Tillandsia xeric species like Xerographica can survive well in direct sunlight for short periods due to trichomes.

Trichomes offer a flurried look at an air plant’s surface, making it absorb nutrients and water more effectively. It also makes it possible for the air plant to manage direct sunlight better. Another variety that is also capable of withstanding periods of full sun is the Orthophytum. They take full sunshine and do not require a lot of water.

The trichomes serve as sunscreens protecting the leaves from the sun’s rays. More trichomes mean that the plant will be able to withstand more sun. So give the silver-colored plants as much light as you can.

It is important to remember that they will not tolerate the full summer sun, but the winter sun is fine. Also, remember that you may need to water more frequently when exposed to direct sunlight.

Artificial Light for Air Plants

Although air plants can withstand short periods of darkness, they require good lighting to produce their best. Placing your plant in an office or basement where it will get no natural sunlight is possible. Nevertheless, there are some specific rules to follow to ensure the success of your air plant.

Grow lights can provide extra light to air plants – or as the sole light source. Fluorescent or full-spectrum LEDs are the perfect artificial light for air plants, specialized for growing plants.

Standard filament lamps do not emit the quality of light required for photosynthesis.

Position your Tillandsia not more than 3 feet from the light source. If artificial light is their primary source of light, plan to keep it on for approximately 12 hours per day to provide adequate light. You can use an automatic timer to have them receive the proper amount.

Signs of Excessive Sunlight

Signs of sunburn include:

  • Brown spots,
  • Dried patches occur inside the growth.
  • The unhealthy splotchy appearance of the outer leaves 
Dying airplant
Air plants do not grow well in full sunlight.

Once you notice these signs, remove the plant right away from its current location. Next, carefully pull out the outer leaves that are completely damaged. If they do not detach easily, use a pair of scissors to cut the damaged areas. Finally, give the plant a good soak before finding it a new place, better off away from the sun.

Bottom Line

Air plants do not grow well in full sunlight, but they require a few hours of bright and indirect sunlight per day. The quantity of the sun also depends on the type of air plant and the climatic condition. In addition, you can use artificial lamps to grow them. If you keep them appropriately watered, they may take more direct sun for a more extended time.

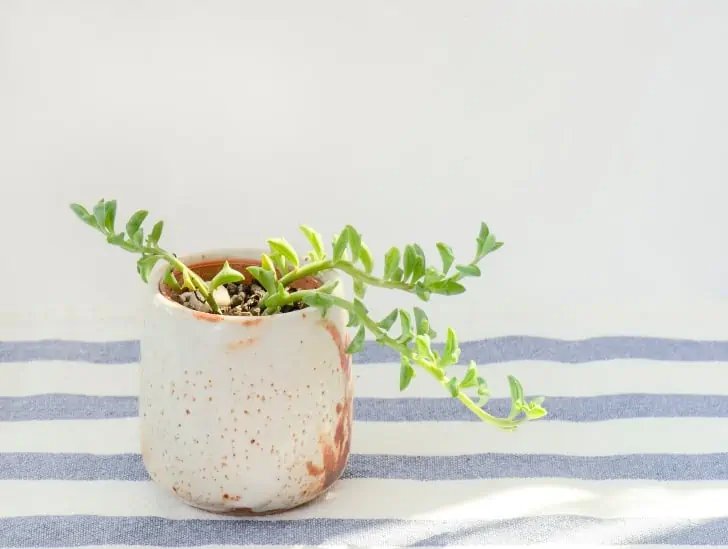
String of Dolphins Plant – Does It Require Sunlight

A string of dolphin on the shade.

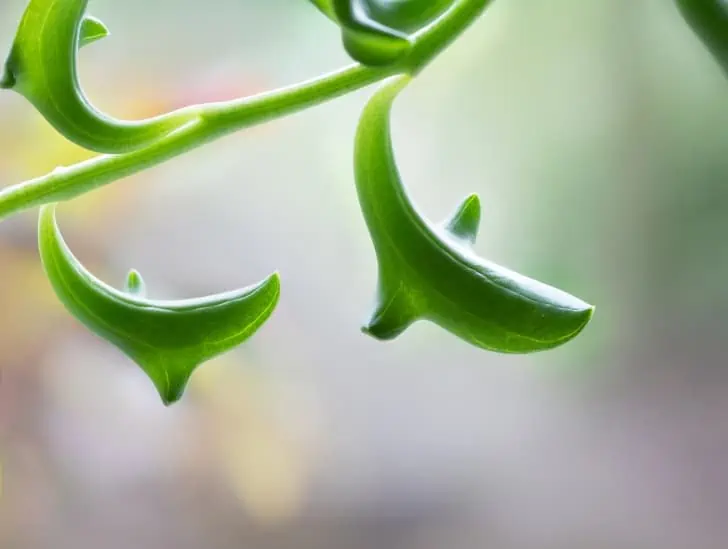
The String of dolphins are succulents with dolphin-shaped leaves and long hanging tendrils. While they can bloom, the delicate blooms are relatively inconspicuous, and these plants are grown for their attractive foliage rather than their flowers. 

The String of Dolphins is not heat-loving succulent, so don’t give them direct sunlight when it is getting too hot. If you want to cultivate them outside, put them in a shaded place where they can access indirect or filtered sunlight throughout the day.

Although it can easily get sunburned in direct sun when grown outdoors, when grown as a houseplant, a string of dolphins does best when it receives at least six hours of sunlight a day. Therefore, place your String of Dolphins outdoors in the shade or indoors near a sunny window to strike the right balance.

Dolphin Plants need sunlight, but they can tolerate slightly less light than some non-green succulent varieties, thanks to their leaf windows. Therefore, you can supplement with grow lights to get an adequate amount of sun exposure for your StringString of dolphins.

Artificial sources come in handy during low-light periods like winter. However, shady locations will increase the risk of root decay because of a lack of sufficient light. In addition, the amount of light the plant gets will affect the plant’s health. 

The Leaf Windows in String of Dolphins

Dolphin Plants need sunlight, but they can tolerate slightly less light than some non-green succulent varieties, thanks to their leaf windows. A Leaf window is a leaf structure that consists of a translucent patch where light enters the interior surfaces of the leaf. 

A string of dolphin.
Reduces exposure of leaf surface area and prevents drying because of intense heat. 

The translucent windows increase the absorption of sunlight. In addition, you can find them at the leaf tips, and they allow light to be captured and used even when the plant is almost entirely below the soil surface; this reduces exposure of leaf surface area and prevents drying because of intense heat. 

Indoor Light Requirements

Lots of sunshine encourages fast growth and healthy, green foliage, as with all succulents. Preferably, the String of dolphin plants requires at least six hours of sunlight a day to flourish. If you are growing indoors, try to ensure that the plant is in the brightest location in your home. A bright sunny windowsill is best for this houseplant.

The String of dolphins grows best in bright light but make sure you shield them from direct sunlight. Place the plant near an eastward or west-facing window to get adequate light. Intense sunshine will lead to yellow, scorched leaves. In addition, growing in low light or shade causes leggy growth and sparse foliage.

A string of dolphin has been watered.
Dolphin plants do best next to south-facing windows.

If growing in a south-facing room, the constant direct sunlight can burn the foliage. So, it’s best to keep the hanging succulent a few feet away from the window. Alternatively, you can get lighting conditions right by growing the dolphin plant behind a sheer curtain.

The String of dolphin plants is not low-light plants. So, you should avoid growing them in rooms with little light or shaded corners. Also, because dolphin plants don’t require much humidity, they are not ideal for bathrooms. Finally, the lack of light causes the dangling vines to stretch towards the light and give the plant an unkempt look.

Dolphin plants do best next to south-facing windows. Here, they receive at least six hours of morning sunlight and some partial shade in the afternoon. We suggest placing a fluorescent or LED artificial light around your plants during the winter.

Best Indoor Locations For String of Dolphins

Balcony

Planting your succulents on the balcony helps them achieve sufficient light. Additionally, it improves the overall outlook of your patio and the house as a whole. 

The balcony is convenient for larger succulents that may not fit the window. The ample balcony space will accommodate your String of Dolphins. To get light, ensure that your balcony has access to sunlight for at least 6 hours a day.

Window

When you are growing your String of Dolphins indoors, the best place would be by the window. East or south-facing windows are ideal sources of light for your succulents because they filter in enough light levels for the survival of your succulents. Through these, your plants will receive indirect bright sunlight throughout the day.

A string of dolphin exposed to sunlight.
The best place of growing string of dolphin indoors would be by the window.

Hanging Basket

Succulents grown in hanging pots can be placed anywhere in the house as long as they get enough sunlight, especially in cases where you have limited space within your home. However, it is essential to note that growing succulents in hanging pots or baskets depends on the plant’s growth pattern.  

How To Use Grow Lights For Indoor String of Dolphins

Dolphins are sun-loving plants, and sometimes, growing them indoors might not provide enough sunlight, especially during winter when daytime gets shorter. That is when artificial light comes into play. The two common types of grow light for indoor succulents are Fluorescent and LED.

If your window is exposed to full sun all day, then your succulents can survive well even in winter without growing light. However, during wintertime, String of Dolphins rarely get adequate sunlight, and therefore, etiolation and fading are common issues. You can prevent those issues by getting a suitable grow light.

Find a place to put the plants and install the lights in your house. The distance between your succulents and the light is significant. If placed too close, the heat emitted from the bulbs might burn your succulents. On the other hand, there is insufficient lighting for succulents to grow healthy if it is too far. Generally, we recommend at least 6 inches and not exceeding 40 inches.

Expose your String of Dolphins plants to lighting for around 12-14 hours per day. Do not let the plants sit at just one angle of the light source. Instead, rotate the plants weekly so that each side has the same amount of light.

Outdoor Light Requirements

The String of Dolphins enjoys spending the summer outdoors. So wait to move it outside until a few weeks after the danger of frost has passed, and be sure to bring it back inside when nighttime temperatures drop to 55°F.

When your StringString of dolphins is outdoors, please put it in a spot that receives either dappled sun, morning sun, or indirect light. Avoid the hot, blasting sun at midday outdoors. Also, you’ll need to water it more frequently than you do indoors since wind and sun often dry the soil out faster.

A string of dolphin stem.
They thrive in direct sunlight in rare cases where the region has temperatures that are not too hot.

The String of Dolphins plants flourishes in a location with exposure to lots of bright and indirect light throughout the day. They thrive in direct sunlight in rare cases where the region has temperatures that are not too hot, and the sun is mild. When you provide a String of Dolphins with too much sunlight, they will quickly get sunburned and may die off eventually.

Signs of Too Little Light

Plants that are Light-starved or etiolated look pale and spindly, with significant gaps between leaves on their stems. Succulents will grow tall and lose pigmentation to try and absorb more sunshine. 

You can expose your plants gradually to more sun. Start by a step-by-step transition to a brighter location within 1-2 weeks. The growth will help the plants to not only grow more leaves but also recover their color. However, some changes to the shape of the plants can be irreversible. At the first signs of etiolation, move the succulent closer to a south-facing window or outdoors.

You can prevent etiolation by keeping indoor succulents that are colorful/non-green near a sunny window. Additionally, you can use artificial lights to supplement indoor light, starting with a few hours of sunlight each day and gradually increasing duration. Then, over two weeks, slowly move the plant into sunnier conditions, watching for signs of sunburn.

Signs of Too Much Light

Let’s explore signs to look out for when your String of Dolphins is overexposed:

  • Pigments look washed out and bleached
  • Leaves get blotchy burns in white, yellow, or brown
  • Wrinkled, scaly, or crispy leaves

To prevent sunburn, take two weeks to transition plants into brighter light gradually. Also, protect your plants from the full sun when temperatures exceed 85F; you can use shade cloth. Moving your plants to lower light conditions is the first step you should take if you notice sunburn. 

A top view image of a string of dolphin.
The burnt leaves will eventually fall off, and new growth will soon appear.

You can also increase watering frequency slightly and water during the coldest parts of the day. Though the dark burns will not disappear, the burnt leaves will eventually fall off, and new growth will soon appear.

Bottom Line

The String of Dolphins thrives in a location where it can get tons of bright and filtered light all day. Ensure your plant is in a brightly lit room, where it gets at least 6 hours of indirect sunlight daily. A sunny southward window is ideal for this succulent. However, avoid direct sunlight that can easily sunburn, causing unattractive black spots on its sensitive leaves. If needed, you can use grow lights to provide additional light for your String of dolphins.

.

Madagascar Palm, Are They Ever In Need Of Direct Sunlight?

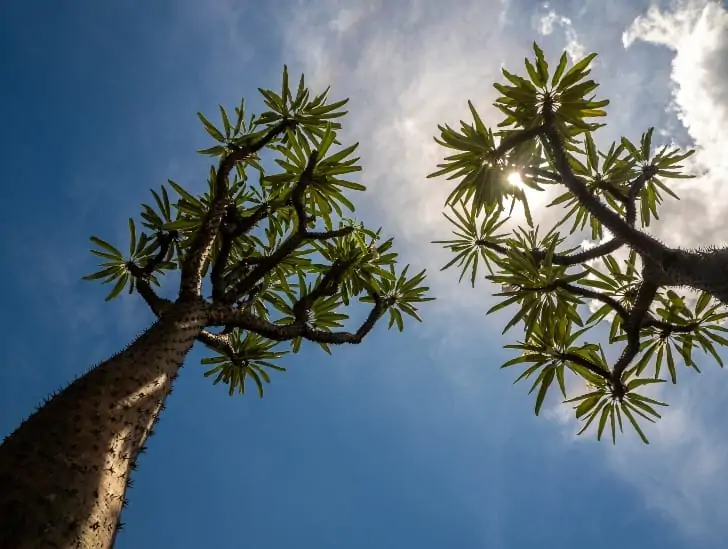
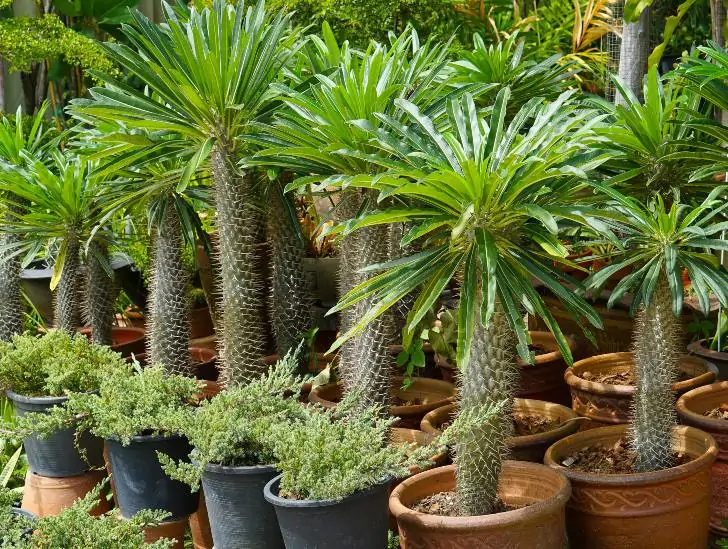
The impressive Madagascar palm is no palm but a succulent plant armed with sharp thorns and a palm-like summit. This tree that likes the sun is native to the south of Madagascar; in its natural habitat, it grows in full sun. As a result, the Madagascar palm can be grown outdoors in the mild winter zones throughout the year.

You can cultivate the succulent in a container (using a clay pot, not a plastic pot), move outdoors in summer, or cultivate exclusively as an indoor plant. Inside, please place it in full sunlight in front of a window facing south or west. Then, rotate your plant to receive equal sunlight. Otherwise, the plant is at risk of deformation as it reaches sunlight on one side.

Ensure that sunlight gets to the plant without artificial shade. As a succulent, it benefits from full sun, but it can tolerate partial shadow on the outside, as well. You can keep it in a pot to move it inside during cold spells or plant it in a sheltered place and cover it during cold nights.

The best spots for Madagascar palms are bright spots with some sun in the morning or evening. We recommend exposing yours to about two or three hours of sunlight daily for solid growth. Newly purchased specimens will need to increase their sun tolerance within the next six weeks to prevent sunburn.

Basics Of Acclimatizing Your Madagascar Plants To Direct Sunlight

While Madagascar plants prefer bright indirect light, you can acclimatize your plants to limited direct sunlight. So how can you acclimate your plant to direct light? Here are some things you can do:

● Put your plant in a bright area away from direct sunlight on the first day. It can be under a patio or a shadow tree in the courtyard. Also, you should protect the plant from too low temperatures and wind to support its survival.

Madagascar palm exposed to indirect sunlight.
You should protect the plant from too low temperatures and wind to support its survival.

● Shift the plant into full sun for only one hour on the first day. The best time to move the plant is early or at the end of the day. Watch out for the hottest noon sun. Please return it to the sheltered location after this time.

● Leave it in the protected place most of the second day, but move it in direct sunlight for just two hours. Once again, it is preferable to do so early in the morning or later on in the day.

● Keep moving the plant towards direct sunlight, increasing total sun exposure by one hour each day. Work up to as many hours in bright sunlight as recommended for Madagascar Plants, at least four to six hours.

● Next, water and nourish your plant enough outdoors. Outdoor areas generally dry the soil of indoor plants slightly more than indoor areas due to breezes and wind, so it will likely require more water. In addition, due to the increased intensity of sunlight and time, the plant will also use more nutrients, so fertilize it slightly more often.

Light Requirements For Madagascar Outdoor Plants

Madagascar palms are beautiful outdoor landscape plants and may be cultivated as hardy perennials. Choose a position that is sunny or partially shaded. The palm will do great in full, bright, indirect light, but the full direct sun is best for this plant, as light affects its growth speed.

If you have recently purchased your own Madagascar plant, you can induce it to tolerate more challenging levels of sunlight than most indoor plants. To do so, gradually add on to the number of hours in the sun over the next month. It is preferable to do so from autumn to the end of winter when the rays are weakest.

Madagascar palm in a pot.
Madagascar palm outdoors during daylight hours every time the weather is above 70 degrees F.

Every week, increase the amount of light by an hour, starting with only an hour of morning light to gain momentum. As a result, the plant will slow down chlorophyll production, reducing the risk of bleaching and sunburn.

Remember to hydrate the sample during this time and permanently stop the experiment if it shows signs of solar burn. This plant’s maximum amount of sunlight is approximately 4 hours per day.

Put your Madagascar palm outdoors during daylight hours every time the weather is above 70 degrees F. Madagascar palms need full sun to thrive. Exposure to temperatures below 30° Fahrenheit (1° Celsius) increases the risk of severe harm and death.

Bring your potted Madagascar palms indoors in the cold weather to avoid any damage. If planted outside and freezing temperatures are imminent, covering it with a tarp can help it survive.

Expose your plants to sunlight in the morning or evening to recreate their natural habitat. Plants kept in areas with too much shade quickly show growth retardation, soil mold, and root decay.

Direct sunlight keeps your Madagascar palms healthy and robust. However, they can wither if you expose them to insufficient light, especially during the day. In summer, put the Madagascar palm in a warm place, protected from the wind and sheltered from the rain.

Signs Of Overexposure To The Sun

You will observe initial signs of stress on the leaves; brown edges and yellowed halos will circulate the leaf diameter. The plant may also appear white bleached.

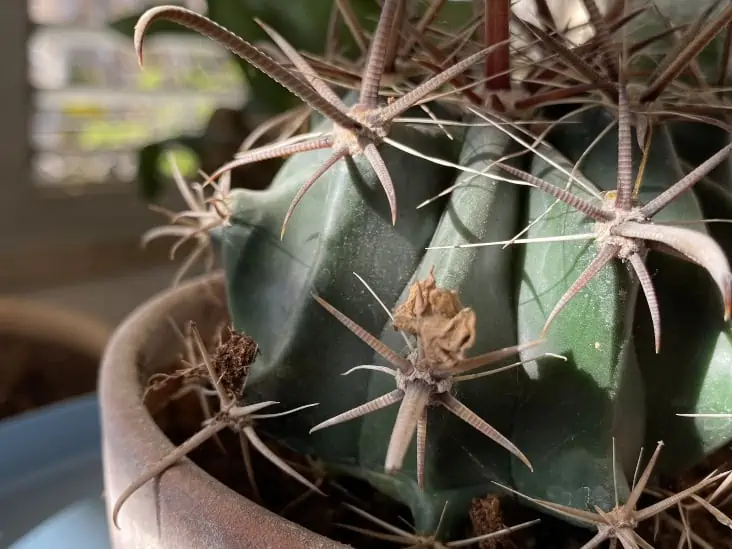
Cactus over exposed to the sun.
Higher sweat levels will lead to the drying up of the soil and the development of wilting.

Higher sweat levels will lead to the drying up of the soil and the development of wilting, thus becoming a serious problem that you must tackle immediately. In addition, some species wither before much water is lost to reduce sweating and dehydration rates.

Growth retardation is the final symptom to monitor. Again, due to the undesired environment, there will be a reluctance to re-grow as juvenile tissues are more susceptible to scaling than older, thicker leaves.

Remedies For Sunburn In Madagascar Palms

As mentioned above, if a plant bears overly damaged leaves and severe dehydration, the chances of survival are considerably reduced. So, let’s talk about tips that may help the recovery process for your plant.

Keep the plant clear of sunlight as early as possible. As there may still be relatively intact portions of the foliage, removing it will prevent further general damage.

If there is visible dehydration, accompanied by dry soil, this is the time to water. Rather than shock the roots by immediately soaking the ground, give it little and often the water in the next few hours. The plant’s root system can still be sensitive to chemicals and cold water, so it is crucial to drop fertilizers for a while.

A close up image of a Madagscar palm.
Keep the plant clear of sunlight as early as possible.

Trim all yellow and brown leaves attached to the plant. Keep branches that are still foldable with a green cambium (under the bark), as new nodal shoots may develop in the next few weeks.

Display a bright environment that does NOT provide direct sunlight. Moving it to a more shaded area may not be helpful mainly because the leaves contain very little chlorophyll, which means that they will not convert natural light sufficiently into stored energy. In addition, moving a plant to a new environment under different conditions will result in environmental shock, resulting in the sudden loss of leaves, delayed growth, and possible death.

Keep the soil uniformly damp and allow the top third to dry. If the leaves do not straighten after one week of saturated soil, there is little chance of survival. Keep the potted plant under a clear bag or box to lock in moisture for better transpiration speed. A well-hydrated leaf is more likely to be photosynthesized, producing more stored energy for the recovery process of the plant.

Indoor Light Requirements

In colder climates, the Madagascar palm is grown in a pot so that you may take it indoors during the colder months of the year. While they do not grow as large in containers—they will grow to about 6 feet high—they still make interesting indoor plants with beautiful tropical leaves.

Even entirely indoors, perfectly positioned in front of a south-facing window, could do the trick! Of course, you should keep the plant in places with lots of lights, whether indoor or outdoor. But it is challenging to keep it as a houseplant as they need a lot of light. Keep them close to a window that benefits from several hours of full sunlight per day if they are inside.

Madagascar palm in a white pot.
It generally requires an environment that is more illuminated than only artificial interior lighting can provide.

Ensure your plant grows in a highly illuminated area. You will need a place that gets at least 6 hours of sunshine. In addition, this plant will do well in an area that gets direct or indirect sunlight from the sun. It generally requires an environment that is more illuminated than only artificial interior lighting can provide.

If you realize that the leaves of your Madagascar palm start to bend to one side, your succulent does not receive enough light. Give your succulents a lighter and rotate your plant occasionally to fix the lean.

Bottom Line

Are you looking for an intriguing and unusual indoor plant? If yes, the Madagascar palm is an attractive choice. The Madagascar palm enjoys the sun, so you should place it in the sunniest place possible. These bold succulent ones are easy to maintain, provided you have a bright, sunny spot for them to call home.

Does Euphorbia Plant Require Direct Sunlight?

Euphorbias are hardy perennial plants that are easy to grow with few problems. Famous for their richly colored leaves and unusual flowers, euphorbias are an excellent addition to your plant collection.

They prefer a spot in full sun, meaning at least six hours of direct sunlight on most days, though some species can tolerate partial shade. In hot climates, some afternoon shade can be helpful for most species. 

Euphorbia plants require plenty of light and different temperature requirements depending on their location. You can grow this semi-succulent outdoors as an ornamental shrub if you live in a warm climate.

When outdoors, they will need at least six hours of sunlight a day, while you should set indoor plants in an area that gets three to four hours of natural or artificial light daily. In cold climates, make sure that you store your plants in a place where they can get plenty of sunlight.

What is Full Sun?

A full sun location, on most days, must receive six to eight hours of direct sunlight. Full sun is hard to achieve because while many plants need full sun to set buds and bloom, some plants cannot handle the intense heat and dry conditions that often come with that much sunshine.

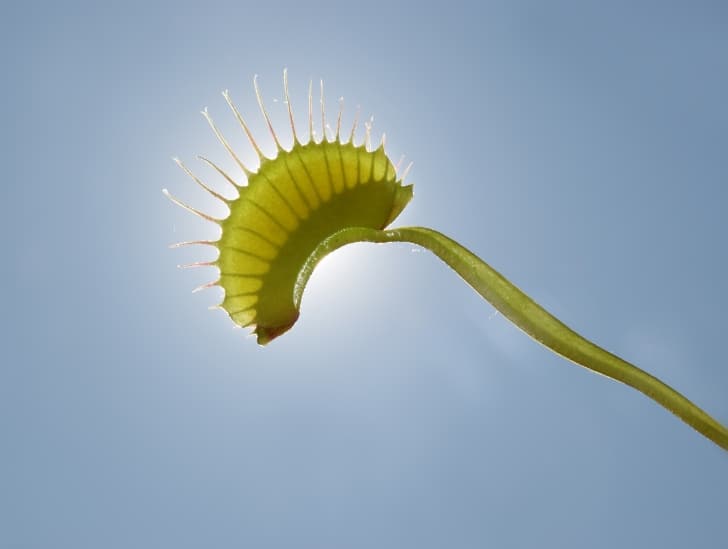
A venus flytrap exposed to sun.
If the plants get at least six to eight hours of direct sunlight, they should grow well.

One way to place these sensitive plants where they receive most sunlight is in the morning or late afternoon because the temperatures are slightly lower. However, if the plants get at least six to eight hours of direct sunlight, they should grow well.

The Different Species of Euphorbia and their Sunlight Requirements

Euphorbia is known to have more than 2,000 species. Out of the total, nearly about 1,300 come under the category of succulents. These different species have different light requirements. Let’s look at some of the species and the additional sunlight requirements.

Silver-leaved Euphorbia

Silver-leaved euphorbias love sunny environments. They include Euphorbia myrsinites and Euphorbia rigida.

Variegated Euphorbias

Variegated euphorbias grow best in dark soil. Therefore bright and sunny places are for this type of plant. These plants may not make it through harsh and freezing winters.

Mediterranean Euphorbia

Mediterranean varieties, mainly euphorbia characias, are excellent winter plants for well-drained, sunny areas. You have to protect them from frost storms. 

Woodland Euphorbias

In comparison to other varieties, Woodland euphorbias grow best in darker environments. Still, You have to provide them with some sunlight to grow. These euphorbias are stockier.

Euphorbia wood spurge.
Woodland euphorbias grow best in darker environments.

Indoor Euphorbia Light Requirements

Euphorbias will happily grow indoors with proper care and attention. If your Euphorbia succulent is indoors, it may need a bright light throughout the day. Place the plant close to a window with lots of natural light rather than artificial light for those looking to grow indoors. 

Southward or west-facing windows are the best place for them inside (four or more hours of the direct sun shining on the plant), though they can also be grown in very bright indirect light. They also do well when located close to an east-facing window or door during the cold months of winter.

Euphorbias’ skin is more delicate than cactus, so their chances of burning if placed within 18 inches of a window are high. Placing them at an angle to the window helps prevent this. Place it less than 1ft from a south-facing window to maximize the growth potential.

A plant near the window.
Euphorbia will want more indirect or artificial sun exposure hours than other plants.

If you grow them in bright indirect light, ensure the plant has excellent drainage and keep it as warm as possible. Euphorbia does not tolerate low-light. Remember that EuphorbiaEuphorbia will want more indirect or artificial sun exposure hours than other plants. More exposure to light will increase their chances of surviving through those colder periods while keeping them warmer than being outdoors on your porch.

Outdoor Sunlight Requirements

From Spring to Fall, you can place the containers on the patio or in the garden. If you’re planting your EuphorbiaEuphorbia outdoors, then choose an area that gets at least four hours of direct sunlight each day.

Most Euphorbias are sun lovers, but some will tolerate partial shade. Increase sun exposure gradually to prevent sunburn. If you want your Euphorbia plant to be healthy, try to provide it with as much light exposure.

Euphorbia plant outside.
It is usually grown in a container indoors, but you can move it outdoors for the colder winter months.

If the succulent becomes too stressed out by the full sun, we recommend a location in the partial shade instead. Just remember to make sure you provide it with plenty of bright light. It is usually grown in a container indoors, but you can move it outdoors for the colder winter months.

What is Partial Shade?

Partial shade for Euphorbias means four to six hours of sun exposure each day, preferably in the cooler hours of the morning. However, there is a subtle difference:

  • If a plant requires partial sun, make sure it receives at least four to six hours of sun daily. These plants need a couple of hours of sun to set flowers and fruits; however, they are not as demanding as the sun worshippers, which require a full sun day.

You will need to experiment to find the ideal spot in your garden for plants listed as the partial sun. If the plants you’ve tucked into a part sun garden aren’t flowering or growing up to expectations, it is because they need more direct sunlight.

  • If a plant requires partial shade, the plant will need some relief from the intense heat of the late afternoon sun. You can easily accomplish this by planting where a nearby tree will cast afternoon shade or growing on the east side of a structure where you block the area from the direct afternoon sun.

Can Euphorbias Take too much sun?

Euphorbia plants do better when they receive a lot of exposure to light, but they need protection from scorching heat and direct sun. Too much heat will cause severe damage to your plants.

Too much sunlight causes sunburn and sun damage in Euphorbia plants. Sun damage can happen quickly during a heatwave or when the temperatures suddenly soar. Sometimes, the damage can occur over time. The first sign of sunburn is brown/yellow spots on your plant. If you notice the signs of sun stress early, you can remedy the effects to avoid further damage to your plants. 

Move your Euphorbias to a shaded area or place them next to taller plants to protect them from excessive sun. If you don’t take action even after realizing these signs, some Euphorbia plants will burn and die after a while.

Although some species may adapt to and survive the heatwave, ensure that you provide sufficient protection to your plants when temperatures start to soar.

Gradually Introducing your Euphorbia to More Sun. Typically, prolonged exposure to direct sunlight can damage your Euphorbia plants, leading to permanent scarring or even death. Acclimatize your plants slowly to the intense sunlight before total exposure to prevent this from happening.

You can start by positioning them to partial shade and slowly introducing them to more sunlight until you fully acclimate them to more sun. First, expose them to the morning sun, which is less intense, and slowly introduce the plants to the more scorching afternoon sun.

You can also put your Euphorbias under the shade of other tall plants before moving them away and exposing them to direct sunlight. The main objective is to gradually increase sun exposure to avoid shocking the plants and causing sunburn or permanent scarring.

A euphorbia rigida exposed to sunlight,
Find out the best way to determine which location will suit your Euphorbia plants best.

Euphorbias growing indoors can also suffer from sun damage when moved outdoors abruptly. So, it is always good to find ways of gradually acclimatizing the plants to intense heat before you put them under direct sun.

Newly propagated or young euphorbias are highly susceptible to sun damage when placed under direct sunlight. Let them mature first before exposing them to more sun. Since your outdoor spaces receive varying amounts of sunlight, you will need to find out the best way to determine which location will suit your Euphorbia plants best.

Signs of Too Little Light

Generally, most cacti species need at least four to six hours of sunlight to thrive; Euphorbias are no exception. These plants enjoy being in bright and sunny spots. Plants that don’t get adequate exposure to light may show some signs.

One of the most common signs that your plants aren’t receiving adequate light is etiolation/elongation, whereby they stretch trying to seek out more light. Although stretching out appears to be an excellent self-adaptation mechanism, it causes weak stems and may lead to poor growth.

Euphorbia plants that do not receive adequate exposure to light may also become pale or go back to their original green color. On the contrary, plants that receive sufficient exposure to light demonstrate their true beauty by showcasing a wide range of vibrant colors.

Bottom Line

If you plan on growing Euphorbias outdoors, find a place that gets plenty of sunlight. When growing indoors, place it near a south or west-facing window. Full sun or partial shade works best for Euphorbias. Try to keep them out of the most extreme conditions if you want the best results.

Haworthia Plant: DO They Need Direct Sunlight?

Haworthia is one of the best indoor plants because it is easy to care for. While caring for your haworthia plant, it is critical to pay close attention to watering and lighting needs as they are very sensitive. A slight mistake with any of the two and your succulent could easily suffer premature death.

So, does haworthia need direct sunlight to survive? The simple answer is no. It’s a common myth that haworthia plants need direct sunlight in order to thrive. In fact, these plants can grow quite well in shaded areas – making them perfect for indoor gardening. Even in their natural habitat, they mostly grow in the filtered shade of rocks, bushes, and shrubs to avoid contact with direct sunlight. However, you also need to ensure the light isn’t too low because it will cause the plant to experience etiolation. Typically, you should provide your haworthia with four to five hours of bright indirect sunlight for it to thrive.

If you want to learn more about haworthia plant light requirements, you have come to the right place. Read on to find out everything you need to know to make your succulent happy.

General Haworthia Plant Light Requirements

As a general rule, haworthia thrives under bright indirect sunlight. So, if you are growing this plant at home, you need to ensure you provide it with four to five hours of bright indirect sunlight, preferably in the morning hours.

Haworthia plant with Offset.
You also need to be careful not to deny your plant access to a sufficient amount of light needed for survival.

Some haworthia species, such as Haworthia fasciata, can survive well under low light. When exposed to excessive direct sunlight, the succulent can suffer severe sunburn that may lead to its death.

This makes them perfect for indoor growth. In fact, if you want to have haworthia in your outdoor garden, you need to position them under tall plants to provide them with enough shade.

But you also need to be careful not to deny your plant access to a sufficient amount of light needed for survival. Generally, if you notice your plant stretching towards the direction of light and showing signs of stunted growth, it could mean you are not providing it with sufficient amounts of light.

If it is indoors, move it to a bright sunny spot immediately and give it a few days to recover. If your house doesn’t have a good spot that receives plenty of sunlight, consider installing artificial grow lights to fulfill your plant’s light requirements.

The only haworthia species that can survive low light is the Haworthia fasciata. In fact, if you have this type of haworthia, lighting shouldn’t be among your list of worries when caring for the plant.

As long as the plant receives some light enough to conduct photosynthesis, it will be fine.

What Is the Importance of Good Light for Haworthia?

All green plants require sunlight to thrive and photosynthesize their own food. Generally, the plant does well under bright indirect light because it grows in areas that experience a tropical climate.

Some haworthia species can tolerate full sunlight as long as the intensity isn’t too strong. Adequate sunlight helps the plant conduct photosynthesis and maintain its unique patterns and colors.

Haworthia Caorctata Plant.
They may survive the full sun, keeping it in a relatively shaded area makes it feel better.

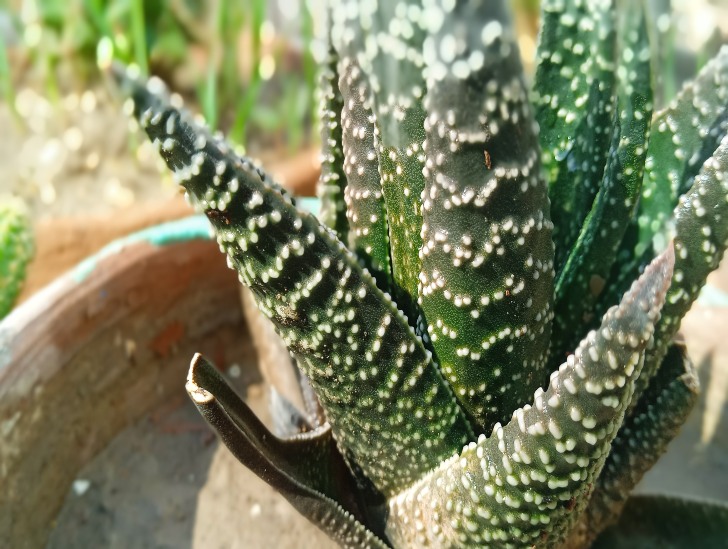
Most haworthia species have relatively long leaves with white stripes hence the nickname the zebra plant. The succulent requires exposure to sufficient amounts of light to maintain its rich color and beautiful pattern.

While it may survive the full sun, keeping it in a relatively shaded area makes it feel better, and it will appreciate it by maintaining its beautiful color and patterns. Depriving it of sufficient light exposure can be catastrophic in the long run.

What Is the Difference Between Direct and Indirect Light?

We have constantly mentioned that haworthia does well when exposed to bright indirect light throughout this post. So, what is the difference between direct and indirect light?

Well, the best way to figure out if you are providing your plant with direct or indirect light is using your hand.

Stretch your hand between your haworthia and the light. Look at the shadow formed carefully. If it is clear and sharp, then the light is direct. You will most likely also feel increased heat intensity for the direct light.

Haworthia plant in a pot.
Haworthia does well when exposed to bright indirect light.

On the other hand, if the shadow formed is somehow blurry, the light is indirect. In most cases, indirect sunlight will also be quite soft and gentle. The heat you feel in such a case will be less intense and more bearable.

It is always good to feel the light and determine whether it is direct or indirect before planting your haworthia in a given spot. If you have a spot in mind and realize that it receives a lot of direct, intense sunlight, be sure to choose a different spot for the safety of your succulent.

What Is the Appropriate Light Intensity?

As mentioned earlier, haworthia, just like other green plants, requires exposure to sufficient light to photosynthesize. Light intensity refers to how strong the light rays are.

Typically, this succulent can tolerate around 6,000 to 12,000 lux of light. If the intensity goes beyond 12,000 lux, the plant may suffer severe sunburn. Some of the common signs of sunburn in haworthia include leaves turning brown.

If you notice signs of sunburn and do nothing about it, your plant will most likely die. So, you need to do everything possible to ensure you maintain the light intensity within the acceptable range.

In some cases, the intensity differs and may be slightly higher for mature plants and the varieties that produce rich color and patterns.

The succulent takes time to adapt to intense light. So, you need to introduce it to bright light gradually.

To estimate the exact intensity of your light, feel free to use a measuring device to count the intensity level of your preferred planting spot.

To be on the safe side, it is important to understand your plant’s stage to provide it with appropriate light intensity.

Established or stressed haworthia needs a maximum of 5,000 lux; a plant that is still growing requires 10,000 lux maximum, while a robust and well-established haworthia can survive in relatively intense light conditions of up to 20,000 lux.

Relatively larger, matured haworthia plants with prominent patterns can handle full sun pretty well and will thrive in intense light of up to 23,000 lux.

What Is the Best Light Quality for Haworthia?

When we discuss light quality, we are mainly talking about artificial grow light. Generally, haworthia will survive under grow lights, but you still need to ensure the intensity is right and the light isn’t too low.

A Haworthia house plant.
The succulent requires exposure to sufficient amounts of light to maintain its rich color and beautiful pattern.

When you live in an area that doesn’t receive plenty of sunlight, you can supplement the little amount of natural sunlight that your succulents receive with artificial grow lights.

When installing artificial grow lights, make sure you use a blend of warm and cool white bulbs to deliver adequate intensity and balance in the plant color.

We highly recommend using the T5 fluorescent lights to achieve better results. These lights tend to produce the right intensity needed by haworthia to thrive. Just ensure the lumens stand at around 6k to 12k lux.

Can Haworthia Receive Too Much Sunlight?

The simple answer is yes. While some haworthia species can tolerate full sun, some can’t. You need to be extra careful with your plant in summer when temperatures rise too high, and sunlight becomes too intense since it can affect your plant’s overall health.

Keep in mind that in their native habitats, these succulents don’t grow under full sun. Most of them take refuge under shades of bushes, shrubs, and even rocks to avoid the effects of bright, direct sunlight.

No matter the type of haworthia you have, just know that it will need protection from a full sun at some point. It is your duty to monitor your plant and take action whenever you notice any signs of sunburn.

Haworthia succulent plant in a pot.
Some haworthia species can tolerate full sun, some can’t.

Besides developing sunburn, the plant leaves will also develop yellow/white patches when exposed to excessive light. The leaves may also turn from green to black or dark red, depending on the haworthia species you have.

Should I Rotate My Plant?

The simple answer is yes. If you are growing haworthia indoors, consider rotating it so that the entire plant gets sunlight evenly.

If you don’t rotate your plant, only one side will flourish while the other side of the plant remains stunted. Be sure to rotate your plant at least twice every week. Some gardeners even choose to rotate their plants every day!

For younger plants, avoid exposing them to direct sunlight as much as possible since they are weak and highly susceptible to sunburn.

Summary

While some haworthia species can survive in direct sunlight, most of the species require some form of shade during a period of too much intensity. To be safe, consider planting your haworthia in a spot that receives bright indirect sunlight.

Maintain the light intensity between 6,000 lux and 12,000 lux for better results. Once your plant is fully mature, you can gradually increase the intensity.

No matter where you plant your haworthia, ensure it receives at least three hours of morning sunlight every day for better results.

How To Cut, Split And Propagate Sempervivum

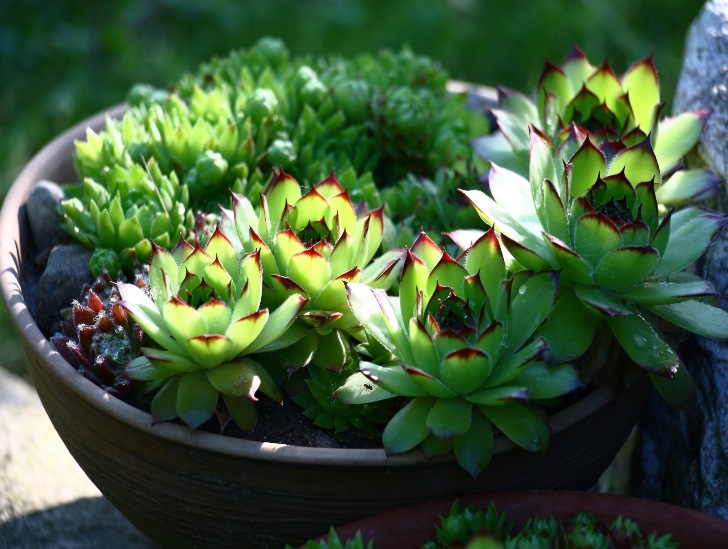
One of the joys of every succulent gardener is to see their plant collection multiply to form a colony. Unlike other succulents, the sempervivum, commonly referred to as the hen and chicks’ plant, has a remarkable ability to reproduce through offshoots (chicks) that grow into beautiful plants. Therefore, propagating the sempervivum isn’t that difficult. The most important thing you need to know is how to separate the offshoots from the mother plant at the right time and propagate them into new plants.

So, how do you propagate sempervivum? Sempervivum has a remarkable characteristic of producing rosettes that grow into relatively tidy, mounding clusters. To propagate the plant, carefully cut the rosettes and plant them in a well-draining potting mix. Carefully position them in partial sun and water them regularly until they establish a stable root system. The propagation of offshoots into new plants is best done outdoors in spring or summer. Other than offset propagation, you can also try your luck at propagating the succulent from seeds.

Do you have a sempervivum plant in your home, and you want to grow it into a colony of beautiful plants? You have come to the right place. Read on to find out everything you need to know about propagating the hen and chicks plant.

Propagation from Rosettes

As mentioned in the introduction, it is possible to grow your sempervivum colony without any effort on your part. The succulent produces beautiful rosettes that mature into young plants forming a neat colony.

When the mother plant flowers, it automatically dies, leaving behind a space to be occupied by the young plants.

Sempervivum plant exposed to sunlight.
It is critical to replant the young rosette divisions you obtain into a well-draining potting mix.

However, you can still take charge of the propagation process and divide the rosettes manually using a sharp, clean knife.

One of the benefits of manual division and propagation is that it gives you more control over your colonies’ size and exact location.

When you subdivide the rosettes into several pieces for propagation, it is critical to ensure each piece of the rosette has a bit of root tissue that will develop into a new root system for the young plant.

It is also critical to replant the young rosette divisions you obtain into a well-draining potting mix. Proper subdivision of the rosettes can take some time, but it is worth every effort.

Follow the steps outlined below to propagate your sempervivum through rosette subdivision:

1. Choose Healthy and Juicy Rosettes

You will have the most successful propagation if you choose healthy rosettes that have already formed some roots other than going for the youngest chicks on the plant.

The easiest way to establish if the rosettes have formed some roots is by carefully lifting the plant from its pot and shaking off some of the potting mix to expose the root system.

Selecting rosettes with an already developed root system gives your offshoots the best chance of survival when transplanted away from the mother plant.

Close up image of sempervivum.
You can easily identify rosettes that have formed roots based on their age.

If you take offshoots without any roots, the propagation process will take longer since rooting alone can take up to one year. There is also a real risk of death.

If you don’t want to lift the plant from the pot, you can easily identify rosettes that have formed roots based on their age. In this case, make sure you go for offsets that are at least one year old.

2. Dividing the Offsets from the Mother Plant

Once you have identified healthy and juicy rosettes, the next thing you need to do is to separate them from the mother plant. You can do this using a sharp kitchen knife if necessary.

Be careful when making your cut to avoid damaging the young roots already formed on the rosette. You should also remove the stem that connected the sempervivums carefully. You need to ensure you obtain a clean cut.

Once you have obtained your rosette, don’t rinse the roots in water because it will only complicate the rooting system. If the roots have traces of the potting mix, it is okay, and you don’t have to worry about removing it.

If the rosette has dry leaves, get rid of them gently. Be careful to avoid damaging the healthy leaves since it can cause your rosette to develop diseases.

If the cutting was deep, set your rosette in a relatively dry and sheltered area to allow the cutting to form a callus. You can allow the cut part to receive some light but not direct sunlight.

3. Preparing the Rooting Spot

You can root the rosette in-ground or growing pot. It all depends on what you need in the long run. When choosing a place to root the rosette, it is critical to ensure the chosen spot receives plenty of light.

Take time to prepare the potting mix and ensure everything is okay. You can mix regular garden soil with sand in the ratio of 1:1 to obtain a good potting mix for your young sempervivum plants.

Sempervivum in a pink pot.
The only part of the rosette that should be in the soil is the roots.

Carefully place the sempervivum roots in the preparing soil. The only part of the rosette that should be in the soil is the roots. Every other part of the young plant must be above the ground level.

If you are propagating more than one rosette at the same time, ensure each rosette is carefully positioned at a sufficient distance from the other. A distance of approximately three inches between the rosettes will be okay.

Do I Need to Shade Newly Propagated Offsets?

Generally, you don’t have to provide your newly propagated offsets with shade but don’t expose them to direct sunlight.

The only exception will be when you are propagating the dwarf species of the sempervivum. In this case, you need to provide your newly propagated rosettes with sufficient shade to prevent them from sunburn.

If the place you want to position your rosettes is relatively sunny (receives more than eight hours of direct sunlight), then you need to tighten the shade to protect your young plant from intense heat.

Sempervivum and rocks.
You need to remember that there are times when the shade may be needed for a relatively longer period.

To create a simple shade for your young sempervivum, stick two sticks in the ground and pull a shade net between them. You can also position your growing container under tall plants such that the relatively tall plants are protecting the young plants.

You need to provide the shade for at least two weeks to allow your young sempervivum plants to adapt to their new environment.

When the middle of the rosette starts turning bright green, it means that the rosette has successfully developed a root system, and you are free to remove the shade.

However, you need to remember that there are times when the shade may be needed for a relatively longer period (one month or even more). This is especially true if you propagate your sempervivum rosettes in summer.

If during the rooting there is almost no sun or it rains, then you can do away with the shade, and your rosette will do just fine.

Should I Water Newly Propagated Sempervivum Offsets?

It is prudent to water your newly propagated offsets a little to keep them hydrated. However, watering should only be started at least three days after planting. Don’t water the rosettes immediately after planting because they will die.

When watering the rosettes, use a small amount of water and only moisten the plants. Feel free to gradually increase the amount of water as the offsets develop a stable root system.

Sempervivum and rosettes in a pot.
You need to remember that there are times when the shade may be needed for a relatively longer period

Avoid overwatering at all costs because young sempervivum plants are at an increased risk of developing root rot.

Watering is only necessary if there is no rainfall at all. There is no need to water your young sempervivum plants in the rain.

Should I Fertilize Newly Propagated Sempervivum Rosettes?

There is no need to fertilize your newly propagated sempervivum rosettes until they form a stable root system. Typically, the root system will be strong enough to sustain fertilization after 30 or 40 days.

Keep the fertilizer to a minimum amount, and be sure to use slow-release plant fertilizer since it is the best option.

Don’t worry if you forget to fertilize your plant because it is not a matter of life and death. The succulent still produces many vitamins and other critical elements needed for survival.

Therefore, it only requires minimal fertilization to thrive. A few pellets under the rosette are enough for survival.

Can I Propagate Sempervivum from Leaves?

There is a lot of information circulating online about propagating sempervivum from leaf cutting. Unfortunately, the information isn’t correct, and nobody can verify it.

It is almost impossible to propagate sempervivum from leaf cuttings because new roots may never form. Several people have tried taking cuttings from the leaves and stems and rooting them in soil, but they only ended up drying instead of forming new plants.

Even spraying and positioning the leaf cuttings in a greenhouse doesn’t change the outcome. Basically, if you want to propagate sempervivum successfully, you need to stick with the offset propagation method described above.

Summary

Sempervivum is one of the easiest succulents to propagate, making it an excellent choice for beginners. If you have healthy and juicy rosettes, you can separate them from the mother plant and root them.

Once the offsets have rooted, you can transplant them into their own container or garden bed. You may need to shade newly propagated offsets in hot weather, but overall, they should be relatively easy to care for.

Nepenthes Plants: Top 5 Tips for Properly Watering

A close-up bear claw image.

Nepenthes is one of the best indoor plants for a gardener. However, a significant number of people who try their hand at cultivating nepenthes end up with a dead plant because they simply don’t know how to care for it. The truth is that nepenthes is a relatively fussy plant, and any slight mistake with watering can be costly. Watering a pitcher plant appropriately means finding the perfect balance between overwatering and underwatering.

So, what are the golden rules for watering nepenthes? Pitcher plants must be watered regularly to keep the potting mix moist. Water your plant as soon as the tray is empty and until the potting mix is completely moist. Use rainwater or distilled water and avoid tap water as much as possible. Bottom watering is highly recommended because your plant gets a chance to absorb as much moisture as possible. Always wait until your potting mix is completely dry before you water your nepenthes to avoid root rot issues.

Taking care of a nepenthes plant can be tricky, especially for beginners. One simple mistake can make you feel like you are a plant killer. But you don’t have to fear anything because we will show you the best way to maintain the moisture requirements for your plant.

Read on to find out everything you need to know about watering pitcher plants.

1. Know When to Water

A general rule of thumb that most gardeners use is to wait until the potting mix is completely dry before watering the pitcher plant. While this is an acceptable approach, you can still use some better ways to figure out when to water your pitcher plant.

Rather than waiting for the potting mix to dry out completely, study your plant over some period and establish a watering schedule to follow.

The best option for beginners is to check your plant regularly without fail.

 For instance, if you discover that you mostly water your plant after two days during the dry season, stick to that schedule and maybe water after four or five days during periods of high humidity.

The watering schedule you establish will, of course, vary depending on where you live and the general climatic conditions of the area. The best option for beginners is to check your plant regularly without fail.

Ensure that your plant’s roots are not sitting in excess water that isn’t draining out of the growing pot. Waterlogging a pitcher plant can lead to serious root rot issues that can easily kill it. In simple words, keeping your potting mix moist is crucial but don’t make it soggy or oversaturated.

2. Water the Pitchers

Sometimes, the pitchers themselves may also require watering. When you first bring your nepenthes plant home, take a peek inside the plant’s pitchers. If you notice they are entirely empty, use an eyedropper to refill each of them to about a third way with distilled or reverse osmosis water.

The primary purpose of filling the pitchers with water is to prevent them from becoming dehydrated and dying off as they struggle to fill themselves.

Make a routine to check the level of fluid inside the pitchers regularly. If you notice the fluid level is periodically low or empty, it could be a sign of underwatering or low light.

Nepenthes with a fly.
Be sure to increase the moisture levels inside the pitchers as soon as possible.

A combination of underwatering and low light can be catastrophic. So, be sure to increase the moisture levels inside the pitchers as soon as possible and provide your plant with sufficient exposure to sunlight.

If you live in an area that doesn’t receive plenty of sunlight, consider using artificial grow lights to ensure you are fulfilling your pitcher plant’s light requirements.

3. Know How to Water Your Pitcher Plant

Pitcher plants are native to Madagascar, Australia, and Southeast Asia. These species generally grow in mountain forests or low-lying jungles. So, this tells you that they thrive in humid areas. The mountain-growing pitcher plants prefer relatively cooler temperatures than the jungle-growing species.

Some species grow in dense jungles below elevations of 3,000 feet. They are known as the lowland nepenthes and prefer relatively high heat and constant, steamy humidity to thrive.

Nepenthes near the water.
Mountain-growing pitcher plants prefer relatively cooler temperatures.

So, if you are growing these plants at home, especially indoors, you need to keep in mind that they cannot tolerate dry soil at all. No matter the species you have, be sure to provide it with enough moisture and keep the roots slightly damp all the time. Damp doesn’t mean wet.

So, what is the best way to water your nepenthes to achieve this target? Well, you can use the top-bottom watering technique or the bottom watering method.

In top-bottom watering, you will need to add enough distilled water to an irrigation can and use it to water the plant from the top until excess water starts to drain out of the drainage holes at the bottom of the growing pot.

Make sure the excess water drains off well before you walk away. Avoid using clay pots because they can easily wick water and cause the potting mix to dry out relatively quickly.

The best way to water nepenthes is by using the bottom watering method by placing the growing container in a relatively shallow tray filled with distilled water; a third way the depth of the container. Don’t fill the tray more than a third of its depth.

Take your pitcher plant and immerse it in the tray. Allow it to sit in the tray of water for up to 30 minutes before you remove it. The plant would have absorbed enough water to keep it going for three to five days before you water again.

The highland species that enjoy relatively cooler temperatures can benefit greatly from ice cubes placed on top of the potting mix every night. The ice cube will melt through the night and offer the moisture that the plant loves.

4. Don’t Let the Plant Sit in Water for Too Long

Using the bottom watering method can be tricky because you may be tempted to leave the plant sitting in the water tray for too long, thinking you are helping it.

Unfortunately, pitcher plants don’t like being waterlogged. The more they are waterlogged, the more they develop root rot that can kill your plant in no time. So, you should never let the plant sit in water for more than 30 minutes.

The bottom watering method.
You should never let the plant sit in water for more than 30 minutes.

If you are tempted to let your plant sit in the tray for prolonged times, ensure you empty it first and only live about an inch of water in it. The little water you leave in the tray plays a crucial role in increasing the plant’s humidity.

5. Use the Right Type of Water

When it comes to watering pitcher plants, not all water is the same. Choosing the wrong water type can kill your plant faster than overwatering.

Don’t attempt to water your nepenthes using bottled water or tap water since it can be extremely harmful. These plants are naturally intolerant to nutrients and minerals.

For that reason, they need to be watered with water sources that contain little to no mineral substances. Rainwater, distilled water, or reverse osmosis water are the three best options. These options are highly safe because they don’t have any mineral substances.

If your area receives plenty of rainfall during winter, be sure to collect as much rainwater as possible and store it safely somewhere. When you run out of rainwater, go for distilled water.

Fortunately, distilled water can be found in almost every grocery store, and it is highly affordable. A gallon of it will go for about $1, depending on where you live.

A water.
Choosing the wrong water type can kill your plant faster than overwatering.

Reverse osmosis water is mostly sold in licensed water stores and select pharmacies. However, you need to remember that reverse osmosis water may be slightly more expensive than distilled water.

When buying distilled water, avoid any bottles that contain words such as “contains electrolytes,” “enhanced for flavor,” and “additives added for taste.” These words mean that some chemicals have been added to the water, which is not a good sign.

Why Is Rainwater the Best Option for Watering Nepenthes?

Nepenthes plants generally grow in poor acidic conditions and are highly sensitive to the water they grow in. So, any water containing a relatively high quantity of dissolved salts and minerals such as calcium and magnesium does them no good.

The mineral concentration can build up with time, causing root rot and severe decline in their overall health. The effects are quite dramatic for pitcher plants but slightly slower for other carnivorous plants.

Generally, the type of water you use must contain less than 100ppm (parts per million) of dissolved minerals and salts. Rarely will you have this type of water coming out of your tap, no matter where you live.

You can always check with your local water authority to ascertain the softness of water coming out of your tap. Sticking to rainwater, distilled water, or reverse osmosis water will do you good in the long run.

Summary

Watering nepenthes incorrectly is a catastrophic mistake that many gardeners tend to commit. Even the slightest mistake can affect the general growth of your plant and make you start questioning your gardening skills.

To avoid committing these mistakes, it is good to understand your plant’s moisture requirements to help you maintain a perfect garden. We hope you now know what you need to do in terms of watering to keep your pitcher plant happy!