Why Are Succulents a Tasty Treat for Birds and Other Wildlife?

A rabbit eating succulent.

Do you have a collection of beautiful succulents in your home? Do you often find them eaten or bitten but have no idea why? If so, you’re not alone! Many succulent owners have experienced this issue. Well, the truth is that you may be dealing with a bigger problem than pests and bugs. Birds or other animals may be eating your succulents, and you must find a way to stop them as quickly as possible.

So, why do birds and other animals eat succulents? Although the diet of most birds and other animals doesn’t include succulents, these creatures will only have one other option if their usual food and water sources are scarce. They will turn to your succulents because they love succulent’s tasty and nutritious juice. Birds and other animals may also eat succulents because they are curious or want to bury the seeds in the soil. Remember that most succulent plants store plenty of water which can attract birds and other animals when their usual sources are depleted.

This blog post discusses why dogs, birds, snails, mice, squirrels, and other animals eat succulents and what you can do to stop them. Read on to learn more.

How Do I Know If Birds Are Eating My Succulents?

To determine if birds or other animals are eating your succulents, carefully inspect the soil around the pot.

If you see bird poop around it, it could mean birds are eating your plants. Birds’ poop is typically small and round.

You might also see solidified urine as small, white excrement. Birds only focus on eating the leaves of succulents.

Therefore, you will most likely see small holes in your plant leaves if birds attack them. Huge holes may be a sign of large animals feeding on your plants.

A bird eating a dragon fruit.
Birds only focus on eating the leaves of succulents.

Large animals that feed on succulents include mice, voles, squirrels, possums, and other rodents. Sometimes, even cats and dogs eat succulents but stop after tasting them. Ensure your succulents are non-toxic if they are within reach of your pets and children.

Tiny bugs, such as slugs and snails, can also eat succulents and cause extensive damage if you don’t stop them.

But don’t think that only birds and other animals feed on succulents. Tiny pests may also eat your succulents or suck juices out.

An excellent example of pests that eat succulents is aphids. These bugs are often yellow, black, or green and can cause much damage if left unchecked.

Other pests that feed on succulents include mealybugs, spider mites, scale insects, mites, and caterpillars.

Always inspect your succulents and their roots for signs of bug infestation, discoloration, and pest/bug infestation.

Consider using natural solutions such as neem oil to eliminate the bugs if your succulents are infested.

Why Do Birds and Other Animals Eat Succulents?

The truth is that the diet of most bird species doesn’t include succulents. However, things can change pretty fast if these creatures can no longer access their water and food sources due to scarcity.

Succulents such as echeverias and aloes contain delicious and highly nutritious water that attracts pests, birds, bugs, and other animals. These provide the birds and animals with what they require regarding water and nutrients when their natural resources have been depleted.

Some succulents, such as agaves, are naturally delicious; many birds know it. So, they will irresistibly feast on the succulent because it is almost like a dessert.

A camel eating desert cactus.
These provide the birds and animals with what they require regarding water and nutrients when their natural resources have been depleted.

Unfortunately, it doesn’t leave your succulent in the best condition when they are done with the pecking. Birds can also invade your succulent pots if they want somewhere to build nests.

In such a case, you will notice that your succulent has been invaded and some of it eaten as the birds build their nests.

Most animals eat succulents because they store water. Common animals that eat succulents include woodrats, gophers, jackrabbits, and many more.

Most animals usually target the softer parts of the succulent. For cacti, they try as much as possible to avoid spiny areas.

However, alpacas and camels can eat even the spiniest without any problems. This is because camels usually have a rough lining in their mouth that protects them from the spiny thorns.

How Do I Stop Birds and Other Animals from Eating My Succulents?

Fortunately, there are several things you can do to stop birds and other animals from eating your succulents. Here are some of them:

1. Feed the Birds

Birds will only consider feeding on succulents when hungry or thirsty and don’t have any other source of food/water.

Therefore, you can quickly stop them from feeding on your succulents by setting up water baths and open feeders. Be sure to position the feeders and water baths away from your succulents.

Once the birds have had enough water and food, they won’t bother eating your succulents. To make things less messy, avoid putting mixed seeds in all your feeders.

Keep in mind that different bird species like different types of seeds. If you mix the seeds, birds will most likely spend time picking through the seeds to find the ones they like while discarding the rest on the floor.

The sorting process can be pretty messy and even attract unwanted pests. The best way to deal with the issue is to set up different feeders and put only one type of seed in each.

This makes it easy for the birds to find the feeder with their favorite seed types. When birds have access to the feeders, they won’t be bothered looking for food anywhere else.

2. Install Bird Netting

Another way to stop birds from eating your succulents is by installing bird netting or barriers around the pots and plants.

You can also use various deterrents, such as motion-activated sprinklers, owl decoys, and reflective tape.

These methods are simple. For instance, you can easily keep birds away from your succulents by hanging old CDs near the plants or pots. The reflection of the sunlight on these CDs will scare away most birds.

Bird on the net.
Another way to stop birds from eating your succulents is by installing bird netting.

Netting can also be used to protect vegetable gardens from birds. It is an excellent way to keep them away from your succulents while allowing access to other beneficial insects and wildlife.

3. Grow Succulent Species That Repel Animals

You can also deter rabbits, gophers, and wood rats by planting succulents with a strong, unpleasant smell.

These succulents usually produce a chemical referred to as terpenoid, which repels animals and insects. Examples of such succulents include Echeveria setosa and Cotyledon orbiculata var. oblonga.

You can also plant other species near your succulents with strong scents known to repel animals. Examples of such plants include rosemary, oregano, and lavender.

4. Scare Birds Away from Your Succulents

Scarecrows are still an effective way to scare away birds and other animals. You can easily make a homemade scarecrow or buy one from a garden center.

A owl as a scarecrow.
You can consider placing such objects near your succulents to scare birds away.

When positioned near your succulents, the scarecrow will frighten away birds and other animals, such as gophers and woodrats, that might be tempted to feed on the plants.

However, you will be required to move the scarecrow around because the same birds and animals coming to your succulent garden over and over will begin to recognize it as a harmless dummy.

Most birds and animals also fear objects that shimmer in the light, such as reflective tape, pieces of foil, broken mirrors, or CDs. You can consider placing such objects near your succulents to scare birds away.

What If Nothing Seems to Work?

Sometimes, you may try everything possible to keep birds away from your succulents, but nothing seems to work.

In such a case, you can consider covering the pots and plants with netting or using cloches (clear plastic covers) to protect them from birds.

These protective measures are effective in keeping birds away without damaging or affecting the growth of your plants.

You can also consider keeping your succulents indoors or in a greenhouse to reduce the risk of birds feeding on them.

Bonsai tree in the windowsill exposed to sunlight.
You can also consider keeping your succulents indoors.

Also, ensure you see the birds eating your succulents before you conclude that they are culprits. This is because you could be dealing with other issues, such as pests and insect infestation thinking it’s birds.

It is vital to correctly identify the problem before you take any measures to prevent it. If birds are the main issue, follow the tips outlined above to keep them away.

Summary

It is possible to stop birds and other animals from eating your succulents. All you need to do is set up water baths and open feeders, install bird netting and barriers, grow succulent species that repel animals, scare birds away using a homemade scarecrow or reflective objects, and cover the pots with netting.

If you take all these steps, your succulents should be safe from birds and other animals. However, if nothing else works better, consider covering them with netting or keeping them indoors.

With proper management and protection, you can enjoy your succulents for many years without worrying about the issue of birds or animals.
What Else Can You Use in a Terrarium? Unique Ideas to Elevate Your Design

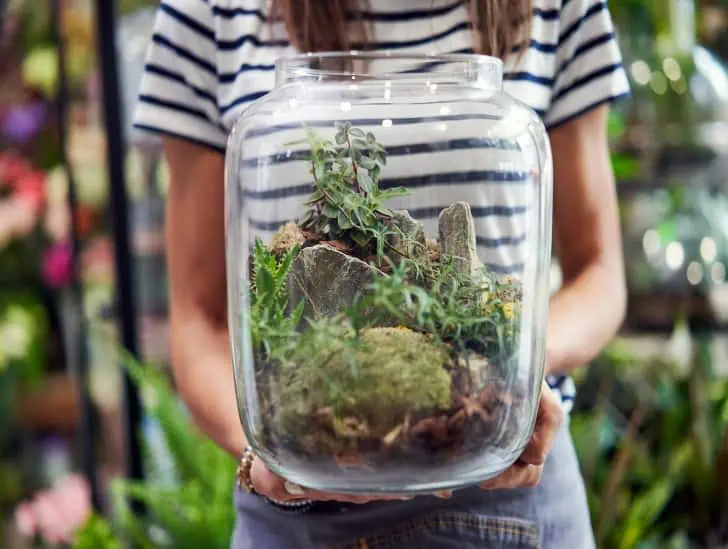
A person holding a terrarium.

Nobody can dispute the fact that plants make beautiful terrariums. However, there are so many ways of firing your terrarium to life that go beyond plants. Whether you want to create an idyllic beach scene or go full throttle and make an enchanted forest, there are many ways to achieve your dreams. All you have to do is keep an open mind and explore as many ideas as possible.

So, what can you put in your terrarium besides plants? The ideas are endless: The ideas are endless, but you should consider adding shells to create a tropical or beachy theme, twigs or wooden logs if you want to achieve a forest theme, slate pieces to set a mountainous or ancient theme, small figurines to add a touch of fantasy, stones, and pebbles that are not just visually pleasing but also aid in drainage, moss tendrils for extra greenery, and even fairy lights. You can also opt for moss, toys, figurines, resin, or sand.

This blog post discusses unique ideas that you can use to adorn your terrarium to improve its aesthetic appeal.

1. Crystals, Gemstones, and Minerals

Let us start with the most glamorous addition you can add to your terrarium – crystals, gemstones, and minerals.

Whether it is the shining amethyst and quartz or rose quartz crystal clusters in shades of lavender, these additions will add a touch of elegance and sophistication to your terrarium. These items are great at turning your terrarium into a fantasy wonderland you will love.

Some people believe that certain types of stones possess healing powers, so you can use them as a means to bring positive energy and vibes into your home.

Just check out online stores such as Amazon or Etsy, and you will find many different colors and shapes. Ensure you pick something that will make your terrarium stand out and shine.

2. Ropes and Threads

Ropes and threads can be a wonderful addition to your terrarium. You can choose from different types of ropes depending on what you want to achieve.

For instance, you can choose to add a brown braided rope to your terrarium if you want to create a forest-like environment. This will give the illusion of a tree branch or vine climbing up your terrarium walls and make it look more realistic.

On the other hand, if you want to incorporate a beachy theme into your terrarium, choose thin white ropes with shells hanging off them, as they will create an idyllic setting that you can look at in awe.

A combination of red and blue ropes can create a wonderful sea theme.

Three small terarium.
Ropes and threads can be a wonderful addition to your terrarium.

The thickness of the rope will mostly depend on how much space you have in your terrarium. If your terrarium is smaller, go with a 1/8 or 1/4-inch rope. However, consider using a 1/2-inch rope if you want to set the primary accent on it.

3. Model Trees and Animals

If you have a big terrarium, why not adorn it with small model trees and animals? You can purchase these online or make your own if you feel crafty. These additions will bring the terrarium to life, making it look like a mini world.

When it comes to model animals, there are so many options you can choose from, such as dragons and dinosaurs for a fantasy theme or zebras and elephants for safari vibes. You can even choose smaller insects if you wish.

Miniature trees will create an illusion of a unique and surreal forest. To set the vibe, you can choose between various types of trees, such as bonsai, palm trees, or conifers.

4. Shells

Various types of seashells perform a wonderful job when it comes to decorating a terrarium. Many prefer using seashells to create a tropical or beachy theme in the terrarium.

Feel free to choose from urchins or sea fans, clams, moon shells, and starfish. Other great shells for a terrarium that you should consider include conch, fig shells, sand dollars, limpet shells, and nautilus.

You can go for more vibrant colored shells or pick neutral-tone shells, depending on your preference.

Just make sure you don’t pick shells with open cracks. They may be prone to bacteria and water damage, especially in a humid environment such as that of a terrarium.

A open terrarium with shells.
Many prefer using seashells to create a tropical or beachy theme in the terrarium.

You can make shells the main accent of your terrarium by picking one large shell to create a specific theme and then surrounding it with several small shells. You can even arrange them uniquely to form a specific shape.

5. Fairy Lights and Lanterns

Another unique addition that can give your terrarium a magical vibe is fairy lights or lanterns.

You can find them in local stores or online, and they come in many colors and shapes. You will definitely be able to find something that suits your needs.

Furthermore, there are even solar-powered fairy lights for those who don’t want to bother with wires.

These small pieces of art can enhance the ambiance of your terrarium and make it look more romantic and dreamier. Place them around the walls or topsoil, and you will have a breathtaking view.

6. Logs or Twigs

Logs and twigs are common in plant terrariums since they help paint the picture of a magnificent mini forest with fallen trees. Wood and logs come in various shapes, which can add a lot of character to your terrarium.

You can purchase unique logs and twigs or gather your own from the wild. If you are gathering your own logs and twigs from the wilderness. Check them thoroughly for bugs that may turn your terrarium into their home.

Consider soaking the wood logs and twigs in warm water for approximately 30 minutes or baking them for about 45 minutes before use. The primary objective here is to kill any pests residing in the logs. Remember to maintain your terrarium to keep the longs looking their best all year round.

7. Resin

Resin is a type of polymer with a blueish, transparent color. You can think of it as a powerful version of marble.

It is commonly used to create an artificial water body in relatively small crafts. This can be an excellent option if you want to create a lakeside view or some scenic island with a relatively nice beach.

You can check Pinterest for various ideas on incorporating resin into your terrarium. Resin is also relatively cheap and can be found in most craft stores.

8. Moss

Moss is great for creating a lush, green forest look in a terrarium. It’s also low maintenance and aesthetically pleasing. You can buy moss for terrariums from most garden centers or gather your own from the wild.

If you decide to collect it on your own, be sure to harvest moss growing on rocks and logs rather than the ground since it will contain fewer bugs.

A terrarium
Moss is great for creating a lush, green forest look in a terrarium.

Moss can also be used to cover the topsoil of your terrarium, which will give it a natural, finished look. You can use cotton thread or fishing line to weave and attach moss to various decorations in the terrarium, such as logs or branches.

9. Glitter

Glitter is another option if you love a sparkly look in your terrarium. You can use colored glitter to bring in some vibrancy or go for silver and gold if you prefer the more subtle, glam look.

You can sprinkle it on the topsoil of your terrarium or use it to make a statement by creating specific shapes, such as stars and hearts. Be sure not to overuse glitter since too much can be overwhelming.

Adding decorations to your terrarium is a great way to personalize it and give it a unique touch that reflects your personality and style. However, do not overdo the decorations since they can easily become the focus of attention rather than the plants themselves.

10. Charcoal/ Rock False Bottom

A false bottom is basically a drainage layer at the bottom of your terrarium that allows excess water to drain away from the soil. Creating a terrarium without a false bottom can lead to root rot issues and eventually kill your plants.

The best option for creating a false bottom is to use charcoal, which will filter any impurities and help keep the soil clean, or rocks.

A close round terrarium with succulent.
Creating a terrarium without a false bottom can lead to root rot issues and eventually kill your plants.

If you are using charcoal, purchase aquarium-grade charcoal that has not been treated with chemicals. This can usually be found in pet stores or garden centers.

If you are using rocks, make sure they are free of any dirt or debris and that their size is small enough to allow water drainage.

11. Salt

Lastly, you can also add salt to your terrarium to create artificial snow. In fact, this is the best way to create a winter-themed terrarium.

To accomplish this, put some masking tape or paper over the area you want to snow and start sprinkling salt until you achieve what you want.

A person spraying water to a Open Terrarium.
You can also add salt to your terrarium to create artificial snow.

Summary

A terrarium provides a great way to bring a bit of nature indoors. With the right materials and decorations, you can create a unique and beautiful environment that will be a pleasure to look at for many years.

Use the appropriate materials for terrariums, such as wood, resin, moss, glitter, and charcoal/rocks for your false bottom layer.

Every material plays an important role in your terrarium’s success, so choose wisely. Good luck with creating your own unique terrarium!

What Causes Rosemary to Bloom? Understanding the Science Behind it

A closeup image of a rosemary flower.

Rosemary is one of the best herbs to grow at home. The herb is evergreen and features beautiful needle-shaped leaves that are fragrant and flavorful. The herb is mainly used to add flavor to dishes but has many other uses. Often the plant will produce beautiful purple or blue flowers that add interest and color to your home. Scientists have discovered approximately 24 cultivars of the herb, and each has slightly varying leaf and flower colors. Some are even variegated leaves.

Why is Rosemary flowering? Rosemary usually blooms to complete a reproductive cycle. Flowering is the last step in the process since it leads to seed production, which provides the plant with the best way to ensure continuity. Many factors, such as temperature, light, and soil acidity, trigger the flowering cycle. It’s important to note that the ideal conditions for producing flowers may not be suitable for your particular area or climate. Generally, rosemary will bloom in late spring or early summer and last until mid-summer. To encourage flowering, provide your rosemary with plenty of sun, heat, and well-drained soil. Prune the plant regularly to keep it healthy and promote flowering.

This blog post discusses everything you need to know about rosemary flowering. Read on to learn more.

Understanding the Flowering Process in Herbs

Before we dive into why rosemary flowers, it’s crucial to understand how flowering works in herbs. Most herbs flower during their growth cycle as part of a reproductive process. This is known as ‘bolting‘ and involves the plant sending up a long stem with flowers at the top.

Many factors, including warmth, light levels, and water availability, can trigger the flowering process.

For rosemary, the ideal conditions for growth are balmy spring days that move into hot summer months.

If you live in an area with a relatively colder climate, your rosemary may fail to flower. This herb can take up to three years to flower, so patience is vital.

Why Is Rosemary Flowering?

As mentioned earlier, the flowering process is part of the productive cycle. In fact, it is the last step in the entire cycle.

The herb flowers with the objective of producing seeds that will ensure its continuity. It is the best survival mechanism.

A flowering rosemary.
Rosemary flowers begin to appear in spring and remain vibrant throughout summer.

Typically, a rosemary herb will only produce flowers if the climatic conditions are right. Therefore, you must ensure your herb receives plenty of sunlight, has enough space, and stay in well-draining soil to encourage blooming.

You are doing something wrong if your herb fails to flower during spring or early summer. Carefully review your care schedule to identify the mistake and correct it.

Rosemary flowers begin to appear in spring and remain vibrant throughout summer. However, some gardeners say that their rosemary plants bloom at different times of the year. This is understandable because they are wide varieties of the herb.

What Do Rose Flowers Look Like?

Rose flowers vary in color depending on the cultivar. The herb has approximately 24 cultivars with flowers ranging from pink to white.

The Majorca pink cultivar has soft green leaves and pink flowers, while the Golden Rain cultivar has golden leaves and dark blue flowers.

Among the 24 cultivars, the most common cultivars grown indoors and outdoors include the Square Sea Rosemary, Benden Blue Rosemary, Prostrate Rosemary, Sissinghurst Rosemary, and Miss Jessoppi Rosemary. The Prostrate rosemary stays rather small and is ideal for growing indoors in small spaces.

Does Rosemary Die After Flowering?

Typically, rosemary doesn’t die after flowering since it is not a monocarpic plant. The herb will continue to grow and produce new shoots once the flowering cycle is complete.

You may be surprised because many herbs are annual plants that grow from seed, produce massive flowers and seeds then die afterward.

However, rosemary is different since it is grown as a perennial herb in most parts of the world.

A rosemary plant.
Rosemary doesn’t die after flowering since it is not a monocarpic plant.

The most important thing you need to know is that rosemary will only continue to produce leaves, stems, and flowers if the climatic conditions are right, and the soil is well-drained.

Tips for Promoting Rosemary Flowering

Providing the right environment and care is the key to getting your rosemary to flower. Here are some tips to help you out:

1. Provide Your Rosemary with Plenty of Light

Give your rosemary plenty of sunlight for it to flower. Consider providing 6-8 hours a day. Place the plant in an area with enough sun or provide artificial lighting if growing indoors.

2. Water Properly

Rosemary needs plenty of water, but too much can harm the plant. Water deep and only when the soil is dry to keep it flourishing. Watch out for signs of overwatering, such as yellow leaves and fungus on the stems. It is best to avoid watering the leaves.

A person watering a rosemary in a pot,
Water deep and only when the soil is dry to keep it flourishing.

3. Check for Pests

Check for Rosemary pests such as slugs, aphids, and whiteflies. If you spot any of these critters, use insecticidal soaps or oils to get rid of them.

4. Fertilize Monthly

Fertilize your rosemary plant monthly with an organic fertilizer made for herbs. This helps ensure that the soil is nutrient-rich and encourages healthy growth.

Provide your rosemary with a balanced fertilizer for best results, and read the label to ensure you are using the right one.

Does Rosemary Produce Seeds?

Yes, rosemary produces seeds after flowering. Once insects pollinate it, the flowers will begin to form seeds. You can collect the seeds and use them for propagation or save them for later use in your garden.

Proper storage is critical to ensuring the viability of rosemary seeds. Store them in an airtight container at room temperature or in the refrigerator for up to one year.

What Can You Do with Rosemary Flowers?

Rosemary is mostly used as a landscape plant. It is versatile, evergreen, and perennial, with aromatic leaves that flavor many dishes. The herb also produces beautiful flowers that attract pollinators.

The tiny purple or blue flowers are edible and can be used in many ways. The flowers are best eaten fresh to enjoy the mild and delicate flavor.

Some people believe the herb is most flavorful when consumed just before flowering. However, that is largely a matter of personal preference. Maybe you should try it out yourself and decide if it is good for you.

How Else Can I Use Rosemary Flowers?

Besides being edible, there are many other creative ways to use rosemary flowers. Here are some of them:

  • Add the blossoms to salads for a pop of color.
  • Use it as an ingredient in herbal teas.
  • Sprinkle over roasted vegetables for a unique flavor.
  • Infuse honey or oil with dried rosemary flowers for a fragrant flavor.
  • Use petals as decoration on cakes and pastries.
  • Make a flower crown or add it to bouquets for a romantic touch.

The oil extracted from these flowers provides soothing effects for cramps and arthritis. Apply the oil on aching muscles and joints in the evening or at night. Applying the oil can also help prevent hair loss or baldness.

Rosemary flower oil also contains numerous minerals, vitamins, and antioxidants that help fight various illnesses and boost your health.

It improves blood circulation in your body vessels which is critical to improving your overall immune system.

Can You Still Use Rosemary After It Flowers?

The truth is that many herbs tend to lose or change taste after the flowering season.

Rosemary flavor and color don’t change much after the flowering season. So, you can still harvest your herb and use it in your favorite dishes without worrying.

A oil bottle with rosemary flower.
it’s best to use the leaves before they flower.

Maybe, the only difference you might notice is that the leaves are slightly tougher after flowering. So, if you’re using them for a salad or other raw dish, it’s best to use the leaves before they flower.

Why Is My Rosemary Not Flowering?

Flowering in a rosemary plant usually signifies proper growth and development. But what if it no longer produces flowers? Does it mean your rosemary is dying?

Many factors can prevent your rosemary plant from flowering. These factors may be care-related, environmental, or seasonal.

Too much fertilizer is perhaps the most common culprit. Remember that the herb is adapted to growing in sandy soils with relatively poor nutrient rations.

The herb thrives and produces beautiful flowers in naturally nutrient-deficient sandy soils. It means that the herb doesn’t require heavy fertilizers, and excess fertilizer can cause the plant to stop flowering.

Another common factor is improper pruning. Prune your herb in late spring when it has already finished flowering, and avoid pruning too deeply, as this will reduce its flowering capability.

Overcrowding can also prevent the plant from flowering. When there is not enough space, the herb becomes too shady and thus cannot flower. So, be sure to give your rosemary some space in your garden.

A rosemary in a white pot.
Be sure to give your rosemary some space in your garden.

Finally, timing also plays a crucial role in rosemary’s blooming cycle. The herb starts flowering in late spring and continues through summer.

If you planted your rosemary too late, it might not have enough time to bloom before the cold winter season sets in.

Summary

Rosemary is a hardy herb, and if given the right care, it can produce beautiful clusters of fragrant flowers that you’ll enjoy all season long.

All you need to do is follow the right care guide to encourage your rosemary plant to blossom, and you’ll be rewarded with gorgeous blooms.

Starting Your Cactus Journey: Our Top 7 Picks for Beginners

Cacti are amazing plants available to buy and grow in your garden. Most of them are relatively easy to look after and survive, even with neglect. In fact, they are the only group of plants known to be highly forgiving. However, these succulents can still suffer various problems that beginner gardeners might have trouble identifying and dealing with. For instance, some cacti varieties require more water than others, or they may need to be repotted every few years to thrive. This can be daunting for beginners. Luckily, there are some cacti varieties perfect for newbie gardeners who may not have much experience in this area.

So, what are the best cacti for beginners? We can recommend many cacti plants that are relatively easy to grow, but not all of them are easily available in plant nurseries and online stores. So, if we were to pick the best cacti for beginners, we would go with Mammillaria, Rebutia, Echinopsis, Orchid cacti, Barrel cactus, Prickly Pear Cactus, and Gymnocalycium. Others include the Angel Wings cactus, the Rat Tail cactus, the Saguaro cactus, and the Christmas cactus. These cacti are easy to find and relatively low maintenance.

This blog post discusses some of the best cacti for beginners in detail while highlighting their unique characteristics and needs. Read on to learn more.

Mammillaria

Commonly referred to as the “pincushion cactus,” mammillaria remains one of the largest species in the cactus family, with more than 250 varieties. They are also one of the most cultivated cacti species. They vary from relatively small to large clusters and are Native to Mexico.

Mammillaria loves bright, indirect sunlight but can still survive in full light. In fact, exposing it to full light promotes flowering, but you must be careful to avoid causing sunburn.

In summer, water your Mammillaria frequently (every week) but go slow during winter since the plant slides into a state of dormancy.

A person holding a Flowering Mammiliaria in a brown pot.
Exposing it to full light promotes flowering, but you must be careful to avoid causing sunburn.

Consider reducing your watering frequency to once every four or five weeks. The cactus will thrive in relatively cool spots with temperatures of between 60-65 degrees Fahrenheit.

Mammillaria is known to flower quite easily, but they produce relatively small flowers. The flowers range from white to purple.

Mammillaria is one of the best cacti for beginners due to its easy-going nature, forgiving behavior and resilience. They are also easy to find, and you can find lots of information online on their general care routine.

Rebutia

Rebutia is a special type of cactus that comes from the high altitudes of Bolivia. It has a very relaxed look with its small globular body.

Rebutia is one of the best cacti for beginners because it can survive in low-light conditions as well as relatively harsh conditions.

Unlike Mammillaria, this type of cactus does not require frequent watering and can go for weeks without being watered.

During summer, water your Rebutia occasionally only if the soil is completely dry. During winter, the cactus will not require any watering at all.

Rebutia loves bright indirect sunlight since too much light can lead to sunburns. So, you must limit its exposure to full light, especially during summer when we have extended periods of sunny days.

A flowering rebutia cactus in a pot.
Once you get used to its prickly nature, you will realize that Rebutia is a great choice for a beginner.

It produces bright yellow and red flowers, but only if you expose it to the right amount of light.

Rebutia is not as popular as other cacti species due to its small spines, which can be uncomfortable when handling it.

However, once you get used to its prickly nature, you will realize that Rebutia is a great choice for a beginner.

Barrel Cactus

The barrel cactus belongs to genus Ferocactus known for being fierce and hardy. A typical barrel cactus is usually covered with long, sharp spines that protect its juicy and edible pulp.

In its natural habitat, this cactus species can grow up to 6ft tall and is easy to find in stores. It needs full sun with temperatures of between 55-90 degrees Fahrenheit.

Water your barrel cactus sparingly during summer and let the soil dry out completely between watering sessions. During winter, you can reduce your watering frequency by half or even more, depending on the environment.

Barrel cactus can live for many years and reach great heights. Indoor barrel cactus can easily hit a height of five feet.

The succulent is a great choice for those who want an easy-to-maintain plant that requires little attention and care. Its ability to thrive in the harshest conditions has made it popular amongst beginners and experienced gardeners.

The barrel cactus will produce beautiful flowers (usually yellow or orange) during summer if you provide it with enough sunlight and water.

Echinopsis

Also known as the hedgehog cacti, Echinopsis remains one of the most popular cactus types amongst gardeners.

It is native to South American deserts and boasts beautiful spines that stretch out like hair from its body, making it one of the most unique cacti plants.

A flowering echinopsis in a black pot.
You must grow it in a highly porous and well-draining potting mix to achieve good results at home.

However, its ability to survive in relatively harsh conditions with minimal attention makes it a great choice for beginners.

This succulent loves rich soil in its natural habitat, where it grows pretty quickly since it develops a dense root system for water and mineral absorption.

Therefore, you must grow it in a highly porous and well-draining potting mix to achieve good results at home.

It loves good watering during summer but should only be watered when the soil is completely dry. During winter, water it sparingly to prevent root rot.

Echinopsis can handle variable light conditions, but direct sunlight can damage its spines. Therefore, consider providing it with indirect or filtered sunlight to avoid sunburns.

For temperature and humidity, this cactus is quite hardy, requiring a minimum temperature of 15 degrees Celsius and relative humidity of about 40%.

Echinopsis produces beautiful flowers in bright yellow, pink, and red colors that attract bees and butterflies.

Thelocactus

Thelocactus refers to a cacti genus comprising medium-sized columnar or globular-shaped cacti plants. Cacti plants in this category tend to have many beautiful spikes with a diameter of around 8-20cm.

When growing Thelocactus, you must provide it with an appropriate soil mix (well-draining) and full sun exposure to encourage growth.

In fact, you should only consider growing Thelocactus if you live in an area that receives plenty of sunlight. Water your cacti when the soil is dry and reduce watering frequency during winter.

This cactus species can tolerate some frost, but it is always recommended to keep it indoors during the cold months.

A flowering thelocactus in a pot.
Thelocactus refers to a cacti genus comprising medium-sized columnar or globular-shaped cacti plants.

Thelocactus is a great choice for those who want an easy-to-care-for plant that will grow well in harsh conditions.

It produces attractive flowers in yellow, purple, and red shades, making it a great addition to any indoor or outdoor garden.

Plus, its sturdy and long-lasting nature makes it ideal for those who want a cactus that will last for many years.

Prickly Pear (Opuntia Cactus)

Prickly pear is one of the traditional types of cacti species ideal for beginners. The opuntia cactus is native to North America and commonly found in desert habitats.

It is a low-maintenance plant that requires minimum care and attention. It can handle high temperatures and extended drought periods with little water requirements.

Always allow the soil to dry out completely before watering your prickly pear cactus. Reduce the frequency of watering significantly during winter to prevent root rot.

The prickly pear cactus is quite cold hardy and can tolerate temperatures of up to -30 degrees Celsius. It thrives in full sun exposure but consider watering it sparingly during summer for best results.

A prickly fruit cactus.
The prickly pear cactus is definitely worth trying if you’re looking for an easy-to-care-for plant.

This cactus is known for its stunning red, yellow or white flowers appearing from late spring to summer. It also produces edible fruits with a sweet and refreshing taste, making them a great addition to any garden.

The prickly pear cactus is definitely worth trying if you’re looking for an easy-to-care-for plant that will add beauty and color to your landscape.

Astrophytum

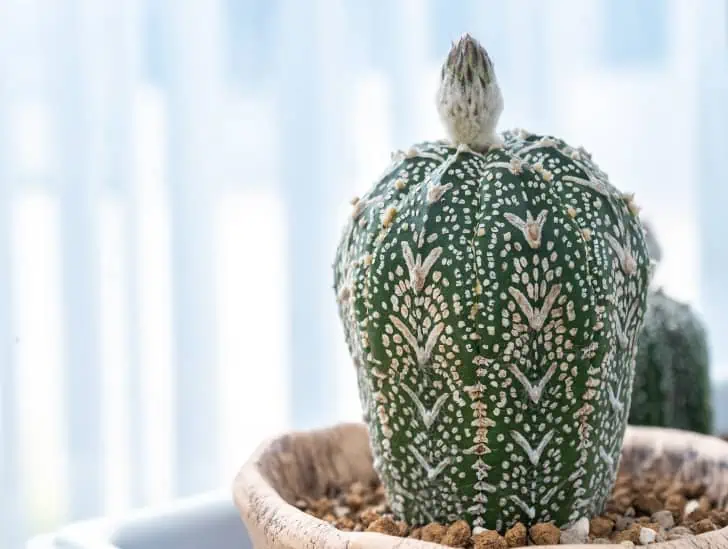
Astrophytum is a small group of cacti plants also referred to as star cacti due to their star-shaped appearance.

Most of them are columnar and somehow globular. Some species in this genus are spineless, making it a great choice for beginners.

The succulent is known for its slow growth and low maintenance requirements making it ideal for both experienced and beginner gardeners.

Astrophytum thrives in a well-draining potting mix with some added sand to enhance water drainage.

Water your cacti plant once a week during summer when temperatures are high and reduce the frequency significantly during winter.

It requires bright sunlight to survive and thrive. However, adjust the amount of light you provide depending on your environment.

Too much direct sun can cause sunburns, while too little light will result in poor growth and blooming.

This cacti species is very tolerant of cold temperatures and can tolerate temperatures down to -5 degrees Celsius.

It produces beautiful yellow and pink flowers that attract bees and butterflies when grown outdoors.

It is definitely worth trying if you’re looking for a low-maintenance cactus species with stunning blooms.

Summary

These are some of the best cacti for beginners. These species are a great way to start if you are considering getting into cacti culture.

After getting to know these plants and how to care for them, you will be well on your way to becoming a cactus expert.

But be sure to conduct your research before purchasing any plant to ensure it is the right fit for you and your home.

Why Is My Rosemary Woody? Expert Tips

A closeup image of a rosemary.

Rosemary plants are an excellent addition to every garden. They are a perfect herb for every hobby cook. You can use its leaves to flavor various foods and drinks. If you don’t have an outdoor garden, you can still grow it indoors in pots. However, one of the most common issues with rosemary is that it can sometimes get woody making it unsuitable for use in cooking. But what exactly causes rosemary to get woody? You should know exactly why your rosemary is turning woody by the time you are done reading this.

So, why is my rosemary woody? One of the most common causes of woody rosemary is improper watering. Many gardeners give too much water to their plants, drowning them in moisture. Rosemary prefers drier soil. The other causes of this problem include lack of pruning, overgrowth, plant age, and exposure to the sun. Sometimes, the plant may still turn woody even if you do everything right. This is not surprising because it is natural for rosemary to turn woody since it is a shrub.

This blog post discusses some of the reasons your rosemary might be turning woody and what you can do to prevent this from happening. Read on to learn more.

Rosemary Plant: Overview of Optimum Growing Conditions

Rosemary is naturally a sun-loving and heat-tolerant shrub, but it also thrives in cooler temperatures of between 40-60 degrees Fahrenheit.

The plant will survive through winter as long as the light is strong enough. The shrub is hardy and can survive a lack of sunlight exposure and water for an extended period.

This makes it a popular plant among beginners. In its natural habitat, rosemary does well in relatively warm areas with good humidity.

Rosemary in a pot.
The plant will survive through winter as long as the light is strong enough.

It can reach up to five feet tall under optimal conditions. The plant grows so much that it can become a bit of a burden if you don’t manage it properly.

Tuscan Blue is one of the tallest varieties of rosemary. This variety can grow up to six feet tall, given the right conditions. Its leaves are quite broad, producing dark blue flowers during spring.

The Golden Rain is perhaps the shortest variety since it doesn’t grow past three feet tall. It has golden yellow leaves and produces dark blue flowers. This rosemary species is excellent for growing indoors in pots since it is relatively easier to manage.

What Causes Rosemary to Become Woody?

Many gardeners have probably encountered this problem at one point or another in their gardening adventures. But what really causes rosemary to become woody? Let us find out:

1. Lack of Pruning

One of the common reasons for woody rosemary is lack of pruning. The shrub needs occasional trimming to maintain its shape and promote fresh growth.

Remember that in the Mediterranean heat, these plants are pruned naturally. Brooding summers, thin soils, and relatively strong winds greatly ensure the shrub doesn’t get bushy.

Growing it in a relatively wetter, milder climate means you have to go further to ensure it remains in good shape.

Consider pruning your rosemary once or twice a year to maintain its nice shape. The best time to prune your rosemary is early spring or late summer.

Harvesting the young leaves and twigs regularly is considered part of the pruning schedule, but you still need to do some shaping to maintain a neat shape.

A peron pruning rosemary.
Remember that in the Mediterranean heat, these plants are pruned naturally.

To prune your rosemary, you will need a sharp knife or pair of pruning shears. You must be careful not to cut the plant at the wrong parts.

Start by removing the dead branches and fading blooms. Feel free to cut off the dead branches at the base and plug the faded blooms with your hand. Also, cut dead shoots to the first pair of green leaves to allow them to grow afresh.

Be careful not to cut woody stems because it will only damage your rosemary and won’t stimulate new growth.

In fact, if you cut the woody parts of the shrub too much, it won’t develop new shoots in that area. The effects can be fatal if the cutting is severe.

Avoid cutting below the leaves since this is where the new growth buds are located. Don’t forget to remove branches that cross over and form a tangled mess.

What Can I Do with the Cuttings After Pruning?

Once you are done with pruning, cut the stems and use them in your culinary recipes or make a bunch of them dry for winter.

Rosemary has more than 40 types of essential oils, minerals, vitamins, and antioxidants that can be used for medicinal purposes. You can also use the fresh cuttings to propagate new plants.

2. Overwatering

Another reason rosemary might become woody is due to overwatering. This plant needs enough water to grow, but too much water can quickly cause its demise. Too much water will make the soil soggy and prevent oxygen from reaching the roots.

This is why you need to ensure your rosemary is planted in well-draining soil and gets enough sunlight exposure.

A person watering rosemary in a pot.
This plant needs enough water to grow, but too much water can quickly cause its demise.

Essentially, the shrub should be watered only when the top inch of soil has dried out completely. An easy way to check this is by sticking your finger into the soil up to an inch deep. If it feels dry, water the plant.

In winter, when temperatures are relatively mild, reduce watering a bit since the plant doesn’t need as much water as it does during hot summer days. You can also lay mulch on top of the soil to help retain moisture and reduce water evaporation.

3. Overgrowth

This is also a common cause of woody rosemary. When a shrub is planted in ideal and well-drained soil, it will grow tall and wide and eventually become woody.

To prevent your rosemary from becoming too large, you must trim its tips periodically.

This reduces the size of the bush while stimulating new growth at the same time. Doing this will ensure the plant remains bush-like and does not become too large.

4. Freeze Damage or Dying Rosemary

If you notice an increased presence of bare stems on your rosemary plant after winter, it may be a sign that your plant didn’t survive.

We have mentioned that the best time to prune your plant is early spring or late summer to protect it from extremely low temperatures.

Anything below 17 degrees Fahrenheit is considered too low for a rosemary plant to survive.

If you live in an area that experiences such low temperatures during winter, consider covering your plant with a frost cover to protect it.

Keep in mind that the succulent’s main requirements for survival are lots of sunlight, warm temperatures, and succulent soil with good drainage.

Rosemary outdoor in snow.
Anything below 17 degrees Fahrenheit is considered too low for a rosemary plant to survive.

These are the conditions in its natural habitat. If your plant doesn’t get these conditions, it won’t survive too long.

Typically, a rosemary plant requires about 10-12 hours of direct sunlight during the active growing season and at least eight hours during the dormancy period.

Failure to adhere to these guidelines and maintain your rosemary plant’s health will make it woody.

You must also ensure the soil is light, sandy, gritty, and well-draining. Avoid heavy soils that may take too long to drain, resulting in root rot.

5. Natural Woodiness

As rosemary plants age, they tend to become woodier as well. This is natural and normal for the plant. To ensure the growth of new shoots, you should still prune your plant in spring or late summer.

This will help prevent it from becoming too overgrown and encourage fresh foliage to grow and bloom again. You can also use a balanced fertilizer to replenish the soil nutrients and help your rosemary thrive.

How Can I Keep My Rosemary from Turning Woody?

Fortunately, there are a few steps you can take to ensure your rosemary plant stays healthy and doesn’t become woody. You need to understand the lifecycle of your shrub and take deliberate steps to keep it in great shape.

Typically, most stem growth of these shrubs occurs in spring and summer. It is more likely that some of the new growth will harden and turn woody during the dormant season. Once this happens, the plant’s stem won’t grow again for the rest of its life.

As mentioned earlier, it is natural for rosemary plants to turn woody as they age. It is part of their lifecycle.

However, regular pruning can do quite a good job of preventing it from becoming woody. Proper pruning also encourages young branches and leaves to grow pretty quickly.

Rosemary in a white pot.
It is natural for rosemary plants to turn woody as they age.

And it is not just about pruning. Regular watering and feeding are also important.

Keeping your rosemary plant in a warm and sunny spot, with well-drained soil, will also help it stay healthy and look vibrant. Water your rosemary regularly and feed it well to keep it healthy.

But you should be careful not to overwater because this can cause root rot. Also, avoid planting your rosemary in poorly drained soil because it will also damage the roots and make them woody.

Summary

These are some of the common causes of woody rosemary. With proper care and pruning, your rosemary should remain in good shape and produce healthy foliage for many years. Just remember to give your plant enough sunlight, water, and well-draining soil for better results.

Why Is My Air Plant Not Growing? Causes and Tips

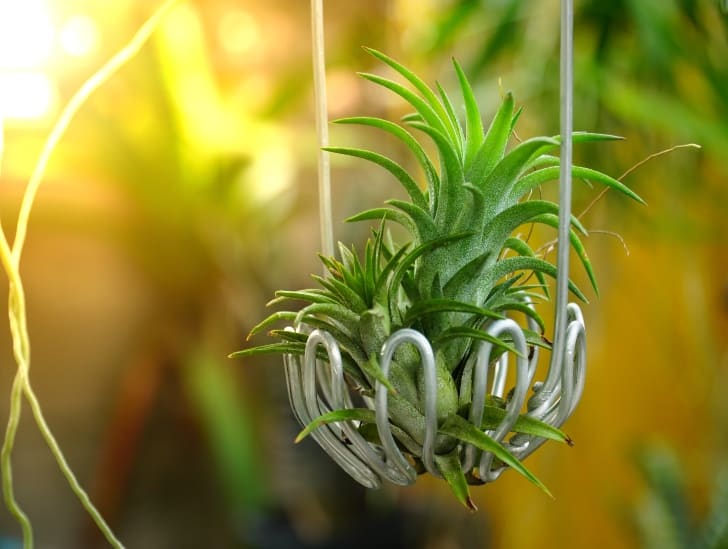
A airplant in a wood.

Air plants are quite popular among gardeners since they are epiphytic. It means that, unlike most plants, their survival doesn’t depend on soil. Instead, these plants draw nutrients and moisture through their highly modified leaves. Although air plants are quite easy to grow, lack of proper care and maintenance can affect their growth rate immensely. You need to keep a close eye on your plants and act quickly if you realize they aren’t growing as they should. But before you get there, you need to know some of the common causes of air plants not growing.

So, why is my air plant not growing? One thing you need to remember is that air plants are generally slow growers. Some air plant species, such as xeric, can take up to three years to complete the first growth cycle. Other species may take even longer than this, so don’t be concerned if your air plant isn’t growing quickly and everything seems fine. However, you should be worried if your air plant shows signs of stress and is not growing. Common causes of stunted growth include underwatering, lack of enough sunlight, pest infestation, lack of air exchange, or extreme temperature fluctuations.

This article discusses some common causes of air plants not growing and what you can do about it. Read on to find out everything you need to know.

How Fast Do Air Plants Grow?

Before diving into the causes of air plants not growing, let’s look at how fast these plants typically grow.

Generally, air plants are slow growers and may take several years to complete one growth cycle. Therefore, patience is key when growing these plants at home. No amount of care can speed up their growth rate.

For instance, xeric air plants may take up to three years to complete one growth cycle. Other species may take even longer than this.

Most of them typically grow less than one inch within the first two years when grown through seed germination.

Caput medusa air plant exposed to sunlight.
No amount of care can speed up their growth rate.

They only bloom once in their lifetime, but they are not monocarpic. These plants can take up to five years to reach maturity and bloom. They continue producing offsets for many years after blooming.

The only way to speed up their growth rate is to try and mimic the conditions in their natural habitat as much as possible. Mesic air plants generally grow faster in high humidity levels with relatively low light.

You can also boost their growth rate by promoting rooting and fertilization. Be keen on the type of fertilizer you use. Some fertilizers can be too strong for air plants and cause them to burn.

These plants are part of the bromeliad family. They are epiphytic and love to grow without soil, although they can survive in traditional potting mediums.

Common Causes of Air Plants Not Growing

Now that you know how fast these plants typically grow, let’s dive into the causes of air plants not growing.

Reason #1: You Have a Slow Growing Air Plant

As mentioned earlier, there are two main types of air plants – xeric and mesic. These categories separate air plants that originate from two different types of environments.

The xeric air plants are generally slow growers and may take more than five years to reach maturity.

This type of air plant is naturally found in arid areas. They have large trichomes giving them a fuzzy appearance. Trichomes are water absorbing openings on the plants’ leaves.

Xeric air plant in a pot hanging.
Xeric air plants come from a relatively harsh environment, they are adapted to survival.

The relatively large and denser trichomes allow xeric air plants to absorb more water whenever it rains. They also play a critical role in protecting the plant from the adverse effects of direct sunlight.

Therefore, it is safer to conclude that xeric air plants have a relatively slower metabolic process leading to a slower growth rate.

On the other hand, mesic air plants originate from areas that receive plenty of rainfall and are generally humid. These plants have small trichomes and are greener than their xeric counterparts.

Since xeric air plants come from a relatively harsh environment, they are adapted to survival. You must provide them with lots of indirect sunlight at home to aid growth. They also require infrequent watering and a well-draining potting mix.

Reason #2: Your Air Plant Is Underwatered

Underwatering is one of the major causes of air plants not growing. These plants require very little water compared to other houseplants, but they still need some amount of water to survive.

When an air plant is underwatered, its leaves turn yellow and eventually dry out completely. Since these plants are native to areas where it rains frequently, they need some sort of watering routine at home.

A air plant soak in a water.
These plants require very little water compared to other houseplants, but they still need some amount of water to survive.

Soak your air plants in a bowl or sink filled with room temperature water for about 15-20 minutes. Do this once or twice a week, depending on the weather and climate of your home.

Use distilled water since tap water may contain minerals that can harm your plant. You should also mist them with a spray bottle every few days for extra humidity.

Reason #3: Your Air Plant is Overwatered

It can be tricky to determine when your air plant needs watering. If you overwater them, the leaves may become mushy and droop. This can lead to root rot, eventually killing the entire plant if left untreated.

The best way to avoid overwatering is by checking the potting mix regularly. If the soil feels completely dry, you can go ahead and water your air plant.

Finally, ensure the potting mix is well-draining, and never let your air plant sit in standing water. Let the excess water drain away from the roots before returning your plant to its container.

Reason #4: Lack of Enough Light and Air Exchange

Even though these plants are relatively hardy and can survive with neglect, they still need to be taken care of to thrive.

Most of them require lots of bright, indirect light and infrequent watering to thrive. Without proper light exposure, watering, and air exchange, your air plant won’t grow.

These plants require lots of light to grow. Ensure the light is filtered to achieve better results. Avoid exposing them to bright, direct light for more than two hours daily. Overexposure to direct sunlight can lead to irreversible sunburn.

All air plants also require air exchange to thrive. Be sure to ventilate the room where they are positioned at least once a day.

Furthermore, take your plants outdoors for a couple of hours daily to aid their growth. Never leave them under a working air conditioner.

Air plant exposed to sunlight,
Without proper light exposure, watering, and air exchange, your air plant won’t grow.

Watering is another critical aspect that affects their growth rate. Mesic air plants require lots of watering than xeric air plants.

Consider submerging your mesic air plants in water and letting them sit there for one hour during summer and spring. This should be done once every week. For xeric plants, submerge them once every 10/15 days.

However, some air plants don’t need this type of deep watering because they are prone to rot. A good example of such a plant is the Tillandsia tectorum.

You can still water them intensively but less often during winter. The best way to water these plants is to let lots of water run over the plant for a couple of minutes under a sink or shower.

Misting won’t provide them with enough water. But you can consider misting your air plants every two or three days just to keep the leaves hydrated.

Reason #5 Pests and Diseases

Lastly, your air plant may not be growing due to pests or diseases. Air plants can be prone to pests like mealybugs, mites, aphids, and thrips that feed on their juices. As a result, the plant’s growth is inhibited, and it may even die if left untreated for too long.

Air plant hanging.
Inspect your air plants regularly for any signs of disease and treat them immediately.

To keep pests away from your air plant, regularly inspect them for any signs of pests. If you notice any, treat the plant immediately with an insecticidal soap or neem oil solution.

Furthermore, air plants may get infected by various fungi and bacteria that grow in soil or water. These diseases can be tough to spot and may lead to yellowing of leaves, stunted growth, or even death.

To prevent these diseases, you should always use clean water and mix it with a few drops of hydrogen peroxide before watering your air plants.

Also, inspect your air plants regularly for any signs of disease and treat them immediately to save them from further damage.

Final Thoughts

Generally, air plants are very resilient and can survive with minimum care. However, to ensure proper growth and development of your air plant, you must provide it with the right amount of water, light, and air exchange.

You should also watch for pests and diseases that might be wreaking havoc on your beloved air plant.

Now that you know how fast air plants grow and why yours is not growing, it’s time to get creative and have fun with these amazing plants!

How to Care for Succulents in Office?

Does the thought of walking into your office on a Monday morning make you feel low and unmotivated? If so, bringing some plants into your office space could be the perfect pick-me-up! Research shows that adding some houseplants to your office may significantly boost your production and creativity. And one of the houseplants to keep in an office are succulents because they don’t need much attention to survive. However, there are a few things you need to know that will help you keep your office succulent happy.

So, how do I care for office succulents? One of the most important things you need to do is maximize the amount of light you get. Look around your office to determine if any spot receives a good amount of natural light. That is where you should position your succulent. Although most succulents need to be watered once every one or two weeks, err on the side of caution with your office succulent. Consider watering it once or twice a month because it is most likely getting less light. Ensure you plant it in well-draining soil and choose a good pot.

This blog post outlines essential tips you need to know on how to care for office succulents. Read on to learn more.

What Are the Benefits of Having Succulents in the Office?

According to research, plants can clean water and air in enclosed environments. Succulents such as Aloe vera and the snake plant can remove up to 87% of volatile organic compounds such as benzene, mostly found in ink, books, and carpets.

These plants can also reduce the harmful toxins from chemical cleaning agents left lingering in your office.

Like other houseplants, succulents can help reduce office sickness by improving humidity and oxygen levels, reducing the spread of respiratory illnesses.

Succulent in a brown pot at the office.
You can always put your gardening skills to work right in your office.

A study by Kansas State University revealed that bringing plants into your workplace could significantly increase your productivity and creativity by limiting the risk of dry, itchy skin, sore throats, coughs, and colds.

Furthermore, these plants are incredibly low-maintenance and need minimal attention to thrive. This makes them ideal for office people who love gardening but may not have time to practice it at home due to relatively long work hours.

You can always put your gardening skills to work right in your office. Some succulents make your office look good because they can be used as decor pieces.

This is especially true for hanging/trailing succulents such as String of Pearls and String of Bananas. These plants will add texture, color, and charm to your office space.

Lastly, office succulents boost productivity by providing a more relaxing and calming atmosphere. They make your office feel less like an industrial space and more homier, which could result in an improved working environment.

How to Take Care of Office Succulents

Now that you know the benefits of having office succulents, let us look at how to take care of them.

1. Start By Choosing the Right Succulent

One of the most important things you need to do to keep your office succulent happy is to choose the right plant.

You need to remember that not all succulents are the same. Consider each succulent species as unique with its own growing requirements.

While some succulents are adapted to thriving in low-light environments, such as an office, others won’t survive a day.

A top view of succulent plant, coffee, and an alarm clock.
Take time to get to know your succulent before you bring it to your office.

Your best bet will be to go for low-light plants. Avoid succulents that need full sun because they won’t last long. Take time to get to know your succulent before you bring it to your office.

Generally, relatively small and slow-growing succulents make ideal office plants because they don’t need a lot of space or attention.

Some succulent species that may thrive in an office setting include the Jade plant, Haworthia, Echeveria, Aeonium, Sedum, and Sempervivum.

2. Maximize the Sunlight You Receive

Generally, succulents love to bask in the sun. They need at least four to six hours of bright indirect light each day to stay alive and happy. So, you need to determine if there is any spot in your office that receives a good amount of natural light.

You can start by positioning your succulent near a windowsill that you can find in your office. Ensure you rotate it for a couple of days so that all sides receive an even amount of sunlight.

Succulent in a windowsill.
You need to determine if there is any spot in your office that receives a good amount of natural light.

If you notice your succulent leaning towards one side, be sure to rotate it to the other side, and it will straighten in a couple of days.

If you discover that your succulent is still getting leggy or stretching out despite being near a windowsill, it means that it is not receiving enough light. In that case, you should find an alternative spot for your plant.

If there are no windows in your office, consider positioning the succulent under artificial light.

Typically, it will need at least six hours of light a day to thrive. Your succulent will be fine under that LED or fluorescent light above your desk.

Alternatively, consider getting a small grow lamp and keeping it by your desk to provide your plant with light.

Luckily, there are many affordable options for artificial grow lights. Therefore, finding one that suits your needs and budget is relatively easy.

3. Know How to Water Your Succulent

Typically, succulents need to be watered once every one or two weeks in spring/summer and once every three or four weeks during winter.

However, you need to be extra careful with how and when you water your succulent when planted in a low-light environment such as an office.

Gardening experts advise watering your succulent once or twice every month because it is getting less light.

Always check the soil before you water the plant. Stick your finger an inch or two into the potting mix and feel it.

A woman watering the plants.
You need to be extra careful with how and when you water your succulent when planted in a low-light environment such as an office.

If it feels dry, go ahead and water your plant. If it is still moist, wait another couple of days before checking again.

When you water your office succulent, pour the water directly into the potting mix at the base of the plant. Avoid pouring water on the leaves or rosette because it can lead to rot.

If some water gets on these parts accidentally, wipe it off with a tissue immediately.

Alternatively, use the bottom-watering method. To accomplish this, fill a saucer with water and let the plant sit on it for about 15 minutes before you empty any remaining water. This ensures the potting mix gets enough moisture without getting too wet.

Like any other succulent, the key to getting the best out of your office succulent is infrequent watering.

When you water, give your succulent a good drink, then let the soil dry out completely before you water again. Never mist your office succulent with a spray bottle because the effects can be catastrophic.

Finally, try to use distilled or filtered water on your succulent because tap water may contain too many chemicals that may harm your plant.

If you must use tap water, let it sit for about 24 hours before using it. This will help eliminate chlorine and other impurities in the water.

4. Use a Well-Draining Porous Soil

The type of soil you use is also critical when growing a succulent in an office. It needs to be porous and well-draining so that the plant can access enough oxygen and water without getting too wet or soggy.

A mixture of pumice, perlite, sand, vermiculite, and loam is often recommended for starting off. You can add some potting soil or a small amount of compost if you desire richer soil.

5. Everything Has to Do with a Good Pot

The type of pot you use will also determine the success of your journey of having an office succulent. To avoid waterlogging your plant, use a relatively shallow pot with plenty of drainage holes.

Select a lightweight pot to make it easier to move around when necessary. A terracotta or clay pot is always recommended for cacti and succulents.

Use the right size of pot for your succulent too. Succulents need just enough space to grow, but they don’t want to be cramped.

Generally, it is advised to use a pot two inches larger in diameter than the root ball of your plant.

A succulent in the windowsill of the office.
Select a lightweight pot to make it easier to move around when necessary.

For instance, if the succulent you are about to pot has a root ball that is four inches in diameter, choose a six-inch pot for it.

Finally, give your succulent a good start with some fertilizer. A balanced slow-release type of fertilizer will be ideal for your office succulent because it will provide it with all the nutrients it needs to thrive.

Summary

If you are looking for a plant that can spruce up your office space and improve your health, succulents are a great choice. These hardy plants are easy to care for, even if you don’t have a ton of gardening experience.

With a little bit of sunlight and occasional watering, your succulent will thrive in its new home. Just be sure to choose the right type of succulent and give it the attention it deserves.  

The Ultimate Closed Terrarium Care Guide

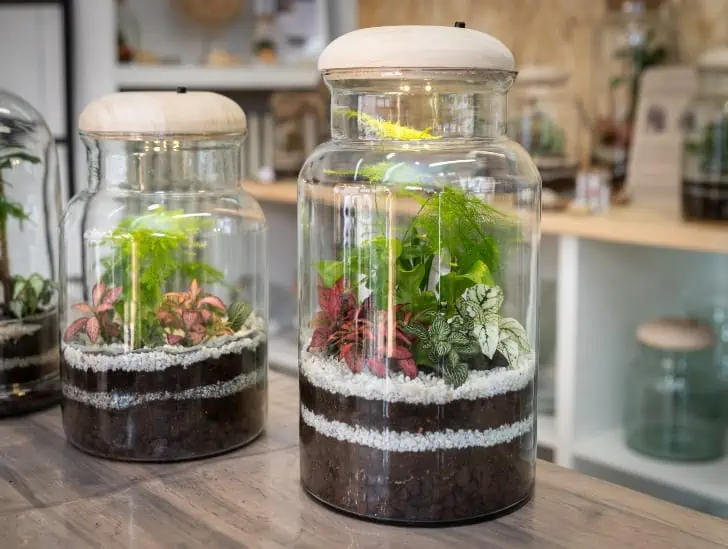
A two closed terrarium.

Closed terrariums, also known as gardens under glass, provide a unique design while creating tiny eco-systems of attractive plants and other decorative elements in a transparent glass enclosure. Terrariums play a critical role in bringing nature indoors, and if taken care of properly, they can provide you with a beautiful indoor landscape for many years. And what is even more interesting is the fact that most of them are low-maintenance and require less attention to thrive compared to other houseplants.

So, how do you take care of your closed terrarium? Closed terrariums will do best when positioned in good natural light rooms with an average temperature of 20 degrees Celsius. If your terrarium looks wet and foggy, open the lid for a couple of hours until the visible fog clears. Monitor it closely for any signs of mold or fungi, and check for humidity levels. If it looks dry, use a spray bottle to mist the plants and soil lightly. Open the windows and doors of the room where you have positioned your closed terrarium during winter to prevent excessive humidity. In terms of water, most closed terrariums only require occasional light misting and should never be overly watered since it can cause root rot or mold growth.

This blog post discusses key tips and tricks for caring for your closed terrarium. Read on to find out everything you need to know.

How Do Closed Terrariums Work?

Before diving into how to care for your closed terrarium, it is crucial to understand the science behind how they work. Understanding how the eco-system works will help you maintain it properly.

Closed terrariums are self-contained ecosystems that rely on the water cycle, photosynthesis, and respiration by their inhabitants to keep them healthy and thriving.

The inside of the glass enclosure creates a moist environment in which humidity levels are higher, and temperatures are warmer than the surrounding air.

This allows moisture to condense, form droplets, and collect on the walls of the glass enclosure, which then filter back into the soil, providing water for the plants.

Closed terrariums also benefit from the transpiration of plants, which involves releasing water vapor into the air. The water vapor plays a critical role in maintaining humidity levels inside the terrarium.

Plant on a closed terrarium near the window.
Understanding how the eco-system works will help you maintain it properly.

The soil within the terrarium plays a critical role in supporting healthy microbial processes that nourish the plants. Moisture from plant transpiration and evaporation recirculates in the terrarium as “rain“, keeping the soil moist.

The terrarium is designed to absorb small changes that help it to maintain a healthy balance.

However, nature takes care of most of the issues in a closed terrarium. The ecology isn’t complete on its own since it requires light and occasional watering to keep the plants in great shape.

What Plants Do Well in a Closed Terrarium?

The plants you choose to put in your closed terrarium will determine the success of your little ecosystem.

Generally, ferns and other moisture-loving houseplants are great for a closed terrarium since they thrive in more humid environments. Small succulents and cacti also do well in a closed terrarium as long as they are not overwatered.

You can also go for trendy plants such as Baby Tears, Pilea, and Peperomias. Exotic epiphytes and low-growing nerve plants are good choices as well.

A woman smiling while holding a closed terrarium.
It is also essential to select plants of similar sizes so that the enclosure does not become overcrowded.

When selecting plants for your closed terrarium, ensure they are compatible with the environment.

Research each plant you are considering and consider whether it can survive in a more humid environment. It is also essential to select plants of similar sizes so that the enclosure does not become overcrowded.

Key Closed Terrarium Care Tips

Now that you understand how closed terrariums work and which plants are suitable, it is time to learn how to maintain them. Here are some tips for keeping your terrarium in good condition:

Watch Your Watering

Close terrarium plants are highly sensitive to excess water. In fact, overwatering them is riskier than underwatering. It is relatively easy to overwater your closed terrarium but quite challenging to fix the damage that follows.

Therefore, it is good to understand your terrarium’s watering needs and only add water at the right time. Use a spray bottle or mister to water your plants as evenly as possible.

The presence of heavy condensation on the glass wall is a vital sign of overwatering, but it is not the only one.

A jar converted to a closed terrarium.
Overwatering them is riskier than underwatering.

Keep in mind that your soil should never be saturated. Your plants only need a light misting to thrive. If the soil appears dark and wet, open up your terrarium and let it dry before things get out of hand.

Although the individual care of your closed terrarium plant will mostly depend on the plant species you have, it is relatively safe to maintain consistent light moisture for better results.

If you use a drainage layer, check how full it is. Ideally, you should have no water pooling in there. If there is water, you need to open your terrarium and let it evaporate.

Provide Adequate Light

Since closed terrariums are mostly lightproof, they require artificial light for plants to grow.

Depending on where it is placed, you may want to get a small LED lamp or a fluorescent light that provides enough illumination.

LED lights are the ideal choice since they do not generate too much heat that can damage your plants’ delicate environment. Also, you need to keep the light on for about 8-10 hours a day for better growth.

Watch Out for Signs of Mold

Mold is the biggest enemy when it comes to taking care of your closed terrarium. Mold tends to thrive in relatively hot and humid environments. It only takes a couple of weeks for it to ruin your beautiful environment.

However, a single mold spot in your closed terrarium doesn’t spell a disaster because mold is part of a natural decomposition cycle.

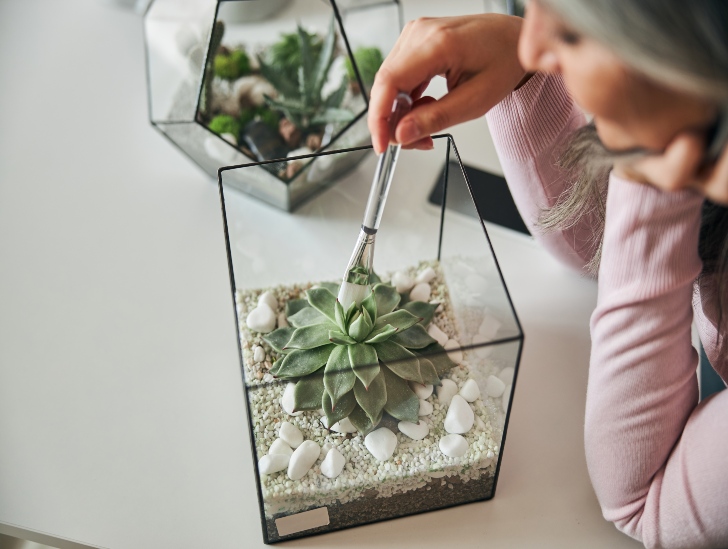
A woman brushing the plant in a Terrarium.
It is always good to tackle the mold at its source.

The spot will always disappear after a couple of weeks, and everything will be fine. Getting some air into your terrarium can hasten the process.

You can also deal with small patches of mold using a Q-tip and hydrogen peroxide. All you need to do is wipe off the patches, and you are good to go. It is always good to tackle the mold at its source.

Monitor Temperature and Humidity Levels

The temperature and humidity levels in your closed terrarium should be closely monitored. The ideal temperature range for terrariums is between 70 and 80 degrees Fahrenheit.

You can monitor the humidity levels with a hygrometer or by feeling the soil with your finger. If it feels cold and wet, you are probably good to go. You should also aim to keep the humidity level between 40 and 60 percent.

If the humidity level gets too low, you can increase it by adding a light mist of water or simply placing a wet sponge in the terrarium.

Provide Ventilation

Ventilation isn’t a big issue with closed terrariums since the air that plants produce is automatically recycled in the ecosystem. Typically, plants produce oxygen during the daytime but consume it at night.

However, the balance isn’t perfect, and you need to intervene to keep things in check. Consider opening your terrarium for a couple of hours every two or three weeks to keep the ecosystem fresh.

This is also the perfect time for other routine maintenance tasks. Once you are done with everything and put the lid back, check the rate at which condensation forms on the glass wall.

If you don’t see any signs of condensation after a couple of days, consider misting your plants to restore balance.

Should I Prune My Closed Terrarium Plants?

Most closed terrarium plants are relatively easy to care for since they grow slowly in limited conditions. Pruning is a must-do task that keeps your terrarium looking healthy and attractive.

However, you must inspect your plants objectively before you decide to prune them. Some plants may require selective pruning of some of their leaves and branches to get rid of dead or dying foliage.

A african violet plant in a terrarium exposed to sunlight.
Pay close attention to how much light each plant receives.

Furthermore, you must appreciate the fact that your plants grow at different rates. Therefore, you will be pruning each plant at different times.

Pay close attention to how much light each plant receives. The primary objective is to ensure no plant puts out leaves that block others from receiving their fair share of light.

You should also consider pruning leaves and branches that have started touching the glass wall. These leaves attract condensation and are more prone to fungal and mold issues.

Choose Appropriate Plant Sizes

It is also essential to select plants of similar sizes so that the enclosure does not become overcrowded.

If your closed terrarium is too small, you should opt for miniature plants that only require a little space, like mosses and ferns.

Final Thoughts

Closed terrariums are a great way to bring nature indoors and create a unique living environment. They look beautiful and provide numerous benefits, including better air quality, lower stress levels, and improved concentration.

Caring for your closed terrarium is essential to maintain its beauty and ensure the health of your plants. Ensure you monitor temperature, humidity, and ventilation and always keep an eye on signs of mold buildup.

Also, select appropriate plant sizes so your terrarium won’t become overcrowded. You can always have a beautiful, closed terrarium with a little effort and care.

How to Propagate a Zebra Plant?

A zebra plant on a white pot.

Also known as Haworthia Attenuata, zebra plants have evolved to become incredible houseplants common in North America and other parts of the world. Gardeners enjoy adding this succulent to their plant collection since it does not require much care and is quite resilient. If you have a few zebra plants, you might be looking for ways of multiplying them to increase their number in your home. Fortunately, you can always propagate your zebra plant if you know what you are doing.

So, how can I propagate a zebra plant? Propagating zebra plants usually involves breaking off pieces of the plant and planting them in well-draining soil. There are two ways to do this: by leaf propagation or stem propagation. Leaf propagation involves taking a single leaf from the zebra plant and burying it in a pot of soil. Stem propagation involves cutting off the stem with some leaves attached and burying it in moist soil. Both methods are relatively easy but can take time to yield results.

This blog post discusses everything you need to know about zebra plant propagation. Read on to learn more.

Why Should I Propagate My Zebra Plant?

The truth is that propagating a zebra plant is not essential. You can just leave it alone and enjoy the beautiful foliage, flowers, and fruits that it produces throughout the year.

But many gardeners opt to propagate their plants for one simple reason: it enables them to increase their collection of zebra plants without having to buy new plants from nurseries.

Zebra plant in a white pot.
You will feel proud that you have managed to nurture it successfully.

Moreover, propagating your zebra plant can help you keep it healthy and happy. Removing diseased or dead leaves or stems plays a critical role in curbing the spread of diseases and pests to the other parts of the parent plant.

The art of propagating your zebra plant is also satisfying and fulfilling since it gives you a sense of accomplishment.

When your propagated plant starts to produce new shoots and leaves, you will feel proud that you have managed to nurture it successfully.

How to Propagate Zebra Plant

Now that you know why propagating zebra plants is essential, let’s look at the steps involved in this process.

Step 1: Identify a Healthy Leaf/Stem from the Mother Plant

The first step in propagating a zebra plant is to identify a healthy leaf or stem from your parent that you will use in the propagation process. Take time to identify a leaf or stem that is healthy for cutting.

Make sure you use a sharp and sterile knife to avoid causing unnecessary infections. You can sterilize your knife using bleach or rubbing alcohol. Simply wipe it with alcohol or bleach before you take the cutting.

As long as your knife is well sterilized, feel free to take a clean cutting without any worries. Once you take a clean cutting of a healthy leaf or stem from your zebra plant, you will be ready to move to the next step.

Step 2: Choose an Appropriate Container

The next thing you need to do is find a suitable container for your cutting. Ideally, you should use a plastic or glass container with plenty of drainage holes at the bottom that is large enough to accommodate your cutting.

A small zebra plant in a pot.
You should use a plastic or glass container with plenty of drainage holes at the bottom.

Avoid using metal containers as they are more likely to cause root rot. You should also pay close attention to your container size.

You don’t want the container to be too tall because your cutting will move around too much, interfering with root formation.

It is recommended that you scrub the container with some soap and hot water and rinse it thoroughly to get rid of soap traces.

Don’t rush the process because a single mistake may be catastrophic. Let the container dry completely before you fill it with clean water or soil.

Once you have found a suitable container and prepared it, fill it up with potting soil or a mixture of soil and organic matter. Ensure it is not too compact or dry; otherwise, your cuttings will have difficulty taking root.

Step 3: Rooting the Leaf/Stem Cutting

Rooting your leaf/stem cutting is the most vital step in propagating your zebra plant. You must do it correctly for successful propagation.

The best way to root your cutting is by submerging it in a glass of water for 2-3 weeks. Ensure the part of the leaf or stem you cut from the mother plant is completely submerged underwater, and keep the water level consistent.

Take time to pull any leaves from the bottom part of the cutting if you are using a stem cutting. Feel free to use a wire mesh to hold the stem cutting in place. You can use a rubber band to secure the wire mesh.

A zbra plant with a pruner besied.
Rooting your leaf/stem cutting is the most vital step in propagating your zebra plant.

You can also root your cutting directly in the potting soil or a mixture of soil and organic matter, but this is more prone to failure. Once you have rooted your cutting successfully, you can transplant it into a new spot.

Step 4: Transplanting and Caring for Your Cutting

Once your cutting has taken root, it is time to transfer it to your preferred spot. Choose a location that provides plenty of sunlight and water the soil moderately. Watering should be done only when the top layer of soil feels dry.

Zebra plant exposed to sunlight.
Choose a location that provides plenty of sunlight and water the soil moderately.

Watch out for any pests and diseases while caring for your cutting, and act immediately if you notice something.

Once your plant is established and starts to grow, you will feel proud that you have managed to nurture it successfully.

How Do You Propagate a Zebra Plant in Water?

Although succulents are highly sensitive to excessive water, rooting a zebra plant in a glass of water is quite simple and risk-free.

In fact, many gardeners prefer water propagation because it is an easy way of monitoring rooting progress. However, it might take relatively longer for roots to form in water.

If you choose to root your zebra plant cutting in water, ensure you choose a relatively narrow glass to help keep the cutting in position. You can dip the cutting in a rooting hormone before you place it in the container.

Carefully fill the container with distilled water while ensuring the bottom of the stem cutting is completely submerged.

Place the container in an area with indirect sunlight and change the water every other day for a few weeks to keep it fresh.

You will know that your cutting is rooted when you spot tiny white root hairs on the stem or a few tiny roots protruding from the stem base. Once you see these signs, proceed to transplant the cutting into its new home.

One thing you must be careful with when rooting your stem cutting in water is the type of water you use. Distilled water is the best because it has no added chemicals, but you can still use rainwater.

Avoid using tap water because it contains harmful chemicals that may interfere with the rooting process. If you must use tap water, ensure it is well-aerated for at least 24 hours before you use it.

Air Layering a Zebra Plant

Air layering is a unique form of propagation that involves getting a zebra plant to produce new roots before you cut the stem off the parent plant.

Air layering takes a little longer, but it is less risky and more successful than propagating cuttings directly.

The process of air layering involves laying a moss or sphagnum-wrapped stem, cutting in moist soil, and allowing it to root for some time before severing it from the parent plant.

Choose a healthy, relatively thick stem and wrap it with wet moss or sphagnum. Secure the moss with a plastic film and ensure it does not dry out. You can also mist the stem occasionally to keep it moist for faster rooting.

Once you start spotting root hairs, separate the rooted cutting from the parent plant and transplant it. Water moderately and provide enough sunlight to help the cutting establish itself over time.

When Is the Best Time to Propagate Zebra Plant?

If you choose to propagate your zebra plant by stem cutting, the best time to do so is during spring or summer, when the stem cuttings are easiest to work with. This is because they are more pliable and less likely to suffer from shock after propagation.

A person repotting a zebra plant.
The best time to do so is during spring or summer, when the stem cuttings are easiest to work with.

In terms of air layering, the best time to do this is during the summer months when the conditions are favorable for rooting.

Summary

Propagating a zebra plant is easy as long as you have patience and pay attention to detail. Start by choosing the right container for your cutting and filling it with soil or a mixture of soil and organic matter.

You can then root your cutting directly into the potting medium or submerge it in a glass of water for 2-3 weeks.

Once your cutting has taken root, transplant it elsewhere. Choose a location that provides plenty of indirect sunlight and water the soil moderately.

Monitor your plant closely for any diseases or pests while caring for it, and act quickly if you notice anything wrong.

With a little effort, your cutting will grow into a healthy and vibrant houseplant.

Terrarium Maintenance: Preventing Mold and Fungus

An open terrarium with succulent.

Having a terrarium is one of the best ways to bring a beautiful combination of outdoor scenery into your home. However, taking care of your terrarium may be an uphill task, especially for beginners. If you don’t take proper care of your terrarium, it can become overrun with mold and fungus. In fact, mold is the biggest threat to every terrarium since it steals away all nutrients leaving your plants malnourished. With time, your plants will wither, toppling over the entire ecosystem.

So, what can you do to prevent mold and fungus in a terrarium? Consider adding springtails to your terrarium and avoid overwatering. Springtails are tiny insects that love feeding on fungi and other decaying matter. They are a mold’s arch nemesis. Always apply fungicide to your terrarium substrate, remove all dead or decaying plant matter, and give it enough light. You can also prevent mold growth by sterilizing your substrate before adding it to the terrarium, airing it out periodically, and ensuring adequate drainage.

This blog post discusses everything you need to know about preventing mold and fungus in a terrarium. Read on to learn more.

Why Does Mold Grow

Before we start discussing strategies for preventing mold growth in a terrarium, it is essential to understand why mold thrives in terrariums.

Typically, mold loves warm, damp, and dark places with minimal air circulation. It can quickly grow on any moist surface, but its growth rate increases exponentially when the substrate has high organic content.

A standard terrarium experiences a lot of moisture circulation that helps to keep the water cycle working properly.

Mold also uses plant material as nutrients, so if there is no other source of nutrition, they will start feeding on your plants. That’s why keeping the terrarium clean and free from any dead or decaying matter is crucial.

A jar converted in to a closed terrarium.
The temperature, humidity, and organic matter in a terrarium create an ideal environment for mold growth.

Closed terrariums are at an increased risk of experiencing mold and fungus issues because the temperature is always perfect.

Due to the greenhouse effect, it will always be warmer in a closed terrarium, providing the perfect conditions for mold growth.

Furthermore, the relative humidity is quite high in a closed terrarium, making it even more susceptible to mold and fungus growth.

In short, the temperature, humidity, and organic matter in a terrarium create an ideal environment for mold growth. To prevent this, you need to ensure that your terrarium is properly ventilated and not too moist.

Tips For Preventing Mold Growth in A Terrarium

Now that you understand why mold grows in a terrarium, let’s look at some tips for preventing mold growth and fungus.

Tip #1: Ensure You Have a Drainage Level in the Terrarium

One of the most crucial steps to take to prevent mold growth in your terrarium is to make sure you have a drainage level.

The primary purpose of the drainage level is to catch excess water. Since there are no drainage holes in most terrariums, you must find a way of catching the excess water in your drainage layer. This will play a critical role in preventing it from causing mold growth in your terrarium.

To make a drainage level, you first need to prepare your terrarium container and then fill the bottom part with rocks or sand.

The material you use for your drainage layer may depend on the general design of your container. You may even pick different color sand or rocks. The primary objective is to create a clear distinction.

Cactus terrarium.
You first need to prepare your terrarium container and then fill the bottom part with rocks or sand.

Once you have a drainage layer, put a divider on top to separate the drainage layer from the charcoal level. This technique also prevents seeping.

For a divider, feel free to use cheese gauze or cloth, a coffee filter, construction paper, or something similar.

Avoid using something that might block water from passing through the divider. The charcoal layer goes right below the divider.

Expert gardeners prefer using charcoal because it soaks in a wide range of impurities and also plays a critical role in eliminating bad smells in your terrarium.

It also helps fight fungus and mold growth. You can add some potting mix on top of the charcoal layer.

Tip #2: Add Springtails to Your Terrarium

Springtails are tiny, white bugs that can survive in damp conditions. They are also efficient at removing fungus gnat larvae and other small pests in your terrarium.

These harmless creatures play a critical role in controlling mildew, mold, and other organic matter by consuming them before they cause any harm to your plants or terrarium decorations.

Tip #3: Avoid Overwatering Your Terrarium

Overwatering is one of the leading causes of mold and fungus growth in a terrarium. When you overwater your plants, the excess water remains stagnant for too long, encouraging growth of unwanted organisms like mold and fungus.

It’s essential to make sure that your terrarium plants have enough water but not too much of it.

A person watering the terrarium.
Overwatering is one of the leading causes of mold and fungus growth in a terrarium.

Consider adjusting the watering schedule based on several factors, such as the type of plant, the time of year, and the terrarium’s size.

Tip #4: Avoid Mixing Plants with Different Care Requirements

Choosing the right plants is one of the most critical decisions you need to make when designing a terrarium. You can make a fatal mistake if you are not careful. Generally, you should never mix plants that have different care requirements.

For instance, don’t mix succulents with cold-tolerant plants in a closed terrarium since it will lead to root rot and complex mold issues.

Keep in mind that succulents love well-draining soil and less moisture. Therefore, mixing them with air plants or moss plants doesn’t make sense.

Air plants don’t require soil since they get all the essential nutrients they require from the air.

A cactus terrarium hanging,
You should never mix plants that have different care requirements.

If you must mix them with succulents in your terrarium, they should be placed on top of another object instead of planting them directly in the soil.

Otherwise, feel free to use dry fillers such as pebbles, stones, dry preserved moss, pumice, or crushed oral in an air plant-only terrarium. The dry fillers are critical in preventing mold growth and root rot.

Avoid putting succulents in closed terrariums since they need more air circulation and less humidity. Instead, use an open-top terrarium for them.

Tip #5: Remove Dead Leaves

If any of your plants has shriveled leaves or other signs of decay, you must remove those leaves as soon as possible.

Dead leaves can quickly invite pests and mold into your terrarium. It is also essential to remove any roots that have gone bad.

Keep in mind that fungi feed on decaying matter. Therefore, if you don’t take steps to remove decaying matter from your terrarium, the fungus will only spread faster.

Tip #6: Apply Fungicide to Your Substrate

If you notice any kind of mold or fungus in your terrarium, it’s best to use a fungicide treatment as soon as possible. Fungicides help control and prevent the spread of fungal diseases in your terrarium.

Choose an organic fungicide safe for your plants and animals. Applying the fungicide directly to the substrate is the best way to control and prevent the spread of fungus in your terrarium.

Tip #7: Prune Your Plants Regularly

Pruning your plants regularly is another effective way to prevent mold growth in your terrarium.

While pruning encourages healthy new growth in plants, it also helps remove dead leaves and stems that could act as food for fungus.

By pruning your terrarium plants regularly, you can keep the air circulation going properly and limit the spread of mold growth in your terrarium.

Tip #8: Replace the Soil

Some types of soil usually have mold spores causing mold growth in your terrarium. If this is the case, you should consider replacing the soil with a fresh one to eliminate mold spores.

You can also try adding some activated charcoal or perlite to your soil mix to help absorb extra moisture and reduce chances of mold growth.

Both of these materials provide excellent drainage and aeration, which prevents mold growth.

You can also kill spores and pathogens by baking your soil at 300 degrees Fahrenheit for at least 30 minutes. Baking will sterilize your potting mix, making it safe for your terrarium.

Tip #9: Increase Air Circulation

Mold loves moist environments where air circulation is limited. Ensure you have proper air circulation in your terrarium by providing adequate ventilation, such as using open-top terrariums or adding a fan to blow fresh air into the closed container.

A glass hexagon terrarium.
Ensure you have proper air circulation in your terrarium.

This will help to keep the air in your terrarium fresh and reduce the risk of mold growth.

You should also ensure you don’t overcrowd your terrarium with too many plants, which can restrict air circulation and lead to mold problems.

Tip #10: Monitor Your Terrarium Regularly

Finally, it is imperative to keep an eye on your terrarium and monitor it regularly. Check for any signs of mold or fungus and act immediately if you find anything suspicious.

Conclusion

Mold and fungus growth can quickly become a significant issue in your terrarium if it’s not managed correctly.

Fortunately, there are several steps you can take to prevent and control the spread of mold growth in your terrarium.

Follow the tips above to keep your terrarium clean and healthy, so it can remain a beautiful display of plants for many years.