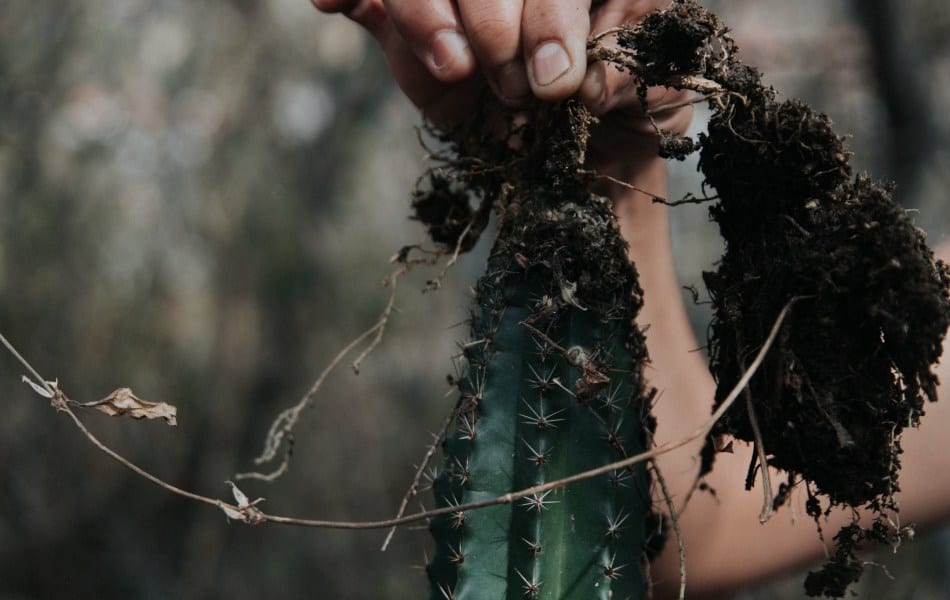
Is your cactus dying from the roots? Has it started to grow horizontally or have leaves that are dried and falling off at random? It could be dying from the bottom. Noticing that your cactus is dying from the roots is one of the dreaded moments of all cactus gardeners. Luckily, there’s still time to save it if you act fast.
For some reason, cacti can die from the bottom moving towards the upper part. They don’t just dry out; they literally wither away like their roots are rotting. Some of the causes of this slow death could be overwatering, poor soil drainage, or disease and pest attack. Some of the ways to save a cactus that’s dying from the bottom is to control watering, fertilize, re-pot, and remove the rotting parts.
This article will look at the possible causes of your cactus dying from the bottom and help you figure out what to do in each situation.
Reasons Cacti is Dying from the Bottom
Below are some of the common reasons why cacti are dying from the bottom up.
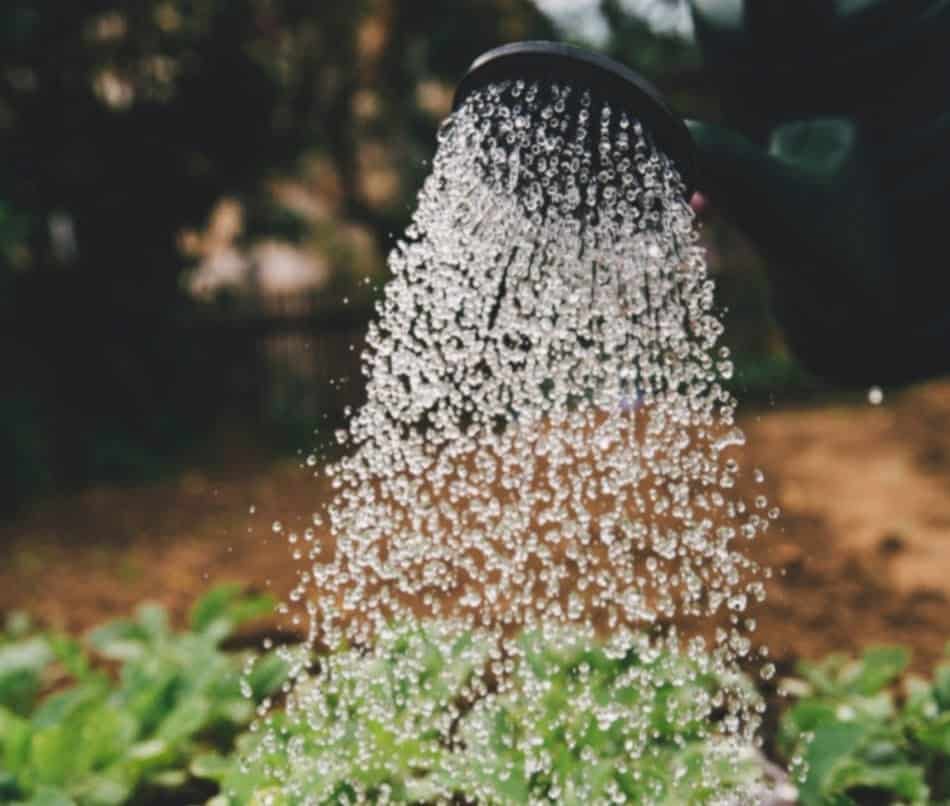
Overwatering
Overwatering is one of the most common reasons for your cactus to die at the roots. Cacti usually store water in their stems, and they can shrivel up like prunes if they dry out too much. However, there’s another reason why these cacti look like prunes.
Overwatering causes the roots to rot, which then eventually kills off the plant. With overwatering, water can collect in one area and become stagnant. The roots will eventually start growing horizontally through this standing water and become soggy, which leads to decay. It’s best to bury your cactus in gravel so that the water can drain.
If your cactus is dying at the roots, the chances are high that you have been overwatering your plant.
Disease Attack
If your cactus is houseplants, they may be infected with root rot. Since the infection originates at the roots, you won’t be able to tell that anything’s wrong right away. The leaves will wilt for no reason, and while it looks like your plant has died from lack of water, it has a slow-moving disease.
If your cactus is outdoors, the culprit may be a fungal disease. This causes the roots to become overly soft and mushy because they’re rotting away. The best way to prevent this type of infection from taking hold is to keep your cactus as dry as possible, especially during rainy seasons.
Insect and Pests Attack
There are probably thousands of different types of pests that love to feed on cacti. The main ones are mealy root bugs. These aren’t actually insects; they’re a type of scale that feeds on the roots and stems of your cactus instead of sucking away their sap. It looks like white cottony balls around your cactus, and brown or black spots usually accompany it on the stems.
Moreover, some types of slugs and snails also love to chomp down on cacti. These guys can do a lot of damage, especially if the plant is outdoors.
Poor Drainage
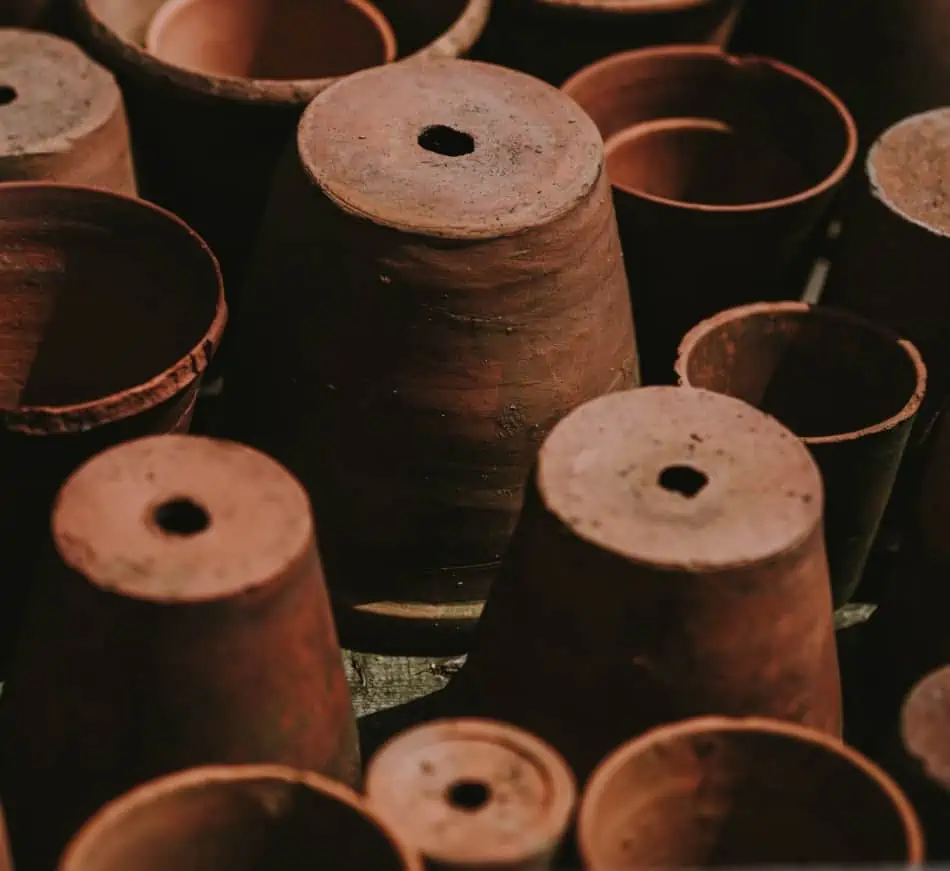
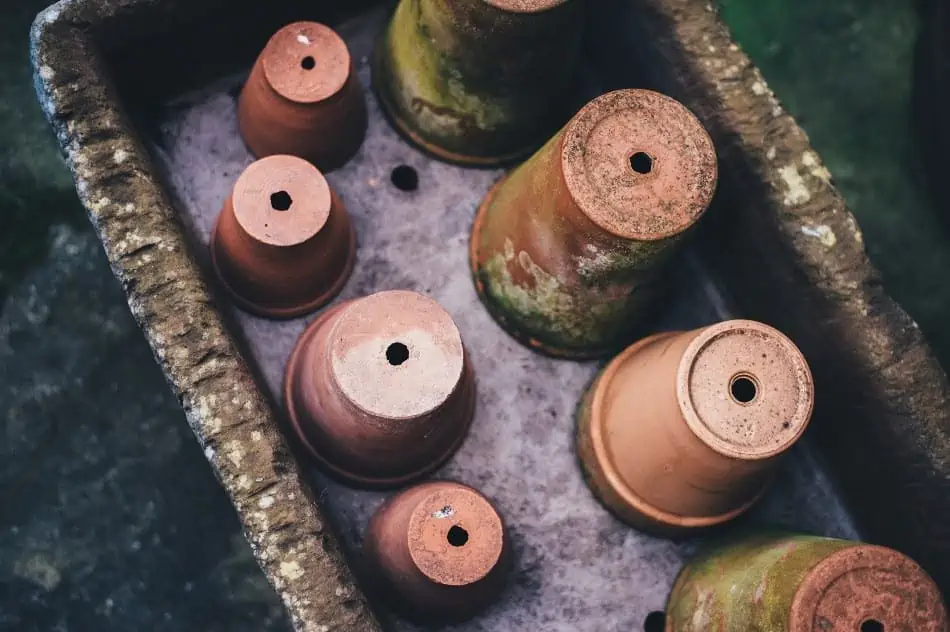
If your cactus is placed in a container with tiny drainage holes, then it’s going to stay wet longer than it should. This can cause the roots to rot and lead to death from the bottom up.
You’ll notice that when you water your cactus, some of the excess water stays at the bottom of the container rather than draining away. If you see a water ring at the bottom of your container after watering, then it’s time to re-pot your cactus and use a pot with better drainage.
Using containers with no holes at the bottom will lead to insufficient drainage and cacti may die from the bottom.
How to Save a Cactus Dying From the Bottom
As long as your cactus is not dead, you can still save it. There are many ways to start saving your cactus, including the most basic and best practice.
Repotting
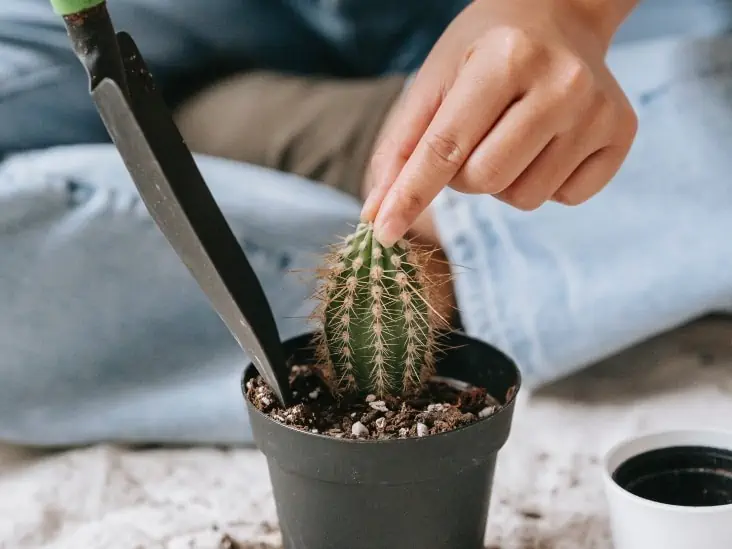
You can sometimes save dying cacti by re-potting them into healthier soil. Make sure that you use a new potting mix that should contain no organic matter whatsoever. You don’t want any bacteria or disease spreading to the roots.
When you re-pot your plant, https://transparentpharmacy.net make sure that the container or hole is fairly large so that water can drain away easily. You should also ensure there are good drainage holes in the bottom of your pot to prevent sogginess.
Repotting is one of the best ways to save a cactus that is dying at the roots.
Fertilize Your Cactus Correctly
It’s best to use a cactus fertilizer for desert plants, as these fertilizers are more balanced. You can also spray organic copper foliar spray on your plant once every two weeks. This will help fix the problem by feeding your plant and reducing the number of insects attracted. Also, make sure that you don’t give an overdose of fertilizer, especially if you’re going to water your cactus with rainwater.
Get Rid of Pests and Slugs
If you find white cottony balls around your plant which look a bit like lint, then it means that you have root mealy bugs. Not only are they unsightly, but they also cause damage to your cactus. To get rid of them, use a cloth or cotton ball soaked in rubbing alcohol and wipe away the pest’s eggs as well as any other visible evidence you can find.
Stop Overwatering Your Cactus
This is an obvious tip, but it’s best that I state it here nonetheless. Don’t over-water your cactus. It’s true that during dry periods, cacti will need to be watered more, but the truth is that too much water can lead to root rot and other problems. Hold watering during the cold months, and when you water your plant, ensure that the soil is completely dry before watering it again.
Clean Your Cactus
Not only does this look good, but it can also help prevent pests from taking hold of your plant. Simply use a cotton swab dipped in alcohol to wipe away any grime. You can use a very small amount of dish soap and water to scrub away any bugs attached to your cactus for outdoor plants.
Remove the Rotting Parts
If your cactus is too far gone, you need to remove the dead parts of the plant. You can either cut them off using sharp scissors or simply pull out any soft areas using a clean, dry cloth. Cutting the rotting parts out will allow the healthy tissue to grow around its edges. As long as you’re careful when doing so, you won’t damage the rest of your plant.
Adjust Sunlight and Temperature
One of the best ways to help your cactus recover is to adjust the lighting and temperature it receives. You should place the plant in a spot that gets plenty of sunlight, but not too much at once. During winter, consider setting up a grow light to give your cactus an artificial source of UV rays. Also, try to adjust the temperature so that it’s somewhere between 50ºF and 80ºF.
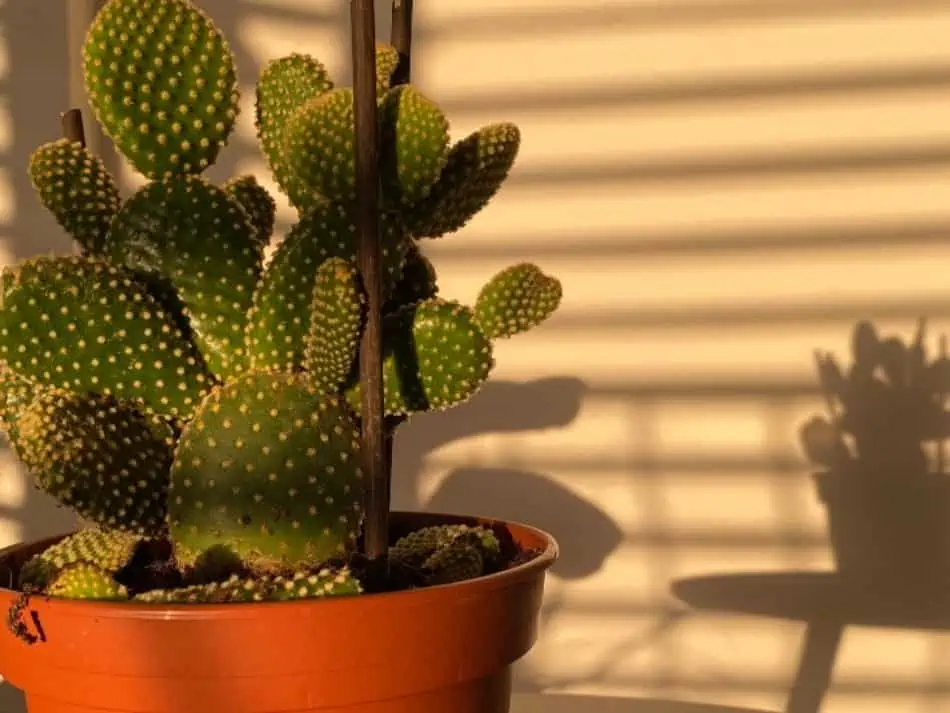
Make sure your cactus receives plenty of sunlight to prevent it from dying at the roots.
Frequently Asked Questions
Can you save a dying cactus?
If your cactus is dying from the bottom, you can save it. The key to saving your plant is replanting your cactus and taking care of it until it regains its vitality. If done correctly, your cactus should come back in about two weeks or less.
Should I water a dying cactus?
You may still be able to save a dying cactus by watering it. But before you do, make sure that the soil isn’t too wet and that your cactus gets a lot of sunlight.
If you’re not going to be spending time with your cactus for a while, consider placing it in an area with lots of sunlight but no rain. This will ensure that water doesn’t get into its soil and kill it.
Should I fertilize a dying cactus?
If you’re going to water your cactus after noticing that it’s starting to die, wait at least two weeks before giving your plant any nutrients. This will give the roots time to recover from whatever killed them in the first place so that they can absorb nutrition from the fertilizer.
What can I do with a dead cactus?
If your cactus is too far gone to recover, then there are two options you can consider. If you have a green thumb, you can try to take cuttings from the healthy parts of the plant and, if successful, use them to create an entirely new one. You could also dig up the roots and place them in a pot.
Summary
Cacti can survive in a variety of environments. But they can also die easily in the wrong ones. Cacti are resilient plants and, as long as you’re careful to adjust their needs as it grows over time, your cactus will live happily for years without much intervention from you.
But when your cactus does start to decline in health, there are plenty of things you can do to help revive it and keep it alive. These things include ensuring that your cactus is planted in the right environment, watering it at the appropriate times, and removing dead parts of the plant. As long as you’re careful and attentive to detail, you won’t be able to go wrong when taking care of a cactus.
Cactus can easily be grown at home and are a popular houseplant for those who enjoy gardening. However, they do not always stay green as they mature. Some cacti turn white due to distress, and it is your responsibility to figure out what is causing your plant to turn white and address it promptly.
So, why is my cactus turning white? Typically, your cactus will start turning white due to sunburn, overfeeding, pest infestation, corking, overwatering, or root rot. Your plant may also turn white because it isn’t receiving a sufficient amount of light.
In this blog post, we explore why your cactus might be turning white and what you can do about it!
1. Pest Infestation
One of the common reasons why your cactus is turning white is due to a pest infestation. Ants, mealybugs, and scale insects all love to eat the sap that is abundant in cacti plants.
They can turn white from being covered with these pests as their bodies excrete a waxy substance called honeydew which attracts more ants!
If you suspect your plant has an insect problem, it’s best to find a solution as quickly as possible.
The best way to start is by giving your cactus plant a good wash with water and then inspecting the undersides of the leaves for any signs of pests. If you see ants or other insects crawling around, use an insecticide that specifically targets them!
A critical factor to keep in mind is that cacti should be placed somewhere with plenty of sunlight and room to grow. If you don’t give your plant enough light or space, their leaves will turn white since a lot of darkness tends to attract more pests!
2. Sunburn
Your cactus may also start turning white from sunburn. Cacti are native to desert climates, and they need sun exposure just like other plants do to survive.
But some cacti species have a highly sensitive stem that may be highly susceptible to extremely high temperatures. So if it’s not given enough time in a shade or protection from the sunlight, the plant may start turning white!
If your cactus is exposed to excessive amounts of direct sunlight, it may turn white from a sunburn.
A good way of preventing this from happening is by giving your cactus a little shade during the hottest parts of the day.
You can do this by placing a piece of plywood or cardboard in front of it and then removing it at night when temperatures start to cool down!
It is crucial to understand the type of light your cactus plant loves and strive to provide it with the right exposure it requires to survive. Ensure it is not too little or too much.
3. Frost Burn
Just like sunburn, frost burn can also cause parts of your cactus to turn white.
Frost is a form of dehydration, and it occurs when an object’s temperature falls below freezing point, and its moisture freezes instantly! This will happen if you’re living in cold climates where frost is common during the winter months.
Unfortunately, the frost-burned areas of your cacti plant won’t return to normal even after the winter season is over. When you realize that your cactus is turning white due to frost burn, bring it indoors and place it on a window where it can still receive plenty of light.
If you keep your cacti in freezing conditions, they will get frost burns and the damage is irreversible.
But you need to ensure that it is not touching the window to avoid further damage. You can either leave the affected parts of the plant or remove them to allow new growth.
One way that may help prevent frosty burns on your cacti is by covering it with a transparent material such as a window screen or plastic sheeting. This will help the leaves stay warm and wet while also providing some protection from frost!
4. Low-Level Light
If you want your plant to grow healthy, green succulent stems and leaves, then it needs lots of light!
Cacti are best grown in a bright, sunny spot where they can receive as much sunlight as possible. If you don’t provide this to them, the leaves will start to turn white, and your plant may not grow properly!
You should aim for at least six hours of direct sun exposure per day if possible. This is perfect for any cacti that prefer a location with lots of sun and heat.
If you don’t have any windows or direct sunlight in your home, then there are some other options for providing the right amount of light that cacti require!
Fluorescent bulbs emit frequencies similar to natural daylight, which may help keep their leaves green (and they’re not too expensive either!).
5. Overfeeding
If you’re a novice cactus plant owner, then it is likely that you are overfeeding your cactus!
All plants need fertilizer or nutrients to thrive, and if they don’t receive enough of these nutrients, their leaves will turn white.
However, it is the opposite thing in cacti plants. Although these succulents require to be fed occasionally, overfeeding them causes unnecessary stress on the plant making some parts start turning white.
So if you can’t see any other signs of health problems on your cactus, then parts of it could be turning white as a result of too much fertilizer!
Giving your cacti too much fertilizer means that you are overfeeding them and they may turn white.
But don’t worry because there’s an easy way to help fix this problem; simply cut back the amount you’re feeding it and give it a little time to recover.
The plant should start turning green again in a few weeks and will return to its usual self!
Typically, you should only fertilize your cactus once per year. The best time to feed it is during springtime when it is undergrowth.
Avoid feeding it during winter because most cacti species go into dormancy during the cold months and don’t need a lot of nutrients.
6. Corking
If you notice your cactus plant turning white from its base and nearly halfway up the plant, then you could be experiencing corking!
Corking is a common problem that happens to many different types of plants. Corky areas are usually found on the base and outside edges of your plant, but they can be all over it in some cases.
This condition occurs when there’s insufficient airflow for the roots to get oxygen, so water builds up, and the corky areas start to form. It mostly happens if you cover your plant with soil or mulch that’s too thick and prevents air from reaching it.
Remember that a cactus plant affected by corking can look white, but it may also turn brown or pale grey.
The best way to know that your http://www.gulfportpharmacy.com plant is corking is by touching the affected areas and note how it feels. If it’s soft and wet, then this condition is likely to be corking.
7. New Growth
A cactus can also turn white due to the presence of new growth.
This is usually a sign that the plant is in distress or has experienced some injury, so it’s essential to take notice if you see it happening!
If there are no other symptoms on your cactus and some parts keep turning white but not browning, then they may be experiencing an issue with their roots and need to be repotted.
If the leaves turn white on a cactus that is not new, this may be an issue with overwatering or excess fertilizer. It’s important to take notice of any other symptoms as well before you try anything else!
8. Root Rot
If you have been overwatering your cactus or the potting mix has poor drainage, then your cactus may be suffering from root rot.
This condition is characterized by browning and rotting roots as well as a white or yellowish discoloration on the leaves, which will eventually turn them brown too!
If you have noticed that your plant has been having these symptoms for a while, then it’s time to repot into a fresh potting mix.
This should help provide the right amount of drainage your plant needs and prevent it from experiencing any further root rot problems!
If you suspect the whitening is due to overwatering, the first thing you need to do is reduce the amount of water you’re giving it. You should only be watering your cactus when the top inch or two of soil feels dry to touch, not wet!
If your cactus has been turning white due to root rot, either reduce watering or repot the plant.
If things don’t change, then you should proceed to repot it in the new potting mix. Ensure the new potting mix has excellent drainage and also make sure that the pot has holes in the bottom to prevent water from accumulating.
The best time for repotting a cactus is during winter because they go into dormancy during this time, so their roots won’t be disturbed by the new soil or pot!
9. Underwatered
Another possibility is that your cactus is not getting enough water. Cacti are notoriously picky when it comes to watering, so it’s easy to overwater or underwater them.
If your cactus looks withered and its white spots are spreading, give it a good drink of water and see if that helps.
10. Too Much Water
It might seem counterintuitive, but too much water can also be just as harmful to a cactus as too little water.
If you think your cactus is getting too much water, try letting the soil dry out completely before watering it again. You may also want to consider switching to a different type of potting soil that drains better.
11. Fungal Infection
The other possibility is that your cactus has a fungal infection. This is probably the problem if the white spots on your cactus are fuzzy or have a mildew-like smell.
Don’t despair—there are fungicides available that can help clear up the infection. However, you’ll need to act quickly before the fungus has a chance to spread too far.
12. Disease or Pests
Unfortunately, sometimes the reason your cactus turns white has nothing to do with its environment and everything to do with disease or pests. If you suspect this might be the case, look closely at your cactus for any signs of pests or disease.
Some common diseases that affect cacti include root rot and powdery mildew. As for pests, mealybugs and aphids are two of the most common offenders.
If you do find evidence of disease or pests, don’t despair! There are plenty of products on the market that will help get rid of them. Just be sure to follow the directions carefully so that you don’t damage your cactus in the process.
Can I Save My Cactus?
Now that you know some of the most common reasons why cacti turn white, you might be wondering if there’s anything you can do to save your plant. The good news is that, in most cases, it is possible to reverse the damage and get your cactus back to its healthy self.
If your cactus is turning white due to overwatering, the first step is to cut back on watering. Allow the soil to dry out completely between watering sessions, and be sure to empty any water that collects in the saucer beneath the pot.
If underwatering is the problem, start by giving your cactus a good drink of water. If the roots are dry and shrunken, you may need to soak the plant in a water bowl for an hour or so before replanting it in fresh potting soil.
If your cactus has a fungal infection, the first step is to isolate it from any other plants. Next, treat the plant with a fungicide according to the manufacturer’s directions. Be sure to dispose of any infected leaves or stems and sterilize your gardening tools before using them on other plants.
Finally, if your cactus is turning white due to disease or pests, the best course of action is to contact a professional. They will diagnose the problem and recommend the best course of treatment.
The bottom line is to investigate the cause of the problem before taking any action. Once you know what’s causing the issue, you can take steps to fix it and get your cactus back to its healthy self.
Conclusion
Sometimes a cactus might turn white due to frost burn, low-level light exposure, or too much watering. These are all conditions that require care and attention in order for the cactus to thrive.
If you suspect your cactus is experiencing any of these problems, please contact your local plant expert for immediate assistance.
Furthermore, you must know how your cacti plants grow so you can properly care for them. With the right information about the diversity of problems that can occur, you’ll be able to identify and address them early.
If you enjoy having plants in your home, you might have come across a ceropegia plant, also known as string of hearts. These plants are known for the shape of their leaves- small hearts all connected by a vine that drapes over its pot. They are beautiful to look at and although they require some special care, it is clear that they are worth it.
It is important to know how to care for your plants so that they can live long, healthy lives and provide your home with clean air and a beautiful ambiance. Learn how to care for this delightfully poetic plant with just a few simple steps! Soon your string of hearts will be well taken care of.
What Kind of Plant Is a String of Hearts?
String of hearts is part of the succulent family. This one very small detail is incredibly important so that you know exactly how to care for a string of hearts.
Succulents are known for their durability and love for hot weather. They tend to live in hot climates, surviving with very little water. They are great indoor plants if you are looking for something to spice up your kitchen or living room.
The string of Hearts plant features heart-shaped leaves that are connected to each by draping vines.
These cute little plants will make a great addition anywhere you put them, as long as there is enough sunlight for them to eat up. Succulents are very popular right now, so finding a string of hearts for a cheaper price may be difficult, but do not worry because these pretty plants propagate very easily!
Know Where to Place Your String of Hearts
String of hearts is known for its trailing way of growing. They are almost vine-like, growing downwards or trailing off the older they get. For a beautiful effect, place your indoor string of hearts by a window, or in a hanging pot somewhere high up. That way, the more they grow, the more space they take up.
When growing a string of hearts indoors, place them near the window or in a hanging pot higher up.
A string of hearts draped by a window is lovely imagery. If your string of hearts is an outdoor plant and part of your garden, try draping them against a garden wall. If you do not have a garden wall, the best place to put them is in a hanging pot where the vines can trickle down beneath the pot as the plant gets older.
Water your string of hearts only when the soil is dry to avoid overwatering the plant.
It is a common tip with succulents to check the water level of the soil before watering. Too much water can harm your string of hearts, so be careful and make sure to check the moisture of the soil. If the soil beneath your finger feels slightly moist, then it is best to wait a couple of days before watering. With these plants, it is better to give them less water than to overwater.
String of hearts prefers a drought period in between waterings. This means that you should wait until the water is almost completely dry before watering for a second time. This plant is prone to root rot from overwatering, which can potentially kill it.
If you fear that you are underwatering your plant, just look at the leaves. If the usually plump and healthy leaves look a bit wilted and lackluster (and if the soil is extremely dry) then it is time to water!
What Does an Overwatered Plant Look Like?
If you are overwatering your string of hearts, your plant could die of root rot. This is something that succulents deal with frequently when they are overwatered.
An overwatered string of hearts can have:
Wilted leaves
Yellow leaves
Edema
All of these symptoms can be a sign that your plant is overwatered but also that it might have root rot. Root rot is when too much moisture from excess watering seeps into the roots. Essentially, the roots of your plant drown because of too much water and because they do not have access to enough air.
All the moisture in the roots will allow for the growth of fungus, mold, and other bacteria that will rot the roots and kill the plant.
If your plant has yellow leaves it typically means that your plant has an iron deficiency, caused by too much watering. Wilted leaves mean that the leaves are beginning to fall off, which is never a good sign.
Edema is also caused by overwatering your plants. This is when there are water droplets or spots between or on the leaves. Eventually, these moist spots turn brown and black, eating up at the plant. When a plant gets overwatered it needs to be purged of the extra water within it.
How to Save an Overwatered String of Hearts
To save your withered string of hearts, there are a few options. You can either re-pot your plant to a new pot or propagate from what is left of the plant.
If your plant suffered lots of root damage, then it is best for you to propagate it. If there has not been too much damage to your plant, then you can simply re-pot your string of hearts to a new location and remember to keep watering your plant to a minimum! It is better for your string of hearts to go through a drought than a flood of water.
Sunlight and Temperature
String of hearts require lots of sunlight and a hot temperature, due to them being part of the succulent family. While they do not require direct sunlight, it will be a good idea to keep them in a well-lit room or by a west-facing window, where the sun will hit them at some point of the day.
To save an overwatered string of hearts, provide the plant with sufficient sunlight.
String of hearts require:
About 80-85 degrees in temperature
Sunlight but not direct
About 60 degrees in the winter
These plants love the heat, so 80-85 degree weather is perfect for them during the summer months. In the winter 60 degrees should be good enough for them to survive. If you live in a warmer environment, then a string of hearts can be grown outside and will probably survive. If you live in a colder environment, however, it is important that you keep your plants inside to protect them from the cold.
Sunlight is great for these plants but direct sunlight is something that they simply can not tolerate. To tell if your plants are getting too much sunlight is to check the leaves. If your plant needs more light, the leaves will appear pale and with less marbling than usual. Healthy strings of hearts have a gorgeous marbling effect going throughout their leaves.
Make sure that your plant’s leaves are not scorched, as this is another sign of having too much direct sunlight. This does not mean you should move them to a place with low light. Not enough sunlight will kill your string of hearts.
Fertilize Your String of Hearts
Plants need fertilizer to absorb vitamins and minerals so that they can be healthy and happy. Some plants need more fertilizer than others. As for the string of hearts, when it comes to fertilizer it is pretty simple:
Half diluted
Relatively infrequent
None during the winter months
What makes this plant so easy to take care of is its lack of fertilizer usage. Some plants need a lot of assistance with fertilizer and plant food and vitamins that it has to become a regular routine. For example, orchids have to be fed plant food and fertilizer almost every other week in order to be healthy.
The string of hearts requires half-diluted fertilizer only once in a while and no fertilization during winter.
Luckily for you, the string of hearts is not that needy. The only fertilizer you will need is half diluted, meaning that the fertilizer is diluted with water and is not nearly as potent as other fertilizers. This means that you can have one portion of fertilizer for a long time without having to buy more, which saves you some money.
You have to fertilize these plants about once a month during the summer months, but it is not set in stone. If you skip a http://www.rustburgpharmacy.com month or two your plant will not really mind as it is pretty self-sufficient. During the winter, string of hearts enters their dormant period where they do not really grow or need much care.
Fertilizing your string of hearts can also cause it to flower, which is one of the best parts of owning a plant. The flowers that string of hearts give out are a very pretty magenta pink color, and if you fertilize the right amount (a small portion) then the flowers will bloom and thrive. Be careful not to add too much fertilizer, as this could harm the plant and cause it not to flower.
Know How to Repot Your String of Hearts
Most house plants at one point or another need to be repotted in order to have their space for their roots to grow. With a string of hearts, it will not happen often, as they are not very large or exceedingly fast-growing.
You should repot:
Every year to year and a half for plants in a small pot
Every two years to two years and a half for plants in larger pots
If you notice that your plant is suffering
Since the string of heart is not a large succulent, you may not need to repot the plant.
If you have a small desktop or kitchen counter string of hearts, then you will not need to worry about repotting until a year and a couple of months have passed by. If you wish for your plant to grow larger, then repot gently to a new pot that is not much bigger than the previous pot. Getting a pot that is much bigger than the previous will most likely drown the roots.
If you wish to keep your plant the same size, then transfer it into the same pot or a different pot of the same size, but make sure to trim the roots a bit. This will cause it to have to regrow until it eventually maintains its small shape that is molder to the small pot it resides in.
If you have a bigger pot for your string of hearts, then you will need to repot your plant every two to two and a half years. When repotting, make sure to do it during the summer months, when your plant is at its healthiest. The winter months are the plant’s time to rest.
If you notice that your plant has some rot root issues or is perhaps looking a little more dull than usual, it is time to repot the plant. Plants need space to grow, and if the roots are infected with fungus or bacteria, cutting out the infected parts and repotting the plant to a new location may be the best bet for saving its life.
Know How to Propagate Your String of Hearts
When a plant is propagated, it begins its first steps in reproducing and breeding. If you are looking to have more than one string of hearts in your home, or want to give one out as a gift to a friend, then you need to know the correct way to propagate this plant.
There are three methods of propagation for a string of heart plants. They include:
Water
Soil
Tuber
The great part about string of hearts is that they are mostly very easy to propagate, and with a few different methods, you should be able to have more than one string of hearts in no time.
You can easily propagate the string of hearts in water, soil, or tuber.
Water Propagation
The water method of propagation is fairly simple and probably the most popular method to use because of how easy it is. The first step is to find a piece of vine from your string of hearts that you would like to use to propagate with. With a pair of gardening scissors, carefully cut a piece of vine off from the plant and transfer it to a vase of water.
After a few days or weeks, the plant should begin to sprout roots. Make sure to propagate during the right time of the year. For a string of hearts, this means the summer months, when they are at their strongest and most healthy. The summer is also a perfect season because of the ample sunlight and hot temperature.
The summer sun and heat will speed up the root growing process and in turn, speed up propagation. In this environment, roots should appear in a few days.
Soil Propagation
The soil propagation method is also relatively simple as your string of hearts will make sure to help you.
In order for this method to work, you will need some soil in its own separate pot, water, and the right amount of light.
Simply find a part of the plant that has a leaf and a vine. With gardening scissors, cut off the perfect piece of vine. Make sure that the side of the vine that you are planting in the soil does not have any leaves. If it does, just remove these excess leaves and plant the vine into the soil.
Make sure to water the area. Water is especially important during propagation. For best results, water about once a week, so that the soil is consistently semi-moist. Make sure to place your propagated plant in the perfect amount of sunlight. Make sure the area is not a place with blazing direct sunlight, as that will be too harsh.
It is also important to note that the area needs to have plenty of fresh air. Air is very important for new roots to form and grow into healthy adult roots.
Tuber Propagation
As your plant becomes bigger and healthier, you will begin to notice small nodes or nodules on the plant between the leaves. These are part of the propagation process and will help you tremendously. They are known as tubers.
When you cut your vine to begin propagation, make sure to cut a piece that has these nodules on it. In a separate pot of dirt, plant the vine and the end with the nodules into the soil. This is mandatory for your plant to sprout roots.
String of hearts are so easy to propagate because of these nodules. Naturally, these plants will propagate if you let the plant grow and fall into a layer of dirt below it. If the nodules get buried in the dirt, they will sprout roots with enough luck and care.
If you plan on using this method, take the part of the plant with the tuber and without separating it from the mother plant, dig it into the soil of the pot and wait until it sprouts a root. Once a root sprouts, you may cut it from the mother plant and move it to its own separate pot where it will grow.
If you have never propagated plants before, a string of hearts will make for an excellent place to start. Make sure to water the soil and that it is placed in enough sunshine.
Euphorbia is a genus of flowering plants belonging to the family Euphorbiaceae, often called spurges. It is a succulent that can grow to be a large shrub or small tree. It can also take on the form of an upright or trailing plant depending on how it’s grown and what type you decide to purchase.
These plants are native to Africa, Madagascar, and the Arabian Peninsula in southern Asia. The name is derived from Greek words meaning “well-being”. There are around 800 different species of euphorbia growing throughout the world today.
So, how do you grow Euphorbia? For better results, start with a plant that has already been growing for some time so as not to shock the roots. Euphorbias are very tolerant of cold temperatures, drought, and low-light conditions which makes them ideal plants when trying to grow indoors or outside in colder climates.
If you’re planting your euphorbia outdoors then choose an area that gets at least four hours of direct sunlight each day. For those looking to grow indoors, it’s best to place the plant near a window with lots of natural light rather than artificial light.
Euphorbias are relatively pest-resistant plants and grow quickly which makes them an ideal addition for home gardens but they do have one major drawback. They’re poisonous to animals, humans and birds so use caution when handling this plant or any part of it at all times.
If you’re looking for some Euphorbia growing tips, then this article is perfect for you. We’ll go over soil preparation, watering frequency, sunlight requirements, and more in-depth topics like pruning and propagating your plants.
Common characteristics and features of the Euphorbia
-Euphorbia plants are a succulent that can grow to be either large shrubs or small trees
-Euphorbias usually have spiny stems, branches, and leaves but not always which is why it’s so important to identify the species before planting
-Euphorbia plants are able to grow in a variety of conditions with low water needs, cold tolerant, drought-resistant, and ideal for beginners
-Many Euphoria species have leaves that can be either green or red as well as other colors which is why they’re often planted close together for their varied color combinations
-Euphorbia plants are poisonous to animals, humans, and birds
-Euphorbias grow relatively fast so they’re a good choice for home gardens but can be pruned to produce new cuttings that will then root in water or even the soil if conditions are right.
Propagation for Euphorbia plants
Euphorbia can be propagated in the following ways:
1. Cuttings
Steps:
-Take a cutting from the plant and make sure that it has at least two sets of leaves on it
-If you’re planting indoors, then place your cuttings in a glass or jar filled with water. Make sure to change out the water every few days until roots develop
-For outside plants, take your potting soil and poke a hole about an inch deep in it
-Insert your cutting and make sure that the leaves are at least one to two inches underground level. Cover up with soil and gently pat down until there are no air pockets left
-Water well before placing outdoors or bringing inside for a few weeks of growth
Note: This method is perfect for propagating new plants or cuttings but will not work for creating a mature tree
-A hardwood cutting is the best way to produce healthy and strong euphorbia trees. This method requires more time as it takes about one year before the plant can be planted outdoors
Steps:
-Take your Euphorbia branch and remove the leaves, making sure that there is at least one set of leaves on it
-Cut your branch into two-inch segments and place it in water. Make sure to change out the water every few days until roots develop
-After a few weeks you’ll notice new growth coming from where you cut off your branches which is when you can then place it in potting soil. Ensure that the cut end is at least one inch below ground level and cover up with soil
-Water well before placing outdoors or bringing inside for a few weeks of growth
Note: This method will not work on branches without leaves as they won’t be able to absorb water needed for new root development
2. Air layering
Steps:
-Take a plant cutting that is about six to eight inches long and make sure it has two or more sets of leaves on it. Cut off the bottom portion and place in water with new growth coming from where you cut off your branch for rooting purposes
-You’ll then need to take some soil from your desired location and wrap the plant cutting with it. Make sure to leave about two inches from ground level for roots
-After a few weeks new growth will come out of where you cut off your branch which is when you can then place it in potting soil, just like before. Ensure that the bottom end of your plant is at least one inch below ground level and cover up with soil
-Water well before placing outdoors or bringing inside for a few weeks of growth
Note: Air layering is the process where you don’t need to remove any leaves from your plant but still requires that it has two sets of leaves. This method also takes longer than cuttings because it’s not until after one year that you can place the plant in your garden.
3. Division
Steps:
-Identify which Euphorbia plant you want to divide and gently pull it apart with a spade or your hand. Be careful not to damage the roots while doing this as they can be easily damaged if pulled too hard
-Take some potting soil from your desired location and place it on top of the roots. Make sure that the top portion is covered by about an inch of soil
-Water well before bringing inside or placing in your garden for a few weeks to allow new roots to develop
Note: This method will only be successful if you’re dividing mature plants with at least one year’s worth of growth on them. It also takes longer than cuttings or air layering because it’s not until after one year that you can place the plant in your garden.
Watering guide
Euphorbia plants need to be watered every week for at least an hour to ensure they don’t dry out. The watering time can be extended to every two weeks if the plants are indoors and do not receive a lot of natural light from outside. In case of drought, it is important to water the plants twice a week.
This will not only ensure that the plants stay looking healthy but it will also save your pot from cracking. Nevertheless, you may water your plant any time to notice the leaves are curling up and turning to a yellow or brown color. This means that it has been deprived of water for too long
Water your euphorbia once a week for at least an hour to prevent it from dehydrating.
If you want to make sure your plant is getting enough water, the best way to do so is by using a soil meter. Simply stick one end into the potting soil until it hits the top, then wait a few seconds and look at the readings. If they’re not within an ideal range of 80-100% you’ll need to water your plant more often or invest in a new pot with better drainage
It’s worth noting that when watering it is best to use room temperature (cold) water rather than cold. This will prevent the soil from contracting around the roots and shrinking.
Euphorbia Fertilization Guide
Euphorbia needs to be fertilized every two weeks for understory plants that are outdoors and four times a year for indoor plants. The fertilizer composition is different depending on the type of soil you are using. Understory plants will require a fertilizer that has both nitrogen and phosphorous, while indoor plants only need fertilizers with nitrogen or phosphor.
Ideally, you should fertilize your euphorbia every two weeks.
If you would like to use organic fertilizer, try using compost tea or fish emulsion diluted at half strength. This ensures that you are feeding the soil with a nutritious liquid.
For synthetic options, look into Miracle-Gro which is known to work well with this plant.
Euphorbia Light and temperature requirements
Euphorbia plants will require plenty of light and different temperature requirements depending on their location. Understory plants need at least six hours of sunlight a day, while indoor plants should be set in an area that gets three to four hours of natural or artificial light daily. In case of cold climates, make sure that your plants are stored in a place where they can get plenty of sunlight.
Euphorbia requires at least 6 hours of sunlight daily.
In terms of temperature requirements, both understory and indoor plants need to be kept at room temperature for the most part but should not exceed 75°F (24°C). If you want to keep them alive during the summer months without sun but it’s important to note that they don’t do well in humid environments. Euphorbia prefers natural light to artificial light and should not be placed in dark areas.
Euphorbia Pruning guide
Euphorbia plants grow in a wild and natural pattern that can make it difficult for gardeners to prune the plants. Do not be afraid of cutting off some branches, as this will help them to look tidy and create desired space. Pruning also helps get ideal cuttings for propagation.
Pruning your euphorbia will make the plant look much tidier.
If you’re pruning your plants for the first time, it’s best to use a sharp pair of scissors or garden shears. You can cut off any branches that look unhealthy and make sure they are at least two inches away from the plant. It is important not to leave too many stubs behind because these will grow into new shoots.
Do not prune your plants in the winter because it is important to do so when they are dormant and would prefer http://windhampharmacy.com you not to mess with them during this time. Prune during spring or fall months when they are actively growing. If you notice that some branches have grown low enough, now might be a good time to trim them off and avoid future accidents.
Euphorbia Pests and Diseases Guide
In the event that your plant becomes infected by pests or has a disease, it is important to act quickly before they spread. Insects like aphids can cause yellow leaves, brown spots, wilting branches, stunted growth, and leaf drop while fungus diseases can cause a plant to turn brown and die.
To get rid of bugs you may use insecticide diluted with water, which should be sprayed onto the plant’s foliage one time every two weeks. To treat fungus it is best to mix up some baking soda (half cup) in a gallon of water then spray over your plant’s leaves as needed.
If you are unsure of the cause, it is best to call an expert who can help diagnose your plant’s specific problem and provide a solution for getting rid of them.
Aphids
Aphids are one type of insect that can infect plants like Euphorbia with yellow leaves and wilting branches. To get rid of these insects you will need to use insecticide diluted with water and sprayed onto the plant’s foliage every two weeks.
Fungus Disease
Fungus disease is another type of problem that can affect Euphorbias, causing them to turn brown or die if left untreated. The best way to treat this is by mixing up some baking soda in a gallon of water then spraying it onto the plant leaves as needed.
Wilting branches
Wilted Branches can be caused by aphids or fungus diseases, both of which need to be treated with insecticide diluted with water and sprayed every two weeks.
Stunted growth
Stunted Growth can be caused by aphids, fungus diseases, or dry weather. To prevent stunted growth it is recommended to use organic fertilizers that have nitrogen as well as phosphorous.
Pests that like to attack Euphorbias are mostly found on the top of the plant or in the leaf axils. If you notice this happening then it is best to use a product with Neem oil on it, which can be bought at any garden center. Alternatively, you can use the natural remedy of baking soda to get rid of them.
Importance and uses of Euphorbia
-Euphorbia plants are a beautiful centerpiece that can brighten up any space.
-The Euphorbia produces an ornamental flower called the crown of thorns, which is used for decoration purposes and in some religious ceremonies.
Euphorbia features gorgeous flowers that can be used as decorative pieces.
-Euphorbias also offer medicinal benefits to people suffering from different ailments such as asthma or arthritis by producing substances that help relieve pain, swelling, and itching.
-The Euphorbia is the national flower of Kenya, where it grows in great numbers.
Euphorbia Varieties to grow at home
1. Euphorbia cactus (crassulaceae)
Euphorbia Cacti can be planted outdoors or indoors, and are popular for their low maintenance requirements. The Euphorbia cactus has a variety of names in different languages including ”Espuela de Caballo”, which means “horse’s spur”. These plants grow in the wild in many regions of North America and Central America.
Euphorbia cacti prefer to grow in soil that has a lot of organic matter like manure, compost, or peat moss. They can be planted from seeds, cuttings or purchased as potted plants ready for planting.
2. Euphorbia pulcherrima
Euphorbia Pulchirima is a beautiful plant that comes in many colors and can even be grown indoors. They are popular for their colorful flowers which grow on the tips of tall stalks, with some varieties having multiple blossoms per stalk. These plants prefer to live outdoors because they need lots of suns, with soil that should be allowed to dry out before watering.
Euphorbia pulcherrima plants can start reproducing when they are about one year old and will need to be divided every few years for maximum growth in numbers.
Euphorbia Pulcherrima, AKA Poinsettia, is a type of euphoria that features colorful flowers and loves the sun.
3. Euphorbia erythraea
Euphorbia Erythrea grows in the wild on rocky hillsides near waterfalls. In their natural environment, these plants need to be planted in soil with a lot of organic matter like manure or compost. They can also survive in dry climates as long as they are watered regularly and given a partly sunny location.
Euphorbia Erythraea is a type of euphorbia that thrives in dry climates as long as it is watered regularly.
These plants come in many different colors and are popular for their beautiful flowers which can grow up to 12 inches tall.
Euphorbia Erythrea is a slow-growing plant that does best when it is given lots of water, fertilizers, or organic matter as well as plenty of light. It will also need to be divided every few years for maximum growth in numbers.
Conclusion
Euphorbia is one of the most notable succulents you can get for your home garden. They come in many varieties and colors, and they are easy to take care of. They originate from arid regions near the equator but have recently become popular as house plants due to their low maintenance requirements.
If you are looking for a new plant to add to your cacti garden, the Euphorbia is an excellent choice. The most popular variety of this succulent is the cactus type which can be found in many colors and are low maintenance. They grow well indoors or outdoors but prefer dry climates with lots of sunlight for best growth results.
Echeveria is an interesting succulent plant that you can grow in pots or in the ground. It is commonly featured in succulents gardens,terrariums, floral arrangements, and planters. Echeveria is the most common type of succulents in cultivation, but there are other types like Crassula (Crassulaceae).
Interestingly enough, echeverias have thrived under different conditions from temperate to sub-arctic climates. These succulents stand out with their rosette shape and vibrant colors.
So, how do you grow echeveria plants? If grown indoors, it would need lots of bright light and less water to avoid getting root rot. It also needs well-drained soil so make sure your pot has enough holes on the bottom for drainage. When growing it outdoors, provide shade from the hot sun during summer months but allow some sun in cold months. If they need more sun (if you have them outside), move them closer to the window but not in direct sunshine as this will cause scorching of their leaves and stunted growth.
This article will be looking at the best growing practices for echeveria plants focusing on cultivation in pots or the ground, both indoors and outdoors. It will also look at the different types of echeveria that are available and their best uses.
Common features and properties of the echeveria plant
The echeveria plant has a number of features that make it stand out. You can easily identify it in the following ways:
– Rosette shape with fleshy leaves that are spiny and succulent. They have a convex, symmetrical rosette around the stem.
– The color of their foliage is usually somewhere in between light green to deep red or pink, but there are also some other colors like yellow and orange available for purchase at nurseries.
The color of echeveria leaves varies from light green to deep red or pink.
– The leaves are usually in clusters along the stem and can be flat or pointed.
– Echeverias have flowers that come out of a sheath at the base of their leaves, but these species lack showy blooms. Their colors range from red to pink to white.
– They thrive under different conditions with varying amounts of sunlight.
– Echeverias are drought tolerant and can survive long periods without water, but they need good drainage soil to reduce the risk for root rot if grown indoors or in pots.
Interesting facts about echeveria plant
Echeveria is a genus of succulent plants in the Crassulaceae family which are mainly native to Mexico. They can be found mostly in semi-arid regions and they usually grow as solitary rosettes forming large clumps or clusters, although some species form mats on rocks. Echeverias have thick leaves that store water, and they grow in a wide range of colors and sizes.
Echeveria features thick leaves that store plenty of water.
Echeveria is grown for their rosettes of thick fleshy leaves that can be shaped into attractive foliage plants or cut to create interesting containers with dramatic shapes. They have long-lasting flowers too: urns or bells which open at night but are often hidden under the foliage.
Echeverias are very easy to grow, and they will flower best in full sun or near a north-facing window. They can be grown from seed (which is usually collected from ripe fruits), cuttings, offsets of larger plants, tubers, or by dividing mature clumps.
The Echeveria plant thrives on neglect and doesn’t need frequent watering unless the pot is very small or it does not have holes for drainage. This is a great plant to grow if you want something that requires little care while still looking pretty.
Propagation of the echeveria plant
Echeveria plant can be propagated in several ways:
Leaves
This is the simplest way to propagate echeveria plants. Simply cut off a leaf and plant it in potting soil or your garden bed. Be sure that you use enough water from time to time.
The simplest way to propagate echeveria is using its leaves.
Root Cuttings
This is another simple method of propagating echeveria plants. The root cutting should be taken in March, when the plant is dormant, from a healthy echeveria. The cutting should be around eight inches long and two to three inches wide.
Division
The easiest way of propagating an echeveria (especially if it has been in your garden for some time) is by dividing it into small clumps with at least four or five miniature plants. You can do this by carefully pulling the plant up from its roots, and then dividing it into clumps with a sharp knife.
An echeveria can be propagated by dividing the plant into clumps.
Seed Germination
Most types of echeveria will not grow successfully from seed because they have developed an adaptive strategy to prevent self-fertilization. However, there are a few rare types that can be propagated from seed.
Soil and Fertilizer guide for echeveria plant
Echeveria plant does not need much soil, as they like to grow in dry conditions and therefore do not require a lot of water. For soil, it is advisable to use a potting mix that does not hold water very well, as this will allow the plant to dry out quickly.
It is important for echeveria plants to be fertilized regularly. This will help them to grow and maintain their health. This should be done on a bi-weekly or monthly basis, but it is important to remember that the echeveria plant does not need extensive fertilizing. When need is, the best way to fertilize an echeveria plant is with a diluted liquid fertilizer, which should be applied in the morning. Fertilize them with potassium-rich fertilizer and apply it every other week during springtime. When applying fertilizers to your garden, it is very important to use a sprayer that covers the whole area and not just individual plants.
Echeveria should be fertilized with a diluted liquid fertilizer bi-weekly or monthly.
Best planting season and conditions
The best time of year for planting an echeveria will vary depending on where you live. In general, it is better to wait until after frost has passed before planting. It can also depend on what type of echeveria you are planting. Some types of echeveria plants will not grow well in cold climates, such as Echeveria elegans and a few other species.
Echeverias prefer to have their roots kept cool. When the plant is brought into your home for winter care, it should be http://www.slaterpharmacy.com/ placed at moderate temperatures. The plant should be kept at a temperature of 55-65 degrees Fahrenheit. For better results, ensure that the temperature is kept even throughout winter.
Echeveria plant watering guide
Echeveria plants should be watered when the soil is dry to a depth of at least one inch. If you have multiple echeveria plants in your garden, it is advisable not to water them all at once because this will dilute their need for water. Each plant should be watered individually, and it is advisable to water them in the morning or late evening because this will stop water from evaporating.
You should water your echeveria when the soil is dry.
The water requirements for echeveria plants can depend on several factors, such as the climate and soil type. In most cases, these plants prefer to be watered at least two or three times a week during periods of hot weather. If you have an indoor plant that is kept in a pot that holds water; it is advisable not to let this stay stagnant for too long.
Watering echeveria plants outside
The best time of day for watering your outdoor echeveria plant will depend on the climate and temperature, but in general, it is better to water them at dusk or during periods when temperatures are not too high. The soil should be kept moist until the following morning so that it can dry out before nighttime.
Echeveria plant pests and problems
The echeveria plant is generally not prone to any serious pest or disease, but one of the most common issues encountered with them is an infestation from aphids. These are small insects that feed on plants by sucking up their sap through a long tube, which can leave the plant wilting.
In order to stop this, it is advisable to use a spray bottle of water mixed with soapy dish detergent and then spraying around the base of your plants. The soap will clog up their little tubes and they will eventually die from starvation or dehydration. It should also be noted that aphids are more likely to infest plants that have been watered with water from a hose, so it is important not to spray your echeveria plant directly anymore.
Additionally, there are other pests such as slugs and snails which can also eat the leaves of an echeveria plant if left unchecked. If this happens you should use a natural slug killer, which is very easy to find in stores.
Common diseases, signs an cure
This succulent is hardly prone to diseases seen in other similar plants. However, occasional cases can see the plant suffer from the following conditions:
_Root rot – This can be caused by overwatering, or the plant’s roots being in contact with water for too long. To prevent this, the plants roots should be kept cool.
_Stem rot – This is caused by a fungus or bacteria. To prevent this, ensure that you water your echeveria plant infrequently in order to avoid flooding their root system with too much water at one time. It can also help if there are several inches of air
_Leaf spot – This is a sign of infection from soft scales insects. To prevent leaf spots, use an insecticide that has been approved for succulents plants such as neem oil.
Echeveria plant harvesting guide
It’s not necessary to harvest an echeveria plant in order for it to grow and flower; only if you want a particular part of the plant or are propagating new plants through cuttings. When harvesting parts from an echeveria plant, be sure to use a sharp knife or razor blade. Do this by cutting the plant off at ground level. If you need to harvest its flowers, make sure that you are not cutting the plant in half. If there is a part of the plant which it does not require, such as if it has been damaged or attacked by pests, cut this off and discard it. Echeveria plants will flower prolifically; you can cut off the flowers at their base to stop this.
It is, however, important to know that echeveria plants may not always bloom when they are planted in certain locations. This can depend on where you live and what type of climate your region has. If this happens, a good way to get them to flower is by transplanting them into warmer soil. This will make them experience the same change in climate that occurs when they are shipped from a nursery.
Potting and repotting
This succulent plant does not need to be repotted or re-potted often. Potting and replanting an echeveria plant will usually only be necessary if you have harvested a large amount of it from the ground, for example when harvesting its flowers. Otherwise, it is advisable to leave the plant alone and replant if necessary. However, if you have to repot them, it is advisable to use a pot with drainage holes and one which has the same diameter as the original.
Echeveria does not require repotting, but you should consider transplanting if you harvest its flowers.
If you are replanting your echeveria plant in order to move it from a cooler climate (such as an indoor or outdoor container) into warmer soil; be sure not to do this during winter because they will probably not be able to survive. If you are repotting your plant outside, always wait for the soil to thaw out first. The best way to go about this is to move it during the spring or summer. This will ensure that it will have time to adjust before winter sets in.
The best way of securing an echeveria plant in its container is by using a layer of gravel on the bottom that has good drainage properties. This ensures that it does not get waterlogged and can withstand any sudden changes in temperature or weather conditions that might affect other plants.
Uses of echeveria plant
1) Echeveria plants are often used as decorative plants in gardens. This is mainly because the Echeveria plant is a flowering species of succulents that can grow to be about 15 cm tall, depending on the strain and whether or not it has been cultivated from seed or propagated by cuttings. Flowers range in color but usually have dark green leaves with pink or purple spots.
2) Echeveria plant is also known as a houseplant for those who might want to have it in their homes. As a houseplant, it helps clean the air of toxins by absorbing them.
3) Echeveria plant is often used as a ground cover in gardens, especially if they are planted with other plants. This is because they can grow to a considerable size and will also have flowers, so it is easy for them to provide an attractive display.
4) Echeveria plant is a traditional food for the people of Lima, Peru. This is because echeveria plants are easy to grow and they can be prepared in many different ways.
5) They can be used as ornaments in cakes and other foods.
Best echeveria plant varieties to grow at home
If you are looking to grow an echeveria plant at home, there are plenty of varieties that will do well in both containers and gardens.
– Echeveria Elegans: This is one of the most commonly seen species grown as an ornamental houseplant because it is easy to maintain even if planted in high light conditions or if it is too dry of a climate.
– Echeveria derenbergiana: This variety will need to be watered less often than others, so it’s perfect for those who live in more arid climates or are busy with work and don’t have the time to give plants much attention.
– Echeveria carnicina: This variety is easy to grow and can thrive in both low-light conditions or higher light.
– Echeveria lauii: This plant is one of the most vulnerable species because it needs moisture at all times, so you will need to be vigilant when looking after an echeveria carnicina.
– Echeveria peacockii: This is a species of echeveria plant that doesn’t need to be watered often, and it also takes up less space.
– Echeveria purpusorum: This variety will not flower as much as others but if you are looking for something small then this might be the one for you.
Conclusion
Echeveria is an interesting plant that every succulent enthusiast needs to have in their collection. You will love the diversity in the different types of echeveria plant varieties that are available. If you decide to buy one, make sure it has a label with information about where and how it was grown so you know what type will work best for your climate. The fact that its care is so simple is one of the reasons why it has become such a popular plant. Just make sure you give it the right amount of water and repot it as needed. It will also help if you offer the right light conditions, so you may need to move it around your home if light conditions change.
The answer to whether cacti can die or survive without sunlight is either a yes or no. Some Cacti species can survive for short periods without sunlight. However, others need full sun and will not survive if you keep them in the dark place.
Because cacti plants have their natural habitats in the desert, they’re used to the harsh sunlight and will not survive if you deny them the light. Many species need exposure to lots of sunlight to grow well and even produce flowers. Some require at least four hours of direct sunlight to flourish. Others are known to need very low amounts of light to survive, but they still won’t survive with zero light. Not giving your cacti enough sunlight exposes them to infections and prevents them from blooming.
If you’re wondering about the light requirements of cacti and how you should expose various species to sunlight, this article is for you. Here is a comprehensive guide on cactus and its light requirements.
How Does Sunlight Help a Cactus Plant?
Sunlight is crucial in aiding plants to make their own food through photosynthesis. During photosynthesis, plants transform various chemicals into vital nutrients essential for growth.
This chemical conversion process serves as the nutritional foundation for the plant’s growth and flowering.
Whether you’re considering acquiring a Christmas cactus, prickly pear cactus, Easter cactus, or any desert cacti of your choice, it is crucial to ensure that your plant receives adequate sunlight.
Although succulent plants vary in shape and size, they require full or direct sunlight for at least six to eight hours per day to thrive.
If you cannot provide enough natural light indoors, consider investing in an artificial lighting system that will help your plants get the necessary amount of daily light exposure.
How Much Light do Cactus Need?
The light that your cactus needs to thrive is measured in duration since you cannot quantify light. Instead of asking how much light, you should ask the duration of the light that your plant needs.
Cacti need around 10-14 hours of sunlight each day. Well, this doesn’t include the cacti that love the shade because those will burn if exposed to light for that period.
Most cacti need 10-14 hours of sunlight daily.
Many cacti plants have devised techniques to help them get the amount of light they need.
Others have taken distinct shapes that help them minimize their exposure to the sun. Some types elongate their branches and tend to grow towards the direction of the sun.
Other cacti feature highly modified leaves that help them minimize evaporation as a result of sun exposure. Make sure such plants only get four to five hours of sunlight every day.
How Do You Know the Amount of Sunlight that Your Cacti Need?
Since you’re going to grow different species of cacti, it will be hard to know which one needs what amount of light. Well, most species love light exposure and will do pretty well under intense heat.
But too much of it can cause damage to even the hardiest plant out there. Cacti also suffer from sunburn damage which can cause scars or even kill them.
Don’t subject your precious plants to full sun exposure right away. The best cause of action is positioning your cactus under partial shade and slowly exposing them to more sun until they get used to it.
Consider getting them out in the morning sun, which is less intense, then gradually introduce them to the hotter afternoon sunlight.
You can also consider placing your young cacti under the shade of other plants before exposing them to direct sunlight.
Gradual exposure is vital to avoid sunburn and permanent scarring due to the intense heat.
Consider placing younger cacti in shade to protect them from direct sunlight.
Cactus plants that love shade are more susceptible to sunburn and scaring. Such cacti include Easter cactus and Mistletoe Cactus.
However, cacti plants come in blue, grey, and red plants highly covered with spines love direct sunlight exposure.
Cacti that are used to growing indoors will also suffer sunburn and damage when moved outdoors, where they’ll suddenly get sunlight exposure.
Whatever the plant you plan to move to more light, make sure you do it gradually, so you don’t stress your precious plants.
Don’t expose newly propagated cacti to the sun as they can also suffer damage. Allow them to mature and become strong enough to deal with the intense heat.
Monitor your plants carefully and find out which one will do well under direct sun and which one needs shade.
Do Cactus Need Bright and Direct Light?
Some cacti need bright and direct light, while others don’t. Others prefer bright but indirect light. This means you shouldn’t expose them to full sun. Some hate direct light and can kill them if exposed.
While some cacti require bright and direct sunlight, others thrive under bright but indirect sunlight.
Rhipsalis, which falls under epiphytic cacti, cannot survive under bright and direct sunlight. They prefer shade and will do well under other trees or indoors.
Other species need bright light but can also do well with the part sun. Good examples of such include barrel-shaped cacti, chin cacti, and Mammillaria cactus genus.
Those cactus species prefer bright and direct sunlight but sometimes need to go without too much light. If you treat them for infections or repotting, make sure you shade them from direct sunlight.
Others also need time to transition for winter hence bright light will not do them any good.
Should You Give Your Cacti Artificial Light or Sunlight?
When it comes to cactus light requirements, both sunlight and artificial light do great work. But there are times when sunlight will do better than artificial light and vice versa. Let’s see how the two sources of light work.
Cactus Sunlight Needs
Natural light is usually the easiest to give you cactus plants because it’s easily available.
You don’t have to do anything to control this light apart from just placing your cactus on the windowsill. Your cactus will know how to harness this energy and use it for various chemical reactions.
Most cactus plants were naturally made to benefit from sunlight, and they’ll appreciate it if you generously expose them to it.
The plants have different adaptations that allow them to absorb only the light they need and protect themselves from excess heat.
Exposing such plants to direct sunlight will not hurt them because they know how to adapt.
Maximizing Sunlight for Indoor Cacti
There are plenty of indoor cacti that still need natural light to survive. You should put such plants on windowsills so they can harness the sunlight that they need.
The best way to ensure your cactus receives maximum sunlight; position them on the south-facing windowsill. This is where the sun heats most, and your cactus will receive maximum hours of sunlight.
But if you want your cacti to http://theshoalspharmacy.com/ receive the strongest sunlight, which doesn’t last too long, place them on the east-facing windows. This is where you’ll get the strong morning sun which weakens as the day progresses.
If your sunlight prefers partial shade, the north and west-facing window sills will do them justice.
Artificial Lights for Cactus
When there is no sunlight getting to your cactus, you’ll need artificial light to keep it going. This light is also important for the plants that can’t access the space on the windowsill.
If you live in places that experience strong winter, you might want to transfer your plants indoors, and that means offering them artificial light.
When propagating your cactus, they’ll also need artificial light. Direct sunlight from the sun can be too hot for them. They need low-intensity sunlight.
Unlike sunlight, artificial lights are not free of charge, and you must invest in them. Make sure you find the right bulb for your plants and pay for electricity bills. Well, you should not panic because the bulbs don’t consume too much energy and the costs are generally low.
When choosing your bulbs, don’t go for those that get too hot or emit very little light. Usually, fluorescent bulbs or LED grow lights will do you good. Avoid incandescent bulbs or mercury vapor.
75w of grow lights is enough for an area of 5-10 square feet of growing area. Fluorescent bulbs cover a wider area.
How Does Dormancy Affect Light Requirements?
Like many plants, cacti go through a period of dormancy. The dormant period usually occurs during winter when temperatures drop below freezing. This phase is characterized by a slow growth rate and decreased light requirements.
Cacti will require less light during this time than during the active growing season.
When exposed to too much light during dormancy, these plants can become sunburned or stressed, resulting in slowed growth or death.
Therefore, adjusting the amount of light your cactus receives during its dormant period is important.
Consider maintaining cool temperature and less light exposure during this time. Once spring arrives, gradually increase the plant’s exposure to sunlight to encourage healthy growth and flowering.
How Does Light Affect Flowering in Cacti Plants?
Light plays a pivotal role in influencing the flowering of cacti plants. The timing, duration, and intensity of light exposure directly impact the flowering process in these plants.
Short-day cacti typically require longer nights and shorter days to initiate flowering, while long-day cacti require shorter nights and longer days.
The changing light patterns of different seasons trigger the plants to bloom at specific times.
Protecting Your Cactus from Heatwaves
Cactus species react differently to weather changes, and excess heat might damage others while some may survive.
Either way, you need to ensure your cacti don’t suffer the excess heat, especially if you stay in areas that receive extreme heatwaves.
Heatwaves mostly happen in summer, last many weeks, and can kill plants. You need to tend to your plants in several ways to avoid this. Here’s how to do it.
Although cacti love sun, you still need to protect them from excess heat and sunlight.
Give Your Plants Some Shade
If you think that your region will suffer heatwaves in the coming weeks, you need to prepare for it.
You need to find some shelter for your young and fragile plants that might not tolerate the extreme weather.
If you have outdoor cactus, find them the shadier spots in the garden. For those species that do well indoors, take them inside to avoid heat.
You might not be able to move the tall and mature cacti, but don’t forget to check on them often. Buy shade clothes for those cactus plants in the bed.
Don’t Repot
This will not be the best time to repot your plants because the heat will burn them right away.
Even mature plants will undergo stress when you repot, and if you add intense heat to that, they won’t survive.
Wait for the heatwave to subside, and the temperatures dropped before you can repot.
Don’t Fertilize
While fertilizers are perfect for the growth of plants, not all the time is fertilization time. The best way to fertilize in spring, when many of them will be growing actively.
During a heatwave, your plants will be merely struggling to survive and will not grow. If you introduce new nutrients, you’ll only cause more damage than even that of a heatwave.
Summary
Cacti plants love light and will do well in areas that receive direct sunlight. Others don’t need direct light but will still need some form of light to survive.
Denying your precious plants the much-needed light will only mean destroying them.
Direct sunlight or heatwave is likely to cause sunburns or even kill your plants. So, whether you choose to give your plants sunlight or artificial light, make sure you do it carefully. Too much or too little light both cause damage to cactus plants.
Succulents are different from other plants in a lot of ways. They don’t need as much water, and they can do well in various conditions. But that doesn’t mean they don’t need fertilizer or that you don’t need to know how to fertilize your succulents.
Whether you’re new to succulents or gardening in general, you should consider how to fertilize the plants. That way, they can grow, and you can enjoy them for a long time. Read on to learn how you should take care of succulents.
What to Use as Fertilizer
Before you can learn how to fertilize succulents, you should know what to use as your fertilizer of choice. While you can use the same fertilizer as you would for other plants, that isn’t your only option.
To ensure your succulents are growing perfectly healthy, use a specific fertilizer for them.
Sometimes, you may want to use a fertilizer specifically for succulents. That way, it can work with the plants and help them grow. A more general fertilizer can work well for other plants, but you should consider investing in fertilizer specifically for your succulents.
Tea
Manure tea is a kind of fertilizer that works great for succulents. As the name suggests, it’s very similar to manure or compost. However, you don’t have to worry about the smell or mess, and you don’t have to spend time producing it.
Manure tea is a natural fertilizer and is an ideal option for those who avoid chemicals.
You can buy manure tea in tea bags that are ready for you to prepare for fertilization. That way, you can keep them in your home or garden shed. It’s a great option for beginners and advanced gardeners.
Tea is a natural fertilizer, so it’s also fantastic if you don’t want to use chemicals. Whether you or someone you live with is sensitive to chemicals, manure tea might be worth it. Then, you can live comfortably, and so can your succulents.
Commercial
If you don’t want to use manure tea, you can use a commercial granular fertilizer that you might find at a garden shop. This is a good choice if you have other plants to fertilize and you want to minimize your equipment and maximize your budget.
A granular fertilizer is great for succulents you plant in the ground. The brand doesn’t matter, but make sure you choose a fertilizer with an equal ratio of:
K/potassium
N/nitrogen
P/phosphorus
You can look for a fertilizer near you or online, so you can get something that meets the needs of all of your plants. But even if you only have succulents, commercial fertilizers are an excellent option.
Nothing
It may sound ridiculous to say nothing, but some succulents don’t need any special fertilizer. Before you add anything to your succulents, consider how they look now and how you want them to look in the future.
Always check the appearance of your succulents and add a fertilizer onlywhen it is needed.
Adding fertilizer can improve the plant’s appearance, but it can change it for the worse as well. If you like how it looks right now, you might want to hold off on adding any fertilizer.
You can always add more later, but it’s hard to take it back after you put something in the soil. So think carefully about both manure tea and commercial fertilizers. Then, you can make sure one of them is the best option for you and your garden.
When to Fertilize Succulents
Next, you should know when you should add fertilizer if you decide that’s what’s best for your succulents. Regardless of the species you have, there are a couple of times where adding fertilizer is a good idea.
In the spring, you should wait until temperatures are consistently above 60℉ (15.5 ℃) during the day. That way, the environment will be warm enough for the fertilizer to support the plants as they grow.
Later in the year, you can add more fertilizer during the fall. However, you should do so before a rainstorm, so the rain can help water the plants after the fertilizer. The rain can help dilute the fertilizer, so it won’t hurt your succulents.
Ideally, you’d start with only using fertilizer once in the spring and once in the fall. However, you can add fertilizer more if you want to stimulate even more growth. Growers will fertilize their succulents throughout the year to keep them looking good.
How to Fertilize Succulents
Now, you can learn how to fertilize succulents so that you can give them the best chance at thriving. This process involves everything from providing the right growth environment to setting the right schedule for adding fertilizer.
If you’ve used fertilizer on other plants, that can help here. However, the process is a bit different with succulents. Even if you’re new to gardening overall, the steps are easy enough to learn and follow.
Your succulents should have access to sunlight for at least four to six hours each day. That sunlight should be indirect so that light gets through but not too much. However, more sunlight is better than less, so feel free to put your succulents somewhere with more light throughout the day.
Make sure you provide your succulents with plenty of sunlight after fertilizing them.
One of the problems with fertilizing succulents that don’t get enough light is irregular growth. After you add the fertilizer, the plant will start to grow fast. But it will grow in the direction toward the light.
While that can provide a unique look, it may not be the shape or appearance you want. In that case, you should make sure your succulent can either get enough light or grow a bit more slowly. If you don’t have much sunlight, consider holding off on using fertilizer.
Prepare the Fertilizer
When you decide to use manure tea, you need to spend some time preparing it. Like any other form of tea, it needs to steep in water before use. Here’s how to prepare manure tea:
Take a tea bag out of the package but leave the tea in the bag.
Place the tea bag in a big bucket (5 gallons).
Fill the bucket with one to five gallons of water.
Cover the top with a lid.
Let the water and tea bag sit for two or three days.
Check on the water and remove the tea bag.
If you want to make the last step easier, you can tape the string on the tea bag near the top of the bucket. That way, you won’t have to reach for it at the bottom.
When using other types of fertilizer, you won’t have as much preparation. But you should still make sure you have what you need and that you portion it out. That way, you don’t use too much fertilizer on your succulents.
Fill Your Watering Can
After your fertilizer is ready to go, you can set it aside and fill up a watering can. Consider how many succulents and plants in https://www.bernardspharmacy.com general you have to water. Of course, you can also use water directly from the hose if it’s close enough.
Then, you can add enough water to complete your plant-watering routine. While you won’t fertilize your succulents every day, you can incorporate this step into watering all of your other plants.
Water Your Succulents
Now, you can go through each of your succulents and water them. Try to add just enough water to moisten the soil but not drown the plants. This is particularly important when using manure tea.
Always water your succulents after fertilizing them to dilute the fertilizer a bit and make your plant grow even faster.
Adding water alone will keep the fertilizer from being too harsh on the succulents. Plus, it gives you an excuse to add plain water to help your plants grow. If you have plants other than succulents, you can water those now with the plain water.
Then, you can follow up the plain water with your fertilizer. If you use manure tea, you can pour some of the water from your bucket and add that. When using granular or commercial fertilizer, follow the directions and then use half of the dose to keep from “burning” the succulents.
Wait a While
After you finish watering and fertilizing your succulents, you can go about the rest of your day or week. Now, you need to decide if you want to fertilize them again the next time you water them or if you want to wait longer.
Fertilize With Each Water
Wait Until the Next Season
Faster growth
Slow growth
Soft plants
Hard plants
Easy to remember
Save on fertilizer
Consider the pros and cons of each fertilizing schedule. If you want your succulents to get really big, adding fertilizer more often is great. However, it can be a bit too much if you keep your succulents in a terrarium or small pots.
Succulents in the ground may benefit from more fertilizer since they have room to grow. But if you live in an apartment or small house without much space, don’t be afraid to wait.
Benefits of Fertilizing Succulents
As you learn how to fertilize succulents, you may wonder why you should. Like any other plant, succulents can benefit from the nutrients in fertilizers.
Whether you have a small or big garden, you can use fertilizer to keep your plants in good shape so that they can grow. The right fertilizer can also help with the appearance of the plants, which is great if you want a visually appealing garden.
Either way, consider a few of the major benefits of fertilizing your succulents.
Promote Growth
Of course, the most apparent benefit is that you’ll notice your succulents get bigger more quickly. If you want to have a garden full of them, adding fertilizer is a no-brainer. Even if you keep them in pots, you may want to fertilize your succulents to fill out the pot.
The most evident benefit of fertilizing succulents is that the plants start growing even faster.
As you add more fertilizer, the plants can continue to grow and mature. You won’t have to wait as long for them to reach the size you want.
Whether you want to set a world record or simply enjoy the succulents from across the yard, you may want to add fertilizer each time you water the plants. Even adding it every month or so can provide more benefits than a few times a year.
Maintain Shape
Adding fertilizer can either help the shape or hurt it, but the right fertilizer and growth environment is great for your succulents. Not using enough fertilizer may keep the succulents from growing well, so they might look bad, even if they’re healthy.
Of course, you don’t want to add too much fertilizer, especially if your plants don’t get enough indirect light. But as long as they do get four or more hours of sun a day, you can add fertilizer to help your succulents keep a good shape as they grow.
Preserve Color
As your succulents grow, fertilizer can also help keep them a healthy color. While it can be cool to see changing colors, you may or may not want that. If you want to keep all of your succulents the same color, make sure you add fertilizer.
The nutrients will help keep your plants healthy, so they won’t die as easily. Sometimes with plants, changing colors signals that the plant isn’t doing well. Luckily, you can preempt that by fertilizing your succulents on a regular schedule.
Risks of Fertilizing Succulents
While there are many benefits to fertilizing succulents, doing so doesn’t come without risks. If you’re fairly happy with how your succulents look, you might not want to fertilize them and risk changing the color or size.
Fortunately, you can fertilize some of your succulents and not others. Then, you can see if you like the results and if it’s worth risking the rest of your garden.
Also, some of the risks come from using too much fertilizer. So don’t be afraid to start slow if you want to avoid the following.
Too Much Growth
Fertilizer can make your succulents grow, which may be what you want, but it might not. If you start adding fertilizer without a strategy, the plants could grow too big for their pots, or they could take up too much space on the ground.
As mentioned, when you add too much fertilizer to inside plants, they might grow in an odd shape. They’ll want to grow toward the light if they don’t get enough exposure. Sure, that could give you a cool design, but it can look odd.
Consider how much you want the succulents to grow and how fast. They can still grow if you only use fertilizer a few times a year.
Soft Plants
Soft and hard plants, in terms of a nursery, come down to personal preference. Because of that, this may be a con or a pro, depending on what you want. If you don’t want soft plants, you should avoid fertilizing your succulents too often.
Hard plants are more tough, so they can withstand more. If you want to keep your succulents outside, you might want to keep them on the tougher side. That’s even more important if your succulents will be in a garden rather than pots.
But if you don’t care as much about that, feel free to add more fertilizer. Think about how you want your plants to grow to help decide if this risk is worth taking.
How Do You Choose the Right Fertilizer?
To choose the right fertilizer for your succulents, consider what they are and where they are. For example, granular fertilizers are generally the better choice for gardens. When using granular fertilizers, make sure you spread them lightly and all over the garden, then water the plants.
If your succulents are in pots, you may want to use manure tea or another liquid. Keep the fertilizer to half of the normal dose so that you don’t overdo it. If the plants don’t grow quickly enough, you can add more each time.
Does Your Soil Matter?
Your soil can have an effect on how to fertilizer your succulents. If your soil already has a bunch of nutrients, you may not need to fertilize the plants as often. When you do fertilize them, you can use less fertilizer.
On the other hand, if the soil is pretty basic and doesn’t contain any nutrients, you may need to add more fertilizer. Or you might want to increase the frequency of using something. That way, your succulents have plenty of nutrients to thrive.
Always consider the type of your succulent soil before adding a fertilizer.
What Are Some Common Types of Succulents?
Before you start fertilizing succulents, make sure you know that the plant in question falls into that category. That way, you don’t use the wrong product on it. Here are some common types of succulents you should know.
Aeonium
Agave
Aloe
Echeveria
Kalanchoe
Opuntia
Senecio
You can find tons of other succulents, so this list isn’t complete. Be sure to learn how to fertilize succulents when you get any type of the plant.
Final Thoughts
Knowing how to fertilize succulents is vital, whether you plan to do it once a year or once a month. Make sure you choose the right type of fertilizer, prepare it well, and add it to your gardening routine. Then, you can see the growth that you want from your succulents.
Cacti are beautiful plants that make great additions to any home. However, they can be susceptible to various fungal infections that may kill them or significantly reduce their growth.
While most people know how important it is to water cactus properly and keep the plant from getting too much sun, sometimes these steps aren’t enough to prevent an infection. You also need to be aware of the signs that indicate a fungal infection, such as black spots, discoloration, decay, etc.
You should also know how to get rid of the cactus fungus if you discover it, such as transplanting and removing the infected parts. In extreme cases, you may need to use fungicides to get rid of fungi from your plants, and you should know the right type to use.
This article provides all the information you need about safe and effective ways for dealing with fungus on your cactus. It starts by explaining how to identify these fungi before you proceed to get rid of them. Let’s get started!
Cacti Fungus Symptoms
Before you learn how to eliminate fungi from your cacti, it’s important to be familiar with a few of them first. Knowing how these cacti look will help you get rid of them before they cause severe damage to your precious plants. Here are some common fungi infections and how they look.
Stem Rot
One of the more common fungal infections is corky stem rot, which most often infects prickly pears. This particular fungal infection produces dry, light-colored patches on the plant’s stem, which expand in time. These sections look discolored and may eventually cave in.
Stem rotting is especially common in prickly pear cacti.
Black Rot
This fungal infection is a type of canker disease that affects many different cacti species, including barrel-shaped cactus varieties. This fungal infection makes it difficult for the plant to grow any higher, which is why it’s called black rot. It causes large sections of cactus skin to become eroded and look coated in a black substance.
Soft Rot
Soft rot is a fungal infection that affects the area of the cactus between its spines. It often starts as a small, white spot that quickly spreads into an extensive area of decay. The infected flesh eventually turns brown and crumbles away to expose the main part of the plant underneath.
Cotton Root Rot
This kind of fungal infection affects the cacti’s roots. It usually appears as a thin layer of mold growing on the soil surrounding the plant, and it can eventually spread to infect other parts of the plant if left untreated for too long. If your cactus has a cotton root rot infection, you’ll notice its new growth is weaker, and the plant’s overall health seems to be declining.
Cotton rot is a fungal infection that attacks the roots of a cactus.
Stem Tip Blight
Another type of cacti fungus is called stem tip blight, which attacks one of the plant’s lower sections. It starts by causing damage to the structure of the plant and eventually rots it completely, especially when the infection spreads into other parts of the cactus.
Soil-based Fungi
The last type of fungus is soil-based, affecting different plants, including agave and aloe. They tend to grow in the soil around the plant (and not on its surface). It can be more difficult to notice, especially if you let your plants go unwatered for some time.
The main symptoms of a fungal infection are spots or patches that look discolored and have a slightly sunken appearance. If you see these marks on your cacti, you should carefully inspect the part of the plant they’re on to ensure that it isn’t just a different type of discoloration. Also, look at any other parts of the cactus to make sure other spots aren’t present, which would indicate a fungal infection.
How to Get Rid of Cactus Fungus
As previously mentioned, you may treat cacti fungal infections in different ways. Here are some ways to do so:
Use an Insecticide
If you notice that your cactus has a number of small insects crawling over it, then try spraying the plant with an insecticide to get rid of them. They can also help prevent more pests from infesting your cactus in the future.
Remove the Plant from Its Environment
Fungal infections often appear when the plant’s growing conditions aren’t ideal. One of the easiest ways to get rid of these types of infections is to change your cactus’s environment, so it doesn’t suffer from them anymore. For example, if your cactus has developed a fungal infection because you let its soil go dry for too long, then try watering more regularly instead. The same goes for other types of cactus fungus.
Remove the Infected Part
If your plant has a large fungal infection, you might need to get rid of the infected part entirely and be careful not to spread it into other parts of the plant. There are a few different ways to do so, including pruning or sharpening your cactus to remove the discolored area.
You can also use a sharp tool like a knife or razor blade to carefully scrape away the damaged sections of skin and expose the healthy part beneath. This is sometimes enough to get rid of all signs of fungal infection.
Use Fungicides
Fungicides are also a popular way to get rid of the cactus fungus, and there are many available for purchase. One of the most common types of fungicides is the Bordeaux mixture, which you can find at your local gardening store. Apply fungicide directly to the affected areas of your cactus to get rid of the spores and stop them from spreading any further.
Clean Your Pots
You can clean your plant pots specifically to prevent cactus fungus growth. Cleaning the leaves or soil in your pot regularly will help prevent fungal infection or remove small signs of these types of problems already present. This is especially important if you’re using a pot designed for cacti since these pots tend to hold onto moisture and could encourage fungal growth.
Always ensure the pots are clean before planting your cacti.
Avoid Placing the Cactus in Direct Sunlight
Finally, keeping your cactus in direct sunlight can also cause it to develop fungal infections. If you notice the plant beginning to decline in health or its surface is developing discolored or sunken spots, move it. It’s a good idea to move your plant into filtered light or shade until the condition clears up.
How to Prevent Fungi Infection
Cactus fungal infections often occur when the cactus is in a state of decline and can no longer fight off pests and pathogens. By taking care of your plant, however, you can avoid this problem.
To keep your cactus healthy, plant it in the correct soil. The soil should be coarse enough to allow good drainage but not compacted either. You should also avoid overwatering your plant.
Make sure your cactus soil offers enough drainage for the succulent to get rid of excess water.
Spend a few minutes each week or two to inspect the cactus for any signs of pests that are commonly attracted to these plants, like fungus gnats. If you notice any pests, then try removing them manually using an insecticidal soap or a pesticide.
Keep your cactus away from direct sunlight, especially if it’s suffering from a fungal infection. The plant will be able to fight off the fungus easier and quicker in more indirect light as opposed to direct sun.
Related Questions
How can I tell if my cactus has fungus growing on it?
If you notice that some plant parts look discolored or sunken in, then it might have a fungal infection. Other signs indicate the presence of fungus gnats, like small black flies flying around your cactus.
Can fungi infections kill my cactus?
The above types of infections can cause irreparable damage to your cactus. However, it should be fine as long as you quickly take care of the problem and don’t allow it to spread. Your plant might lose a few leaves or suffer from discolored areas on its surface, though, which would make it look unsightly.
How do I get rid of a fungus gnat infestation?
Try keeping your cactus plant in indirect sunlight and remove any affected soil or potting material the next time you water it. You might save small plants with a fungicide if necessary, but this is unlikely to work on large cacti. If all else fails, you can also try pruning your cactus and removing the affected parts.
How much water should I give my cacti?
Cacti, like other plants, require enough water but don’t like to be overwatered. Too much water can cause root rot in larger varieties. You’ll need to let the soil dry out slightly before watering it again and avoid watering heavily on the leaves.
Summary
The best way to prevent these types of diseases from harming your cacti is to keep an eye on their overall health. You should be sure that your plants get enough water; they’re getting the amount of sunlight they need and that no insects are bothering them. A lot can affect a cactus’s health, so maintaining it properly can help prevent fungal infections from developing as well.
Being able to identify different types of cactus fungus can help you get rid of them before they do too much damage and take the plant’s health down with them. We hope this article helped you learn how to identify a fungal infection and what you can do to prevent it from spreading.
If you are used to working with succulents, you know they take time and patience. They have different seasons when they flourish and when they are dormant. Caring for succulents in the winter is a worthwhile pastime.
When caring for succulents in winter, take precautions regarding the plant and the possibility of it freezing. You should bring Soft Succulents inside, and Hardy succulents can remain outside if you live in the proper planting zone. The plants also need water and nutrition during this time.
If you are interested in raising succulents or are a seasoned grower, continue reading for facts regarding the care and feeding of succulents in winter.
What Temperature is too Cold for Succulents?
The temperature your succulent can tolerate depends upon what type of plant you have. Hardy succulents can withstand -30 degrees Fahrenheit, and their bodies will close slightly and turn from green to red. The soft succulents will tolerate anything over 32 degrees Fahrenheit.
Although some succulents can withstand -32 degrees Fahrenheit, they thrive at temperatures 40 degrees and higher.
However, they thrive at 40 degrees and up. When the temperature falls below 32 degrees Fahrenheit, the leaves which store the water will freeze and rot the plant.
The cold temperatures can affect the plants, and they can go dormant. However, if temperatures fall between 40 and 50 degrees, the succulents change into magnificent colors. If temperatures fall below 32 degrees, you should bring plants inside.
Winter Dormancy Explained
Winter dormant soft succulents cease growth during this season to survive the harsh weather. These plants tend to grow faster during the summer. They typically respond to the rain and more tolerable weather.
Succulents come in three categories. These include:
Winter growing
Partially dormant
Fully dormant
Dormancy is a process that is essential to plant survival. As the days shorten, plants begin to slow their growth, and dormancy begins in each succulent. Fully dormant succulents will die back entirely above ground. Their root systems live on, and new growth occurs each spring.
Partial Dormancy During Winter
Partial dormancy is expected in the winter. This inactivity means that they do not change significantly in appearance, and they do not grow too much. Partially dormant succulents do not require as much water. They also do not require fertilizer. They need good drainage so the roots will not rot.
See below for examples of Partial dormancy succulents.
Agave
The main visual characteristic of agave is its sizeable rosettes of firm, plump leaves. Dormancy occurs in the winter, and the plant will begin to grow again in the spring when the temperature goes above 40 degrees. It is used for sweetener, and it is also used to make tequila.
Mammillaria
This plant is one of the largest plants in the cactus family. A native to Mexico and the United States, they contain sharp spines and delicate flowers. Their common name is called “pincushion cactus.” Also, winter dormant, it will come back in the spring at 40 degrees or above.
Mammillaria is a winter dormant plant that comes back in the spring when the temperature is above 40 degrees Fahrenheit.
Echeveria
A popular succulent found in gardens and floral arrangements is Echeveria. The leaves come in various colors, including pink, purple, blue, peach, and rainbow. This plant is winter dormant at below 40 degrees. When the temperature rises in the spring, you will see new growth.
Echeveria is a popular winter dormant succulent that continues to grow once the temperature rises in spring.
Winter Growing Succulents
Other types of succulents are called winter growing. The shorter days and cooler temperatures allow for these plants to grow. During their summer dormancy, they need water so that their roots stay cool in the summer heat. There is no change in appearance, and if indoors, they never go dormant.
See below for examples of winter growing succulents.
Aloe
Aloe is a familiar succulent plant for the home gardener. The sap inside the leaves is used for burn treatment and in ultrasound gel. The leaves are spear-shaped with white dots, and they grow both inside and outside. They are summer dormant and do well at 25 – 40 degrees.
Aloe vera is a summer dormant succulent that grows perfectly healthy at 25-40 degrees Fahrenheit.
Avonia
Avonia is a perennial evergreen that grows well in temperatures of 30 to 40 degrees. It resembles a dragon and produces flowers that can be pink, white, or yellow. It does not need much water and is drought tolerant.
Crassula
The Crassula plant has many variants; you could use it as a ground cover or grow ten feet tall. This plant grows well in 25 to 40-degree temperatures. They require good draining soil and do well in dry areas.
Winter dormant succulents include cactus plants, air plants, and others. Winter dormant means that the plant takes a rest from growing during this season. As you can see, whether your plant sleeps in summer or winter, succulents are easy to care for and are easy on the eyes.
Fully Dormant Succulents
Some succulents go into a deep dormancy, and they die off above the ground. They resemble deciduous trees in that they lose their leaves. Some disappear above ground, and only the roots remain. See below for examples:
Sedum spurium
This plant is a perennial, which means it comes back to life yearly. It loses its leaves like a deciduous tree, and all that is left are the bare stems. The plant “dies off” in late fall and winter and returns in late spring to early summer.
Sedum Kamtschaticum
This succulent is also a perennial that actually disintegrates above the ground, and you will not see it. This deep dormancy occurs from November through March, and the plant will regrow in April.
Orostachys Spinosa
This succulent also degenerates above ground. It is very hardy and can survive – 30 degrees. This plant is a small, slow-growing succulent that is very rare. It can survive at -40 degrees and is from Mongolia.
Fully dormant succulents are very cold hardy. You will not see them during the winter because they are in a deep sleep beneath the ground. They are dormant between November and March, and like all perennials, no care is needed.
Why Succulents go Dormant
Dormancy is nature’s way of allowing plants to take a break and rest. During this time, they do not grow, and they are protected from their surroundings. For succulents, the dormant period is brought on by a decrease or increase in temperature.
If plants could grow in the winter, the water in the trunk stems and leaves would freeze. This process would cause a lot of damage to the plant. Winter also does not provide enough sunlight for the plants to use.
Succulents take a break and stop growing during their dormancy months.
When the soil is frozen, the water is insufficient. This freezing renders it difficult for plants to get much water during this dark, cold time of year. Dormancy gives plants a fresh start by resting and growing again when the weather is warm.
When the temperature is hot in the summer, some succulents go dormant to cope with the increase in heat. Again, the plant will emerge from dormancy when the temperature decreases.
Can Succulents Survive Inside?
Succulents can survive inside and outside, and they need dry indoor air to make it through the winter. Their fleshy leaves are puffy and filled with water, and these robust leaves can survive in a dry environment.
Many succulents resemble an artichoke with thick leaves. Remember, do not give them too much water or direct sunlight. The light is good but should be filtered, or you could use a grow light.
Because of their brilliant colors, they can be very decorative. The colors of these plants can be surprising. They can produce:
pink
blue
yellow
Burgundy
Orange
These colors can be dynamic in that they can go slightly lighter or shades darker.
When grown indoors or outdoors, many succulents feature bright and vibrant colors.
If you have a soft succulent outside and it is winter, you must bring them indoors. Soft succulents are sensitive to freezing weather. The ice and snow are hazardous for these types of succulents. Fortunately, many succulents will thrive indoors.
The Jade likes full or partial sun, and it can live outside in 30 to 50-degree temperatures. It is mainly seen indoors where the http://www.buyxanax.org/ environment is more steady. It has fleshy oval-shaped leaves and is dark green.
Burro’s Tail looks like an animal tail with short cylindrical leaves with points on the end. It is grown as a house plant or outside if above 40 degrees. It does not like overwatering, so keep the soil on the dry side.
Flaming Katy is related to the Jade plant and will produce beautiful salmon-colored flowers. They do not stay very long, but with patience, the plant will bloom for you again. The plant is poisonous to humans and cats, so you may want to keep it out of reach. They like bright light and little water.
How to Keep Your Succulents Healthy Inside During Winter
It takes knowledge to grow succulents indoors during the winter successfully. Many people inadvertently kill their succulents due to overwatering. There is no prescribed amount of water for your plant. The soil should be moist, not saturated, and you should only water when the soil is dry.
If you look at the plant and see specific symptoms, you will know that you have overwatered.
Leaves turning brown
Leaves falling off
Plant looking pruney, like your fingers when you stay in the tub too long
Edema in the leaves
You need to accommodate their dormancy periods. This lack of growth means the plant is dormant, so do not keep watering. Here are some tips.
Create a Seasonal Calendar
You need to know when winter begins for succulents. Winter begins mid to late fall for succulents when the days shorten and the trees lose their leaves. This period is the time to bring your soft succulents inside. Always bring them indoors before the first frost.
Give Your Plants Plenty of Light
Place your plants where they will catch the light, not direct but filtered. Rotate your plants so they get even light. When the weather turns freezing, move them away from the window to maintain warmth for them.
Fluorescent bulbs will help succulents grow. The color of light needs to be in the visible color spectrum. The lights need to be about 6 to 12 inches away from the plants.
Group Your Plants According to Their Schedule
Try to group your plants according to the light and water needed. Different plant species have different needs, and it will be easier to keep the watering and feeding schedule straight.
For example, the Jade is a species of the genus Crassula. The Jade is mainly grown indoors but can survive in 30 to 50-degree weather. The plant can take the full or partial sun and if inside, should be rotated to grow straight—water when the ground feels dry.
Mother-In-Laws tongue is a species of the genus Sansevieria trifasciata is a hardy evergreen perennial plant. It is a great houseplant. You should water around the edges of the container, not on the leaves. This plant likes temperatures above 60 degrees.
Cut Down on Watering and Stop Feeding
You must cut back on the watering for cacti because they can get root rot with too much water. Even though cacti and succulents are related, all cacti are succulents; however, not all succulents are cacti.
During their winter, which is September to March, they do not flower. They should not be fertilized and only water when dry.
Winter is a tricky time for succulents. They require adequate amounts of water to keep them healthy. You want to water your winter plants when the soil is entirely dry. You should space out the watering to about once a week or once every two weeks.
You will know when your succulents get thirsty because the soil will be dry. Also, if the plant leaves look shriveled, that is a good indicator that your plant needs water.
The actual test to tell when your plant needs water, find a free area of soil. Put your finger into the dirt up to the first knuckle. If the soil feels moist, wait a couple of days and check again. However, if the soil is dry, it is time to water.
Succulents should not be fertilized because their growth is slowed, and the food can stress them and burn the roots.
Prepare the Pot for Inside
Before you bring your succulents inside, you need to make sure your pot is set up. You should clean the pot and make sure it is free of dirt, leaves, or cobwebs. It is important to remove dead leaves so that your pot does not become infected by bacteria or fungus.
Without cleaning, you could also bring pest eggs into your home, and they could hatch. Hence, you could have spiders inside that belong outside.
Watch Out for Insects
Mealybugs and armored scale bugs love to come inside where it is dry and warm. They like to feast on succulents and will make their home in them. Use 70% rubbing alcohol in a spray bottle and lightly mist the plant. A kitchen sink or stationary tub is a good place for this.
Pretty up the Pot
When your succulent is in the process of growing, it will shed leaves. You should make sure that your plant is pruned and kept looking polished. This cutback is what you need to be mindful of before bringing your succulents in for the winter. Removing the dead leaves will prevent rotting.
What Happens in the Spring
Do not hesitate to move your plants back outside—these plants like the sunlight, heat, and air movement. You have to do this slowly, beginning over two weeks. Put them in the shade and gradually move them into the sun. They can get sunburned if placed in direct sunlight too quickly.
Taking care of your succulents during winter can be a challenge, but know how to take care of them will keep your plant alive and thriving. If you follow these simple tips, you will have a beautiful succulent to admire by the time spring arrives.
Once spring comes and the temperature rises, you can put your succulents back outdoors.
Are Succulents Hardy?
Most succulents like to be in warmer climates. The winter-hardy ones are a bit of a rarity. The hardy ones belong to specific families. This plant type includes but is not limited to:
Sempervivums
Sedums
Yucca
Lewisias
These hardy succulents can withstand brutally cold temperatures. As long as they are kept within their temperature range, they should continue to flourish. They tend to be larger, which helps them to survive colder climates. See the table below:
BOTANICAL NAME
COMMON NAME
PLANT SIZE
TEMPERATURE
PLANTING ZONE
Sempervivum Tectorum
Hens and Chicks
2-foot width
20 – (40) degrees
3 – 8
Sedum spathulifolium
Broadleaf Stonecrop
2 inches ground cover
5 – 10 degrees
7
Hesperaloe Parviflora
Red Yucca
2 – 3 feet
10 – 20 degrees
8
Siskiyou Lewisia
Lewisia Cotyledon
12 inches
20 – (40) degrees
3 – 8
Do not be intimidated to work with succulents during the winter. Let the chart be your guide if you live in colder climates. Choosing the succulent for your planting zone will help ensure successful growing.
See below winter succulents that you should consider:
Hens and Chicks
Sempervivum Red Lion
Sempervivum Mahogany
Sempervivum Calcareum
Sempervivum Cobweb
Sedum Dasyphyllum Major
Dragon’s Blood Sedum
Sempervivum and Sedum both have a broad spectrum of different succulents that are fun and unique. These are all plants that prosper when the temperature drops. They require proper care and attention for the winter.
Frost Damage to Winter Succulents
If your succulents are put into temperatures that they cannot handle, frost damage is always possible. In zones 8 or 9, temperatures only drop below freezing for one or two nights. This situation is when you introduce the succulent to a “frost cloth.” Frost damage takes a couple of days to become apparent.
A frost cloth does not inhibit air from getting to the plant. However, it protects the leaves from frost. It also gives a layer of protection, retaining warmer temperatures between the plant and the outside air. It provides protection as low as 20 degrees.
Amazon sells frost covers for plants, and they cost about $25.00. This is a worthwhile purchase to protect your succulents. Because succulents are water-bearing plants, they can freeze, and the leaves can rupture. This damage only happens if they are exposed to below freezing for several days.
Conclusion
If you have outdoor succulents, it is important to know how to care for them year-round. If you have a dormant winter plant, you cut back on the water to not freeze. You can transition plants indoors for the winter, and then they will not go into dormancy, and you would take care of them as usual.
Cacti are exotic plants that brighten every home they’re planted in with their abundance and flamboyant flowers. Many gardeners plant cactus to enjoy their beautiful and sweet-smelling flowers. However, sometimes these striking plants may fail to bloom after many years of having them in your garden. But why won’t cacti bloom?
When your home cacti aren’t blooming, the issues can be lighting, watering, temperature, or soil. Another reason could be your cactus isn’t mature enough to bloom. Some cacti species take up to 50 years before you can see their first blooms. Others might be too old to continue blooming regardless of the care you give them.
So, if you’re wondering why your precious cactus isn’t blooming, this article may provide you with the answer. Here are the reasons your cactus isn’t blooming and what you can do about it.
Weak Root System
Many cacti species like to be root bound, and re-potting them without careful consideration can interfere with their growth. If you must re-pot your cactus, do it early enough, so you don’t interfere with its growth. Cacti with weak and unhealthy root systems will not flower. If you re-pot, your cactus will take time before their roots can strengthen in the soil, and until this happens, they won’t bloom.
Cacti with weak root systems should be repotted and they will still need some time to bloom.
When repotting, choose a container that’s large enough. It should be bigger than the current pot so it can comfortably accommodate the plant’s needs. Don’t forget to fill the new pot with good quality potting soil that will encourage flowering.
When planning to re-pot your cactus, don’t do it while the plant is still blooming or about to bloom. It’s essential to wait for the plant to finish blooming before transferring to another container.
Rest Period
Before cacti start flowering, they need a rest period. Know the types you have at home and their bloom periods, so you understand when they need to rest. When in their natural habitats, most cacti rest in hot summers. Such species mainly flower in autumn.
If you live in areas that experience cold winters, allow your cactus to rest during this period. The rest period is very crucial for cactus flowering. This is when they develop buds that become visible around 30 to 50 days before they can flower. If you deny them the rest, your cacti may have a difficult time blooming.
You’re Overwatering
One grave mistake that most cactus growers make is to give their plants too much water. While many cactus species love to drink once a week or twice, they can survive long periods without water, even in summer. These plants need a period of almost drought so they can be ready to start blooming.
Don’t worry; your cactus won’t die if you forget to water them for a month or so. The plants have various ways of storing water which they use during drought periods. However, don’t forget to water completely because the stored water can still run out.
Instead of overwatering your cacti, give the plants a period of drought for them to start flowering.
Like other plants, cacti still need water to thrive, though they have strict watering requirements. There are periods when your plant will need constant watering and times when you need to water sparingly. If you want to see the beautiful blooms, you need to understand those seasons to water and withhold watering.
Too Young or Too Old
One of the common reasons why your cactus won’t bloom is because it’s not yet time. Many cactus species are not able to produce flowers for many decades. You should understand the type you have at home, so you know how long you’re going to wait. Some varieties may go for 50 to 100 years before producing their first blooms.
If your main aim for planting cacti is to see the blooms, you should choose ready-flowering indoor cactus types. The types that are likely to bloom fast enough are Parodia, Notocactus, Mammillaria, and Gymnocalycium.
If your cactus was already blooming, then it stops; the reason might be it reached its full maturity stage. An old cactus may not flower as often as it used to. Some stop blooming altogether. But you can still consider giving them special care to encourage blooming.
Your Cactus Is Not Healthy
Flowering means your cactus is healthy and happy. Cacti only bloom when you take good care of them and provide them with habitable conditions. At times, your plants might be experiencing several health conditions that discourage their blooming.
Root rots that are not yet visible or fungi attack can stop your plant from blooming. Sometimes your plants may not http://armodexperiment.com/ show any signs of distress; hence you might not realize they have health issues. Plants that are attacked by pests may also fail to bloom. Ensure you treat your cactus and get rid of all the pests attacking it so it has no trouble blooming.
No Fresh Air
Indoor cacti still need enough light and fresh air, especially during their active growing period. You can try leaving your plants outside to get fresh air until around October. The lower temperatures harden off plants and prepare them to flower. If your plants are too warm after summer, they might become too sensitive, and this will interfere with their blooming.
Not Enough Light
Your cactus needs plenty of light to bloom. You must ensure it receives plenty of light throughout the year. Even in winter, you should still ensure you place your cactus in the brightest locations of the house.
As cacti love sunlight, ensure your plant receives plenty of light during the day.
How you position your cactus towards the light will matter a lot when it comes to its flowering. Positioning is especially vital for indoor cactus placed on the windowsill. Ensure it gets enough light by positioning it properly. Consider turning your cactus from time to time, so it gets consistent light throughout its body. However, don’t turn your cactus too often, as too much movement might prevent it from flowering.
Don’t forget that some cacti species can’t stand intense heat from the sun. But they still need the light to thrive. You should ensure they get the required sunlight. You should protect them from sun damage by filtering the light. You can also consider using grow light, so your indoor plants get the needed light.
Using Wrong Fertilizers
It’s good to give your cactus a little bit of extra care by adding fertilizers. However, you must be careful when choosing your fertilizer type because a little too much or the wrong type can prevent your plant from blooming. Many fertilizer types are not suitable for cactus. Some can make the plants grow at a very fast pace and cause bacteria accumulation in the soil.
Using a fertilizer with wrong nutrient content will prevent your cacti from blooming.
Don’t give your cactus fertilizers that have high nitrogen content. Avoid manure as well. If you must give them fertilizers, consider those with high potash content. Don’t fertilize your cactus when you’ve just re-potted them. Don’t overfeed your cactus because this will interfere with their blooming.
FAQ
What can I do to make a cactus flower?
One of the things you can do to facilitate the flowering of your cactus is to give it enough water and light. Your cactus should get enough sunlight during its growth period and move it to a cooler place during dormancy. Make sure your cactus is healthy and growing for it to flower. If your cactus is not growing, it means it’s unhealthy, and it definitely won’t flower.
When do cacti flower?
The flowering period for your cacti depends on the species. Some cacti may flower in late spring or summer. Others like holiday cacti flowers in winter. Regardless of the blooming period, don’t expect your cacti to bloom until it’s mature enough. Find out the type you have and give it the care it needs to blossom.
Do all cacti bloom?
Cacti are categorized under flowering plants, which mean all of them are capable of blooming. The only thing that makes a difference when blooming is the age and care you give your plant. You must find out the blooming requirements of the cacti species you have so you understand how to make them bloom.
What are the conditions that encourage blooming?
Cacti grow in containers in the USDA zone. All they need is proper care, and they’ll reward you with great blossoms. Make sure your cacti get at least four hours of sunlight, mostly morning hours. Water regularly during the growing seasons and allow the soil to dry between watering. Fertilize monthly, especially during spring growth towards the end of summer. Decrease watering in the winter dormancy period and ensure the temperatures remain at 50s.
Summary
Now that you know why your Christmas cactus is not blooming and what you can do about it, you must want to try it right away. But before you get too excited, remember that the reason why your cacti won’t flower might be because you’re the one who’s so impatient. You can’t just plant your cactus and expect to get results right away. As long as they’re growing, give your plants time, and they’ll bloom when the season is right.