Starting Your Cactus Journey: Our Top 7 Picks for Beginners

Cacti are amazing plants available to buy and grow in your garden. Most of them are relatively easy to look after and survive, even with neglect. In fact, they are the only group of plants known to be highly forgiving. However, these succulents can still suffer various problems that beginner gardeners might have trouble identifying and dealing with. For instance, some cacti varieties require more water than others, or they may need to be repotted every few years to thrive. This can be daunting for beginners. Luckily, there are some cacti varieties perfect for newbie gardeners who may not have much experience in this area.

So, what are the best cacti for beginners? We can recommend many cacti plants that are relatively easy to grow, but not all of them are easily available in plant nurseries and online stores. So, if we were to pick the best cacti for beginners, we would go with Mammillaria, Rebutia, Echinopsis, Orchid cacti, Barrel cactus, Prickly Pear Cactus, and Gymnocalycium. Others include the Angel Wings cactus, the Rat Tail cactus, the Saguaro cactus, and the Christmas cactus. These cacti are easy to find and relatively low maintenance.

This blog post discusses some of the best cacti for beginners in detail while highlighting their unique characteristics and needs. Read on to learn more.

Mammillaria

Commonly referred to as the “pincushion cactus,” mammillaria remains one of the largest species in the cactus family, with more than 250 varieties. They are also one of the most cultivated cacti species. They vary from relatively small to large clusters and are Native to Mexico.

Mammillaria loves bright, indirect sunlight but can still survive in full light. In fact, exposing it to full light promotes flowering, but you must be careful to avoid causing sunburn.

In summer, water your Mammillaria frequently (every week) but go slow during winter since the plant slides into a state of dormancy.

A person holding a Flowering Mammiliaria in a brown pot.
Exposing it to full light promotes flowering, but you must be careful to avoid causing sunburn.

Consider reducing your watering frequency to once every four or five weeks. The cactus will thrive in relatively cool spots with temperatures of between 60-65 degrees Fahrenheit.

Mammillaria is known to flower quite easily, but they produce relatively small flowers. The flowers range from white to purple.

Mammillaria is one of the best cacti for beginners due to its easy-going nature, forgiving behavior and resilience. They are also easy to find, and you can find lots of information online on their general care routine.

Rebutia

Rebutia is a special type of cactus that comes from the high altitudes of Bolivia. It has a very relaxed look with its small globular body.

Rebutia is one of the best cacti for beginners because it can survive in low-light conditions as well as relatively harsh conditions.

Unlike Mammillaria, this type of cactus does not require frequent watering and can go for weeks without being watered.

During summer, water your Rebutia occasionally only if the soil is completely dry. During winter, the cactus will not require any watering at all.

Rebutia loves bright indirect sunlight since too much light can lead to sunburns. So, you must limit its exposure to full light, especially during summer when we have extended periods of sunny days.

A flowering rebutia cactus in a pot.
Once you get used to its prickly nature, you will realize that Rebutia is a great choice for a beginner.

It produces bright yellow and red flowers, but only if you expose it to the right amount of light.

Rebutia is not as popular as other cacti species due to its small spines, which can be uncomfortable when handling it.

However, once you get used to its prickly nature, you will realize that Rebutia is a great choice for a beginner.

Barrel Cactus

The barrel cactus belongs to genus Ferocactus known for being fierce and hardy. A typical barrel cactus is usually covered with long, sharp spines that protect its juicy and edible pulp.

In its natural habitat, this cactus species can grow up to 6ft tall and is easy to find in stores. It needs full sun with temperatures of between 55-90 degrees Fahrenheit.

Water your barrel cactus sparingly during summer and let the soil dry out completely between watering sessions. During winter, you can reduce your watering frequency by half or even more, depending on the environment.

Barrel cactus can live for many years and reach great heights. Indoor barrel cactus can easily hit a height of five feet.

The succulent is a great choice for those who want an easy-to-maintain plant that requires little attention and care. Its ability to thrive in the harshest conditions has made it popular amongst beginners and experienced gardeners.

The barrel cactus will produce beautiful flowers (usually yellow or orange) during summer if you provide it with enough sunlight and water.

Echinopsis

Also known as the hedgehog cacti, Echinopsis remains one of the most popular cactus types amongst gardeners.

It is native to South American deserts and boasts beautiful spines that stretch out like hair from its body, making it one of the most unique cacti plants.

A flowering echinopsis in a black pot.
You must grow it in a highly porous and well-draining potting mix to achieve good results at home.

However, its ability to survive in relatively harsh conditions with minimal attention makes it a great choice for beginners.

This succulent loves rich soil in its natural habitat, where it grows pretty quickly since it develops a dense root system for water and mineral absorption.

Therefore, you must grow it in a highly porous and well-draining potting mix to achieve good results at home.

It loves good watering during summer but should only be watered when the soil is completely dry. During winter, water it sparingly to prevent root rot.

Echinopsis can handle variable light conditions, but direct sunlight can damage its spines. Therefore, consider providing it with indirect or filtered sunlight to avoid sunburns.

For temperature and humidity, this cactus is quite hardy, requiring a minimum temperature of 15 degrees Celsius and relative humidity of about 40%.

Echinopsis produces beautiful flowers in bright yellow, pink, and red colors that attract bees and butterflies.

Thelocactus

Thelocactus refers to a cacti genus comprising medium-sized columnar or globular-shaped cacti plants. Cacti plants in this category tend to have many beautiful spikes with a diameter of around 8-20cm.

When growing Thelocactus, you must provide it with an appropriate soil mix (well-draining) and full sun exposure to encourage growth.

In fact, you should only consider growing Thelocactus if you live in an area that receives plenty of sunlight. Water your cacti when the soil is dry and reduce watering frequency during winter.

This cactus species can tolerate some frost, but it is always recommended to keep it indoors during the cold months.

A flowering thelocactus in a pot.
Thelocactus refers to a cacti genus comprising medium-sized columnar or globular-shaped cacti plants.

Thelocactus is a great choice for those who want an easy-to-care-for plant that will grow well in harsh conditions.

It produces attractive flowers in yellow, purple, and red shades, making it a great addition to any indoor or outdoor garden.

Plus, its sturdy and long-lasting nature makes it ideal for those who want a cactus that will last for many years.

Prickly Pear (Opuntia Cactus)

Prickly pear is one of the traditional types of cacti species ideal for beginners. The opuntia cactus is native to North America and commonly found in desert habitats.

It is a low-maintenance plant that requires minimum care and attention. It can handle high temperatures and extended drought periods with little water requirements.

Always allow the soil to dry out completely before watering your prickly pear cactus. Reduce the frequency of watering significantly during winter to prevent root rot.

The prickly pear cactus is quite cold hardy and can tolerate temperatures of up to -30 degrees Celsius. It thrives in full sun exposure but consider watering it sparingly during summer for best results.

A prickly fruit cactus.
The prickly pear cactus is definitely worth trying if you’re looking for an easy-to-care-for plant.

This cactus is known for its stunning red, yellow or white flowers appearing from late spring to summer. It also produces edible fruits with a sweet and refreshing taste, making them a great addition to any garden.

The prickly pear cactus is definitely worth trying if you’re looking for an easy-to-care-for plant that will add beauty and color to your landscape.

Astrophytum

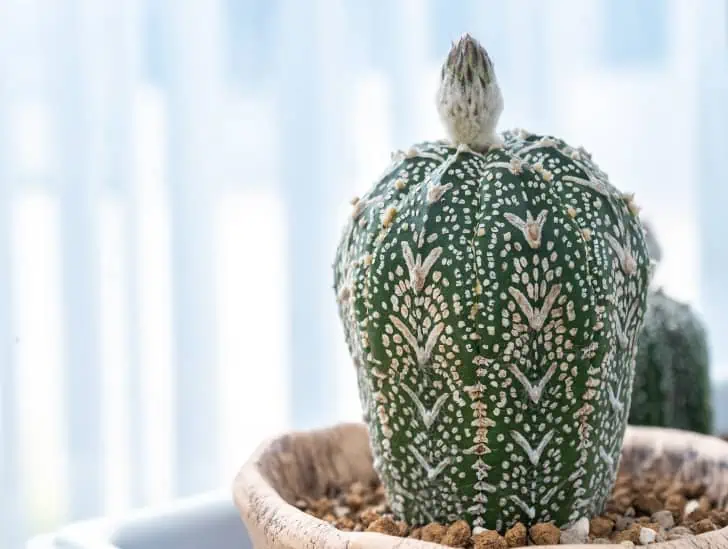
Astrophytum is a small group of cacti plants also referred to as star cacti due to their star-shaped appearance.

Most of them are columnar and somehow globular. Some species in this genus are spineless, making it a great choice for beginners.

The succulent is known for its slow growth and low maintenance requirements making it ideal for both experienced and beginner gardeners.

Astrophytum thrives in a well-draining potting mix with some added sand to enhance water drainage.

Water your cacti plant once a week during summer when temperatures are high and reduce the frequency significantly during winter.

It requires bright sunlight to survive and thrive. However, adjust the amount of light you provide depending on your environment.

Too much direct sun can cause sunburns, while too little light will result in poor growth and blooming.

This cacti species is very tolerant of cold temperatures and can tolerate temperatures down to -5 degrees Celsius.

It produces beautiful yellow and pink flowers that attract bees and butterflies when grown outdoors.

It is definitely worth trying if you’re looking for a low-maintenance cactus species with stunning blooms.

Summary

These are some of the best cacti for beginners. These species are a great way to start if you are considering getting into cacti culture.

After getting to know these plants and how to care for them, you will be well on your way to becoming a cactus expert.

But be sure to conduct your research before purchasing any plant to ensure it is the right fit for you and your home.
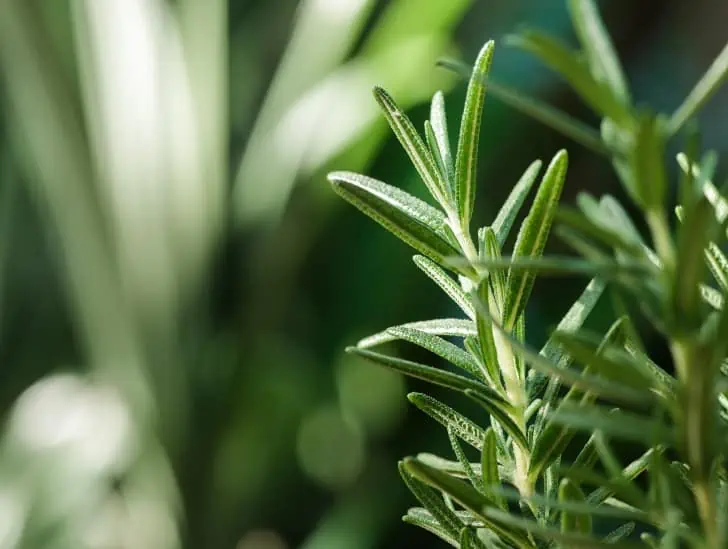
Why Is My Rosemary Woody? Expert Tips

A closeup image of a rosemary.

Rosemary plants are an excellent addition to every garden. They are a perfect herb for every hobby cook. You can use its leaves to flavor various foods and drinks. If you don’t have an outdoor garden, you can still grow it indoors in pots. However, one of the most common issues with rosemary is that it can sometimes get woody making it unsuitable for use in cooking. But what exactly causes rosemary to get woody? You should know exactly why your rosemary is turning woody by the time you are done reading this.

So, why is my rosemary woody? One of the most common causes of woody rosemary is improper watering. Many gardeners give too much water to their plants, drowning them in moisture. Rosemary prefers drier soil. The other causes of this problem include lack of pruning, overgrowth, plant age, and exposure to the sun. Sometimes, the plant may still turn woody even if you do everything right. This is not surprising because it is natural for rosemary to turn woody since it is a shrub.

This blog post discusses some of the reasons your rosemary might be turning woody and what you can do to prevent this from happening. Read on to learn more.

Rosemary Plant: Overview of Optimum Growing Conditions

Rosemary is naturally a sun-loving and heat-tolerant shrub, but it also thrives in cooler temperatures of between 40-60 degrees Fahrenheit.

The plant will survive through winter as long as the light is strong enough. The shrub is hardy and can survive a lack of sunlight exposure and water for an extended period.

This makes it a popular plant among beginners. In its natural habitat, rosemary does well in relatively warm areas with good humidity.

Rosemary in a pot.
The plant will survive through winter as long as the light is strong enough.

It can reach up to five feet tall under optimal conditions. The plant grows so much that it can become a bit of a burden if you don’t manage it properly.

Tuscan Blue is one of the tallest varieties of rosemary. This variety can grow up to six feet tall, given the right conditions. Its leaves are quite broad, producing dark blue flowers during spring.

The Golden Rain is perhaps the shortest variety since it doesn’t grow past three feet tall. It has golden yellow leaves and produces dark blue flowers. This rosemary species is excellent for growing indoors in pots since it is relatively easier to manage.

What Causes Rosemary to Become Woody?

Many gardeners have probably encountered this problem at one point or another in their gardening adventures. But what really causes rosemary to become woody? Let us find out:

1. Lack of Pruning

One of the common reasons for woody rosemary is lack of pruning. The shrub needs occasional trimming to maintain its shape and promote fresh growth.

Remember that in the Mediterranean heat, these plants are pruned naturally. Brooding summers, thin soils, and relatively strong winds greatly ensure the shrub doesn’t get bushy.

Growing it in a relatively wetter, milder climate means you have to go further to ensure it remains in good shape.

Consider pruning your rosemary once or twice a year to maintain its nice shape. The best time to prune your rosemary is early spring or late summer.

Harvesting the young leaves and twigs regularly is considered part of the pruning schedule, but you still need to do some shaping to maintain a neat shape.

A peron pruning rosemary.
Remember that in the Mediterranean heat, these plants are pruned naturally.

To prune your rosemary, you will need a sharp knife or pair of pruning shears. You must be careful not to cut the plant at the wrong parts.

Start by removing the dead branches and fading blooms. Feel free to cut off the dead branches at the base and plug the faded blooms with your hand. Also, cut dead shoots to the first pair of green leaves to allow them to grow afresh.

Be careful not to cut woody stems because it will only damage your rosemary and won’t stimulate new growth.

In fact, if you cut the woody parts of the shrub too much, it won’t develop new shoots in that area. The effects can be fatal if the cutting is severe.

Avoid cutting below the leaves since this is where the new growth buds are located. Don’t forget to remove branches that cross over and form a tangled mess.

What Can I Do with the Cuttings After Pruning?

Once you are done with pruning, cut the stems and use them in your culinary recipes or make a bunch of them dry for winter.

Rosemary has more than 40 types of essential oils, minerals, vitamins, and antioxidants that can be used for medicinal purposes. You can also use the fresh cuttings to propagate new plants.

2. Overwatering

Another reason rosemary might become woody is due to overwatering. This plant needs enough water to grow, but too much water can quickly cause its demise. Too much water will make the soil soggy and prevent oxygen from reaching the roots.

This is why you need to ensure your rosemary is planted in well-draining soil and gets enough sunlight exposure.

A person watering rosemary in a pot.
This plant needs enough water to grow, but too much water can quickly cause its demise.

Essentially, the shrub should be watered only when the top inch of soil has dried out completely. An easy way to check this is by sticking your finger into the soil up to an inch deep. If it feels dry, water the plant.

In winter, when temperatures are relatively mild, reduce watering a bit since the plant doesn’t need as much water as it does during hot summer days. You can also lay mulch on top of the soil to help retain moisture and reduce water evaporation.

3. Overgrowth

This is also a common cause of woody rosemary. When a shrub is planted in ideal and well-drained soil, it will grow tall and wide and eventually become woody.

To prevent your rosemary from becoming too large, you must trim its tips periodically.

This reduces the size of the bush while stimulating new growth at the same time. Doing this will ensure the plant remains bush-like and does not become too large.

4. Freeze Damage or Dying Rosemary

If you notice an increased presence of bare stems on your rosemary plant after winter, it may be a sign that your plant didn’t survive.

We have mentioned that the best time to prune your plant is early spring or late summer to protect it from extremely low temperatures.

Anything below 17 degrees Fahrenheit is considered too low for a rosemary plant to survive.

If you live in an area that experiences such low temperatures during winter, consider covering your plant with a frost cover to protect it.

Keep in mind that the succulent’s main requirements for survival are lots of sunlight, warm temperatures, and succulent soil with good drainage.

Rosemary outdoor in snow.
Anything below 17 degrees Fahrenheit is considered too low for a rosemary plant to survive.

These are the conditions in its natural habitat. If your plant doesn’t get these conditions, it won’t survive too long.

Typically, a rosemary plant requires about 10-12 hours of direct sunlight during the active growing season and at least eight hours during the dormancy period.

Failure to adhere to these guidelines and maintain your rosemary plant’s health will make it woody.

You must also ensure the soil is light, sandy, gritty, and well-draining. Avoid heavy soils that may take too long to drain, resulting in root rot.

5. Natural Woodiness

As rosemary plants age, they tend to become woodier as well. This is natural and normal for the plant. To ensure the growth of new shoots, you should still prune your plant in spring or late summer.

This will help prevent it from becoming too overgrown and encourage fresh foliage to grow and bloom again. You can also use a balanced fertilizer to replenish the soil nutrients and help your rosemary thrive.

How Can I Keep My Rosemary from Turning Woody?

Fortunately, there are a few steps you can take to ensure your rosemary plant stays healthy and doesn’t become woody. You need to understand the lifecycle of your shrub and take deliberate steps to keep it in great shape.

Typically, most stem growth of these shrubs occurs in spring and summer. It is more likely that some of the new growth will harden and turn woody during the dormant season. Once this happens, the plant’s stem won’t grow again for the rest of its life.

As mentioned earlier, it is natural for rosemary plants to turn woody as they age. It is part of their lifecycle.

However, regular pruning can do quite a good job of preventing it from becoming woody. Proper pruning also encourages young branches and leaves to grow pretty quickly.

Rosemary in a white pot.
It is natural for rosemary plants to turn woody as they age.

And it is not just about pruning. Regular watering and feeding are also important.

Keeping your rosemary plant in a warm and sunny spot, with well-drained soil, will also help it stay healthy and look vibrant. Water your rosemary regularly and feed it well to keep it healthy.

But you should be careful not to overwater because this can cause root rot. Also, avoid planting your rosemary in poorly drained soil because it will also damage the roots and make them woody.

Summary

These are some of the common causes of woody rosemary. With proper care and pruning, your rosemary should remain in good shape and produce healthy foliage for many years. Just remember to give your plant enough sunlight, water, and well-draining soil for better results.

Why Is My Air Plant Not Growing? Causes and Tips

A airplant in a wood.

Air plants are quite popular among gardeners since they are epiphytic. It means that, unlike most plants, their survival doesn’t depend on soil. Instead, these plants draw nutrients and moisture through their highly modified leaves. Although air plants are quite easy to grow, lack of proper care and maintenance can affect their growth rate immensely. You need to keep a close eye on your plants and act quickly if you realize they aren’t growing as they should. But before you get there, you need to know some of the common causes of air plants not growing.

So, why is my air plant not growing? One thing you need to remember is that air plants are generally slow growers. Some air plant species, such as xeric, can take up to three years to complete the first growth cycle. Other species may take even longer than this, so don’t be concerned if your air plant isn’t growing quickly and everything seems fine. However, you should be worried if your air plant shows signs of stress and is not growing. Common causes of stunted growth include underwatering, lack of enough sunlight, pest infestation, lack of air exchange, or extreme temperature fluctuations.

This article discusses some common causes of air plants not growing and what you can do about it. Read on to find out everything you need to know.

How Fast Do Air Plants Grow?

Before diving into the causes of air plants not growing, let’s look at how fast these plants typically grow.

Generally, air plants are slow growers and may take several years to complete one growth cycle. Therefore, patience is key when growing these plants at home. No amount of care can speed up their growth rate.

For instance, xeric air plants may take up to three years to complete one growth cycle. Other species may take even longer than this.

Most of them typically grow less than one inch within the first two years when grown through seed germination.

Caput medusa air plant exposed to sunlight.
No amount of care can speed up their growth rate.

They only bloom once in their lifetime, but they are not monocarpic. These plants can take up to five years to reach maturity and bloom. They continue producing offsets for many years after blooming.

The only way to speed up their growth rate is to try and mimic the conditions in their natural habitat as much as possible. Mesic air plants generally grow faster in high humidity levels with relatively low light.

You can also boost their growth rate by promoting rooting and fertilization. Be keen on the type of fertilizer you use. Some fertilizers can be too strong for air plants and cause them to burn.

These plants are part of the bromeliad family. They are epiphytic and love to grow without soil, although they can survive in traditional potting mediums.

Common Causes of Air Plants Not Growing

Now that you know how fast these plants typically grow, let’s dive into the causes of air plants not growing.

Reason #1: You Have a Slow Growing Air Plant

As mentioned earlier, there are two main types of air plants – xeric and mesic. These categories separate air plants that originate from two different types of environments.

The xeric air plants are generally slow growers and may take more than five years to reach maturity.

This type of air plant is naturally found in arid areas. They have large trichomes giving them a fuzzy appearance. Trichomes are water absorbing openings on the plants’ leaves.

Xeric air plant in a pot hanging.
Xeric air plants come from a relatively harsh environment, they are adapted to survival.

The relatively large and denser trichomes allow xeric air plants to absorb more water whenever it rains. They also play a critical role in protecting the plant from the adverse effects of direct sunlight.

Therefore, it is safer to conclude that xeric air plants have a relatively slower metabolic process leading to a slower growth rate.

On the other hand, mesic air plants originate from areas that receive plenty of rainfall and are generally humid. These plants have small trichomes and are greener than their xeric counterparts.

Since xeric air plants come from a relatively harsh environment, they are adapted to survival. You must provide them with lots of indirect sunlight at home to aid growth. They also require infrequent watering and a well-draining potting mix.

Reason #2: Your Air Plant Is Underwatered

Underwatering is one of the major causes of air plants not growing. These plants require very little water compared to other houseplants, but they still need some amount of water to survive.

When an air plant is underwatered, its leaves turn yellow and eventually dry out completely. Since these plants are native to areas where it rains frequently, they need some sort of watering routine at home.

A air plant soak in a water.
These plants require very little water compared to other houseplants, but they still need some amount of water to survive.

Soak your air plants in a bowl or sink filled with room temperature water for about 15-20 minutes. Do this once or twice a week, depending on the weather and climate of your home.

Use distilled water since tap water may contain minerals that can harm your plant. You should also mist them with a spray bottle every few days for extra humidity.

Reason #3: Your Air Plant is Overwatered

It can be tricky to determine when your air plant needs watering. If you overwater them, the leaves may become mushy and droop. This can lead to root rot, eventually killing the entire plant if left untreated.

The best way to avoid overwatering is by checking the potting mix regularly. If the soil feels completely dry, you can go ahead and water your air plant.

Finally, ensure the potting mix is well-draining, and never let your air plant sit in standing water. Let the excess water drain away from the roots before returning your plant to its container.

Reason #4: Lack of Enough Light and Air Exchange

Even though these plants are relatively hardy and can survive with neglect, they still need to be taken care of to thrive.

Most of them require lots of bright, indirect light and infrequent watering to thrive. Without proper light exposure, watering, and air exchange, your air plant won’t grow.

These plants require lots of light to grow. Ensure the light is filtered to achieve better results. Avoid exposing them to bright, direct light for more than two hours daily. Overexposure to direct sunlight can lead to irreversible sunburn.

All air plants also require air exchange to thrive. Be sure to ventilate the room where they are positioned at least once a day.

Furthermore, take your plants outdoors for a couple of hours daily to aid their growth. Never leave them under a working air conditioner.

Air plant exposed to sunlight,
Without proper light exposure, watering, and air exchange, your air plant won’t grow.

Watering is another critical aspect that affects their growth rate. Mesic air plants require lots of watering than xeric air plants.

Consider submerging your mesic air plants in water and letting them sit there for one hour during summer and spring. This should be done once every week. For xeric plants, submerge them once every 10/15 days.

However, some air plants don’t need this type of deep watering because they are prone to rot. A good example of such a plant is the Tillandsia tectorum.

You can still water them intensively but less often during winter. The best way to water these plants is to let lots of water run over the plant for a couple of minutes under a sink or shower.

Misting won’t provide them with enough water. But you can consider misting your air plants every two or three days just to keep the leaves hydrated.

Reason #5 Pests and Diseases

Lastly, your air plant may not be growing due to pests or diseases. Air plants can be prone to pests like mealybugs, mites, aphids, and thrips that feed on their juices. As a result, the plant’s growth is inhibited, and it may even die if left untreated for too long.

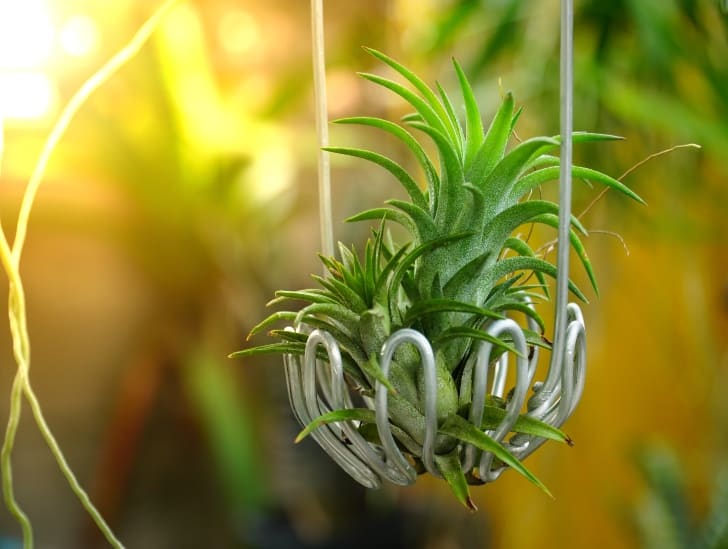
Air plant hanging.
Inspect your air plants regularly for any signs of disease and treat them immediately.

To keep pests away from your air plant, regularly inspect them for any signs of pests. If you notice any, treat the plant immediately with an insecticidal soap or neem oil solution.

Furthermore, air plants may get infected by various fungi and bacteria that grow in soil or water. These diseases can be tough to spot and may lead to yellowing of leaves, stunted growth, or even death.

To prevent these diseases, you should always use clean water and mix it with a few drops of hydrogen peroxide before watering your air plants.

Also, inspect your air plants regularly for any signs of disease and treat them immediately to save them from further damage.

Final Thoughts

Generally, air plants are very resilient and can survive with minimum care. However, to ensure proper growth and development of your air plant, you must provide it with the right amount of water, light, and air exchange.

You should also watch for pests and diseases that might be wreaking havoc on your beloved air plant.

Now that you know how fast air plants grow and why yours is not growing, it’s time to get creative and have fun with these amazing plants!

How to Care for Succulents in Office?

Does the thought of walking into your office on a Monday morning make you feel low and unmotivated? If so, bringing some plants into your office space could be the perfect pick-me-up! Research shows that adding some houseplants to your office may significantly boost your production and creativity. And one of the houseplants to keep in an office are succulents because they don’t need much attention to survive. However, there are a few things you need to know that will help you keep your office succulent happy.

So, how do I care for office succulents? One of the most important things you need to do is maximize the amount of light you get. Look around your office to determine if any spot receives a good amount of natural light. That is where you should position your succulent. Although most succulents need to be watered once every one or two weeks, err on the side of caution with your office succulent. Consider watering it once or twice a month because it is most likely getting less light. Ensure you plant it in well-draining soil and choose a good pot.

This blog post outlines essential tips you need to know on how to care for office succulents. Read on to learn more.

What Are the Benefits of Having Succulents in the Office?

According to research, plants can clean water and air in enclosed environments. Succulents such as Aloe vera and the snake plant can remove up to 87% of volatile organic compounds such as benzene, mostly found in ink, books, and carpets.

These plants can also reduce the harmful toxins from chemical cleaning agents left lingering in your office.

Like other houseplants, succulents can help reduce office sickness by improving humidity and oxygen levels, reducing the spread of respiratory illnesses.

Succulent in a brown pot at the office.
You can always put your gardening skills to work right in your office.

A study by Kansas State University revealed that bringing plants into your workplace could significantly increase your productivity and creativity by limiting the risk of dry, itchy skin, sore throats, coughs, and colds.

Furthermore, these plants are incredibly low-maintenance and need minimal attention to thrive. This makes them ideal for office people who love gardening but may not have time to practice it at home due to relatively long work hours.

You can always put your gardening skills to work right in your office. Some succulents make your office look good because they can be used as decor pieces.

This is especially true for hanging/trailing succulents such as String of Pearls and String of Bananas. These plants will add texture, color, and charm to your office space.

Lastly, office succulents boost productivity by providing a more relaxing and calming atmosphere. They make your office feel less like an industrial space and more homier, which could result in an improved working environment.

How to Take Care of Office Succulents

Now that you know the benefits of having office succulents, let us look at how to take care of them.

1. Start By Choosing the Right Succulent

One of the most important things you need to do to keep your office succulent happy is to choose the right plant.

You need to remember that not all succulents are the same. Consider each succulent species as unique with its own growing requirements.

While some succulents are adapted to thriving in low-light environments, such as an office, others won’t survive a day.

A top view of succulent plant, coffee, and an alarm clock.
Take time to get to know your succulent before you bring it to your office.

Your best bet will be to go for low-light plants. Avoid succulents that need full sun because they won’t last long. Take time to get to know your succulent before you bring it to your office.

Generally, relatively small and slow-growing succulents make ideal office plants because they don’t need a lot of space or attention.

Some succulent species that may thrive in an office setting include the Jade plant, Haworthia, Echeveria, Aeonium, Sedum, and Sempervivum.

2. Maximize the Sunlight You Receive

Generally, succulents love to bask in the sun. They need at least four to six hours of bright indirect light each day to stay alive and happy. So, you need to determine if there is any spot in your office that receives a good amount of natural light.

You can start by positioning your succulent near a windowsill that you can find in your office. Ensure you rotate it for a couple of days so that all sides receive an even amount of sunlight.

Succulent in a windowsill.
You need to determine if there is any spot in your office that receives a good amount of natural light.

If you notice your succulent leaning towards one side, be sure to rotate it to the other side, and it will straighten in a couple of days.

If you discover that your succulent is still getting leggy or stretching out despite being near a windowsill, it means that it is not receiving enough light. In that case, you should find an alternative spot for your plant.

If there are no windows in your office, consider positioning the succulent under artificial light.

Typically, it will need at least six hours of light a day to thrive. Your succulent will be fine under that LED or fluorescent light above your desk.

Alternatively, consider getting a small grow lamp and keeping it by your desk to provide your plant with light.

Luckily, there are many affordable options for artificial grow lights. Therefore, finding one that suits your needs and budget is relatively easy.

3. Know How to Water Your Succulent

Typically, succulents need to be watered once every one or two weeks in spring/summer and once every three or four weeks during winter.

However, you need to be extra careful with how and when you water your succulent when planted in a low-light environment such as an office.

Gardening experts advise watering your succulent once or twice every month because it is getting less light.

Always check the soil before you water the plant. Stick your finger an inch or two into the potting mix and feel it.

A woman watering the plants.
You need to be extra careful with how and when you water your succulent when planted in a low-light environment such as an office.

If it feels dry, go ahead and water your plant. If it is still moist, wait another couple of days before checking again.

When you water your office succulent, pour the water directly into the potting mix at the base of the plant. Avoid pouring water on the leaves or rosette because it can lead to rot.

If some water gets on these parts accidentally, wipe it off with a tissue immediately.

Alternatively, use the bottom-watering method. To accomplish this, fill a saucer with water and let the plant sit on it for about 15 minutes before you empty any remaining water. This ensures the potting mix gets enough moisture without getting too wet.

Like any other succulent, the key to getting the best out of your office succulent is infrequent watering.

When you water, give your succulent a good drink, then let the soil dry out completely before you water again. Never mist your office succulent with a spray bottle because the effects can be catastrophic.

Finally, try to use distilled or filtered water on your succulent because tap water may contain too many chemicals that may harm your plant.

If you must use tap water, let it sit for about 24 hours before using it. This will help eliminate chlorine and other impurities in the water.

4. Use a Well-Draining Porous Soil

The type of soil you use is also critical when growing a succulent in an office. It needs to be porous and well-draining so that the plant can access enough oxygen and water without getting too wet or soggy.

A mixture of pumice, perlite, sand, vermiculite, and loam is often recommended for starting off. You can add some potting soil or a small amount of compost if you desire richer soil.

5. Everything Has to Do with a Good Pot

The type of pot you use will also determine the success of your journey of having an office succulent. To avoid waterlogging your plant, use a relatively shallow pot with plenty of drainage holes.

Select a lightweight pot to make it easier to move around when necessary. A terracotta or clay pot is always recommended for cacti and succulents.

Use the right size of pot for your succulent too. Succulents need just enough space to grow, but they don’t want to be cramped.

Generally, it is advised to use a pot two inches larger in diameter than the root ball of your plant.

A succulent in the windowsill of the office.
Select a lightweight pot to make it easier to move around when necessary.

For instance, if the succulent you are about to pot has a root ball that is four inches in diameter, choose a six-inch pot for it.

Finally, give your succulent a good start with some fertilizer. A balanced slow-release type of fertilizer will be ideal for your office succulent because it will provide it with all the nutrients it needs to thrive.

Summary

If you are looking for a plant that can spruce up your office space and improve your health, succulents are a great choice. These hardy plants are easy to care for, even if you don’t have a ton of gardening experience.

With a little bit of sunlight and occasional watering, your succulent will thrive in its new home. Just be sure to choose the right type of succulent and give it the attention it deserves.  

The Ultimate Closed Terrarium Care Guide

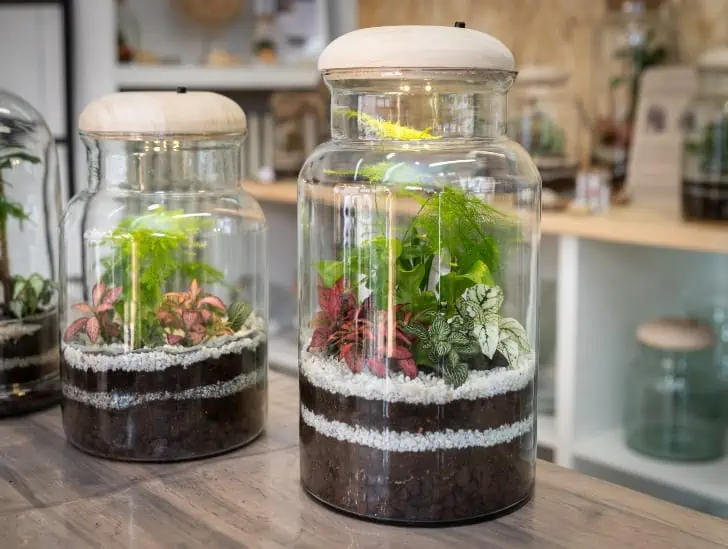
A two closed terrarium.

Closed terrariums, also known as gardens under glass, provide a unique design while creating tiny eco-systems of attractive plants and other decorative elements in a transparent glass enclosure. Terrariums play a critical role in bringing nature indoors, and if taken care of properly, they can provide you with a beautiful indoor landscape for many years. And what is even more interesting is the fact that most of them are low-maintenance and require less attention to thrive compared to other houseplants.

So, how do you take care of your closed terrarium? Closed terrariums will do best when positioned in good natural light rooms with an average temperature of 20 degrees Celsius. If your terrarium looks wet and foggy, open the lid for a couple of hours until the visible fog clears. Monitor it closely for any signs of mold or fungi, and check for humidity levels. If it looks dry, use a spray bottle to mist the plants and soil lightly. Open the windows and doors of the room where you have positioned your closed terrarium during winter to prevent excessive humidity. In terms of water, most closed terrariums only require occasional light misting and should never be overly watered since it can cause root rot or mold growth.

This blog post discusses key tips and tricks for caring for your closed terrarium. Read on to find out everything you need to know.

How Do Closed Terrariums Work?

Before diving into how to care for your closed terrarium, it is crucial to understand the science behind how they work. Understanding how the eco-system works will help you maintain it properly.

Closed terrariums are self-contained ecosystems that rely on the water cycle, photosynthesis, and respiration by their inhabitants to keep them healthy and thriving.

The inside of the glass enclosure creates a moist environment in which humidity levels are higher, and temperatures are warmer than the surrounding air.

This allows moisture to condense, form droplets, and collect on the walls of the glass enclosure, which then filter back into the soil, providing water for the plants.

Closed terrariums also benefit from the transpiration of plants, which involves releasing water vapor into the air. The water vapor plays a critical role in maintaining humidity levels inside the terrarium.

Plant on a closed terrarium near the window.
Understanding how the eco-system works will help you maintain it properly.

The soil within the terrarium plays a critical role in supporting healthy microbial processes that nourish the plants. Moisture from plant transpiration and evaporation recirculates in the terrarium as “rain“, keeping the soil moist.

The terrarium is designed to absorb small changes that help it to maintain a healthy balance.

However, nature takes care of most of the issues in a closed terrarium. The ecology isn’t complete on its own since it requires light and occasional watering to keep the plants in great shape.

What Plants Do Well in a Closed Terrarium?

The plants you choose to put in your closed terrarium will determine the success of your little ecosystem.

Generally, ferns and other moisture-loving houseplants are great for a closed terrarium since they thrive in more humid environments. Small succulents and cacti also do well in a closed terrarium as long as they are not overwatered.

You can also go for trendy plants such as Baby Tears, Pilea, and Peperomias. Exotic epiphytes and low-growing nerve plants are good choices as well.

A woman smiling while holding a closed terrarium.
It is also essential to select plants of similar sizes so that the enclosure does not become overcrowded.

When selecting plants for your closed terrarium, ensure they are compatible with the environment.

Research each plant you are considering and consider whether it can survive in a more humid environment. It is also essential to select plants of similar sizes so that the enclosure does not become overcrowded.

Key Closed Terrarium Care Tips

Now that you understand how closed terrariums work and which plants are suitable, it is time to learn how to maintain them. Here are some tips for keeping your terrarium in good condition:

Watch Your Watering

Close terrarium plants are highly sensitive to excess water. In fact, overwatering them is riskier than underwatering. It is relatively easy to overwater your closed terrarium but quite challenging to fix the damage that follows.

Therefore, it is good to understand your terrarium’s watering needs and only add water at the right time. Use a spray bottle or mister to water your plants as evenly as possible.

The presence of heavy condensation on the glass wall is a vital sign of overwatering, but it is not the only one.

A jar converted to a closed terrarium.
Overwatering them is riskier than underwatering.

Keep in mind that your soil should never be saturated. Your plants only need a light misting to thrive. If the soil appears dark and wet, open up your terrarium and let it dry before things get out of hand.

Although the individual care of your closed terrarium plant will mostly depend on the plant species you have, it is relatively safe to maintain consistent light moisture for better results.

If you use a drainage layer, check how full it is. Ideally, you should have no water pooling in there. If there is water, you need to open your terrarium and let it evaporate.

Provide Adequate Light

Since closed terrariums are mostly lightproof, they require artificial light for plants to grow.

Depending on where it is placed, you may want to get a small LED lamp or a fluorescent light that provides enough illumination.

LED lights are the ideal choice since they do not generate too much heat that can damage your plants’ delicate environment. Also, you need to keep the light on for about 8-10 hours a day for better growth.

Watch Out for Signs of Mold

Mold is the biggest enemy when it comes to taking care of your closed terrarium. Mold tends to thrive in relatively hot and humid environments. It only takes a couple of weeks for it to ruin your beautiful environment.

However, a single mold spot in your closed terrarium doesn’t spell a disaster because mold is part of a natural decomposition cycle.

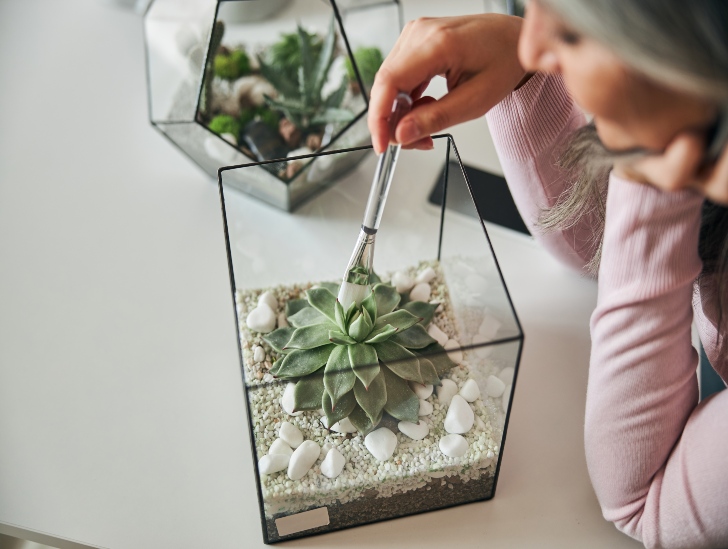
A woman brushing the plant in a Terrarium.
It is always good to tackle the mold at its source.

The spot will always disappear after a couple of weeks, and everything will be fine. Getting some air into your terrarium can hasten the process.

You can also deal with small patches of mold using a Q-tip and hydrogen peroxide. All you need to do is wipe off the patches, and you are good to go. It is always good to tackle the mold at its source.

Monitor Temperature and Humidity Levels

The temperature and humidity levels in your closed terrarium should be closely monitored. The ideal temperature range for terrariums is between 70 and 80 degrees Fahrenheit.

You can monitor the humidity levels with a hygrometer or by feeling the soil with your finger. If it feels cold and wet, you are probably good to go. You should also aim to keep the humidity level between 40 and 60 percent.

If the humidity level gets too low, you can increase it by adding a light mist of water or simply placing a wet sponge in the terrarium.

Provide Ventilation

Ventilation isn’t a big issue with closed terrariums since the air that plants produce is automatically recycled in the ecosystem. Typically, plants produce oxygen during the daytime but consume it at night.

However, the balance isn’t perfect, and you need to intervene to keep things in check. Consider opening your terrarium for a couple of hours every two or three weeks to keep the ecosystem fresh.

This is also the perfect time for other routine maintenance tasks. Once you are done with everything and put the lid back, check the rate at which condensation forms on the glass wall.

If you don’t see any signs of condensation after a couple of days, consider misting your plants to restore balance.

Should I Prune My Closed Terrarium Plants?

Most closed terrarium plants are relatively easy to care for since they grow slowly in limited conditions. Pruning is a must-do task that keeps your terrarium looking healthy and attractive.

However, you must inspect your plants objectively before you decide to prune them. Some plants may require selective pruning of some of their leaves and branches to get rid of dead or dying foliage.

A african violet plant in a terrarium exposed to sunlight.
Pay close attention to how much light each plant receives.

Furthermore, you must appreciate the fact that your plants grow at different rates. Therefore, you will be pruning each plant at different times.

Pay close attention to how much light each plant receives. The primary objective is to ensure no plant puts out leaves that block others from receiving their fair share of light.

You should also consider pruning leaves and branches that have started touching the glass wall. These leaves attract condensation and are more prone to fungal and mold issues.

Choose Appropriate Plant Sizes

It is also essential to select plants of similar sizes so that the enclosure does not become overcrowded.

If your closed terrarium is too small, you should opt for miniature plants that only require a little space, like mosses and ferns.

Final Thoughts

Closed terrariums are a great way to bring nature indoors and create a unique living environment. They look beautiful and provide numerous benefits, including better air quality, lower stress levels, and improved concentration.

Caring for your closed terrarium is essential to maintain its beauty and ensure the health of your plants. Ensure you monitor temperature, humidity, and ventilation and always keep an eye on signs of mold buildup.

Also, select appropriate plant sizes so your terrarium won’t become overcrowded. You can always have a beautiful, closed terrarium with a little effort and care.

How to Propagate a Zebra Plant?

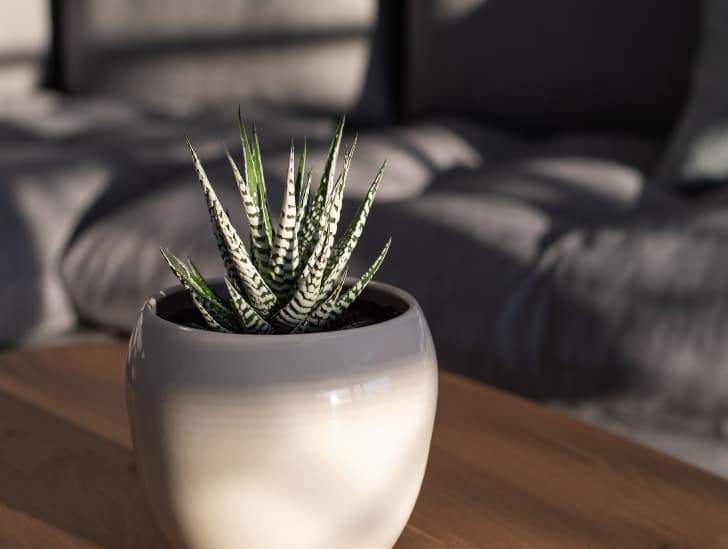
A zebra plant on a white pot.

Also known as Haworthia Attenuata, zebra plants have evolved to become incredible houseplants common in North America and other parts of the world. Gardeners enjoy adding this succulent to their plant collection since it does not require much care and is quite resilient. If you have a few zebra plants, you might be looking for ways of multiplying them to increase their number in your home. Fortunately, you can always propagate your zebra plant if you know what you are doing.

So, how can I propagate a zebra plant? Propagating zebra plants usually involves breaking off pieces of the plant and planting them in well-draining soil. There are two ways to do this: by leaf propagation or stem propagation. Leaf propagation involves taking a single leaf from the zebra plant and burying it in a pot of soil. Stem propagation involves cutting off the stem with some leaves attached and burying it in moist soil. Both methods are relatively easy but can take time to yield results.

This blog post discusses everything you need to know about zebra plant propagation. Read on to learn more.

Why Should I Propagate My Zebra Plant?

The truth is that propagating a zebra plant is not essential. You can just leave it alone and enjoy the beautiful foliage, flowers, and fruits that it produces throughout the year.

But many gardeners opt to propagate their plants for one simple reason: it enables them to increase their collection of zebra plants without having to buy new plants from nurseries.

Zebra plant in a white pot.
You will feel proud that you have managed to nurture it successfully.

Moreover, propagating your zebra plant can help you keep it healthy and happy. Removing diseased or dead leaves or stems plays a critical role in curbing the spread of diseases and pests to the other parts of the parent plant.

The art of propagating your zebra plant is also satisfying and fulfilling since it gives you a sense of accomplishment.

When your propagated plant starts to produce new shoots and leaves, you will feel proud that you have managed to nurture it successfully.

How to Propagate Zebra Plant

Now that you know why propagating zebra plants is essential, let’s look at the steps involved in this process.

Step 1: Identify a Healthy Leaf/Stem from the Mother Plant

The first step in propagating a zebra plant is to identify a healthy leaf or stem from your parent that you will use in the propagation process. Take time to identify a leaf or stem that is healthy for cutting.

Make sure you use a sharp and sterile knife to avoid causing unnecessary infections. You can sterilize your knife using bleach or rubbing alcohol. Simply wipe it with alcohol or bleach before you take the cutting.

As long as your knife is well sterilized, feel free to take a clean cutting without any worries. Once you take a clean cutting of a healthy leaf or stem from your zebra plant, you will be ready to move to the next step.

Step 2: Choose an Appropriate Container

The next thing you need to do is find a suitable container for your cutting. Ideally, you should use a plastic or glass container with plenty of drainage holes at the bottom that is large enough to accommodate your cutting.

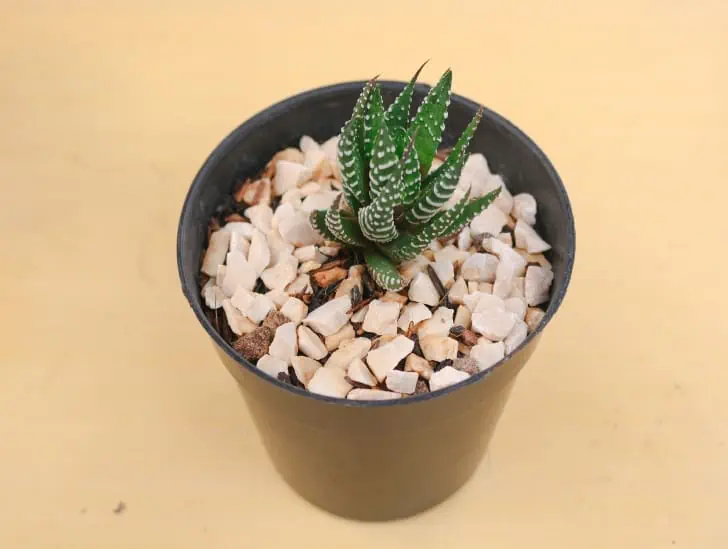
A small zebra plant in a pot.
You should use a plastic or glass container with plenty of drainage holes at the bottom.

Avoid using metal containers as they are more likely to cause root rot. You should also pay close attention to your container size.

You don’t want the container to be too tall because your cutting will move around too much, interfering with root formation.

It is recommended that you scrub the container with some soap and hot water and rinse it thoroughly to get rid of soap traces.

Don’t rush the process because a single mistake may be catastrophic. Let the container dry completely before you fill it with clean water or soil.

Once you have found a suitable container and prepared it, fill it up with potting soil or a mixture of soil and organic matter. Ensure it is not too compact or dry; otherwise, your cuttings will have difficulty taking root.

Step 3: Rooting the Leaf/Stem Cutting

Rooting your leaf/stem cutting is the most vital step in propagating your zebra plant. You must do it correctly for successful propagation.

The best way to root your cutting is by submerging it in a glass of water for 2-3 weeks. Ensure the part of the leaf or stem you cut from the mother plant is completely submerged underwater, and keep the water level consistent.

Take time to pull any leaves from the bottom part of the cutting if you are using a stem cutting. Feel free to use a wire mesh to hold the stem cutting in place. You can use a rubber band to secure the wire mesh.

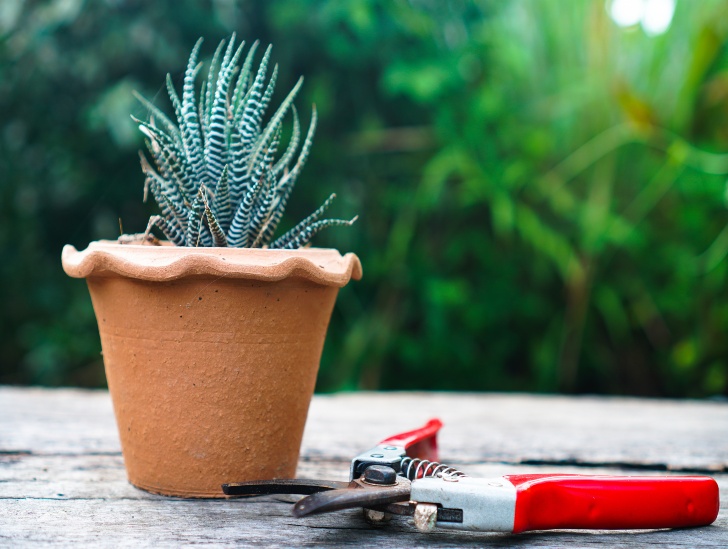
A zbra plant with a pruner besied.
Rooting your leaf/stem cutting is the most vital step in propagating your zebra plant.

You can also root your cutting directly in the potting soil or a mixture of soil and organic matter, but this is more prone to failure. Once you have rooted your cutting successfully, you can transplant it into a new spot.

Step 4: Transplanting and Caring for Your Cutting

Once your cutting has taken root, it is time to transfer it to your preferred spot. Choose a location that provides plenty of sunlight and water the soil moderately. Watering should be done only when the top layer of soil feels dry.

Zebra plant exposed to sunlight.
Choose a location that provides plenty of sunlight and water the soil moderately.

Watch out for any pests and diseases while caring for your cutting, and act immediately if you notice something.

Once your plant is established and starts to grow, you will feel proud that you have managed to nurture it successfully.

How Do You Propagate a Zebra Plant in Water?

Although succulents are highly sensitive to excessive water, rooting a zebra plant in a glass of water is quite simple and risk-free.

In fact, many gardeners prefer water propagation because it is an easy way of monitoring rooting progress. However, it might take relatively longer for roots to form in water.

If you choose to root your zebra plant cutting in water, ensure you choose a relatively narrow glass to help keep the cutting in position. You can dip the cutting in a rooting hormone before you place it in the container.

Carefully fill the container with distilled water while ensuring the bottom of the stem cutting is completely submerged.

Place the container in an area with indirect sunlight and change the water every other day for a few weeks to keep it fresh.

You will know that your cutting is rooted when you spot tiny white root hairs on the stem or a few tiny roots protruding from the stem base. Once you see these signs, proceed to transplant the cutting into its new home.

One thing you must be careful with when rooting your stem cutting in water is the type of water you use. Distilled water is the best because it has no added chemicals, but you can still use rainwater.

Avoid using tap water because it contains harmful chemicals that may interfere with the rooting process. If you must use tap water, ensure it is well-aerated for at least 24 hours before you use it.

Air Layering a Zebra Plant

Air layering is a unique form of propagation that involves getting a zebra plant to produce new roots before you cut the stem off the parent plant.

Air layering takes a little longer, but it is less risky and more successful than propagating cuttings directly.

The process of air layering involves laying a moss or sphagnum-wrapped stem, cutting in moist soil, and allowing it to root for some time before severing it from the parent plant.

Choose a healthy, relatively thick stem and wrap it with wet moss or sphagnum. Secure the moss with a plastic film and ensure it does not dry out. You can also mist the stem occasionally to keep it moist for faster rooting.

Once you start spotting root hairs, separate the rooted cutting from the parent plant and transplant it. Water moderately and provide enough sunlight to help the cutting establish itself over time.

When Is the Best Time to Propagate Zebra Plant?

If you choose to propagate your zebra plant by stem cutting, the best time to do so is during spring or summer, when the stem cuttings are easiest to work with. This is because they are more pliable and less likely to suffer from shock after propagation.

A person repotting a zebra plant.
The best time to do so is during spring or summer, when the stem cuttings are easiest to work with.

In terms of air layering, the best time to do this is during the summer months when the conditions are favorable for rooting.

Summary

Propagating a zebra plant is easy as long as you have patience and pay attention to detail. Start by choosing the right container for your cutting and filling it with soil or a mixture of soil and organic matter.

You can then root your cutting directly into the potting medium or submerge it in a glass of water for 2-3 weeks.

Once your cutting has taken root, transplant it elsewhere. Choose a location that provides plenty of indirect sunlight and water the soil moderately.

Monitor your plant closely for any diseases or pests while caring for it, and act quickly if you notice anything wrong.

With a little effort, your cutting will grow into a healthy and vibrant houseplant.

Terrarium Maintenance: Preventing Mold and Fungus

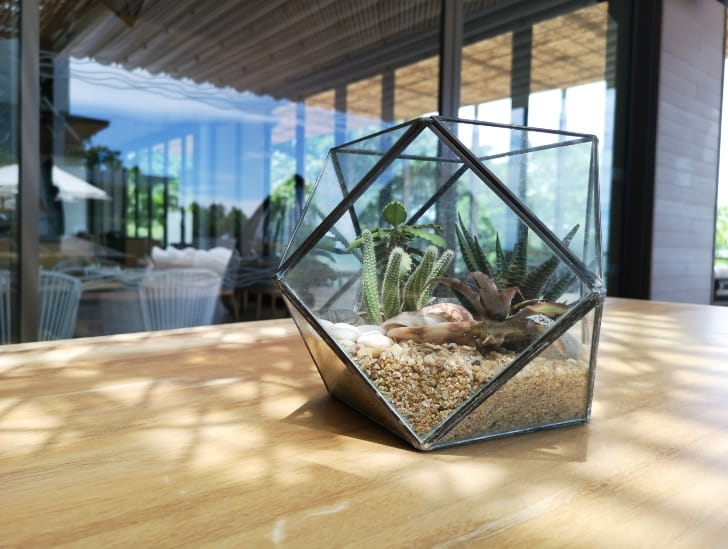
An open terrarium with succulent.

Having a terrarium is one of the best ways to bring a beautiful combination of outdoor scenery into your home. However, taking care of your terrarium may be an uphill task, especially for beginners. If you don’t take proper care of your terrarium, it can become overrun with mold and fungus. In fact, mold is the biggest threat to every terrarium since it steals away all nutrients leaving your plants malnourished. With time, your plants will wither, toppling over the entire ecosystem.
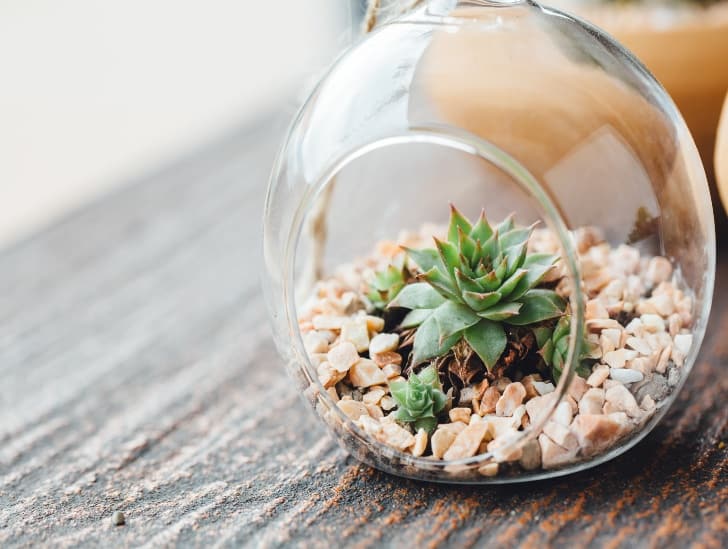
So, what can you do to prevent mold and fungus in a terrarium? Consider adding springtails to your terrarium and avoid overwatering. Springtails are tiny insects that love feeding on fungi and other decaying matter. They are a mold’s arch nemesis. Always apply fungicide to your terrarium substrate, remove all dead or decaying plant matter, and give it enough light. You can also prevent mold growth by sterilizing your substrate before adding it to the terrarium, airing it out periodically, and ensuring adequate drainage.

This blog post discusses everything you need to know about preventing mold and fungus in a terrarium. Read on to learn more.

Why Does Mold Grow

Before we start discussing strategies for preventing mold growth in a terrarium, it is essential to understand why mold thrives in terrariums.

Typically, mold loves warm, damp, and dark places with minimal air circulation. It can quickly grow on any moist surface, but its growth rate increases exponentially when the substrate has high organic content.

A standard terrarium experiences a lot of moisture circulation that helps to keep the water cycle working properly.

Mold also uses plant material as nutrients, so if there is no other source of nutrition, they will start feeding on your plants. That’s why keeping the terrarium clean and free from any dead or decaying matter is crucial.

A jar converted in to a closed terrarium.
The temperature, humidity, and organic matter in a terrarium create an ideal environment for mold growth.

Closed terrariums are at an increased risk of experiencing mold and fungus issues because the temperature is always perfect.

Due to the greenhouse effect, it will always be warmer in a closed terrarium, providing the perfect conditions for mold growth.

Furthermore, the relative humidity is quite high in a closed terrarium, making it even more susceptible to mold and fungus growth.

In short, the temperature, humidity, and organic matter in a terrarium create an ideal environment for mold growth. To prevent this, you need to ensure that your terrarium is properly ventilated and not too moist.

Tips For Preventing Mold Growth in A Terrarium

Now that you understand why mold grows in a terrarium, let’s look at some tips for preventing mold growth and fungus.

Tip #1: Ensure You Have a Drainage Level in the Terrarium

One of the most crucial steps to take to prevent mold growth in your terrarium is to make sure you have a drainage level.

The primary purpose of the drainage level is to catch excess water. Since there are no drainage holes in most terrariums, you must find a way of catching the excess water in your drainage layer. This will play a critical role in preventing it from causing mold growth in your terrarium.

To make a drainage level, you first need to prepare your terrarium container and then fill the bottom part with rocks or sand.

The material you use for your drainage layer may depend on the general design of your container. You may even pick different color sand or rocks. The primary objective is to create a clear distinction.

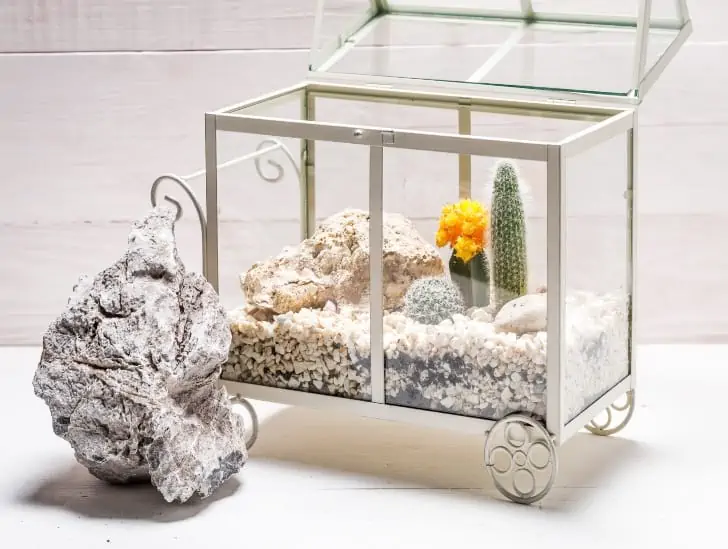
Cactus terrarium.
You first need to prepare your terrarium container and then fill the bottom part with rocks or sand.

Once you have a drainage layer, put a divider on top to separate the drainage layer from the charcoal level. This technique also prevents seeping.

For a divider, feel free to use cheese gauze or cloth, a coffee filter, construction paper, or something similar.

Avoid using something that might block water from passing through the divider. The charcoal layer goes right below the divider.

Expert gardeners prefer using charcoal because it soaks in a wide range of impurities and also plays a critical role in eliminating bad smells in your terrarium.

It also helps fight fungus and mold growth. You can add some potting mix on top of the charcoal layer.

Tip #2: Add Springtails to Your Terrarium

Springtails are tiny, white bugs that can survive in damp conditions. They are also efficient at removing fungus gnat larvae and other small pests in your terrarium.

These harmless creatures play a critical role in controlling mildew, mold, and other organic matter by consuming them before they cause any harm to your plants or terrarium decorations.

Tip #3: Avoid Overwatering Your Terrarium

Overwatering is one of the leading causes of mold and fungus growth in a terrarium. When you overwater your plants, the excess water remains stagnant for too long, encouraging growth of unwanted organisms like mold and fungus.

It’s essential to make sure that your terrarium plants have enough water but not too much of it.

A person watering the terrarium.
Overwatering is one of the leading causes of mold and fungus growth in a terrarium.

Consider adjusting the watering schedule based on several factors, such as the type of plant, the time of year, and the terrarium’s size.

Tip #4: Avoid Mixing Plants with Different Care Requirements

Choosing the right plants is one of the most critical decisions you need to make when designing a terrarium. You can make a fatal mistake if you are not careful. Generally, you should never mix plants that have different care requirements.

For instance, don’t mix succulents with cold-tolerant plants in a closed terrarium since it will lead to root rot and complex mold issues.

Keep in mind that succulents love well-draining soil and less moisture. Therefore, mixing them with air plants or moss plants doesn’t make sense.

Air plants don’t require soil since they get all the essential nutrients they require from the air.

A cactus terrarium hanging,
You should never mix plants that have different care requirements.

If you must mix them with succulents in your terrarium, they should be placed on top of another object instead of planting them directly in the soil.

Otherwise, feel free to use dry fillers such as pebbles, stones, dry preserved moss, pumice, or crushed oral in an air plant-only terrarium. The dry fillers are critical in preventing mold growth and root rot.

Avoid putting succulents in closed terrariums since they need more air circulation and less humidity. Instead, use an open-top terrarium for them.

Tip #5: Remove Dead Leaves

If any of your plants has shriveled leaves or other signs of decay, you must remove those leaves as soon as possible.

Dead leaves can quickly invite pests and mold into your terrarium. It is also essential to remove any roots that have gone bad.

Keep in mind that fungi feed on decaying matter. Therefore, if you don’t take steps to remove decaying matter from your terrarium, the fungus will only spread faster.

Tip #6: Apply Fungicide to Your Substrate

If you notice any kind of mold or fungus in your terrarium, it’s best to use a fungicide treatment as soon as possible. Fungicides help control and prevent the spread of fungal diseases in your terrarium.

Choose an organic fungicide safe for your plants and animals. Applying the fungicide directly to the substrate is the best way to control and prevent the spread of fungus in your terrarium.

Tip #7: Prune Your Plants Regularly

Pruning your plants regularly is another effective way to prevent mold growth in your terrarium.

While pruning encourages healthy new growth in plants, it also helps remove dead leaves and stems that could act as food for fungus.

By pruning your terrarium plants regularly, you can keep the air circulation going properly and limit the spread of mold growth in your terrarium.

Tip #8: Replace the Soil

Some types of soil usually have mold spores causing mold growth in your terrarium. If this is the case, you should consider replacing the soil with a fresh one to eliminate mold spores.

You can also try adding some activated charcoal or perlite to your soil mix to help absorb extra moisture and reduce chances of mold growth.

Both of these materials provide excellent drainage and aeration, which prevents mold growth.

You can also kill spores and pathogens by baking your soil at 300 degrees Fahrenheit for at least 30 minutes. Baking will sterilize your potting mix, making it safe for your terrarium.

Tip #9: Increase Air Circulation

Mold loves moist environments where air circulation is limited. Ensure you have proper air circulation in your terrarium by providing adequate ventilation, such as using open-top terrariums or adding a fan to blow fresh air into the closed container.

A glass hexagon terrarium.
Ensure you have proper air circulation in your terrarium.

This will help to keep the air in your terrarium fresh and reduce the risk of mold growth.

You should also ensure you don’t overcrowd your terrarium with too many plants, which can restrict air circulation and lead to mold problems.

Tip #10: Monitor Your Terrarium Regularly

Finally, it is imperative to keep an eye on your terrarium and monitor it regularly. Check for any signs of mold or fungus and act immediately if you find anything suspicious.

Conclusion

Mold and fungus growth can quickly become a significant issue in your terrarium if it’s not managed correctly.

Fortunately, there are several steps you can take to prevent and control the spread of mold growth in your terrarium.

Follow the tips above to keep your terrarium clean and healthy, so it can remain a beautiful display of plants for many years.

What Are the Common Types of Caudex Plants?

A caudex plant.

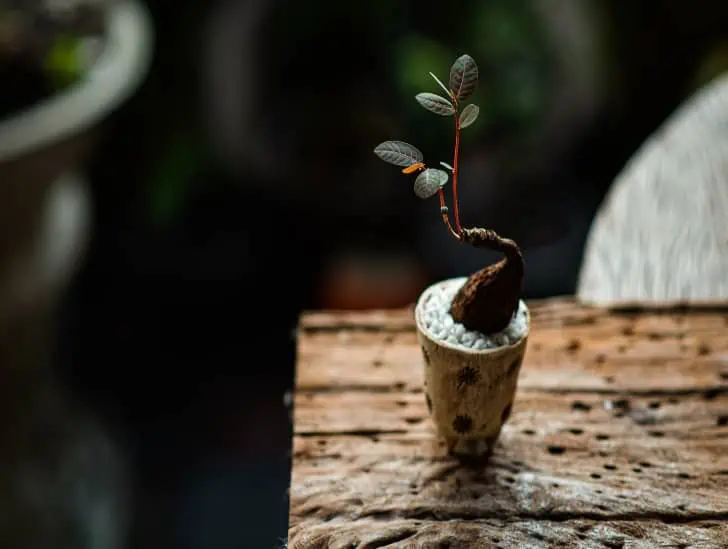
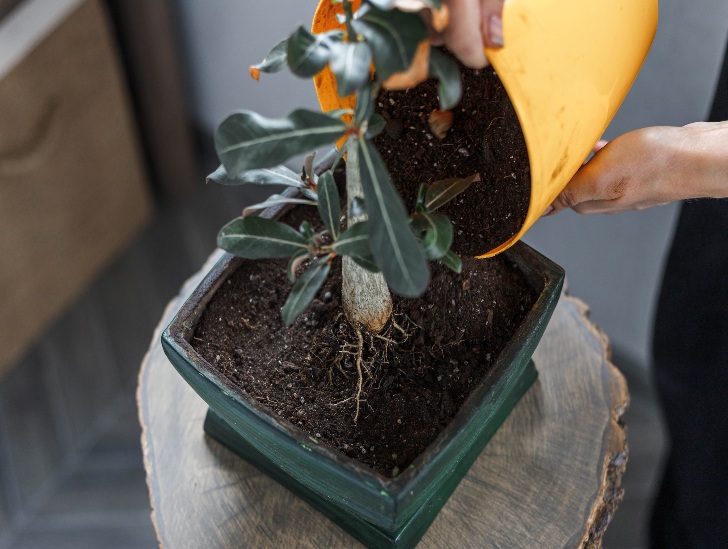
If you are an ardent succulent lover, you must have encountered a caudex plant and wondered what it was. The swollen trunk is the main giveaway. Also known as caudiform plants, caudex succulents are popular, even though the overall concept of this plant remains unclear. Most succulents in this category also have exciting names making them unique. They make great indoor decorative plants since they have an attractive appearance. Although most caudex varieties are succulents, we also have caudex trees, vines, and bonsai.

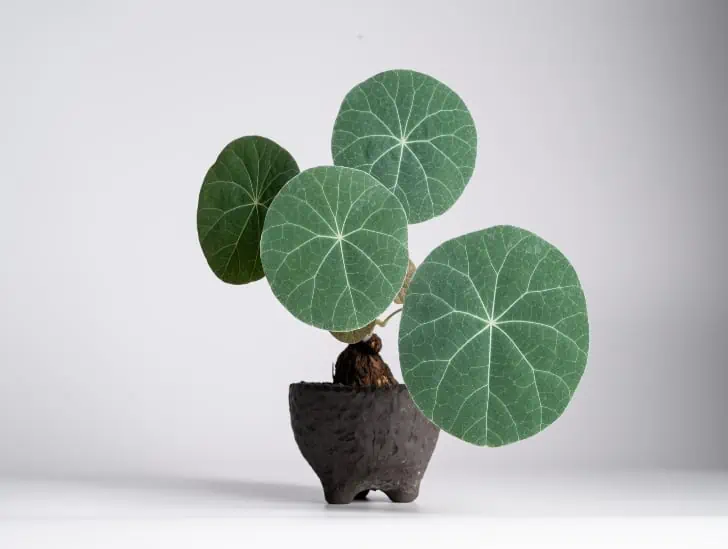
So, what are some of the common types of caudex plants? The best-known type of caudex plant is probably Stephania erecta. Also known as the “potato plant,” this plant has a tuber resembling a potato. The tuber is deliberately potted above the ground level to contrast beautifully. The other common types of caudex plant include the beaucarnea ponytail palm, known for its prolific green foliage; the Madagascar palm tree, known for its tall, thin leaves; the Euphorbia stellata; Rock fig caudex plant; and Begonia partita caudex plant.

This blog post discusses some common types of caudex plants and their unique characteristics. Read on to find out everything you need to know.

What Are Caudex Plants?

Before we dive into the common types of caudex plants, it’s crucial to understand what a caudex plant is.

The term caudex is Latin, meaning “tree trunk” in English. So, in Latin, it is used to refer to the axis of a woody plant, such as the palm tree. These plants are usually classified as Pachycauls, meaning “thick stem.”

Caudex plants are known for their characteristic swollen stem or trunk. This stem/trunk helps to store water during dry periods, making them drought tolerant and drought resilient. The swollen stem also makes them aesthetically pleasing when grown in pots or other containers.

A stephania Caudex plant.
Caudex plants are known for their characteristic swollen stem or trunk.

The caudex stem and roots are never below the ground. Some people call them “fat plants” thanks to their unique appearance.

One of the reasons the roots stay above the ground is to help the plant withstand a rough period before it starts growing swiftly when the weather conditions improve.

The stem stores enough water and nutrients to nourish it through prolonged drought spells.

These plants feature a substantial center storage space and are highly delicate. Their leaves will only be present when the weather conditions are favorable.

So, don’t be worried if your caudex plant sheds its leaves for several months in a year.

These plants are slow growing but great for indoor and outdoor decorative purposes. They also make great gifts since they can serve as a living reminder of special moments shared by two people.

Common Types of Caudex Plants

Now that we have discussed what caudex plants are all about let’s get into the common types of caudex plants.

Beaucarnea Ponytail Palm

The Beaucarnea ponytail palm is also known as the “Elephant Foot plant” and is one of the most popular caudex plants in the world.

It is famous for its evergreen foliage and large trunk. The leaves are ponytail-like and curled hence the name “ponytail palm.”

This succulent plant adds a touch of the tropics to every room in your house. If you want to add a lovely caudex plant to your home without investing much effort in caring for it, the Beaucarnea ponytail palm is the best option.

A Beaucarnea Ponytail Palm exposed to sunlight.
It is famous for its evergreen foliage and large trunk.

It can be grown as a bonsai and requires less light and water than other palm trees.

Unfortunately, the Beaucarnea ponytail palm rarely blooms indoors, but it can produce beautiful flower stalks when grown outdoors. Clusters of yellow flowers will emerge from the leaves in the summer if the conditions are right.

The Beaucarnea ponytail palm can reach up to 16 feet when grown outdoors but rarely goes beyond seven feet when grown indoors.

The plant thrives in relatively strong light since it is classified as a desert plant. However, it can endure moderate shade but will need to grow faster.

Since the root system of a Beaucarnea ponytail palm is similar to that of a cactus, you don’t need to water it frequently.

Generally, consider watering it every two weeks, although you can cut it to weekly if exposed to direct sunlight.

Plant it in specialized palm soil and apply fertilizer in spring and summer. Use a liquid cactus fertilizer every two to four weeks. Cut down the fertilization frequency to once every month during the off-season.

Stephania erecta

Also known as the “Potato Plant,” this plant has a tuber resembling a potato. The tuber is deliberately potted above the ground level to contrast beautifully. It features long, thin stems, fleshy oval leaves, and a single tuber.

The Stephania erecta is native to Central America and is also grown as an ornamental plant in some parts of the world.

It requires little care and maintenance since it can survive without water for long periods.

Therefore, you don’t have to worry about watering your plant regularly. The soil should, however, be kept slightly moist.

A Stephania erecta exposed to sunlight.
The tuber is deliberately potted above the ground level to contrast beautifully.

The Stephania erecta is a great fit for indoor and outdoor environments since it doesn’t require direct sunlight. It does, however, need plenty of indirect sunlight to grow healthy.

You can also put your plant in a shady spot outdoors or place it near but not directly in front of a south-facing window indoors.

The Stephania erecta should be planted in light, well-drained soil mixed with some organic matter.

You should also use fertilizer during the growing season but reduce the frequency of application once the active growth slows down.

This plant doesn’t need any pruning or trimming and can be grown in containers of almost any size.

The Stephania erecta is an excellent choice if you want something different and unique to add to your home. It has an intriguing shape and can quickly draw attention with its eye-catching appearance.
The plant is also easy to care for and doesn’t require much maintenance, making it an excellent option for novice gardeners.

Madagascar Palm Caudex Plant

The Madagascar palm caudex plant is another classic caudex plant that makes a beautiful home decoration plant.

The most outstanding feature of the plant is its tall, thin, tapering leaves that envelop its stem. This plant produces beautiful flowers resembling frangipani blossoms.

The Madagascar palm tree can easily be recognized by its spear-shaped, dark green leaves and its single, strong trunk that may contain thorns.

The trunk is always grey. The plant produces tiny flowers every spring, but they may last up to the beginning of summer. The flowers are mostly white but can also be red, pink, or yellow.

A Madagascar Palm Caudex Plant exposed to sunlight.
The Madagascar palm tree can easily be recognized by its spear-shaped.

When grown outdoors, the Madagascar palm tree can grow up to 24 feet tall with an array of spiral leaves at its top. However, it only goes up six feet tall when cultivated indoors.

This caudex plant may take up to a decade to reach maturity. It thrives in full sun, although it can tolerate partial shade.

It is highly sensitive to excessive water. Therefore, you must let the soil dry out completely between watering sessions.

It generally prefers well-drained soil with a pH of between 6 and 7.8. Feel free to apply fertilizer on your Madagascar palm at the start of summer and spring. Be sure to use liquid fertilizer for better results.

Rock Fig Caudex Plant

The rock fig caudex plant is known for its dense roots and stems that extend above the ground.

It features a short, thick trunk with long branches branching in different directions. The plant produces small, clustered green leaves with white veins running through them.

This caudex plant can be grown outdoors and indoors since it is easy to care for. When placed outdoors, it prefers full sun and well-drained soil.

Planting the rock fig in a pot with plenty of drainage holes is good since it is highly susceptible to root rot.

Rock fig plant in a rocky area.
This caudex plant can be grown outdoors and indoors since it is easy to care for.

Outdoors, the rock fig can grow up to five feet high, while indoors, it won’t exceed four feet tall. Therefore, choose a large pot for the plant’s root system.

To keep your rock fig caudex healthy, it needs regular watering in its growing season (spring and summer).

You can water it twice weekly, but let the soil dry completely between watering sessions. During the winter months, reduce watering as the plant takes a rest.

It would be best to fertilize your rock fig caudex once or twice a month during the active growing season.

Use a balanced fertilizer and dilute it with water before applying it to the soil. The rock fig won’t require pruning since its natural shape is impressive.

Final Thoughts

Caudex plants are great for the home decoration since they add an exotic look to any space.

Many different caudex plants exist, such as the Stephania erecta, Madagascar Palm tree, and Rock Fig Caudex plant.

All these plants require relatively similar care but have unique features that make them stand out.

With the proper care and attention, you can create a beautiful living piece of art from these beautiful plants.

So why not try it and bring some natural beauty into your home? Good luck!

Gasteria Flow 101: Tips for Growing and Maintaining

Native to the Eastern parts of South Africa, Gasteria Flow is a unique and rare species of flowering succulent. It is also known as “Little Warty” due to its peculiar growth patterns. Gasteria Flow has thick green, waxy leaves that form a rosette shape and protrude outwards from the main stem in a fan-like shape. The leaves are mottled with bright white spots or stripes and are often covered in bumps, giving them a warty appearance. As the plant matures, it can produce long, graceful flowers on long thin stalks that resemble small bells with a pointed tip.

So, what facts do you need to know about Gasteria Flow? It is less popular than other succulents due to its slow growth rate and relatively high price tag. However, Gasteria Flow is an excellent choice for those looking for a unique and unusual houseplant that can tolerate some neglect. It prefers bright indirect sunlight and infrequent watering for the best results. Cultivated Gasteria flow is unlikely to bear flowers, but you may be lucky if you do everything right. It can grow to six feet tall and survive outdoors in USDA hardiness zones three through eight.

This blog post discusses everything you need to know about Gasteria Flow succulent. Read on to learn more.

Gasteria Flow: Description & Appearance

Gasteria Flow is a rare perennial succulent in the Asphodelaceae family. It features hard, dark green, and tongue-shaped leaves resembling succulents such as haworthia and aloe vera.

It is often mistaken for a Haworthia due to its similar appearance. The leaves are mottled with white spots or stripes, giving them an interesting texture and pattern.

A gasteria flow plant in a white pot.
It features hard, dark green, and tongue-shaped leaves.

Gasteria Flow can occasionally produce nectar-filled tubular pink, green, or orange flowers. However, young Gasteria Flow plants will bloom once they mature.

The succulent derives its name from the Latin term “gaster,” meaning “stomach.” This drought-tolerant succulent has a relatively slow growth rate and prefers slightly warm and dry climate conditions to thrive.

Gasteria Flow: Classification

As mentioned earlier, Gasteria Flow belongs to the Asphodelaceae family, and its scientific name is Gasteria fasciata. It belongs to the genus Gasteria, consisting of around 50 plant species native to Southern Africa.

The species is further divided into two varieties or subspecies: Gasteria fasciata var. fasciata and Gasteria fasciata var. poellnitziana.

The former variety features gray-green leaves with bright white spots, while the latter has green-gray leaves with a velvety texture and white stripes.

The succulent was first discovered in 1803 by botanist Johannes Burchell. Today, Gasteria Flow is widely grown as a decorative houseplant due to its attractive leaves and low maintenance.

Its common names include cow tongue, ox tongue, or lawyer’s tongue.

Gasteria Flow: Distribution and Habitat

Gasteria Flow is native to eastern parts of South Africa, particularly the Eastern Cape Province. It is often found growing on rocky slopes and hillsides in the Succulent Karoo Biome of South Africa.

However, it is now widely cultivated as a houseplant and can be found in most nurseries or online stores.

A little warty plant in a tray.
It is often found growing on rocky slopes and hillsides in the Succulent Karoo Biome of South Africa.

Pay close attention to the suitability of the climate and soil before investing in this succulent for your home, especially if you live outside Africa.

Gasteria Flow: Size and Growth Rate

Gasteria Flow is generally a slow-growing succulent. It can reach about 6-20 inches, depending on how well you care for it.

The succulent leaves are flat, stiff, and thick, with a rough texture covered in wax. The leaves resemble the shape of a tongue, explaining why it has many tongue-themed names.

The leaves can grow to be a foot long. The leaves usually grow in opposing pairs on young Gasteria Flow plants but change to a spiral formation as the plant matures. Mature plants grow clumps of rosettes that may reach a foot in diameter.

Gasteria Flow and Aloe/Haworthia: Similarities and Differences

Gasteria Flow resembles aloe and haworthia plants. Many confuse it for an aloe because it was initially included in the same genus as other aloe plants.

However, botanists realized there is a massive difference between these plants regarding leaf formation and configuration.

Generally, aloe plant leaves grow in a rosette formation, while Gasteria Flow leaves grow in opposing pairs or a loose spiral formation.

Young Gasteria plant leaves usually display opposing pairs of leaf formation that turn into a spiral formation as the plant matures.

A haworthia plants.
Gasteria Flow resembles aloe and haworthia plants.

Aloe plant leaves are relatively smooth, while Gasteria leaves are marked with white tubercle warts or bumps. They also have a relatively rough texture.

The flowers produced by these succulents also display massive distinctions. Gasteria Flow plant flowers grow in small clusters on one end of a relatively long stem, while aloe flowers tend to grow along the length of the flower stalk.

Gasteria flowers are tubular with inflated bases, while aloe flowers adopt a slim silhouette appearance. In fact, the names of these succulents are inspired by the shape of the flowers they produce.

Although Gasteria Flow is no longer in the same genus as aloe plants, the two succulents are similar in many ways.

For instance, these succulents belong to the same family and are native to South Africa. They also belong to one tribe, along with Bulbine, Poellnitzia, Astroloba, and Chortolirion.

Gasteria Flow: Care Guide

Gasteria Flow is easy to care for and can thrive indoors, even in low light conditions. It’s ideal for those who want a unique succulent requiring little attention or effort.

When caring for Gasteria Flow, use a lightweight soil mix and pot with enough drainage holes. This plant requires regular watering but allows the soil to dry out between watering sessions completely.

Gasteria Flow prefers bright indirect sunlight or partial shade exposure and requires temperatures between 65-85°F.

A little warty plant in pot.
It’s ideal for those who want a unique succulent requiring little attention or effort.

Feed your Gasteria Flow plants with a balanced liquid fertilizer once every two weeks during the growing season and reduce feeding during winter.

The succulent prefers normal indoor humidity levels and doesn’t need to be misted for humidity.

Low humidity is not a significant problem for these succulents, but you may experience issues with the plant in highly humid environments.

Combined with overwatering, excessively high humidity levels can easily trigger root rot and fungal infections.

The succulent can survive in the same pot for many years without issues. However, you should consider repotting your Gasteria Flow if you notice a significant decline in its growth rate.

The best time to repot your plant is in summer or spring since the warm conditions will compensate for any watering mistakes you might commit.

Ensure you repot the plant in a relatively shallow container with plenty of drainage holes. Also, repot the succulent with a well-draining soil mix, and remember to water it once you are done repotting.

Gasteria Flow is not known to be affected by pests or diseases, but you must watch out for signs of mealybugs, spider mites, scale insects, and root rot in case of overwatering.

To prevent any infestation or infection, regularly inspect your succulent for signs of pests and diseases and clean it with a damp cloth if needed. Pruning is only necessary if you want to maintain its size or shape.

Gasteria Flow: Flowering and Propagation

Gasteria Flow is a flowering succulent that produces small tubular flowers with inflated bases. The flowers can be pink or orange, usually in summer, particularly after rainy periods.

The Gasteria Flow plants primarily propagate through the offset method rather than seeds. You may need to repot your succulent to separate the offsets from the mother plant.

The offset should root within a month, and you can then repot it in a shallow pot with a well-draining soil mix.

Place the new plants in bright indirect sunlight and ensure you water them regularly but allow the soil to dry out before watering again.

Gasteria Flow: Toxicity

The succulent is classified as poisonous and should not be consumed. It contains saponin, which can cause gastrointestinal problems in humans and animals.

Accidental consumption of any part of the succulent may cause nausea, a loss of appetite, and vomiting.

Accidental consumption of Gasteria Flow must be dealt with promptly to avoid catastrophic outcomes.

It is also important to note that the leaves of Gasteria Flow may be covered with minute spines. So, keep it away from children or pets. If ingested, contact your veterinarian immediately for medical attention.

Buying Gasteria Flow

Remember that Gasteria can easily be crossed with Haworthias and aloe plants to produce hybrids. So, make sure you know what you are buying before purchasing.

A top view of a little warty plant.
The original succulent is readily available in the market.

Fortunately, the original succulent is readily available in the market, and you can find it in most nurseries or online stores.

The succulent usually comes with a colorful label, but if you need clarification on its identity, compare it with authentic Gasteria Flow images.

When buying the succulent, look for signs of pests or diseases, such as brown spots, wilting leaves, and webbing on the foliage.

If you encounter these problems, avoid that particular plant because it may also spread to other healthy plants in your collection.

Finally, ensure you buy a succulent with healthy foliage and roots. It should not be dry or underwatered. Otherwise, it may take a long time to recover from any damage.

The Bottom Line

Gasteria Flow is a unique, eye-catching succulent perfect for adding texture and color to any garden or indoor space.

Its robust care requirements make it an ideal choice for those who want to maintain a low-maintenance plant.

Whether you grow it indoors or outdoors, Gasteria Flow will be an attractive addition to your home.

Caudex Bonsai: How to Keep Them Healthy

A litlle caudex bonsai.

Caudex bonsai is a relatively small genus of bonsai plants known for their thick and gnarled trunks. Most caudex bonsai plants are native to the Mediterranean, Africa, and Asia. These low-maintenance plants can be grown indoors or outdoors as a focal point in any garden. They can grow up to five feet tall in a regular pot. These plants have many qualities that make them an exciting addition to your plant collection. However, you must be careful with their care and provide the appropriate environment to ensure they thrive.
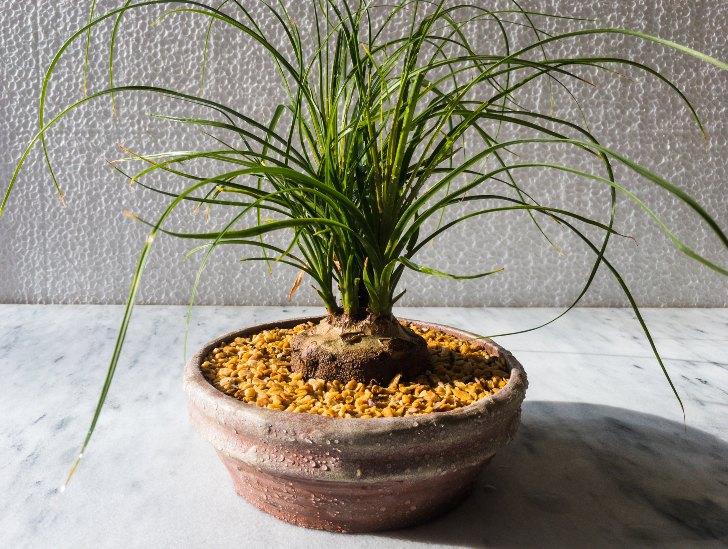
So, how do you care for caudex bonsai plants? First, these plants need plenty of sunlight. They should be placed in an area with lots of natural light or near a window to receive at least six hours of sunlight daily. However, direct sunlight should be avoided since it can cause severe sunburn. These plants can survive with little or no water since they are adapted to growing in desert areas. You should only water your caudex bonsai plant once a week. The plants require fertilizer to be applied steadily in relatively low dosages. Consider using water-soluble fertilizer and only apply it once a month. Caudex bonsai plants need regular pruning and trimming to maintain their shape.

This blog post discusses everything you need to know about caudex bonsai care and how to keep your plant happy. Read on to learn more.

Ideal Placement

If you live in an area with a relatively warm climate, you can grow your caudex bonsai plants outdoors throughout the year. These plants love heat and have no problem staying outdoors, even on hot afternoons.

However, if you live in a temperate climate, you should consider growing them in your backyard from spring through fall and provide them with some shade on the hottest days.

A caudex bonsai plant in a pot.
These plants love heat and have no problem staying outdoors, even on hot afternoons.

Remember that the ideal temperature for these succulents is 40 degrees Fahrenheit at night to 90 degrees Fahrenheit during the day. Anything below 40 degrees Fahrenheit can lead to irreversible damage.

Therefore, you should consider bringing them indoors when temperatures start dropping massively. But treat them for insects and other pests before you get them indoors.

Once indoors, these plants will need much light to survive the cold weather. Consider positioning them on a south-facing window where they can enjoy some sunlight.

If sunlight is insufficient, consider growing them under artificial grow lights. Don’t worry if your plant sheds leaves over the cold season. This is normal if you don’t live in a typical tropical climate.

When you take your caudex bonsai plant outdoors after winter, ensure you do it progressively, allowing the plant to adjust to the sunlight outside slowly.

That way, your plant won’t suffer sudden shock due to overexposure to intense sunlight.

Watering Requirements

Caudex bonsai plants are drought-tolerant and can survive long periods without water. But they still need some regular watering to stay healthy.

Water them every 10-14 days by allowing the soil to drain entirely between watering sessions. You may need to water them more often if you live in hot regions.

You can tell if your plant needs water when its leaves turn brown and feel crunchy.

If you live in an area with much rainfall, consider raising the pot off the ground so the excess water won’t damage your plants’ roots. Also, avoid splashing the leaves with water since it can cause rot.

A person watering the bonsai.
Avoid watering in the afternoon when the sun is at its peak.

The best time to water your caudex bonsai plants is in the morning or after work. The goal is to avoid wetting them at night since they require full sun exposure to stay healthy.

If you cannot water them early in the morning, consider watering in the evening when the evaporation rate is relatively low. Avoid watering in the afternoon when the sun is at its peak.

You must also use a suitable watering method to achieve better results.

Water at the base of the plant using a thin stream of water instead of overhead watering since it can lead to leaf-spotting and other issues.

Light and Temperature Requirements

As mentioned earlier, keeping your caudex bonsai plants outdoors all year long if you live in a tropical climate.

Otherwise, you must bring it indoors when the cold season kicks in and back outdoors during the active growing season (spring and summer).

These plants usually prefer morning sun and afternoon shade. Your plant will be okay if the nighttime temperatures don’t drop 40 degrees Fahrenheit below.

Consider positioning your plant on a south-facing window when you bring it indoors.

Avoid placing it near a chilly north-facing window because the results could be catastrophic. Position it on a west or east-facing window if you don’t have a south-facing one.

Consider using artificial grow lights if you live in an area that doesn’t receive plenty of sunlight.

However, you must be careful when choosing these lights because some emit excess light that may overheat your plants.

If you need help with this, consider consulting a professional who can recommend the proper lighting setup for your particular bonsai plant.

Doing so will help ensure that your caudex bonsai plants receive enough light during winter and stay healthy all year round.

Fertilization Requirements

Like other succulents, caudex bonsai plants don’t require much fertilization. Feeding your plants with a balanced fertilizer every three months should be enough to keep them in good shape.

A 10-10-10 fertilizer works well for these plants, but you can also use an organic fertilizer such as fish emulsion.

A caudex bonsai soil.
Avoid using too much fertilizer.

Dilute the solution to half the recommended strength before pouring it around the base of your plant when fertilizing.

Avoid using too much fertilizer since it can cause your plants to become over-fertilized, which is never good.

Pruning and Trimming

Caudex bonsai plants need regular pruning and trimming to maintain their shape and form. Prune every two months or so, depending on the size of your plant.

Use sharp shears or scissors when pruning since dull ones can damage the branches severely. You can also use thinning shears to reduce the size of your bonsai plant’s canopy and give it a more compact shape.

Be sure to remove the dead or spotted leaves as soon as you spot them since they can cause massive problems.

Potting and Repotting

Consider repotting your caudex bonsai plants every two or three years. The best time to repot your plant is late spring or mid-summer when the plant is actively growing.

Wait until the potting mix is completely dry before you repot your caudex bonsai plant. Gently remove it from the pot along with some soil around its roots.

A caudex bonsai repotting.
You should consider choosing a pot about two-thirds as wide as the height of your plant.

Carefully rinse the soil off the plant’s roots, then prune them. To do this, remove about one-quarter of them from the sides and bottom of the plant.

These plants tend to thrive in relatively shallow pots. So, you should consider choosing a pot about two-thirds as wide as the height of your plant.

For instance, a four-inches wide and four inches deep pot should be enough if your bonsai is six inches tall.

Once you have selected the correct pot size for repotting, fill it with a high-quality succulent soil mix. Leave about an inch or two of space between the top of the soil mix and the pot’s rim.

Finally, water your plant thoroughly after repotting it, and place it in a sunny area. Doing so will help your caudex bonsai plants thrive in their new homes.

Propagation

Most caudex bonsai plants can be propagated through seed germination or stem cuttings. Before you begin, select a healthy plant showing no disease or damage.

If you are propagating through seed germination, keep the soil moist but not soggy at all times and place the seeds in a warm area that receives plenty of sunlight.

If you are propagating through stem cuttings, look for a healthy stem and ensure it’s free of disease or pests.

Carefully snip off the stem’s top part with clean scissors, then place it in moist soil. Keep the cutting in an area with direct sunlight and wait for new leaves to grow.

Pests and Diseases

Caudex bonsai plants are generally healthy succulents that rarely suffer from pests or diseases. However, it’s still important to be vigilant and inspect your plants regularly for any signs of illness.

If you spot pests such as mealybugs or scale insects, treat them immediately with an insecticidal soap spray.

If the problem persists despite treatment, consider repotting your caudex bonsai plant and replacing the soil with a fresh mix.

It’s still important to be vigilant and inspect your plants regularly for any signs of illness.

If you notice any fungal or bacterial diseases, immediately prune out the affected areas and treat the plant with a fungicide or bactericide.

Doing so will help ensure your caudex bonsai plants remain healthy for years.

You can also use neem oil to control pests and diseases naturally. Neem oil is a natural insecticide that can be safely used on caudex bonsai plants without damaging them.

Final Thoughts

Caudex bonsai plants are an exciting and unique addition to any succulent garden. They require minimal care and attention since they’re pretty hardy.

With the proper lighting, fertilization, pruning, potting, and propagation practices, you can be sure that your caudex bonsai plants will thrive and stay healthy for many years.