How Do You Revive a Dying Air Plant: 10 Easy Steps

Air plants are one of the fascinating types of plants on the planet. Unlike other plants, Tillandsia is epiphytic, which means it does not need soil to thrive. This makes them a versatile addition to your indoor or outdoor space. 

However, just because they don’t require soil doesn’t imply they don’t need some attention. Air plants collect nutrients and moisture from the air using trichomes. Trichomes are modified hairs present on the leaf to help absorb nutrients and water.

If you see that your plant is not thriving or dying, it is high time you pay attention to it and revive it.

How Can I Tell My Air Plant Is Dying?

Sometimes, the leaves will turn brown and start to fall off. If you can’t get your air plant to green up after a few days of care, it probably needs more effort to revive it.

1) Smaller leaves: The size of the leaves might be smaller than usual because there isn’t enough food to create substantial growth.

2) Dying Leaves: Leaves may go limp and die altogether if they’re not getting enough water.

3) Browning / Dryness: Brown leaves mean that it’s been too dry or lacks enough light for too long in general; if your air plant has been potting-bound for a while, this could be due to excessive crowding or root damage from fertilizer burn when planting.

dried leaves resulting from not having enough light
Always make sure to give your plant some sunlight to avoid drying the leaves

Dead areas on the leaf edges may appear if the air plant has been in a very humid environment for an extended time. 

Mold and fungus can or may begin to grow on your plant or soil surface. The leaves are not only brown but also shriveled up.

4) Over-watering: If you’re overwatering your plant, then it’s not getting the proper amount of airflow. This usually occurs when your plant is kept in a very humid environment for an extended period.

5) Under-watering: If you don’t water your air plant enough, then it may begin to shrivel up and die. This typically happens if the soil dries out completely before the next watering.

10 Easy Steps to Revive a Dying Air Plant

Tillandsia is a low-maintenance plant. Although, if your air plant portrays dying signs or looks unhealthy, this might indicate they need extra attention to revive it. 

Fortunately, air plant resuscitation is not difficult. Trimming off the dead leaves or branches and immersing the plant in water are just a few of the many fast solutions.

Now let’s dig into ten easy gardening tricks to revive your plant.

Dunking

Is your air plant leaves turning brown or wilting because of lack of water? If this is the case, watering or immersing your air plant in water is the first easy fix to revive the air plant.

If you have less time, you can immerse the plant in water for six to eight hours, or you might as well leave it overnight. Putting it in water will give it enough time to acquire enough moisture to sustain it.

plant getting immersed in water
One of the common ways to revive your plant is to immerse them in water

Always use lukewarm water to offer the plant a gentle bath. You can use spring, rain, or swamp water for additional nutrients. Tap water might have chlorine that may affect the plant’s growth.

Another thing you can do to revive it is mist it when you realize it is drooping. Misting air plants between immersions can assist prevent dehydration in hot weather, but it does not provide enough moisture alone, so you should not rely on misting alone.

Air Dry Your Air Plant

Air plant leaves turning black or brown is a sign of rot. If you constantly water your plant and do not air dry it properly, water retention will cause plant rot.

After watering your plant, ensure a proper air dry. Before returning the plant to its pot, you can add a paper towel to absorb all the remaining water in the pot.

Air Circulation

Like everybody else, air plants also need good air circulation. Poor or no air circulation can kill your beautiful air plant. An open-air display or pot is a brilliant idea for your air plant to grow and thrive well. 

An enclosed vessel encourages stagnant conditions, and this will end disastrously for your plant. Air circulation will help maintain a stable air temperature and prevent water from building up on the leaves. Place your air plants away from heating and cooling vents.

Humidify Your Plant

Air plants are used to high humidity levels; tropical rainforest conditions. You can revive your plant if it grows in a less humid environment by increasing the humidity levels. 

The right level of indoor humidity for an air plant is 50-90%. You can use a  humidifier to increase the humidity levels.

Another way to increase the humidity is by spraying water on the air plant in a misting method. This should be done in an open room with good airflow, so it does not promote mold/fungus growth that comes after soaking air plants.

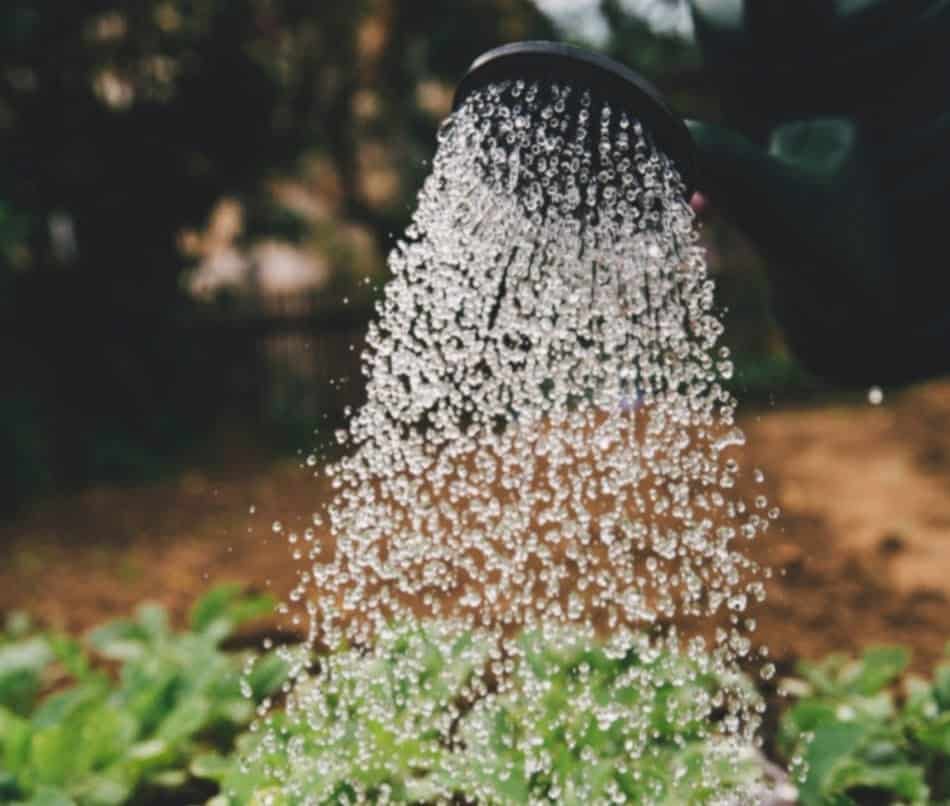
watering plants using misting method
Use the misting method to increase the humidity level around your plant.

Cut Brown Leaves

Overwatering or underwatering Tillandsia might cause browning of the leaves. When the plant has a lot of water in it, the leaves or branches are constantly wet, and this might lead to fungal infections. Fungal infections damage the plant cell; hence browning or plant rotting.

If you spot such a problem on your plant, you can start by cutting off the brown dead leaves and branches to revive your plant. Be careful not to harm the plant when removing dead leaves.

Cutting off the brown or black leaves and stems will ensure there’s no spread of infection to healthy parts. 

Provide Some Sunshine

The three essential items for air plants are air, water, and light. Because of a lack of sunlight, your air plants may be dying.

Indoor air plants thrive in bright filtered and indirect light, about 3-5 feet from the window. The small amount of direct sunshine will also be excellent; ideally, it should be morning sun. 

Don’t let your plants sunburn or get dehydrated if they are subjected to too much light for extended periods.

Artificial lighting is also a fantastic option, but place the plants near the light source and switch off the lights at night. This will aid in the air plant retaining enough moisture.

Add Additional Nutrients

Like any other plant, air plants also need nutrients. The most common misconception about air plants is that they get all of their needs from the atmosphere. You can add fertilizer to your plant once or twice a month when watering to help it thrive.

healthy leaves in an orange pot
Try using fertilizer to help your plant thrive more.

Feed your air plants with a solution of air plant fertilizer. Always follow the recommended amounts to give your plant.

You can use an air plant or bromeliad mix. If you cannot find any air plant fertilizer, you are better off using any liquid houseplant fertilizer with a 1/4 strength.

Eradicate Pests

The presence of pests is a rare and frequently overlooked reason for the death of your air plants and other indoor plants. When watering, it is the right time to check and pay attention to the pest.

If you find a web-like substance on your plants, you’re dealing with a mealybug. These pests produce a waxy covering to shield themselves and then consume the plant’s sap.

The procedure for eradicating these pests is straightforward. To begin, isolate the plants from one another. Next, clean the plants with a mild liquid dish soap and water solution. 

Use a cotton swab soaked in rubbing alcohol to clean out all of the nooks and crannies. Keep an eye on the plant for a while and return the plant to others after you’ve eradicated all of the pests.

Temperature

Air plants thrive well in temperatures of 50 to 90 degrees Fahrenheit. It might be difficult to revive if you expose your air plant to extremely cold or scorching temperatures. Extreme heat may cause the air plant to dry out and die.

Note that the drier and hotter the air, the more you will have to water your air plant. This should not come as a surprise, and these subtropical and tropical plants will die under freezing conditions.

Have New Home for Your Plant

Some air plants require periodic repotting. You can do this by removing the plant from its pot and just replanting it in a different pot, or you can free-pot the plant.

Free-potting is where you push the roots down into the soil or marbles so they are buried. This will enable them to grow more freely and be healthier.

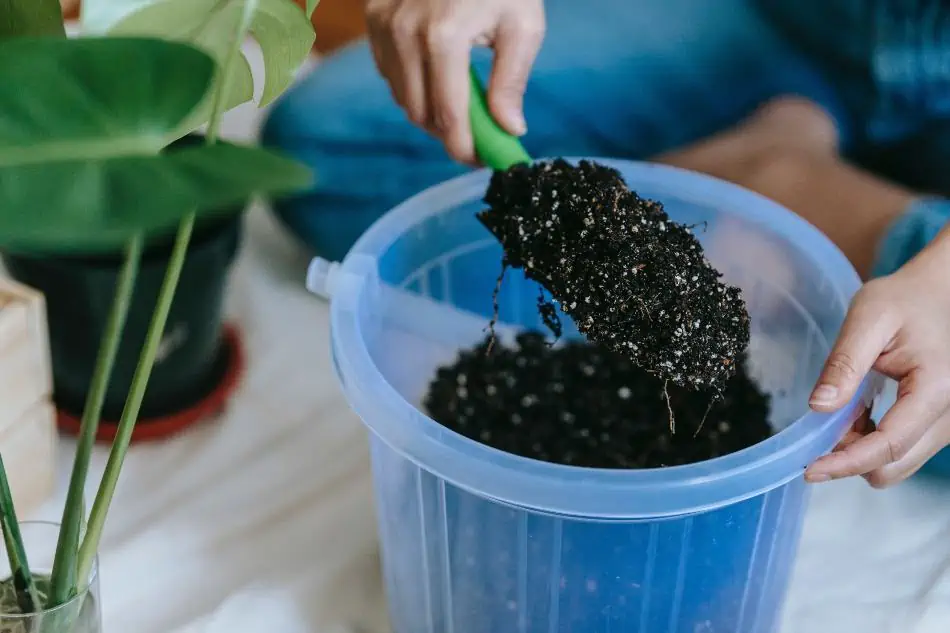
preparing to repot the plant
Repotting allows you to provide fresh soil for your plant to grow more.

Another thing, you should strive to imitate its natural habitat for it to grow and thrive. If you notice your plant is dying, maybe it might be because of the pot. You can always use wood materials or any other material that portrays their natural environment.

Bottom Line 

Finally, after learning how to revive your air plants, apply the principle that prevention is preferable to cure. And since no lesson goes unlearned, if your plants are beyond reviving, make a note of everything here as a life lesson learned for future reference and continue looking after the remaining ones. 
Ultimate Guide: How To Care For Sedum (Stonecrop) Plant

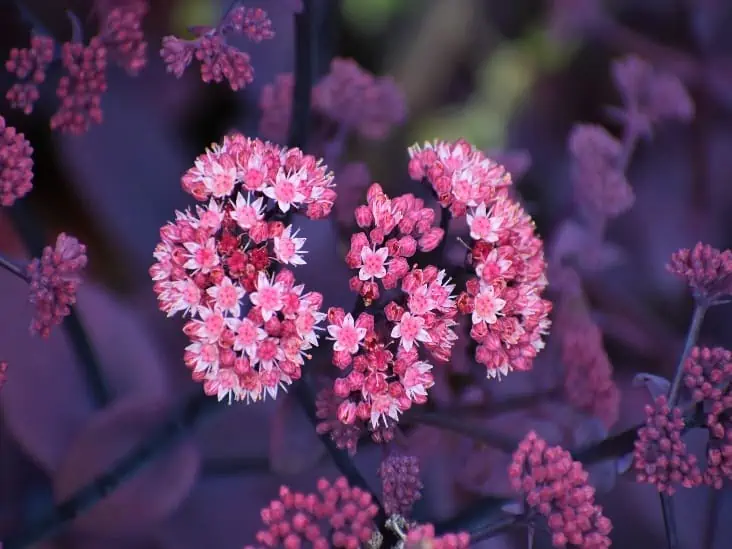
Sedum is a herbaceous perennial succulent found in many parts of the world and also thrives indoors Sedum is a plant that has an abundance of green or red flowers. It can be grown to cover even the most barren areas in your garden, but it requires little care to survive. The Sedum plant needs very little water and can endure many different conditions to support its growth.

What is the necessary care for your Sedum plant? The plant’s succulent leaves, stem, and roots enable it to restore water, so you only water it regularly when newly planted. Once established, you water it sparingly. You will want to keep your plant healthy by ensuring it gets enough sunlight and fertilizer. Mulching ensures it retains water and gets nutrients when pruning and trimming are necessary to give it a standard growth height.

Sedums give your home a beautiful look, but you must give them proper care to achieve that look. If you are ready to take on the challenge of indoor gardening then this article will help you understand what it takes to care of the sedum plant.

Basic Requirements for a Healthy Stonecrop

Sunlight

Sedums grow well in dry and hot regions. That does not mean they can’t thrive in your garden if you do not live in such areas. All you need is to ensure your plant is exposed to full sunlight and gets at least 6 hours of sunlight each day. Getting enough sunlight helps sedums attain their best colors. The species that grow taller require more sunlight than those that stay on the ground.

succulent getting sunlight
At least 6 hours of sunlight each day is needed for a plant like a sedum

Lack of sunlight causes the plant’s stem to flop over. The stem develops soft foliage, grows tall and thin as it attempts to grow in the direction of available sunlight.  As such, your plant will find it challenging to remain erect at the flowering stage because the thin stem will be weighed down.

Watering

Like most plants, sedums require water to survive despite their ability to store water longer. Giving your plant water at regular intervals keeps it healthy and blooming. However, take care of the amount of water you provide to avoid overwatering.

woman watering her plant in a cup
You must feel the soil of your sedum plant to determine if it needs watering or not

Before watering your sedum, identify when it needs it by feeling if the soil is completely dry using your fingers. If the top layer of the soil feels dry, it is time to water your plant. Lack of enough water makes the leaves lose their plump look and become droopy and wilted. In extreme cases, the leaves start dying out and falling.

So how often should you water your sedum? When you first plant it, ensure you water the plant every day. In summer, give the plant water every 7 to 10 days and every 2 to 3 weeks in winter.

Mulching

Sedums need mulch for two reasons; to retain water and to keep away weeds. Some sedum plants clump together, and if not mulched, weeds can grow and compete for nutrients with your plant. After planting your sedum, make sure you add compost up to 1 inch in thickness. Mulch your plant at least once per year to keep them thriving and producing flowers.

various types of plants surrounded by rocks
Perform the mulching method on your plant at least once a year to allow it to thrive more and produce more flowers

Take note, however, that too much mulch can cause your plant to rot. Mulching material should be placed a distance from the base of the plant to prevent that. Remember gravel mulching is usually advisable because it allows easy water passage, reduces rotting risks, and makes your garden attractive.

Staking

While creeping sedum varieties can thrive without staking, the clumping types can become floppy due to a lack of enough sunlight and nutrients. As your clumping sedum plant approaches the flowering stage, keep it erect by wrapping twine or a wire around it.

 Avoid tying the plant too tightly to prevent the wire from cutting through and injuring it. If you have the clumping types, you should consider planting them close by to ensure they support each other.

Pruning and Trimming

Sedum plants have beautiful flowers from the time they start budding to when they bloom fully. You can either choose to trim clumping sedums immediately after they bloom or let the flowers dry on the plant for fall colors. You can prune them at the onset of summer to prevent them from growing too tall. Some gardeners pinch them off at the growth point to give the plant a bushier look. However, doing that delays the plant’s flowering process. In spring, pruning is only necessary if the plant’s growth extends to unwanted areas; pruning at that time can cause your plant to rot.

Fertilizer

Sedums are generally low-maintenance plants and need just a little fertilizer. Sometimes, the 1-inch layer of compost mulch you put on the base of the plant may provide enough nutrients. This said you don’t want to take chances with your plant. Feed it with enough nutrients to get that strong and beautiful look. One month after planting, give the plant some fertilizer and ensure you keep feeding it after every three months. Ensure the fertilizer you use has equal amounts of potassium, nitrogen, and phosphorus.

basic gardening tools used
Even though these plants need just a little fertilizer, it’s still best to feed them enough to keep them strong and thriving

Propagating Sedum Plants

To propagate sedum:

  • Take cuttings from healthy new growth. You can use fresh or dried cuttings.
  • Use sharp pruners to remove about 1/3 of the stem below the node where you want to make the cutting. Cut off the lower portion of the stem just above a bud that has formed.
  • Fill a shallow tray with moistened peat moss.
  • Place the cuttings in the tray so that the nodes are facing down.
  • Cover the cuttings with plastic wrap. Allow the cuttings to remain undisturbed for one week.
  • After seven days, gently lift the plastic wrap and place the cuttings into individual pots filled with potting soil. The cuttings will root within three months.
  • You can also divide mature plants. Gently remove the roots from the parent plant. Fill a container with moistened peat moss. Plant the divided plants in their containers.

Pest and Diseases Associated with Sedum

Pests

The most common sedum-associated pests include aphids, spider mites, whiteflies, leafhoppers, thrips, mealybugs, slugs, snails, caterpillars, and ants.

  • Aphids cause stunted growth and yellowing leaves. Aphid infestation should be treated immediately with insecticidal soap.
  • Spider Mites cause web-like patterns on the undersides of the leaves. These tiny creatures suck the juices from the leaves, causing the wilting and eventual death of the plant. Apply a mixture of water and dishwashing liquid directly onto the affected areas. Repeat once per week until the problem clears up.
  • Whiteflies cause small, whitish spots on the underside of the leaves. Remove any infected leaves and destroy them. Spray the entire plant with insecticidal soap.
  • Leafhoppers cause small brown spots on the undersides of the leaves. Destroy all damaged leaves and spray the entire plant with insecticidal soap.
  • Thrips cause smudged, light green patches on the undersides of the leaves. Thrips can also attack the stems and buds. Destroy any infested leaves and spray the entire plant with insecticidal soap.
  • Mealybugs cause soft, sticky honeydew excretions on the undersides of the leaves. Mealybug infestation should be treated immediately with insecticidal soap.
  • Slugs and Snails eat the tender young shoots of the plant. To deter these pests, cover the base of the plant with an inch layer of mulch.
  • Caterpillars eat the foliage of the plant. To discourage this pest, keep your garden clean by removing fallen leaves regularly.
  • Ants damage the leaves of the plant by eating the sap. Keep ant activity under control by covering the base of the plant with an inch layer of mulch.
sample of a leafhopper
Sample of leafhopper found in succulents like sedums

Diseases

Sedums are susceptible to many diseases, including mildews, rusts, blights, and various viruses.

Mildews cause dark, fuzzy patches on the undersides of the leaves. Mildew infection should be treated immediately with fungicide.

Rusts cause reddish or orange spots on the undersides of the leaves. Rust is caused by fungi that live in the soil and infect the plant through wounds or injury. Rust can be prevented by keeping the soil well maintained and avoiding injury to the plant.

Blights cause blackened areas on the undersides of the leaves. It is caused by bacteria that enter through cuts or injuries. Remove and destroy infected leaves and spray the entire plant with a fungicide.

Viruses cause deformed leaves and stunted growth. Virus infections should be controlled by spraying the plant with insecticidal soap.

Looking for low-maintenance succulents to grow in your garden? Why not give the sedum a try. They not only give your garden a beautiful look but are easy to maintain and care for. They retain water in their leaves, roots, and stems, making them able to resist drought. Although they grow well in hot and dry areas, with proper care, they can bloom well in your garden no matter the weather conditions.

Amazing Facts You Didn’t Know About Lithops (Living Stone)

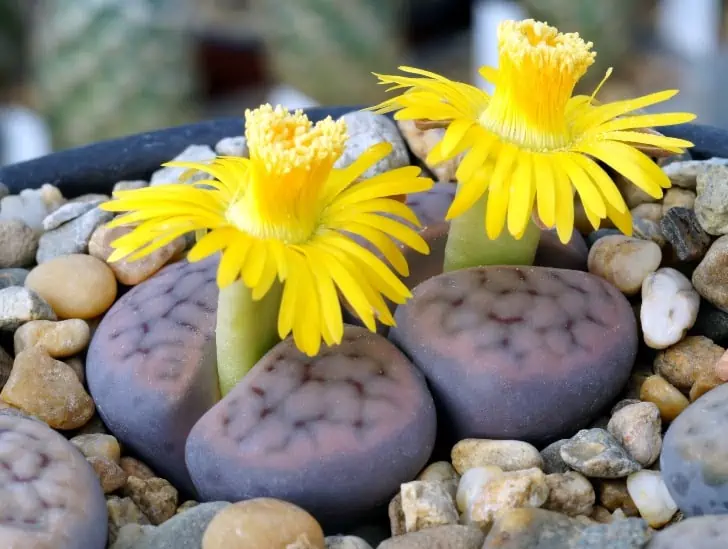
Lithops are small, stemless, succulent plants in the Aizoaceae family, indigenous to southern Africa. These strange-looking plants grow in two joined leaves resembling a pebble or craggy stone lying on its side. They can vary in color according to the species. This may range from yellowish-brown to gray, but all have the same general body plan due to convergent evolution.

So what are some interesting facts you may not know about Lithops? Instead of developing conventional flat leaves, lithops make small knobby and stone-like leaves (hence the name living stone). These plants look so much like stones that they wouldn’t look out of place in a gravel pit. They come in different colors and shapes. While some Lithops look like a pebble, others have the shape of a jelly bean. Its resemblance to stones helps Lithops blend in their surroundings. This edible succulent can live up to 50 years.

There are so many fun facts about this strange plant that will surprise you. This article will focus on some of these facts that make lithops so interesting.

1.    It is the world’s most camouflaged plant.

 The Lithops flower comes in all colors, but they are all tan to brown in direct sunlight. Their bodies are perfectly shaped for blending into rocks. The light color helps them blend in better in direct sunlight. If it’s too dark, they will close up their leaves to prevent water loss. They are mostly perfect for surviving in deserts because of this unique ability.

Lithops on the ground.
Their bodies are perfectly shaped for blending into rocks.

In their natural habitats in South Africa and Namibia, lithops blend in so well with the desert environment that they can be challenging to locate even for people with years of experience.

2.    They survive with little or no water

If you ask anyone who has tried to cultivate lithops, the worst mistake you can make is over-watering them (or watering them at all.) Lithops thrive in the desert conditions of Namibia, Botswana, South Africa, and some bordering regions of Angola.

The one thing these places have in common is the rocky ground and dry conditions. While a few lithops species require up to 600mm of rainfall to survive, most of them require near zero and survive on morning dew.

They also favor extreme temperatures and grow in areas where the summers are hot, and winters are freezing, except for one species located at the coast with moderate temperatures throughout the year.

3. Lithops were discovered in 1811

In 1811, John Burchell, an English explorer, naturalist, traveler, artist, and author, picked up a strange-looking pebble from the stony ground in South Africa. He quickly discovered that the “pebble” was a plant after all.  He initially named it Mesembryanthemum turbiniforme, and unfortunately, he didn’t document a detailed physical description to help us know what type of lithops it was.

Nowadays, the name Lithops turbiniformis is rarely used, although, for many years, it was used to describe what we now know as Lithops hookeri.

A colored brown lithops with stones.
The one thing these places have in common is the rocky ground and dry conditions.

Several more lithops discoveries were documented as Mesembryanthemum species until 1922, when Nicholas Edward Brown split up the genus based on capsules. Lithops was then conceived and had numerous species that continued to be discovered in the decades that followed. However, the findings between different researchers were so diverse that they could not agree on the relationships between them and what clusters could be named as species. Thus, by the 1950s, little was still known about lithops taxonomically.

This changed when Naureen and Desmond Cone began to study Lithops. They discovered almost all their natural habitats and collected more than 400 samples from different lithops populations. Then, they documented them, assigning them individual identities known as the Cole number, which is still used today. Their studies culminated in a definitive book (Lithops: Flowering Stones) in 1988, which details all the species, subspecies, and varieties of the plant.

There are at least 38 species of lithops and 145 varieties. They all mostly look similar, only differing in color, markings, and texture of the body. They come in various colors, including pink, rust, brown, green, and gray. They also have a vast variation in lines, patches, and dots on the upper surface, which help them with camouflage by hiding most of the leaf surface. They could also be dimples or indentations where these markings appear.

Because of their amazing camouflage abilities, new Lithops species continue to be discovered, with the latest discovery being as recent as 2006.

4. Lithops can live up to a 50 years

Lithops grow very sluggishly and can take up to 3 years to flower. However, because of their ability to store water for months and little need for maintenance, lithops can live for up to 50 years in their natural habitat.

As a matter of fact, you can keep healthy lithops in the same pot for more than 15 years with little water and 4 to 5 hours of direct sunlight every day. Lithops are unlike most succulents in that they don’t have stems. However, their flowers bloom with a short stem.

A blooming flower of lithops.
Their flowers bloom with a short stem.

They flower mainly from March to May in the Southern Hemisphere. All lithops are noonday flowering plants, which means that they flower at noon when the sun is shining the brightest.

5. Lithops are edible

Lithops are nonharmful to humans and pets. As a result, they are popular house plants. What most people don’t know, however, is that lithops are used as a source of food and herbal medicine in some parts of Southern Africa. There are also stories of children in the Namib desert chewing lithops to hydrate in the desert heat.

However, just because they’re safe doesn’t mean you should eat them. They aren’t too tasty anyway.

6. The name lithops comes from a Greek word

These plants belong to the plant family Mesembryanthemaceae (Aizoaceae). Nicholas Edward Brown named Lithops from two Greek words, lithos (stone) and opsis (like), for their deep resemblance to stones. The word lithops is used to describe the plants in both singular and plural forms. Local African names where lithops are found include skaappootjie and beeskloutjie, which mean cattle and horse’s hoof, respectively, for their resemblance to hoof-prints.

7.   Lithops are self-sterile

This fact means that they must be pollinated to produce seeds. The seeds are contained in a hydrochastic 4-8 chambered fruiting capsule. The capsules only open when exposed to moisture, revealing tiny seeds.

In their natural habitat, rain opens the capsules and splashes the seeds up to an inch from the mother plant. Once they dry, the capsules close to protect any remaining seeds for the next rain.

How to take care of lithops

As we’ve already established, lithops are popular plants to cultivate at home. While they are naturally found in Namibia and parts of Southern Africa, their seeds are found in many stores and even online.

Lithops are relatively easy to maintain. However, there are a few mistakes you can make in their care and kill them. Here are a few things you should do when growing them.

Light exposure

Lithops are desert plants, so you can bet they require some sunlight to survive. There is nothing like “harsh sunlight” with these plants, so feel free to place them where there is no shade. A South or East window with lots of sunlight is the best place to have them, but remember that insufficient sunlight might cause lost patterns and elongated leaves.

Lithops exposed in the light.
Too much heat can cause sunburn and damage your lithops’ foliage.

Although too much sunlight is not an issue, too much heat can cause sunburn and damage your lithops’ foliage. Ensure you place them in less sunny pots or cover them up if you realize that the pots absorb too much heat in the summer.

Best temperatures

Lithops can tolerate temperatures of 90 to 100 degrees Fahrenheit. However, they are likely to be most healthy in temperatures between 65 to 80 degrees Fahrenheit.

Since the plant may develop rot, it is essential to protect it from extremely low temperatures. Therefore, carry it indoors when the temperatures drop to less than 40 degrees Fahrenheit.

Soil requirements

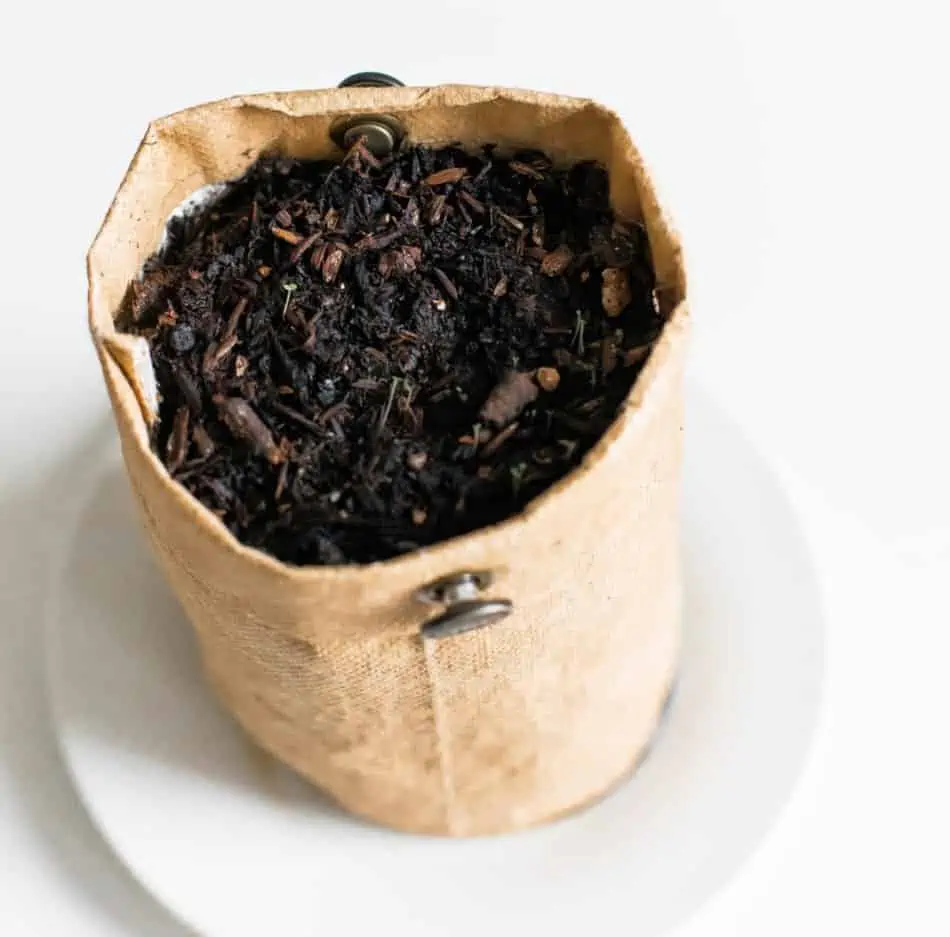
Lithops require to be planted in fast-draining potting soil. They grow even better when they are planted in a cactus mix. Pebbles, sand, and anything gritty can be added to the soil to enhance drainage.

Watering lithops

Because these plants can store water in their leaves for months, using the wrong watering cycle can lead to their death.

To avoid this, you should water them once a fortnight at most from the end of summer, when the plants are actively growing. During winter, it’s best to leave them without water as it is their dormant season when they are reserving the water in their leaves. Watering them in this period will harm their growth.

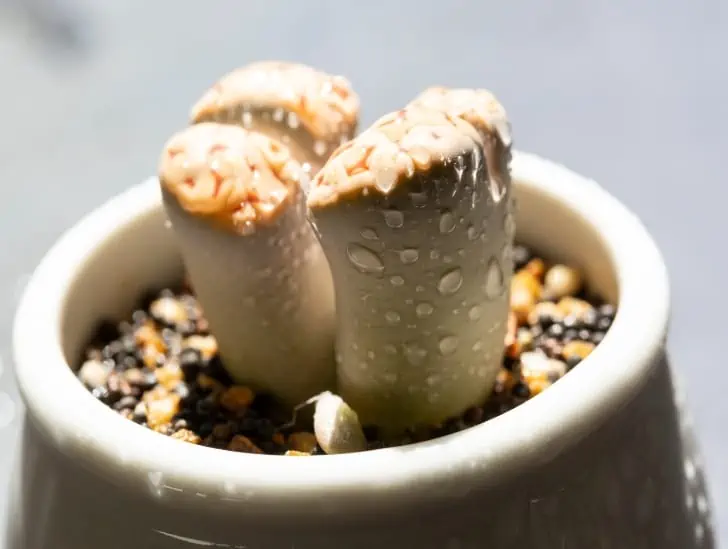
A lithops freshly watered.
One way to determine if it’s time to water your lithops is by observing their physical conditions.

Apart from the watering schedules above, another way to determine if it’s time to water your lithops is by observing their physical conditions. For example, if you notice that they have started to pucker, wrinkle or appear to be sunken in the pot, it might be time to water them.

To wrap it up

Lithops are arguably the most intriguing succulent plants. They look like stones but bloom the most colorful flowers. They also survive in harsh conditions and live up to half a century.

Snake Plant Care 7 Essential Tips for Beginners

The snake plant is a low-maintenance houseplant that can be used as an alternative to traditional plants. It’s also known as Mother-in-Law’s Tongue, and for good reason: it has long, slender leaves that resemble the tongue of a snake!

And though this plant might not look like much at first glance, it packs some pretty cool benefits. For those looking to purchase or grow their own Snake Plant (Sansevieria trifasciata), we have 7 essential tips to help you grow the plant as a beginner.

So, what are the essential growing tips for snake plants as a beginner? Becoming an expert at snake plant growth and care starts with picking the right varieties. Ensure you have done proper propagation, drainage, and placing it under natural low light.

Look out for common pests like mealybugs and aphids while ensuring proper watering to avoid root rot. Picking suitable indoor varieties based on your region’s temperate zone is also helpful.

Looking to plant the sake plant at home for the first time but not sure what to expect? This article will help you get started with Snake Plant (Sansevieria trifasciata) care and propagation.

1.    Picking Ideal Snake Plants For Indoors

Snake plants can be grown outdoors, but they thrive best indoors. If you’re looking to grow snake plants indoors, pick up a low-light requirement variety that you can place in your living room. Growing snake plants indoors requires high humidity and good air circulation, so find a spot near a window or vent.

As a rule of thumb, the larger the leaf, the higher the light requirement it has. This means that a plant with large leaves will thrive in brighter rooms while smaller-leafed varieties can survive in darker spaces.

Snake Plants with larger leaves require a brighter environment to thrive.

When positioning your snake plant indoors, consider possible contact with children or pets. Ensure the plant is out of reach, especially with children and pets to avoid the risk of poisoning. You should also avoid placing your snake plant next to a radiator as the heat will dry out its soil and scorch its leaves.

A common snake plant variety can grow in low-light and bright light conditions, making it a good choice for beginners who are unsure about the amount of sunlight their living spaces have to offer. These plants do best in rooms that get medium or indirect sunlight exposure, but they will also survive in shades.

2.    Best Propagating Practices for Snake Plant

Once you have your ideal indoor snake plants, it’s essential to propagate them before they become overcrowded in their pot. One of the best ways is to divide up an overgrown clump into several separate plants by cutting through its roots with a sharp knife. This will help ensure that each new snake plant has its own space to grow big and strong.

Alternatively, you can propagate snake plants by using leaf cuttings. Here, you simply take a leaf from an existing plant and place it in a moist, soilless potting mix. Make sure the bottom of the cutting is touching the soil. Roots will grow along their underside, providing you with new snake plants to love!

To propagate a Snake Plant, either divide up an overgrown clump or use leaf cuttings instead.

3.    Troubleshooting Snake Plants

Snake plant care for beginners also extends to looking after its unique traits, such as its ability to store water within its leaves and roots. Overwatering is one of the main reasons your snake plant will die over time, so make sure to keep the soil moist but not wet.

If you notice your snake plant is not doing well as expected, check for root rot or fungal damage signs. These can be identified by black, dried-up leaves falling off the plant and/or mushy roots covered with dark brown spots.

If you notice any issues like these, it’s time to take action! For example, if there is a problem with its drainage system, repot the plant with fresh soil in a larger pot. If too much water is surrounding its roots, simply take out some of the excesses and let it dry up before re-watering.

4.    Pot Drainage

Another important factor in snake plant care is ensuring that your pot has proper drainage, which will prevent root rot or fungal diseases from taking hold of your new friend. Any good quality potting mix should have enough aeration for roots to breathe properly, so it’s important to avoid those that contain peat moss.

Additionally, it is best to repot your snake plant into a pot with several drainage holes at the bottom so water can drain out properly and not sit around its roots for too long. Unlike most other succulents, the snake plant can store water in its roots, so it can survive for several days without water. This means that you will want to avoid having wet soil sitting around the plant’s root system at all times.

As Snake Plants store water in their roots, it is essential to plant them in containers with several drainage holes.

5.    Light Requirements

Snake plants are low-light requirement varieties that make them perfect houseplants for a variety of homes, from apartments to dorm rooms. For best results, avoid extreme light levels such as those found in direct sunlight. Instead, place your snake plant near a window where it will receive bright but indirect light throughout the day.

Snake plants can tolerate prolonged shade but will do best under filtered, strong light. For starters, any spot that allows your snake plant to receive bright, indirect sunlight for about six hours a day should suffice.

If you have a naturally low-light home or apartment with minimal windows and no direct light source, try placing it by an artificial grow light on the lowest setting instead. Snake plants prefer warm temperatures between 70°F (21°C) and 80°F (27°C), but they can survive in temperatures as low as 40°F (40°).

6.    Dealing With Pests and Diseases

Since snake plants are known for their durable leaves, they’re often used as natural insect repellent. However, this doesn’t mean that pests won’t try to get inside your snake plant at some point or another. If you notice any bugs on your new plant, use a cotton swab or an old toothbrush to gently remove them from its leaves.

Nutritious soil and proper watering will protect your Snake Plant from pests and diseases.

Your snake plant should be safe in terms of diseases and other problems as long as you keep it healthy with nutritious soil and proper watering practices. Unfortunately, snake plants are not immune to fungal infections or common houseplant bugs like spider mites, aphids and mealybugs.

These can be identified by their webs or by seeing them carried around your plant. If these are spotted, use insecticidal soap to kill off the insects. If you do notice any signs of disease, such as black spots or leaf drop-off, promptly take action to remove the affected leaves and roots.

7.    Popular Snake Plant Varieties

Not all snake plants are created equal. Each of these has their own unique features that make them perfect for different homes. Among some of the most popular options for growing as indoor plants include:

Common snake plant (Dracaena trifasciata) – This is often considered a classic option for those looking to grow as indoor plants. These have long, narrow green leaves that are serrated and connected by multiple stems.

Bird’s nest snake plant (Dracaena trifasciati ‘Hahnii’) – This snake plant type features short dark-green leaves with a white stripe down the center.

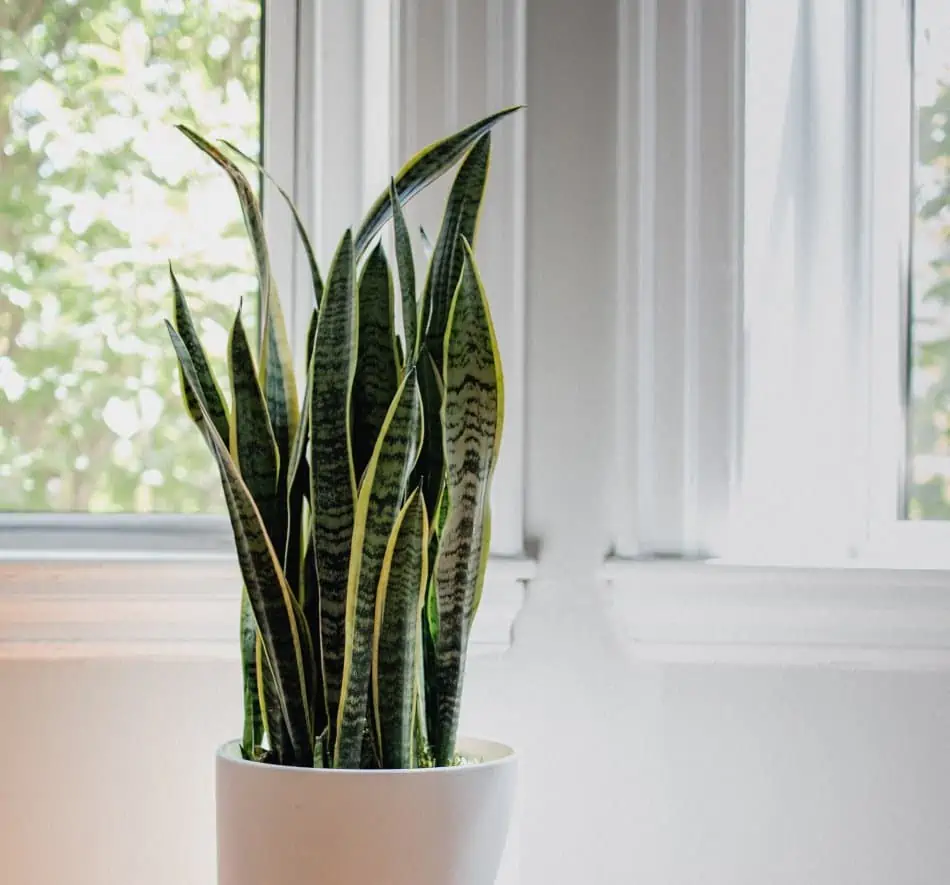
Variegated snake plant (Dracaena trifasciata ‘Laurentii’) – This type is noted for its unique foliage which features short dark-green leaves with a yellow or cream-colored striping from top to bottom of each leaf.

Cylindrical snake plant (Dracaena cylindrica) – This type stands out with bright-green leaves that are narrow and tall, often growing up to eight feet in height.

Moonshine snake plant (Dracaena trifasciata’ Moonshine’) – This snake plant’s foliage features short dark-green leaves with a yellow striping from top to bottom of each leaf.

Most snake plant varieties thrive in soil that has a pH range of around five to seven, so it’s important to test the acidity levels in your potting mix before planting. While most varieties prefer moist but well-draining soils with minimal water retention capacity, they also like their roots and crowns to be slightly on the dry side. Pick a medium that provides the snake plant with just enough moisture for its needs without letting it get soggy and wet.

Conclusion

The snake plant can be a great addition to your indoor garden. However, this can only be possible if you have the right snake plant care information. This unique succulent houseplant stands out with its grassy leaves and is known for thriving in low-light conditions.

As a beginner, you may want to focus more on getting it right the first time as this will determine how best you will fair for subsequent care planting regimes. With these tips, you should have a better idea of how to care for your snake plant even if you are new to this.

Aloe Vera Care 10 Essential Tips for Beginners

Aloe vera is a plant that everyone desires to have in their home garden. This plant is not only beautiful but also serves many great benefits. It serves as a natural treatment for sunburns, skin allergies, and rashes, etc. But before you can get all these benefits at the comfort of your home, you have to learn how to care for your aloe vera plant.

Well, the good news is that the aloe vera plant isn’t too demanding in terms of care needs and is a beginner-friendly plant. The plant needs moderate watering, a perfect container, full sunlight, well-draining soil, and good feeding from time to time. You also need to protect your plant from pests and diseases that might interfere with its growth.

If you’re growing aloe vera for the first time, you need to have a deeper understanding of how to care for this precious plant. Below are more detailed tips you need to know about caring for the aloe vera plant.

1. Alow Vera Prefers Being Dry

This plant is from the family Asphodelaceae. Aloe vera loves a warm climate and hates cold weather. Thus, in northern climates, it needs a place with lots of sunlight to grow well. Avoid using overly moist soil while growing aloe in pots because this can rot root tips and lead to the development of fungus.

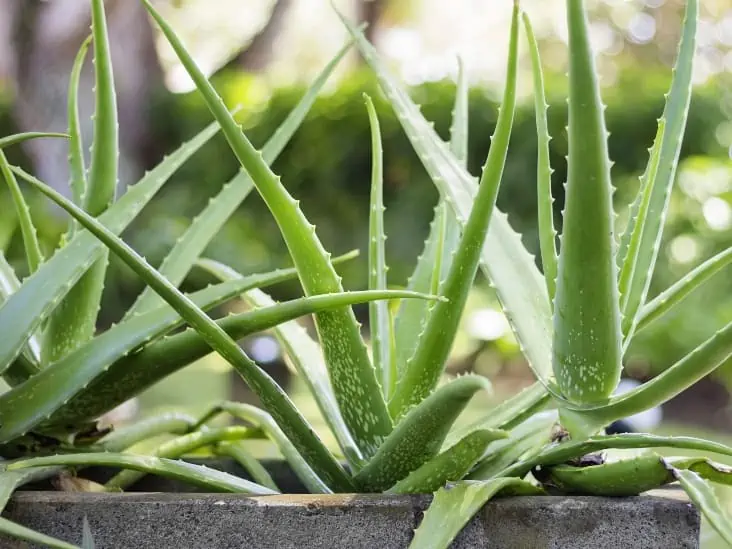
Aloe Vera plant
As Aloe Vera loves dry climate, it should be placed in a sunny spot.

The worst sin you can make against your aloe vera plant is overwatering. This can rot the tender roots and damage them. In addition to this, it will also make the plant grow slower. Along with maintaining the proper moisture level in your aloe vera care routine is knowing when to water it. The best time for watering these plants is early morning or after 4 pm. Water your plant when you notice that the top 2-3 inches or so of soil are dry.

2. Container Gardening Is Perfect For Aloe Vera

If you’re just planting your first aloe vera plant, you should know that this plant prefers being grown in a container. This is a sun-loving plant, and therefore, you should place it in a location where it can get plenty of sunlight. You can use a pot that has ample drainage holes to prevent root rot from occurring.

To choose a pot for your container, keep in mind that aloe vera plants grow up to 1 foot tall and about 2 feet wide. So ideally, a pot with dimensions of 18 inches (height) x 12 inches (width) is perfect for your aloe vera plant.

3. Aloe Vera Loves Sun

Aloe vera grows well in full sunlight. A minimum of six hours a day is recommended for aloe plants growing indoors. Use a room with lots of sunlight and place the plant near the window or a place to capture sunlight directly. Avoid using fluorescent lighting as your light source because this will not give out enough heat to support aloe vera growth.

Aloe Vera should receive at least 6 hours of sunlight per day.

4. Take Care of the Soil

You can use a loose, well-draining soil mix, or you can add sand to your regular potting soil to aid proper drainage and aeration. You may also consider adding perlite, peat moss, and rotted pine bark without nitrogen fertilizer. These substances will help retain water and prevent the soil from becoming too crusted.

If you live in a cold climate, make sure to use only sterilized potting mixes because the spores of certain fungi can kill your plant. If you manage to provide the perfect soil for your plant, it will grow happy and strong in your home.

5. Feeding Aloe Vera Will Benefit It

Fertilize aloe vera once every 1-2 months using an age-appropriate fertilizer. Only use 1/4 strength when it comes to fertilizing aloe vera plants growing indoors. This plant is sensitive to salts and other harmful elements, often found in fertilizer at full concentration.

Consider fertilizing your Aloe Vera every 1-2 months.

If your potting mix does not contain nutrients, you can add slow-release fertilizer granules directly to the soil once every six months. However, remember not to over-fertilize aloe vera plants. Also, avoid fertilizing during wintertime.

6. Pests and Diseases

Aloe vera is not prone to many pests or diseases, but you can occasionally see mealybugs on the stem of the plant. The sticky sap that oozes out of aloe vera can trap these insects. Use 90% rubbing alcohol to remove them from your plant.

Mealybugs can be deadly to aloe vera plants, so you should always remove these pests when they are spotted. Aloe vera can also develop powdery mildew, a fungus-like disease that appears when the plant is dried out or overwatered.

You can control this by removing dead tissues and leaves from the plant when it gets wet for too long and ensuring that the plant has enough water. You should also avoid overhead watering in cold climates when aloe vera is not growing actively.

7. If You Have Sick Plants, Separate them From the Healthy Ones

No matter how well you take care of your plants, pests and diseases can still find their way to your aloe vera plant. If you identify that one or some of your aloe vera plants are sick, you should immediately isolate them.

It’s always a good idea to separate sick plants from healthy ones. This will prevent the spread of insects, fungus, and other pests that could damage or kill your aloe vera. When you have a large group of aloe vera plants growing well together, you can transfer only the weaker ones to another location so they can later be brought back to their original group after being restored.

8. Aloe Vera Doesn’t Like Cold

If you’re going to grow your aloe vera plants outdoors, one thing you must consider is the climate in your area. Aloe doesn’t like cold weather. If your climate is too cold for aloe vera plants, make sure to plant them in a pot or container. You should also remember to bring them indoors when the temperature drops below 60 degrees Fahrenheit.

Make sure you determine the zone you live in, so you can take better care of aloe plants in your garden. Aloe veras will thrive in zones 8-11, but they will die in colder or warmer than these zones.

9. Transplanting

You can transplant your aloe vera plant when it gets too big for its pot, and it’s about two years old. You may also consider dividing the bigger plant into smaller ones and then putting them in new pots to enhance propagation.

You should repot your Aloe Vera when it is too big for the pot, typically at the age of 2.

You can also consider repotting your aloe vera when the potting soil starts to break down. You may choose to replace the potting mix every two years or so if you want to keep your aloe vera healthy and thriving.

When repotting, ensure you choose a pot 2 inches bigger in diameter and 1-2 inches deeper than the previous pot. Also, ensure the pot drains and has proper aeration.

10. Propagating

Aloe vera plant propagation is not difficult, and you can do it by simply planting a leaf cutting in potting soil or even directly into the garden if you want to start over with another plant. Aloe vera cuttings will grow roots in about two weeks’ time, but aloe vera leaf cuttings are different. They can root in about three to four weeks. You have to be patient with them because it also depends on the humidity and temperature of your environment.

To propagate aloe vera, cut the tip of aloe vera leaves and let them air-dry for one day. Make sure you keep them out of direct sunlight, so they don’t dry too fast. Fill a pot with the moist, sterilized potting mix, then place the cut end into it. You can place the leaf with its cut end up or down. Keep the pot in an area that gets lots of sunlight and let it sit for about two weeks to sprout before moving it to another location.

Aloe vera propagation is comparatively easier than other plants because it doesn’t need pollination, rooting hormones, or water stress for propagation. All you have to do is follow very simple tips.

Aloe Vera plant

Related Questions

Can you regrow aloe vera from the leaf?

You can’t regrow aloe vera from a leaf, but you can grow a new plant from an aloe vera leaf cutting. However, you should know that aloe vera leaves have a lot of water and chances of rotting when you put them in a pot. So, you should always allow an aloe vera leaf cutting to dry up for 1-2 days before planting it.

How do you cut aloe vera without killing it?

The best time to cut an aloe vera leaf is when it’s new yet mature growth. You can also cut an aloe vera leaf when it’s halfway through the plant’s cycle, but you have to be careful not to damage the sap channel for each of these leaves too much so they don’t rot.

Should you water aloe vera from the top or bottom?

You may water the aloe vera plant from the top or bottom, but it’s best to water them from the bottom. You should allow this plant to sit in its soil without any moisture for at least 2-3 weeks before watering it again.

Summary

Aloe vera is one of the best succulents you can grow in your garden, but only if you know how to take care of it. Planting aloe vera in the right soil types and providing it with the right amount of sunlight is essential for healthy growth and optimum production.

Aloe veras are one of the three leading succulents used worldwide because of their medicinal properties. So, if you take good care of it, you’ll no doubt reap great benefits from this plant.

Ultimate Guide: How to Care for A Jade Plant

Succulents have enjoyed a rise in popularity over the past few years, with Jade plants being no exception. These plants are fairly resilient and relatively easy to grow indoors and outdoors since they are long-lived.  With just a little care, they can grow to between three and six feet tall, albeit slowly.

So, how do you care for a jade plant? Jade plants are mostly grown as indoor plants but will benefit greatly from being moved outdoors during summer since they love a lot of light. The plant requires at least six hours of light every day to thrive.  You also need to ensure the potting mix you choose for your jade plant is a succulent-specific blend with good drainage. Water your plant more often during summer but reduce the watering during the cold winter months and feed it with controlled-release fertilizer at the beginning of the growing season.

In this guide, we go further into outlining the most important things you need to do to keep your Jade plant happy throughout the year.  Keep reading to learn everything you need to know.

A Brief Overview of the Jade Plant

Jade plant is a succulent that is mainly grown as a houseplant. It has fleshy, oval-shaped leaves and thick, woody stems resembling tree trunks.  The plant is native to South Africa, where it is believed to bring luck and good feng shui to its owners.

With its miniature tree-like appearance, the jade plant is mostly used as a decorative houseplant.  Since it can survive for many years, the plant is usually passed down from generation to generation.

The jade plant is well adapted to growing in relatively warm and dry conditions in most homes. However, it is still important to keep it well watered during spring and summer when it is actively growing.

The Jade Plant is one of the most popular succulents that brings luck and good feng shui.

Like other succulents, it is crucial to let the soil dry completely between watering since the plant is highly susceptible to stem and root rot.

If you live in an area that experiences a mild, dry climate throughout the year, you can grow Jade plants outdoors as landscape plants. But, you can’t do so in areas that experience extremely low temperatures during winter since these succulents are highly susceptible to cold damage.

Homeowners with pets must be careful where they position their jade plant in the house since all parts of the plant are toxic to dogs and cats.

How to Care for Jade Plants

The truth is that jade plants are generally less demanding and easy to grow. The most important thing you need to keep in mind is that these succulents are highly susceptible to too much moisture and some diseases.

Like all the other succulents, overwatering a jade plant can be fatal. That is why it is critical to keep the soil dry between watering sessions and do everything possible to avoid overwatering your plant.

Below are some of the essential jade plant care tips you need to know to keep your plant happy throughout the year.

1. Growing Area

As mentioned earlier, these plants can be grown as either indoor or outdoor plants. But you should only consider having them as outdoor plants if you live in an area with favorable climatic conditions (no snow falls or freezing temperatures during winter).

Indoor jade plants benefit greatly when moved outdoors during spring and summer. The additional sunlight during these seasons results in increased growth, color, and vigor.

Ensure you move your plant to a safe area such as your porch or patio area that receives direct sunlight, acclimating the plant slowly to prevent shock and sunburns.

Always bring it back indoors in the fall when nighttime temperatures start dropping to below 50oF.

2. Light Requirements

Jade plants are succulents and love a lot of light, especially when they are still young. So, a jade plant needs to be exposed to indirect sunlight for at least six hours to thrive. However, you need to keep your plant away from direct sun rays to prevent sunburns.

Although Jade Plant requires plenty of light, it should not be exposed to direct sunlight.

Harsh light can easily scorch young jade plants or cause the leaves of older plants to turn red. The spots are permanent unless you prune off the affected areas and allow new growth to replace them.

During fall and winter, when there is no plenty of sunlight, you should consider using artificial lights to keep your plant happy. Ideally, the best place to position your plant is on the south-facing window if you live in the northern hemisphere.

3. Water Requirements

During the active growing season (spring and summer), you should consider watering your plant more often so that the soil is moist but not wet.  As long as you use the right type of succulent soil and your container has plenty of drainage holes, it shouldn’t be difficult to keep the soil moist.

However, you need to reduce the watering frequency during winter because the plant goes into dormancy. During winter, consider watering your jade plant once or twice a month.

The best way to water your jade plant is by letting it sit in a saucer of water for a few minutes and pour off excess water from the container after a few minutes.

You can also water from the top and only stop when the water starts pouring out of the draining holes at the bottom of the growing container. That is an indication that the soil has soaked well.

Allow the soil to dry completely before you water your plant again. Always scoop the top two or three inches of the topsoil and feel it before watering your plant. If it feels moist, don’t water.

4. Soil Type

Jade plants require good drainage to thrive and overcome potential root rot.  Typically, they will do well in native soils that are sandy or rocky. For houseplants or outdoor garden plants, ensure you use a well-draining succulent potting mix.

Add an equal amount of perlite or pumice to regular soil to improve drainage and prevent excess moisture from accumulating. The soil should have a neutral or slightly acidic pH level.

Jade plants do well in sandy or rocky soil that offers sufficient drainage.

Alternatively, you can house your jade plant in a clay or terracotta vessel to help with extra moisture from the soil. Keep in mind that poor drainage will lead to root rot hence killing your plant in no time.

5. Repotting Jade Plants

These succulents don’t mind being root-bound in a relatively small growing container. In fact, keeping them root bound in a small pot will only make the plant smaller and more manageable.

Ideally, you should consider repotting your plant every two or three years to encourage growth. However, older jade plants can be repotted every four or five years.

The best time to re-pot is during spring, just before the growing season kicks off. Avoid watering your plant after repotting for at least one week, and wait for at least one month before you feed it with fertilizer to avoid burning its roots.

6. Fertilizer Requirements

Many people think that jade plants don’t require fertilizer to thrive, which isn’t the case. In fact, if you underfeed your plant during the growing season, it won’t grow as expected.

Fertilizing your Jade Plant during the growing season will help the succulent thrive.

To keep your plant healthy and happy, feed it with a controlled-release fertilizer at the start of every growth season or maintain a weekly feeding schedule using a liquid fertilizer solution.

Use a balanced 20-2-20 plant fertilizer at quarter strength on mature jade plants and fertilizer with less nitrogen on the young plants.

7. Pruning

The only time you should prune a jade plant is when you see dead/dying or shriveled branches. If that happens, simply snap off the affected branches and let new ones grow.

The good thing about these succulents is that they are highly forgiving and will always develop new growth wherever you cut them.

You can also prune if you want to get rid of sunburn spots or shape your plants to create beautiful scenery.

8. Temperature and Humidity

Jade plants will generally do well in temperatures ranging between 65oF and 70oF. But it doesn’t mean that these plants can’t handle cooler temperatures completely. During winter, they can handle temperatures of 55oF to 60oF.

Never keep a jade plant in temperatures below 50oF for a prolonged time because they are highly susceptible to cold damage.

If you start to notice white spots on your plant, it could be a sign of exposure to extremely low temperatures. Like sun damage, cold damage is permanent, and the only way of getting rid of it is through pruning.

9. Propagation

Jade plants can easily be propagated through a leaf cuttings, stem cuttings, or offsets. Stem propagation is quicker and has a relatively higher success rate.

For leaf cuttings, start by selecting a healthy leaf on your plant. Gently remove the leaf from the stem, ensuring a clean break.

Allow the leaf to callus over for a few days to prevent rot before placing the callused leaf in well-draining soil. Water sparingly until roots and new growth appear, then transplant the new plant to its new home.

Propagation through stem cutting is quite similar to propagation through leaf cuttings. Start by choosing a healthy stem and cutting it into sections, each containing several leaves.

Allow the cut ends to air dry and callus over before you plant the stem sections in well-draining soil, burying them slightly.

Water sparingly until roots develop and new growth emerges, then transplant them into individual pots.

You can also propagate jade plants through offsets. Carefully separate the offset from the main plant, ensuring it has roots attached. Plant the offset in its own pot with well-draining soil and water it lightly as you monitor its growth rate.

Consider propagating during the warm months and ensure that the leaf or stem cutting you use is healthy and disease-free.

10. Pests and Diseases

The jade plant is highly susceptible to mealybugs, aphids, spider mats, and scale insects. Mealybugs cluster on the undersides of the leaves and along the stems. They feed on the plant’s sap, causing wilting and yellowing of leaves.

You can remove them manually using a soft brush, or a cotton swab dipped in alcohol. Regularly inspect your jade plant for early signs of infestation.

Aphids feed on the sap of jade plants and can cause leaves to curl and turn yellow. The best way to deal with aphids is by spraying the affected areas with a mixture of soapy water (a few drops of dish soap in water) or using neem oil.

Spider mites usually spin fine webs and can cause stippling, yellowing, and leaf drop. Use a strong jet of water to dislodge spider mites.

Frequent misting can also help prevent infestations. If the issue persists, consider neem oil or insecticidal soap.

Common diseases that affect this succulent include root rot and powder mildew. Root rot is commonly caused by excessive watering, and symptoms include wilting, yellowing leaves, and a foul odor from the soil.

Final Thought

Caring for a jade plant is relatively simple.  Although these plants are slow-growing, they can mature into a beautiful jade tree that adds beauty to your indoor space or outdoor plant garden.  Take time to learn your plant’s needs, and everything will be fine.  

Ultimate Guide: How To Care For A Desert Rose?

Caring for a desert rose requires having an accurate knowledge of different aspects of the plant. Desert rose is a succulent plant native to Africa and Arabia. Taking care of a Desert Rose will ensure it blooms at least once a year. 

A desert rose is a small flowering succulent plant with a large bulbous stem, green foliage with red, pink, and white flowers. It has a succulent stem native to dry climates, storing water in the stem for dry seasons. The plant can help decorate your porch, garden, or interior in spring or all year round if you live in an all-year climate. 

You can enjoy its showy flowers after it has dropped its leaves in the summer to warm up the house in bright colors. 

The botanical name for the desert rose is  Adenium obesum, and it is also called  Japanese frangipani, Sabi Star, Dwarf Bottle Tree, Impala Lily, and desert azalea.

How to Plant

Adenium is a rare species of plant that you can use seeds or stem cuttings to propagate. The best way to propagate the plant is through stem cuttings. 

You have to let the stem cuttings dry out before planting, and if you see some sprouts on the stem cutting, it is ready for planting. The best time to plant is during spring or summer when there is enough light. 

However, you have to keep them filtered from the light until they begin to grow.

You can propagate a Desert Rose via seeds or stem cuttings.

What You Need to Plant a Desert Rose

  • A small plant pot
  • A rooting hormone powder
  • A healthy Desert Rose
  • Clean, sharp pruners or shears
  • A rooting medium like perlite or soil (mixture of  sand and potting soil)

Planting Procedure

  1. Select a healthy branch on the mother plant 
  2. Cut a six-inch tip cutting from the end of the branch
  3. Give the cutting time to callus by leaving it in a shade
  4. Once the stem has callused, fill the pot with a rooting medium and moisten slightly
  5. Cut the end and dip it in a rooting hormone
  6. Plant the cutting so that it is just below the soil
  7. Keep the soil moistened and in bright light while you mist the plant daily for about two months till the roots appear

Growing Conditions

From the shrub’s name, it is easy to deduce that a desert rose is native to dry and hot climates. Hot and dry climates with perennial rainfall are the plant’s optimum growing conditions. 

The ideal growing temperature for the flower is 40° F (4°C) to 90° F ( 32° C). You can grow the flower in your garden if you experience a relatively dry climate in the area.

The warm temperature needs of the ornamental garden plant make it a trendy plant in USDA zones 10 and 11. Japanese frangipani can’t withstand cold weather and may wither during winter. 

When you want to curb this shortfall, you can plant it in a pot and keep it indoors where the temperatures are ideal. The potted plant or potted bonsai can be moved outside during summer. 

If you grow the plant indoors in cold climates, get a south-facing window to let the plant have an ideal dose of sunshine. That said, you should limit the amount of sunshine received by the plant to prevent scorching of the foliage.

In warm climates, it is advisable to keep the plant outside in sunny spots during the afternoon from spring to autumn as long as there are warm nights temperatures. Desert roses are sensitive to climate changes; hence you have to acclimate the plant to sunnier conditions in spring and debug it before bringing it to winter.

Desert roses are accustomed to desert soil which is always either sandy or well-drained. Using the plants in well-drained sandy soils helps them grow faster and reduces losing some of the foliage due to soil clogging. 

If the soil is too wet, it can also promote the rotting of the plant. Also, give it a healthy amount of sunlight to help it absorb water.

Watering

All plants need water, but the amount and frequency of the watering differ greatly depending on the origin of the plant. Adeniums are very sensitive to water, and improper watering can easily kill these plants. 

The plants have adapted to the tropical desert weather that allows them to grow during the rainy season and become dormant in the dry season.

The plant is part of the succulent family that stores water in the leaves, stems, or roots. In the desert rose, the water is conserved in its bulbous stem called the caudex. A fat stem indicates that the Sabi star is healthy, while a thin one is a cause for alarm and a reason to increase moisture. You should match the watering needs of the plant to the different seasons of the year.

The watering needs of a Desert Rose depend on the season and climate.

Armed with its desert survival tricks, a desert rose is a plant that needs moderate amounts of water and should only be watered when the soil feels dry.  You can test how dry the soil is by inserting your finger in the soil. Always use a quick draining pot to reduce clogging. 

Saturate the soil until the water drips from the bottom of the pot and empty the pot drip tray after each watering

The plant should be watered in spring and summer, but the water level is reduced during autumn and winter. You can water the desert once every two to four weeks so that it can become dormant. The dormancy helps the plant flower in springtime.

Adding Fertilizer

A desert rose is a low-maintenance plant that does not need lots of fertilizer. Good fertilizer application goes a long way in ensuring that the outdoor plant will blossom well in summer and spring. 

A good regimen should be to fertilize the plant twice or thrice in spring and summer with a balanced mix of all the major nutrients. All the fertilizers used should be water-soluble.Indoor Adeniums should be fed weekly with a water-soluble fertilizer diluted to half strength. Phosphoric fertilizer and bone meal to boost the bloom. 

Using the right fertilizer for your Desert Rose will promote the formation of flowers.

Use high nitrogen granules in early spring with a slow-release in June and before November. Slow-release fertilizers are often coated with polymers that allow them to release nutrients for at least eight weeks; some fertilizers may even release nutrients for up to twelve weeks. 

The recommended usage for the fertilizer is 20-20-20 balanced nutrients containing Nitrogen, Phosphorus, and potassium.

Pruning

A desert rose has a healthy amount of foliage that can become problematic if not taken care of, sometimes becoming long and leggy over time. 

Some overstay branches may also be infected with diseases or infested by pests that simple pruning can help control. While pruning is possible all year round, a flush of new growth is susceptible to cold weather damage; hence the best time is early spring before the plants start blooming.

Pruning away long and leggy branches of a Desert Rose is essential for the succulent to thrive.

Pruning away long leggy branches encourages the growth of more flowers. The pruning procedure is quite simple:

  1. Sterilize the cutting blades before pruning them by wiping them with a 10% bleach solution or rubbing alcohol. If you cut deceased growth, then sterilize the blade between each cut. 
  2. Remove cold damaged growth whenever new growth appears in late winter or early spring. 
  3. Prune branches that cross or touch other branches avoid cutting old branches as they may have buds or blooms.

Pest Control

A desert rose is pretty hard and poisonous to humans, dogs, and cats, yet it attracts pests such as scale, mealybugs, and spider mites. 

You can use a cotton ball washed in alcohol to wash away the insects. If caterpillars have infested the plant, shear away infested leaves and freeze infested parts for a day to clean and kill caterpillars. 

Handle fungal infections by  spraying foliage with a general fungicide and pruning any unhealthy looking stems

Flowering

One of the greatest attractions to a desert rose is its colorful petals when it blooms over spring. Any healthy and mature desert azalea will bloom for several weeks in summer and spring under the right conditions. Some new and improved species may bloom all year round. 

Exercise patience while waiting for your well-tended plant to grow, as it may not bloom overnight. Desert roses may take several months before blooming.

A recently repotted plant may take time before blooming as it takes its efforts from flowering to focus on growing roots in the new pot. You can improve a potted desert rose bloom ability by giving the plant a day or half more sunshine during the warm weather. 

Water it well and ensure the soil is well-drained in the warm season and keep the plant on a dry cycle to mimic its natural conditions to maintain an excellent flowering pattern. 

Apply a good balance of fertilizer in summer and spring, emphasizing phosphorus, which may aid in flowering. Poor care and maintenance may lead to delayed or no flowering in spring and summer.

Conclusion

A desert rose is low maintenance and a beautiful plant you can have in your home or garden. 

However, ensure you repot it in a bigger pot annually or biannually and follow the maintenance tips discussed. 

Check it for pests or withering and to apply the instructions when necessary.

Ultimate Guide: How to Care for String Of Bananas?

String of bananas plant

A string of bananas is a wonder plant that any succulent enthusiast would love to have in their indoor garden. Its name may be contradictory, and you may be tempted to think it has something to do with the popular banana fruit. Far from it, this is a succulent vine plant that derives the name from its banana-shaped leaves.

This is an easy-to-care-for houseplant native to South Africa. It’s a perfect option for someone who doesn’t have a green thumb and needs something to decorate their space with minimal effort. The string of bananas will help you create a tropical vibe and give your home a much-desired ambiance.

So, how do you care for a string of bananas? A string of bananas thrives best when potted in hanging baskets. Use porous well-draining soil and ensure it gets bright but indirect light. As a succulent adapted for the warm weather, a string of bananas can comfortably handle temperatures of up to 110 degrees. Its unique growth pattern includes trailing vines, and thus, using strong to support the vines helps it thrive and extend even more.

Are you looking to grow a string of bananas but not sure where to start? This ultimate guide will help you care for a string of bananas in the best possible ways. It takes you through its growth circle and offers great insights on how to take care of it and keep this succulent vine healthy and growing strong.

Propagating String of Bananas

You can easily propagate string of bananas through its cuttings. The vines are sturdy enough to support themselves. Follow these steps when propagating string of bananas:

Cutting the vine – Cut a healthy stem from the main plant. The cutting should have at least three or four leaves on it and include some of the roots as well.

Potting medium – Use any moist potting mix to start with, such as cactus/succulent soil mix or perlite-based seedling mixes (preferred). Add 50% of perlite or pumice to your potting mix.

You should use moist soil mix when propagating the String of Bananas.

Rooting the cutting – Take a clean plastic container and fill it with enough water until about an inch of water remains at the top. Dip in half-inch deep rooting hormone powder (optional) and tap off excess on the side of the container.

Place string of bananas cutting in the water and gently push down until it’s halfway submerged. Place a container on a tray or saucer to collect runoff during watering and cover with clear plastic wrap (cling film).

Let the cuttings sit undisturbed for about two weeks before removing from water; this allows enough time for roots to form at least an inch long.

You can plant the cuttings in individual pots filled with moistened potting mix. Make sure to cover all exposed roots and keep them warm during this period.

Water Requirements

String of bananas may be succulents, but they still need enough water to avoid getting stressed. Watering frequency varies depending on how much sunlight it gets and the temperature of your room.

During spring/summer: water every two weeks when soil is dried up to your first knuckle. You can tell if a string of bananas needs water by checking for moistness in the potting medium.

During winter: water once a month when soil is dried up to your first knuckle and keep it warm (75 degrees). Temperatures below 55 degrees can cause root rot, so avoid this at all costs.

You should water the String of Bananas every two weeks in summer and once a month in winter.

Light Requirements

String of bananas thrives in bright but indirect light. Place it near east or west-facing windows to receive ample sunlight during the morning and stay out of the direct sun all day long. It can tolerate some full afternoon sun if it gets adequate water to prevent wilting. However, too much sunlight may burn the leaves.

Ensure there is enough ventilation in your room to prevent string of bananas from getting too hot. Keep it away from heat sources such as radiators and vents or fireplaces that can dry out the air around them.

The String of Bananas requires indirect sunlight as too much direct sunlight may burn its leaves.

Temperature and Humidity

String of bananas can tolerate light frost, but it’s best to keep in temperatures above 64 degrees Fahrenheit. String of bananas thrives in high humidity, so increase the ambient room temperature by grouping together with other plants or place a humidifier nearby for optimum growth. This will help prevent dry air conditions, which may cause leaves to turn yellow.

Potting and Repotting String of Bananas

String of bananas does best when potted in hanging baskets. Use porous well-draining soil and ensure it gets bright but indirect light. As a succulent adapted for the warm weather, string of bananas can comfortably handle temperatures of up to 110 degrees. Its unique structure makes it easy to identify when watered and provides a fun display.

The pots should be large enough to accommodate the string of bananas roots. Ensure there is adequate space so that water doesn’t collect at the bottom and rot the roots. For hanging baskets, be sure to use sturdy hangers that can hold the weight of string of bananas without tipping over.

Hanging baskets are the perfect choice when it comes to potting the String of Bananas.

Common Pests/Diseases

Even with proper care, pests and diseases may attack your string of bananas plant. Treating it early is key so as not to compromise its overall health. Here are some common problems you may encounter and how to treat them.

Pests

Thrips – These are tiny insects noticeable by the damage they inflict on leaves, causing yellow spots, scarring, or stippling (irregular white patterns). Apply an insecticide containing neem oil when thrips appear in large numbers. Keep it out of reach of children and pets. You can also apply Diatomaceous earth to the soil every few weeks, which will help control thrips among other insects such as spider mites and mealybugs.

Mealybugs – These are tiny white bugs that feed on plant sap, causing leaves to turn yellow or appear dry and dusty, eventually leading to leaf drop. To treat for mealybugs, uses a cotton swab dipped in alcohol or apply an insecticide containing neem oil directly onto the affected plant parts.

Mites – These are spider-like pests that appear as tiny dots on leaves and stems but do not cause any noticeable damage until they have multiplied significantly; at this point, you will notice areas of leaf yellowing and dropping as well as webbing on the leaves. To treat for mites, apply an insecticide containing neem oil directly to affected plant parts every seven days until pests disappear.

Diseases

Powdery mildews – These are fungal diseases that appear as a white powdery-like growth on leaves and stems and the soil. While powdery mildews are not usually fatal, they do weaken plant defenses, so you will need to treat them immediately before they spread or cause further damage. To treat powdery mildew, apply a fungicide containing myclobutanil directly onto affected areas of the plant every seven days until the mildew disappears.

Downy/Verticillium wilt – These are fungal diseases that cause the leaves to droop and become water-soaked. It also causes yellowing on one side of the leaf and eventually dies off entirely. To treat for downy or verticillium wilt, remove affected leaves as soon as you see the symptoms. You can then apply a fungicide containing myclobutanil directly onto affected areas of the plant.

Other Common Issues with String of Bananas

Root rot – This is common when plant roots are constantly wet, typically due to a lack of drainage in the soil. To treat for root rot, ensure your string of bananas has proper drainage and that you aren’t overwatering it or grouping together with other plants, which will add more humidity into the air.

A lack of leaves on the soil’s top – this is typically the result of overwatering or insufficient light that causes root rot, leading to an overall unhealthy plant. To treat for lack of leaves on top, water string of bananas less frequently and make sure it has adequate drainage in its pot while providing bright but indirect sunlight

Reddened leaves – This is often a result of cold drafts, low humidity, or insufficient light. To treat for reddened leaves, make sure the string of bananas is in an area with bright but indirect sunlight and keep it away from drafts. Also, ensure there’s plenty of humidity by misting the plant regularly

Failed vine cuttings – A lack of water typically causes this after planting. You can prevent it by making sure vines are well-watered after planting until they have started to take root.

Pruning & Maintenance

String of bananas plants needs pruning every few months for it to maintain its beautiful shape and lush foliage. Pruning also encourages new growth along with more flowers. It’s best to prune when the plant is young to encourage it to grow into a manageable size that fits in your home or outdoors.

The best way to prune string of bananas is to remove dead leaves and stems growing inward towards the center. This will promote growth along its outer edges where you can see new foliage emerging from.

String of Bananas Toxicity

String of Bananas is closely related to Senecio rowleyanus (String of Pearls), known to be mildly toxic to humans and animals. It is safe to use as a house plant but should be kept out of reach from pets and children because it can cause some skin irritation upon contact. In case of ingestion, contact the Poison Control Center immediately.

This easy-to-grow houseplant requires minimal effort, making it a great choice for anyone who likes low-maintenance plants in their homes or offices. Hanging string of bananas plants is great for indoors or outdoors in areas that receive at least six hours of sunlight per day.

How To Save A Rotting Air Plant?

Air plants (Tillandsia) are truly unique types of plants. Think about it; they can survive without soil and only need humidity, air, warmth and light. Unfortunately, these plants can also die if their care requirements aren’t met. Air plants that have been neglected may start to show signs of rot or decay. The good news is that it’s easy to save an air plant that has started to go bad.

So how do you save a rotting air plant? The best way to save a rotting air plant is by practicing proper watering techniques. Get rid of the old water in your air plant’s container, then mist it with distilled water. Ensure the plant gets enough air circulation and stays out of direct sunlight for a couple of days until it shows signs of improvement. You can also place your air plant in a semi-shaded location as a temporary measure. This helps the plant’s potential for recovery.

Air plants are such a beautiful addition to any home, but it can be heartbreaking when they start to rot. If you want to save your air plant from rot, this article is for you. It will be looking at the most common causes of rot and how to fix them.

What Causes Air Plant Rot?

Overwatering

Overwatering is the main cause of rot for this houseplant. Air plants are desert-dwelling, so they don’t need much water to survive. If you’re using tap or filtered water on your air plant, make sure that it’s distilled or rainwater. Using normal drinking water will kill the plant.

Overwatering leads to the rotting process because air plants can only absorb so much water before they start to rot. This can happen even if you’re watering the plant once a week.

Overwatering is one of the most common reasons an air plant starts to rot.

Poor Airflow

If there isn’t proper airflow around your air plant, it’s going to be difficult for them to absorb water from their leaves. Poor airflow can be caused by placing your air plant in a dark, enclosed space. If you’re keeping the air plant on top of another object, then it’s blocking airflow and moisture from entering or exiting that area.

Poor airflow can also make it difficult for your houseplant to dry out after watering them. This eventually leads to rotting.

Bad Bacteria and Fungus

If your air plant is damp, it will be a breeding ground for bacteria and fungus. The humid environment that rot-inducing fungi need can easily occur in an enclosed area or if the plant becomes overwatered. This leads to slimy surfaces on the leaves of the houseplant, and white or gray fuzz can grow on the plant. If you notice this happening, then it’s time to take action.

Bad bacteria and fungus lead to rot because they break down cells of living things, eventually causing decomposition. This is why air plants that have been infected with these fungi need immediate care if you want them to survive long.

Signs Of Rot On Air Plants

While under the right conditions, air plants rarely rot, but when they do, it’s important to take action right away. If you notice any of these signs, then it may be time to save your air plant.

It looks like the leaves are wilting or curling up at the edges

If you see that some of the outermost leaves on your air plant are starting to curl inwards, it could be a sign of rot. This is because the plant cells within these leaves are decomposing, causing them to dry up and curl.

If your air plant are wilting or curling up, the succulent is probably starting to rot.

There’s brown or black spots on your air plants

If you see dark patches forming all over your houseplant, it has probably fallen victim to infection with bad bacteria or fungus. These fungi form spores that spread to other areas of the plant and can cause it to rot very quickly.

The soil smells like rotten eggs or sewage

Bad bacteria and fungus emit a strong, pungent smell that is unmistakable if you’re familiar with it. If your air plant’s soil starts to smell like this, you should take immediate action because these fungi break down the plant’s cells.

White or gray fuzz growing on the air plants

If you see white or gray mold-like growths on your air plant, it has probably fallen victim to one of these fungi that causes rot. These fuzzy patches are made up of spores, and they will continue to spread if not taken care of immediately.

Ways to Save a Rotting Air Plant

If you notice your air plant is rotting, relax; this is not the end of the world. There are several ways you can help your air plant out of this unfortunate situation, and it all starts with these simple steps:

Take Your Air Plant Outdoors For an Hour or Two

Taking your air plant outside for a few hours each day will give them some fresh air to breathe, which is often enough to save their life. This is especially true if you’ve noticed your plant has started to rot because of poor airflow. If there’s no sign of rotting, then it might take a few days before the air outside will save them from going bad.

Once you notice that your houseplant isn’t absorbing water anymore and its leaves are starting to look wrinkled or slimy, it’s time to start this process.

Remove Your Houseplant From Its Pot or Container

If your air plant is turning bad because of the potting soil you used, removing them from their container will help save them. You can accomplish this by gently pulling off any moss on top of the soil with your fingers before setting the plant aside.

Add A Little Water to Your Air Plant, But Do Not Overwater

If you notice your air plant is starting to rot because it wasn’t absorbing water properly, then the first thing that you should do is add a little bit of distilled or rainwater directly on top of its soil. After adding moisture back into this desert-dweller, wait for about an hour or two before adding any more water to the soil.

To save a rotting cactus, add just a little bit of water and avoid overwatering the succulent.

Be Careful Not To Overwater Your Air Plant Again

While it’s important that you add moisture back into your air plant, make sure not to overdo it again. It might take several days (or weeks) until the humidity around this houseplant starts to go back up again, so keep the soil moist but not soaking wet.

Use Only Distilled or Rainwater on Your Air Plant Again

Now that you’ve noticed your air plant has started to rot because of how much water they were absorbing, make sure never to use normal tap or filtered drinking water ever again. This is because water from these sources may contain chemicals, minerals and pollutants that can damage the health of your air plant.

Return Your Air Plant to Its Pot

Finally, after you’ve successfully removed the rotting parts on your houseplant leaves, start slowly adding distilled or rainwater to their soil again. After a few weeks, you can also add some moss back over the top of this desert-dwellers soil and then place it back in its usual spot inside your home or office.

For even better results, try using a spray bottle to mist the air around your plant and keep it moist all day long. Doing this will help raise humidity levels right away, which is extremely beneficial for saving an air plant that’s starting to rot due to low moisture levels in the air.

Keep Your Air Plant Clean at All Times For Better Results

The final step that you can take to help save your air plant is keeping it clean. This means you should wipe the leaves of this houseplant every day using a damp cloth or paper towel so that they won’t collect dust and other particles around your home or office space. Dust on top of their leaves will only make them rot faster, so keep them as healthy as possible by wiping them clean.

Keeping your air plant clean at all times will make it much easier to save a rotting succulent.

Stay Away From Plant Food and Other Chemicals

Do not use plant food or any other uncertified fertilizers on your air plants, as this can do more harm than good for these unique houseplants. If you notice that the leaves of your desert-dweller have started to turn brown around the edges, then you should remove them from the soil and put this houseplant away for a few days.

If your air plant isn’t absorbing water anymore or its leaves are starting to look wrinkled, it’s time to start these simple steps immediately. In case there is no sign of rotting on the leaves, then the chances are that humidity levels in their immediate environment have gone down.

To help fix this, try adding a little bit of distilled or rainwater directly on top of the soil and wait for an hour before adding more water. If your air plant is turning bad because it absorbed too much moisture from its surroundings over time, remove them from their container by gently pulling off any moss on top of the soil. Then, add a little bit of distilled or rainwater directly on top of their soil and wait for about an hour before adding more water to the container.

If you notice brown spots forming around your air plant’s leaves, then you should remove them from this houseplant entirely and put them away for a few days so that humidity levels can go back to normal.

Conclusion

Rot in air plants can be a serious problem. This is especially so if you notice brown spots forming on the leaves of this plant. If there is no sign of rotting, then the chances are that humidity levels in your home or office have gone down because it’s starting to get colder outside as winter sets in. Taking the right steps towards saving your air plant is essential. Whether it’s making sure these desert-dwellers get enough humidity levels or adding distilled or rainwater directly on top of this houseplant, you are doing their health a huge favor.

Sansevieria Care Essential: 11 Tips for beginners

If you are new to gardening or simply looking for an easy-care houseplant, sansevieria is the perfect plant for you. These plants are some of the toughest plants you can get, and they are popular because of their adaptability to most growing conditions. You need to know about proper sansevieria care Essential. Whether you want to plant it indoors, on the balcony, or in your garden, these hardy plants can put up with almost everything.

Sansevieria plants are easy to grow, but there are a few things that you need to know as a beginner. These essential tips will help you care well for this plant to its maturity. We will discuss the 11 most fundamental Sansevieria Care Essential tips that have been proven and worked well when applied to this plant. As you keep on reading these tips, you will realize how low maintenance these plants need.

If you want to grow this plant and enjoy the flowering beauty, and quality air in your room or balcony, the following tips are a MUST DO.

1. Why Soil is a Sansevieria Care Essential

A snake plant is easy to grow because of its soil requirements. They do well in a free-draining soil mix. Always use a free-draining soil mix, because the Sansevieria plant is prone to rot if the roots are dipped for long in the water. You can grow the plant in commercial succulent soil or cactus soil.

Free-draining soil is a must for growing a healthy Snake Plant.

This commercial soil has added sand that helps in drainage. You can also decide to make your mix of soil, and the plant will still grow well. An accessible blend will require:

  1. 1 part potting mix or garden soil
  2. 1 part peat moss or coconut coir
  3. Two parts of sand or perlite

This mixture will ensure maximum water drain from the container and provide a nutritious planting medium for the plant, allowing it to glow.

2. Choose the Correct Pot.

Different pots have different looks and different functions. Example of common materials used for potting includes terracotta, plastic, ceramic or wood.

As a beginner, there is something pretty in combining this gorgeous plant with a beautiful and proper working pot. Choose a pot that has suitable drainage holes. They are prone to overwater, and they may die from root rot. A terracotta pot will work well with you.

Choose a pot considering the place you will grow the plant. If the plant is to be planted outdoor, you may need to choose a pot that will withstand adverse conditions like wind. If you want to plant it on a desk, you may need a decorative pot.   

A correct pot will only leave 2 inches of space between the pot and the plant. Not planting a snake plant in that kind of pot makes the plant susceptible to rot.

3. Proper Lighting is A Sansevieria Care Essential.

Snake plants should always get enough light. Droopy and sad-looking leaves are always the effects of lack of enough light. Snake plant prefers indirect but steady light with some direct sunlight once in a while. However, they also tend to do well in shady corners or other low-light areas of your home.

Sansevieria requires plenty of light, but you should not expose the plant to too much direct sunlight.

Too much sunlight may make the plant susceptible to leaf burn, but only in very severe cases will the leaf burn cause any long-term damage. During the winters, ensure that you protect the plant from drafty windows. Lack of light for a long time can make a plant die from chlorosis.

4. Know How to Water Your Plant

Do not water your plant so frequently. Let the soil dry before watering. To know when it’s time to water, don’t rely on the appearance of the surface of the soil. Instead, stick your finger 2 inches into the soil and feel the moisture.

When watering the snake plant, ensure that you water it at the bottom of the pot. This encourages the roots to grow downwards and reduces the splash of water to the leaves. Watering from the bottom will also stabilize the plant’s thick, tall leaves supported by strong roots.

5. Always Monitor Temperature and the Humidity Levels

Snake plant is a surviving plant that will tolerate fluctuating temperature, but not too cold or too hot. An optimum room temperature of 16-320C is most favorable for the plant. At this temperature, the plant will grow tremendously.

In cold conditions, the plant develops mushy white areas to the leaves, which may occur 1-4 weeks after exposure to cold. During the winter season, get the plant from outdoors to indoors to prevent the plant from dying.

6. Fertilizer

Snake plants do not need a lot of fertilizer. If need be, it should be done during the spring or the summer season. During the winter season, the plant is at rest; hence fertilizing should be avoided. It is also essential to ensure that the plant is not under stress during fertilizing.

You should fertilize your Snake Plant during spring or summer months.

How often to fertilize the plant, depends on several factors. When fertilizing, use a composed 10-10-10 or 20-20-20 fertilizer for proper growth. It is recommended that you apply half of the dose of the total strength to avoid over-fertilization. These factors include:

  • Size of the plant and the pot. The larger the pot or the plant, the higher the use of fertilizer.
  • The type of fertilizer used.

In a nutshell, most snake plants are fertilized after 4-6 weeks and only during the growing seasons.

7.  Pruning

Pruning is essential as it encourages new growth. To prune, use sterilized pruning shears or a sharp knife. Remove leaves at the soil line or cut off damaged mature leaves and leave the developing leaves to grow. Pruning is best done during the growing season as new leaves can grow.

Pruning the plant during the off-season may make it stressed; hence it is best done when the plant is healthy. Pruning is also done to control the height of the snake plant. To do this, cut the tall leaves carefully and leave the rest. Also, get rid of spoilt leaves.

8. Sansevieria Care Essential to Propagate a Snake Plant

You can quickly multiply your sansevieria plant for your home as a gift to share with friends because; these plants are incredible to propagate. There are two ways to propagate the plant.

a.  Propagate leaf cutting in water

Cut a healthy sansevieria plant leaf near its base. Make a notched upside-down V cut at the bottom and place it in a clean jar of water, which should be slightly above the V cut. In about 3-5 weeks, you will see roots growing from the leaf-cutting. You can transplant it into the soil or keep it growing in the water.

b.    Propagate leaf-cutting in soil as a Sansevieria Care Essential

Cut off a healthy sansevieria near its base and let the cut dry for 1-2 days. Plant the cutting in potting soil, water it regularly, and let it grow. Don’t let the soil get too dry or wet as the plant is still very young and sensitive.

9. Common Pests

The snake plant is hardy, and it is rarely infested with pests. Overwatering, high humidity, and air poor circulation are the root causes of pest infestation. Scales, gnats, spider mites, and whiteflies are the common pests attracted to this plant.

If the snake plant is already infested, the methods used depend on the severity of the infestation. You can mix alcohol with water and spray it to the plant or wipe the leaves with a solution to deter the problem. If the plant is severely infected, you should prune the infested leaves and leave the rest to grow.

10. Sansevieria Care Essential to Get Snake Plants to Bloom

Snake plant tends to flower annually when water, sun and humidity level are optimally met. During flowering, the snake plant develops creamy white, tubular flowers that look like lilies. Shifting the plant’s location from indoors to outdoors regularly can encourage blooming as the plant rarely blooms when kept indoors for long.

The coming of spring kicks the plant from its dormancy stage and spurs its growth. Its flowers are fragrant, and it blooms at night. After some time, these flowers drop on their own hence no need to cut them.

If water, sun, and humidity levels are optimal, the Snake Plant may produce flowers.

11. Don’t Overwater or Underwater the Plant.

There is nothing as dangerous as overwatering your plant. Overwatering is the fastest way to kill your plant. But because the snake plant is excellent, it will always tell by the look on its leaves. The leaves become heavy, squishy, and limp and sometimes may even fall. The leaves start to rot, therefore spread to other parts of the plant and require.

Though it is a dry plant, don’t let it go for long without water. Underwatering will show itself in the leaves. The leaves might bend over, become limp and die. The old leaves start becoming yellow, turn brown, and lastly, break.

Bottom Line

As I promised earlier, snake plants are almost comically simple to grow. You will encounter minor troubles with them, but they are plants that can thrive well even in neglect.

 All in all, watering the sansevieria plant is the most important thing. It may survive from other conditions, but not overwatering. Follow these Sansevieria Care Essential tips and be assured of a healthy snake plant in your house, office, or even outdoors.