6 Amazing Facts You Didn’t Know About Desert Rose

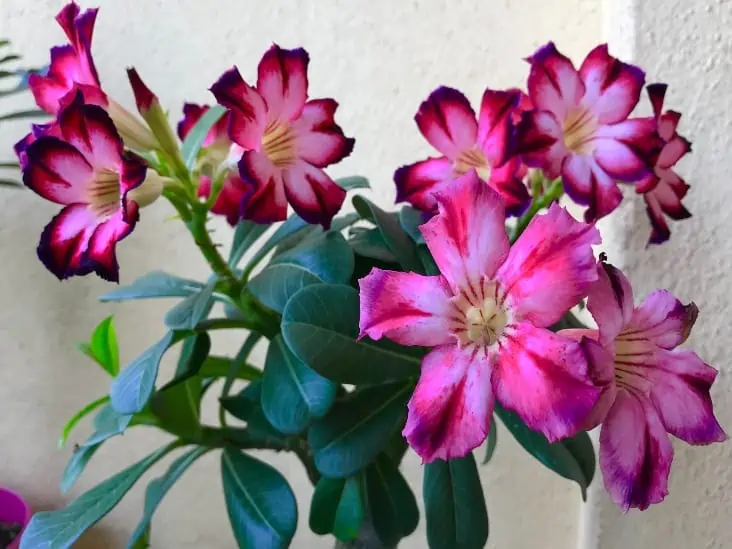
The desert rose is a beautiful and unique plant native to the deserts of North Africa. It has many different names: Moroccan oleander, Algerian iris, Egyptian jasmine, and Arabian tulip. It got its name “Desert Rose” (a reference to its pink color) because it grows exclusively in dry regions. This succulent blooms beautiful flowers in different shades of pink and has a succulent stem that is a beauty to behold. Apart from this, there are some amazing facts about the plant you didn’t know that will surprise you.

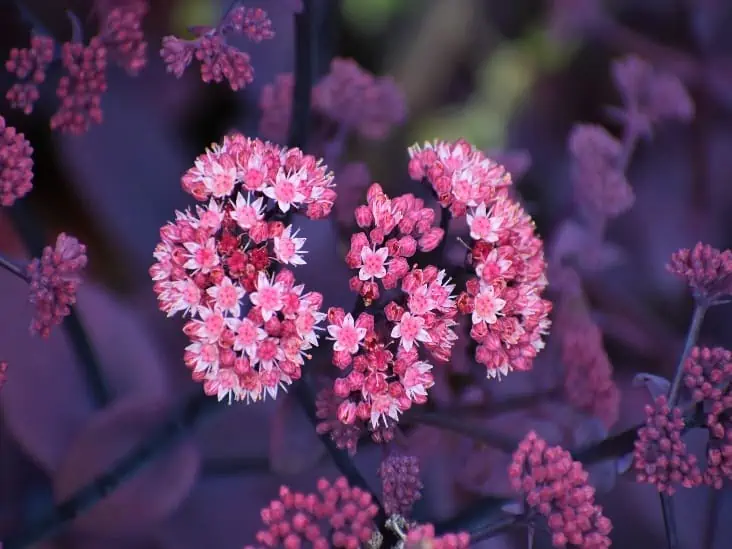
A full bloom Pink Desert Rose.
Adenium refers to one species, a succulent shrub or tree in Africa and Arabia.

So what are the amazing facts about the desert rose you didn’t know? Although the Adenium Obesum is the commonly known type of the plant, it has various other species. The plant has a medicinal value and has been used for many years in various countries to cure certain illnesses. Its sap is poisonous and can have severe effects on humans and animals. What’s more, it is used in the smudging ritual for cleansing, has a lifespan of up to five hundred years, and is traded internationally.

You probably know and admire the desert rose for its beautiful flowers, leaves, and stem. Apart from its beauty, there are various other things you need to know about the succulent. In this article, you will learn various facts about the plant you didn’t know that will amaze you.

1.     It has Medicinal Value

All the parts of the desert rose have medicinal value and are used as traditional medicine in different countries. In Oman, the stem, roots, flowers, and leaves of the plant are crushed and blended to make a mixture used to treat sexually transmitted diseases.  They also use the skin of the stem and the roots to make a lotion used in treating skin diseases and killing lice. The plant produces white latex that is used in treating septic wounds and tooth decay.

The desert rose has been used over the years in African countries to cure various diseases. In Somalia, the different parts of the plant are used in treating nose infections. The plant has toxic white latex used in killing pesticides. In Kenya, the latex is used in killing lice. Kenyans also make a powder from the plant’s stem that they then apply on livestock to kill parasites. The sap is used as an abortion agent to terminate unwanted pregnancies in humans and animals.

Traditional medicine men in Nigeria use different parts of the desert rose to cure various illnesses. This includes headache, joint and muscle pains, and various skin diseases. In the medical world, some properties of the plant are used in some drugs formulation. Research is ongoing to identify if it can cure some types of cancers. 

2.     It is Poisonous

You love the desert rose for its beautiful flowers, leaves, and stem, but did you know it has a dangerous toxins? The sap in its roots and latex in the stem contain toxins. If ingested and the toxin reaches the heart, it can cause heart failure and, in severe cases, death in humans and animals. However, in African countries, the poison is used in hunting activities. It is applied in the sharp edges of hunting arrows used in hunting large animals.

A poisonous magenta Foxglove.
A Poison to animals.

The poison kills quickly, and once shot by a poisoned arrow, an animal drops dead within two kilometers from where it was shot. The poison can be used alone or in combination with other poisonous concoctions. The skin of the stem and leaves are blended to make a mixture used in poisoning fish. The poison is mainly used for hunting purposes in Tanzania, Kenya, Cameroon, Nigeria, and Senegal. The poison is also used for criminal purposes in Senegal and Mauritania, such as poisoning people.

3.     Used in Cleansing Ritual

In various Native American homes, the smudging ritual is done to cleanse the home spiritually. It is a meditative routine done to dismiss negative energy, improve moods, and purify the home. So, what does the desert rose have to do with the smudging ritual? The plant is used during the ritual as a meditation element and to signify mind clarity. Its presence during the ritual is believed to create a calm effect and make a meditator relaxed by eliminating evil thoughts. As a person conducts the ritual, they declare their intentions focusing on the desert rose to invite positive energy in their being and home.

4.     Comes in Multiple Varieties

Most probably, you are familiar with Adenium Obesum, the most commonly known type of the desert rose. What you may not know is there are other types of the plant that most people don’t know exist. These are the Adenium oleifolium, Adenium socotranum, Adenium somalense, and Adenium swazicum. The different types have different flower colors, stem width, leaves sizes, and growth heights.  

Adenium Oleifolium

Oleifolium is commonly found in Botswana and South Africa. It features a large stem with narrow, olive-green leaves. Its flowers can either be pink, salmon, or red and are tubular-shaped.

Adenium Socotranum

The socotranum is commonly found in Socotra, between Yemen and Somalia. It is the biggest in the family, growing up to 15 feet in length and its flowers are larger than those of the other types. Its trunk grows to a diameter of eight feet. The plant has no leaves, and its flowers are pink.

A tree like Adenium.
This Adenium is more tree-like than other varieties.

Adenium Somalense

Somalense is mostly found in Eastern Africa. They have twisted branches and narrow leaves. They grow up to 12 feet in length, and their trunks are usually twisted. Their flowers are trumpet-shaped and can either be white, crimson red or pink.

Adenium Swazicum

Swazicum is the smallest of all the desert roses, growing no more than two feet in length. They are found in South Africa and Swaziland, and they have showy reddish-pink and pink flowers.

5.     It has a Long Lifespan

The desert rose has a long life span of up to 500 years. It boasts notable characteristics that enable it to live through the decades. For instance, its stem has a swollen base that keeps on swelling with the passing of years and can reach up to two meters in diameter. The stem stores essential nutrients that it keeps feeding the other parts of the plant through different weather conditions.

To identify the age of a desert rose, measure the diameter of the stem. This is a slow-growing plant, and every millimeter represents one year. It is a seasonal succulent that sheds leaves when not in season. The plant, interestingly, gets enough nutrients even when other plants start dying due to unbearable weather conditions.

6.     It is Traded Internationally

By now, you already know the various benefits of the desert rose. You are probably considering planting it in your home for a beautiful look, or medicinal value, or even for your hunting escapades. However, you are wondering where you can get the plant since you don’t live close to a desert. You need not worry as the plant is available for sale, probably in a market near you.

A Pinned world map.
Desert Rose traded internationally

The desert rose is traded globally for its various properties, but mostly for ornamental purposes. While it is popular for its medicinal and toxic nature in Africa, it is popular in the West for its aesthetic value. For both reasons, it is exported and imported in large quantities thanks to its ever increasing demand. All you need is to walk into a market near you or search the internet for where you can buy the plants in your area.

How to Grow the Desert Rose at Home Successfully

The desert rose is widely planted for its beautiful flowers, leaves, and succulent stem. Some people grow it around their compounds as a fence, and in Tanzania, it is used in marking grave positions. Its stem and branches produce wood that some people use as firewood. For whatever reason you plant it, take precautions when handling it to avoid getting into contact with its toxic sap by wearing protective clothing. When growing it, always ensure members of your household and pets are safe from its effects. 

A plant that is being taken care indoors.
Desert Rose adds character to your home

The desert rose grows well in dry areas. Ensure it gets enough sunlight and avoid giving it too much water.  Always ensure the soil is completely dry before watering and avoid pouring water directly on the plant. It can be propagated from seeds or branches and stem cuttings. The stems of plants grown from cuttings may not be as succulent as those produced from seeds.

It is no wonder that something as beautiful and hardy as the desert rose can be found in a place like this. The plant has withstood many hardships to grow where it does, but now you know how to care for one so they will continue living on. With its amazing facts, it is easy to see why so many people want a desert rose of their own. Make sure your Desert Rose gets enough water, fertilizer, sunlight and protection from pests. With these tips in mind, we hope you enjoy caring for your own little piece of the Sahara Desert at home or office.
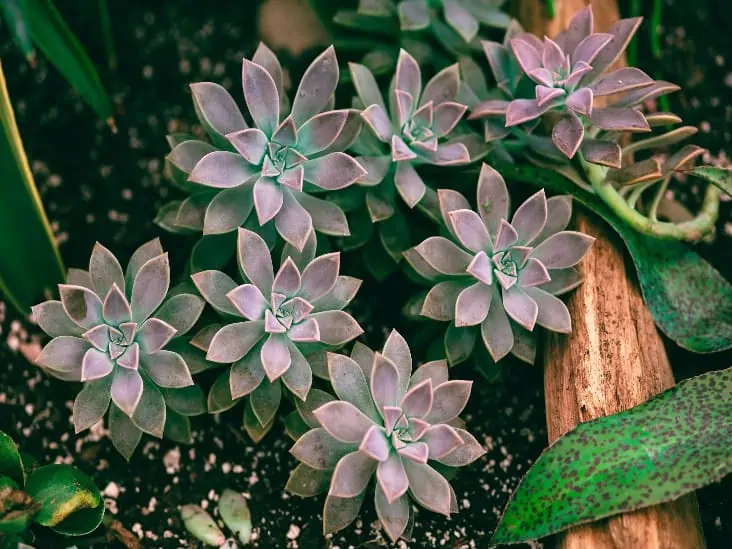
Golden Rules for Watering Echeveria

In Echeveria care, watering is probably the most challenging task that gardeners have to deal with. Keep in mind that, like other succulents, overwatering your Echeveria can result in death-causing effects. In fact, you are much better off underwatering your Echeveria than overwatering. A slight overwatering mistake and you could remain with a dead plant to dispose.

So, what are the golden rules for watering Echeveria?  Generally, you want to ensure that the soil is completely dry before watering. It is almost impossible to say how many days should pass between watering because different areas experience different climatic conditions that affect how slow or fast the soil loses moisture. While watering, consider watering from the bottom to achieve better results.

If you cultivate Echeveria and have been struggling with watering, you have come to the right place. By the end of this blog post, you should be able to water your plant with confidence, even if you are a beginner.

Know When Your Echeveria Is Active/Dormant and How It Impacts Watering

Like many succulents, Echeveria plants are summer growers. It means that the plant becomes super active during spring and summer and will require frequent watering.

Since most of the plant’s growth will happen during this time, feel free to take advantage of it and feed it as well. Growth will start to slow down in fall as the winter season approaches.

During summer, you can feed your plant with fertilizer every two weeks, but you need to keep in mind that some fertilizers can be really strong for it. Therefore, consider diluting it by at least half before offering it to your plant.

succulent plants getting sunlight
Plants that are very active during the summer will require more frequent watering

If you over-fertilize your Echeveria, it may experience severe fertilizer burn, resulting in root damage and discolored leaves.

If your plant has already suffered fertilizer burn, consider replacing the potting mix with an unfertilized one which can help prevent further damage.

Carefully prune off the burned leaves. If everything is already burned, consider leaving a few leaves because the plant requires them to continue growing.

Winter Dormancy

During winter, your Echeveria will slowly slip into dormancy, and growth slows down drastically. In fact, the dormancy starts late fall.

As the growth slows down, the plant also absorbs less amount of water and requires less frequent watering. Therefore, it is critical to cut down on your watering schedule during winter.

We recommend giving it half the amount of water you usually give it during spring or summer. For instance, if you usually water it every week during spring and summer, start watering it every two weeks.

plants in winter
During winter, you should water your plants less for it absorbs water slowly

Echeveria is a succulent and well adapted to surviving in dry areas. Typically, the plant will show you signs of dehydration when it is fully dehydrated. These signs include wrinkled leaves and contracted stems.

Feel free to water your plant whenever you notice these signs. However, you need to be careful not to overwater it because overwatering is the #1 cause of death for Echeveria plants.

If you notice that you have overwatered your Echeveria, get rid of all the blackened spots with a clean pair of shearers. Leave it to sit in a relatively dry area for up to three days so that the cut wound can callous over.

Once the wound has been calloused over, repot your plant in dry potting mix and mist it every three or four days until it starts to show signs of life again.

Use the Right Watering Method

The truth is that most gardeners water their plants from top to bottom, directly onto the soil. For many, it is the perfect way of providing their plants with the much-needed water supply.

However, it is recommended not to water Echeveria this way and instead use the bottom watering method. In the top-down watering method, water only remains at the top of the potting mix, encouraging the growth of odd leaves.

However, the bottom watering method completely wets the soil, ensuring your plant absorbs as much water as possible.

echeveria plant getting watered
Use the right watering method depending on your plant type to allow it to grow more

But there is another reason why top watering won’t work well with Echeveria. Generally, these plants will be delivered when they are already potted in a potting mix that comprises peat moss. When peat moss is allowed to dry completely, it cannot absorb water when it is poured from the top.

The water will only run through the soil pretty quickly, leaving the bulk of it completely dry.  The only way you can get it wet is by gradual wicking found with the bottom watering method.

How Do You Bottom Water Echeveria?

To bottom water your Echeveria or any other succulent plant, start by submerging the growing pot in a water basin up to its rim. Let the pot stay under the water for up to 20 minutes.

This allows enough water to enter the potting mix through the drainage holes and saturate the soil. Once the soil is fully saturated, allow the excess water to drain away before taking the plant back to its spot.

But the biggest disadvantage of bottom watering you need to know is that the method can lead to the build-up of excess fertilizer, which isn’t washed out of the potting mix as it is when the plant is watered from the top.

sample of bottom water method
This is an example of a bottom water method for plants like the Echeveria

Therefore, it is highly recommended you fertilize a bottom watered plant less often. Furthermore, you should use relatively weaker fertilizer strength. Watering from the top after every five or six bottom watering sessions can help rinse out the excess fertilizer.

The best time to water your Echeveria plant is early in the morning so that any water spilled on your plant’s leaves can evaporate rapidly during the day.

Water Sparingly

When it comes to watering Echeveria, less is definitely better than more. Since you should always wait until the soil is completely dry before watering, it’s safe to assume that you should water your Echeveria at most once every two weeks.

Watering an Echeveria too often can cause root rot and eventually lead to plant death. So, you must be cautious and only water when absolutely necessary.

If you let the soil dry out completely, your Echeveria will begin to show signs of drought stress.

It’s a good idea to use a moisture meter or an electronic soil tester to check the water level in your potting mix and determine whether it is the right time for watering.

These devices will save you from over-watering and let you control how much water your Echeveria needs.

Use a Growing Pot with Plenty of Drainage Holes

No matter how attractive it may seem, you should never be tempted to grow Echeveria directly in a glazed pot without enough drainage holes. While it may be possible to keep your plant alive in such a pot, you will have to pay extraordinary attention to the amount of water and watering method you use.

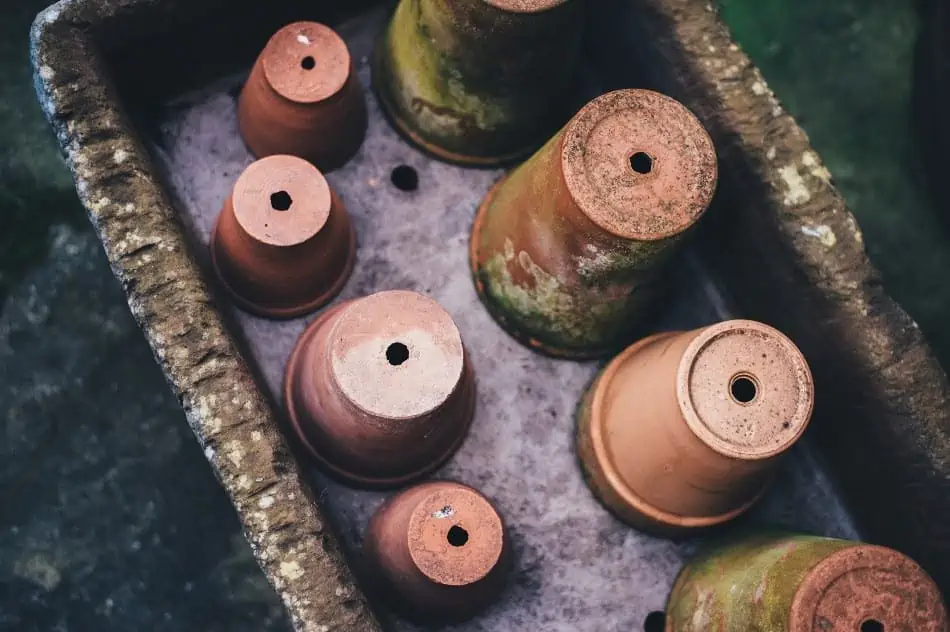
If you must grow your Echeveria in a beautiful glazed pot, be sure to get at least a terracotta pot with proper drainage. You can always slip the plant in and out of the container easily when it is time for watering.

You should also choose the right size pot. Don’t choose a too big pot because Echeveria doesn’t like a lot of room for its roots. Generally, you should go for a shallow pot that is slightly larger than your plant’s root ball.

Keep in mind that if there is a lot of soil around your plant’s roots, it has a great potential of holding a lot of moisture, which can result in root rot.

Know the Signs of Improper Watering

If you want to keep your plant happy, you should be able to tell when you are not watering correctly. In this case, improper watering refers to either overwatering or underwatering.

The good thing is that your Echeveria plant will always show you signs when it is unhappy with how you water it. For instance, if you are underwatering, you will notice your plant dropping leaves, wilting, shriveling up, and becoming weak.

succulent leaves turning brown
To know if you are underwatering your plant, it will start turning black or brown

If you are overwatering, you will start to notice sections of your plant turning black or brown. The stem may also start bulging and feeling soft. The dark areas are signs of rotting, and you need to act pretty quickly before you lose your entire plant.

If you notice any of these signs, take time to examine your plant for rot and other issues. Sometimes, you may be forced to repot it if the problem has already become severe.

Ensure you cut off all rotted parts of the plant before repotting in fresh potting mix. You should also allow the plant to lie out in the open air for at least one day before repotting it in fresh soil.

Water At the Right Time of the Day

The time of the day you choose to water your Echeveria is critical to its overall health. You should avoid watering your Echeveria early in the morning or late at night because the temperature is low at these times of the day, which increases the chances of fungal disease and root rot.

The best time to water a succulent is between 9:00 am and mid-day when it’s relatively sunny and hot. This will help the water evaporate faster from the soil and leaves, reducing moisture-related problems.

If you cannot afford to water at this time, t aim for the hours between 3:00 pm and 5:00 pm when there is still plenty of sunlight to help the water dry faster.

Avoid watering Echeveria in the late evening since the water will stay in the soil for extended periods, promoting fungal disease and root rot.

How Often Should You Water Your Echeveria?

Typically, the frequency of watering will depend so much on where you live. If you live in a relatively humid area, you need to water your plant less frequently because it takes time before the soil is completely dry.

However, if you live in a dry area or have a central heating device installed in your house, you may be forced to water more frequently.

Generally, consider watering Echeveria once every week or ten days. But keep in mind that other factors such as your plant size and pot size may influence the watering schedule.

It is always good to check the top few inches of the potting mix and only water when the soil is completely dry.

Use the Right Type of Water

Did you know that succulents are highly sensitive to the type of water you use? If you use hard water, rich in minerals, the plant may experience calcification.

The best type of water to use is soft water, preferably rainwater. If you don’t have access to it, use distilled or reverse osmosis-filtered water, free from minerals.

Avoid using tap water because it may lead to mineral buildup. This may cause your Echeveria to suffer from a condition known as lime disease and will die with time.

If you must use tap water, allow it to sit for about 24 hours before using it.

You should also avoid sprinkling water directly on the plant’s foliage since it may cause issues such as leaf rot, discoloration, and even death.

Summary

Knowing how to water your Echeveria plant correctly is critical to its survival. Take time to study your plant and determine how much water it requires based on its size, then adjust your watering schedule appropriately.

As long as you do everything right, you don’t have to worry about some things such as root rot and wilting.

Once you figure out its wagering requirements, you can focus on other things that will make it stay healthy and happy.

Ultimate Guide: How to Care for Kalanchoe

With its relatively large, glossy leaves, the kalanchoe remains one of the most attractive and easy-to-grow plants ideal for your indoor or outdoor garden. It produces beautiful flowers in the shades of magenta, orange, red, pink, and yellow, which forms a spectacular view. The foliage is also attractive. Since the plant is easy to care for and highly resistant to some of the common plant diseases, it is one of the best low-maintenance indoor/outdoor plants for your home.

So, how do you care for kalanchoe? Kalanchoe plants require relatively sunny and bright locations with moderate to warm temperatures. Your indoor kalanchoe will do well if positioned near a window, receiving plenty of indirect sunlight. It will thrive in a well-draining potting mix complemented with the right pot size. Typically, you should only water your kalanchoe when the soil is completely dry and only feed it with fertilizer when it is almost bloom time. You should also watch out for dead stalks or foliage once your plant has bloomed and prune them off.

In this guide, you will learn everything you need to know about taking care of and growing kalanchoe in your home. So, let us get started.

A Brief Overview of Kalanchoe

The genus Kalanchoe comprises more than 100 different species of plants, but only a few are known and cultivated at home. The most famous one is the Kalanchoe blossfeldiana that has acquired the title “Kalanchoe” over time.

Native to Madagascar’s tropical and sub-tropical climate, the plant tends to thrive in a relatively arid environment, making it one of the best and most popular succulents to have in your home. Plant lovers are usually attracted to kalanchoe thanks to its beautiful leaves and flowers that bloom consistently throughout the year.

beautiful pink and white kalanchoe
Kalanchoe showing off its beautiful leaves and flowers

Kalanchoe is a slow-growing succulent and will take between two to five years to mature and reach its maximum height, which can be up to 45cm tall. Younger plants in nurseries and flower shops are usually available in yellow, white, pink, and red shades.

Kalanchoe is readily available in most plant nurseries, florist shops, and even grocery stores, especially during the holiday season.  While this is one of the best succulents to have in your home, you need to be careful if you own curious pets because almost all parts of the plant are toxic to both dogs and cats.

Taking Care of Kalanchoe Plant

If you are looking to grow an almost perfect succulent that offers a magnificent floral show throughout the year, then look no further than the kalanchoe plant. Like other succulents, this is a relatively hands-off plant that only requires minimal care to thrive.

As long as you provide it with plenty of sunlight, well-draining soil, and know when to water it, everything will be fine. It can survive in a wide range of temperatures and will bloom at the beginning of spring.

The flowers last for several weeks and can reoccur at different times throughout the year as long as the plant receives plenty of sunlight and is pruned appropriately between blooms.

Here is a comprehensive list of some of the most critical things you need to do to take care of your kalanchoe and enjoy the many benefits that it offers:

1. Sunlight and Temperature Requirements

Due to its high sensitivity to cold, kalanchoe tends to do well when grown as a houseplant where the temperature is maintained at between 60oF and 85oF. However, if you want to grow them in your outdoor garden, you need to ensure the temperatures are at least 45oF for them to thrive.

The most important thing you need to keep in mind is that these succulents are highly sensitive to cold and won’t survive long if you don’t maintain the right temperature.

Kalanchoe will also thrive in a home that gets plenty of bright and natural sunlight. But they don’t like direct sunlight and may portray stunted growth if you leave them in direct sunlight all day.

plants getting sunlight
Only give your kalanchoe plants bright and natural sunlight.

You can position them on east or south-facing windowsill but keep them away from the windowpane since the hot surface can result in severe burns.

Generally, the more bright and indirect sunlight you give to your kalanchoe, the brighter and more colorful the flowers will be. In low-light conditions, the flowers may fail to open, and its leaves turn spindly.

So, if you are purchasing a kalanchoe for your low-light rooms, ensure you get one that is already flowering. You can always substitute the natural light with artificial growers’ light.

2.Humidity

Kalanchoe plant generally thrives in normal indoor humidity levels. If you are growing them in an area with high humidity, provide sufficient air circulation to prevent powdery mildew and other fungal diseases.

Extremely high or low humidity levels can cause the leaves to drop or turn yellow. You can use a humidifier if the room is dry and a dehumidifier if there’s too much humidity. The most important thing is to ensure that your kalanchoe is comfortable.

3. Watering

Kalanchoe plant is succulent, which means it doesn’t require a lot of water to survive. In fact, too much watering can lead to root rot and other issues. Its leaves are highly sensitive to water which can cause irreversible damage when overwatered.

With that in mind, you should only consider watering your kalanchoe when the potting mix is completely dry. Try to avoid wetting the leaves and flowers during watering.

When your plant stops flowering, you need to cut down on watering and let the soil remain reasonably dry. Increase watering during spring or summer when you start to notice signs of new growth on your plant.

For the watering method, it is highly recommended to use the bottom watering method. The method allows you to avoid getting the leaves and flowers wet by accident while ensuring your plant gets the sufficient amount of water it requires to stay happy and healthy.

You can also water your plant the conventional way, which is from above the pot. The only thing you need to ensure is that no leaves or flowers of the plant should come in direct contact with the water.

If you accidentally splash some water on the plant’s leaves, get a tissue and wipe it off immediately. Don’t forget to drain the excess water from the growing container.

4. Use the Right Potting Mix

A kalanchoe plant will only thrive in a well-draining potting mix because it is a succulent. So, make sure you choose or create a perfect blend of succulent soil that doesn’t retain too much moisture.

You can achieve good drainage by mixing 50% regular potting mix and 50% cactus mix or 60% peat moss and 40% perlite mix.

plant preparing to be repotted
Kalanchoe plants only thrive in well-draining potting mix.

To ensure proper drainage of your kalanchoe potting mix, try as much as possible to avoid a moist environment. You are free to grow your kalanchoe in a clay pot which can help drain excess water from the potting mix.

5. Fertilizing Kalanchoe

Typically, you don’t need to fertilize your kalanchoe plant. All you need to do to keep your plant happy is to provide it with some top dressing for nutrients.

Consider dressing the topsoil with some compost and worm castings at the start of spring. You should top dress your kalanchoe whether it is growing indoors or outdoors.

If you don’t have a top dress combo, consider fertilizing your plant with an organic liquid fertilizer at a half-strength only once during spring. If you fertilize the plant with a full-strength fertilizer, it can result in severe burning of the tip of the leaves.

two indoor plants with orange pots
One way to take care of your kalanchoe is to put a top dress combo at the start of Spring

Don’t top dress or fertilize your kalanchoe plant after summer because it enters into a period of dormancy. During this time, the plant only focuses on recovering from the stress of the growing season and preparing for the next flowering season.

If you are still a newbie to these plants, you may easily mistake the dormancy for death, and you may even be tempted to throw it away.

But the only thing you need to do is water the plant one last time and keep it in a relatively dark room until spring. When spring kicks in, water your plant, return it to a spot that receives plenty of indirect sunlight and watch it put on a spectacular floral show.

6. Watch Out for Common Pests

Although these succulents are highly resistant to pests and diseases, they can still get infected by scale, nematodes, spider mites, and aphids, especially when grown outdoors. These insects feed on the plant’s leaves.

succulent plants without their pots
As pests and diseases are almost inevitable for every plant, make sure to remove them using hose pipe or sink sprayer.

To remove common pests such as aphids, quickly pass your plant through a stream of fast-flowing water from a hose pipe or sink sprayer. For mealybugs and other pests that won’t be washed away by water, dab them off from the plant with an alcohol-saturated cotton swab.

You can also get rid of scale insects from your plant using a plastic bank card. Simply scrape the insects from the plant, and you are good to go.

7. Pruning

Kalanchoe usually requires some pruning to remove damaged or dead branches and to shape the plant. Prune it plant before it goes into dormancy to help prepare the plant for the next flowering season.

To prune your kalanchoe, use scissors or shears to cut away dead flower heads and dried leaves. Cut back the stems as much as 65% of their length when they become lanky or stretched out.

Be sure to use a pair of sterilized scissors or shears when pruning your plant to avoid spreading diseases or fungus. You should also consider labeling your pruning tools and storing them away safely when not in use.

With proper pruning, your kalanchoe will reward you with plenty of blooms and lots of appreciation from your visitors.

8. Propagation

Kalanchoe can be propagated through stem cuttings and leaf cuttings. For stem cutting propagation, take a healthy kalanchoe branch that is at least four inches in length, remove the lower leaves and place it in a soil-free medium such as vermiculite or perlite.

Keep the pot with the stem cuttings in a bright spot where it can receive plenty of indirect light but avoid direct sunlight. Water the cuttings regularly until new growth appears.

For leaf propagation, you need to take a healthy and undamaged leaf from your kalanchoe plant and place it in a soil-free medium for about four weeks or until the roots start to appear.

Once roots appear, transfer the leaf cutting into a pot with moist soil and water it regularly until new growth appears.

Summary

The bottom line is that caring for kalanchoes is relatively easy because these succulents are less demanding.

As long as you provide them with a well-draining potting mix, water them appropriately, top dress the soil once every spring and expose them to bright indirect sunlight, they will survive and thrive.

Good care is a recipe for flowering, which is amazing because their flowers are long-lasting and have rich green foliage that you will surely love. This is definitely one of the great blooming succulents to brighten your outdoor garden or indoor spaces.

How Long Can a Plant Live In a Terrarium?

Let’s face it, we all want a vibrant, long-lasting terrarium. The good news is your terrarium, when done right, can live for a very long period. But, on the other hand, it can also die down after a few weeks. At first, a terrarium looks excellent, but the health of your plants can quickly deteriorate if the conditions are just not right.

For your terrarium to thrive indefinitely, it is essential to set up your terrarium correctly and select the right plants. So just how long can terrariums live, and how do we make them last? Let’s delve right into it. 

Houseplants can generally live a long time with proper care. However, there is no sure way to determine how long a plant should live. Most plants live in one growing season. However, some houseplants can live for decades or even centuries. For instance, the oldest documented houseplant is the Eastern Cape giant cycad over 240 years old! 

Interestingly, most household plants die due to external factors and not because they are mature or old. If you want to know if your terrarium can last that long you are in the right place, we will discuss how to prolong your terrarium’s lifespan and the most durable houseplants.

The lifespan of a Terrarium

Most plants do not have a fixed lifespan. Instead, plant mortality is dependent on external factors such as water, light, nutrition, and temperature. Therefore, the lifespan of a terrarium depends on the care you give it and the environment.

example of terrarium inside a container
When taking care of a terrarium, you must find the perfect container for it to thrive

A terrarium’s duration is hard to gauge because it is an ecosystem. Precipitation from the plants and soil evaporates due to the high temperatures in the sealed glass container. The vapor condenses on the walls and back to the soil and plants. Since the system is autonomous, longevity is not based on a single plant but on its ability to support itself. 

If the right conditions are met, your terrarium can last up to 10 years or more. Theoretically speaking, a well-balanced terrarium in optimal conditions can last indefinitely. However, the average terrarium lasts anywhere from four months to approximately two years. If you would like your terrarium to survive, you might want to avoid the common mistakes below.

Factors That Can Undermine the Lifespan of Your Terrarium

Keeping indoor plants alive and healthy can be pretty difficult. Terrariums are the most convenient option for adding a touch of green to your home because they require minimal care. They are also easy to set up. However, the fact that they do not need much attention should not make you miss the below five factors that can significantly reduce the lifespan of your terrarium:

Poor Container Choice

There are two types of containers: open and closed. Most plants thrive in open terrariums. You should use the kind of plant you are considering as a guide for container choice. For example, air plants require proper air exchange and are best suited for open containers. Same as succulents, which do well with optimum ventilation, low humidity, and fast-draining soils. On the flip side, plants such as ferns, mosses, and lichens thrive in closed terrariums. Select a suitable glass container that your hand can comfortably fit through and consider the plant type when singling out the best option. 
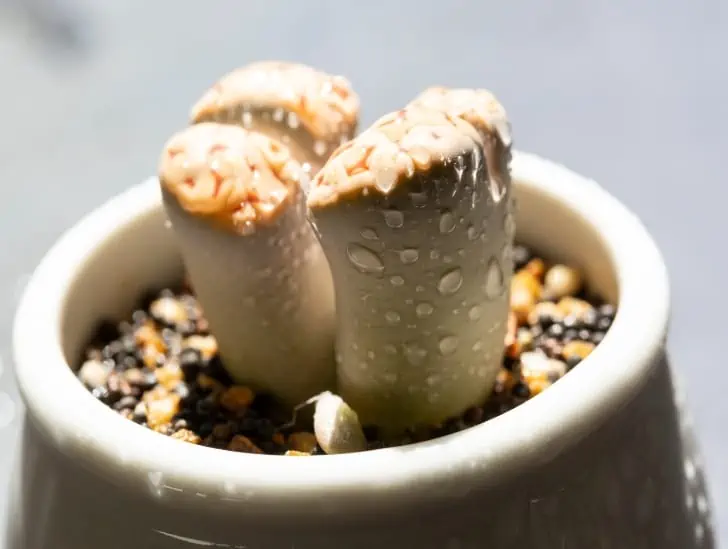
three plants with no pot
Choosing the wrong container for your terrarium can cause your terrarium to wilt

Overwatering

Most terrarium plants do not require a lot of watering. However, one of the most common reasons for dying out of terrariums is overwatering. This is because terrariums do not have drainage holes, making the plants susceptible to mold growth and plant rot. Discolored leaves and brown roots are among the signs you have to watch out for in submerged plants. Also, a rotting plant feels exceptionally soft and crumbly.

On the other hand, underwatering can also affect your plants negatively. Lack of adequate moisture will eventually cause your plants to die. To figure out if your plants are not getting enough water, look out for falling, dry or yellow leaves. 

Wrong Choice of Plants

Choose plants that do not have a growth spurt. It would be best if you went for slow-growing plants to avoid plant rot. When plants get too long/big, they touch the terrarium sides and trap water, ultimately leading to rot. Leggy plants also suffer from a lack of adequate sunlight. If you notice that your plants are getting too big, trim them a little and place your terrarium in bright but indirect light for all parts to get sufficient sunlight. You can also prune the roots to keep the plants small.

different types of indoor plants
Know your plants well especially how they grow so that it is much easier to maintain

Overfertilization

Healthy plants require a fertilizer that is low in nitrogen and high in potassium. Most terrarium plants don’t need fertilizers. However, you can add fertilizers once every two months. Too much fertilizing of plants leads to faster growth, and this can cause the plants to outgrow your terrarium. Additionally, you can also use direct plant sprays to aid in plant growth. Signs of over-fertilization include slow or minimal growth, yellowing of leaves, and blackened roots.

Lack of Adequate Light

Terrarium plants require bright but indirect light. Different plants require different amounts of light. For instance, succulents need lots of bright light, but mosses can survive on minimal amounts of light. Light-deprived plants usually have discolored leaves and experience wilting. While adequate lighting is ideal, extreme light/heat is destructive. You should avoid direct unfiltered light as it can cause your terrarium plants to start dying.

Durable Houseplants for Your Terrarium

The lifespan of a houseplant is not dependent on the species. Below are examples of plants known for their long lifespan:

Cacti 

The cactus is one of the most recognizable succulent plants. They only require water once every couple of weeks and tons of sunshine. The lifespan increases when grown outdoors. The average life of a Christmas cactus is between 20 and 30 years.

Table Palms

Table Palms are a part of the Arecaceae family, known for living for 80-100+ years. If you desire that tropical feel in your home, this would be your best bet. This evergreen plant does not require much sunshine.

Spider Plant

The spider plant is a hanging plant that can survive for decades. They thrive best in indirect light but can be prone to rot. To increase longevity, avoid overwatering the plant.

Succulents

One of the most trouble-free to care for houseplants. Fleshy and can go weeks on end without water. The lifespan varies but can be anywhere between six years to a couple of decades.

three succulents perfect for indoors
Types of succulent for your terrarium

Cycads

Cycads can be grown outdoors or indoors. As earlier mentioned in this article, one of the oldest recorded indoor plants is the cycad which can thrive for centuries. Relatively easy to take care of as watering is only required twice a week.

ZZ Plant

The Zanzibar Gem is indestructible. While this may seem an exaggeration, indoor plants can go for long periods without water. In addition, the ZZ plant is low maintenance and can handle low lighting.

Bird of Paradise

The Bird of Paradise is not mainly known for its looks. Originating from South Africa, the best part about this plant is the mesmerizing flowers which can take up to 20 years to grow.

How to Make Your Terrarium Last

You’ve picked out the recommended long-lasting plants and avoided all the factors that could lead to drying out of your plants. But how do you make your terrarium last? The following secrets could be critical to a long-lasting terrarium.

  • Regulate Water Levels: Most people struggle figuring out the right amount of water for their terrariums. The amount of water required depends on the type of plant as well as a terrarium. To tell if your plants are getting optimum water is to feel the substrate; ideally, it should feel moist but not dry or soggy. Another good sign is the sighting of slight condensation, particularly in the mornings and evenings in your container.
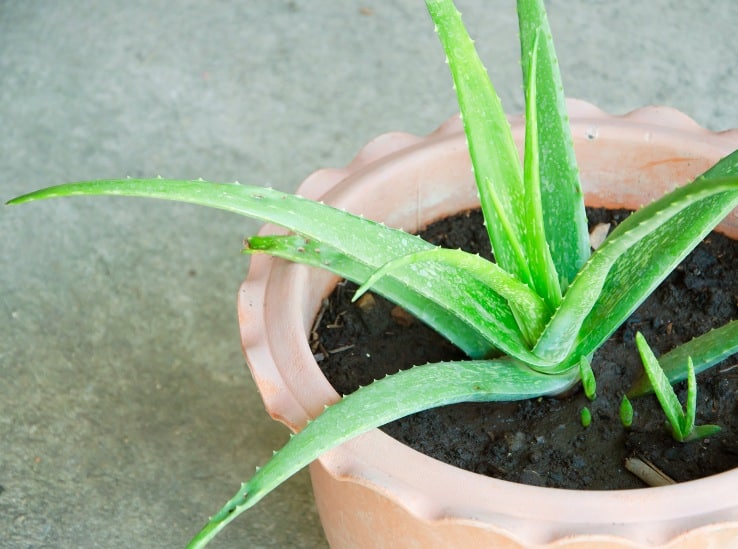
aloe vera plant being watered
Make sure to do some research before watering you plant.
  • Get Rid of Dead Plant Parts: Dead plants don’t you are doing everything wrong. Permanently remove any plants that show signs of browning. This makes your terrarium to look vibrant. When you do away with the dead plants, the risk of diseases or rot to the healthy plants is minimized. Just grab a pair of tweezers, and take out the dead plants.
  • Clean the Container: Cycles of evaporation and condensation over time lead to the deposit of trace minerals on the walls of your container. The deposit ultimately leads to a cloudy appearance on your container. Plants require sunlight for photosynthesis, and the hazy appearance will hinder optimum light from reaching your plants. To clean off the deposit, grab a towel, preferably a microfibre towel, and wipe swiftly on the inside.

The Bottom Line

Good terrarium maintenance coupled with in-depth research on the best plants and factors to consider can prolong the life of your terrarium. If everything else fails, try again, and you will see just how far your terrarium could go.

How Do You Revive a Dying Air Plant: 10 Easy Steps

Air plants are one of the fascinating types of plants on the planet. Unlike other plants, Tillandsia is epiphytic, which means it does not need soil to thrive. This makes them a versatile addition to your indoor or outdoor space. 

However, just because they don’t require soil doesn’t imply they don’t need some attention. Air plants collect nutrients and moisture from the air using trichomes. Trichomes are modified hairs present on the leaf to help absorb nutrients and water.

If you see that your plant is not thriving or dying, it is high time you pay attention to it and revive it.

How Can I Tell My Air Plant Is Dying?

Sometimes, the leaves will turn brown and start to fall off. If you can’t get your air plant to green up after a few days of care, it probably needs more effort to revive it.

1) Smaller leaves: The size of the leaves might be smaller than usual because there isn’t enough food to create substantial growth.

2) Dying Leaves: Leaves may go limp and die altogether if they’re not getting enough water.

3) Browning / Dryness: Brown leaves mean that it’s been too dry or lacks enough light for too long in general; if your air plant has been potting-bound for a while, this could be due to excessive crowding or root damage from fertilizer burn when planting.

dried leaves resulting from not having enough light
Always make sure to give your plant some sunlight to avoid drying the leaves

Dead areas on the leaf edges may appear if the air plant has been in a very humid environment for an extended time. 
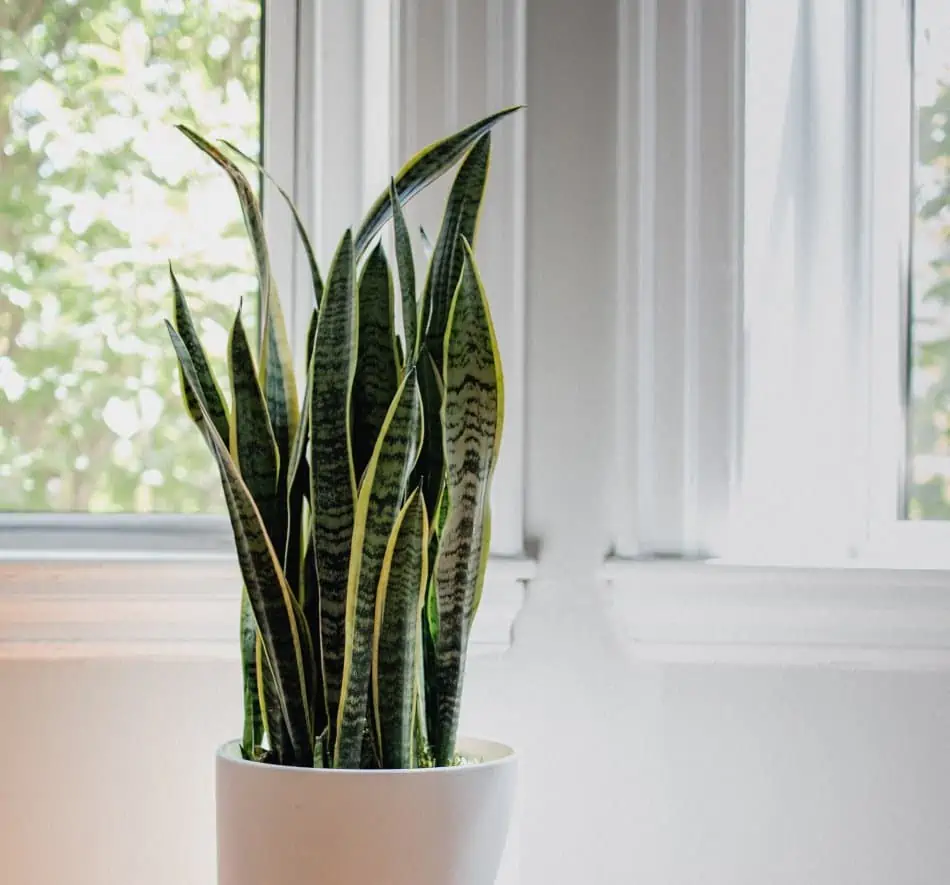
Mold and fungus can or may begin to grow on your plant or soil surface. The leaves are not only brown but also shriveled up.
4) Over-watering: If you’re overwatering your plant, then it’s not getting the proper amount of airflow. This usually occurs when your plant is kept in a very humid environment for an extended period.

5) Under-watering: If you don’t water your air plant enough, then it may begin to shrivel up and die. This typically happens if the soil dries out completely before the next watering.

10 Easy Steps to Revive a Dying Air Plant

Tillandsia is a low-maintenance plant. Although, if your air plant portrays dying signs or looks unhealthy, this might indicate they need extra attention to revive it. 

Fortunately, air plant resuscitation is not difficult. Trimming off the dead leaves or branches and immersing the plant in water are just a few of the many fast solutions.

Now let’s dig into ten easy gardening tricks to revive your plant.

Dunking

Is your air plant leaves turning brown or wilting because of lack of water? If this is the case, watering or immersing your air plant in water is the first easy fix to revive the air plant.

If you have less time, you can immerse the plant in water for six to eight hours, or you might as well leave it overnight. Putting it in water will give it enough time to acquire enough moisture to sustain it.

plant getting immersed in water
One of the common ways to revive your plant is to immerse them in water

Always use lukewarm water to offer the plant a gentle bath. You can use spring, rain, or swamp water for additional nutrients. Tap water might have chlorine that may affect the plant’s growth.

Another thing you can do to revive it is mist it when you realize it is drooping. Misting air plants between immersions can assist prevent dehydration in hot weather, but it does not provide enough moisture alone, so you should not rely on misting alone.

Air Dry Your Air Plant

Air plant leaves turning black or brown is a sign of rot. If you constantly water your plant and do not air dry it properly, water retention will cause plant rot.

After watering your plant, ensure a proper air dry. Before returning the plant to its pot, you can add a paper towel to absorb all the remaining water in the pot.

Air Circulation

Like everybody else, air plants also need good air circulation. Poor or no air circulation can kill your beautiful air plant. An open-air display or pot is a brilliant idea for your air plant to grow and thrive well. 

An enclosed vessel encourages stagnant conditions, and this will end disastrously for your plant. Air circulation will help maintain a stable air temperature and prevent water from building up on the leaves. Place your air plants away from heating and cooling vents.

Humidify Your Plant

Air plants are used to high humidity levels; tropical rainforest conditions. You can revive your plant if it grows in a less humid environment by increasing the humidity levels. 

The right level of indoor humidity for an air plant is 50-90%. You can use a  humidifier to increase the humidity levels.

Another way to increase the humidity is by spraying water on the air plant in a misting method. This should be done in an open room with good airflow, so it does not promote mold/fungus growth that comes after soaking air plants.

watering plants using misting method
Use the misting method to increase the humidity level around your plant.

Cut Brown Leaves

Overwatering or underwatering Tillandsia might cause browning of the leaves. When the plant has a lot of water in it, the leaves or branches are constantly wet, and this might lead to fungal infections. Fungal infections damage the plant cell; hence browning or plant rotting.

If you spot such a problem on your plant, you can start by cutting off the brown dead leaves and branches to revive your plant. Be careful not to harm the plant when removing dead leaves.

Cutting off the brown or black leaves and stems will ensure there’s no spread of infection to healthy parts. 

Provide Some Sunshine

The three essential items for air plants are air, water, and light. Because of a lack of sunlight, your air plants may be dying.

Indoor air plants thrive in bright filtered and indirect light, about 3-5 feet from the window. The small amount of direct sunshine will also be excellent; ideally, it should be morning sun. 

Don’t let your plants sunburn or get dehydrated if they are subjected to too much light for extended periods.

Artificial lighting is also a fantastic option, but place the plants near the light source and switch off the lights at night. This will aid in the air plant retaining enough moisture.

Add Additional Nutrients

Like any other plant, air plants also need nutrients. The most common misconception about air plants is that they get all of their needs from the atmosphere. You can add fertilizer to your plant once or twice a month when watering to help it thrive.

healthy leaves in an orange pot
Try using fertilizer to help your plant thrive more.

Feed your air plants with a solution of air plant fertilizer. Always follow the recommended amounts to give your plant.

You can use an air plant or bromeliad mix. If you cannot find any air plant fertilizer, you are better off using any liquid houseplant fertilizer with a 1/4 strength.

Eradicate Pests

The presence of pests is a rare and frequently overlooked reason for the death of your air plants and other indoor plants. When watering, it is the right time to check and pay attention to the pest.

If you find a web-like substance on your plants, you’re dealing with a mealybug. These pests produce a waxy covering to shield themselves and then consume the plant’s sap.

The procedure for eradicating these pests is straightforward. To begin, isolate the plants from one another. Next, clean the plants with a mild liquid dish soap and water solution. 

Use a cotton swab soaked in rubbing alcohol to clean out all of the nooks and crannies. Keep an eye on the plant for a while and return the plant to others after you’ve eradicated all of the pests.

Temperature

Air plants thrive well in temperatures of 50 to 90 degrees Fahrenheit. It might be difficult to revive if you expose your air plant to extremely cold or scorching temperatures. Extreme heat may cause the air plant to dry out and die.

Note that the drier and hotter the air, the more you will have to water your air plant. This should not come as a surprise, and these subtropical and tropical plants will die under freezing conditions.

Have New Home for Your Plant

Some air plants require periodic repotting. You can do this by removing the plant from its pot and just replanting it in a different pot, or you can free-pot the plant.

Free-potting is where you push the roots down into the soil or marbles so they are buried. This will enable them to grow more freely and be healthier.

preparing to repot the plant
Repotting allows you to provide fresh soil for your plant to grow more.

Another thing, you should strive to imitate its natural habitat for it to grow and thrive. If you notice your plant is dying, maybe it might be because of the pot. You can always use wood materials or any other material that portrays their natural environment.

Bottom Line 

Finally, after learning how to revive your air plants, apply the principle that prevention is preferable to cure. And since no lesson goes unlearned, if your plants are beyond reviving, make a note of everything here as a life lesson learned for future reference and continue looking after the remaining ones. 

Ultimate Guide: How To Care For Sedum (Stonecrop) Plant

Sedum is a herbaceous perennial succulent found in many parts of the world and also thrives indoors Sedum is a plant that has an abundance of green or red flowers. It can be grown to cover even the most barren areas in your garden, but it requires little care to survive. The Sedum plant needs very little water and can endure many different conditions to support its growth.

What is the necessary care for your Sedum plant? The plant’s succulent leaves, stem, and roots enable it to restore water, so you only water it regularly when newly planted. Once established, you water it sparingly. You will want to keep your plant healthy by ensuring it gets enough sunlight and fertilizer. Mulching ensures it retains water and gets nutrients when pruning and trimming are necessary to give it a standard growth height.

Sedums give your home a beautiful look, but you must give them proper care to achieve that look. If you are ready to take on the challenge of indoor gardening then this article will help you understand what it takes to care of the sedum plant.

Basic Requirements for a Healthy Stonecrop

Sunlight

Sedums grow well in dry and hot regions. That does not mean they can’t thrive in your garden if you do not live in such areas. All you need is to ensure your plant is exposed to full sunlight and gets at least 6 hours of sunlight each day. Getting enough sunlight helps sedums attain their best colors. The species that grow taller require more sunlight than those that stay on the ground.

succulent getting sunlight
At least 6 hours of sunlight each day is needed for a plant like a sedum

Lack of sunlight causes the plant’s stem to flop over. The stem develops soft foliage, grows tall and thin as it attempts to grow in the direction of available sunlight.  As such, your plant will find it challenging to remain erect at the flowering stage because the thin stem will be weighed down.

Watering

Like most plants, sedums require water to survive despite their ability to store water longer. Giving your plant water at regular intervals keeps it healthy and blooming. However, take care of the amount of water you provide to avoid overwatering.

woman watering her plant in a cup
You must feel the soil of your sedum plant to determine if it needs watering or not

Before watering your sedum, identify when it needs it by feeling if the soil is completely dry using your fingers. If the top layer of the soil feels dry, it is time to water your plant. Lack of enough water makes the leaves lose their plump look and become droopy and wilted. In extreme cases, the leaves start dying out and falling.

So how often should you water your sedum? When you first plant it, ensure you water the plant every day. In summer, give the plant water every 7 to 10 days and every 2 to 3 weeks in winter.

Mulching

Sedums need mulch for two reasons; to retain water and to keep away weeds. Some sedum plants clump together, and if not mulched, weeds can grow and compete for nutrients with your plant. After planting your sedum, make sure you add compost up to 1 inch in thickness. Mulch your plant at least once per year to keep them thriving and producing flowers.

various types of plants surrounded by rocks
Perform the mulching method on your plant at least once a year to allow it to thrive more and produce more flowers

Take note, however, that too much mulch can cause your plant to rot. Mulching material should be placed a distance from the base of the plant to prevent that. Remember gravel mulching is usually advisable because it allows easy water passage, reduces rotting risks, and makes your garden attractive.

Staking

While creeping sedum varieties can thrive without staking, the clumping types can become floppy due to a lack of enough sunlight and nutrients. As your clumping sedum plant approaches the flowering stage, keep it erect by wrapping twine or a wire around it.

 Avoid tying the plant too tightly to prevent the wire from cutting through and injuring it. If you have the clumping types, you should consider planting them close by to ensure they support each other.

Pruning and Trimming

Sedum plants have beautiful flowers from the time they start budding to when they bloom fully. You can either choose to trim clumping sedums immediately after they bloom or let the flowers dry on the plant for fall colors. You can prune them at the onset of summer to prevent them from growing too tall. Some gardeners pinch them off at the growth point to give the plant a bushier look. However, doing that delays the plant’s flowering process. In spring, pruning is only necessary if the plant’s growth extends to unwanted areas; pruning at that time can cause your plant to rot.

Fertilizer

Sedums are generally low-maintenance plants and need just a little fertilizer. Sometimes, the 1-inch layer of compost mulch you put on the base of the plant may provide enough nutrients. This said you don’t want to take chances with your plant. Feed it with enough nutrients to get that strong and beautiful look. One month after planting, give the plant some fertilizer and ensure you keep feeding it after every three months. Ensure the fertilizer you use has equal amounts of potassium, nitrogen, and phosphorus.

basic gardening tools used
Even though these plants need just a little fertilizer, it’s still best to feed them enough to keep them strong and thriving

Propagating Sedum Plants

To propagate sedum:

  • Take cuttings from healthy new growth. You can use fresh or dried cuttings.
  • Use sharp pruners to remove about 1/3 of the stem below the node where you want to make the cutting. Cut off the lower portion of the stem just above a bud that has formed.
  • Fill a shallow tray with moistened peat moss.
  • Place the cuttings in the tray so that the nodes are facing down.
  • Cover the cuttings with plastic wrap. Allow the cuttings to remain undisturbed for one week.
  • After seven days, gently lift the plastic wrap and place the cuttings into individual pots filled with potting soil. The cuttings will root within three months.
  • You can also divide mature plants. Gently remove the roots from the parent plant. Fill a container with moistened peat moss. Plant the divided plants in their containers.

Pest and Diseases Associated with Sedum

Pests

The most common sedum-associated pests include aphids, spider mites, whiteflies, leafhoppers, thrips, mealybugs, slugs, snails, caterpillars, and ants.

  • Aphids cause stunted growth and yellowing leaves. Aphid infestation should be treated immediately with insecticidal soap.
  • Spider Mites cause web-like patterns on the undersides of the leaves. These tiny creatures suck the juices from the leaves, causing the wilting and eventual death of the plant. Apply a mixture of water and dishwashing liquid directly onto the affected areas. Repeat once per week until the problem clears up.
  • Whiteflies cause small, whitish spots on the underside of the leaves. Remove any infected leaves and destroy them. Spray the entire plant with insecticidal soap.
  • Leafhoppers cause small brown spots on the undersides of the leaves. Destroy all damaged leaves and spray the entire plant with insecticidal soap.
  • Thrips cause smudged, light green patches on the undersides of the leaves. Thrips can also attack the stems and buds. Destroy any infested leaves and spray the entire plant with insecticidal soap.
  • Mealybugs cause soft, sticky honeydew excretions on the undersides of the leaves. Mealybug infestation should be treated immediately with insecticidal soap.
  • Slugs and Snails eat the tender young shoots of the plant. To deter these pests, cover the base of the plant with an inch layer of mulch.
  • Caterpillars eat the foliage of the plant. To discourage this pest, keep your garden clean by removing fallen leaves regularly.
  • Ants damage the leaves of the plant by eating the sap. Keep ant activity under control by covering the base of the plant with an inch layer of mulch.
sample of a leafhopper
Sample of leafhopper found in succulents like sedums

Diseases

Sedums are susceptible to many diseases, including mildews, rusts, blights, and various viruses.

Mildews cause dark, fuzzy patches on the undersides of the leaves. Mildew infection should be treated immediately with fungicide.

Rusts cause reddish or orange spots on the undersides of the leaves. Rust is caused by fungi that live in the soil and infect the plant through wounds or injury. Rust can be prevented by keeping the soil well maintained and avoiding injury to the plant.

Blights cause blackened areas on the undersides of the leaves. It is caused by bacteria that enter through cuts or injuries. Remove and destroy infected leaves and spray the entire plant with a fungicide.

Viruses cause deformed leaves and stunted growth. Virus infections should be controlled by spraying the plant with insecticidal soap.

Looking for low-maintenance succulents to grow in your garden? Why not give the sedum a try. They not only give your garden a beautiful look but are easy to maintain and care for. They retain water in their leaves, roots, and stems, making them able to resist drought. Although they grow well in hot and dry areas, with proper care, they can bloom well in your garden no matter the weather conditions.

Amazing Facts You Didn’t Know About Lithops (Living Stone)

Lithops are small, stemless, succulent plants in the Aizoaceae family, indigenous to southern Africa. These strange-looking plants grow in two joined leaves resembling a pebble or craggy stone lying on its side. They can vary in color according to the species. This may range from yellowish-brown to gray, but all have the same general body plan due to convergent evolution.

So what are some interesting facts you may not know about Lithops? Instead of developing conventional flat leaves, lithops make small knobby and stone-like leaves (hence the name living stone). These plants look so much like stones that they wouldn’t look out of place in a gravel pit. They come in different colors and shapes. While some Lithops look like a pebble, others have the shape of a jelly bean. Its resemblance to stones helps Lithops blend in their surroundings. This edible succulent can live up to 50 years.

There are so many fun facts about this strange plant that will surprise you. This article will focus on some of these facts that make lithops so interesting.

1.    It is the world’s most camouflaged plant.

 The Lithops flower comes in all colors, but they are all tan to brown in direct sunlight. Their bodies are perfectly shaped for blending into rocks. The light color helps them blend in better in direct sunlight. If it’s too dark, they will close up their leaves to prevent water loss. They are mostly perfect for surviving in deserts because of this unique ability.

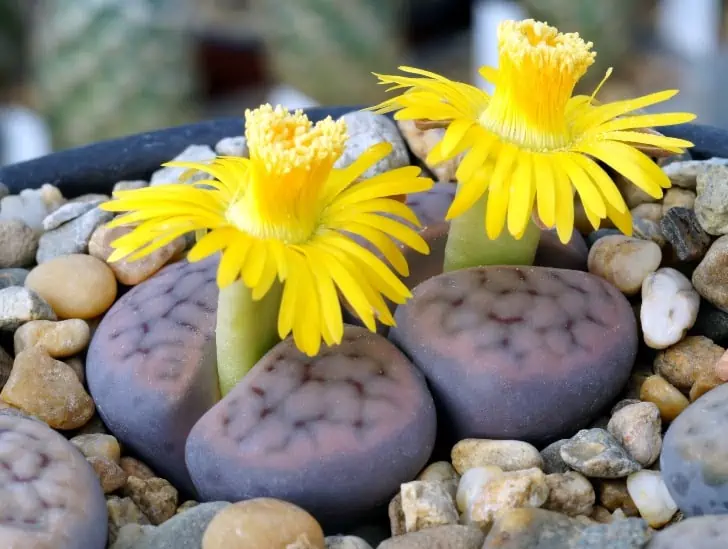
Lithops on the ground.
Their bodies are perfectly shaped for blending into rocks.

In their natural habitats in South Africa and Namibia, lithops blend in so well with the desert environment that they can be challenging to locate even for people with years of experience.

2.    They survive with little or no water

If you ask anyone who has tried to cultivate lithops, the worst mistake you can make is over-watering them (or watering them at all.) Lithops thrive in the desert conditions of Namibia, Botswana, South Africa, and some bordering regions of Angola.

The one thing these places have in common is the rocky ground and dry conditions. While a few lithops species require up to 600mm of rainfall to survive, most of them require near zero and survive on morning dew.

They also favor extreme temperatures and grow in areas where the summers are hot, and winters are freezing, except for one species located at the coast with moderate temperatures throughout the year.

3. Lithops were discovered in 1811

In 1811, John Burchell, an English explorer, naturalist, traveler, artist, and author, picked up a strange-looking pebble from the stony ground in South Africa. He quickly discovered that the “pebble” was a plant after all.  He initially named it Mesembryanthemum turbiniforme, and unfortunately, he didn’t document a detailed physical description to help us know what type of lithops it was.

Nowadays, the name Lithops turbiniformis is rarely used, although, for many years, it was used to describe what we now know as Lithops hookeri.

A colored brown lithops with stones.
The one thing these places have in common is the rocky ground and dry conditions.

Several more lithops discoveries were documented as Mesembryanthemum species until 1922, when Nicholas Edward Brown split up the genus based on capsules. Lithops was then conceived and had numerous species that continued to be discovered in the decades that followed. However, the findings between different researchers were so diverse that they could not agree on the relationships between them and what clusters could be named as species. Thus, by the 1950s, little was still known about lithops taxonomically.

This changed when Naureen and Desmond Cone began to study Lithops. They discovered almost all their natural habitats and collected more than 400 samples from different lithops populations. Then, they documented them, assigning them individual identities known as the Cole number, which is still used today. Their studies culminated in a definitive book (Lithops: Flowering Stones) in 1988, which details all the species, subspecies, and varieties of the plant.

There are at least 38 species of lithops and 145 varieties. They all mostly look similar, only differing in color, markings, and texture of the body. They come in various colors, including pink, rust, brown, green, and gray. They also have a vast variation in lines, patches, and dots on the upper surface, which help them with camouflage by hiding most of the leaf surface. They could also be dimples or indentations where these markings appear.

Because of their amazing camouflage abilities, new Lithops species continue to be discovered, with the latest discovery being as recent as 2006.

4. Lithops can live up to a 50 years

Lithops grow very sluggishly and can take up to 3 years to flower. However, because of their ability to store water for months and little need for maintenance, lithops can live for up to 50 years in their natural habitat.

As a matter of fact, you can keep healthy lithops in the same pot for more than 15 years with little water and 4 to 5 hours of direct sunlight every day. Lithops are unlike most succulents in that they don’t have stems. However, their flowers bloom with a short stem.

A blooming flower of lithops.
Their flowers bloom with a short stem.

They flower mainly from March to May in the Southern Hemisphere. All lithops are noonday flowering plants, which means that they flower at noon when the sun is shining the brightest.

5. Lithops are edible

Lithops are nonharmful to humans and pets. As a result, they are popular house plants. What most people don’t know, however, is that lithops are used as a source of food and herbal medicine in some parts of Southern Africa. There are also stories of children in the Namib desert chewing lithops to hydrate in the desert heat.

However, just because they’re safe doesn’t mean you should eat them. They aren’t too tasty anyway.

6. The name lithops comes from a Greek word

These plants belong to the plant family Mesembryanthemaceae (Aizoaceae). Nicholas Edward Brown named Lithops from two Greek words, lithos (stone) and opsis (like), for their deep resemblance to stones. The word lithops is used to describe the plants in both singular and plural forms. Local African names where lithops are found include skaappootjie and beeskloutjie, which mean cattle and horse’s hoof, respectively, for their resemblance to hoof-prints.

7.   Lithops are self-sterile

This fact means that they must be pollinated to produce seeds. The seeds are contained in a hydrochastic 4-8 chambered fruiting capsule. The capsules only open when exposed to moisture, revealing tiny seeds.

In their natural habitat, rain opens the capsules and splashes the seeds up to an inch from the mother plant. Once they dry, the capsules close to protect any remaining seeds for the next rain.

How to take care of lithops

As we’ve already established, lithops are popular plants to cultivate at home. While they are naturally found in Namibia and parts of Southern Africa, their seeds are found in many stores and even online.

Lithops are relatively easy to maintain. However, there are a few mistakes you can make in their care and kill them. Here are a few things you should do when growing them.

Light exposure

Lithops are desert plants, so you can bet they require some sunlight to survive. There is nothing like “harsh sunlight” with these plants, so feel free to place them where there is no shade. A South or East window with lots of sunlight is the best place to have them, but remember that insufficient sunlight might cause lost patterns and elongated leaves.

Lithops exposed in the light.
Too much heat can cause sunburn and damage your lithops’ foliage.

Although too much sunlight is not an issue, too much heat can cause sunburn and damage your lithops’ foliage. Ensure you place them in less sunny pots or cover them up if you realize that the pots absorb too much heat in the summer.

Best temperatures

Lithops can tolerate temperatures of 90 to 100 degrees Fahrenheit. However, they are likely to be most healthy in temperatures between 65 to 80 degrees Fahrenheit.

Since the plant may develop rot, it is essential to protect it from extremely low temperatures. Therefore, carry it indoors when the temperatures drop to less than 40 degrees Fahrenheit.

Soil requirements

Lithops require to be planted in fast-draining potting soil. They grow even better when they are planted in a cactus mix. Pebbles, sand, and anything gritty can be added to the soil to enhance drainage.

Watering lithops

Because these plants can store water in their leaves for months, using the wrong watering cycle can lead to their death.

To avoid this, you should water them once a fortnight at most from the end of summer, when the plants are actively growing. During winter, it’s best to leave them without water as it is their dormant season when they are reserving the water in their leaves. Watering them in this period will harm their growth.

A lithops freshly watered.
One way to determine if it’s time to water your lithops is by observing their physical conditions.

Apart from the watering schedules above, another way to determine if it’s time to water your lithops is by observing their physical conditions. For example, if you notice that they have started to pucker, wrinkle or appear to be sunken in the pot, it might be time to water them.

To wrap it up

Lithops are arguably the most intriguing succulent plants. They look like stones but bloom the most colorful flowers. They also survive in harsh conditions and live up to half a century.

5 Golden Rules for Watering a Snake Plant

Sansevieria, also known as the snake plant, is one of the most beautiful and drought tolerant houseplants around. The plant requires minimal care to thrive and make your indoor spaces dazzle with beauty.  Although it is drought-resistant, it doesn’t mean that the plant doesn’t require watering at all.

So, how often should you water a snake plant? Like any other succulent, you should only water your snake plant when the potting soil is completely dry to maintain its beautiful appearance. Touch and feel the soil at least once a week to see if it is completely dry. If the top one or two inches of the soil feels completely dry, then you know it is time to water. Avoid overwatering your snake plant at all costs since it could cause severe damage to the leaves.

In this blog post, we discuss everything you need to know about watering your snake plant. So, let us get started right away.

A Quick Overview of Basic Snake Plant Facts

The botanical name of the snake plant is Dracaena trifasciata. It is one of the most popular houseplants that is usually kept for its beautiful leaves.  The houseplant is famous for its upright leaves that appear gorgeous throughout the year.

The leaves stay green most of the time, although some snake plant varieties have green leaves with white or yellow edges.

The plant’s origin is in South Africa and can grow to a height of up to two feet, although some mini varieties will grow only a few inches tall.

A Snake Plant is one of the most popular houseplants with gorgeous upright leaves.

The only downside of keeping a snake plant indoors is that it will rarely bloom. Only a few varieties will produce small flowers at the base of the plant for a relatively short period.  The rare flowering mostly happens when the plant is a few years old and is never consistent.

So, if you are looking for a flowery houseplant, a snake plant might not be the best option.

However, this is one of the best houseplants for beginner gardeners because it is low-maintenance. A snake plant can literally survive for many years with minimal care.

How Often Should You Water a Snake Plant?

Incorrect watering is one of the leading causes of death among snake plants. Therefore, you must ensure that you are watering your plant at the right time to avoid losing it.

You need to keep in mind that overwatering a snake plant can lead to severe root rot, while lack of water will cause the plant to lose its beautiful appearance since it will be struggling with normal growth.

In a perfect world, there would only be one simple rule that dictates how often to water a snake plant to make your life simple. Unfortunately, we don’t live in a perfect world, and you need to learn how to deal with different situations.

Overwatering your Snake Plant can lead to severe root rot.

Basically, several factors will determine how often you need to water your snake plant. But before we look at these factors, it is good to mention the general rule of watering a snake plant.

As mentioned earlier, you should only water your snake plant when the potting soil is completely dry. The easiest way to check if the soil is completely dry is by digging your finger into the soil up to two knuckles.

If you don’t want your fingers to get dirty, feel free to use a pencil or dipstick. Now, feel the soil carefully and see if it is dry or moist. If the soil feels completely dry, then it is time to water your snake plant.

Typically, a snake plant can go without water for up to one month but don’t be tempted to overwater it because the results will be catastrophic.

Here are some of the critical factors that determine how often you should water your snake plant:

1. Temperature

This is one of the most critical factors that determine how often you should water your snake plant. Ideally, your snake plant will be happy in the 55o-85oF temperature range. This is quite a broad spectrum which shows you how strong these plants can be.

Your snake plant will start struggling if you allow the temperature to drop below 50oF.

Generally, your plant will require frequent watering at high temperatures because the leaves will be releasing a lot of moisture, and the soil tends to dry out faster as a result of the increased evaporation rate.

2. Location of your plant

The general location of your plant inside the house will also determine how often you water the plant.

When choosing the perfect spot for your snake plant, think about what sort of lighting it requires to thrive and the general position of the central heating appliances inside your house.

Sometimes, the plant can grow taller than anticipated, forcing you to change its position. Generally, avoid positioning the plant in high-traffic areas because someone can easily knock it down.

Snake plants tolerate different light conditions, but you should avoid placing them anywhere near direct sunlight. Exposing the plant to direct sunlight will increase the risk of its leaves being sun-scorched and complicate watering.

Ideally, you should place your plant on a west or east-facing windowsill. Avoid a south-facing windowsill because that would expose it to direct sunlight.

If the plant is exposed to direct sunlight, there will be an increase in the evaporation rate, which will increase the watering frequency.

Likewise, if you keep your snake plant in a relatively shadier position, evaporation and transpiration will be relatively slower, increasing the time required between watering sessions. 

The most important thing you need to do is monitor the moisture levels carefully so you only water at the right time.

3. Seasons

Although a snake plant is primarily an indoor plant, it still responds to weather and seasons. In spring, the plant usually becomes active and begins to experience massive growth. During this time, it requires more frequent watering than the rest of the year.

By summer, it starts to slow down the sudden burst of energy experienced during spring, but it will still require regular watering because the evaporation and transpiration rate is still relatively high.

Consider the current season when thinking of how often to water your Snake Plant.

The growth rate slows down in autumn, then come winter, it stops growing, and watering will be almost unnecessary.  Although a lot of people love these plants for their long and sword-like leaves, they occasionally flower.

For them to produce flowers, they require a lot of energy which may force you to increase the watering frequency.  But you need to be extremely careful not to overwater your plant.

4. Humidity levels

Humidity and temperature are closely related. If the air surrounding your plant becomes too dry, it will begin to struggle.

Furthermore, a snake plant is a desert plant and is highly susceptible to diseases such as mold if the air is too humid. Therefore, you need to be careful with using air conditioning and central heating devices in your home because they tend to dry the air and lower humidity levels.

However, if your plant is being watered properly, it will be well-equipped to cope with fluctuating humidity levels. 

The most important thing you need to know when it comes to humidity is that the more humid the conditions around your snake plant, the less you should be watering it.

5. Type of container

The type of container your plant is planted in can also have a significant bearing on the amount of water it requires.

For instance, a glazed or plastic pot won’t allow water to evaporate through the sides. However, a terracotta pot is highly porous, and some of the water is lost through evaporation.

Using highly porous containers is not out of the question because they are the best option for growing indoor plants.

However, it only means that you need to be aware of the potentially increased moisture loss and test your potting mix regularly to see if your plant requires watering.

How to Water a Snake Plant

The best way to water your snake plant is to give it a relatively deep watering by soaking the potting mix. Ensure you use rain or filtered water, and always allow the topsoil to completely dry out before watering again.

Avoid using tap water because it contains chlorine that can damage the plant’s leaves. If you only have access to tap water, allow it to stand overnight so that the chlorine and other chemicals disperse.

Don’t wet the leaves, and try not to let the water pool at the center of the plant leaves because it can cause severe plant rot.

When planting or repotting your snake plant, ensure that the plant container has plenty of drainage holes at the bottom and use the highly porous potting mix to avoid waterlogging it.

When planting a Snake Plant, select a container with sufficient drainage holes.

Like other succulents, snake plants store water in their rhizomes, roots, and leaves. It means that these plants can survive even without frequent watering.

So, as long as you give your plant a deep watering, you don’t need to be worried about anything for at least two weeks.

You are free to check the potting soil’s dryness once or twice per week, but chances are the plant won’t require watering for at least two weeks.

Summary

That is it about watering a snake plant, and we believe you are now fully prepared to take care of your plant.

Snake plants are beautiful and low-maintenance. With the right watering schedule, you can be sure that your plant will stay healthy and thrive for many years.

Let us know if you have any questions or suggestions in the comments section below. 

10 Easy Steps on Reviving a Dying Aloe Vera

aloe_vera_plant

Aloe Vera is a hardy plant that will not require much of your attention. Sometimes, aloe leaves may start dying which might just be its natural cycle. However, at times dying of leaves can make you lose the whole plant.

There are 10 easy steps that you can use to recover a dying Aloe Vera. But before moving on to save your Aloe plant, examine why the plant is dying. Some of the reasons might be too simple to manage, and not worth killing this “plant of immortality”.

1.    If Your Aloe Plant Looks Sunburned, Move it To a Shade

Aloe Vera does well in proper sunlight. However, the aloe plant is susceptible to much light hence should not be placed in direct sunlight for long hours. Direct sunlight tends to dry out the plant and turns its leaves from green to yellow, which might be a sign that your plant is dying.

If you realize that your plant is sunburned, you should move it to a shady area and diffuse light. If you have planted your aloe plant indoors near the window, you may consider relocating it to places with less light. With time, your aloe leaves start to turn back to their usual color.

2.    Minimize Watering if Your Plant Looks Overwatered.

The Aloe plant is known to flourish even in rough conditions. It can store water within its leaves hence does not require regular watering. Thanks for your care, but overwatering your aloe plant will lead to root rot and browning of the leaves. These are signs of a dying plant.

This occurs mainly for potted aloe plants where the pot does not have enough drainage holes. To avoid the effects, you need to ensure that you place your plant in a pot that can quickly drain the water. Also, only water the plant when it has completely dried up.

Insufficient drainage and overwatering often lead to root tot and your Aloe Vera may die.

Watering may also depend on the climates and the temperatures. During winter temperatures, water your aloe much less frequently because the plant is in a dormant phase. During summer periods, you may need to increase your watering.

3.    Replace the Potting Soil if it Lacks Nutrients

Unlike other plants, the aloe plant does not require many nutrients from the soil. However, a complete lack of nutrients in the soil may be a reason why your plant is dying. Unhealthy Aloe Vera will show pale leaves which turn light brown with time. Leaves may tend to dry up and wither even with proper watering.

To help the unhealthy Aloe plant, you may need to replace the potting soil with a better soil type to provide the essential minerals to the plant. Don’t forget that even when looking for better soil, drainage of the soil is critical. The natural process allows water to move through the soil to ensure the Aloe Vera plant benefits from all the nutrients.

4.    Drainage Holes are Vital for Every Potted Plant

In the intervals of your watering, there should be good drainage for excess water to be removed. A pot that retains water may cause the roots to rot. Watering too often and not allowing the water to drain may make the plant start dying.  

 To help a dying aloe plant rotting, you should consider using a terracotta pot ideal for the aloe plant. Terracotta pots are porous to ensure the roots are not left to sit on the water and that water can drain. The purpose is to satisfy the requirement for dryer soil conditions, for aloe plant to flourish.

5.    Expose your aloe to more sun

Planting Aloe Vera indoors may bring beauty to your house but may affect plant growth when some conditions are not met. Aloe is a plant that thrives better and becomes very healthy under the sun. If your aloe has stayed for quite a long time in a damp spot, think of taking it out to the sun.

Place the aloe plant in a sunny place for 4-6 hours of direct sunlight. Without much sunlight, your succulent plant will begin to stretch and lose its attractiveness. However, as much as it may require light, it may not appreciate sustained direct sunlight. It may topple over as the stems become weak day by day.

6.    Cut Off Healthy Remaining Leaves for Propagation.

Sometimes the health condition tends to get worse despite the many practices to care for it. The leaves progressively become discolored and show signs of withering. At this point, practices to save the plant may be rendered futile. For such a matter, the problem might be hidden under the soil. Rot root.

If your Aloe Vera is dying, consider cutting off remaining healthy leaves to propagate them later on.

       The most effective option is cutting off any healthy remain leaves of the plant for propagation. Aloe Vera can quickly propagate from leaf-cutting, which may be the only way to save it. Cutting some of the healthy leaves may also help to produce different plants at no extra cost.

       Some plants overstay for too long in the shades making the leaves too weakened to stand back again. At this point, no amount of sunlight can save them. Propagation is the only effective way to prevent such plants from dying.  

7.    Examine the Aloe leaves

Aloe is a succulent plant that stores water in its leaves, but if the plant lacks enough water, the leaves begin to droop or are become almost transparent. However, this sign can also indicate root rotting, which is due to overwatering. The most important thing is to examine when you last watered the plant.

If your Aloe Vera leaves are becoming transparent, the plant is not getting enough water.

If you realize that it has taken many days before watering, you need to water the plant to return it to its standard shape. But if you watered the plant lately, you should eliminate it from the soil and check for root rot. Aloe Vera is a talking plant that will tell you what it needs before it even dies.

8.    Tend the Root In Case of Root Rot

If your plant is turning yellow or withering even with all the conditions in place, you should examine the root rot and determine how many are well. Mushy roots are characteristics of root rot and need to be removed. If there are a lot of healthy roots and a small portion of mushy roots, you can save the plant by removing the mushy roots.

To remove the rotten roots, you should use a sharp knife to cut off the dead roots. Ensure that you cut them all to avoid more infection. If the more significant portion of the root is affected, then use the earlier method of removing the leaf for propagation.

9.    Choose a Pot, One-Third Larger than the Root System

If you plant a small aloe plant in a large pot with much soil, the excess soil will hold up more water, leading to root rot in the future. The root system of aloe Vera grows horizontally rather than vertically. Choosing a wider pot can be better because a narrow one may tip over as the plant grows.

You should always consider the size of your Aloe Vera when choosing the container for the plant.

On the other hand, choosing a too-small pot deprives the plant of enough room for the roots to grow. Due to watering, it can easily lead to root rot or a stagnant plant due to lack of growth. When the plant seems to be dying, you can check on the size of the plant and the size of the pot, and always opt to select a pot that is wide rather than a narrow or a deep pot.

10.     Remove dead leaves

Dead leaves tend to draw nutrients from other healthy portions of the plant. They also affect by infecting other parts of the plant, and slowly but surely, the plant can die. To prevent the rest of the plant from suffering, you should take a sharp knife and cut the leaf away at the base.

Cutting back of dead leaves encourages more aloe leaves to grow and helps the plant to recover. Don’t be too fast in cutting broken leaves, instead, it would help if you let them sit for few days after breaking. These will allow the leaves to develop callus, which will help harden the leaves on the outside.

Bottom Line

You can always ensure that your aloe Vera remains healthy and in good shape with all that understanding. Aloe Vera will only be attractive if it is well taken care of, and if not, you may not even want to keep it in your house. When the color turns and the leaves shrink, aloe plant loses its aesthetic.

Aloe will mostly be restored if the damage is only to a few leaves. Therefore, it is essential to examine your plant immediately after it starts showing some unhealthy characteristics. The Aloe plant keeps on recreating itself in your home, and a single plant can assure you of a never-ending aloe plant in your compound. For this reason, take good care of your Aloe Vera so that it can take care of the beauty of your compound or house and your health.   

Ultimate Guide on How to Get your Aloe Vera to Flower

Aloe Vera plants are a unique addition to your garden. The succulents grow perfectly in flowerbeds and make effective indoor plants. You have been caring for your aloe plant for some time now, and you expect it to start flowering. Hey, be patient and stop expecting much from your young plant. Aloe Vera tends to flower once it has reached its maturity stage. For a standard aloe plant, the maturity stage is achieved approximately when it is about four years.

In this article, we will focus on the ultimate guide to get your aloe Vera to flower. While some aloe plant tends to take longer to bloom even after maturity, there are steps that you can take to persuade your aloe plant. The plant expects you to take good care of it to bloom and it will not discourage you when it is ready. It will flower and glow yellow.

1.    Fertilize Your Aloe Plants

Proper fertilizing of your aloe plant can help persuade the plant to flower. Fertilizing at proper times can also be a reason for your plant to bloom. It is essential to use a well-balanced fertilizer in early spring and again in midsummer. After feeding the plant, you should water it to drain the excess salt out of the pot to prevent destroying the roots.

It is essential to take a keen look at the kind of fertilizer you are using. Using high phosphorous or superphosphate that promises blooms may damage the plant due to their high concentration. After every two years, you should transplant the plant to freshen the soil and aerate the roots.

Fertilizing your Aloe Vera at proper times will promote the flowering process.

2.    Place Your Aloe Plant Where There is Enough Sunlight.

Unexposed mature aloe plants to sunlight will result in a lack of flowering and may bring discolored growth, and withering which may weaken the plant. If the plant is planted indoors, place adult aloe plants outside if you want to witness big bright flowers. Outdoor will ensure the plant gets enough light, and wind and bee activity will pollinate the plant.

Just like any other plant, aloes’ fresh and notable stems scorch when temperatures are high. Therefore, it is essential to monitor the sunlight that is reaching your plant. The proper amount of sunlight can make the stems of the plant vigorous to hold the flowers.

3.    Schedule Your Aloe for spring

Aloe plant only flowers at particular times of the year. If you anticipate your aloe to grow, make sure that the climate is conducive to growing and blooming. Aloe Vera blooms each year, especially in the early spring. If it is of the right age, then expect it to flower.

As you wait for this time of the year to come, the best way to help your plant bloom is to ensure that it remains healthy. You should follow all the steps that ensure that your aloe is well maintained. Before spring comes, make sure that your plant is in the soil with adequate nutrients to support it and no pests and insects invading it.

If your Aloe Vera is mature enough, you should expect the plant to flower in the early spring.

4.    Pamper Your Aloe Plant

 Time to flower is here, and you can’t notice any signs from the plant, do not despair. If you are sure that the plant is of age, you need to experiment with various techniques that will pumper it. Pamper your plant by ensuring that it receives just enough of everything that it needs.

If your plant is indoors, ensure that it gets additional coaxing to trigger flowering. Ensure that the temperature is correct and that the drainage is just working right. If all these conditions can be done well, then the spiky and the vibrant yellow flowers can be seen when the time comes.  

5.    Choose a Liquid Fertilizer.

 One of the benefits of using a liquid fertilizer is that it penetrates the soil immediately after application. The plant is given fast access to nutrients which ensures rapid root growth. A potted aloe plant may require the application of this fertilizer more often than the other one.

The best fertilizer to use is the liquid 10-40-10 houseplant mixes or those explicitly designed for succulent plants. Using the liquid fertilizer as a foliar spray should be done in the proper times of the day to avoid leaf sun-scald. The best times are early morning, late afternoon or overcast days when there is little sunlight.

6.    Remove the Pups From Your Plant.

Pups are not bad, as they are a sign that your plant is healthy and can produce babies at the mother plant’s base. As the aloe plant grows, the babies may tend to clump and spread as they try to mature. It would help if you took a sharp knife and cut the connection between the plant and the pups.

Pups tend to take the energy from the mother plant, the energy that could be used for flowering. Pups also consume the nutrients that the mother plant could appropriately utilize for blooming. For these babies, allow them to dry a bit for at least 24 hours before replanting them in their new pots.

Pups usually take the energy from your Aloe Vera and the plant no longer has sufficient resources to bloom.

7.    Encourage Flowering By Watering.

When watering is done correctly, it encourages the blooming of the aloe plant. You should ensure to water the plant when the top inch of the soil is dry. Ensure that the plant has exhausted most of the water in the pot before you decide to water again.

Don’t overwater the plant to prevent it from embarking on rotting, which may discourage blooming. Adequate watering ensures that essential nutrients are transported through the plant. Enough water will also help strengthen the stem of the plant to stand upright and support the flowers.

While proper watering is essential for Aloe Vera to produce flowers, you should avoid overwatering the plant.

8.    Water the Aloe Plant from the Bottom

The Aloe plant is a hard-to-kill plant. You might have been watering the plant wrongly without even realizing it. The truth is that if you can rectify this behavior, you may end up encouraging it to flower. You have known when to water your aloe Vera, but how do you do it?

Watering Aloe Vera should be done from the bottom of the plant so that water can reach the roots properly. Watering should be done consistently until the water can pour out through the drainage. Watering the plant from the top may end up breaking the flower if it is not done slowly and carefully.

9.    Watch for Insects and Pest.

When your aloe plant is maturing, some pests and insects are ordinary fans of the plant. This pest includes the mealybugs, which are flat and brown. These pests suck on the sap from the aloe leaves, which weakens the plant and destroys a healthy flowering aloe plant.

To prevent these pests, you should use a natural, non-toxic pesticide to drive away the pests from your aloe Vera. Avoid misting your aloe Vera as it can make it rot out. If the leaves have gotten dirty or dusty, you can wipe them with a clean cloth once in a while to even remove dead bugs that can cause infection.   

10. Get Your Plant to the Garden.

If you want your aloe Vera to flower correctly, get it to the garden. The aloe plant will only flower when it senses its ideal growing condition, and it also blooms well in the indigenous garden. A mature aloe plant first produces a spike known as an inflorescence which looks spectacular in the latter summer months.

When the plant has stayed indoors for long, it’s hard to get the plant to produce the inflorescence, leave alone the flowers. However, in some places, the conditions in the house might be very favorable, and the plant may flower well.  

For Aloe, Patience is a Virtue.

The information above will help you maintain your plant as it thrives in its maturity until it starts flowers, which happens each spring. Unlike other plants, aloe takes their time before they can start flowering. You have to be patient with the process.

The most exciting thing with the aloe Vera plant is that immediately it starts flowering, you will realize that it was worth the effort. An accomplished feeling for any gardener. Aloe does not require or take much time and resources. Hence a little effort brings a significant result.

Bottom Line

Aloe Vera is found in very many species. In most species, flowers appear yellow, other species may show red flowering while others may mix the colors. For each year, the aloe plant blooms only for 2-3 months, and after that, it dries and drops off.

 For the flowers, you can sometimes decide to prune them so that they may not consume the nutrients in the soil. Cutting the flower stalk from the base will help your aloe Vera recover from some of the leaves that have dried up or browned.

With all this information in mind, we expect to see your aloe plant flowering soon. When aloe flowers, trust me, you will call your friends to come and make a compliment about your garden or your kitchen as it will be glowing yellow.